
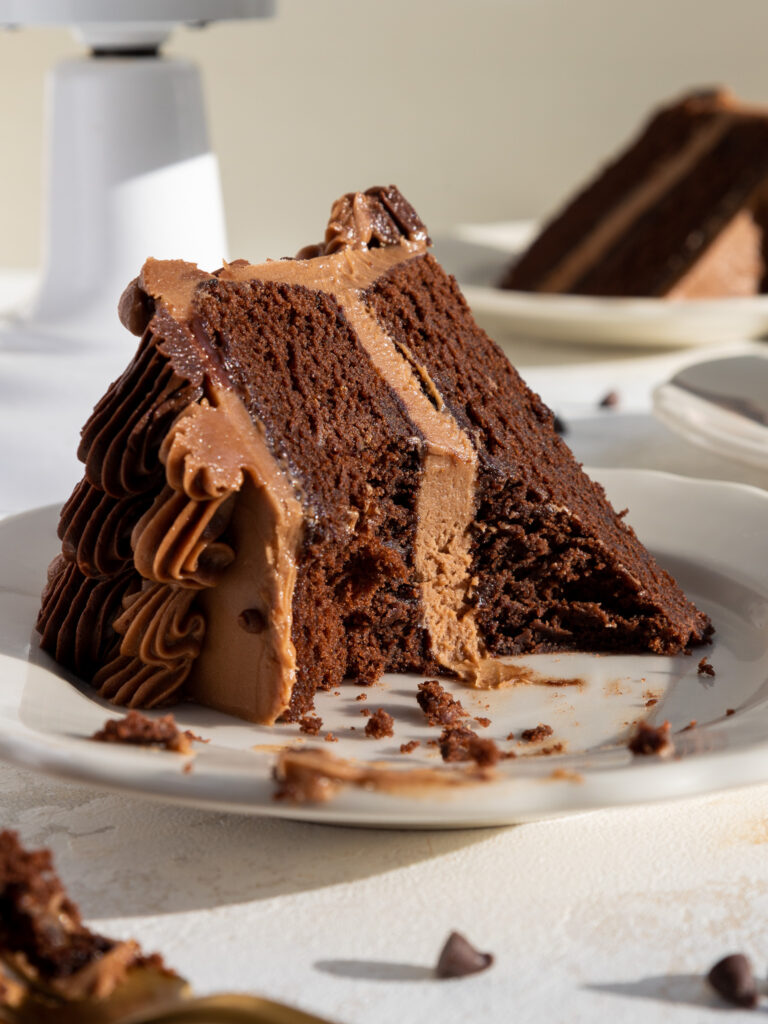
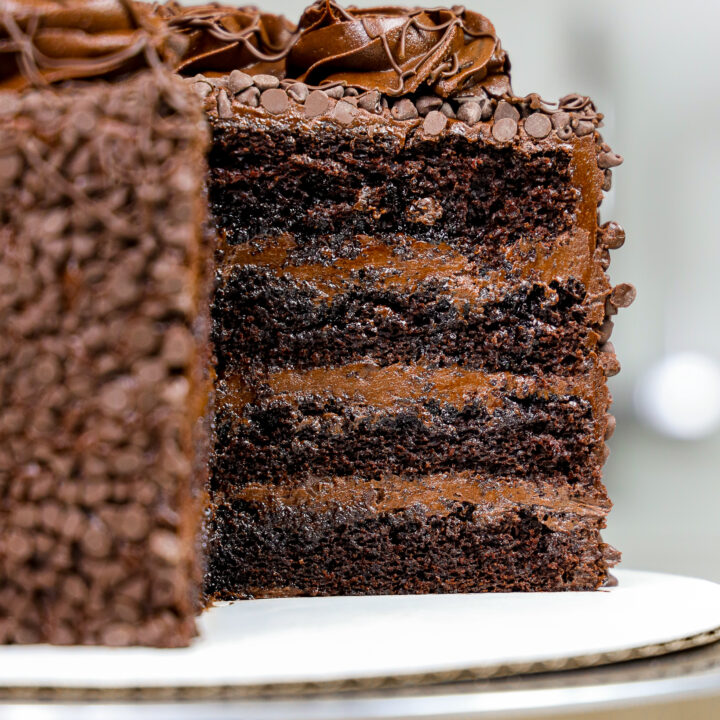
Chocolate Buttermilk Cake
This chocolate buttermilk cake recipe is actually a modification of my favorite vanilla cake recipe! It’s delicious, moist, and best of all, it keeps its shape!
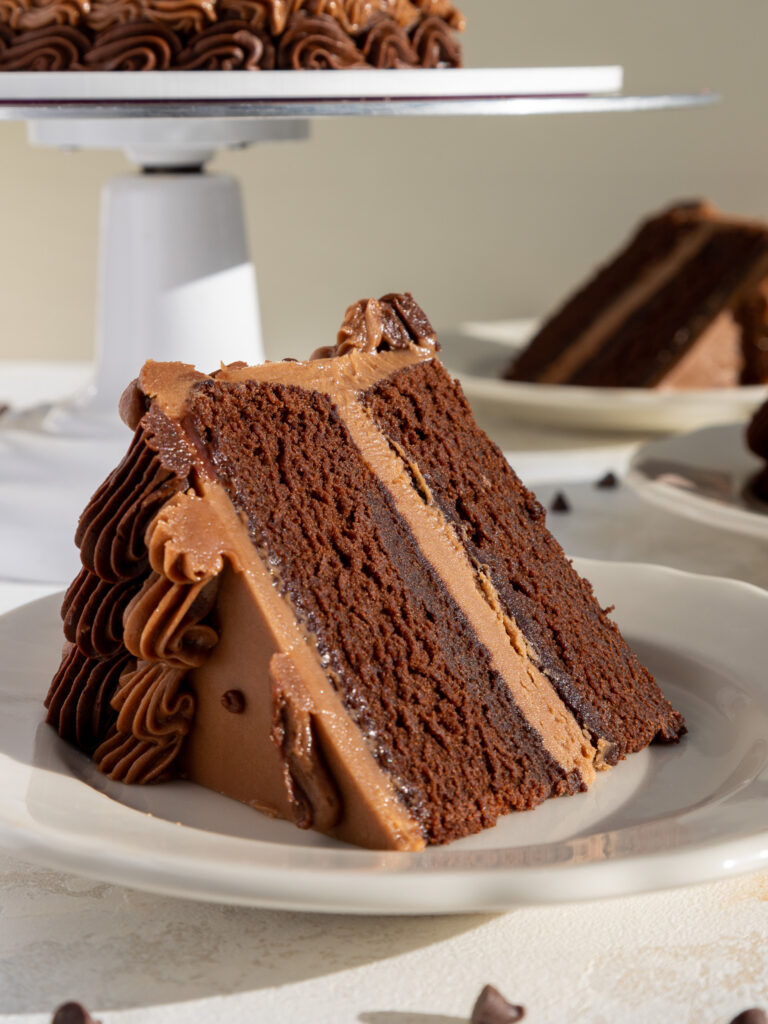
This is a butter cake, which means it has a denser crumb that a sponge cake. I love this, because it makes the layers perfect for stacking and frosting. I love using this recipe to make tiered cakes.
How to Make This Chocolate Buttermilk Cake
To make sure this cake turns out as amazing as possible, let’s walk through each step together! I’ve also included a video tutorial of the process below.
I figured it might be helpful to know what tools I use too, so I’ve shared a list below.
Not all of these are mandatory, but they make the process a lot easier.
If you don’t have all these things on hand, feel free to improvise and work with what you have.
- Round, Light Colored Cake Pans
- Spinning cake stand
- Electric hand mixer or stand mixer
- 10-inch greaseproof cake board
- Large offset spatula
- Bench Scraper
Step 1: Bake the Buttermilk Chocolate Cake Layers
Make the cake layers first following the recipe card at the bottom of this post.

Divide the batter evenly between the prepared cake pans and bake for 33-36 minutes or until a toothpick comes out with a few moist crumbs.
Remove the cake layers from the oven and let them cool in the pans for about 30 minutes.
Gently run an offset spatula around the rim of the cake pans to loosen them, then flip them onto wire racks to finish cooling.
These layers bake up pretty flat, so leveling them is optional! If you want to level them, use a serrated knife to level the top of each cake layer.
If you’re making these in advance, you can wrap and freeze them at this point.
Step 2: Make the Chocolate Buttercream Frosting
While the cake layers bake and cool, make the chocolate buttercream.
I like to use an American buttercream base to make this frosting because I think it’s the easiest to make and I love eating it. However, it is quite sweet!
If you want to use a less sweet frosting base, I’d recommend making a batch of my Swiss meringue buttercream or 1.5 batches of my hybrid buttercream.
This frosting can also be made in advance if needed and kept in the fridge for up to a month.
Cover the buttercream flush with plastic wrap to prevent crusting, then set aside.
Step 3: Stack and Frost the Cake Layers
Then it’s time to assemble this cake! Stack and frost cake layers on a greaseproof cake board or flat plate. Use a dab of buttercream to help stick the first cake layer to the board.
Spread an even layer of buttercream on top of each cake layer with a large offset spatula.
Repeat with the remaining cake layers and place the top cake layer upside down to make the cake easier to frost.
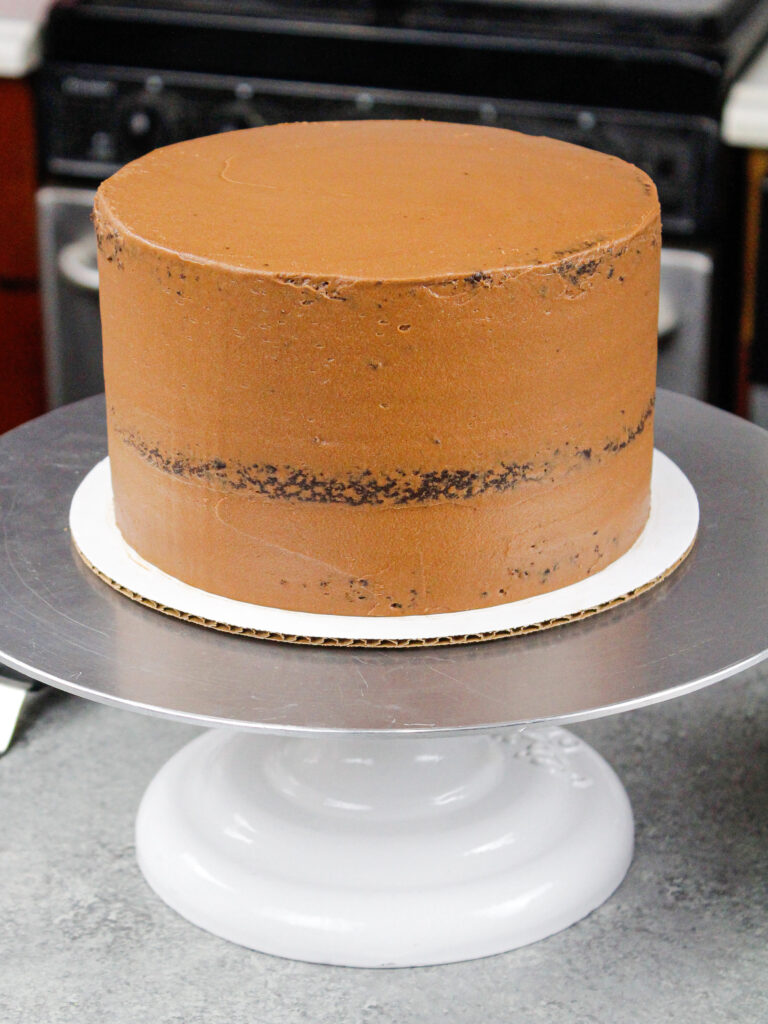
Step 4: Crumb Coat the Cake
Spread a thin coat of frosting around the cake to fully cover the cake layers.
Smooth the frosting using a large offset spatula or bench scraper, then chill the cake in the fridge (30 minutes) or freezer (10 minutes) until the frosting is firm to the touch.
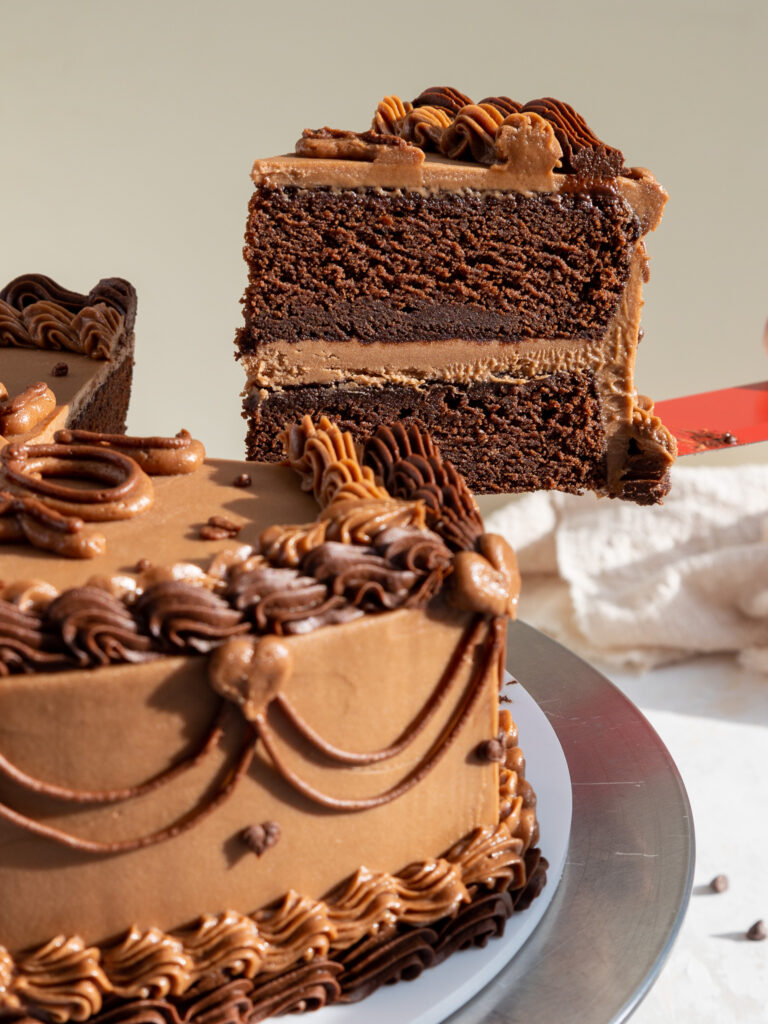
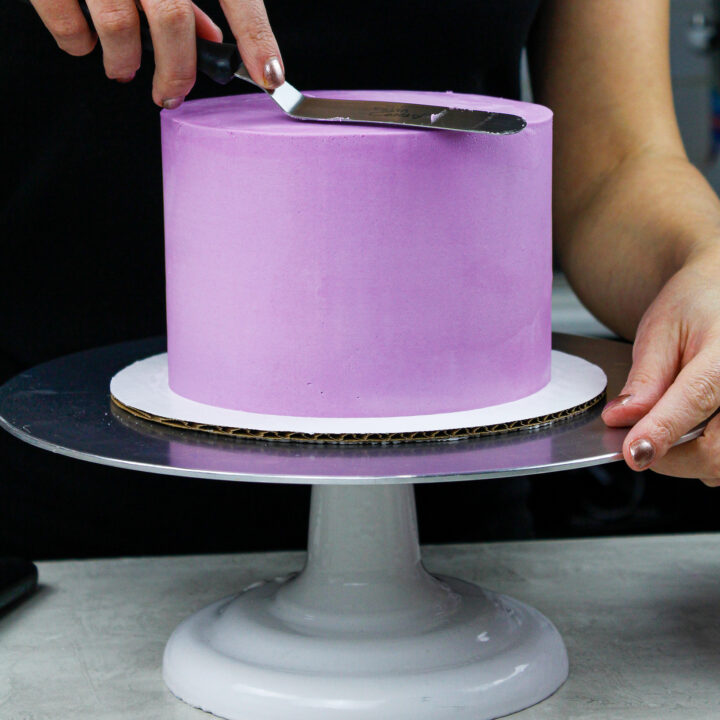
Step 6: Frost and Decorate this Cake
Add a second, thicker layer of frosting to the cake, and smooth using a bench scraper. Then decorate as desired and enjoy!
If you’re making this cake in advance, it can sit at room temperature for up to a day or be stored in the fridge for up to a week.
Substitutions and Swaps – Chocolate Buttermilk Cake Layers
This recipe uses quite a few ingredients and I know you might not have them all on hand. Or if you have food allergies or restrictions, I’ve got you covered.
Below are some swaps and substitutions that can be made in this cake recipe.
- All-Purpose Flour – This recipe turns out best with AP flour, but you can use a gluten-free flour blend or cake flour if that’s all you have on hand.
- Granulated Sugar – I do not recommend reducing the amount of sugar or changing the type of sugar, as it will change the texture of the cake layers.
- Cocoa Powder – I like to use regular, unsweetened cocoa powder in this recipe. However, it would also taste great with dark cocoa powder or Dutch-processed cocoa powder.
- Unsalted Butter – If you only have salted butter on hand, you can use it in place of the unsalted butter in this recipe. Just be sure to omit the salt that this cake recipe calls for. You can also use vegan butter in its place (and also omit the salt)!
- Egg Whites – I like to use egg whites from a carton, but you can also use 4 large eggs in place of the egg whites in this recipe. Or if you have an egg allergy you can use a flaxseed egg or an egg replacer.
- Buttermilk – You can also use full-fat yogurt, sour cream, whole milk, or an alternative yogurt or milk (almond, soy, oat) if you’re dairy-free.
- Vegetable Oil – You can use any flavorless oil in this recipe. Canola or even sunflower oil would work great!
Substitutions and Swaps – Chocolate Buttercream
This recipe uses a chocolate American buttercream frosting.
If you want to use a less sweet frosting, I recommend making a half batch of my chocolate Russian buttercream or my chocolate Italian meringue buttercream.
Or if you’re unsure about the ingredients, below are some substitutions that can be made in this frosting recipe.
- Unsalted Butter – If you only have salted butter on hand, you can use it in place of the unsalted butter. Just be sure to omit the salt that this frosting recipe calls for. You can also use vegan butter in its place (and omit the salt)!
- Heavy Cream – Whole milk or alternative milk (soy, almond, oat) will work fine in this frosting recipe if that’s what you have on hand.
- Chocolate Chips – I like to use dark chocolate chips, but you can also use semi-sweet or milk chocolate chips. You can also use chocolate bars or couverture chocolate.
Making This Chocolate Buttermilk Cake Gluten Free
You can swap in your favorite gluten free flour blend cup for cup in this recipe!
I personally prefer King Arthur’s gluten free flour blend, and find that 1 cup of GF flour weighs about 120 grams.
In addition to swapping the flour, there are two additional steps you need to take when making this mini cake gluten free.
Gluten Free Baking Tip #1: Over-Mix the Batter
The first step is to vigorously whisk your batter for a few minutes once it’s made. This helps give your cake layers structure.
I know this goes against everything you’ve ever heard about baking, but over mixing your batter is key when making anything gluten free.
It helps the cake layers rise better as they bake and gives the cake a more tender crumb.
Gluten Free Baking Tip #2: Let the Batter Rest
The second step I recommend is letting your batter rest for about 30 minutes before baking your cake layers.
Gluten free flour blends can have a hard time absorbing moisture and fats.
Letting the batter sit before baking it gives the flour more time to absorb all that goodness.
This helps thicken the batter and prevents your cake layers from having a gritty texture.
Making This Buttermilk Chocolate Cake in Different Sizes
This recipe can be used to make different sized cakes.
You can make three, 8-inch or four, 6-inch cake layers with one batch of batter. Bake 8-inch cake layers at 350 F / 175 C for 33-36 minutes, and 6-inch cake layers for 35-39 minutes, or until a toothpick comes out with a few moist crumbs.
One batch of batter can also make two, 9-inch cake layers. Bake them at 350 F / 175 C for 33-36 minutes.
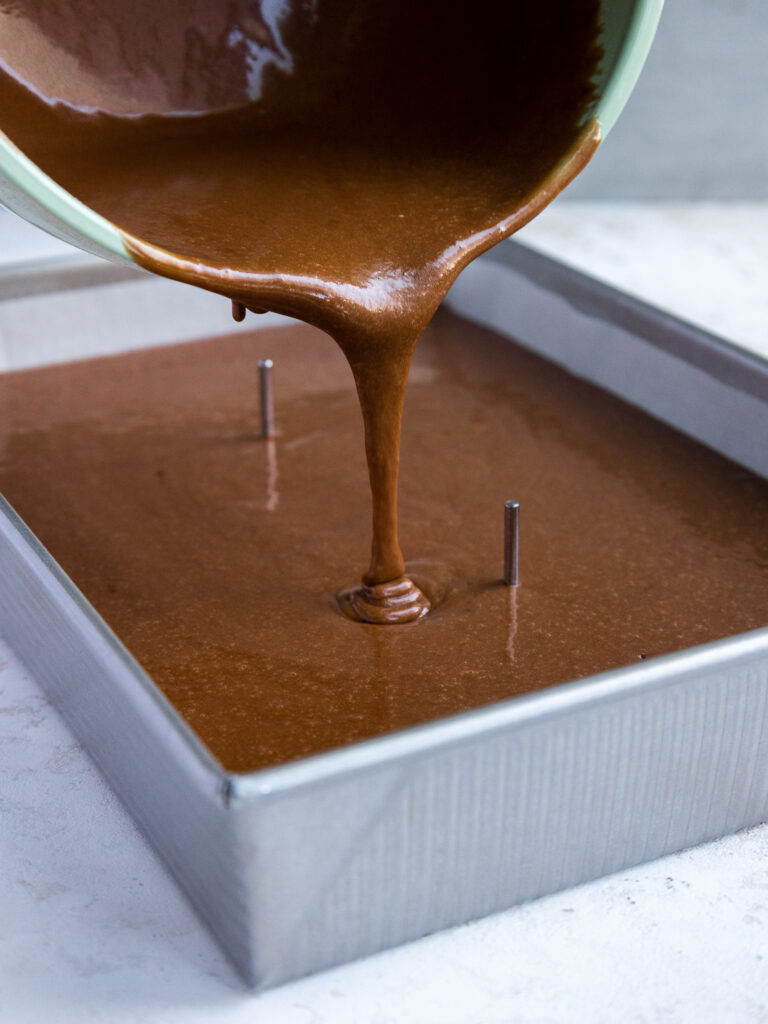
One batch of batter can also be used to make one 9×13-inch sheet cake. Bake it at 350 F / 175 C for 40-50 minutes and use flower nails or heating cores to help the cake bake evenly. It should end up being about 2 inches tall.
I do not recommend using this recipe to make cupcakes! Instead, I highly recommend trying my favorite chocolate cupcake recipe. I like the texture better for cupcakes.
Tips for Making the Best Chocolate Buttermilk Cake
- Ingredients at room temp mix together better! Set out any cold ingredients ahead of time.
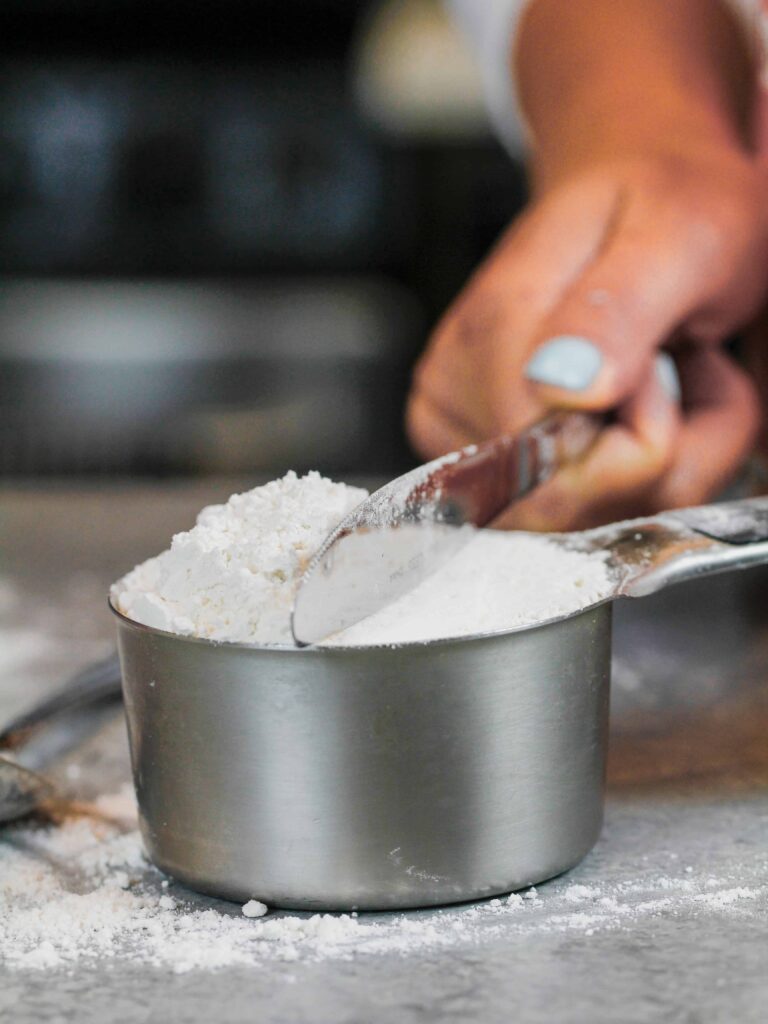
- Properly measure your flour (spoon into the cup measure, then level). Or better yet, use a kitchen scale to measure your dry ingredients.
- Use a scale to weigh your cake pans as you fill them. It will make the cake layers bake up to be the same height and bake more evenly.
- Level the room temperature or thawed cake layers with a serrated knife to make them easier to stack.
- Make sure the buttercream is the right consistency. This will help give the cake proper structure and make it easier to decorate.
- Chill the cake layers in the freezer for about 20 minutes before assembling the cake. It makes them so much easier to stack and frost!
- If your cake layers turn out less than perfect, read my cake troubleshooting guide to see where things might’ve gone awry.
Making These Chocolate Cake Layers in Advance and Storage Tips
Make your cake layers in advance and freeze them. It breaks the process up and makes it more approachable.
These cake layers can be frozen for up to 3 months, and as long as they’re wrapped right I promise they’ll taste just like they did the day you baked them.
Make your frosting ahead of time too or save any leftover frosting! It can be stored in an airtight container in the fridge for up to a month, or in the freezer for up to 3 months.
Be sure to give it a good stir once it thaws to get the consistency nice and smooth again.
A frosted cake can last in the fridge for up to a week, or in the freezer for up to a month. The buttercream locks in all the moisture, keeping the cake fresh and delicious!
If you cut into the cake and have leftovers, use any remaining frosting to cover the cut section to keep it moist and store in the fridge for up to a week.

Let Me Know What You Think!
If you try this chocolate buttermilk cake recipe, I’d love to hear what you think of it! Please leave a rating and comment below.
Tag me @chelsweets and use #chelsweets on social media so that I can see your amazing creations!
Other Recipes You Might Like:
Chocolate Buttermilk Cake
Ingredients
Chocolate Cake Recipe
- 3 cups granulated sugar 600g
- 2 1/4 cups all-purpose flour 280g
- 3/4 cup unsweetened cocoa powder, sifted 75g
- 2 1/2 tsp baking powder 10g
- 1 tsp fine salt 6g
- 1 cup unsalted butter, room temperature 226g
- 1 cup carton egg whites or 7 large egg whites, room temperature 235g
- 1 1/2 cups buttermilk, room temperature 360g
- 2 Tbsp vegetable or canola oil 30g
- 2 tsp vanilla extract or vanilla bean paste 8g
- 1 tsp instant espresso – optional
Dark Chocolate Buttercream Frosting
- 2 cups (4 sticks) unsalted butter, room temperature 454g or 1 lb.
- 1 cup sifted, dark baking cocoa 80g
- 1 tsp vanilla extract or vanilla bean paste 4g
- 1/2 tsp fine salt 3g
- 5 cups powdered sugar 625g
- 2/3 cup heavy whipping cream, room temperature 180g
- 1 1/3 cups dark chocolate chips, melted and cooled 230g
Instructions
Chocolate Buttermilk Cake Layers:
- Preheat oven to 350°F / 175°C. Line four 7", three 8", or two 9" pans with parchment rounds and grease with non-stick baking spray or homemade cake pan release.
- Mix 3 cups sugar, 2 1/4 cups all-purpose flour, 3/4 cup of cocoa powder, 2 1/2 tsp baking powder, and 1 tsp salt together in a stand mixer with a paddle attachment or hand mixer until fully combined.
- Mix in 1 cup of room temperature, unsalted butter slowly into the dry ingredients on a low speed. Continue to mix until no large chunks of butter remain, and the mixture looks like moist sand.
- Pour in 1 cup of egg whites and mix on low until just incorporated. Mix in 1 1/2 cups of buttermilk in two installments, on a low speed.
- Add in 2 Tbsp of vegetable oil, 2 tsp of vanilla extract, and 1 tsp instant espresso. Mix on a low speed until fully incorporated.
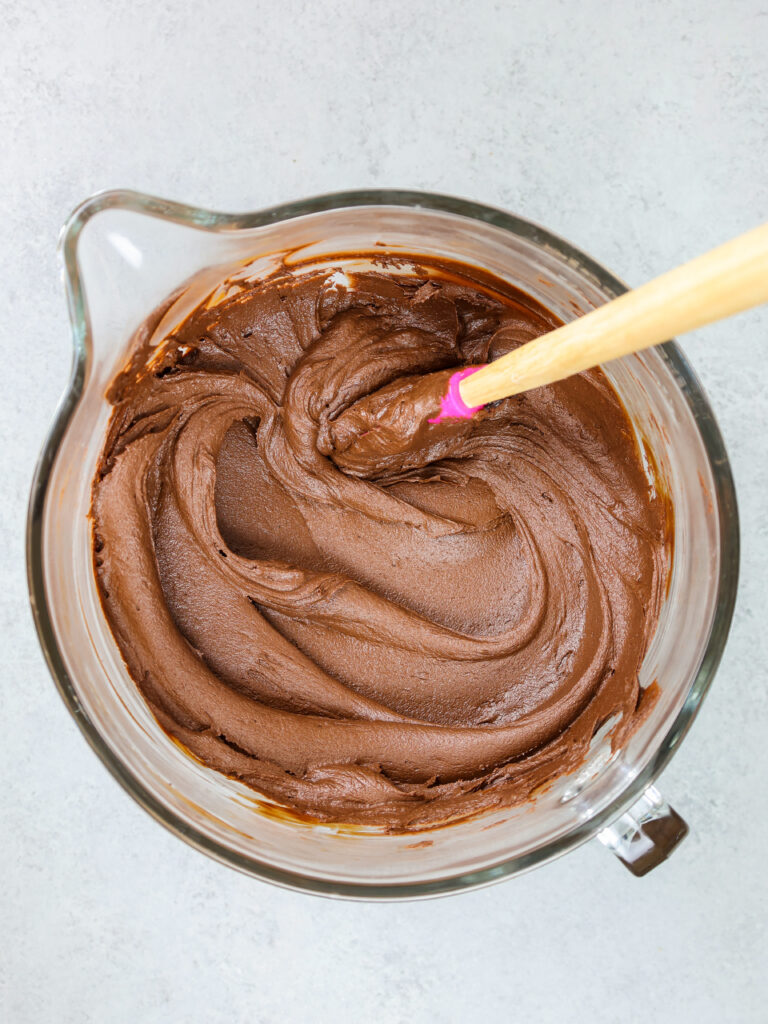
- Scrape down the sides of the bowl with a rubber spatula, then beat on a medium speed for about a minute to make sure everything is properly mixed together. This also helps lighten the texture of the cake layers a bit.
- Divide the batter evenly between your prepared pans. I like to use a scale to make sure each pan has the same amount of batter and will bake up to the same height.
- Bake for 33-35 minutes or until a toothpick comes out with a few moist crumbs.
- Let the pans cool for 10 minutes, then run a small offset spatula around the perimeter of the pan to separate the cake from the pan.
- Place the cake layers into the freezer for 30 minutes to accelerate the cooling process. Once the layers are fully cooled, carefully flip the pans and remove the layers.
- Use a serrated knife to level the tops of the layers right before you plan to assemble your cake, or you can wrap and freeze them if you're making them in advance.
- If you make these cake layers in advance and freeze them, let them thaw for about 20 minutes before making your cake. The cake layers should still be slightly cold to the touch, which will make it easier to assemble your cake.
Dark Chocolate Buttercream Frosting:
- Beat 2 cups of butter on a medium speed for 30 seconds with a paddle attachment until smooth.
- Add in 1 cup sifted dark cocoa, 1 tsp vanilla extract, and 1/2 tsp salt, and mix on low until the ingredients are fully incorporated.
- Slowly mix in 5 cups of powdered sugar. Halfway through, add in 2/3 cup of heavy cream to make the frosting easier to mix. Scrape the sides and bottom of the bowl as needed with a rubber spatula.
- Then mix in 1 1/3 cups of melted and cooled dark chocolate on a low speed until the ingredients are fully incorporated and the desired consistency is reached.
- To make the frosting extra smooth, stir by hand with a rubber spatula for a couple of minutes. Push the frosting back and forth to work out any extra air that was incorporated while the frosting was being mixed. Cover with plastic wrap to prevent crusting and set aside.
- Repeat step 5 and stir the frosting by hand again right before you use it. Sometimes as frosting sits it develops air bubbles. Giving it a good stir helps make sure it stays silky smooth before you add it to your cake or cupcakes.
Assembling This Chocolate Buttermilk Layer Cake:
- Stack and frost cake layers on a greaseproof cake board using a dab of frosting to help stick the first cake layer to the board.
- Add an even layer of buttercream between each cake layer with a large offset spatula.
- Add a thin coat of frosting around the cake, and fully cover the cake layers.
- Smooth using a bench scraper, then chill the cake in the fridge (30 minutes) or freezer (10 minutes) until the frosting is firm to the touch.
- Add a second, thicker layer of frosting to the cake, and smooth using a bench scraper. Then decorate as desired and enjoy!
Video
Notes
Recipe Variations
This recipe can also be used to make a sheet cake! One batch will make 2, 9 x 13-inch cake layers that are about 1-inch tall. Bake for 35-40 mins at 350 F / 175 C. I recommend using heating cores if you have them to help large cake layers like this bake more evenly and quickly. You can make one 9 x 13-inch cake layer that's about 2 inches tall, but bake time will be 45-55 minutes at 350 F/ 175 C. One batch of cake batter makes about 1800 grams. If you plan use four circular cake pans, add 450 grams of batter into each pan.Tips for Making the Best Chocolate Layer Cake
- Ingredients at room temp mix together better! Set out any cold ingredients ahead of time.
- Properly measure your flour (spoon into the cup measure, then level). Or better yet, use a kitchen scale to measure your dry ingredients.
- Use a scale to weigh your cake pans as you fill them. It will make your cake layers bake to the same height and bake more evenly.
- Level your room temperature or thawed cake layers with a serrated knife to make them easier to stack.
- Chill your cake layers in the freezer for about 20 minutes before assembling the cake. It makes it so much easier to stack and frost them!
When you say flour do you mean all purpose or self raising?
all purpose 🙂
hi! How much espresso do you use?
1 tsp instant espresso (or coffee), dissolved in 1 tbsp of hot water 🙂 just updated the recipe!
Hi!! I’m curious what pans do you use to bake your cakes! Then seem to be much deeper than traditional pans.
I use fat daddios! They’re 2 inches deep, and i order them on amazon!
I won’t the ingredients with grams ???? I don’t understand the recipe ??
I’ve updated the recipe to include grams 🙂
I can not have dairy so the buttermilk is out for me, do you think that soy milk for the replacement would work with this recipe.
It will change the texture of the cake slightly, but it should still turn out great! Since this recipe only uses baking powder instead of baking soda, you can swap out the buttermilk for whatever milk works best for you (the acid in the buttermilk isn’t essential to the chemistry of the batter)! Hope that helps 🙂
Hi, do I need to sift the dry ingredients before I mix them?
It’s not mandatory! Since you combine them using a mixer before adding the butter, I find it usually isn’t necessary!
Could I do without the espresso? Or is there something else I could add to replace the espresso?
The texture will turn out the same, but I really enjoy the depth the bit of esspresso gives the cake!! It’s only for flavor, so if you omit it the cake will still turn out fine!
Have you tried this recipe with Dutch processed cocoa? With the baking powder it should work…and I prefer the chocolate flavor with the Dutch…just wondering if you had tried it.
I have not, but it would work too! Let me know if you do try it 🙂
I tried it and it worked beautifully! I used the Dutch-processed in the cake and then made your buttercream with the same cocoa. My father-in-law LOVED it! Thank you!
So happy to hear that 🙂
I have seen on your IG stories and throughout your site here that you like to freeze the cakes first. Do you freeze them solid and then use them that way?
And once you have assembled your cakes with buttercream/drip etc and bring them to room temperature to serve, do they hold together well? I guess I am worried as I know with fondant, a cold cake can make it sweat through the outside.. and I would like to transport the cake.
They are usually partially thawed when I decorate the cake, but because my buttercream is a crusting buttercream, one it’s sits in my fridge overnight it is usually very sturdy! It holds up pretty well, but I also usually cut into the cake before it is fully thawed (it’s easier to get a clean cut when the layers are still slightly chilled).
Hi Chels. I’m making a silver and black drip cake for a 40th. I like the sound of this chocolate cake as my chocolate cake is lovely but very dense and possibly too rich for all the additions to this cake. Can you please help me to pair a filling/buttercream to put between the layers? I think she will love your caramel sauce and I plan on covering the cake with chocolate ganache as I’m going to to try to brush on silver to go under the black chocolate drip (if that makes sense) lol. TIA, Jolene
I love frosting with american buttercream! Sometimes people think it’s a bit sweet, but It’s my favorite. THe recipe can be found here: https://chelsweets.com/2016/11/01/the-best-american-buttercream-recipe/
I don’t think her chocolate cake is dense. Rich, yes, but it is light and soft and delicious. In my humble opinion, the chocolate ganache is where things get over the top…but I am not a huge chocolate lover either. All of Chelsea’s recipes that I have tried are the best recipes that I have ever used and I have been baking for decades.
Thanks Chels and Amanda! I was referring to my chocolate cake recipe, that one is very dense that’s why I’m going to try this one. I will definitely try your american buttercream. It looks good! I’m just hoping the combination of it all tastes good and looks good when it’s cut open. Hold thumbs for me;)
I totally agree!
Just commenting for others who wonder about this cake in high altitude – it works perfectly without any adjustments!
Ah that is great to know! thank you for sharing 🙂
Hi Chelsea! Huge fan! I have to ask- how thick are your cake layers? i have the two inch thick Wilton cake pans, how much batter should i pour into the pan? (i’ll probably use a 6 inch or 8 inch pan)
Also- how do you get your cake circle to stay on your cake stand when decorating? do you add buttercream to the bottom of the circle too? Thanks a ton!!!
Thanks! My cake layers usually bake to be between .75-1.5 inches tall! I usually use 7 or 8 inch pans. The recipes makes pretty tall layers if you spread it between four 7 inch pans. If you use 6 inch pans, you will have to make more than four layers, or save of the batter for something else. I use 2 inch tall pans. I have a non-slip mat which i cut into a circle, and place beneath my cake round. works like a charm!
Hi Chelsea! How do you line your cake pans? I want to try and make this as fool proof as possible 🙂 thank you!
i cut out circles of parchment paper and place then at the base of my pans! i then spray the with a non-stick cooking spray!
Hi Chelsea..
Huge fan of your work.. hats off!!
Just a little query..
Can i replace baking powder, flour and salt with self raising flour?
Thanks..
Hey Chelsea. I’m making a Wonder Woman cake for my daughter birthday with a minecraft for tier two. The bottom layer will be around 10 inches in diameter so I can decorate with the square minecraft block on top of the round tier. I don’t want it to be too high. Do you think this recipe would work for two layers of the bottom tier?
Yes, I think you could probably make 2 10′ layers using this recipe!
Would this recipe work with three 8 inch round pans? I am doing a two tier cake and want this recipe for the bottom 8inch round tier. How much batter should I put in each pan?
It would, but your layers would be pretty tall and you would need to increase the back time by about 5 minutes!
If I want to make a chocolate and vanilla marble cake, would I use the full recipe of your chocolate and vanilla cake?
Yes, or you can make a half batch of both!
Can I substitute the milk I normally use (2%) for the buttermilk? I don’t want to change the consistency but I also want to use what I have on hand!
you can! it will change the taste and texture of the cake slightly, but it will still turn out great!
This is the first recipe I’ve seen for sponge using only egg whites, I appreciate American cakes can be very different to UK recipes, why no yolks?
it’s not really a sponge cake, it’s a buttermilk cake base! If helps the buttermilk taste shine through, and keeps the batter a bright white shade. You can use 5 eggs in place of the 7 egg whites if you want though!
Would this be enough for 2 8″ (2″ sides) pans and 2 6″ pans? I need my layers to be the full 2″ tall. So would I fill the pans fuller and just bake a little longer?
Same with your vanilla cake recipe.
definitely! Yup, that’s what I would do!
Thanks so much. I am making my first fondant covered 2 tier cake and your cake recipe will be perfect!
2 8″ pans and 2 6″ pans didn’t work. They are too thin. So remaking today using 2 8″ and 1 6″. I can use the thinner layers to add height.
The vanilla layer cake worked perfect I’m 3 6″ pans. All cakes came out 2″ high.
Have you ever made cupcakes with this recipe? I’m curious how many it would make!
Ugh, I accidentally used baking soda instead of baking powder. Is this gonna screw me up? ?
it’ll change things a bit, i would assume it will just be less flat / have more of a domed top!
Could I use this recipe for an 11” x 15” sheet cake? If so, would I need to double the recipe? Thanks
yes you can! Do you plan to make a single layer sheet cake, or 2? if you want 2 layers, you should def make extra batter!
I was wondering if there was any way to get a “richer chocolate color”? These just seem so much lighter than any chocolate cake I’ve made. Thanks!
You can try using dutched cocoa of black cocoa!
I substituted the regular unsweetened cocoa powder for Dutch processed cocoa powder and it worked beautifully. It has a darker color. Or you could use black cocoa powder. Then it would be super dark!
Hi there! I would like to make this for the taco cake recipe you have but as per the taco cake instructions I only need one 6″ choco cake. Seems like I will have a ton of extra batter left over. Do you have a smaller recipe for chocolate cake or can I just half it or maybe use the rest for cupcakes?… Thank you!
You can definitely just half the recipe 🙂
Hi Chelsea, love this recipe but just saw that in this one it says that 1 cup of butter is 454 gram but in your vanilla recipe it says that 1 cup is 226 gram of butter. Just to let you know
just updated it! I usually bake by volume, but try to add in weight for international bakers! Thanks for flagging this!!
Hi, I’ve just seen this update and had written your recipe down before the change to the butter quantities…my cake is in the oven with 454g butter – will I need to start again?
ah so sorry for not responding earlier! yes, you would need to adjust for this!
Hi, can you bake 2 2x 10 cakes with this recipe? How long would you bake it for? Thank you so much for your recipes!
yes, you can! I’m not quite sure, but I’d think about 45-50 minutes! I’d recommend adding a metal flower nail upside-down in the center of the layer to help it bake faster!
Can you bake 3 2x 9 inch cakes? How tall do you think the layers would be, and how long should you bake them?
Yes, you can! I’d bake them for about 38-40 minutes! they should be about 1.5 inches tall!
How many 10×2 inch cakes could you make with this recipe? I want the cakes to be 2 inches tall if possible. How long would you need to bake them at and what temperature?
They take about 45 minutes to bake! I’d place a flower nail in the center to help them bake more quickly and evenly! This recipe can make 2 10 inch layers, but they won’t be 2 inches tall!
Hi Chelsea!
Do these cake layers usually bake flat or do you have to level them?
they bake relatively flat, but I usually trim off the tops when I’m using the layers in a video!
How long would this cake last when it is fully decorated? After being cut into?
slices of leftover cake can be frozen for several weeks if they’re wrapped up correctly in an airtight container! You can also leave it unsliced, and frost over the exposed areas of cake to keep it nice and moist, and keep in the fridge for up to a week! in general, I make cakes at least one day in advance, and sometimes several days in advance! The buttercream locks in the moisture, so they keep well!
Hi Chelsea!
I was wondering how many 6 inch cakes you could make with this recipe? How tall would they be and would you need to change the bake time and temperature?
Thanks so much!
this recipe can make 2 6 inch cakes! I usually make them with three or four layers. the layers only need to bake for 27-30 minutes!
Hi chelsea
What can i use as egg substitute please
I really wanna try your receipe for my kids 1st and 5th birthday so please if you can let me know..
Thanks
Hi Palak! I’ve heard that 1/4 cup of apple sauce can be used in place 1 egg, but i’ve never tried it before! that’s my best suggestion though, hope that helps! <3
Hi chelsea! I just started learning and making cakes from scratch! I want to become a great baker and you are one person I look up to (:. I just have a problem I did this cake last night and I have done others too but my I don’t know why my cakes are not coming out fluffy or moist ): they come out dry.
Thank you !
Aw thanks Rubi! If your cakes are coming out dry, you might be using too much flour (sometimes when you scoop out of a bag you end up packing a lot more flour into the cup than the recipe calls for (by weight), or you may be overmixing! Those are usually the two main culprits for dense/dry cake layers <3 hope that helps!!?
I only have 9 inch cake pans. How do I increase the recipe
Hi
If using 8×2 inch cake pans, how many will I need for this recipe.
Hi is there a printable version of your chocolate buttermilk layer cake recipe ?
Hello,
I am making my first wedding cake for two of my best friends and I would like to use your recipe. I have many questions!!! I’d like to do four tiers, 12 inch, 10 inch, 7 inch and 4 inch. However I only have one pan of each…is it possible to make your recipes in one pan and cut/trim accordingly? Also, do you have a recipe converter that you recommend for the larger/smaller cakes? I apologize for my ignorance but would appreciate any help you can provide! Thank you in advance!
How much cake does this make? Me and my sis are gonna make this for my birthday and I don’t know how big the cake is gonna end up-
Oh jeez I’m prob not gonna get reply because the comments were from 2017 oop
Hi, I wonder if you have ever try to make this recipe or any other recipe with sugar substitutes like MONK FRUIT or STEVIA. Or if in this recipe sugar can be replaced with any sugar substitute, if is possible, in what proportion?
Is there way to make this like, half of the size? Should I half it and make it or would that affect it’s taste and/or texture?
Hey, Chels! Love this cake, just baked up my layers. I’m curious, how many people would you say this cake serves? Thanks! ??
Hi Abigail,
Yay! I depends on the size of slices you cut, but I’d say it feeds about 24 people. Happy baking!
Trying to make a two tiered birthday cake for my son’s birthday. Would this recipe work, or would you recommend a different recipe?
Hi Maggie,
Great question! This recipe would be excellent for a two tiered cake! It’s essentially the chocolate version of my go to vanilla cake recipe, which I’ve used to make several wedding cakes 🙂 I hope your son’s birthday cake turns out great!!
is there a 6 inch version of this like the white cake?
Hi Terra,
Sadly there isn’t yet, I’m so sorry!! I’m still working on converting all my full batch cake recipe down to small batch :/ Hoping to have it up soon though!
have you ever added a chocolate fudge to the mix for a more fudge-y choc flavor? Thanks so much!
Hi Rachel,
I haven’t added chocolate fudge to the cake batter before, but you could frost the cake with chocolate ganache if you want a richer, more intense chocolate flavor 🙂 Hope that helps, happy baking!
Long comment incoming, but I made this cake yesterday and am thrilled with the results. It is exactly the dense, rich, not overly sweet chocolate cake I was hoping for.
Some notes:
– room temperature ingredients and measuring by weight instead of volume is key. My baking has gotten so much better since I started doing these things.
– I was suspicious that it would be too much batter for two nine inch cake pans. Mine are very short and I was worried about overflow. Instead, I divided into three nine inch cake pans, and shortened bake time slightly. I couldn’t say exactly how long, because I don’t remember and all ovens are different anyway. I took them out when they still had very moist crumbs on toothpicks in the center.
– I was also skeptical about using chocolate chips in the frosting. “Cheap ingredients bring about cheap results,” or something like that. Well, it turned out great. I just used Tollhouse dark chocolate chips. The taste is incredible. So lush and dark. I suspect a lot of that is to do with the heavy cream!
– The recipe makes an enormous amount of frosting. I could have used a little more in the layers between cakes, but I still would’ve had a lot left over. I am wondering if the recipe is that way for proper mixing proportions. I am keeping my leftover frosting in the fridge for now.
– Next time I might add even more espresso powder. I loved the addition of one teaspoon and think it could even be taken up a notch.
Can’t emphasize enough how much I enjoyed this cake. I am tired of super spongey, light, open-textured chocolate cakes. This one feels bakery style.
Thank you Chelsweets!
So happy to hear you loved this recipe Teresa! The recipe does make a decent amount of frosting, but I wanted it to be enough in case you wanted to pipe on borders around the base and top of the cake.
Also, when you make more layers (like 3 8-inch or 4 7-inch) you end up using more frosting between them. I usually add a very generous layer of frosting between the layers too, so I’m sure I end up using more on the inside as well!. Thanks so much for sharing, happy baking!
So I’m wondering how much batter this recipe makes. Can I make two 9 inch and two 6 inch with it? If so can you tell me how long I would have to bake them. Thank you