
Chocolate Italian Meringue Buttercream
Note: This recipe was updated in March 2025 to increase the yield and include more troubleshooting to make sure your buttercream turns out perfectly!
While I frost most of my cakes with American buttercream, sometimes I like to mix things up! After a bit of trial and error, I feel like I’ve finally mastered chocolate Italian meringue buttercream (IMBC).

My favorite thing about Italian meringue buttercream is that it’s silky smooth and doesn’t crust. You don’t have to cover it with plastic wrap or worry about the frosting crusting on your cake if you make it in advance.
I find that I prefer my Italian meringue buttercream with a little more sugar and slightly less butter than most IMBC recipes call for.
How To Make This Chocolate Italian Meringue Buttercream
While half the battle of IMBC is having a good recipe, the other half is how you make it!
That’s why I’m also walking through everything you need to know and use to make the smoothest, fluffiest chocolate Italian meringue buttercream frosting.
Below are to the tools I use to make this frosting:
Step #1: Melt the Chocolate
I like to melt it at the beginning of this recipe because it needs time to cool before it’s added to the frosting.
You can heat the chocolate with a double boiler or a microwave.
If you use a microwave, heat the chocolate in 15-second intervals. Stir between intervals to help the chocolate heat more evenly.
Once the chocolate is mostly melted (usually takes 4 intervals for me) with a few bits of chocolate still intact, let the chocolate sit for a minute.
This will allow the heat from the bowl to melt those last bits of chocolate and prevent your chocolate from overheating.
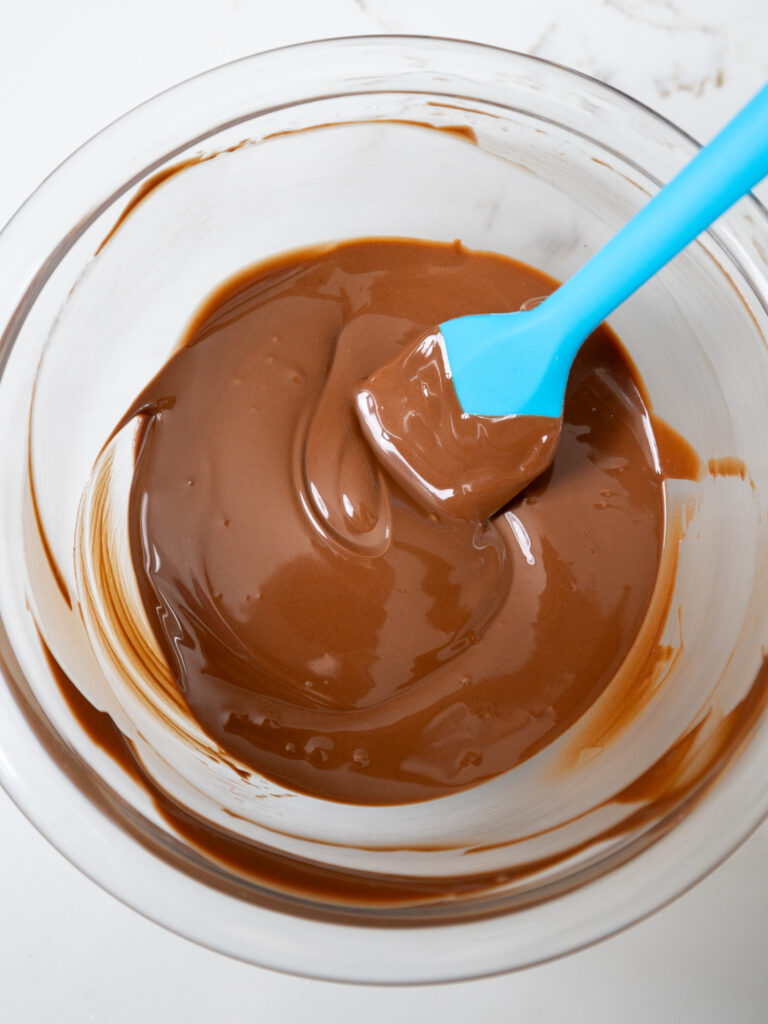
If the chocolate gets too hot, it can seize up and become chunky. Stir the chocolate until it’s smooth, then set aside to cool.
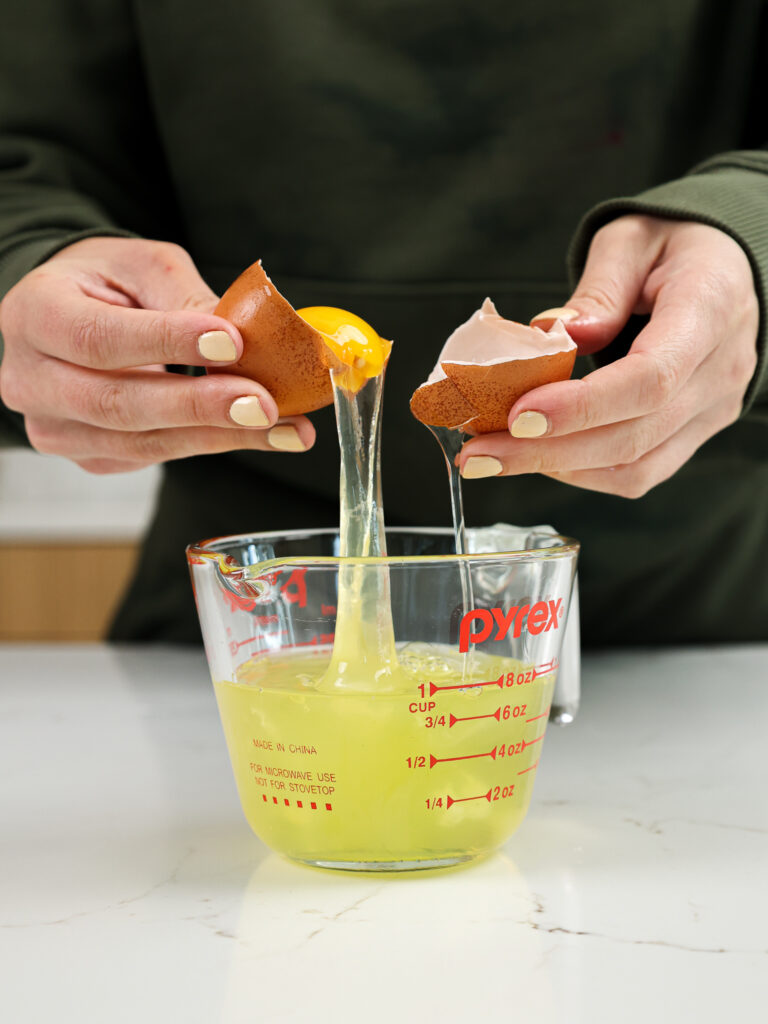
Step #2: Whip Up the Egg Whites
I suggest separating your eggs about an hour before you plan to make your frosting. Be careful as you do this because they won’t whip up properly if any yolk gets into the mixture!
Then, it’s time to whip up the egg whites and add a bit of cream of tartar. Slowly add in 1/3 cup of sugar and continue beating until soft peaks form.
This happens quite quickly and usually takes about a minute when mixing with a whisk attachment at a medium-high speed.
You could in theory make this chocolate Italian buttercream with a hand mixer, but it would take forever!! Making it with a stand mixer is much easier and quicker.
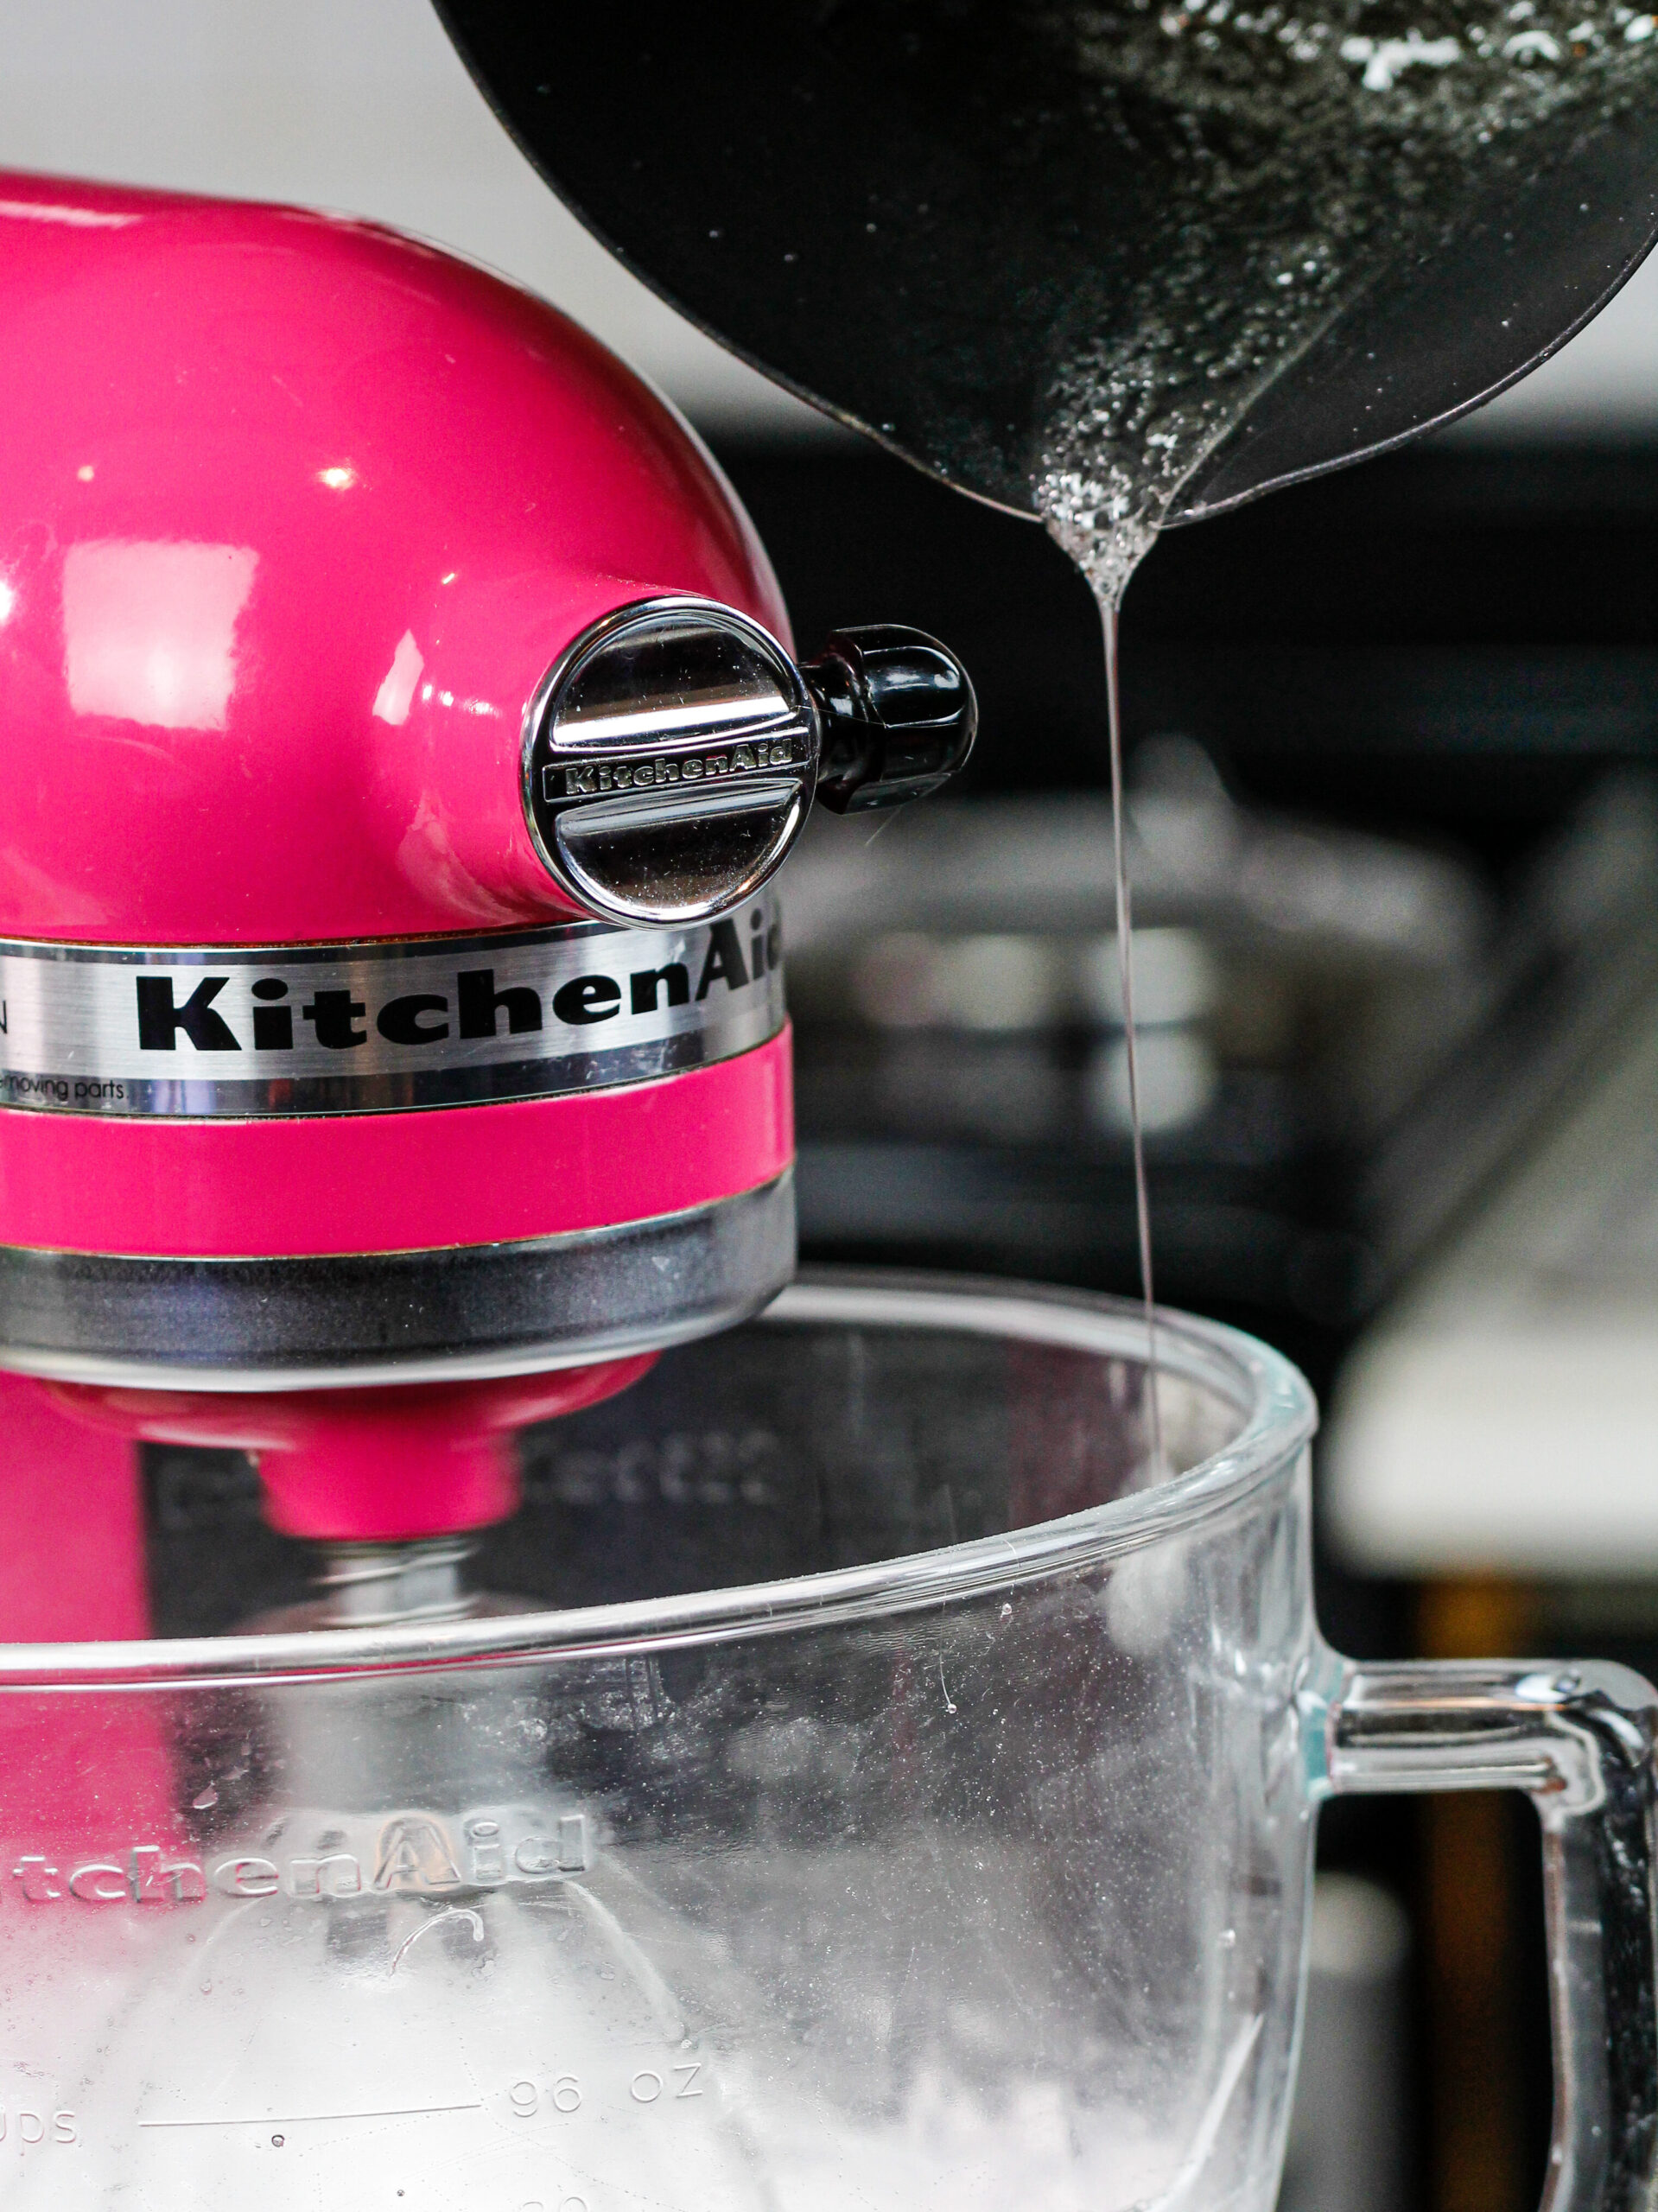
Step #3: Make the Egg Whites Safe to Eat
While the egg whites are whipping, we heat a sugar syrup to 240 F / 116 C and pour it into the egg whites while they mix. This kills any potentially harmful bacteria and makes the frosting safe to eat.
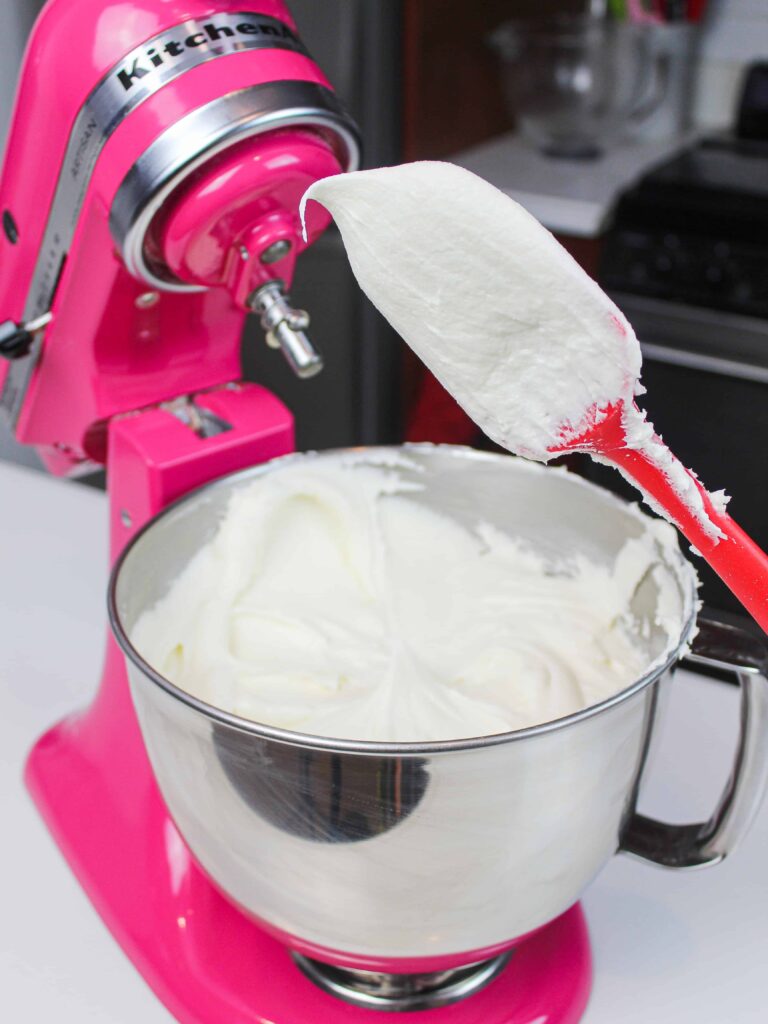
Step #4: Make the Meringue
After whipping the egg whites while pouring in the hot sugar syrup, the meringue should form stiff peaks. Stiff peaks are when meringue can stand up on its own when flipped upside down.
If you’re having a hard time knowing when the meringue reaches this stage just by looking at the mixing bowl, feel free to turn off your mixer and test the meringue by removing your whisk attachment and flipping it upside down.
It should look like the picture below at this stage.

Step #5: Add in the Butter
Once the meringue has stiff peaks and has cooled to room temperature, it’s time to mix in the unsalted butter.
During this step, I like to feel the bottom of my mixing bowl with my hand. If it feels pretty much room temperature, I add in my butter.
However, if it still feels warm, I’ll wait a few more minutes before adding the butter and place some frozen veggies or berries around the base of my bowl to help it cool down.
If the meringue and bowl are still warm when you add the butter, it can result in buttercream that’s too thin or soupy.
When I add in the unsalted butter, I do it in small chunks. This gives the meringue time to incorporate the butter and helps it mix together more easily.
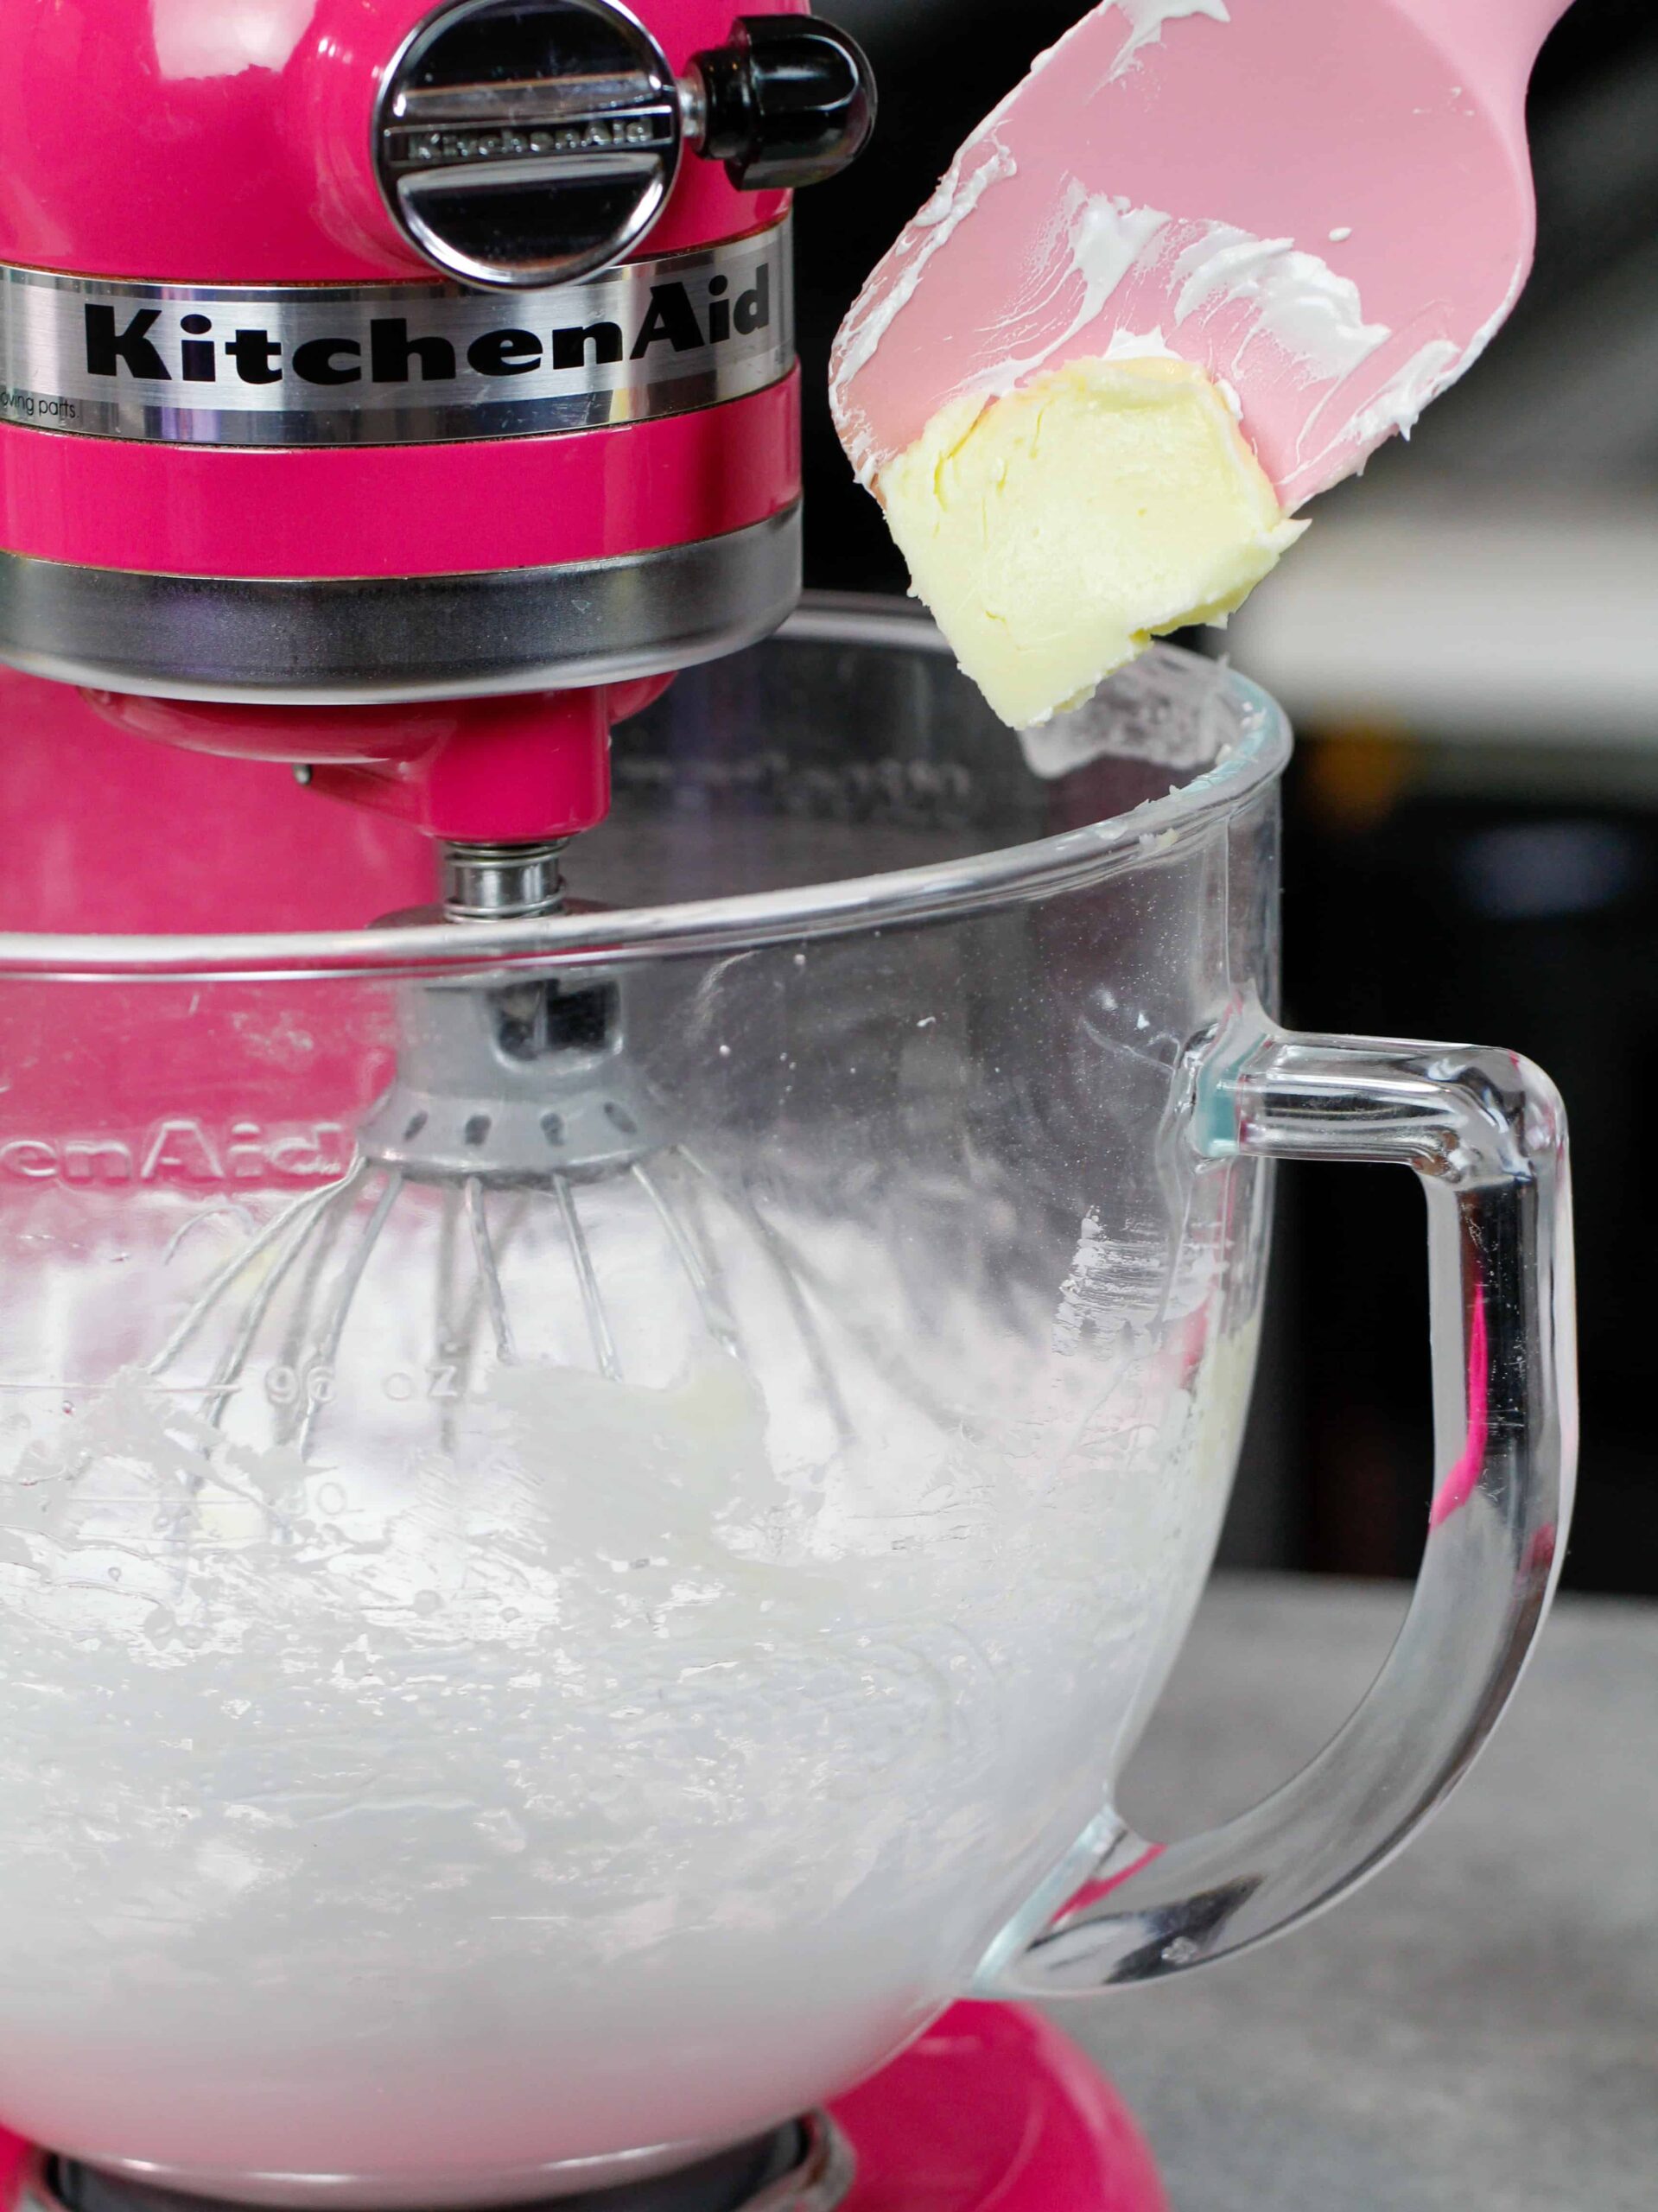
As you add the butter, it’s super important that the butter is at room temperature. This does NOT mean soft to the touch or greasy.
Most sticks of butter come to room temp in about 2 hours. Don’t let your butter doesn’t sit out much longer than that or it may become too soft.
It should be soft enough for you to be able to press your finger into but firm enough that you have to apply a bit of pressure to do so.
Step #6 Mix in the Chocolate
The final step is to add in the melted and cooled chocolate.
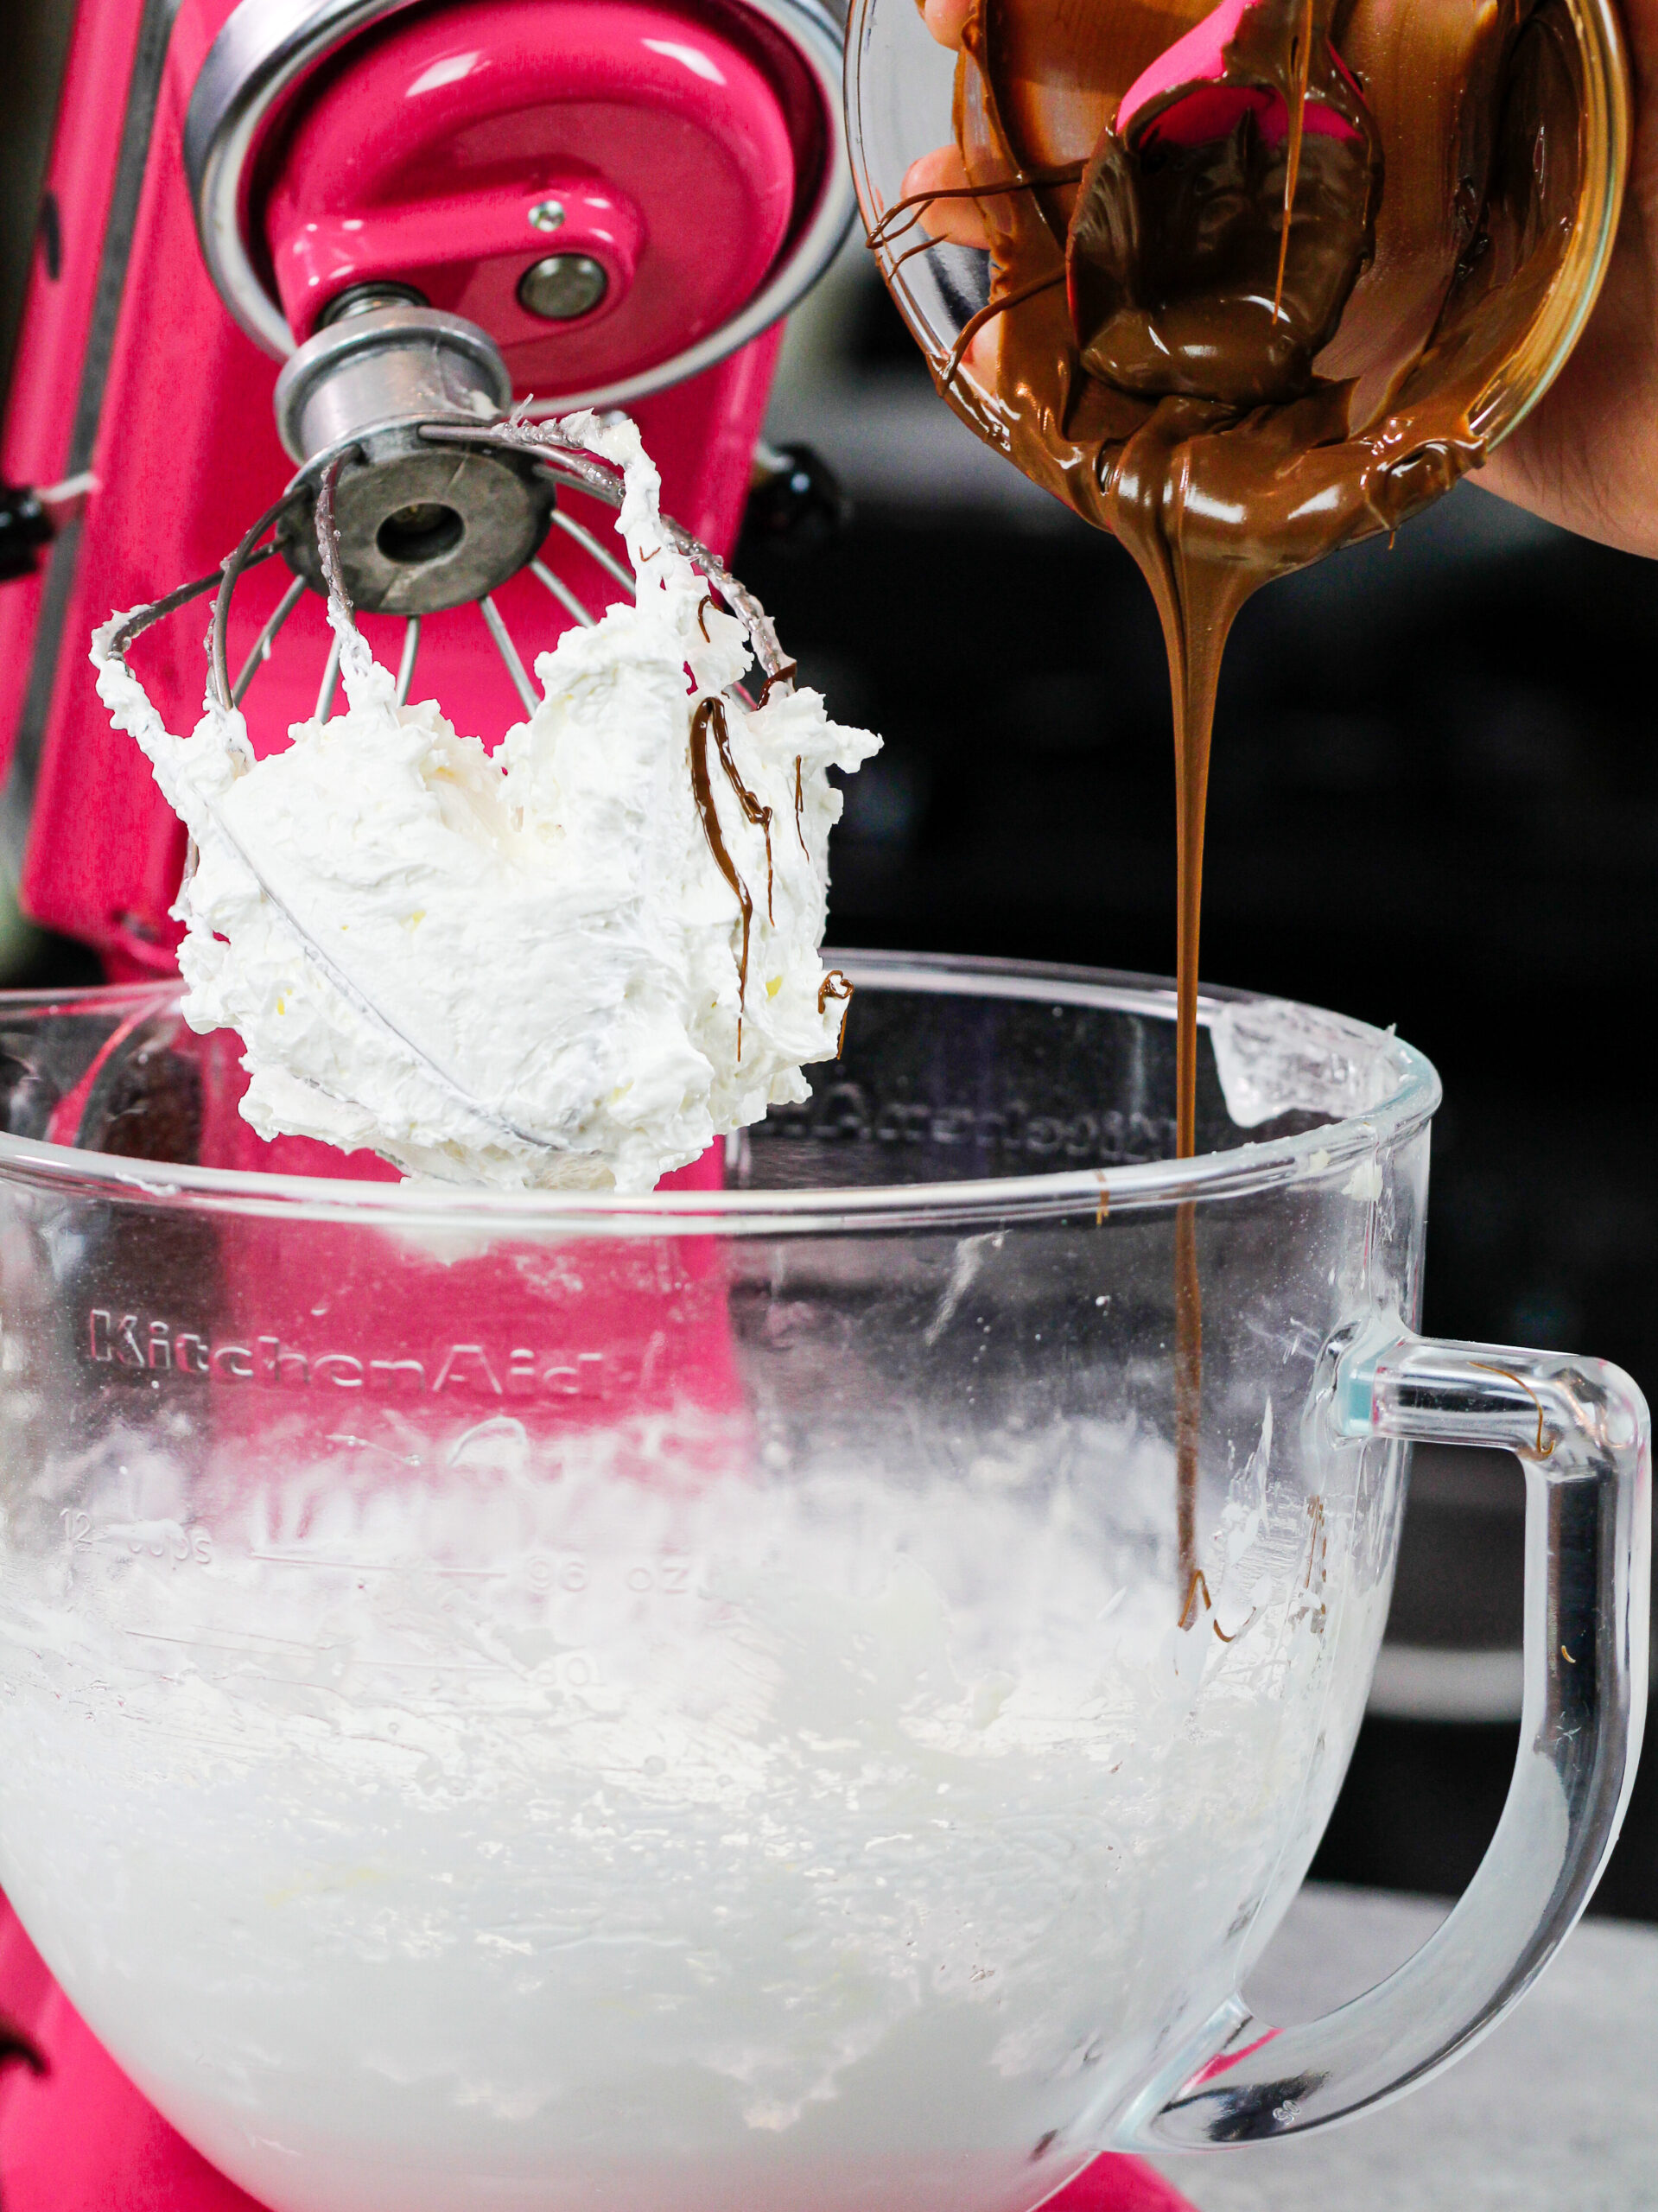
Then mix in a bit of vanilla, espresso powder, fine salt, and the melted and cooled chocolate, and you’re done!!

Chocolate Italian Meringue Buttercream Troubleshooting Guide
While I’d love to think everyone’s first attempt at this recipe will turn out perfectly, I know that’s not always the case!
So I’ve pulled together a fun little table to help walk you through any issues you might encouter along the way.
Italian meringue buttercream is more forgiving than it seems, I promise! Temperature issues can always be fixed, so don’t give up if it doesn’t look perfect right away.
Common Chocolate IMBC Issues & Fixes
| Problem | Possible Causes | Solution |
|---|---|---|
| Meringue won’t form stiff peaks | • Traces of grease or fat in bowl/whisk • Egg whites too cold • Egg yolk contamination • Using carton egg whites | • Wipe down bowl and whisk with lemon juice or vinegar • Let egg whites come to room temperature • Separate eggs carefully; restart if yolk contaminates whites • Use fresh eggs, not carton egg whites |
| Curdled/broken buttercream | • Butter too cold • Kitchen temperature too cold • Buttercream not fully thawed | • Place bowl over hot water bath/double boiler until edges of frosting melt • Mix for several minutes to incorporate the melted frosting with the cold frosting • Continue mixing until smooth (can take 3-10 minutes) |
| Soupy buttercream | • Meringue too warm when butter added • Butter too warm/soft • Chocolate too warm • Kitchen too warm | • Place entire mixing bowl and whisk in refrigerator for 15 minutes • Mix for 3-4 minutes to see if it firms up • If still too soft, refrigerate for another 10 minutes and mix again |
| Chocolate seizes | • Chocolate overheated | • Heat chocolate in 15-second intervals, stirring between each • Stop microwaving when most but not all chocolate is melted • Let residual heat melt the remaining pieces • For future batches, start with finely chopped chocolate for more even melting |
| Sugar crystallizes | • Sugar crystals on sides of pot • Stirring after sugar dissolves | • Use a wet pastry brush to wash down crystal formation on sides of pot • Only stir until sugar dissolves, then leave it alone to boil |
| Deflated meringue | • Adding butter before meringue cooled • Adding butter too quickly | • Ensure meringue and mixing bowl feel room temperature before adding butter • Add butter 1 Tbsp at a time, allowing each addition to incorporate fully |
Other Important Steps in the Process
If you run into issues that aren’t outlined in my troubleshooting table above, below are a few more parts of the recipe that are super temperature sensitive!
| Stage | Temperature | How to Check | Why It Matters/What To Do |
|---|---|---|---|
| Sugar syrup | 240°F (116°C) | Digital thermometer | Temperature too low: meringue won’t stabilize Temperature too high: sugar may caramelize |
| Meringue before adding butter | Room temperature | Feel bottom of mixing bowl | If warm: Wait longer or place frozen veggies around bowl to cool If cool: Proceed with adding butter |
| Butter | Room temperature | Press finger into butter – should leave slight indent but not be greasy | Too cold: causes curdling Too warm: causes soupy frosting |
| Melted chocolate | Slightly warm but not hot | Should flow but not feel hot to touch | Too hot: can seize or make frosting soupy Too cool: won’t incorporate smoothly |
Substitutions & Swaps
This chocolate Italian meringue buttercream recipe uses quite a few ingredients and you might not have them all on hand.
Below are some swaps and substitutions that you can make.
- Unsalted Butter – If you only have salted butter on hand, you can use it in place of the unsalted butter, just omit the salt that the recipe calls for. You can also use vegan butter in its place.
- Dark Chocolate – you can use milk, dark, or semi-sweet chocolate to make this chocolate frosting! Just be sure it’s a good quality chocolate so it will melt down smoothly.
- Vanilla extract – You can use another extract in place of the vanilla! Almond, coconut, or even orange would taste great with the chocolate in this recipe.
- Espresso powder – This ingredient is optional and can be omitted. I like to add it because I think it really enhances the flavor of the chocolate in this frosting.

Making This Chocolate Italian Meringue Buttercream in Advance & Storage Tips
Make this frosting ahead of time or save any leftover frosting! It can be stored in an airtight container at room temperature for 1 day, in the fridge for up to a week, or in the freezer for up to 3 months.
If made in advance, re-whip the frosting once it thaws to room temperature to get the consistency nice and fluffy again.
A frosted cake can last in the fridge for up to a week or in the freezer for up to a month. The buttercream locks in all the moisture, keeping the cake fresh and delicious!
If you cut into the cake and have leftovers, use any remaining frosting to cover the cut section to keep it moist and store it in the fridge for up to a week.
How Much Frosting Does This Recipe Make?
One batch of this recipe makes about 5 cups of frosting. I find that’s enough to frost about 3 dozen cupcakes or a small 6-inch layer cake.
This recipe can easily be doubled to frost a 7- or 8-inch layer cake.

Tips For Making the Best Chocolate Italian Meringue Buttercream Frosting:
- Traces of grease in your mixing bowl can prevent your meringue from forming stiff peaks. Wipe down your bowl and whisk attachment with lemon juice or vinegar to make sure they’re grease-free.
- Use room-temperature egg whites; they whip up more quickly and easily than cold egg whites.
- Closely watch the temperature of your sugar mixture, and remove it from heat as soon as it reaches 240 F / 116 C.
- Whip the meringue until its peaks are stiff enough to defy gravity.
- Make sure your butter is actually at room temperature and add it in gradually (1 Tbsp at a time).
- When in doubt (if your frosting breaks/curdles), just keep mixing!! It should come back together with the help of your stand mixer.
- Chocolate quality matters! Use the best quality chocolate you can – it’s the star flavor.
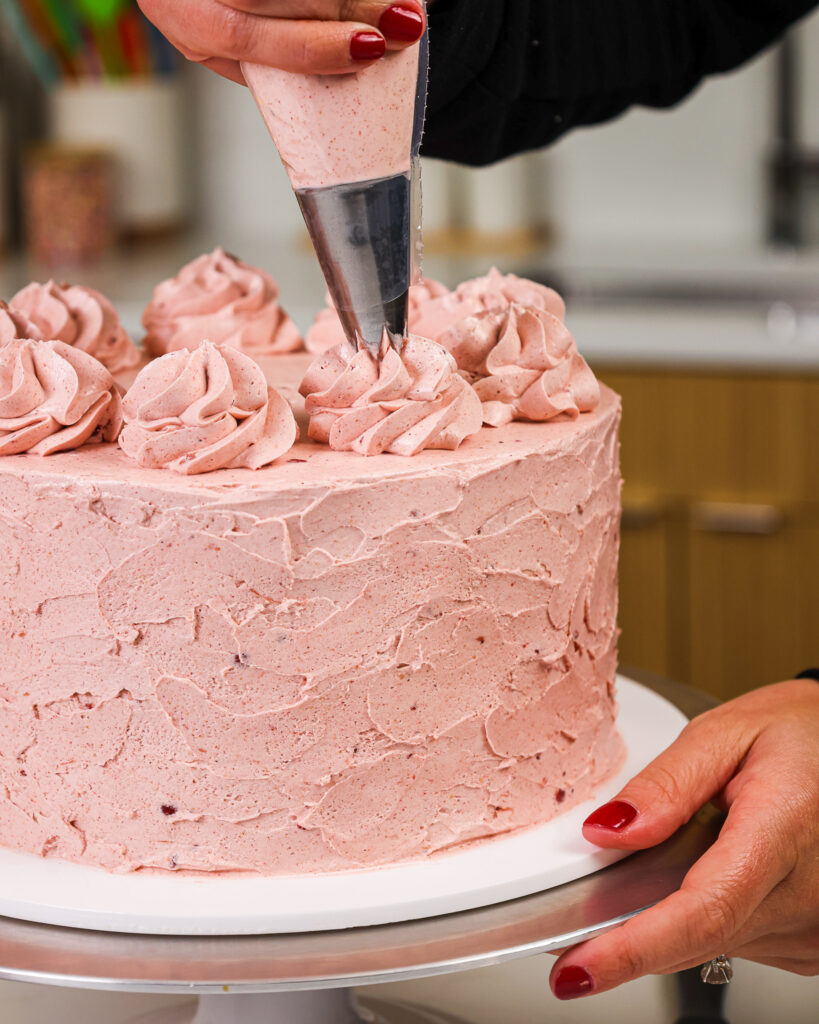
- If you want smooth frosting for a cake, mix your finished buttercream on the lowest speed with a paddle attachment for a few minutes to make it super smooth.
Let Me Know What You Think!
If you try this recipe for chocolate Italian meringue buttercream frosting, I’d love to hear what you think of it! Please leave a rating and comment below.
And don’t forget to tag me @chelsweets and use #chelsweets so that I can see your amazing creations on social media.

Chocolate Italian Meringue Buttercream
Ingredients
Chocolate Italian Meringue Buttercream
- 3/4 cup high-quality milk or dark chocolate, chopped finely 135g
- 4 large egg whites, room temperature 120g
- 1/4 tsp cream of tartar
- 1 1/3 cups granulated sugar – divided 266g
- 1/3 cup water 80g
- 2 cups (4 sticks) unsalted butter, room temperature and cut into 1-inch pieces 454g or 1 lb.
- 1 Tbsp vanilla extract or vanilla bean paste 15g
- 1 tsp instant espresso – optional
- 1 tsp fine salt 6g
Recommended Tools
Instructions
- Start by melting the chocolate because it needs time to cool down before it's added to the frosting. Make sure you're using high-quality chocolate bars or couvertures. Place 3/4 cup of chocolate that's been finely chopped into a microwave-safe bowl. Heat in 15-second intervals, stirring between intervals to help the chocolate melt more evenly. Once the chocolate is mostly melted (it usually takes 4 intervals for me), stir until smooth, then set aside to cool.
- Next, clean your mixing bowl and whisk the attachment with a splash of lemon juice or vinegar to remove residual grease from prior baking. This helps ensure your egg whites whip up properly.
- Then beat 4 large room-temperature egg whites and 1/4 tsp cream of tartar together at a medium-high speed. Slowly add 1/3 cup of granulated sugar and continue beating until soft peaks form. Stop the mixer at this point.
- Then add the remaining 1 cup of sugar and 1/3 cup of water into a medium pot and place on medium-low heat. Stir until the sugar melts and becomes clear. Continue to heat the mixture at medium-high heat until the sugar reaches 240F/ 116C.
- Turn the mixer back on to a medium-high speed and slowly pour the sugar into the whipped egg whites. Try to pour the syrup directly on top of the egg whites and avoid having it hit the side of your bowl. Continue to mix on medium-high until the mixture increases in volume and becomes shiny with stiff peaks. It's marshmallow frosting at this stage, which is great for s'mores-flavored treats or pies!
- Then, feel the bottom of your bowl and make sure the meringue isn't still warm. If it is, let it sit for a few minutes to cool. If it is, I like to place bags of frozen veggies around the base to help it cool.
- Switch the whisk to the paddle attachment, turn the mixer onto medium speed, and add 2 cups of room temperature butter, one Tbsp at a time. This buttercream sometimes deflates/curdles once all the butter is mixed in, especially if the butter is too warm or cold. But don't worry, it's fixable! Allow the buttercream to continue to mix on a medium-high speed until it comes back together and fluffs up again. This can take anywhere from 3 to 10 minutes. If the frosting still hasn't come back together at this point, please refer to my detailed troubleshooting guide in the post above.
- Beat until the butter is fully incorporated and the mixture has reached a fluffy, silky-smooth consistency. Then, mix 1 Tbsp of vanilla extract with 1 tsp of instant coffee (optional) together in a small bowl, and add this mixture, along with 1 tsp of fine salt, into the buttercream while mixing on a low speed.
- Next, pour in the melted and cooled chocolate. It should no longer be warm to the touch but still fluid. Mix on a medium speed until the ingredients are combined. Scrape the sides of the bowl as needed with a rubber spatula.
Video
Notes
How Much Frosting Does This Recipe Make?
One batch of this recipe makes about 5 cups of frosting. I find that’s enough to frost about 3 dozen cupcakes or a small 6-inch layer cake. This recipe can easily be doubled to frost a 7- or 8-inch layer cake.Tips For Making the Best Chocolate Italian Meringue Buttercream Frosting:
- Traces of grease in your mixing bowl can prevent your meringue from forming stiff peaks. Wipe down your bowl and whisk attachment with lemon juice or vinegar to make sure they’re grease-free.
- Use room-temperature egg whites; they whip up more quickly and easily than cold egg whites.
- Closely watch the temperature of your sugar mixture, and remove it from heat as soon as it reaches 240 degrees F.
- Make sure your butter is actually at room temperature and add it in slowly (1 Tbsp at a time).
- When in doubt (if your frosting breaks/curdles), just keep mixing!! It should come back together with the help of your stand mixer.
- If you want smooth frosting for a cake, mix your finished buttercream on the lowest speed with a paddle attachment for a few minutes to make it super smooth.
Making This Chocolate Italian Meringue Buttercream in Advance & Storage Tips:
Make this frosting ahead of time or save any leftover frosting! It can be stored in an airtight container at room temperature for 1 day, in the fridge for up to a week, or in the freezer for up to 3 months. Be sure to re-whip the frosting once it thaws to room temperature to get the consistency nice and fluffy again. A frosted cake can last in the fridge for up to a week or in the freezer for up to a month. The buttercream locks in all the moisture, keeping the cake fresh and delicious! If you cut into the cake and have leftovers, use any remaining frosting to cover the cut section to keep it moist and store in the fridge for up to a week.Nutrition
Other Recipes You Might Like:

I have Valrhona Cocoa Powder that I would like to use up. Can you suggest how I could use that in this recipe? Thanks for your time!
if you are using vegan butter get unsalted or DO NOT USE EARTH BALANCE VEGAN BUTTER!!!!!!!! it was so salty without me adding salt and it smelled like stale saltwater taffy. Now onto the review, even thought it was my mistake it couldn’t be reflected upon the recipe. it have a wonderfully texture, very silky and this was only the second time I had made this kind of frosting. it made a beautiful meringue that tasted delicious and had a wonderfully texture.
Appreciate the feedback Keegan, so good to know!!!! Thank you for sharing 🙂
Instead of eggs use aquafaba
Does the hot sugar water actually kill any potential bacteria?
@CH, Yes it does! it completely kills bacteria, which is why it’s safe to use 🙂
Hey is there a recipe for Vanilla Italian buttercream
@Kate, it’s definitely not. one large egg typically has around 20-30 g of egg whites, give or take
@Bella, So are we shooting for closer to 60 g of egg whites? Or should I go for 112? I’m going to try this recipe this week.
What if I made it vanilla flavored and put in freezer but decided I would like to add chocolate? When I thaw it, can I add chocolate and re-whip?
Can you make a white chocolate meringue icing
Hi Adele,
You can definitely make a white chocolate version of this recipe 🙂 Once you’ve made the buttercream following this recipe (skip the milk or dark chocolate), just melt some good-quality white chocolate, let it cool to room temp (still melted but not warm), and then slowly mix it into the finished buttercream.
The key is to make sure the chocolate isn’t hot when you add it, otherwise it can seize or melt the butter. Start with about 4 ounces of melted white chocolate per batch, taste, and then add more if you want a stronger flavor. Hope that helps, happy baking!
It’ll give the buttercream a lovely creamy sweetness and a subtle white chocolate flavor while keeping that silky meringue texture.
Made this for my Son’s birthday, and overall it was good except for the salt. One teaspoon of salt is just too much. I would go with 1/4 teaspoon, or omit the salt and use lightly salted butter. Disappointing because it kind of ruined the cake. : (
Hi Tom,
I’m so sorry to hear the salt threw things off for you. That’s frustrating, especially for a birthday cake. Can I ask what type of salt you used, and whether your butter was salted or unsalted? I use 1 tsp fine salt with unsalted butter, and to me it balances well with the sweetness of the frosting.
But everyone’s palate is a little different, so if you prefer things less salty, definitely feel free to cut it back to ¼ tsp (or omit it and use lightly salted butter).
Excellent recipe, I lost my Italian buttercream recipe in a recent move and have been looking for a good one for a while. A few notes mostly for my future reference, I added a tbs more of sugar because the cake is for my brother in law who likes things sweet (it wasn’t overly sweet at all,) it was very cold out so I turned the heat up and still the butter was to stiff so it took a little longer for it to incorporate, and I used the wisk attachment the whole time and it still came out incredibly smooth.
So happy to hear that Will!! And thank you for sharing your notes, I’m sure they’ll be helpful both for you and everyone else who uses this recipe going forward 🙂
Thank you for this recipe, it’s exactly what I was looking for. It came out delicious and silky smooth. I made 1-1/2 batch for a 9in two layer cake and it was way too much, so I’ll know next time a single batch will be plenty.
So happy to hear that Mark!! And good to know, thank you for sharing 🙂
Absolutely loved this recipe. I made a German Chocolate Cake using a Chocolate Mayonnaise Cake recipe that I pulled of c the web. I expect my wife to LOVE it in a couple of days. (or earlier if she sees it.) I should have refrigerated it for a bit before frosting the sides of the cake!
Thank you for posting your recipe! ???
I was a night baker in the Navy MANY years ago, and never made anything quite like this. You Rock!
Hi Rick,
This absolutely made my day!! I’m so happy you loved the recipe, and I hope your wife loves the cake just as much when she sees it. Chilling the cake before frosting the sides definitely helps make assembly a little easier, but it sounds like you made it work beautifully. And coming from someone who baked in the Navy, that means so much! Thank you for making my recipe and for taking the time to share 🙂