
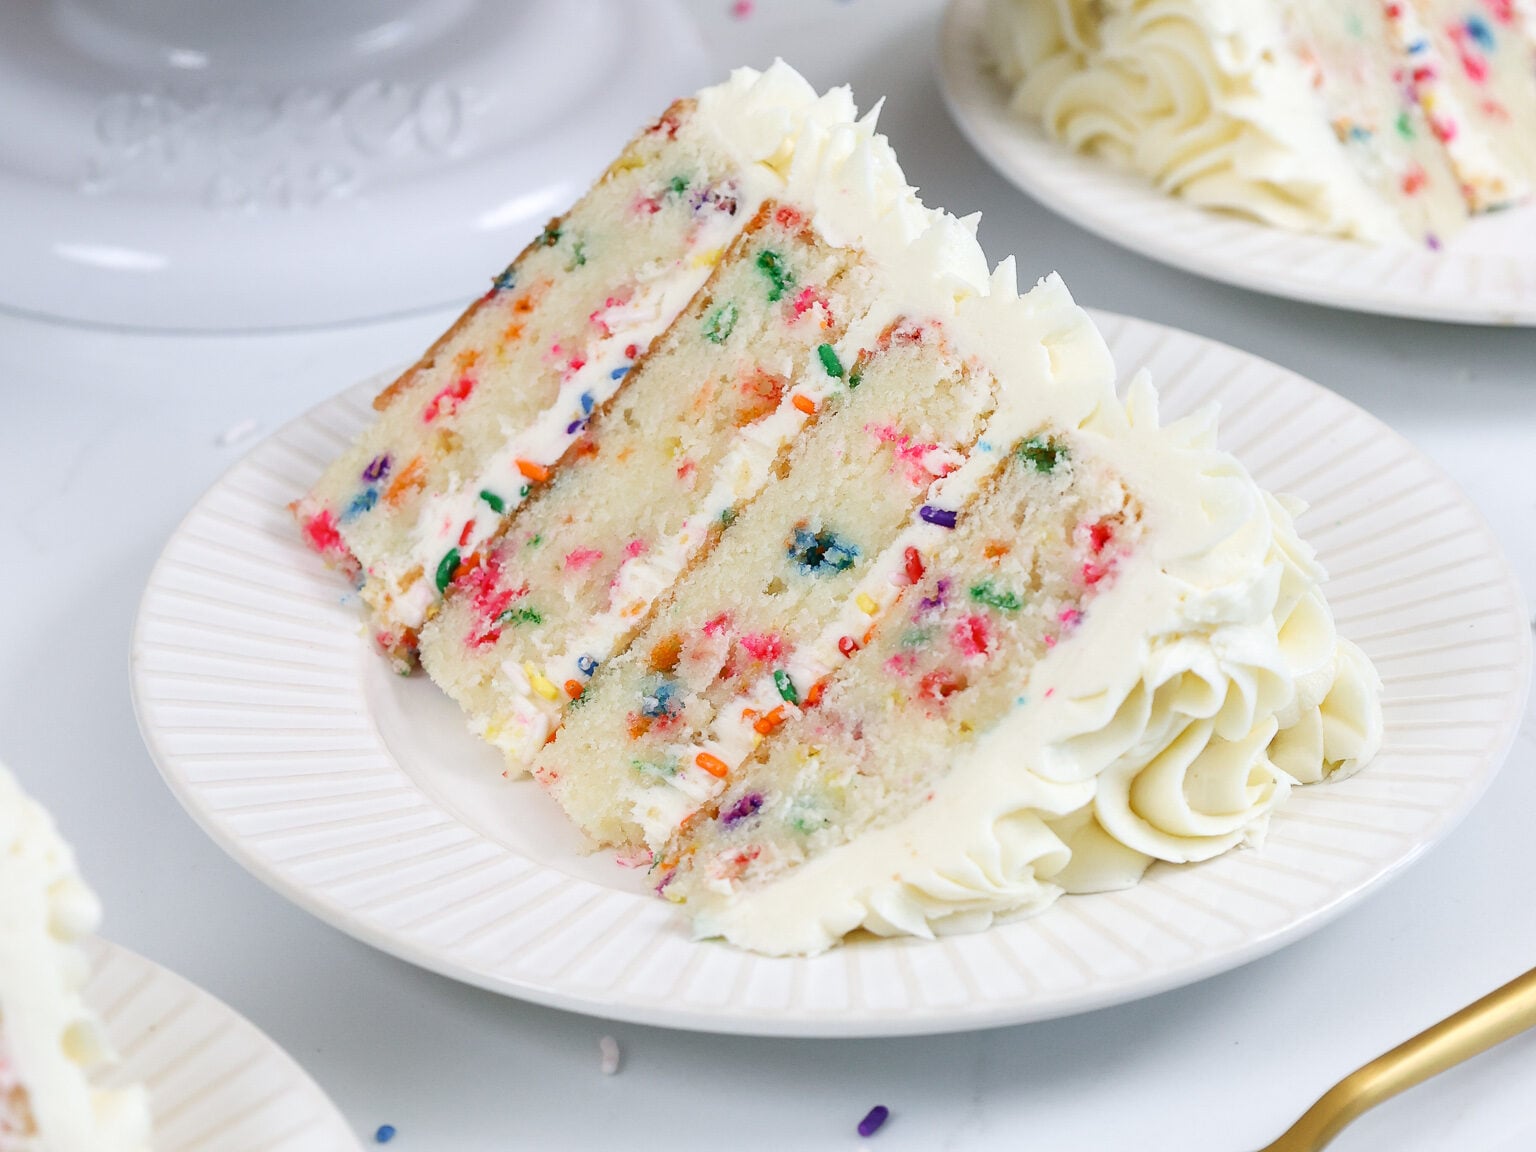
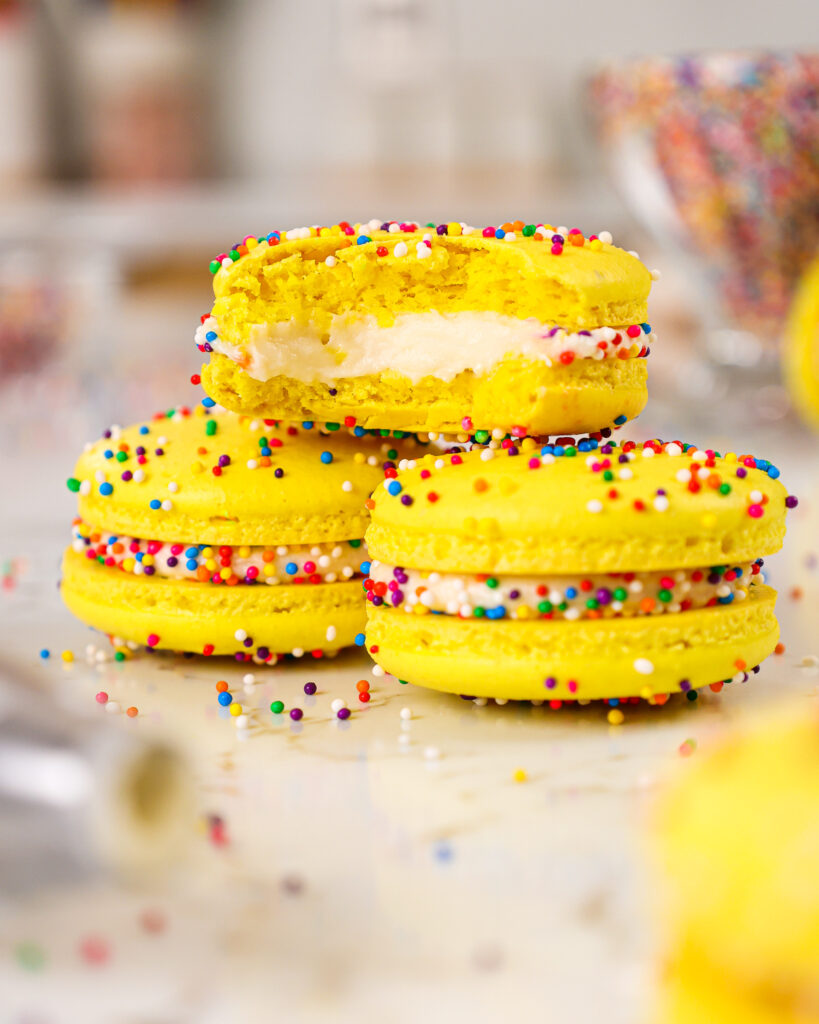
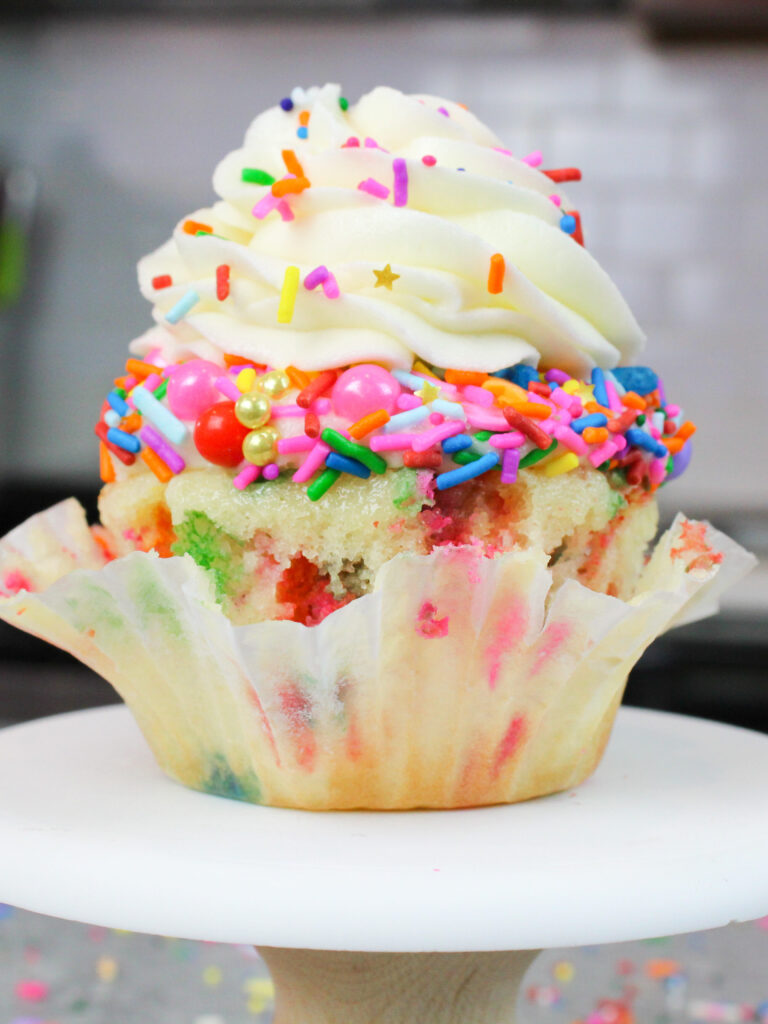
Funfetti Layer Cake
This delicious funfetti layer cake recipe is made from scratch and is so easy to make. It’s tender, moist, and packed with sprinkles!!

How to Make This Funfetti Layer Cake
To make sure this cake turns out as amazing as possible, let’s walk through each step together! I’ve also included a video tutorial of the process below.
I figured it might be helpful to know what tools I use, too, so I’ve shared a list below.
Not all of these are mandatory, but they make the process a lot easier. If you don’t have all these things on hand, feel free to improvise and work with what you have.
- 3, 8-inch cake pans
- Parchment paper
- Serrated knife
- Spinning cake stand
- Electric hand mixer or stand mixer
- 10-inch greaseproof cake board or large flat plate
- Large offset spatula
- 1 Large piping bag
Step 1: Bake the Funfetti Cake Layers
The first step is to make the funfetti cake batter following the recipe card at the bottom of this post.
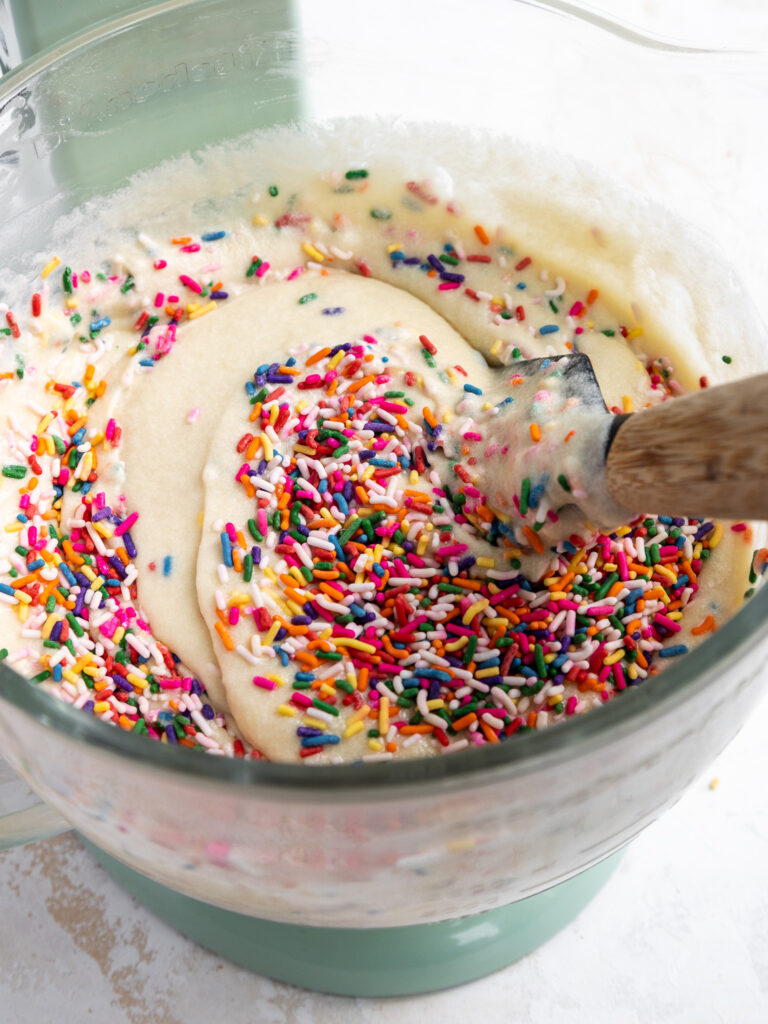
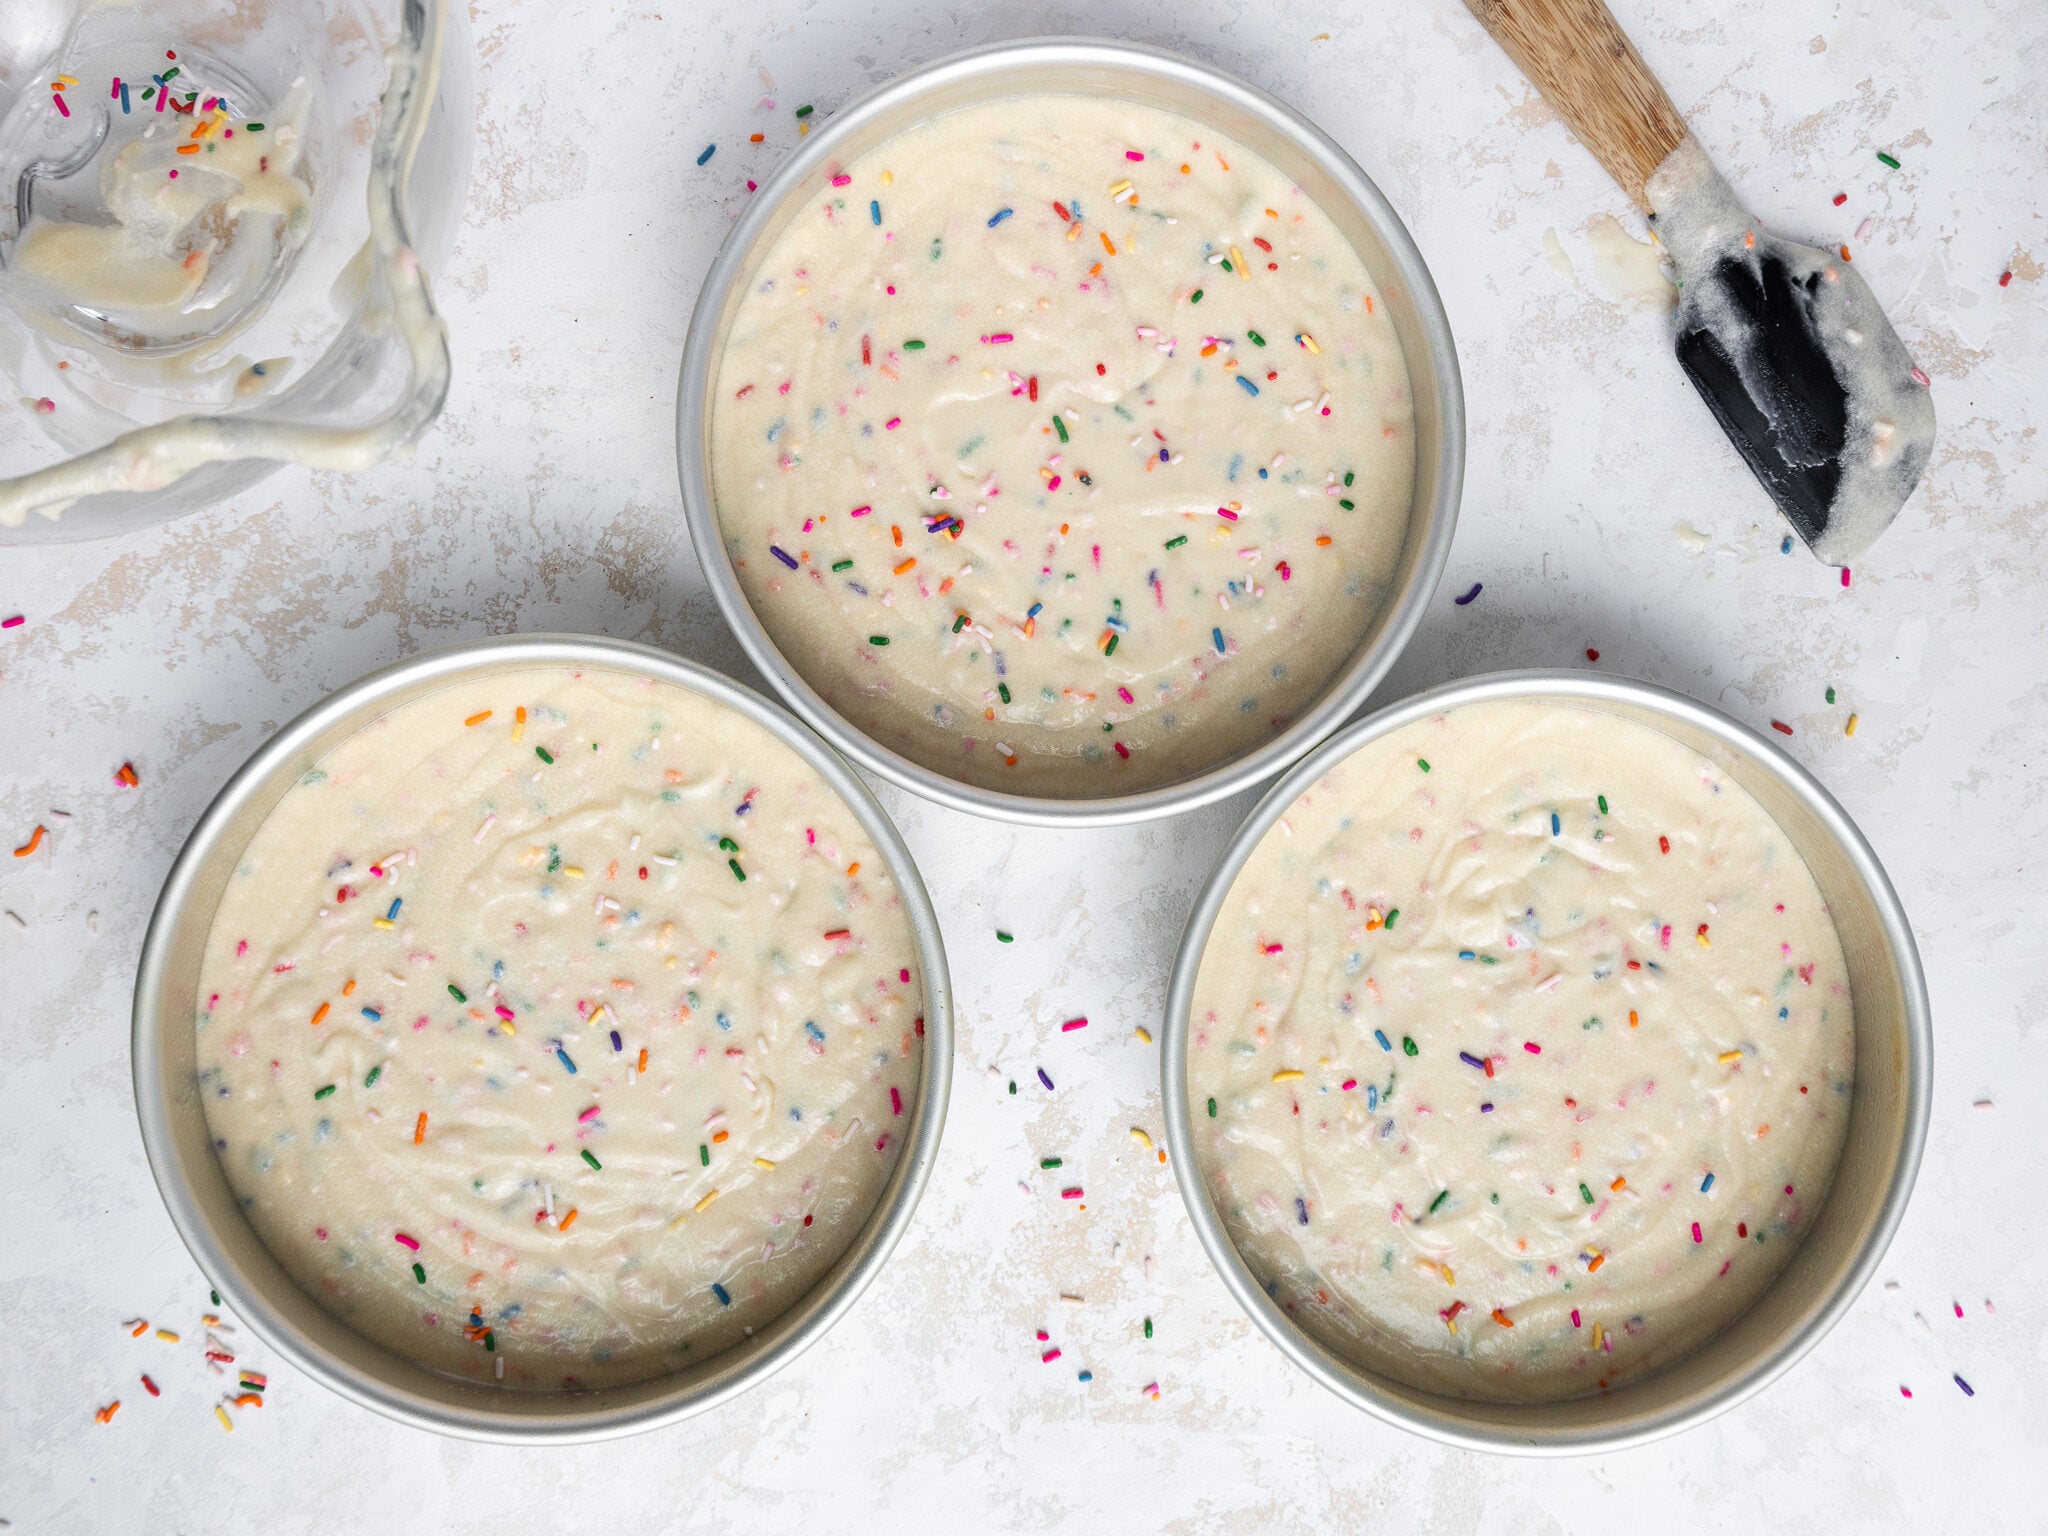
After folding the rainbow sprinkles into the batter, divide the batter evenly between the prepared cake pans.
Bake the layers for 34-36 minutes or until a toothpick comes out with a few moist crumbs. Remove the cake layers from the oven and let them cool in the pans for about 15 minutes.
Gently run an offset spatula around the rim of the cake pans to loosen them, then flip the cake layers onto wire racks to finish cooling. If you’re in a rush (or impatient like me), you can pop the cake pans into the freezer for 30 minutes to accelerate the cooling process.
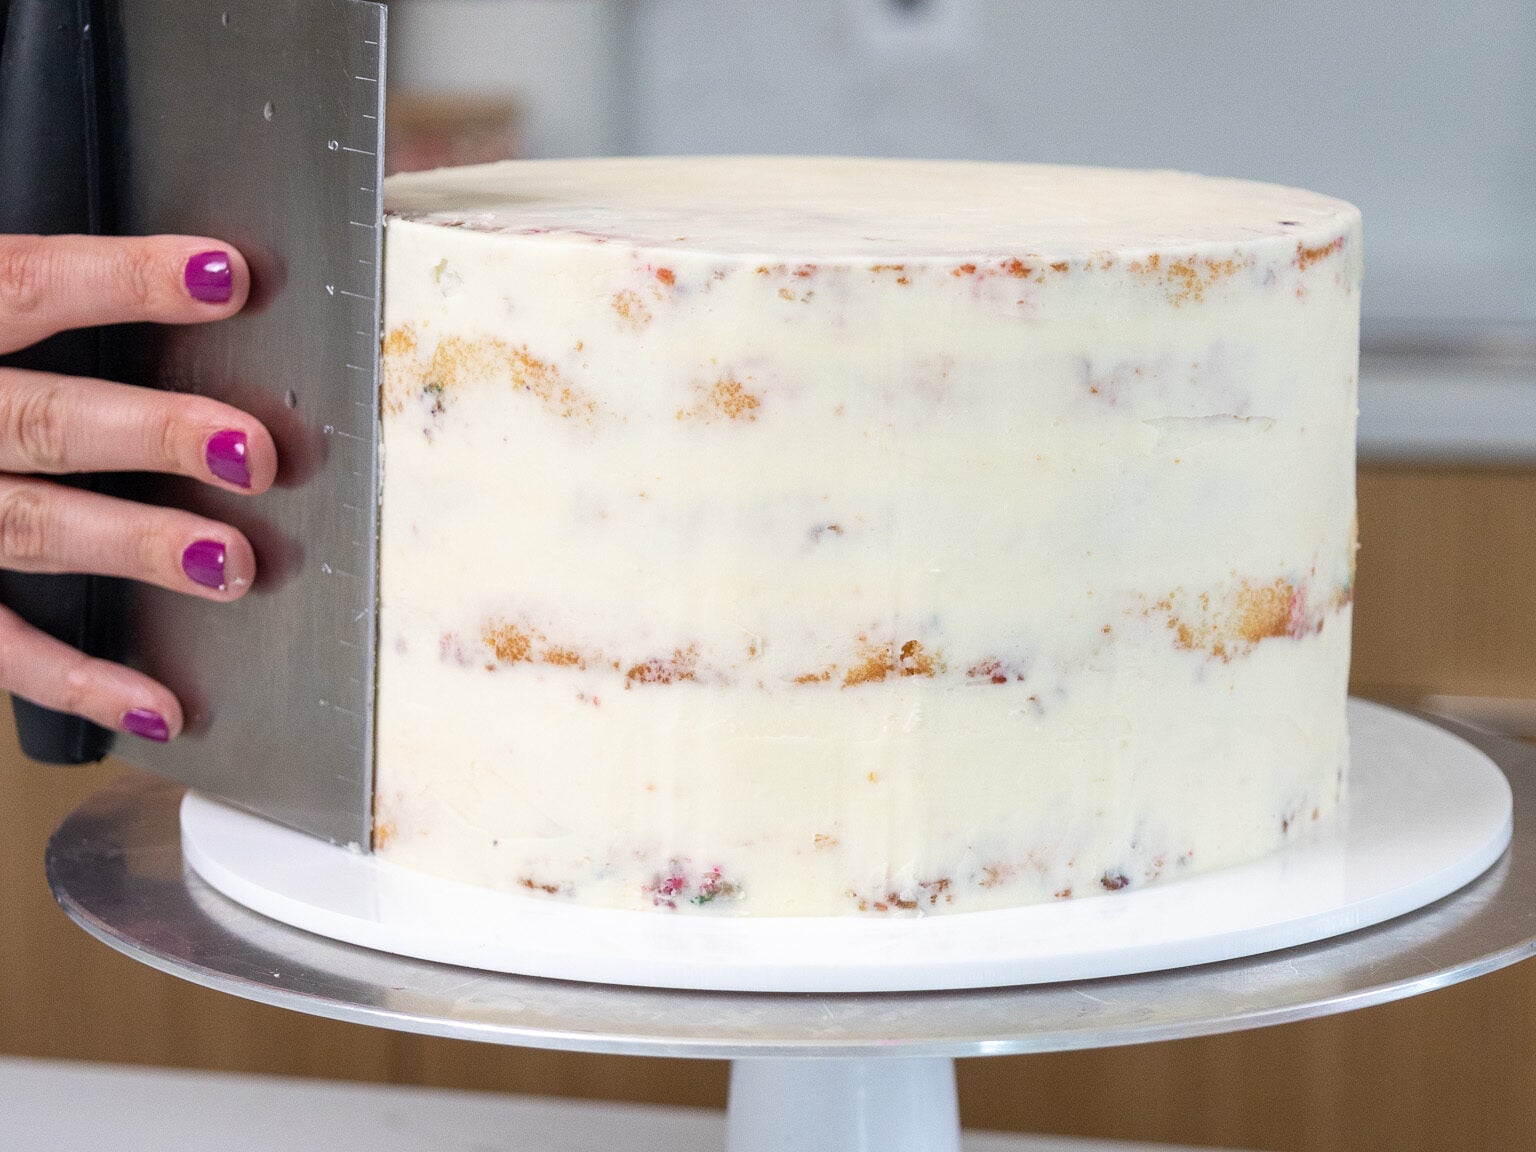
Once cooled, use a serrated knife to level the top of each layer and remove the caramelization around the sides of the layers.
I also like to torte the cake layers horizontally to create 6 thinner cake layers, but this is optional.
If you make these cake layers in advance and freeze them, let them thaw for about 20 minutes before assembling your cake. The cake layers should still be cold to the touch, which will make it easier to assemble your cake.
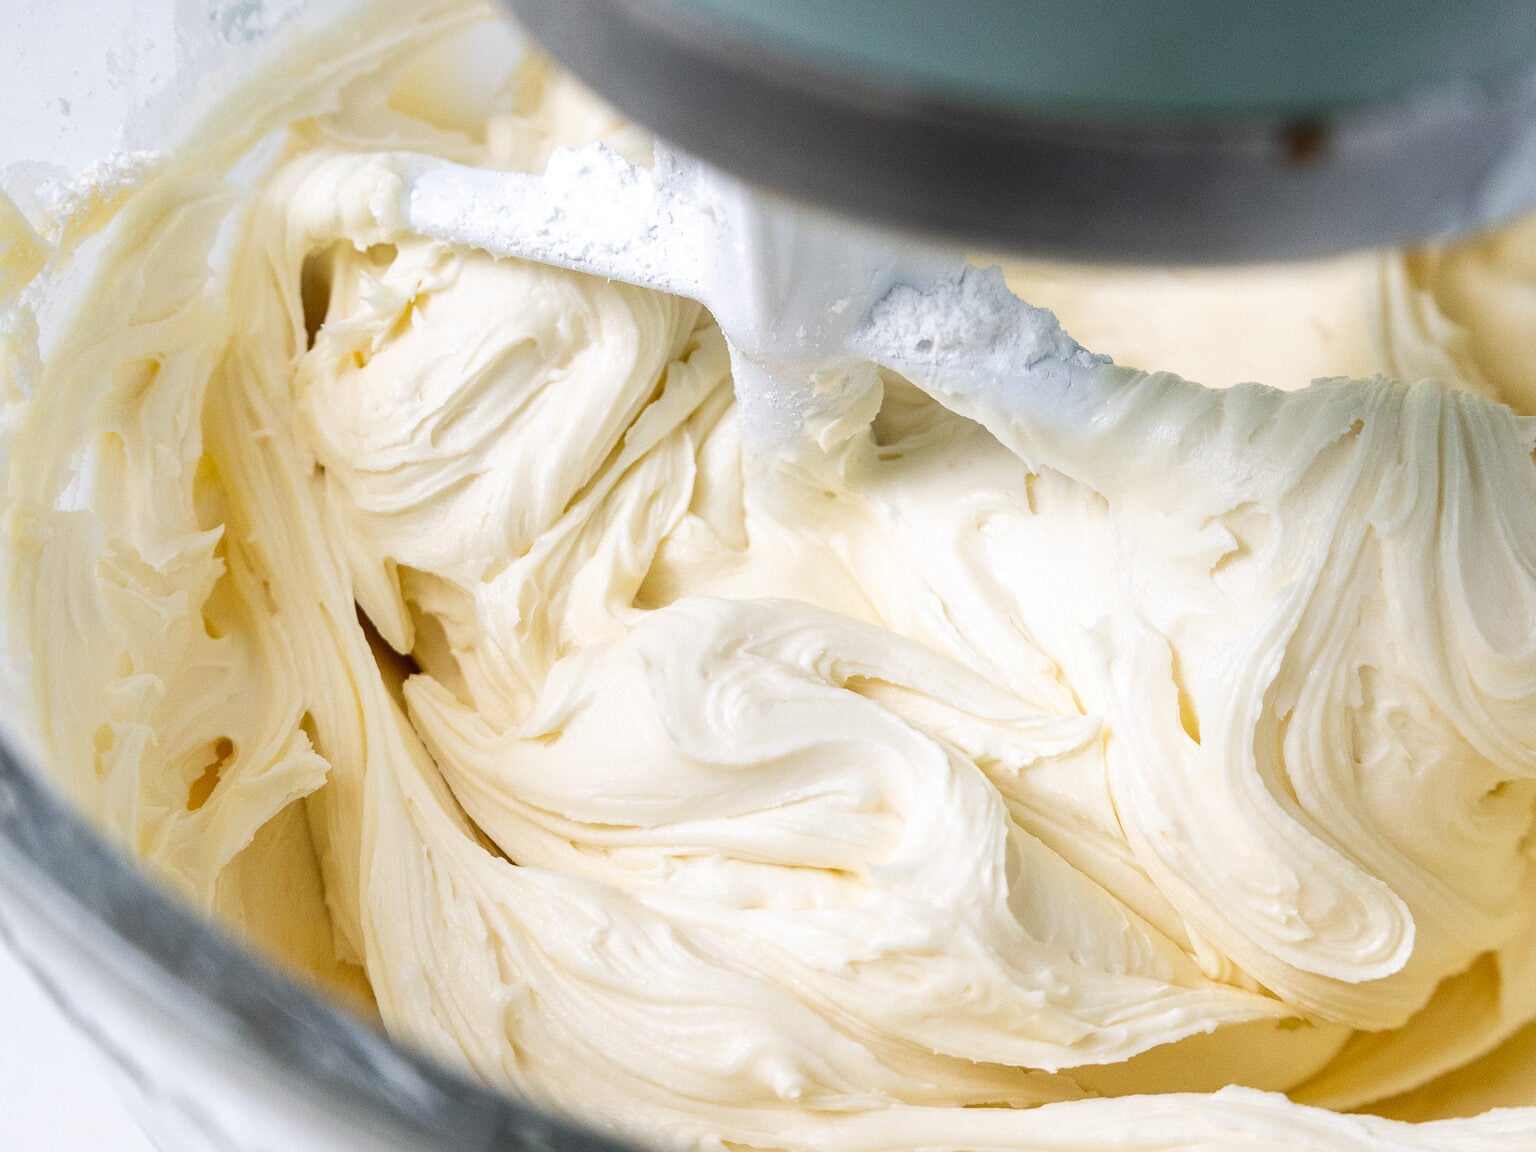
Step 2: Make the Vanilla Buttercream Frosting
While the cake layers bake and cool, make the vanilla frosting.
I like to frost this cake with my American buttercream because it’s so easy to make and I love eating it. However, I know that it can be a bit sweet for some palates!
If you aren’t a fan of American buttercream, I’d recommend using a batch of my Swiss meringue buttercream (SMBC) or 1.5 batches of my hybrid buttercream.
This frosting can also be made in advance if needed and kept in the fridge for up to a month.
Step 3: Stack and Fill the Cake Layers
Then it’s time to assemble this cake! Stack and frost the cake layers on a greaseproof cake board or flat plate. Use a dab of buttercream to help stick the first cake layer to the board.
Spread an even layer of buttercream on top of each cake layer with a large offset spatula. If desired, add a couple of spoonfuls of sprinkles on top of the frosting. Repeat with the remaining cake layers.
Flip the top cake layer upside-down to make it easier to frost.
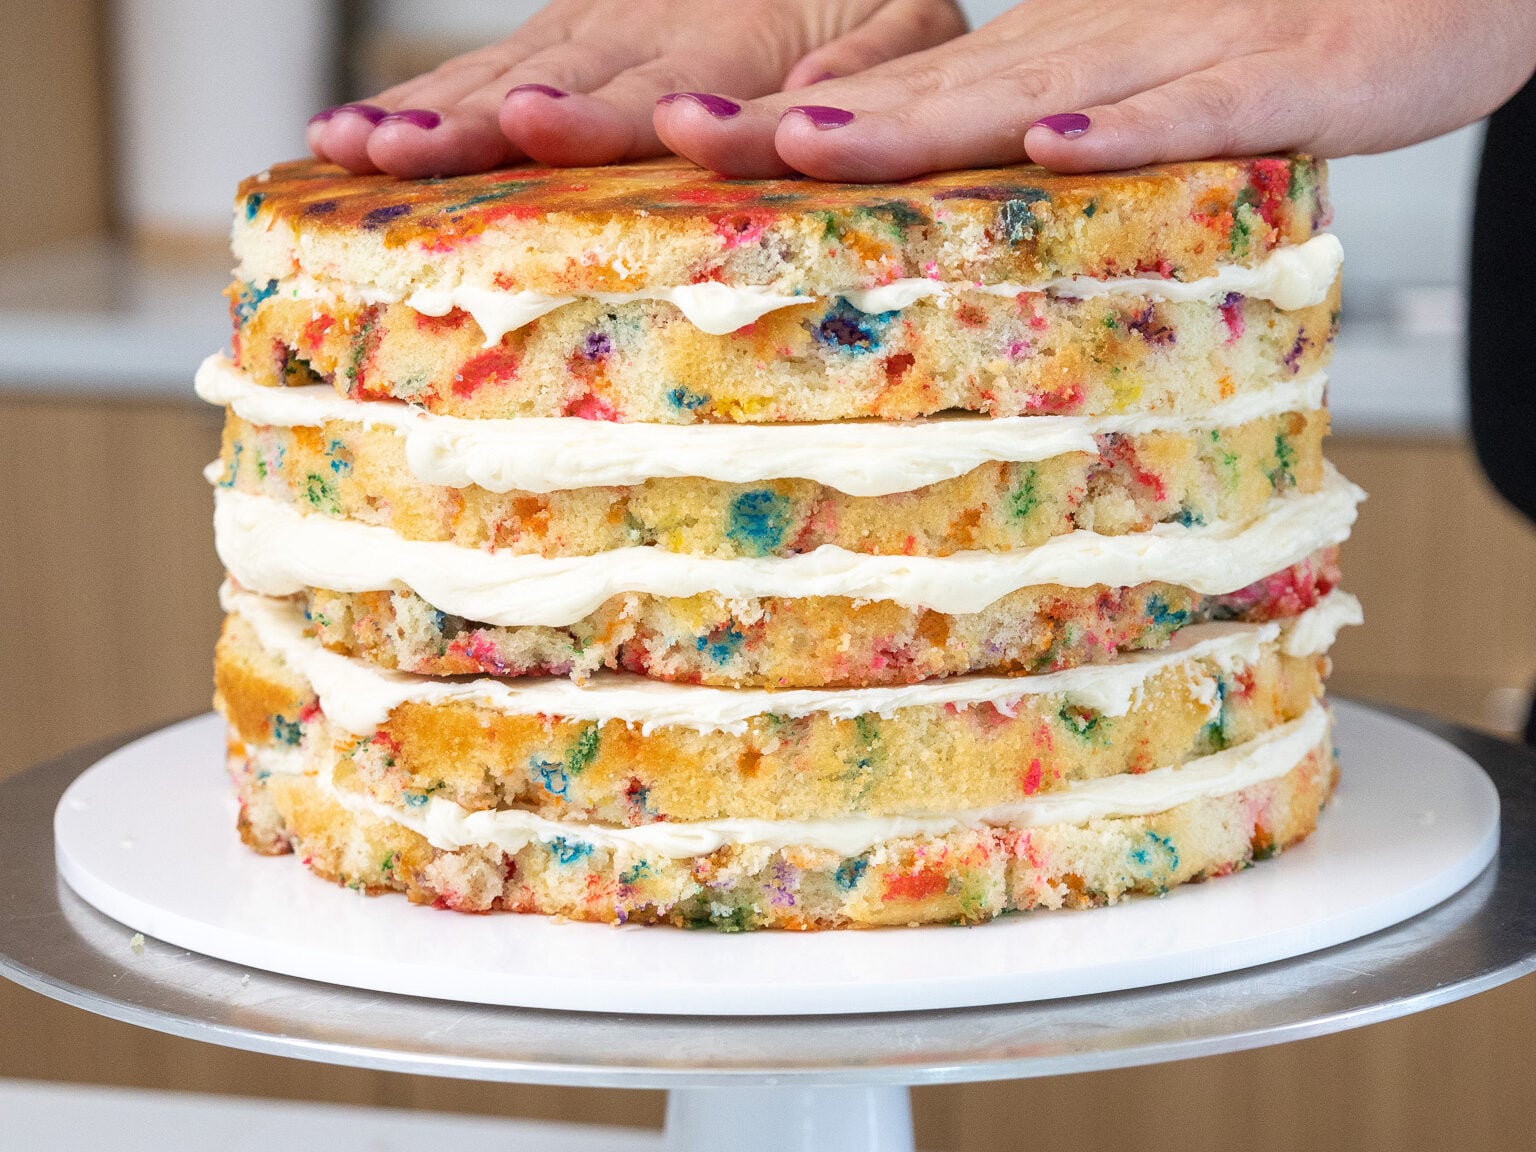
Once all the layers are stacked, gently press down on top of the cake with both of your hands to help them settle and to press out any trapped air between the cake layers.
Step 4: Chill and Crumb Coat the Cake
Chill the cake in the freezer for 5-10 minutes to prevent the layers from sliding, then add a thin coat of frosting around the cake that fully covers the cake layers.
Smooth using a large offset spatula and/or bench scraper, then chill the cake again in the fridge (30 minutes) or freezer (10 minutes) until the frosting is firm to the touch.
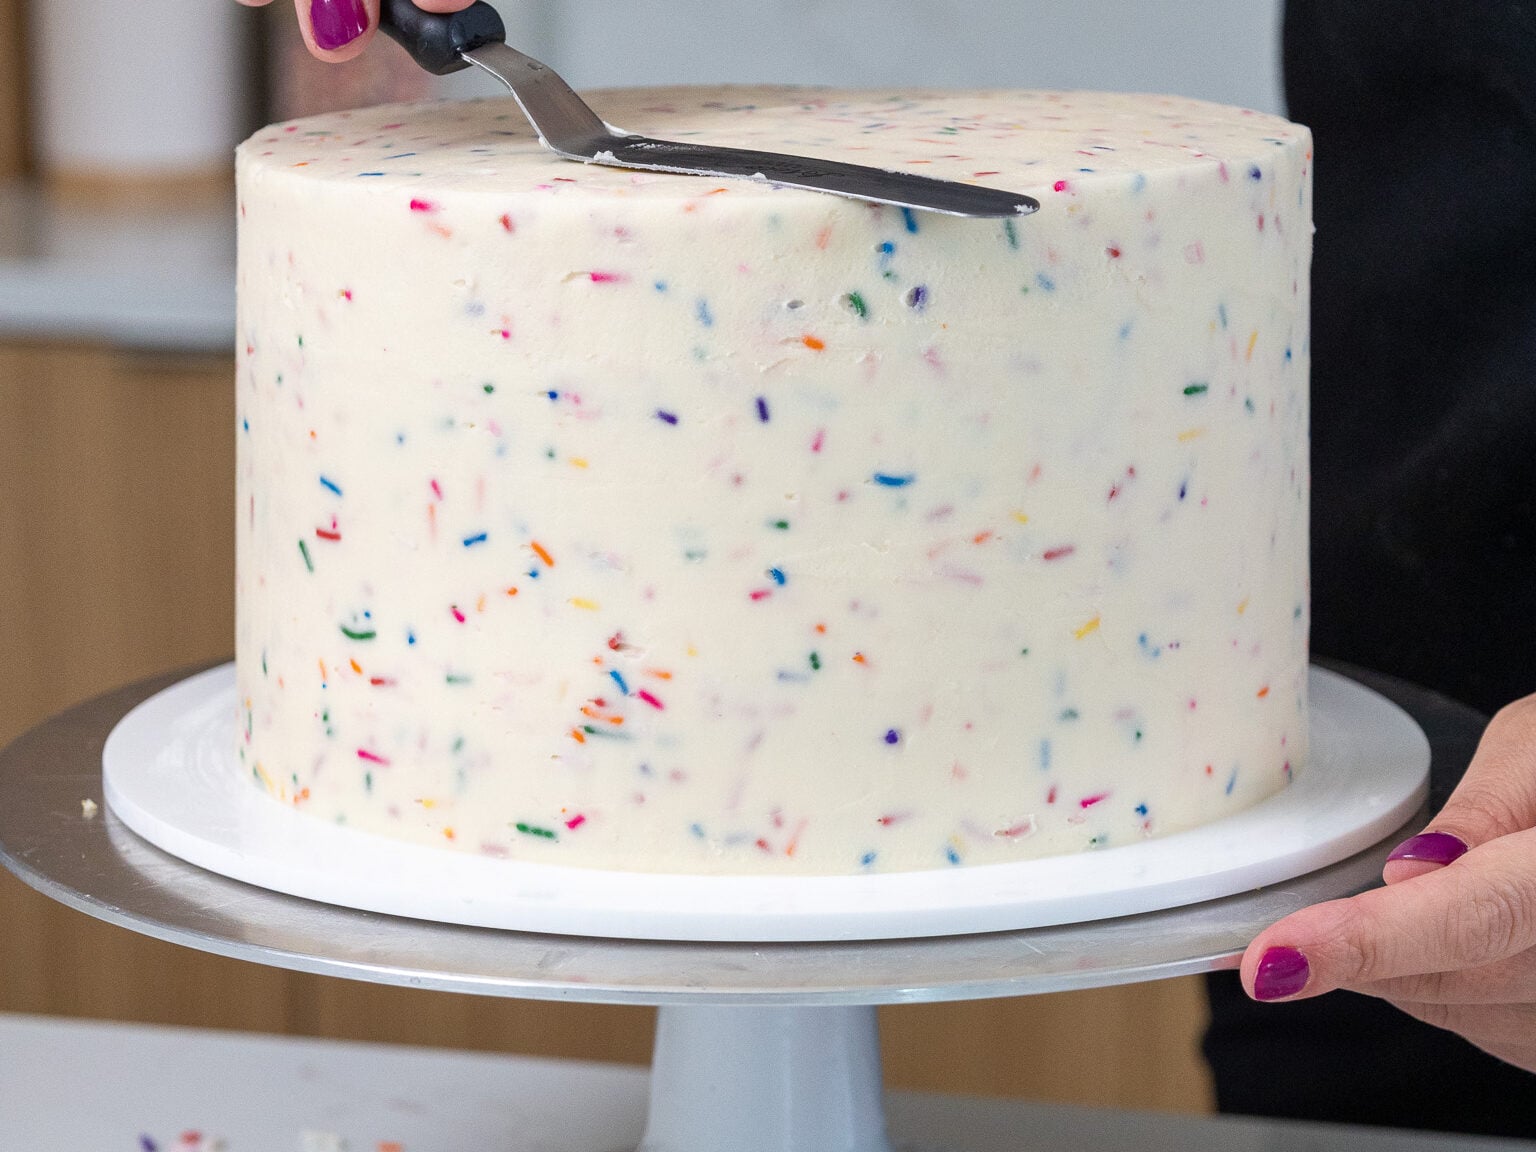
Step 5: Add the Second Layer of Frosting & Decorate
While the cake chills, fold ½ cup of rainbow sprinkles into the remaining buttercream.
Use the sprinkle frosting to add a second layer of frosting to the cake with the remaining buttercream. Smooth using a large offset spatula and bench scraper.
Then decorate as desired and enjoy! I added some pink white chocolate ganache drips around the cake and used the remaining buttercream to pipe some buttercream dollops in a ring around the top of the cake.
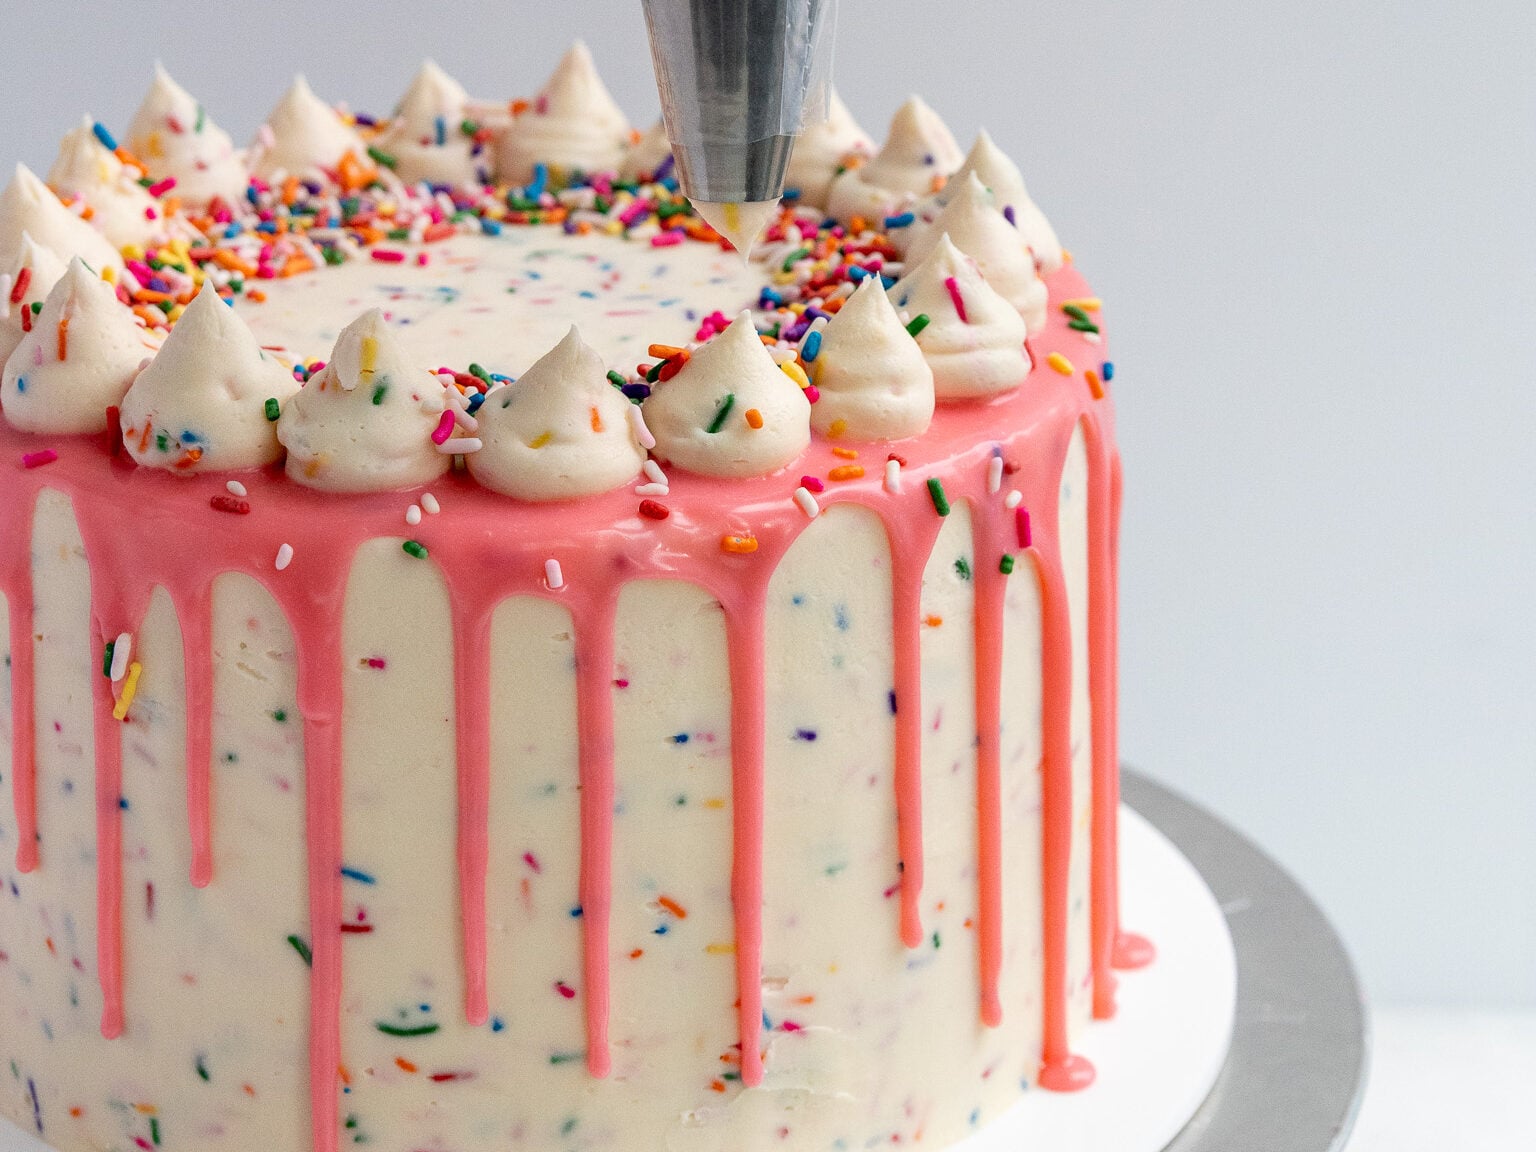
If you want to pipe a border around this cake, be mindful of the sprinkles in the buttercream. They can get stuck in the grooves of frosting tips. I recommend using a large, round piping tip if you use one.
Substitutions and Swaps – Funfetti Cake Layers
Below are some swaps and substitutions that can be made in this cake recipe.
- All-Purpose Flour – This recipe turns out best with AP flour, but you can use a gluten-free flour blend or cake flour if that’s all you have on hand.
- Granulated Sugar – I do not recommend reducing the amount of sugar because it will change the texture of the cake layers.
- Unsalted Butter – If you only have salted butter on hand, you can use it instead of the unsalted butter in this recipe. Just be sure to omit the salt that this cake recipe calls for. You can also use vegan butter in its place (and also skip the salt)!
- Egg whites – I like to use the pasteurized egg whites that come in a carton, but you can also use 7 fresh egg whites or 4 whole, large eggs. If you have an egg allergy, you can use flaxseed eggs or an egg replacer.
- Buttermilk – You can also use full-fat yogurt, sour cream, or an alternative yogurt or milk (almond, soy, oat) if you’re dairy free.
- Vegetable Oil – Any flavorless oil can be used in this recipe. Canola or even sunflower oil would work great!
- Almond Extract – I love a hint of almond in this recipe, it really elevates the flavor! However, if you have a tree nut allergy, you can skip the almond extract or replace it with another extract like lemon or coconut.
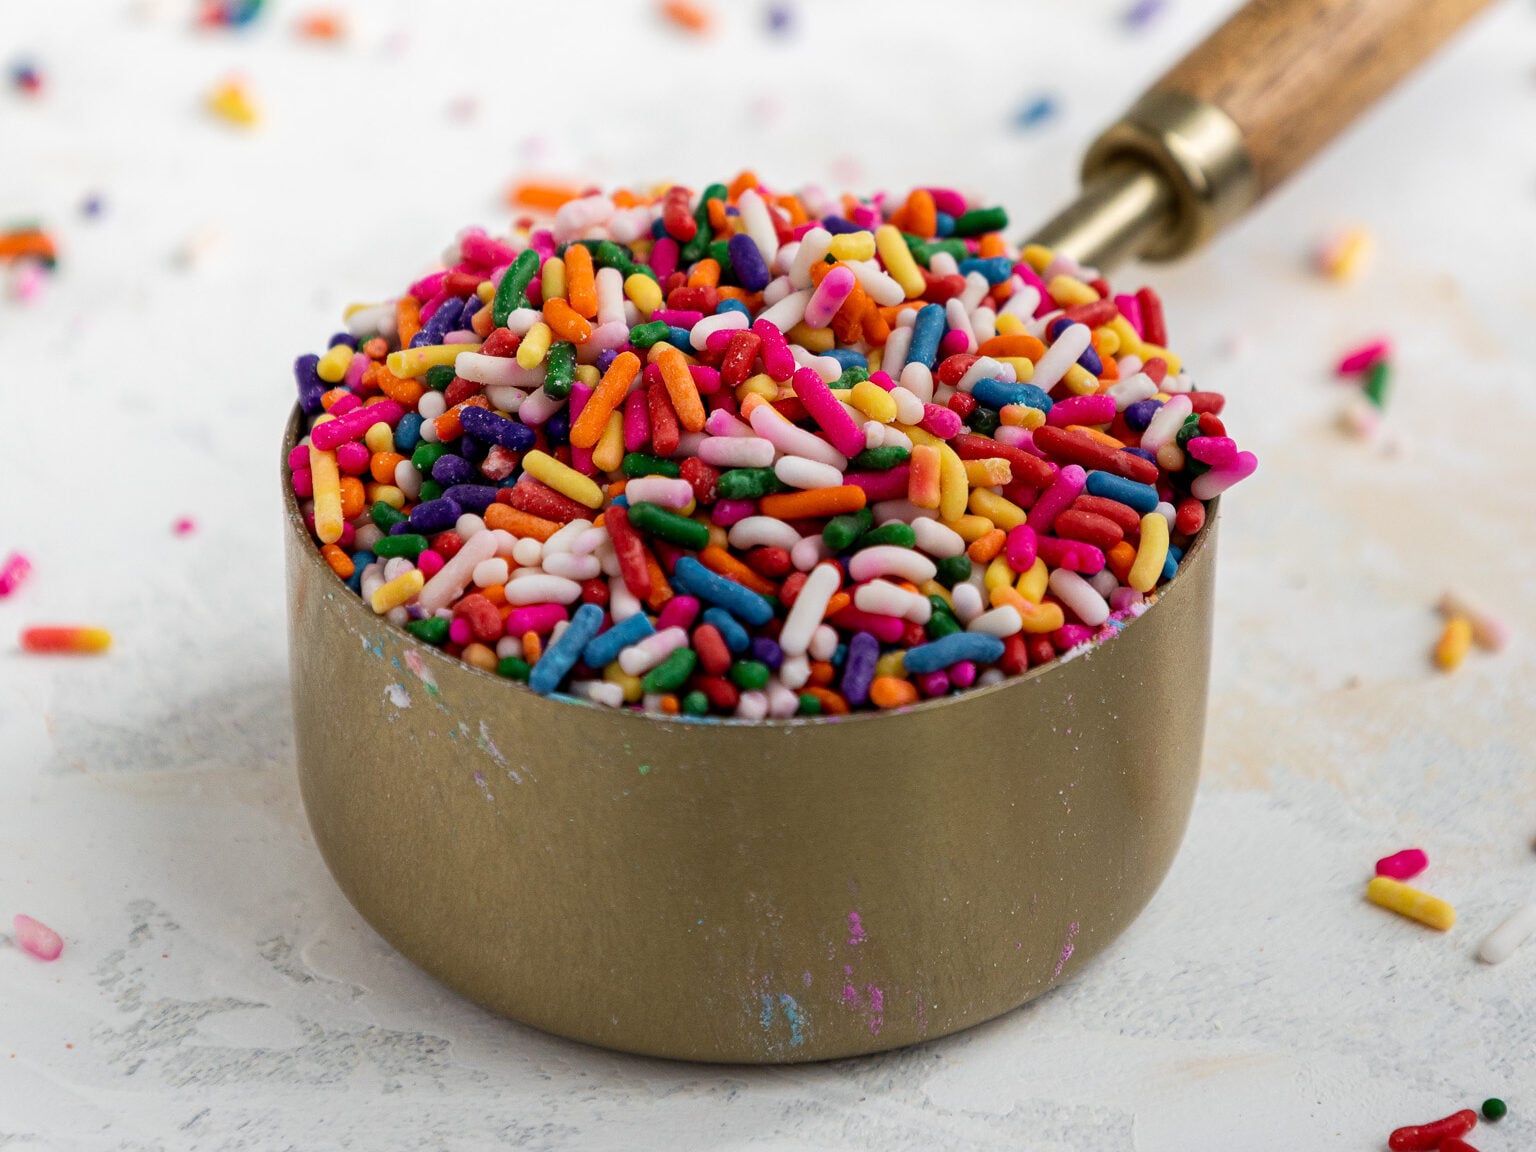
- Sprinkles – The best sprinkles for making a funfetti cake are rainbow jimmies. They hold up best in the batter and bleed less than other types of sprinkles. Avoid nonpareils at all costs, they instantly bleed into the batter and turn it grey.
Substitutions and Swaps – Vanilla Buttercream
- Unsalted Butter – If you only have salted butter on hand, you can use it in place of the unsalted butter. Just be sure to omit the salt that this frosting recipe calls for. You can also use vegan butter in its place (and skip the salt)!
Can I Make This Funfetti Layer Cake in Different Sizes?
One batch of batter is about 1900g or 10.5 cups, so I add about 630g to each of my cake pans when using 3, 8-inch cake pans.
If I’m making 4, 7-inch cake pans, I’ll add 475g to each pan.
You can also use one batch of batter to make 2, 9-inch cake layers or 4, 6-inch cake layers. Bake time will be a few minutes longer at 350°F/175°C.
If you want to make a tiered cake with this recipe, check out my cake batter calculator to see how many batches of batter you’ll need.
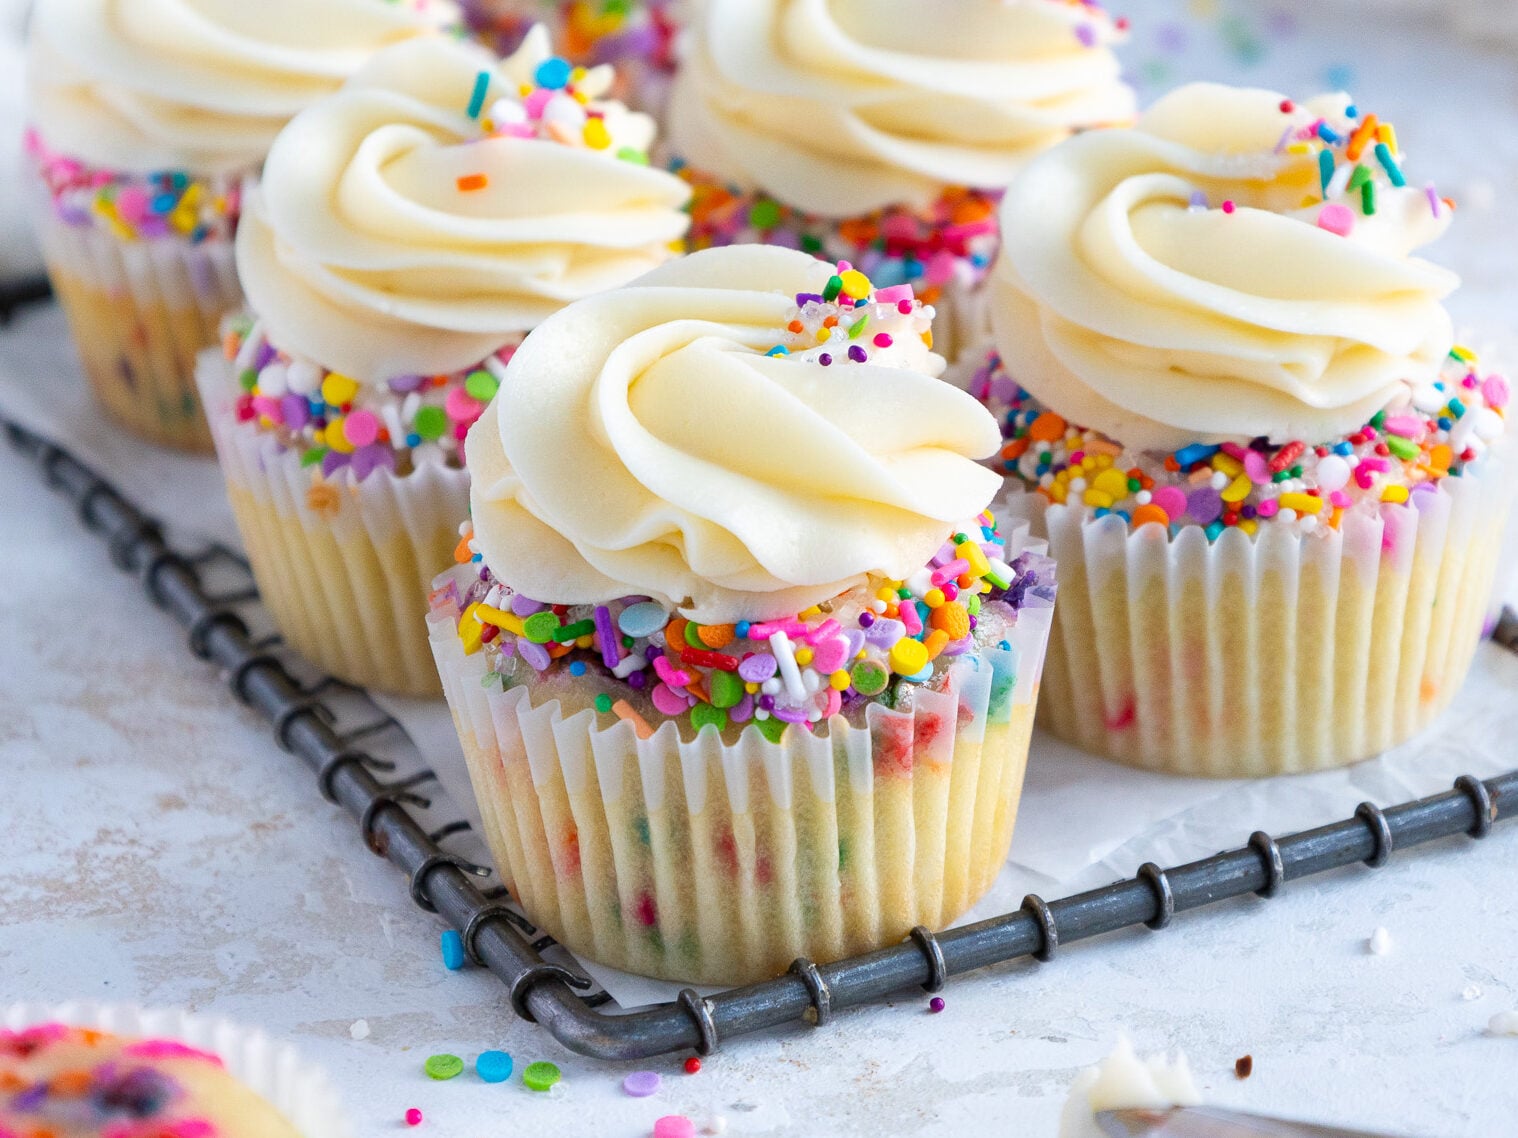
If you want to make funfetti cupcakes, fill the liners 3/4 full and bake them at 350°F/175°C for 18-21 minutes. One batch of batter will make about 3 dozen cupcakes (yield will vary based on the size of your liners).
Or if you just want to make a dozen cupcakes, you can use my funfetti cupcake recipe and make a half batch of this frosting recipe.
Can I Make This Funfetti Cake in Advance?
I highly recommend making the components of this cake in stages. It breaks the process up and makes it so much more approachable!
The cake layers can also be made in advance and frozen. They taste just as great when they’re frozen as when they’re freshly baked, I promise!
You can make the frosting ahead of time or save any leftover frosting. It can be stored in an airtight container in the fridge for up to a month.
Be sure to give the frosting a good stir once it thaws to get the consistency nice and smooth again.
If you cut into the cake and have leftovers, use any remaining frosting to cover the cut section to keep it moist and store it in the fridge for up to a week.
Tips for Making the Best Funfetti Layer Cake
- Properly measure your flour. Either spoon it into the cup measure, then level with a knife, or use a kitchen scale to measure your dry ingredients.
- Ingredients at room temperature mix together better. Set out any cold ingredients ahead of time.
- Use a kitchen scale to weigh your cake pans as you fill them. It helps the cake layers bake to the same height and bake more evenly.
- Chill the cake layers in the freezer for about 20 minutes before assembling the cake. This makes them easier to stack and frost.
- Level the room temperature or thawed cake layers with a serrated knife to make them easier to stack and fill.
- Chill the cake before adding the crumb coat. This will help lock all the layers in place and minimize crumbing.
- If you want to make funfetti cupcakes, I recommend trying my funfetti cupcake recipe (I like the texture better for cupcakes).
- Use my small batch funfetti cake recipe to make a 6-inch layer cake.
- Use this recipe if you want to make a vegan funfetti cake.
Let Me Know What You Think!
If you make this funfetti layer cake recipe, I’d love to hear what you think of it! Let me know by leaving a rating and comment below.
Tag me @chelsweets and use #chelsweets if you share on social media so that I can see your amazing creations.
Funfetti Layer Cake
Equipment
Ingredients
Funfetti Cake
- 3 cups all-purpose flour 360g
- 3 cups granulated sugar 600g
- 2 1/2 tsp baking powder 10g
- 1 tsp fine salt 6g
- 1 cup (2 sticks) unsalted butter, room temperature 226g
- 1 cup carton egg whites or 7 large egg whites, room temperature 240g
- 1 1/2 cups buttermilk, room temperature 360g
- 2 Tbsp vegetable or canola oil 30g
- 2 tsp vanilla extract or vanilla bean paste 8g
- 1 1/2 tsp almond extract – optional 6g
- 2/3 cup rainbow jimmies or long strand sprinkles 115g
- gel food coloring if desired
Vanilla Buttercream Frosting
- 2 cups (4 sticks) unsalted butter, room temperature 454g or 1 lb.
- 1 Tbsp vanilla extract or vanilla bean paste 12g
- 1/2 tsp fine salt 3g
- 7 cups powdered sugar 904g or a 2 lb. bag
- 1/4 cup heavy whipping cream, room temperature 60g
- 1/2 cup rainbow jimmies or long strand sprinkles – to be mixed in once the cake is filled and crumb coated 85g
Instructions
Funfetti Cake Layers:
- Preheat the oven to 350°F / 175°C. Grease then line four 7-inch or three 8-inch cake pans with nonstick spray and parchment paper rounds. Set aside. You can also use this recipe to make 4, 6-inch cake layers but the bake time will be a few minutes longer. If you don't have enough cake pans, the batter can sit at room temperature for a few hours. Bake as many layers as you can at a time.
- Mix 3 cups all-purpose flour, 3 cups sugar, 2 1/2 tsp baking powder, and 1 tsp salt together in a stand mixer with a paddle attachment or hand mixer until fully combined.
- Mix in 1 cup of room temperature, unsalted butter slowly into the dry ingredients on a low speed. Continue to mix until no large chunks of butter remain, and the mixture looks like moist sand.
- Pour in 1 cup of egg whites and mix on low until just incorporated. Mix in 1 1/2 cups of buttermilk in two installments on a low speed.
- Add in 2 Tbsp of vegetable oil, 2 tsp of vanilla extract, and 1 1/2 tsp almond extract and mix at a low speed until fully incorporated. If you want to color these cake layers, add the gel food coloring during this step.
- Scrape down the sides of the bowl with a rubber spatula, then beat on a medium speed for about a minute to make sure everything is properly mixed together. This also helps lighten the texture of the cake layers a bit.
- Fold 2/3 cup of sprinkles into the cake batter using a rubber spatula and mix until they're evenly distributed.
- Divide the batter evenly between the prepared cake pans. I like to use a scale to weigh each pan and make sure they have the same amount of batter. This ensures that the layers bake evenly and end up being the same height.
- Bake for 34-36 minutes or until a toothpick comes out with a few moist crumbs. Let the pans cool for 10 minutes, then run an offset spatula around the perimeter of the pan to separate the cake from the pan.
- Place the cake pans into the freezer for 45 minutes to accelerate the cooling process. Once the layers are fully cooled, carefully flip the pans, and remove the layers from the pans.
- These layers bake up pretty flat, so leveling them is optional! If you want to level them, use a serrated knife to level the top of each cake layer. I also like to trim the sides of the cake layers to remove any sprinkles that have caramelized and make them easier to frost. If you make these in advance, wrap and freeze them at this point.
Vanilla Buttercream Frosting:
- While the cake layers bake and cool, make the vanilla buttercream frosting. Beat 2 cups of unsalted butter on a medium speed for 30 seconds with a paddle attachment until smooth.
- Mix in 1 Tbsp of vanilla extract and 1/2 tsp salt on a low speed.
- Slowly add in 7 cups of powdered sugar while mixing slowly on the lowest setting. Halfway through add 1/4 cup of heavy cream or milk to make it easier to mix. I like to place a kitchen towel over my mixer to contain any powdered sugar clouds.
- Continue to mix on a low speed for a few minutes until the desired consistency is reached. If the frosting seems too thick, add additional cream (1 Tbsp at a time). If the frosting is too thin, add more powdered sugar (a quarter of a cup at a time).
- Wait to add in the sprinkles until you've filled and crumb-coated the cake. Cover the buttercream flush with plastic wrap to prevent crusting, then set aside.
Assembling This Funfetti Cake:
- Stack and frost cake layers on a greaseproof cake board or flat plate using a dab of frosting to help stick the first cake layer to the board.
- Spread an even layer of buttercream on top of each cake layer with a large offset spatula. If desired, add a couple of spoonfuls of sprinkles on top of the frosting. Repeat with the remaining cake layers.
- Flip the top cake layer upside-down to make it easier to frost.
- Once all the layers are stacked, gently press down on top of the cake with both of your hands to help them settle and to press out any trapped air between the cake layers.
- Spread a thin coat of frosting around the cake to fully cover the cake layers. Smooth using a bench scraper, then chill the cake in the fridge (30 minutes) or freezer (10 minutes) until the frosting is firm to the touch.
- While the cake chills, fold ½ cup of rainbow sprinkles to the remaining buttercream.
- Use the sprinkle buttercream to add a second layer of frosting to the cake with the remaining buttercream. Smooth using a large offset spatula and bench scraper.
- Then decorate as desired and enjoy! I added some pink white chocolate ganache drips around the cake and used the remaining buttercream to pipe some buttercream dollops in a ring around the top of the cake.
- If you want to pipe a border around this cake, be mindful of the sprinkles in the buttercream. They can get stuck in the groves of frosting tips. I recommend using a large, round piping tip if you use one.
Video
Notes
Funfetti Cake Recipe Variations
This recipe can also be used to make a sheet cake! One batch will make 2, 9-inch x 13-inch cake layers that are about 1 inch tall. Bake at 350°F/175°C for 30-35 minutes. One batch of cake batter makes about 1900 grams. If you plan to use three circular cake pans, add 630 grams of batter into each pan. If you plan to use four circular cake pans, add 475 grams of batter into each pan.Tips for Making the Best Funfetti Cake
- Properly measure your flour. Either spoon it into the cup measure, then level with a knife, or use a kitchen scale.
- Make sure your ingredients are at room temperature to help them mix together better.
- Chill your cake layers in the freezer for about 20 minutes before assembling the cake. This makes them easier to stack and frost.
- Level your room temperature or thawed cake layers with a serrated knife to make them easier to stack.
- Crumb coat and chill your cake, then smooth on a second layer of frosting. This will help ensure your final coat of frosting is crumb-free and beautiful.
- Make sure your buttercream is the right consistency before frosting your cake. It will help give your cake proper structure and make it easier to decorate.
- If you want to make funfetti cupcakes, I recommend trying my funfetti cupcake recipe (I like the texture better for cupcakes).
- Use my small batch funfetti cake recipe to make a 6-inch layer cake.
- Use this recipe if you want to make a vegan funfetti cake.
Make this Funfetti Cake in Advance and Storage Tips
I recommend making your cake layers in advance and freezing them. It breaks the process up and makes it more approachable. Make your frosting ahead of time too, or save any leftover frosting! It can be stored in an airtight container in the fridge for up to a month or in the freezer for up to 3 months. Be sure to give it a good stir once it thaws to get the consistency nice and smooth again. A frosted cake can last in the fridge for up to a week or in the freezer for up to a month. The buttercream locks in all the moisture, keeping the cake fresh and delicious! If you cut into the cake and have leftovers, use any remaining frosting to cover the cut section to keep it moist and store it in the fridge for up to a week.Nutrition
Other Recipes You Might Like:
Could you share a step by step of the fault line cake?!
Also you are my ultimate inspo thank you for all your great recipes and ideas!!
of course! Here’s the link to my fault line cake recipe and tutorial: https://chelsweets.com/2019/05/13/sprinkle-fault-line-cake/
Hi! I’m a new baker and don’t have a stand mixer. Is there anything special I’ll need to do differently with a hand held mixer?
You can totally use a hand mixer for this recipe, and just follow the instructions like normal! 🙂
Does this recipe work well for cupcakes?
i would not recommend it for cupcakes! This cake recipe is great because it bakes flat, but this causes the cupcakes not to have much rise, and they also stick to the liners 🙂
I’m actually going to share my funfetti cupcake recipe next week, which I would recommend using instead!
funny story, I came to the comments to say, “I just made this recipe in cupcake form and it’s now my favorite recipe! the cupcakes turned out spectacularly. this recipe is fantastic! thank you!
Ah I love that! So happy to hear it Rachel, thanks for sharing!!
Does your recipe work with 4 eight inch pans?
it can, but they’ll be thin! I like doing 3 8-inch layers if I’m going to make them that size, so they’re nice and tall!
@Chelsweets, how tall are the layers using the 3-8” pans? Thank you.
Hi Pam,
Great question! Almost all my cake pans are 2-inches tall, including my 8-inch pans. I like that height because it makes them easier to store. Hope that helps, happy baking!
Thanks! I did the carrot cake and the chocolate cake, both were amazing. However, I only have 9 inch cake pan, should I multiply the recipe by 1.3? I had five of those pans (I don´t know how) but I would love to make a 4 layer cake.
best!!!
Haha that’s going to be one big cake!! I’d actually recommend making 1.5 batches to make four, nine-inch cake layers! That way the layers should have decent height <3 Hope that helps, happy baking Sandra!
@Chelsweets, what about 3 9” layers? I do t know why I bought 9” pans. I do want it to be a tall cake. I thin will these layers come out if I do 3 9”? Thank you! I love all of your recipes!
@Danielle, how did the 3, 9″ turn out for you with this recipe?
Can you use cake flour for this recipe or does it have to be all purpose?
I’ve never tried it with cake flour, but it should still turn out! The texture will definitely be different though. I really love the way it turns out with AP flour <3
im also waiting for your funfetti cupcake recipe please!! 🙂
haha it’s coming, I promise Cris!! I’m baking a batch to take photos this week, and it should be up shortly after that 🙂
Thank you so much for your response, I am glad you responded because I was going to give it a whirl this weekend. Trying to come up with the perfect funfetti for my Nieces wedding?
Hi Chelsweets, I love watching your videos on YouTube and have not yet tried one of your recipes but I plan on giving this one a whirl this weekend for a birthday cake. I have 2 questions: 1) For someone with a nut allergy, do I just omit the almond extract and use the same amount of vanilla or should I increase the amount of vanilla extract slightly? and 2) How would I adjust the recipe if I’m making a 2 or 3- layer, 6 inch cake?
Thanks so much for your help in advance!
Hi Belinda! I’m so happy to hear you’ve been enjoying my videos 🙂 Great questions! You can definitely swap out the almond extract and replace it with vanilla!
If you want to make a funfetti cake, I recommend using this recipe instead! It makes perfect cake layers that bake pretty flat 🙂 Here’s the link: https://chelsweets.com/2019/05/09/funfetti-cake-recipe/
Hope that helps, happy baking!!
My daughter has been looking at cakes for what seems like a month… she has finally picked a winner for her birthday with this cake! Now do I bake a practice one before her party?!?! Thank you for your straight forward instructions and pictures and just being awesome! My whole family watches!
Quick question…do you know what sprinkle blend you used here? Thanks!
If I have 9 inch pans how many layers should I do?
I’m actually going to go pick up 7 or inch pans as I want the height
Is the only difference between this recipe and the vanilla cake the almond extract and sprinkles? Also is it okay to make this in 3 – 633 grams each instead of 4 – 475 inches? Going to try and make a tiered funfetti cake and hoping your small batch vanilla will work for the 6″ tier if I just add almond and sprinkles!
I am going to try this right now actually!! I have made the small batch vanilla, but today I am going to add some almond extract ( 1/2 tsp ), 1/2 cup of sprinkles, and a little of the dark pink gel color. I will taste test and I will have my trusty team of taste testers try it too!! 🙂
How does everyone, or yourself, handle possible allergies to nuts when adding almond extract to cakes? My family and friends are not allergic, but I have a friend who may be wanting me to make a vanilla, or funfetti cake, and I want to add the almond extract, but am wary. I have read many conflicting comments and opinions on almond extract. What are your thoughts? Thank you,.
@Paula, my nephew is nut allergic, so I always bake with just almond flavoring or I use McCormick almond extract. Their extract is made from apricot kernels and not almonds. They do not use peanuts or tree nuts in their facilities.
I made this cake yesterday and it came out quite dense. I followed the recipe to to T. Any idea why that would have happened?
Thanks!
Hi Jessica, so sorry to hear that!
If it’s dense it means you might be using too much flour (sometimes when you scoop out of a bag you end up packing a lot more flour into the cup than the recipe calls for (by weight), or you may be over mixing! Those are usually the two main culprits for dense cake layers <3 Hope that helps!!?
I am planning on making this recipe for my sons first birthday party. I was going to make a cute bear face cake using 12 inch round pans. Should I double this recipe?
It depends on how many 12 inch layers of cake you want to make!
Can I use whole large eggs instead of egg whites and if yes, how many eggs? Thank you in advance 🙂
Yup! You can use 5 whole eggs in place of the egg whites <3
I made this recipe tonight and used three 8” pans. When they baked they are only a lil over 1” think/high per layer. Does that seem right? My plan is to make a unicorn cake for a birthday but I wanted the cake to be tall. Should I make another batch for more layers?
Hi Abra,
Yup, this recipe bakes pretty flat! that’s one of my favorite things about it, you don’t have to level the layers if you don’t want to. Each cake layer is usually about 1 inch tall. If you want taller layers, I’d recommend using 4, 7-inch pans! I use 7 inch pans to make most of my cakes.
Hi Chelsea! Just wondering why the vanilla recipe says 390g of APF and this one says 410g. Thank you!
Hi Amelia! I’ve gone back and forth on this. 3 and 1/4 cups of APF are 390 grams, but I find a lot of home bakers (including myself when I first started baking) actually add more when they use a cup measure. I liked the way the recipe turned out with a tiny bit more flour, but didn’t want to make the recipe 3 1/2 cups, because I was worried that people using cup measures would end up adding way too much flour. I eventually conceded to just using the standard weight on my vanilla cake recipe, and need to update the grams on this too to avoid confusion :/
Made this cake for a trial run before my son’s birthday- my husband took it to work and everyone loved it! Thanks for posting measurements in grams- makes it super easy to know I am using exact measurements.
I’m so happy to hear that Anna! And yes, it’s a bit of extra work but everyone seems to appreciate when I include the grams 🙂 Happy you’re utilizing the recipe that way!!
This recipe is terrific! I used it for my birthday cake and everyone loved it. I personally could have done with a smidge less almond extract, but my party guests disagreed. Thanks also for a recipe that uses pasteurized egg whites, saving time and lots of egg yolks! Will definitely make again.
Hi Nadja,
I’m so happy to hear that! Almond extract is totally a preference thing, so if you want to add a touch less next time, you definitely can!! And yes, carton egg whites make life so much easier 🙂
Hi Chelsea, let me first say that your cakes always look amazing, you’re truly talented! You’ve inspired me to attempt to make my son’s 1st birthday cake. I’m not sure yet if I want to make a single tier (8”) or a 2 tier (8” and 10”) cake. I am planning on using your funfetti and buttercream recipes. My question is, how many layers of cake is needed per each tier?
Hi Chelsea, let me first say that your cakes always look amazing, you’re truly talented! You’ve inspired me to attempt to make my son’s 1st birthday cake. I’m not sure yet if I want to make a single tier (8”) or a 2 tier (8” and 10”) cake. I am planning on using your funfetti and buttercream recipes. My question is, how many layers of cake is needed per each tier?
You’re too sweet Judy! That part is up to you!! I’ve done tiered cakes with three layers, and with four layers! It all depends on what look you’re after 🙂
I need help. I’d like to make this cake but with (3) 12-inch layers. Based on your batter guide I know I need 339 cubic inches of batter, but I don’t know how many batches of batter this funfetti cake makes (unless it makes 154 cubic inches like your vanilla cake recipe). Could you advise me? Thanks, ma’am.
Hi Jessica! It does make almost the same volume as my vanilla cake recipe (slightly more bc of the sprinkles, but pretty close!). You should be able to use a double batch of my funfetti cake batter for 3, 12-inch pans <3
This looks amazing! I want to make this cake in 6 inch layers, but I am wondering how to adjust the recipe. Will 3 six inch layers be way too tall with one full recipe? If I half it will it not be enough for 3 six inch layers? I know this is the most annoying question to ask… sorry!
Hi Bethany! Great question!! You are totally right, I’ve found a half batch makes the layers a bit too thin for 3, 6-inch cake layers. I’d recommend making 2/3 of a batch! It’s an annoying calculation, but it makes 3 perfect little 6 inch cake layers! Or you can use 1 batch to make 4, taller six inch cake layers!
hope that helps, happy baking!! <3
2! Sorry ?
Hi Chelsweets
How do you get 25 slices out of this cake.
Hi Jackie!!
So sorry, that’s a typo! It should be 24 servings, like the rest of my 8-inch cakes! Just updated it. I usually cut the cake into quarters, then cut each quarter into 6 thin slices (or you can cut three slices, and then cut them in half so that each slice has only 2 cake layers)!
Hi just wondering if I have to use pasteurized eggs? The batter will be baked anyways so wondering what difference does it make? I want to try this recipe for my sons birthday using three 6 inch pans. 🙂
You definitely don’t have to! I just mentioned that because that’s how egg whites in a carton are sold! You can totally use fresh egg whites in this recipe <3
This is going to be a lot of batter for 3 six-inch pans!! They may need to bake a bit longer, since the layers will be super tall. I usually use 2/3 of this size of recipe for 6 inch pans, but you may want taller layers than the way mine are!
I’m going to make this today
Yay! I hope you love how it tastes!! Happy baking Tracy <3
I made this cake today as a practice round for my son’s birthday party. It is so cute and YUMMY! Thank you for giving me the confidence to try and do this on my own. My only concern is that the cake turned out a little sweet for our taste, is there a way to dial the sweetness back some? Also to get an even cook, I may have to bake two layers at a time, should I keep the batter room temp. for the two layers awaiting baking?
I’m so happy to hear that Nicole!! If you can only cook two layers at a time, the other two can sit out at room temp until you can bake them. Just be sure to pour the batter in to the pans right after it’s made, and then not stir it/move it as they sit. Otherwise the sprinkles will bleed!
You can try to dial down the sweetness by adding more heavy cream to the frosting, and mixing it at a high speed to incorporate more air into! Or you can try frosting the cake with a less sweet frosting like swiss meringue buttercream, or even whipped cream <3
What are the dimensions are your cake pans? Also, where did you buy yours? Thanks!
Hi Caitlin! I usually bake my cake layers in pans that are 7in x 2 in tall! I love the Fat Daddio’s brand (the silliest name but they’re great pans), and I order them on amazon! Here’s the link to the ones I use: https://amzn.to/2HT3r8r
I’m using this recipe for a wedding cake, and the bottom tier is going to be three 10” layers. How much batter per pan should I use?
Hi Jenna! I actually have a great blog post that helps you calculate exactly how much batter you need! Here’s the link: https://chelsweets.com/2019/04/22/how-much-cake-batter-per-pan/
Hope that helps <3
Hi! I’m making this recipe this weekend for my daughters 3rd birthday and it’ll be a 3D cat cake for about 36ish people. How many layers should I make and how big of layers should I make? I figure the head I would make 6inch rounds but the rest I’m not sure ? and I have low fat Greek yogurt on hand already, would I be able to use that instead of buttermilk or do you think it would taste bad?
Hi Brooke,
I’m so sorry for the delayed response on this! I was on my honeymoon, and am still playing catch up now.
I think full fat greek yogurt would probably work fine, but I’m not sure about low fat. If you did end up using it, how did it work out?? I’d love to hear, I hope it was a big success!!
Hi I was wondering what blend of sprinkles you used! Thanks!
Hi Jenna,
Sadly I don’t remember the name! I got it from Sweetapolita a while back, but here is a similar medley: https://sweetapolitashop.com/collections/twinkle-sprinkle-medleys/products/baby-love-twinkle-sprinkle-medley
If you do order some, don’t forget to use my discount code CHELSWEETS15 to get 15% off your entire order <3
I think you are better of using 4 regular white eggs
Hi Raven!
Do you mean you’ve tried the recipe for 4 egg whites, and then with 5 egg whites, and you like version with 4 better?
Love this cake for my daughter’s birthday! Did you make a note of what gel colors you used for the cake and frosting and how much you added? Thanks!
I use squirt bottles, so it’s hard to quantify the amount I added! I used americolor turquoise gel, and americolor deep pink gel food coloring to color the cake layers and frosting. Hope that helps Jackie!
Do you recommend using simple syrup on this cake to keep it moist? I find that my from scratch cakes always tend to be a bit on the dry side, and I don’t know if that would help.
Hi Jocelyn,
This cake recipe definitely doesn’t need any simple syrup! It’s a butter cake base, and should be plenty moist from all the buttermilk in the batter. If you find your cake is a bit dry or dense, it means you might be using too much flour (sometimes when you scoop out of a bag you end up packing a lot more flour into the cup than the recipe calls for (by weight), or you may be over mixing!
Those are usually the two main culprits! Hope that helps!!?
Have you ever made this recipe in a rectangular pan? Can you tell me what size you would recommend? Thank you so much.
Would it still cook for the same amount of time if using 8 inch pans?
Hi Jessica,
It should still bake in the same time range if you make 3, 8-inch cake layers with this recipe. Hope that helps, happy baking!!
I’m wondering this as well!
Hi! I looked through comments for this answer and couldn’t find it so I’m sorry if this is a repetitive question but I’m wondering if I can make this without the almond extract due to allergies and if That means I’d have to add more vanilla extract instead ? Thanks so much I love your recipes i can’t wait to try this one out!
I was so excited to try baking this recipe of yours and I was totally amazed! The crumb was fluffy, and the layers came out unbelievably even. I’ve tried many different recipes to get even layers and this recipe is #1! I used a pudding based filling instead of buttercream because I was looking for something less sweet. Was a nice balance to the sweetness of the buttercream. Worked perfectly! Thanks for sharing your amazing recipes.
Hi chelsey thank you for sharing your recipe but my question is the amount of sugar is to much compariothe amount of flour this is weird because Whole my life I never see recipe like that specially in cake because you will frost your with butter cream and butter cream is to sweet,can you tell us why did you use this big amount sugar,and the cake with this big amount of sugar and butter cream you don’t think is to much sugar?
Hi Faiza,
I grew up eating American desserts and sweets, and they use quite a bit of sugar. I like a lot of sugar in my desserts, and so do my friends and family. Some parts of the world make desserts with less sugar, which is totally fine too! It all comes down to your personal preference. Some people do find my frosting too sweet. I recommend using a swiss meringue buttercream if you generally find american buttercream to be too sweet. Hope that helps!
Hi I love watching you make cakes. I want to make this funfetti cake but with 6 inch pans. How do I figure out the amount I need for the 6 inch pans?
Hi Vivian,
I’m actually writing a small batch funfetti cake recipe right now, which is perfect for 6 inch cake pans! It won’t be live for a bit though (it’ll be up 02/06), so in the meantime, I find that making 2/3 of a batch of batter is the perfect amount for making 3, 6-inch cake layers. It’s a bit annoying to calculate, hence me sharing the new post soon 🙂
Hope that helps, happy baking!!
Question for you….I like to make cakes from three six-inch cake pans. Is there a way to adapt your recipe to fit into my preferred pans/size? P.S. LOVE all your sprinkle usage. ?
Hi Betsy,
That is a great question! I’m actually working on a small batch funfetti cake recipe right now, but it won’t be up until early february! It’s pretty much just 2/3 of a batch of batter though, to make three perfect little 6 inch cake layers.
It’s a pain to calculate, but I find that’s the perfect amount of batter. Hope that helps, happy baking!
Hi! I’m from the UK and have recently found you on Instagram and I LOVE your page! I have been looking for a funfetti recipe for ages so am glad I saw this today! We don’t use cup measures in the UK so I presume I can use your grams conversion listed? I hope that doesn’t sound horrendously stupid!! 🙂 x
Hi Jade,
YAY! I’m so glad you found mine. You can totally use the amount of sprinkles listed in grams 🙂 Happy baking!!
Hi. I love your videos! I am making my cousin’s wedding cake (semi naked cake) and wanted to do the 4 tier wedding cake just like your wedding cake. Can I just use your vanilla cake recipe and omit the sprinkles? Would I still only need 6 batches of the vanilla cake recipe as you used 6 batches of the funfetti recipe for your wedding cake?
Hi Bonnie,
You sure can!! You will need about the same amount of batter. The sprinkles add a tiny bit more volume, but I had a bit of leftover batter so that should still work. Best of luck with your cousin’s wedding cake, I’m sure it’ll be amazing!! <3
Can you add almond extract to the cupcake recipe as well? How much do you recommend?
Hi Samantha,
You sure can!! I’d suggest adding in 1 tsp in addition to the other ingredients 🙂 Hope that helps, happy baking!!
Thank you ??
Why do you only use egg whites in your cakes recipe instead of the whole egg? Just curious!
Hi Tiffany,
I think it helps counteract the moisture that the buttermilk adds the recipe! I love baking with buttermilk, and the egg whites lighten up the batter a bit. However, you can totally use 4 whole eggs in place of the egg whites if you want 🙂 Hope that he;ps, happy baking!
@Chelsweets, hi, in a previous comment you stated 5 whole eggs could replace the egg whites and here you wrote 4. Can you confirm which is correct? Thanks!
Love your videos and recipes! Can I do two 9 inch pans?
Hi Joanna,
Thank you! You can definitely make 2, 9-inch cake layers with this recipe!
For large cake layers like that, I suggest adding a couple heating cores to the center (these are the ones I use: https://amzn.to/2NQ0lVZ), to help the layers bake more evenly and quickly! Hope that helps, happy baking!
cake are the best! to make. there are easy to make and there fun
Yay!! Yes, I always try to keep my recipes as simple as possible 🙂
Oh my goodness!! A couple of questions 🙂 1)Cupcakes? 2)These colors are AMAZING!! Can you share which colors you used and where you got the amazing sprinkles for the decorative base?? SO PRETTY!!
Hi Sandra,
The sprinkles around the base are from sweetapolita! you can use the code “CHELSWEETS15” to get 15% off 😛 Here’s the link: http://bit.ly/2JX3ikO
I have a great funfetti cupcake recipe I suggest you use instead! https://chelsweets.com/2019/06/18/funfetti-cupcakes/
I used the americolor gel food coloring shades of teal and deep pink <3 Hope that helps, happy baking!!
How many heating cores do I need to place in each pan?!
Hi Samantha,
it can vary based on the size of the pan! I like to do 1 for 9 inch cake layers, 2 for 10 inch, and three for 12 inch! Hope that helps, happy baking!!
Hi, thank you so much your wedding cake vid was really inciteful. Can this recipe be used for a wedding cake that needs to be covered in chocolate Ganesh then Fondant?
Hi Jacqui,
It sure can! I used this recipe to make my own wedding cake, and it worked great! It has great structure, so it’s awesome for making tiered cakes with. It should work well with ganache and fondant. Hope that helps, happy baking!
Can I say, you’re so amazing for running this blog and helping others with their cake baking endeavors. I was so scared to take on making and decorating a cake at home for my baby shower since funds are low .. you gave me inspiration to take it on all on my own. I feel like a ran into your Instagram by fate. Thank you so much!!!
Aw thank you Maya!! I hope your cake for your baby shower turns out amazing 🙂 Happy baking!
Hi Chelsey!
I only have two 8 inch cake pans and I’m planning on baking two cakes first and the third cake after first two cakes bake. I might be running the risk of texture differences between baking round 1 and round 2, but what are your thoughts on leaving the third bowl of batter at room temp vs in the fridge while the first two cakes bake and cool?
I plan on dividing the sprinkles and batter into thirds and folding sprinkles in right before baking to prevent color bleeding.
PS – l love your videos, I’ve been watching for years 🙂
Aw thank you Elli! That should be just fine, as long as you bake the third layer as soon as possible after the other two bake. My only worry would be about the sprinkles bleeding, but you’ve got thought that part through and have it covered 🙂
Happy baking!!
Hey Chelsey,
I love this recipe! Made it my go to. My only problem is my cake pulls away from the pan and shrinks a bit and the sides look more rounded and doesn’t hold that straight shape. The crumb is still beautiful so it doesn’t affect the integrity of the cake. I use aluminum pans, measure out, room temp, ect…basically follow the recipe to a T. Any thoughts on what I might be doing wrong to this recipe? My other vanilla cake recipe doesn’t do this. Just your. And I bake all the time. Thanks!!
Hi Sheryll,
So sorry to hear that! Is there a chance you’re over mixing the batter? I’d try mixing is a little less next time if possible, or you can also try baking the layers at 325 degrees F for 40 minutes. Hopefully one of those will help, happy baking!
I have 3 inch deep 8 inch fat daddios pans, could I use two of those pans for this cake?
Hi Liz,
You can, but they will take longer to bake because there will be a lot more batter in each pan! You might want to use a heating core (like these: https://amzn.to/39oJK3I) to help the layers bake more evenly and quickly. Hope that helps, happy baking!
Yay thank you for you reply! I love your cakes and your content.
Np Liz! And thank you 🙂
Hi Chelsey,
Would it make a difference if I don’t use the almond extract!
I want to make this recipe
Hi Sulema,
You can totally omit the almond extract if you want! Hope that helps, happy baking!!
Hi Chelsey,
I want to bake this for my daughter’s birthday, do I have to double the recipe for two 9” pans?
Can I refrigerate the unfrosted cakes for one or two days till the birthday ?
Hi Nazia,
I think this would actually be about the perfect amount of batter for 2 9″ pans! If you want the buttercream to keep its shape, I’d suggest putting it in the fridge! I only leave a cake out for a few hours at a time. It won’t spoil though, and it can sit out for up to a day. Hope that helps, happy baking!
Hi! This is probably a dreadfully silly question, but how would i need to modify the recipe for glass pyrex dishes? Or is this recipe even conducive to baking in glass?
Thank you!
Hi Kaitlan,
Not a silly question at all! You can bake in it just as you would in metal, but like a dark metal pan, your cake will brown faster than in a shiny metal pan. I’d recommend checking on it a couple minutes earlier than the recipe calls for. Hope that helps, happy baking!
Hi Chels! I’m curious to know if you ever use 9inch rounds. It’s what I happen to have on hand. I would love to do a 3 layer cake but wasn’t sure if this recipe would make enough. I’m okay with the layers being a little bit more thin. I do have enough to do 1.5 recipes. Curious to know your thoughts! Thank you for sharing this recipe, what a great quarantine find!
Hi Julie,
I rarely do, but most of my cake recipes make enough batter for only 2 9-inch cake layers if you want to them to have a bit of height. If you used one batch to make 3 9″ cake layers they’d be pretty thin!
I would recommend making 1.5 batches to make 3 9″ cake layers. Hope that helps, happy baking!! 🙂
I am so excited to follow your recipes to make my sons 6th birthday cake! I have carbon steel pans, could I use those for this cake recipe?
Hi Stephanie,
I’m so happy to hear that!!
You can use that type of pan, but dark metal pans bake cakes faster than regular cake pans! I’d recommend lowering the temp to 325 F and checking on the cake layers to see if they’re done a few minutes earlier than the recipe calls for. hope that helps, happy baking!
Hi!
I just made this and noticed the sprinkles were gone in the cake, there was no crunchy feeling and only the colors of the sprinkles remained. Is that normal? or did I do something wrong?
Thanks!
Hi Sue,
That is totally normal! They’re mostly sugar, so they kind of dissolve into the cake batter as they bake! That’s why I like to add some additional sprinkles between the cake layers, to give it a bit of texture 🙂 Hope that helps, happy baking!
Hi Chelsey! I’m obsessed with your website and it’s definitely re-energized my love of baking, decorating, and perfectly straight icing edges! Can I use this (or any of your recipes) with whole eggs instead of just whites? I don’t have anything to do with that many egg yolks right now and eggs are hard to come by in quarantine! Thank you!!!
Hi Frances,
I’m so happy to hear that! You totally can! You can use 4 whole, large eggs in place of the egg whites in this recipe. Hope that helps, happy baking!
I’m going to attempt to make a dinosaur cake for my daughters 2nd bday in a week and I was wondering if I needed to do anything different (like heating cores) if I baked it in a rectangular pan? My plan is to cut out to make a Dino shape then frost. You are awesome and I’m so excited to finally try one of your recipes!
Hi Nichole,
Sounds like it’ll be an awesome cake!
When I bake sheet cakes, I place two or three flower nails (like these: https://amzn.to/39oJK3I) spaced evenly apart in the center of 2 9×13 inch pans (and spray them), to help the layers bake more evenly and quickly. With flower nails, the cake layers bake in 37-40 minutes in my oven. I hope that helps, happy baking!!
do I have to use buttermilk or will 1% milk work? love your tiktoks by the way <3
Hi Amy,
1% milk will work in this recipe if that’s all you have on hand <3 And thanks! haha I love TikTok!!
Hope I’m not overstepping my bounds here … You can actually make buttermilk out of the kind of milk you have on hand by adding the same amount of tablespoons of lemon juice or apple cider vinegar to cups of milk. This sours the milk. So for every cup of milk, add one tablespoon of vinegar or lemon juice.
I made this recipe using this method. It turned out great.
You could just try artificial almond actract.
Your cake looks delicious! I’m planning to use this cake for my daughter’s unicorn cake this weekend. I only have two 7″ tins – will it bake well if I divide the batter between 2 tins rather than 4? How much longer would you increase the cooking time? I worry that if I leave the batter to sit while the first cakes are cooking then the sprinkle colours will run before the second cakes gets to the oven.
Thanks!
Hi Amy,
Thank you! I’d suggest just baking two layers and letting half the batter sit at room temp, letting them cool, then baking the next two layers. if you try to just make two cake layers with this much batter the layers will take forever to bake and will have a TON of caramelization.
As long as you don’t stir the batter, and scoop it straight into the pans after it’s been sitting it the sprinkles shouldn’t bleed too much. Hope that helps, happy baking!
I’ve made your cakes and love them and most others enjoy the cakes as well however I get the occasional comment that the cake is to heavy/ dense. Is there a way to make it a little lighter/ fluffier?
Thanks in advance for everything! I love watching your cakes ??
Hi Brittany,
This recipe is a butter cake which does have a tighter crumb than a sponge cake, and some people have a hard time with that. I have a similar vanilla cake recipe that’s a bit lighter, which I use in this recipe: https://chelsweets.com/2020/02/24/white-chocolate-raspberry-cake/
I’d suggest trying that, hope that helps! <3
Hi chelsweet!
How would using 10 inch cake pans change the cooking time? I’m making this cake to feed 30. How would you change the recipe? Would you do 4 8in layers or 3 10in?
Hi Jessica,
I’d probably do 4 8″ cake layers because I think that’s easier! I’d make 1.5 batches of batter to do that. I also can only fit 2 10″ cake pans in my oven at a time.
10-inch cake layers with heating cores usually take about 45 minutes in my oven to bake. Hope that helps, happy baking!
Hi Chelsea, is there any change for high altitude?
Thanks so much!
Hi do I have to have a mixer or can I do by hand and also if I added a table spoon of yogurt would it affect the baking in any way
Hi Cherisse,
you can make the cake batter by hand, but you really need a hand mixer to make the frosting <3
Hello Chelsweet!
I love your videos and recipes. I want to make your buttercream but I live in Texas where it’s super hot and high humidity. Do you have any suggestions on how to keep it from melting and getting to soft?
If I replace the flour with cake flour how much cake flour would i need?
Used this recipe for my daughter’s birthday cake – it tasted great! I halved the recipe and baked it in two 6×3 rounds. Turned out fluffy and moist. Will definitely visit your site again! Thanks for sharing your recipes!
Hello Chelsweet. I’m a home baker and my sister in law is getting married in November. Just like you her absolute favorite cake is the boxed funfetti and she wants her wedding cake to be that. I plan on making a 6, 8, and 10 inch layered cakes. How many batches would you recommend for the 8 and 10? I will use your small batch recipe for the 6. Thank you!
Hi Chelsweets! Wondering if I can use this recipe to make a semi naked cake? I did it with your vanilla cake recipe and it was great – I am wondering if the sprinkles change anything?
Hello Chelsweets!!! Love your videos!!!! I plan on making this soon for my my mother’s birthday but she has an almond allergy. I was wondering whether I just use 2 tsp or 3 1/2 tsp. of vanilla extract? Thanks for the help in advance. Keep up the great work!!!
Hi Chelsey, I love this cake. Can you please advise what AmeriColor gel colours you used specifically to get the blue and pink? Thank you!
Hi Chelsey, thank you so much for this! I was wondering where you get you cake spinner?
Thanks so much!
Hi! Wondering if I’m just baking two days ahead , if I should bother freezing the layers or jusr fridge? And how do you store them? Wrap them in Something ?
Bonjour ! J’ai adoré votre recette. Mais, il y a-t -il une version chocolat ou caramel ? Et que va -t-il arrivé si j’utilise une moule en forme de coeur ? On peut le mettre d’une différente couleur ? Svp et merci en avance ! 😉
Would this turn out ok substituting with gluten free flour?
Hey, i’m Planning on making a two tiered cake with three layers of six inch for the top, and three nine inch layers for the bottom. How many batches of your vanilla buttercream should I make?
Hi!
Absolutely love your tutorials and recipes!! I just wanted to get your thoughts on baking with cake strips? Do you recommend it? Why or why not?
Thank you
Hello!
Would you recommend this type of cake for a two tier cake? I want to make it for my daughters 1st birthday but I’ve had some issues with very soft cakes getting squished under the pressure of just a 4 layer cake. Thank you! Love all your stuff by the way! ??
Hey Chelsweets,
I was planning on using this recipe for my son’s smash cake for his first birthday. Bug I only want to use one 8 inch square pan as I’m not doing layers . What would be the cooking time in that? And also would I be correct in dividing the recipe by 1/3rd?
Thank you so much! Your videos have got me excited about baking again!!!!
Quick question! How much of a difference did you notice if you Substituted the buttermilk for low fat yogurt? /is Greek yogurt ok to use?
Hello, I am from Holland, I would like to make your fun fetti cake, I only have a cake of 20 cm, and 10 cm long, I want to make a cake and then cut layers myself with a knife, that amount on your recipe is good for my pass or is too much, i will make the amount of half, thanks
I used this recipe for my middles 7th birthday last week! She requested a Bluey cake, so I was excited to get creative!! The funfetti cake was so delicious! I won’t make another cake from scratch again unless it’s this one!! And it’s still moist days later!! I also used your buttercream recipe and am hooked! I usually use Wilton’s recipe but I absolutely love yours!!! Thanks so much for sharing your creativity with us!!
I just love your creations! And this cake is amazing. I’m hoping to make for my dd who is graduating tomorrow… and I wonder why she procrastinates! Ok to use a star pan, holds a 2 layer cake mix? Or a set of 6 inch diameter pans? It’s only immediate family… we’re slowly returning to normal. Worst case, I’ll purchase something?
Thanks!
Hi! Would it work to color the cake with fruit juice of some kind (to also add fruit flavor?) Maybe a strawberry simple syrup? If so, could you recommend how much and if anything else should be omitted to account for the extra liquid? Thanks so much!
Hi Chelsea. Love you videos and recipes! Would you please share a link to the exact Jimmies that you use for this cake? There are so many different brands and I wanna make sure to get the best ones. Making this cake this week:) Thank you!
How much would I increase the recipe to yield a 3 layer 10 inch cake?
Hi, how tall will this cake be with 3x8in pans? Thank you!
I absolutely love this recipe!!! I made my sisters birthday cake and She LOVED IT!!! Thank you for the videos and ideas!!!!
Every time I made this, my batter split. I made this batter 3 times! I even bought all new ingredients and used a thermometer to bring the egg whites, buttermilk, and butter to room temp (65 degrees). What am I doing wrong? On the third batch, I ended up just baking it. I feel so defeated!
Hello ?
How many cups of batter approximately does this recipe yield.
Thank you,
Carolyn Ellis
I would like to personally thank you for this wonderful recipe! We used it for my niece’s 6th birthday cake and my entire family was blown away especially because we bought a $200 cake for my sister’s birthday a few days before and this actually seemed to surpass the flavour and quality that we got from the professional bakers! I was going to use it for my birthday coming up this Monday but I wanted cupcakes for social distance sharing and therefore I’m going to try your Funfetti cupcake recipe instead!
I wish I could attach pictures to share how great our cake turned out in May!
Hi!
This is the second time making this cake! I use 3-8” rounds! And each time I make this the tops of my cake brown up quite badly in order for the cake to be cooked all the way through… thoughts?? My friend that I made the cake for said it was the best cake she’s ever had tho! It’s a great recipe just wondering why I keep crisping the tops… thanks in advance!
So excited to make this! I plan on using 3 8″rounds, is the amount of icing noted enough to decorate the cake in rosettes? Or should I up the amount of frosting?
Hi! I’ve make this recipe several times using round pans. It’s awesome! Would this recipe make the correct amount of batter for a 9” x 13” pan? Thanks.
Hi. New baker here. Looking to make a three layer 10 inch funfetti cake. What would the differences be with the Measurement for the ingredients
Thanks !
My daughter fell in love with this cake and I’m trying to find the sprinkle blend you used on the sides, do you have a link?
Can you use this recipe in a single layer 9×13 pan??
Hi Chelsea,
I notice that some recipes use egg and others use egg white. Why egg white in the funfetti cake?
Thanks
Hi, I am looking to make this cake. Once it is decorated can this can sit at room temperature or does it need to be refrigerated? Thanks in advance!
Good morning,
Can this recipe be doubled in the same bowl?
Thank you,
Carolyn.
Hi! I’ve made this cake recipe several times and love it BUT I find that the bottom & sides brown sooooo much faster than the middle cooks. I usually end up carving a lot off because I’m worried about there being a burnt taste on the super brown parts. Any tips to help prevent the overbrowning? My pans are dark nonstick, so I wonder if a lighter colored pan would help. Thanks for any tips!
Hi Patty,
The cake pans you use can have a big impact on the browning! And your oven can too! I definitely recommend using light colored aluminum pans if possible. I use the Fat Daddio brand, and I order them on Amazon. Here’s the link: https://amzn.to/39PrlTy
It also might be worth checking the temp of your oven to make sure it’s properly calibrated?! My oven in my last apartment ran about 10 degrees hot. Hopefully that helps, happy baking!
I am making this cake batter for our daughters 6th birthday party next week, so am reading and reading and reading it to make myself familiar with it, and just wanted to say how great it is to have such a detailed method and tips. Even down to the choices of size of cake pans and how much to our into each one! And the scales measurements too! This is great as it’s sometimes time consuming to try and work out cups to grams which I prefer to work in. So Thankyou for this!
Hi Stacey,
Love that you’re planning ahead! It really does make the process so much easier 🙂 I hope your cake turns out amazing!!
Hello! I have loved all of your recipes!! I have a question about this one. I just made it and the top and sides of it taste almost gummy. I can’t taste the inside as it’s for a party but I’m worried. Is this normal? Will the inside taste okay or did I do something wrong? Any help would be greatly appreciated!
Hi Kelly,
I’m so sorry to hear that! I’m not 100% sure what you mean when you say gummy, but sometimes the top of the layers is a little sticky because of all the buttermilk in this recipe. If that’s what you mean, then your cake layers should be just fine!
A great way to test if the layers are fully baked is to stick a toothpick or scribe into the center of the cake layers and see what it looks like coming out. There should be a few moist crumbs, but as long as it isn’t wet, then the cake layers are fully baked.
If the inside was gummy as well, the layers may have been underbaked. If that’s the case, it may have been caused by using cold ingredients (not brought to room temp) or it may mean your oven runs a little cold. Hope that helps, and that your cake layers ended up tasting great!
I only have one cake pan. What do you suggest for cooking them separately?
Hi Shelby,
No worries! The batter can sit at room temperature for a few hours. Bake one layer at a time and making however many cake layers the recipe calls for with the size of pan you have. Happy baking!
Hey hey! This was so delicious, but my cake did come out super dense. Any thoughts as to why? I used 3 5×3 fat daddiez pans and it baked for about 55 minutes. It was moist still but super dense. Still amazing though!
Hi Lauren,
This recipe does bake up a bit denser than a sponge cake, but it shouldn’t be super dense! If that’s the case, it could be few different things! Common culprits include using too much flour (not fluffing up the flour, then spooning and leveling it in a cup measure or using a scale), using ingredients that aren’t fully at room temperature, or that step #6 was skipped! Mixing the batter on a medium speed for about a minute once it’s made helps make sure everything is properly mixed together and lighten the texture of the cake layers.
Do you think it could have been either of those? If not, we can keep working together to try to figure out what it might have been!
This is definitely a 1 in 1.3 chance you’ll respond because you have so many followers but fingers crossed. I love this cake but I can’t seem to get it to not be dense.
First time it was super dense, everything was measured in cups, baked in 5×3 fat daddios pans 2/3ish full. 350 degrees and ended up being about 55 minutes. Crispy on top and edges but wasn’t baked through until 55 minutes. SUPER DENSE (but delish).
2nd time I said ok maybe it was too much flour and the pans used need to be lower and slower. So I measured by grams which ended up being less flour / sugar than the first time. Liquid was the same. Same sized pans baked at 330 degrees this time per fat daddios tip for their pans, took the same time – about 50 ish minutes. Still crispy top and edges and still super dense 🙁
Any clue!? I’m mixing until JUST incorporated, and had done the extra 30 seconds or so on medium speed as the recipe said to help with fluffiness. IM DETERMINED to figure this out b
Hi Lauren,
So sorry to hear that!! How many 5-inch cake layers are you making with one batch of this recipe? I would recommend making it in at least 6-inch pans, if not 7- or 8-inch pans! I think that will help with the texture a lot. Making smaller, thicker layers does require a super long bake time, which will make the top quite crispy.
One other thing to keep in mind is that this is a butter cake recipe, not a sponge cake recipe. So the texture is meant to be different and more dense than a classic sponge cake. However, it should still have a nice crumb!!
The only other things I can think of that would make the texture denser is if the ingredients aren’t all at room temperature, or if your baking powder is old / expired. Baking powder can start to lose its potency after 6 months. Both of those things can have a huge impact on how much the cake layers rise.
Hope it’s one of those things, and that we can figure it out together <3
Thank you for posting this! My daughters and I (with the help of grandma) just made your three-layered, violet outside/pink inside funfetti cake for my 5 year old’s fairy-themed birthday party! It’s sitting pretty in the fridge ready to be admired and then eaten! Such a great recipe. Thanks again. 🙂 <3
Hi Kelly,
Aw I love that, that sounds like such a cute cake!! Thank you so much for sharing 🙂 And happy belated birthday to your daughter!!
beautiful cake idea. going to try it today for my grandaughters birthday. thankyou!
Hi Shelley,
Love that! I hope it turns out great, and that your granddaughter loves it!! <3
Hi ,could you please help, the sprinkles went to the bottom of the cake, what i did wrong,thank you
Hi Liz,
I’m so sorry to hear that! What type of sprinkles are you using? That would be my first guess! I find that the long strand sprinkles that are called rainbow jimmies work best in this recipe. Hopefully we’ll be able to figure out what happened!
Hi Chelsey! I made this for my daughter’s family birthday party and it was a big hit! The cake was easy to make and your frosting recipe had a great consistency for piping and decorating. I’d like to make it again for her friend party but I was hoping to cut back on the amount of sugar in the cake, as it was a bit too sweet for our tastes. Do you have a recommendation about how much sugar to omit? Will less sugar change the texture of the cake in any way? Thanks!
Hi Anastasia,
Totally hear you, this is a sweet cake! Rather than omitting sugar from the cake recipe (it changes the texture and makes dense cake layers), I’d suggest using a less sweet frosting! I recommend frosting this cake with my hybrid frosting: https://chelsweets.com/not-too-sweet-buttercream-frosting/
Hope that helps, happy baking!
I measured out my baking powder to 10g and the cake turned out perfectly but some spots in the cake have a tinny taste. My baking powder is not aluminum free, could this have caused the tinny taste? It was perfect otherwise but the tin taste really threw me off and I’m scared of it happening again.
Hi Brittany,
That’s so odd! I’ve never heard of that before, but if you think that’s what caused it I’d recommend trying a different brand. Is there any chance it might be the pans or mixing bowl that caused it?? Hopefully we’ll be able to figure out what’s causing it!
This is an amazing recipe I’ve made many times now. I don’t normally leave reviews for recipes but I just have to on this one. I’ve made this cake for 2 of my friends weddings now, and it’s always a huge hit. People flip over it, probably because wedding cakes are notoriously dry, but not Chelsweets recipes!! So moist and dense and flavorful and delicious. I’m so grateful for your recipes and instructions, Chelsea! Everyone should make this cake!!
Hi Dineen,
I am so happy to hear that!! Yay 🙂 Thank you so much for sharing!!
Hi, I made this cake for the first time and found when I removed from the pans after baking that all the sprinkles sank to the bottom… ? any thoughts on why this would be? Thanks!
Hi Amy,
Oh no! I’m so sorry to hear that!! My first guess would be maybe the type of sprinkles that you’re using? What brand are they?? The other thing is that the batter may have been too thin. But if you’re following the recipe correctly, that shouldn’t be an issue. Hopefully we’ll be able to figure it out together!
Could I whip the egg whites a little before incorporating into the dry ingredients to get a thicker batter to stop the jimmies sinking ??
Hi Amy
I haven’t tried that, but you can try doing that! What type of jimmies are you using? Mine usually don’t sink to the bottom!
Can I make my frosting I did before and leave it in the fridge
Hi Judy,
You totally can! You can make your frosting ahead of time or save any leftover frosting! It can be stored in an airtight container in the fridge for up to a month, or in the freezer for up to 3 months. Be sure to give it a good stir once it thaws to get the consistency nice and smooth again.
Hope that helps, happy baking!
Made it..loved it!!! you should make it because you’re gonna love it!!! it’s my new go to funfetti recipe so easy to follow turns out perfect…xo
Thank you Jasmyn!!! I am so happy to hear that 🙂
As suggested , if we were to substitute 5 whole eggs for the whites,
will the cake will still come out flat and
Will it still be fluffy ?
TIA
Does this recipe work ok with a milk alternative?? Soy or almond milk and add an acid?
Hi Chelsea, I’m excited to make your cake for my daughter’s birthday. I separated 7 eggs whites but when I weighed them it did not equal to 240g. Is that ok? Or do I need to add more egg whites to get to the exact total grams? Thanks for your amazing recipes and your knowledge ?????
Hi Tracy,
That’s totally normal! Egg whites naturally vary a bit in size. As long as it’s not more than like 20g off, you should be ok. If it is, adjust accordingly and add or scoop out a bit. Hope that helps, happy baking!
Hey there! My little one wants a strawberry funfetti with cream cheese frosting. Do you have any suggestions for making it strawberry?
Delicious cake!!!! Definitely my new go to vanilla cake recipe. BUT all my sprinkles sank to the bottom…? Any idea why? I used jimmies and have beautiful vanilla cake with a sprinkle heavy bottom.
Anytime you put something in a batter- choc chips, dried fruit, sprinkles, etc.. you should coat them with a small amount of flour first. it keeps them from sinking. 🙂
Would the dry ingredients from this recipe be a good substitute for a recipe that calls for ‘funfetti cake mix’?
Hi Katya,
It depends on the recipe but I would think it would probably work?! What are you trying to make?
Would cream cheese frosting pair well with this funfetti cake?
Absolutely! I love it with cream cheese frosting!!
to Make 2 tier cake. How do I adjust Funfetti recipe for 45 people,
You have great cakes
Hi Dotti,
I would recommend either making an 8 inch and 6 inch tiered cake which will feed about 40 people, or you can make a 10 inch and 8 inch tiered cake that will feed about 64 people.
One batch of this recipe makes 10 cups of batter, and I have a wonderful cake batter calculator that tells you how much batter you need depending on the size of your cakes.
Here’s the link: https://chelsweets.com/how-much-cake-batter-per-pan/
Hope that helps, happy baking!
Hi Chelsea
Can I use this recipe to make a Football Funfetta cake, also can I use Chocolate Frosting
Please email me at olasavage1@gmail.com
I love all your Recipes
Hi Ola,
You totally can use this recipe to make a football funfetti cake! It keeps it’s shape well and is easy to trim. It also would pair great with my chocolate buttercream recipe. Hope that helps, happy baking!
Hi! So this cake is delicious, BUT if anyone ever mixes up like me and uses baking soda and not powder this makes a delicious loaf (like banana bread). So it’s a win in 2 ways.
OMG I am DYING!!! That is hilarious and good to know, thank you for sharing Kristy!!!! 🙂
Would you suggest any changes if baked in 3 9-inch pans?
Hi Roxanne,
If you’re baking it in three 9-inch pans, you’re good to go using the recipe as written—you’ll just want to slightly reduce the bake time since the layers will be a bit thinner (I’d start checking around the 28–30 minute mark). Use a toothpick inserted in the center to check for doneness – it should come out with a few moist crumbs when it’s done.
If you want the layers to be the same thickness as the original recipe intends, you can make 1.5x the recipe. That’ll give you enough batter to fill all three 9-inch pans nicely without the layers being too thin. Just be sure not to overfill the pans—aim to fill them about halfway to two-thirds full. You can always bake a little extra batter as cupcakes if needed!
Hope that helps and happy baking!
I love the recipe. But I used hazelnut extract instead and it was amazing. I made a second one added the almond extract this time and the taste is a bit off to me. Idk what it is with the almond extract but it’s not as good as the hazelnut one. Even one wiped it out made it amazing! Maybe 25 people for a tall 3 tear wedding cake it was crazy! Wish I could post photo
Hi Jennie,
That’s such a fun twist with the hazelnut extract! That sounds so delicious, especially in a wedding cake! Almond extract can definitely be a little strong or floral for some tastes, so I totally get where you’re coming from. I wish I could see a photo too, it sounds like such a special (and scrumptious) cake. Thanks so much for sharing this, it made my day!
Can you substitute cake flour for AP flour?
Hi Marie,
You absolutely can! I’ve done that before and it tastes great! The batter will be a bit thinner but will bake up with a really soft, tender texture. Hope that helps, happy baking!!
This is hands down THE BEST Funfetti Cake from scratch I’ve ever tried, and trust me, I’ve tried so many recipes looking for the perfect one and THIS IS IT! Thanks for sharing <3
Hi Belle,
Ahh this makes me so happy to hear!! Thank you for trusting my recipe and taking the time to share such sweet feedback 🙂
How long would you cook your 10 inch cakes for, in a 2 inch deep tin and would you use the same temp? Would doubling the recipe make 3 x 10 inch cakes ?
Hi Rosemary,
I use 2 or 3 heating cores, which help big layers bake more evenly and quickly, and I usually bake them for 45-55 minutes, depending on how full the pans are and how crowded my oven is! This recipe makes about 10 cups of batter, and a 10 inch pan needs 5 cups of batter, so you’d need 1.5 batches to make 3 10-inch cake layers. Hope that helps, happy baking!!
For anyone interested in making 10 inch layer cakes, I made one and a half times the recipe and it was the perfect amount for 3 ten inch circular pans. They were 900 g per pan and I baked them for 42 minutes and they were perfect.
So good to know, thanks for sharing Michelle 🙂