
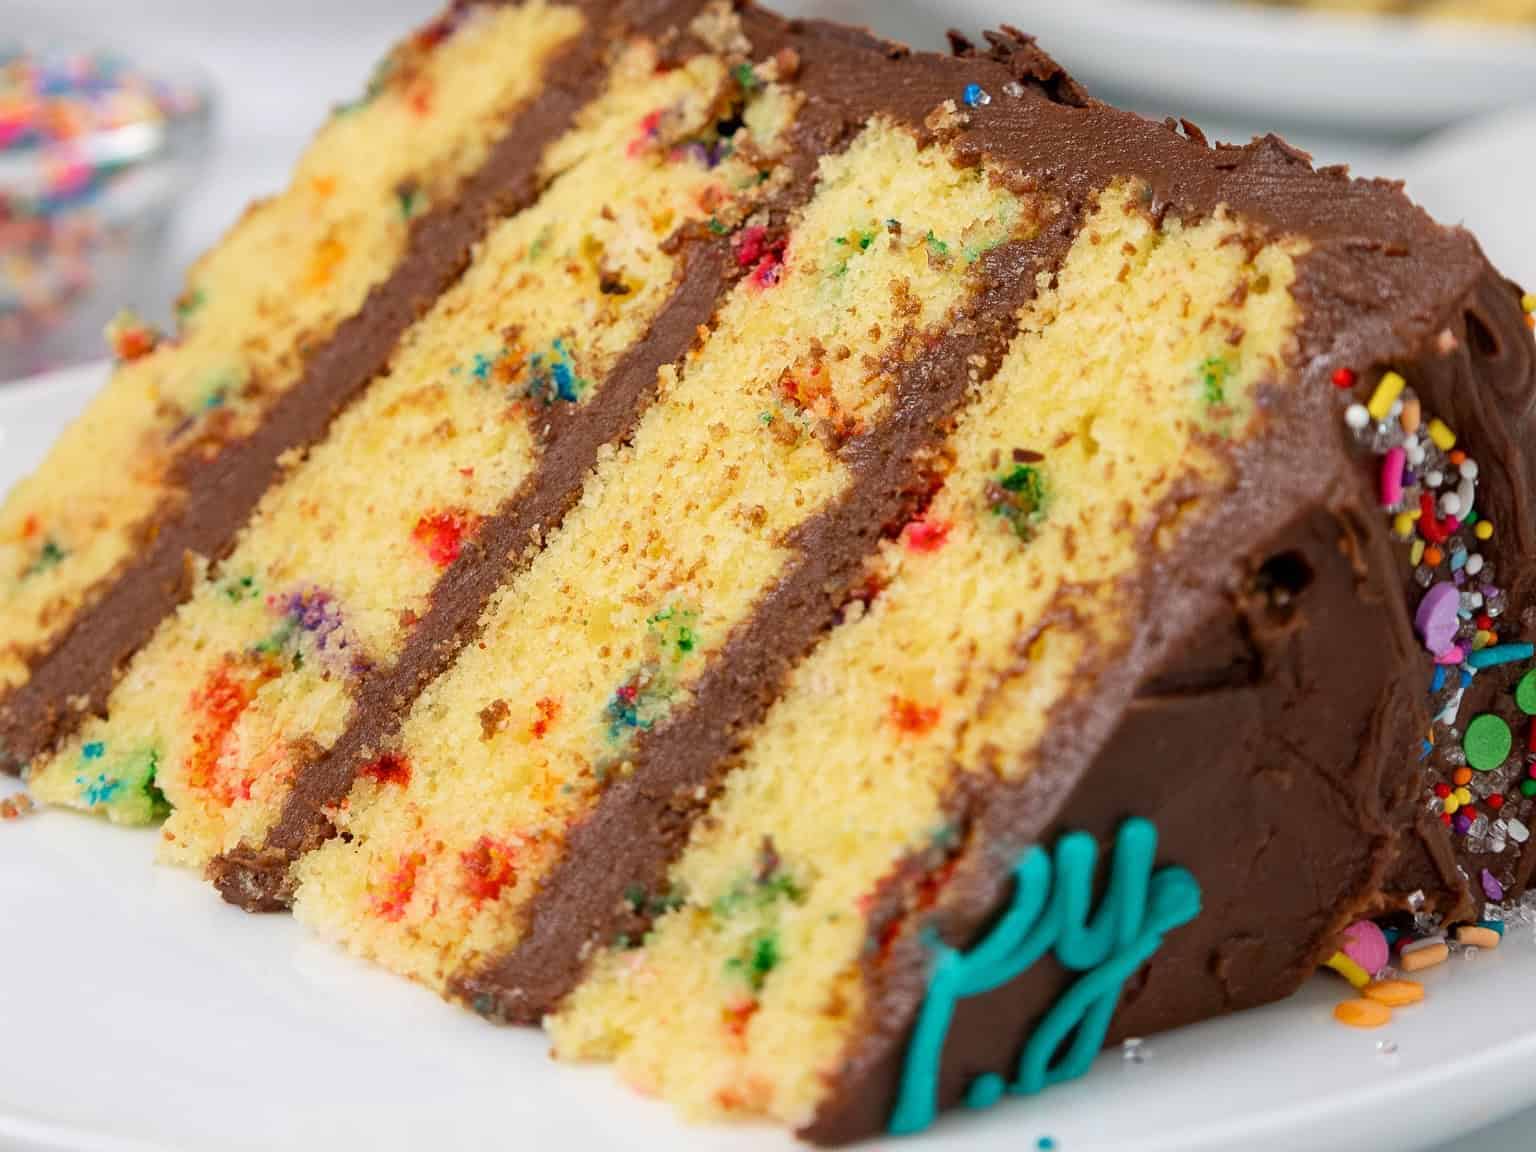
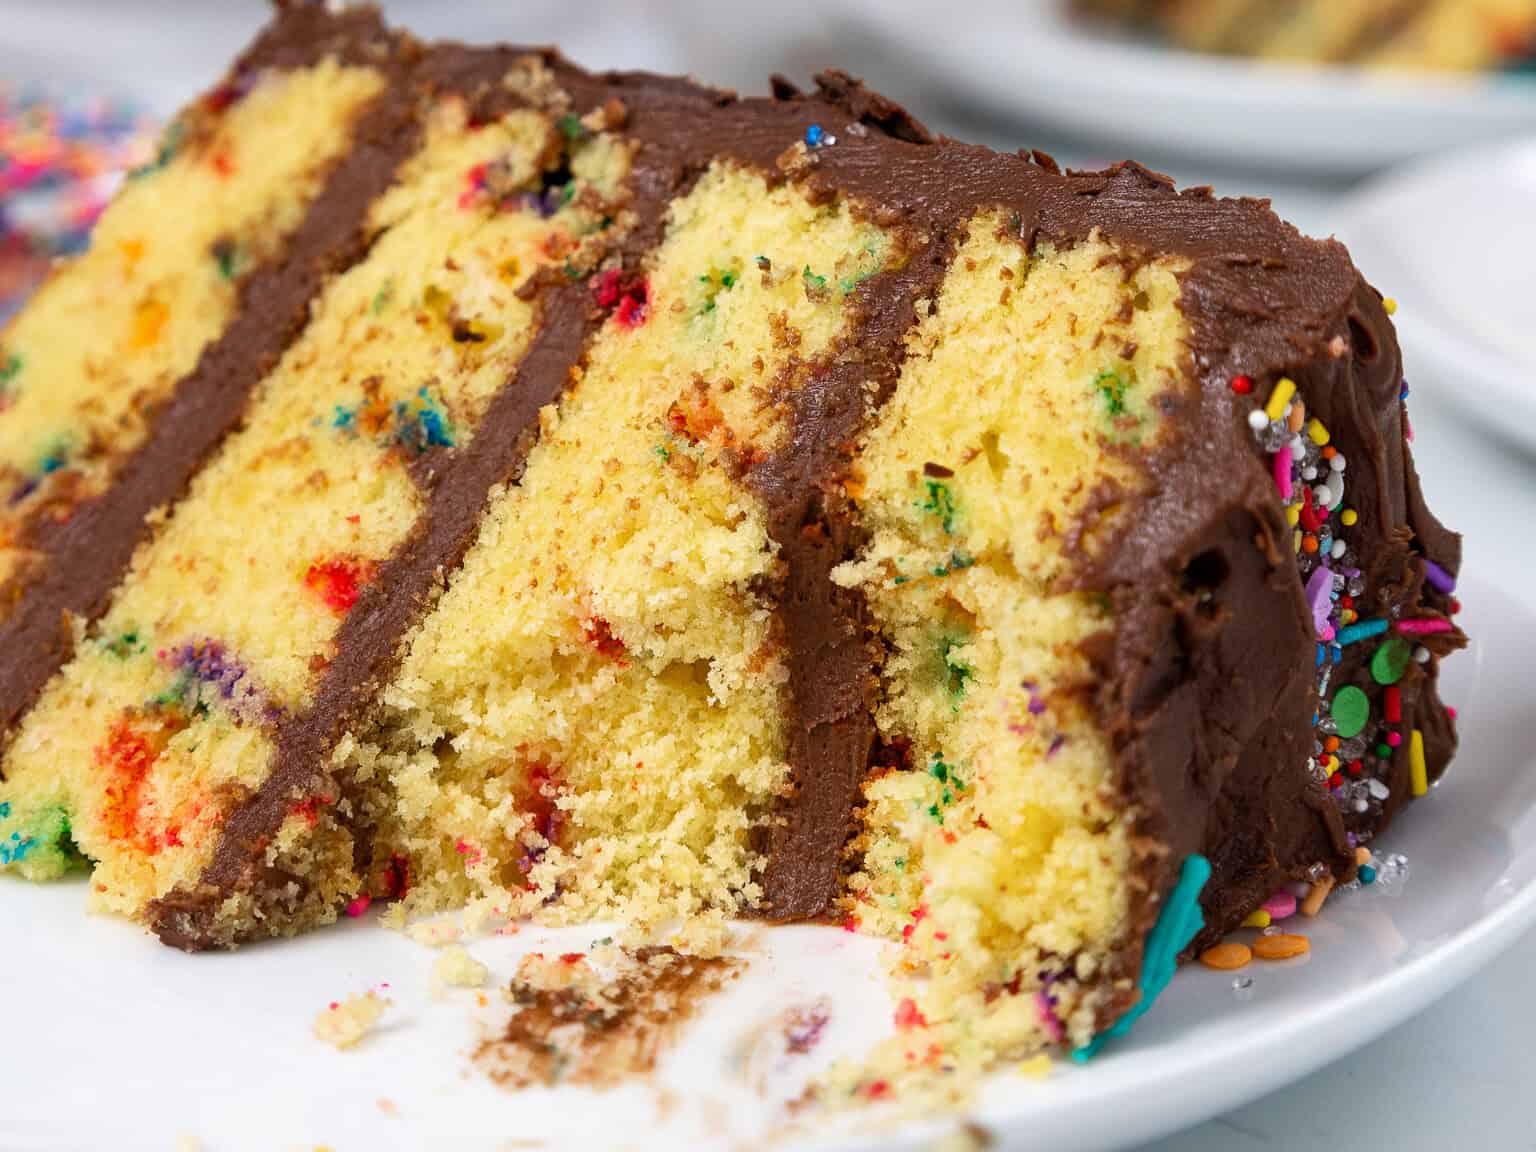
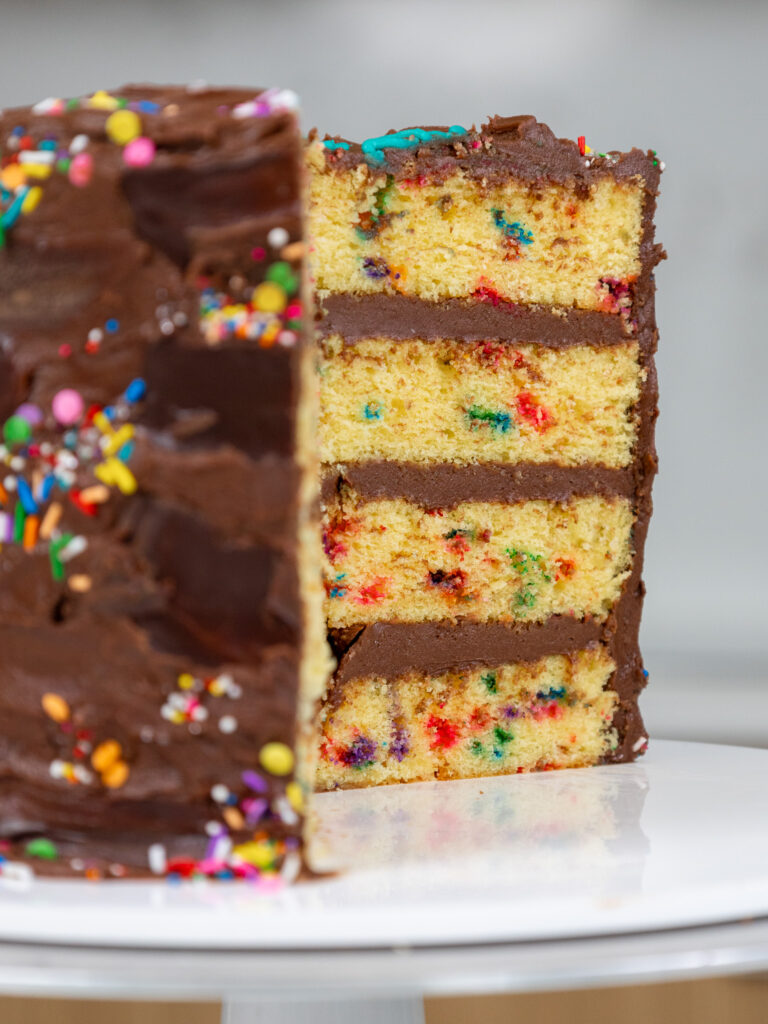
Best Yellow Cake Recipe
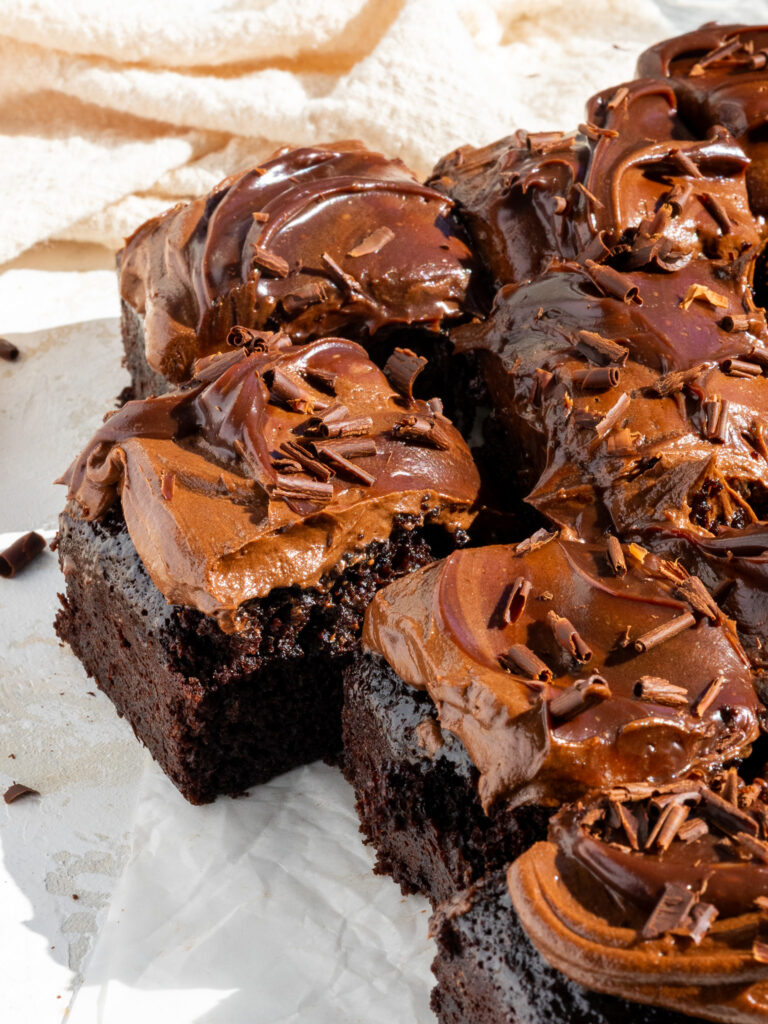
This is my go-to yellow layer cake recipe! It makes soft, tender, yellow cake layers that are frosted with irresistible chocolate buttercream!
How to Make This Yellow Layer Cake
Let’s walk through each step together to make sure this cake turns out as amazing as possible! I’ve also included a video tutorial of the process below.
I figured it might be helpful to know what tools I use so I’ve shared a list below. Not all of these are mandatory, but they make the process a lot easier.
If you don’t have all these things on hand, feel free to improvise and work with what you have.
- 4, 7-inch Cake Pans or 3, 8-inch Cake Pans
- Spinning Cake Stand
- Electric Hand Mixer or Stand Mixer
- Serrated Knife
- 10-inch Greaseproof Cake Board or Flat Plate
- Large Offset Spatula
Step 1: Bake the Yellow Cake Layers
Make the cake layers first following the recipe card at the bottom of this post.
Divide the batter evenly between the prepared cake pans and bake for 34-36 minutes or until a toothpick comes out with a few moist crumbs.
Remove the cake layers from the oven and let them cool in the pans for about 30 minutes. Or if you’re in a rush, place the pans directly in the freezer to accelerate the cooling process.
Then gently run an offset spatula around the rim of the cake pans to loosen them and flip them onto wire racks to finish cooling.
These layers bake up pretty flat but I still recommend leveling them with a serrated knife to make them easier to stack and frost.
I also like to trim away the caramelization around the sides of the layers. This is totally optional though! If you’re making these in advance, you can wrap and freeze them at this point.
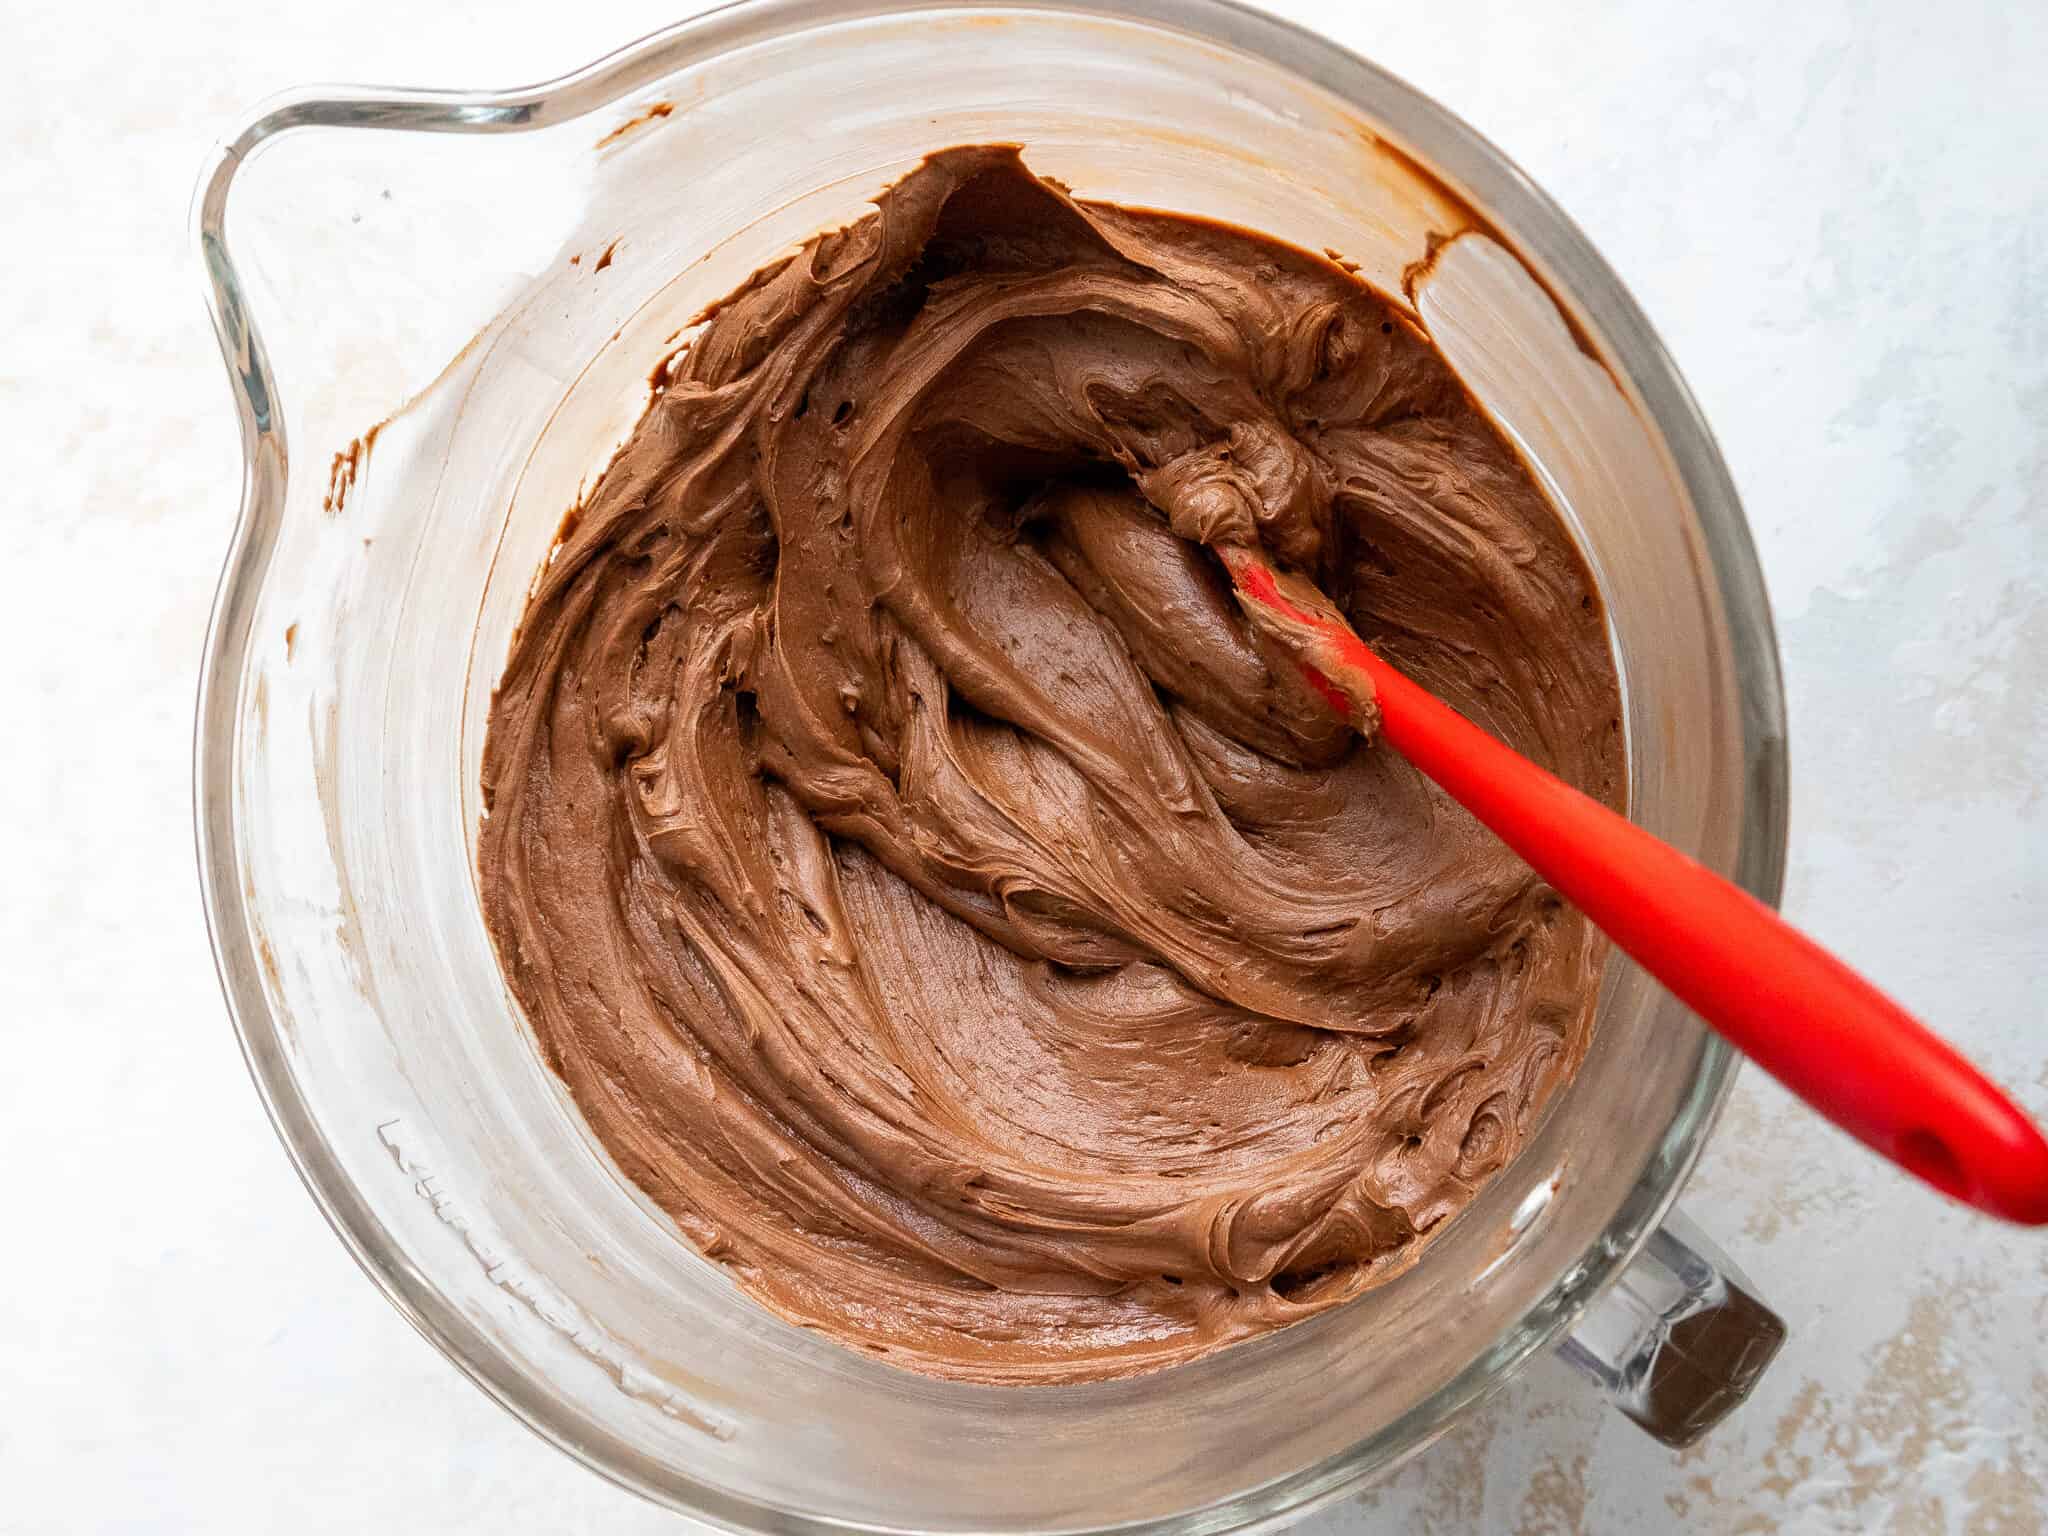
Step 2: Make the Chocolate Buttercream Frosting
While the cake layers bake and cool, make the chocolate buttercream frosting.
I like to use an American buttercream base to make this frosting because I think it’s the easiest to make and I love eating it. However, it is quite sweet!
If you want to use a less sweet frosting base, I’d recommend making adding the melted chocolate and cocoa powder to a batch of my Swiss meringue buttercream or 1.5 batches of my hybrid buttercream.
If you’re short on time or want to work ahead, this frosting can be made in advance and kept in the fridge for up to a month or in the freezer for 3 months.
Step 3: Stack and Frost the Cake Layers
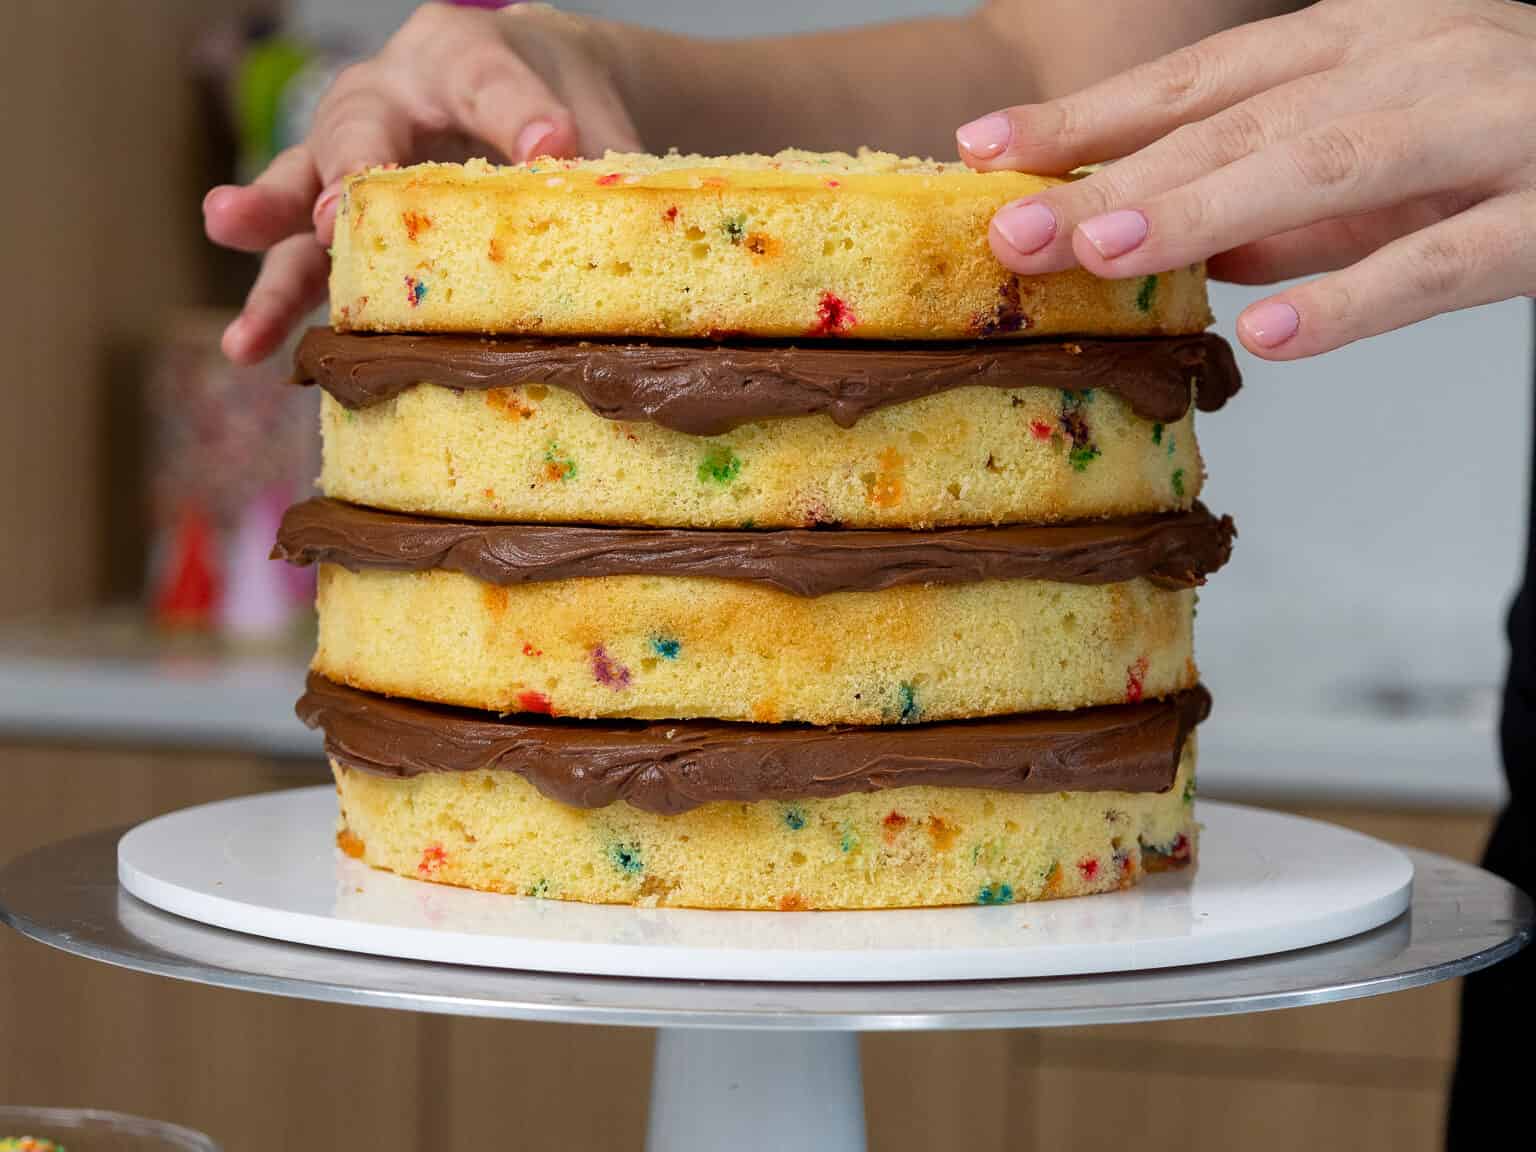
Then it’s time to assemble this cake! Stack and frost cake layers on a greaseproof cake board or flat plate. Use a dab of buttercream to help stick the first cake layer to the board.
Spread an even layer of buttercream on top of each cake layer with a large offset spatula. Repeat with the remaining cake layers.
Once the cake layers are stacked, smooth any overhanging frosting and chill the cake in the freezer for 15 minutes.
This will help the frosting between the layers firm up and reduce crumbing as you frost the cake.
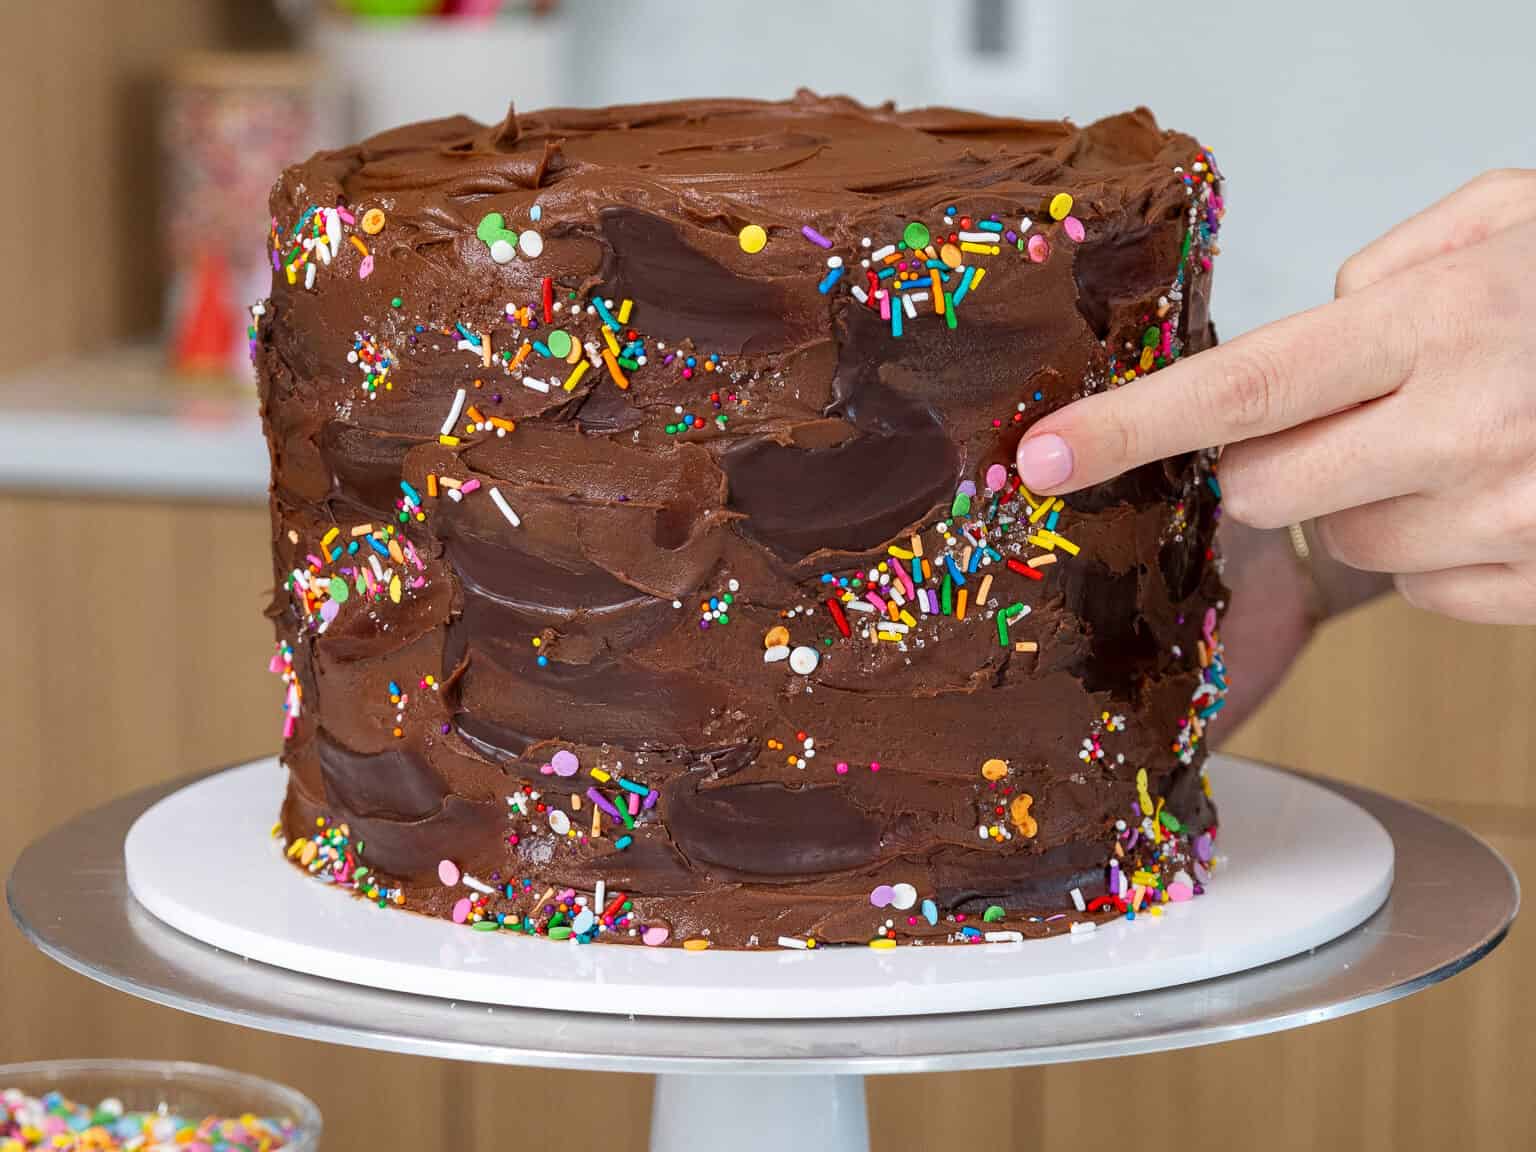
Step 4: Cover the Cake in a Thick Layer of Frosting
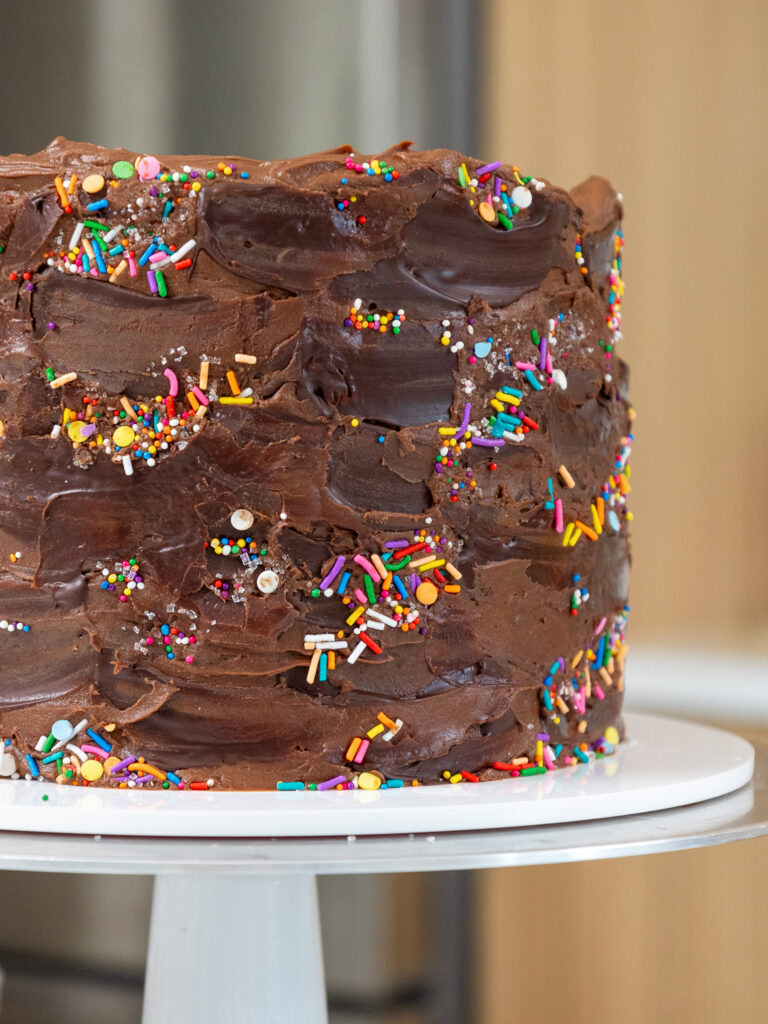
Once the cake is chilled, cover it with the remaining chocolate buttercream. Use a large offset spatula or the back of a spoon to create a textured look around the cake.

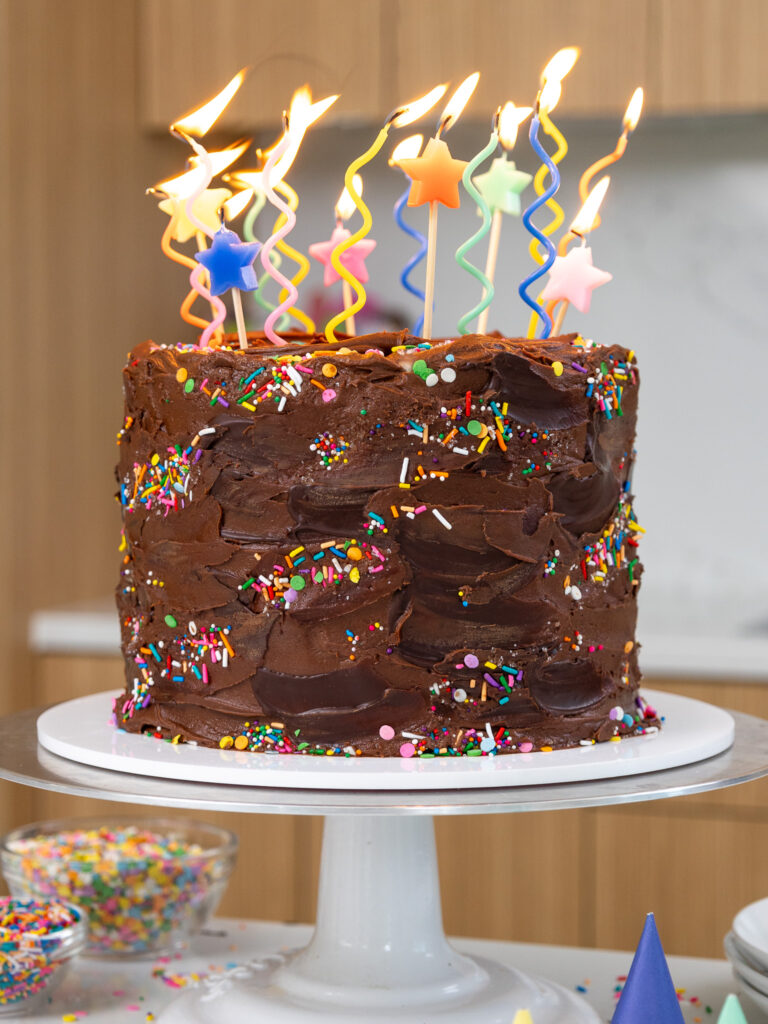
Then add on some chocolate swirls and gently press rainbow sprinkles in clusters around the cake, then enjoy!
Substitutions and Swaps – Yellow Cake Layers
This recipe uses quite a few ingredients and I know you might not have them all on hand. Or if you have food allergies or restrictions, I’ve got you covered.
Below are some swaps and substitutions that can be made in this cake recipe.
- Cake Flour – This recipe turns out best with cake flour, but you can use a gluten-free flour blend or AP flour if that’s what you have on hand.
- Granulated Sugar – I do not recommend changing the type or reducing the amount of sugar in the cake batter by much because it will change the texture of the cake layers. If you really want to reduce the sugar, you can decrease it by 1/2 cup. However, I’d recommend just using a less sweet frosting base to cut down on the sweetness of the cake if that’s what you’re after.
- Unsalted Butter – If you only have salted butter on hand, you can use it in place of the unsalted butter in this recipe. Just be sure to omit the salt that this cake recipe calls for. You can also use vegan butter in its place (and also omit the salt)!
- Large Eggs – I like to use brown eggs in this recipe because the yolks are a deeper yellow color and naturally give the batter a nice yellow color. If you can’t find brown eggs, white eggs will work too.
- Buttermilk – You can also use full-fat yogurt, whole milk, sour cream, or an alternative yogurt or milk (almond, soy, oat) if you’re dairy-free.
- Vegetable Oil – Any flavorless oil will work in this recipe. Canola or even sunflower oil would work great!
- Rainbow Sprinkles – These are totally optional, but I love to add some rainbow jimmies into the batter to give it a fun pop of color.
Substitutions and Swaps – Buttercream Frosting
- Unsalted Butter – If you only have salted butter on hand, you can use it in place of the unsalted butter. Just be sure to omit the salt that this frosting recipe calls for. You can also use vegan butter in its place (and omit the salt)!
- Heavy Cream – Whole milk or alternative milk (soy, almond, oat) will work fine in this frosting recipe if that’s what you have on hand.
- Cocoa Powder – I like to use regular, unsweetened baking cocoa in this recipe, but you can also use Dutch-processed or dark cocoa powder if needed.
- Chocolate Chips – Milk, semi-sweet, or dark chocolate chips can be used to make this frosting.
Making This Yellow Cake in Different Sizes
I used 4, 7-inch cake pans to make this cake, but this recipe can be used to make different-sized cakes.
You can make three, 8-inch or four, 6-inch cake layers with one batch of batter. Bake the cake layers at 350 F / 175 C for 34-38 minutes or until a toothpick comes out with a few moist crumbs.
If you want to make a yellow sheet cake, I recommend using my yellow sheet cake recipe.
You can also make cupcakes using this recipe. Fill the liners 3/4 full and bake them at 350 F / 175 C for 18-21 minutes, or until a toothpick inserted in the center comes out with a few moist crumbs.
Tips for Making the Best Yellow Cake
- Ingredients at room temperature mix together better! Set out any cold ingredients ahead of time.
- Properly measure the flour (spoon into the cup measure, then level). Or better yet, use a kitchen scale to measure your dry ingredients.
- Use a scale to weigh the cake pans as you fill them. It will make the cake layers bake up to the same height and bake more evenly.
- Level the room temperature or thawed cake layers with a serrated knife to make them easier to stack.
- Make sure the buttercream is the right consistency. This will help give the cake proper structure and make it easier to decorate.
- Chill the cake layers in the freezer for about 20 minutes before assembling the cake. It makes them so much easier to stack and frost!
- If your cake layers turn out less than perfect, read my cake troubleshooting guide to see where things might’ve gone awry.
Making This Yellow Cake in Advance
I highly recommend making these cake layers in advance and freezing them. It breaks the process up and makes it more approachable.
You can also make the frosting ahead of time or save any leftover frosting! It can be stored in an airtight container in the fridge for up to 2 weeks, or in the freezer for up to a month.
Be sure to give it a good stir once it thaws to get the consistency nice and smooth again.
A decorated cake can last in the fridge for up to a week, or in the freezer for up to a month. The buttercream locks in all the moisture, keeping the cake fresh and delicious!
If you cut into the cake and have leftovers, use any remaining frosting to cover the cut section to keep it moist and store it in the fridge for up to a week.
Let Me Know What You Think!
If you make this yellow cake recipe, I’d love to hear what you think of it! Let me know by leaving a rating and comment below.
And don’t forget to tag me @chelsweets use #chelsweets if you share on social media, so that I can see your amazing creations.
Best Yellow Cake Recipe
Ingredients
Yellow Cake Ingredients
- 3 cups cake flour 360g
- 3 cups granulated sugar 600g
- 2 1/2 tsp baking powder 10g
- 1 tsp fine salt 6g
- 1 cup (2 sticks) unsalted butter, room temperature 226g
- 5 large brown eggs, room temperature 280g
- 1 1/2 cups buttermilk, room temperature 360g
- 2 Tbsp vegetable or canola oil 30g
- 2 tsp vanilla extract or vanilla bean paste 8g
- 1/2 cup rainbow sprinkles – optional 90g
Chocolate Buttercream Frosting
- 1 1/3 cups milk or dark chocolate chips, melted and cooled 230g
- 2 cups (4 sticks) unsalted butter, room temperature 452g
- 1 tsp vanilla extract or vanilla bean paste 4g
- 1/2 tsp fine salt 3g
- 6 cups powdered sugar 750g
- 1/2 cup unsweetened cocoa powder, sifted 50g
- 2/3 cup heavy whipping cream, room temperature 180g
Cake Decoration
- 1/2 cup dark chocolate chips 85g
- 1/4 cup heavy whipping cream, room temperature 60g
- 1/2 cup rainbow sprinkles 90g
Recommended Tools
- 4, 7- inch cake pans or 3, 8-inch cake pans
- Spinning cake stand
- Electric hand mixer or stand mixer
- 10- inch greaseproof cake board
- Large offset spatula
Instructions
Yellow Cake Layers
- Preheat the oven to 350°F / 175°C. Line four, 7-inch, or three 8-inch pans with parchment rounds and grease with non-stick baking spray or homemade cake pan release. I used 7-inch cake pans.
- Mix 3 cups cake flour, 3 cups sugar, 2 1/2 tsp baking powder, and 1 tsp salt together in a stand mixer with a paddle attachment or hand mixer until fully combined.
- Gradually mix 1 cup of room-temperature butter into the dry ingredients on a low speed. Continue to mix until no large chunks of butter remain, and the mixture looks like moist sand.
- Mix in 5 large eggs, one at a time, on medium speed until incorporated. Scrape the sides and bottom of the bowl as needed with a rubber spatula.
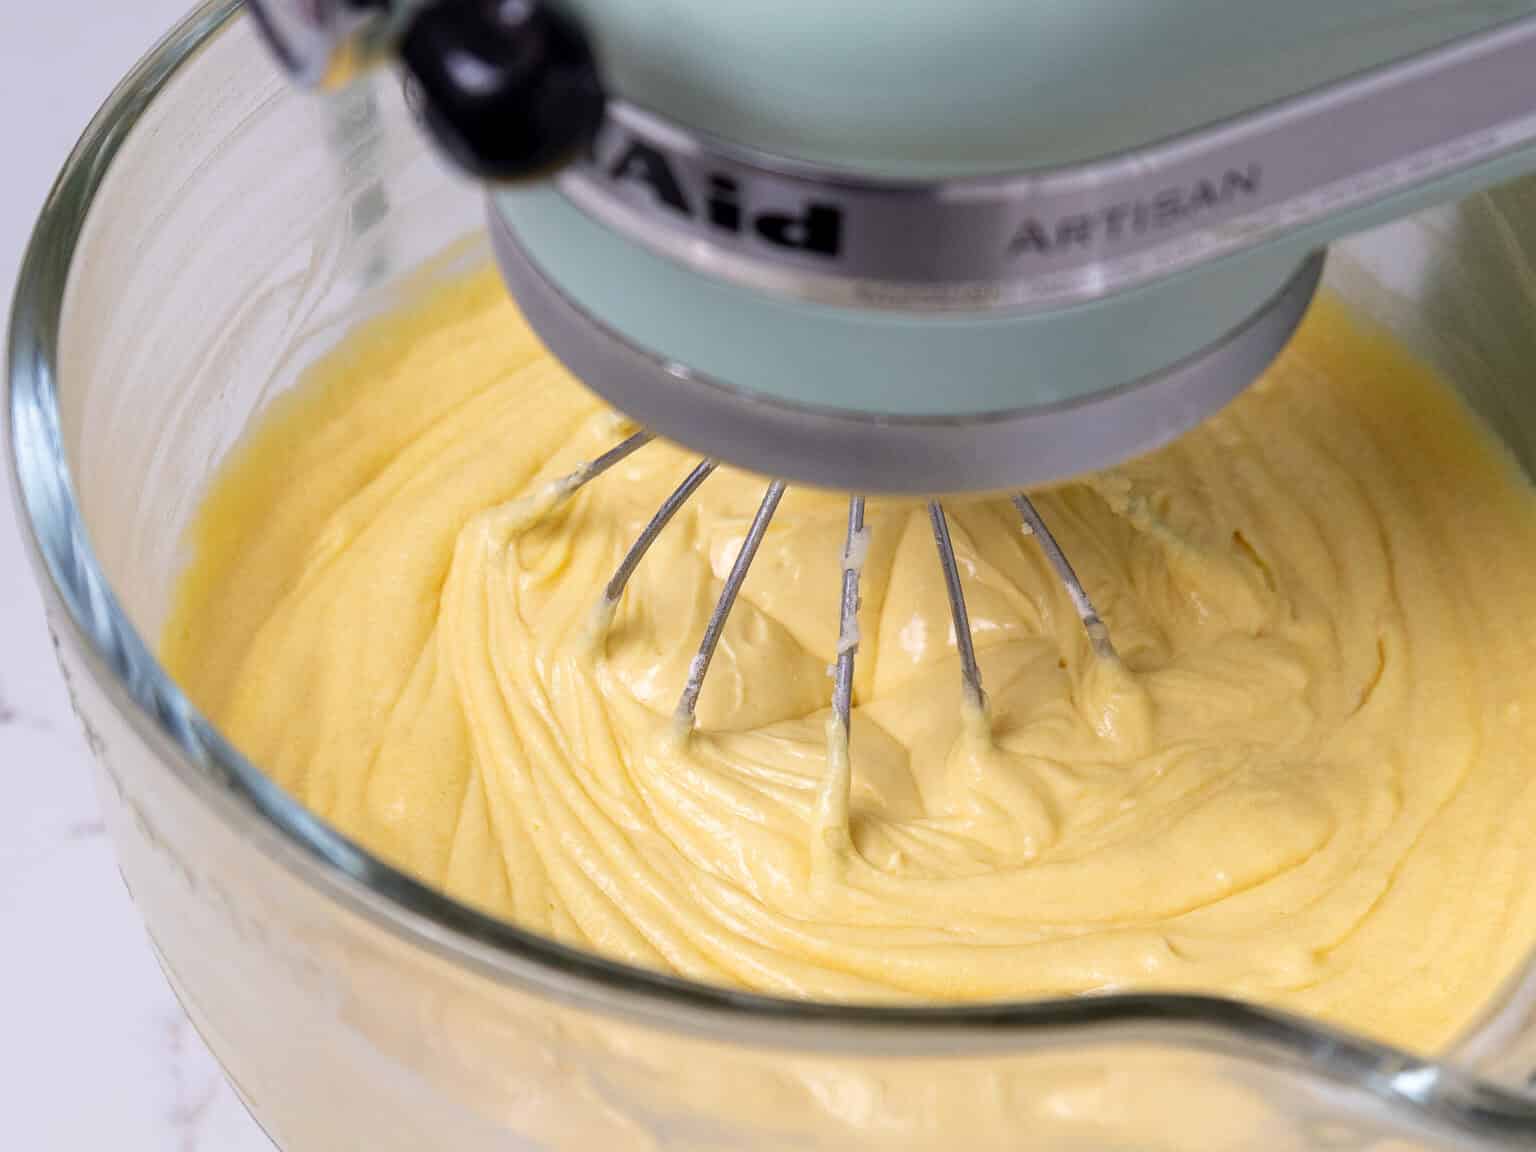
- Then mix in 1 1/2 cups buttermilk, 2 Tbsp vegetable oil, and 2 tsp vanilla extract on a low speed until fully incorporated. Scrape down the sides of the bowl with a rubber spatula one more time, then beat on a medium speed for about 30 seconds to make sure everything is properly mixed together. This also helps lighten the texture of the cake layers.
- If desired, gently fold 1/2 cup rainbow sprinkles into the batter.
- Divide the batter evenly between the cake pans (450g per pan if you make 4 layers, 600g per pan if you make 3 layers). Bake for 34-36 minutes or until a toothpick comes out with a few moist crumbs. Rotate the pans halfway through to help them bake evenly.
- Let the pans cool for 10 minutes, then run a small offset spatula around the perimeter of the pan to separate the cake from the pan.
- Place the cake layers into the freezer for 30 minutes to accelerate the cooling process. Once the layers are fully cooled, carefully flip the pans, and remove the layers.
- These cake layers bake up pretty flat, but I like to use a serrated knife to level the tops and remove any caramelization around the sides of the layers. This step is optional but makes the cake a lot easier to frost. You can also trim the layers, then wrap and freeze them if you're making them in advance.
- If you make these cake layers in advance and freeze them, let them thaw for about 15 minutes before making the cake. The cake layers should still be slightly cold to the touch, which will make it easier to assemble the cake.
Chocolate Buttercream Frosting
- While the cake layers bake and cool, make the chocolate buttercream frosting. Start by melting 1 1/3 cups of dark or milk chocolate with either a microwave or double boiler. Set aside to cool.
- In the bowl of a stand mixer or a large bowl, beat 2 cups of unsalted butter on medium speed for 30 seconds with a stand mixer and paddle attachment or hand mixer until smooth.
- Mix in 1 tsp of vanilla extract and 1/2 tsp salt on a low speed.
- Gradually mix in 6 cups of powdered sugar, 1/2 cup of cocoa powder, and 2/3 cup of heavy cream on a low speed until combined. Use a rubber spatula to scrape the sides and bottom of the bowl as needed.
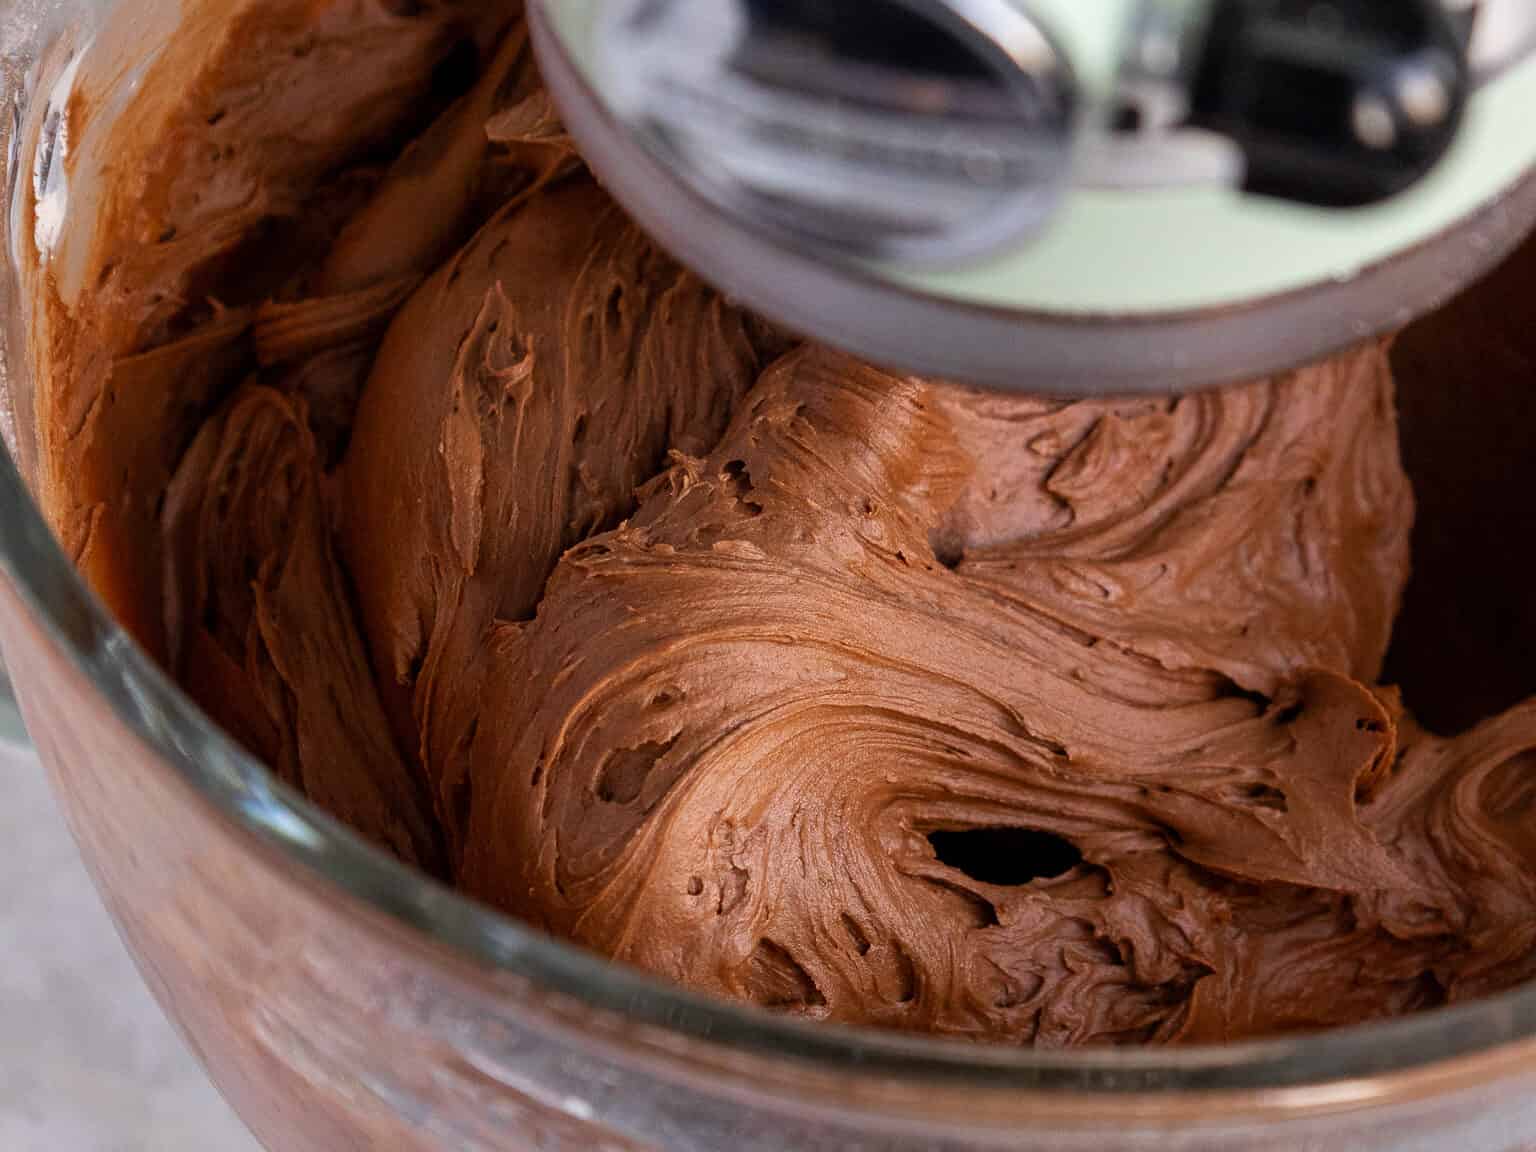
- The chocolate melted in step 1 should have cooled off a bit by now, and should still be fluid but not hot to the touch. Pour the chocolate into the buttercream and mix on a low speed until combined.
- Then stir by hand with a rubber spatula for a couple of minutes to get the frosting SUPER smooth. If the frosting seems too thick, add in additional cream (1 Tbsp at a time). If the frosting seems too thin, add more powdered sugar (a quarter of a cup at a time).
Assembling this Yellow Cake
- Stack and frost the cake layers on a greaseproof cake board or flat plate using a dab of frosting to help stick the first cake layer in place.
- Spread an even layer of chocolate buttercream on top of the cake layer with a large offset spatula. Top with the next cake layer and repeat until all the cake layers are stacked.
- Once the cake layers are stacked, smooth any overhanging frosting and chill the cake in the freezer for 15 minutes. This will help the frosting between the layers firm up and reduce crumbing as you frost the cake.
- Once the cake is chilled, cover it with the remaining chocolate buttercream. Use a large offset spatula or the back of a spoon to create a textured look around the cake.
- Add 1/2 cup of dark chocolate and 1/4 cup of heavy cream into a heat-proof bowl. Heat in the microwave for 30-45 seconds, then stir until the chocolate is fully melted and the mixture is combined. Use the back of a spoon or offset spatula to make chocolate swirls in the frosting. Gently press rainbow sprinkles in clusters around the cake, then enjoy!
Video
Notes
Recipe Variations
One batch of cake batter makes about 1800 grams or 10 cups. If you plan to use four circular cake pans, add 450 grams of batter into each pan. If you make 3 layers, add 600 grams to each pan. If you want to make a yellow sheet cake, I recommend using my yellow sheet cake recipe. You can also make cupcakes using this recipe. Fill the liners 3/4 full and bake them at 350 F / 175 C for 17-20 minutes, or until a toothpick inserted in the center comes out with a few moist crumbs.Tips for Making the Best Yellow Layer Cake
- Ingredients at room temp mix together better! Set out any cold ingredients ahead of time.
- Properly measure the cake flour (spoon into the cup measure, then level). Or better yet, use a kitchen scale to measure your dry ingredients.
- Use a scale to weigh your cake pans as you fill them. It will make the cake layers bake up to the same height and bake more evenly.
- Level the room temperature or thawed cake layers with a serrated knife to make them easier to stack.
- Make sure the buttercream is the right consistency. This will help give the cake proper structure and make it easier to decorate.
- Chill the cake layers in the freezer for about 20 minutes before assembling the cake. It makes them so much easier to stack and frost!
- If your cake layers turn out less than perfect, read my cake troubleshooting guide to see where things might've gone awry.
Making This Yellow Layer Cake in Advance & Storage Tips
Make these cake layers in advance and freeze them. It breaks the process up and makes it more approachable. You can also make the frosting can also be made ahead of time or you can save any leftover frosting! It can be stored in an airtight container in the fridge for up to a month, or in the freezer for up to 3 months. Be sure to give it a good stir once it thaws to get the consistency nice and smooth again. A frosted cake can last in the fridge for up to a week, or in the freezer for up to a month. The buttercream locks in all the moisture, keeping the cake fresh and delicious! If you cut into the cake and have leftovers, use any remaining frosting to cover the cut section to keep it moist and store it in the fridge for up to a week.Nutrition
Other Recipes You Might Like:
Good Morning, I Think That All Your Recipes Are The Best!!, I Love Your Vanilla Cake Recipe and Only Use Them For All My Cakes, So Thankful That You Have Shared A Yellow Cake Recipe With Us, Can We Substitute The Buttermilk For Sour Cream, Or You Will Be Sharing A Recipe Using Sour Cream With Us Soon.
Sorry I Meant Thank You
I made cupcakes instead of full cake and were awesome!
Hi Heidi,
I’m so happy to hear that! I’ve never tested this recipe out as cupcakes, so thank you for sharing that it works!! 🙂
@Heidimarietaylor14@yahoo.com
Did the cupcakes rise very well for you?
@Heidimarietaylor14@yahoo.com, how long to bake if making cupcakes?
Hi Kim,
I’d recommend baking cupcakes using this recipe at 350 F for 18-22 minutes, or until a toothpick inserted in the center comes out with a few moist crumbs. Hope that helps, happy baking!
Hey I love your recipes! I just made this and it still came out good. I left out the baking powder….instructions say mix in dry ingredients (cake flour and salt) and I never saw the baking powder lol. It was my own fault but someone else may make the same mistake. ?????
Ah I am so sorry about that Shannon! It’s definitely not your fault!!!
Thank you for letting me know, I just updated the recipe card to fix it <3
Looks amazing! What size would this recipe translate to a sheet cake?
I actually am sharing the sheet cake version of this recipe next month!! It’s 3/4 of this recipe, to bake a 9×13 inch sheet cake <3
Made This Cake For My Friend Birthday The Best!!!! Thanks!!!!!!
Could 2-9” pans be used with this recipe?
Hi Bonita,
This recipe can be used to make 2, 9-inch cake layers! I’d recommend placing a flower nail in the center to help it bake more evenly and quickly though, since it’s a pretty large cake layer. Hope that helps, happy baking!!
I noticed you use way more flour than most recipes. Most other yellow cake recipes call for anywhere from 2 to 2.5 cups of flour. How did you decide on the amount of flour to use? Thanks and love your stuff!
Hi Betty,
This is recipe makes a pretty big cake!! It makes 4, pretty thick 7 inch cake layers. The recipe just uses a lot of flour because it makes a lot of batter 🙂 Hope that makes sense, happy baking!!
I made this yesterday for my sisters bday and it was paler and denser than I would have liked but I used ap flour and maybe I shouldn’t have done three 8 in layers ?? GREAT flavor though ! The buttercream was sooo good !
Hi Japhia,
I think the cake flour makes a huge difference in the texture of this cake! If it turned out dense, you might also be using too much flour (sometimes when you scoop out of a bag you end up packing a lot more flour into the cup than the recipe calls for (by weight), or you may be over mixing! Those are usually the two main culprits for dense cake layers.
I’ve tested the recipe with 3 8-inch cake layers and 4 7-inch cake layers, and it turns out great both ways! So I don’t think you have to worry about that part 😛 I’d say try using cake flour next time, and maybe mix a little less. Hope that helps, happy baking!!
Is the sheetcake version available yet for a 9×13 size?
Hi Kacie,
I haven’t shared the recipe on here yet (I need to reshoot the recipe), but I just emailed it to you 🙂 Hope that helps!!
Is the recipe for the 9×13 inch cake available yet?
Thank you.?
Hi Wally,
It’ll be live March 9th!! I can also email it you if you need it before then 🙂
What is the easiest way to make sure you have the same amount of batter in each pan?
Hi Jazmine,
I like to use a digital scale to weigh each pan and make sure they’re all the same weight (give or take about 10 grams)! It’s the easiest way to know you have exactly the same of batter in each pan 🙂 Hope that helps, happy baking!
Can this be cooked in a bundt pan?
Hi Karen,
I haven’t tried it so, so sadly I’m not sure! In terms of volume, this recipe makes enough batter to bake up great in a 10 cup bundt pan. I’d suggest baking it at 350 degrees F for 50-60 minutes if you want to try it out.
Please let me know how it turns out if you do bake this as a bundt cake, I’d love to know 🙂
I’ve made and love your Chocolate Layer Cake. I’ve tried to make the Best Yellow Cake recipe twice, it did not rise at all either time!! Any idea what went wrong? Can you mix to much?
Hi Laurie,
I’m so sorry to hear that! It might be two things. The first is that your baking powder might be old! They lose their potency after 9 months. Testing it is super easy. Just stir about half a teaspoon of baking powder into a cup of hot water. It will immediately start to fizz and release carbon dioxide gas if it’s still fresh enough to use.
The other is that you may have overmixed the batter? That can also cause cake layers to be more dense / not rise well. I’d first test your baking powder, and if that’s not it I’d suggest trying to mix the batter less next time. Hopefully one of those will help!
I don’t know what I did wrong on this one, but it was definitely not yellow and it didn’t have much flavor. Kind of tasted like dense bread. I even checked to make sure I followed the instructions. Maybe it’s because I’m at high altitude? The good news is the frosting came out perfectly and it was amazing!!! Will have to try a different cake recipe next time for the chocolate buttercream.
Hi Sara,
So sorry to hear that! If your cake turns out dense it means you might be using too much flour (sometimes when you scoop out of a bag you end up packing a lot more flour into the cup than the recipe calls for (by weight), or you may be over mixing! Those are usually the two main culprits for dense cake layers <3 hope that helps, happy baking!!?
Oops I think my comment was a little confusing! I meant the rest of your ingredients are on par with most of the other recipes I’ve tested, but you use significantly more flour (you call for 4 cups and most other call for 2-2.5 cups). I’m always interested in comparing recipes and ingredients so I when I noticed you used more flour in yours I was curious how you decided on this and what that does to the texture of the cake. I’m a spreadsheet nerd so I love comparing and testing different recipes! Thanks!
No worries Betty! I found that the cake needs that much cake flour based on the amount of eggs and buttermilk included in the recipe!! I find the texture of this cake is perfect with the ratio of ingredients 🙂 It’s fluffy, super soft, and so tender!! It’s the same ratio of ingredients I use in my yellow sheet cake. This recipe is really just that recipe scaled up to make enough batter for a layer cake. Hope that helps, happy baking!
I would like to make this cake for two or three people. Maybe a 6 in 2 layer round? Thanks!
Hi Melody,
I’d make 1/3 of a batch of cake batter and frosting. Hope that helps, happy baking!!
Hi, I plan on trying this recipe for a friend that has a dairy intolerance and would like it if I used as little dairy products as possible. So, I wanted to know if it was possible to replace the buttermilk and heavy cream with almond milk? If not that’s fine
Hi Newt,
You can use almond milk in place of the buttermilk, but it will change the texture and flavor a bit! Using it to replace the heavy cream should work just fine though <3
Hey im in love with your recipes, just wanted to understand the standard cup size you use. As in your recipes sometimes 1 cup is 200gms whilee others 120gms. I am planning to make the vanilla sheet cake. Thanks in advance. And hope u and your family are keeping well
Hi Tanvi,
The number of grams on a cup can vary greatly based on the ingredient! For example a cup of flour is going to weigh a lot less than a cup of heavy buttermilk. Hope that makes sense, happy baking!
Hi Chelsea. For the eggs, do you mean 5 large eggs as in the yolks too, not just whites? Thanks!
Hi Marissa,
Yup, it means whole eggs! Usually a recipe means whole eggs when they’re listed as eggs, and they’ll specifically say egg whites or egg yolks if that’s what the recipe calls for. Hope that helps, happy baking!
Hi Chelsea,
This recipe makes enough batter for four cake pans right? Can I half the recipe if I only can do 2 cake pans? wondering if that would still work. Thanks.
Hi Cassie,
You can definitely halve this recipe and make 2 7″ or 8″ cake layers. Hope that helps, and that your cake turns out great!
Hi, do you use any liquid for making the layers moist before frosting. Thanks
Hi Tanvi,
I don’t usually add simple syrup to theses cake layers, but you can if you want to or like your cakes that way!
I can’t find cake flour…quarantine life. Can I use regular flour???
Hi Catherine,
The texture will be a bit less fluffy, but you can if that’s all you can find <3
Hi Chelsea
Can this measurement be used for 2 x 9 inch pans?
I generally see 4 x 7 inch pans or 3 x 8 inch pans.
Unfortunately, I only have two sets of each size (7s, 8s, and 9s)
Also, I’m in the Caribbean. Buttermilk isn’t really a thing here. What are my substitutes?
Also, can margarine be used instead of butter?
Hi Julene,
This recipe would work great to make 2, 9″ cake layers 🙂 In place of the buttermilk, you can use full-fat yogurt, whole milk, or sour cream. Margarine does not work great in this recipe, so def try to use butter if possible <3
Hope that helps, happy baking!!
I just wanted to thank you for sharing this recipe. I make my son’s birthday cake with it and it was perfection!!!! I weighed the ingredients and followed your instructions and it was pure magic!!!
What if I only have 6 inch cake pans, will I have a bunch left over?
How about using for two 11.5 inch pans
Hey just want to say that I love your recipes! Quick question, will this cake hold up to fondant?
I can usually get 5 6” layers out of her recipes. Just watch the time!
Should I double this recipe to use for 3 10in pans ?
I saw a video that states you can make your own but not sure if it would turn out the same.
Per every cup of regular flour you remove 2 Tbsp of the flour and replace it with 2 Tbsp of Corn starch. Then you sift it together 2 times and there you have it, easy Cake flour.
I saw a video that states you can make your own but not sure if it would turn out the same.
Per every cup of regular flour you remove 2 Tbsp of the flour and replace it with 2 Tbsp of Corn starch. Then you sift it together 2 times and there you have it, easy Cake flour.
Did you try this and did it work and come out ok?
I’m out of dark chocolate- would milk chocolate chips or semi sweet ghirardelli baking chocolate work?
I made this cake tonight and it was amazing!!
Hi! I was wondering about how tall do your layers come out to be?
Hi Chelsea,
Thank you for offering your recipies. The ingredients section of this recipe lists 1 1/3 cups buttermilk. In the instruction portion, it says to add half of the buttermilk first (1/2 cup)… Is the total amount of buttermilk for the recipe 1 1/3 cups or 1 cup? Thank you.
@Cathy, I had the same question.
This is hands down the best yellow cake recipe ever!! I’ve tried several other yellow cake recipes and the cakes have always end up dry and tasting eggy. I used this recipe to make cupcakes (baked for about 18-20 mins, and made 50 large cupcakes) and they were fluffy, moist, and absolutely delicious!! Definitely my new favorite!
Hi! I was wondering how I can adjust this for a 10inch cake 3 layers? Does it stack well? I have an 8inch and 10inch tier cake to make and im hoping to use your recipe.
Can I use this recipe in a 4in and 6in tiered cake? Will it hold up for it? Thanks
I know this is a yellow cake, but can I add less eggs to make it less yellow? I love the flavor and texture of this specific recipe and wanted to make it look more “vanilla”
Have you tried making it gluten-free? Do you use a 1:1 flour to gf flour ratio?
I have only two cake pans to bake your three layer cake so I bake two cake first and ake the third layer when the two layer cake was done
I made your yellow cake but I use only two pans but when I had use of the one of my cake pans I bake it in one of them
Hi I made your yellow cake it came out just great I have wait on one of my cake to bake because only had two pans
I made your yellow cake it came out perfectly
Hi I bake your yellow cake it came out perfectly Thank you I like this receipe I made q Carmel Cake out of the cake
Trying to find a good yellow cake recipe. Maybe it’s just me but the instructions are complex. My cake fell to a million pieces when I tried to move it. Definitely not liking this recipe. Sorry just want to give feedback.
@ElanaSparkl m
I made this today and my layers fell apart too. I made the spice cake and vanilla cake and had no problems.linda kraner
Can this recipe be used for cupcakes? How long would they bake for?
Hi Amy,
It should work great as cupcakes! I’d recommend baking them for 17-20 minutes (bake time can vary based on the size of your liners and on your oven!). Happy baking!
Hi! I don’t have cake flour, can I make it by mixing cornstarch with regular flour?
Hi Julia,
No worries! You can make your own cake flour with the cornstarch + regular flour hack! Hope that helps, happy baking!
Hi! I love all your cakes! I need to make a 6in 3 layer cake what would you do for the ingredients for that? 2/3? Thanks! Hoping to do it this weekend!
Hi Samantha,
Thank you!! And great question. This recipe is awkward to divide, but I would recommend making 2/3 of the recipe! Use 3 large eggs plus an egg yolk for the eggs. If you have a scale, I’d recommend just dividing the amounts in grams and calculating it out that way. Hope that helps, happy baking!
Can this yellow cake recipe be used for yellow cupcakes?
Hi Tammi,
Great question! You can use this recipe to make yellow cupcakes. Bake them at 350F / 175C for 17-20 minutes. One batch of batter will make about 3 dozen cupcakes (yield will vary based on the size of your liners). Hope that helps, happy baking!
Hey Chelsey! Just wondering, can I substitute all purpose flour instead of using cake flour? I know there will be a slight texture difference but I’m wondering if it would be that big of a difference?
Hi Katrina,
Great question! You can substitute it, but the texture of the layers will be way different! I like my yellow cake to be super soft and the cake flour helps achieve that texture. It’ll still taste great with AP flour, but the texture will be less soft. Hope that helps, happy baking!
I wish i could submit a photo. The dark chocolate swirls didnt stand out on the chocolate frosting at all. Wonder what happened. But this is by far the mosy delicious yellow cake and most divine chocolate frosting i have ever made. Thank you for the recipe.??
Hi Via,
So happy to hear you loved this recipe!! But that is a bummer about the swirls! I have to use a pretty high % dark chocolate to get the swirls to show, usually anything about 70% works for me. Do you know what type of chocolate you used for the swirls? Hopefully we’ll be able to figure it out together!
I cannot wait to make your yellow cake , chocolate cake and vanilla bean cake. What is the correct temp for baking? 350 or 325? Plus. Can u make a spice cake using your yellow cake recipe and can u make a strawberry cake or cupcakes from your vanilla bean cake? Thank you so much.
How??much batter needed for one layer 12 inch round cake!? Thank you linda
Hey! I only have two 9x2in round pans on hand. I was wondering how much batter I would need for both pans and how long you recommend I bake them for?
This recipe was delicious! I was able to bake 3 6″ cake layers and 3 3″ cake layers with the recipe. It was a big hit! Thank you
do you know approximately how many cups of frosting this makes?
About 7 cups of frosting! Hope that helps, happy baking Nat!!
Hi! I was wondering how I should alter the amount of ingredients if I want to make a smaller cake – was planning on 2 6” layers for a smaller cake. Should I cut the ingredients by half or would that be too much? Thanks!!
Hi Michelle,
That is exactly what I’d recommend! I would recommend cutting the ingredients in half, and you should end up with two thick 6-inch cake layers! Bake time might be a couple minutes longer, just because the layers will be a little bit thicker in the smaller pan. Hope that helps, happy baking!
I’m wondering if this recipe is correct. I’ve made your yellow sheet cake before and it was perfect. My layers for this were dense and gummy. I compared the two recipes and as written the sheet cake has 300g sugar and 360g cake flour and the layer cake has 600g sugar for the same 360g cake flour. Is that right?
Hi Demetra,
I’m so sorry to hear that! My yellow sheet cake uses a classic creaming method, and this recipes uses a reverse creaming method, hence the higher ratio of sugar to flour. This gives the layers a denser, but super tender texture. However, the layers shouldn’t turn out gummy! Were all the ingredients at room temp? Did the centers sink at all, or is there a chance the layers weren’t fully baked through? Hopefully we’ll be able to figure out what happened!