
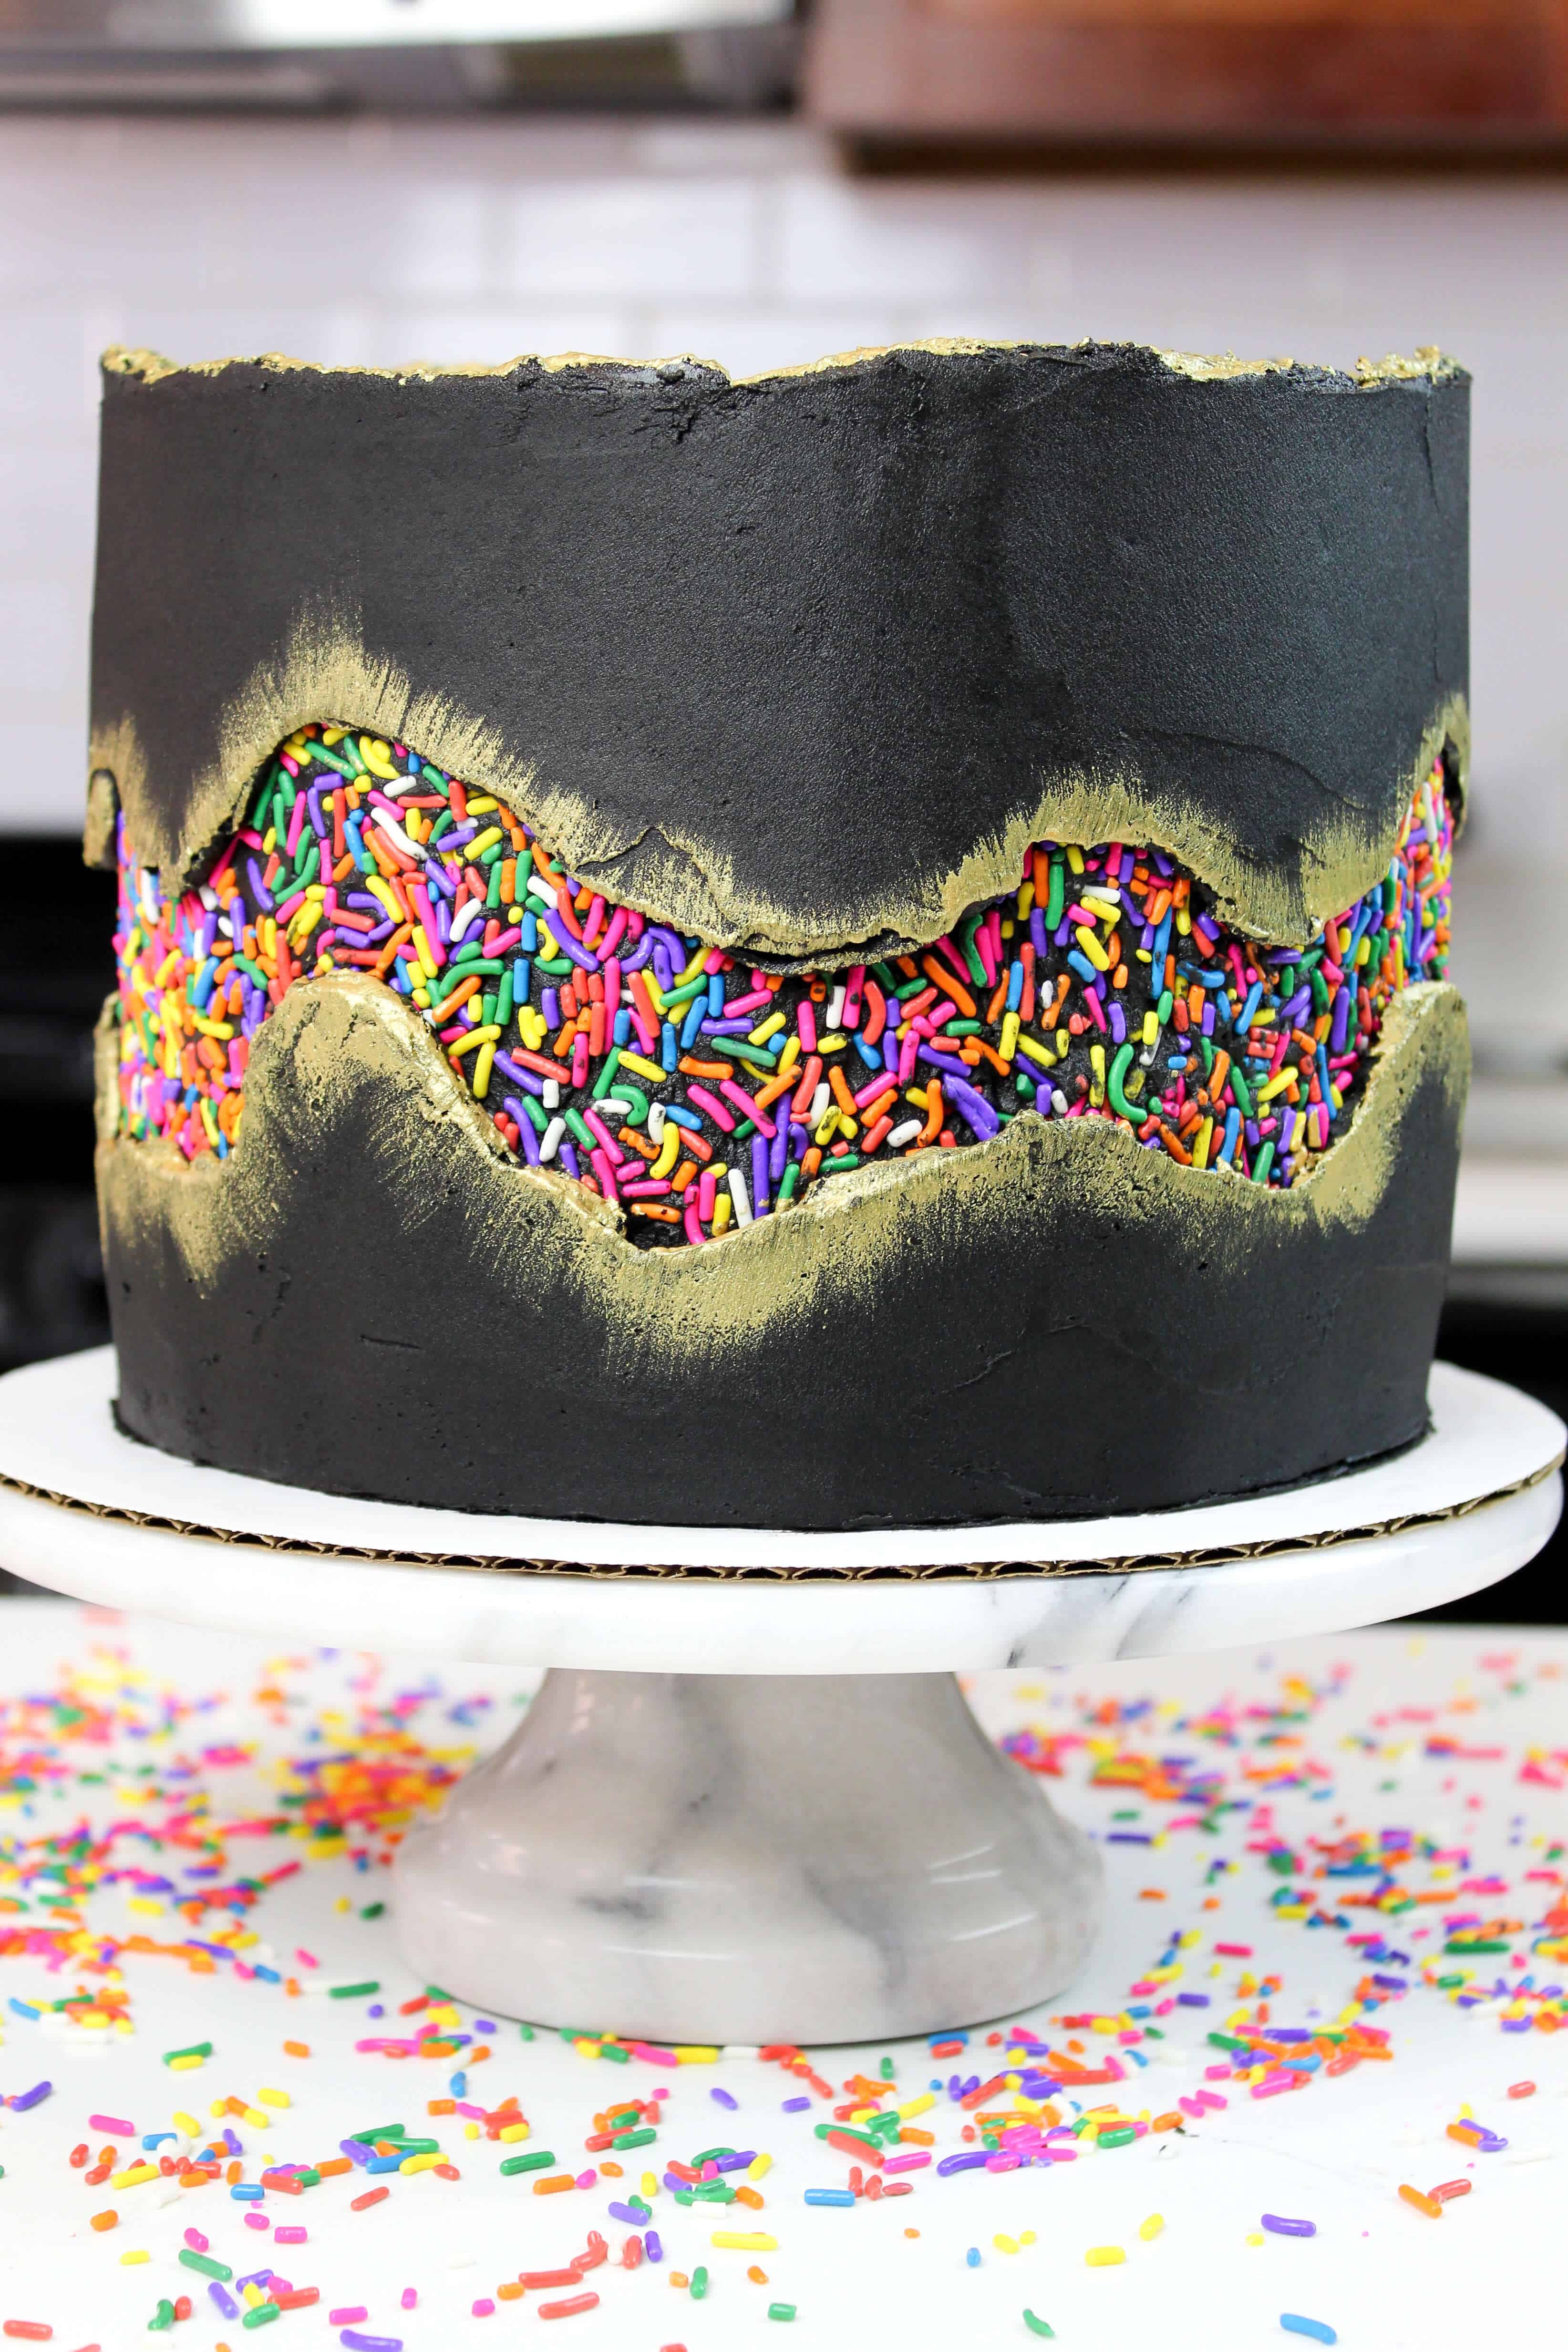
Sprinkle Fault Line Cake
Sometimes I try to resist cake trends, other times I hop right on them. This sprinkle fault line cake design was way too awesome for me to resist!!
It’s almost reminiscent of the whole geode cake trend, but takes on a different geological concept…fault lines!
I first became aware of this trend when I saw a fault line cake made by @cakedesignbysheri. She’s an amazing cake decorating, and definitely inspired me to try my hand at it!
Below are a few tips I learned along the way that will help you make the perfect fault line cake.
Converging Fault Lines: Make Your Fault Outline Larger Than You Want It To Be
I took an elective class on volcanoes in college (it was surprisingly harder than you’d think), and we learned all about convergent and divergent fault lines.
As I was decorating this cake, I realized that all fault line cakes are convergent fault lines. As you smooth the frosting, you have to apply pressure with your offset spatula and bench scraper.
This causes the frosting fault line to get pushed closer together. It also means that your fault line will end up being smaller once your cake is smoothed.
Keep this in mind when you pipe the outline of your fault line. It should be bigger than where you want it to end up.
What Types Of Sprinkles Should I Use?
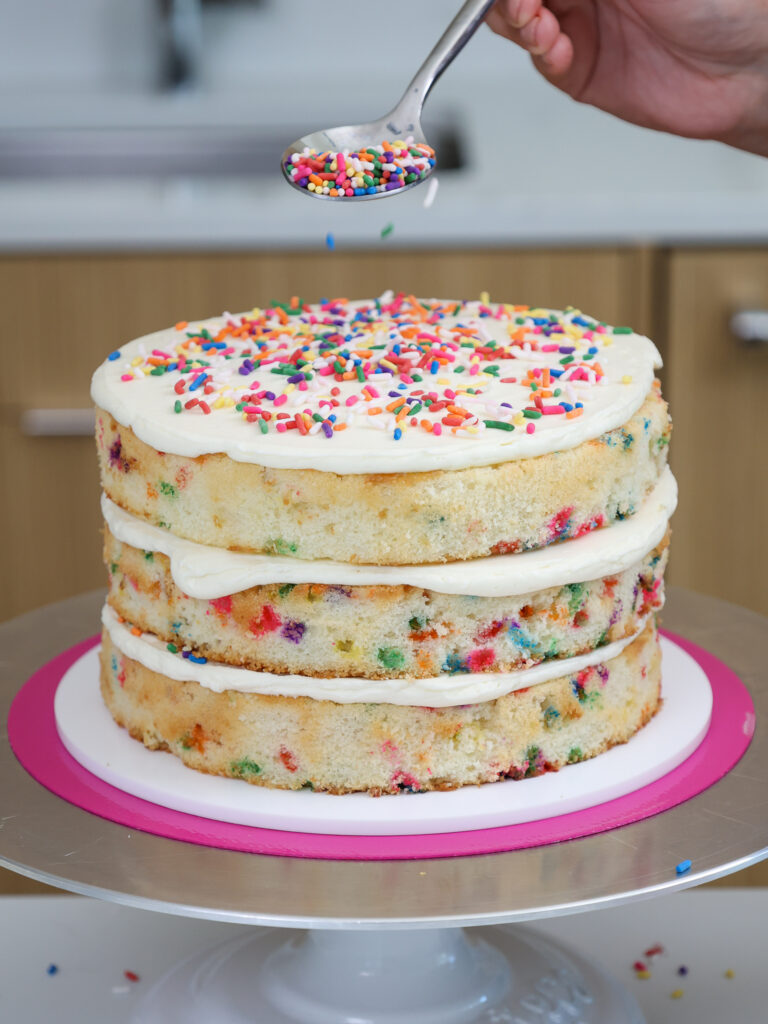
While you might think all sprinkles are created equal, sadly they’re not. When making this funfetti cake recipe, you have to be sure you use the right type of rainbow sprinkle.
The best sprinkles for making a funfetti cake are rainbow jimmies. They are the longer sprinkles, that you used to (and may still) put on your ice cream. These sprinkles keep their color, and won’t bleed into your batter.
This is important, because it will help your batter say white while you add it to your pans. This will allow the color of the sprinkles to really shine through once the layers are baked.
If you really want to be picky about your sprinkles, I also recommend getting a rainbow sprinkle blend that doesn’t have any chocolate/brown sprinkles in it. Funfetti cake layers look so much better without any brown sprinkles!
The type of sprinkle you should NOT use in your cake batter are the tiny, round, rainbow sprinkles. They’re called nonpareils, and they are the true enemy of funfetti cake layers.
Nonpareils will start to bleed their colors the second they’re stirred into your cake batter.
It will turn the batter a gross, pink/grayish batter. This can also happen if you let you rainbow jimmies sit in your batter for an extended period of time, and then try to stir it.
I used the same sprinkles to make my funfetti cake batter, fill the center of my cake, and fill my fault line.
However, you could use a fun sprinkle blend to decorate your fault line. My one word of caution is that if there are any large sprinkles or balls that stick out far, this can make it harder to smooth your fault line.
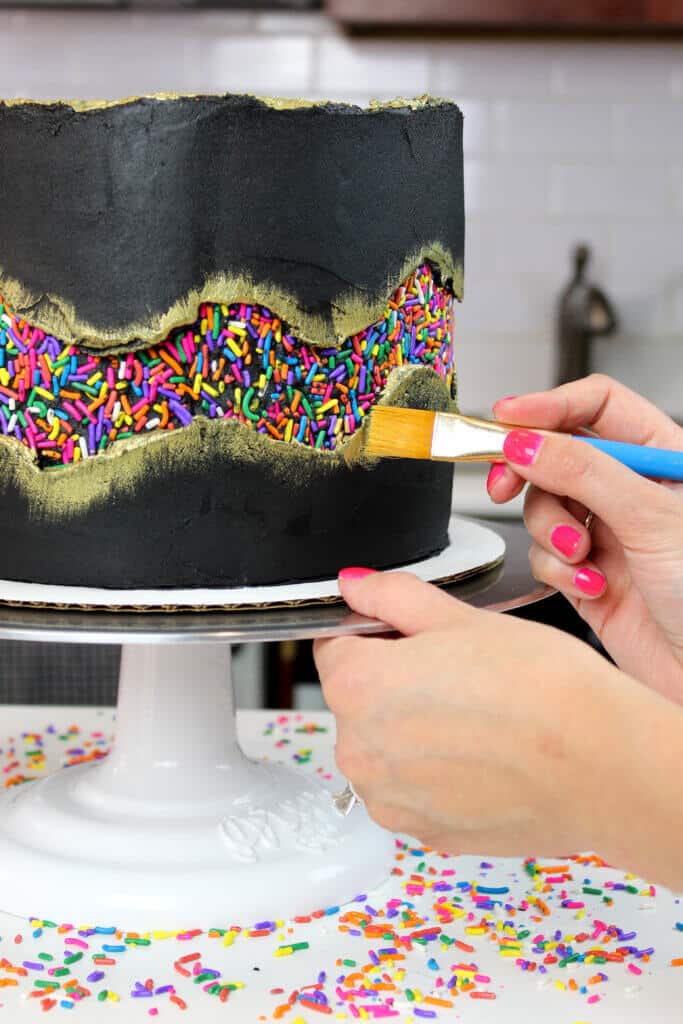
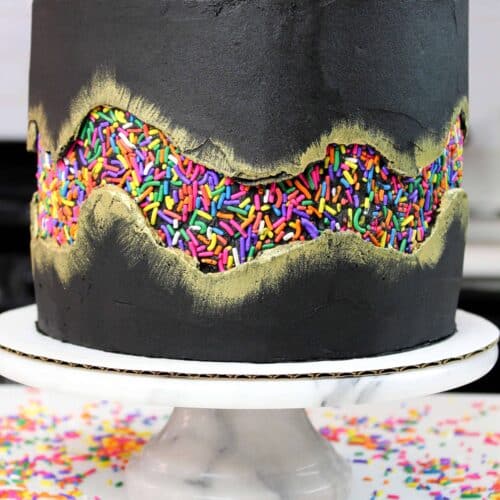
Add A Metallic Touch To Your Sprinkle Fault Line Cake
Add a metallic touch to your cake to really make your fault line pop!
Painting the edge of the fault line really makes it almost seem like it’s exploding. It also bright the cake up, and creates a great contrast with the black cocoa frosting.
I used edible art paint on this cake, which is so easy to use. However, you could also use a mixture of luster dust and a clear alcohol too!
I chose to use gold based on the sprinkles I used. Silver accents could look really cool with other sprinkle blend though!
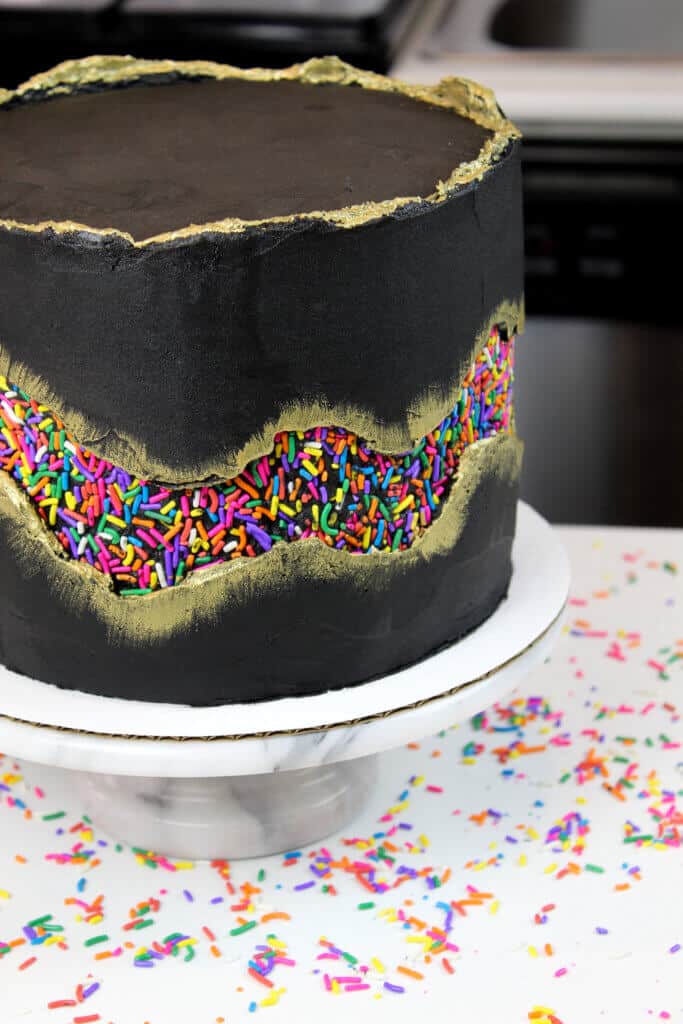
Leaving Texture On The Top Edge Of The Cake
As I decorated this cake, I decided to leave a textured edge around the top of it. This style became super popular after it was used on Prince Harry and Meghan Markle’s wedding cake.
I liked the way it looked on this cake, because it seemed to echo the whole rocky, geological theme. The rough edge looked kind of rugged, and I loved how it kind of tied the whole cake together.
Let Me Know What You Think!
If you try this sprinkle fault line cake recipe, please tag me @chelsweets and use the #chelsweets so that I can see your amazing creations!
Other Recipes You Might Like:

Sprinkle Fault Line Cake
Ingredients
Funfetti Cake
- 3 cups all-purpose flour 390 grams
- 3 cups granulated sugar 600 grams
- 2 1/2 tsp baking powder 10 grams
- 1 tsp fine salt 6 grams
- 1 cup unsalted butter, room temperature 226 grams – 2 sticks
- 2 tsp. vanilla extract or vanilla bean paste 8 grams
- 1 cup carton egg whites, room temperature or about 7 egg whites (235 grams)
- 1 1/2 cups buttermilk, room temperature 345 grams
- 1/8 cup vegetable or canola oil 28 grams
- 3/4 cup rainbow jimmies or long strand sprinkles 130 grams
Black Cocoa Buttercream Frosting
- 3 cups unsalted butter, room temperature 678 grams
- 10 cups powdered sugar 1250 grams
- 1 tsp fine salt 6 grams
- 1 1/3 cups melted dark chocolate, cooled for about 10 minutes 228 grams, 8 oz.
- 1 cup black cocoa powder 100 grams
- 1/2 cup heavy whipping cream, room temperature or whipping cream (115 grams)
- 1 Tbsp vanilla extract or vanilla bean paste 12 grams
- 1 tsp black gel food coloring
Decorations
- edible art gold paint or gold luster dust mixed with vodka
- kitchen paint brush
- Rainbow sprinkles
Instructions
Funfetti Cake Layers:
- Preheat oven to 350°F. Line four 7 inch pans round pans with parchment rounds, and grease with non-stick cooking spray.
- Mix together all dry ingredients (flour, baking powder, sugar, and salt) in a stand mixer with a paddle until fully combined.
- Mix chunks of room-temperature butter slowly into the dry mix, on a low speed. Continue to mix until no large chunks of butter remain, and the mixture becomes crumbly.
- Pour in egg whites, and mix on low until just incorporated. Mix in the buttermilk in two installments, on a low speed.
- Add in vanilla extract and oil, and mix at a low speed until fully incorporated.
- Scrape down the sides of the bowl with a spatula, then beat on low speed for about 15 seconds (the key is to mix until the ingredients are JUST incorporated, so that the batter isn’t over-mixed).
- Fold the sprinkles into the cake batter using a rubber spatula, just they’ve evenly distributed.
- Divide batter evenly between the prepared cake pans (about 475 grams per pan).
- Bake for 34-37 minutes, or until a toothpick comes out clean. Allow the pans to cool for 10 minutes, then run an offset spatula around perimeter of the pan to separate the cake from the pan.
- Place cake layers into the freezer for 45 minutes, to accelerate the cooling process. Once the layers are fully cooled, carefully flip the pans and remove the layers from the pans.
- Use a serrated knife to level the tops of the layers.
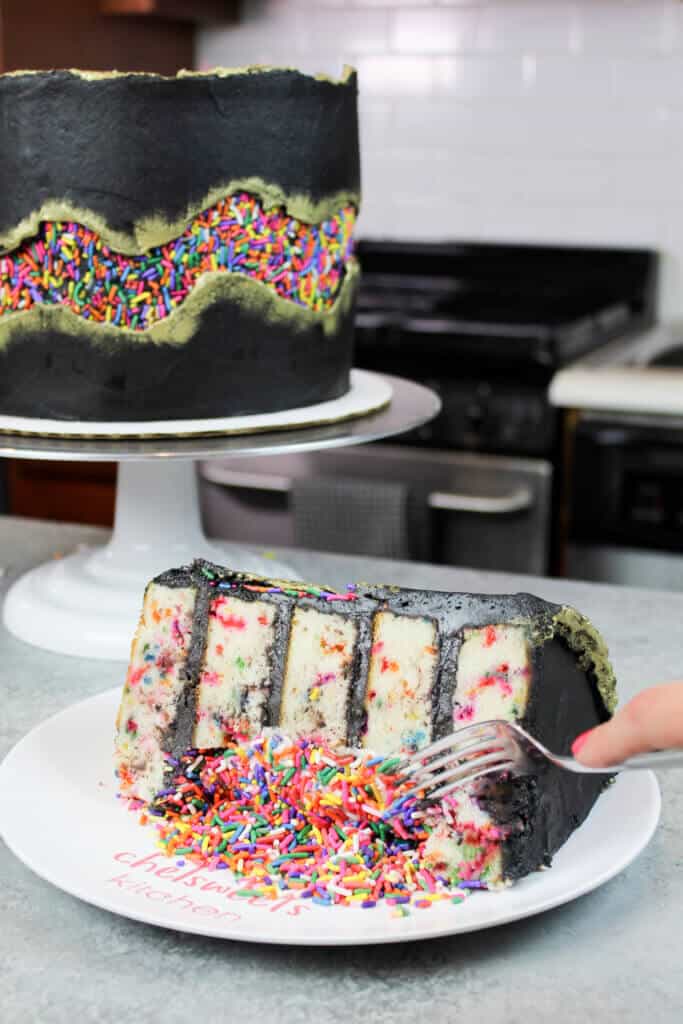
- Remove the centers from two of the cake layers, using a 3 inch circle cutter. This will create a chamber for the sprinkles once the layers are stacked.
Black Cocoa Buttercream Frosting:
- Beat the butter on a medium speed for 30 seconds with a paddle attachment, until smooth.
- Add in the sifted black cocoa, and mix on low until the cocoa is fully incorporated, and no clumps remain.
- Slowly add in the powdered sugar, 1 cup at a time. Alternate with small splashes of cream.
- Mix in the cooled, melted chocolate.
- Once fully mixed, add in the black gel food coloring, salt and vanilla.
- Beat on low until the ingredients are fully incorporated, and the desired color and consistency is reached.
- If the frosting is too thick, add an extra Tbsp of heavy cream. If it’s too thin, add in another 1/2 cup of powdered sugar.
- Stir by hand with a rubber spatula to get the frosting SUPER smooth. Place into large piping bags, to make assembling and decorating the cake easier.
To Assemble The Cake:
- Build the cake on a greaseproof cake board, using a dab of frosting to help stick the first cake layer to the board. Begin with one of the full cake layers
- Add an even layer of buttercream on top of the cake layer.
- Stack and frost the two cake layers that have had their centers removed.
- Pour rainbow jimmies into the center of the cake, to fully fill the space.
- Top of the remaining uncut cake layer.
- Apply a thin coat of frosting around the the cake, to fully cover the cake layers. Smooth using a bench scraper, then chill the cake in the fridge (10 minutes) or freezer (5 minutes) until the frosting is firm to the touch.
- Add a second, thin layer of frosting around the center of the cake. Gently press rainbow sprinkles into the frosting with your hands.
- Pipe a thick boarder around the sprinkles, and the fill in above and below the piping with additional frosting. Smooth using both an offset spatula and a bench scraper.
- Chill the cake for another 5 minutes in the fridge (or 20 in the freezer), and then paint the edges of the fault line and top lip of the cake with edible gold paint.
I’m very excited to make this cake but I need clarification, the recipe you posted is for four layers but I’m your pictures and video you have five…?
Hi Makenna! So sorry for any confusion. It’s a long story, but I just had an extra funfetti cake layer on hand from another project (the Mug cake I made for Live With Kelly And Ryan), and didn’t want it to go to waste! This recipe only makes 4, 7 inch cake layers.
Hi! This looks amaaazing ! Thank you so much for sharing:)
Just curious : What size cake pans do you use for the cake ?
Hi Gaby,
Thanks! I recommend using 7 inch cake pans for this cake! You want the cake to be tall enough to have space for a nice and wide fault line <3
question, after you put the sprinkles on the middle part of the cake, do you chill it before you put buttercream on the top and bottom?
Hi Eleanor,
I chill the cake once it’s crumb coated, but not after that! I just add on the additional frosting right after I add the sprinkles around the sides of the cake. Hope that helps, happy baking!
Do you chill your buttercream a bit between steps? I struggle to get a really smooth finish, and wonder if the buttercream is just too warm.
Hi Rachel! I don’t chill the buttercream, but I do chill my crumb coated cake, and use chilled cake layers! Both of the things help keep my layers from sliding, and help me get a smooth finish. If you think your buttercream is too warm, you can chill it for a tiny bit, or try adding less heavy cream next time to make it stiffer.
Hope that helps, happy baking!
Hi! I love everything you do!!! What do you think about using whipped ganache instead of the buttercream? I’m not a fan of buttercream. Thanks!
Betty
Hi Betty,
I think whipped ganache should work great in the place of buttercream, as long as you’re comfortable decorating with it 🙂 Happy baking!!
Hi, I was amazed with your cake creation… And I was thinking to give it a try, even in just a small pan. And I loved watching your video, so I can have an idea for my started online sweets business. More power and God bless
Hi Leony,
You’re too sweet 🙂 And you totally should! Baking is such a fun creative outlet, and can be a great business too 🙂
Hi… I love your recipes but have a question.. I want to decorate my fault line with an edible paint with edible glitter. What should I do going about that? Please advise must bake this in a few days!! :((((()))))
Hi Mary,
Apologies on the delayed response, I answer comments on Sundays! You can totally decorate a fault line cake with edible paint and edible glitter. You can either purchase edible paint on amazon or make your own using a mixture of gel food color and clear liquor, and then luster dust and alcohol liquor or clear extract. Hope that helps for the future!