I made my first attempt at a Brooklyn blackout cake a few years ago and decided it was time to revamp the recipe! I’ve dubbed this updated version my chocolate blackout cake.
I liked my original plan for this cake, but there were a few things I wanted to change.
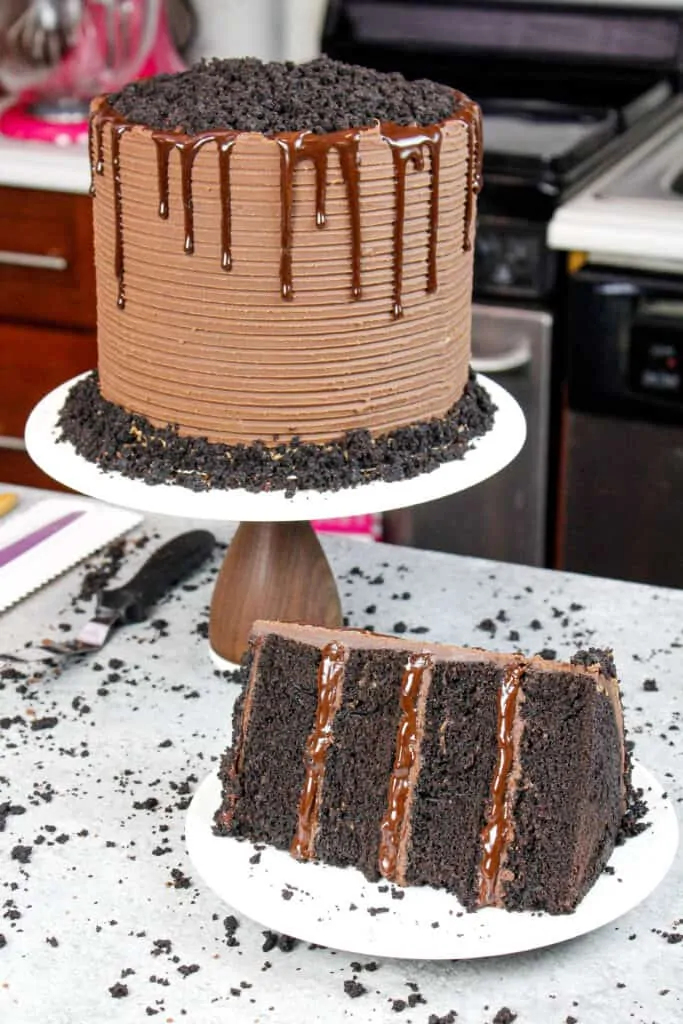
Changes Made to this Chocolate Cake Recipe
One of the most notable changes to this recipe involves the cake layers.
Originally I used my go-to chocolate layer cake recipe, because I was convinced I needed a layer cake with great structure to stand up against the moisture of the pudding.
Last time I made this cake with pudding from scratch. It wasn’t as thick as store bought pudding usually is (I probably needed to let it cook longer).
This go around I decided to make life a little easier and use store-bought pudding, and it was much thicker.
So I played around with my chocolate layer cake recipe, and actually swapped the all-purpose flour for self-rising cake flour.
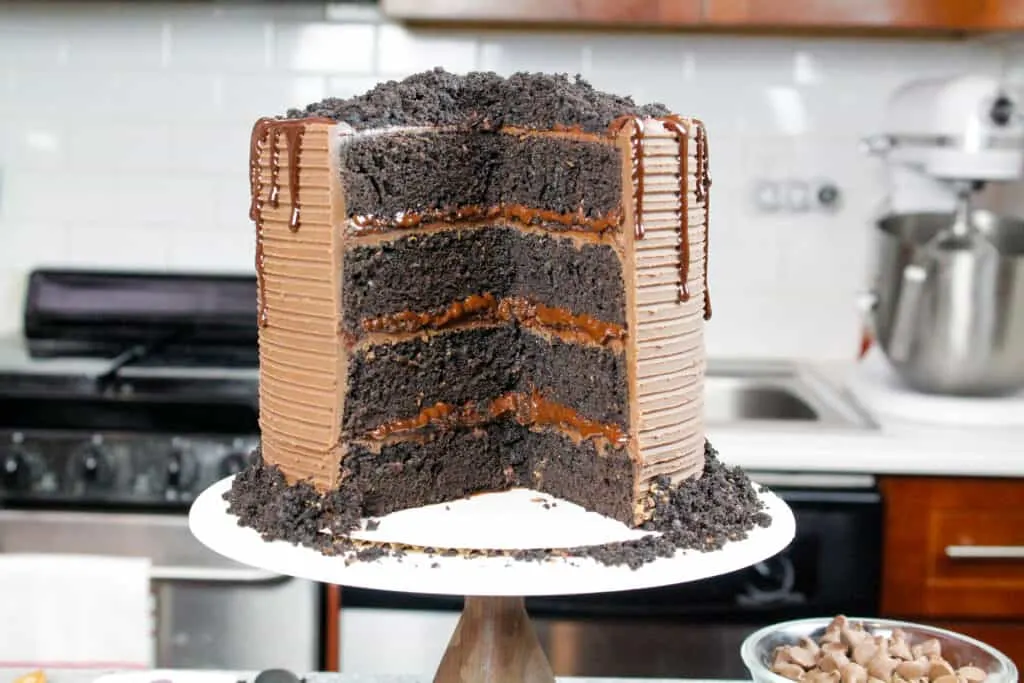
This simple swap had a huge impact on the texture of the cake layers. They were super moist, soft, and fluffy. They turned out exactly how I had hoped they would.
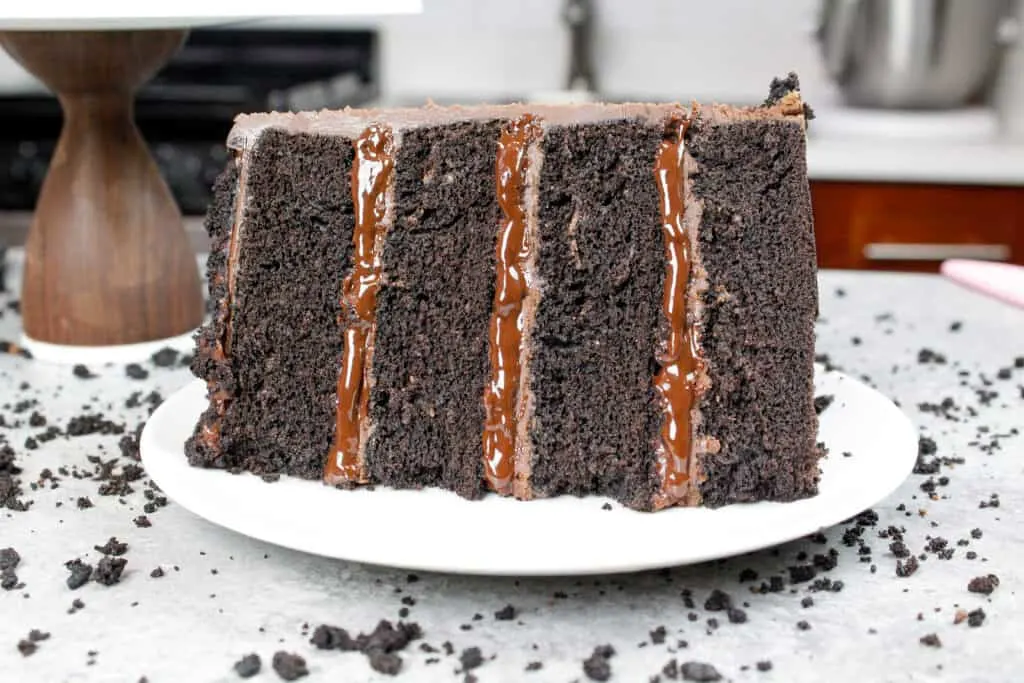
One thing to note, this does cause the cake layers to lose a bit of their structure. Now, this isn’t necessarily a bad thing!
Especially with this cake, since it’s frosted with (what I like to call) chocolate ganache frosting.
The chocolate ganache in this recipe sets pretty firmly once it’s on the cake, and this keeps everything in place. Even with the creamy chocolate pudding filling!
Cake Flour vs. All-Purpose Flour
Now some of you might be asking, why cake flour?? Your recipes usually use all-purpose flour!
Cake flour has less protein in it (usually 7-8%) than all-purpose flour (about 11%). Why does the protein content matter? Because this protein becomes gluten as you mix it with liquid.
More protein means more gluten, which means denser, chewier baked goods (think of a chewy loaf of sourdough bread!).
Cake flour makes baked goods that are fluffier, and lighter like angel food cake. They also give baked goods a finer crumb.
All of this probably sounds super good, right? I’m totally team light & fluffy. So why not ALWAYS use cake flour??
Sometimes you need a little bit more structure, like when you’re making a super tall layer cake!
I generally prefer using all purpose flour in my cake recipes. A lot of my cake recipes use a ton of buttermilk (like my vanilla layer cake recipe), and I find they’re already plenty moist and tender.
All purpose flour helps my cake layers keep their shape when they’re being stacked and/or carved in a layer cake. I also always have all-purpose flour on hand.
But I wanted this cake to be different. The ganache is pretty rich and dense, as the pudding is also pretty thick!
I wanted fluffier cake layers to help balance it all out, and to create a great variety of textures.
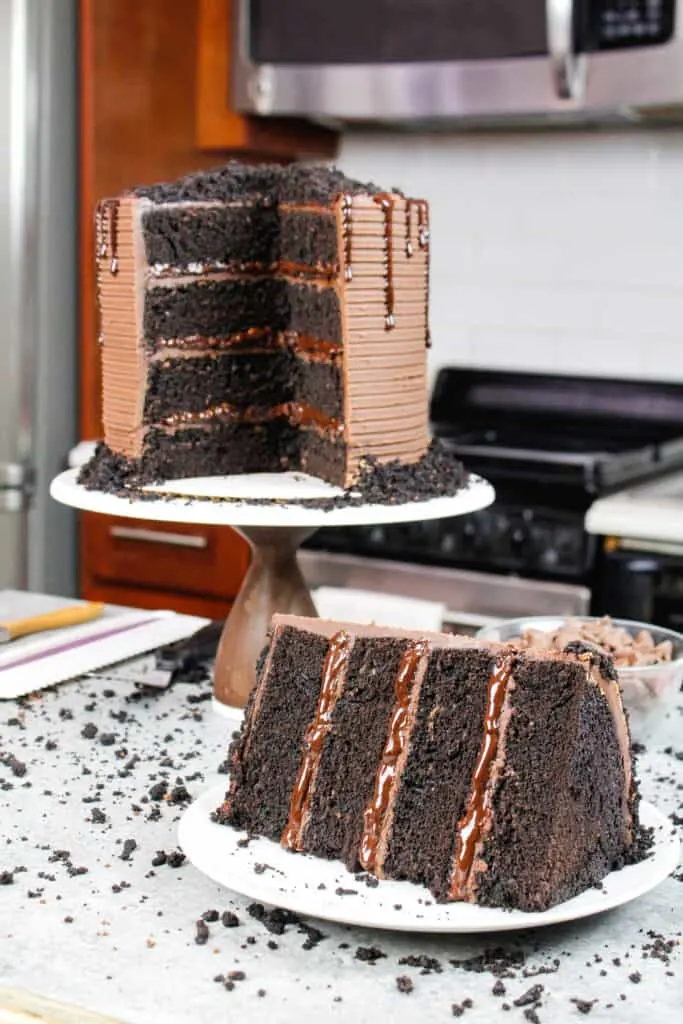
Why Self-Rising Cake Flour is Your Best Friend
Now onto the self-rising part. Self-rising cake flour is pre-mixed, so salt and baking powder are already perfectly incorporated into the cake flour.
I love this because it helps you skip three steps.
Rather than getting out the ingredients, placing them a in a separate bowl, and whisking them together, you just use 3 cups of your self-rising cake flour. Viola!
Surprisingly, my neighborhood grocery store ONLY carries the self-rising type of cake flour. If you forgot to grab some at the store or can’t find any, don’t worry.
For every cup of self-rising flour that this recipe calls for, measure out 1 cup of cake flour, then add 1/4 teaspoon salt and 1 1/4 teaspoons baking powder.
Or if you are more of a metrics person, here’s the same formula in grams.
You can swap 100 grams of self-rising flour with 100 grams of cake flour, plus 5 1/2 grams baking powder and 1 gram salt.
Using Store-Bought Pudding
Like I mentioned above, another change I made this time around was to use store bought pudding.
Don’t get me wrong, I’m all about making things from scratch. I haven’t bought frosting or a box cake mix in years.
But when you’re already putting so much energy and effort into the rest of the cake, I think it’s ok to take a little short cut.
I also can honestly say after making pudding from scratch, that I like the instant kind better!!
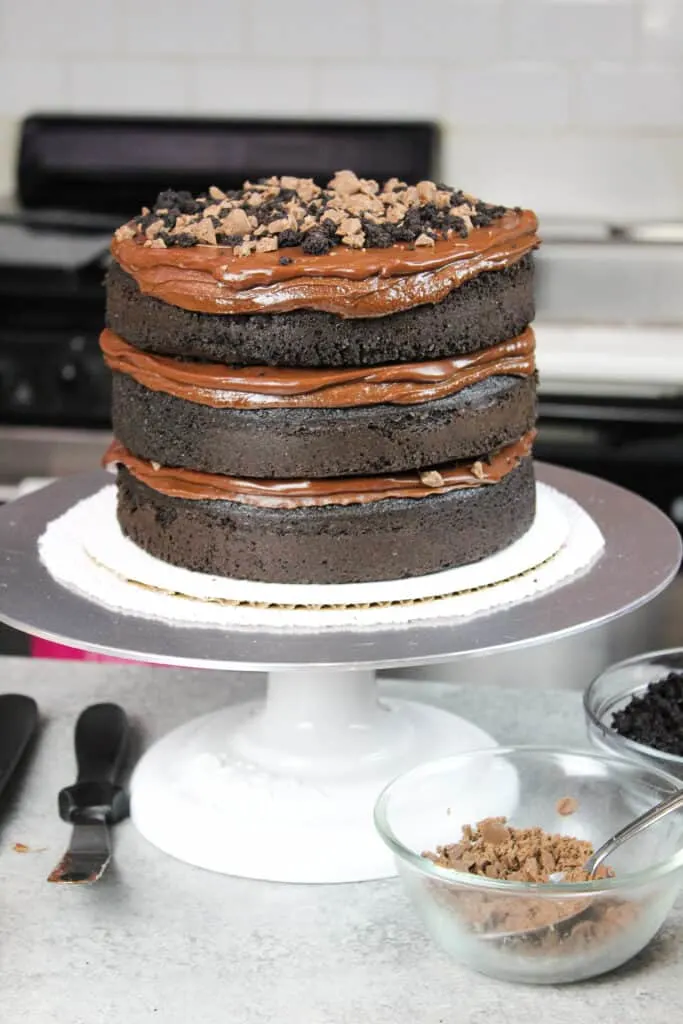
It’s texture is perfect to be used as a cake filling, especially when you add slightly less milk than the package calls for.
Instead of adding 2 cups, I chose to add 1 1/2 cups of whole milk. It gives the pudding a thick consistency, which you need when adding it to a layer cake like this.
Chocolate Ganache vs. Chocolate Frosting
This chocolate blackout cake is filled and covered with milk chocolate ganache. It sets quite firmly once it’s on the cake, which keeps that pudding filling in place!
I love it because it’s rich, but not too sweet. It also really lets the chocolate flavor shine through!
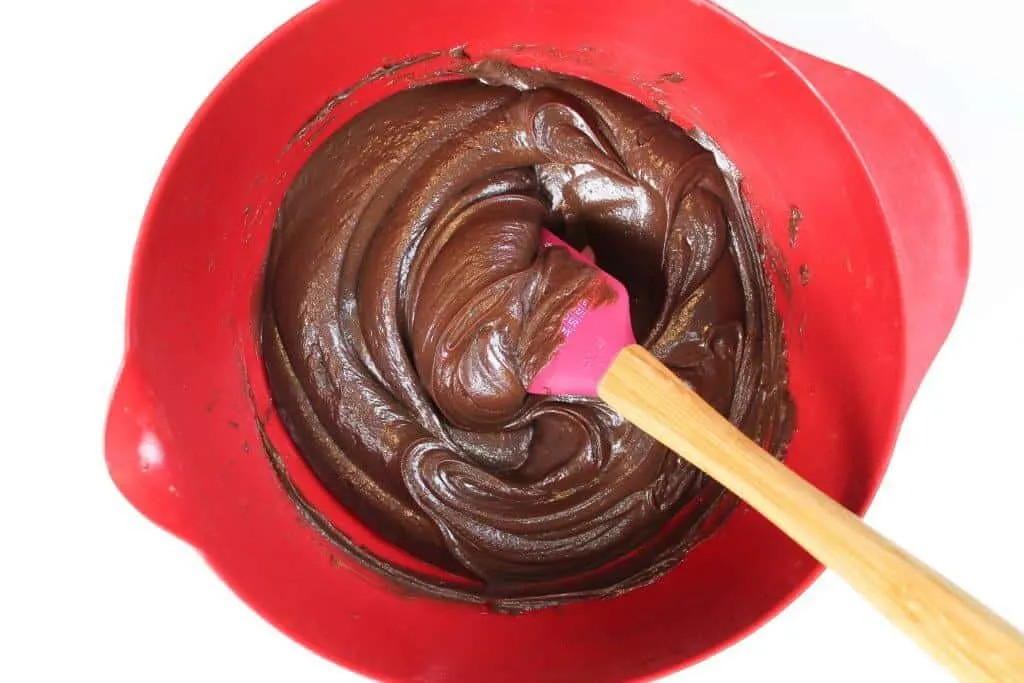
Be sure to use a good quality chocolate when making your ganache. I love using either Ghirardelli or Guittard.
If you’re not a fan of chocolate ganache, or just prefer regular chocolate frosting, feel free to cover this cake in whatever you like best!
I think this cake would also be amazing with my chocolate buttercream frosting.
Changing the Decoration of This Chocolate Blackout Cake
The final thing I want to touch on is the decoration of this cake. I’m going to be totally honest, I absolutely LOVED the way I decorated my original Brooklyn Blackout Cake.
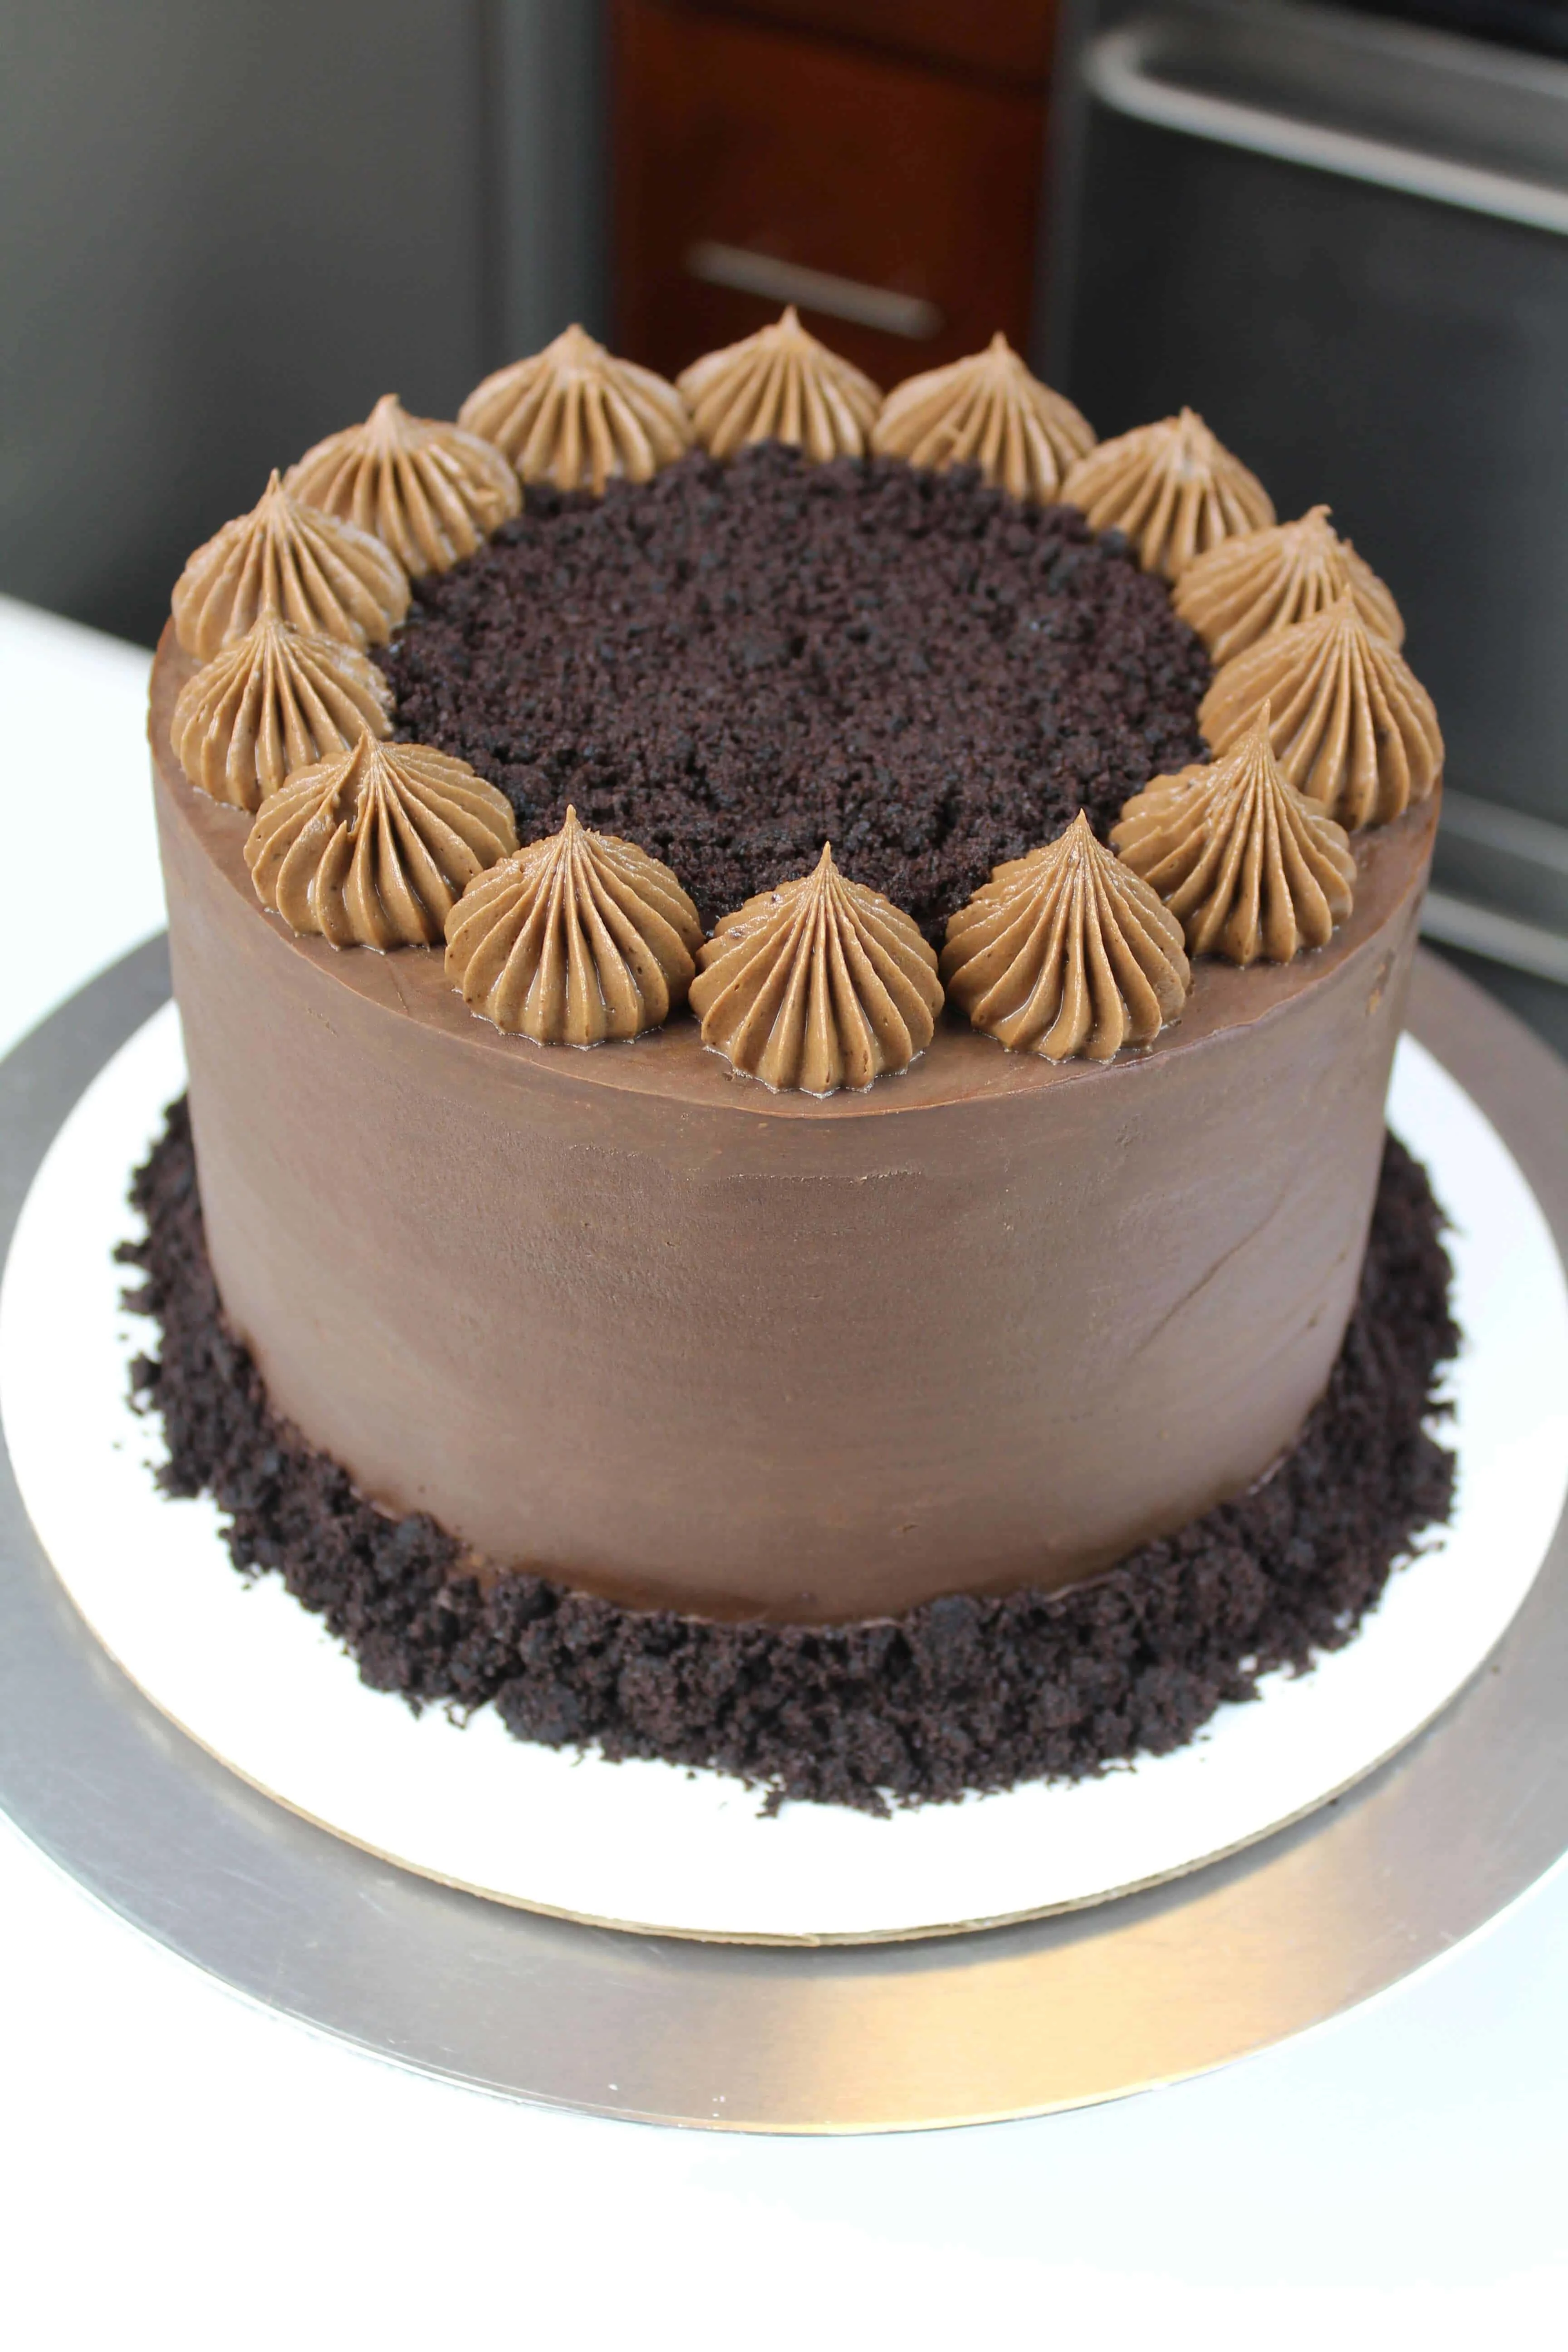
It was simple, yet stunning. I used an ateco 869 piping tip to make that gorgeous border, and it was exactly how I’d envisioned it.
But I couldn’t remake this cake and not change the decoration. I usually go into my kitchen with a plan, or sketch out my design for a cake ahead of time.
But I went a little rogue while making this chocolate blackout cake, and I didn’t really plan out how the cake would look. I just let myself go wild.
I used an icing comb to make some ridges in my ganache, left a rustic edge on top, and even added in a partial chocolate drip.
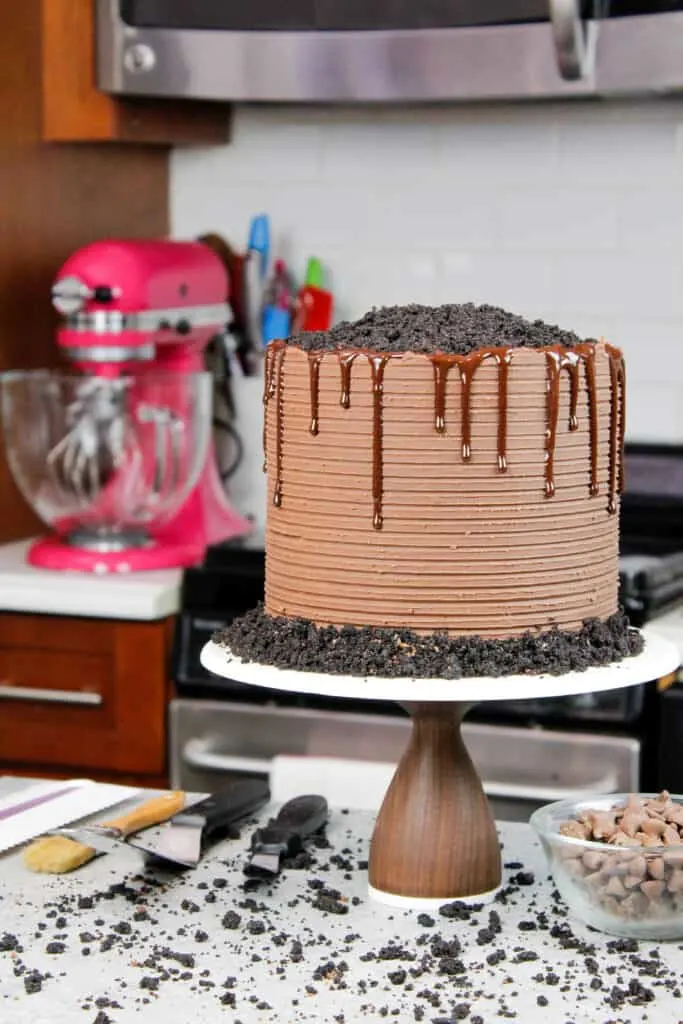
Feel free to let yourself get creative with the decoration too!
Sometimes we get so caught up in our plans and vision, we don’t allow ourselves to just have fun in the kitchen 🙂
Tips for Making the Best Chocolate Blackout Cake:
- Don’t overmix your batter, stir until the cake flour is just combined
- Be sure to properly measure your flour (spoon into the cup measure, then level) or use a kitchen scale
- Make sure your ingredients are at room temperature to help them mix together better
- Don’t level your cake layers until they are completely cooled.
- Save your cake tops and crumble them with a fork to decorate your cake
Making This Chocolate Blackout Cake in Advance and Storage Tips
Make your cake layers in advance and freeze them. It breaks the process up and make it more approachable.
Make your chocolate ganache ahead of time too, or save any leftover ganache! It can be stored in an airtight container in the fridge for up to a week, or in the freezer for up to a month.
You may need to heat it up in the microwave a bit once it’s thawed to get it to a workable consistency. Heat it in 30 second intervals at a medium power level until it’s a spreadable consistency.
A frosted cake can last in the fridge for up to a week, or in the freezer for up to a month. The ganache locks in all the moisture, keeping the cake fresh and delicious!
If you cut into the cake and have leftovers, use any remaining ganache to cover the cut section to keep it moist and store in the fridge for up to a week.
Let Me Know What You Think
If you try this chocolate blackout cake recipe, please tag me @chelsweets, and use the #chelsweets, so I can see your beautiful creations!!
Also leave a comment below, and a rating to let me know your thoughts.
Other Recipes You Might Like:
Chocolate Blackout Cake
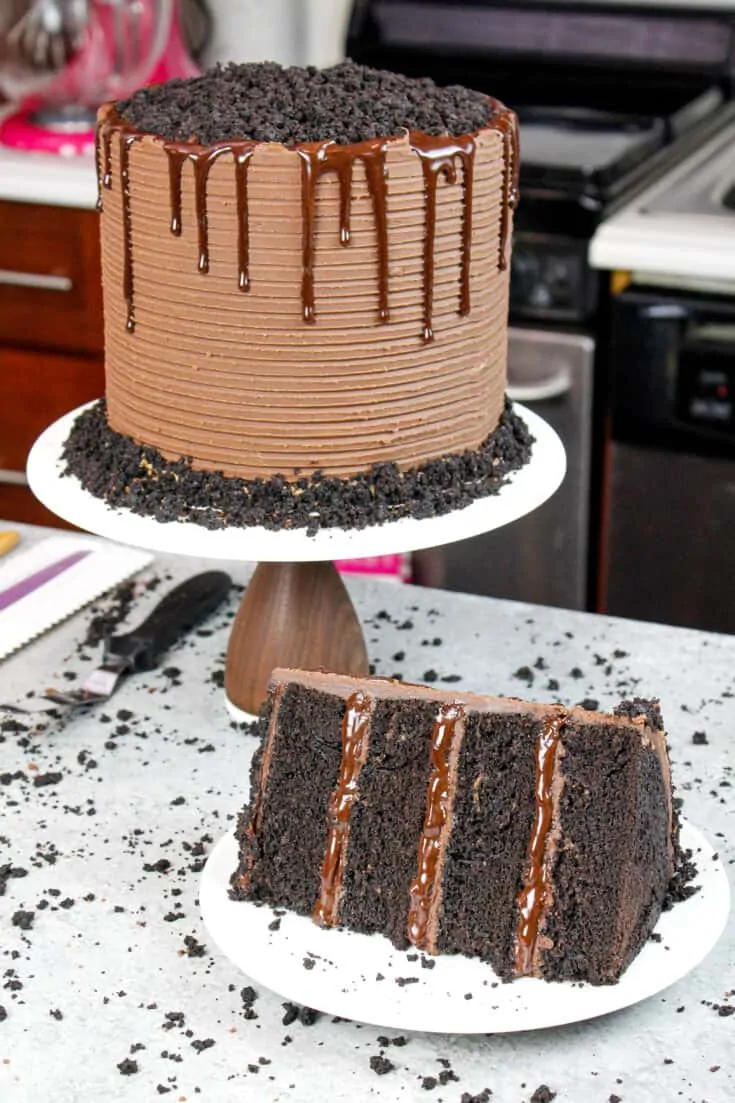
This chocolate blackout cake is a chocolate lover's dream! It's made with soft, incredibly moist cake layers that are filled with chocolate pudding and milk chocolate ganache frosting.
Ingredients
Chocolate Cake Layers
- 1 cup unsalted butter, room temp (2 sticks, 226 grams)
- 2 1/2 cups granulated sugar (500 grams)
- 4 large eggs, room temp (224 grams)
- 1 cup hot coffee or water (237 grams)
- 1 cup buttermilk, room temp (240 grams)
- 1 cup black cocoa (100 grams)
- 3 cups self-rising cake flour (360 grams)
Milk Chocolate Ganache Frosting
- 4 cups milk chocolate chips (650 grams, about 2 bags)
- 1 cup heavy cream, room temperature (230 grams)
Chocolate Pudding Filling
- 1 package instant chocolate pudding (3.9 oz package, 110 grams)
- 1 1/2 cups whole milk, cold (367 grams)
Instructions
Chocolate Cake Layers
- Begin by preheating the oven to 350 F / 175 C.
- Line four seven-inch or three 8-inch pans with parchment rounds and spray with non-stick baking spray.
- Add 1 cup butter and 2 1/2 cups sugar into the bowl of a stand mixer. Mix on high for 1 minute with a whisk attachment or with a hand mixer until the mixture becomes light in color.
- Add in 4 large eggs, two at a time. Mix on a medium high speed until they're fully incorporated.
- In a separate bowl, combine 1 cup of hot coffee, 1 cup of buttermilk, and 1 cup of black cocoa. Whisk until no clumps remain.
- Next, mix 1 cup of self-rising cake flour into the butter/egg mixture on a low speed. Scrape the sides of the bowl with a rubber spatula to ensure the flour is fully incorporated.
- Pour in half of the buttermilk/cocoa mixture and mix on a low speed.
- Repeat with the remaining cake flour and cocoa mixture.
- After adding in the last cup of self-rising cake flour, mix on low until the flour is just incorporated.
- Pour the batter evenly between the prepared pans. I like to use a kitchen scale to ensure each pan has exactly the same amount of batter.
- Bake for 31-33 minutes or until a toothpick comes out with a few moist crumbs.
- Allow layers to cool in the pans for about 10 minutes then run an offset spatula around the edge of the pans to help separate the layers from the pans.
- Place the pans in the freezer for about 45 minutes, to accelerate the cooling process. Once the layers are fully cooled, carefully flip the pans and remove the layers from the pans.
- Use a serrated knife to level the tops of the layers and place them in a bowl.
- Use a fork the break the cake tops into small crumbs, then cover with plastic wrap and set aside (for the decoration of the cake).
- If made in advance, wrap and freeze the cake layers for up to a month. Let them thaw at room temperature for about 20 minutes before assembling the cake. Using slightly chilled cake layers makes them easier to stack and frost.
Chocolate Ganache Frosting
- While the cake layers bake and cool, make the chocolate ganache "frosting."
- Place the 4 cups of milk chocolate in a heat proof bowl and set aside.
- Pour 1 cup heavy cream into a pot and heat on medium high until it is just beginning to bubble.
- Pour the hot cream over the chocolate, being sure all the chocolate is submerged / covered.
- Let this sit for 1-2 minutes, to allow the heat from the cream to melt the chocolate.
- Stir the mixture with a spoon or rubber spatula until the ganache is silky smooth and all the chocolate is melted.
- If any bits of chocolate still aren't melted, you can heat the ganache in the microwave for 30 second intervals until the cream and chocolate are fully incorporated.
- Cover with plastic wrap and set aside.
- If making this in advance, it can either sit out overnight or be refrigerated for up to a week. Let it thaw to room temperature then heat the in 30 second intervals until it is a workable consistency.
Chocolate Pudding:
- Add the instant pudding mix into a medium sized bowl, and add 1 1/2 cups cold whole milk.
- Whisk for about 1 minute, until the mixture thickens.
- Cover with plastic wrap and set aside.
- If made in advance, refrigerate for up to a week and use it cold straight from the fridge.
Assembling This Chocolate Blackout Cake:
- Stack and frost cake layers on a greaseproof cake board, using a dab of chocolate ganache to help stick the first cake layer to the board.
- Spread an even layer of chocolate ganache on top of cake layer as you stack them with a large offset spatula and spread 1/4 of the chocolate pudding on top of each layer of ganache.
- Cover the cake in a thin crumb coat of chocolate ganache. Smooth using a bench scraper, then chill the cake in the fridge (10 minutes) or freezer (5 minutes) until the ganache is firm to the touch.
- Add a second, thicker layer of chocolate ganache to the cake, and smooth using a bench scraper. If desired, use an icing comb to create texture around the sides of the cake.
- Decorate as desired! I chose to use the crumbled cake tops and leftover pudding to cover the top of the cake, and placed some crumbs around the base. I also added on a chocolate ganache drip for fun!!
Notes
Make your cake layers in advance and freeze them. It breaks the process up and make it more approachable.
Make your chocolate ganache ahead of time too, or save any leftover ganache! It can be stored in an airtight container in the fridge for up to a week, or in the freezer for up to a month. You may need to heat it up in the microwave a bit once it's thawed to get it to a workable consistency. Heat it in 30 second intervals at a medium power level until it's a spreadable consistency.
A frosted cake can last in the fridge for up to a week, or in the freezer for up to a month. The ganache locks in all the moisture, keeping the cake fresh and delicious!
If you cut into the cake and have leftovers, use any remaining ganache to cover the cut section to keep it moist and store in the fridge for up to a week.
Nutrition Information
Yield
24Serving Size
1Amount Per Serving Calories 445Total Fat 20gSaturated Fat 12gTrans Fat 0gUnsaturated Fat 6gCholesterol 62mgSodium 84mgCarbohydrates 59gFiber 2gSugar 40gProtein 7g

Chantal
Sunday 7th of May 2023
My compliments for such a great tutorial in all your recipes. It makes it so much easier to follow.
Chelsweets
Monday 8th of May 2023
Aw thank you Chantal!! :)
Salted Caramel Apple Cake: Delicious, From-Scratch Recipe
Sunday 12th of June 2022
[…] Vanilla Cake Chocolate Blackout Cake Chocolate Drip Cake Blackberry Peach Cake […]
Euodias Lee
Monday 2nd of May 2022
Hello, May I know how much should I use for the following as I'm making a six inch version of your cake: 1) chocolate pudding (OG: 1 package instant chocolate pudding - 3.9 oz package, 110 grams) and 1 1/2 cups - 367 grams whole milk, cold) 2) milk chocolate ganache (OG: 650 grams milk chocolate, melted down with 217 grams heavy cream) – to be made in advance 3) 1 cup chocolate frosting (OG: 1 cup American buttercream plus 2 Tbsp cocoa, and 2 additional tsp heavy cream)
Thank You
Chocolate Chip Banana Bars - Soft, Chewy Squares
Monday 14th of March 2022
[…] Banana Bread S’mores Cupcakes Chocolate Blackout Cake Classic Banana Bread Yield: 16 […]
Dan
Thursday 10th of February 2022
Which is better for a wedding cake this one or the moist, I mean 3 or for leyers cake?