
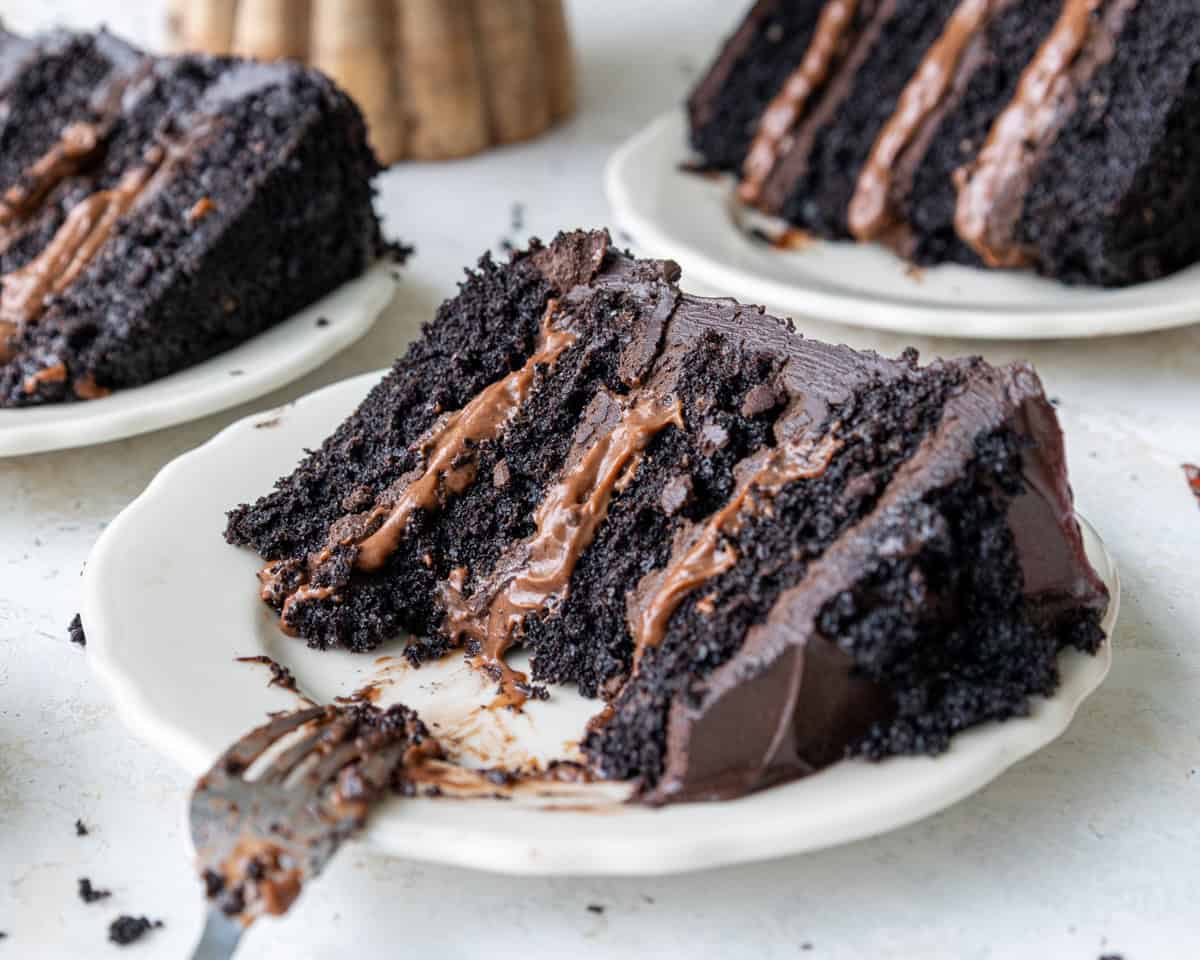
Chocolate Blackout Cake
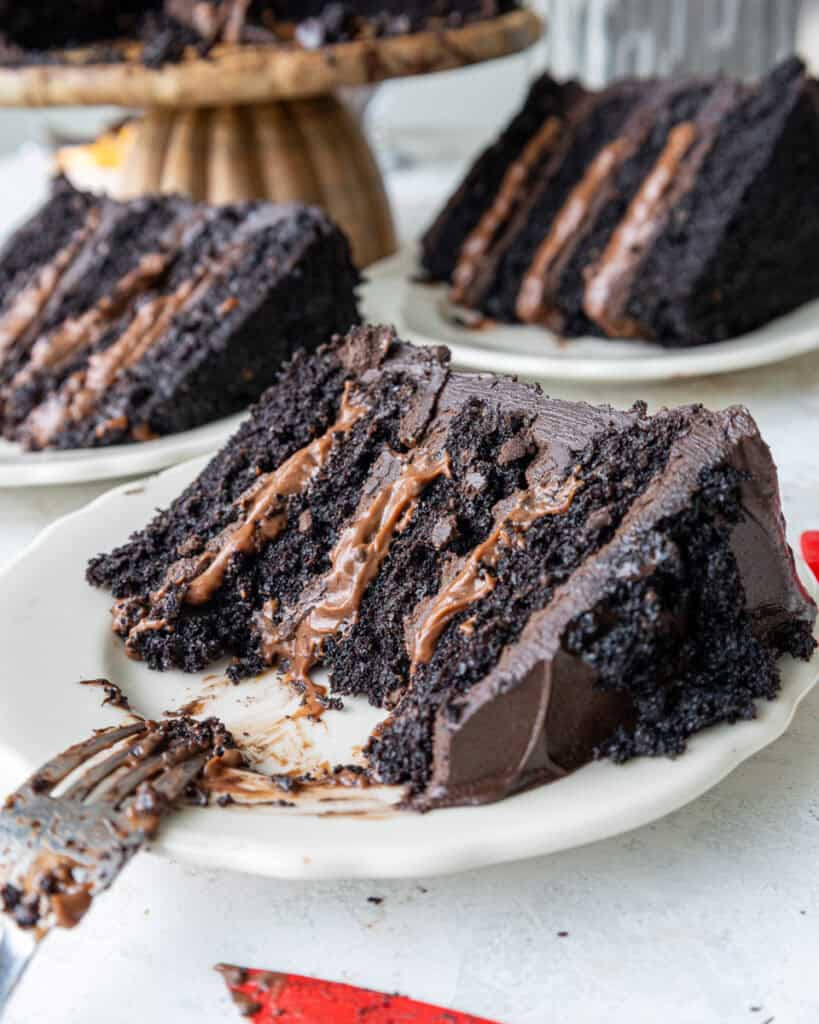
This chocolate blackout cake is rich, dark, and ultra moist, with a chocolate pudding filling, silky dark chocolate frosting, and classic cake crumbs.
What Is Chocolate Blackout Cake?
Chocolate blackout cake is a Brooklyn-style chocolate cake made with dark chocolate cake layers, chocolate pudding filling, rich chocolate frosting, and chocolate cake crumbs.
This version keeps all the classic blackout cake flavor, but makes it easier to pull off at home with a thicker pudding filling and soft, ultra-chocolatey cake layers.
If you want a blackout cake recipe that looks dramatic, tastes intensely chocolatey, and is still approachable to make, this is it.
This Recipe at a Glance
- Flavor: rich dark chocolate
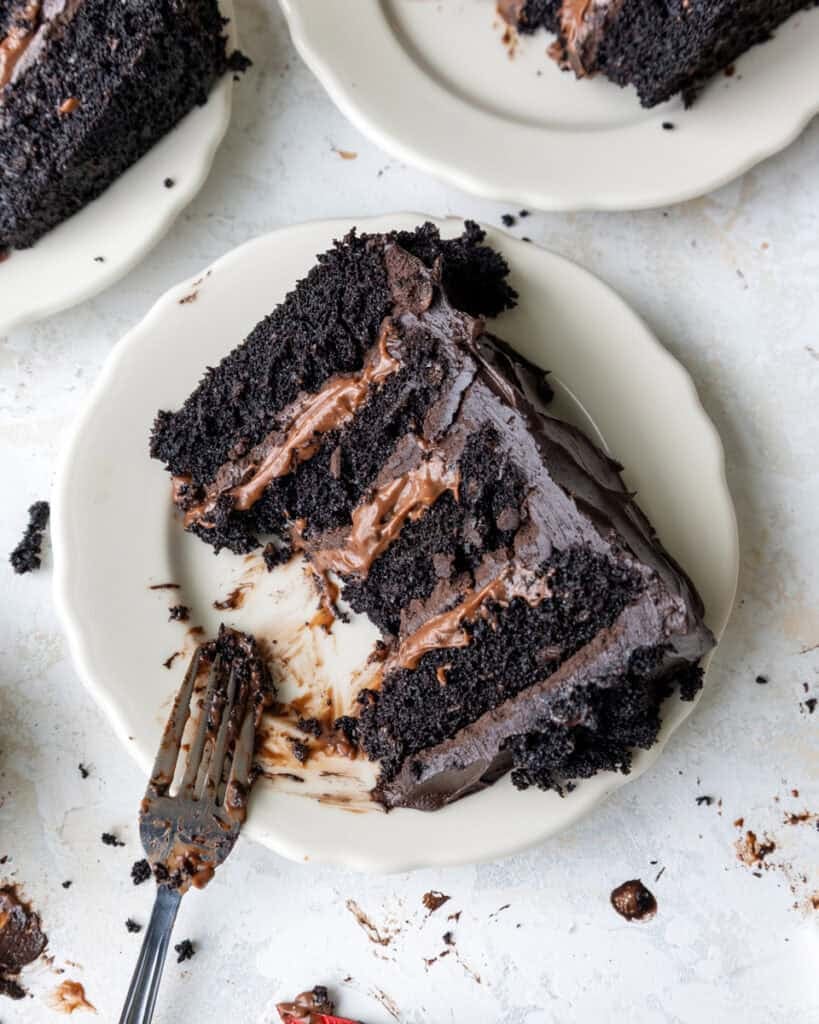
- Texture: soft cake + thick pudding + silky chocolate frosting
- Difficulty: intermediate
- Best for: birthdays, celebrations, serious chocolate lovers
Key Ingredients and Substitutions
A few key ingredients give this chocolate blackout cake its signature flavor and texture.
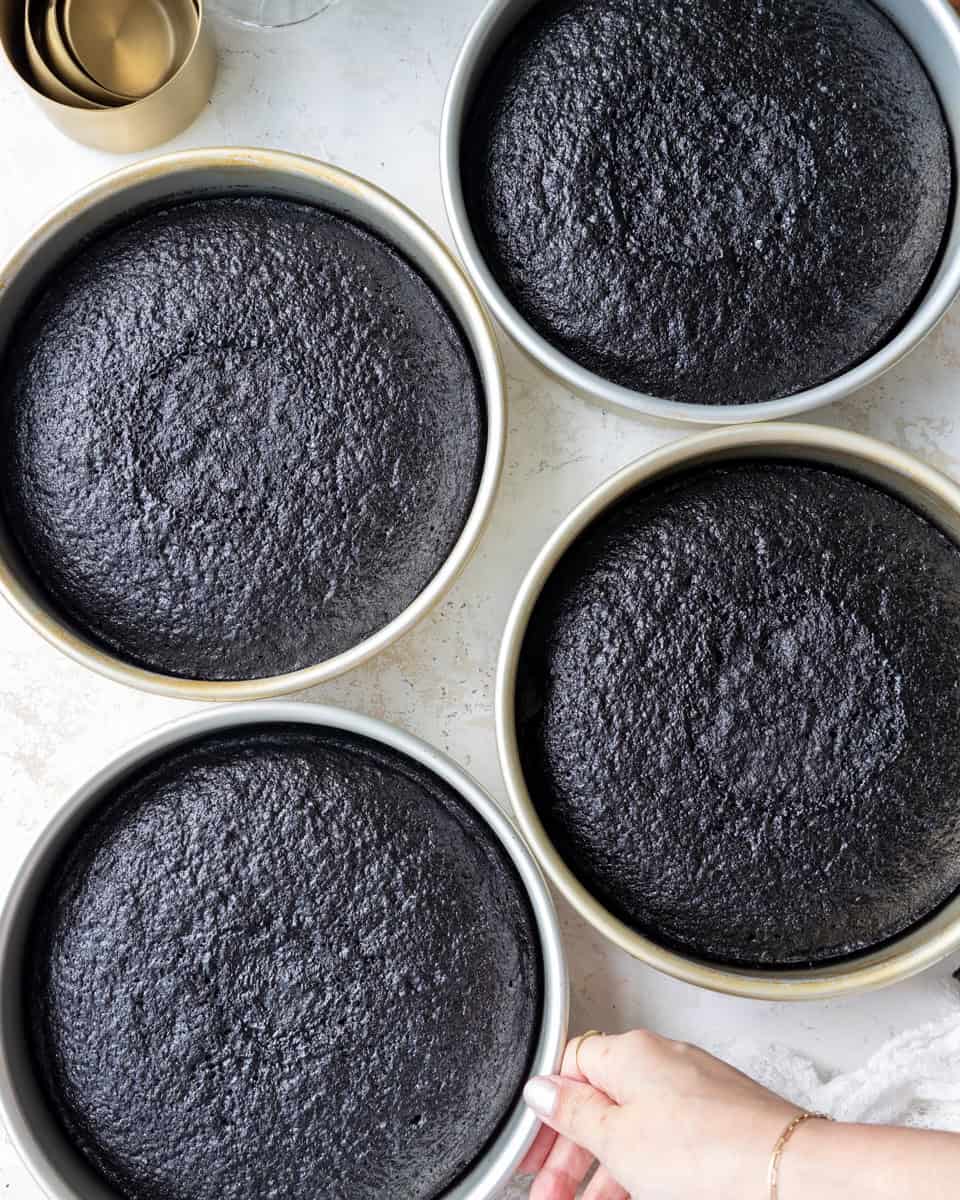
Black cocoa powder gives the cake its dark color and deep chocolate flavor. If needed, you can use Dutch-process or regular unsweetened cocoa powder instead, but the cake will be lighter in color and won’t have that classic blackout cake look.
All-Purpose Flour can be substituted with gluten-free flour or cake flour if needed.
Buttermilk keeps the cake moist and adds a slight tang that balances the chocolate. If you don’t have any on hand, stir 1 tablespoon lemon juice or white vinegar into 1 cup of milk and let it sit for a few minutes before using.
This recipe also uses warm coffee or water. Coffee helps deepen the chocolate flavor without making the cake taste like coffee, but hot water works well, too.
For the filling, instant chocolate pudding is an easy shortcut that gives this blackout cake its thick, creamy center. I recommend using this recipe if you want to make homemade chocolate pudding.
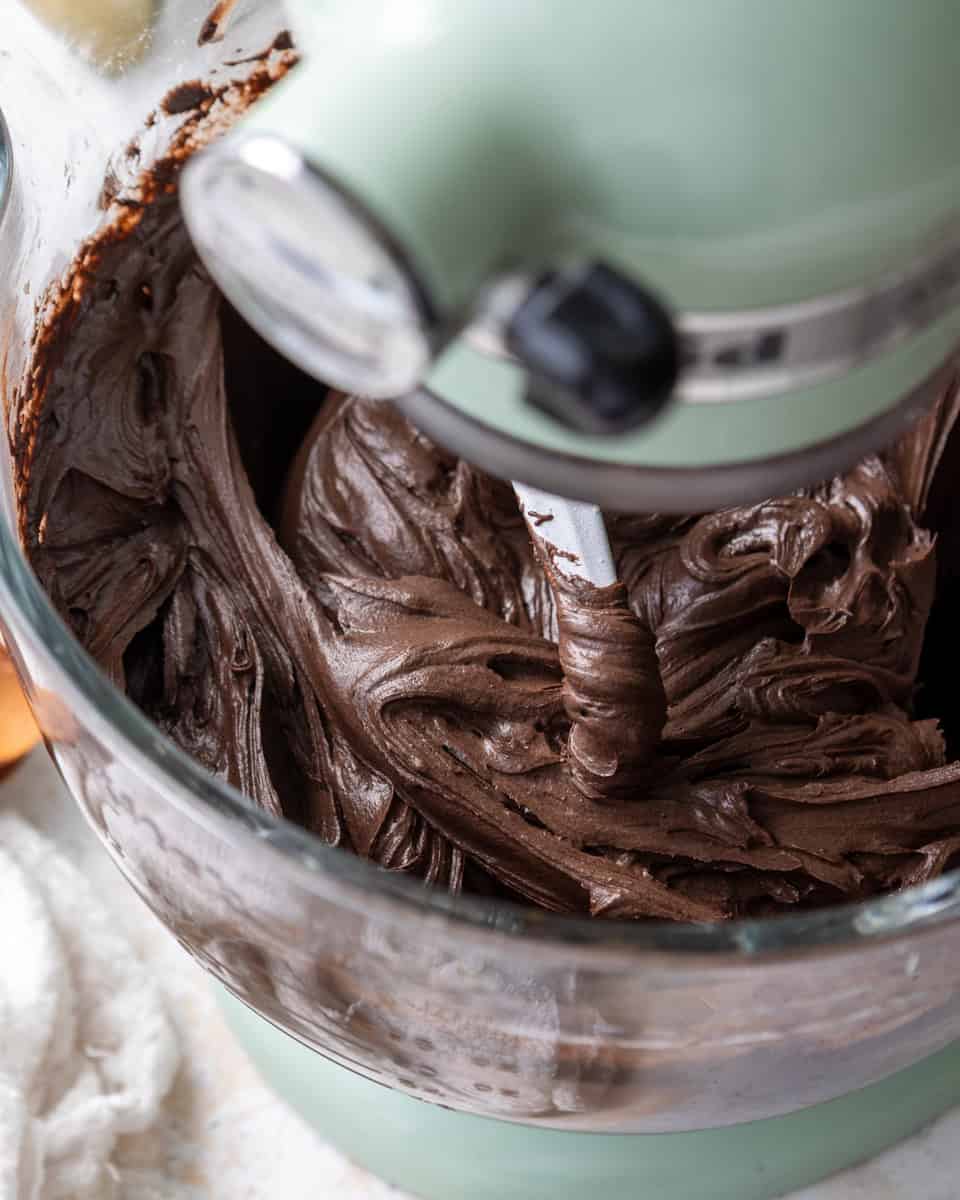
The frosting is a simple dark chocolate buttercream, which adds rich chocolate flavor and helps hold the cake together. Use a good-quality chocolate for the best flavor. You can swap in chocolate ganache if you prefer a less-sweet frosting.
How to Make Chocolate Blackout Cake
Let’s walk through how to make this chocolate blackout cake to make sure it turns out as amazing as possible.
Step 1: Make the Chocolate Cake Layers
Start by making the chocolate cake layers and letting them cool completely.
Once the layers are cool, level the tops and save those cake scraps, because you’ll use them to make the signature blackout cake crumbs for decorating.

Step 2: Make the Chocolate Frosting and Pudding Filling
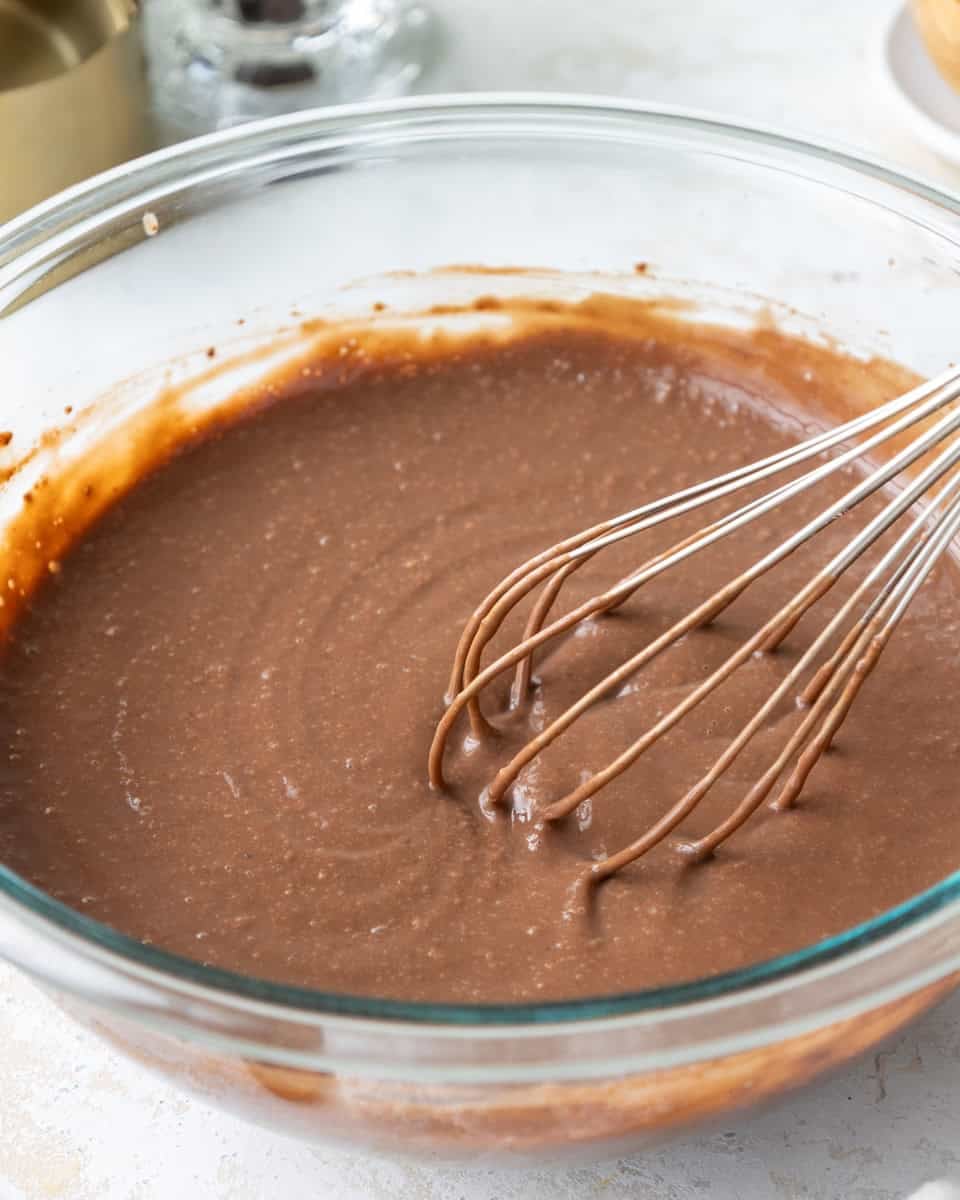
While the layers cool, make the dark chocolate frosting and chocolate pudding filling. The frosting should be smooth and spreadable, not warm or runny, so give it time to cool and thicken before using it.
For the pudding, whisk the instant pudding mix with the amount of milk that the box calls for so that it sets up thick enough to hold between the layers.
Step 3: Assemble the Chocolate Blackout Cake
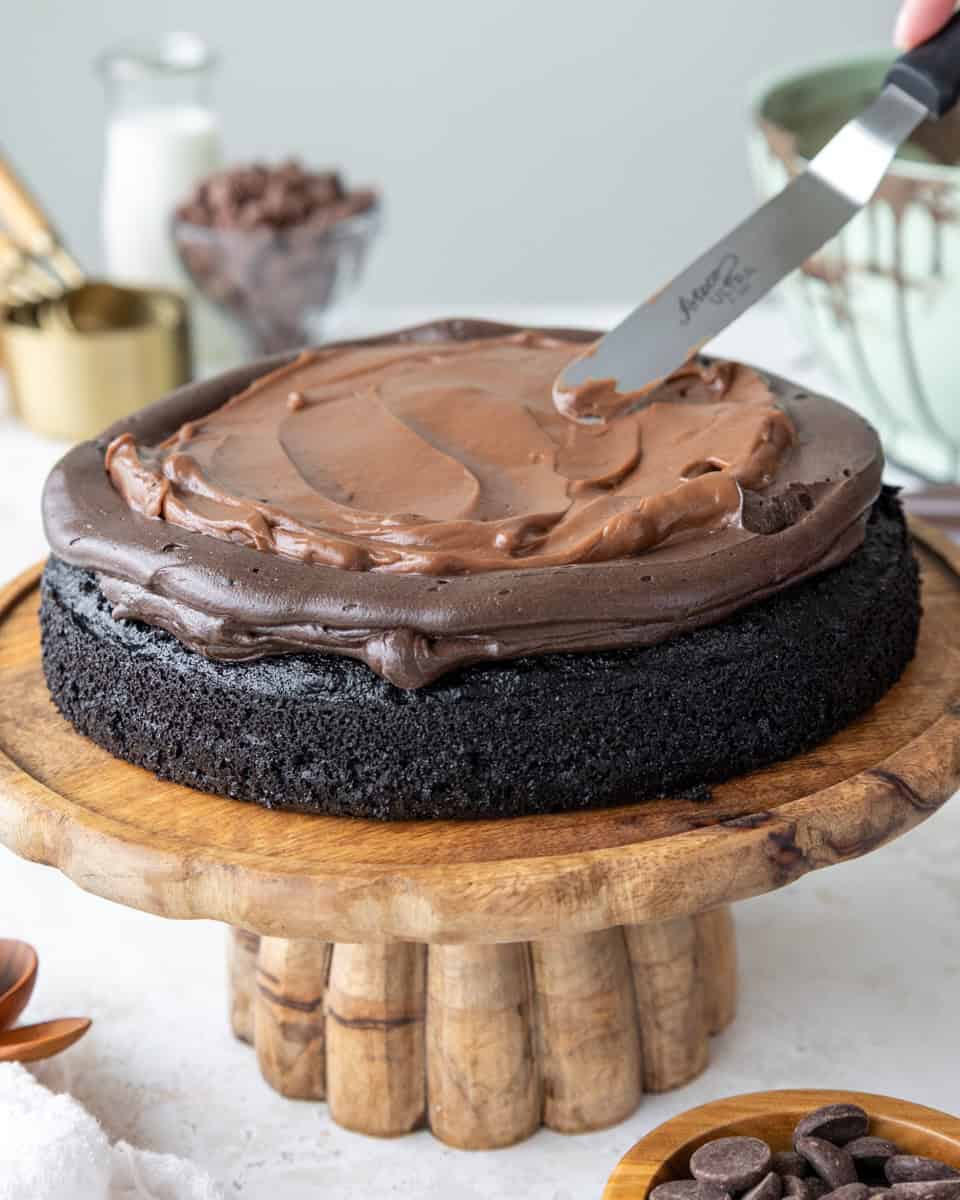
To assemble the cake, spread a layer of frosting on top of each cake layer, then add a ring of frosting and fill it with chocolate pudding.
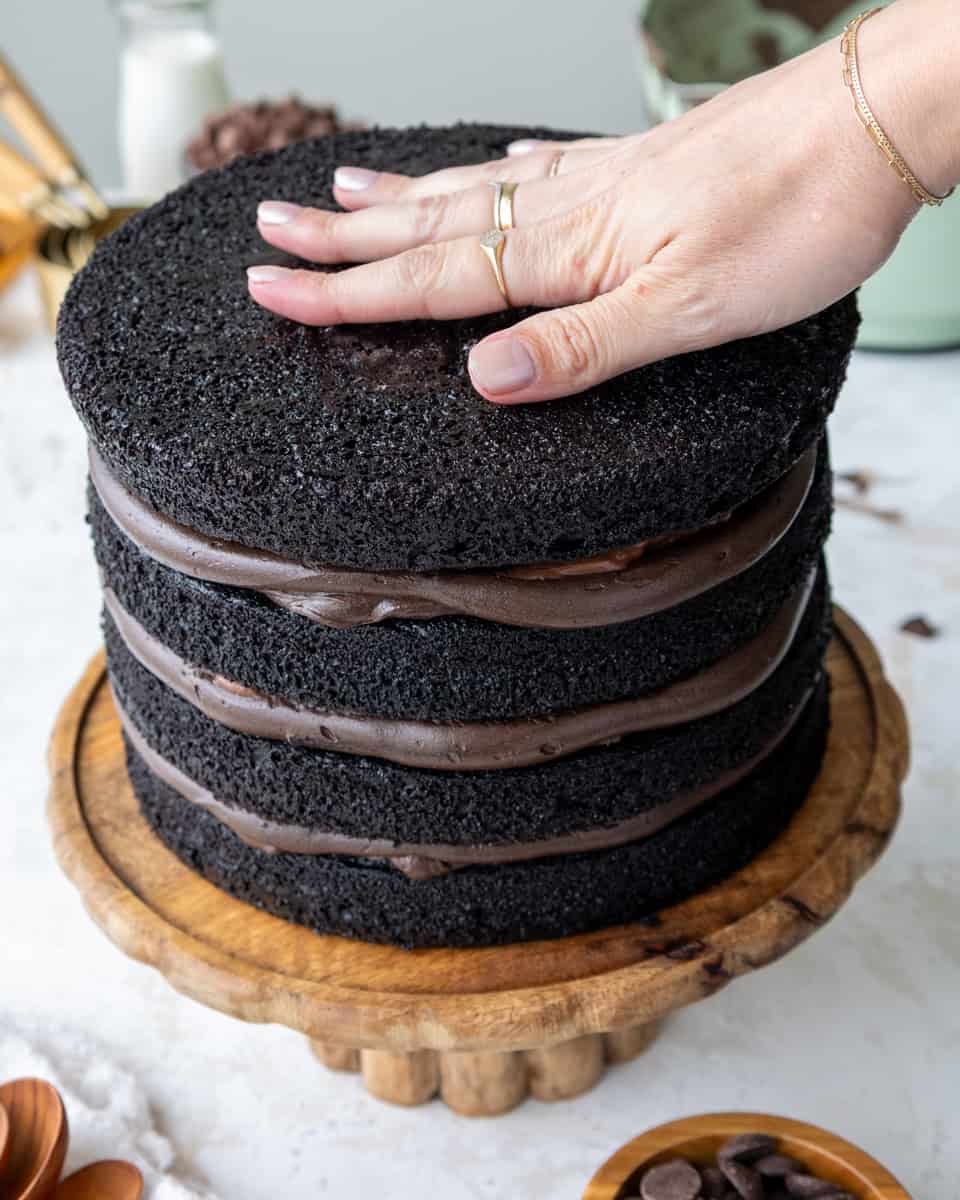
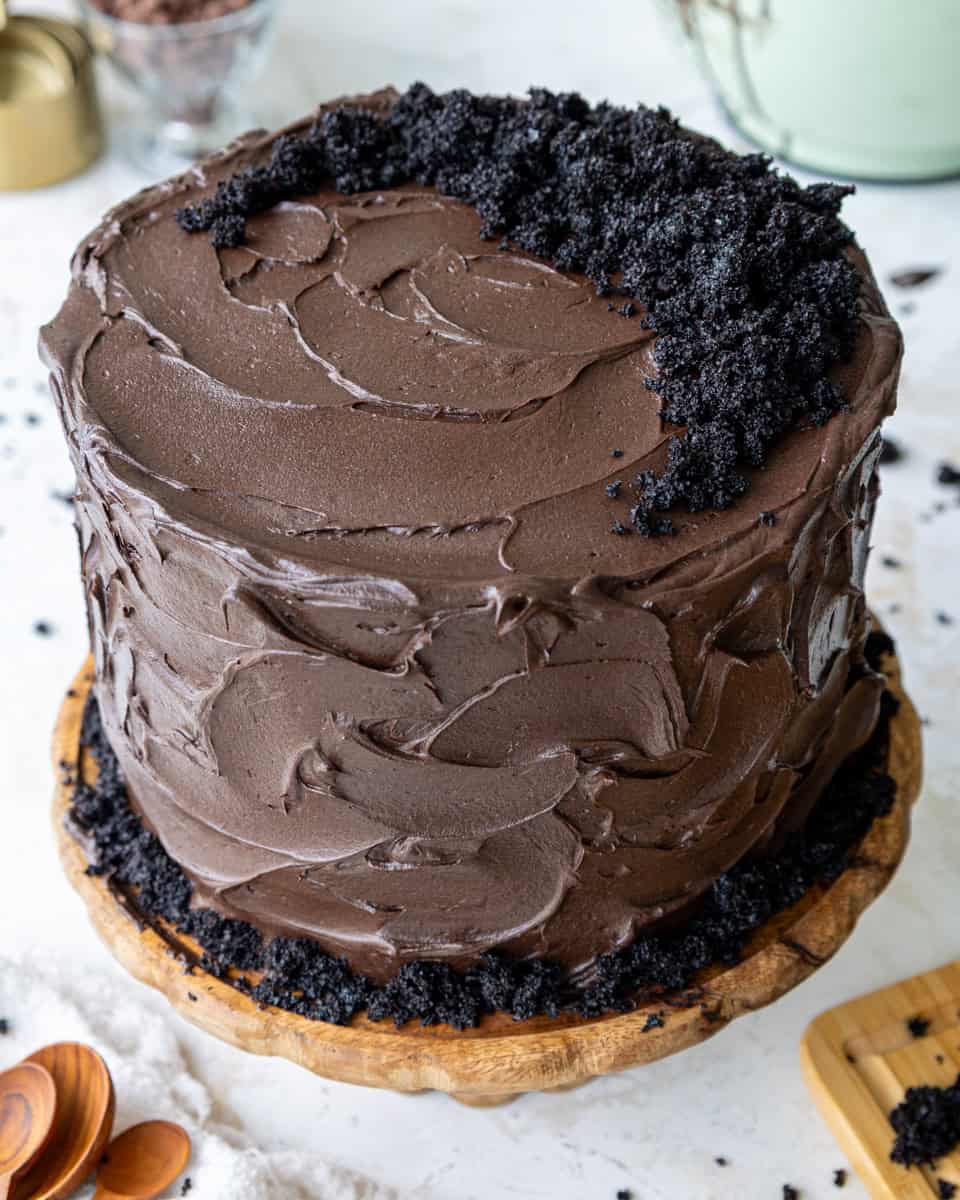
Repeat until all the layers are stacked, then chill the cake until it’s firm. Next, coat the cake in a thick layer of chocolate frosting.
Finish the cake with the reserved chocolate cake crumbs on top and around the base for that classic chocolate blackout cake look.

Pan Size and Yield Notes
This chocolate blackout cake recipe makes four 8-inch cake layers, which gives you a tall, dramatic layer cake with plenty of pudding filling and frosting in every slice.
If you want to make 6-inch layers, I’d use half of the recipe to make 3, 6-inch cake layers so they don’t end up too tall. For four 9-inch layers, plan to double the recipe.
Smaller pans will give you taller layers, while larger pans will make slightly shorter layers unless you increase the batch size.
No matter which pans you use, I recommend dividing the batter with a kitchen scale so the layers bake evenly.
Tips for Making the Best Chocolate Blackout Cake
- Don’t overmix your batter. Stir until the dry ingredients are just combined.
- Properly measure the flour (spoon into the cup measure, then level) or use a kitchen scale.
- Make sure cold ingredients are at room temperature to help them mix together better.
- Don’t level the cake layers until they are completely cooled.
- Save the cake tops and crumble them with a fork to decorate the cake.
Making This Chocolate Blackout Cake in Advance and Storage Tips
I recommend making your cake layers in advance and freezing them. It breaks the process up and makes it more approachable.
Make your chocolate frosting ahead of time, too, or save any leftover frosting! It can be stored in an airtight container in the fridge for up to a week, or in the freezer for up to a month.
A frosted cake can last in the fridge for up to a week, or in the freezer for up to a month. The frosting locks in all the moisture, keeping the cake fresh and delicious!
If you cut into the cake and have leftovers, use any remaining frosting to cover the cut section to keep it moist and store it in the fridge for up to a week.
Frequently Asked Questions
What makes blackout cake different from regular chocolate cake?
It usually has dark chocolate cake, chocolate pudding filling, and chocolate cake crumbs, which gives it that classic blackout cake look and texture.
Can I use regular cocoa instead of black cocoa?
You can. The cake will still taste great, but it will be lighter in color.
Can I use coffee instead of water?
Yes. Hot coffee deepens the chocolate flavor, but hot water works too.
Why is my frosting too thin, or why are my cake layers sliding?
The frosting needs to cool until it is thick and spreadable. Chilling the cake after stacking also helps keep the pudding and frosting in place.
Can I make this cake in 6-inch pans or as cupcakes?
Yes. In 6-inch pans, the layers will be thicker and may need a little extra bake time. For 3 6-inch layers, make a half batch of the recipe.
This batter should also make about 4 dozen cupcakes, though the exact bake time may vary a bit since this recipe is designed first as a layer cake.
Let Me Know What You Think
If you try this chocolate blackout cake recipe, please tag me @chelsweets, and use the #chelsweets, so I can see your beautiful creations!!
Don’t forget to leave a comment and rating below to let me know your thoughts.
Chocolate Blackout Cake
Equipment
- Serrated knife
Ingredients
Chocolate Cake Layers
- 2 1/2 cups all-purpose flour 310g
- 2 1/2 cups granulated sugar 500g
- 1 cup black cocoa powder, sifted 100g
- 2 1/2 tsp baking powder 10g
- 2 tsp baking soda 12g
- 1 tsp fine salt 6g
- 1 1/4 cups water or coffee, warm 300g
- 1 1/4 cups buttermilk, room temperature 300g
- 2/3 cup vegetable or canola oil 150g
- 3 large eggs, room temperature 168g
- 2 tsp vanilla extract or vanilla bean paste 8g
Chocolate Fudge Frosting
- 2 cups 4 sticks unsalted butter, softened 454g
- 1 tsp vanilla extract or vanilla bean paste 5g
- 1 tsp fine salt 6g
- 5 cups powdered sugar 625g
- 1 cup black cocoa powder, sifted 100g
- 3/4 cup heavy whipping cream, room temperature 180g
- 1 3/4 cups dark chocolate chips, melted and cooled 300g
Chocolate Pudding Filling
- 1 package instant chocolate pudding 5.9 oz package
- 3 cups whole milk, cold 720g
Instructions
Chocolate Cake Layers
- Preheat oven to 350°F/175°C. Line four 8-inch cake pans with parchment paper rounds and spray the sides of the pans with non-stick cooking spray or baking spray. If you don't have 4 cake pans, the batter can sit at room temperature for a few hours. Bake as many layers at a time as you can.
- Whisk together 2 1/2 cups (310g) flour, 2 1/2 cups (500g) sugar, 1 cup (100g) black cocoa powder, 2 1/2 tsp baking powder, 2 tsp baking soda, and 1 tsp salt in a large bowl. If your cocoa powder is lumpy, make sure you sift it. Set aside.
- In a separate, large bowl, add 1 1/4 cups (300g) warm water or coffee, 1 1/4 cups (300g) buttermilk, 2/3 cup (150g) oil, 3 large eggs, and 2 tsp vanilla and whisk together until fully incorporated.
- Whisk the dry ingredients into the wet ingredients until they're just combined, and the batter is smooth.
- Divide the batter evenly between the four prepared cake pans (450g per pan) and bake for 23-26 minutes or until a toothpick comes out with a few moist crumbs.
- Let the layers cool in the pans for about 20 minutes, then run an offset spatula around the edge of the pans to help separate the layers from the pans. Place the cake layers in the freezer for about 30 minutes to accelerate the cooling process and make them easier to handle and stack when we assemble the cake.
- Once the layers are fully cooled, carefully flip the pans and remove the layers from the pans. Then use a serrated knife to level the tops of the layers and place them in a large plate. Use a fork to break the cake tops up into small crumbles (we'll use these to decorate the cake later), then set aside.
- If made in advance, wrap and freeze the cake layers for up to a month. Let them thaw at room temperature for about 10 minutes before assembling the cake. Using slightly chilled cake layers makes them easier to stack and frost.
Chocolate Fudge Frosting
- While the cake layers bake and cool, make the chocolate frosting. Beat 2 cups or 4 sticks of butter, 1 tsp vanilla extract, and 1 tsp salt on a medium-high speed for 2 minutes with a paddle attachment. The butter should become lighter in color. Scrape the sides and bottom of the bowl as needed with a rubber spatula.
- Gradually mix in 5 cups of powdered sugar, 1 cup of black cocoa powder, and 3/4 of a cup of heavy cream on a low speed.
- Then, mix in 1 3/4 cups of melted and cooled dark chocolate at a low speed until the ingredients are fully incorporated. Try to avoid pouring it against the side of the bowl, as sometimes this can cause the chocolate to harden into chunks if the bowl is cold. The chocolate should still be fluid, but no longer hot to the touch. I let mine sit for about 10 minutes before adding it to the frosting. Scrape the sides and bottom of the bowl as needed with a rubber spatula. You want to make sure all the melted chocolate is mixed in, or else you can end up with lumps of hardened chocolate in your buttercream. Cover with plastic wrap to prevent crusting and set aside.
Chocolate Pudding
- Add the instant pudding into a medium-sized bowl, and add 3 cups of cold whole milk. Whisk for about 1 minute, until the mixture thickens. Cover with plastic wrap and set aside.
- If you make this in advance, refrigerate for up to a week and use it cold straight from the fridge.
Assembling This Chocolate Blackout Cake
- Stack and frost the chilled cake layers on a greaseproof cake board or a flat plate, using a dab of chocolate frosting to help stick the first cake layer to the board.
- Scoop about 2 cups of chocolate frosting into a piping bag and seal the top with a rubber band or clip. Cut an opening at the base of the bag that's about 1/2 inch wide.
- Spread an even layer of chocolate frosting on top of the cake layer as you stack them with a large offset spatula, then pipe a ring of chocolate frosting around the edge of the cake layer. Spread about 1 cup of chocolate pudding into an even layer inside the ring of frosting. Repeat this process with the remaining cake layers, then chill the cake in the freezer for 15 minutes to prevent the layers from sliding.
- Cover the cake in a thick layer of chocolate frosting, then use the reserved crumbled cake tops on the top and base for a classic blackout cake look.
Video
Notes
Nutrition
Other Recipes You Might Like:
This looks absolutely heavenly!
Aw thank you Nichole!! I’m not going to lie, it was hard to stop eating this one 😛
I made the pudding with 3 cups milk like the recipe calls for and it didn’t thicken up very much. Is that the right amount? Later I saw one of your other recipes and you only used 1- 1/2 cups milk. Which should it be? Thanks
Hi Trish,
What size of pudding box did you use? I use 3 cups of milk in this recipe because that’s the amount a 5.9 oz box of instant pudding that I use (the Jello brand) calls for. It thickened up really nicely for me after I mixed it for about a minute. You could also put it in the fridge to help it thicken up further once it’s mixed! What brand and size of pudding mix were you using? Was it the instant type?
I want to try this but I just can’t stand to make chocolate cake without coffee/espresso! It just makes chocolate so much more chocolate!
Haha I actually totally agree Lishia! But everytime I share a chocolate cake recipe with espresso or coffee, i get a ton of comments asking if they can omit it 😛 It’s the worst!
I def support adding in some instant espresso to elevate the flavor 🙂
If one were going to use coffee how much to add? Brewed coffee or espresso powder? THX <3
Hi Jennifer,
Great question! You can use either 1 1/4 cups of brewed coffee in place of the water, or you can do 3 tsp instant espresso powder or instant coffee powder in 1 1/4 cup of water. Hope that helps, happy baking!
Thanks so much for this recipe. Also what if we want to use regular flour inatead of cake flour .
Of course, I’m always happy to share! I think the texture is a lot better with cake flour, but you can use regular flour in its place!
Hi! I’m hoping to make this for friends soon and saw your comment.
Is the texture better with all purpose or cake flour?
Hi Sylvia,
The updated recipes works best with all purpose flour, which is why the recipe card calls for that 🙂
The entire recipe was revamped, so it’s very different than the older version which used cake flour. Hope that helps, happy baking!
Both versions look gorgeous and I’m sure they taste delicious! What brand chocolate pudding do you use, as I find some to taste very artificial? I also usually make everything from scratch.
Hi Desiree,
I just use the Jello brand, but I grew up eating it so I’m pretty used to the flavor. I think Trader Joe’s and Whole foods carry some less artificial brands of instant pudding that might be a good alternative!! Or you can always make your own too 🙂
I’d just say definitely make sure you like the taste of whatever pudding you end up using, since it’s such a dominant flavor inside the cake. Hope that helps, happy baking!!
Hi Chelsey! I love all of your recipes (and so do my coworkers, when I share with them!) and it’s been so exciting and impressive to see you turn your passion into a full-time job. I hope you get to take some more time off this year to enjoy your success 🙂
I went looking for your favorite chocolate cake recipes and would love to try this updated Blackout Cake. Do you think it would bake into cupcakes well, or would the cake flour make it a little too crumbly? Do you think this recipe would make about 24 cupcakes, or would it make more since it’s a 4 layer cake? Thank you so much!
Aw thank you Grace!
I think this recipe would probably make about 3 dozen cupcakes, because it’s a lot of batter! I’m not sure if they would bake well into cupcakes because I haven’t tried it before, but I feel like they should!
If you try it, please let me know how it goes!! <3
This sounds delicious! Would I need to change anything if I used 6 inch cake pans?
Hi Sarah,
The bake time will be a bit longer with 6 inch cake pans, and you will probably have a bit of leftover ganache! But other than that you should be fine 🙂 Happy baking!
is there a substitute for the black cocoa powder or do i need to hunt it down? i need a chocolate cake recipe that can hold a cookie crumb/fudge layer in between the cake layers
Hi Daisy,
You can use regular baking cocoa in place of the black cocoa! This cake recipe is pretty soft because of the cake flour in the recipe, but it should be able to handle a chocolate ganache / fudge filling. Hope that helps, happy baking!
Help! I made this cake and my layers never rose. Flat as a pancake. Didn’t taste that fabulous either. Thought I followed the recipe. Any suggestions without having been there watching what I did. I’ve baked many cakes before and I’m at a total lose as to what went wrong. Even bought cake flour.
Hi Anna,
I’m so sorry to hear that! Is there a chance that the cake flour you used wasn’t self-rising?? Or what brand of self-rising cake flour did you use? That would be my first guess as to what went wrong :/ In terms of the taste, what type of cocoa powder did you use??
Hopefully we can get to the bottom of this together, this is one of my favorite cake recipes! <3
Hi Chelsea! Instead of water can I substitute coffee for the whole amount?
Hi Melissa,
You can totally do that! I bet that would be delicious 🙂 Happy baking!
Hello! Is it possible to use regular cake flour instead of self rising? How much baking soda / powder shall I add?
Hi Yasmeen,
You can definitely do that instead! Just like I mention in my post, for every cup of self-rising flour that this recipe calls for, measure out 1 cup of cake flour, then add 1/4 teaspoon salt and 1 1/4 teaspoons baking powder.
Hope that helps, happy baking! <3
Is there any way u can make it with 9 inch Cale pans? Double the recipe? I want it to be 4 layers.
Hi Cate,
I would recommend doubling the recipe to make 4, 9-inch cake layers. That should be just about perfect!! Hope that helps, happy baking!
Hi Chelsea!
I only have 9” (2 pans) but don’t want to double the recipe. Could I do a 2 layer and would I get a lot of leftover ganache or filling? I am just trying to practice my coating.
Hi! Yes, you can make this as a 2-layer 9-inch cake without doubling the recipe.
I wouldn’t divide the full batch of batter between just two 9-inch pans, because the layers would be quite thick. Instead, I’d add about 550-575g of batter to each 9-inch pan and use any extra batter to make cupcakes.
Since you’ll only have one layer of pudding filling instead of three, you will have extra pudding filling. You’ll probably have some extra frosting too, but that can actually be helpful if you’re practicing your coating and want plenty to work with.
The 9-inch layers should bake in a similar amount of time, but start checking around 23-26 minutes and bake until a toothpick comes out with a few moist crumbs. Hope that helps, happy baking!
I made this cake tomorrow. It was so so tasty. I can’t even explain. Thank you so much for this amazing recipes. I have made this cake for my fiance to sorry him. Lol and this cake melts his heart. ? . So much love from Pakistan ??
So happy to hear that Ayesha!! Thank you so much for sharing 🙂
What can you use instead of the chocolate pudding? X
Hi Sky,
I would add in some chocolate buttercream! Here’s my recipe for it: https://chelsweets.com/2019/03/28/chocolate-buttercream-frosting/
Hope that helps, happy baking!
Hi
According to the video there were two items you put on top on the chocolate pudding.
Please let me know what it was. Was it chocolate crumbs and toffee etc
Thank you
Hi Carole,
I just added a bit of extra pudding I had left over, and some of the cake tops that I reserved and crumbled up (same thing added around the base of the cake). Hope that helps, happy baking!
Hello! I’m making a cake for Friday. I put the cakes in freezer last week and wanted to make the frosting on Wednesday. Could I frost the cake Wednesday and it not be dry and taste great for Friday or should I wait until Thursday?
Hi Crystal,
A frosted cake can stay good in the fridge for up to a week! As long as the frosting is completely covering the cake layers, it should lock in all the moisture, and the cake should stay nice and moist 🙂 I let cakes sit in the fridge overnight, or for a few days all the time! I usually leave my cakes just open in the fridge without a covering! It should be fine as long as you don’t have anything fragrant in your fridge (like fish or onions).
Hope that helps, happy baking!
Hey Chels!! My brother wants a two tiered chocolate cake for his wedding and I love this recipe but I was wondering would it be able to hold the top tier or
If there wouldn’t be enough support and the sides could bludge out. Should I use your original Brooklyn blackout cake recipe?
Thanks for your help 🙂
Hi Jake,
The ganache on this cake is surprisingly super sturdy, especially if you make a dark chocolate ganache! It should hold its shape just fine as long as it’s properly supported, and you pipe a ring of ganache on each cake layer to keep the pudding in place. I’d suggest using this recipe instead of my original Brooklyn Blackout cake. Hope that helps, happy baking 🙂
I plan to make this recipe, but in 6-inch pans. I think you said at one point that you have a 27-inch oven — so do I. I do use an oven thermometer but I find that bake times are often too short for my over, and I figure it’s b/c most people have a 30″ oven. If you still have a 27-inch oven, how many pans do you bake at a time? If I put three 6-inch pans, I try to rotate them halfway through to bake more evenly but they still take longer than the recipe says they should take to bake. Should I just do two at a time?
I also tried using cake strips but could never get them to bake all the way through. One thing I have tried is starting at a lower temp (like 300F for 20 minutes) and then upping it (to 350F for 20 minutes) and that seems to help them bake all the way through without doming up really bad. Looking for any tips with cakes in a 27-inch oven, basically!
Hi Jagax,
I still bake all my cake layers at one time! Otherwise it would take me forever to make all my cakes. I do rotate my cake pans halfway through to help them bake more evenly, but they all bake through in the amount of time I share in my recipes. I’ve tested my recipes in full sized ovens and the bake time is the same in larger ovens.
If your oven seems to struggle with all your cake pans you can definitely try baking 2 at a time to see if that helps them bake more quickly/evenly.
I found that cake strips don’t do much for me either just because me cake pans are so close to sides of my oven. It doesn’t really change how they bake up. They still bake through all the way though!
Hope that helps, best of luck with your oven!!
Hi,
I made this recipe but I didn’t have cake flour. I found it to be dense. It baked flat and nice but was dense. Do you think I can lessen the flour ?
Hi Arielle,
The cake flour is what gives this cake a tender crumb! This recipe calls for self rising cake flour, did you add in leavening agents?
For every cup of self-rising flour that this recipe calls for, you should use 1 cup of cake flour, then add 1/4 teaspoon salt and 1 1/4 teaspoons baking powder. If you want to use AP flour, still add in this additional baking powder and salt, but make the adjust below too!
If you use AP flour, you can def use slightly less! Take one cup of all purpose flour, spooned and leveled. Remove two tablespoons, and then add two tablespoons of cornstarch to the all purpose flour. Sift together before using.
Hope that helps, happy baking!
Hi Chelsea,
I’m from the UK and I made this cake using AP with added cornstarch and then 1 3/4 tsp of baking powder. The sides rose slightly but then 2/3 of the layers had a dome. Is this normal? Or did I do something wrong. I also use a fan over so cooked at 160
Hi Sian,
Are you able to turn off the fan in your oven? Convection ovens definitely bake cake layers differently than a normal oven!
Would love to try this recipe. How much batter would I need for a 10 inch cake pan?
Hi Joanne,
That depends on how many cake layers you want to make! I have a great batter calculator you can use to figure out how much batter you need here: https://chelsweets.com/2019/04/22/how-much-cake-batter-per-pan/
Hope that helps, happy baking!
Hi Chels
Can I use just regular self raising flour? The UK has a shortage of flour so can’t find any ?.
Please let me know.
Thank you!
It loooks so so so good!
Hi Chelsea,
Due to the lockdown, it’s impossible to find flour in the UK. All I have is self raising flour – can I use that insteAd of the cake sr flour?
Please let me know – I really want to try this out!
Hi Anam,
If that’s all you have on hand you can use it in place of the self-rising cake flour. The cake texture will be slightly denser, but the cake should still turn out great!
I recently made this cake and the cake layers were very small what can I do to make them taller?
Hi Megan,
What size of cake pan did you use? The easiest way to make taller cake layers is to either increase the amount of batter in each pan or use smaller pans <3
Hi there, if I wanted to make this recipe in 3 6 inch pans, would you recommend cutting the recipe in half or 1/3?
Hi Lori,
I’d actually recommend making 2/3 of this recipe to make 3, 6″ cake layers! If you half it, the layers will be thinner than mine are in these photos. Hope that helps, happy baking!
Awesome, thank you
Hey chelsweet!!!
Your cakes are soo amazing I really enjoying and loving it…I just want to know how to make three layer to this chocolate cake how much should i decrese the ingredients can you please help me .
Thank you..
hi you make awesome cakes. I have a question you just stir the ganache? no whisk or mixer? thanks
Hey! I am thinking about trying this recipe, and I have a few questions.
1. Can we use regular cake flour?
2. How many 6 inch layers would I get out of this recipe?
3. Would this work/be good without the pudding and just the chocolate ganache?
So sorry about the ambush of questions. Thank you!
Hey there! I think I’m seeing what Carole saw! It looks like you do, ganache, pudding, crumbled cake, then chocolate nibs or chips or something! I thought at first toffee too. Let us know what you used in the video about the recipe 🙂 can’t wait to try this cake!!!
Nothing about this recipe has turned out for me, wasted $40 on ingredients including the ingredients to try again…was making it for a friends birthday. Used cake flour…super dense and doesn’t taste right. Ganache won’t set and keeps melting everywhere.
Hi Chelsea!
I made your carrot cake (first cake I’ve ever made), for my mothers birthday last week and EVERYONE absolutely loved it. Now, I’d like to make 3 mini cakes for my family for valentines, using this recipe! I wanted to use the same size layers as your vanilla mini cake tutorial (3, 4 inch layers). I’m trying to guage it here, but it seems like this recipe may be enough to do that? Your vanilla calls for a 1 cup of flour, so since this chocolate one calls for 3, I’m assuming, it may suffice for 3 mini cakes? I’d be using 4 x 2 inch pans 🙂
My family is a sucker for chocolate, so this would be perfect! Thank you for all that you do.
Hi! This looks amazing!
I can’t find cake flour, so I have to use all purpose flour. Do I have to add any salt or baking powder/soda if I use reg flour? I notice your recipe doesn’t have any listed.
Hi Chelsey,
Could you please recommend how you would incorporate Cadbury Crunchie/ Maltesers into your Brooklyn cake.
I have a request to make a chocolate cake with Crunchie and maltesers & I’m finding it hard to find inspiration.
Thank you in advance,
Grace
Hi
Everything else constant, can the reverse creaming method be used with this recipe?
Thanks
I used your original pudding recipe as filling in my chocolate mocha cupcakes and found it too thin also, so I increased to cornstarch to 4Tbs and it’s perfect in thickness now. I love the pudding recipe now and boxed cook n serve doesn’t compare.
I’m a little confused about the decorating. Did you use different chocolate for the drip to get the contrast?
I’m so excited to make this! I do have a question- when I measure out the flour on my scale, 2 cups for me is already at 360 grams. Is that normal? I just don’t want to screw this up! Thank you.
Hi… are you supposed whip the ganache after combining and smoothing with the cream? Or should it still be ‘drippy’… my layers ended up sliding off each other!
Which is better for a wedding cake this one or the moist, I mean 3 or for leyers cake?
Hello, May I know how much should I use for the following as I’m making a six inch version of your cake:
1) chocolate pudding (OG: 1 package instant chocolate pudding – 3.9 oz package, 110 grams) and 1 1/2 cups – 367 grams whole milk, cold)
2) milk chocolate ganache (OG: 650 grams milk chocolate, melted down with 217 grams heavy cream) – to be made in advance
3) 1 cup chocolate frosting (OG: 1 cup American buttercream plus 2 Tbsp cocoa, and 2 additional tsp heavy cream)
Thank You
My compliments for such a great tutorial in all your recipes. It makes it so much easier to follow.
Aw thank you Chantal!! 🙂
Just need clarification- as per recipe it says all purpose flour. But in comments you mentioned it’s better to use cake flour as it makes cake softer. Whst should I use? Thanks.
Hi Anu,
Like I mention in the notes section of the recipe card, I updated this recipe this past month to be made with AP flour (and tweaked some of the other ingredients to make it easier to make, and give it a better flavor) instead of cake flour. Those comments are related to the older version of this recipe. Hope that helps, happy baking!