
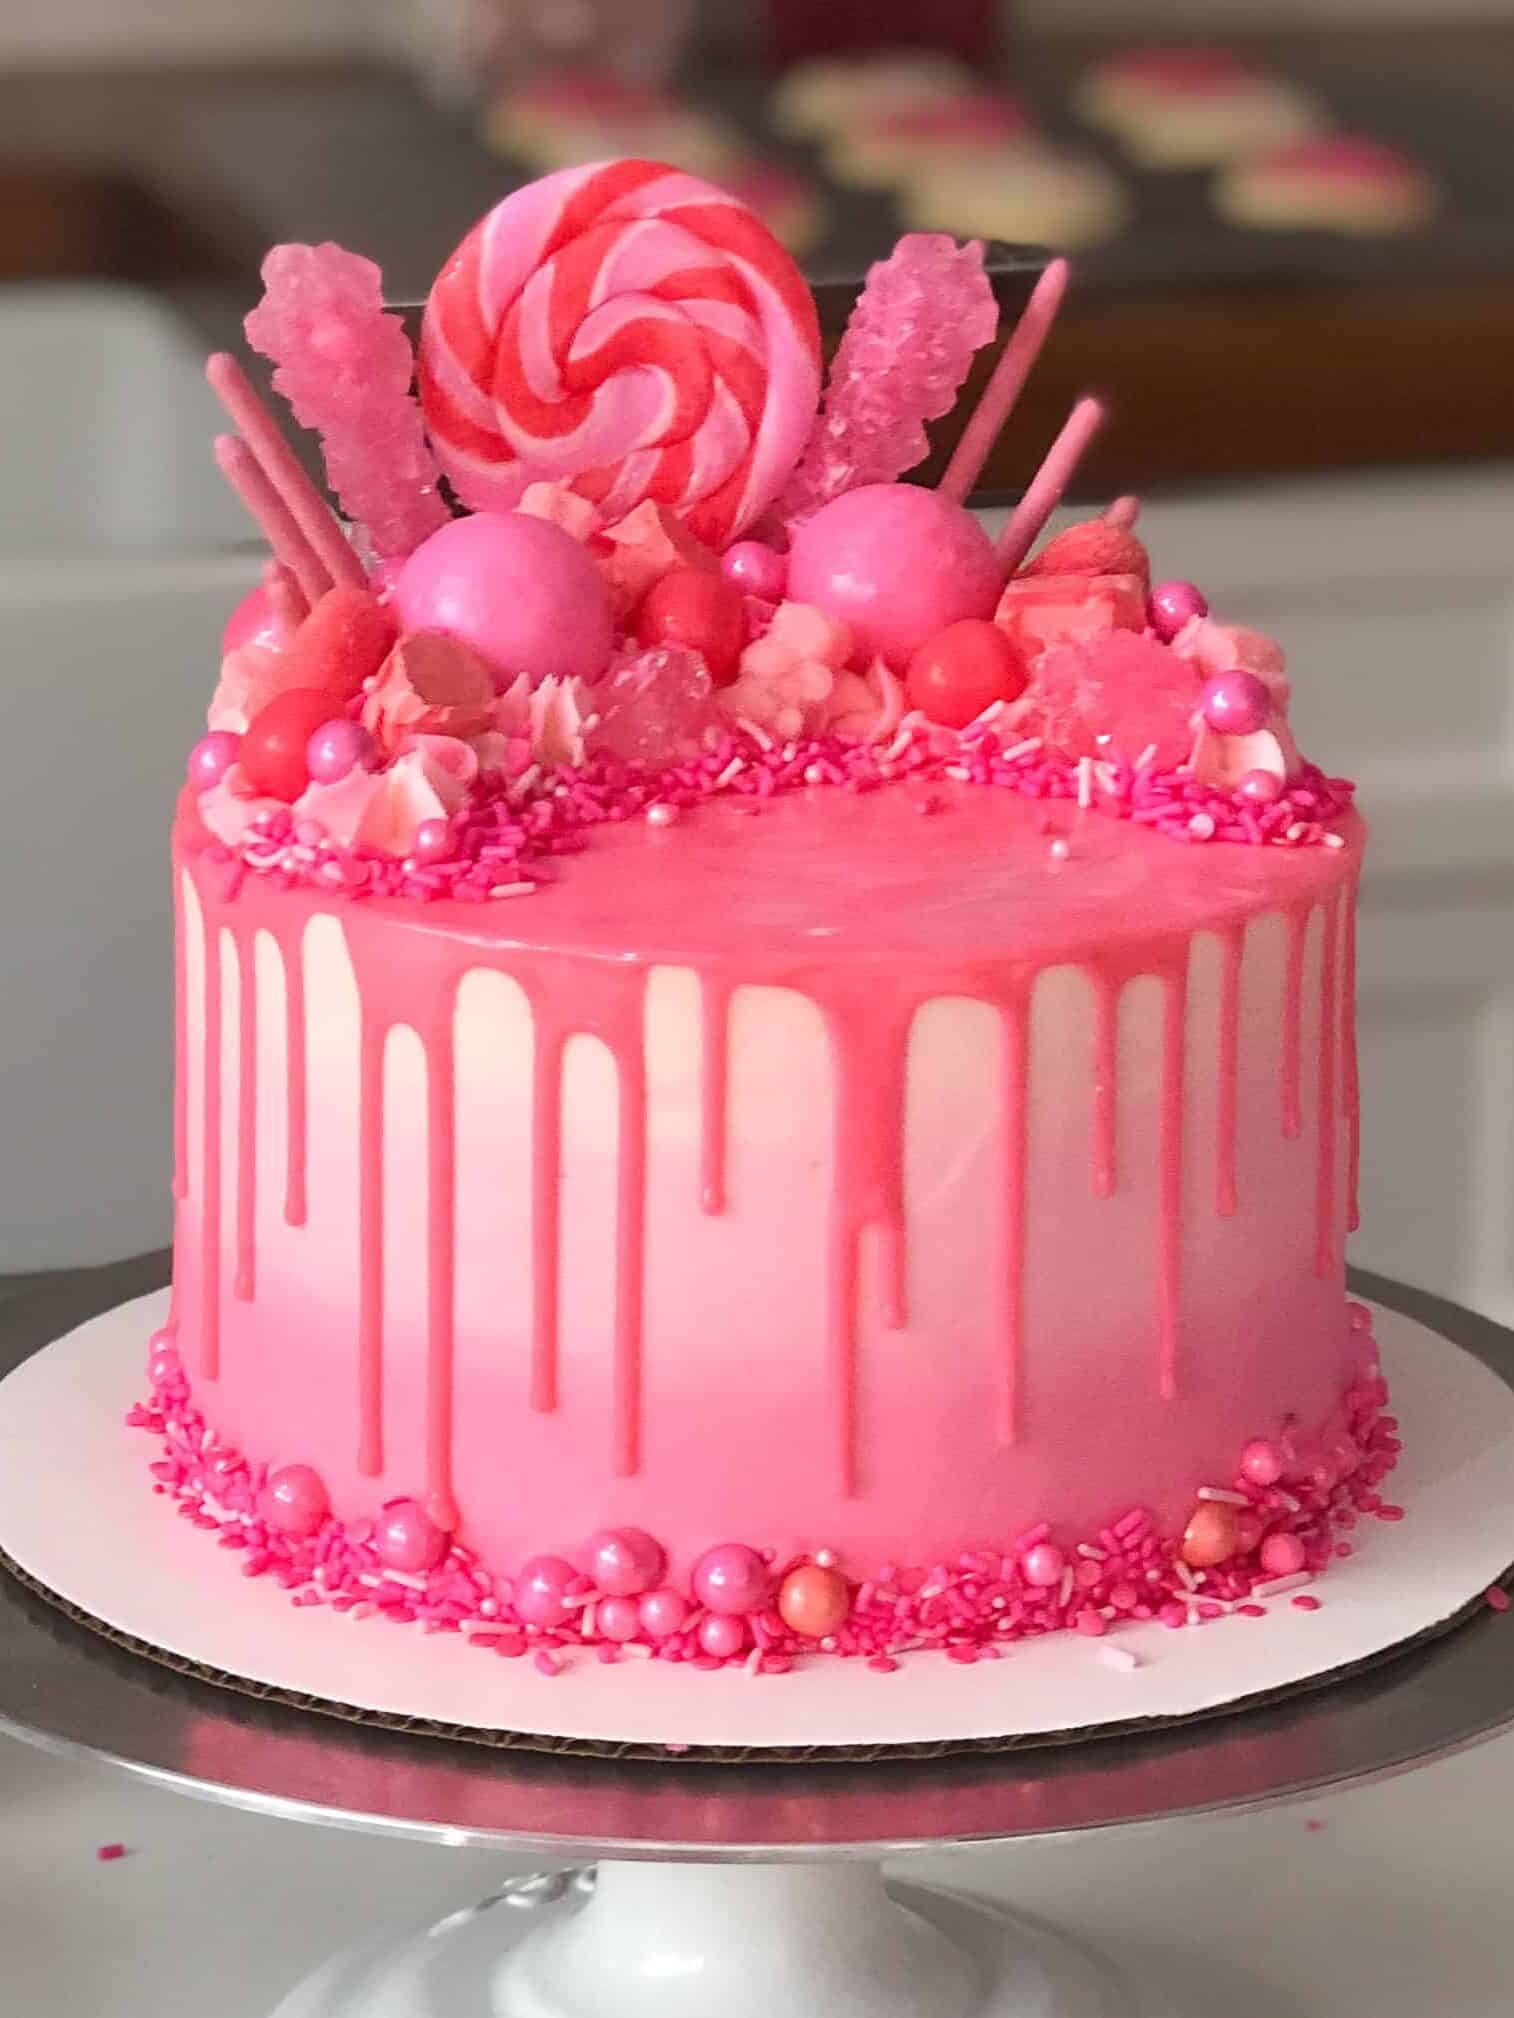
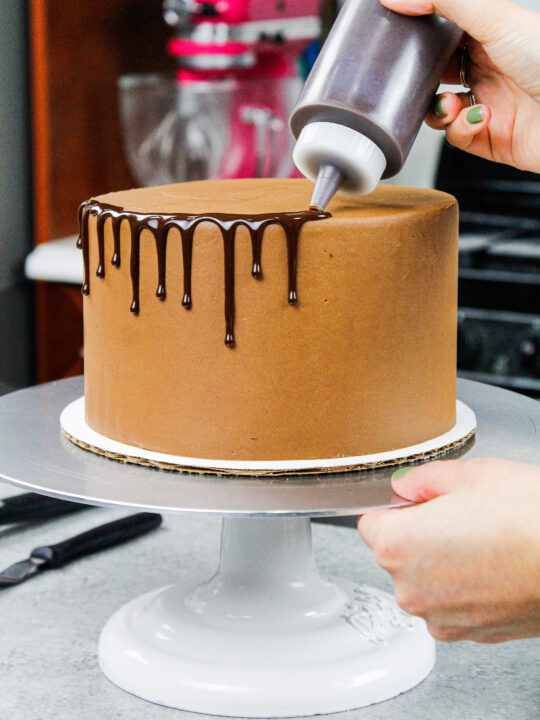
Drip Cake
Drip cakes look fancy, but the technique is simple once you know two things: your cake must be cold, and your ganache must be barely warm.
This tutorial shows you how to make smooth drips (white or chocolate), how to test and adjust the consistency, and exactly when to drip so it doesn’t run to the cake board.
This Recipe At A Glance:
- Best for: Buttercream cakes (American, Swiss, Italian, or cream cheese buttercream)
- Drip type: Chocolate or white chocolate ganache
- Key step: Chill frosted cake until firm + do a test drip
- Tools: Squeeze bottle (easiest) or spoon
- Time: 10 min ganache + chilling time
What Are Drips Made From?
While the ways you can dress up a drip cake are limitless, the recipe is pretty much always the same. There are some recipes that use water and chocolate, or even oil and chocolate.
However, classic ganache recipes use cream and chocolate. To make the ganache drips, all you have to do is heat the heavy cream and pour it over the chocolate.
After letting it sit for a couple of minutes, the chocolate softens. Then you give the ganache a good stir until it’s smooth, and let it continue to cool.
It’s a very straightforward recipe. Making the ganache is easy. The more challenging part of drip cakes is adding the drips onto the cake.
How Do I Add Drips To A Cake?
There are two easy ways to add drips to a cake. You can use a spoon or a plastic squirt bottle.
Some people prefer one over the other, and I recommend using whatever method you feel most comfortable with.
The Spoon Method
The first method is the spoon method. The pros are that you don’t need any special tools. I think everyone has a spoon in their kitchen!!
You simply take about a teaspoon of ganache and carefully pour it over the edge of a chilled buttercream cake.
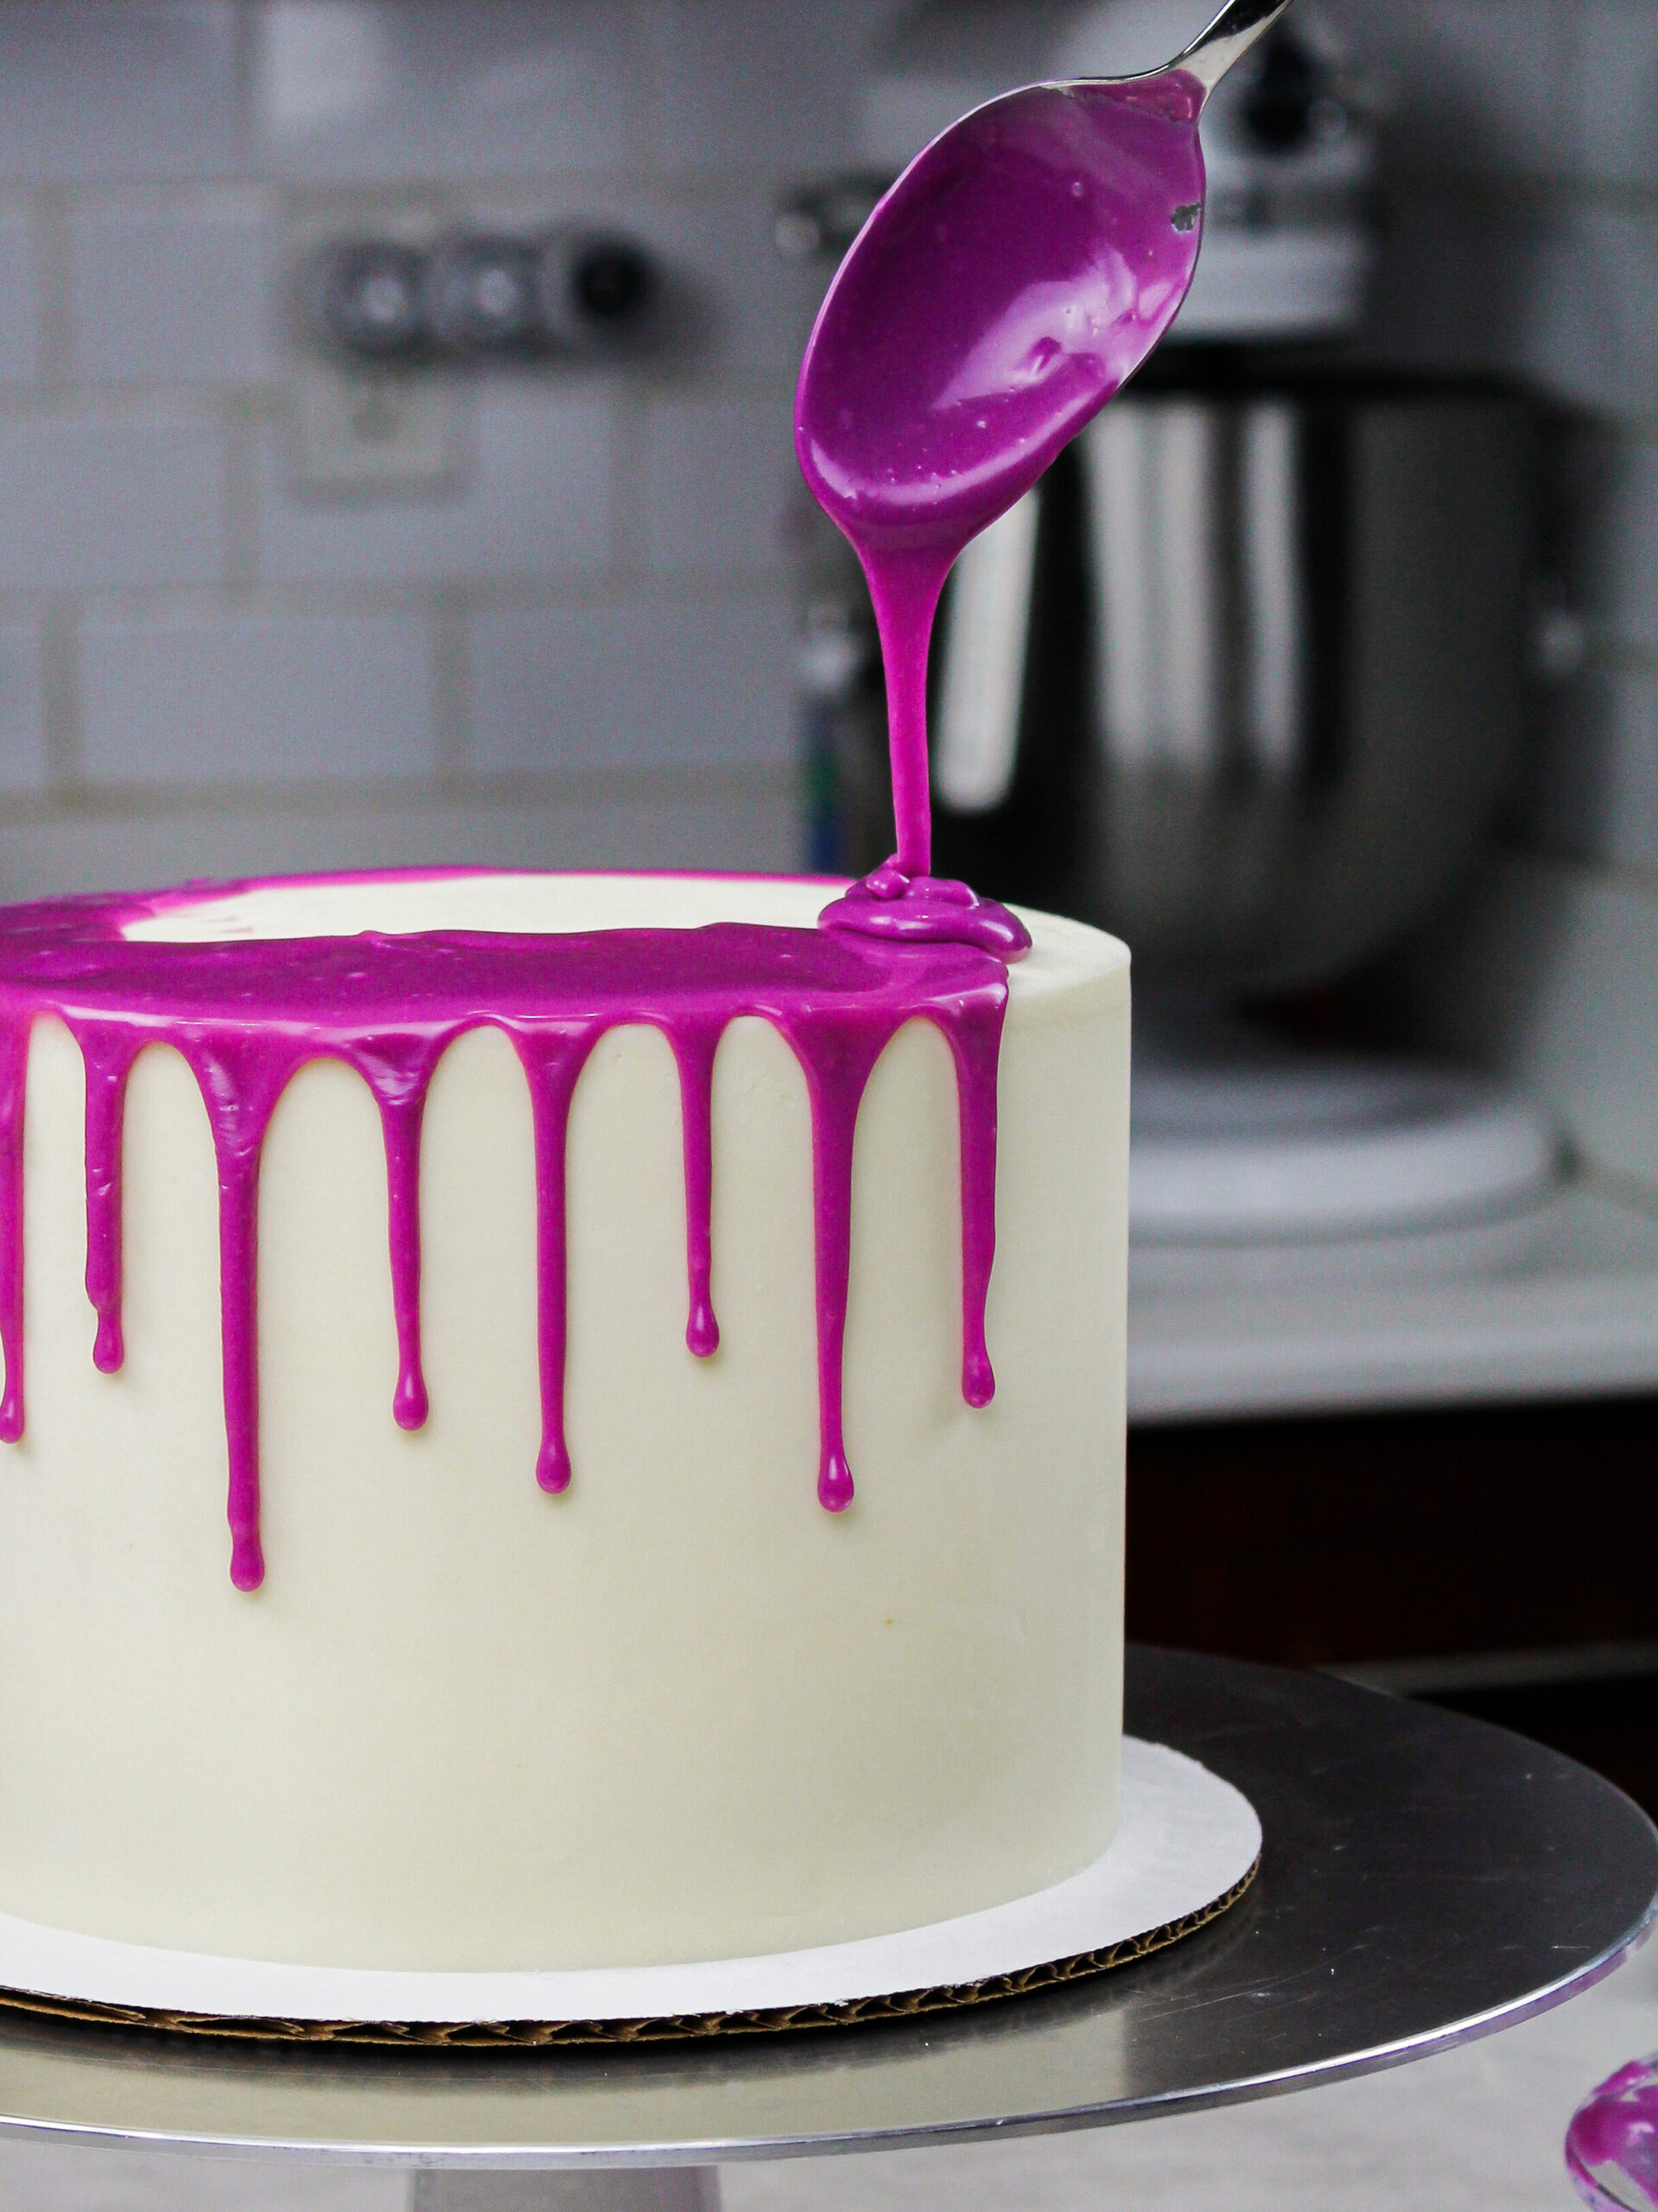
One thing to keep in mind is that you need to scrape the bottom of your spoon against the bowl each time you get more ganache.
This will prevent rogue bits of ganache from flying off the bottom of your spoon all over your counter and cake.
The Squirt Bottle Method
The second method uses a plastic bottle. Once the ganache is made, pour it into a plastic squirt bottle. Not everyone has these on hand, but they’re easy to find online.
Squirt bottles allow you to add a drip to a cake much more quickly. It is also a lot easier and cleaner! If you have leftover ganache, you can simply pop the cap on your bottle and throw it in the fridge.
To reuse it, just pop the bottle into the microwave and reheat it in 15-second intervals until it’s the right consistency.
Drip Cake Quick Fixes
- Drips run to the board: ganache is too warm/thin. Cool 2–5 min OR stir in 1–2 Tbsp more chocolate
- Drips are short/stubby: ganache is too cool/thick. Warm 3–5 sec OR add 1 tsp cream
- Buttercream melts: cake wasn’t chilled enough. Chill until the frosting feels firm
- Ganache seized/grainy: overheated. Warm gently and stir; if it’s badly split, remake with gentler heat
Troubleshooting
Why did my drip run all the way down the cake?
Your ganache was too warm/thin or your cake wasn’t chilled enough. Chill the frosted cake until the buttercream feels firm, then do a test drip and adjust the ganache.
Why are my drips short and thick?
Ganache is too cool or too thick. Warm it for 3-5 seconds or add 1 tsp cream and test again.
Can I drip on whipped cream frosting?
Only if the cake is very well chilled/frozen and your ganache is not hot. Whipped toppings soften faster than buttercream.
Can I drip on cream cheese frosting?
Yes, as long as it’s a cream-cheese buttercream that’s chilled and firm.
Can I drip on fondant?
Buttercream is best. Fondant can get tacky from moisture/condensation, so if you try it, keep the ganache thicker and test on a small spot first.
My colored drip looked dull or grainy the next day. Why?
This can happen if the ganache was overheated, condensation formed in the fridge, or too much color was added. Chill the cake gradually and use gel color sparingly.
Will gel food coloring seize ganache?
In a cream-based ganache it usually behaves fine, but add it after the chocolate is fully melted and smooth, then stir gently.
Additional Tips For Drip Cakes
- Use this drip recipe on any type of buttercream cake, as long as it’s chilled.
- For the white chocolate, I love using the Whole Foods mini white chocolate chips, because they melt so easily!
- You can also use regular white chocolate chips, white chocolate wafers, or even a chopped-up white chocolate bar for the chocolate this recipe calls for.
- The ratio of heavy cream is different if you use white candy melts. Candy melts cannot be swapped for the white chocolate in this recipe! They are not interchangeable.
- Use heavy cream or heavy whipping cream! You need the high-fat content to create the right consistency in this recipe.
Making This Drip Cake Recipe in Advance & Storage Tips
Make this ganache drip recipe ahead of time or save leftovers! Once it’s made, wrap the bowl with plastic wrap or cover the top of the plastic bottle and store it in the fridge for up to 3 weeks.
To use chilled ganache, heat the bottle or bowl in the microwave for 10-second intervals until it reaches the right consistency.
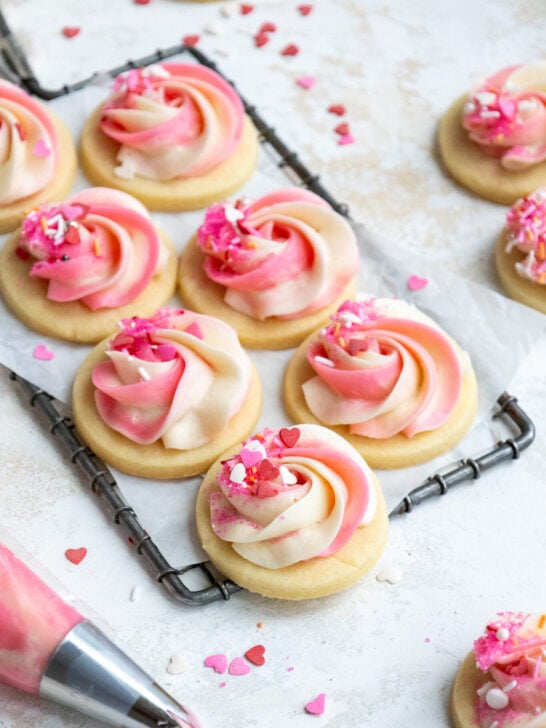
Use leftover ganache to top cupcakes, cookies, or even ice cream!
Share Your Creations With Me!
If you try this drip cake recipe, please tag me @chelsweets and use #chelsweets so I can see your amazing creations!
Drip Cake
Equipment
Ingredients
Vanilla Cake Recipe
- 3 cups all-purpose flour 375g
- 3 cups granulated sugar 600g
- 2 1/2 tsp baking powder 10g
- 1 tsp fine salt 6g
- 1 cup (2 sticks) unsalted butter, room temperature 226g
- 2 tsp vanilla extract or vanilla bean paste 8g
- 1 cup carton egg whites or 7 large egg whites, room temperature 240g
- 1 1/2 cups buttermilk, room temperature 360g
- 2 Tbsp vegetable or canola oil 28g
- gel food coloring – optional
Vanilla Buttercream Frosting
- 2 cups unsalted butter, room temperature 452g
- 1/2 tsp fine salt 3g
- 1 Tbsp vanilla extract or vanilla bean paste 12g
- 7 cups powdered sugar 907g
- 1/4 cup heavy whipping cream, room temperature 60g
Colorful Drip Recipe
- 1/4 cup heavy whipping cream, room temperature 60g
- 1 cup white chocolate chips 175g
- gel food coloring
Instructions
Vanilla Cake Layers:
- Preheat the oven to 350°F/175°C and line three 8" or four 7" pans with parchment rounds, then grease them with non-stick baking spray. Set aside.
- Mix 3 cups all-purpose flour, 3 cups sugar, 2 1/2 tsp baking powder, and 1 tsp salt in a stand mixer with a paddle attachment or hand mixer until fully combined.
- Mix in 1 cup of room temperature, unsalted butter slowly into the dry ingredients on a low speed. Continue to mix until no large chunks of butter remain, and the mixture looks like moist sand.
- Pour in 1 cup of egg whites and mix on low until just incorporated. Mix in 1 1/2 cups of buttermilk in two installments, at a low speed.
- Add in 2 Tbsp of vegetable oil and 2 tsp of vanilla extract and mix at a low speed until fully incorporated. If you plan to color your cake layers, add in the gel food coloring with the oil and vanilla.
- Scrape down the sides of the bowl with a rubber spatula, then beat on a medium speed for about a minute to make sure everything is properly mixed. This also helps lighten the texture of the cake layers a bit.
- Divide the batter evenly between your prepared pans. I like to use a scale to make sure each pan has the same amount of batter and will bake up to the same height.
- Bake for 33-35 minutes or until a toothpick comes out with a few moist crumbs.
- Let the pans cool for 10 minutes, then run a small offset spatula around the perimeter of the pan to separate the cake from the pan.
- Place the cake layers into the freezer for 30 minutes to accelerate the cooling process. Once the layers are fully cooled, carefully flip the pans and remove the layers.
- Use a serrated knife to level the tops of the layers right before you plan to assemble your cake, or you can wrap and freeze them if you're making them in advance.
- If you make these cake layers in advance and freeze them, let them thaw for about 20 minutes before making your cake. The cake layers should still be slightly cold to the touch, which will make it easier to assemble your cake.
Vanilla Buttercream Frosting:
- While the cake layers bake and cool, make the vanilla buttercream frosting. Beat 2 cups of butter on a medium speed for 30 seconds with a paddle attachment or hand mixer until smooth.
- Mix in 1 Tbsp of vanilla extract and 1/2 tsp salt on a low speed.
- Slowly mix in 7 cups of powdered sugar on a low speed. Add 1/4 cup of heavy cream halfway through to make the frosting easier to mix. Continue to mix on a low speed for a few minutes until the desired consistency is reached.
- If the frosting is too thick, add additional cream (1 Tbsp at a time). If the frosting is too thin, add more powdered sugar (a quarter of a cup at a time).
- If you plan to color the buttercream, add the gel food coloring once the frosting is fully made, and beat on low until it reaches the desired color.
White Chocolate Ganache Drips:
- The last component to make is the white chocolate ganache! Add 1/4 cup of heavy cream to a heat-proof bowl and heat the cream until it's steaming and just starting to bubble. If you don't have a microwave, you can use a double boiler.
- Gently pour 1 cup of white chocolate chips into the heavy cream, making sure they are fully covered with cream. Let the mixture sit for 1 minute.
- Stir slowly until the cream and white chocolate are combined. If some bits of chocolate are not fully melted, heat the mixture again for 15 seconds, and stir. Repeat as necessary until all the chocolate bits are fully melted and incorporated.
- Then mix in the gel food coloring, if desired. Let the mixture cool until the desired viscosity is reached (barely warm to the touch). If it seems too thin or thick, you can add a touch more chocolate chips or heavy cream. The type of cream and white chocolate that you use can affect the consistency, so feel free to adjust as needed.
To Assemble The Cake:
- Then it's finally time to assemble this drip cake! Stack and frost cake layers on a greaseproof cake board or flat plate, using a dab of frosting to help stick the first cake layer to the board.
- Add an even layer of buttercream between each cake layer with a large offset spatula.
- Once the layers are stacked, spread a thin coat of frosting around the cake that fully covers the cake layers. Smooth using a bench scraper, then chill the cake in the fridge (30 minutes) or freezer (10 minutes) until the frosting is firm to the touch.
- Next, add a second, thicker layer of frosting to the cake and smooth using a bench scraper. If you're struggling to get smooth sides on your cake, I share all my tips and tricks in this post.
- Chill the cake again in the fridge (30 minutes) or freezer (10 minutes) until the frosting is firm to the touch. This step is crucial because it will prevent the ganache drips from melting the frosting, and it keeps the drips from running too far down the cake.
- Add the drips to the cake using a plastic squirt bottle or spoon, following the pictures and tips in the post above. Then decorate as desired!
Video
Notes
Drip Cake Alternatives
Dairy-free alternative: Full-fat coconut cream (canned) can be used in place of the heavy cream in this recipe to make it dairy-free. You can use this recipe if you want to make a chocolate drip cake.Tips for Making the Best Drip Cake
- Ingredients at room temperature mix together better! Set out any cold ingredients ahead of time.
- Properly measure the flour (spoon into the cup measure, then level). Or better yet, use a kitchen scale to measure your dry ingredients.
- Level the room temperature or thawed cake layers with a serrated knife to make them easier to stack.
- Make sure the buttercream is the right consistency. This will help give the cake proper structure and make it easier to decorate.
- Chill the cake layers in the freezer for about 20 minutes before assembling the cake. It makes them so much easier to stack and frost!
- If your cake layers turn out less than perfect, read my cake troubleshooting guide to see where things might’ve gone awry.
- You can also use regular white chocolate chips, white chocolate wafers, or even a chopped-up white chocolate bar for the chocolate this recipe calls for.
- The ratio of heavy cream is different if you use white candy melts. Candy melts cannot be swapped 1:1 for the white chocolate in this recipe! They are not interchangeable.
- Be sure to use heavy cream or heavy whipping cream! You need the high-fat content to create the right consistency in this recipe.
Making This Drip Cake in Advance and Storage Tips
I highly recommend making the components of this cake in stages. It breaks the process up and makes it so much more approachable! The cake layers can be made in advance and frozen. They taste just as great when they’re frozen as when they’re fresh, I promise! You can make the frosting ahead of time or save any leftover frosting! It can be stored in an airtight container in the fridge for up to a month or in the freezer for 3 months. Make this ganache drip recipe ahead of time or save leftovers! Once it’s made, wrap the bowl with plastic wrap or cover the top of the plastic bottle and store it in the fridge for up to 3 weeks. To use chilled ganache, heat the bottle or bowl in the microwave for 10-second intervals until it reaches the right consistency. Use leftover ganache to top cupcakes, cookies, or even ice cream! A frosted cake can last in the fridge for a week or in the freezer for a month. The buttercream locks in the moisture and keeps the cake fresh and delicious! If you cut into the cake and have leftovers, use any remaining frosting to cover the cut section to keep it moist and store it in the fridge for up to a week.Nutrition
Other Recipes You Might Like:

Beautiful drip cakes amd i love your tutorials!
I know you dont do many fondant covered cakes but can you do the drip on fondant? Or is buttercream preferred?
I’ve never tried it on fondant, but I’d be scared it might get a little bit goopy!! I’d definitely say buttercream is preferred!
Can I use your recipe for cupcakes? If so, what temperature to bake and for how long? Thank you.
I’d recommend using my vanilla cupcake recipe instead! It makes super moist cupcakes 🙂 Here’s the link: https://chelsweets.com/2017/07/03/classic-vanilla-cupcake-recipe/
Hi! What type of chocolate do you prefer to use for the drip??
I usually use milk chocolate chips, either nestle or hershey! But it kind of varies based on the type of cake, and flavor! sometimes I’ll use dark chocolate
I adore the shape of ur cakes u are really talented
But i dont like butter cream .. can i use any kind of cream else
i’d recommend trying a swiss meringue buttercream or italian buttercream, which are much less sweet 🙂
not an expert here just a home baker.. you would need royal icing to make drip on fondant it will dry hard super fast and won’t affect fondant at all… 🙂
Good to know! I hardly ever cakes in fondant, so I had no idea!! Thank you for sharing 🙂
If I were to do glitter for the white chocolate ganache to make the color glittery, would edible glitter show up through the colors or ruin the chocolate?
Hi Nicole,
It wouldn’t really show up through the ganache. I’d recommend brushing it onto the finished drips with a soft brush once the cake is chilled and they’ve firmed up!
Can I make the ganache ahead of time and store in my fridge? If so how do I get it back to the right temperature/barely warm to the touch?
For sure! jost cover it or put it in an airtight container in the fridge, and then when you are ready to use it, pop it in the microwave and heat it for 15 second intervals! I usually do 2 or 3 intervals (depending on the amount of ganache) to get it back to the right temp to use. Hope that helps, happy baking!
I am going to try this for my daughters mermaid birthday cake! Ill post a picture (if it turns out). I have 9 inch cake pans, will it make a huge difference if my cake is a little shorter and wider? or should I double the recipe and just have extra batter?
Hi Bethany! That’s so fun!! I would make 1.5 batches of batter to make 3, 9-inch cake layers! It will be a bit shorter, but I think it I will still look great 🙂
My son is lactose intolerant and can’t have heavy cream – any other suggestions what I can use to melt with chocolate to make a drip cake for him?
This is going to sound crazy, but you can try making a water ganache instead! Sugar geek has a great recipe for it, here’s the hink: https://sugargeekshow.com/recipe/water-ganache-recipe/
I’m about to do the drip with your tutorial(on buttercream using white candy melts), how long after I do the drip does it take to harden?
Hi Sharon,
I’ve never done a drip with candy melts before, so sadly I’m not sure how long they take to set :/ So sorry!
Hi! Can I color the drips? I need to make a cake with silver drip and I have seen people make the drip and then paint it with diluted shimmer. Or should I try to color it with silver dust?
you totally can! Once the drips are added to your cake, they will need to sit in the fridge for about a day to really set and firm up though. Once they’re firm to the touch, you should be able to paint them. Hope that helps, happy baking! <3
Hi! I dont have a paddle attachment to beat butter. Can i use a whisk for buttercream making?
Hi Nazneen,
You can use a whisk attachment if you don’t have a paddle attachment <3
Hi can you tell us how many ml of oil is needed? How much is 1/8 cup in ml?
Hi Nazneen,
1/8 cup is about 30ml! Happy baking!
How much is 28 grams of oil?? Can you give us the ml amount please
Hi there, thank you very much for your recipe and tips on colouring the ganache and how to do the drips. I tried it over the weekend for my daughter’s birthday cake and it worked perfectly!!
Hi Amanda,
You are too sweet 🙂 I am so happy to hear that your daughter’s bday cake turned out so great!!! Thank you for sharing <3
Hi Chelsey,
I stumbled across your page while looking for inspiration for my niece’s 13th birthday cake. Last night I made her a chocolate layer cake, with a purple buttercream frosting and purple dripping. All from your recipes. And it was amazing!! I love baking, but I’m far from an expert. My family couldn’t believe that I’d made the cake (and neither could I really). Thank you so much for sharing such wonderful and easy to follow recipes. Using buttermilk in the cake batter is an amazing trick to know. And that dripping recipe worked perfectly first time!
Thank you very much for me, and a very happy purple-obsessed 13 year old 🙂
Kate
Hi Kate,
That is so wonderful to hear!! And yes I totally agree, buttermilk is one of my favorite ingredients to bake with ? Keep up the great baking!!!
Hi Chelsea,
I am going to bake a fruity cake with whipped cream frosting and would like to decorate it with colours dripping. You think is possible? Will freezing the cake to perform the drips works?
Hi Fion See,
I haven’t tried it myself, but I’d think as long as the whipped cream is frozen it should work! Please let me know how it goes, I’d love to know! happy baking <3
Sweetened canned coconut milk works as a great substitute for the heavy cream for ganache.
Hi Lorrie,
That is great to know! Thank you for sharing Lorrie 🙂 Happy baking!
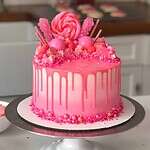
I’m.looking to get the medium drips like the pink one in the picture. How long do you leave the ganache to cool for after heating?
Hi Andi,
It can vary a lot based on how warm your heat your cream, the type of chocolate you use, etc. The best way to know if your ganache is the right temp is to do a test drip like I suggest in this blog post. That’s the only way to really guarantee it’s the right temp / will give you the look you’re after <3
Also what inch cake tins are you using?
I usually use 7 inch cake pans like these: https://amzn.to/2ttArQF
@Chelsweets, how many does 3 7 inch pans serve?
Hey! I’ve always found waiting for the cakes to cool properly at room temperature painstakingly slow and I’m always impatient and frost when they are not cool enough which usually ends in disaster. I want to follow your freeze-to-chill method but was just wondering if I have to wrap the cakes in cling film beforehand and will this method have an affect on how soft/moist my cake will be? Thank you! (Love your website and recipes!)
Hi Phoebe,
I feel you!! If you plan to use the layers within a few hours of making them you definitely don’t need to. I pop my pans right into the freezer uncovered, and then take them out about 45 minutes later or until they’re cool to the touch. The texture of the layers doesn’t change much! If anything they’re a tiny bit more moist 🙂
Hope that helps, happy baking!
Hi Chelsea is urgently need your help, please! What kind of drip should I put on a fondant cake? I read it should be royal icing but I need my drip to be chocolate colour (dark brown). What do I do??!
Chelsea please help me! How do I do a drip on a fondant cake? I need it to look like dark chocolate. I need this tomorrow!!! Thank you ??
Hi Nina,
I have never added drips to a fondant cake because I very rarely cover cakes in fondant! After doing a bit of research on google though it seems like you should be able to add a drip on top of fondant?! I’d say try it but just make sure your ganache is thick enough.
Hello,
Is refrigeration required once the cake is fully decorated with the drips and all?
Thanks, Kristina
Hi, can I use golden caster sugar or normal for the sponge?
Sorry I meant golden caster sugar or normal caster sugar instead of granulated?
I’m looking for a piñata drip cake… but with no cake! Just the chocolate outside! Any ideas how to do this?
Canning make the cakes ahead of time and freeze for a couple days?
Hi. I tried your drip recipe and it turned fantastic. Thank you so much for sharing. I do have a question. I have tried using food gel coloring before with gánage and it hardened. Then I started using a kind of powder food coloring Specially for chocolate and it was fine but I don’t feel 100% happy with the variety of colors I can get here in Peru. Can you tell me why my ganage might have hardened when I tried the gel food coloring? To a point where I had to toss it and make it again. Thank you so much again for sharing ??
Hi Chelsea! If I want a really white drip can I use Wilton’s white food coloring or is it too much liquid?
Can you put a drip on Swiss meringue buttercream?
I have 3 8 inch sandwich tins which are a bit shorter than 2 inch. I will use leftovers for cupcakes. how should I change the cooking time for the layer cake?
The chocolate that you use, is it couverture or confectioneric coating (compound) that has vegetable shortening? I regularly follow your blog and I love how simple you make it sound for home bakers like me. Wish you a lot of success.
Thank you so so so much for this recipe . I tried to perfect the perfect drips and have never had luck . It’s my daughters first birthday tomorrow and I perfected it thanks to your recipe . THANK YOU ? ??
Hi Chelsea. At what stage do you put your fondant toppers on drip cake. And once it’s applied can cake be outside fridge as fondant toppers tend to attract moisture in fridge. Tia
Followed your tutorial and my drip cake decorated with assorted chocolates and mini captain Morgan rum bottles ( 2 bottles ) one on cake one on cake board got me EIGHT HUNDRED yes 800+ likes in a Facebook group. Thank you for the amazing tutorial. I posted the link to this page in my post. Happy Thanksgiving!
I made a drip cake using this recipe and the drip completely ruined my cake. I followed the directions precisely and the drip was so running it made a huge mess everywhere and was a disaster. I couldn’t even freeze the drip to hold up, it would not stop running everywhere. Super upset about this recipe 🙁
can i substitute eggs with yogurt in this recipe? what would be the quantity of yogurt needed as usually i substitute 1 egg to 1/4 cup yogurt
Can a use this drip on a carrot cake that has cream cheese frosting?
This was so easy to follow and it turned out great for my first drip cake! Thank you for the instructions and tips!
I would like to use colored chocolate wafers (some call it candy melts). Would you happen to know the heavy cream and chocolate wafer ratio?”
Thank you so much for all the tips! They were so helpful. My daughter saw a pic of a cake online that she really liked so I gave it a shot. This was my first attempt at a drip cake and it turned out great!
I have a client that requested a strawberry cake. I love to do drip cakes, but she is also dairy and soy-free. If I can find dairy-free white chocolate and dairy free heavy cream, do you believe it will have same results? Do you have any tips on how to do a dairy free drip 🙁
Curious as to what elevation you are at so that I can adjust? I live in the foothills of the Rockies which is approx 3800 feet above sea level.
Tnks slot God give u more wisdom
I have used this drip recipe several times and I absolutely love it! Perfect results every time and it is so simple! This weekend I am making a cake that I would like to use drips with a marbled look- think a couple shades of green with white. I have seen your marble glaze recipe but I would prefer the drips instead. What is your suggestion? Is there a way to marble the drips or maybe should I use only a small amount of glaze that doesn’t completely cover the cake?
Hi Chelsea, I tried your drip last night and have a couple questions. My drip was kind of dull in colour despite using gel colouring – how can I make it more rich or brighter in colour? Secondly my drip discolored and looks graining after chilling overnight. What could be the cause of this so I can correct in future?
Thanks!
Wow! Great post! I just found your blog today. I want to make an Anniversary cake for my Godmother and her husband and have been interested in doing a drip cake! This really makes it feel less intimidating. Also, I saw your red wine drip cake. Totally my Godmother! She loves wine! I think she would really dig it. Thanks for all the hints and ideas!
Thanks
I have learn a lot
Hello! I made this cake a couple years ago- soo much fun! I just made one this evening for tomorrow, New Years Eve ? Does it need to stay in the fridge, or can it be kept out over night?
Hi,
How many layers are your cake?
Thank you so much for your recipes, directions, and tips! I made my first drip cake, and it turned out great. I’d love to share a photo with you.
Does the cake have to have a thick layer or buttercream for this to work? I’m making this for my sisters birthday but she hates frosting and wanted the cake frosted with marshmallow fluff but I don’t think the drip would work with that so I convinced her to let me put a thin layer of buttercream. Any help/tips would be appreciated. Love your stuff!
Hi! I would like to make this cake for a party on Saturday but wanted to make it on Friday (about 24 hours ahead of time). My daughter wants a blue buttercream and purple chocolate ganache to make an ice cream cone drip cake. Does the ganache need to stay in the fridge so it does not spoil?
I am not sure if I should make it on Friday and put in the refrigerator or leave it out. I do not want the purple to bleed onto the blue. What do you think? Will the fridge help to prevent the bleeding or will it make it worse?
Hi Kaitlin,
Apologies for the delayed response! Making this drip cake in advance should be totally fine. It can be made up to a week in advance and stored in the fridge.
I’ve never had any coloring bleed from the ganache into the frosting, but I also don’t live in a super humid climate. As long as the cake doesn’t have a big temperature shock (like going from the cold fridge straight into like 90F weather) it shouldn’t bleed or have condensation. I would recommend keeping the cake refrigerated until about 2 hours before you plan to cut into it.
Hope that helps for the future and that your cake turned out great <3
When does a ganache covered cake need to be refrigerated? Can this set out at room temperature for a couple days or does it need to stay refrigerated unless serving? Sorry I’m not sure about all the dairy rules.
Hi Lori,
A cake filled/covered with ganache should be able to sit at room temperature for up to 2 days, but I’ve never really tested them more than about 12 hours. Ganache sets quite firmly so cakes covered with ganache hold up quite well at room temperature. However, I usually refrigerate cakes and pull them out of the fridge a couple hours before I plan to serve them.
Buttercream cakes can also sit out at room temperature for a day! But I find sometimes buttercream cakes can settle (and form bubbles/buldges) as they sit at room temperature, so I don’t usually let them sit out for more than a couple hours.
Hope that helps, happy baking!
Hi! Do you have a recipe for drips on fondant covered cakes? Is it better to use royal icing if the cake is covered in fondant?
Can I make rainbow drip cake a day before the party…Ian’s save in fridge.
Hi Naina,
You can totally make a rainbow drip cake a day in advance! The cake should keep well in the fridge, and can be stored in the fridge for up to a week. Hope that helps, happy baking!
On the recipe it says to use egg whites for the cake, so what should you do with the egg yolks?
Hi Bella,
Great question! I usually use egg whites out of a carton, so I don’t have leftover egg yolks. If you’re separating fresh eggs, here’s a list of delicious things you can make with the yolks: https://insanelygoodrecipes.com/egg-yolk-recipes/
Hope that helps, happy baking!
Hi there,
will this work with cream cheese frosting instead of buttercream as the base?
Hi Victoria,
Great question! This drip recipe works great on cream cheese buttercream as long as it’s chilled. Hope that helps, happy baking!
Is it do able to make drips on a sheet cake? I am making large numbers for the cake, but they are only one layer. If I make really thin drips, will it make enough of an effect? I plan on making them in two different colors. Thanks.
Hi Andrea,
Great question! It depends on how tall your sheet cake is, but I think it should definitely work! They will need to be a bit shorter than normal, but I think they’d still look cool!! Hope that helps, happy baking 🙂
Can you do a white chocolate drip over a cake that has been coated in dark chocolate ganache, or does it have to be buttercream?
Hi Natalie,
I’ve never added a drip to a ganache covered cake, but as long as the ganache is chilled, I would think it should work just fine on it! If you try it, please let me know how it goes!!
Very good information and tips, going to try.
Thank you Debbie! I hope it turns out amazing!!! 🙂
Does the drop solidify once it’s on? Or does it remain wet and liquid. Just wondering if I can decorate the drip cake a day ahead
Hi Jenn,
It does firm up once it’s refrigerated, and can definitely be decorated a day ahead. Hope that helps, happy baking!
can I do a metallic drip on a cake frosted with swiss buttercream?
Hi Chris,
You can paint the drips once they’re fully chilled and set with a mixture of luster dust and clear liquor or extract. It’s a time consuming process but it works! Hope that helps, happy baking!
Will gel food coloring seize the ganache!!?? I’ve added gel color to almond bark and it did not work!!!
Hi Allison,
Great question! Gel food coloring works great in this recipe, I’ve never had it seize up! The heavy cream in the recipe keeps the chocolate from seizing. Hope that helps, happy baking!
Will this work on ordinary frosting opposed to buttercream?
Im making a chocolate cake with choco frosting with white drips.
So what is the ratio of heavy cream to candy melts?