
S’mores Cake
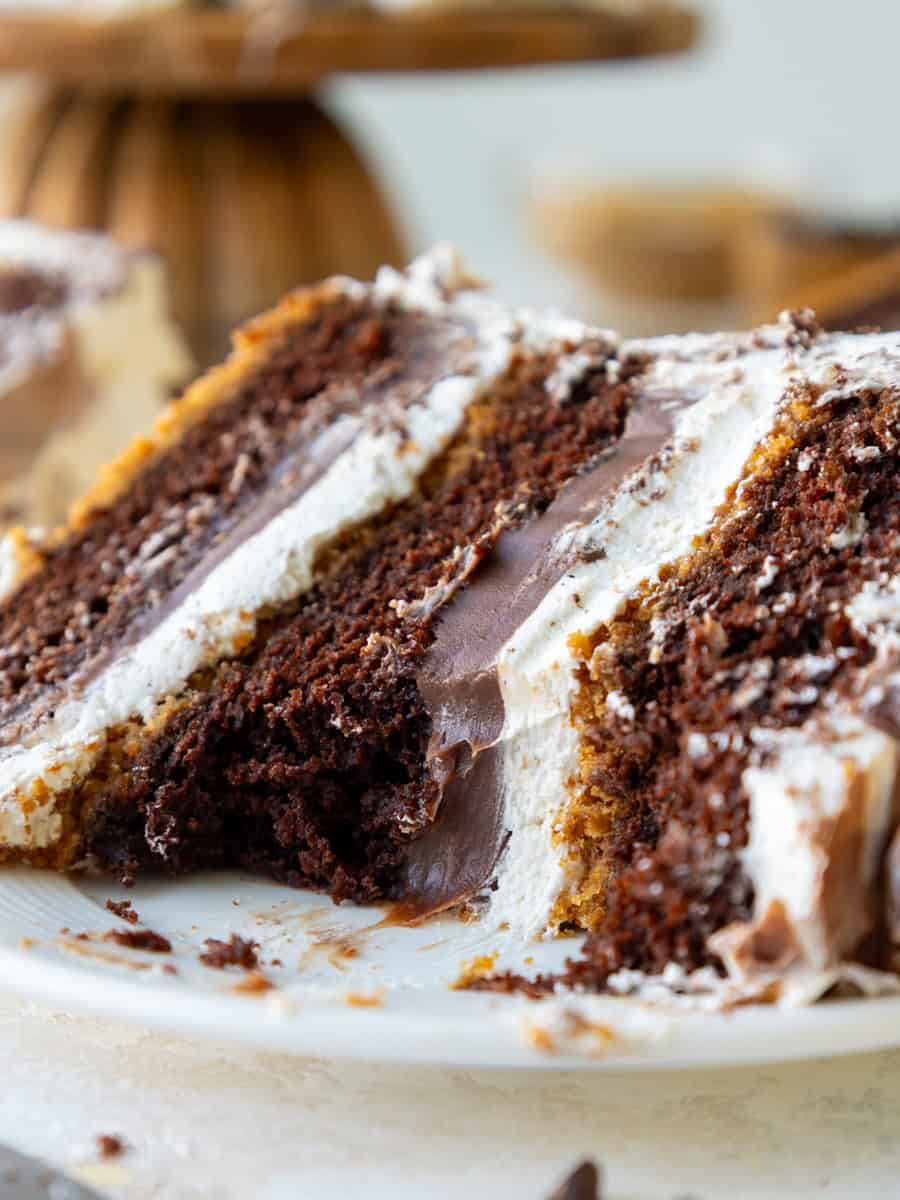
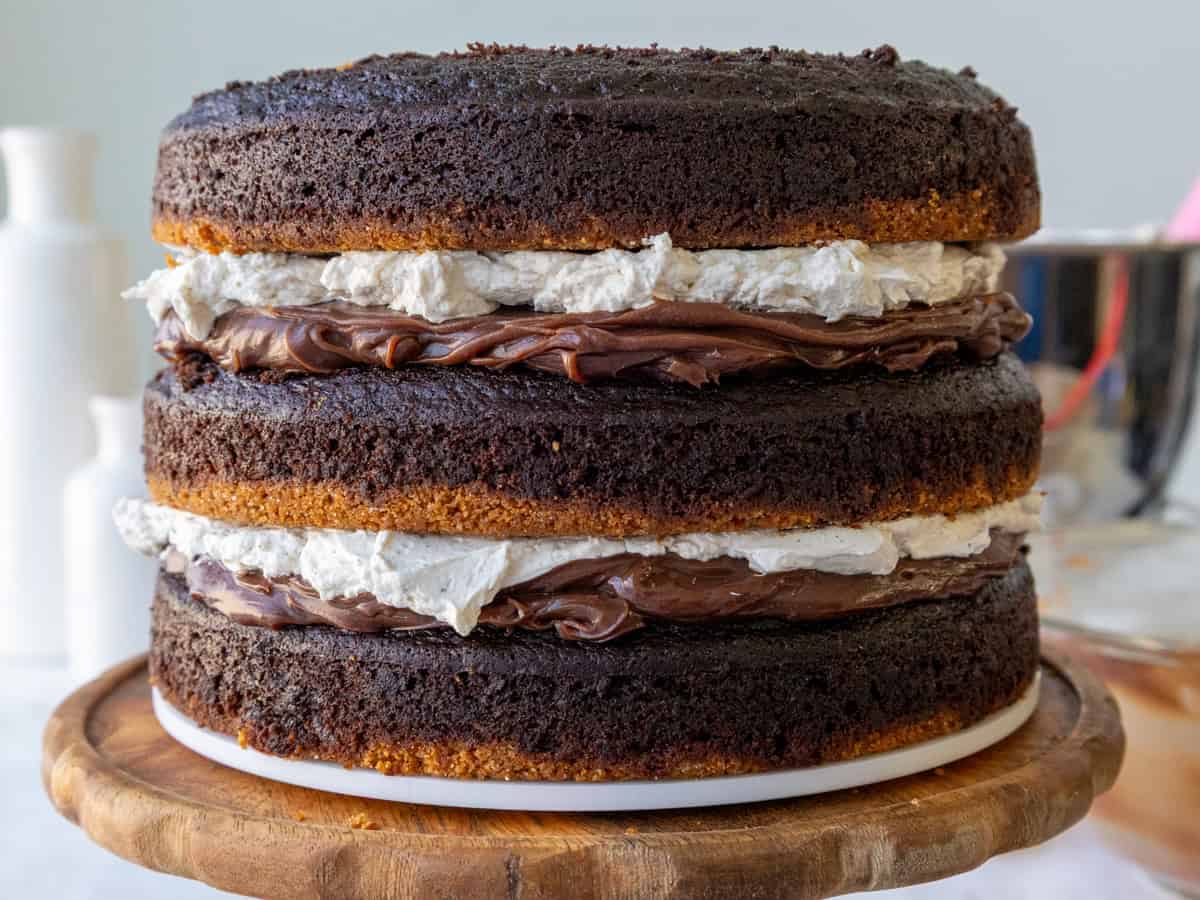
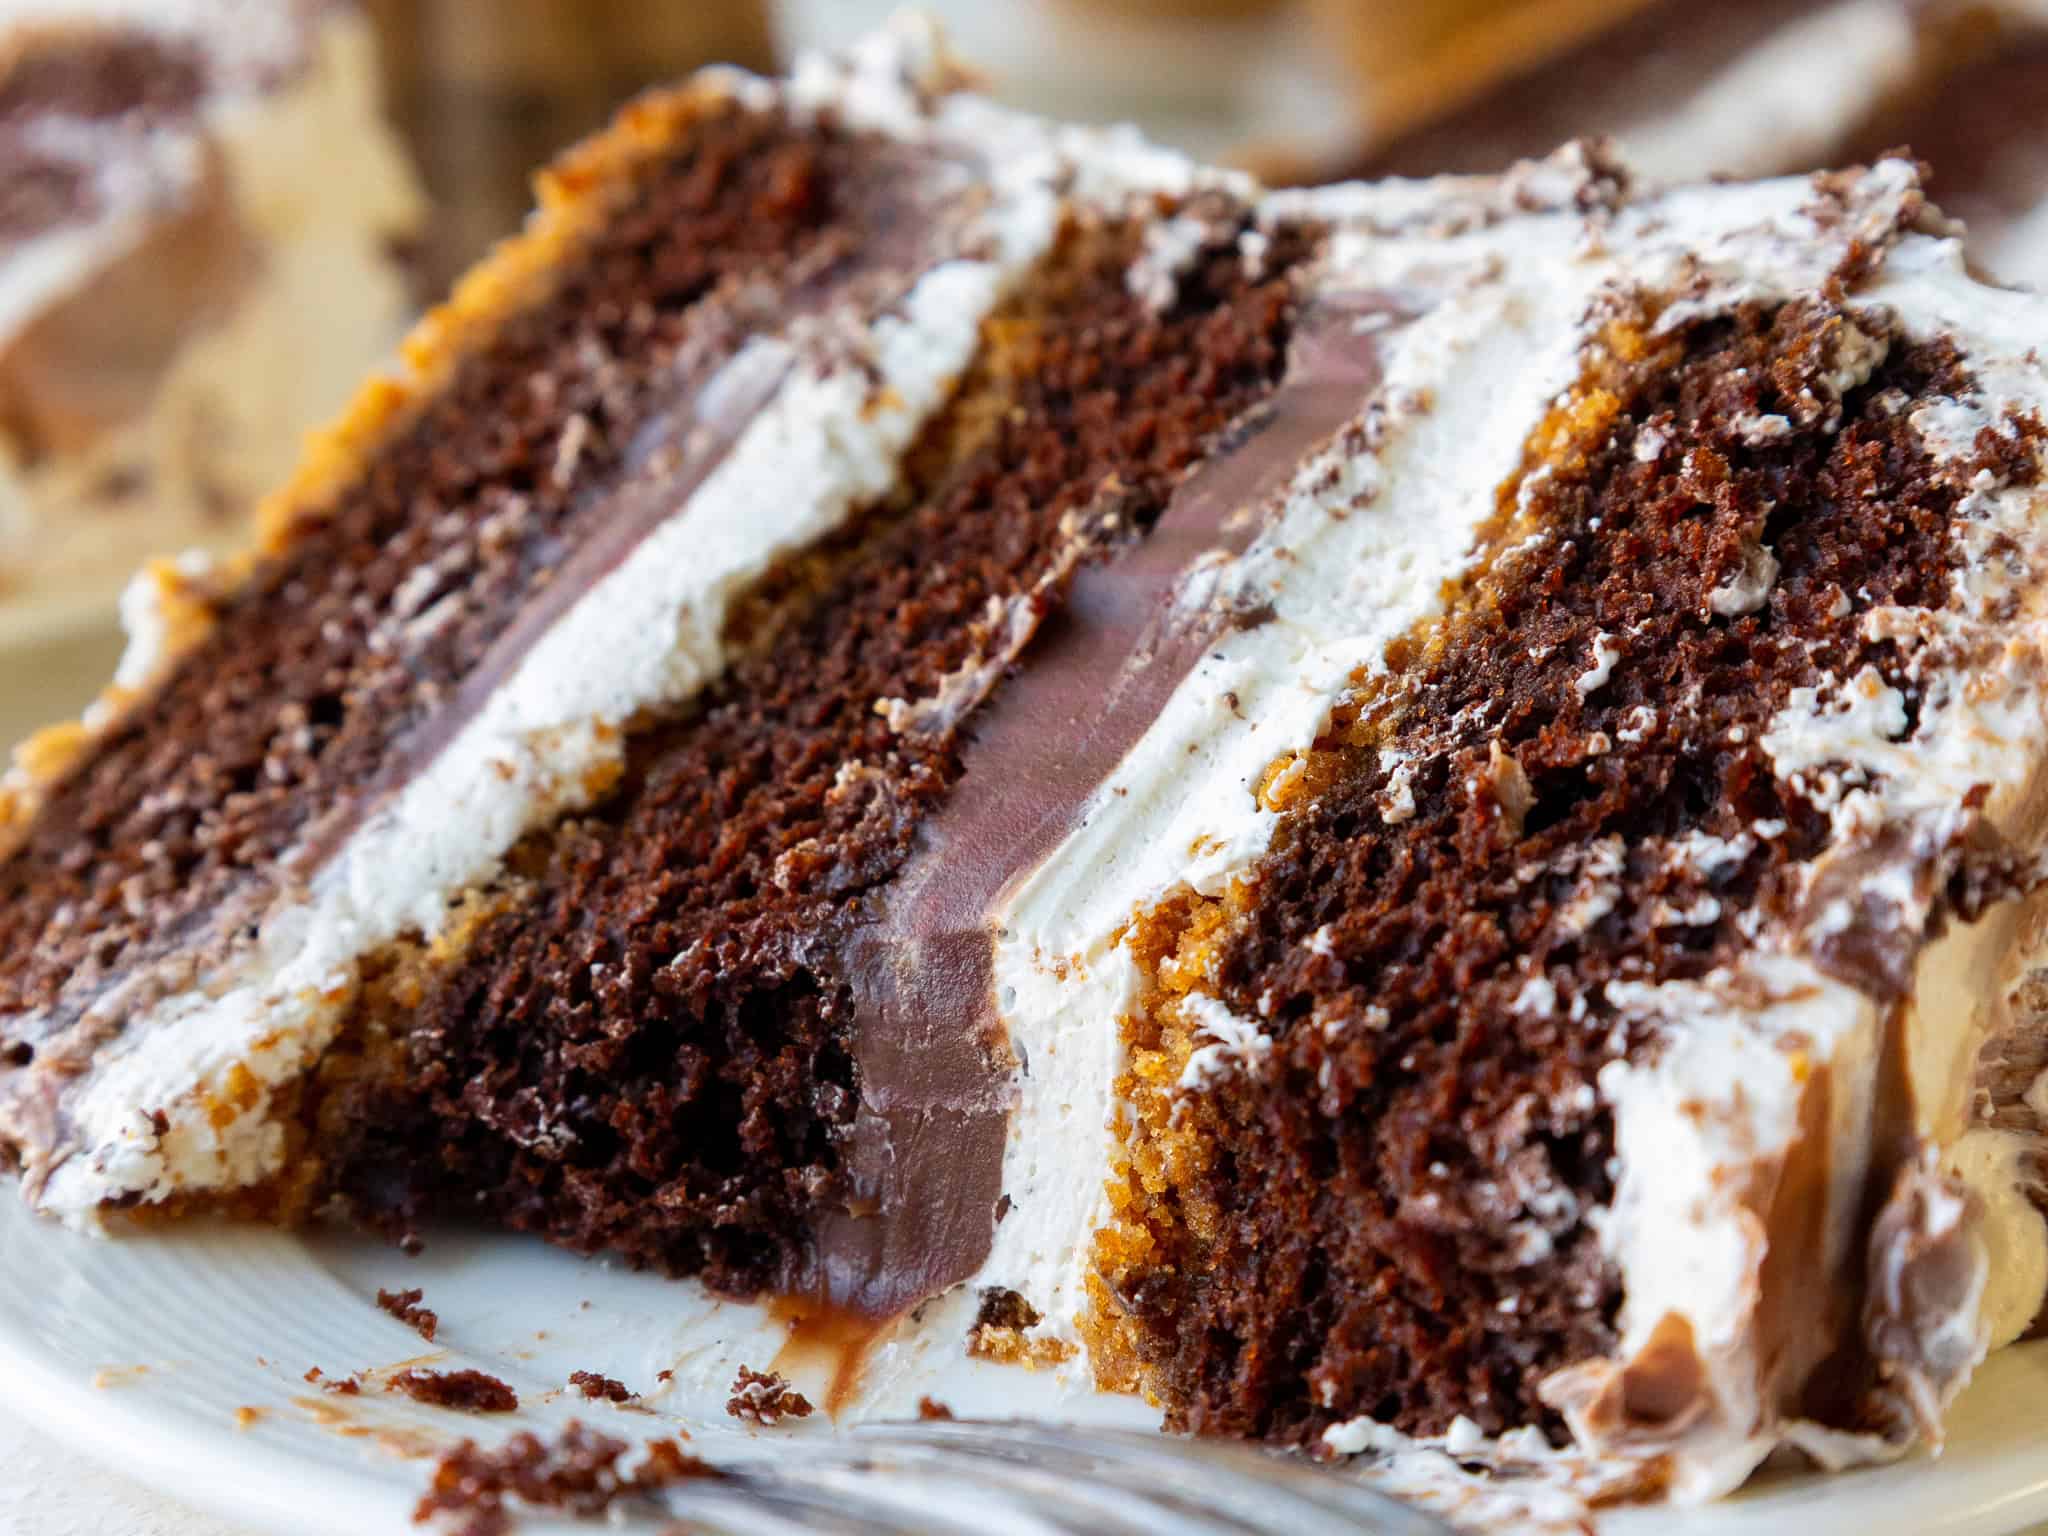
This s’mores cake is made with moist chocolate cake layers baked over a buttery graham cracker crust, then filled with toasted meringue buttercream and rich chocolate ganache.
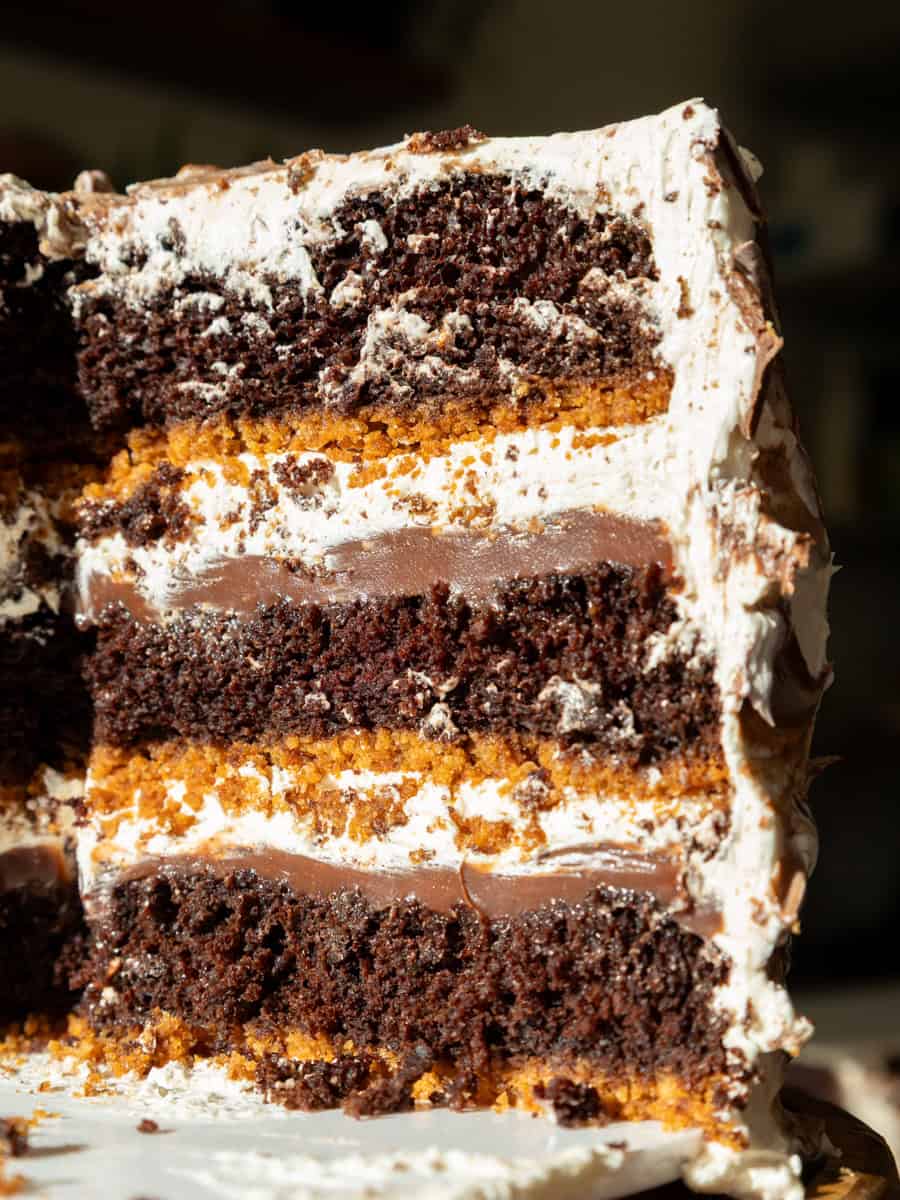
It has everything I love about a classic s’more, including crisp graham crackers, gooey marshmallow, and plenty of chocolate. But somehow, it’s even better in cake form!
This S’mores Cake at a Glance
- Yield: One 3-layer, 8-inch cake
- Serves: About 24
- Cake layers: Moist chocolate cake baked directly over a graham cracker crust
- Filling: Milk chocolate ganache and toasted meringue buttercream
- Skill level: Intermediate
- Make ahead: Yes! I highly recommend making the components in stages.
- Special equipment: A kitchen torch creates the signature toasted marshmallow flavor, and an instant-read thermometer helps ensure the meringue reaches 160°F/71°C.
How to Make This S’mores Cake
To make sure this cake turns out as amazing as possible, let’s walk through each step together!
I highly recommend reading through the entire recipe before you start. There are several components, and a little planning makes this cake so much easier to tackle.
Step 1: Make the Chocolate Ganache Filling
I recommend making the ganache first because it needs time to cool and thicken. I usually make it the night before, but you can also make it a few hours in advance.
Heat the heavy cream until it just begins to bubble and steam, then pour in the milk chocolate chips. Make sure the chocolate is fully covered by the cream and let the mixture sit for about a minute.
Slowly stir until the chocolate and cream come together into a smooth, glossy mixture.
Mix in the room-temperature butter, optional corn syrup, and salt. The corn syrup helps make the ganache extra smooth and glossy, but the recipe will still work without it.
Cover the ganache with plastic wrap and let it cool to room temperature. If you’re short on time, pour it into a shallow container so it cools more quickly.
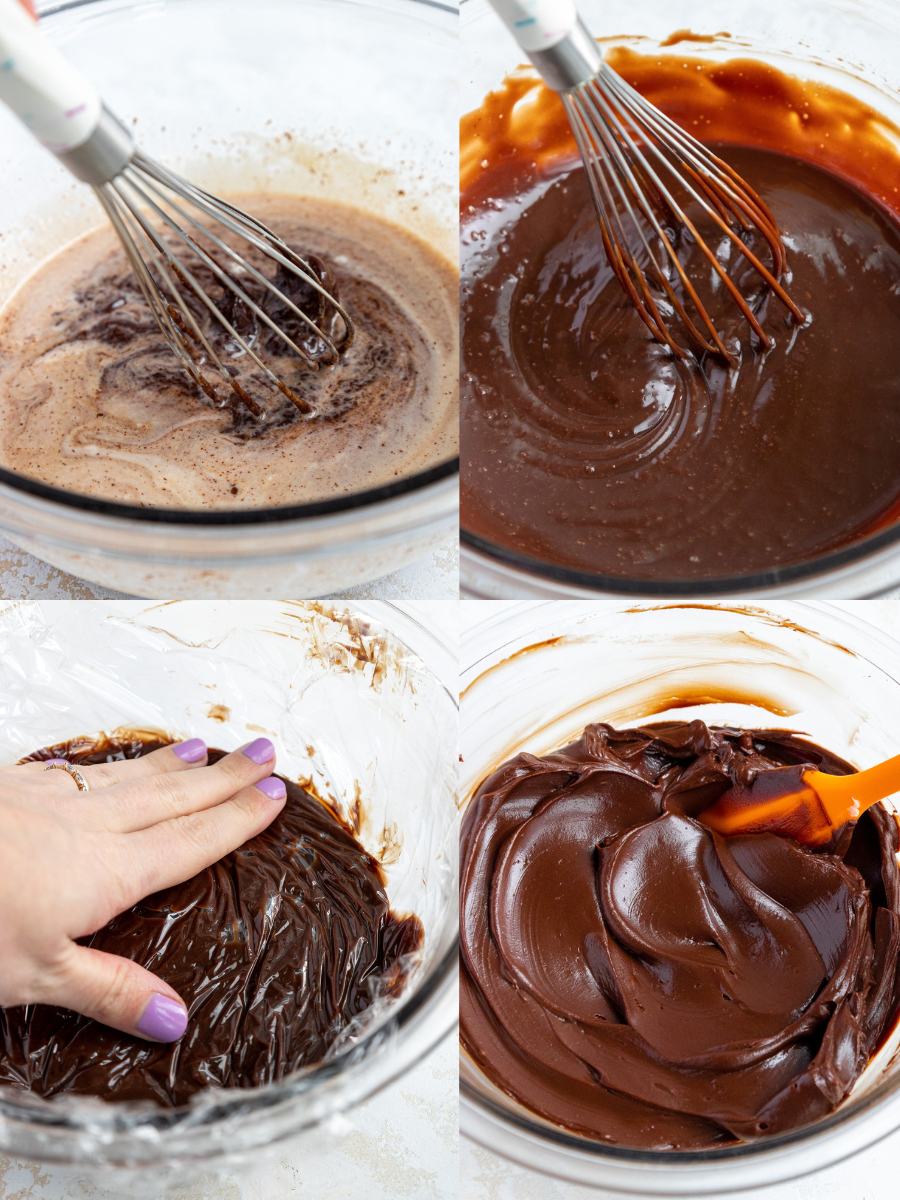
My biggest tip here is not to rush the cooling process. Warm ganache is too fluid to use as a cake filling and can make the layers slide.
Step 2: Make the Graham Cracker Crust
Preheat your oven to 350°F/175°C and prepare three 8-inch cake pans with parchment paper rounds and nonstick spray.
Mix the graham cracker crumbs, melted butter, granulated sugar, and salt until evenly combined.
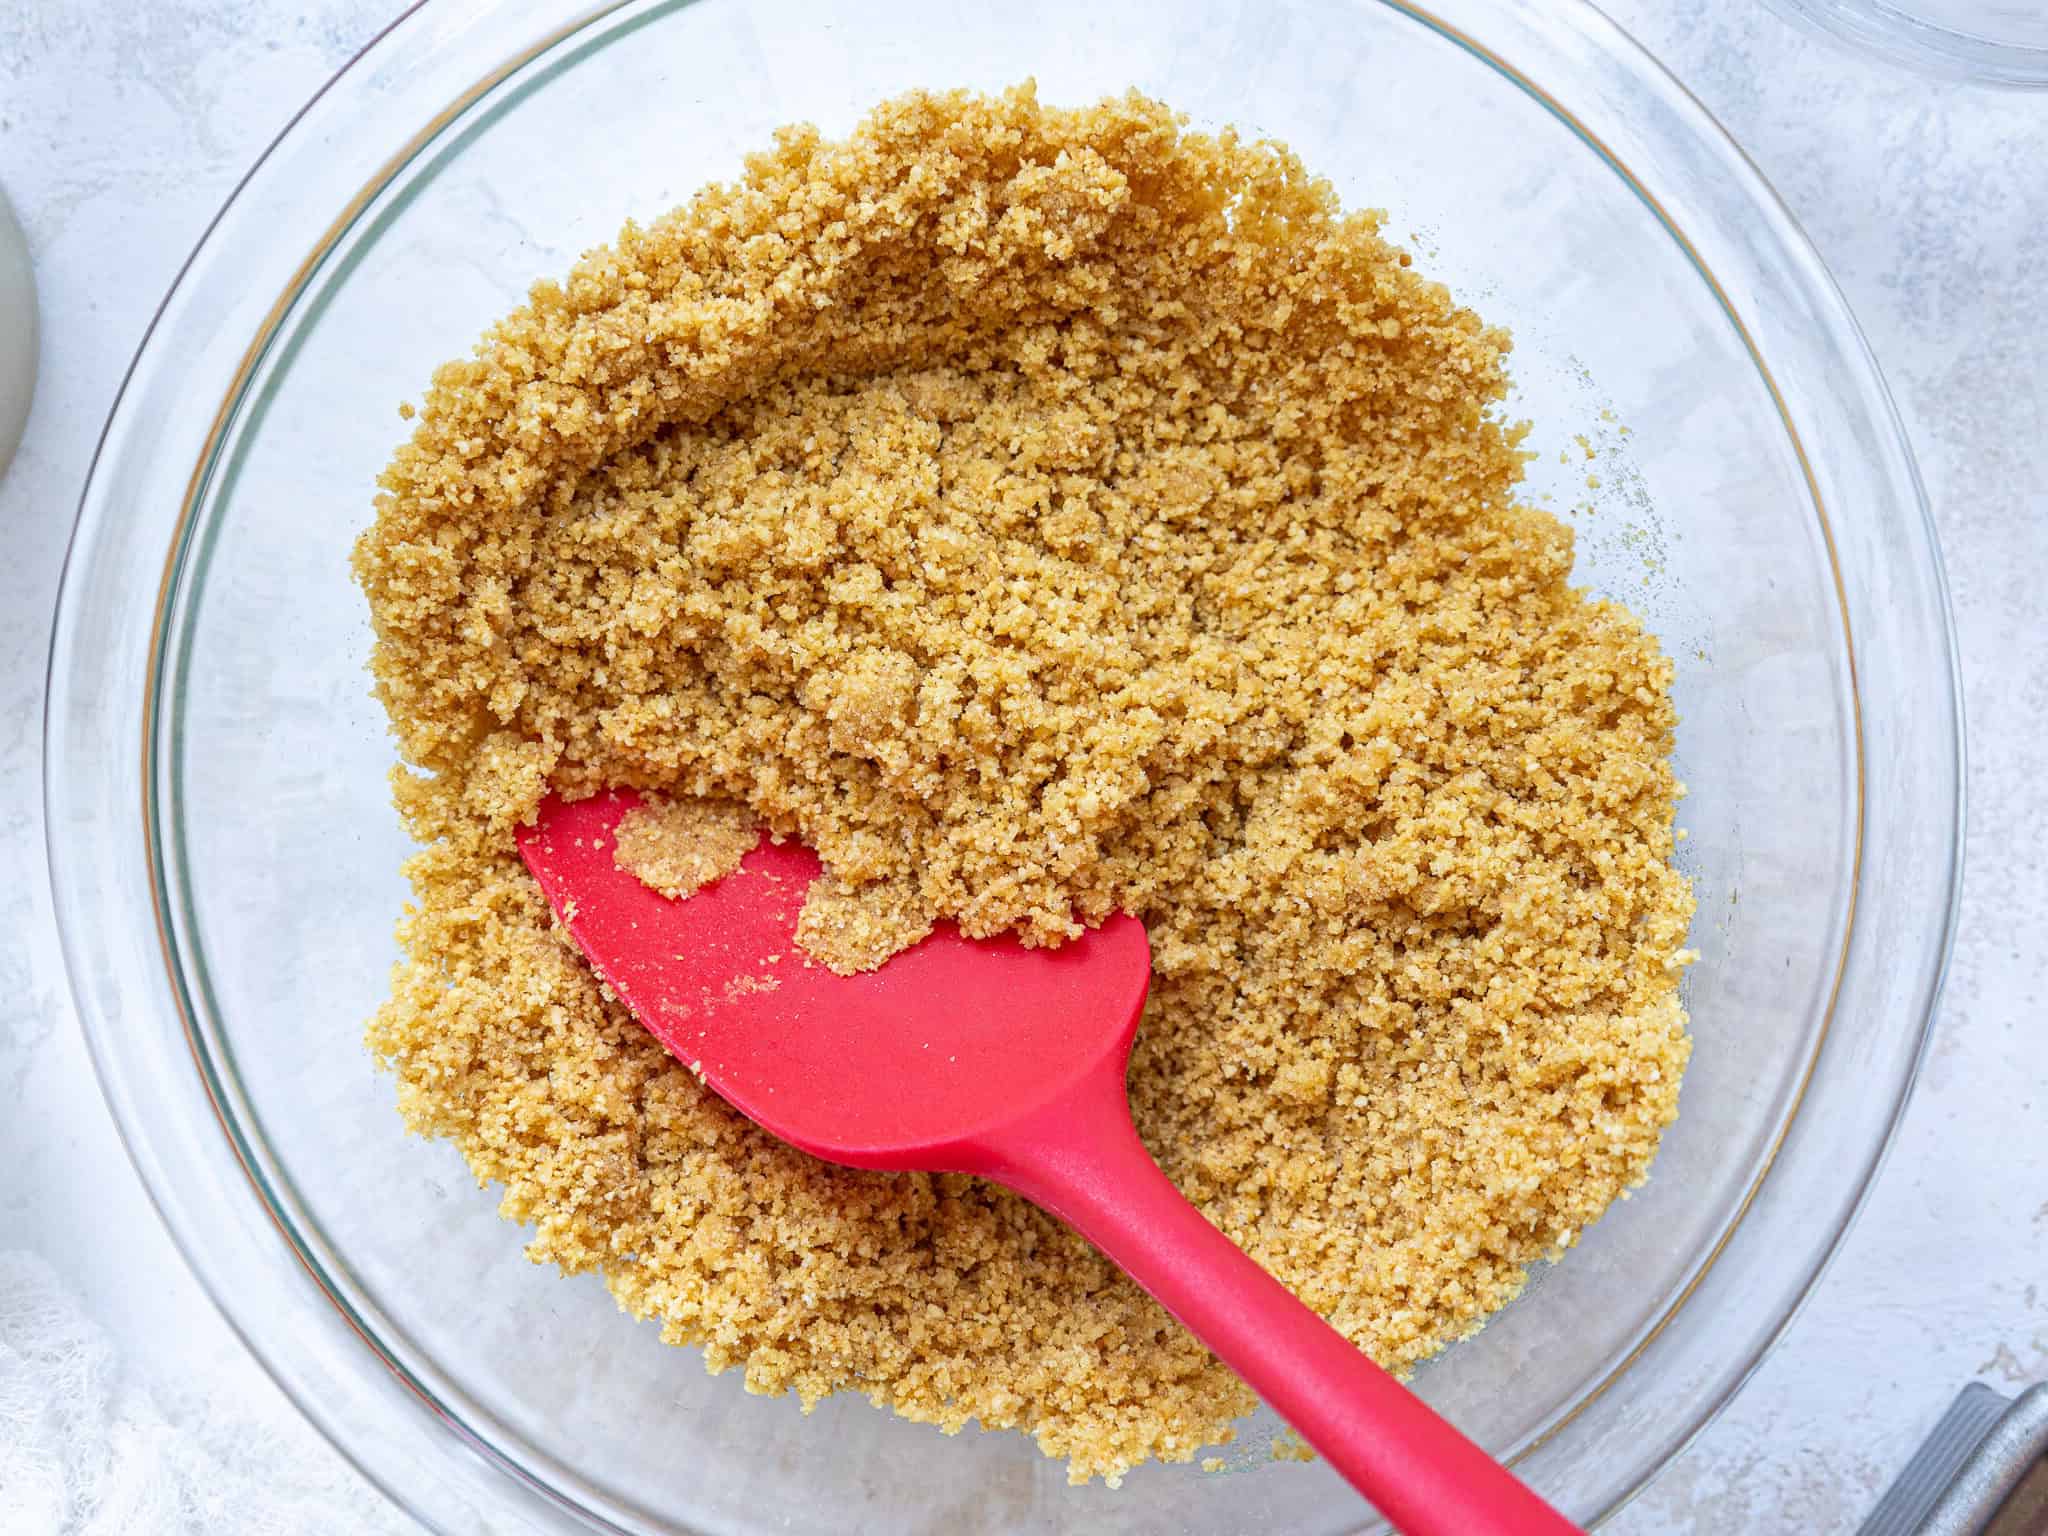
Divide the mixture between the prepared pans and press it firmly into an even layer. Bake the crusts for 8 to 10 minutes, then set them aside to cool slightly.
I love baking the chocolate cake directly on top of the crust. It makes each layer feel like an actual s’more and ensures you get graham cracker flavor in every bite.
Step 3: Bake the Chocolate Cake Layers
Next, make the chocolate cake batter following the recipe card at the bottom of this post.
Whisk the dry ingredients together in one bowl and the wet ingredients together in another. Add the dry ingredients to the wet ingredients and mix just until the batter is smooth and combined.
Divide the batter evenly between the three prepared pans, pouring it directly over the baked graham cracker crusts.
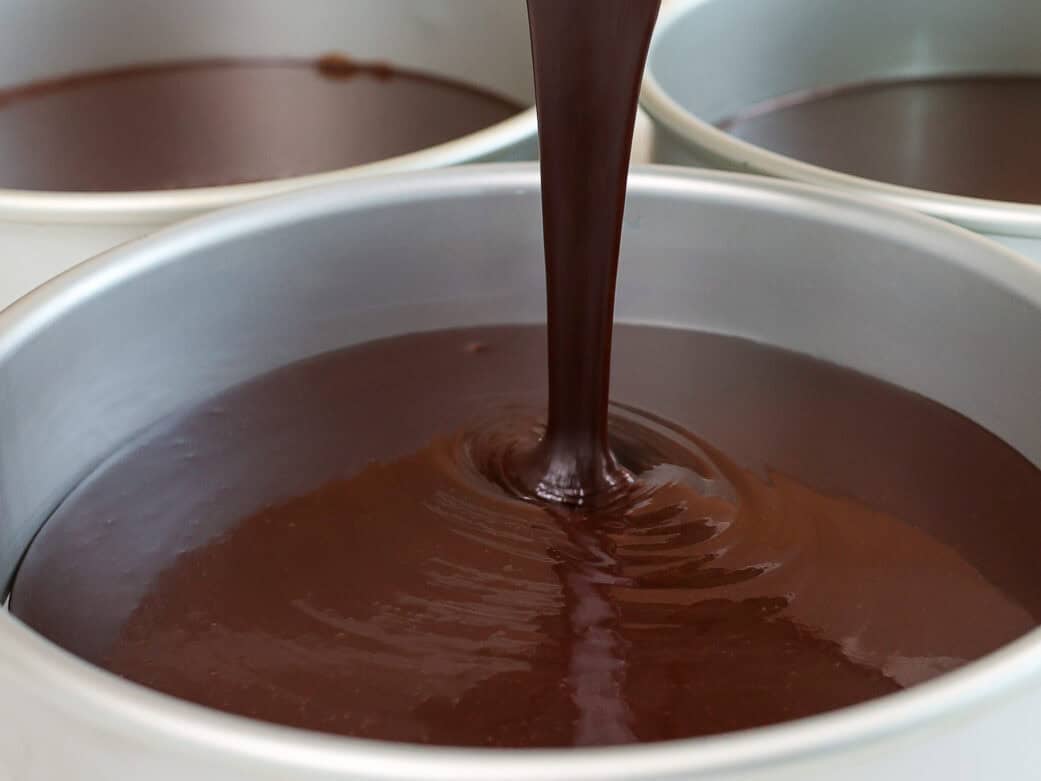
I recommend using a kitchen scale and adding about 475g of batter to each pan. This helps the cake layers bake to the same height and makes the finished cake easier to stack.
Bake for 24 to 27 minutes, or until a toothpick comes out with a few moist crumbs. Let the pans cool for 10 minutes, then run a small offset spatula around the edge of each pan.
Place the cake pans in the freezer for about 30 minutes to speed up the cooling process. This helps lock in steam and keeps the cake layers extra moist.
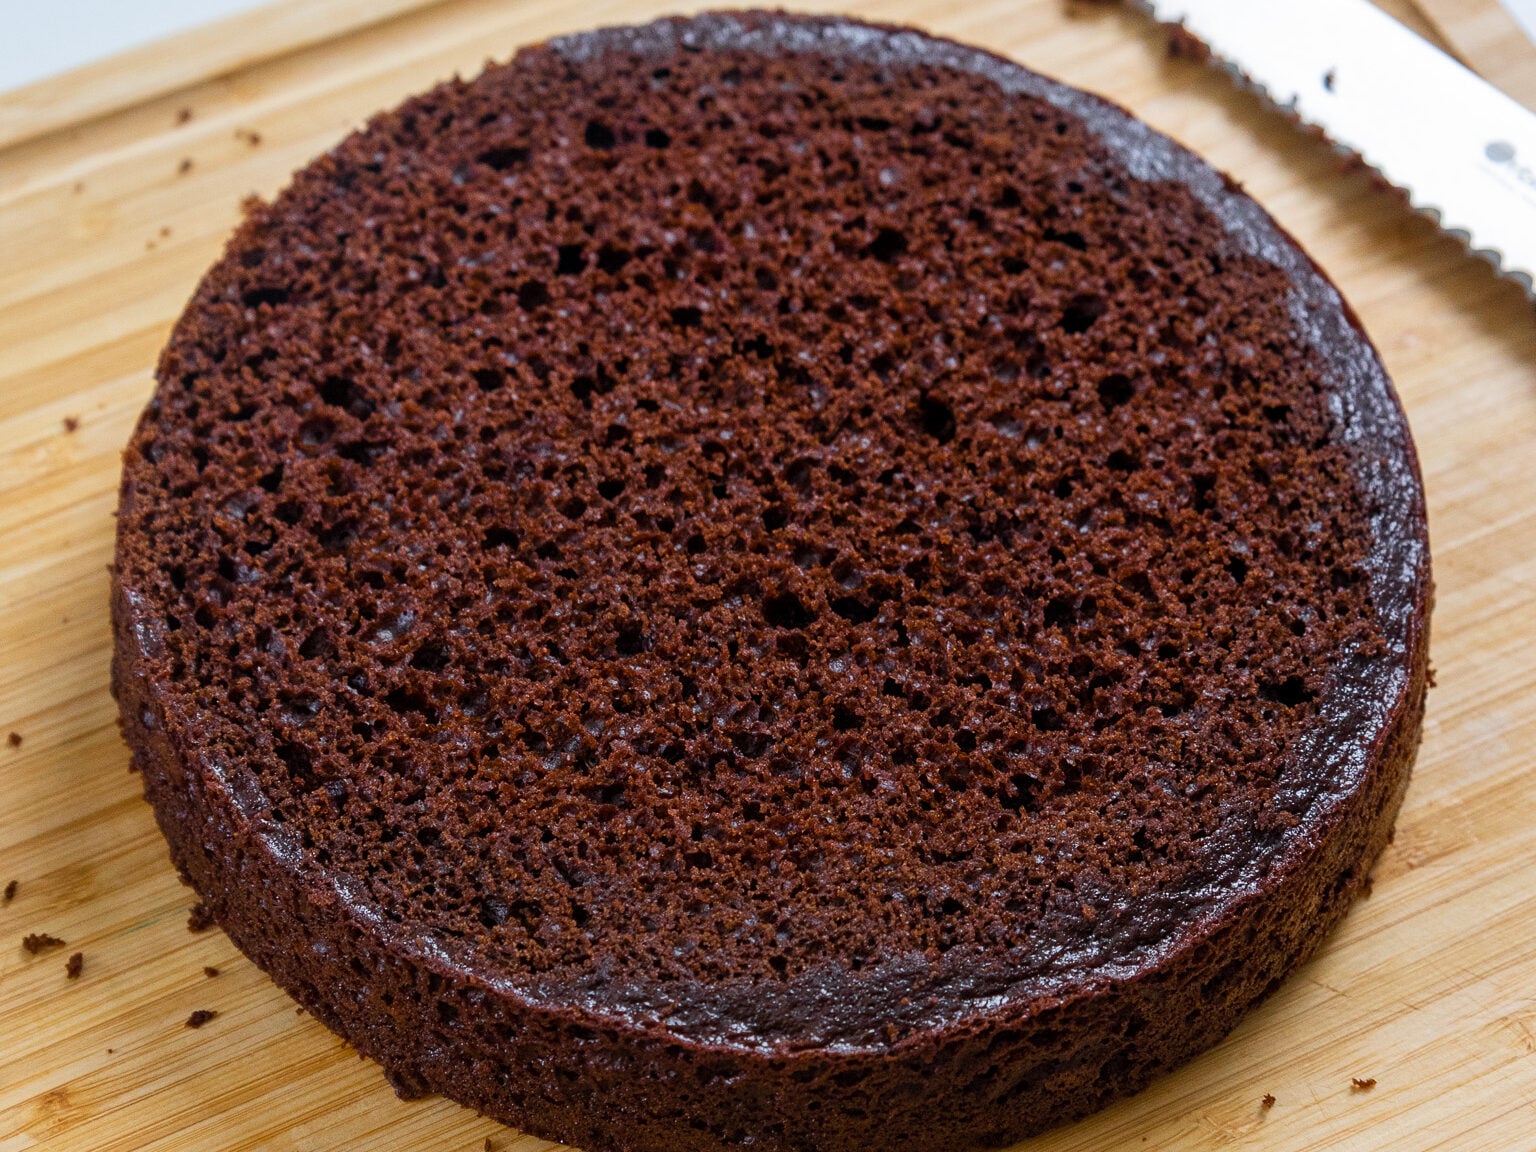
If you don’t have room in your freezer, let the cake layers cool completely on a wire rack before removing them from the pans.
Once the layers are fully cooled, carefully remove them from the pans. These cake layers usually bake up pretty flat, so leveling them is optional. However, I like to trim them with a serrated knife if needed to make the cake easier to stack and fill.
Step 4: Make the Meringue Base
While the cake layers cool, make the toasted meringue. Before you start, thoroughly clean and dry your mixing bowl and whisk. Even a small amount of grease can make it difficult for the egg whites to whip properly.
Add about an inch of water to a medium saucepan and bring it to a gentle simmer.
Combine the egg whites, granulated sugar, and light corn syrup (optional) in a large heatproof metal bowl, then place the bowl over the saucepan. The bowl should sit over the pot without touching the simmering water.
Whisk the mixture constantly until it reaches 160°F/71°C. The sugar should be completely dissolved. You can carefully rub a tiny bit of the mixture between your fingertips to check. It should feel smooth rather than grainy.
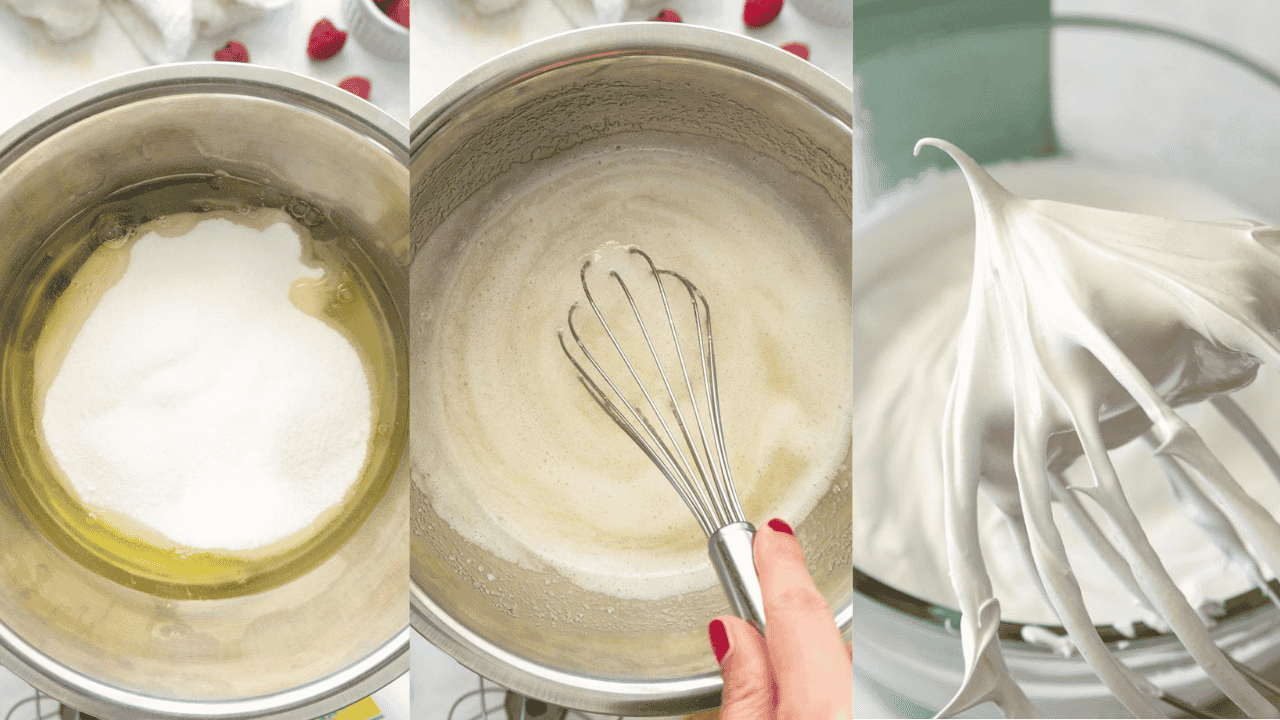
Transfer the mixture to the bowl of a stand mixer and whip on medium-high speed for about 10 minutes, or until stiff, glossy peaks form. The meringue should also cool back down before you add the butter later.
One of my favorite tricks is to place something cold around the base of the mixing bowl while the meringue whips. A bag of frozen vegetables works surprisingly well! This helps the meringue cool more quickly and can prevent the buttercream from becoming soupy.
Step 5: Toast the Meringue
Then comes the fun part! Use a kitchen torch to carefully toast the surface of the meringue directly in the bowl. Turn the mixer back on briefly to incorporate those toasted bits.
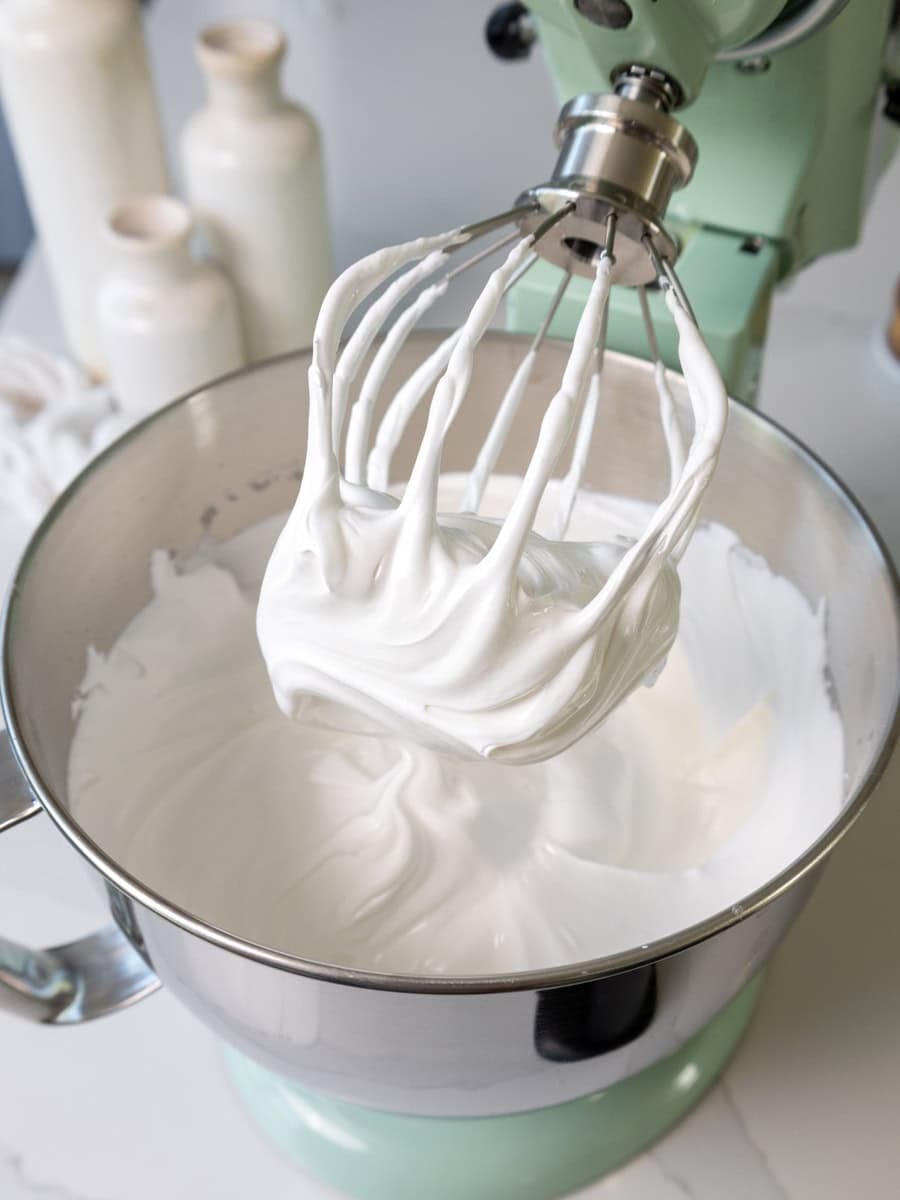
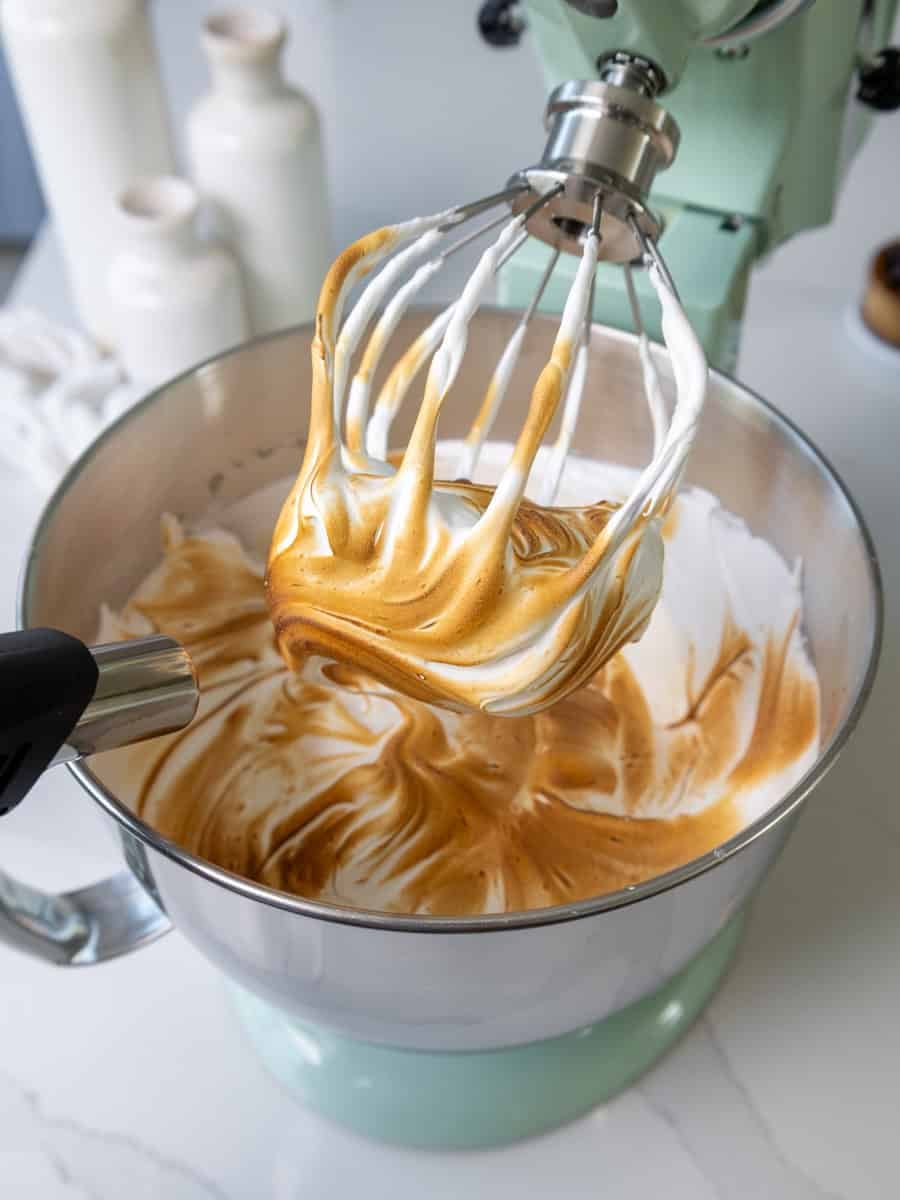
Repeat this process a few times until you can see small flecks of toasted meringue throughout the mixture.
This is what gives the buttercream its roasted marshmallow flavor, so don’t skip it!
Step 6: Mix in the Butter
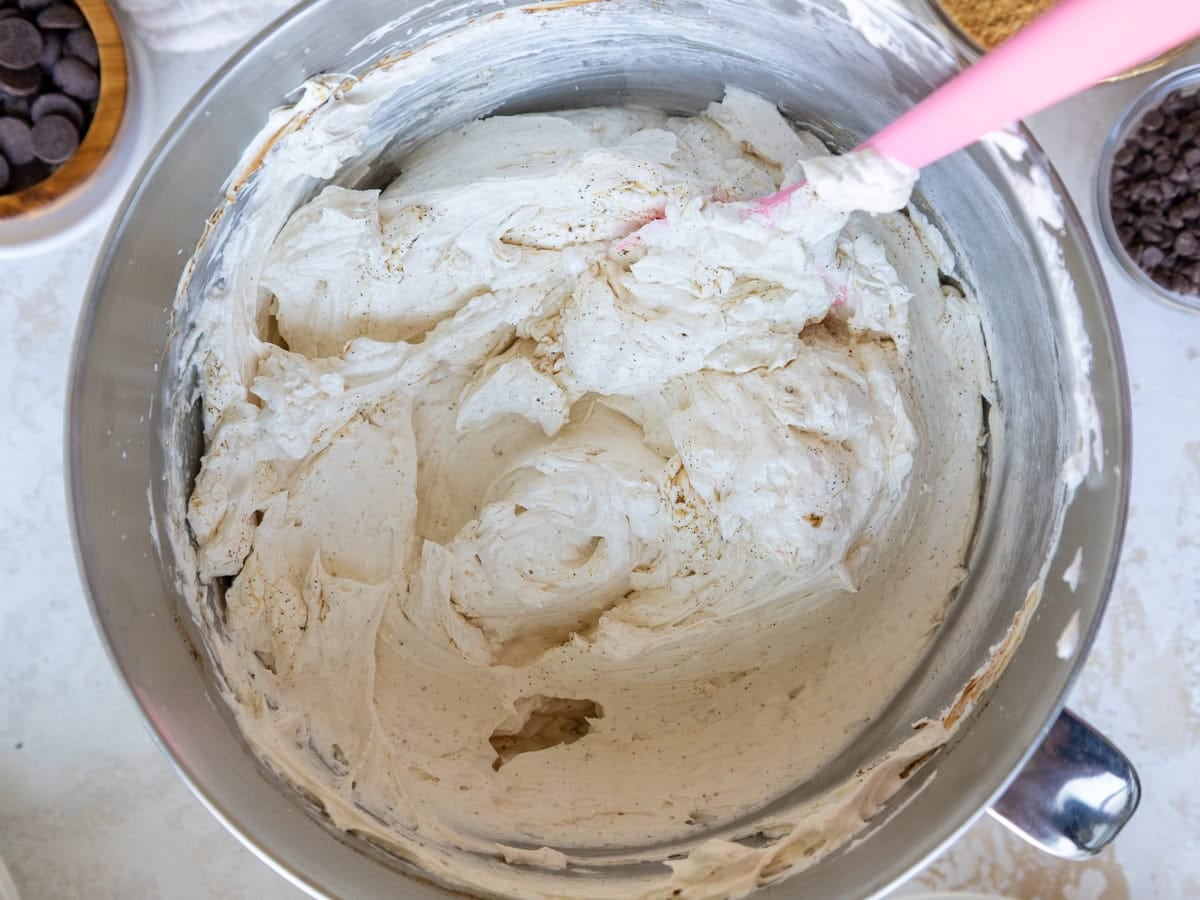
Gradually mix the room-temperature butter into the meringue, along with the vanilla extract and salt. Once all the butter has been incorporated, the frosting should look thick, smooth, and fluffy.
At first, the frosting might look slightly broken or lumpy. Don’t panic! Keep mixing. Meringue-based buttercream often goes through an awkward stage before coming together. It should look fluffy and thick once it’s done mixing.
How to Assemble This S’mores Cake
Once all the components are ready, it’s time to put everything together!
Stack and frost the cake layers on a greaseproof cake board or large flat plate. Use a small dab of frosting to help stick the first cake layer to the board.
Step 1: Add the Chocolate Ganache
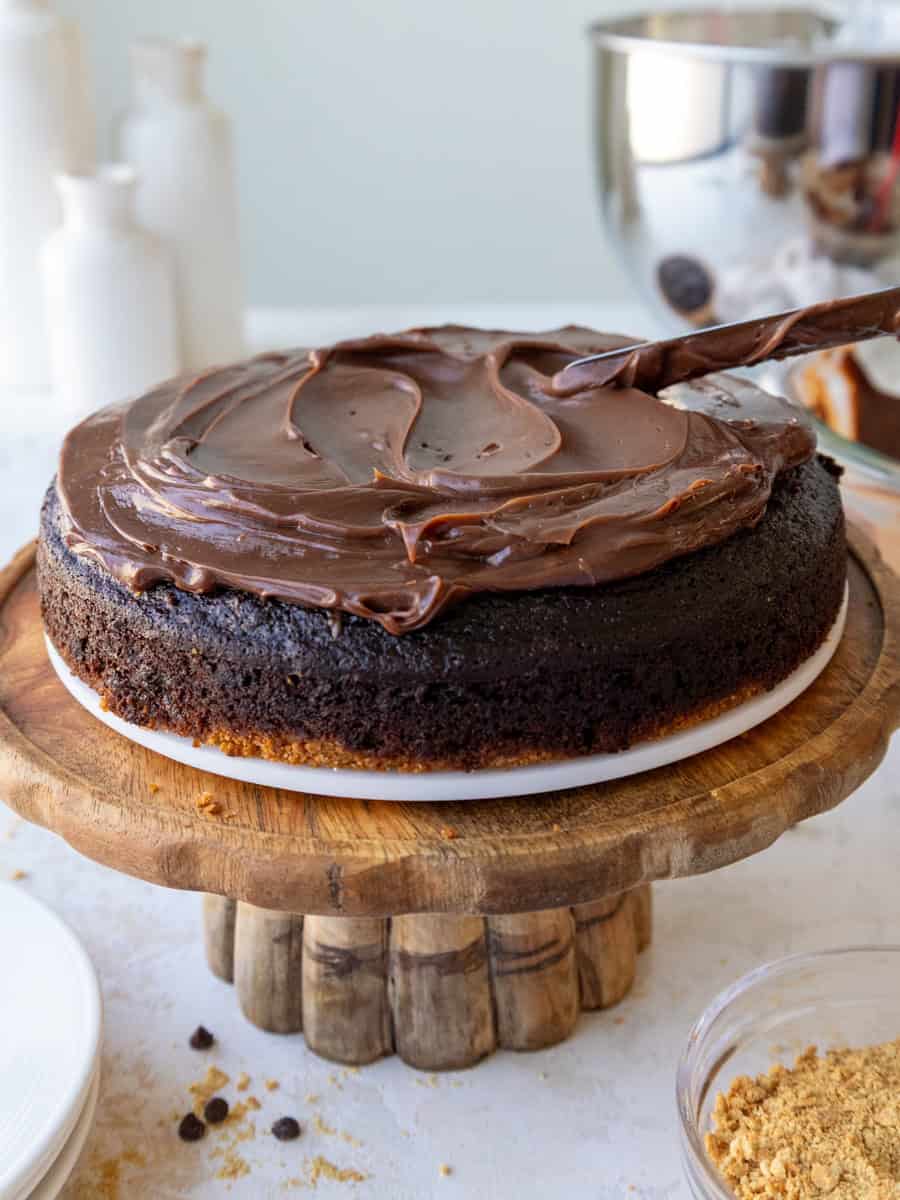
Place the first cake layer on the board. Spread half of the thickened chocolate ganache over the cake layer.
Make sure the ganache has cooled enough to hold its shape. If it’s still runny, let it sit longer before assembling the cake.
Step 2: Add the Toasted Meringue Buttercream & Repeat
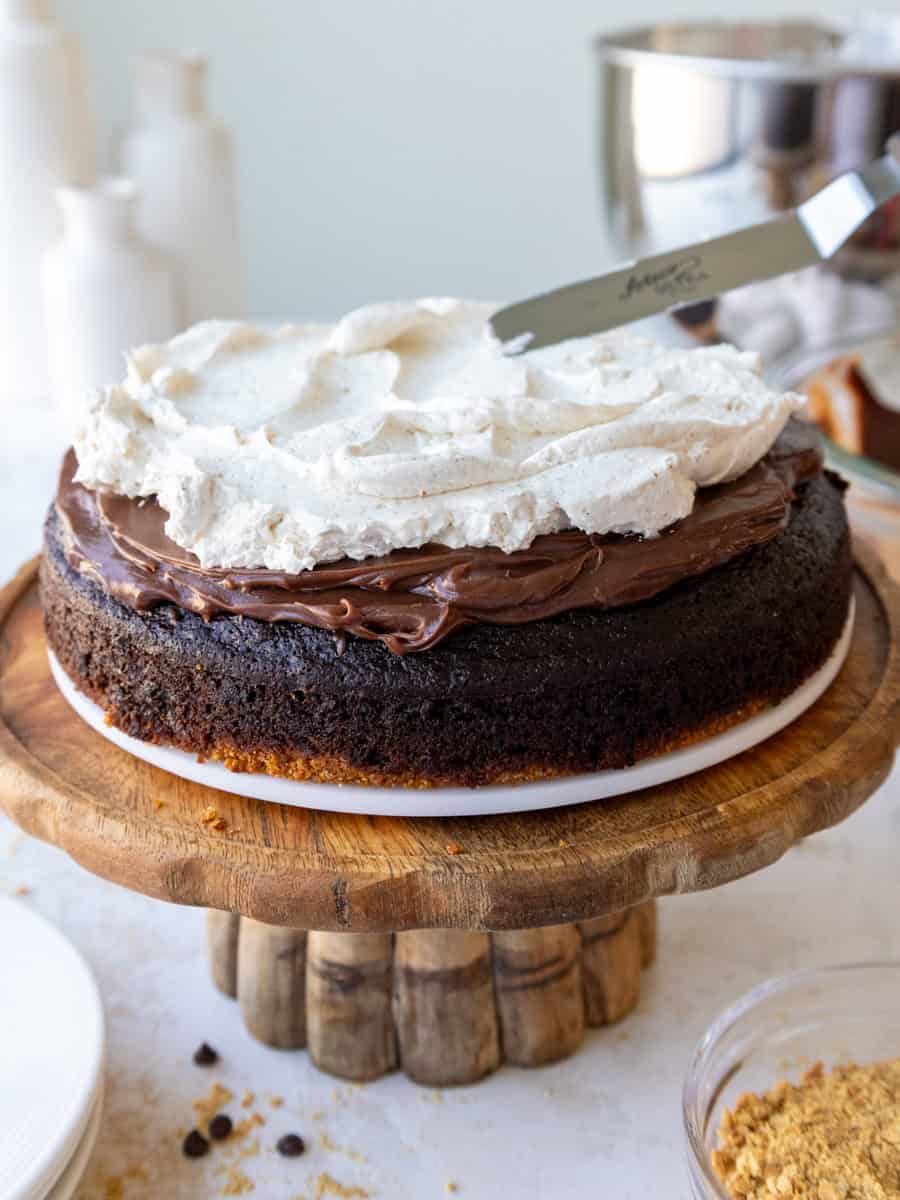
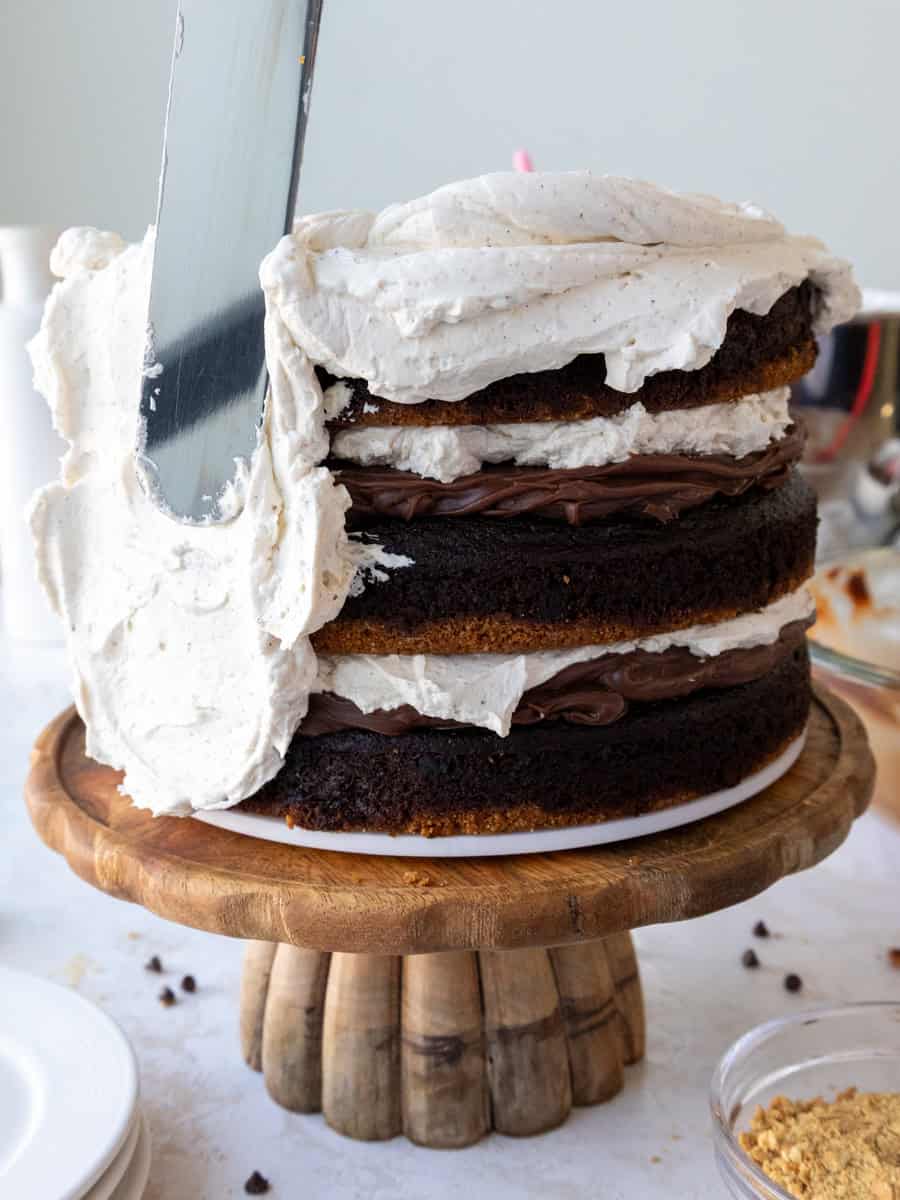
Then spread a thick layer of toasted meringue buttercream on top of the ganache. Try to keep the filling relatively even so the next cake layer sits flat.
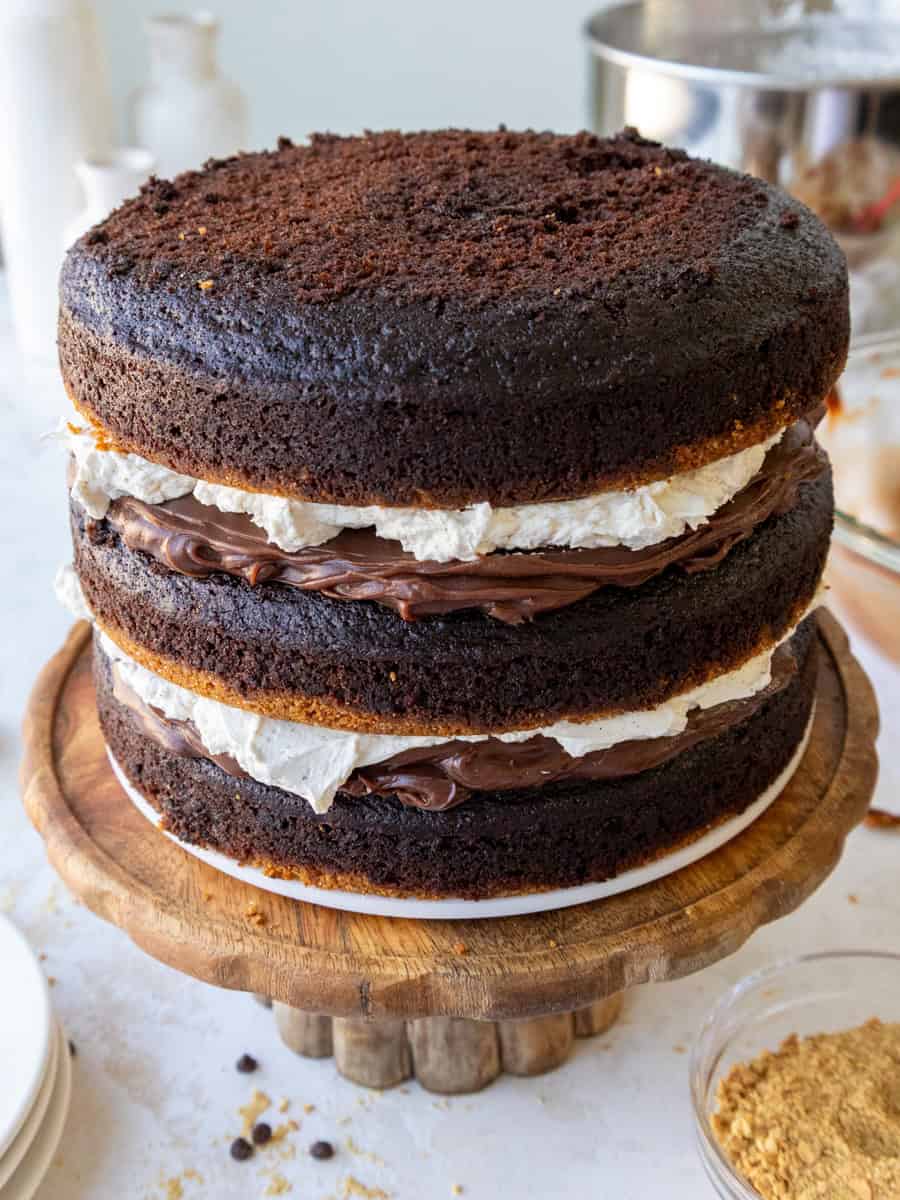
Add the second cake layer and repeat this process, then place the final cake layer on top.
Step 3: Chill and Frost the Cake
If the cake feels soft or unstable after stacking, chill it before frosting.
I recommend placing it in the freezer for about 20 minutes or in the fridge for 30 minutes. This gives the fillings time to firm up and helps prevent the cake layers from shifting.
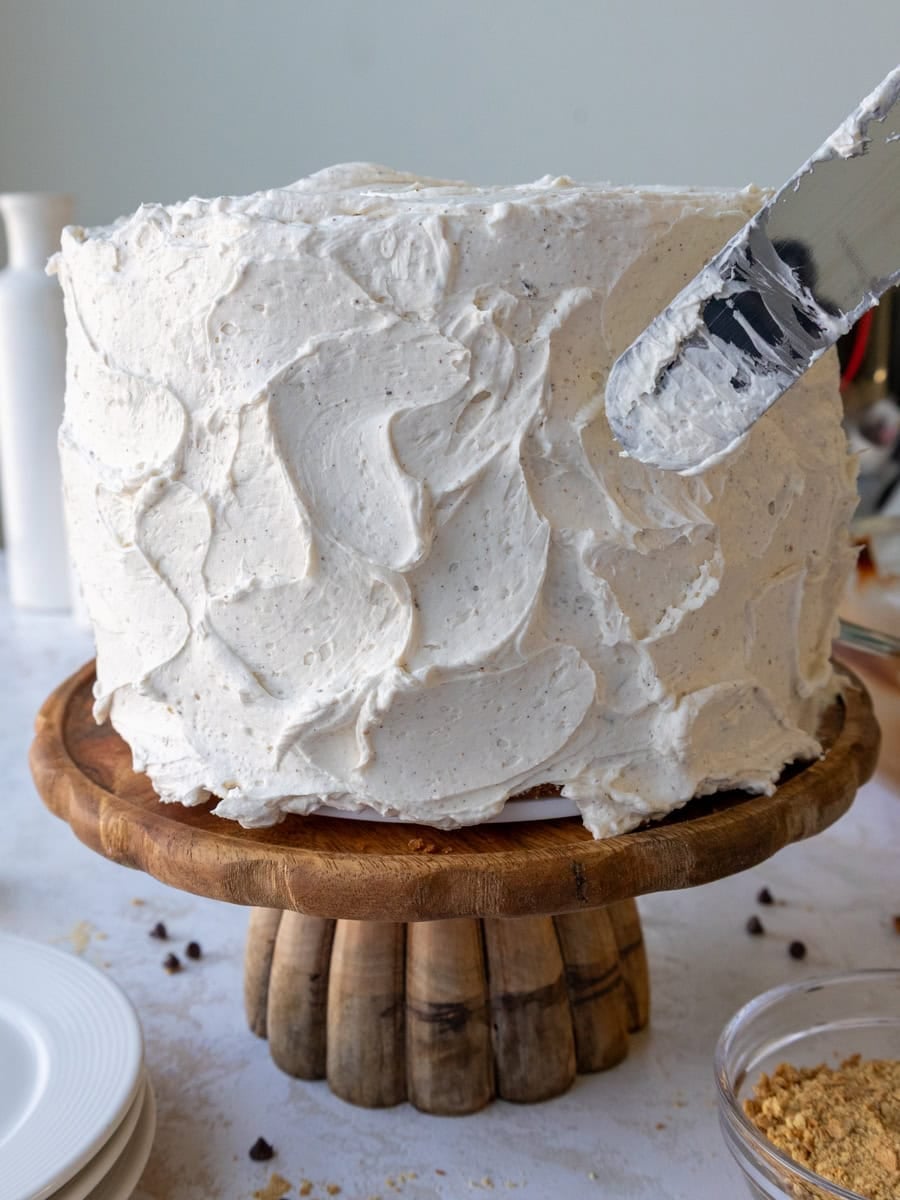
Use the remaining buttercream to cover the cake in a thick layer of toasted meringue buttercream. Use a large offset spatula or the back of a spoon to create a textured look around the cake.
Step 4: Marble Some Melted Chocolate Into the Buttercream
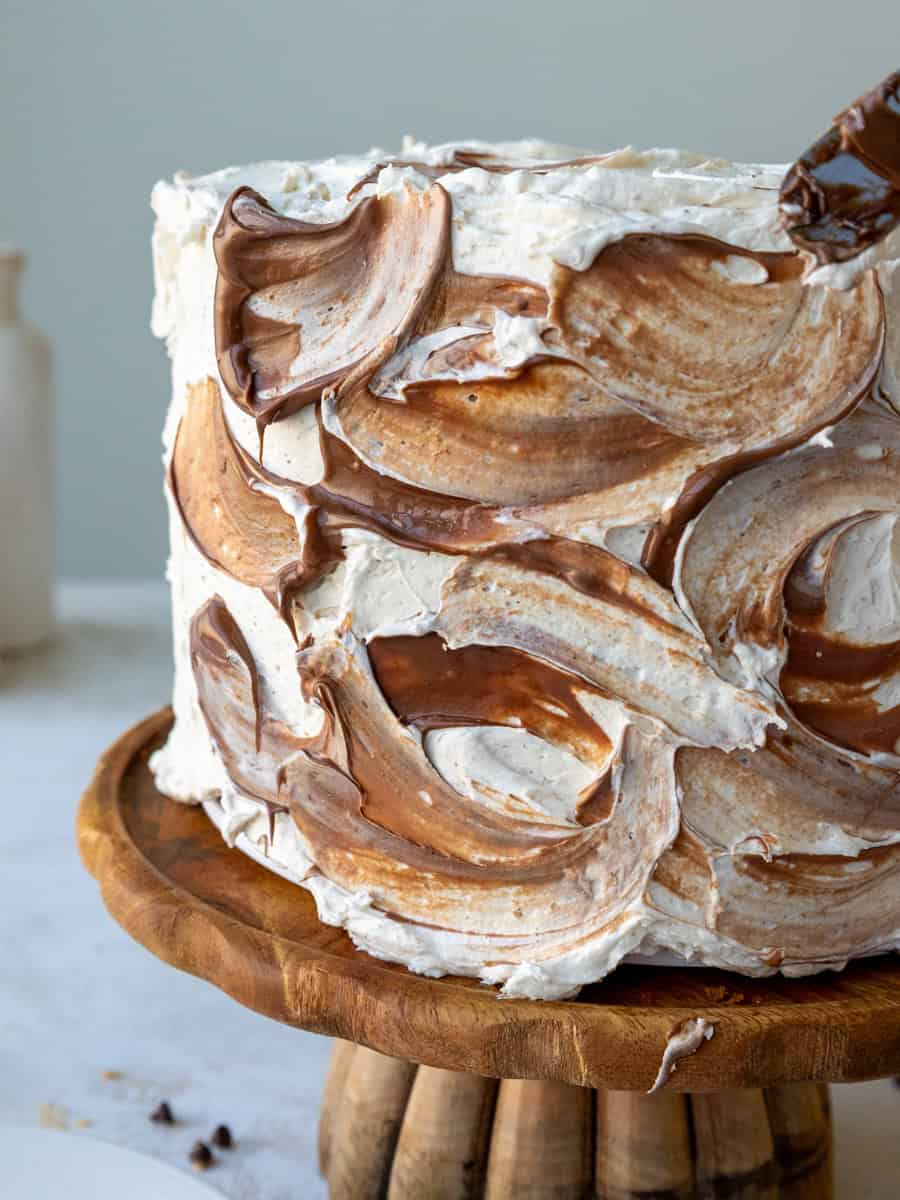
If desired, drizzle the melted and cooled milk chocolate over the frosted cake while it is at room temperature but still fluid. Use the back of a spoon or an offset spatula to gently swirl it into the buttercream for a marbled finish.
Troubleshooting the Toasted Meringue Buttercream
Meringue-based frostings can look intimidating, but most problems come down to temperature.
Why Won’t My Meringue Whip to Stiff Peaks?
The most common culprit is grease. Make sure the mixing bowl and whisk attachment are completely clean and dry. Even a small amount of fat or egg yolk can prevent the whites from whipping properly.
Also, make sure the sugar is fully dissolved before whipping. The egg white mixture should reach 160°F/71°C and feel completely smooth when rubbed carefully between your fingertips.
Finally, be patient. It can take around 10 minutes for the mixture to become thick, glossy, and stiff.
Why Is My Buttercream Soupy?
Usually, the meringue was still too warm when the butter was added. The whipped meringue should cool close to room temperature first. If the bowl still feels warm, keep mixing or place something cold around the outside of the bowl.
If your finished buttercream is soupy, chill it briefly, then mix again.
Why Does My Buttercream Look Curdled or Broken?
This usually means the ingredients are at different temperatures. Keep mixing first. Often, the buttercream will come back together on its own after several minutes.
If it still looks broken, the temperature is usually the issue. A very cold buttercream may need gentle warmth, while a very soft buttercream may need a short chill before being mixed again.
Substitutions and Swaps
This recipe has several components, so I know you might not have every ingredient on hand. Below are the swaps I’d recommend.
Chocolate Cake Layers
- All-Purpose Flour: This recipe turns out best with all-purpose flour. However, you can use a good gluten-free 1:1 baking flour blend if needed. I recommend mixing the batter slightly longer and letting it rest for about 20 minutes before baking when using a gluten-free blend.
- Granulated Sugar: I don’t recommend reducing the sugar or changing the type of sugar. Sugar affects both the moisture and texture of the cake layers.
- Unsweetened Cocoa Powder: I usually use Ghirardelli or Hershey’s unsweetened cocoa powder. Dark cocoa powder can also be used.
- Buttermilk: Full-fat yogurt, sour cream, whole milk, or a nondairy milk can be used in its place.
- Vegetable Oil: Any neutral-flavored oil will work. Canola or sunflower oil are great alternatives. I don’t recommend olive oil because its flavor can come through in the finished cake.
- Eggs: This recipe turns out best with large eggs. If needed, you can experiment with a commercial egg replacer, but the texture may differ.
Milk Chocolate Ganache
- Milk Chocolate: I love milk chocolate here because it gives the cake that classic s’mores flavor. If you prefer dark chocolate, use 1 1/3 cups or 240g dark chocolate chips with 1 cup of heavy cream instead of the milk chocolate ratio in the recipe card.
- Corn Syrup: This is optional. It makes the ganache extra smooth and glossy, but can be omitted.
- Unsalted Butter: Salted butter can be used if needed. Reduce or omit the additional salt to taste.
Toasted Meringue Buttercream
- Unsalted Butter: Salted butter can be used in the buttercream, but I recommend reducing the added salt.
Making This S’mores Cake in Different Sizes
One batch of chocolate cake batter makes three 8-inch cake layers, with about 475g of batter per pan.
Because this uses the same chocolate cake base as my other layer cakes, you can also use the batter to make:
- Two 9-inch cake layers
- Four 6-inch cake layers
The bake time will vary depending on the size and depth of your cake pans, so use the visual cues in the recipe rather than relying only on the timer.
For any alternate size, divide the graham cracker crust evenly between the pans before adding the cake batter.
Because this cake has both ganache and toasted meringue filling, keep in mind that smaller-diameter cakes can become very tall. Chill the cake well during assembly if needed.
Can This S’mores Cake Be Made in Advance?
Yes! In fact, I highly recommend making this cake in stages.
There are several components, and trying to make everything in one sitting can feel like a lot.
Chocolate Ganache
The ganache is one of the best components to make ahead.
It needs at least an hour to cool and thicken, and I often make it the night before. Store it covered in the fridge, then let it soften until it reaches a spreadable consistency before assembling the cake.
Chocolate Cake Layers
The cake layers can be baked in advance and frozen. Once they’re fully cooled, wrap them tightly and freeze until needed. Let them thaw for about 15 minutes before assembling the cake.
I actually prefer stacking cake with slightly chilled layers because they’re easier to handle and create fewer crumbs.
Toasted Meringue Buttercream
The frosting can also be made ahead of time and stored in an airtight container in the fridge. Let it return to room temperature, then mix it again until smooth before using.
Assembled Cake
A fully frosted cake can be stored in the fridge for up to a week. Let the cake sit at room temperature before serving so the buttercream and ganache have time to soften.
Frequently Asked Questions
Can I halve this s’mores cake recipe?
Yes. A half batch works well when you want a smaller cake. I’d recommend dividing it between three 6-inch pans for layers with a similar thickness to the original recipe.
Keep a close eye on the cakes as they bake because smaller layers may finish sooner.
Do I need a kitchen torch?
For the full toasted marshmallow flavor, yes, I strongly recommend using one.
The torch caramelizes the surface of the meringue and creates those little toasted bits that are mixed throughout the filling and frosting. Without torching, the meringue will still be sweet and fluffy, but it won’t have the same roasted marshmallow flavor.
Can I use dark chocolate instead of milk chocolate in the ganache filling?
Yes, but you need to adjust the ganache ratio. For a dark chocolate ganache made with 60 to 65% cocoa chocolate, use 240g dark chocolate and 1 cup of heavy cream.
Milk chocolate creates a sweeter, more classic s’mores flavor, while dark chocolate makes the cake richer and less sweet.
Why is my chocolate ganache too runny?
The most likely reason is that it’s still too warm.
Ganache thickens significantly as it cools. Let it sit at room temperature longer, or chill it briefly and stir as needed until it reaches a spreadable consistency.
Also, make sure you’re using the correct chocolate-to-cream ratio. Milk chocolate and dark chocolate require different proportions.
Can I use marshmallow fluff instead of the toasted meringue buttercream?
I don’t recommend it as a direct substitute in this recipe. The homemade meringue is mixed with butter to create the toasted meringue buttercream that’s used both between the cake layers and around the outside of the cake.
Store-bought marshmallow fluff has a different consistency and won’t create the same stable, fluffy buttercream once the butter is added.
How do I keep the cake layers from sliding?
Make sure the chocolate ganache is fully cooled and thick before assembling the cake. Don’t overfill the layers, and use cool cake layers whenever possible.
Once the cake is stacked, chill it for about 20 minutes in the freezer or 30 minutes in the fridge before frosting. This gives the fillings time to firm up and helps everything stay in place.
Can I make the toasted meringue buttercream with a hand mixer?
You can, but it will take longer and require more patience. A stand mixer is much easier for this recipe because the meringue needs to be whipped for around 10 minutes, and then the butter needs to be gradually incorporated.
If you use a hand mixer, make sure the meringue reaches true stiff, glossy peaks before adding the butter.
Tips for Making the Best S’mores Cake
- Properly measure your flour. Spoon it into your measuring cup and level it with a knife, or use a kitchen scale for the most accurate results.
- Use room-temperature ingredients. They mix together more easily and help create smoother batters, ganache, and frosting.
- Cool the meringue before adding butter. Warm meringue is one of the most common causes of soupy buttercream.
- Chill the stacked cake before frosting. With both ganache and buttercream between the layers, this extra step makes the cake much easier to finish.
- If your cake layers turn out less than perfect, check out my cake troubleshooting guide to figure out what might have happened.
Let Me Know What You Think!
If you make this s’mores cake recipe, I’d love to hear what you think! Let me know by leaving a rating and comment below.
And don’t forget to tag me @chelsweets and use #chelsweets if you share on social media so I can see your amazing creations.
S’mores Cake
Equipment
- Stand Mixer with Whisk Attachment
- Large Metal Bowl
- Kitchen Torch
- Kitchen Thermometer
Ingredients
Chocolate Ganache Filling
- 1/2 cup heavy whipping cream 120g
- 2 cups milk chocolate chips 360g
- 1/4 cup unsalted butter, room temperature 56g
- 2 Tbsp light corn syrup – optional 40g
- 1/2 tsp fine salt 3g
Graham Cracker Crust
- 2 cups graham cracker crumbs 200g
- 1/2 cup unsalted butter, melted 113g
- 1/3 cup granulated sugar 66g
- 1/4 tsp fine salt
Chocolate Cake Ingredients
- 2 cups all-purpose flour 260g
- 2 cups granulated sugar 400g
- 3/4 cup unsweetened cocoa powder, sifted 75g
- 2 tsp baking powder 8g
- 1 1/2 tsp baking soda 9g
- 1 tsp instant coffee or espresso, optional
- 1 tsp fine salt 6g
- 1 cup water, warm 240g
- 1 cup buttermilk, room temperature 240g
- 1/2 cup vegetable or canola oil 110g
- 2 large eggs, room temperature 112g
- 1 tsp vanilla extract or vanilla bean paste 4g
Toasted Meringue Buttercream
- 8 large egg whites, room temperature 240g
- 2 1/2 cups granulated sugar 500g
- 2 Tbsp light corn syrup (optional) 40g
- 2 cups unsalted butter, room temperature 454g
- 1 Tbsp vanilla extract or vanilla bean paste 15g
- 1/2 tsp fine salt 3g
Additional Decorations (optional)
- 1/3 cup milk chocolate, melted and cooled 60g
Instructions
Chocolate Ganache Filling
- This ganache needs about an hour to thicken, so I recommend making it before the cake layers if possible! I usually make it the night before. Heat 1/2 cup of heavy cream in a heatproof bowl in the microwave for 45 seconds, until it just begins to bubble and steam. If you don't have a microwave, you can also use a double boiler to heat the cream.
- Gently pour 2 cups of milk chocolate chips into the heavy cream. Make sure the chips are fully covered with cream. Let the mixture sit for 1 minute. If you want to use dark (60-65% cocoa) chocolate chips, use 1 1/3 cups (240g) and 1 cup of heavy cream.
- Stir slowly until the cream and chocolate combine and the mixture is smooth. If any bits of chocolate aren't fully melted, heat the mixture again for 10 seconds and stir until smooth.
- Then mix in 1/4 cup of room temperature unsalted butter, 2 Tbsp corn syrup (optional), and 1/2 tsp fine salt until combined.
- Cover with plastic wrap to prevent the ganache from forming a skin, then set aside to cool to room temperature. You can pour the mixture into a shallow, wide tray to help it cool faster if you're in a rush.
Graham Cracker Crust
- Preheat the oven to 350°F/175°C. Line three 8-inch cake pans with parchment paper rounds, and spray the sides of the pans with non-stick cooking spray or baking spray.
- In a large bowl, mix together 2 cups of graham cracker crumbs, 1/2 cup of melted butter, 1/3 cup of granulated sugar, and 1/4 tsp of fine salt.
- Divide the mixture evenly between the prepared pans (about 120g per pan), and press it into an even layer in each pan. Bake for 8-10 minutes, then set aside to cool.
Chocolate Cake Layers
- Sift or whisk together 2 cups flour, 2 cups granulated sugar, 3/4 cup cocoa powder, 2 tsp baking powder, 1 1/2 tsp baking soda, 1 tsp fine salt, and 1 tsp instant espresso or coffee (optional) in a large bowl. Set aside.
- In a separate, large bowl, add 1 cup warm water, 1 cup buttermilk, 1/2 cup oil, 2 eggs, and 1 tsp vanilla and whisk together until fully incorporated.
- Whisk the dry ingredients into the wet ingredients until they're just combined, and the batter is smooth.
- Pour the batter evenly (about 475g per pan if you're making 3 layers) between the 3 cake pans, pouring it directly onto the crust. Bake for 24-27 minutes or until a toothpick comes out with a few moist crumbs.
- Let the pans cool for 10 minutes, then run a small offset spatula around the perimeter of the pan to separate the cake from the pan.
- Place the cake pans into the freezer for 30 minutes to accelerate the cooling process. This helps lock in the steam and makes the layers extra moist. If you don't have room in the freezer, place the cake pans on a wire rack and let them cool fully before removing them.
- Once the layers are fully cooled, carefully flip the pans and remove the layers. These cake layers bake up pretty flat, so leveling them is optional, but I like to level them with a serrated knife to make the cake easier to fill and frost.
- If you make these cake layers in advance, let them thaw for about 15 minutes before making the cake. The cake layers should still be slightly cold to the touch, which will make it easier to assemble the cake.
Toasted Meringue Buttercream
- While the cake layers bake and cool, make the toasted meringue frosting. Before making this frosting, be sure to thoroughly clean your mixing bowl. If there’s any grease, it can make it difficult to whip up the meringue.
- In a medium-sized pot, add about 1 inch of water and bring to a simmer. Add 8 egg whites, 2 1/2 cups of granulated sugar, and 2 Tbsp of light corn syrup (optional) into a large metal bowl. Place the bowl on top of the pot filled with simmering water. The bowl should create a seal over the pot. Make sure the water isn’t actually touching the bottom of the bowl, or it can cook the egg whites.
- Whisk the mixture constantly for about 3 minutes, until it reaches 160°F/71°C. You can test the mixture to see if it’s ready by rubbing a tiny bit between your fingertips. The sugar should be fully dissolved, and it should feel super smooth and hot to the touch.
- Once it reaches this stage, lift the bowl away from the pot and dry the bottom with a towel. Pour the mixture into the metal bowl of a stand mixer and beat on a medium-high speed with a whisk attachment. Mix for about 10 minutes, or until you have stiff, glossy peaks that stick straight up. While the meringue whips, I like to add something cold around the base of my bowl. The meringue usually is quite warm as it whips up, and placing a couple of bags of frozen veggies around the base of the bowl helps cool the meringue back to room temperature. This is super important and can prevent your buttercream from becoming soupy when you add the butter later.
- Then use a kitchen torch to toast the top of the meringue in your bowl. Turn the mixer on medium speed to incorporate the toasted bits. Repeat this process a few times until you can see little bits of toasted meringue incorporated throughout the mixture.
- Gradually mix in 2 cups of unsalted butter, 1 Tbsp vanilla extract, and 1/2 tsp fine salt on a medium speed. Scrape the sides and bottom of the bowl with a rubber spatula as needed. The frosting should have a thick, whipped consistency once all the butter is mixed in. If it looks lumpy or broken, keep mixing until it looks fluffy and thick. If it doesn't seem to come together after an additional 10 minutes of mixing, check out the troubleshooting section in the post above.
S'mores Cake Assembly
- Place the first cake layer on a greaseproof cake board or large flat plate, using a small dab of buttercream to hold it in place.
- Spread half of the chocolate ganache on top of the first cake layer, then top this with a thick layer of toasted meringue buttercream. Repeat with the next cake layers, then place the third cake layer on top. If the stacked cake feels soft or unstable, chill it for about 20 minutes in the freezer or 30 minutes in the fridge before frosting.
- Use the remaining buttercream to cover the cake in a thick layer of toasted meringue buttercream. Use a large offset spatula or the back of a spoon to create a textured look around the cake.
- If desired, drizzle the melted and cooled milk chocolate over the frosted cake while it is at room temperature but still fluid. Use the back of a spoon or an offset spatula to gently swirl it into the buttercream for a marbled finish.
Video
Notes
Nutrition
Other Recipes You Might Like:
Hey Chelsey! This is a BIG cake! Could I simply halve all of the ingredients and make a smaller version?
yes you can 🙂
how much 1 cup cocoa powder in gram please?
1 cup of baking cocoa is about 100 grams 🙂
Beautiful, can’t wait to try it!
What chocolate frosting did you use ?
here’s the link to my chocolate buttercream recipe: https://chelsweets.com/2018/07/31/easy-chocolate-buttercream-recipe/
If I were to make chocolate buttercream, should I use a half recipe since I only use it on the outside of the cake. I’m making this cake for my brother’s birthday! Thanks
If I were to make chocolate buttercream, should I use a half recipe since I only use it on the outside of the cake. I’m making this cake for my brother’s birthday! Thanks
Hi Caroline,
Yup! I usually like to just wait to fill the cake, then add melted chocolate and cocoa powder to the remaining frosting to decorate the outside of the cake. Hope that helps, and that your brother’s birthday cake turns out great!!
Hi Chels – how far in advance can I assemble this – do the gram crackers go soggy if made too far in advance? We don’t cook with them much in Australia! Thoughts would be great as I am making this for an ex-pats Thanksgiving dinner! x
They won’t really get soggy, but they will get a bit stale! You could always just make the cake in advance, and add the smores the day off! I frost cakes several days in advance, then add the finishing touches the day of all the time 🙂
Hi I’m a big fan from Belgium 🙂 and I have a little question: Is it possible to do the stripes on the side of the cake with 2 different kinds of ganache? Thanks in advance x
It’s possible in theory, but it’d be challenging just because ganache has a different consistency than buttercream! It’s always softer when you spread it, but then it firms up quickly as it’s added to the chilled & crumb coated cake. If you try it, please let me know how it goes for you <3
For this recipe if you want to make the exact cake you made is the amounts listed for the icing for the whole cake or just 1 layer? Or do you need to multiply it by 4?
Hi Jessica! This recipe is for the entire layer cake, so no need to multiply to make the exact cake I made <3
Can you replace the chocolate cake with BOXED CHOCOLATE CAKE?
Hi! Yes, you can replace the homemade chocolate cake layers with boxed chocolate cake mix. I’d prepare two standard boxes according to the package directions, then divide enough batter evenly between the three 8-inch pans over the graham cracker crust. You may have a little batter left over, which you can bake as cupcakes.
Bake according to the visual cues on the box, checking the layers early since the graham cracker crust and amount of batter can affect the timing. They’re ready when a toothpick comes out with a few moist crumbs. You can make the ganache and toasted meringue buttercream as written. Hope that helps, happy baking!!
If I were to make chocolate buttercream, should I use a half recipe since I only use it on the outside of the cake. I’m making this cake for my brother’s birthday! Thanks
If I were to make chocolate buttercream, should I use a half recipe since I only use it on the outside of the cake. I’m making this cake for my brother’s birthday! Thanks
Your marshmallow buttercream says you put cocoa powder in it….Yours looks white?
@Sarah, she uses white and then makes the chocolate using it for the outer stripes.
Does the cake recipe make 3 or 4 8″ layers?
3! And her weights for each pan were spot on.
Did anyone try torching the frosting on the cake instead of mixing in more chocolate?
Nope will melt everything! Disregard! (Tried on a dollop of frosting… also with all the butter made it more like crème brûlée than toasted marshmallow.
Yah sadly the buttercream can definitely not be torched!! It’s like half butter, so if will just melt! If you want to torch it, I’d recommend reserving a bit of the meringue before you mix in the butter, and then you can use that to decorate the cake and torch it! Hope that helps for next time 🙂
First time making one of Chelsey’s cakes and holy cow. First this was a labor of love but boy was it worth it. It took a long time for the merengue to come together only to have it melt again when I torched it, but it came back with more whipping. I made the ganache the night before and it got soooo hard. I wound up having to whip it to make it spreadable but it didn’t impact the taste. I also made this GF using King Arthur 1:1 and Pamela’s Honey Grahams and you could not at all tell this was GF. Took all day but it was one of the best cakes I’ve ever made.
Hi Laura,
This made me so happy to read!! It is definitely a labor of love, so I’m thrilled to hear it was worth the effort and ended up being one of the best cakes you’ve ever made. Thank you so much for sharing your gluten-free swaps too, that is incredibly helpful for other bakers! I’m glad the meringue came back together with more whipping, and whipping the ganache was a great save once it had firmed up. Thank you for making one of my cakes and for taking the time to share 🙂
Can’t wait to make the cake this weekend for my nieces birthday!! For the milk chocolate chips, it is the same as I would use in chocolate chip cookies. Sorry if it’s a double question
Hi Ashley,
There’s no such thing as a bad question! You are right, you can use milk chocolate chips just like the ones you add to chocolate chip cookies. Hope your cake turned out amazing, happy baking! 🙂
This was delicious! The graham cracker crust gives it the perfect s’mores flavor! I do wish the recipe portion said to wait for the meringue to fully cool before adding the butter (it says it in the troubleshooting). I’ve never made a Swiss meringue buttercream and ended up with soup. Put it in the fridge to cook and it eventually worked. I know now for next time. Regardless, I could see myself making this cake again.
Hi Matthew,
Thank you so much for the thoughtful feedback! I’m so happy you loved the cake and would make it again. I’m sorry the buttercream instructions weren’t clearer about letting the meringue cool completely before adding the butter. That temperature difference is so important with Swiss meringue buttercream, especially when you’re making it for the first time, and I’ll make that step more prominent. I’m glad chilling and rewhipping it brought everything together in the end!
Whatever you do make sure the icing components are cooled or you will be making soup instead of icing and it will take you hours longer. Sitting here making my kids bday cake and did the icing fresh today, started 2 hours ago the party starts in 45 min and I have soup
This was definitely worth the effort. When I saw the recipe and reel on TikTok I instantly knew I had to try this. I will say that the soup icing issue occurred for me even with frozen strawberries and green beans wrapped around the mixer. I also bought a torch for this and now am equipped for the next time. The taste is amazing.
Hi Sophia,
Thank you so much for sharing this! I’m glad you loved the flavor and felt it was worth the effort. I’m sorry the frosting stayed soupy even with the frozen produce around the bowl. If that happens again, I’d refrigerate the frosting for 15 to 20 minutes, then continue whipping it until it thickens and holds its shape.
That’s great that you’re now officially equipped with a kitchen torch for round two! Happy baking 🙂
I made the cake this weekend. I had a hard time with the buttercream and had to do it a second time only to have the same problem happen all over again. It just wouldn’t thicken up. I should have just kept whipping it which I didn’t do until realizing it wasn’t going to work as is later. In the end the cake was delicious. I decided to finish it the next day and kept the cake in the freezer. I had already made the ganache and wasn’t sure if it should be refrigerated. I was afraid to leave it out because of the cream so I did refrigerate it. It was fine after some mixing. While it wasn’t too difficult to make, there were a lot of steps so I won’t make this cake again anytime soon.
Hi Shari,
Thank you for sharing such detailed feedback! I’m sorry the buttercream gave you so much trouble. If it stays loose, the mixture is usually still too warm, so chilling the bowl briefly and continuing to whip should help it thicken. Refrigerating the ganache was a good call, and I’m glad it smoothed back out after mixing. I always include a section in my blog posts about making the components of the cake in advance, which you can refer to in the future if you have any questions like this 🙂
This cake definitely has quite a few components, so I completely understand not wanting to tackle it again anytime soon, but I’m happy it tasted delicious in the end!
Can I make the cake layers a day or two before and keep in fridge or must I freeze them?
Hi Joyce,
Yes, you can make the cake layers 1 to 2 days ahead and refrigerate them. Let them cool completely, then wrap each layer tightly in plastic wrap so they don’t dry out or absorb any refrigerator odors. Freezing isn’t a must, I just prefer using slightly chilled or partially frozen layers because they be easier to stack and decorate. Hope that helps, happy baking!!
Hello to the person reading this who wants to make it–it is so good and worth the effort. It is very sweet and rich, so I recommend preparing to freeze it. Additionally, I found it tasted best around day 3 in the fridge, as the graham cracker crust under the cake layers really softened and unified the cake. I am on day five of it in the fridge and it is still incredibly moist and delicious, so don’t worry about it drying out.
Hi Madison,
Thank you so much for such a sweet comment 🙂 I’m so happy you feel the cake was worth the effort, and I totally agree about the flavor and texture improving after a couple of days. The graham cracker crust really does soften as it sits and blends into the cake layers beautifully. I’m also glad it stayed so moist for you through day five 🙂
Chelsey, thank you for sharing this delicious recipe!
I made this for my boyfriend’s birthday since he loves s’mores. The ganache is delicious! For the cake, I used 9 inch pans instead since I didn’t have three 8 inch pans. I baked it for 27 minutes as a starting point and then an additional 5-8 minutes. The buttercream was the only hiccup I had since my torch ended up dying on me. I decided to take a huge risk and broil the meringue in a cake pan to get it toasted. If I make this again, the only thing I’ll change is the amount of salt in the buttercream. I felt like it was a little too salty for me. Overall, everyone enjoyed it! Make sure you plan ahead and don’t rush yourself while making all the different components for the cake.
Hi Linda,
Thank you so much for sharing all of these details! I’m thrilled the cake was a hit for your boyfriend’s birthday, and I love that you found a creative way to toast the meringue when your torch died. Broiling it separately was definitely a bold save! I’m also glad the 9-inch pans worked well with the extra baking time. The salt can absolutely be reduced to suit your taste next time, especially since different brands of butter vary in saltiness. And yes, planning ahead makes the process so much more enjoyable since there are so many components 🙂
Made this cake for a going away dinner. It was delicious and everyone loved it. It is even better the next day after sitting out at room temperature. All of the components just meld together beautifully. The cake was very moist and not sweet at all. I did have a little trouble with the SMB as it was very soupy. Being a seasoned baker and having made SMB on multiple occasions, the only thing I could think of was maybe torching the buttercream. Since I did not have a lot of time, I stuck it in the freezer for about 15-20 minutes and then, it whipped up perfectly. I made two batches of SMB and this happened both times, maybe from the torch? In any event, the cake was delicious and well worth it. Thank you Chelsey for such a great recipe!
Hi Anna,
Thank you so much for sharing, I’m so happy the cake was such a hit 🙂
And yes, I do think the torch could have contributed to the soupy Swiss meringue buttercream. If the meringue or mixing bowl is still warm after torching, that extra heat can soften the butter as it’s added and make the buttercream look loose. Your freezer fix was perfect. Chilling it for 15 to 20 minutes and then whipping again usually brings it right back together. Next time, I’d make sure the toasted meringue and bowl are completely cool before adding the butter. I really appreciate you sharing your experience, especially since it happened with both batches!
Thank you for posting this amazing cake! Made it for my son’s 10th birthday and it was a HUGE hit – not just with the kids but with the parents that attended the party! The venue employees were hugely impressed too and asked “where I bought the cake because they wanted to order one”. The instructions were amazingly clear and the tips were so helpful. Thank you! Definitely a keeper and helped me get over my fear of making a Swiss meringue buttercream!
Hi Tiffany,
Thank you so much! That’s wonderful to hear, I’m so happy the cake was such a hit! Happy belated 10th birthday to your son 🙂