
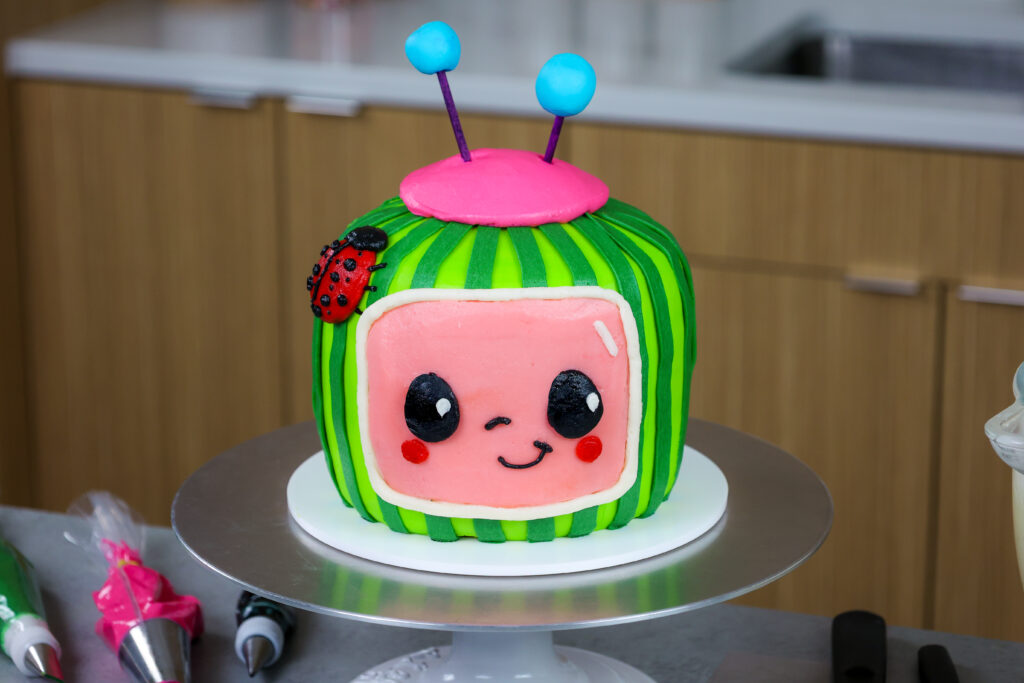
Cocomelon Cake
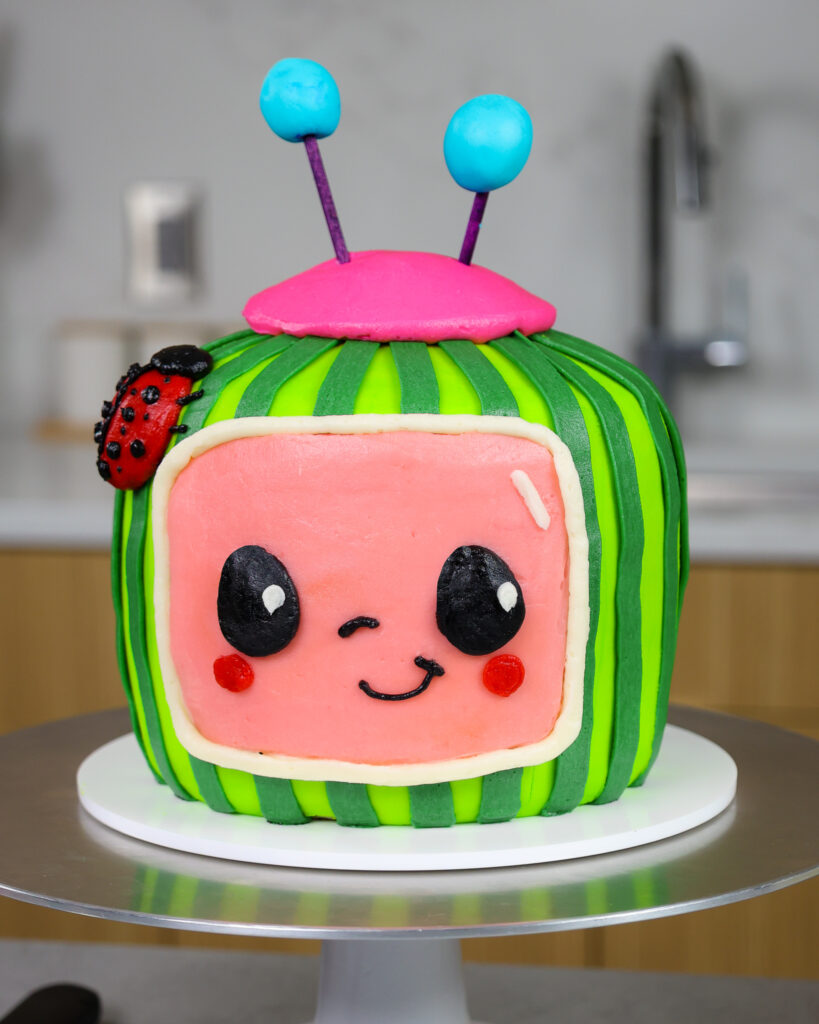
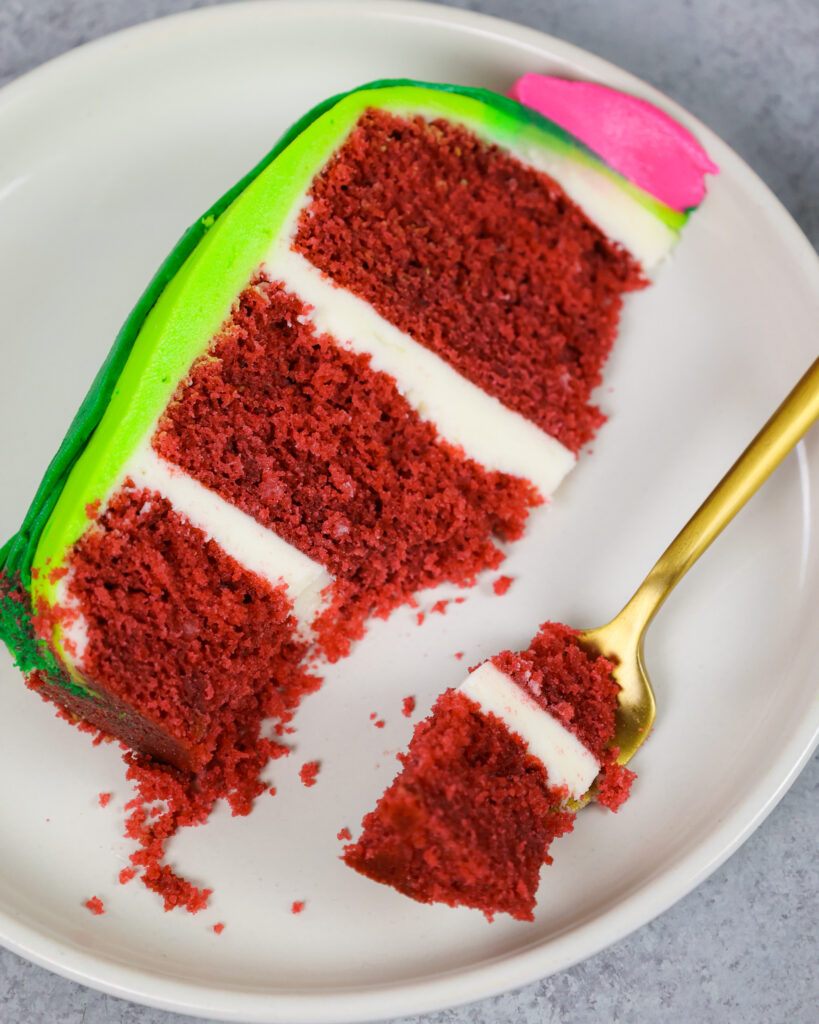
This Cocomelon cake is a cute buttercream birthday cake designed to look like the Cocomelon logo, complete with green stripes, a sweet little face, a pink top, a ladybug, and the signature antennae. It’s made with soft red velvet cake layers and homemade buttercream frosting, but you can easily swap in another sturdy cake flavor if you prefer.
This design looks detailed, but it’s very doable if you break it into steps. The main things that make this cake work are the rounded cake shape, a smooth buttercream base, and simple piped details for the stripes and face.
If you’re making a Cocomelon birthday cake for a toddler or little kid, this tutorial walks you through the whole process step by step.
Cocomelon Cake at a Glance
- Style: buttercream Cocomelon birthday cake
- Cake flavor: red velvet cake
- Skill level: intermediate
- Best pan size: 3 six-inch cake layers
- Main techniques: cake shaping, smooth frosting, piped stripes, simple character details
- Make-ahead friendly: yes
How to Make a Cocomelon Cake: Step-by-Step Tutorial
Let’s walk through each step of this buttercream Cocomelon cake together to make sure it turns out as amazing as possible.
Step 1: Bake the Red Velvet Cake Layers
Preheat your oven to 350 degrees F / 175 degrees C. Grease three 6-inch cake pans with homemade cake release or non-stick baking spray and parchment paper.
Divide the batter evenly between the prepared pans and bang the pans on your counter a few times to release any air bubbles that might be trapped in the batter.
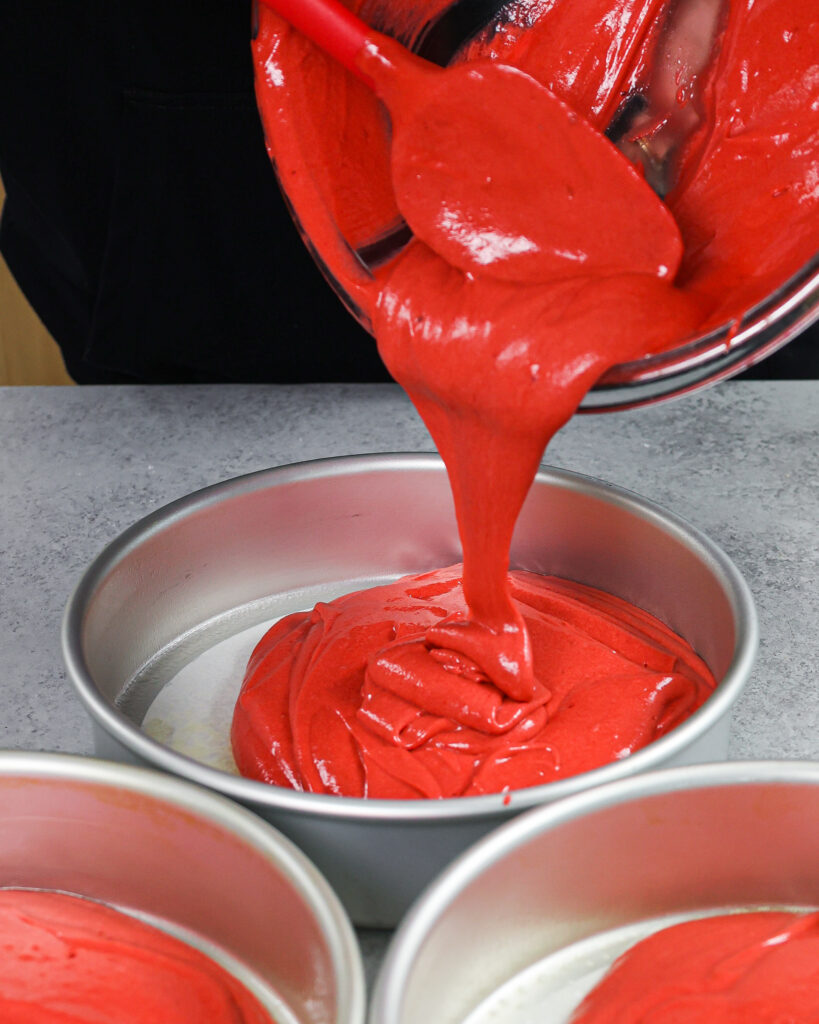
Bake for 30-33 minutes, or until a toothpick inserted in the center of the cake comes out with a few moist crumbs. Remove the pans from the oven and let them cool for 10 minutes, then run a small offset spatula around the perimeter.
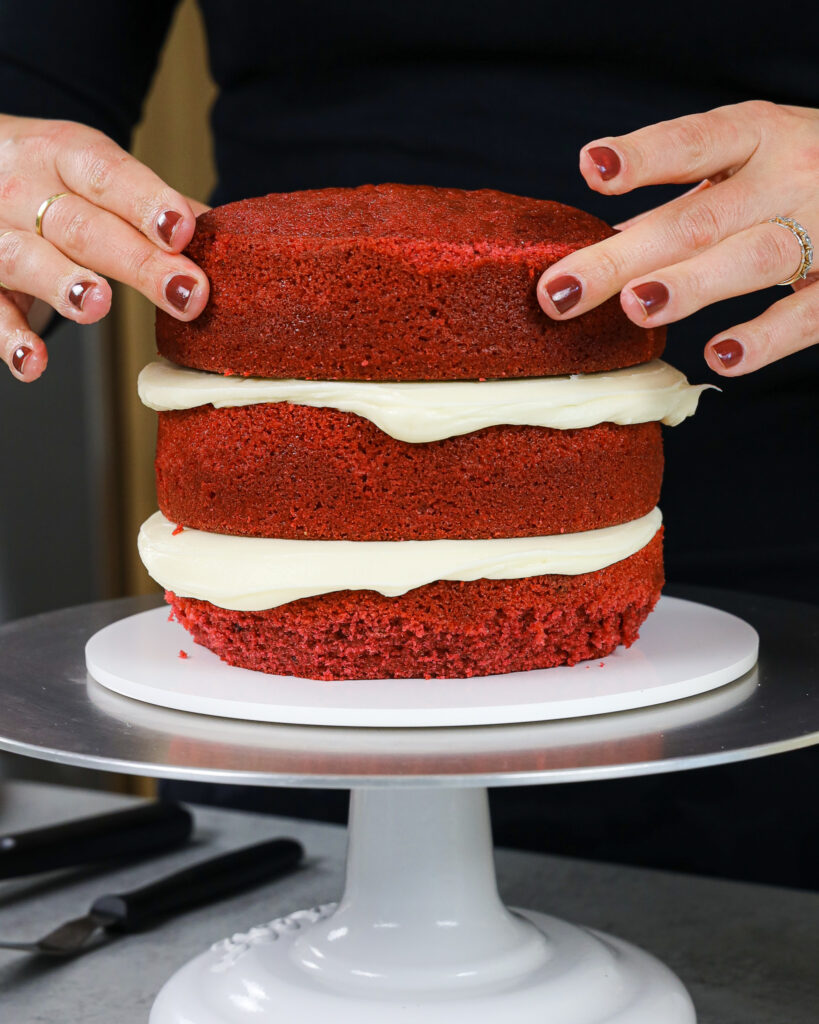
Carefully flip the layers out of their pans and place them on a wire rack to finish cooling. Level 2 of the cake layers with a serrated knife once they’re fully cooled. Stack the three cake layers (without any frosting), making sure to have the untrimmed layer at the top.
Using a serrated knife, trim the bottom cake layer to give the cake a somewhat rounded shape (see pictures below).

If you’re making the cake layers in advance, wrap and freeze them at this point.
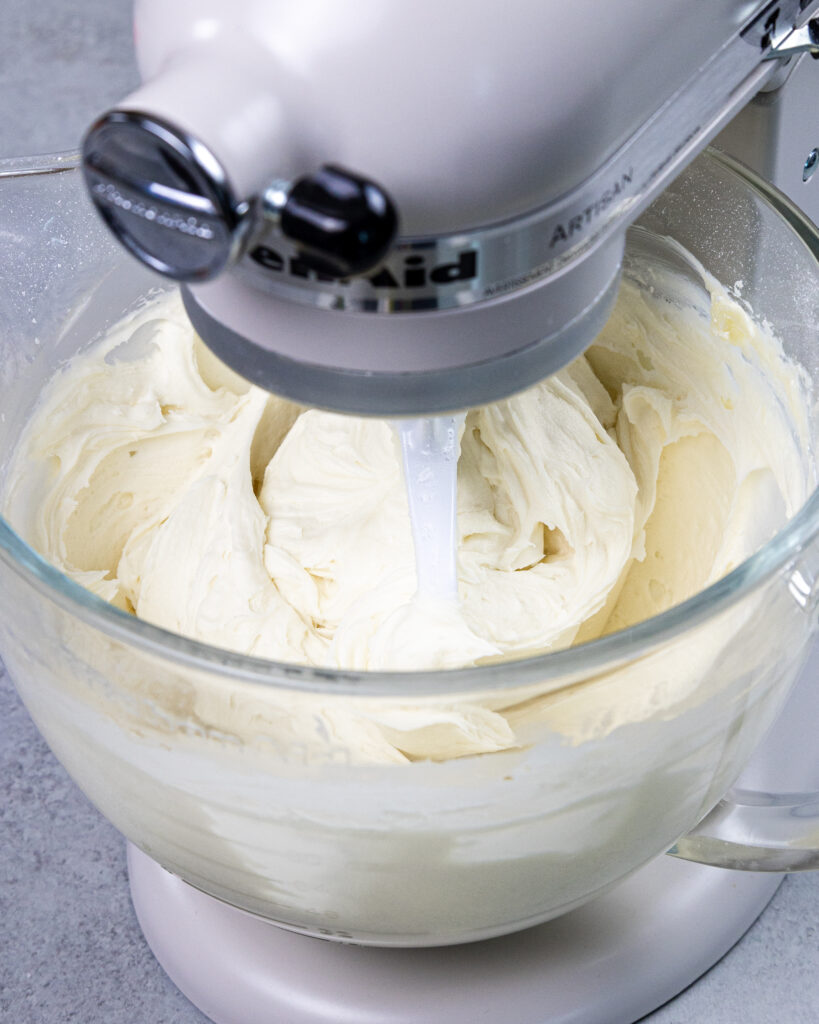
Step 2: Make the Vanilla Buttercream Frosting
While the cake layers bake and cool, make the vanilla buttercream frosting with either an electric hand mixer or a stand mixer.
If your frosting seems too thick after mixing your ingredients, add additional cream (1 tablespoon at a time). Or if the frosting is too thin, add in more powdered sugar (quarter of a cup at a time).
If you’re unsure how thick your frosting should be, you can learn what consistency you’re looking for in my frosting consistency post.
Once the frosting reaches the desired consistency, place 1/3 cup of white frosting in a small piping bag fitted with a small round tip, like a Wilton 12, and set aside.
Place 1/4 cup of frosting in a separate bowl and color it black with black gel food coloring. Add this into a small piping bag fitted with a small round tip, like a Wilton 12, and set aside.
Scoop 1/3 cup of frosting into a separate bowl and color it red with red gel food coloring. Add into a small piping bag fitted with a small round tip, like a Wilton 12, and set aside.
Place 3/4 cup of frosting in a separate bowl and color with a tiny drop of red and orange gel food coloring to make a salmon pink color. Add this into a small piping bag fitted with a large round tip, like a Wilton 2A, and set aside.
Scoop 3/4 cup of frosting into a separate bowl and color a light shade of green with electric green gel food coloring. Add to a small piping bag fitted with a large round tip, like a Wilton 2A, and set aside.
Place 3/4 cup of frosting in a separate bowl and color a dark shade of green with leaf green gel food coloring and a tiny drop of black gel food coloring. Add to a small piping bag fitted with a wide flat tip, like a Wilton 2B, and set aside.
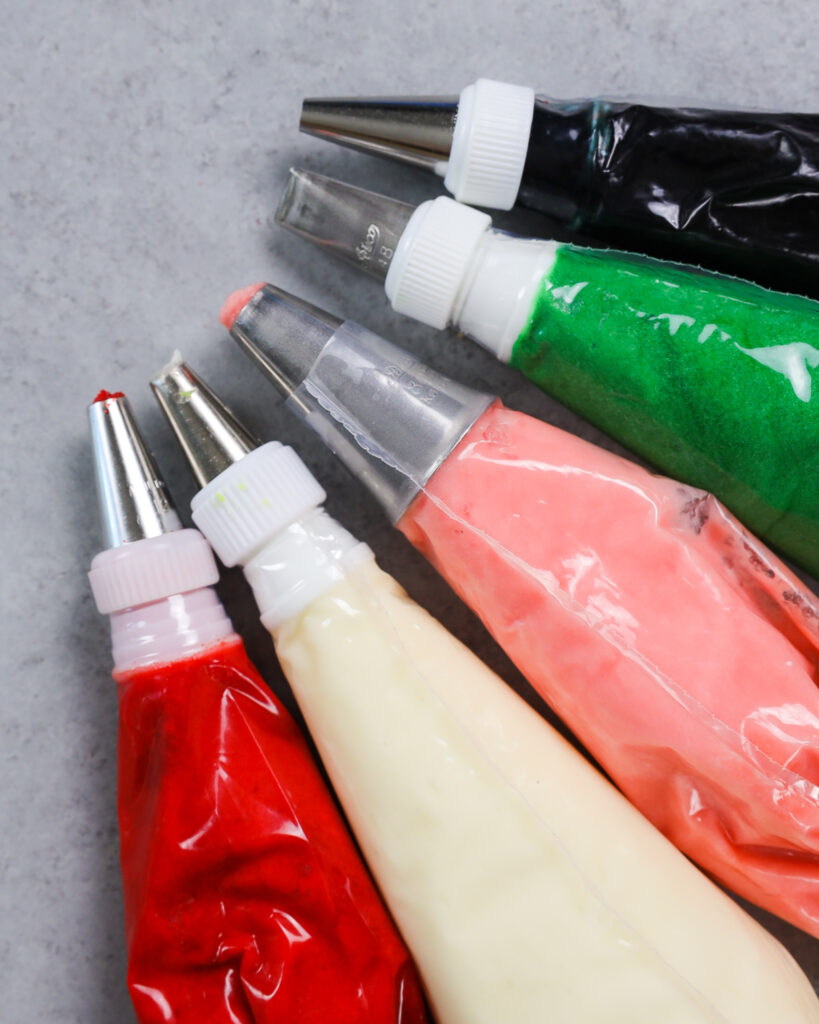
Leave the remaining buttercream uncolored, cover it with a piece of plastic wrap to prevent a crust from forming, and set it aside.
Step 3: Stack and Crumb Coat the Cake Layers
Stack and frost the cake layers on a greaseproof cake board. Use a dab of frosting to help stick the first cake layer to the board.
Using the white frosting you set aside, spread an even layer of frosting between each cake layer using an offset spatula. Add a thin coat of white frosting around the cake that fully covers the cake layers.

Smooth using an offset spatula and/or acetate sheet. Chill the cake in the fridge (20 minutes) or freezer (10 minutes) until the frosting is firm to the touch.
Step 4: Add a Second Layer of Frosting
Color the remaining buttercream bright green using electric green gel food coloring (or green and yellow gel food coloring).
Remove the cake from the fridge or freezer and smooth a thick layer of bright green buttercream around the cake.
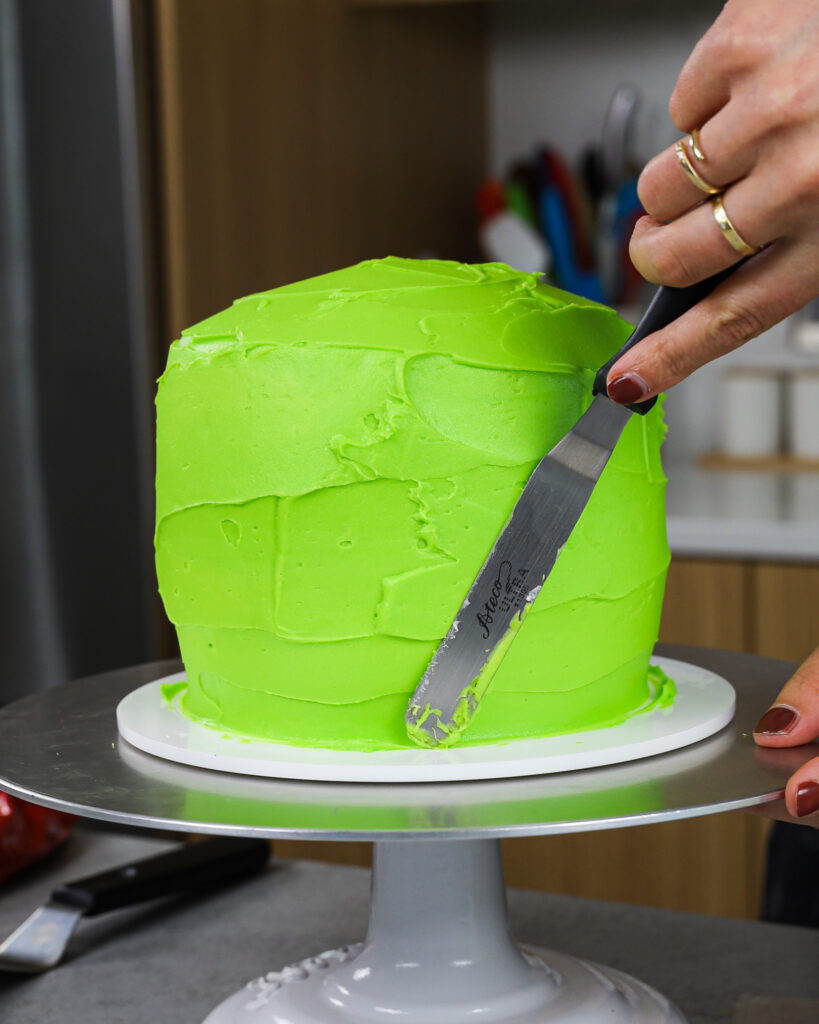

Use an acetate sheet or a small offset spatula to smooth the frosting.
Chill the cake again in the fridge (30 minutes) or freezer (10 minutes) one more time until the frosting is completely firm to the touch.
Step 5: Bringing this Cocomelon Buttercream Cake to Life
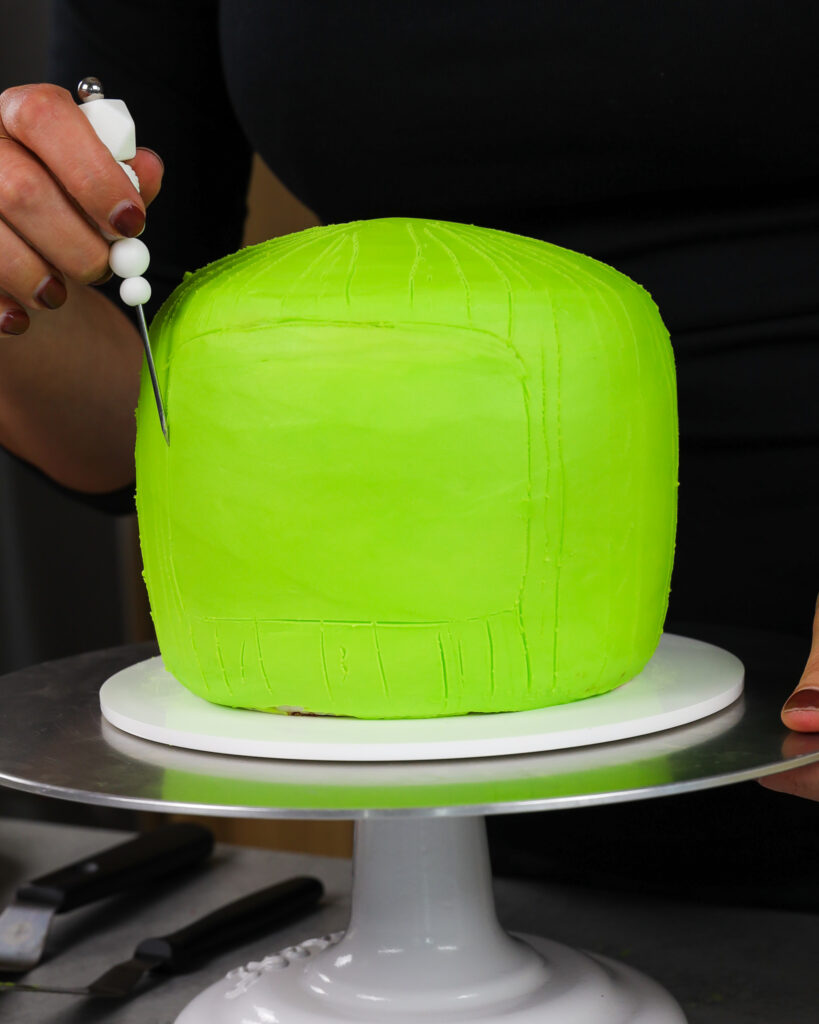
Remove the cake from the fridge or freezer. Use a toothpick or scribe to lightly trace where you want to pipe the face and stripes.
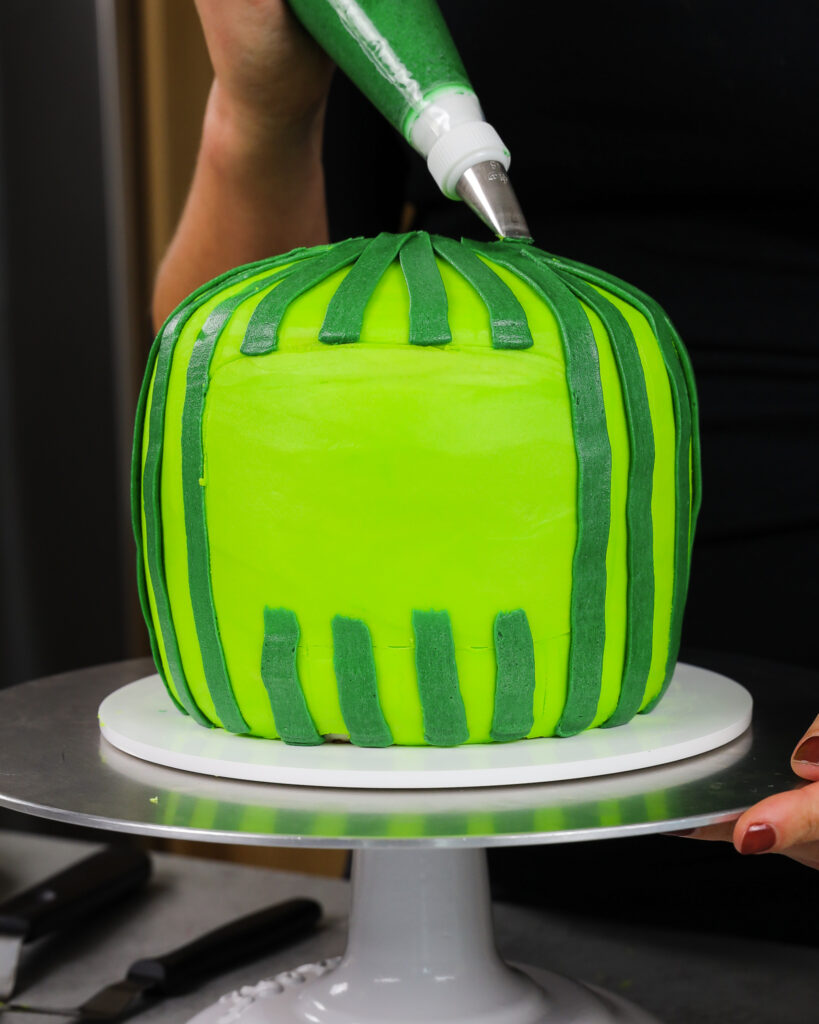
Pipe dark green buttercream stripes up the side of the cake. I recommend starting at the back of the cake. It took me a few stripes to get the hang of it, and that way your best stripes will be in the front!
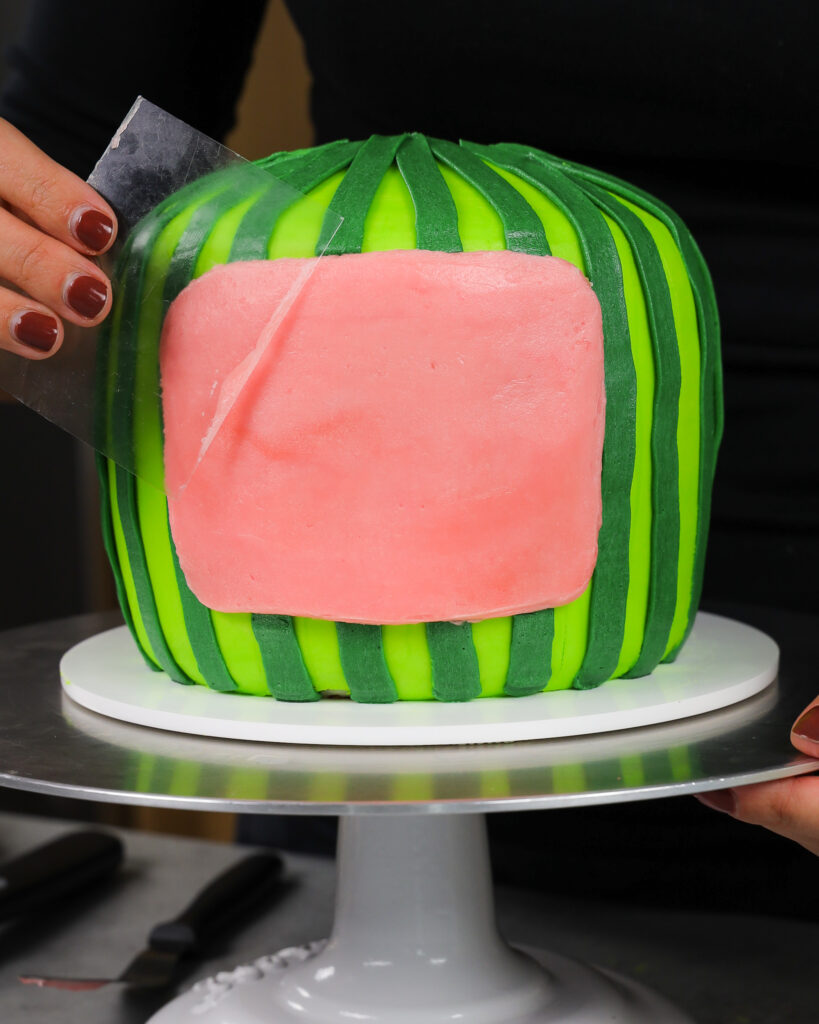
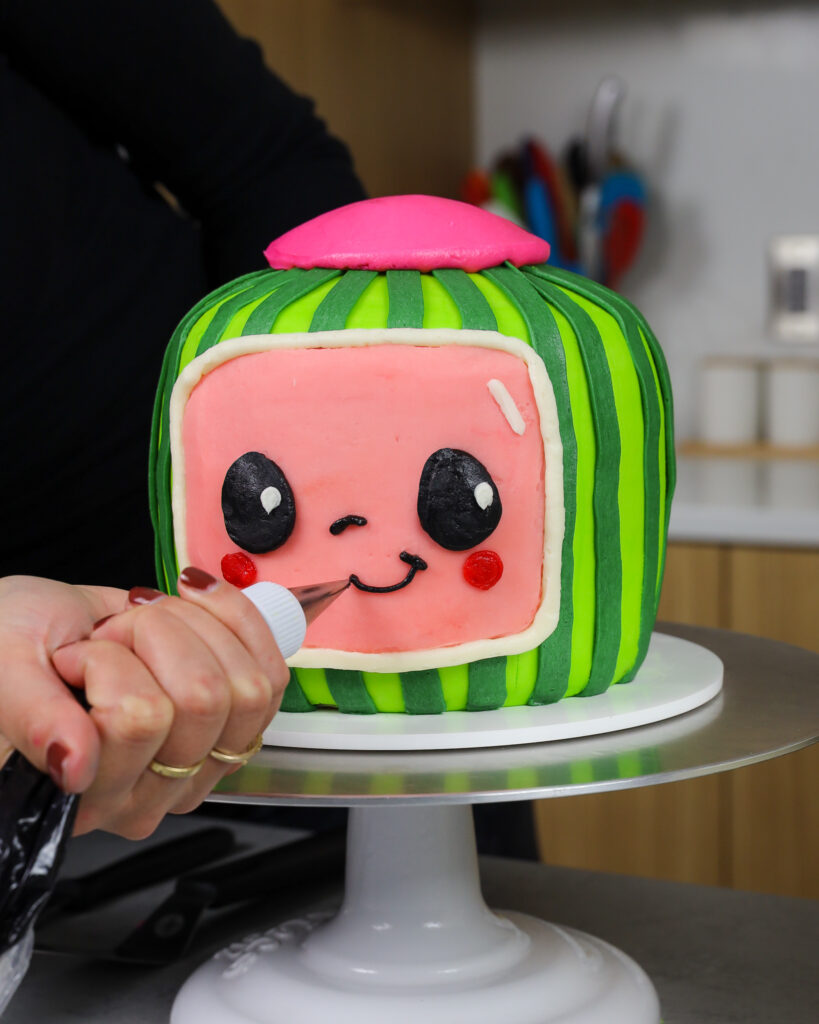
Then add the cute little face using the pink, white, red, and black buttercream. Start by piping and smoothing a pink rectangle on the front of the cake. Next, pipe the white outline around it.
Use the black frosting to pipe on the eyes, nose, and mouth. Use the white buttercream to add the accents, then pipe on the little red cheeks.
Next, pipe and smooth a mound of pink buttercream on top of the cake. Smooth the frosting using an acetate sheet or a small offset spatula.
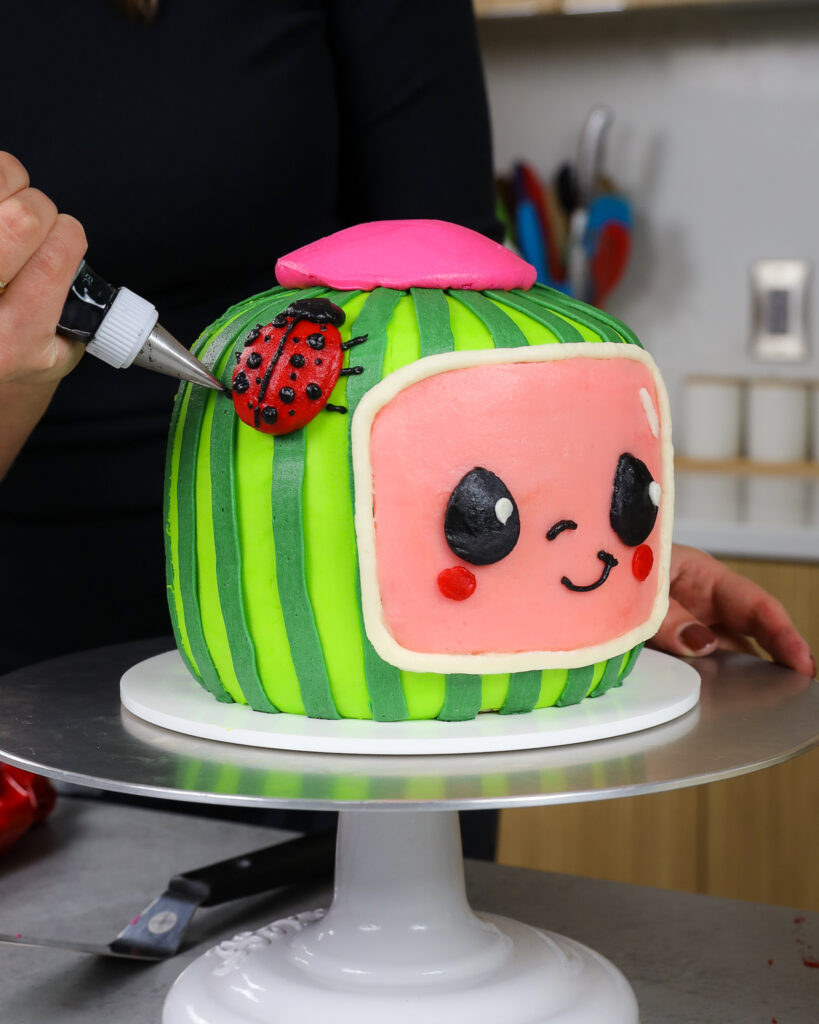
Use the red and black buttercream to pipe a ladybug on the upper left corner of the cake.
Mix a drop of purple gel food coloring with a 1/2 tsp of clear extract (like lemon or almond) and paint half of the top half of each wooden skewer.
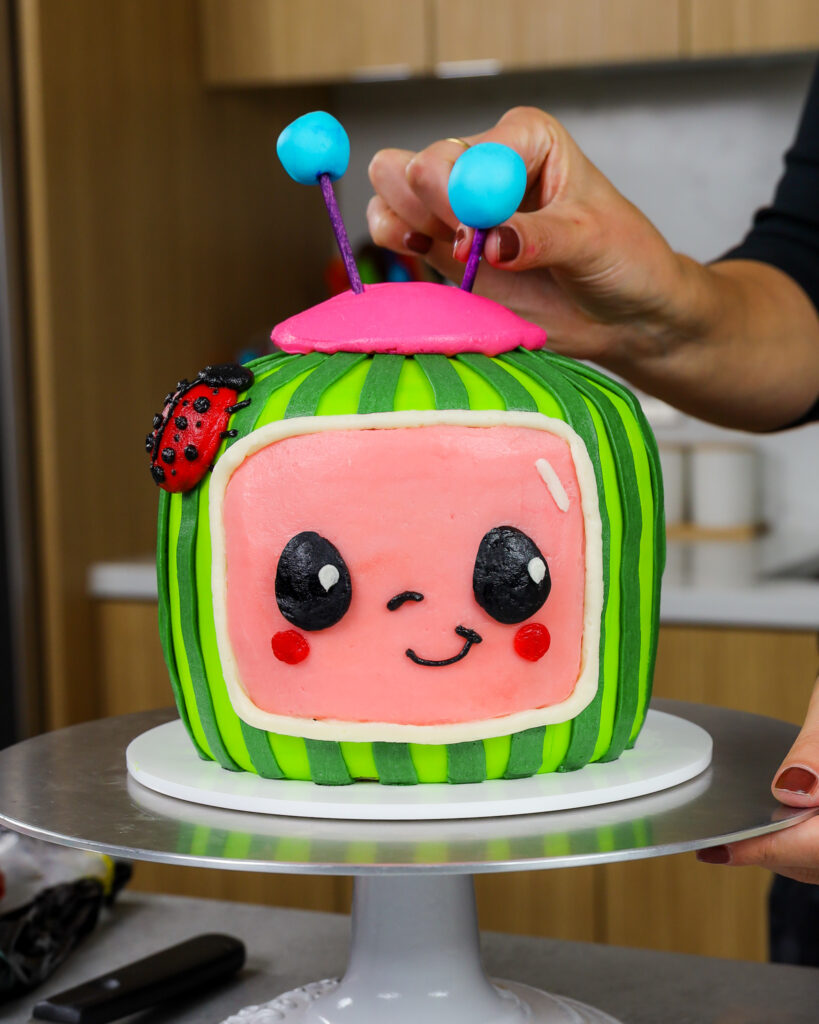
Roll the blue fondant into two small balls and place them on top of the wooden skewers. Press the wooden skewers into place on top of the cake and enjoy!
Substitutions and Swaps – Red Velvet Cake Layers
Below are some swaps and substitutions that can be made in this cake recipe. If you want to make a different cake flavor instead of red velvet, I recommend using my small batch vanilla cake recipe.
- Cake Flour – This recipe turns out best with cake flour, but you can use a gluten-free flour blend if that’s all you have on hand. Or if you can’t find cake flour, you can make your own using this technique.
- Granulated Sugar – I do not recommend reducing the amount of sugar or changing the type of sugar, as it will change the texture of the cake layers.
- Unsalted Butter – If you only have salted butter on hand, you can use it in place of the unsalted butter in this recipe. Just be sure to omit the salt that this cake recipe calls for. You can also use vegan butter in its place (and also omit the salt)!
- Eggs – If you have an egg allergy, you can try using flaxseed eggs or an egg replacer, but it will affect the texture of the layers.
- Buttermilk – You can also use full-fat yogurt, sour cream, whole milk, or an alternative yogurt or milk (almond, soy, oat) if you’re dairy-free.
- Vegetable Oil – You can use any flavorless oil in this recipe. Canola or even sunflower oil would work great!
- Gel food coloring – Natural food coloring or liquid food coloring can be used if needed to color the cake layers. However, I find gel food coloring works best!
Substitutions and Swaps – Vanilla Buttercream Frosting
- Unsalted Butter – If you only have salted butter on hand, you can use it in place of the unsalted butter. Just be sure to omit the salt that this frosting recipe calls for. You can also use vegan butter in its place (and omit the salt)!
- Heavy Cream – Whole milk or alternative milk (soy, almond, oat) will work fine in this frosting recipe if that’s what you have on hand.
- Gel food coloring – Natural food coloring or liquid food coloring can be used if needed to color the frosting. However, I find gel food coloring works best!
- If you want to use a frosting that is less sweet, try my Swiss meringue buttercream or my Russian buttercream.
Frequently Asked Questions
Is this Cocomelon cake beginner-friendly?
I’d call this an intermediate cake. None of the individual steps are especially hard, but the design does take time, patience, and a little practice with smoothing frosting and piping details. The good news is that it becomes much more manageable when you break it into steps and chill the cake between decorating stages.
Can I make this Cocomelon cake with a different cake flavor?
Yes. I used red velvet cake for this version, but you can absolutely use another sturdy cake flavor if you prefer. Vanilla or chocolate would both work well, as long as the cake layers are sturdy enough to stack, trim, and frost cleanly.
Can I use chocolate frosting or cream cheese frosting?
You can definitely use chocolate frosting or cream cheese frosting as the filling between the layers if that’s what your family prefers. For the outside decorations, though, I strongly recommend vanilla buttercream because it is easier to color, pipe, and smooth into the Cocomelon design.
Can I make this cake the day before?
Yes. I actually think making it the day before is a great idea. Store the finished cake in the fridge overnight so the shape stays firm and the decorations look their best, then let it sit out for a bit before serving so it has time to come back closer to room temperature.
Can I use fondant for the decorations instead of buttercream?
Yes. You can absolutely use fondant for parts of the design if that feels easier to you. Fondant decorations will stick to buttercream, especially if the buttercream is fresh or if you use a tiny dab of frosting to help hold pieces in place.
Can I make this cake in 8-inch pans?
You can, but the proportions will change, and the cake will not look quite the same unless you scale it up. This design works especially well as written with 3 six-inch cake layers because that size gives the cake the right Cocomelon shape. If you want to use 8-inch cake layers, I’d recommend making at least four layers, if not five, to give it the right dimensions.
What if I do not have electric green gel food coloring?
That’s totally fine. You can mix green and yellow gel food coloring to create a similar bright green shade for the base of the cake.
Do I have to use fondant for the antennae?
No, but it is the easiest way to get that clean look. If you really do not want to use fondant, you could try shaping the tops with frosting, but fondant will be much sturdier.
How do I keep the buttercream from getting too soft?
Chilling is the key. This design is much easier when the cake is cold, and the frosting is firm to the touch before you add the next layer of decorating. If your kitchen is warm, you can also chill the cake again between steps or make the frosting a bit more stable.
What is the easiest way to make the stripes look neat?
Start piping the stripes on the back of the cake first. That gives you a little time to get the hang of the motion before you move to the front, where the best stripes will be most visible.
Can I color the frosting ahead of time?
Yes. You can make the frosting in advance, and you can also color it ahead of time if needed. Just keep in mind that buttercream colors often deepen as they sit, so it is smart to make them slightly lighter than your final goal if you are prepping them in advance.
Tips for Making the Best Cocomelon Birthday Cake
- Be sure to properly measure the flour (spoon into the cup measure, then level) or use a kitchen scale to measure your dry ingredients.
- Ingredients at room temp mix together better! Set out any cold ingredients ahead of time.
- Use gel food coloring to create brightly colored frosting. It works best because it doesn’t throw off the consistency of the frosting or give it a bitter taste.
- Mix your cake batter just until the ingredients are incorporated. This will ensure your cake layers are tender and fluffy.
- Use a scale to weigh your cake pans as you fill them. Make sure each pan has the same amount of batter, which will make your cake layers bake to the same height and bake more evenly.
- Level your room temperature or thawed cake layers with a serrated knife to make them easier to stack.
- Chill your cake layers in the freezer for about 20 minutes before assembling the cake. It makes it so much easier to trim, stack, and frost them!
- Start piping your stripes on the back of the cake. That way your best stripes will be in the front, and any boo-boos can be hidden in the back 🙂
Making this Cocomelon Cake in Advance & Storage Tips
I recommend making your cake layers in advance and freezing them. It breaks the process up and makes it more approachable.
You can also make your frosting ahead of time or save any leftover frosting. It can be stored in an airtight container in the fridge for up to a month. Or store it in the freezer for up to 3 months! Be sure to give it a good stir once it thaws to get the consistency smooth again.
A frosted cake can last in the fridge for up to a week. The buttercream locks in all the moisture, keeping the cake fresh and delicious.
If you cut into the cake and have leftovers, use any remaining frosting to cover the cut section to keep it moist. It can be stored in the fridge like this for up to a week.
If you freeze the cake, transfer it to the fridge overnight, then bring it to room temperature the following day. This helps prevent condensation by minimizing the temperature shock.
Let Me Know What You Think!
If you try this Cocomelon birthday cake recipe, I’d love to hear what you think of it! Let me know by leaving a rating below.
If you share on social media tag me @chelsweets and use #chelsweets so I can see your amazing creations!
Cocomelon Cake
Ingredients
Red Velvet Cake
- 2 1/2 cups cake flour 300g
- 2 Tbsp unsweetened cocoa powder, sifted 10g
- 1 tsp baking soda 6g
- 1/2 tsp fine salt 3g
- 1/2 cup unsalted butter, room temperature 113g
- 1 3/4 cups granulated sugar 350g
- 2 large eggs, room temperature 112g
- 1 1/4 cups buttermilk, room temperature 300g
- 2/3 cup vegetable or canola oil 145g
- Squirt of red gel food coloring
- 2 tsp vanilla extract or vanilla bean paste 8g
- 1 tsp white vinegar 4g
Vanilla Buttercream Frosting
- 2 cups unsalted butter, room temperature 454g – 4 sticks
- 1 Tbsp vanilla extract or vanilla bean paste 12g
- 1/2 tsp fine salt 3g
- 7 cups powdered sugar 875g
- 3 Tbsp heavy whipping cream, room temperature 45g
- Green Gel Food Coloring
- Black Gel Food Coloring
- Red Gel Food Coloring
- Pink Gel Food Coloring
- Electric Green Gel Food Coloring
- Orange Gel Food Coloring
Additional Tools / Decorations
- 3, 6- inch Cake Pans
- 10- inch greaseproof cake board
- Spinning Cake Stand
- Small offset spatula
- 6 Small Piping Bags
- 1 Large Round Piping Tips like a Wilton 2A
- Wide, Flat Piping Tip like a Wilton 2B
- 3 Small Round Piping Tips like a Wilton 12
- 2 Thin Wooden Skewers
- Small Acetate Sheet
- Purple Gel Food Coloring
- 1/4 cup Sky Blue Fondant or White Fondant kneaded with a drop of blue gel food coloring
Instructions
Red Velvet Cake Layers
- Preheat oven to 350 F / 175 C. Grease three 6-inch cake pans with homemade cake release or non-stick baking spray and parchment paper. Set aside.
- In a medium bowl, sift together the cake flour, cocoa powder, baking soda, and salt.
- In a large bowl or the bowl of a stand mixer, use either a hand mixer or a stand mixer to cream together the butter and granulated sugar. Mix on a medium-high speed for 1-2 minutes, until the mixture becomes lighter in color. Scrape the sides and bottom of the bowl as needed with a rubber spatula.
- Mix in the eggs on a medium speed until fully incorporated.
- Add in the buttermilk, oil, red gel food coloring, vanilla extract, and white vinegar. Mix on a low speed until combined. The mixture might look broken at this stage, but I promise it will come together once we add in the dry ingredients.
- Slowly mix in the dry ingredients into the wet ingredients at a low speed in two installments. Mix until just combined, and you can no longer see any visible streaks of cake flour.
- Divide the batter evenly between the prepared pans and bang the pans on your counter a few times to release any air bubbles that might be trapped in the batter. Bake for 30-33 minutes, or until a toothpick inserted in the center of the cake comes out with a few moist crumbs.
- Remove the pans from the oven and let them cool for 10 minutes, then run a small offset spatula around the perimeter. Carefully flip the layers out of their pans and place them on a wire rack to finish cooling.
- Level two of the cake layers with a serrated knife once they're fully cooled. Trim the bottom cake layer to give the cake a somewhat rounded shape (see pictures above).
- If you're making these cake layers in advance, wrap and freeze them at this point.
Vanilla Buttercream Frosting
- Beat the butter on a medium speed for 30 seconds with a paddle attachment until smooth. Add in the vanilla and salt, and beat on low until the ingredients are fully incorporated.
- Slowly mix in the powdered sugar and heavy cream on a low speed. Place a kitchen towel over your mixer to prevent powdered sugar clouds from coating your kitchen. Scrape the sides and bottom of the bowl as needed with a rubber spatula.
- If the frosting is too thick, add additional cream (1 Tbsp at a time). If the frosting is too thin, add more powdered sugar (1/4 cup at a time).
- Once the frosting reaches the desired consistency, place 1/3 cup of uncolored frosting in a small piping bag fitted with a small round tip, like a Wilton 12, and set aside.
- Place 1/4 cup of frosting in a separate bowl and color it with black gel food coloring. Place in a small piping bag fitted with a small round tip, like a Wilton 12, and set aside.
- Place 1/3 cup of frosting in a separate bowl and color it with red gel food coloring. Place in a small piping bag fitted with a small round tip, like a Wilton 12, and set aside.
- Place 3/4 cup of frosting in a separate bowl and color a salmon pink with a tiny drop of red and orange gel food coloring. Place in a small piping bag fitted with a large round tip, like a Wilton 2A, and set aside.
- Place 3/4 cup of frosting in a separate bowl and color it hot pink with a generous squirt of pink gel food coloring. Place in a small piping bag and cut a round opening at the base of the bag that is about 1 inch wide.
- Place 3/4 cup of frosting in a separate bowl and color a dark shade of green with leaf green gel food coloring and a tiny drop of black gel food coloring. Place in a small piping bag fitted with a flat piping tip, like a Wilton 2B, and set aside.
- Leave the remaining buttercream uncolored and cover it with a piece of plastic wrap to prevent a crust from forming, and set it aside.
Decorating this Cocomelon Cake
- Stack and frost the cake layers on a greaseproof cake board. Use a dab of frosting to help stick the first cake layer to the board. Spread an even layer of the uncolored frosting between each cake layer.
- Add a thin coat of white frosting around the cake that fully covers the cake layers. Smooth using an offset spatula and/or bench scraper, then chill the cake in the fridge (20 minutes) or freezer (10 minutes) until the frosting is firm to the touch.
- Color the remaining buttercream bright green using electric green gel food coloring (or green and yellow gel food coloring).
- Remove the cake from the fridge or freezer and smooth a thick layer of bright green buttercream around the cake. Use an acetate sheet or a small offset spatula to smooth the frosting.
- Chill the cake in the fridge (30 minutes) or freezer (10 minutes) one more time until the frosting is completely firm to the touch.
- Remove the cake from the fridge or freezer. Use a toothpick or scribe to lightly trace where you want to pipe the face and the stripes. Pipe dark green buttercream stripes up the side of the cake. I recommend starting at the back of the cake. It takes a couple stripes to get the hang of it, and that way your best stripes will be in the front!
- Then add the cute little face using the salmon, white, red, and black buttercream. Start by piping and smoothing a pink rectangle on the front of the cake. Next, pipe the white outline around it.
- Use the black frosting to pipe on the eyes, nose, and mouth. Use the white buttercream to add the accents, then pipe on the little red cheeks.
- Next, pipe and smooth a mound of hot pink buttercream on top of the cake.
- Use the red and black buttercream to pipe a ladybug on the upper left corner of the cake.
- Mix a drop of purple gel food coloring with a 1/2 tsp of clear extract (like lemon or almond) and paint half of the top half of each wooden skewer.
- Roll the blue fondant into two small balls and place them on top of the wooden skewers. Press the wooden skewers into place on top of the cake and enjoy!
Video
Notes
My Tips for Making the Best Cocomelon Cake
- Ingredients at room temp mix together better! Set out any cold ingredients ahead of time.
- Properly measure the cake flour (spoon into the cup measure, then level). Or better yet, use a kitchen scale to measure your dry ingredients.
- Use gel food coloring to create brightly colored frosting. It works best because it doesn’t throw off the consistency of the frosting or give it a bitter taste.
- Use a scale to weigh your cake pans as you fill them. Make sure each pan has the same amount of batter, which will make your cake layers bake to the same height and bake more evenly
- Level the room temperature or thawed cake layers with a serrated knife to make them easier to stack.
- Chill your cake layers in the freezer for about 20 minutes before assembling the cake. It makes it so much easier to trim, stack, and frost them!
Nutrition
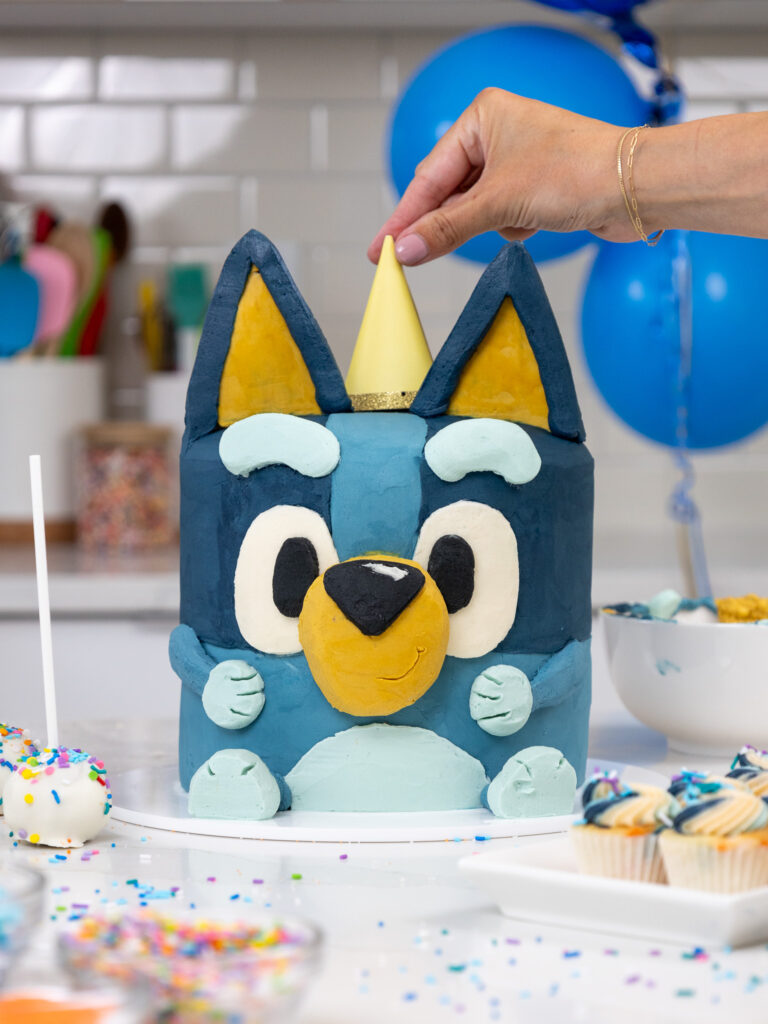
Other Recipes You Might Like:
I’m making a cocomelon cake for a party next week and they’ve requested whipped cream frosting. I’ll be using your recipe, bc they’re always so good! Do you think the consistency of the whipped cream will decorate this cake well?
Hi, to get such bright bold colors – do you color your buttercream then let it sit at room temp for a couple hours for it to develop?
I made this cake today following the tutorial. A few notes: it’s not mentioned in the list of frosting colors to make about 1/2 a cup of hot pink icing for the blob on top. I used Wilton’s gel color rose and got a good hot pink. Also, it does mention to make 3/4 cup a light shade of green, fitted with a wilton 2A tip. You never use that, I’m not sure what that was to decorate on the cake? Americolor has an electric green color in it’s gel color line, however i use wilton gel colors. I got a good electric green by using leaf green. And for the dark green for stripes, i got a good dark green with the Wilton Kelly green gel color. I also did the lemon extract and purple mix to color the skewers, however it didn’t do a nice color really, so i thought why use the extract? I just sounded the skewer with straight up purple gel color, let it sit for about 20 minutes (tho i don’t know if that’s necessary or not) and then i just wiped the excess off with a paper towel and it colored the skewer nicely! Hope this helps someone else if they attempt the cake!
I can always count on you to come up with a great tutorial for a cake idea. Making this for a 1st birthday this weekend! Thank you.
Hi! I would like to make this cake for a birthday party, but how would I adjust the ingredients for 3 8 inch layers? Thank you!
Question? Can I just cover the cake with the colored buttercream n make the design of cake out of colored fondant. Will the fondant stay/glue on the buttercream?? I need to learn if this can be possible. TY
I am such a fan of you. Loveeee all your cakes and designs! I follow you since you were here in NY in your little apartment ? ?. TY again !
I will be making your cocomelon cake for my granddaughters birthday I would like to know if I could make it with chocolate instead of the red velvet as she loves chocolate. What chocolate recipe of yours will be better for this cake?
Love that Rhonda, I’m sure she’ll love it! I would recommend using this chocolate cake recipe: https://chelsweets.com/my-go-to-chocolate-layer-cake-recipe/
It’s should work great for this.
I was wandering if l could do a chocolate frosting on the coco melon cake for the crumb coat and also in between the layers as Iam making a chocolate cake ?
Hi Rhonda! You can totally do that! That would be delicious 🙂
Can I make this into a 5 layer 6inch cake
Hi Mykaela,
You could, but the layers would be pretty thin! They also would bake more quickly, I’d recommend taking a few minutes off the bake time.
Hi. Do you have the written recipe of the red cake and also the frosting?
Hi Nina,
For sure! If you scroll to the bottom of this page (but just above the comments section) there is a detailed recipe card 🙂 Happy baking!
This tutorial was super easy to follow! I didn’t make the cake and buttercream mentioned but I did the exact same design.
Haha love that Brandi!! I try really hard to make my tutorials easy to follow, so this comment put a big smile on my face 🙂 Thank you for sharing!!
I would like to know how much shortening you would add to the buttercream frosting. I live in the south and want to make sure it doesn’t melt. Would you add the same amount as you do butter??
Hi Susie,
That’s a great question! I would recommend swapping out half of the butter for hi-lo shortening to help make this frosting more stable in the heat. Hope that helps, happy baking!
You haven’t given instruction for the hot pink top mound on the cake.
Hi Di,
Apologies! I’ve add a step in the recipe card to walk through piping on the pink mound. Thanks for pointing this out <3
nice cake !
Thanks Hiba 🙂
Making this cake this weekend for my grandaughter who is turning 5. If I make the day before, do you suggest leaving it out on counter or in fridge overnite? I did read your comment that it could be stored in fridge up to week. Just wondering best idea to keep decoration looking great for next day party. TY Veronica
Hi Veronica,
Apologies for the delayed response! The buttercream on this cake won’t go bad if the cake is left out overnight, but I’d recommend storing it in the fridge overnight just so that the cake keeps its shape and the frosting decorations look their best. Then when it’s time to serve the cake, I’d recommend taking the cake out of the fridge about an hour before you plan to serve it to let the cake come to room temperature to make it easier to cut. Hope the helps for the future!!
I want to make this for my daughters bday but she loves carrot cake with cream cheese frosting. Do you think it would work with the cream cheese frosting too?
Thank you
Hi Shraz,
I think you could totally make this cake design with carrot cake and cream cheese frosting as a filling! I would recommend still using regular / American buttercream to decorate the cake though, it’ll be easier to pipe with and color. Hope that helps, happy baking!