Buttercream Turkey Cookies
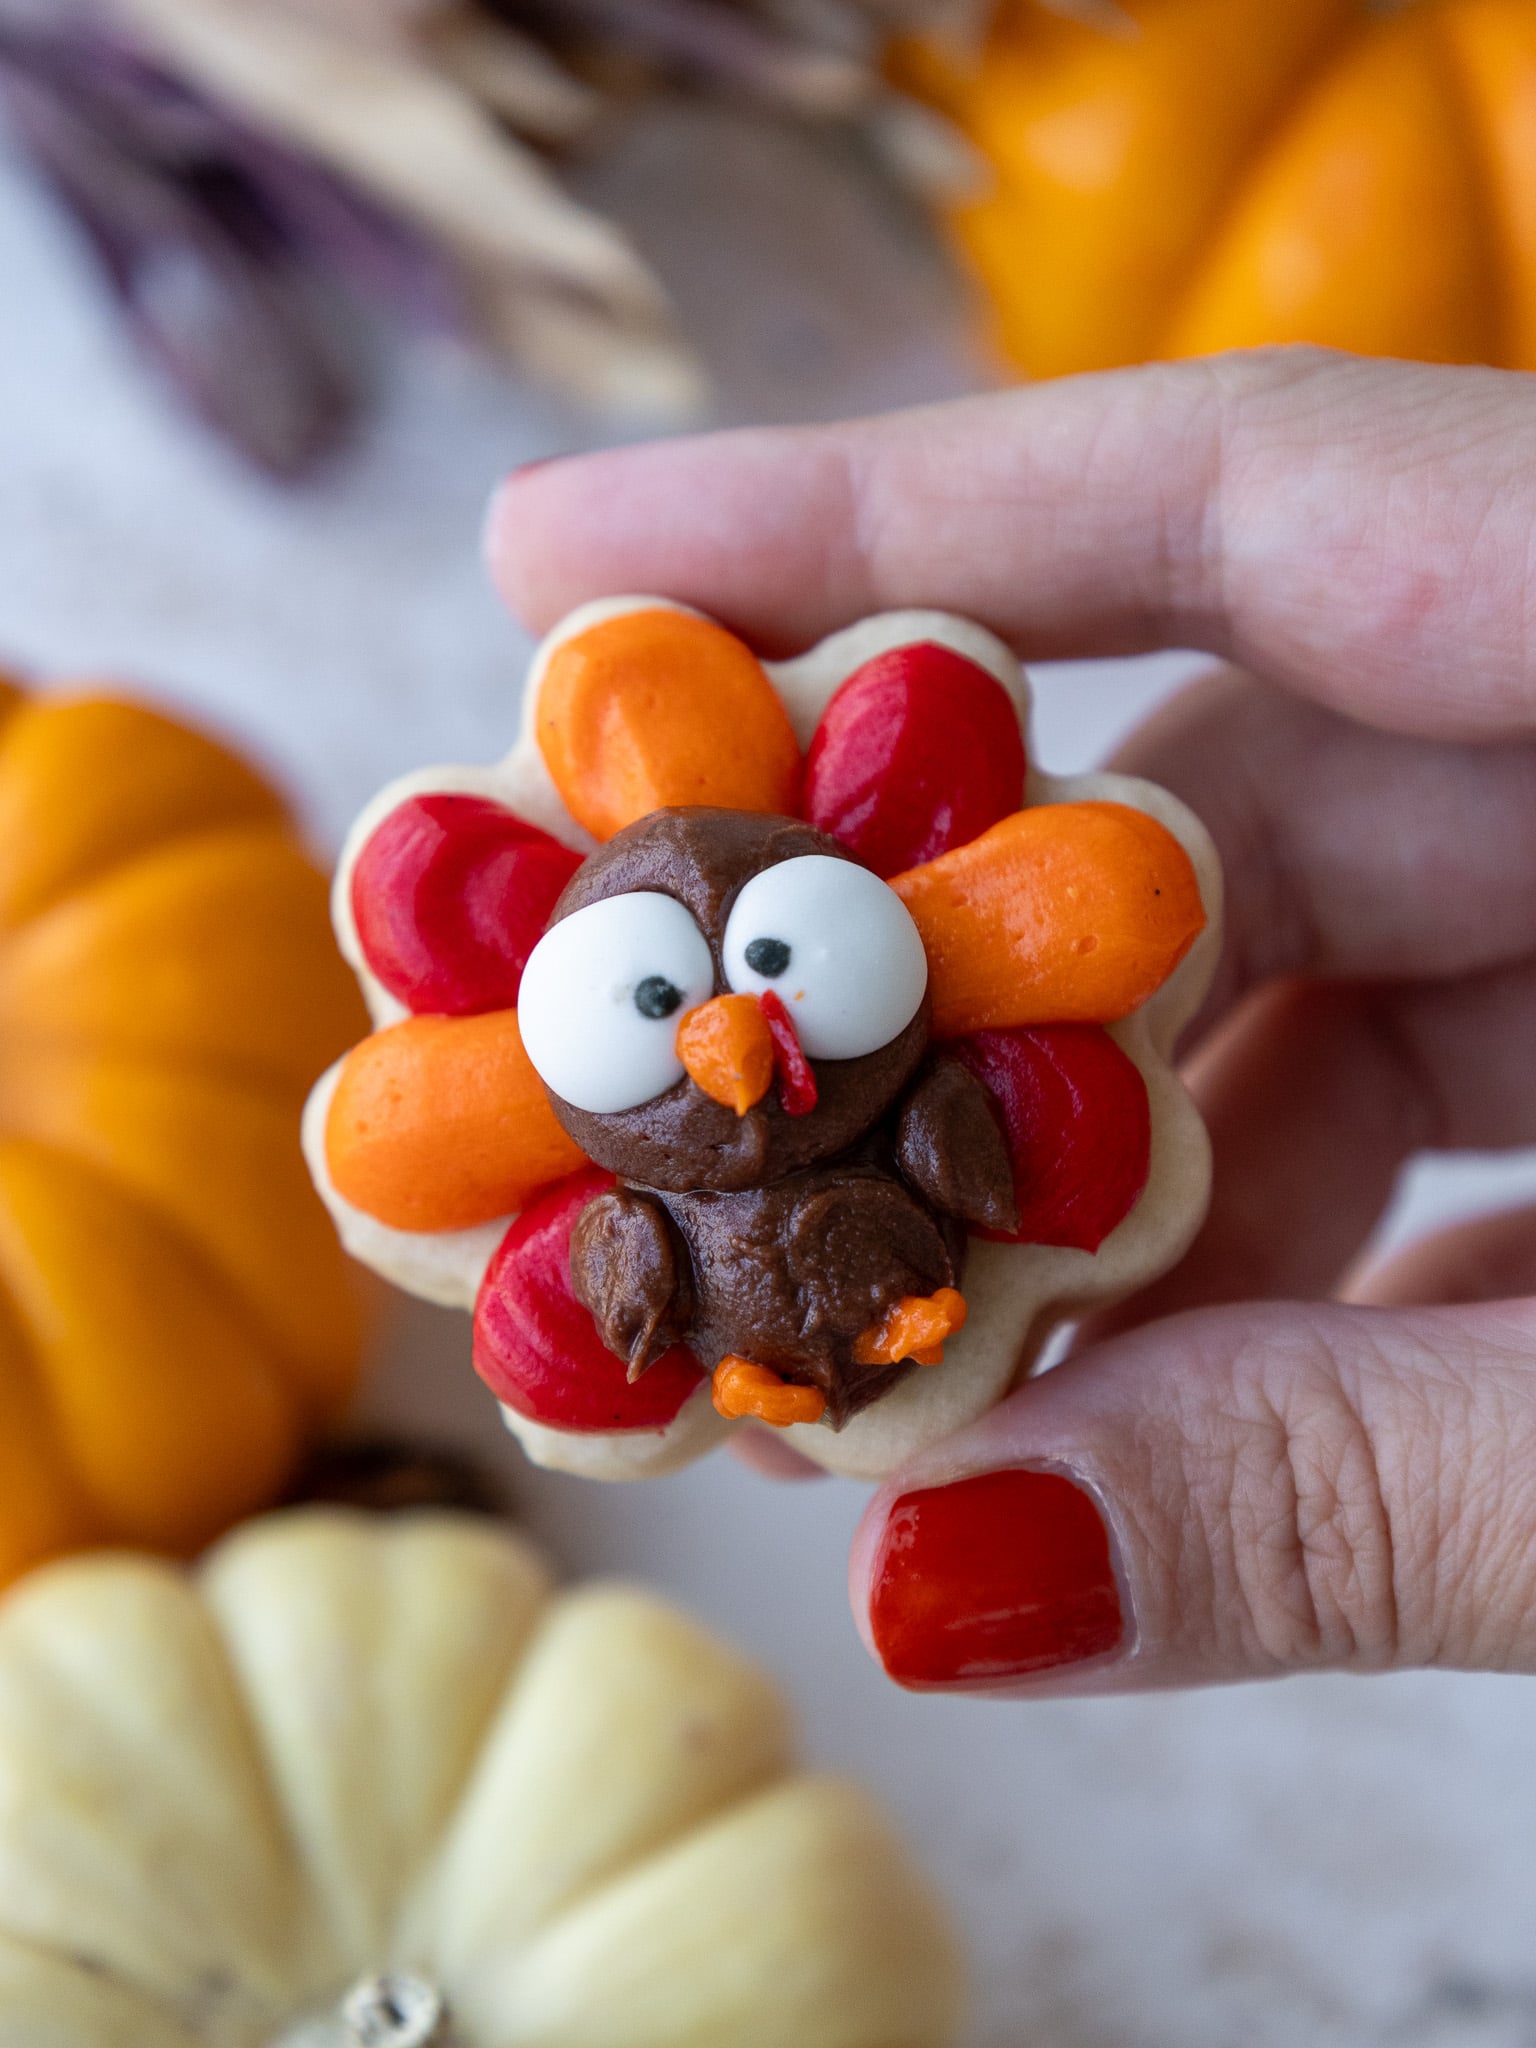
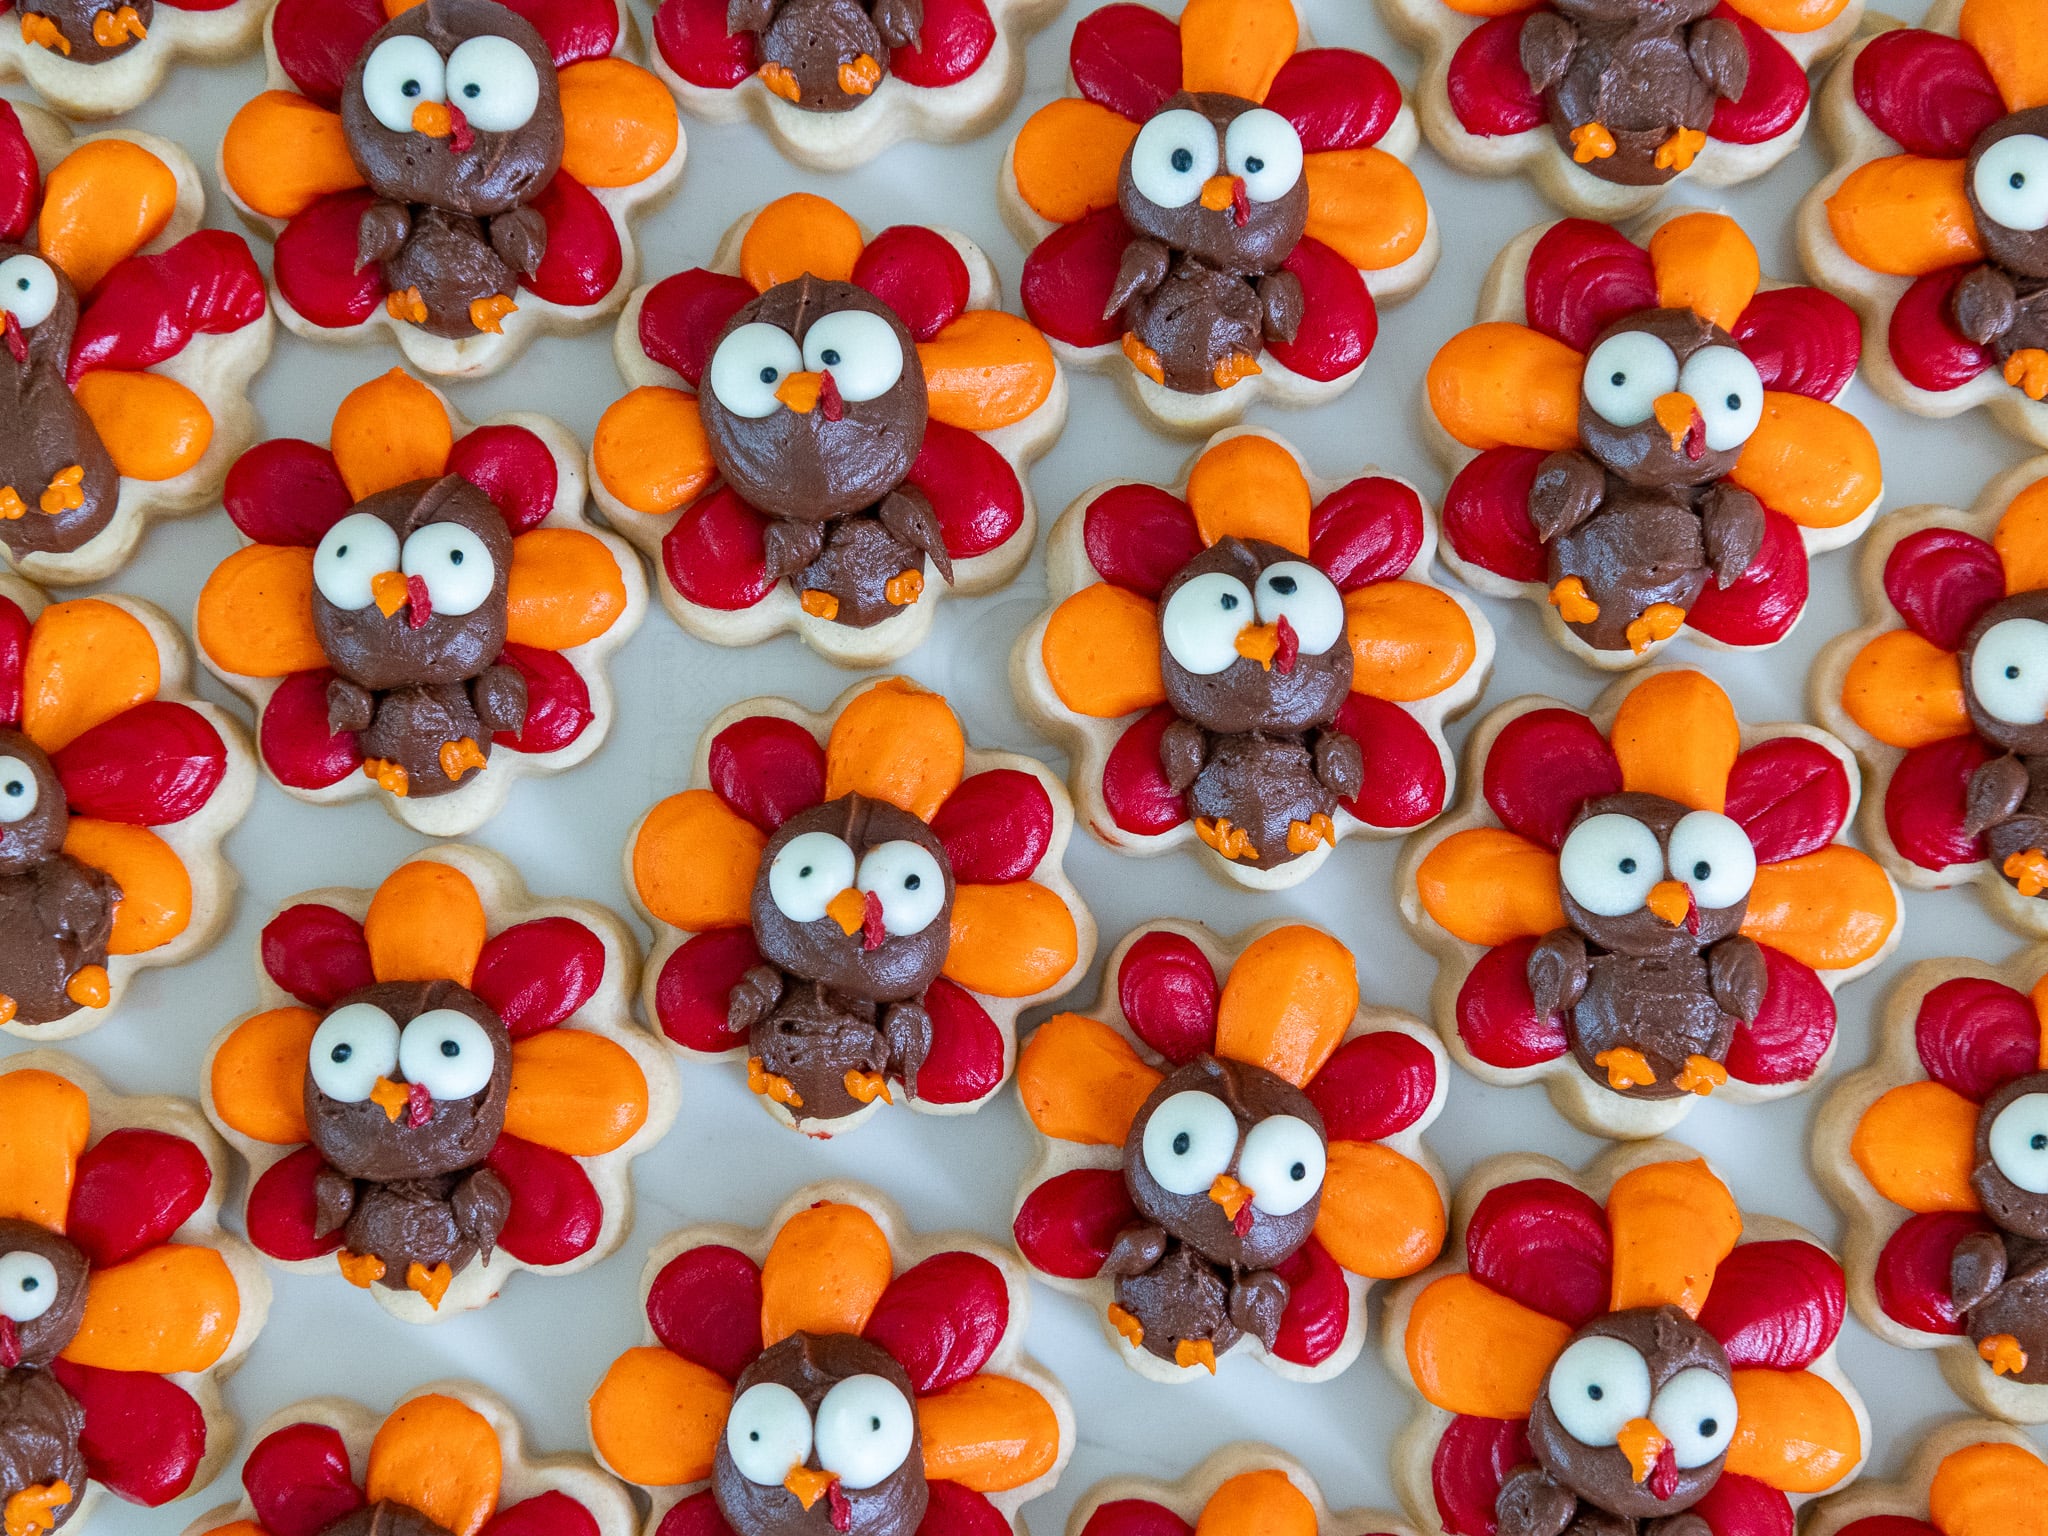
These adorable buttercream turkey cookies are made with soft and chewy cream cheese sugar cookies and decorated with homemade buttercream frosting!
They’re such a cute Thanksgiving cookie and are so fun to decorate.
This Recipe at a Glance
- Yield: About 40 2-inch cookies
- Texture: Soft and chewy
- Prep Time: 20 minutes
- Chill Time: 1 hour + 15 minutes after cutting
- Recommended Cookie Cutter: 2-inch flower-shaped cookie cutter
- Bake Time: About 12–15 minutes per tray, depending on the size and shape of the cookies
- Decoration: Red, orange, and brown buttercream with candy eyes
- Make Ahead: The dough and baked cookies can both be frozen for up to 1 month
Key Ingredients & Substitutions
This recipe uses my cream cheese cookie dough and a simple homemade buttercream frosting. Here are a few of the ingredients that are especially important.
- Unsalted Butter: Butter is used in both the cookie dough and the buttercream. Make sure it’s at room temperature so it mixes smoothly with the other ingredients.
- Full-Fat Cream Cheese: The cookie dough is made with full-fat cream cheese. Let it come to room temperature before mixing it with the butter.
- Granulated Sugar: This sweetens the cookie dough. Be sure to cream it with the butter and cream cheese for a couple of minutes, until the mixture becomes lighter in color.
- Vanilla Extract or Vanilla Bean Paste: Either works in both the cookie dough and frosting.
- Almond Extract: This is optional, so you can leave it out if you don’t have any on hand or don’t like the flavor.
- Cornstarch: This is whisked into the dry ingredients along with the flour, salt, and baking powder.
- Gel Food Coloring: You’ll need red, orange, and brown gel food coloring for the turkey decorations. If you want to naturally color the brown frosting, the recipe card also includes an option using melted dark chocolate.
- Candy Eyes: I love using my homemade candy eyes to decorate these, but you can use store-bought eyeball sprinkles too.
How to Make Buttercream Turkey Cookies
Let’s walk through this recipe step by step so the cookies bake up soft, hold their shape, and are easy to decorate.
Step 1: Make the Cream Cheese Cookie Dough
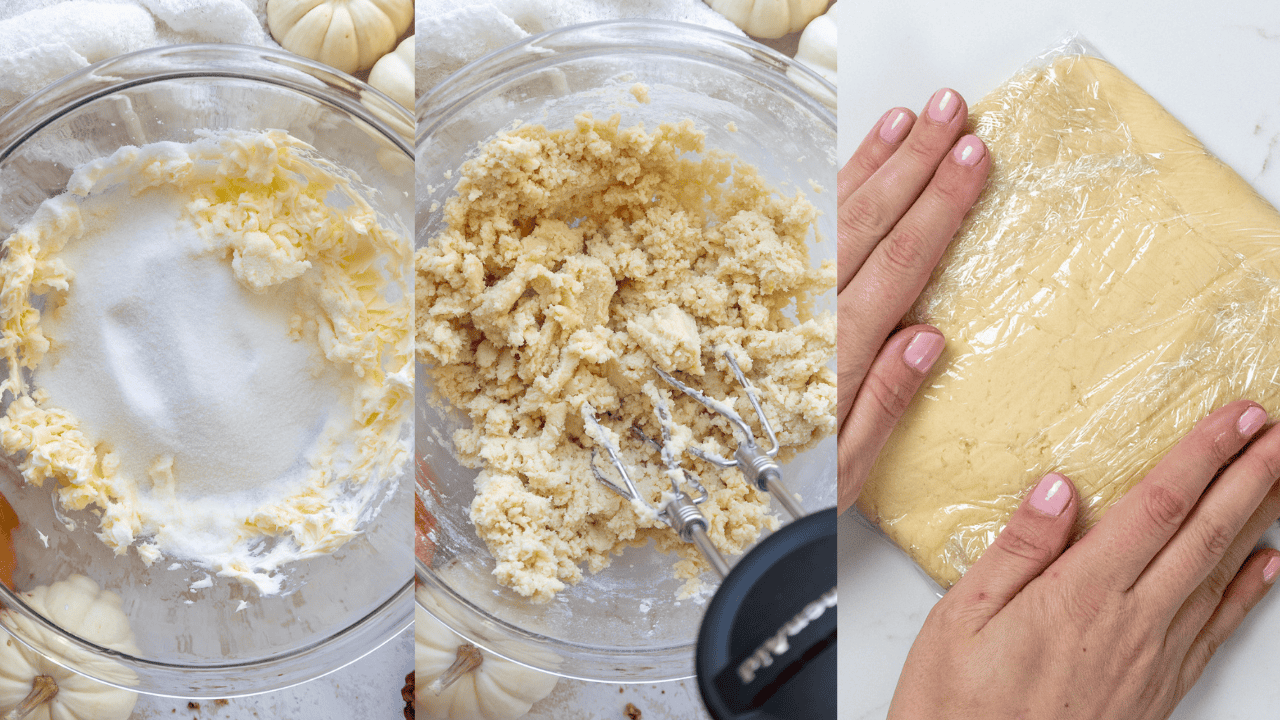
Beat the room-temperature butter and cream cheese together until smooth, then add the granulated sugar and mix on medium-high speed for a couple of minutes until the mixture becomes lighter in color.
Mix in the egg, vanilla extract or vanilla bean paste, and optional almond extract.
In a separate bowl, whisk together the flour, cornstarch, fine salt, and baking powder. Add the dry ingredients to the butter mixture and mix on low speed until they are just incorporated.
Scrape the sides and bottom of the bowl with a rubber spatula to make sure everything is evenly combined.
Step 2: Chill the Cookie Dough
Divide the dough in half and wrap each portion tightly in plastic wrap. I like to flatten each portion into a rectangle about 1/2 inch tall so it’s easier to roll out once chilled.
Chill the dough in the fridge for 1 hour, in the freezer for 30 minutes, or in the fridge overnight.
If you chill the dough overnight, let it sit at room temperature for about 10 minutes before rolling it out so it’s easier to work with.
Step 3: Roll Out and Cut the Cookies
Preheat the oven to 350°F / 175°C and line two large baking sheets with parchment paper or silicone baking mats.
The cookies will spread less and keep their shape better when baked on parchment paper.
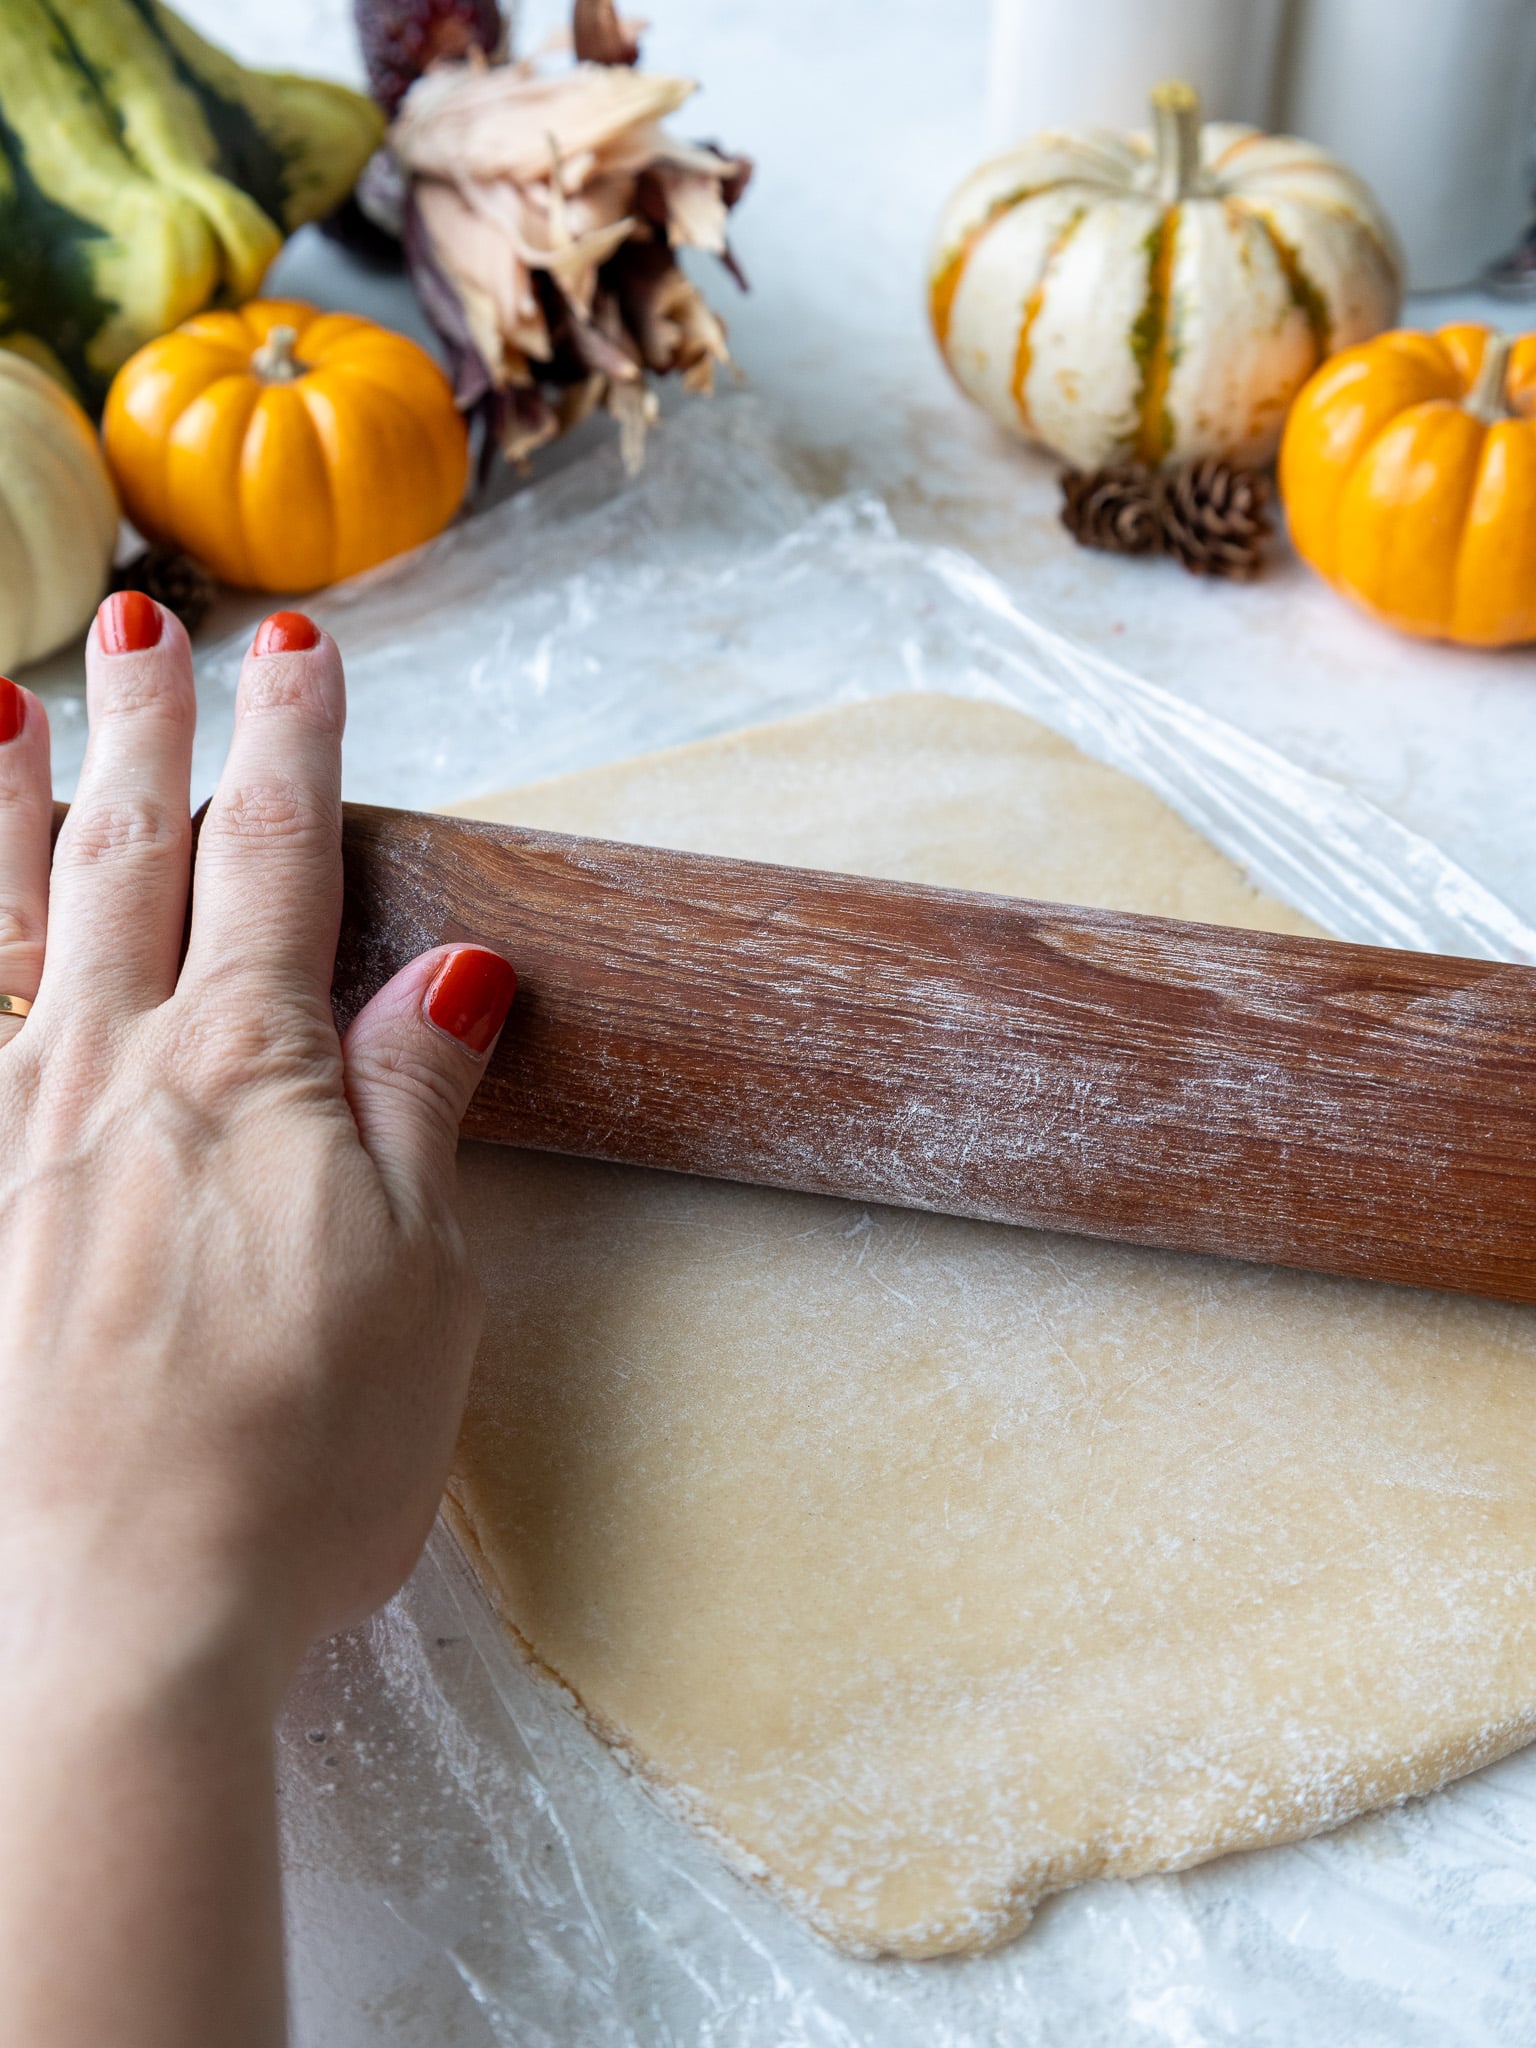
Work with one chilled portion of dough at a time, leaving the second portion in the fridge. Roll the dough out on the plastic wrap, dusting the dough and rolling pin with flour as needed.
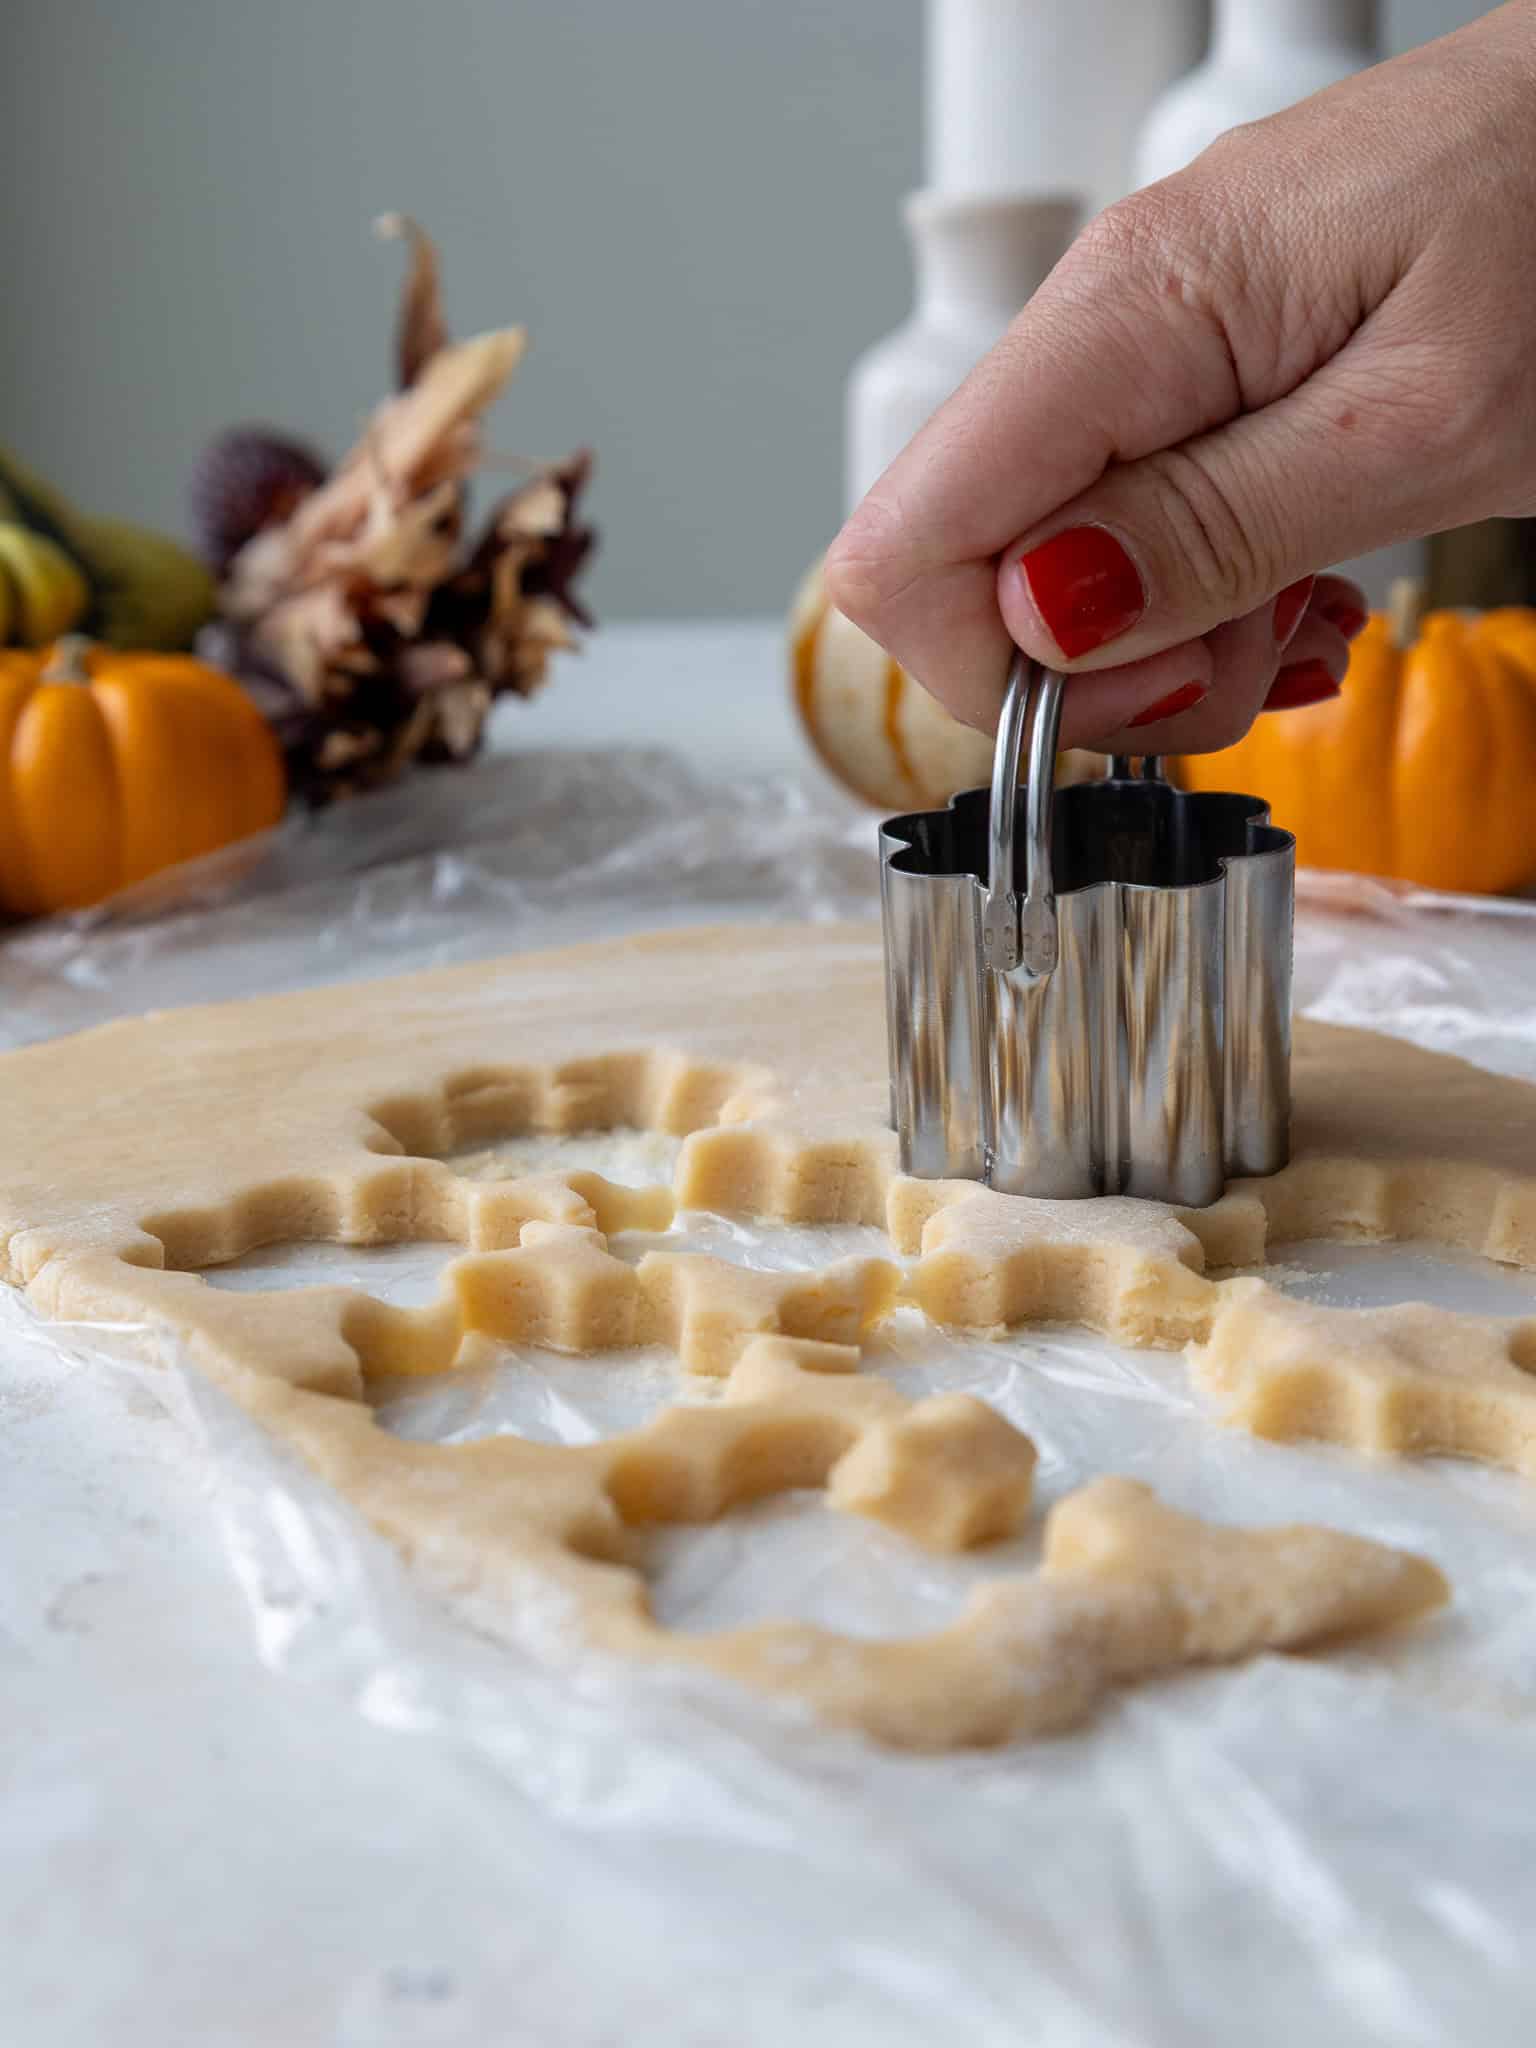
Roll the dough to an even 1/3-inch thickness, then cut out the cookies with a flour-dusted cookie cutter. This recipe uses a 2-inch flower cutter.
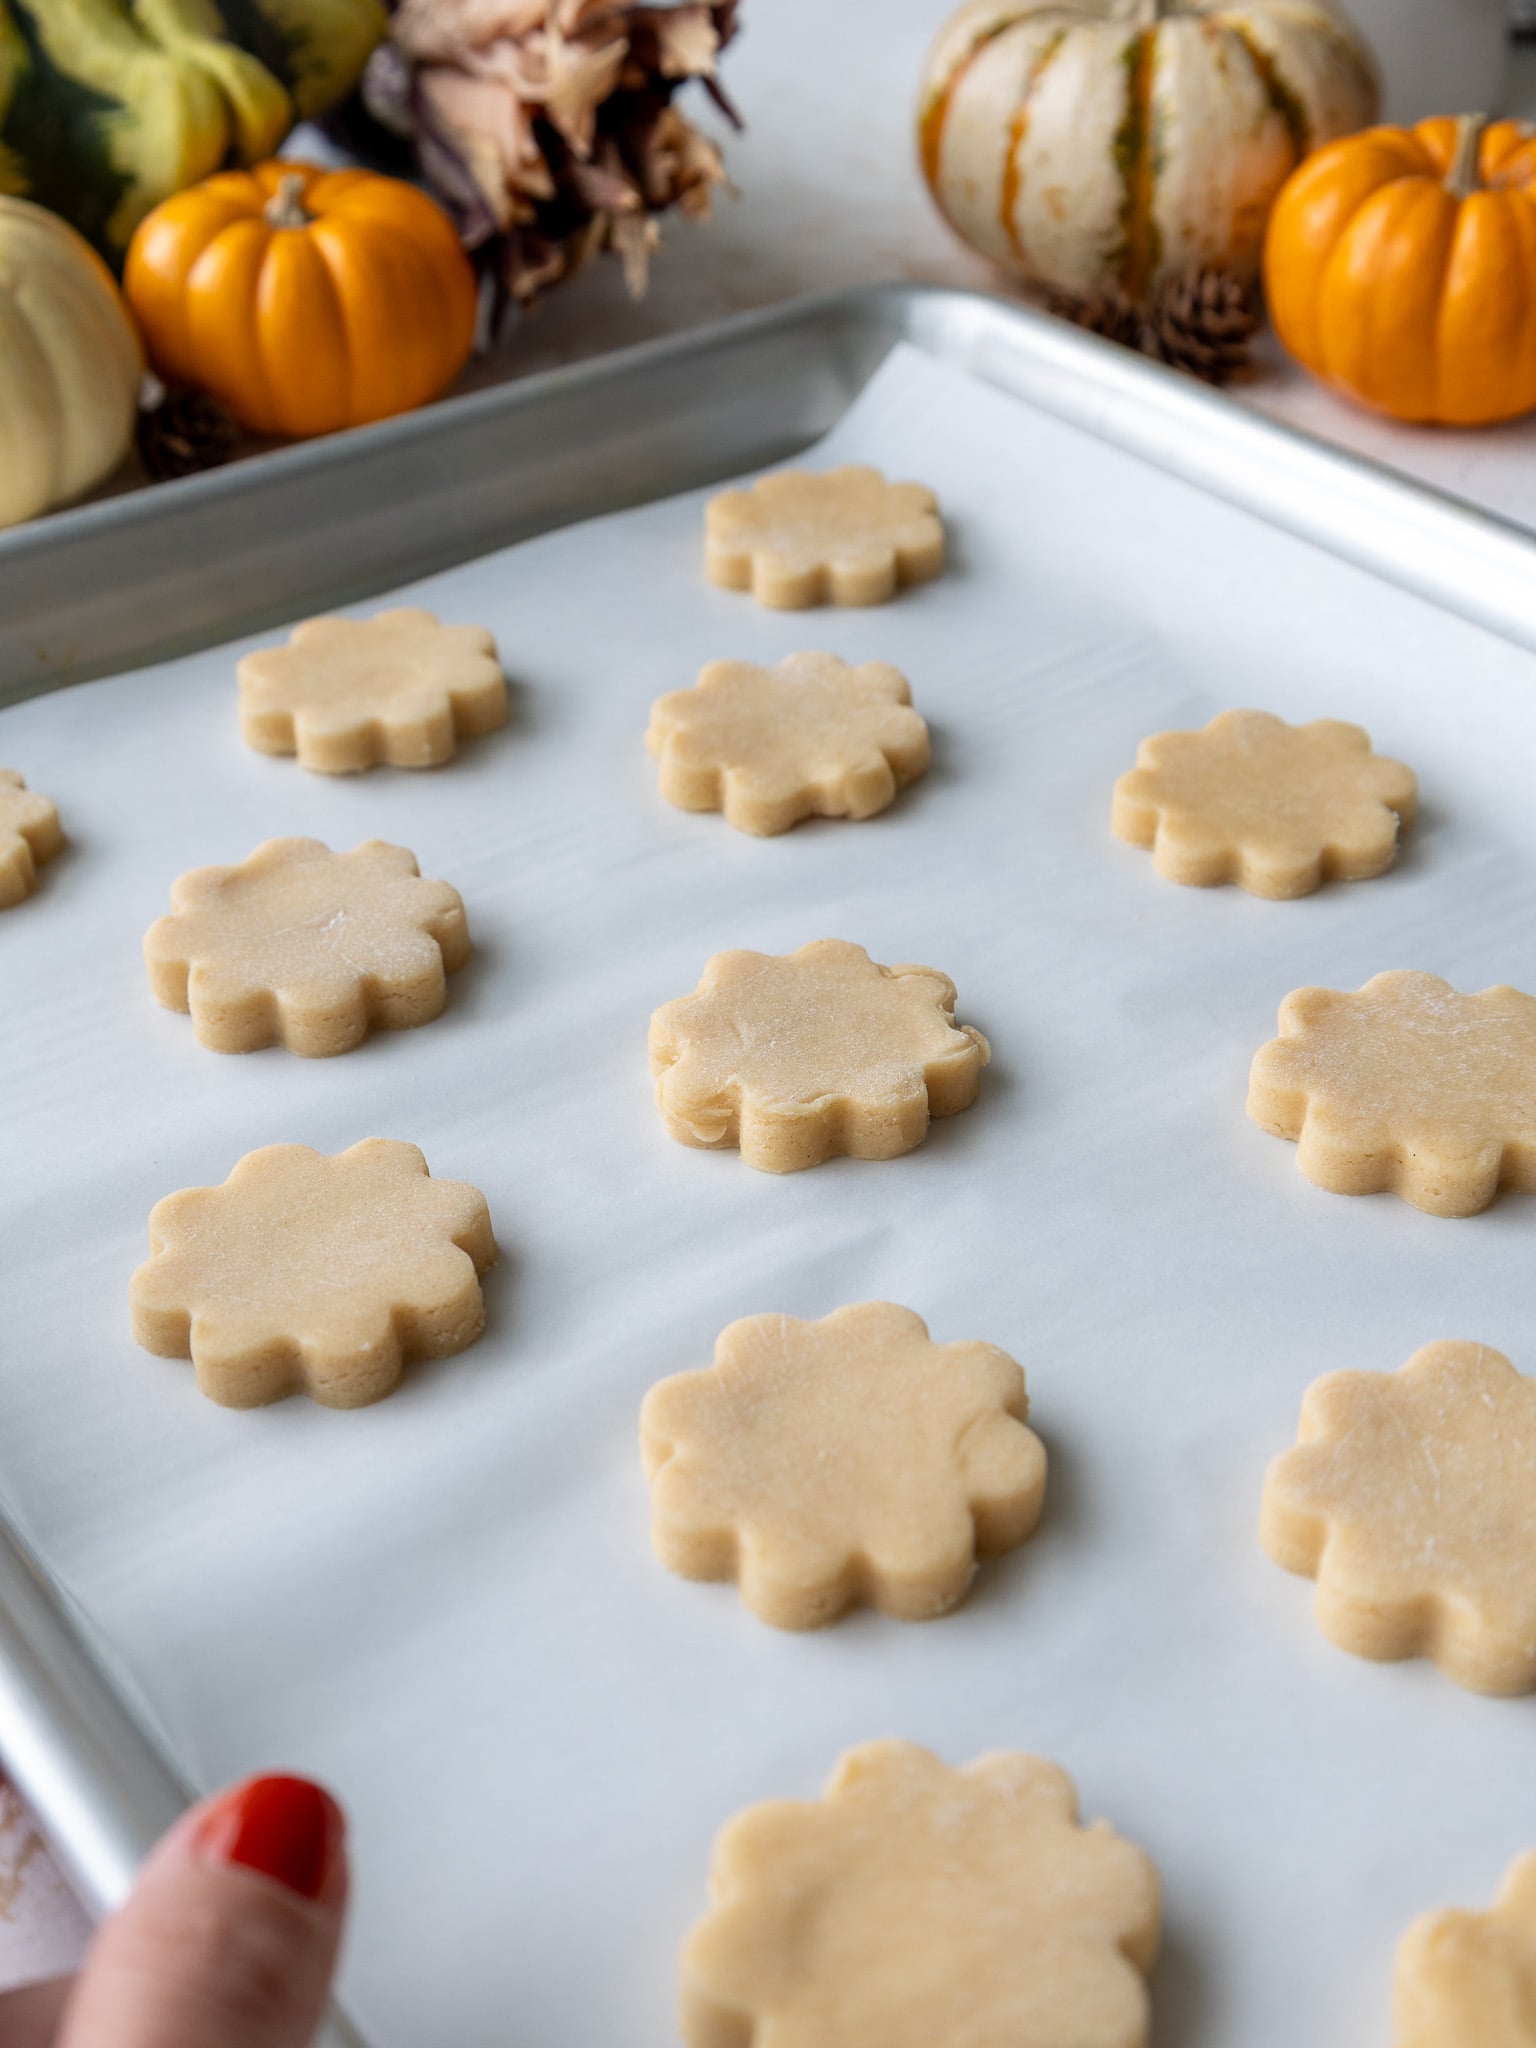
Brush off any excess flour with a kitchen brush, then place the cookies about 1 inch apart on the prepared baking sheets.
Step 4: Chill and Bake the Cookies
Chill the cut-out cookies one more time for 15 minutes in the fridge or 5 minutes in the freezer. This helps them keep their shape as they bake.
Bake one sheet at a time on the top rack for about 12–15 minutes. The exact bake time will depend on the size and shape of your cookies.
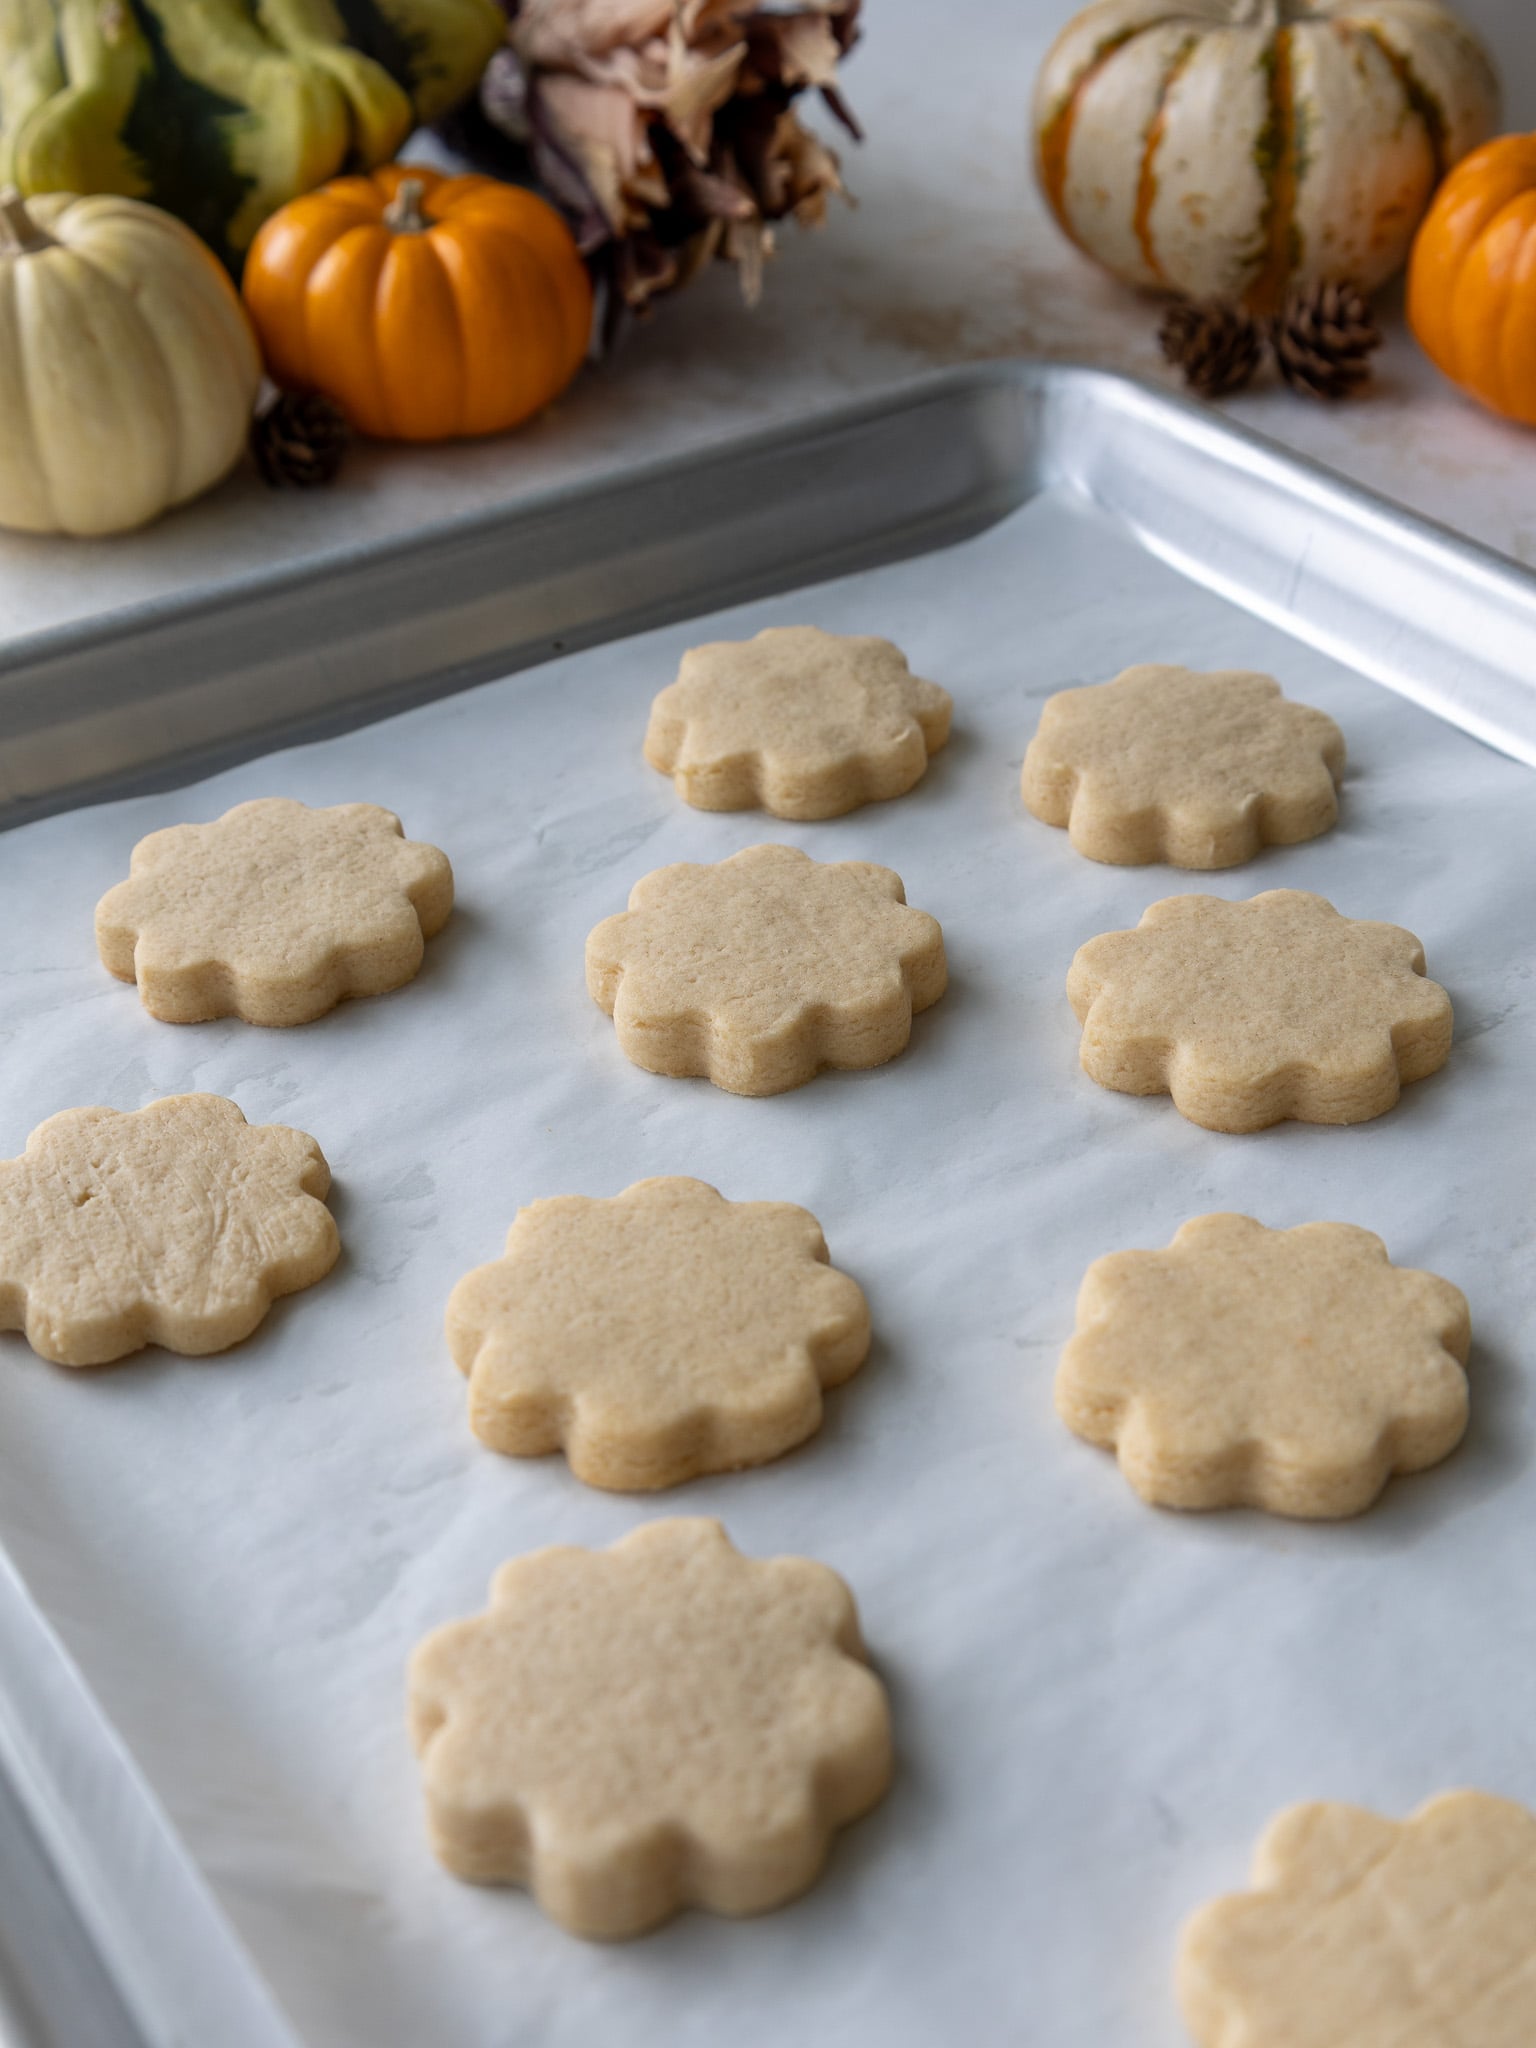
Keep a close eye on them and pull them out before the edges start to brown.
Let the cookies cool on the pan for about 15 minutes, then transfer them to a wire rack to finish cooling. Rewrap and chill any dough scraps before rolling and cutting them again.
Step 5: Make and Color the Buttercream
While the cookies cool, make the buttercream. Beat the room-temperature butter until smooth, then mix in the vanilla and salt.
Gradually mix in the powdered sugar and heavy cream on low speed. Scrape the sides and bottom of the bowl as needed and continue mixing until everything is fully incorporated and you’ve reached the desired frosting consistency.
If the frosting is too thick, add more heavy cream 1 tablespoon at a time. If it’s too thin, add more powdered sugar 1/4 cup at a time.
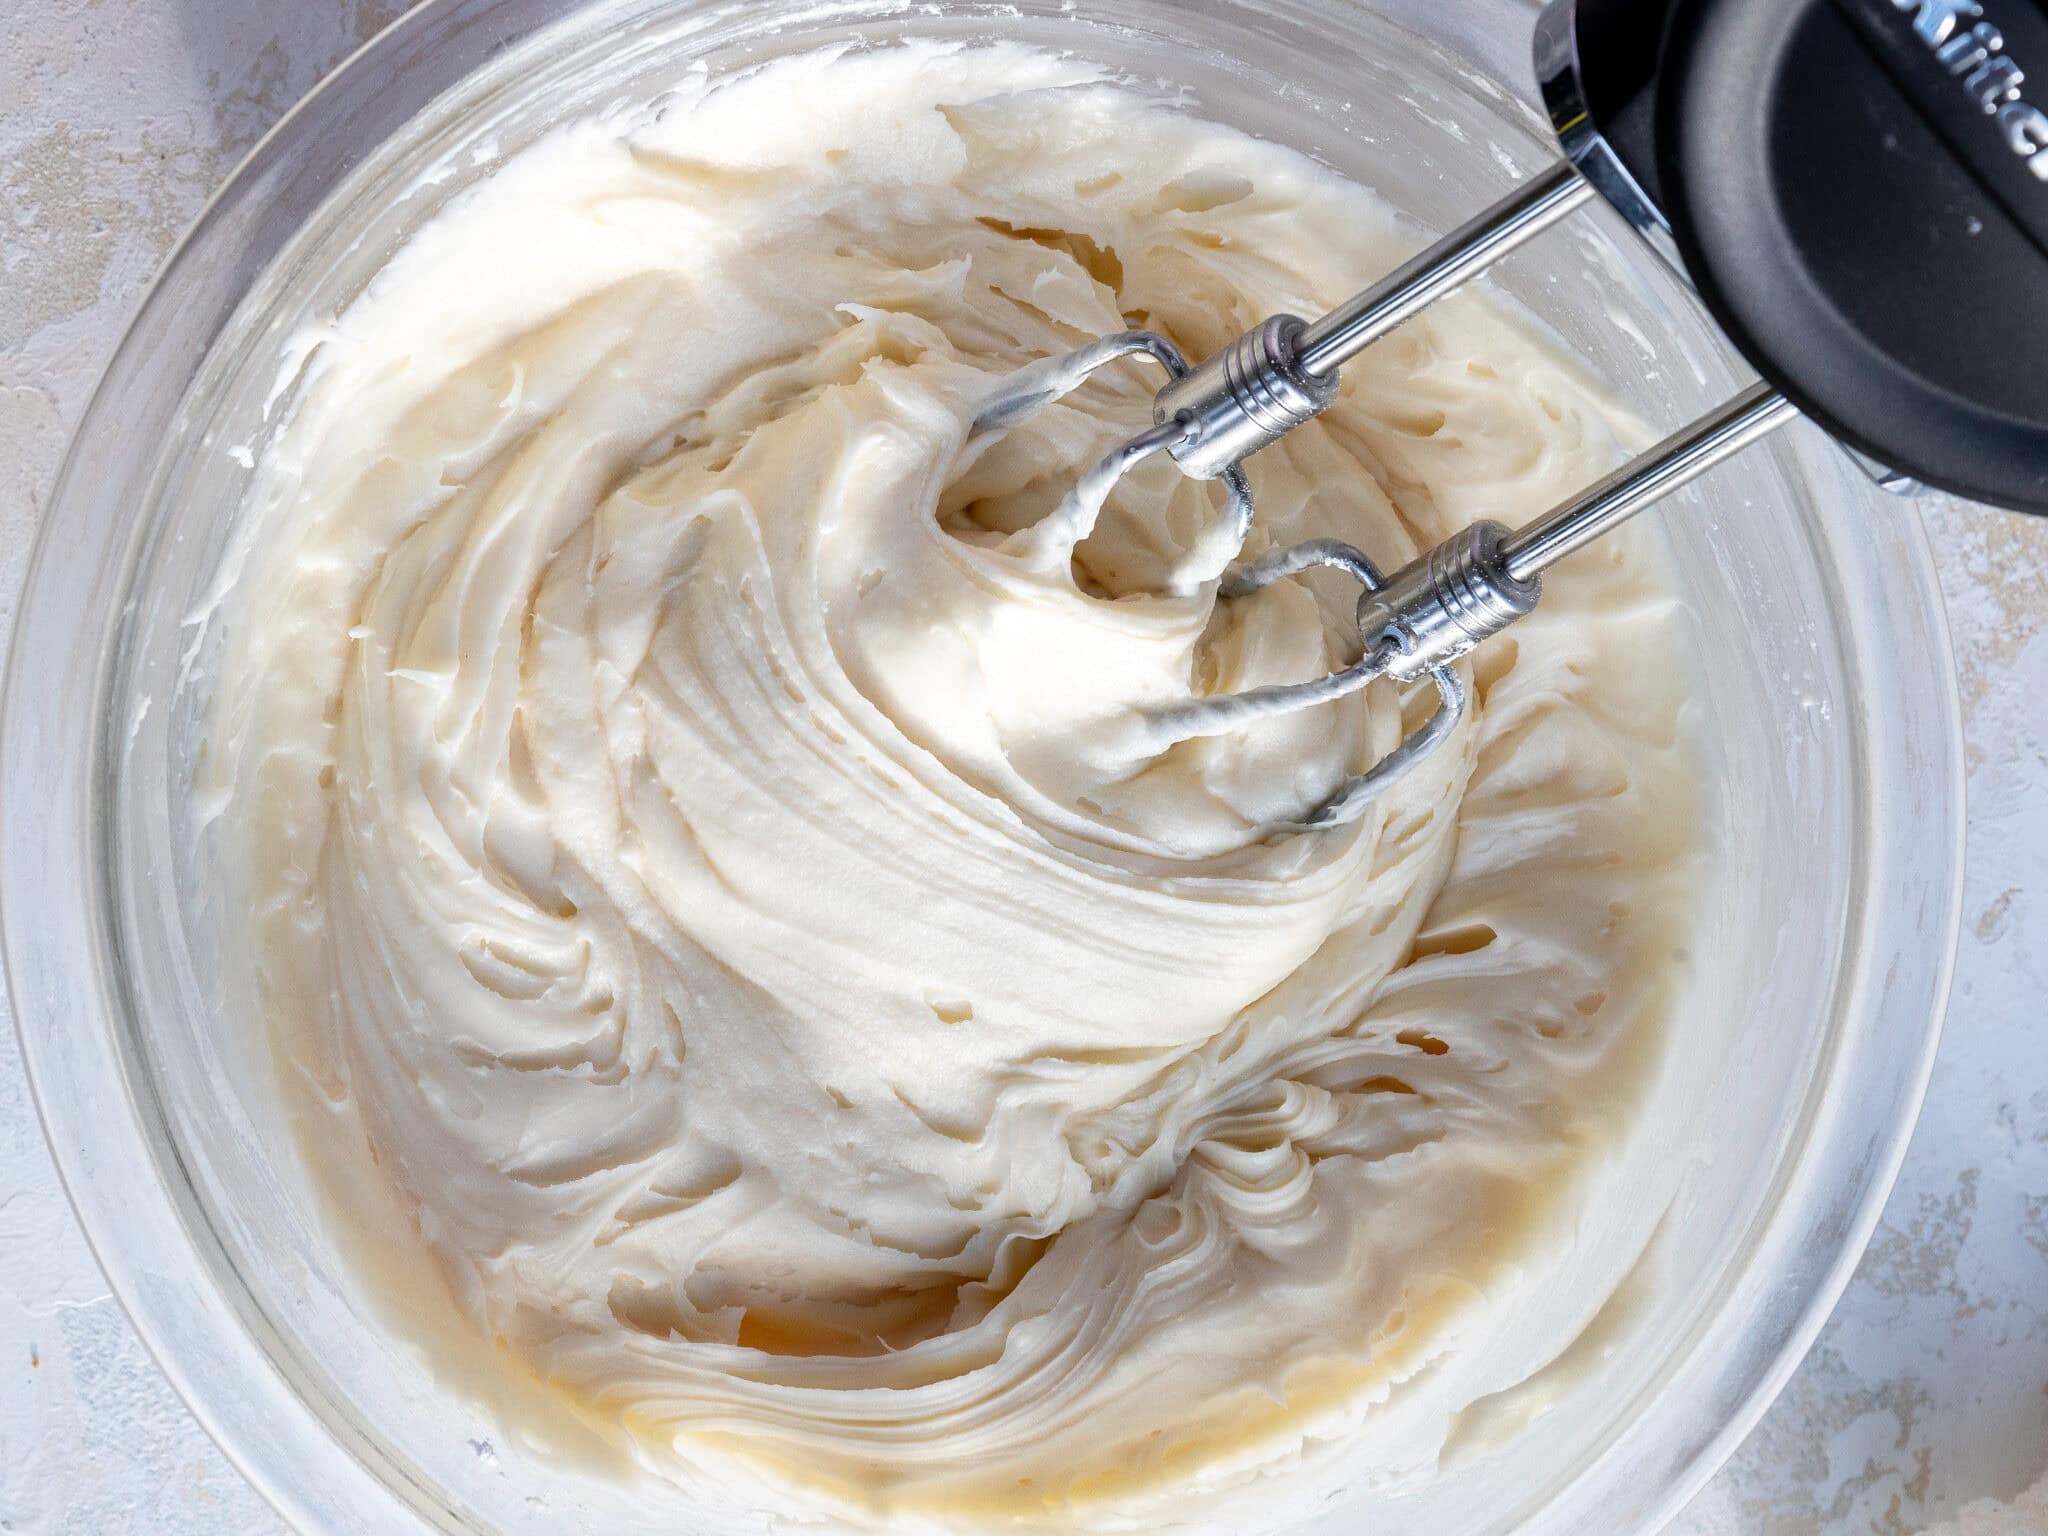
Divide the frosting into three equal portions and color them orange, red, and brown with gel food coloring.
If you’d rather use chocolate to make the brown frosting, mix 1/2 cup (about 85g) of melted and cooled dark chocolate and an additional 1/4 cup (60g) of heavy cream into that portion.
Step 6: Prepare the Piping Bags
Scoop about 3/4 of the brown frosting and about 5/6 of both the orange and red frosting into three separate small piping bags. Seal the tops with rubber bands and cut about a 1 cm opening at the tip of each bag.
Place the remaining brown, orange, and red frosting into three additional small piping bags. Seal the tops and cut a much smaller opening, about 1/4 cm, at the tip of each bag.
The larger openings are used for the feathers and turkey body, while the smaller orange, red, and brown bags are used for the beak, feet, wattle, and wings.
How to Decorate Buttercream Turkey Cookies
Once the cookies are completely cool and your piping bags are ready, it’s time for the fun part!
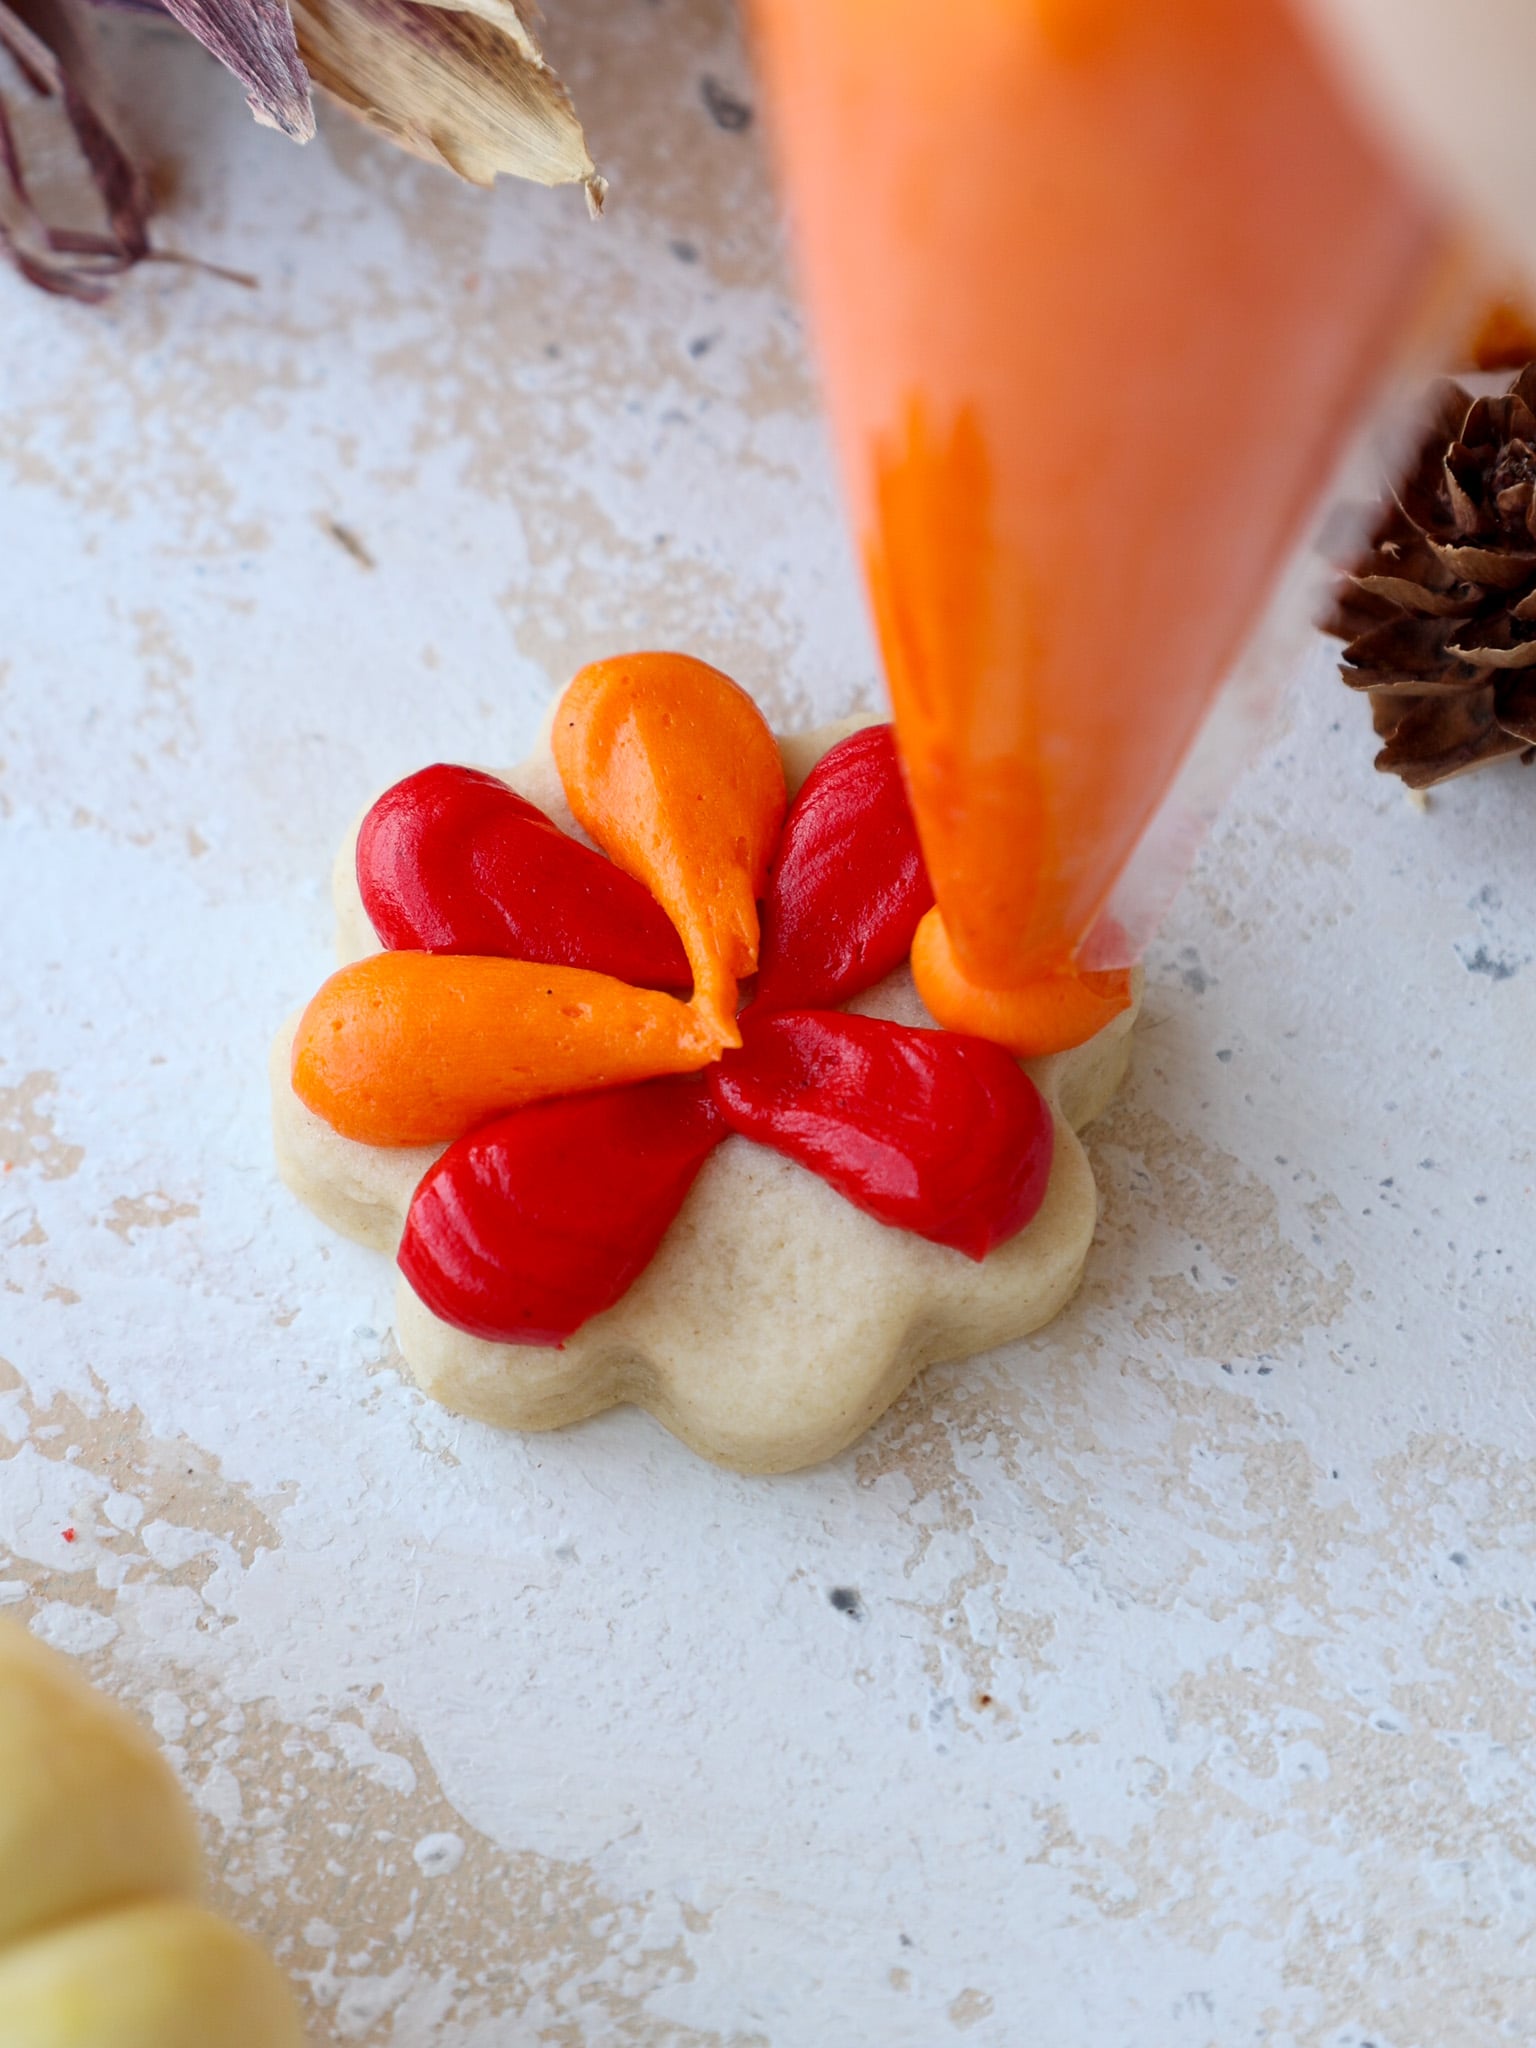
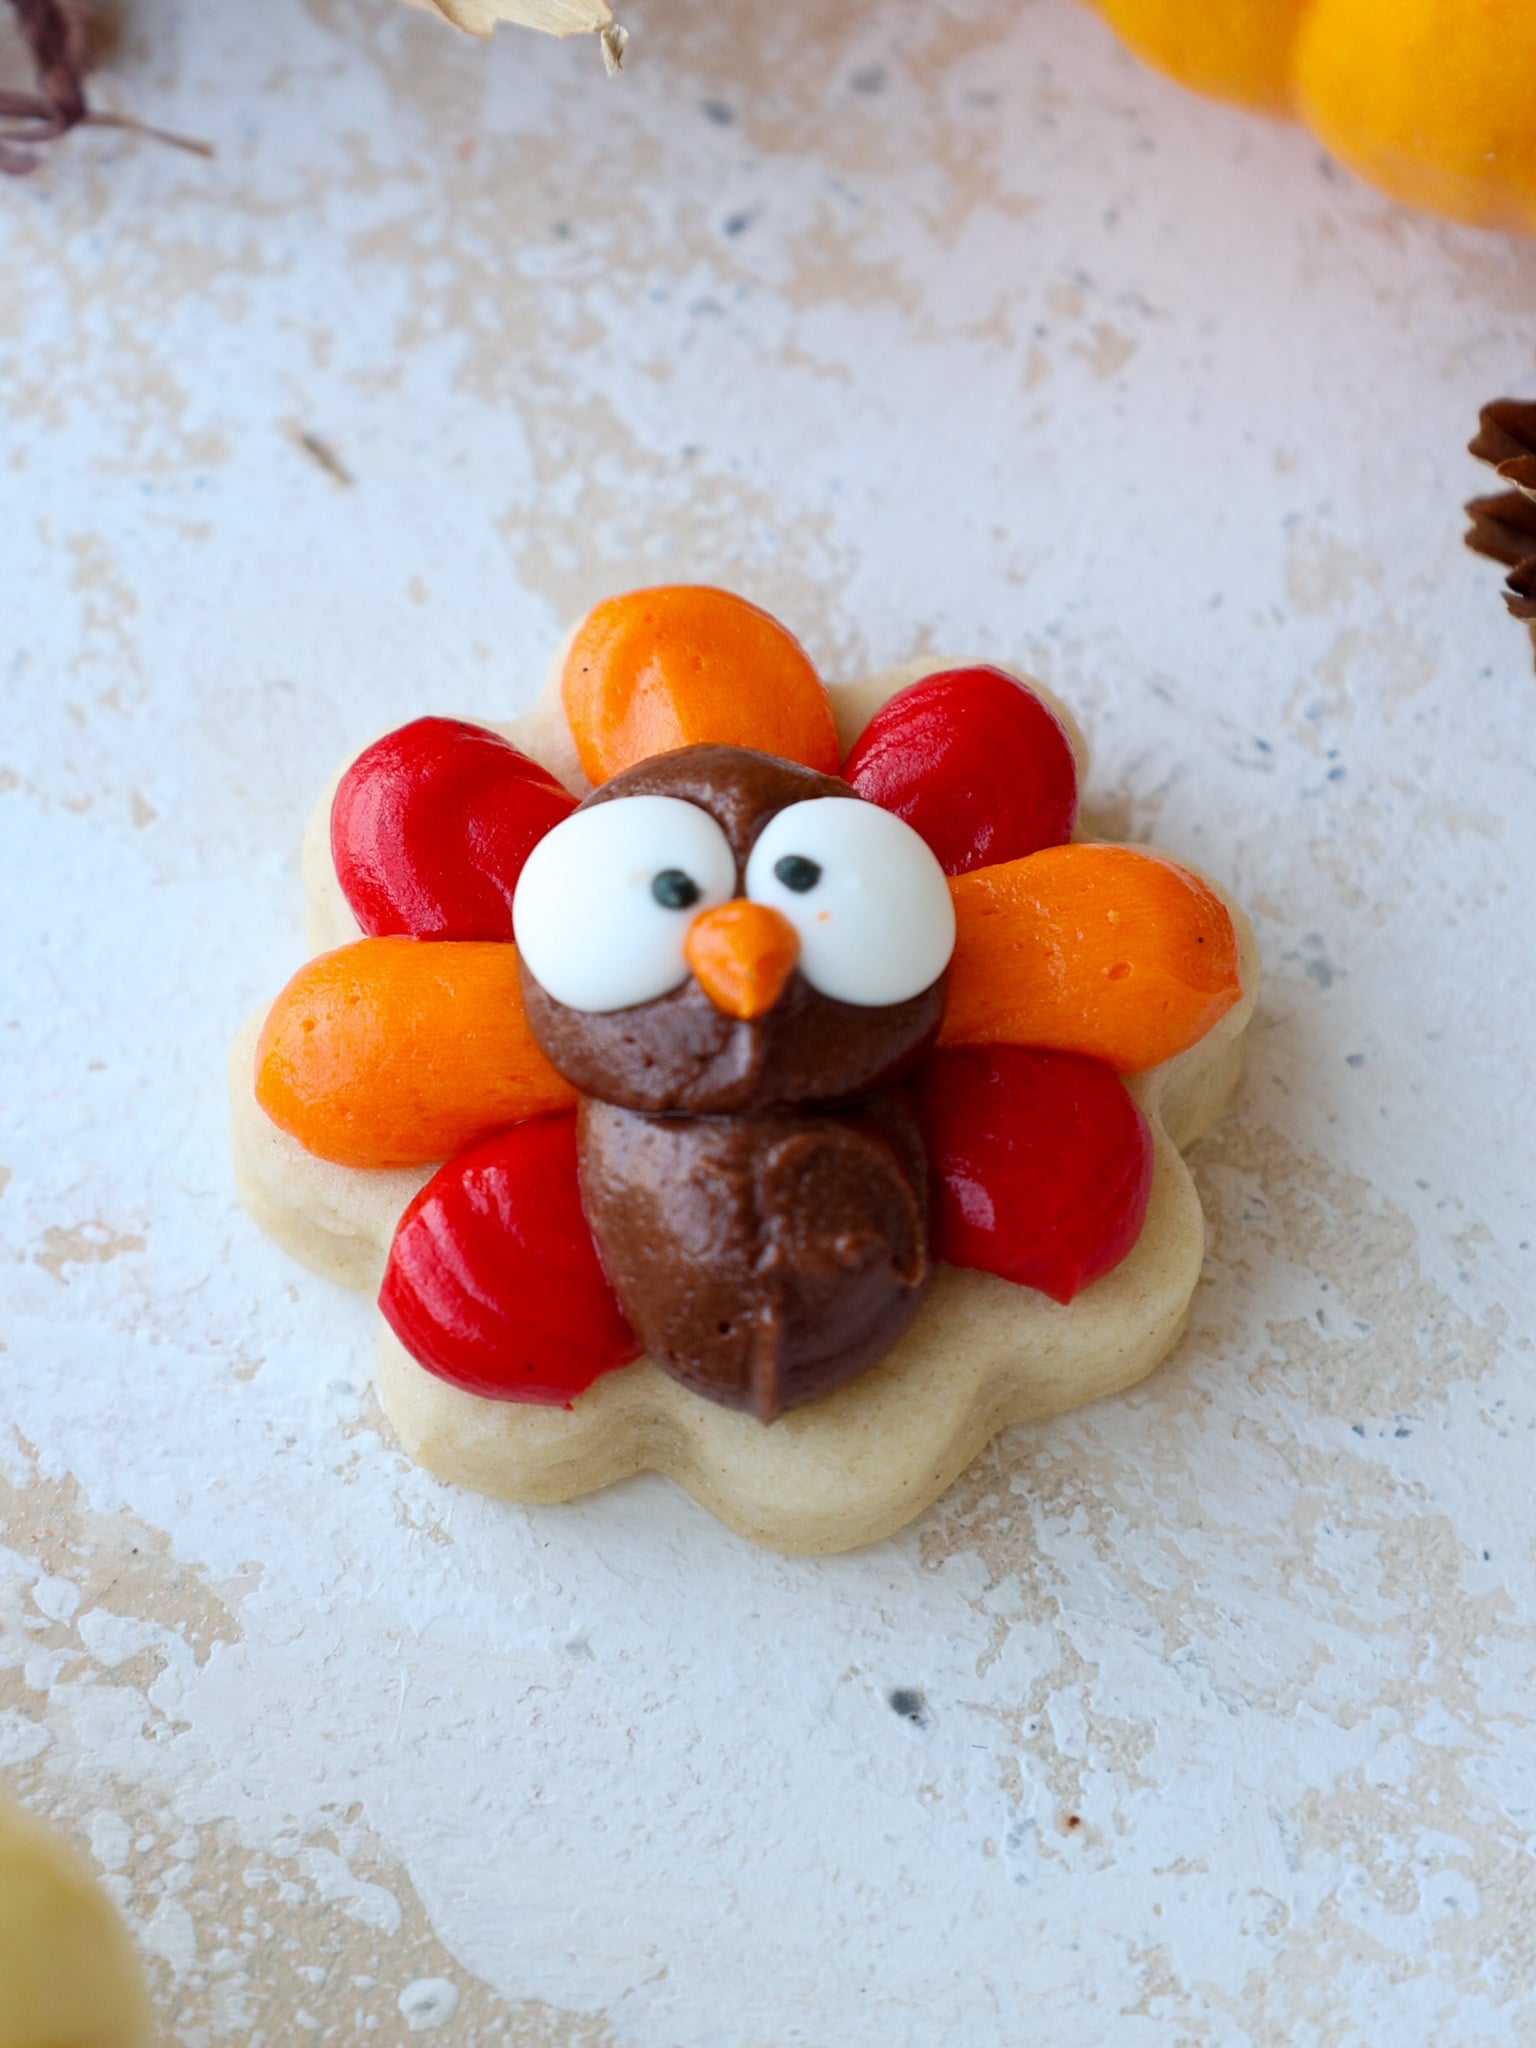
Start by piping alternating red and orange feathers around the top and sides of each cookie. Leave a small section open at the bottom center for the turkey’s body.
Use the brown frosting to pipe two circles for the turkey’s body and head.
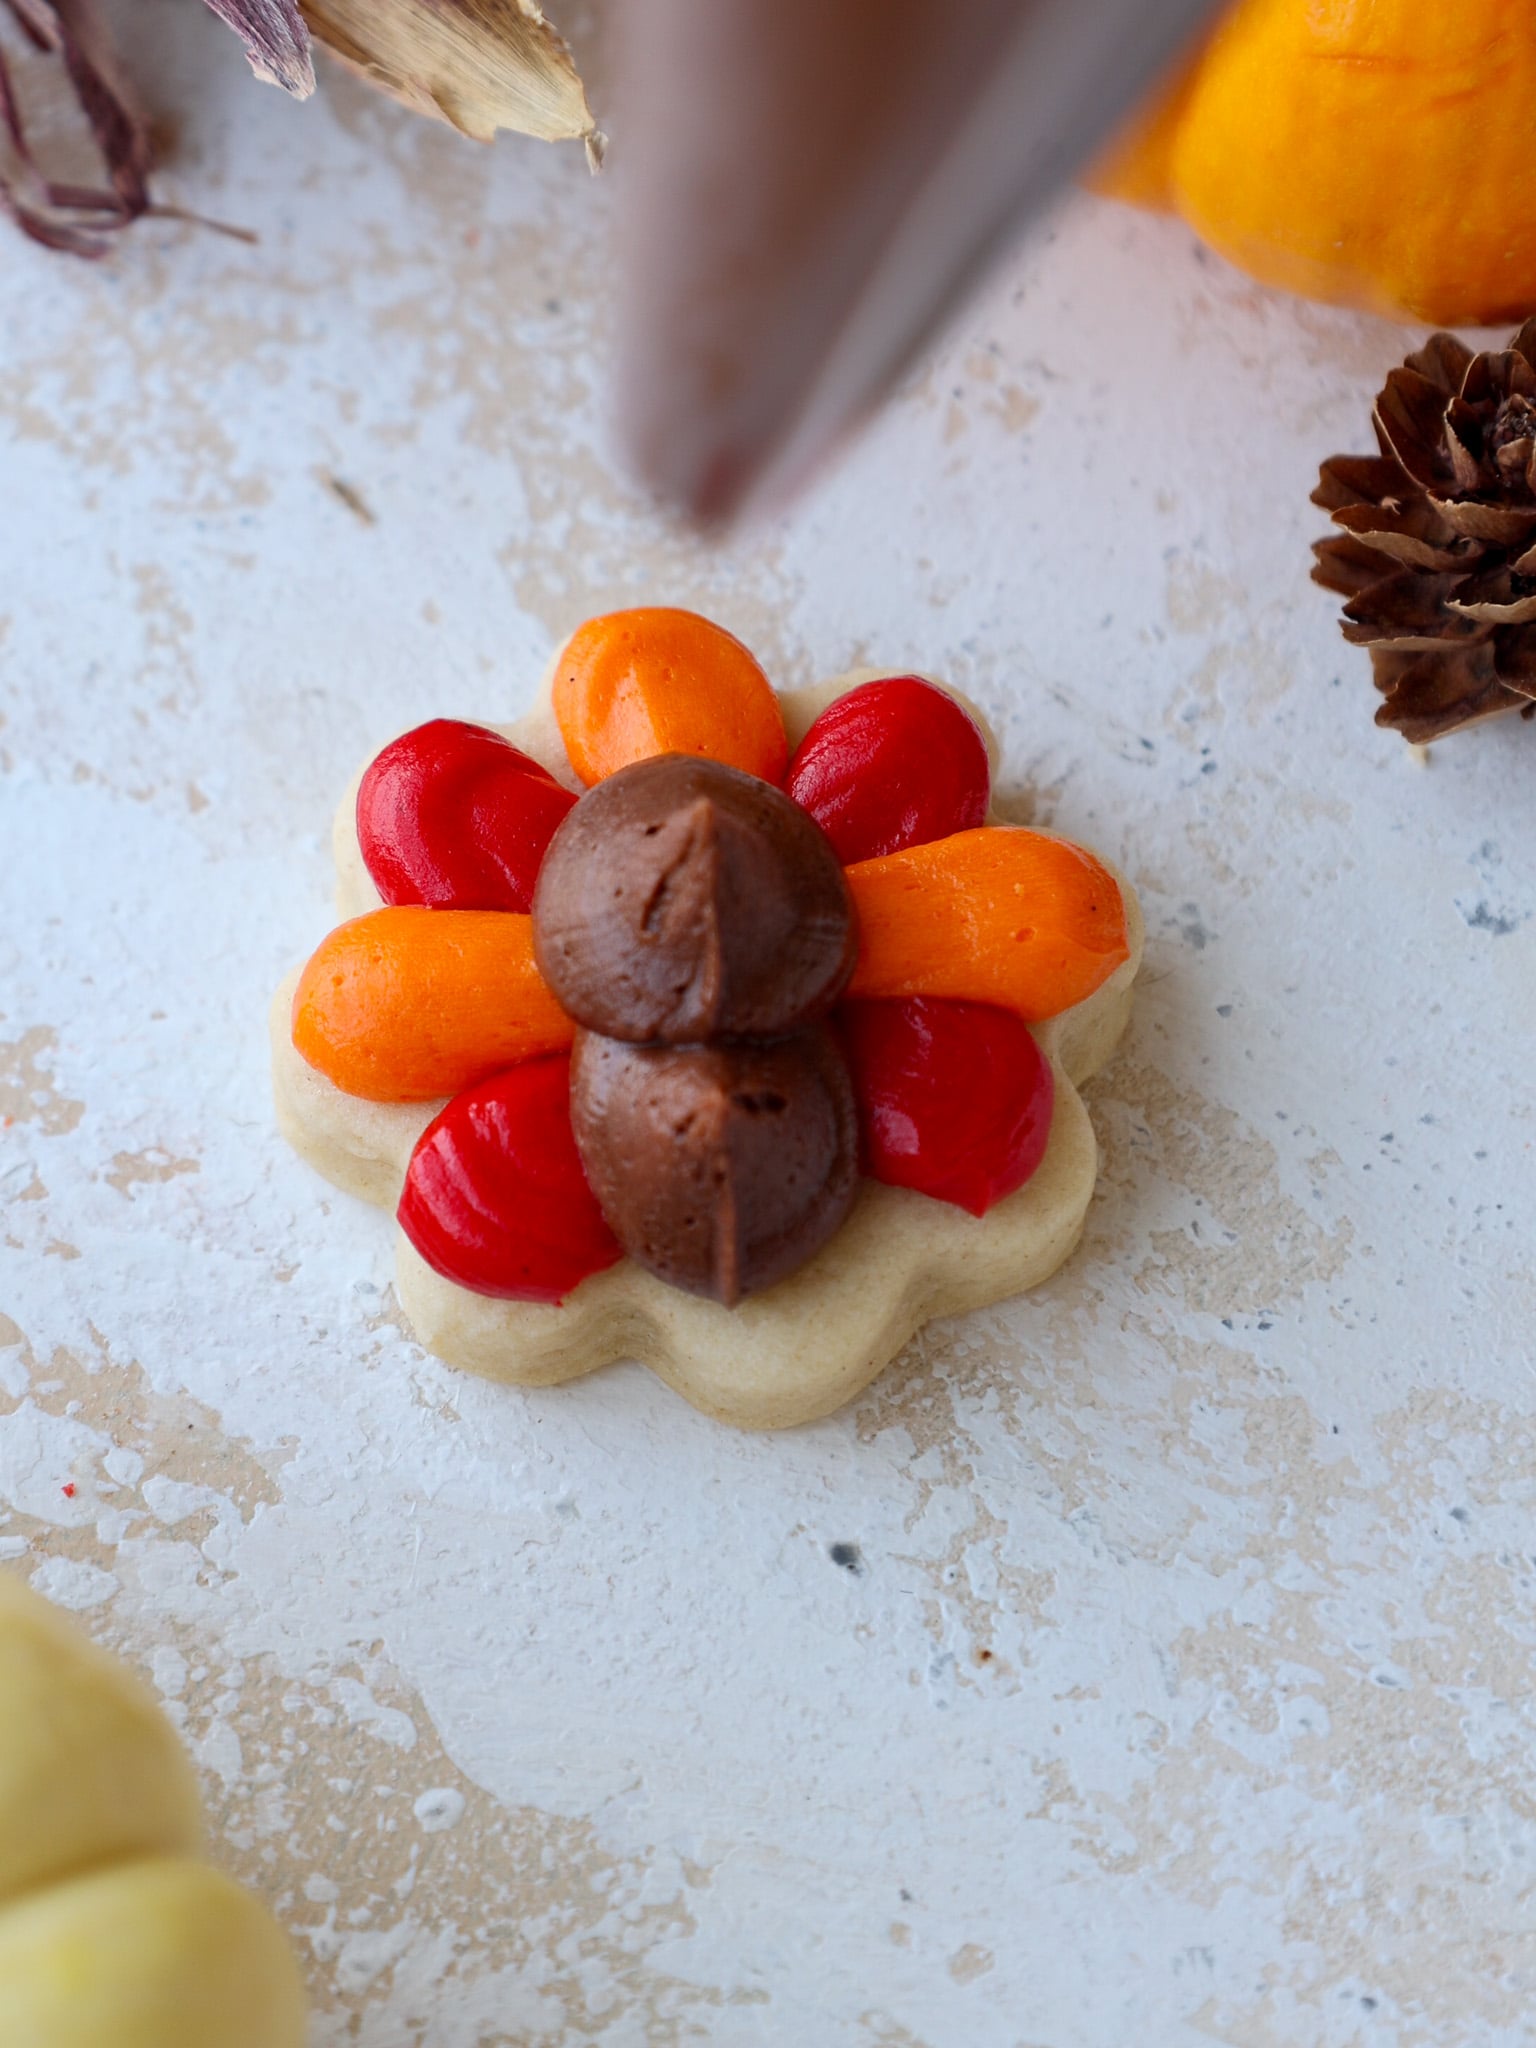
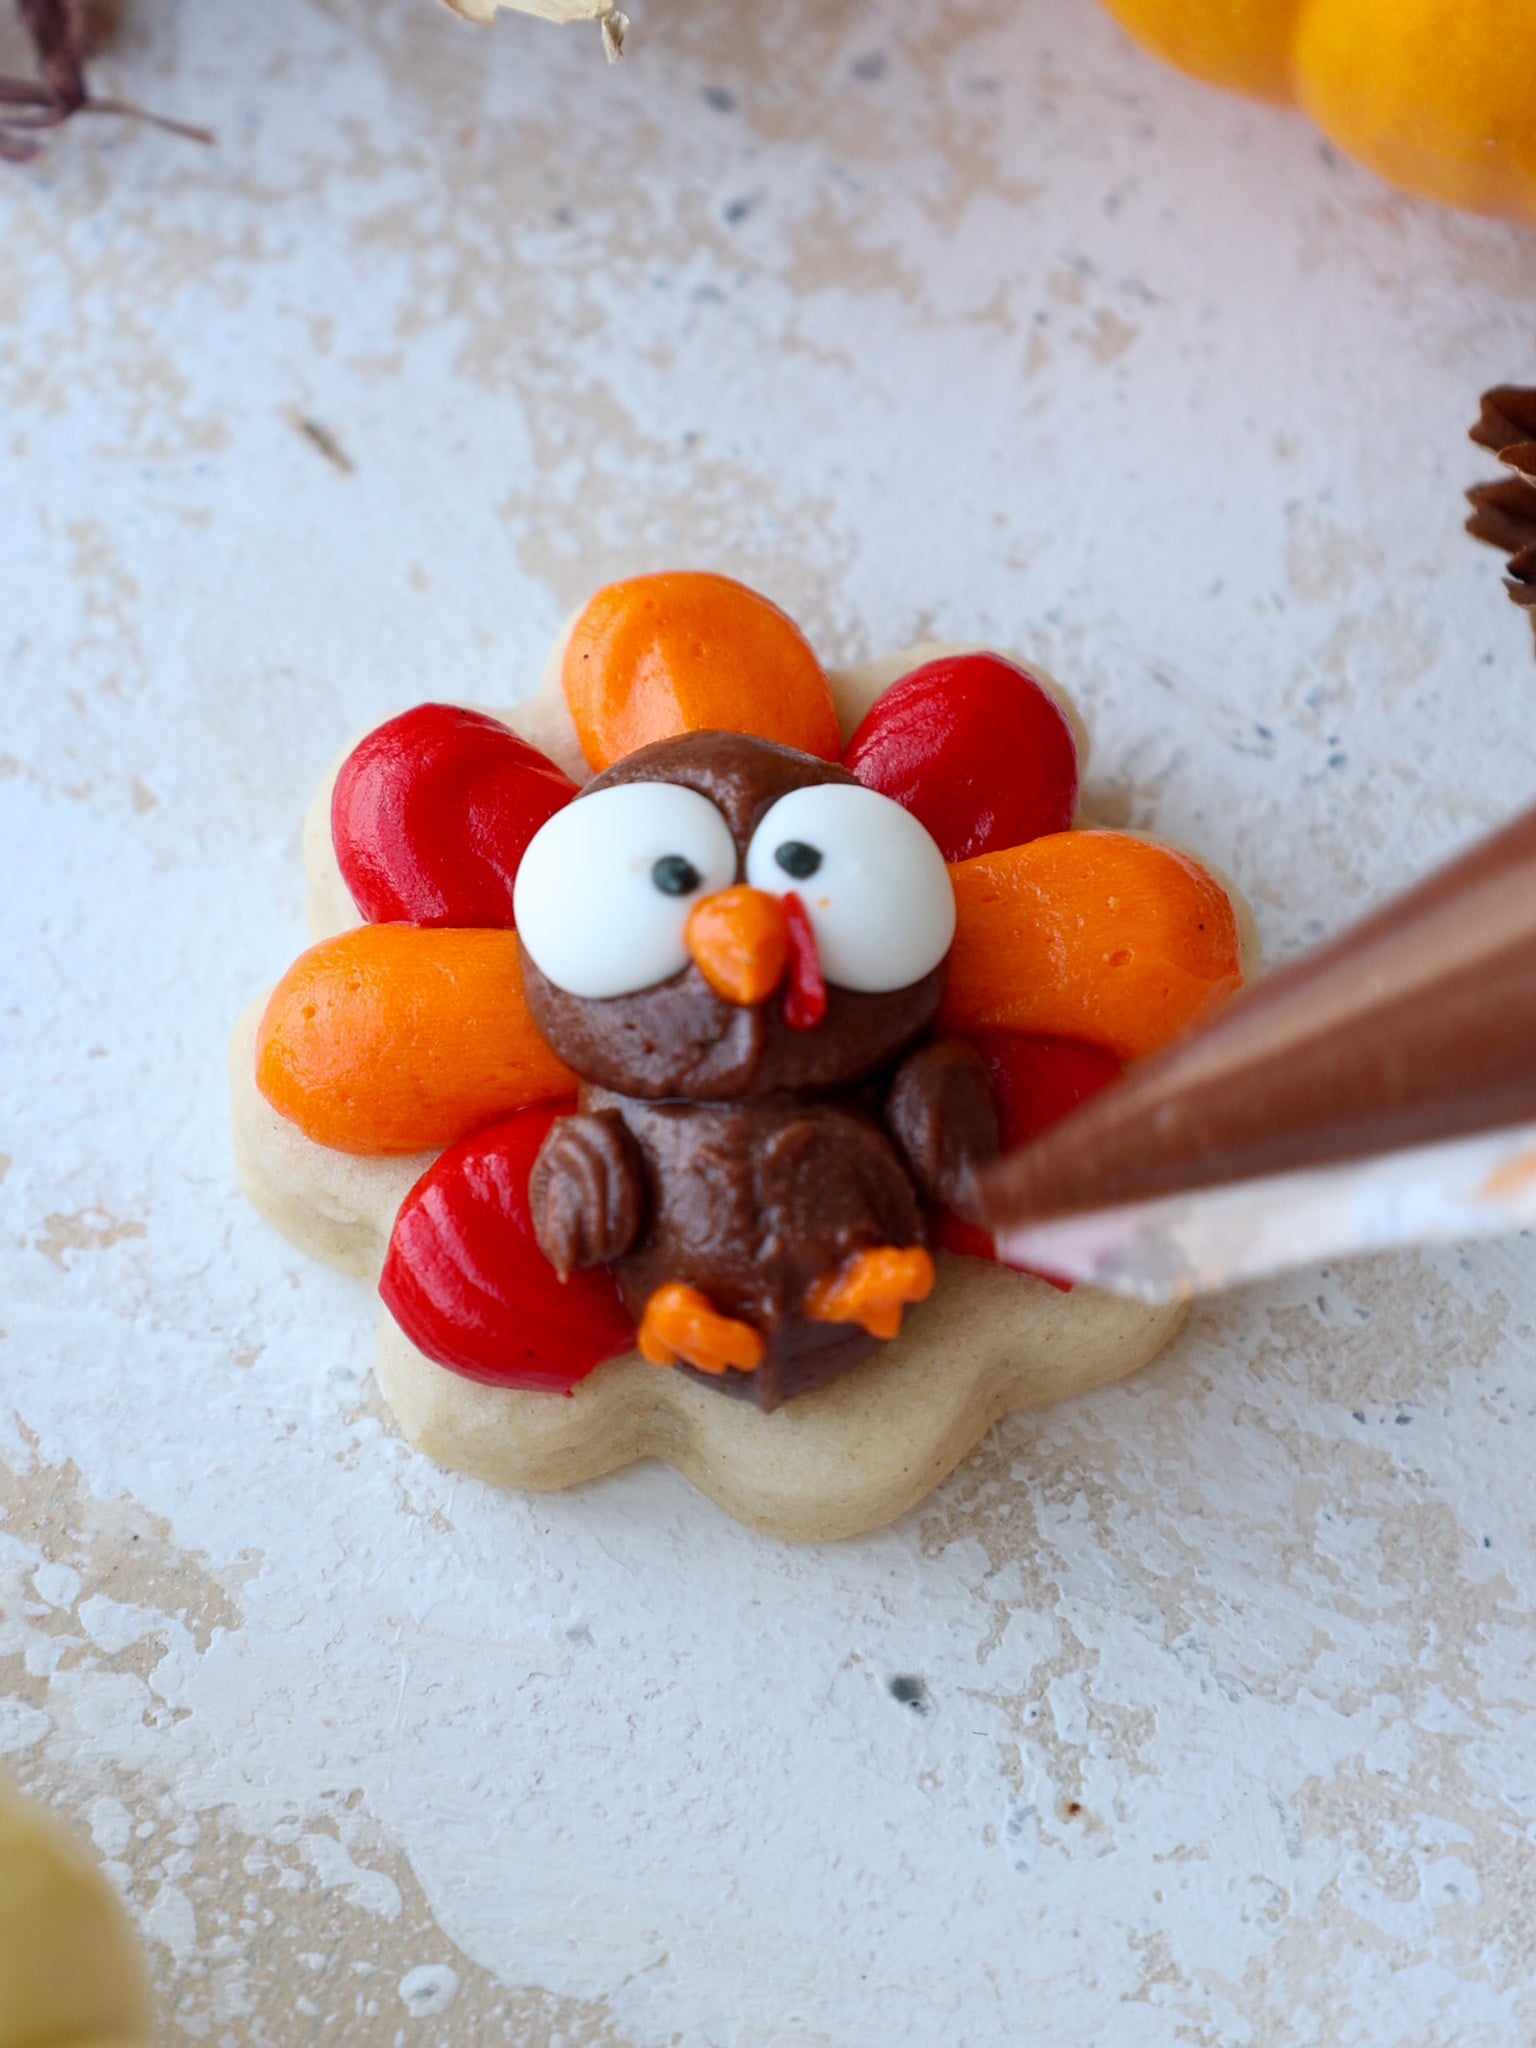
Gently press two candy eyes into the frosting on the turkey’s head. Use the orange frosting with the smaller opening to pipe the beak and feet.
The last step is to use the red frosting with the smaller opening to pipe a little wattle next to the beak, and use the brown frosting with the smaller opening to pipe the wings. Repeat with the remaining cookies, then enjoy!
Can These Turkey Cookies Be Made in Advance?
Yes! There are a few different ways to make these cookies ahead of time.
The cookie dough can be frozen for up to 1 month when it’s tightly wrapped in plastic wrap and stored in an airtight container. Move it to the fridge the night before you plan to roll it out and bake the cookies.
Baked, unfrosted cookies can also be frozen for up to 1 month in an airtight container. I recommend waiting to decorate them until they’ve thawed to room temperature.
Frosted cookies can be stored in an airtight container for up to 2 days at room temperature, up to 5 days in the fridge, or for up to 1 month in the freezer.
If you want to stack the decorated cookies, chill them thoroughly until the buttercream is firm to the touch and place a layer of parchment paper between the cookies. The buttercream will crust, but it won’t set hard like royal icing.
Frequently Asked Questions
Why did my turkey cookies spread?
Make sure you chill the dough before rolling it out and chill the cut-out cookies again before baking. It also helps to bake them on parchment paper rather than a silicone mat.
How thick should I roll the cookie dough?
Roll the dough to an even 1/3 inch thick. Keeping all the cookies the same thickness helps them bake evenly.
Can I use a different cookie cutter?
Yes, but the yield and bake time will change depending on the size and shape of the cutter. This recipe makes about 40 cookies when using a 2-inch cutter.
Can I leave out the almond extract?
Yes. The almond extract is optional, so you can leave it out without making any other changes to the recipe.
Can I make the brown buttercream with chocolate?
You can! Instead of brown gel food coloring, mix 1/2 cup (about 85g) of melted and cooled dark chocolate and an additional 1/4 cup (60g) of heavy cream into the brown portion of frosting.
Can I stack these cookies after decorating them?
Yes, but chill them first until the buttercream is firm to the touch and place parchment paper between the layers. The buttercream will crust as it sits, but it won’t become completely hard like royal icing.

Tips for Making the Best Buttercream Turkey Cookies
- Really cream together the butter, cream cheese, and granulated sugar. The recipe calls for mixing them until the mixture becomes lighter in color.
- Don’t overwork the cookie dough. Mix the dry ingredients in only until they are just incorporated.
- Roll the dough to a consistent 1/3-inch thickness. Cookies that are different thicknesses can bake at different rates.
- Don’t skip the chill time. Chill the dough before rolling it out, then chill the cut-out cookies again before baking.
- Don’t overbake the cookies. Pull them from the oven before the edges start to brown.

Let Me Know What You Think!
If you try these buttercream turkey cookies, I’d love to hear what you think! Please leave a rating and let me know your thoughts by sharing a comment.

Buttercream Turkey Cookies
Equipment
- 6 Small Piping Bags or Freezer Ziplock Bags
Ingredients
Cream Cheese Cookie Dough
- 3/4 cup (1 1/2 sticks) unsalted butter, room temperature 170g
- 1/2 cup (4 oz) full-fat cream cheese, room temp 113g
- 1 1/2 cups granulated sugar 300g
- 1 large egg, room temperature 56g
- 2 tsp vanilla extract or vanilla bean paste 8g
- 1 tsp almond extract, optional 4g
- 3 cups all-purpose flour 375g
- 1 Tbsp cornstarch 8g
- 1 tsp fine salt 6g
- 1/2 tsp baking powder 2g
Buttercream Frosting
- 1 cup unsalted butter, room temperature 226g
- 1 Tbsp vanilla extract or vanilla bean paste 12g
- 1/2 tsp fine salt 3g
- 3 1/2 cups powdered sugar 454g or 1 lb. box
- 1/4 cup heavy whipping cream, room temperature 60g
- red, orange, and brown gel food coloring
Cookie Decorations
- 80 Candy Eyes
Instructions
Cream Cheese Cookie Dough
- In a large bowl or the bowl of a stand mixer, beat 3/4 cup butter and 1/2 cup cream cheese on medium speed with a hand mixer or whisk attachment until smooth.
- Next, add 1 1/2 cups of granulated sugar and mix on medium-high speed for a couple of minutes, until the mixture becomes lighter in color.
- Add 1 egg, 2 tsp vanilla bean paste or vanilla extract, and 1 tsp almond extract (optional). Mix on medium speed until incorporated.
- In a separate bowl, whisk together 3 cups flour, 1 Tbsp cornstarch, 1 tsp fine salt, and 1/2 tsp baking powder. Add the flour mixture into the butter mixture and mix on a low speed until it is JUST incorporated. Scrape the sides and bottom of the bowl with a rubber spatula to make sure everything is properly mixed together.
- At this point, the dough should still be pretty sticky. Divide the dough in half and wrap each portion of dough in a piece of plastic wrap. I like to flatten the dough out into a rectangle that's about 1/2 inch tall to make it easier to roll out once it's chilled.
- Chill the dough in the fridge for an hour, in the freezer for 30 minutes, or in the fridge overnight. If you chill the dough overnight, let it sit out at room temperature for about 10 minutes before trying to roll it out. This will make it easier to roll out!
- Preheat the oven to 350°F/175°C for about 30 minutes before you plan to roll out the dough, and line two large baking sheets with silicone baking mats or parchment paper. Set aside. NOTE: The cookies will spread less/keep their shape better if baked on parchment paper.
- Take one piece of dough out of the fridge, leaving the other in there to continue to chill. Unwrap the cookie dough and lay the plastic wrap out flat on your counter. We will be rolling out the cookie dough on the plastic wrap to make cleanup a breeze and to make it easier to cut out the cookies. Dust the cookie dough and your rolling pin with flour.
- Roll the chilled dough to be 1/3 inch thick and cut out shapes with a flour-dusted cookie cutter. Use a kitchen brush to brush any excess flour off the cookies and place them on the prepared baking sheets. The cookies don't spread much as they bake, so you can place them about 1 inch apart.
- Chill the cut-out cookies one more time in the fridge for 15 minutes or the freezer for 5 minutes to help them keep their shape as they bake.
- Bake one sheet of cookies at a time. Bake for 13-16 minutes on the top rack of your oven (bake time will vary based on the size and shape of the cookies). Keep a close eye on the cookies and be sure to pull them out before the edges start to brown.
- Let the baked cookies cool on the pan for about 15 minutes, then transfer to a wire rack to finish cooling. While the first batch bakes and cools, knead together the cookie dough scraps and rewrap them in plastic wrap. Pop them back in the fridge to chill.
- Pull out the 2nd chilled portion of dough and repeat the steps above. Then repeat with the chilled dough scraps.
Buttercream Frosting for Sugar Cookies
- Beat 1 cup of butter on medium speed for 30 seconds with a paddle attachment, until smooth.
- Mix in 1 Tbsp vanilla paste or vanilla extract and 1/2 tsp salt on a low speed.
- Gradually mix in 3 1/2 cups powdered sugar and 1/4 cup of heavy cream. Scrape the sides and bottom of the bowl as needed with a rubber spatula. Beat on low until the ingredients are fully incorporated and the desired consistency is reached.
- If the frosting seems too thick, add additional cream (1 Tbsp at a time). If the frosting is too thin, add in more powdered sugar (a quarter of a cup at a time).
- Divide the frosting into three equal portions. Color one portion orange, one red, and one brown using gel food coloring. NOTE: If you want to naturally color the brown frosting, mix in 1/2 cup (about 85g) of melted and cooled dark chocolate and an additional 1/4 cup (60g) of heavy cream.
- Scoop about 3/4 of the brown frosting and about 5/6 of both the orange and red frosting into separate small piping bags. Seal the tops with rubber bands and cut a 1 cm opening at the tip of each bag.
- Place the remaining brown, orange, and red frosting into three additional small piping bags. Seal the tops and cut a small, 1/4 cm opening at the tip of each bag. These will be used to pipe the turkeys' beaks, feet, wattles (the little red piece that hangs from their beaks), and wings.
Decorating These Turkey Cookies
- Pipe alternating red and orange feathers around the top and sides of each cookie, leaving a small section at the bottom center open for the turkey's body.
- Once all the feathers are piped, use the brown frosting to pipe two circles to create the turkey's body and head. Gently press two candy eyes into the frosting on the turkey's head, then use the orange frosting with the smaller opening to pipe the turkey's beak and feet.
- The last step is to use the red frosting with the smaller opening to pipe a little wattle next to the beak, and use the brown frosting with the smaller opening to pipe the wings. Repeat with the remaining cookies, then enjoy! You can store frosted cookies in an airtight container for up to 2 days at room temperature, up to 5 days in the fridge, or for up to a month in the freezer.
Video
Notes
Making These Buttercream Turkey Cookies in Advance and Storage Tips
You can store frosted cookies in an airtight container for up to 2 days at room temperature, up to 5 days in the fridge, or for up to a month in the freezer. If you want to stack the cookies on top of one another, I recommend chilling the cookies thoroughly until the buttercream is firm to the touch and then adding a layer of parchment paper between them. The buttercream will crust, but it won’t set hard like royal icing. This cookie dough can also be frozen for up to 1 month if wrapped tightly in plastic wrap and stored in an airtight container. I like to move the cookie dough to the fridge the night before I plan to roll it out and bake the cookies. Baked, unfrosted cookies can also be frozen! These cookies last for up to a month if frozen in an airtight container. I recommend waiting to decorate them until they’ve thawed to room temperature. Move them to the fridge the day before you plan to eat them, then let them sit out at room temperature for a few hours before frosting them.Tips for Making the Best Turkey Cookies
- Really cream together the butter, cream cheese, and granulated sugar in the first step of this recipe. It helps incorporate air into the dough, which makes soft and chewy cookies.
- Don’t overwork the cookie dough! It can overwork the gluten and result in tough, dense cookies.
- Roll the cookie dough out to a consistent thickness of 1/3 inch. If some are thicker or thinner than others, they may over- or underbake in the oven.
- Take the time to chill the cookie dough. It helps prevent your cookies from spreading while they bake and helps them bake up with a soft texture.
- Don’t overbake your cookies. Err on the side of underbaking your cookies, and remember that the cookies continue to bake for a few minutes once they’re out of the oven.
Nutrition
Other Recipes You Might Like: