
Snow Capped Red Velvet Sugar Cookies
These delicious, no-chill red velvet sugar cookies bake up with chewy centers and crispy edges and are dipped in creamy white chocolate.
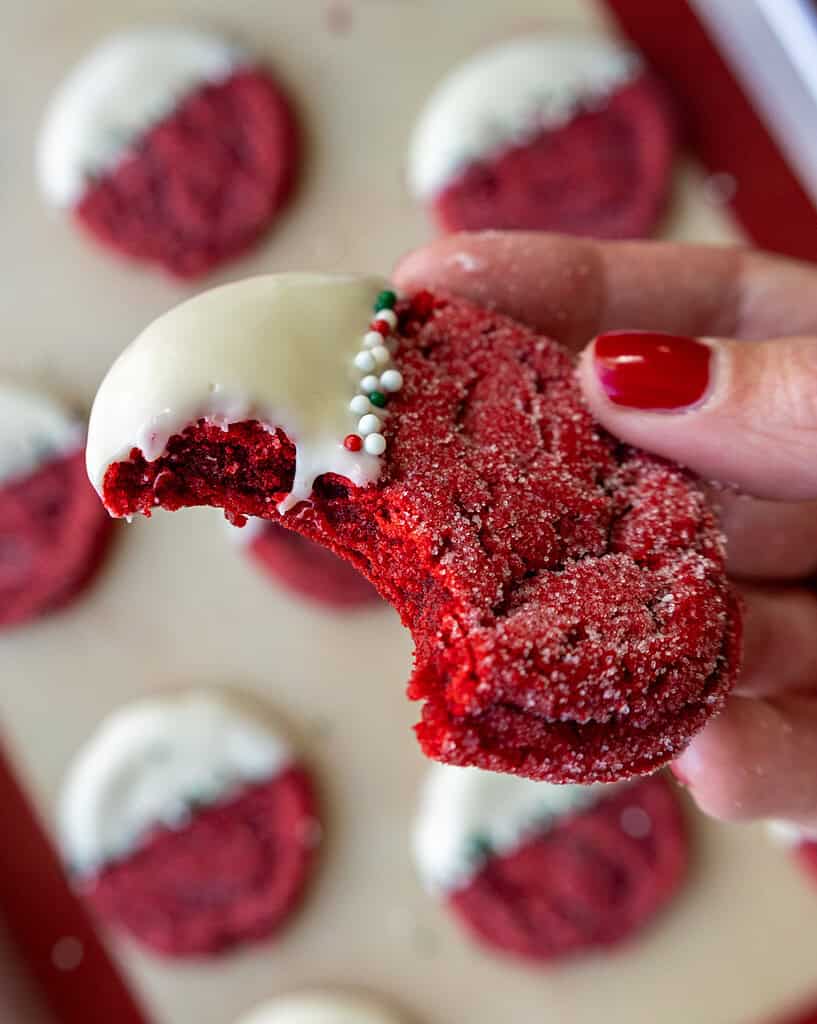
It’s a dreamy combination that will have you going back for seconds!
Tips for Making the Best Red Velvet Sugar Cookies
- Use a 1 1/2 Tbsp cookie scoop to make sure your cookies are uniformly sized.
- Space your cookies about 2 inches apart before baking them. They will spread as they bake.
- Don’t over-bake your cookies! The color of the dough makes it hard to tell when they start to brown, so keep an eye on the texture of the top of the cookie. Even if they seem a bit soft coming out of the oven, they will continue to bake and set on the tray once they’re out of the oven.
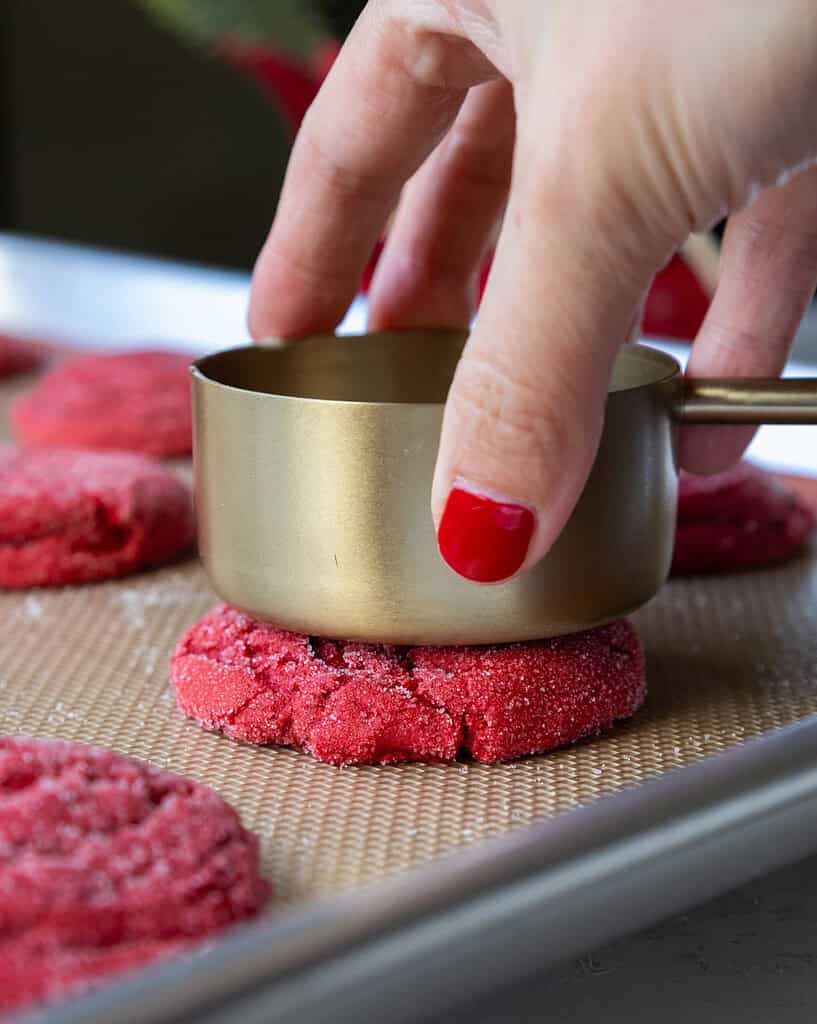
- Gently flatten the baked cookies with the bottom of a metal measuring cup or glass while they’re still warm. This makes the centers even more perfectly chewy!
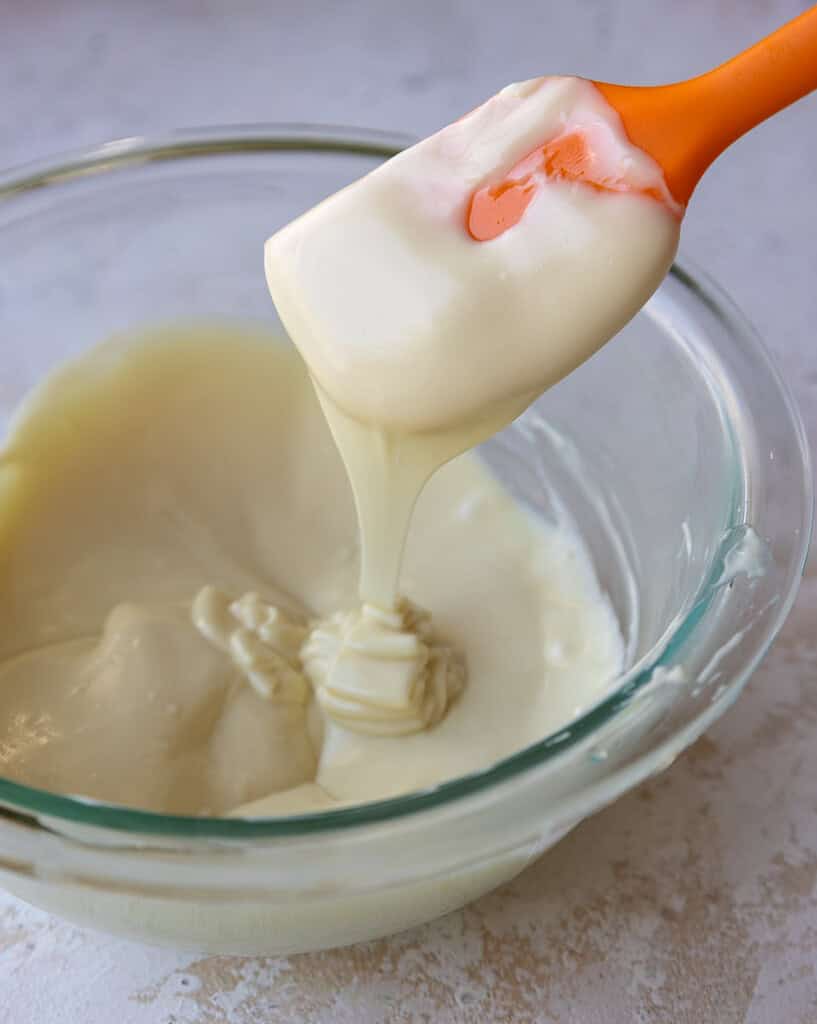
- Melt the white chocolate gradually, heating it in 30-second intervals and stirring between. This will prevent the white chocolate from seizing and give you silky smooth melted white chocolate.
Substitutions and Swaps
This recipe uses quite a few ingredients, and I know you might not have them all on hand.
Or if you have food allergies or restrictions, I’ve got you covered. Below are some swaps and substitutions that you can make.
- Unsalted Butter – If you only have salted butter on hand, you can use it in place of the unsalted butter. Just be sure to omit the salt that this recipe calls for. You can also use vegan butter in its place (and omit the salt)!
- Granulated Sugar – I do not recommend reducing the amount of sugar or changing the type of sugar, as it will change the texture of the cookies.
- Brown Sugar – You can use light or dark brown sugar, but I prefer light! In a pinch, you can use granulated sugar in place of the brown sugar, but the cookies will spread more and be less chewy, and the flavor will be a bit different.
- 1 Large Egg– If you have an egg allergy, try using a flaxseed egg or a vegan egg replacer like this one made by Bob’s Red Mill.
- All-purpose flour – This recipe turns out best with AP flour, but you can use a gluten-free flour blend if needed.
- Cocoa Powder – Make sure you’re using unsweetened cocoa powder. I use the Hershey’s brand, but any brand will work. You can also use dark or Dutch-processed cocoa powder, but the color of the cookies won’t be quite as vibrant.
- Gel Food Coloring – I used red gel food coloring to make these, but you can use whatever you have on hand. You can also use 1 Tbsp of liquid red food coloring in place of gel if needed.
How to Make These Red Velvet Sugar Cookies
Let’s walk through each step of this recipe to make sure it turns out as amazing as possible!
I’ve also included a short video on how to make these cookies in the recipe card at the bottom of this post.
Step 1: Make the Cookie Dough
Preheat oven to 350°F/175°C and line 2 large cookie sheets with parchment paper or silicone mats. Set aside.
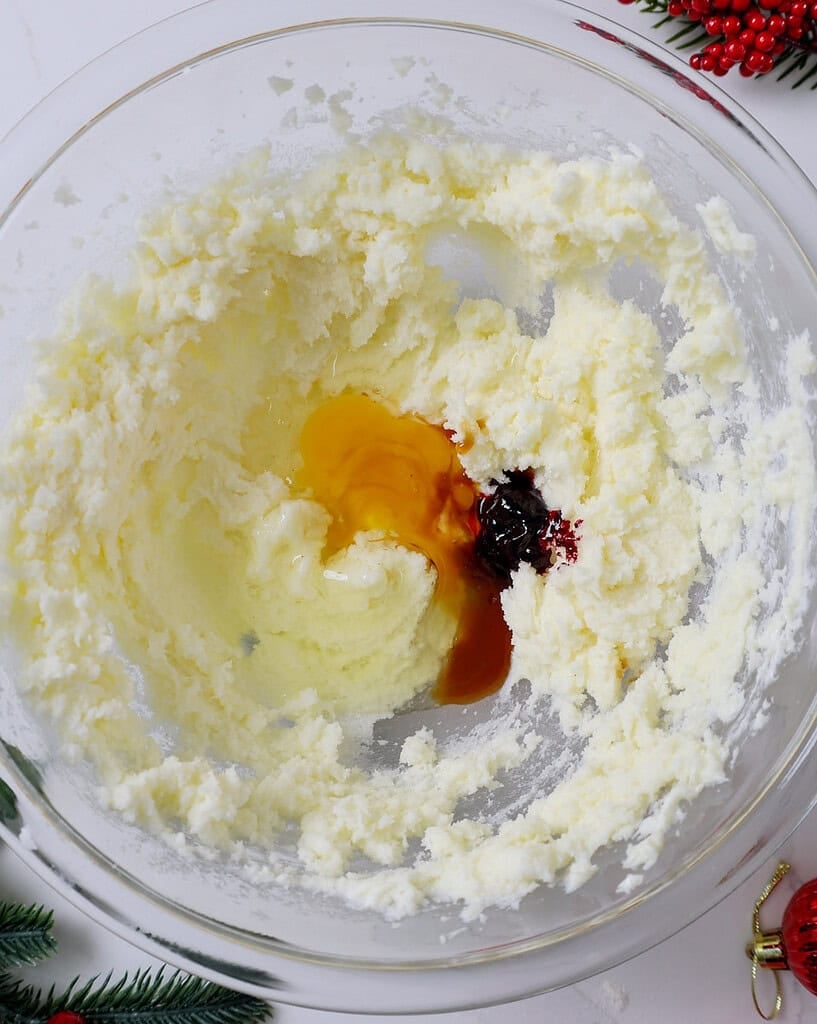
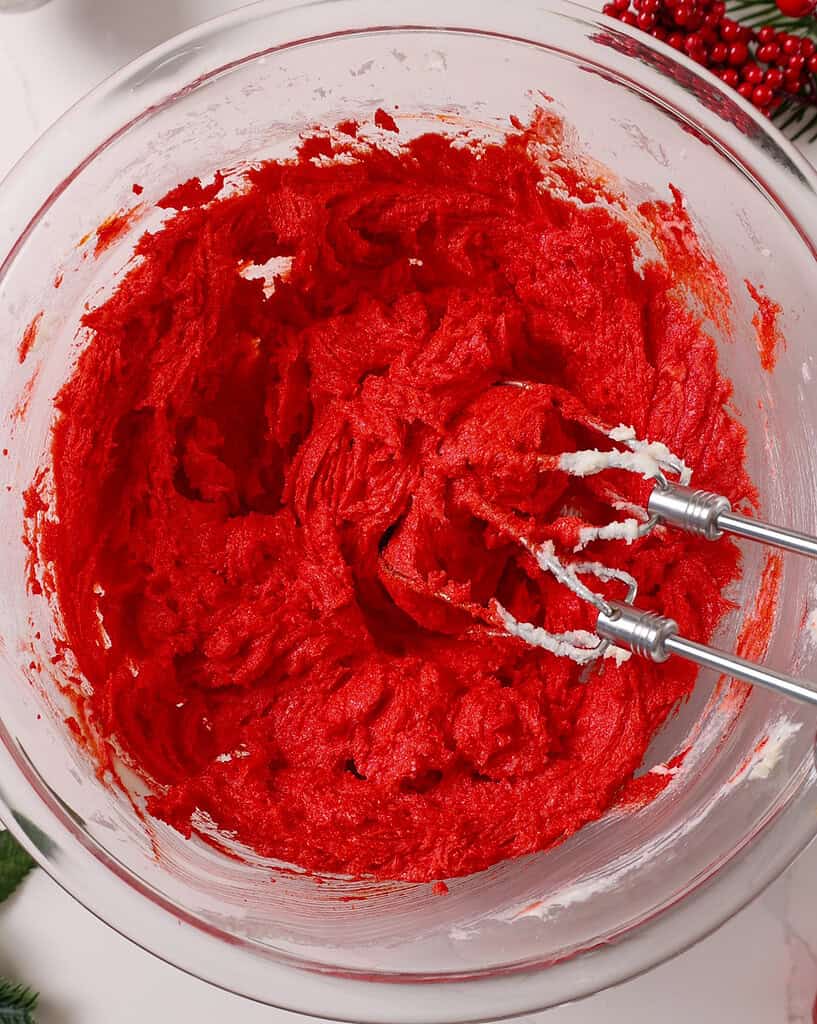
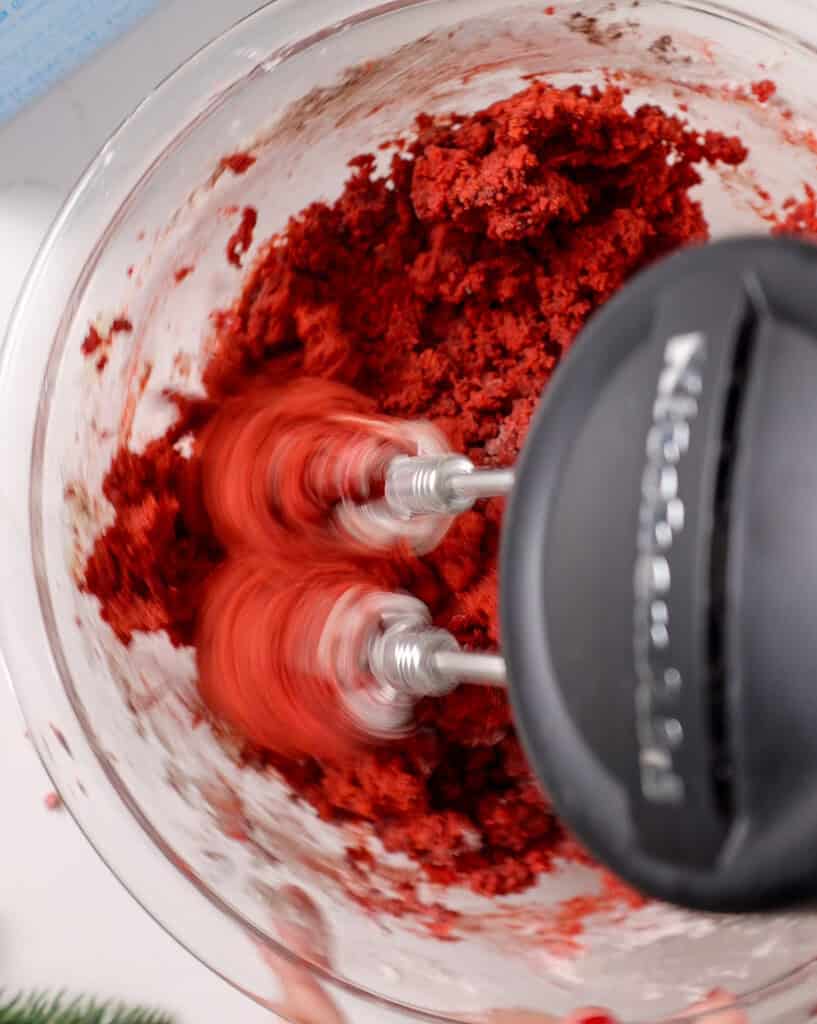
Make the red velvet sugar cookie dough following the recipe card at the bottom of this post. After creaming together the butter and brown and granulated sugar, mix in the egg, vanilla, and red gel food coloring.
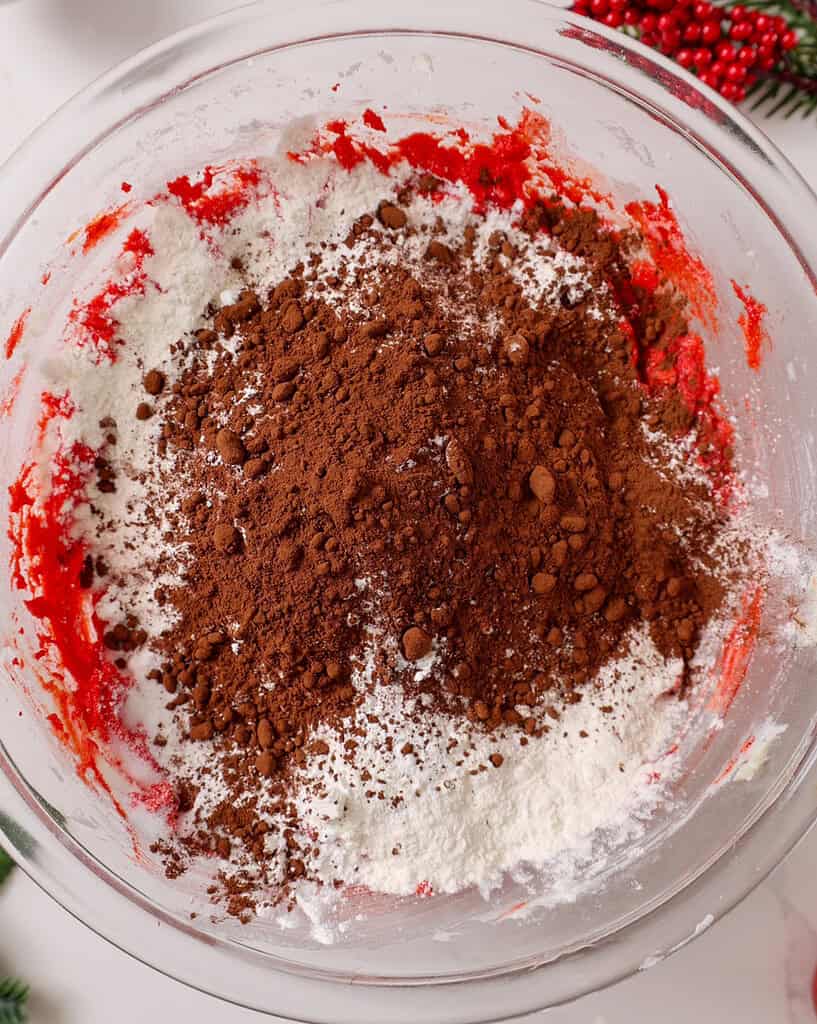
Then add the dry ingredients to the wet ingredients. The dough should be pretty thick at this point!
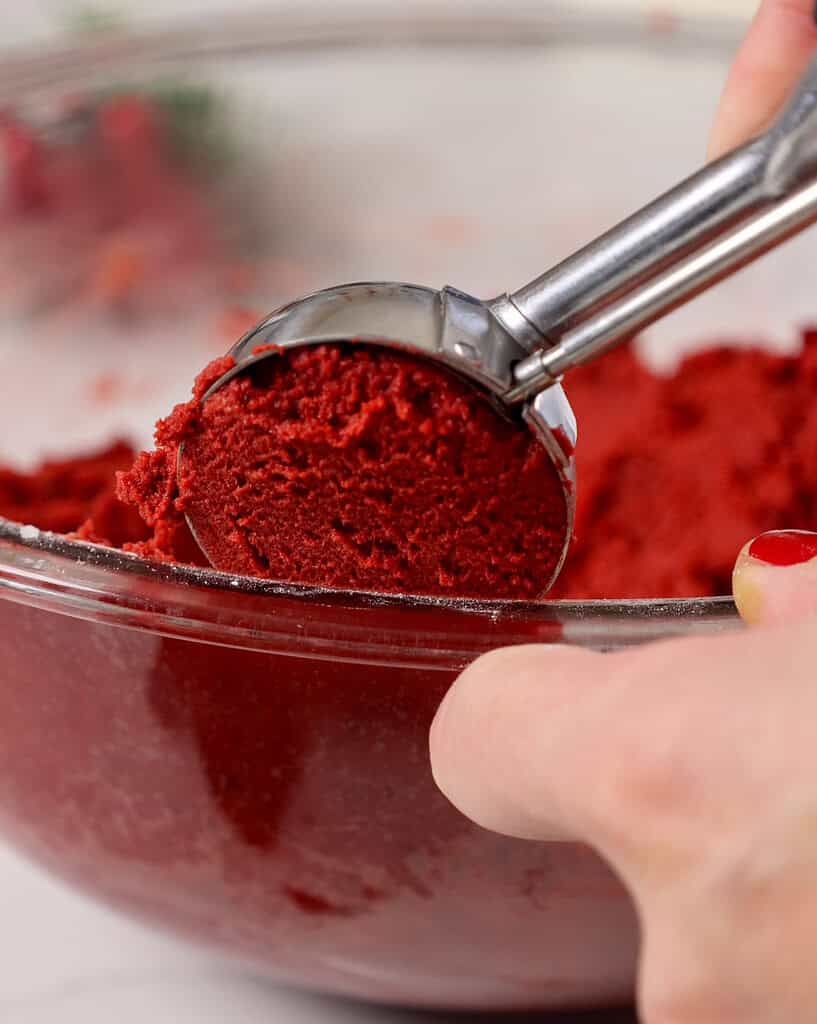
Use a 1 1/2 Tbsp cookie scoop or a large spoon to scoop and roll about 21 cookie dough balls.
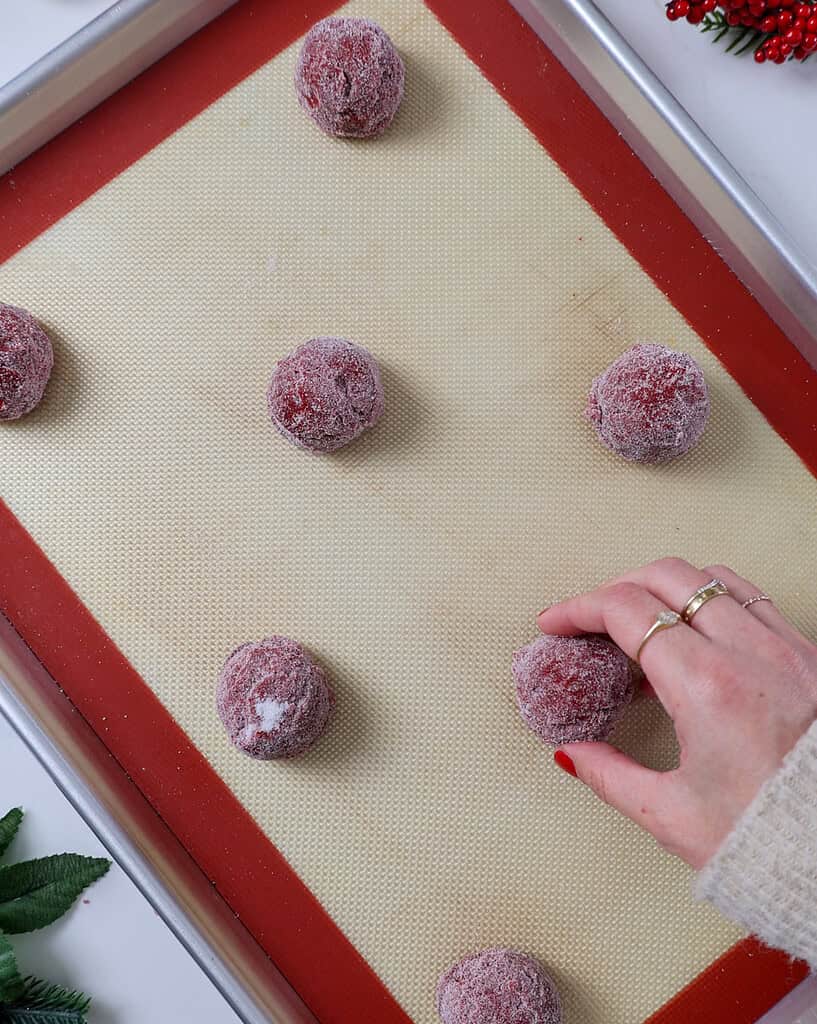
Roll each cookie dough ball in granulated sugar, then place the cookies about 2 inches apart on the prepared baking sheets.

Step 2: Bake the Red Velvet Sugar Cookies
Bake for about 9 minutes, or until the cookies seem set around the edges and still a little puffy in the center.
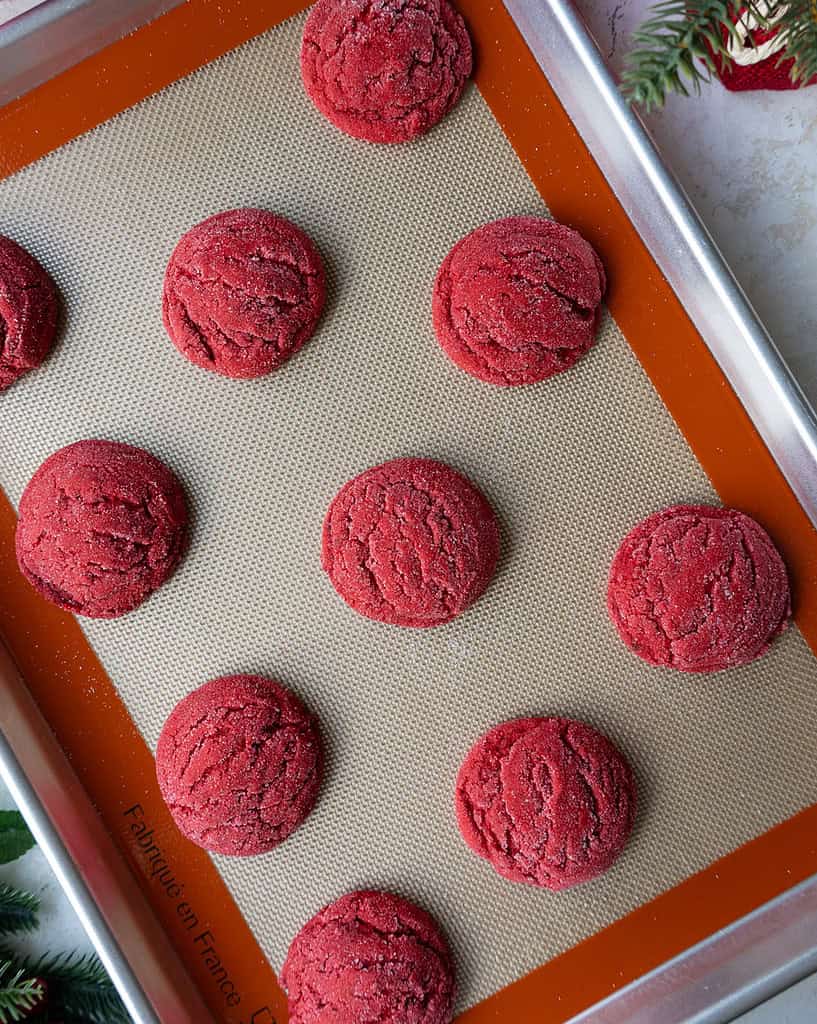
I like to gently flatten the cookies with the bottom of a metal measuring cup or glass while they’re still warm to give them super chewy centers, but this is optional.

Then let the cookies cool on the sheet for 10 minutes, then place them on a wire rack to finish cooling.
Step 3: Dip the Cookie in White Chocolate
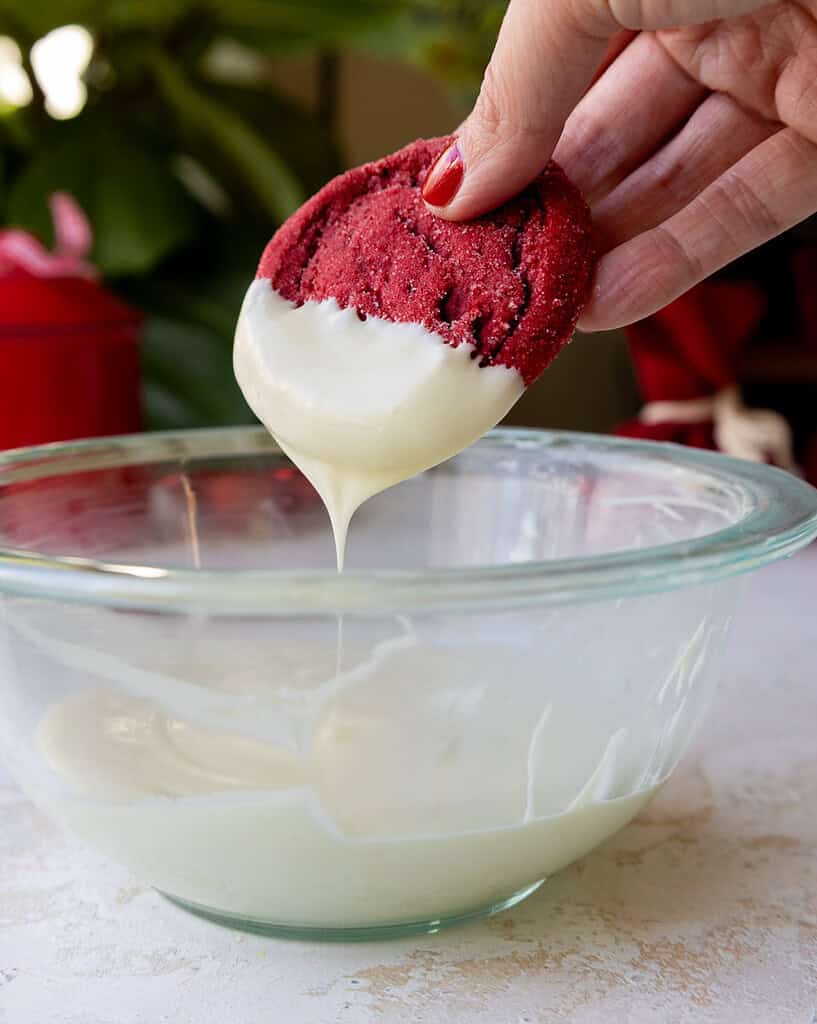
Dip about 1/3 of each cookie into the melted white chocolate, and let any excess run off.
Scrape the excess chocolate from the bottom of each cookie on the bowl’s edge to prevent pooling.
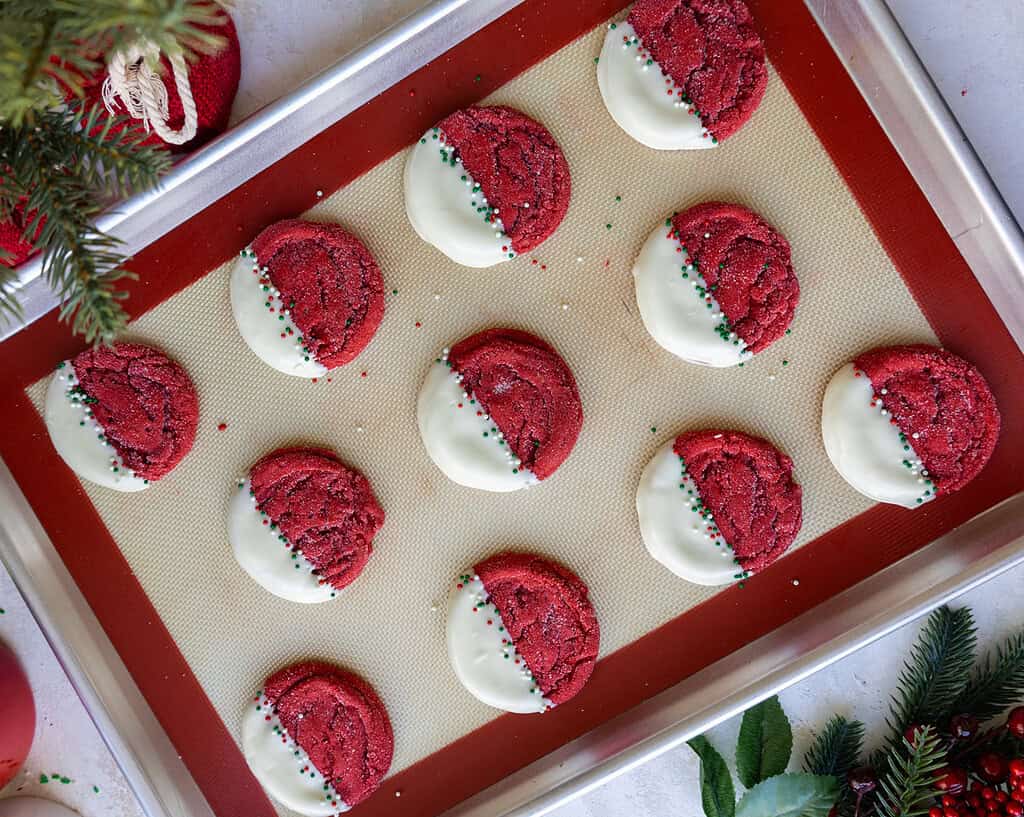
Then place them on a piece of parchment paper or silicone mat to let the white chocolate firm up (it usually takes mine about 30 minutes at room temperature).
If desired, add some nonpareils along the edge of the white chocolate, then enjoy!
How Many Cookies Does This Recipe Make?
The recipe makes 21 total cookies using a 1 1/2 Tbsp cookie scoop.
If you want to make more cookies, you can double the ingredients and make a double batch using either a hand mixer or a stand mixer.
You can also halve this recipe to make 10 cookies (use an egg yolk).
You can also make mini red velvet sugar cookies that are half the size, and end up with 42 little cookies! Scoop them using a 3/4 Tbsp cookie scoop and bake for 7-8 minutes at 350°F/175°C.
Making These Red Velvet Sugar Cookies in Advance and Storage Tips
This cookie dough can be made up to 2 days in advance. Store it in the fridge in an airtight container, then when you’re ready to bake them, let the dough thaw to room temperature, scoop the cookies, and bake them.
Baked cookies can be stored in an airtight container or ziplock bag at room temperature for up to 5 days, or in the freezer for a month.
Let Me Know What You Think!
If you try this recipe for snow-capped red velvet sugar cookies, I’d love to hear what you think! Please leave a rating and let me know your thoughts by sharing a comment.

Snow-Capped Red Velvet Sugar Cookies
Equipment
Ingredients
Red Velvet Sugar Cookies
- 1/2 cup (1 stick) unsalted butter, softened 113g
- 2/3 cup granulated sugar 133g
- 1/3 cup packed light brown sugar 66g
- 1 large egg, room temperature 56g
- 1 tsp vanilla extract 5g
- 1 tsp red gel food coloring (I love Americolor or Chef Master)
- 2 cups all-purpose flour 250g
- 1 Tbsp unsweetened baking cocoa, sifted if lumpy 6g
- 1 tsp baking soda 6g
- 1/4 tsp fine salt 1g
Decorations – Optional
- 1/4 cup granulated sugar for rolling – optional 50g
- 1 cup good quality white chocolate chips or chopped white chocolate, melted 175g
- 1 Tbsp Christmas nonpareil sprinkles – optional
Instructions
Red Velvet Sugar Cookies
- Preheat oven to 350°F/175°C and line 2 large cookie sheets with parchment paper or silicone mats. Set aside.
- Cream together 1/2 cup (113g) unsalted, softened butter, 2/3 cup (133g) granulated sugar, and 1/3 cup (66g) light brown sugar in a large bowl with an electric hand mixer or stand mixer fitted with a paddle attachment. Mix on a medium-high speed with an electric mixer until the mixture becomes lighter in color (about 2 minutes). It's important that the butter is soft to the touch, otherwise you will have a hard time mixing the dry ingredients into the dough.
- Mix in 1 egg (56g), 1 tsp (5g) vanilla extract, and about 1 tsp of red gel food coloring on a medium speed until combined. Scrape the sides and bottom of the bowl as needed with a rubber spatula.
- Then mix 2 cups (250g) flour (NOTE: If you're using a cup measure and not a scale, you need to fluff the flour in the bag, spoon it into the measuring cup, then level it with a knife. This is how you properly measure flour when baking, otherwise you'll end up using a lot more than the recipe calls for 🙂 ), 1 Tbsp unsweetened cocoa powder (6g), 1 tsp baking soda (6g), and 1/4 tsp salt (1g) into the wet ingredients on a low speed until combined. It takes a bit of mixing to come together, so if it looks a little dry, keep mixing! The dough should be quite thick once it's ready to be scooped.
- Use a 1 1/2 Tbsp cookie scoop or a large spoon to scoop and roll about 21 cookie dough balls.
- Roll each cookie dough ball in granulated sugar, then place the cookies about 2 inches apart on the prepared baking sheets. Bake for about 9 minutes, or until the cookies seem set in the center.
- I like to gently flatten the cookies with the bottom of a metal measuring cup or glass while they're still warm to give them super chewy centers, but this is optional. Then let the cookies cool on the sheet for 10 minutes, then place them on a wire rack to finish cooling.
White Chocolate Snow Cap
- Dip about 1/3 of each cookie into the melted white chocolate, and let any excess run off. Scrape the excess white chocolate from the bottom of each cookie on the bowl’s edge to prevent pooling.
- Place them on a piece of parchment paper or silicone mat to let the white chocolate firm up. The white chocolate usually sets in about 30 minutes at room temperature. If desired, add some nonpareils along the edge of the white chocolate, then enjoy!
Video
Notes
Tips for Making the Best Red Velvet Sugar Cookies
- Use a 1 1/2 Tbsp cookie scoop to make sure your cookies are uniformly sized.
- Space your cookies about 2 inches apart before baking them. They will spread as they bake.
- Don’t over-bake your cookies! The color of the dough makes it hard to tell when they start to brown, so keep an eye on the texture of the top of the cookie. Even if they seem a bit soft coming out of the oven, they will continue to bake and set on the tray once they’re out of the oven.
- Gently flatten the baked cookies with the bottom of a metal measuring cup or glass while they’re still warm. This makes the centers even more perfectly chewy!
- Melt the white chocolate gradually, heating it in 30-second intervals and stirring between. This will prevent the white chocolate from seizing and give you silky smooth melted white chocolate.
Making These Cookies in Advance and Storing Them
This cookie dough can be made up to 2 days in advance. Store it in the fridge in an airtight container, then when you’re ready to bake them, let the dough thaw to room temperature, scoop the cookies, and bake them. Baked cookies can be stored in an airtight container or ziplock bag at room temperature for up to 5 days, or in the freezer for a month.Nutrition
Other Recipes You Might Like:


Can I roll the balls in sugar and then freeze them to bake later? I like having extras in freezer for those unexpected fun entertaining moments.
You can! That works totally fine, and you can bake them straight from the freezer! They’ll just need an extra minute or two to bake. Hope that helps, happy baking!
I’ve tried this recipe twice. I am a pretty advanced baker and both times the dough came out sand-like.
@Nicole, I also have the same issue!
Hi Nicole,
So sorry to hear that! The dough is thick, but definitely shouldn’t be sand-like! How are you measuring your flour? Are you using a scale, or if you’re using a cup measure are you fluffing the flour, then scooping it into the measuring cup with a spoon and leveling it? Making sure the flour is measured properly has a big impact on how the dough turns out. If it’s not that, my other thought would be that maybe your butter was a bit cold/not fully at room temperature? That can happen this time of year, when our kitchens are cooler. Let me know, if it’s neither of those and we can keep troubleshooting. Hopefully we’ll be able to figure out what happened!
@Masha, I’m having this problem too. I’m going to try to use my scale for flour for the next batch… will update
@Masha, US TOO. I’m here for the comments because we are stumped.
@Nicole, Came here for the comments as I had similar results. Dough was having a hard time sticking together when scooping. About 1/3 would stay in the scoop. I do weigh my ingredients, butter and egg were room temperature. They did not spread much in the oven and needed a good press after they came out of the oven. Not sure if I will try less flour and more butter for a second batch. Really wanted to offer these in my cookie box for January!
Oh man that is so wild!! I also weigh my ingredients when I recipe tested these, so I’m having a hard time thinking of what else could be causing it. What type of cocoa powder are you using? And what brand of butter? Are you by chance using a European butter?
@Nicole,
I am also having the same problem. I think that the flour amount is off. Like that is for a double recipe and the rest of the ingredients are for a single recipe.
I’m baking a tester with 1/2 the flour now.
Hi Anna,
I retested this recipe this weekend based on these comments, both with cup measures and a scale, and they turned out great as shared in the recipe card. The amount of flour is correct. How are you measuring your flour? Are you scooping it straight from the bag??
This recipe is adapted from my gingerbread sandwich cookie recipe, and the cookies should bake up with a really nice, chewy center. If you use half the flour and it’s measured properly (either by fluffing it then spooning it into the measuring cup or using a scale), the cookies are going to spread a lot more and the texture is going to be a lot different :/
@Nicole, same!! I thought I did something wrong!
The dough isn’t supposed to be sandy :/ I just retested these this weekend, using both cup measures and scale to try to see why this is happening to some of you, and I’m having a hard time figuring it out!
How did you measure the flour? Did you use a scale or fluff the flour and spoon it into your cup measure? If you scoop directly from the bag you end up using a lot more flour than the recipe calls for.
Was your butter full at room temp? Sometimes during winter even if you set the butter out far in advance, it’s a lot firmer just because it’s colder outside/in our homes in winter. Both of those things can cause the dough to be crumbly. It should be quite smooth once it’s all mixed together. If it’s not either of those things let me know and we can keep troubleshooting.
@Lisa, made them last night they came out like kinetic sand and weren’t chewy at all
That is wild! Did you accidentally add the granulated sugar that the cookies are meant to be rolled in, into the dough?? That’s the only thing I can think of that would cause that! It would also make the cookies spread more and turn out crispy. Could that be what happened??
These cookies are delicious and so easy to make. Had all the ingredients on hand and was able to make them pretty quickly.
They smell and taste amazing. What I love most is the chewy cookie center. So good! I think they’ll freeze beautifully as well.
Tagged you on Instagram.
Yesssss! That is so wonderful to hear Julie 🙂 And yes the centers are my favorite part too 🙂 Thank you so much for sharing, I’ll have to go take a look on IG!!
These are delicious, pretty, and so simple! I did add a bit more red food coloring (I used the Wilton no-taste red gel), but otherwise I followed the recipe exactly as written and have gotten rave reviews about these! Thanks so much as usual!!
So happy to hear that Leah!!! Thank you so much for sharing 🙂
This dough was so dry and crumbly. I added am egg white and it made it a little better but when I pressed them down when I got them out of the oven they all cracked. I make a lot of cookies so not new to baking.
Hi Jenny,
So sorry to hear that! Were all your ingredients at room temperature? What type of butter are you using? Did you make any substitutions? How are you measuring the flour? Hopefully we’ll be able to figure out what happened!
LOVE these cookies! I think I used a slightly smaller scoop than recommended & got 24 cookies plus a smaller 25th cookie. The texture is SO good and has that classic red velvet flavor. Dipped in chocolate truly sends these cookies over the edge. So good. Thank you for ALWAYS having the best recipes that I know I can count on!!
So happy to hear that Lisa!!!! The texture on these really is so perfectly chewy! Thank you for sharing 🙂
These are as delicious as they are pretty! I have learned that I can always count on your recipes and especially appreciate all the hints and details. Thank you so much!!
aw thank you Courtney!! So happy to hear you loved this recipe 🙂 Thanks for sharing!
I saw these on your Instagram and had to make them! They are in the oven now and the dough was beautiful! I can’t wait for them to be done and cool down.
So happy to hear that Mina!! I hope the bake up amazing 🙂 happy baking!
I made these twice and did not have great results, I feel like there’s too much flour in this recipe, there was absolutely no spread when I put them in the oven. Third time I lowered the flower by 20 g and upped the butter by about 10 g and it feels like the ratio was right.
Hi Jackie,
What type of butter are you using? Are you using European butter by chance? Appreciate you sharing your feedback, and hopefully we’ll be able to figure out why yours baked up so differently than mine!
Wow these cookies were nice and simple and taste amazing. Thank you for this wonderful recipe!!
So happy to hear it Michelle!! Thank you for sharing 🙂
FWIW, I also got a sandy-textured dough (kind of like dried out play dough) but decided to keep going. I didn’t want to waste the ingredients. I smushed the dough together in my hands to make balls and flattened the 1/2 way through baking with a metal cup measure. They came out pretty good. Very yummy.
Thank you for sharing!!! That is really helpful, appreciate it Megan!
Hesitant in trying this recipe after reading the comments. Why is the comment sections on social media influenced cookie recipes always so hit and miss. I only bake by weight, and it seems others do as well yet still have issues with the consistency of the dough….
Hi Andrew,
The dough does end up quite thick, but it comes together as you scoop it and they should bake up perfectly chewy (as long as you didn’t accidentally add the granulated sugar that’s for rolling the cookies into the dough)! Did you try scooping the dough? How did the cookies bake up?
These are so pretty and festive…my dough was also sand like at first, but I added 1 tbsp. of water and it came together perfectly. I think my food gel was thick and I used vanilla paste, which is thick, so the water loosened it up. They were a huge hit at my hubby’s office for Christmas:)
Hi Brenda,
That totally makes sense, and is so smart! So happy to hear that they turned out great 🙂 Thank you for sharing!!
This might be my favorite cookie this year! Easy to make, decorations are adorable (I used some holly/ivy along the border), and the taste is so good! I love the suggestion of pressing the cookie down after baking too.
AH!! So happy to hear that Debbbie, it sounds like they turned out adorable 🙂 Thank you for sharing!!
These just came out of the oven! They taste great but look more like crinkle cookies than the pictures (thicker & cracked). I’m not sure how to correct this for the future?
Hi Martha,
Happy to hear they tasted great! How did you measure the flour? Did you use a scale or fluff the flour and spoon it into your cup measure? If you scoop directly from the bag you end up using a lot more flour than the recipe calls for, which can make the cookies spread a bit less! If it’s not that let me know and we can keep troubleshooting!
I just tried these and the dough is like sand. Not bind together at all. I am a season baker with my own cookie business so I know how to follow a recipe. I am stumped!
Hi Jojo,
When you say sand, do you mean like dry sand? Or moist sand that sticks together?? When you used a cookie scoop, did the dough stick together? Did you try baking the dough, and if so, what was the texture like when they were baked? I am also so stumped! I wish we could share pictures on here so I could see what you guys mean!! I restested the recipe this weekend and can’t figure it out either!
These were easy to make and turned out so delicious!! 🙂
So happy to hear that Kass!! Thank you for sharing!!!
My batter came out super dry and sand like consistency. Very crumbly.
Hi Melissa,
The dough is quite thick, but shouldn’t be sandy. Did you by chance accidentally add the sugar that the cookie dough is supposed to be rolled in, into the dough? That would be my first guess! The other thing would be how you’re measuring the flour. Did you use a scale or fluff the flour and spoon it into your cup measure? If you scoop directly from the bag you end up using a lot more flour than the recipe calls for. If it’s not either of those, let me know and we can keep troubleshooting!
I was nervous because of the “ crumbly dough” reviews but mine came out absolutely perfect. And they’re delicious too! Thank you for sharing this recipe with us.
– I did weigh everything with except the butter and egg.
Thank you so much for sharing Bon!! And I love that they turned out so amazing 🙂
If I freeze the baked cookies, how long do they take to thaw? I am wanting to bake today and gift them over the week. Or will they also be ok in an airtight container for a few days?
Thanks in advance! 🙂
Hi Desiree,
They thaw in about an hour if set out at room temp. They will also be ok in an airtight container at room temp for a few days, but I think keeping them frozen keeps them the most fresh. Hope that helps, happy baking!
These were delicious and so easy to make, came out perfectly on my first try. Thank you for an amazing recipe
So happy to hear that Demi, thank you for sharing!!! 🙂
Delicious! No changes
Might roll them in icing sugar next time for that crinkle look
My dough was really sandlike. I’m pretty sure the season other had the same issue is because the instruction didn’t said fluff the flour first. I know your other recipe mentioned fluffing the flour before measuring. So this time it wasn’t mentioned so I didn’t fluffed it.
Hi Tiffany,
I will add a note to the recipe card about this. In general when you’re baking, you should always fluff the flour if you’re using cup measures and not a scale 🙂 That is how to properly measure flour! Hope that helps for the future, happy baking!
Made these for Christmas and my family loved them. Next time I make these I’m definitely doubling the recipe next time.
I also don’t really bake but this recipe was easy to follow. If your hesitant to try I highly recommend this recipe.
That’s so great to hear, thank you for sharing Ana!! 🙂
The recipe was delicious but it spread too much and my cookies baked very thin. Any suggestions??
So sorry to hear that Althea!! Did you by chance make any substitutions to the recipe? Or did you bake them on a dark metal pan? Those would be my first guesses, but if it’s not that we can keep trouble shooting!
Really tasty and easy to make. I’ve already had people asking me to make more as they didn’t last very long. I may try to make some mini ones next and think these may be my new go to cookie recipe
Yessss!! That’s so great to hear, I bet mini ones would be so fun!!! Happy baking Hettie 🙂
I made these a couple days before Christmas for gift giving— Our neighbor said they were the BEST cookies he had ever had in his life!! WOW – compliments for you & me both??? I had a little bit of trouble with the dipping process so just did an outer rim on 1/2 of the cookie, rolled in crushed candy cane? Thank you!! so much!
I will definitely make these over & over again!
I meant to give it 5 stars! ?????
Thank you Sandra 🙂 So happy to hear you loved this recipe!!
Omg yesss! I am so happy to hear that Sandra 🙂 Thank you for sharing!!
Name is misleading. I would not say these are red velvet, it is the most mild of chocolate flavor. Mine were a slightly odd texture as others have put it, and more like a pink sugar cookie.
Hi Mary,
Sorry to hear this wasn’t a hit for you! These have a nice hint of cocoa, which is what I associate with red velvet as a flavor. What type of cocoa powder did you use? And what type and brand of food coloring? If you used the type of gel food coloring the recipe calls for, they should have had a nice red color! Hopefully we’ll be able to figured out what happened!
I love it. These cookies Taste great and are easy to bake.
The only problem i had was with the white chocolate, I bought Turin (which is supposedly not that bad) but was watery like and the chocolate looked a little transparent… I will try to use less temperature.
Thank you from Mexico ??
So happy to hear it Rebeca!! That does sound a little odd, next time you can try heating it on a lower heat or maybe try a different brand! Hope that helps, and thanks for sharing 🙂 Happy baking!
These are delicious and were one of the favourites in my Christmas cookie boxes!