
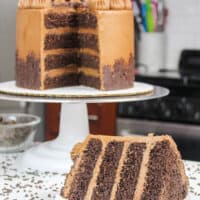
Gluten Free Chocolate Cake Recipe
I’m planning to make a cake for my gluten-free friend’s wedding this spring. This is the catalyst behind my recent gluten-free baking spree and the inspiration for this gluten-free chocolate cake recipe.
Gluten-free baking is unique in a lot of ways, and really throws the rule book out when it comes to baking.

It’s a totally different animal, which has taken a lot of trial and error for me to get comfortable with.
What’s In Gluten Free Flour??
There are a lot of gluten-free flour blends out there. Each brand uses a unique mixture of wheat flour alternatives, like rice flour, brown rice flour, and even almond flour!
It can be difficult to get the texture of gluten-free flour just right for baking. A lot of these alternative flours have a finer texture than all-purpose flour.
Some type of starch is usually added to help give the mixture better structure, and a bit of binding power. Tapioca and potato starch are the most commonly used starches.
One other ingredient in gluten-free flour that might sound a little strange is xanthan gum. It’s a key ingredient in gluten-free baking. Xanthan gum has a big impact on the texture of gluten-free baked goods too.
Gluten adds elasticity and stickiness to dough and batter. Xanthan gum emulates these characteristics in gluten-free baking and helps lock in moisture.
Does It Matter What Brand of Gluten-Free Flour I Use?
I’ve tried this recipe with a few different brands of gluten-free flour, and so far each of them has worked great:
- King Arthur gluten-free measure for measure flour
- Cup4Cup gluten-free multipurpose flour blend
- Bob’s Red Mill gluten-free 1-to-1 baking flour
My favorite brand of gluten-free flour for this recipe was King Arthur. However, any brand of gluten-free flour you can find at your grocery store should work.
My only word of caution is to be sure you use some sort of gluten free flour blend.
Using a single type of gluten-free flour, like almond flour or cassava flour, in this recipe will not yield the same results!
Most grocery stores carry at least one blend of gluten-free flour. Stores like Whole Foods or Trader Joe’s also have lots of great options.
If all else fails, Amazon is another easy way to get your hands on a gluten-free flour blend. I order a majority of my baking supplies on Amazon, including most of my specialty ingredients.
Why This Recipe Works With Gluten-Free Flour
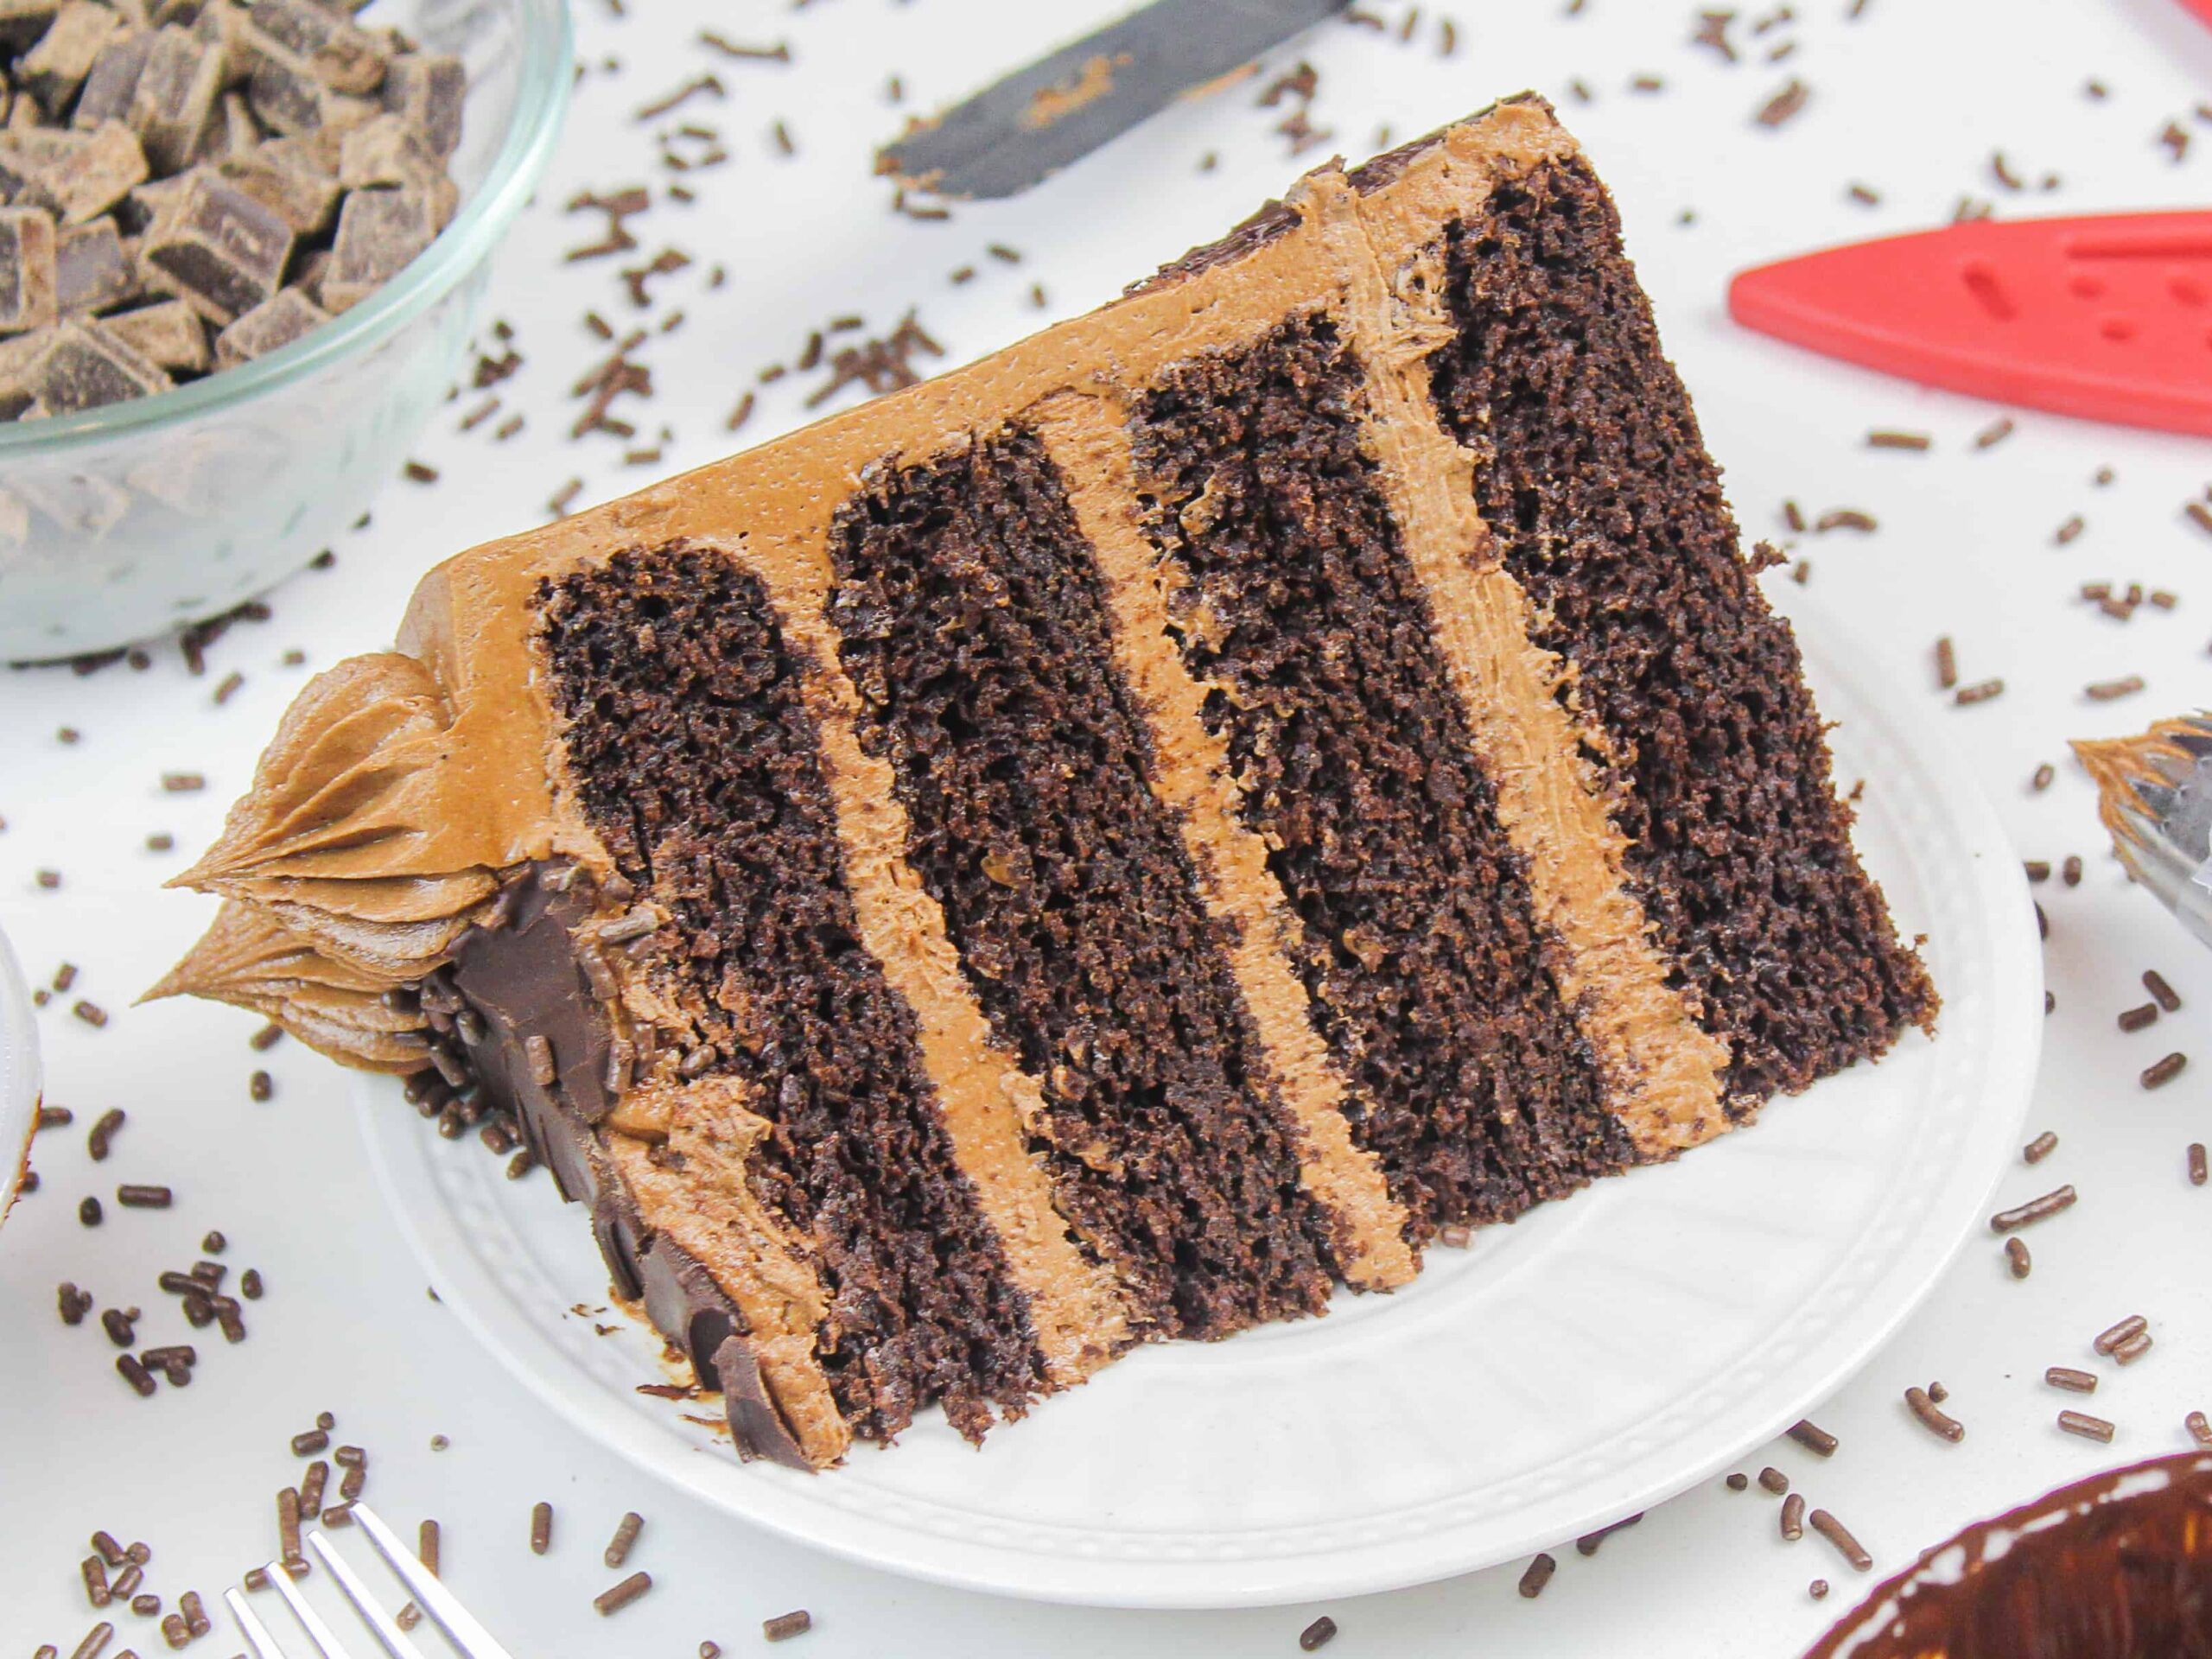
This gluten-free chocolate cake recipe is based on my moist chocolate cake recipe.
Gluten-free baked goods have come a long way in the past few years, but a lot of people still think of them as gritty, dense, and even gummy.
Using a good gluten-free flour blend can fix most of these issues.
However, I found that the gluten-free batters have a hard time incorporating butter. Gluten-free flour blends can’t absorb liquids as well as regular flour, and they also can’t absorb fat as well.
I tried using gluten-free flour in my go-to chocolate layer cake, and the texture wasn’t quite right.
That’s when I decided to try making a gluten-free version of my moist chocolate cake recipe. It uses oil as a fat instead of butter, which is easier for the gluten-free flour to absorb.
The texture was spot on, with the help of the following gluten-free baking tips.
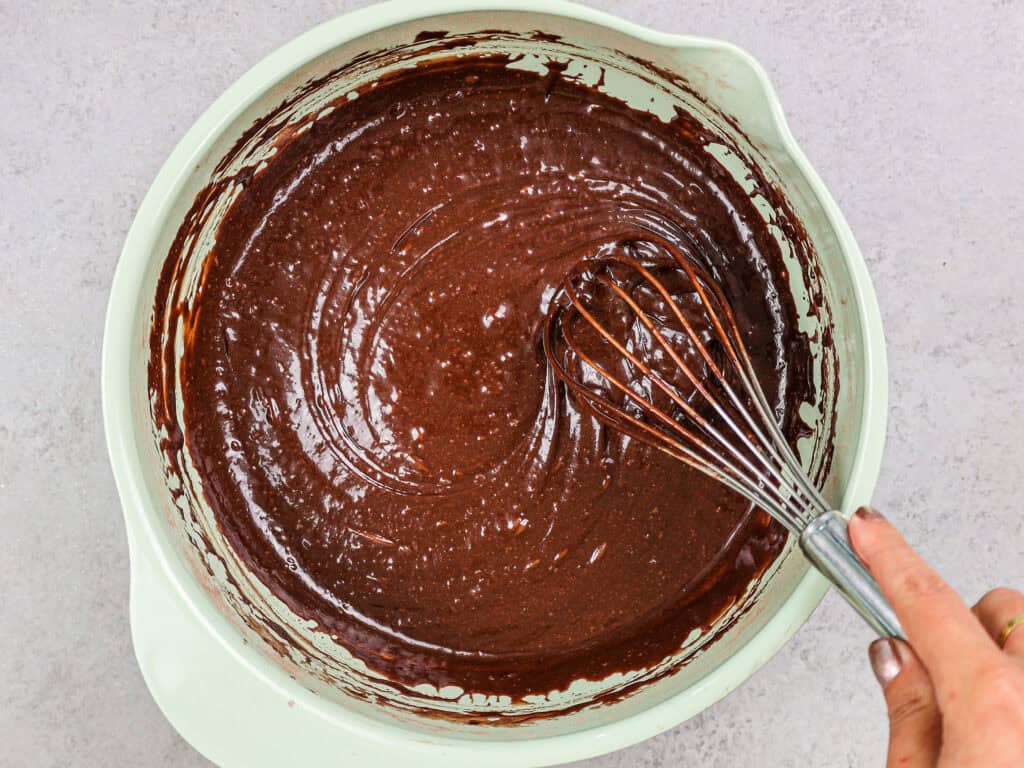
Tip #1: Over-mix the Batter
While I strongly advise against over-mixing batter in other recipes, and even design my recipes to have as little mixing as possible, gluten-free batter is different.
The whole reason you don’t want to over-mix your batter is that it develops thick strands of gluten, which can lead to dense, tough cake layers. But when you’re using gluten-free flour, this isn’t a problem.
In fact, overmixing gluten-free flour can actually give the cake layers better structure! This helps cake layers rise better as they bake and gives the cake a more tender crumb.
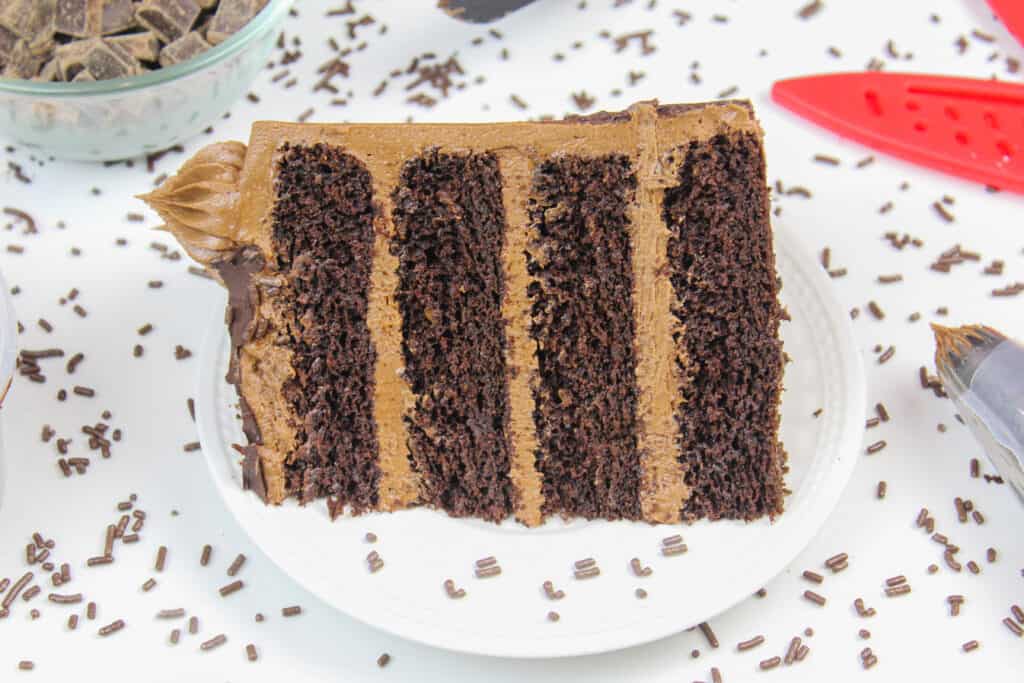
The additional mixing can also make it easier to slice into a tall layer cake like this. The incremental structure helps prevent the cake layers from crumbling as they’re cut.
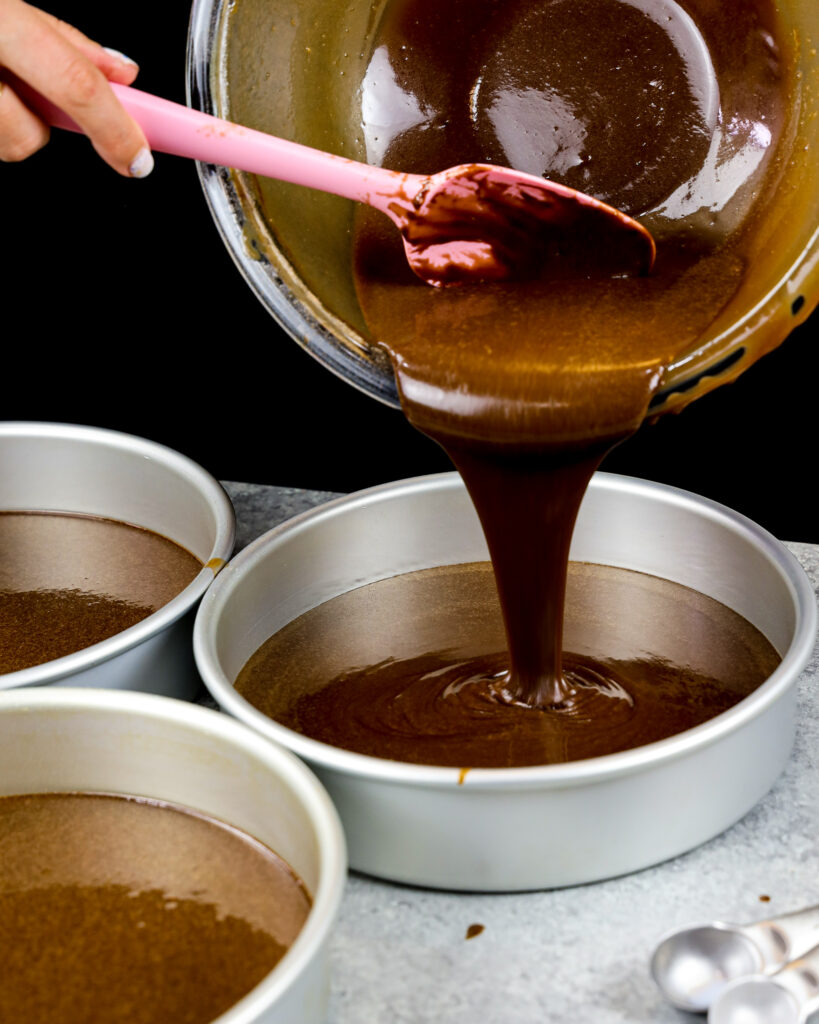
Tip #2 Let the Batter Rest
Remember earlier when I said that gluten-free flour blends can have a hard time absorbing moisture and fats?
If you let the batter sit for a bit before baking it, you give the flour more time to absorb all that goodness. This helps thicken the batter and prevents your cake layers from having a gritty texture.
I unintentionally did this as I was photographing and filming this gluten-free chocolate cake batter. You’d be surprised how long it takes to get a perfect shot of pouring cake batter into a pan!
Letting the batter sit for about 30 minutes drastically improves the texture of these cake layers, so be sure you don’t skip this step!!
Tips for Making the Best Gluten-Free Chocolate Cake:
- Ingredients at room temperature mix together better! Set out any cold ingredients ahead of time.
- Properly measure the gluten-free flour (spoon into the cup measure, then level) or use a kitchen scale to measure your dry ingredients.
- Don’t be afraid to over-mix your batter! Vigorously whisk your batter for a few minutes once it’s made, to help give it structure.
- Let your batter sit for about 30 minutes before baking to help the gluten-free flour absorb more moisture from the batter.
- Chill your cake layers in the freezer for about 20 minutes before assembling the cake, to make it easier to stack and frost.
Making This Cake In Advance & Storage Tips:
I highly recommend making your cake layers in advance and freezing them. It breaks the process up and makes it more approachable.
You can also make your frosting ahead of time or save any leftover frosting! It can be stored in an airtight container in the fridge for up to a month, or in the freezer for up to 3 months. Be sure to give it a good stir once it thaws to get the consistency nice and smooth again.
A frosted cake can last in the fridge for up to a week or in the freezer for up to a month. The buttercream locks in all the moisture, keeping the cake fresh and delicious!
If you cut into the cake and have leftovers, use any remaining frosting to cover the cut section to keep it moist and store it in the fridge for up to a week.
Let Me Know What You Think!
If you try my gluten-free chocolate cake recipe, I’d love to hear what you think of it! Please leave a rating and comment below.
And don’t forget to tag me @chelsweets and #chelsweets so I can see your delicious creations!
Gluten Free Chocolate Cake Recipe
Ingredients
Gluten Free Chocolate Cake Recipe
- 2 cups gluten free flour 300g
- 2 cups granulated sugar 400g
- 3/4 cup unsweetened cocoa powder, sifted 75g
- 2 tsp baking powder 8g
- 1 1/2 tsp baking soda 9g
- 1 tsp fine salt 6g
- 1 tsp instant espresso of coffee 2g
- 1 cup buttermilk, room temperature 240g
- 1 cup very hot water 240g
- 1 tsp vinegar 4g
- 1/2 cup vegetable or canola oil 112g
- 2 large eggs, room temperature 112g
- 2 tsp vanilla extract or vanilla bean paste 8g
Chocolate Buttercream Frosting
- 2 cups (4 sticks) unsalted butter, room temperature 454g
- 1 tsp vanilla extract or vanilla bean paste 4g
- 1/2 tsp fine salt 3g
- 5 cups powdered sugar 625g
- 2/3 cup heavy whipping cream, room temperature 160g
- 2 cups melted dark chocolate, cooled 360g
Instructions
Gluten Free Chocolate Cake Layers
- Preheat oven to 350°F/175°C. Line and grease three eight-inch pans or four seven-inch pans. Set aside.
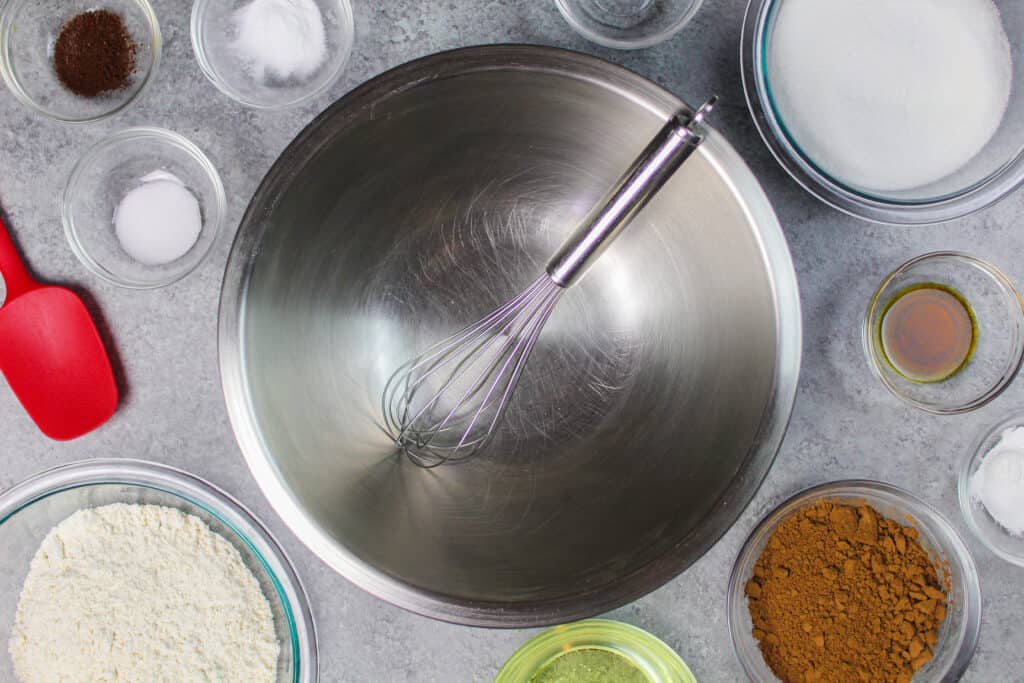
- Combine the dry ingredients (gluten-free flour, granulated sugar, sifted cocoa powder, baking soda, baking powder, salt, and instant espresso) in a large bowl. Whisk together and set aside.
- In a separate, medium-sized bowl, add the water, buttermilk, vinegar, oil, eggs, and vanilla extract. Whisk the ingredients together until combined.
- Pour the wet ingredients into the dry ingredients. Whisk the batter for several minutes to give it some additional structure. Don't be afraid of over mixing, there's no gluten!
- Cover the bowl with plastic wrap and let the batter sit for 30 minutes. This gives the gluten free flour time to absorb the liquids in the batter which can help prevent a gritty texture.
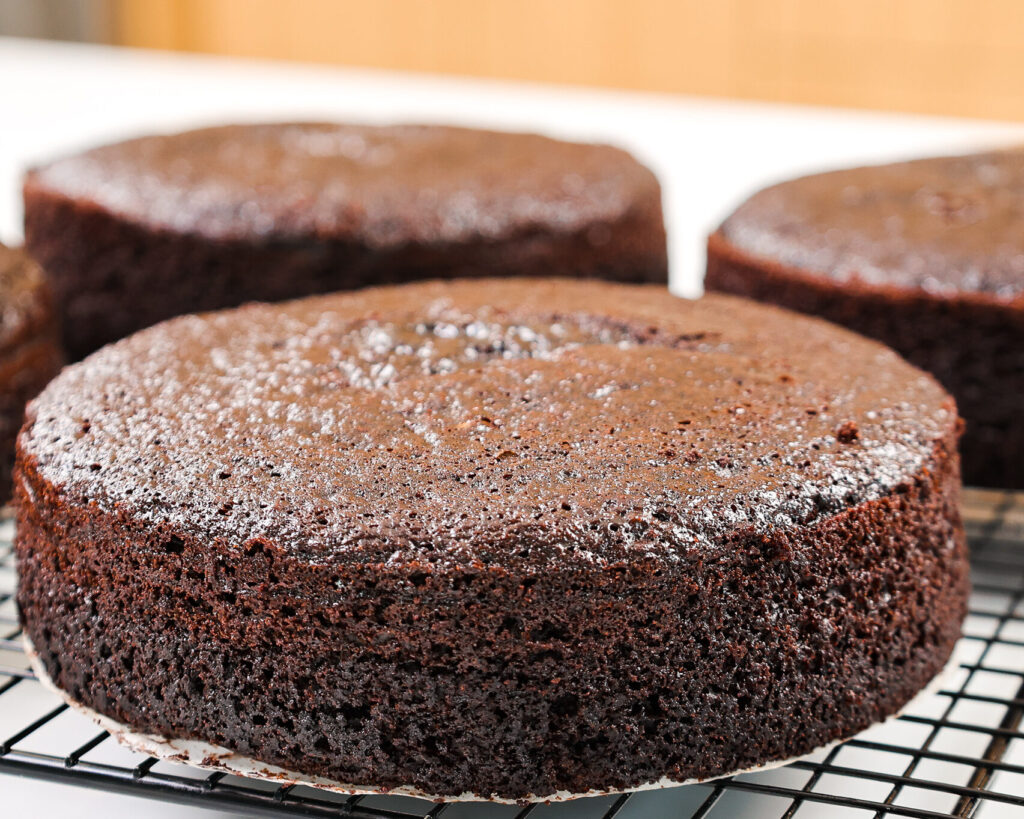
- Divide the batter evenly between the prepared cake pans and bake for 25-27 minutes.
- Remove from the oven and let the layers cool in the pans for about 10 minutes. Gently run an offset spatula around the rim of the cake pans to loosen them.
- Place the cake pans in the freezer to speed up the cooling process and to trap in additional moisture.
Chocolate Buttercream Frosting
- While the cake layers bake and cool, make the chocolate buttercream frosting. Beat the unsalted butter on a medium speed for 30 seconds with a paddle attachment until smooth.
- Add in the vanilla extract and salt and mix on a low speed to combine.
- Slowly mix in the powdered sugar on the lowest speed. Halfway through add in the heavy cream to make the frosting easier to mix.
- Mix in the cooled, melted chocolate. Scrape around the sides and bottom of the bowl as needed.
- Beat on low until the ingredients are fully incorporated and the desired consistency is reached.
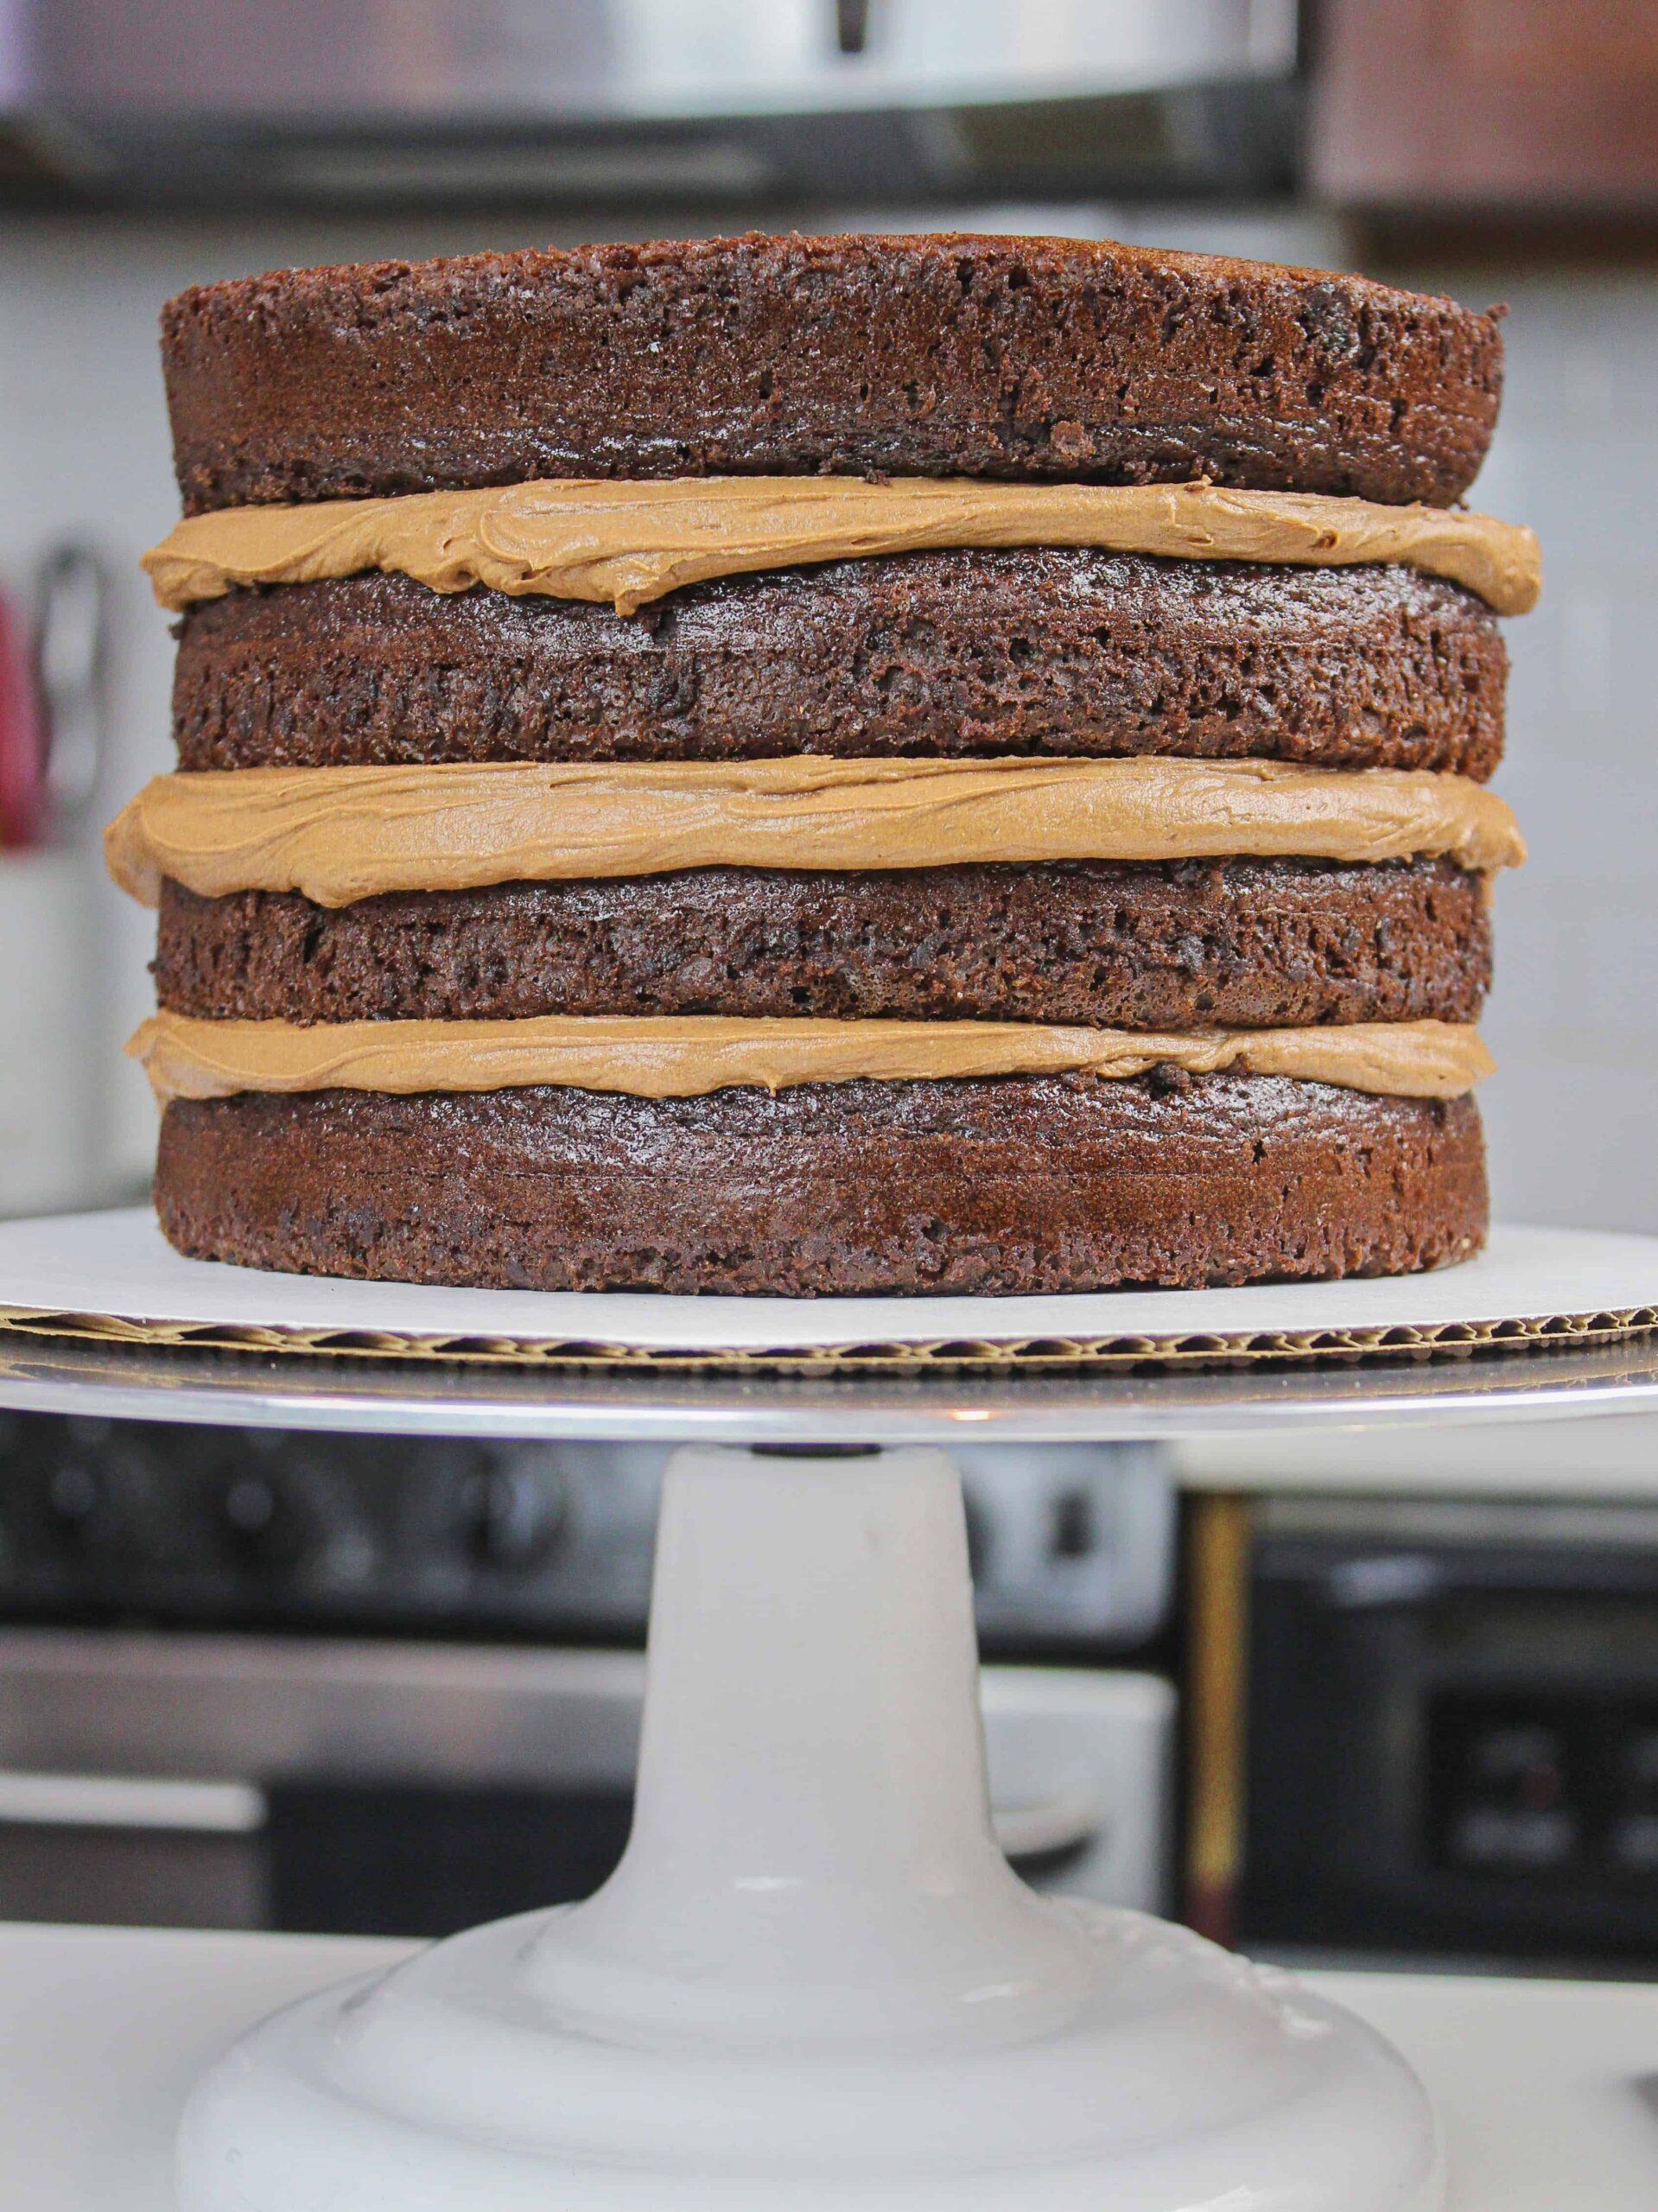
Assembling This Gluten-Free Chocolate Cake
- Stack and frost cake layers on a grease-proof cake board or flat plate. Use a dab of frosting to help stick the first cake layer to the board.
- Add an even layer of chocolate buttercream between each cake layer.
- Spread a thin coat of frosting around the cake that fully covers the cake layers.
- Smooth using a bench scraper, then chill the cake in the fridge (30 minutes) or freezer (10 minutes) until the frosting is firm to the touch.
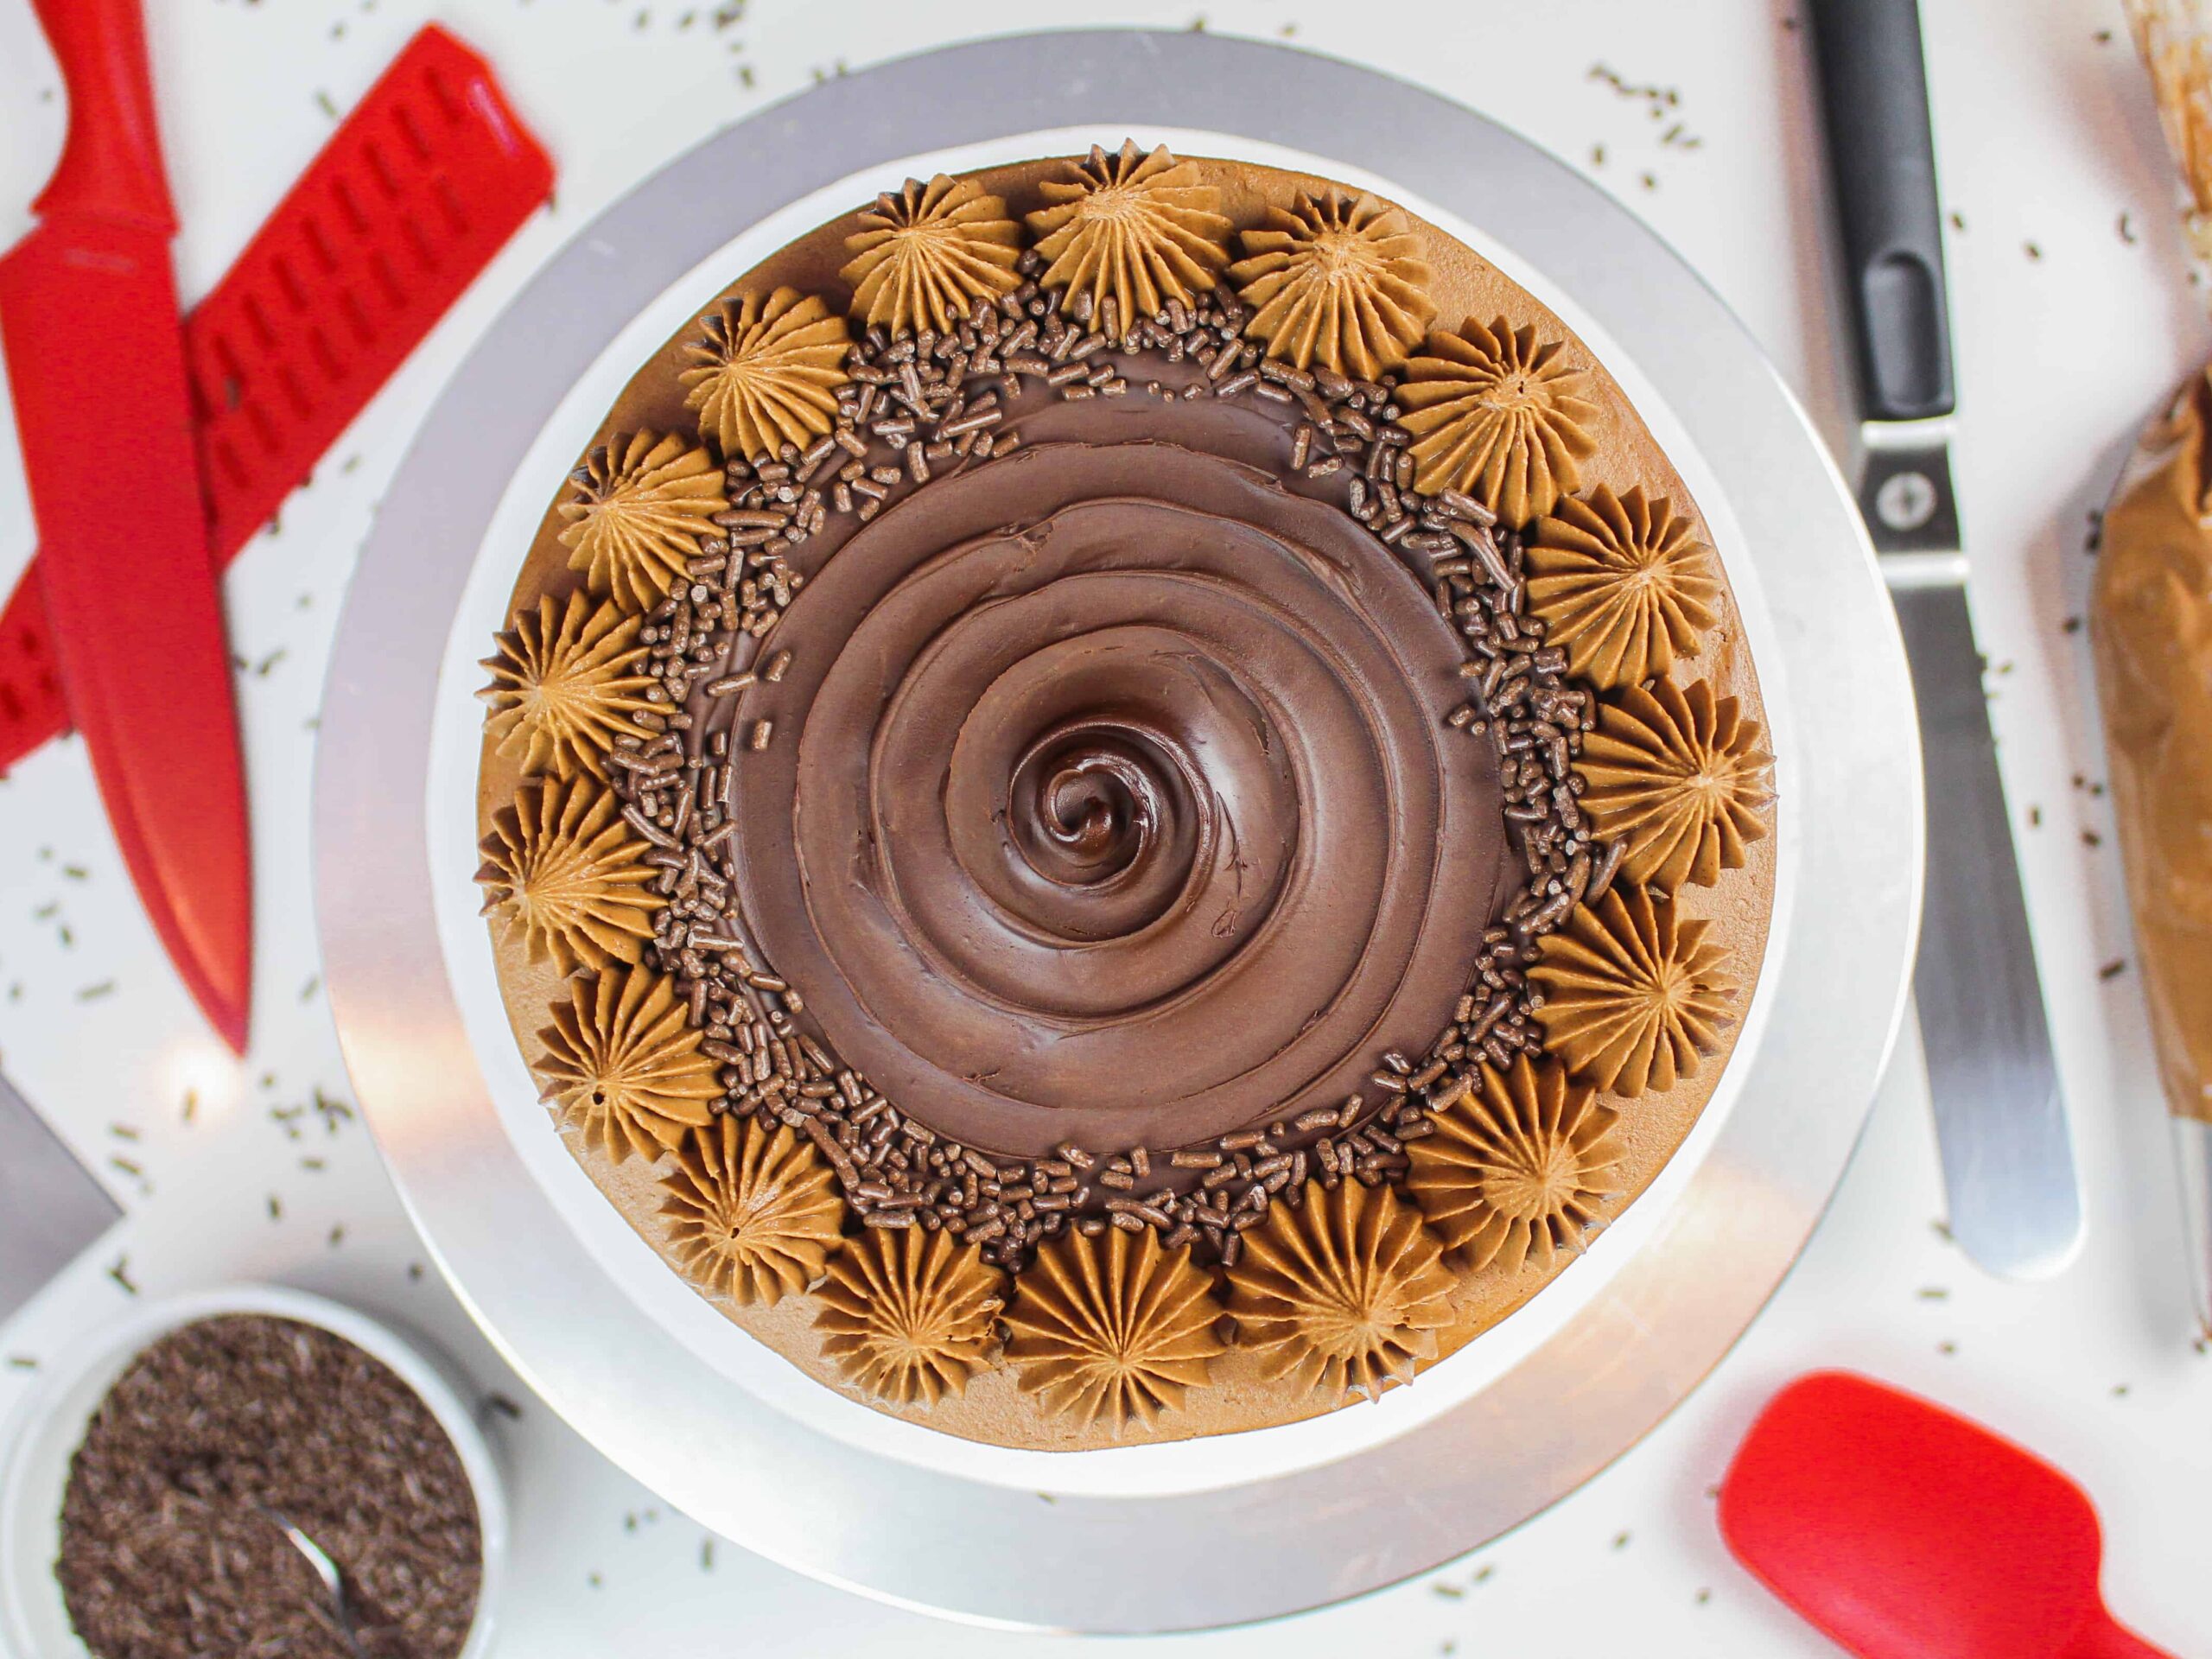
- Add a second, thicker layer of frosting to the cake and smooth using a bench scraper. Then decorate as desired!
- I brushed some melted dark chocolate around the bottom of the cake after chilling it for another 10 minutes in the freezer and used an Ateco 869 to add some fun dollops of buttercream around the top of the cake.
Video
Notes
Tips for Making the Best Gluten-Free Chocolate Cake
- Ingredients at room temperature mix together better! Set out any cold ingredients ahead of time.
- Properly measure your flour (spoon into the cup measure, then level). Or better yet, use a kitchen scale to measure your dry ingredients.
- Don’t be afraid to over-mix your batter! Vigorously whisk your batter for a few minutes once it’s made, to help give it structure.
- Let your batter sit for about 30 minutes before baking to help the gluten-free flour absorb more moisture from the batter.
- Use a scale to weigh your cake pans as you fill them. Make sure each pan has the same amount of batter will make your cake layers bake to the same height and bake more evenly.
- Bang your cake pans on the counter before putting them in the oven. This brings any air bubbles that are trapped in the batter to the surface.
- Level your room temperature or thawed cake layers with a serrated knife to make them easier to stack.
- Chill your cake layers in the freezer for about 20 minutes before assembling the cake and before adding the simple syrup. It makes it so much easier to stack and frost them!
Making this Gluten-Free Chocolate Cake in Advance & Storage Tips
I highly recommend making your cake layers in advance and freezing them. It breaks the process up and makes it more approachable. Make your chocolate frosting ahead of time or save any leftover frosting! It can be stored in an airtight container in the fridge for up to a month. This frosting can also be stored in the freezer for up to 3 months! Just be sure to give it a good stir once it thaws to make it nice and smooth again. A frosted cake can last in the fridge for a week or in the freezer for a month. The buttercream locks in the moisture and keeps the cake fresh and delicious!Nutrition
Other Gluten-Free Recipes You Might Like:
Thank you Chelsea for experimenting with gf recipes! I am in the same boat as you. I am making a friends wedding cake that is gf and I plan to use this recipe!!
Thank you for these gluten free recipes!!
I’ve seen your 2 vegan cake recipes and was wondering, could we incorporate any of the 2 recipes to have a gluten AND dairy free cake?
Am I asking for too much!? ?
Haha so funny you ask Tiana, I actually am working on that right now! I tested four variations today, and am going to be sharing the recipe in a couple weeks 🙂 stay tuned!!
Hi, ur idea is too good and pls let me know a recipe which are both gluten-free and eggfree, as we don’t eat eggs, thanks a lot in advance.
Thanks Anuradha!
For recipes which use eggs primarily as a leavening agent you can try a commercial egg replacement product (like this: https://amzn.to/2Pja6g6) or the following mixture: 1-1/2 tablespoons vegetable oil mixed with 1-1/2 tablespoons water and 1 teaspoon baking powder per egg. Note: this mixture calls for baking powder, not baking soda. Or you can try 1/4 cup of unsweetened applesauce in place of each egg a recipe calls for.
Hope that helps, happy baking!
@Chelsweets, can we use flaxseed instead of eggs as I am looking for gluten free n eggless cake… thanks in advance.
I love your recipes! I’ve got a question! Why is it less amount of powdered sugar for the buttercream than your usual recipe but the same amount of butter?
Hi Jaqui,
The chocolate that’s added the the buttercream really thickens it up, so I find you need less powdered sugar to get the consistency right. My chocolate buttercream recipes do use less powdered sugar than my vanilla buttercream for that reason. Hope that helps, happy baking!
So good, thank you! My daughter has so many things she cant have especially gluten so we made this yesterday! Didn’t have the stuff to make the buttercream so used hersheys but the cake was perfect!
So happy to hear that Cassie!! I have a few more gluten free recipes coming your way soon, so stay tuned! 🙂
Hi, I’m looking at making the gluten free choc cake and was wondering what vinegar you use? Apple cider, white wine??
Also it says in your notes to use gluten free flour blend but can’t see it in the recipe. Is this extra?? Sorry for the questions but never baked gluten free before x
Thanks Jo x
Hi Joanne,
No worries at all, I’m always here to help!
I like to use white vinegar, but apple cider would work too. The gluten free flour blend just means whatever gluten free flour you buy at the store (most are a blend of different types of flour). I like to use this king arthur gluten free flour blend: https://amzn.to/38a3kzL
So sorry for any confusion, I hope that helps! Happy baking!!
Can you substitute the buttermilk for coconut milk? I’ve been looking for a gluten and dairy free cake.
Hi Sam,
I haven’t tested that out, but I think it should work! If you try it, please let me know how it goes 🙂 I’d love to know!!
Any idea how this would translate to a 9×13 cake? How many cups of batter does this recipe make? Thanks so much!!
Hi Tovah,
This cake recipe makes two sheet cakes that are 9×13 inches. However, they’ll be slightly less than 1 inch tall once you level them. So it depends on how tall you want the layers to be! You can also make one thick 9 x 13 inch cake layer.
When I bake layer cakes, I place two flower nails spaced evenly apart in the center of each pan (and spray them), to help the layers bake more evenly and quickly. With flower nails, the cake layers bake in 37-40 minutes in my oven (when I split the batter between two pans). I hope that helps, happy baking!!
made this for my friends birthday yesterday with a salted caramel buttercream and a chocolate ganache drip and she loved it! thanks for this recipe!
Omg that sounds delicious Lissi! You have one lucky friend 🙂 Thanks for sharing!!
Hi Chel! I wanted to make a vanilla gluten free cake, small batch 4 inch or six inch for my nieces smash cake. Could I follow the same recipe as chocolate and make some adjustments to achieve ?? Also Could I fill each pan with the appropriate cups of batter for the inches I need or would I have to do conversions.
Hi Lauren,
I am still working on my vanilla gluten free cake recipe, and sadly I haven’t been able to get it just right yet! I promise to share it as soon as I do though. So sorry I don’t have an answer just yet :/
Wow this is the first gluten free scratch cake that turned out. Thank you so much.
Aw I’m so happy to hear that Angie!! Thank you for sharing 🙂 Happy baking!
Hello,
The recipe looks amazing. Does this have 2 eggs or 4 eggs like you mentioned in The first comment?
I am making it now and really need to know the accurate amount.
Many thanks. Xx
Hi Nahal,
Ahh that comment was meant to be on a different post, please disregard it!! It’s two large eggs 🙂 So sorry for any confusion!!
Hi! I’m using this recipe for a bachelorette cake! ? the molding is 10.8*6.5*2.9 inches. How do you recommend cutting this recipe so it doesn’t have excess batter?
Hi Aliza,
That’s so fun! I think this cake recipe should actually make just the right amount of cake batter for those dimensions. It makes about 154 cubic inches of batter, and that mold is about 204 cubic inches. But with the rise of the cake, it should be good (you’ll fill the mold up about 3/4 of that way. Hope that helps, happy baking!
No problem… I made the cake with 2 eggs and used doves farm Gluten free flour with a 1/4 xantham gum per cup, and let me tell you the cake was so delicious.. I cant even describe in words. Beyond moist so flavourful, honestly i made a Gluten free Black Forest Gateau Cake for a customer and she couldnt stop praising.
Thank you so much for sharing this incredible recipe with all of us. ??
I am so happy to hear that Nahal! That sounds incredible 🙂 Thank you for sharing!!
Is Xantham Gum needed in the recipe?
Hi Stacey,
Xantham gum is included in almost all cup for cup gluten free flour blends <3
It’s not absolutely essential, but if you’re using a good GF flour it should have it. Hope that helps, happy baking!
How would you go about baking this will all-purpose gf flower(not a blend)?
Hi Rachel,
When I say blend, I just mean the flour is made with different types of flour (most have at least two types). The AP GF flour you have is probably a blend too, and can be used in the recipe as is 🙂 hope that helps, happy baking!
I have 2 9×1.5 inch cake pans and was gonna buy another 9 inch but in the recipe it says 3 8inch ones or 4 7 inch ones. I worry that my 9 inch pans are too shallow. I am planning to make the cake April 6 for my moms birthday on the 7th because I have celiac and wanna be able to eat her cake lol. But should I just bite the bullet and buy 3 8 inch pans?
Hi Harper,
So sorry for the delayed response! I’ve never baked in pans that were less than 2 inches, so I’m not sure if they’d overflow or not :/ This recipe doesn’t rise a ton so I want to say it might be ok, but there’s also nothing worse than overflowing cake pans!!
It might work, but you probably you want to get some slightly taller pans for future baking <3 Sorry I can’t be of more help!!
1000% recommend! Made this for my mother in law’s birthday today and everyone loved it. I only had 2 9 inch cake pans and it worked out fine. Thank you for this amazing recipe!
So happy to hear that Karla!! Thank you for sharing 🙂
@Karla R., how long.m did you have to cook the cakes with two 9” pans?
Hi Courtney,
Great question! The bake time will be a few minutes longer if you use 2, 9-inch cake pans. I’d recommend testing the center of the layers with a toothpick when you think they’re done. If it comes out with a few moist crumbs, it’s ready! If it’s wet or goopy, it needs a few more minutes. Hope that helps, happy baking!
Hey! The cake looks delicious, I was about to try out this recipe but I usually don’t like it when the cake is too sweet, do you think it’d be possible to use less sugar in the batter?
Hi Rim,
You can reduce the amount of sugar a bit, but it will affect the texture of the cake layers. I’d recommend just using a less sweet frosting, like my swiss meringue buttercream to cut the sweetness of the cake. Hope that helps, happy baking!
This chocolate cake is soooooo good. I couldn’t even tell it was gluten free. I have a friend who’s daughter is gluten and dairy free. Do you think I could substitute the buttermilk with 1 cup of coconut milk plus 1 tablespoon of lemon juice? Thanks
I love hearing that Hallie! I think that would be a great and delicious substituion!
Hi I only have 2 8 inch cake pans. Should I cut the recipe in half? Or would it work out?? Thanks this recipe looks amazing!!
Hi Kelsey!
You can either make two thick 8-inch layers and bake them a bit longer, or bake two layers and let the leftover batter sit, then bake the third layer once you transfer your cake layers out of the pans. Those are my best suggestions 🙂
Hope that helps, happy baking!
Hello! Would you recommend using this recipe in a Bundt pan or the cupcake recipe? How does this recipe differ than the cupcake recipe? I have smaller baking pans so I am wondering if I can use the leftover batter to make a half dozen cupcakes. Thank you!
Hi Sarah,
This recipe is based on my moist chocolate cake recipe, so it’s a bit different but similar in texture to my gluten free choco cupcake recipe! I think it would make great cupcakes. You can also make mini bundt cakes with leftover batter (I’ve done that and it does work), but I prefer the cupcakes!
Hi,
I’m planning to make this cake next week for my granddaughter’s birthday.
Do you have any additions or substitutions to this recipe for high altitude baking?
Thank you
Hi Kim,
It depends on how high up you, but here are my general recommendations for 5,000 feet:
Reduce baking powder:for each teaspoon, decrease 1/8 to 1/4 teaspoon.
Reduce sugar: for each cup, decrease 0 to 2 tablespoons.
Increase liquid: for each cup, add 2 to 4 tablespoons.
Increase oven temperature by 25 degrees F.
Hope that helps, happy baking!!
made it and it was so moist and delicious! could i make it into a lemon cake by adding lemon zest and taking out the cocoa powder? ( replacing it with more flour)
So happy to hear that!! You can do that, I think that would be delicious 🙂 Let me know how it goes if you try a lemon version!!
Most of my family has a gluten allergy and we are usually bummed when we can’t have desired sweets. I have made this cake three times in the past few weeks and we all LOVE it! I baked 4 cakes in 6 inch pans and it worked well. Thank you for the great recipe!
I am so happy to hear that Macy, that’s wonderful!! Thank you so much for sharing 🙂
Just a question. I noticed how think your batter was. I noticed mine was completely mixed and sat for 30 minutes, mine was still very thin. Any ideas?
@Glenda Wright, i was wondering the same thing! mine too seemed very thin!
Any tips on using this recipe in high altitudes?
Looks wonderful! What percent fat buttermilk do you use and does it matter? If its full fat, will adding vinegar to whole milk work as well?
Hello! I have been baking for over 25 years, but new to gluten free. Could I use hershey’s special dark cocoa in place of the regular cocoa or will that affect the texture of the cake? My gluten free neighbor enjoys dark chocolate very much, but I wanted to check to see if that cocoa would work in this recipe.
Thank you so much!
Kelley
Sorry for my ignorance but is the flour self raising or plain? My country use different wording and just want to double check 🙂
Absolutely love this recipe! The cake is moist, not crumbly just full-on delicious. I left the batter for about 2 hours & it was perfect! I hope my clients enjoy it as much as I did, nibbling on the off cuts ?. Thank you .
My family loved this cake. It was gluten free chocolate cake recipe trial #5. I made it for my sister’s 50th birthday. Frosted it with chocolate “not too sweet” frosting, did some drop flowers and added some rainbow jimmies for color.
By far, the most amazing cake I’ve ever had!!
Made this for my brother-in-law’s small wedding this weekend and it was a huge hit! Frosted with you American buttercream. Delicious!! They asked me to bake their wedding cake after making your GF vanilla cake for my daughters birthday which was also delicious. Thank you, Chelsweets!
I would like to try this recipe but have a question. When you mix all the wet ingredients which also includes hot water, don’t the eggs get cooked when you add them to hot water ?
This has been a lifesaver! My partner and members of his family are GF for medical reasons and I really worried I was going to lose my beloved baking (and decorating!) until I found this. It’s my new go too chocolate cake, and I make it for people without evening knowing it’s GF. PLEEEASE make more classic favourites into GF recipes. X
I’ve made this as a cake and it was delicious! How long and what temp would you recommend for cupcakes?
Hi! Looking to make this cake for a friend next week and just working if it’s plain (all purpose) gluten free flour or self raising? It looks amazing! Thanks ?
This cake is amazing! Made it for my husband who has celiac disease and it was the best gluten free cake we’ve had. Couldn’t even tell it was gluten free. Also was sturdy enough for a 4 layer cake, stacked and filled. It held up perfectly. This will be my go to from now on! Thanks so much for making and posting this recipe.
So I made 1/2 of a recipe today and followed the directions to a tee. It didn’t seem to make a whole lot of batter. I put all of the batter into one 8 inch round pan and also made one cupcake. The cake didn’t rise very much, maybe a quarter inch. And its so dense and heavy. Is it supposed to do this? Your picture of the cake looks fluffy and your layers look like they rose a lot. Did I put too much batter in the pan? I tried the cupcake and it tasted kinda gummy/fudgy. I used Bobs Red Mill 1 to 1 gluten free flour. I was so hoping to find a really good gluten free chocolate cake for my at home cake business. Any help would be greatly appreciated.
I made this recipe, using King Arthur Measure-for-measure flour, subbing 2% lactose free milk for the buttermilk, and adding about 1/2 additional tsp of vinegar. I mixed the batter in my stand mixer for about 5 minutes, and then let it stand for 30-45 minutes. The batter was far thinner than in your pictures–however the cupcakes (made exactly 24) are AMAZING. They rose like regular cupcakes, and the taste is *chef’s kiss*. None of the grainy/chalky mouth feel that I have found in other gluten free products. Thank you SO MUCH. My husband was thrilled with the treat!
Hi Macy, I am planning on making a 6″ cake also. I was wondering if you halved the recipe, threw any out, how thick the layers were and how many layers there were? Haha i’m just trying to get a sense of what to do. Thanks in advance!
Hi! I have 2 orders for gluten free cakes, one a 4″ and one a 6″. I have a general idea of what i need to do to make the 4″ cake, however I am lost when it comes to the 6″. I was thinking 3 layers would be good, although im not sure if halving the recipe would make it too small. Any tips/ideas? Thanks in advance!
My boyfriend requested gluten free Black Forest Cake for his birthday, which is what brought me to this page! It’s encouraging to hear this recipe worked for yours. Did you adjust anything to suit it to the cherry flavors? I was wondering if the espresso would clash.
The texture of this cake is very nice, but the flavor was a bit of a miss. Not quite chocolate-y enough. It was easy to layer and it looked beautiful, but I probably won’t make it again unfortunately.
What kind of espresso do you use?
Thank you so much for sharing this recipe!! It saved my but last night when I needed a great gf chocolate cake!
Do you have any recipe for chocolate cream lactosa free please? My twins have recommendation doctor a period lactosa – gluten free and next week is her birthday.
Thanks for you help from Madrid!
I was skeptics lad every other gf cake I have tried was gritty and dry. This one is amazing. No grittiness and nicely moist. Easy to make and so good. Icing over the cut part to maintain moisture is a great idea. Thank you.
Hello.
I was following the ‘grams’ but I found the dough very runny compared to the video.
I checked and one cup of my flour is 175 gr. So 2 cups would be 350gr as opposed to 244gr. I added more flour hoping to fix it but it’s still quite runny.
Any advice? Disaster..
Thanks. Emily
Hi I wanted to make this cake but I only have 9 inch pans so how much batter would I have to make?
Hi Chelsea , this looks amazing. Can I subtract the vinegar in this recipe ? And is it possible to switch up the buttermilk ? If so what do I switch it for ?
I had a request from my MIL to make chocolate cake/chocolate frosting gluten free dairy free cake. I used this recipe! Subs: for buttermilk I used 1/2 almond milk, 1/2 almond yogurt (based off the dairy free cupcake recipe from chelsweets) in the cake, and then vegan butter for the buttercream, and about half the amount of heavy cream for which I subbed almond milk.
Super happy with the results!
can i substitute sugar with sugar free ? I got a request for a gluten free cake with sugar free..please help. 🙂
Thank you for a really amazing GF chocolate cake recipe! Oh my goodness, this cake is gorgeous! 🙂 I was so impressed at how easy it was to make, and having a recipe to make 3 layers is such a win! I used it for my dad’s birthday cake for a small party, and used a mix of vanilla and chocolate frosting – it was a hit! Nobody believed it was homemade and gluten-free. This is my forever go-to GF cake mix, no more box mixes for me! Thank you! ^_^
Hello , can I ask you about the melted chocolate is it only chocolate or u melted with cream ?
This is by far the best gluten free cake I have had. My co workers keep asking me to make it again, and my husband wants this for every holiday, birthday etc. Thanks for putting the work in and figuring out how to make a great gluten free cake.
Chelsweets! Absolutely wonderful Chocolate GF cake! I made it for the first time for an order and made two cupcakes for taste testers and it was absolutely delish. nice crumb and very moist and fluffy! we do not eat GF, and my son asked if there was any more cupcakes, he inhaled it lol. instead of adding hot water and then coffee powder, I just added very hot coffee to hit and worked just fine. Will be my go to!
Hi Chelsea,
Thank you so much for sharing this amazing cake. I made it to one of my friend’s 70th bday. They loved it. Cake is easy to make and taste delicious also it’s moist. Thank you again.
Love this recipe!! Cake comes out super moist. Used this to make a wedding cake for a friend with Celiac disease and was a big hit. I substituted cream cheese frosting for the chocolate – so delicious!
im so excited to try this !! I now have Hashimoto’s and I have to be gluten free but this has now made me truly want to pursue my dream of being a baker ! I have been following you for a few years now ! thank you again! 🙂
Hi Angela,
I love this recipe and I swear you can’t tell it’s gluten free!! I hope you love it as much as I do, and wish you the best of luck on your gluten free baking journey 🙂
Hi! Made this for a friend’s birthday the other weekend and it was a HUGE hit, no one even knew it was gluten free!! Question about overmixing and letting the batter sit — do you recommend this for all gluten free cake baking, or specifically for your recipes? I still try to substitute 1:1 GF flour into regular cake recipes but they end up pretty dense, and I am wondering if overmixing+sitting would be useful in those recipes as well. Thanks so much!!
Hi Alison,
That is so great to hear!! I do recommend doing that for all gluten free baking! It helps so much. However, some recipes do adapt better to GF flour than others, and I find that oil based recipes work really well! Hope that helps, happy baking!
hiii can i use almond flour instead of gluten free flour?
Hi Natalie,
Sadly the texture and flavor of the cake will be drastically different if you use almond flour instead of a gluten free baking flour. So sorry!
Can I use dairy free milk plus vinegar as a buttermilk substitute? Also, do I still need to add additional vinegar 1tsp vinegar the recipe calls for?
Hi Kike,
You totally can! That should work just fine. You can omit the vinegar the recipe calls for. Happy baking!
Does this taste ok without the espresso coffee?
Hi Stevie,
Great question! The espresso just enhances the flavor of the chocolate in this cake, but it still tastes great without it! If you don’t want to add the espresso powder, it can totally be omitted 🙂 Hope that helps, happy baking!
Curious as to what type of melted dark chocolate you used in your buttercream frosting and then, how cool does it have to be to add to the other ingredients. This is my first time working with GF flour but have made a couple of your other cakes and they were delicious.
Hi Pam,
Great questions! I like to use Ghirardelli 63% dark chocolate chips to make my buttercream. I heat it until it’s full melted, then set it aside for about 10 minutes to cool. It should still be fluid, and just slightly warm to the touch. The goal is just to let it cool off a bit so it doesn’t melt the butter in the frosting! I hope you love this recipe just much as my other ones 🙂 Happy baking!
This cake is amazing! So yummy and easy to work with. Everyone loves it.
I am so happy to hear that Megan 🙂 Thank you for sharing!!
I’m just starting on the cake but I wanted to take a minute and commend you on your awesome video. I so appreciate that you don’t take a minute and 45 seconds showing us how to slice a piece of cake. You jump right into instruction, you’re interesting to listen to and have perfect cadence. I hope my cake comes out as good as your video did!!
I use the king author’s one for one gluten-free flour all the time. But you should know that it does not weigh the same as regular flour. So I assumed that you actually did weigh out your flour and only use 240 g, which is a lot less than two cups of the gluten-free flour which weighs 156 g per cup, per King author website.
Hi Maureen,
You are absolutely right, thank you for pointing this out! I’ve updated there recipe card to reflect it. I appreciate it!!
I cannot tell you how much I appreciate your gf recipes. I have an intolerance that makes gluten just out of reach for me. This recipe does not feel like a compromise at all. I love tricking people and then telling them it’s gf. Literally no one can tell. I appreciate the letting the ingredients marinate for a bit. Haven’t seen this on any other gf cake recipe. Thanks so much!
I am so happy to hear that Maddy 🙂 That is exactly my goal whenever I share a gluten free recipe. Thanks so much for sharing!!!
Love this cake. The frosting is really sweet. Could I use an Italian buttercream instead?
Hi Brian,
So happy to hear you loved the cake! And yes, you can absolutely swap the frosting for Italian buttercream if you prefer something less sweet. It’s a great option—super silky and a little more balanced flavor-wise. Just keep in mind it takes a few extra steps, but it’s totally worth it if you’re looking for that light, not-too-sweet finish!
I’ve got a full Italian buttercream recipe with tips here if you want to check it out: https://chelsweets.com/italian-buttercream-frosting/
Let me know how it turns out if you give it a try!
Thank you for this Chelsea. I have tried your GF vanilla cupcake recipe and it’s amazing. I even made that as GF and Dairy free due to someone I know who has both allergies.
Is there a substitute for buttermilk for this recipe that I could use to make this dairy free as well? Thank you!
Hi Manvi,
I’m so happy you loved the GF vanilla cupcakes—and way to go making them both gluten and dairy free! For a dairy-free buttermilk substitute, you can mix 1 cup of unsweetened almond milk (or any other plant-based milk) with 1 tablespoon of lemon juice or white vinegar. Let it sit for about 5–10 minutes to curdle slightly, and voilà—dairy-free buttermilk! It works great in most recipes. Let me know how it goes if you try it!
Thank you so much for this recipe! This is the best cake recipe. No one even can tell that it’s gluten free. It’s very moist and tasty. Im not gluten,but I prefer this chocolate cake to any other.
Hi Annette,
Thank you so much for your kind words! I’m so happy to hear that you love this chocolate cake and that no one can tell it’s gluten free. That’s always my goal with gluten-free recipes. It means so much that you prefer it even though you don’t have to eat gluten free. Thank you for taking the time to leave such a lovely review!
I have made this awesome cake several times and get fabulous reviews. I bake in 3 8 inch pans. I prefer thicker layers than my results. would the recipe work if I make 1 and a half times the recipe and bake in 3 pans for a thicker layer?
thanks much!
Hi Mitzi,
I’m so happy to hear that! Yes, you can make 1.5x the recipe and divide the batter between three 8-inch pans for thicker cake layers.
Just make sure your pans are at least 2 inches tall and don’t fill them more than about 2/3 full. Since the layers will be thicker, they’ll need a longer bake time. I’d start checking them around 30 minutes, then add more time as needed until a toothpick comes out with a few moist crumbs.
I’d also recommend scaling the frosting up a bit if you want generous filling between the thicker layers and enough frosting to decorate the outside. Hope that helps!
Thanks so much!
I recently used this recipe to make a 13 x 9 inch cake for a family birthday. I have made this recipe before for a layered cake and cupcakes with fabulous results. This time, when making the 13 x 9-in cake, I accidentally grabbed my bag of King Arthur gluten-free “bread flour” instead of my “Measure for Measure”. It was too late in the process when I realized what I had done, so I continued with the recipe using the bread flour. I was pretty certain that I was going to end up with the toughest cake ever, but to my surprise, it was the best gluten-free cake I have made to date. It was very tall, very moist and tender and everyone raved about it. I used the recipe measurements by weight, and baked it to an internal temperature of 205°. It was perfect!
Hi Leslie,
Thank you so much for sharing this! I’m so glad the cake still turned out so well, and honestly, that’s such a helpful accidental test. I love that you baked by weight and checked the internal temperature too. That makes such a big difference with gluten-free cakes.
I haven’t tested this recipe with King Arthur’s gluten-free bread flour myself, so I can’t officially recommend it across the board, but I’m thrilled to hear it worked so beautifully for you in a 9×13-inch cake. So happy everyone enjoyed it!
Hi Chelsea, I really love your GF chocolate cake recipe – it’s delicious!
I wrote it out for myself a couple years ago.
Recently I looked it up again on your website as my latest bake came out quite crumbly. I found your recipe here states 300g GF flour, whereas I had written 240g GF flour.
My question is – did I just write that down wrong and got lucky that it worked well before? Or have you updated the recipe at some point? Would more flour (300g versus 240g) be likely to make it less crumbly?
I have always used half tsp xanthan with the Doves Farm flour (I can’t find flour that includes Xanthan). I’m in UK.
Thank you!