
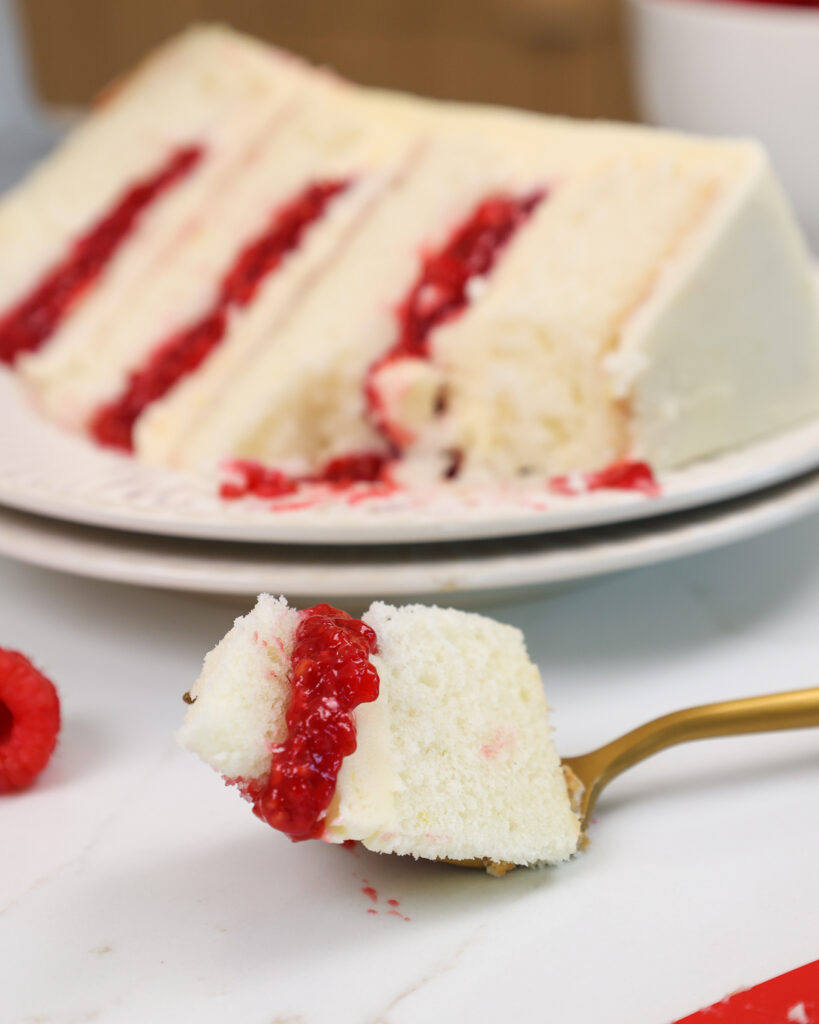
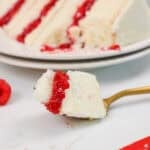
White Chocolate Raspberry Cake
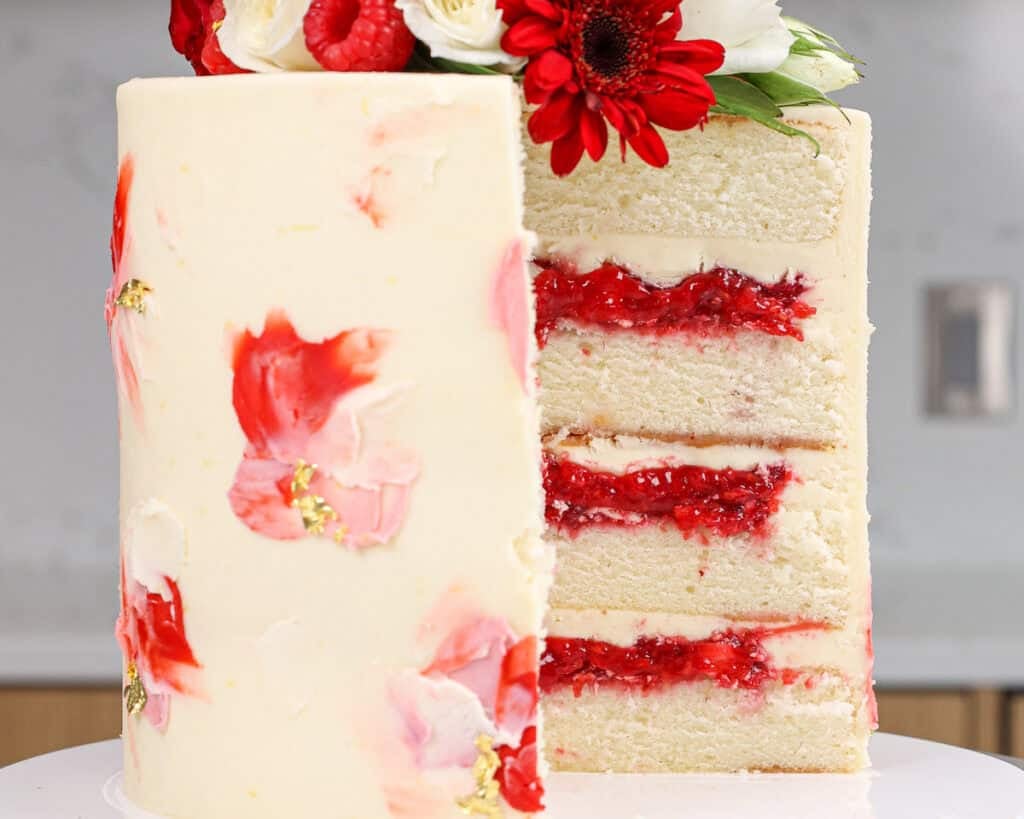
This white chocolate raspberry cake is made with soft, tender white cake layers, a tart homemade raspberry filling, and creamy white chocolate buttercream.
It’s balanced (sweet + tangy), easy to make ahead, and perfect for any celebration! As a bonus, it’s sturdy enough to make tiered cakes with proper support.

This Recipe At a Glance
- Make-ahead friendly: Filling + frosting can be made in advance
- Flavor: Sweet white chocolate + bright raspberry (with a subtle lemon option)
- Texture: Soft, tender white cake + thick raspberry filling
- Skill level: Intermediate (but I walk you through it)
- Best for: Birthdays, showers, weddings, and special occasions
- Makes: 3 (8-inch) layers or 4 (7-inch) layers + filling + frosting
The Raspberry Cake Filling
While the entire cake is delicious, most of the raspberry flavor in this cake comes from its raspberry cake filling!
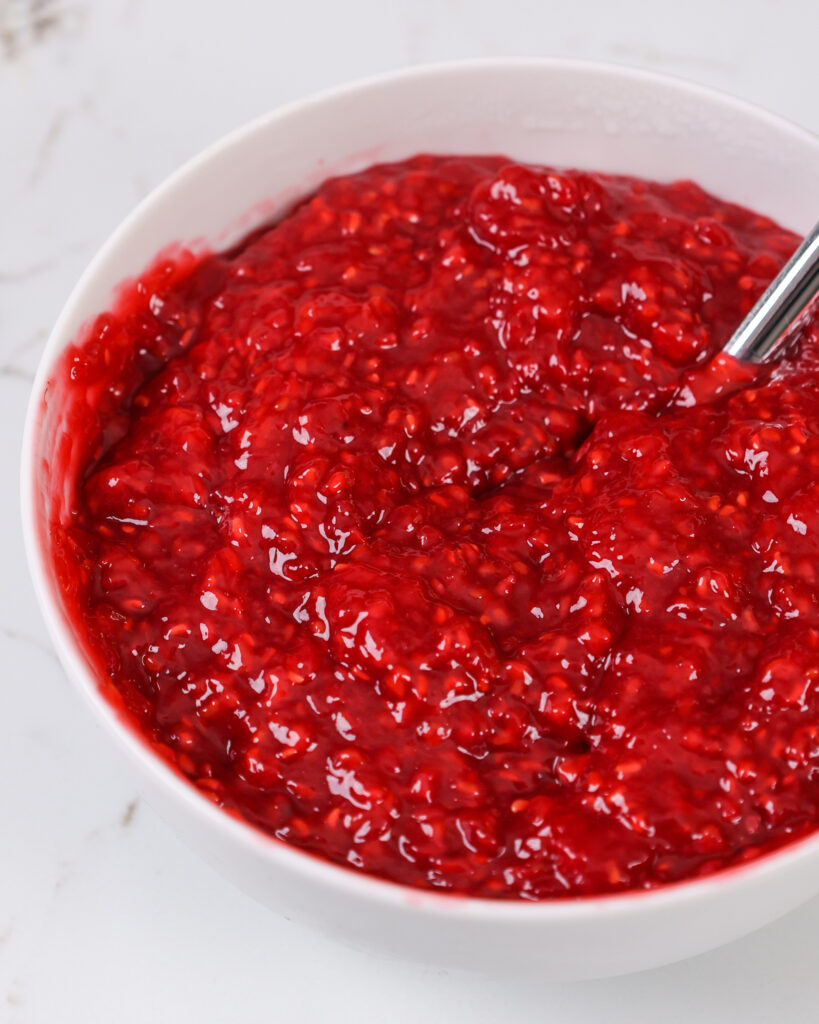
I’m going to be totally honest, it’s a bit of extra work. But it is 100% worth it!!
This raspberry filling is packed with that delicious tart raspberry flavor we know and love, and it has a thick consistency that makes it the perfect cake filling.
Also, if you’ve already taken the time to make the rest of this cake from scratch, there’s no reason to skimp on the filling!
The raspberry cake filling can be made days in advance, so I recommend making it ahead of time. Letting this filling sit also helps it thicken and develop its flavor.
Tips for Making the Best White Chocolate Raspberry Cake
- Properly cream together your butter and sugar with a whisk attachment or hand mixer. It will let you incorporate air into the mixture, which gives the cake layers a fluffy texture.
- Make the raspberry cake filling ahead of time to allow it to properly thicken and develop its flavor.
- Cool the melted white chocolate for at least 10 minutes before adding it to your frosting. Otherwise, it’ll melt the butter in the frosting and turn it into a goopy mess!
- Ingredients at room temp mix together better. Set out any cold ingredients ahead of time.
- Properly measure the flour (spoon into the cup measure, then level). Or better yet, use a kitchen scale to measure your dry ingredients.
- Chill your cake layers in the freezer for 20 minutes before assembling the cake. It makes it so much easier to stack and frost them.
Making This Raspberry White Chocolate Cake in Advance and Storage Tips
I highly recommend making your cake layers in advance and freezing them. It breaks the process up and makes it more approachable and enjoyable!
You can also make the frosting ahead of time, or save any leftover frosting! It can be stored in an airtight container in the fridge for up to a month or in the freezer for up to 3 months.
Be sure to give it a good stir once it thaws to get the consistency nice and smooth again.
This raspberry cake filling can be made up to two weeks in advance if stored in an airtight container in the fridge
A frosted and filled cake can last in the fridge for up to a week or in the freezer for up to a month. The buttercream locks in all the moisture, keeping the cake fresh and delicious!
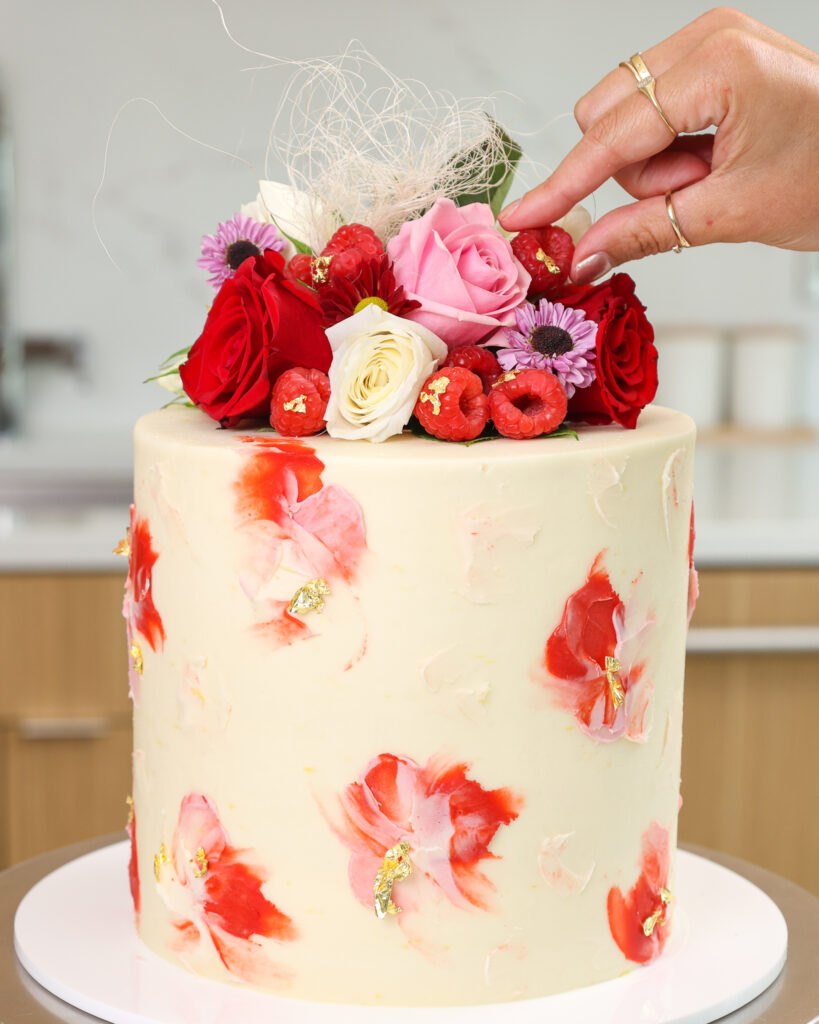
Just wait to add the fresh flowers and berries to the top of the cake until you’re ready to eat it.
Troubleshooting
Why is my raspberry filling too thin?
- It needs to simmer longer to cook down and thicken
- The cornstarch slurry may not have cooked long enough to activate
- If it’s chilled and still thin, warm it slightly and simmer a bit longer
Why is my raspberry filling too thick?
- That’s actually ideal—thick filling won’t ooze out of the cake
- If you want it easier to spread, stir in 1–2 teaspoons of water or microwave briefly, then mix
Why did my cake turn out dense, thin, or gummy?
Most common causes:
- Ingredients weren’t at room temperature (especially butter/egg whites/sour cream)
- Butter and sugar weren’t creamed long enough
- Overmixing once the flour goes in
- Oven temperature is off (an oven thermometer helps a lot)
Why did my cake sink in the middle?
- Underbaked center (aim for a toothpick with a few moist crumbs, not wet batter)
- Opening the oven door too early or the oven temp running low
- Old baking powder
Why is my white chocolate buttercream lumpy (or the chocolate seized)?
This usually happens when white chocolate cools too much and hardens when it hits the frosting.
- Heat the cream + white chocolate together, stir smooth, then cool to room temp.
- Add it slowly to the buttercream with the mixer running so it blends smoothly.
- If your kitchen is cold, let the buttercream sit a bit so it isn’t too firm when the chocolate goes in.
Why is my filling squeezing out or layers sliding?
- Buttercream was too soft, or the layers were too delicate.
- Pipe a thicker buttercream dam, use slightly less filling, and chill between stacking steps.
- Chill the fully stacked cake before your final coat.
Frequently Asked Questions
Can I make this in 2 (9-inch) pans?
Yes. Divide the batter between two 9-inch pans and bake until a toothpick comes out with a few moist crumbs. They’ll be thicker layers, so expect a longer bake time—start checking in the high-30 minute range.
Can I make this as cupcakes?
This batter tends to bake flatter as cupcakes. If you want taller cupcakes, use your vanilla cupcake base, then fill with raspberry filling and top with white chocolate buttercream.
Can I omit the lemon?
Yes. The lemon is subtle and mainly brightens the flavor, but you can leave it out for a more pure white chocolate + raspberry vibe.
Can I freeze the raspberry filling (or the cake)?
- Filling: Yes—freeze airtight for up to 1 month.
- Cake layers: Yes—wrap well and freeze, then thaw in the fridge.
- Assembled cake: You can freeze it, but for best texture, freeze fully frosted and thaw overnight in the fridge.
Can I cover this cake in fondant?
Yes. Use a firm outer layer of buttercream, chill the cake well, then cover with fondant.
Can I use all-purpose flour instead of cake flour?
Yes. Your cake will be slightly less tender, but it will still turn out great. If you want a closer swap, measure carefully (spoon and level) and consider replacing 2 Tbsp of flour per cup with cornstarch.
What can I use instead of sour cream?
Plain full-fat Greek yogurt is the easiest 1:1 swap and gives a very similar texture. In a pinch, you can use buttermilk, but the batter will be slightly thinner and the cake may bake up a bit less rich.
Let Me Know What You Think
If you try this white chocolate raspberry cake recipe, I’d love to hear what you think! Please leave a rating below and a comment to let me know your thoughts.
And don’t forget to tag me @chelsweets and #chelsweets so that I can see your amazing creations!
White Chocolate Raspberry Cake
Equipment
Ingredients
Raspberry Cake Filling
- 3 cups fresh or frozen raspberries 375g
- 2/3 cup granulated sugar 133g
- 2 tsp lemon juice 8g
- 2 tsp fresh lemon zest 5g
- 1/4 cup + 2 Tbsp water, divided 90g – first part added to raspberry mixture, second part used to make the cornstarch slurry
- 2 Tbsp cornstarch 14g
White Cake Recipe
- 3 cups cake flour 360g
- 3 cups granulated sugar 600g
- 2 1/2 tsp baking powder 10g
- 1 tsp fine salt 6g
- 1 cup (2 sticks) unsalted butter, room temperature 226g
- 1 cup carton egg whites or 7 large egg whites, room temperature 240g – can also use 4 large whole eggs
- 1 1/2 cups full-fat sour cream, room temperature 360g
- 2 Tbsp vegetable or canola oil 30g
- 1 Tbsp fresh lemon zest (zest of 1 large lemon) 6g
- 1 tsp vanilla extract or vanilla bean paste 4g
Simple Syrup – Optional
- 2/3 cup water 160g
- 2/3 cup granulated sugar 133g
White Chocolate Buttercream Frosting
- 2 cups (4 sticks) unsalted butter, room temperature 454g
- 2 Tbsp lemon juice 24g
- 2 tsp fresh lemon zest 5g
- 2 tsp vanilla extract or vanilla bean paste 8g
- 1 tsp fine salt 6g
- 7 cups powdered sugar 904g or a 2 lb. bag
- 1/3 cup heavy whipping cream, room temperature 80g
- 1 1/2 cups white chocolate chips, melted and cooled 260g
Instructions
Raspberry Cake Filling
- If possible, make the raspberry filling in advance! The extra time will allow the filling to thicken and develop its flavor. Place 3 cups of frozen or fresh raspberries, 2/3 cup of granulated sugar, 2 tsp lemon juice, 2 tsp lemon zest, and 1/4 cup of water in a saucepan and heat over medium-high heat.
- Stir the mixture until it begins to boil. Lower the heat to medium-low and allow the filling to simmer for 10-15 minutes. Turn off the heat and remove the pot from the stove.
- Pour the filling into a metal strainer suspended over a medium-sized bowl and push the mixture through using a rubber spatula. Use a decent amount of pressure to really get all the liquid through the sieve. You should be left with about 1/2 cup of seedy pulp, which can be discarded or composted. If you don't mind the seeds in your filling, skip this step and leave the filling in the pot.
- In a separate small bowl, make a slurry by combining the remaining 2 Tbsp of water with 2 Tbsp cornstarch. Stir until the cornstarch has fully dissolved into the water.
- Add the cornstarch mixture to the strained raspberry filling and stir until incorporated.
- Rinse out the pot, then pour the filling back into it. You don't want any residual seeds getting into the filling!
- Heat on a medium-high heat and stir constantly during this stage to prevent the filling from burning. Cook until the mixture begins to boil, then reduce the heat to medium-low. Continue to stir and cook for a few additional minutes to let the filling cook down and thicken.
- Turn off the heat and pour the raspberry filling into a separate bowl to let it cool. Cover with plastic wrap and place in the fridge for at least 1 hour, or preferably overnight.
White Cake Layers
- Next, make the cake layers. Preheat oven to 350°F/175°C. Line and grease four 7-inch pans or three 8-inch cake pans with parchment rounds.
- Add 3 cups of cake flour, 3 cups of granulated sugar, 2 1/2 tsp of baking powder, and 1 tsp of salt into the bowl of a stand mixer. Whisk together, then add 1 cup (2 sticks) of room temperature unsalted butter. Mix on a low speed with a paddle attachment or hand mixer until the butter is fully incorporated and the mixture looks kind of like moist sand.
- Mix in 1 cup of egg whites or 4 large eggs on a medium speed until combined.
- Then add 1 1/2 cups of sour cream, 2 Tbsp oil, 1 Tbsp lemon zest, and 1 tsp vanilla extract. Mix on a medium speed until combined. Scrape the sides and bottom of the bowl as needed.
- Divide the batter evenly between the prepared cake pans. I like to use a digital kitchen scale to weigh my pans to make sure my layers bake up to be the same height (if you make 4 layers, add about 450 grams of batter into each pan; if you make 3 layers, add 600 grams to each pan).
- Bake for 32-35 minutes, or until a toothpick comes out with a few moist crumbs. Rotate the pans halfway through to help them bake evenly.
- Allow the pans to cool for 10 minutes, then run an offset spatula around the perimeter of the pan to separate the cake from the pan.
- Place the cake layers into the freezer for 45 minutes to accelerate the cooling process. Once the layers are fully cooled, carefully flip the pans and remove the layers from the pans.
- Use a serrated knife to level the tops and trim the sides to remove any caramelization.
Simple Syrup – Optional
- To make sure these cake layers are nice and moist, make a simple syrup. This is optional, but it really adds to the texture of these cake layers.
- Add 2/3 cup of water and 2/3 cup of granulated sugar into a small saucepan.
- Cook over medium heat, and stir continuously until the mixture just starts to boil. It usually takes about 2 minutes for my simple syrup to reach a boil. At this point, the sugar should have fully dissolved, and the mixture should look clear.
- Remove from heat. Pour into a separate container and cool to room temperature. Set aside.
- If you're making this in advance, it can be stored in an airtight container in the fridge for up to a month. Wait to brush the cake layers with the simple syrup until right before you assemble the cake.
White Chocolate Buttercream Frosting
- While the cake layers bake and cool, make the white chocolate buttercream frosting.
- Beat 2 cups of butter on a low speed for 30 seconds with a paddle or whisk attachment until smooth.
- Add 2 Tbsp lemon juice, 2 tsp fresh lemon zest, 2 tsp vanilla extract, and 1 tsp fine salt, and beat on low.
- Slowly mix in 7 cups of powdered sugar on a low speed. Add 1/3 cup of heavy cream halfway through to make the frosting easier to mix.
- Gradually mix in the melted (and cooled) white chocolate on a low speed and scrape down the sides and bottom of the bowl with a rubber spatula as needed. Pour the white chocolate straight into the frosting (not down the sides of the bowl) to reduce seizing.
- Continue to mix until the ingredients are fully incorporated and the desired consistency is reached. If the frosting seems too thick, add additional cream (1 tablespoon at a time). If the frosting is too thin, add more powdered sugar (a quarter of a cup at a time).
- Stir by hand with a rubber spatula to make the frosting extra smooth. Place half of the frosting in a large piping bag. Cover the remaining frosting with plastic wrap and set aside.
- Note: If you want to make raspberry white chocolate buttercream, mix in either 1/2 cup freeze-dried raspberry powder + 1/3 cup of heavy cream at this point, or mix in 1/2 cup of seedless raspberry jam.
Assembling This White Chocolate Raspberry Cake
- Use a silicone brush to brush the top of the leveled cake layers with simple syrup. Then stack and frost the cake layers on a greaseproof cake board using a dab of frosting to help stick the first cake layer to the board.
- Spread an even layer of white chocolate buttercream on top of the first cake layer (using the frosting in the bag). Pipe a ring around the edge of the cake, then spread the raspberry filling inside the ring. Use half of the filling per layer if you make a cake with 3 layers, use 1/3 of the filling if you make a cake with 4 layers.
- Repeat with the remaining cake layers, then chill the cake in the fridge (30 minutes) or freezer (10 minutes) until the frosting between the layers is firm to the touch.
- Spread a thin coat of white chocolate frosting around the cake using the frosting in the piping bag to fully cover the cake layers. Smooth using a bench scraper, then chill the cake again in the fridge (30 minutes) or freezer (10 minutes) until the crumb coat is firm to the touch.
- Add a second, thicker layer of white chocolate frosting to the cake and smooth using a bench scraper. If you're struggling to get smooth sides on your cake, I share all my tips and tricks in this smooth cake tutorial.
- Then decorate as desired! I chose to color the remaining buttercream different shades of pink and dab them around the cake for a bit of texture. I also topped the cake with fresh flowers and raspberries!
Video
Notes
Recipe Variations
One batch of cake batter makes about 1800 grams or 10 cups. If you plan to use four circular cake pans, add 450 grams of batter to each pan. If you make 3 layers, add 600 grams to each pan. This recipe can also be used to make a sheet cake! One batch will make 2, 9 x 13-inch cake layers that are about 1 inch tall. Bake for 35-40 mins at 350 F / 175 C. I recommend using heating cores if you have them to help large cake layers like this bake more evenly and quickly. You can also make one 9 x 13-inch cake layer that’s about 2 inches tall, but the bake time will be 45-55 minutes at 350°F/175°C. You can also make cupcakes using this recipe. Fill the liners 2/3 full and bake them at 350°F/175°C for 18-21 minutes, or until a toothpick inserted in the center comes out with a few moist crumbs.Making This White Chocolate Raspberry Cake in Advance and Storage Tips
- Make your cake layers in advance and freeze them. It breaks the process up and makes it more approachable.
- You can make the frosting ahead of time, too, or save any leftover frosting! It can be stored in an airtight container in the fridge for up to a month or in the freezer for up to 3 months. Be sure to give it a good stir once it thaws to get the consistency nice and smooth again.
- This raspberry cake filling can be made up to two weeks in advance if stored in an airtight container in the fridge.
- A frosted cake can last in the fridge for up to a week or in the freezer for up to a month. The buttercream locks in all the moisture, keeping the cake fresh and delicious!
- If you cut into the cake and have leftovers, use any remaining frosting to cover the cut section to keep it moist and store it in the fridge for up to a week.
Nutrition
Other Recipes You Might Like:

This is at the top of my to-do list!!! I’m very excited for this recipe! Do you think this will stack well for a tiered cake (6, 8, 10 in)? Thanks for sharing!
Yessss!! This cake recipe would work great as a tiered cake. If you make try this recipe, I’d love to hear what you think of it 🙂
Gorgeous! Love the idea of making my own raspberry! Thanks!
Thank you Heather 🙂 And I totally agree, the filling makes the cake!!
Is the white chicolate buttercream a crusting recipe ? I’m looking for an American buttercream recipe that doesn’t crust
Hi Meme,
This is a crusting buttercream recipe. If you use shortening in place of half or more of the butter, the frosting crust. Hope that helps, happy baking!
I can’t wait to try this cake, it sounds heavenly!! Also, I had a hard time finding raspberry powder for a different recipe a few weeks ago and ended up buying freeze dried raspberries and putting them in a food processor to turn it into powder and it works perfectly!! You’ve converted me to using powder instead of jam or purées in the frosting and I’m never going back, it’s amazing!! I can eat that buttercream with a spoon, the flavor is THAT good!
So happy to hear that Stefanie!! That’s awesome, powders really are the best when it comes to frosting!! I totally agree 🙂
How does this cake recipe work with cupcakes?
Hi Ava,
My cake recipes are designed to bake pretty flat, so it isn’t ideal for cupcakes!
It still works, but they’ll make super flat cupcakes! I suggest just using my vanilla cupcake recipe instead! It’s also delicious, and I highly recommend it! 🙂 Here’ the link: https://chelsweets.com/2017/07/03/classic-vanilla-cupcake-recipe/
Just swap out the buttermilk for sour cream and they’ll be super white!
You can then fill them with the raspberry filling and top them with the white chocolate buttercream 🙂 Hope that helps, happy baking!
i made this cake for my aunt’s baby shower. the cake is super easy to work with! the crust was a piece of cake (ha!) to remove and once the cake was chilled, it was even easier to level off. although, i did find one issue with the flavor of the cake. it is balanced very well, but there was a slight…. dusty taste to it? i’m not quite sure how to explain it, but i also don’t know what it could be from.
Hi Nikki,
So happy the recipe worked well!! I’m not quite sure what you mean by dusty! You do mean dry? Or powdery? Do you think it was from the raspberry powder? or maybe the cornstarch didnt cook out of the rasp filling? Or was it an issue with the actual cake layers? Hopefully we’ll be able to figure out what it is together!!
if i changed all the raspberry parts for strawberry would it turn out the same?
Yup, that actually would work great! You might need to blend up the strawberries though to make them easier to cook down and sift through the strainer 🙂 Happy baking Jess!
what do puls be the difference between using cake flour and using regular flour? can’t wait to make it!
Hi Emma,
Like I mention in this post, cake flour has a lower protein percentage compared to regular all purpose flour. This helps make softer cake layers <3 Hope that helps, happy baking!
Hi I wanted to know if I can freeze the cake after filling and frosting it? Will the filling go bad since there’s fruit?
Thanks!
Hi Farina,
Usually I’d say you can, but because of the fresh fruit in this cake I don’t think it’s a great idea!
Hey! Would you make a strawberry filling with all the same ingredients/steps just sub out the different berry?
Hi Carsyn,
Yup, that’s exactly what I’d do! I think this cake recipe would be awesome with strawberries 🙂 Happy baking!!
can i use swiss buttercream with powdered raspberry in it?
Hi Dammy,
You totally can! Hope that helps, happy baking!! 🙂
I am going to adapt this recipe to a chocolate cake my dad wants for his bday – using raspberry buttercream / filling on the inside, with chocolate cake and chocolate buttercream! Can you tell me if you added raspberry powder to your drip, or only coloring? If only coloring, will probably do a regular chocolate drip. Thanks in advance!
Hi Amy,
That sounds delicious! I just added food coloring, so feel free to use a regular chocolate drip in its place. Hope that helps, happy baking!
Hello! Planning to make this for my husbands birthday. If I were to use six inch layers, would you recommend changing the amount of ingredients (reducing by a particular fraction) Thank you!
Hi Sara,
That’s awesome, this would make an amazing bday cake! It’s annoying, but I’d make 2/3 the amount of batter! I find that makes 3 perfect 6-inch cake layers. Hope that helps, happy baking!
Hi can I just use normal flour instead cake flour?
Hi Kadambari,
You can use all-purpose flour in place of the cake flour, but it will make the cake layers a bit more dense. Hope that helps, happy baking!
Hey I was wondering if its possible to make this cake dairy free and also how did you make the drip on the cake
Hi Ethan,
The drip on the cake is my white chocolate ganache! It’s linked at the bottom of the recipe card 🙂
Making this cake dairy free would be challenging, but you can swap the butter for vegan butter sticks and use applesauce in place of the egg whites. it will be quite a bit denser though!
I also have a great vegan cake and frosting recipe that’s dairy free that might be easier to make and you could add raspberry filling into it! Here’s the link: https://chelsweets.com/2015/05/29/vegan-almond-birthday-cake/
Hope that helps, happy baking!
We made this for my daughter’s birthday – it is delicious! I especially love the raspberry filling – so good. We used 9″ rounds (2) and halved the raspberry filling recipe because we only had one layer to fill (still had plenty of filling left for decorating the top). The cake is dense so my daughter did not like that – she prefers fluffier cakes, but the rest of us think it is wonderful! Yum!
Hi Melissa,
So happy to hear that! I’m sorry your daughter wasn’t a fan of the slightly denser texture of this cake, but I’m glad to hear you guys love it 🙂
Could i use freeze-dried raspberry instead of Raspberry powder? Would it change the recipe in any way?
Hi Sharat,
You can, but you need to grind / pulverize the raspberries to break them up into a powder to evenly flavor the frosting. otherwise you’ll just have vanilla frosting with crunchy bits of freeze dried raspberries :/
I’ve gone to make this cake and it’s come to a total of 904g of BUTTER?! I don’t usually use that much is there a reason for this or an alternative or do I really need to use that much?
The cake layers don’t have a ton of butter in them, so I’m assuming you’re mostly worried about the butter in the frosting! This is an american buttercream, which does use quite a bit of butter and powdered sugar. This cake ends up being pretty big (feeds about 24 people), so I don’t really think of it as being that crazy! But if you want to make a less sweet frosting that uses less butter you can make a batch of my swiss meringue buttercream. Here’s the link:
https://chelsweets.com/2020/04/02/swiss-meringue-buttercream-frosting/
Hope that helps, happy baking Mackenzie!
This cake looks so good! I’m so exited to make it! Hope it turns out good tho ?
Thanks Livity!! I hope your cake turned out wonderfully 🙂
Hiya, I leave and can’t wait to try this recipe!! I was wondering if it has to have sour cream in the batter and if it would affect it if I removed it?
Have a lovely day?
Hi Rachel,
This cake recipe definitely needs the sour cream to turn out properly!! If you don’t want to use sour cream or don’t have any on hand, you can also use full fat yogurt, buttermilk, or whole milk in its place. But some sort of dairy def needs to be added. Hope that helps, happy baking!
Does it need to be full fat sour cream? How should I adjust the measurements to make three 9” cakes?
Hi Kaitlyn,
It tastes best with full fat sour cream, but you can use whatever type of sour cream you have on hand. I’d make 1.5 batches of batter to bake 3, 9″ cake layers!
Hey chels i want to make this recipe for a 7” with 3 layers, how should i do that? ?
Hi Tal,
So sorry for the delayed response! You can make 3, 7″ cake layers with one batch of batter, but they’ll take longer to bake! You may want to add a flower nail to the center to help them bake a bit more quickly, or use baking strips to minimize the caramelization around the layers. They should take about 38-40 minutes to bake. Hope that helps, happy baking!
I’m making the white cake in this recipe along with your Swiss meringue butter cream for my sons birthday tomorrow. I’m preparing it now!! I hope everyone enjoys it!!
That’s wonderful, I hope he loved the cake!! Happy baking Connie 🙂
Hi, I’m making this cake for my sister in-law’s wedding, and I’m wondering your opinion about whether the cake would taste yummy and raspberry-y enough if I didn’t end up adding the raspberry powder for the frosting and just did the raspberry filling and buttercream frosting? I’m sure it’s tricky to answer since you’ve probably never done it that way, but let me know what you think. Maybe I can add the raspberry frosting and filling to the center and then have the frosting without the raspberries on the outside of the cake. Thanks so much! I lovvve watching your Instagram videos!
Hi Makena,
That is a hard question to answer, mostly bc people have different opinions on what is raspberry enough 😛
I think inverting the frosting (rasp frosting inside, plain white frosting outside) would work great, or if you want to keep things more simple this cake would still taste great without the raspberry frosting.Hope that helps, and that your sister-in-law’s wedding cake turns out great!! Happy baking!
I just made the cake batter and OMG! ? it was soo freaking delicious! It came out nice fluffy and flat top but i wanted to try it so i cut a thin slice from the whole top and omg this has to be my go to vanilla cake recipe. I did adjust the sweetness instead of 3 cups of sugar i used 2 cups and even that still tasted sweet but cmon you dont eat cake to not taste at least some sweetness. Ive been baking a lot of different recipes and this one and the vanilla cake from “preppy kitchen” have to be the most moist fluffy cakes ive made by far. And I must say that cooking with sour cream gives the cake the most flavorful moist creamy and tasteful cake by far!
I am so happy to hear that Christina! Haha I love trimming off the tops and eating them too!!! Thank you for sharing, happy baking!
Love this recipe. Just made 2 batches of cake batter which made 3 x 7” square cakes and 24 cupcakes. The cupcakes were so light and moist and a beautiful flavour. Can’t wait to cut the big cake.
Is the additional heavy cream in the buttercream to offset the raspberry powder added after the crumb coat? Would I need to add the heavy cream if I were omitting the raspberry powder and just having it as a white chocolate buttercream? Thank you!
p.s. I’ve already made this cake as written for Easter/my grandmother’s birthday and it was a HUGE hit with my entire family 🙂
Hi Sarah,
That’s so great to hear! And yes you are totally right!! You don’t need to add in the extra heavy cream if you just want to make white chocolate buttercream 🙂 Hope that helps, happy baking!!
Is it okay to swirl the filling in the batter?
Hi Byanka,
I haven’t tried swirling the raspberry filling into the batter, but I’m not sure it would work! This filling firms up a lot, and has a consistency of a thick jelly once it’s cooled! If you swirled it while the filling was still warm it might work though!
Hey! I made the cake this weekend for my baby brother’s 15th birthday, (he requested raspberry), and it turned out amazing!
Thank you!
So happy to hear that Fatima 🙂 thank you for sharing!!!
How should i adjust the recipe for 3 8-inch cakes?
It’s actually exactly the same! Just divide one batch of batter evenly between the pans and bake for 33-35 minutes. Happy baking!
Can i use self rising cake flour for this?
Hi Marlee,
You can, just omit the baking powder and salt that this recipe calls for <3
@Chelsweets,
Perfect! Our finely milled flour in the UK is the closest to cake flour but already has raising agents. Thanks so much for letting us know 🙂
thank you thank you thank you!!!! 🙂
any time Marlee ???
I just made this cake it was so good!! I don’t think my filling got thick enough though. I made it several days in advance and let it sit as recommended but while assembling the cake I felt as if it needed to be thicker. I will try making it again some time and see if I can do that. But the recipe was delicious and such a good cake!!
So happy to hear that Abby!!
If the raspberry filling seemed a little thin I’d recommend letting it cook down a bit more next time you make it, or adding a bit more cornstarch into your slurry. Hope that helps, happy baking!
Just made this vanilla cake and OMG so fluffy and moist. So delicious. I would just reduce the sugar to 2 cups instead of 3 but I love it. Thank you so much. I am thinking of doing a multilayered cake for my daughter birthday. How much batter you think I might need for a 10 inch cake? And how long will it take to bake?
Hi Marian,
So happy to hear that! I’d recommend doubling this cake recipe to make a 10″ layer cake. For large cake layers, I suggest adding a couple heating cores to the center (these are the ones I use: https://amzn.to/2NQ0lVZ), to help the layers bake more evenly and quickly! The bake time can vary based on how tall of cake layers you are making, but I find it usually takes mine about 40-45 minutes. Just keep an eye on them after about 40 minutes to make sure they don’t overbake. Hope that helps, happy baking!
Thank you so much ?. I did the Raspberry filling and it tastes delicious. I am only concerned that I felt it is very thick. Do you think it will be hard to spread on the frosting? I was thinking of piping it and then trying to smooth it with spatula. Or is there a way to make it a little thinner?
Hi Marian,
It does get super thick, but you want it to be so that it doesn’t ooze out of the cake! If you want to thin it out you can add a couple teaspoons of water or heat it up in the microwave. Either will thin it out and make it easier to spread or pipe. Hope that helps, happy baking!
Hello. I would love to attempt to make this but do you have the measurements for a 3 layer- 9inch and a 3 layer- 6inch cake size?
Hi Barbara,
Sadly I dont! but I’d suggest making 1.5 batches to make 3, 9″ cake layers, and 2/3 of a batch to make 3, 6 inch cake layers. Hope that helps, happy baking!
Hey! I’m about to make this for my friends 20th, I found you on tiktok and I love you! Haha, I can’t find raspberry powder anything else I can use?
That’s awesome, you’re too sweet! You can use a bit of raspberry jelly or jam, just be careful not to add too much or the frosting cake break. Hope that helps, and that your cake for your friend turns out great!!
Could I cook this in a sheet pan and then cut out my rounds? Hoping this will work, just unsure on cooking time/temp!
Hi Emily,
You could, but you’d have a lot of of leftover cake scraps! For sheet cake layers, I suggest adding a couple heating cores to the center (these are the ones I use: https://amzn.to/2NQ0lVZ), to help the layers bake more evenly and quickly! The bake time can vary based on how tall of cake layers you are making, but I find it usually takes mine 40-45 minutes. Hope that helps, happy baking!
Can I use all purpose flour instead of cake flour ?
Hi Lauren,
You can use AP instead of cake flour, but the texture will be slightly less fluffy <3 Hope that helps, happy baking!
No worries. i went with 8 inch and oh my the cake was so delicious. question, can I use buttermilk in replace of the sour cream?
That’s great Barbara!! And for sure, this recipe would be great with buttermilk in place of the sour cream 🙂
Thankyou so much for your reply, I want to try with buttermilk and I think I just might today because I could literally eat your cakes everyday haha you have the best recipes and I really appreciate you sharing.
haha np! Sounds like a great way to spend MDW!! Happy baking <3
Hey! I used the flower nail in the center when I did the 10 inch but still it cracked in the middle and took more than an hour to bake. I think I should reduce amount of batter. I baked it at 325
That is a long time! I’d also suggest using less batter next time to help that layers bake more evenly and quickly. Also for 10 inch layers I usually use 2 or 3 flour nails <3
Hey – looking to cook this from New Zealand 🙂
sorry for the silly question but if I’m cooking 3 layers can they all go into the over an the same time? Or do they need to be cooked individually? Any particular spot in the oven they should be?
So I finally made the birthday cake and was a big big hit. Was delicious and super moist. Now my friends are asking me for a vegan one. Do you have a recipe for a vegan cake and frosting ?
Can you ad the powder into the cake batter to make a raspberry flavored cake??
Hi,
I’m still in the process of assembling the cake at the moment, but wondered if this recipe would make a good wedding cake tier?
Any suggestions about coloring the raspberry buttercream? I’m making this cake for my teen son’s birthday and pink just isn’t his thing…but raspberry is. I’m wondering if you’ve added gel coloring to the raspberry buttercream before or if I should just invert the raspberry and white chocolate buttercreams.
Can you use milk instead of sour cream in the cake?
Too sweet and dense. What did I do? Though I used 2 cups sugar.
I think I did something wrong. My cakes came out thin and dense.
Hi, this recipe looks amazing! Can’t wait to try it. Is it possible to use this cake and cover it with fondant? I’m worried it would collapse.
Hi! I had baked this cake a while back and it was delicious!! But this time since I dont have sour cream, I wanted to know if there is any substitute for it.
Thanks a ton
Hi—I made the raspberry filling ahead, and now as I prepare to assemble the cake, it seems too soft. I’d hate to use it and have it come out. Can I thicken it more?
Hi, I love your videos and recipes! Do you think I could use whipped white chocolate ganache instead of the buttercream? If so how much?
Hi, I finally made the cake and the filling and icing are delicious! But the cake itself was rather dense and had a weird taste. I don’t know if I did anything wrong!
Hi, is it possible to split the butter cream partially with butter and part cream cheese?
hi! i was just wondering, i’ve made some berry compotes before and they aren’t very thick almost liquid and i’m making this birthday cake for my friend and i was just worried if it’s not thick does it seep through the cake? thank u, u are my go to person for recipes, they are always delicious?
I made a small wedding cake with a few variations. I did strawberry instead of raspberries and it turned out amazing! changed the white chocolate buttercream to your vanilla buttercream. Everybody loved it! Moist, delicious cake with the filling giving it that little extra something. Just beautiful
So I just made the icing ahead of time and put in the frig over night… it is all hard now, will it be ok and back to normal after it comes to room temperature?
Hello! I was wondering how I would need to adjust the recipe for a 3 layered 6 inch cake? Thanks!
I dont have access to carton egg whites in India. How many whole eggs should I use for this recipe?
4 large eggs!
Hi,
I wanted to make smaller cake so will recipe work the same if I divide the ingredients in half?
Hi. I am going to be making this. I was wondering if raspberry jello would work? Just the powder.
Hi I am baking my daughter’s wedding cake, a five tier with each tier two layers, and will put the raspberry filling between the layers. Do I also try to cover the filling with icing or just have jam between the two layers? Her wedding is on a Friday, how many days in advance can I assemble, fill, and frost the wedding cake so I am not up all night before the wedding??? I am alo making the groom’s cake, a two tier with each tier two layers so I want to do it in advance.
so uuhh odd question but I am having trouble sourcing Raspberry powder- would Raspberry jello powder be ok?
I baked this cake for a dear friend’s birthday. It was so good, everyone loved it. I am truly sold on your recipes. I am an older lady that has just taken up baking cakes. Your website is absolutely the best!! Thanks for all the tips you have given me. I am a great cook but not so much on baking, so I am working on that thanks to you!
I want to make this for my Fiancé’s birthday this weekend but I don’t want it pink. Could I color the raspberry frosting and what would be your recommendation?
I am making these in cupcake form since I’m not quite up to the assembly process yet. Do you think the consistencies of the raspberry frosting and white chocolate frosting are close enough to put in the piping bag together as a swirl? Or should I keep them separate?
Oh dear. I added the vanilla to the melted white chocolate now I know how chocolate seizes I added some whipping cream and warmed it up and got the chocolate back to liquid but now it looks very yellow wondering if I should add this to the icing
This icing is so smooth and delicious!!! Wow??????
This icing is so smooth and delicious!!! Wow??????
Hi!!! Love all of your recipes. I cant wait to try this next one.
Would i be able to use Ghirardelli melting white chocolate instead of the white chocolate chips for the buttercream?
Can I make this cake in two nine inch cake pans? I dont seem to have any other available pans
Could I make this into cupcakes with filling?
@Chloe Sweatman, I have used this recipe successfully for cupcakes many times.
Thank you for sharing Evangelina 🙂
Can I ude the reciprokke to bare it in 2 tier cake
Make**
This was great!!
I made this cake for my daughter’s birthday party. It was absolutely amazing. Everyone at the party thought we bought it from a bakery. We have a tradition of making a tie dye cake every year for her birthday. I was able to accomplish that with this cake as well. I separated the batter into multiple equal bowls and put different colored food colorings in it. I then poured the colors in individually without mixing them. It turned out perfect and the raspberry filling helped the colors pop! Thank you for sharing the impressive recipe!
I cooked the raspberry liquid into the slurry for the recommended amount of time but it is not clear and does still taste of cornstarch. I have chilled it, should I cook it some more…. What do you recommend?
@Beverly Beal, I went ahead and cooked another 10 minutes on low, and added 1/4 cup of my home made raspberry jelly. This seems to have cured the chalky taste left from the slurry. I hope this helps others. Perhaps I did not have quite enough of the raspberry juice. And I did not cook it long enough I think, because I was too afraid of ruining the sauce after I worked so hard to de-seed the raspberries.
This looks awesome,wondering if I could make this in 9×13? Slice in half and then add filling
Hey! I’m so glad I came across this recipe! I am wanting to use it for my son’s 1st birthday but was curious if the white chocolate in the buttercream would make it hard to use decorating tips with it? I’d like to use food coloring and like the grass tip.
Also – I am thinking about making this cake with the outer layer as just straight white chocolate butter icing (not so much to do with the flavour, but because I prefer the colour) do you think it would still work, flavour-wise?
One final question – I am using 7 inch wide tins….what proportion of flour etc would you use for this size?
Thank you x
Can you use three 9 inch pans rather than the 8 inch?
Hi. Is the oven temperature for a fan oven? Thanks. ?
This looks super amazing. I am wanting to colour the white chocolate frosting that goes between the layers and i have gel based colours. Will that be ok? Or would that make the white chocolate in the buttercream sieze up?
Hi! I just saw the recipe for your colored ganache drip and I think I’m going to try it. Did you add the raspberry powder to the ganache?
IF I DONE THIS WHITE CAKE RECIPE ABOVE FOR 6′ PANS, AND I FILLED 4 6′ PANS, COULD I MAKE 12 CUPCAKES WITH LEFTOVER BATTER?
Has anyone tried veganizing this recipe?
This is a great cake recipe. I suggest using King Arthur Cake flour, and increasing the amount of vanilla.
I’m making a cake for a 60th party and it will be decorated with fresh flowers. How many hours can this cake stay out of the fridge with the raspberry filling ?
Can I double this recipe in a 5quart mixing bowl?
You said you made raspberry colored ganache for your drip as well, but it looks like there’s two separate alternating drip colors as if parts of it were the actual raspberry filling thinned down?
I was thinking of decorating this cake with fondant, can I do that. I am worried that I may sweat if I cover it with fondant. Please advise?
How do you think it would turn out if I omit the cornstarch from raspberry filling and combine it with the white chocolate buttercream as one filling?
Hi Chelsea I have done the raspberry filling but it a bit runny I followed the instructions but the only this I did is mix the corn flour with a little bit extra water as I forgot to half it. What kind is consistency shoud it be as I don’t want it running through my cake. Thank u
This cake recipe was absolutely delicious! The egg whites and sour cream make all the difference. I found that an easy way to put the raspberry filling in the cake was to spread it on baking paper in a disc the size of the cake and put it in the freezer for a little bit. I could just flip it onto the cake and it came off the baking paper pretty easily.
Hello!
I’m actually working on making this cake now!
Since the cake is less dense.. do you have a problem with it holding up? Did you use sticking down the center?
Thank you!
I am making a wedding cake and need to make 3 layers, 1 inch in height and 12″ round. How many batches of the batter and filling would I need?
Would you make the same amount of buttercream for a 6 inch cake?
I made this cake for a grad party. It is very sweet. It has the taste/consistency of an angel food cake. Very tight sponge. I’m afraid to frost it. I’m hoping the raspberry cuts through the sweetness. I did reduce the sugar some but I would reduce it much more if making it again.
I have a blackberry cake that I would like to do the drip icing on like you have on this one. However it has a creamcheese frosting. Will the white chocolate ganche w/ blackberry powder work?
I made this cake for a bithday last weekend and it’s a really nice recipe. Loved the cake taste and texture, almost a pound cake. Raspberry filling was killer and will be my go to recipe. The icing was tasty and fluffy but I didn’t get much white chocolate flavor. I looked up a few other white chocolate buttercream recipes and they all had similar ratios. Not sure what you could do to get more of the white chocolate flavor. I made 1.5x the recipe for three 9″ cakes.
First of all this cake is soooooo good. I make it all the time. My question is, could I add rainbow sprinkles to the batter?
I am in the middle of making the white chocolate raspberry cake. However I can no longer get to the recipe on your website. HELP! What happened? I can only see about the first 4 or 5 sentences and then a bunch of comments. Thanks for your help.
Pat C.
I can’t see the recipe, this is one of my favorite and I’m unable to see it…
Hi,
The cake flour I got seems to be self raising cake flour..should I still put baking powder?
First of all.. this is my favorite cake recipe I use it quite often.. my question is, can I add lemon extract, juice and zest to make it a lemon cake?
Has anyone played with making this gluten free? My favorite gf flour is King Arthur and I’m thinking about trying it…
I saw your standalone recipe webpage for the white chocolate buttercream when trying to figure out at what temp to add the white chocolate, and wished I had known about the ganache technique! My frosting was a little chunky after adding the melted white chocolate, so if anyone is concerned about that, read the standalone recipe! (Or maybe Chelsea will add the technique to this page!)
Hi I am going to make this cake on the weekend could you give me some idea on the height of the finished cake please. Thanks Cindy
Hi. I recently made this beautiful cake. All flavors compliment so wonderfully together!! My only question is, my cakes ended up being very dense. Tough. I baked (toothpick tested), cooled, refrigerated for 2 days (covered), then assembled.
The only thing I can think of is it took wayyy more than 7 eggs to get 235 grams of egg whites ?
Your thoughts would be greatly appreciated.
WHat bench sraper do you use?? I need a tall one.
I think all your ideas are wonderful your cakes are beautiful. The only reason I don’t make your cakes is because you use cake flour. Every time I buy it it just taste like a box cake mix. It’s not the same as regular flour. When comparing cake flour cakes to all purpose flour cakes there’s just no comparison for me. I so wish your recipes used all purpose flour but I understand why you use it. For the texture. But for me flavors number one. I know most people probably can’t tell the difference but for some reason I can. But I come here on your site nearly every day because I love your ideas and all your other recipes. Even your cake recipe is good I just don’t like that box cake taste which isn’t your fault. It’s just the cake flour.
My new go-to recipe – I made this cake for my sister’s bridal shower and it turned out perfectly! I love the true white colour. It does not rise much and is denser than a normal vanilla cake, but it’s soft and moist at the same time. It tasted amazing and everyone raved about it!
Hi! I’ve been trying to find what elevation you live at. I just made this cake and it completely sunk in the middle. How do I adjust for altitude? I live at 6000’. Thanks!!
I can only find self raising cake flower; could I use this and leave out the baking powder?
I have made your White Chocolate Raspberry Cake about four times. It is very popular with my family and friends! Everyone requests it for our special occassions! It is absolutely delicious!
I did the raspberry filling what is amazing, frosting as well. I usually bake, but the cake sponge didn’t turned out so well 🙁 it’s not dense at all, it’s like a finger thick 🙁 what did I do wrong???
This is my absolute favorite white cake recipe. SO SO GOOD. Flavor and texture are excellent.
I used a different white cake recipe (had layers in freezer) but your white choc bc and raspberry filling were amazing! For the filling I used about half the cornstarch, made a damn with frosting and had no leaking issues.
Can I put the raspberry filling in freezer for a few weeks?
Would this cake and icing work being covered in fondant ?
Hi Chelsey,
I can’t wait to try this cake, it looks gorgeous!!
I’m wondering how many cups of batter this recipe makes? I’m experimenting with some new deep 6” cake tins & the right volume!
Thanks ?
Hi Emily,
Thank you! This recipe makes about 10 cups of batter. If you’re looking for a great guide on volume of different sized pans/how much batter you need, I have a cake batter calculator that I use all the time that can be super helpful! Here’s the link: https://chelsweets.com/how-much-cake-batter-per-pan/
Happy baking 🙂
My son requested a white chocolate raspberry cake for his wedding and this looks like it would be perfectly light to make a tiered cake! I would love your input on the flower/design they requested – if you can email me so I can be in touch with you – that’d be great! I’m going to do a practice run this week!!
Hi Gina,
This cake recipe would be delicious as a wedding cake!! I’ll email you <3
I made this for a friend’s birthday. It was one of the absolute best cakes I’ve ever made. The cake was so unbelievably fluffy and the hint of lemon really made it perfection.
Hi Alexis,
I am so happy to hear that!!! And right?!?! I swear the hint of lemon really ties it all together 🙂 Thank you so much for sharing!
I was really looking forward to this recipe because of how decadent the cake sponge looks but mine came out a bit dense even though I measured the ingredients on a scale and used cake flour. 🙁
I also found cake to be a bit too sweet for my palate. Would using 2 cups sugar work instead of 3 keeping the rest of the ingredient ratio same?
Hi Aisha,
I’m so sorry to hear that!! My only other guesses as to why the cake layers could have turned out dense is that maybe some of the ingredients weren’t at room temperature, or that the butter and sugar weren’t creamed together for long enough? Hopefully it’s one of those, and next time it’ll turn it just as amazing as you’d hoped!! <3
Would the cake turn out okay if I used 2 cups sugar instead of 3 keeping the rest of the ratio the same?
Hi Aisha,
You can definitely use 2 cups of sugar and keep the ingredients the same! The cake layers will be slightly less tender but it will still taste great <3 Happy baking!
This cake was amazing! Each part was, in itself, perfectly flavored, but when assembled together, oh my!!! My daughter said it was the best cake I’ve ever made!!! I made it for a High School Graduation party. I decorated it with fresh flowers. It was beautiful!
Thank you for sharing this recipe and for all of the tips to make it perfect!
So happy to hear that Charlotte!!! I really love this cake recipe and it makes me so happy to hear you all loved it too 🙂
On my first attempt, the result was delicious! The finished cake did not look much like the lovely picture, however. I used 3 -6″ pans and one 7″ pan to bake the layers, planning the 6″ for one birthday celebration and the 7″ for the second. The cake is very soft and the layers were almost 3″ tall. When stacked, the weight of the layers pushed the raspberry filling out the sides, despite the buttercream ring. I gave up on three layers, and put the first layer in the freezer for 10 minutes before adding the second. Also, I used long bamboo skewers to keep the layers from sliding off one another. By the time I was done, the frosting was a mix of the white chocolate buttercream and raspberry filling… interesting and tasty. Next time, I will try more chocolate in the buttercream and thinner layers, definitely freezing between stacking! Open to other suggestions if you have them!
Hi Stephanie,
While white chocolate buttercream mixed with the raspberry filling does sound delicious, I’m sorry to hear you ran into these issues!! It sounds like you did all the right stuff.
Is there a chance your kitchen was warm, or that your buttercream might have been a little bit soft? I think your idea to add more white chocolate to the buttercream should help thicken it up. With 6″ cake layers you may also need to do either a double ring of buttercream, or use less filling (which is never fun, the filling is my favorite part!!). I hope that helps, and that the next time you make this recipe turns out exactly how you hope 🙂 Happy baking!
The photo shows four layers of cake. I’m planning to do 4 7” rounds (baking two at a time then freezing). Do I need to multiply the cake batter recipe? Frosting recipe?
Hi Julia,
One batch of this recipe makes 4, 7-inch cake layers or 3, 8-inch cake layers, and enough frosting to fill and cover a cake that size, so you should be good to go <3
Hi Julia,
Apologies for the confusion! I updated this recipe in June 2022 and the cake is now made with white chocolate buttercream rather than raspberry white chocolate buttercream. I wanted to make this recipe easier to make and more accessible, and I know finding freeze-dried raspberry powder can be difficult and it’s an expensive ingredient.
If you want to make the original white chocolate raspberry buttercream that the recipe card included, mix in either 1/2 cup freeze dried raspberry powder + 1/3 cup of heavy cream or mix in 1/2 cup of seedless raspberry jam once the frosting is fully made.
I’ve added a note into the recipe card explaining this too to help avoid confusion about this in the future. Hope that helps, happy baking!
I made this cake layers tonight. I cooked the cake at 325 for 42 minutes and I had to add 25 minutes, because the middle was still raw. Now I’m afraid I over cooked it. Any suggestions?
Hi Tasha,
That is wild!! Do you have a full-sized oven? Did you make the cake layers in a different size than the recipe calls for? My only though on how it could take that long to bake is if the cake layers were either crowded in the oven or there was more batter in the pans than I had in mine.
If you think the cake layers might be over-baked, I’d recommend brushing them with simple syrup! It’ll add moisture. Heat 1/2 cup of water and 1/2 cup of sugar in a saucepan over a medium high heat just until the water starts to boil. Stir it as it heats, then let it cool and brush it over the leveled cake layers. That should work like a charm!
@Chelsweets,
I used two 8 inch pans, my mistake. It make sense it would take more time to bake when only using two pans, more batter is in each pan. I did make the cake again and OMG it’s so good! Thank you all the great recipes!
Hi Tasha,
Ah that makes sense!! And yay!!! 🙂 I’m so happy to hear that!!
Hi I love the sound of this. Can you do same cake and filling but cover in fondant?
Hi Raewyn,
You can totally cover this cake in fondant. Just be sure to add a decently thick layer of frosting to make sure all that filling stays in place. Happy baking!
Hi I’m planning on making this cake this week. Can I use caster sugar in place of granulated? Does it make a difference to how it turns out? Thanks
Hi Katie,
While caster sugar and granulated sugar are not exactly the same, they can be swapped 1:1 in most baking recipes. Caster sugar is slightly finer and dissolves more easily, but in my experience, this doesn’t affect most baking recipes if swapped with granulated sugar. Hope that helps, happy baking!
Can I swap the sour cream for buttermilk ? Same amount or different amount ?
Hi Liv,
You totally can! You can swap the sour cream for buttermilk in a 1:1 ratio. Hope that helps, happy baking!
Hello,
I’m planning to make this for my best friends birthday, very excited. I am in love with how you decorated it and I want to try that out. What did you use for the center of the flowers you “drew” on? Can’t quite tell what it is.
Thanks in advance!
Hi Leidy,
Love that, I hope you that your best friend loves this cake!! Great question – I used a palette knife (like these: https://amzn.to/3NiHyzW) to kind of scrape on the frosting flowers on the side.
I did the red and white frosting swipes separately, then I kind of blended them together with a few extra swipes and added a little bit of gold leaf. Hope that helps, happy baking!
I made this cake yesterday for my friends birthday and it was a hit. Unfortunately, I seized the chocolate and it was beyond saving, so I had to go with your buttercream frosting. I LOVED the cake! The cake it self was amazing, and I did not use the simple syrup and don’t think it needed it. So glad I came across this recipe!
Hi Maxine,
That’s a bummer that your chocolate seized, but I’m so happy to hear that the cake turned out amazing!!! Thank you for sharing 🙂
I just made this cake and wow!!! This is hands down the best cake ever. It’s light, moist and fluffy but not overly crumby. The flavor is sweet but paired with raspberries makes it incredibly good! 400/10 recommend this recipe, You won’t regret it! I’m going to post the cake it made to my ig account. Can’t wait to share it with everyone.
Hi Jennifer,
Yay! I’m so happy to hear you loved this cake recipe 🙂 It’s one of my favorites!!! Thank you for sharing!!
My daughter attempted this cake. I don’t know where we went wrong but they didn’t cook at all and then they looked done, just a couple of crumbs on the toothpick when hot but as they cooled, they turned in to a goo. Any ideas of what we could have done wrong?
Hi Nellana,
I’m so sorry to hear that! Was the oven set to the right temperature? Does your oven run a bit cool? Were the ingredients all at room temperature when the batter was made? Those would be my top guesses as to what might have gone awry!
When do you add the simple syrup?
Hi Michelle,
Great question! I usually add it right before I assemble the cake. Hope that helps, happy baking!
I stumbled on this recipe while looking for a cake with white chocolate. I think this is one of the best cakes I’ve ever made. The combo of the lemon in the different components, with the fresh raspberry, and white chocolate is amazing. I made it for some European friends, who usually shy away from “American style sweet” and they all loved it too. This is a winner!
Hi Kelli,
I am so happy to hear that! 🙂 Thank you for sharing, your comment put the biggest smile on my face today!!
Can I add cream cheese and still be firm ?
Hi Lissette,
Do mean can you use cream cheese in frosting? You can, as long as the frosting can hold its shape! You can swap out a half cup of butter for cream cheese. Hope that helps, happy baking!
Can this be made with an egg replacement?
Hi Laura,
These cake layers cake be made with an egg replacement. I’d recommend using a vegan egg replacer like the one made by bob’s redmill or using 4 flaxseed eggs. Hope that helps, happy baking!
Really exited to try making this cake for my sons birthday! Just curious though with this white cake mix recipe how many layers does it make? 3 or 4?
Hi Alesia,
I hope it turns out great!! This recipe cane be used to make four, 7-inch layers or three, 8-inch cake layers. Happy baking!
Hi. Can I make strawberry filling for this or does raspberry just taste better with it? Thank you!
Hi Sonya,
Great question! You can totally make a strawberry filling for this cake, that would be delicious too 🙂 Hope that helps, happy baking!
Can you please tell me HOW you made those beautiful markings like flowers in two tone pink on the cake? Is that the “dabbed” you talked about? With what, how? I think that finishes off the cake so beautifully, it makes it look so classy? Just BEAUTIFUL. Then I’m assuming that’s edible gold in the middle of the flowers on the sides?
Really wish I could make this for my daughter for her 50th…
Do you think it would work with 2 – 9″ heart shaped cake pans, and I made 4 layers?
Thank you!
Hi Donna,
You are too sweet! That is exactly what I did, I show the process a little bit better in this short video: https://www.instagram.com/p/CemCzXJJUyV/
I used a small offset spatula to swipe different colors of buttercream together, and blend them a tiny bit before adding on some edible gold leaf. If you make 9-inch heart shaped cake layers, I’d recommend making 3 layers! Otherwise the layers will be really thin. Also, the bake time will be a couple minutes shorter with 9-inch cake pans.
Hope that helps, and that your daughter’s 50th bday cake turns out amazing!! 🙂
The flavor of the cake just on its own is amazing ? one of the best white cakes I have ever tasted!! I did the raspberry filling but did cream cheese icing, per request. The filling is such a gorgeous color too!
Hi Cat,
You are too sweet, I’m so happy to hear that!!! 🙂 That sounds like an amazing combination!
I’m excited to try this recipe! Is it ok to omit the lemon and lemon zest from the recipe? I really just wanted pure white chocolate and raspberry taste. Or is it mandatory, like for the raspberry filling?
Hi Lindsey,
Great question! You can totally omit the lemon and lemon zest from this recipe, it will still taste amazing. Hope that helps, happy baking!!
Would this be suitable as a 10inch bottom wedding cake tier? It would have 8 inch and 6 inch cakes on top?
Hi Zoe,
This recipe should work great as a 10-inch bottom cake tier as long as the cake is properly supported with dowels. Hope that helps, happy baking!
Hello ??
This cake was so delicious!! I made it for my 30 anniversary and my husband absolutely loved it. I definitely will make this again and share it with my family. Thank you for the recipe.
Also, I had extra frosting, but forgot to put it in the fridge. Would it be OK to eat or should I throw it out?
Thanks, Kimberly
So happy to hear that Kimberly! This buttercream can sit out at room temperature for up to 2 days, so as long as it wasn’t longer than that it should be just fine. Hope that helps, happy baking!
Hi, can i use Raspberry jam for this cake ? and would i have enough batter if i wamt to use a 10 inc and a 6 inch pan, thank you
Hi Maria,
You can totally use raspberry jam for this cake, that should work just fine. Hope that helps, happy baking!!
Hi,
Want to make this for my mum’s birthday but she hates lemon ! Will the icing and batter work the same without the lemon ??
Hi Georgia,
Totally get that! You can totally omit the lemon from this recipe and it will still taste great 🙂 Hope that helps, happy baking!
This recipe is perfect. I added a little more salt and vanilla to the frosting to offset the sweetness and amp up the white chocolate flavor – but otherwise, it is perfection. The cake layers, in particular, are a beautiful light, moist texture.
Hello, I am so excited to make this cake for my friend’s anniversary. She loves white chocolate rasperberry cake! And it looks beautiful!
I only have one concern, is it super lemony? I see all the lemon juice being added to each part. I was wondering if it would still taste as good if I only added it to the raspberry filling?
Thank you for sharing your recipe,
Diana
Hi Diana,
I think the lemon flavor pairs so well with the raspberry in this cake and helps brighten its flavor, but you can omit the lemon juice and zest from the cake batter if you want, and use heavy cream in place of the lemon juice in the frosting. It’s all about personal preference 🙂 Hope that helps, happy baking!
Would this cake be ok covered in fondant?
Hi Sarah,
You can totally cover this cake in fondant, that should work just fine. Happy baking!
Could you make this cake in a bundt pan and swirl the filling in the batter like a Nothin but Bundts cake?
Hi Alisa,
Great question! I haven’t tested this recipe out as a bundt cake, so sadly I’m not sure! I feel like it should work though?? If you try it please let me know how it goes!!
What if I wanted to make this cake in a layered sheet cake. Any suggestions or tips? Would you make 2 sheet cakes & then layer one with the filling & then top with the other sheet cake, then ice? Wanting to make for wedding guests. The bride is having this cake for her cake, but wants the guest to have the same cake at reception.
Thanks
Hi Lezlie,
That is exactly what I’d do! I might also add a layer of frosting between the layers, but that’s up to you!
One batch of this recipe will make 2, 9 x 13-inch cake layers that are about 1 inch tall. I’d recommend baking them for 35-40 mins at 350 F / 175 C. I also recommend using heating cores (like these: https://amzn.to/3rPkEd1) if you have them to help large cake layers like this bake more evenly and quickly.
You can also make one 9 x 13-inch cake layer that’s about 2 inches tall, but the bake time will be 45-55 minutes at 350 F/ 175 C.
Hope that helps, and that the wedding sheet cake turns out great 🙂
Hi so I’m trying to make this into a dairy free cake. My question is can I replace the sour cream (I saw that you can replace it with whole milk) with almond milk instead? And for the heavy cream or whipping cream can I use already whipped cream? Our stores in town don’t carry non dairy whipping cream so is there another option I can do? Thanks
Hi Alesia,
Great question! You can absolutely can use almond milk in place of the sour cream in the layers and heavy whipping cream in the frosting! That should work great. Hope it turns out amazing!!
Could this be turned into a sheet cake? I’ll be making it for Christmas party with 40 people. So, I thought it would be easier to cut smaller portions with making a sheet cake.
Hi Tim,
Great question! One batch will make 2, 9 x 13-inch cake layers that are about 1 inch tall. Bake for 35-40 mins at 350 F / 175 C. I recommend using heating cores if you have them to help large cake layers like this bake more evenly and quickly.
You can also make one 9 x 13-inch cake layer that’s about 2 inches tall, but the bake time will be 45-55 minutes at 350 F/ 175 C. Hope that helps, happy baking!
Hi,
I need to make a white chocolate raspberry cake for a bridal shower, but the bride is gluten free. Would you recommend I just use the gluten free vanilla cake recipe, or try to substitute with GF flour?
Thanks,
Shannon
Hi Shannon,
Great question! I would recommend using this recipe and just swapping out the flour for a good GF baking flour blend. Hope that helps, and that the cake turns out great!!
I am test running cakes for my sons wedding and I would like to try yours ( I will be making the couples cake.) My son does not like lemon. How strong is the lemon in this cake? Can I leave it out or sub the lemon for vanilla?
Hi Karen,
The lemon is subtle in this recipe, but if your son doesn’t like it you can just omit the lemon juice and zest from this recipe and it’ll still taste great. Hope that helps, happy baking!
Hi Chelsey! I’m deciding what to bake for an upscale Mardi Gras-themed dessert auction in February and I think this cake will be wonderful! I want to try your mirror glaze over this cake, what do you think?
Hi Lori,
How fun! I love this cake recipe 🙂 My mirror glaze should work great over this cake! Just be sure the frosting is fully chilled and firm to the touch before you pour the mirror glaze 🙂 Happy baking!
This cake was so good! I used 1/2 batter and made 2 6” rounds for a 2 layer cake. I used sifted all-purpose flour instead of cake flour and it turned out very light and delicious. Also, used 1/2 of the raspberry filling for one layer. This was my first layered cake with a filling and it was amazing!
Hi Samantha,
So happy to hear that! It sounds so delicious 🙂 Thank you for sharing!
For white cake recipes, I recommend using reconstituted dried egg white powder instead of pasteurized egg whites from a carton. Reconstituted dried egg whites whip up even loftier than fresh egg whites, and are much cheaper than the pasteurized option. I buy Honeywell Farms brand in bulk from Amazon.
Thank you for sharing that as option Christine!
Your recipe is lovely. I used GF baking flour and the cake still turned out perfectly with a lovely light texture.
Hi Maria,
So happy to hear that!! Thank you for sharing 🙂
Hi,
I would like to ask. Is this recipe made for four cake layers? And if I want to have 1/2 of batter, can I just use half of these ingredients?
Thank you very much 🙂
Hi Charlotte,
If you want to make a half batch of batter you can totally just use half of the ingredients! That should work great. One full batch of batter makes four, 7-inch cake layers or three, 8-inch cake layers. Hope that helps, happy baking!
Hey! I tried your lemon curd cake and it turned out amazing! It had the perfect amount of sweetness. I don’t like very sweet cakes.
It’s my baby girl’s birthday and i want to make this raspberry chocolate cake but was wondering can I make it with that lemon buttercream?As in follow rest of the recipe as described just switch the chocolate buttercream with lemon buttercream?
Or if used white cake sponge with chocolate buttercream as you’ve mentioned it’ll be having perfect amount of sweetness?
Hi Asma,
YAY! I am so happy to hear that!! You can totally make this cake with that lemon buttercream, that would be delicious 🙂 I think that would be a great way to balance out the sweetness of this cake, especially since you don’t like very sweet cakes (the buttercream in the white choco rasp cake is quite sweet). Hope your baby girl loves the cake, I hope she has a wonderful birthday!! She’s lucky to have a wonderful Mom like you!
Hi there, this is one of my favorite cakes! Love this recipe! Can I freeze the filling after it’s made to use on other things in the future? If so, how long can it be frozen for?
I am so happy to hear that Annie 🙂 That’s wonderful!! You can freeze this filling after it’s made to use in the future. It can be stored in an airtight container in the freezer for up to a month. Hope that helps, happy baking!
This cake is amazing!! I took it to a cookout and it was gone in no time! Everyone loved it!!
So happy to hear that Allison!! 🙂 Thank you for sharing!
You mentioned 325F in the top half but 340F in the actual recipe itself. Should this be 325F for ~40mins?
So sorry for the confusion Kris! It should be 340F for about 40 mins, I’ve updated the typo in the body of the post. Hope that helps, happy baking!
I looove this cake recipe so much and have made it many times! I also made it years ago before lemon was added to the cake. Is that version of the recipe available anywhere? Cake flour, sour cream, egg whites, vanilla? Thank you for all the amazing recipes!
Sadly I didn’t save the original version of this cake :/ But you can totally omit the lemon juice and zest from this recipe to have it be closer to the original from back in the day! Hope that helps, happy baking!
Would I need to double the cake recipe to make a 3 layer 10inch cake?
Hi Macey,
You’d need to make about 1.5 batches of batter to make 3, 10-inch cake layers using this recipe (bake time will be longer than the recipe calls for!). You also can double it, but the layers would be slightly taller and would take quite a bit longer to bake. Hope that helps, happy baking!
Hi, I love the way you decorated this cake pictured. I see how you tinted the icing pink/red to make the flowers on the side. But, I can’t see what you used for the gold centers in the flowers. Can you share what you used please?
Thank you so much!
Hi Suzie,
Thank you!! I used a bit of gold leaf, which I got on amazon! here’s the link: https://amzn.to/4eYPF27
Hope that helps, happy baking!
Wonderful..would this work with a white chocolate Swiss meringue buttercream?? Love your recipes!!
i bought the powdered raspberry for the filling but how do i mix it to a jam consistency
I want to make this cake. My son does not like lemon. Can I leave it out or do I need to replace the lemon with something else?
Quick question: If you make this in advance, does the raspberry filling bleed into the cake and turn it purplish? I’ve done something similar and that happend.
ta Sophie x
My daughter wants a white chocolate icing with raspberry filling for her wedding cake. And of course I came here first to find a recipe. Is there a way to make the frosting more white? I know adding a little purple die can help – but can you do it with the white chocolate in the icing?
I made this for my mom’s birthday subbing strawberries for the raspberries because of her preference. It was delicious! I’m not very experienced with making layer cakes. This tutorial made it approachable, and the cake turned out wonderful. Thank you!
Okay let me start by saying this cake and raspberry filling tastes amazing! I followed the recipes to a T and they came out perfect. Now on to the icing ?… I had this beautiful butter cream until I added the white chocolate and while it still tastes amazing it is a lumpy looking mess. What am I doing wrong? I used white chocolate chips and melted them slowly in the microwave until they were nice and smooth and let them cool as directed but it made white chocolate lumps when I added it. What do I need to do differently? Please help I’m making this for Thanksgiving.
Hi Adrienne! Are you using a metal bowl? Or is you kitchen cold? It sounds like the white chocolate might be hardening into lumps before it’s fully mixed in! You can try heating the heavy cream and white chocolate together and mixing them, then adding that to the frosting! That should prevent any lumps. Hope it helps, happy baking!
Hello, I’m planning on making a tall 10 inch cake using this recipe. What cooking time would you recommend? And how many batches of cake would be needed?
Hi!! I am so looking forward to trying this recipe. A couple quick questions! Do you recommend I follow cups or grams for this recipe? Also, I have store bought simple syrup I use for mixed drinks and cocktails. Would that be okay to use as simple syrup for the cake or should I make my own?
Thank you so much!!!!!
So excited to make this for a Galentine’s day!!!
Hi Mariana,
This is such a yummy cake recipe, I can’t wait for you to try it! In general, using grams is always more accurate than using cup measures, so if you have a scale I would definitely recommend using grams.
Store bought simple syrup should be fine as long as there aren’t other ingredients in it other than water and sugar! I do usually make my own but just because I don’t have it on hand. So as long as your simple syrup isn’t too thick I think it should work just fine. Hope that helps and that you and your friends love this cake as much as I do!
Hi! I love this recipe so much. However, I want to use 6 inch cake pans. How should I adjust the baking time?
Hi Annalien,
So happy to hear that! I’d recommend making 4, 6 inch cake layers and baking them for 36 to 38 minutes, or until a toothpick inserted in the center of the cake layer comes out with a few moist crumbs. Hope that helps, happy baking!
What size are your pans? I want to make this two layered but I think I only have 8 or 9″ pans.
Actually, I saw you used two 8″. Hmmm
Hi Mimi,
This recipe can be made with four, 7-inch pans or three, 8-inch cake pans with parchment rounds! I usually share that info in the first step of the cake layer section of the recipe card 🙂 Hope that helps, happy baking!
I am planning to make a Lego cake shaped as a large lego brick. Is it possible to replace some of the white chocolate in the frosting with colored candy melts to achieve brighter color? Thank you so much ?
Hi Lalitha,
I have never tried adding candy melts into buttercream before but if you use gel food coloring you should be able to get a really brightly colored frosting! I usually just use gel food coloring and it works out really well, I’d recommend doing that instead! I really love the Americcolor and master chef brands and I usually order them on Amazon. Hope that helps and that your cake turns out amazing. Happy baking!!
Hi- do you have any photos of how the pink color looks if you do this with freeze-dried raspberry powder in the buttercream?
Hi Ally,
Great question! I use freeze-dried raspberry powder to color the frosting in this recipe, so you can see what it looks like here: https://chelsweets.com/raspberry-and-coconut-cake/
Hope that helps, happy baking!
Am, I reading the directions for the cake correctly? It looks like there are only 7 egg whites/1 cup to be added in step 5, however, step 4 states to add to a butter/egg mixture. I don’t see any additional eggs in the list of items needed. How many additional eggs are needed and in which step should they be added?
Hi Kim,
Apologies for any confusion! I just updated that recipe and it should say butter/sugar mixture!! I’ve updated the recipe card to correct this, thank you for pointing it out. Happy baking!
It sounds WONDERFUL, but way to large a cake for my purposes. Is there a way to adjust the recipe to just do two 9″ round layers?
Hi Wendy,
Totally get that! Yes, you can actually make two 9″ round layers with one batch of batter. You really need 80% of the amount of batter to make 2, 9-inch layers, but the math gets a bit wonky so I’d recommend just making a full batch and you’ll end up with slightly taller layers. You could also use a bit of batter to make some cupcakes! The bake time will be slightly longer if you use a full batch, so start checking around the 38-43 mins. Let me know how it goes if you try it, happy baking! 🙂
I am so excited to make this cake for my husband’s birthday! I do have a couple of questions though. What are your thoughts on using your lemon curd as a filling for the middle layer (instead of one of the raspberry ones)? Would that be too overpowering and detract from everything? Also, I am thinking that might like to go with Swiss Meringue buttercream and have seen in the comments that you feel this would be ok. But…I have to admit I struggle with this type at times and wonder if you have any tips for when I have to add the raspberry powder and white chocolate so that I don’t end up messing up it all up? Thanks so much. I am very anxious to hear back from you so I can get started 🙂
Hi Michele,
Ahh I love that you’re making this for your husband’s birthday, that’s so sweet!! And your ideas sound delicious.
Using lemon curd as one of the fillings is a great idea! It’ll add a bright pop of flavor without overpowering the cake, especially if you keep the other layer raspberry. That combo of tart lemon and sweet-tart raspberry with white chocolate sounds heavenly and really well balanced.
As for the Swiss meringue buttercream, you’re definitely not alone in finding it tricky sometimes! When it comes to adding raspberry powder and melted white chocolate, here are a few tips to help keep things smooth:
Raspberry powder: Sift it first to avoid clumps, and add it gradually on low speed so it blends evenly without making the buttercream gritty.
White chocolate: Make sure it’s fully melted and cooled to room temp before adding it in. If it’s too warm, it can melt the butter; if it’s too cold, it can seize. Slowly drizzle it in while mixing on low speed.
If your buttercream ever looks curdled or soupy along the way, don’t panic. It almost always comes back together with a little patience and mixing!
I hope this helps ease your nerves a bit! You’ve got this, and I just know it’s going to turn out amazing. Let me know how it goes, I’d love to hear how he likes it!
Hello Chelsea,
Thank you for this wonderful recipe. I am making this cake for my daughter’s 4th birthday, this week.
What do you recommend for a warmer weather- White chocolate whipped ganache frosting or White chocolate buttercream frosting for the cake?
Hi Manmeet,
Aw, how sweet—happy early birthday to your daughter!
For warmer weather, I’d definitely recommend going with the white chocolate buttercream. Whipped ganache is dreamy and light, but it’s much more temperature-sensitive and can get soft or even start to melt if it’s too warm, especially if the cake will be out for a bit.
White chocolate buttercream, on the other hand, holds up much better in heat and still gives you that creamy white chocolate flavor. Just make sure to keep the cake in a cool spot until serving, and you’ll be good to go! Hope the cake turns out amazing!!
As an amateur baker, this was my first raspberry cake, and it will be the only recipe I ever use. This was the best cake I have ever made, and everyone who ate it said it was one of the best cakes they have ever had. It was a longer process for me (having only one pan) but you make it so easy to follow. And THANK YOU for including the amounts for the ingredients in the step-by-step instructions so I didn’t have to scroll back and forth. I greatly appreciated that. You now have a life-long follower in me!
Hi Olivia,
Ahh this made my day!! I’m so glad your first raspberry cake was such a success. And what a compliment that it’s now your go-to! Baking with just one pan definitely adds time, but you clearly nailed it. And thank you for the kind words about the ingredient amounts in the steps. I know that back-and-forth scroll struggle all too well, so I try to make it as easy as possible. I’m so happy to have you here!! 🙂
Sad I can’t share pictures in the comment as I was pretty pleased with my result :’)
I made this cake 5 years ago and I loved it 😀 Going to try it again this weekend. Fingers crossed it turns out as good or better (always something to improve x) ). I can’t find what size you use in your layers. I see most comments are from 5 years ago, so I’m not too hopeful about a reply, but figure it’s worth a shot :’))
Hi Aurora,
Aw, I wish I could see your cake too, it sounds like you nailed it the first time!! I usually bake this recipe in three 8-inch pans, but it works in other sizes too (you might just need to adjust bake time). I’m so excited you’re making it again this weekend, fingers crossed it turns out even better than last time!
When I first started my blog I wasn’t the best at responding to all the comments, but I try my best to get to all of them now 🙂
This recipe sounds INCREDIBLE, and I am going to use parts of it as inspiration for a chocolate and raspberry cake I’m making today. However I’ve got to ask, what is the purpose of adding the white chocolate to the frosting? The Ghiradelli chips that are linked actually don’t contain chocolate in their ingredients, so you aren’t getting any cocoa butter in the frosting. Would it maybe be easier and less expensive to just add milk powder, to closer approach the “white chip” flavor for the frosting?
Hi Alexa,
Great question! The main purpose of adding white chocolate (or white chips) to the frosting is for sweetness, flavor, and a bit of structure. It helps the buttercream set up a little firmer once it cools. You’re right though, a lot of white chips on the market (including Ghirardelli’s) don’t contain cocoa butter, so they don’t have the same properties as true white chocolate. They give more of that “classic white chip” taste than the creaminess you’d get from real cocoa butter. Using milk powder could definitely mimic that flavor in a simpler and less expensive way—you’d get that sweet, milky profile without having to melt chips. It just depends on which flavor and texture you’re going for. Hope that helps, happy baking!!
Hi Chesley, I just have a couple questions please. I am using your recipe to make a 9 inch three layer cake. Should I double the recipe? I am also making this recipe to make a 1/2 sheet cake two layers. Would I also double or triple the recipe. Thank you so much!
Hi Lena,
You definitely don’t need to double it! In an ideal world, you’d make 1.25 batches of batter to have the perfect amount! But it’s pretty hard to calculate, so if I were you I’d probably just make one batch and have the layers be a tiny bit shorter! But it’s your call!! For the future, I have a great chart that shows exactly how much batter you need for different sized cake pans, here’s the link: https://chelsweets.com/how-much-cake-batter-per-pan/
Hope that helps for the future, and that your cake turns out great! Happy baking!
Un des meilleurs gâteaux que j’ai mangé. Le mariage des saveurs chocolat blanc et framboises est bien équilibré, le gâteau est moelleux, vraiment délicieux!
Hi,
Firstly I would like to say your raspberry filling is amazing and easy to make. Now I would like to attempt the whole cake and wanted your guidance on how to amend the batter as I only have 2 6inch tins. Not sure if best to make two thicker layers or make in lesser portion and bake 2 layer at a time making the 4 in total.
Appreciate your guidance and aiming to make this week for my granddaughters’ birthday.
Great question Vikki! This cake batter is very forgiving, I’d recommend making two tins of batter at a time, and letting the remaining batter sit at room temperature until the first two layers are done baking/have cooled and can be removed from the pans. You can pop the pans in the freezer once the first batch of layers in baked to speed up the cooling process.
I wouldn’t recommend baking two really thick layers and then cutting them because the edges will get overcooked and it will take a really long time for the center to bake through. Hope that helps, and that your granddaughter’s cake turns out amazing 🙂 Happy baking!
Comment box won’t let me leave a five star rating, but let me state that it is completely deserving of five stars.
To save time I have used a box mix and replaced the oil with coconut oil. This provides a really luxurious cake from a box. It is currently chilling on our porch and we can’t wait to have it tomorrow.
I have made this cake 4 times now because everyone loves it so much! Today I made it with strawberry filling instead of raspberry and it was delicious too! The last 2 times I made it into a letter cake, once for my daughter’s graduation and today for a retirement. Always get rave reviews!!!
That is so wonderful to hear Candy 🙂 Thank you for sharing, and for putting this recipe to such good use!!
Hi! If I use two 12 x 12 inch cake pans, would you suggest I increase the amount of of batter? I want to stack them into 4 layers, 6 x 12 inch cake. I also need to feed 50 people, so will need double the recipe as well. Do you think that would work?
Hi Phyllis,
I wouldn’t quite double the cake batter for two 12 x 12-inch pans, since that would make the layers very thick. I’d recommend making 1 1/2 batches of batter and dividing it evenly between the pans, then cutting each layer in half to create four 6 x 12-inch layers. I’d also use heating cores or flower nails to help the centers bake evenly.
For the filling, I’d double the recipe since you’ll have three large layers to fill. I’d make 1 1/2 to 2 batches of buttercream, depending on how thickly you plan to frost and decorate the cake.
A 6 x 12-inch cake should provide about 48 narrow event-style servings, so it will be very close for 50 guests. I’d probably make a few cupcakes or another small dessert as backup, especially if you’re planning to cut more generous portions. Hope that helps, happy baking!!
That is excellent advice! If I doubled the recipe and used 1-1/2 for the 12 x 12 pans, could I use the other half to make a smaller extra cake? Do you think there would be enough left over. For “just in case”? Thank you so much. Phyllis