
Smooth Buttercream
A question I get on almost every cake video I share is “how do you get your frosting so smooth??” It’s almost like people think smooth buttercream is some kind of secret.
A lot of people think I’m using some special or obscure type of frosting, or that there’s a secret ingredient I include to create that silky smooth texture.
I’m sorry to ruin any of those illusions, but it has nothing to do with the type of frosting or ingredients. It all comes down to how you make your frosting.
Now, don’t get me wrong, it’s great having a go-to frosting recipe that tastes great and that you’re comfortable working with. For me, I use my American buttercream recipe as a base about 90% of the time.
However, the tips I share below can be utilized with most types of frosting, ranging from American buttercream to Swiss meringue to Russian buttercream.
If you aren’t sure what type of frosting to use, check out my buttercream frosting guide.
Why is Smooth Buttercream Important?
Have you ever made a delicious batch of frosting, only to see it riddled with air bubbles as you add it to your cake?
Or have you spent tons of time trying to smooth frosting on your cake, only to end up with a zillion little air pockets all around the sides of your cake??
It can be incredibly frustrating and can make it impossible to get truly smooth sides on your cake.
And it has nothing to do with your cake decorating abilities!! It’s really just your frosting being difficult to work with.
Once I figured out how to make my frosting really smooth, I had a much easier time frosting my cakes with smooth sides.
My cake decorating process became much faster and easier. It still takes me time to frost a cake, but I don’t get as stressed out or frustrated as I used to.
Frosting a cake now feels simpler and almost therapeutic.
How I Make Super Smooth Buttercream Frosting
There are a few things I do that make my frosting super smooth.
I never really thought of them as unique or different until I started showing exactly how I make my frosting in private cake lessons.
Whenever I shared my tips, people were quite surprised.
You may have heard of some or all of them, and I don’t think any of them are really groundbreaking.
But when combined, they allow you to make incredibly smooth buttercream frosting.
Tip #1: Use a Paddle Attachment
Most stand mixers (I use a 5-qt KitchenAid stand mixer) come with both a whisk attachment and a paddle attachment.
The whisk attachment allows you to incorporate air into whatever you’re making, which is great for certain desserts like meringues or whipped cream.
It is also necessary to use a whisk attachment to make certain types of frosting, like Swiss meringue, Russian buttercream, or Italian meringue.
However, you only need to use the whisk attachment for the first few steps of the process.
Some types of frosting don’t require a whisk attachment, like American buttercream.
In those situations, I recommend starting with the paddle attachment.
Even if you have to use a whisk attachment at the start of a frosting, you can switch to a paddle attachment once you’ve made your meringue or whipped up your butter.
This allows you to finish combining your ingredients without incorporating tons of air, which reduces the amount of air bubbles in your frosting.
If you don’t have a stand mixer or paddle attachment, it’s ok to use the beaters on a hand mixer.
Just be sure to really focus on my next tip!!
Tip #2: Mix on the Lowest Speed
When I make my American buttercream, I never mix on a speed higher than the lowest setting. I only move my lever to the stir option.
It sounds crazy, but mixing the frosting as slowly as possible also helps make it smooth by minimizing the amount of air that’s getting added in.
It also lowers the chance of you covering your entire kitchen with powdered sugar clouds.
While this isn’t possible for other types of frosting, you can still utilize this tip at the end of the process.
No matter what type of frosting you make, I recommend mixing your frosting on the lowest speed for a couple of minutes with a paddle attachment at the end of the process.
This helps push excess air out of the frosting, which makes it nice and smooth.
Don’t be afraid to let your mixer run on low for a few minutes. It makes such a big difference in the texture of the frosting.
It’s pretty difficult to overmix your frosting, especially when you’re mixing it on a low setting.
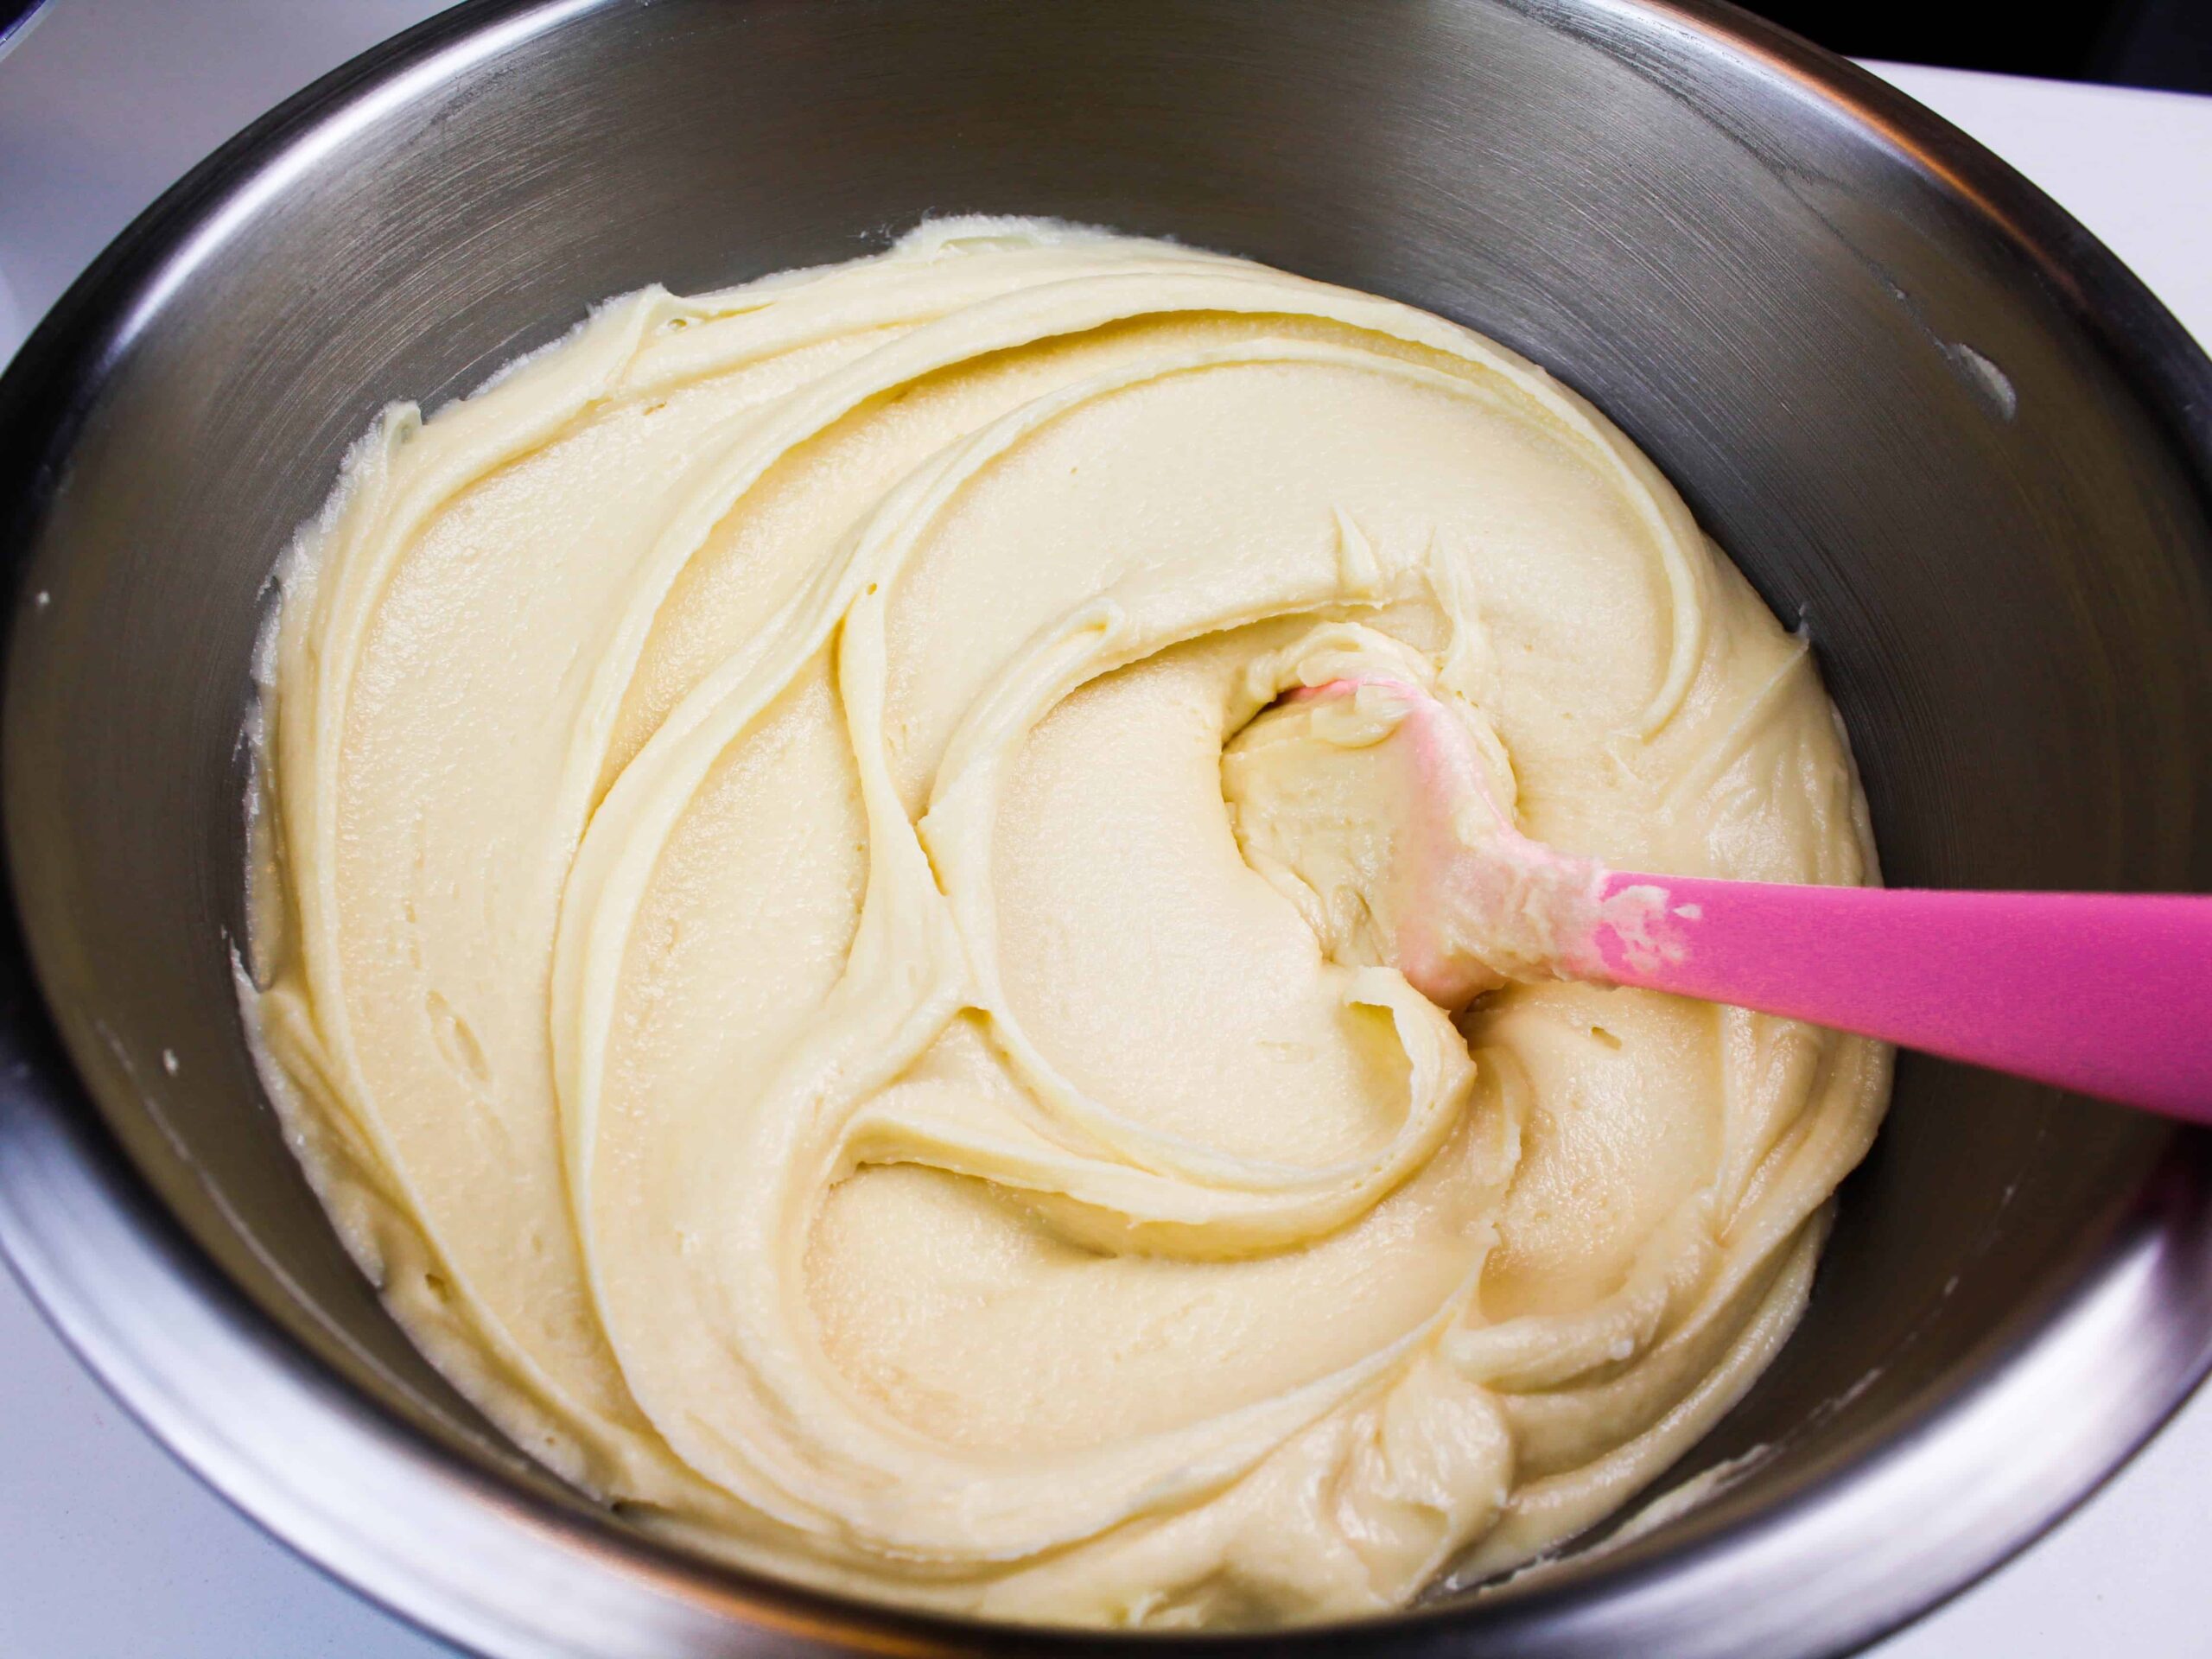
Tip #3: Get the Consistency Right
The two tips above are great, but if your frosting isn’t the right consistency in the first place, you will still struggle getting smooth sides on your cake.
I find my frosting is the smoothest when I get the consistency just right.
This is a delicate balance between the temperature of your kitchen, the type of bowl you use, the temperature of your butter, and the amount of heavy cream used.
It seems like it shouldn’t be that complicated, but each of those variables can have a big impact on how your frosting turns out.
I actually have a whole separate post about making your frosting the perfect consistency.
It might seem excessive, but the neurotic frosting lover in me felt it deserved its own post.
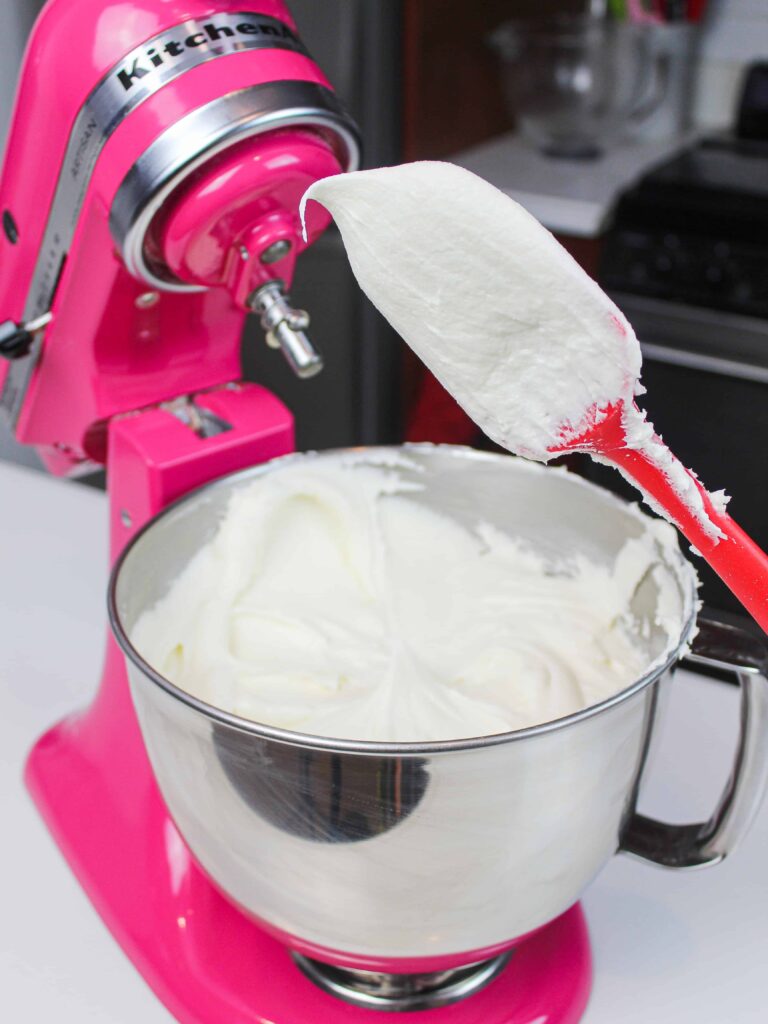
Tip #4: The Spatula Test
The easiest way to see if your frosting is the right consistency is to do (what I like to call) the spatula test.
This test confirms that your frosting is stiff enough to hold its shape, but thin enough for you to easily frost your cake.
I like to use this test with American and Russian buttercream, and I do it with every batch of frosting I make.
Firmly press a rubber spatula into your frosting, and pull directly up. Turn the spatula right side up, and look at the frosting on the tip of the spatula.
It should form a somewhat soft peak that has a little curl on the end.
It’s stiff enough to hold up that curl, but soft enough to create that little curl. That little curl is a great visual cue to know that your frosting is just right.
If it’s too stiff and sticks straight up, I suggest adding in more heavy cream (1 Tbsp at a time).
If it’s too thin and doesn’t form a little peak at all, try adding a bit more powdered sugar (1/4 cup at a time) or chill it in the fridge in 5-minute intervals.
After each adjustment, be sure to retest the frosting with your spatula before making any additional changes.
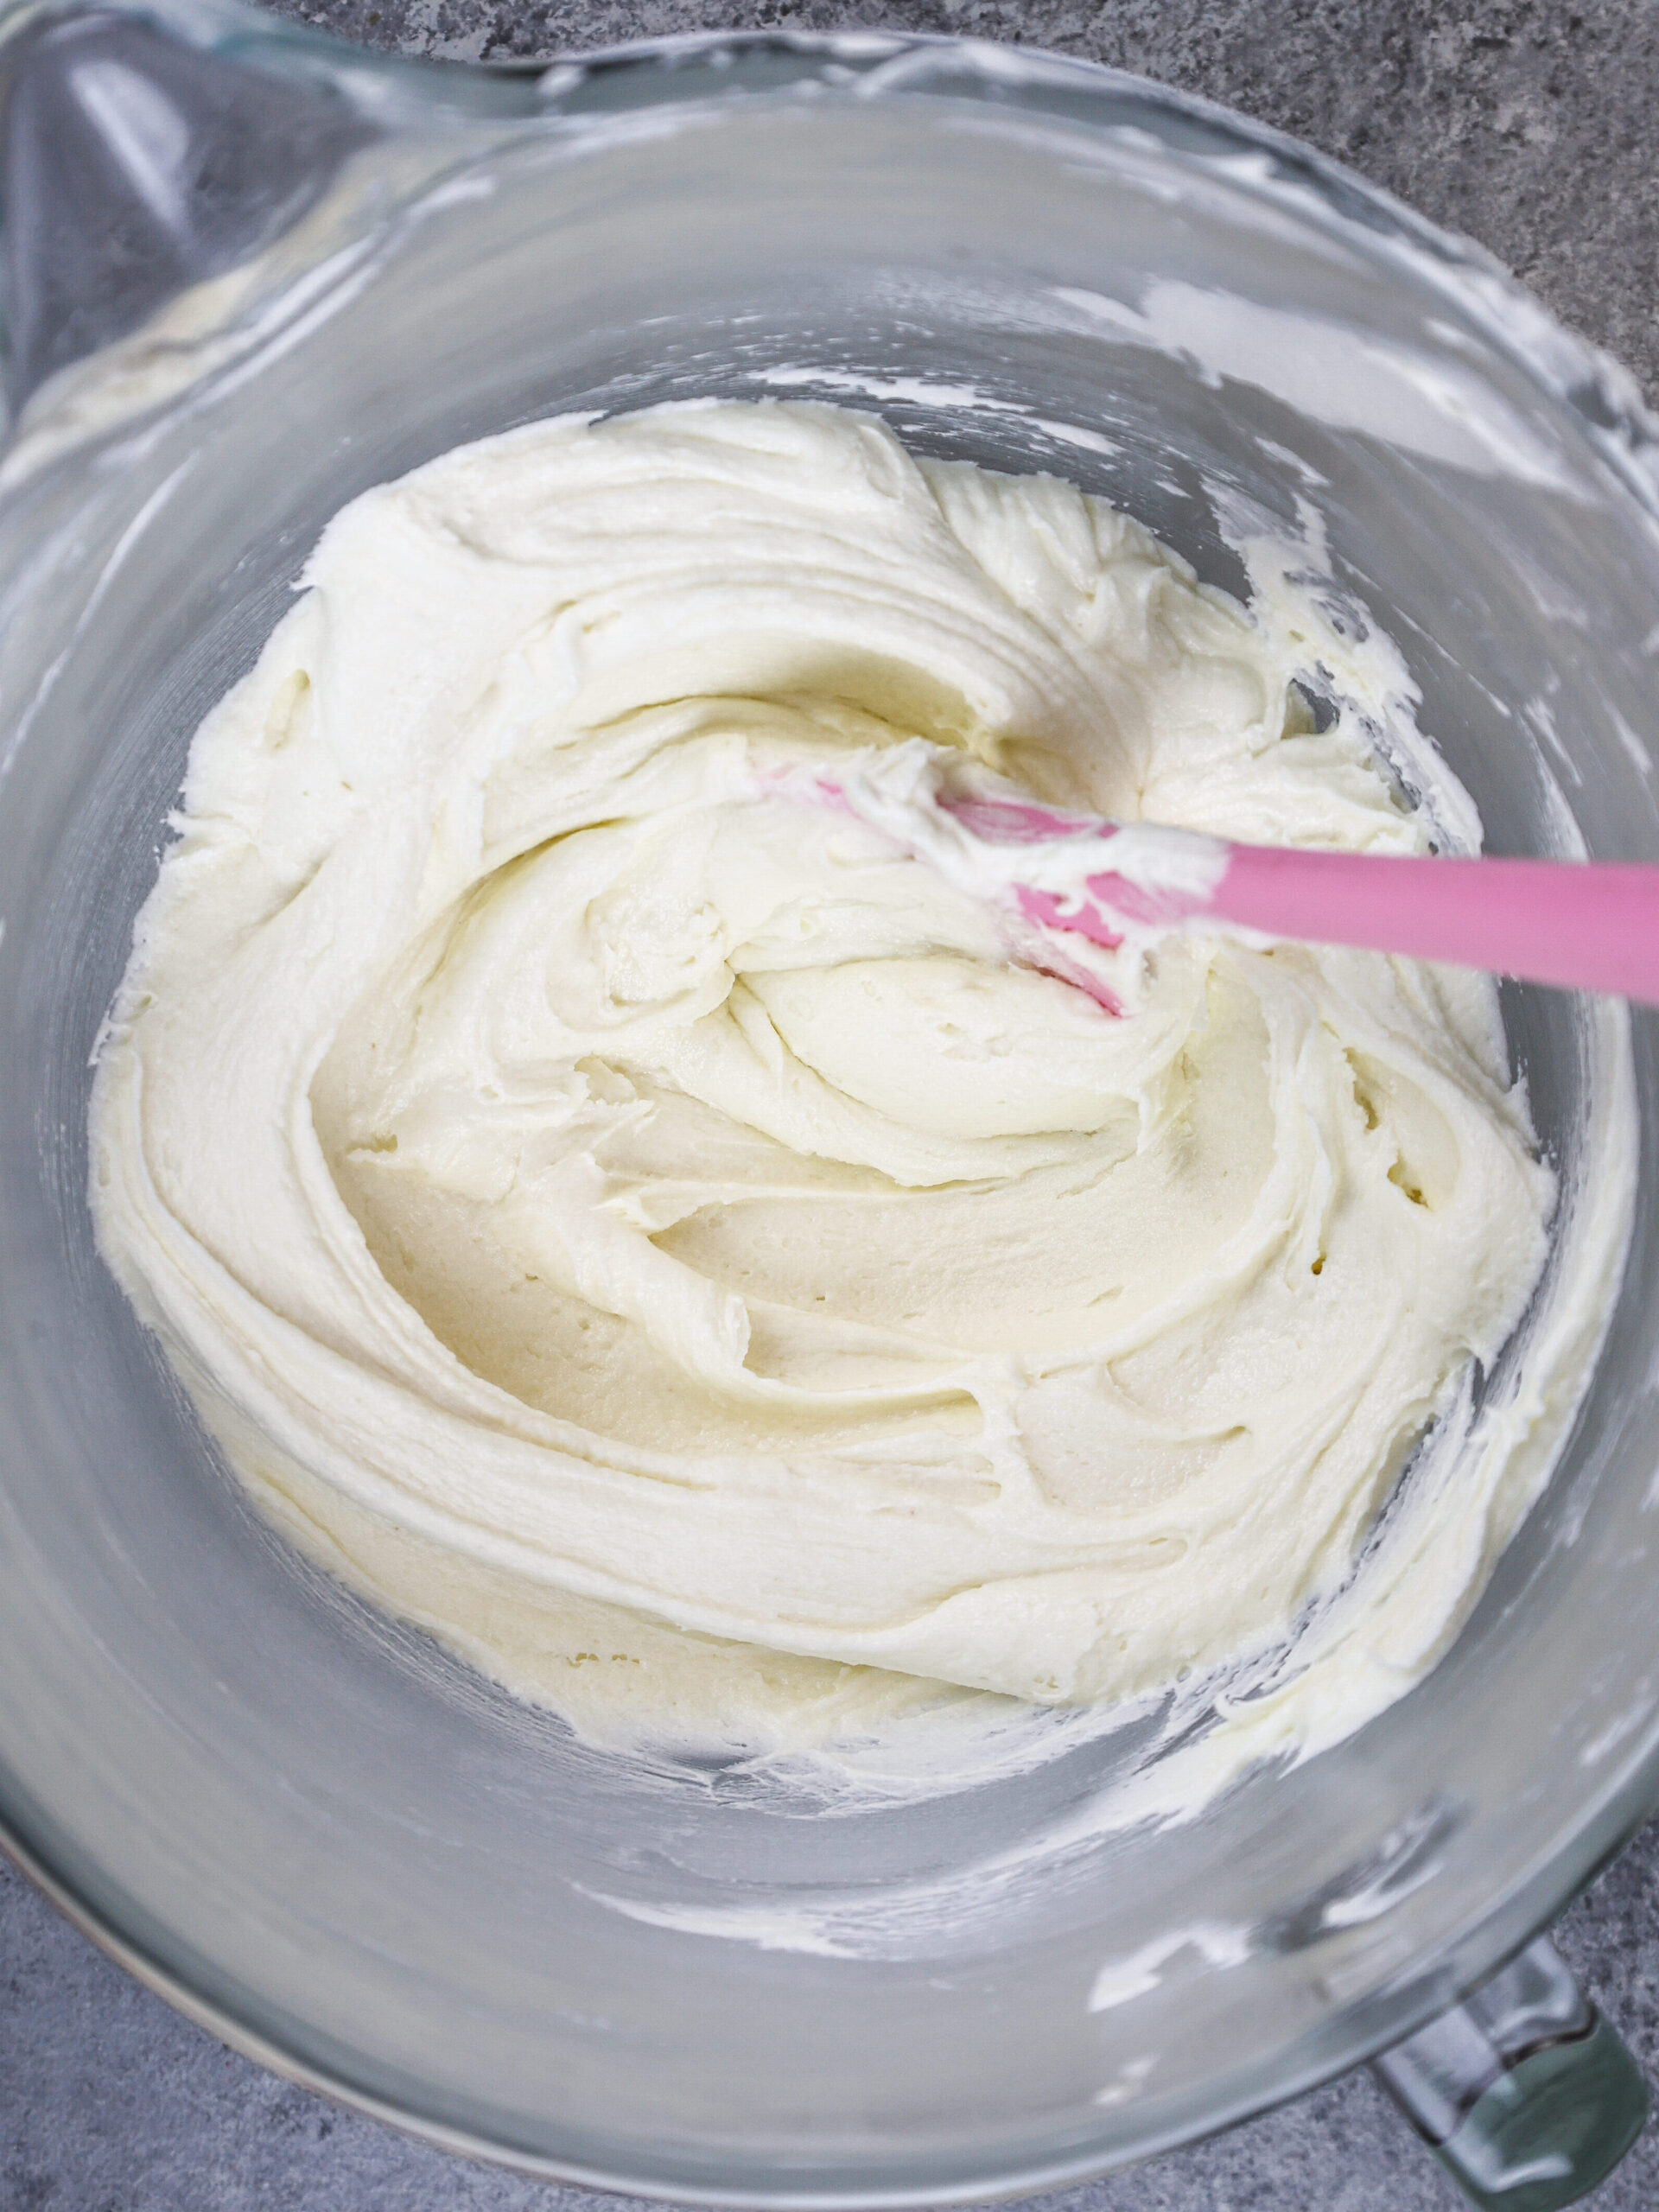
Tip #6: Mix by Hand at the End to Get Rid of Any Pesky Air Bubbles
This final tip is the simplest, but also has the biggest impact.
Once I’ve made a batch of frosting and it’s the perfect consistency, I don’t stop there.
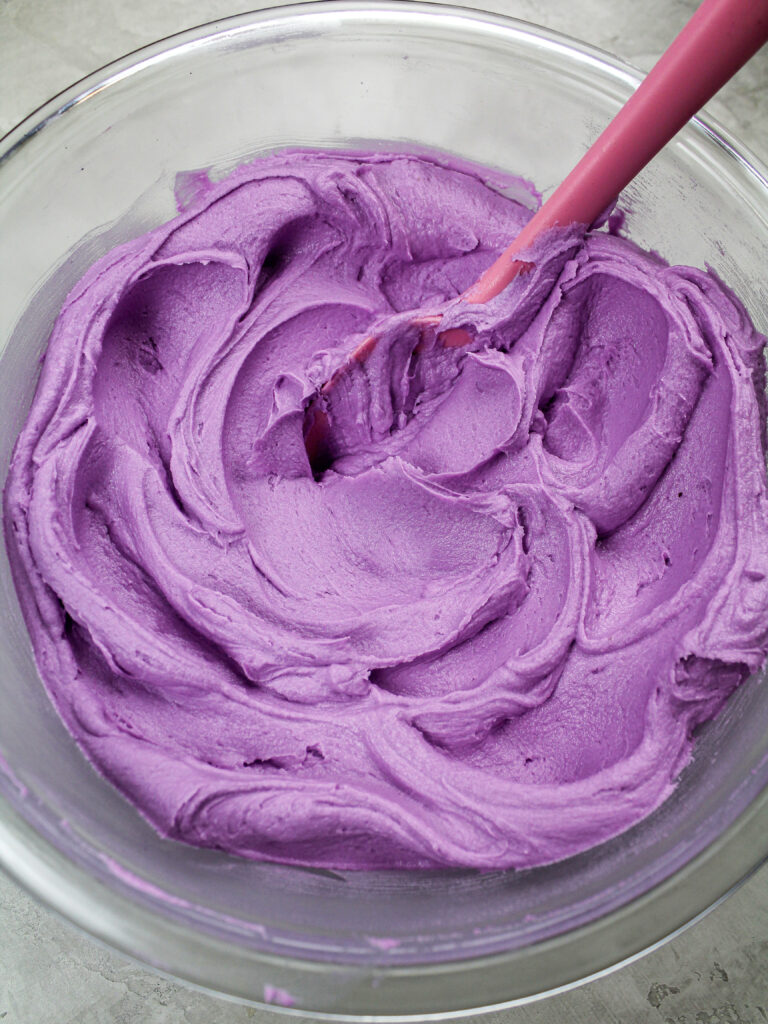
I aggressively grip a rubber spatula and work the frosting around the bowl by hand.
Now I know you’re thinking, but I just had my mixer beat my frosting on low for a long time!! Shouldn’t that have pushed out enough air??
The mixer is great, but this final step makes it silky smooth. There’s something about stirring by hand that a stand mixer can’t replicate.
I push the frosting back and forth and spread it along the sides of the bowl for a couple minutes.
Please watch the video that’s in this post to see what I mean.
If you do it right, it should be a pretty serious arm workout. I’m always tired by the end!
Then, and ONLY then, is your frosting smooth and ready to be added to your cake. You should see a notable difference in texture, and your frosting should be free of any air bubbles.
This is also important to do when you make frosting in advance and let it thaw.
I find my frosting is straight up riddled with air bubbles once it’s thawed.
I usually go to town stirring it by hand, and find it’s nice and smooth after a few minutes of aggressive stirring.
Tips #6: Repeat Step #5 As Needed
Your frosting might be perfectly smooth now, but sadly, it won’t stay that way forever. It doesn’t matter how perfect it was when you started.
As your frosting sits out at room temp, it will slowly develop air bubbles.
But fear not, it can easily be fixed. Just give your frosting another good stir by hand with your rubber spatula.
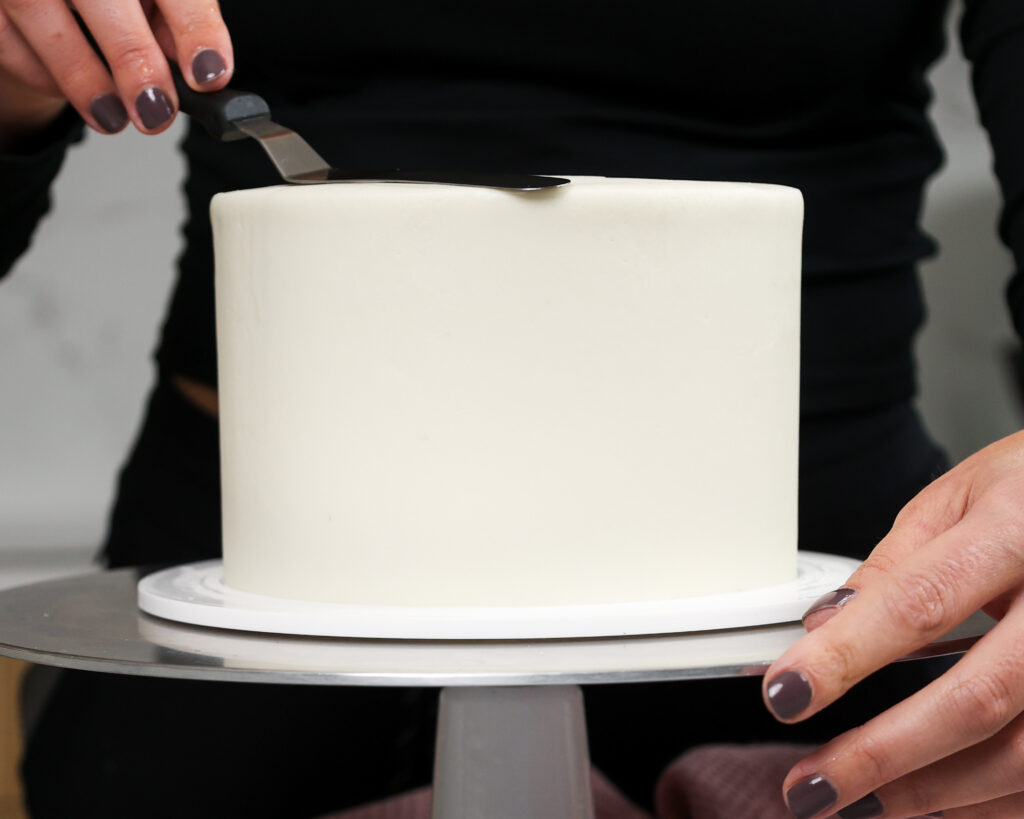
I always have to do this after I crumb coat and chill my cake.
By that point in the process, my frosting usually has been sitting out for at least 30 minutes. That’s long enough for air bubbles to form.
I stir it for a few minutes by hand before taking my cake out of the freezer, and don’t stop until it’s nice and smooth again.
There’s no point in making super smooth buttercream only to let your frosting get air bubbles as you add your second layer of frosting.
That’s when the smoothness of your frosting matters the most!!
Take the extra few minutes to stir it before adding your final layer of frosting.
Let Me Know What You Think!
If you try out these tips to make smooth buttercream frosting, I’d love to hear how they work for you!
Please leave a comment below and let me know if you use any other tricks to make silky smooth buttercream.
If you share on social, don’t forget to tag me @chelsweets and use #chelsweets so I can see your amazing creations!
Other Recipes You Might Like:
If I want to make a vanilla cake with Oreo frosting, how much buttercream do I need to make? I am going to use your oreo buttercrema recipe as well. so excited!
If I want to make a 3 layer 6 inch cake vanilla cake with oreo frosting, how much buttercream do I need to make? I am going to use your oreo buttercream recipe as well. so excited!
Your hints are amazing! I use them whenever I make buttercream! I love everyone one of your recipes and the way you teach how to make them! I appreciate you so much! Just like American Buttercream is your go to…you are mine when I need a new recipe! Thank you for so openly sharing!! @bakingyoutreats
Whats about the microwave tipp? I have heard we can put the frosting for few second in the microwave then stir with spatula? I will try your Tipps its?? i always did wrong using wisk so much for Swissmeringue
What make of butter should I use . My buttercream tastes like butter , it must be the butter I’m using . I’ve mixed and mixed and can’t get it to go sort of whiteish what’s going on . Please help . Step by step .
Thanks lil
It could be that you’re using too much butter. Everyone has their favorite ratio—mine is 2 sticks of butter to 4 or 5 cups of powdered sugar. And always a pinch of salt. Good luck!
Hi Chelsea. So typically when I make wedding cakes, they’re chilled until about a half hour til we serve them and they remain perfect and they don’t settle or bulge at all.This weekend I have a bride who wants a semi-naked cake but she expects it to be sitting out for roughly five hours. I’m worried about it bulging as it sits. It’ll be 3 tiers. Everything I’ve ready says don’t chill it at all at any step so it won’t settle at room temperature. What do you suggest I do? I want it to stay firm and even and smooth but am concerned about it sitting out for so many hours. Thank you!
Nice tips! But in the place I live, whipping cream and cream cheese are a little hard to find so can you suggest some replacement please?
HI, You can use whole milk, heavy cream, or just order it online so it can be shipped to your place. Amazon has a site to buy groceries. Best of luck hope this helps.
Ya I have checked on amazon and other sites too but my area is a containment zone?and so idk. But thanks for your concern
Thank you for your tips! I am preparing to learn how to pipe flowers on cupcakes and will definately use your tips for butter cream frosting! By the way, I love the color of your Kitchen Aid mixer!
Hi, my butter cream always turns out running after I add the icing sugar (powder sugar). I don’t understand why? Is it because not enough icing sugar or over beat?
I put in the same amount of butter and cream cheese. Then about 250gram icing sugar. Thank you. Je. Ifer
@Jennifer wong, instead of beating the cream cheese and butter together and then adding the powdered sugar, try beating the butter and sugar together first until fully incorporated and then beat in cream cheese. The reason this works is because cream cheese has around 50% water content, and since sugar is hygroscopic, that means that it pulls that water out of the cream cheese. However by mixing the softened butter and sugar together first, the sugar is melded with the fat molecules in the butter which prevents the sugar from pulling water from the cream cheese and also prevents the butter fat molecules from repelling the water in the cream cheese which can also happen and cause the water to separate and come out in your icing. The chance of this happening increases when the butter and cream cheese are mixed for longer periods of time and or at higher speeds. Or this is what I have learned so far in my experience but I am still somewhat of a novice myself. This did definitely up my icing game once I learned of this setback and adjusted the order in which I mixed in my ingredients, NO MORE SOUPY ICING PROBLEMS! Hope this helps!?
Listed in your recipe, you wrote 3 tbs cream and 7 cups powdered sugar.
I’m your video, you used 2 tbs cream 8 cups powdered sugar.
Which is the better ratio?? Thanks!
I meant – In* your video
I used your recipe for vanilla buttercream in conjunction with these tips but ended up adding almost a whole cup of heavy cream and still getting peaks. Am I doing something wrong? My buttercream also ended up really grainy after a while.
MY BUTTERCREAM IS SMOOTH HOWEVER WHEN I ADD IT TO THE CAKE WHILST SCRAPING I GET BUBBLES FORMING UNDER THE BUTTERCREAM.
HAS THIS EVEN HAPPENED TO YOU? I NEED SOME HELP PLEASE.
Hello first off thank you for your tips. So, is this butter cream good for piping cupcakes or should I add a bit more heavy cream? Also if I want to add whatever flavor extract do I still add the vanilla extract or do I add whichever flavor I’d like instead of the vanilla extract?
I live your smooth icing! Your cakes are beautiful! Making my daughter’s wedding cake. My buttercream recipe is similar to yours except I use milk to thin icing, will change to cream and half salted butter ( I will try your unsalted route) and half shortening to make it whiter. Your techniques for smooth icing are new to me so I will definitely try this! Your thoughts in half butter half shortening and your technique? I usually make cakes with rolled fondant where the buttercream layer is covered up. Now I need an awesome buttercream recipe as this is the showcase covering of the cake. Stressing out a bit. Your thoughts are appreciated.
Thanks,
Debbie
I love your tips and recipe! It turns out smooth EVERY time. I have an issue though with adding my gel food coloring.. lately, my buttercream splits (white streaks and “wet” looking). How can I fix this issue? I noticed it happens when I need to color frosting that is very bright/deep in color where more of the gel food coloring needs to be used. I know it maybe has to do with the ratio of ingredients but what is a fix for this? Less heavy cream? Thank you!!
@Ashley, that is the exact same problem I get. I use Americolor gel. I haven’t been able to figure out why it happens. It doesn’t happen so much with lighter colours/less food colouring.
Have you had any luck?
Thanks for dis lecture
Would a person get the same effect with Margarine. I have been using margarine for years but have found I get air pockets. And in south Africa butter is extremely expensive. So to keep it cost effective for clients, Margarine is the best option. Although I have never done the step 5, which I will definitely be trying. I usually fill my piping bag straight after the mixer has stopped. Thanks for the article?
Hi! My buttercream is always “grainy”. I can feel the grains of sugar when I eat it! What can I do to get the right consistency? I use powdered sugar and carefully follow your recipe.. what could be the cause of this grainy texture?
@Martina, have you tried sifting the powered sugar before adding it?
Loved this recipe! Definitely gonna use it again! Me and my sister made it and turned out so smooth and silky! We normally make crappy butter cream but this was a hit! We added 3 cups of icing sugar instead of 7 and still turned out great! Thx so much for this recipe!
I’ve been decorating cakes casually for about 3.5 years now, and I’ve never quite been able to get that super smooth finish… Until now! I was doing a birthday cake and I was using a whipped cream Buttercream frosting which I love because it’s so light and fluffy… But when I used it for my crumb coat it came out chunky and even crumbly.. My cake layers were frozen so they rapid cooled all those air bubbles and it was a chunky mess..
So then I found this article and it made sense, the air bubbles were the problem. So I followed this post to a T and frosted literally the smoothest cake I’ve ever made! Literally from the chunkiest to the smoothest! I wish I could put pictures on here!
And the real game changer was that final step of heating the spatula… Oh my gosh!! ?
Can I substitute water for the heavy cream? And if I do use heavy cream, is the frosting shelf stable if I leave my cake out overnight?
Hi Samantha,
It’s a very small amount of heavy cream, so this buttercream can sit out for 1-2 days at room temperature. I wouldn’t recommend using water, it will really thin the buttercream and change it’s consistency. Hope that helps, happy baking!
Tanks alot. I enjoy d process
So happy to hear that! Thanks for sharing Ejiro!
Just made this frosting for the 1st time it is truly smooth and it’s also delicious. I made the recipe but made it one and a 1/2 times. This is truly the 1st time I’ve ever had a butter cream recipe that wasn’t grainy. Thank you!
So happy to hear that Anne 🙂 YAY!!!!! Thank you for sharing!
I have followed all these steps, made sure everything was room temp,etc and sifted my powdered sugar. Several times, this has come out with a very grainy appearance. Do you have any idea why or any suggestions? I don’t know how to get it smooth and would appreciate any help!
Hi Lori,
If not of the tips above are working, the issue might be the type of powdered sugar you’re using. Does it look grainy, or does it feel grainy? Some brands of powdered sugar are less refined than others. What brand of powdered sugar are you using? Hopefully we’ll be able to figure it out together!
@Chelsweets,
It doesn’t appear grainy. I use either Kroger or aldi brand. Both bags have the 10x powdered marking on it like you said the domino I think did. I also sifted it last time and no success. Could it be too little liquid or maybe the butter isn’t quite right?
Sounds like powdered sugar isn’t the problem then! What type of butter are you using? My best guess would be too little liquid! Try adding a bit more next time, and hopefully that’ll help!
@Chelsweets,
I used unsalted butter from aldi or Kroger.
I used 3TBSP of heavy cream. Do you have any suggestions of how much more to add? Thank you so much for your help!
Hi Lori,
Sometimes I end up using 1/3 to 1/2 cup of heavy cream in the winter! I find the air is drier and it’s cold here in Seattle, so I have to add a ton more heavy cream in the winter. So I’d say def add a few more Tbsp and see if that helps! Hopefully it does 🙂
My concern is condensation of frosted cake, how do i deal with it?
Hi Ummi,
Condensation can be challenging, especially if you live somewhere warm or humid! I’d recommend avoiding putting the cake in the freezer, and trying to minimize the temperature change the cake goes through. For instance, if you have to store it in the fridge overnight, turn the AC up in you kitchen so that when you take it out there won’t be as big of a temperature change. This can help minimize condensation. Some people also recommend storing cakes in boxes in the fridge and when you remove them to help with the temperature change. If it’s really moist and the frosting is thoroughly chilled, you can also gently pat the sides of the cake with a paper towel to absorb some of the moisture. Hope that helps, happy baking!
THANK YOU! I almost spent money ????? on a recipe because their buttercream was silky smooth but the creator wouldn’t tell what they did to get it that way and wanted you to pay for it. The finally mixing of the spatula was the trick!
Hi Nic,
It really works so well, right?!?! So happy to hear this helped 🙂