
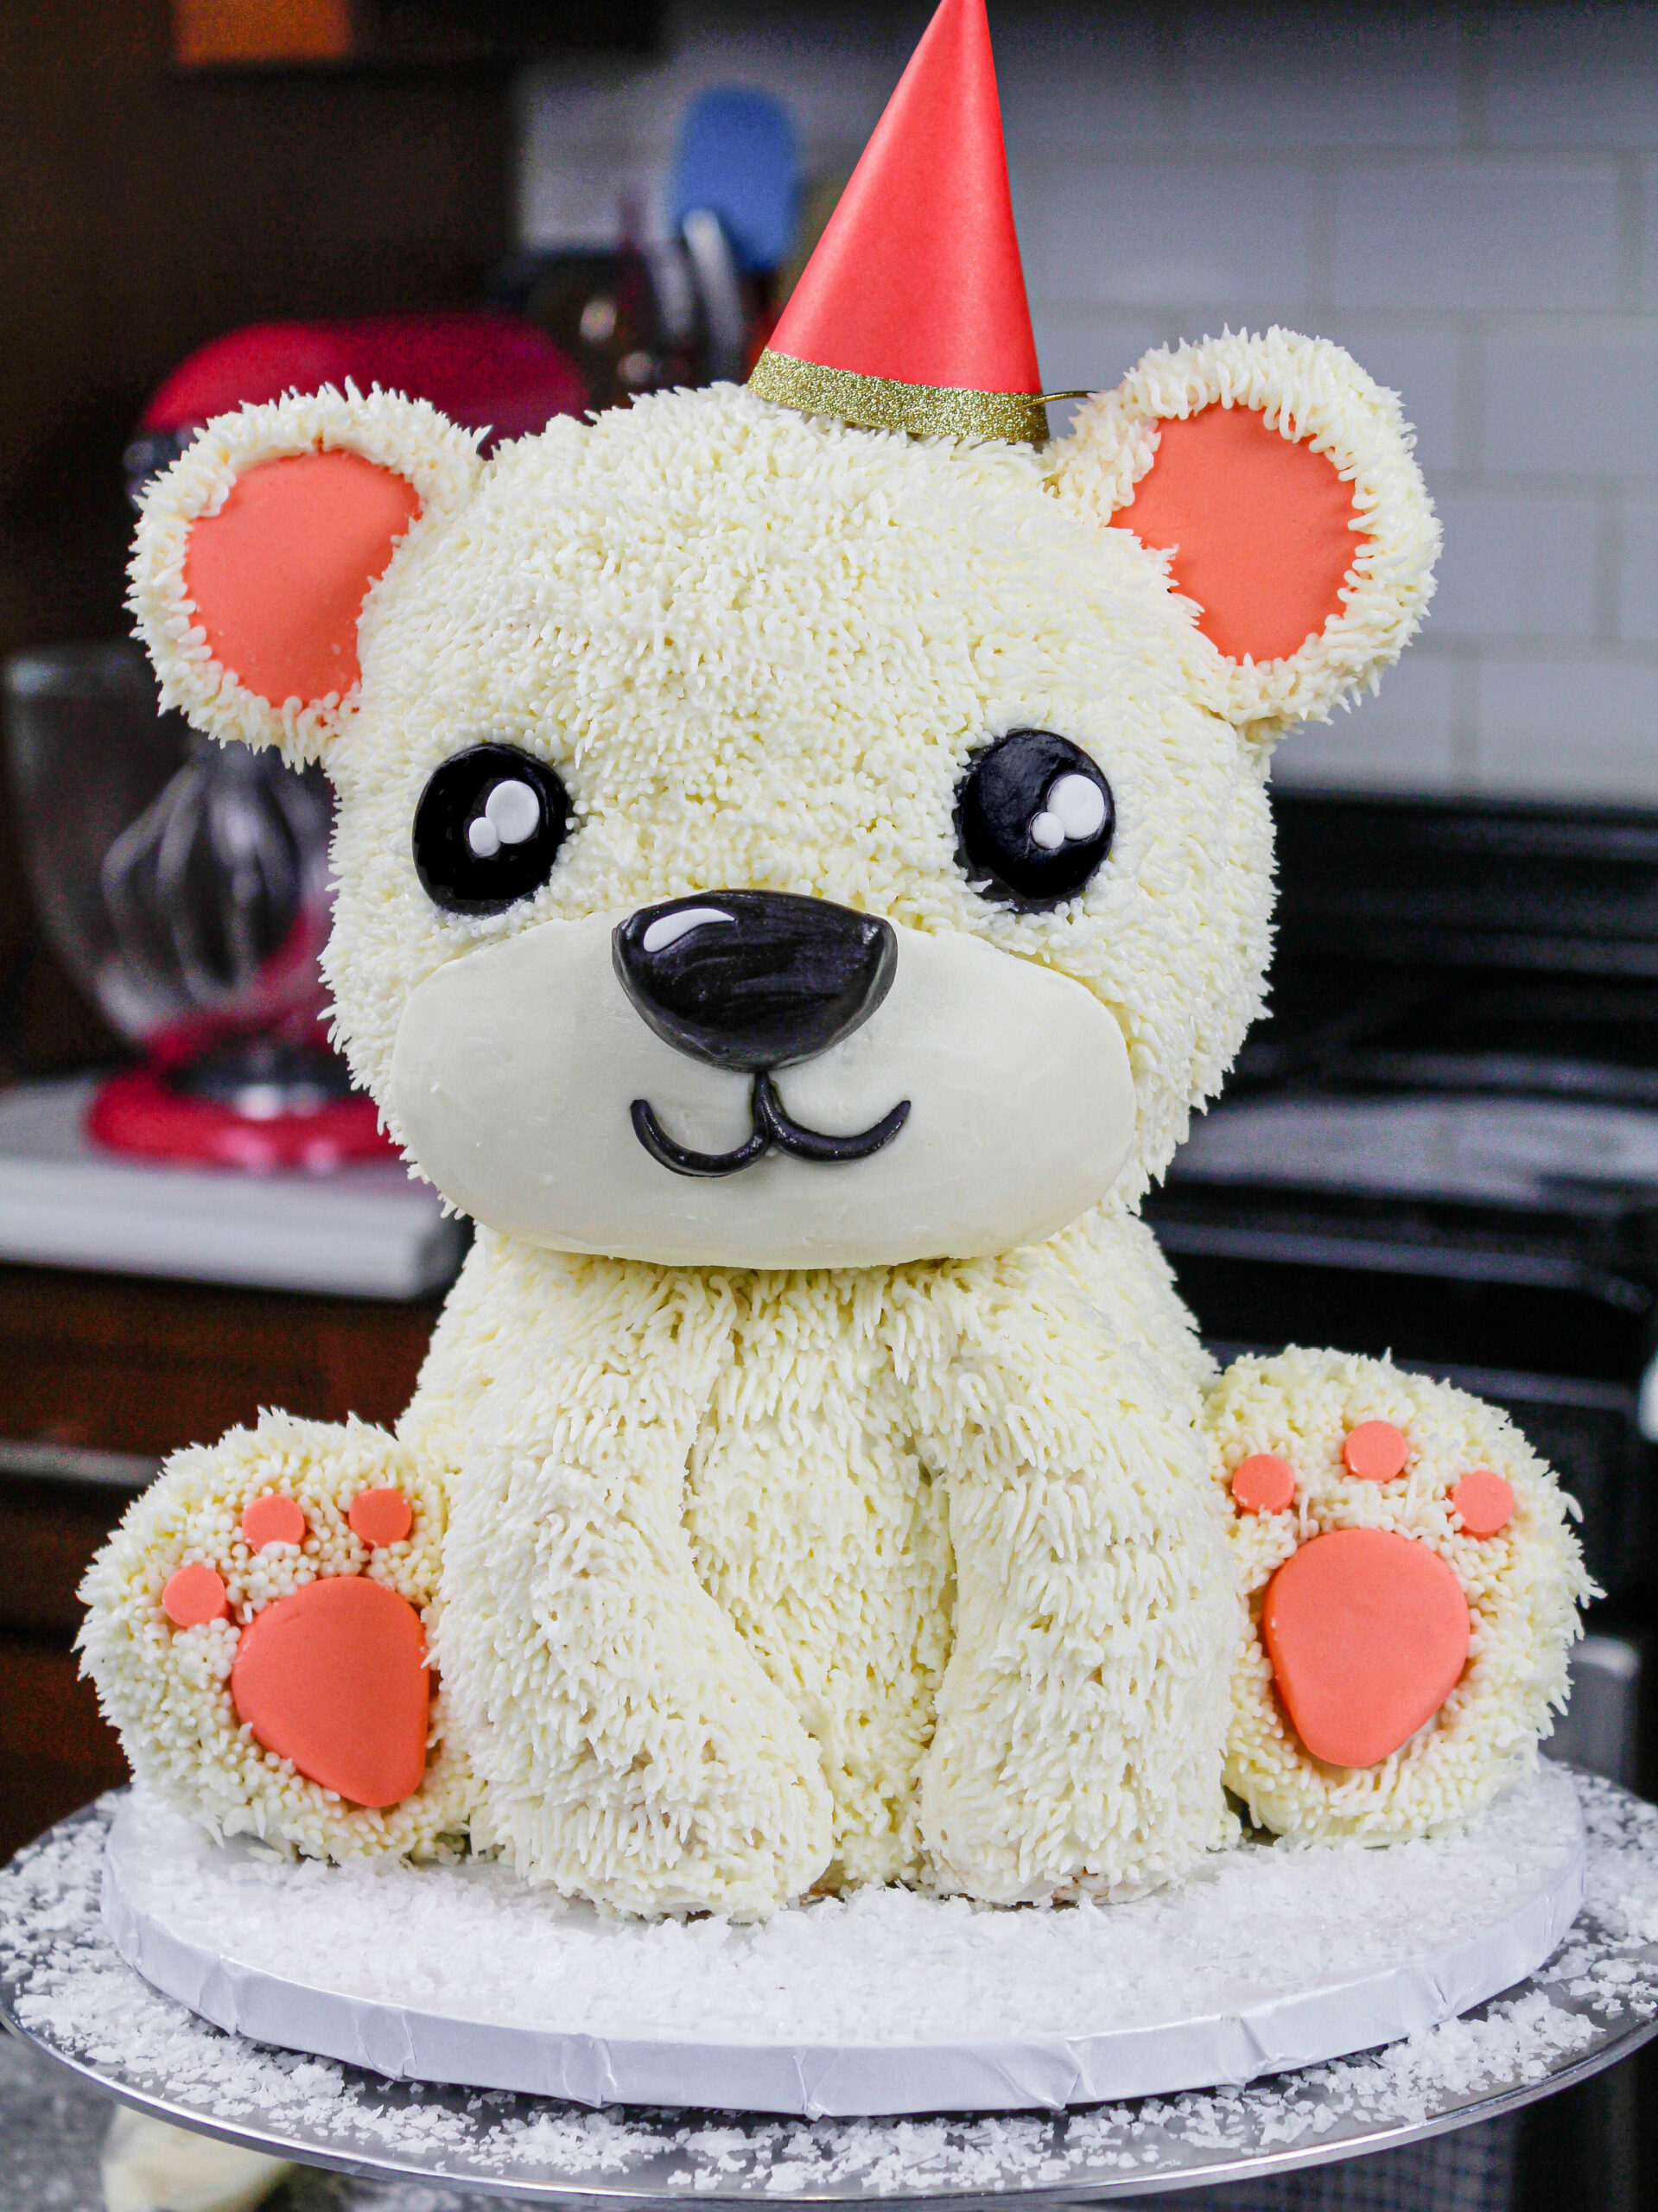
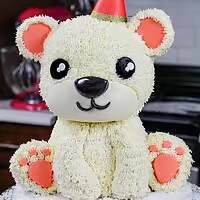
Polar Bear Cake
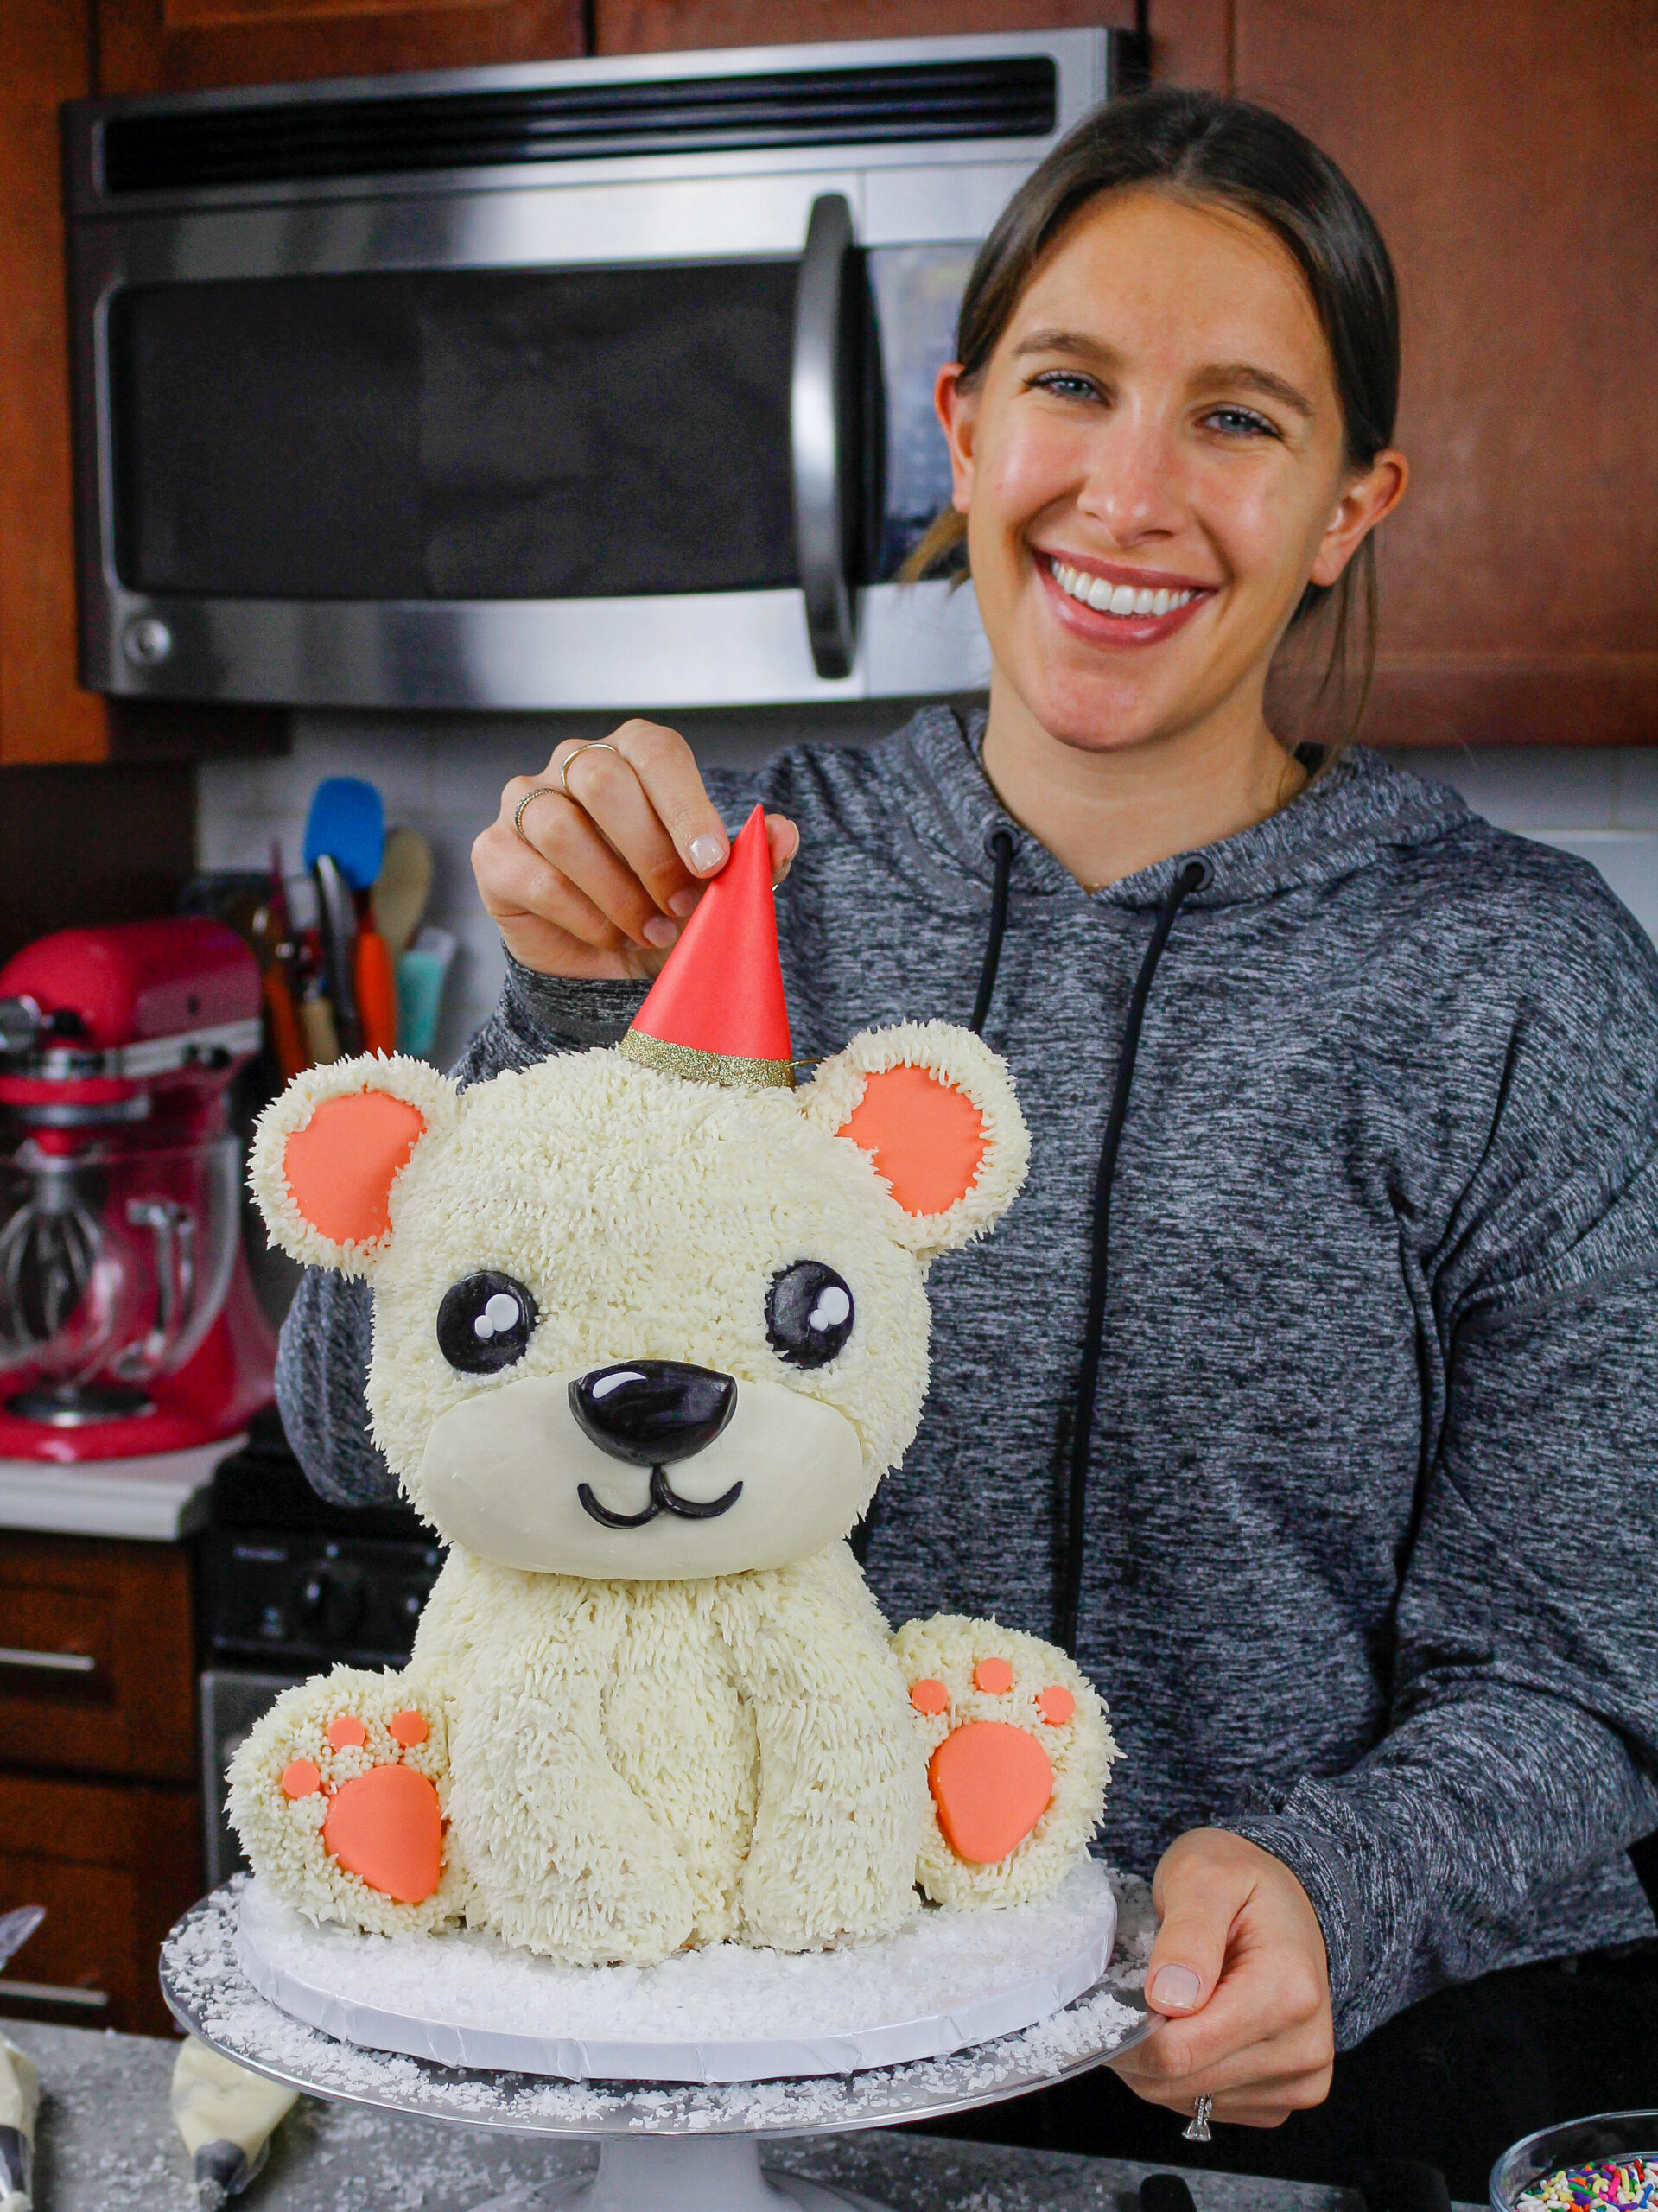
This week I’m making a polar bear cake to continue my animal cake series!
I got a lot of requests for this cake, and it felt appropriate with the frigid temperatures we’ve had lately.
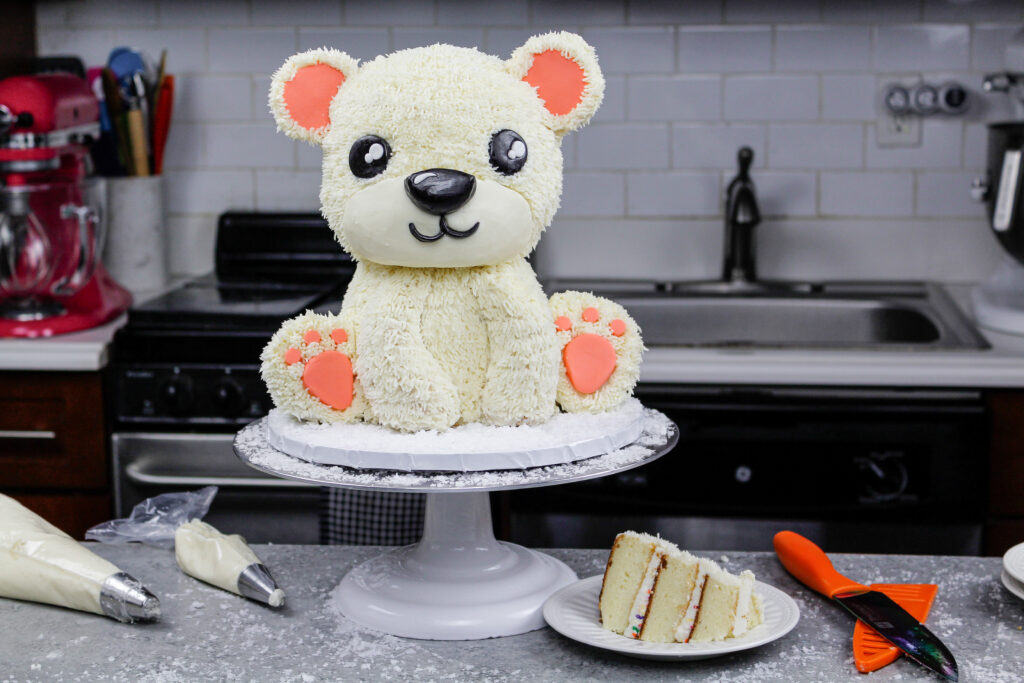
This polar bear cake is made with tender vanilla cake layers and loads of piped vanilla buttercream fur!
Making the Face for this Little Polar Bear
While I’m always team buttercream, sometimes using a bit of fondant just makes sense.
We’re already putting so much energy into making the cake layers and buttercream from scratch, a tiny bit of fondant just makes the process easier.
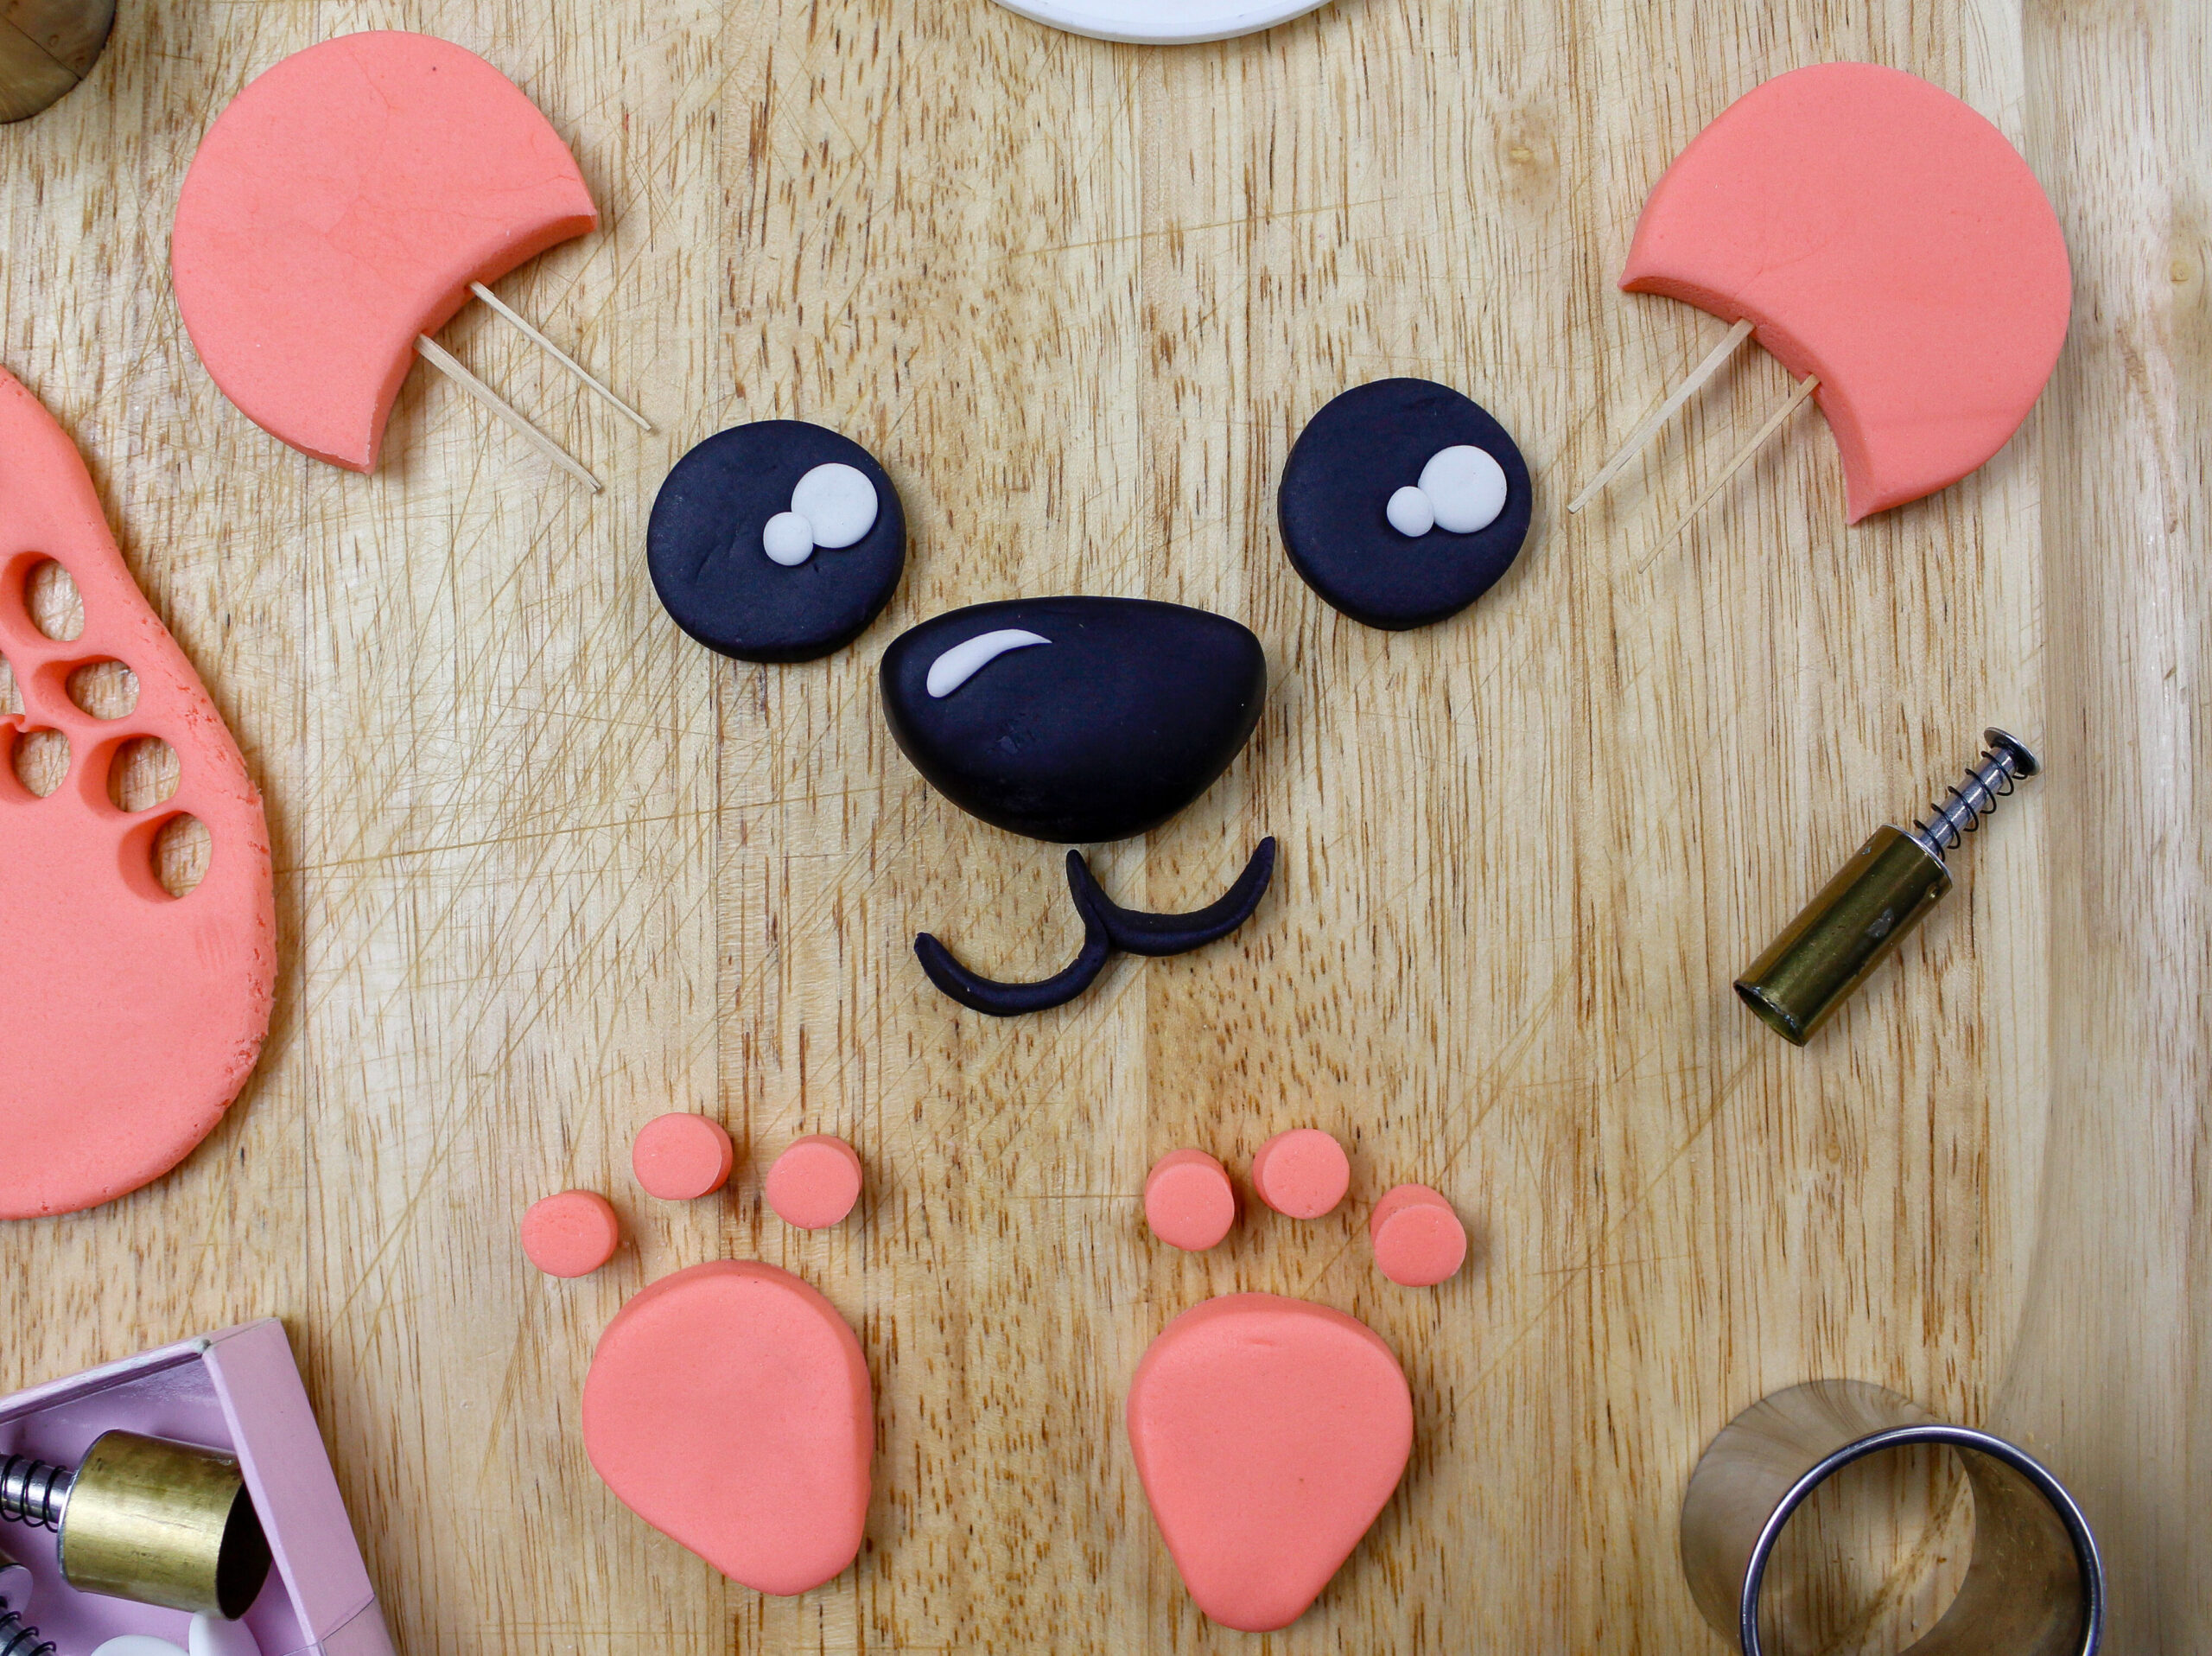
I used a little bit of black, pink, and white fondant to make the little face and ears for this polar bear.
Small circle cutters help you to get the shape of the eyes and ears just right, and I love the adorable expression they give this cake.
Shaping this Polar Bear Cake with Rice Krispie Treats
A batch of cake-decorating-friendly Rice Krispies makes this challenging cake shape so much more manageable.
By omitting the butter that’s in most Rice Krispie treats, my cake-decorating Rice Krispies set quite firmly once they’ve cooled.
This makes it so much easier to make sculpted cakes. I used the same technique to make my Patrick Star cake, and I highly recommend it for shaped cakes like this.
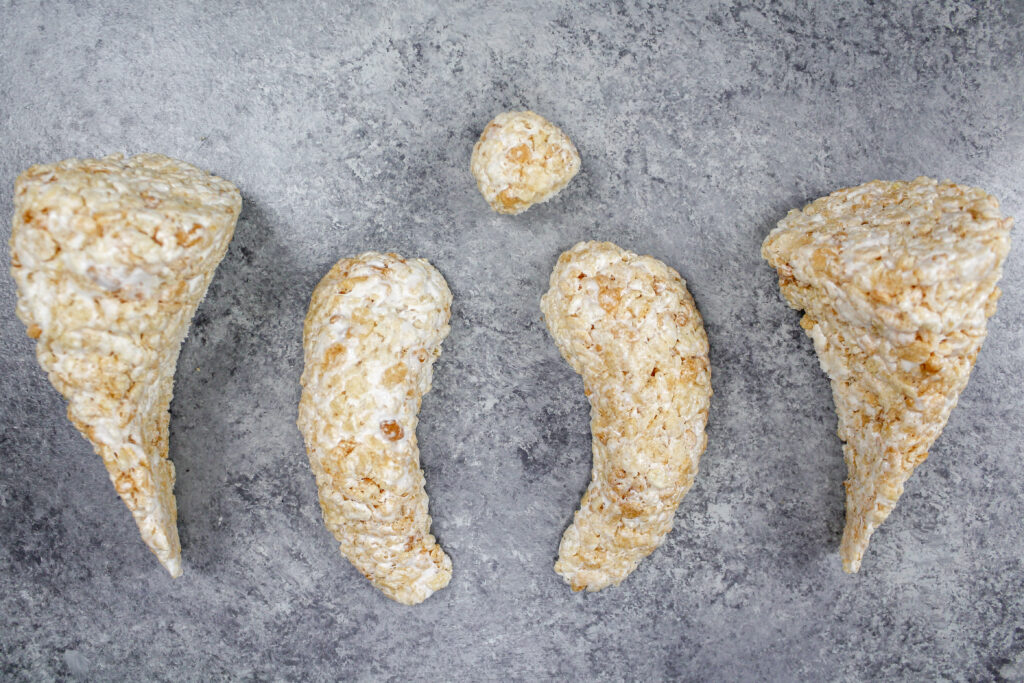
One helpful tip – I highly suggest greasing your hands with cooking spray before shaping the warm Rice Krispie mixture. It makes it so much easier to handle!
As you shape the legs and arms, hold them up next to the cake to make sure they are proportionate and shaped properly.
Substitutions and Swaps – Vanilla Cake Layers
This polar bear birthday cake uses quite a few ingredients and I know you might not have them all on hand. Or if you have food allergies or restrictions, I’ve got you covered.
Below are some swaps and substitutions that can be made in this polar bear cake recipe.
- Cake Flour – I love using cake flour to give these layers a super soft texture, but you can use all-purpose flour or a gluten-free flour blend if needed.
- Granulated Sugar – I do not recommend reducing the amount of sugar or changing the type of sugar, as it will change the texture of the cake layers.
- Unsalted Butter – If you only have salted butter on hand, you can use it in place of the unsalted butter. Just be sure to omit the salt! You can also use vegan butter in its place.
- Egg Whites – If you can’t find egg whites in a carton or want to use whole eggs, use 4 whole eggs instead. Or if you have an egg allergy you can use an egg replacer like this.
- Sour Cream – You can use full-fat yogurt, buttermilk, whole milk, or an alternative yogurt or milk (almond, soy, oat) if you’re dairy-free.
- Vegetable Oil – Any flavorless oil would work great in this recipe, like canola or sunflower oil.
Substitutions and Swaps – Vanilla Buttercream Frosting
- Unsalted Butter – If you only have salted butter on hand, you can use it in place of the unsalted butter. Just be sure to omit the salt that this frosting recipe calls for. You can also use vegan butter in its place!
- Heavy Cream – Whole milk or alternative milk (soy, almond, oat) will work fine in this frosting recipe too.
- Vanilla Extract – Other extracts can also be used in place of the vanilla extract.
Tips for Making the Best Polar Bear Cake:
- Properly measure the flour (spoon into the cup measure, then level) or use a kitchen scale to measure your dry ingredients.
- Ingredients at room temp mix together better. Set out any cold ingredients ahead of time.
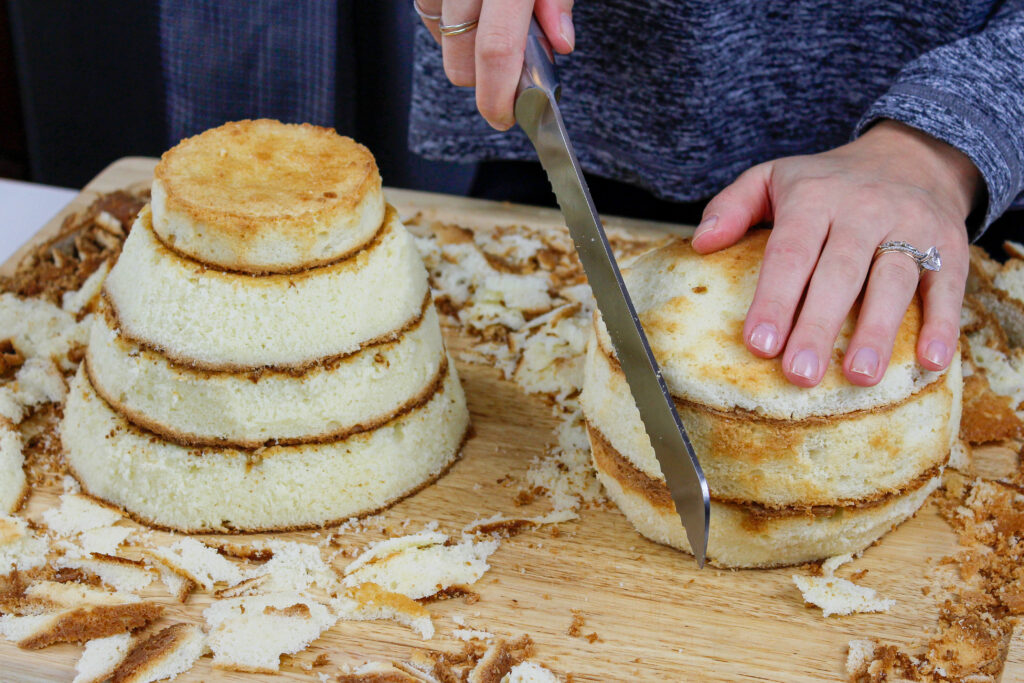
- Trim the cake layers before stacking and frosting them! It makes it so much easier to get the shape of this polar bear just right.
- Use a small grass piping tip to give this polar bear a perfectly fuzzy layer of “fur.”
- Chill the cake layers in the freezer for about 20 minutes before assembling the cake. This makes it easier to stack and frost.
- Make a vegan or dairy-free polar bear cake if needed! Use your favorite type of dairy-free milk to replace the buttermilk and heavy cream and use vegan butter sticks in place of the butter. For the eggs, I recommend using an egg replacer like this.
- Be patient and give yourself lots of time! Sculpted cakes like this can be challenging. Take your time piping the frosting and adding the details to this cake.
- If your hands run hot, wrap a paper towel, or thin kitchen towel around your piping bag to prevent the transfer of heat from your hands into the frosting.
- Take breaks as you pipe on the buttercream fur to prevent hand cramps and keep your sanity!

Making this Polar Bear Cake in Advance & Storage Tips
I highly recommend making the cake layers in advance and freezing them. It breaks the process up and makes it more approachable.
You can also make the frosting ahead of time or save any leftover frosting. It can be stored in an airtight container in the fridge for up to a month. Or store it in the freezer for up to 3 months! Be sure to give it a good stir once it thaws to get the consistency smooth again.
A frosted cake can last in the fridge for up to a week. The buttercream locks in all the moisture, keeping the cake fresh and delicious.
If you cut into the cake and have leftovers, use any remaining frosting to cover the cut section to keep it moist. It can be stored in the fridge like this for up to a week.
Let Me Know What You Think!
If you make this polar bear cake, I’d love to hear how it goes! Let me know by leaving a comment and rating below.
If you plan to share on social media, tag me @chelsweets and #chelsweets so that I can see your amazing creations!
Polar Bear Cake
Ingredients
Vanilla Cake Layers
- 3 cups cake flour 360g
- 3 cups granulated sugar 600g
- 2 1/2 tsp baking powder 10g
- 1 tsp fine salt 6g
- 1 cup (2 sticks) unsalted butter, room temperature 226g
- 1 cup carton egg whites or 7 large egg whites, room temperature 235g
- 1 1/2 cups full-fat sour cream, room temperature 375g
- 2 Tbsp vegetable or canola oil 28g
- 1 Tbsp vanilla extract or vanilla bean paste 12g
White Buttercream Frosting
- 3 cups unsalted butter, room temperature 678g
- 1 Tbsp vanilla extract or vanilla bean paste 12g
- 1 tsp fine salt 6g
- 11 cups powdered sugar 1375g
- 1/2 cup heavy whipping cream, room temperature 120g
Rice Krispie Treats – Polar Bear Arms and Legs
- 3 cups mini marshmallows 150g
- 4 1/2 cups puffed rice cereal 112g
Polar Bear Cake Decoration
Instructions
Step 1: Make the Vanilla Cake Layers
- Preheat the oven to 350°F/175°C. Grease and line six 6-inch cake pans, and one 4-inch cake pan and set aside.
- Mix 3 cups cake flour, 3 cups sugar, 2 1/2 tsp baking powder, and 1 tsp salt together in a stand mixer with a paddle attachment or hand mixer until fully combined.
- Then mix in 1 cup of room temperature, unsalted butter slowly into the dry ingredients on a low speed. Continue to mix until no large chunks of butter remain, and the mixture looks like moist sand.
- Pour in 1 cup of egg whites and mix on low until fully incorporated. Mix in 1 1/2 cups of sour cream, 2 Tbsp of vegetable oil, and 1 Tbsp of vanilla extract and mix at a low speed until fully incorporated.
- Scrape down the sides and bottom of the bowl with a rubber spatula, then beat on a medium speed for 30 seconds to make sure everything is properly mixed together. This also helps lighten the texture of the cake layers a bit.
- Divide the batter evenly between the prepared cake pans. Bake for 32-35 minutes and rotate the layers halfway through to help them bake evenly. Test the center of each cake layer for doneness, and make sure that a toothpick inserted into the center of the layer comes out with a few moist crumbs – that's when you know it's done! If it comes out wet with batter, the layers need a bit more time to bake.
- Once the cake layers are done baking, let the pans cool for 10 minutes, then run an offset spatula around the perimeter of the pan to separate the cake from the pan.
- Place the cake pans into the freezer for 45 minutes to accelerate the cooling process. Once the layers are fully cooled, carefully flip the pans, and remove the layers from the pans.
- Once the cake layers have finished cooling, use a serrated knife to level the tops and trim the layers to look like a polar bear's body and head (see photos above). Set the cake layers aside.
- If you make these cake layers in advance, wrap and freeze them like this. When you're ready to assemble the cake, unwrap the frozen layers and let them thaw for about 20 minutes before you assemble the cake.
Step 2: Make the Vanilla Buttercream Frosting
- While the cake layers bake and cool, make the vanilla buttercream frosting.
- Beat 3 cups of butter on a medium speed for 30 seconds with a paddle attachment or hand mixer until smooth.
- Add in 1 Tbsp of vanilla extract and 1 tsp of salt and mix on a low speed.
- Slowly mix in 11 cups of powdered sugar on a low speed. Add 1/2 cup of heavy cream halfway through to make it easier to mix. Scrape the sides and bottom of the bowl with a rubber spatula to make sure everything is getting mixed together properly.
- Once the ingredients are fully combined and the frosting has reached the desired consistency, beat on low for a couple of extra minutes to make the frosting super smooth and push any extra air out of the frosting.
- If the frosting seems too thick, add additional cream (1 Tablespoon at a time). If the frosting is too thin, add more powdered sugar (1/4 cup at a time).
- Cover the buttercream with plastic wrap to prevent crusting, then set aside.
Step 3: Assemble the Polar Bear Cake
- Before you make this cake, use the black, white, and pink fondant to create the polar bear's eyes, nose, ears, and foot pads. Make the pink fondant ears about 1/2 inch thick to allow you to press 2 toothpicks into each ear to make them easier to add to the cake.
- Place the fondant pieces on a wire rack or piece of parchment paper to dry and firm up while you assemble the cake.
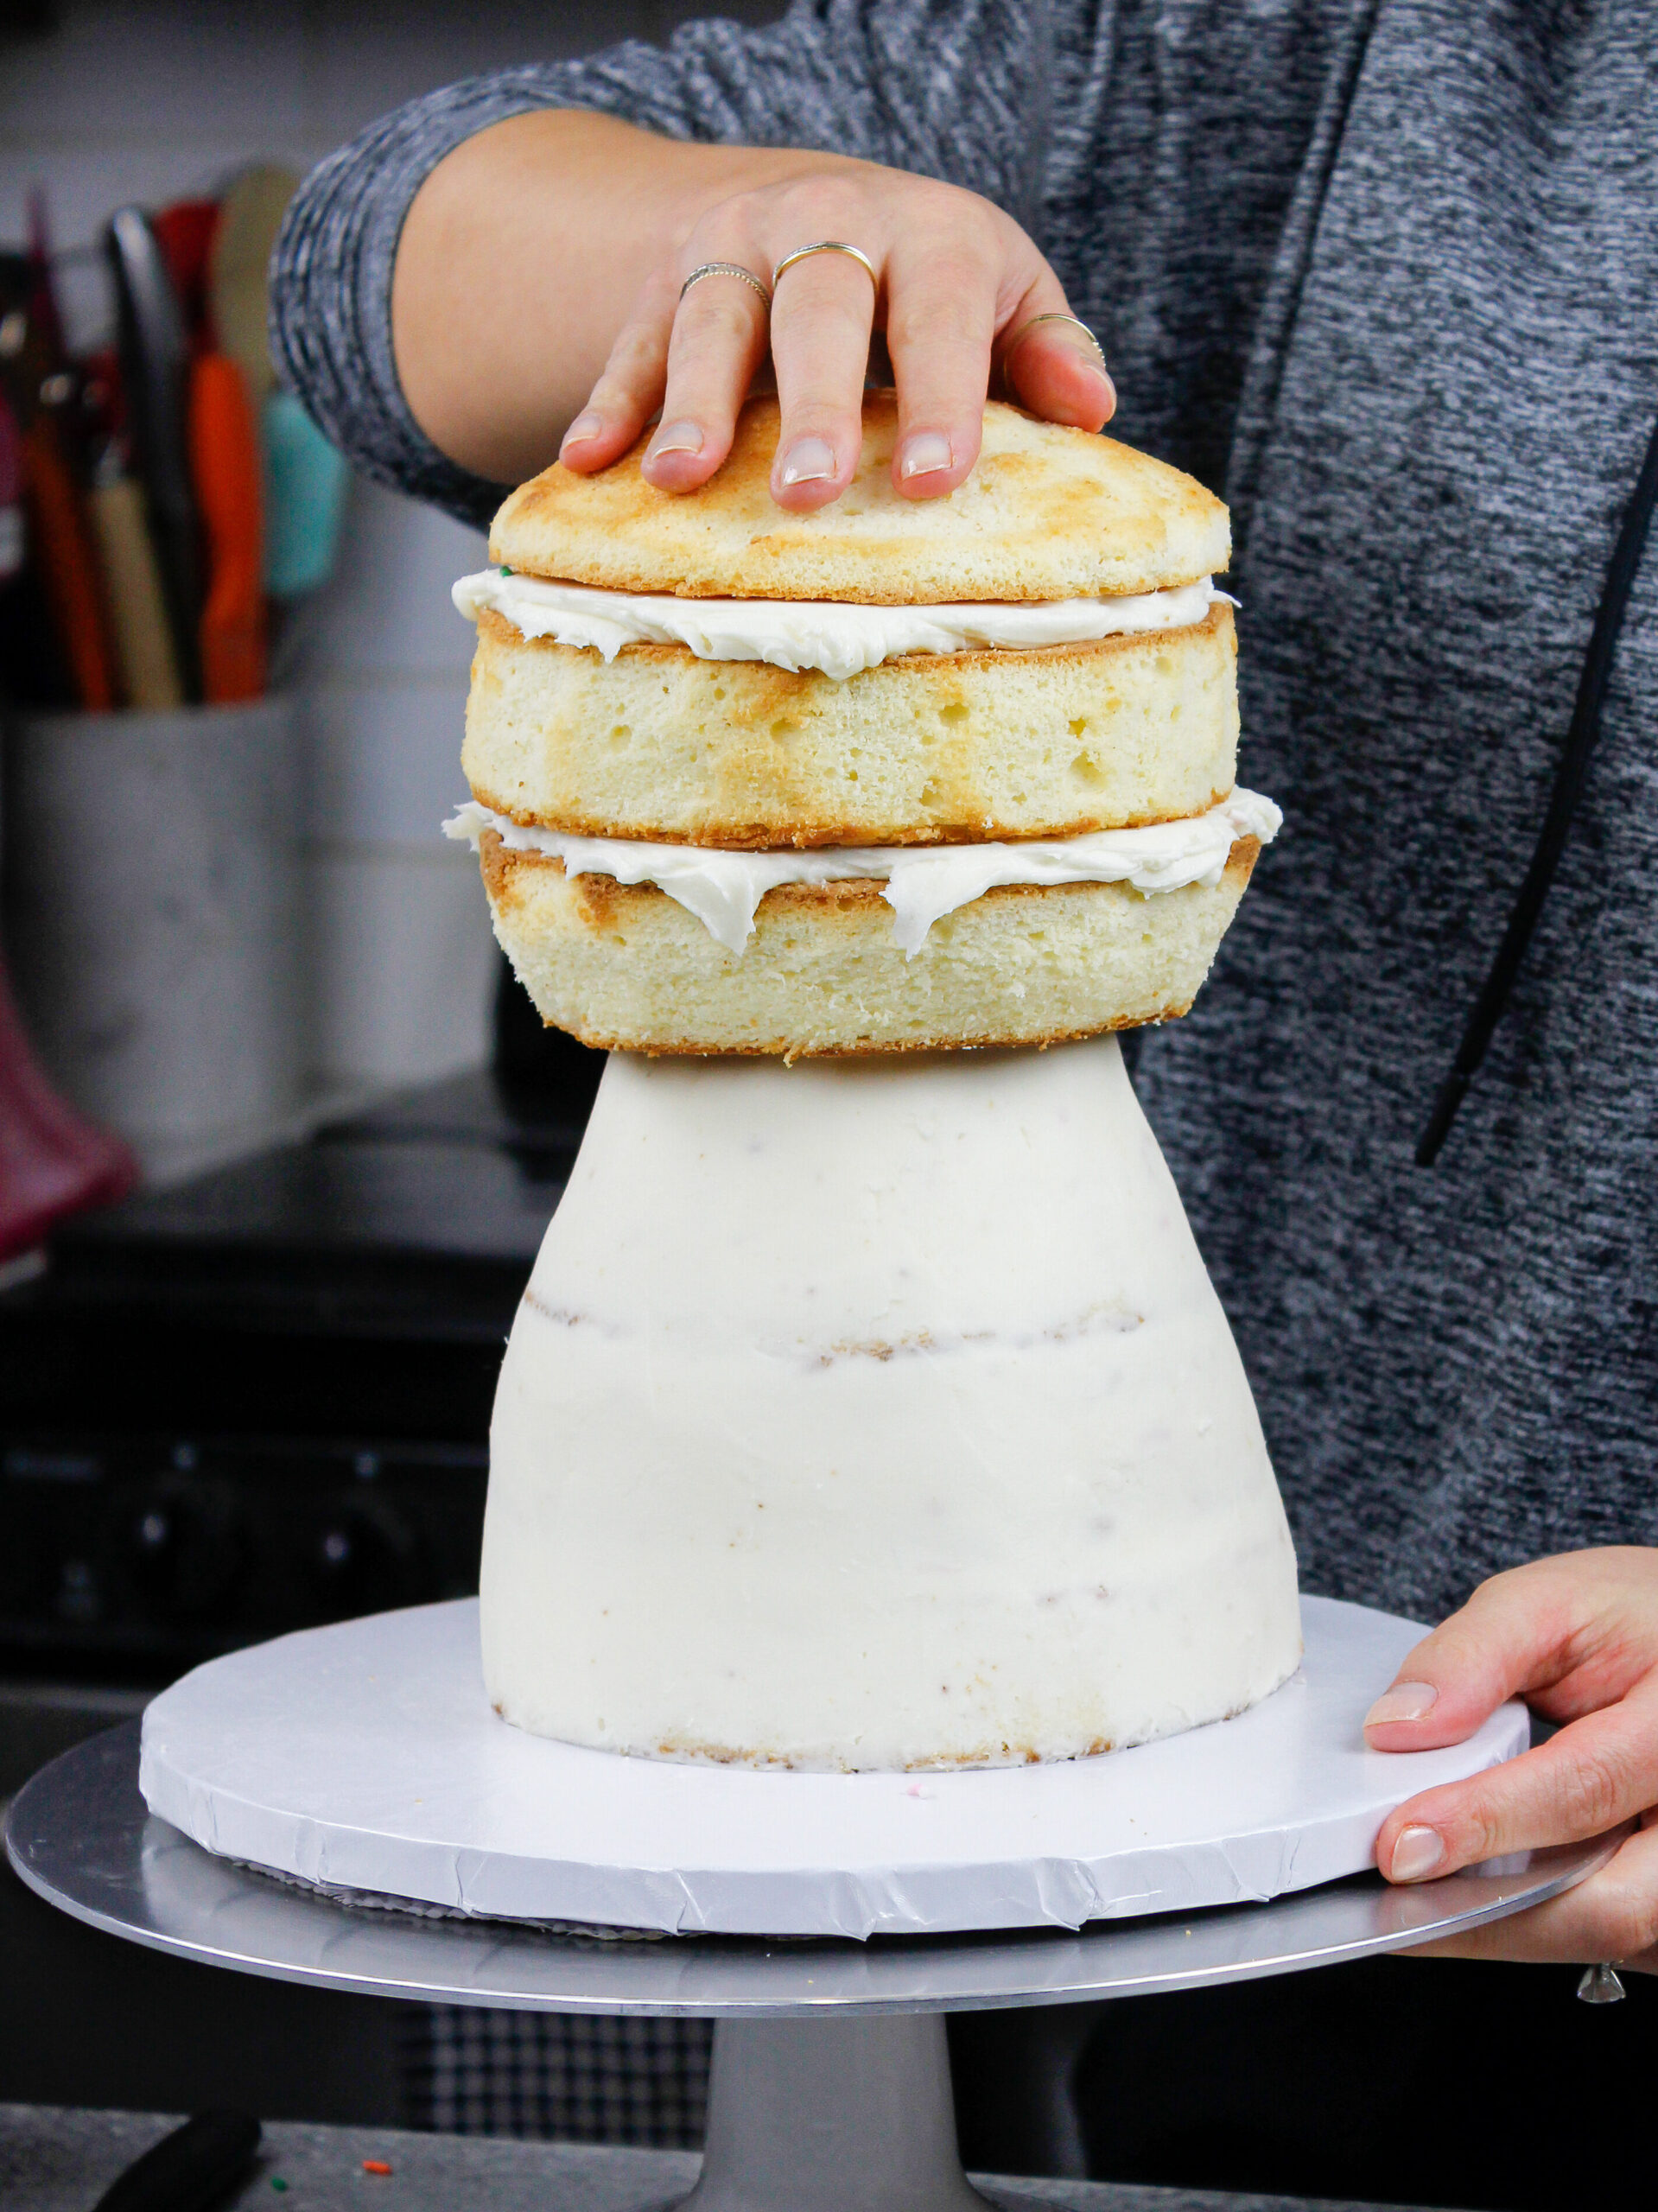
- Stack and frost cake layers on a 10-inch greaseproof cake board or cake drum using a dab of frosting to help stick the first cake layer to the board.
- Add an even layer of buttercream between each cake layer with a large offset spatula and stack them in the following order: 6-inch, 6-inch, 6-inch, 4-inch, 6-inch, 6-inch, 6-inch. If desired, add rainbow sprinkles on top of the frosting like I did in my video!
- Insert either a thick plastic straw (like a bubble tea straw) or a wooden dowel through the center of the cake layers to help stabilize them.
- Spread a thin coat of frosting around the cake to fully cover the cake layers. Smooth using an acetate sheet or small offset spatula, then chill the cake in the fridge (30 minutes) or freezer (10 minutes) until the frosting is firm to the touch.
Step 4: Make the Arms & Legs with Rice Krispie Treats
- Place 3 cups of mini marshmallows in a heatproof bowl and heat in the microwave for 45-60 seconds at full power. They should be melted at this point and easy to stir. If not, heat in additional 15-second intervals until melted.
- Pour in 4 1/2 cups of rice krispies or puffed rice cereal and stir until the cereal is fully coated in melted marshmallows.
- Grease your hands with cooking spray then shape two thin front legs and two thick hind legs with the rice krispie mixture like the picture shown in the post above. Then make a small round ball for the polar bear's tail.
- Place the arms, legs, and tail next to your cake as you shape them to make sure they're proportionate and shaped properly.
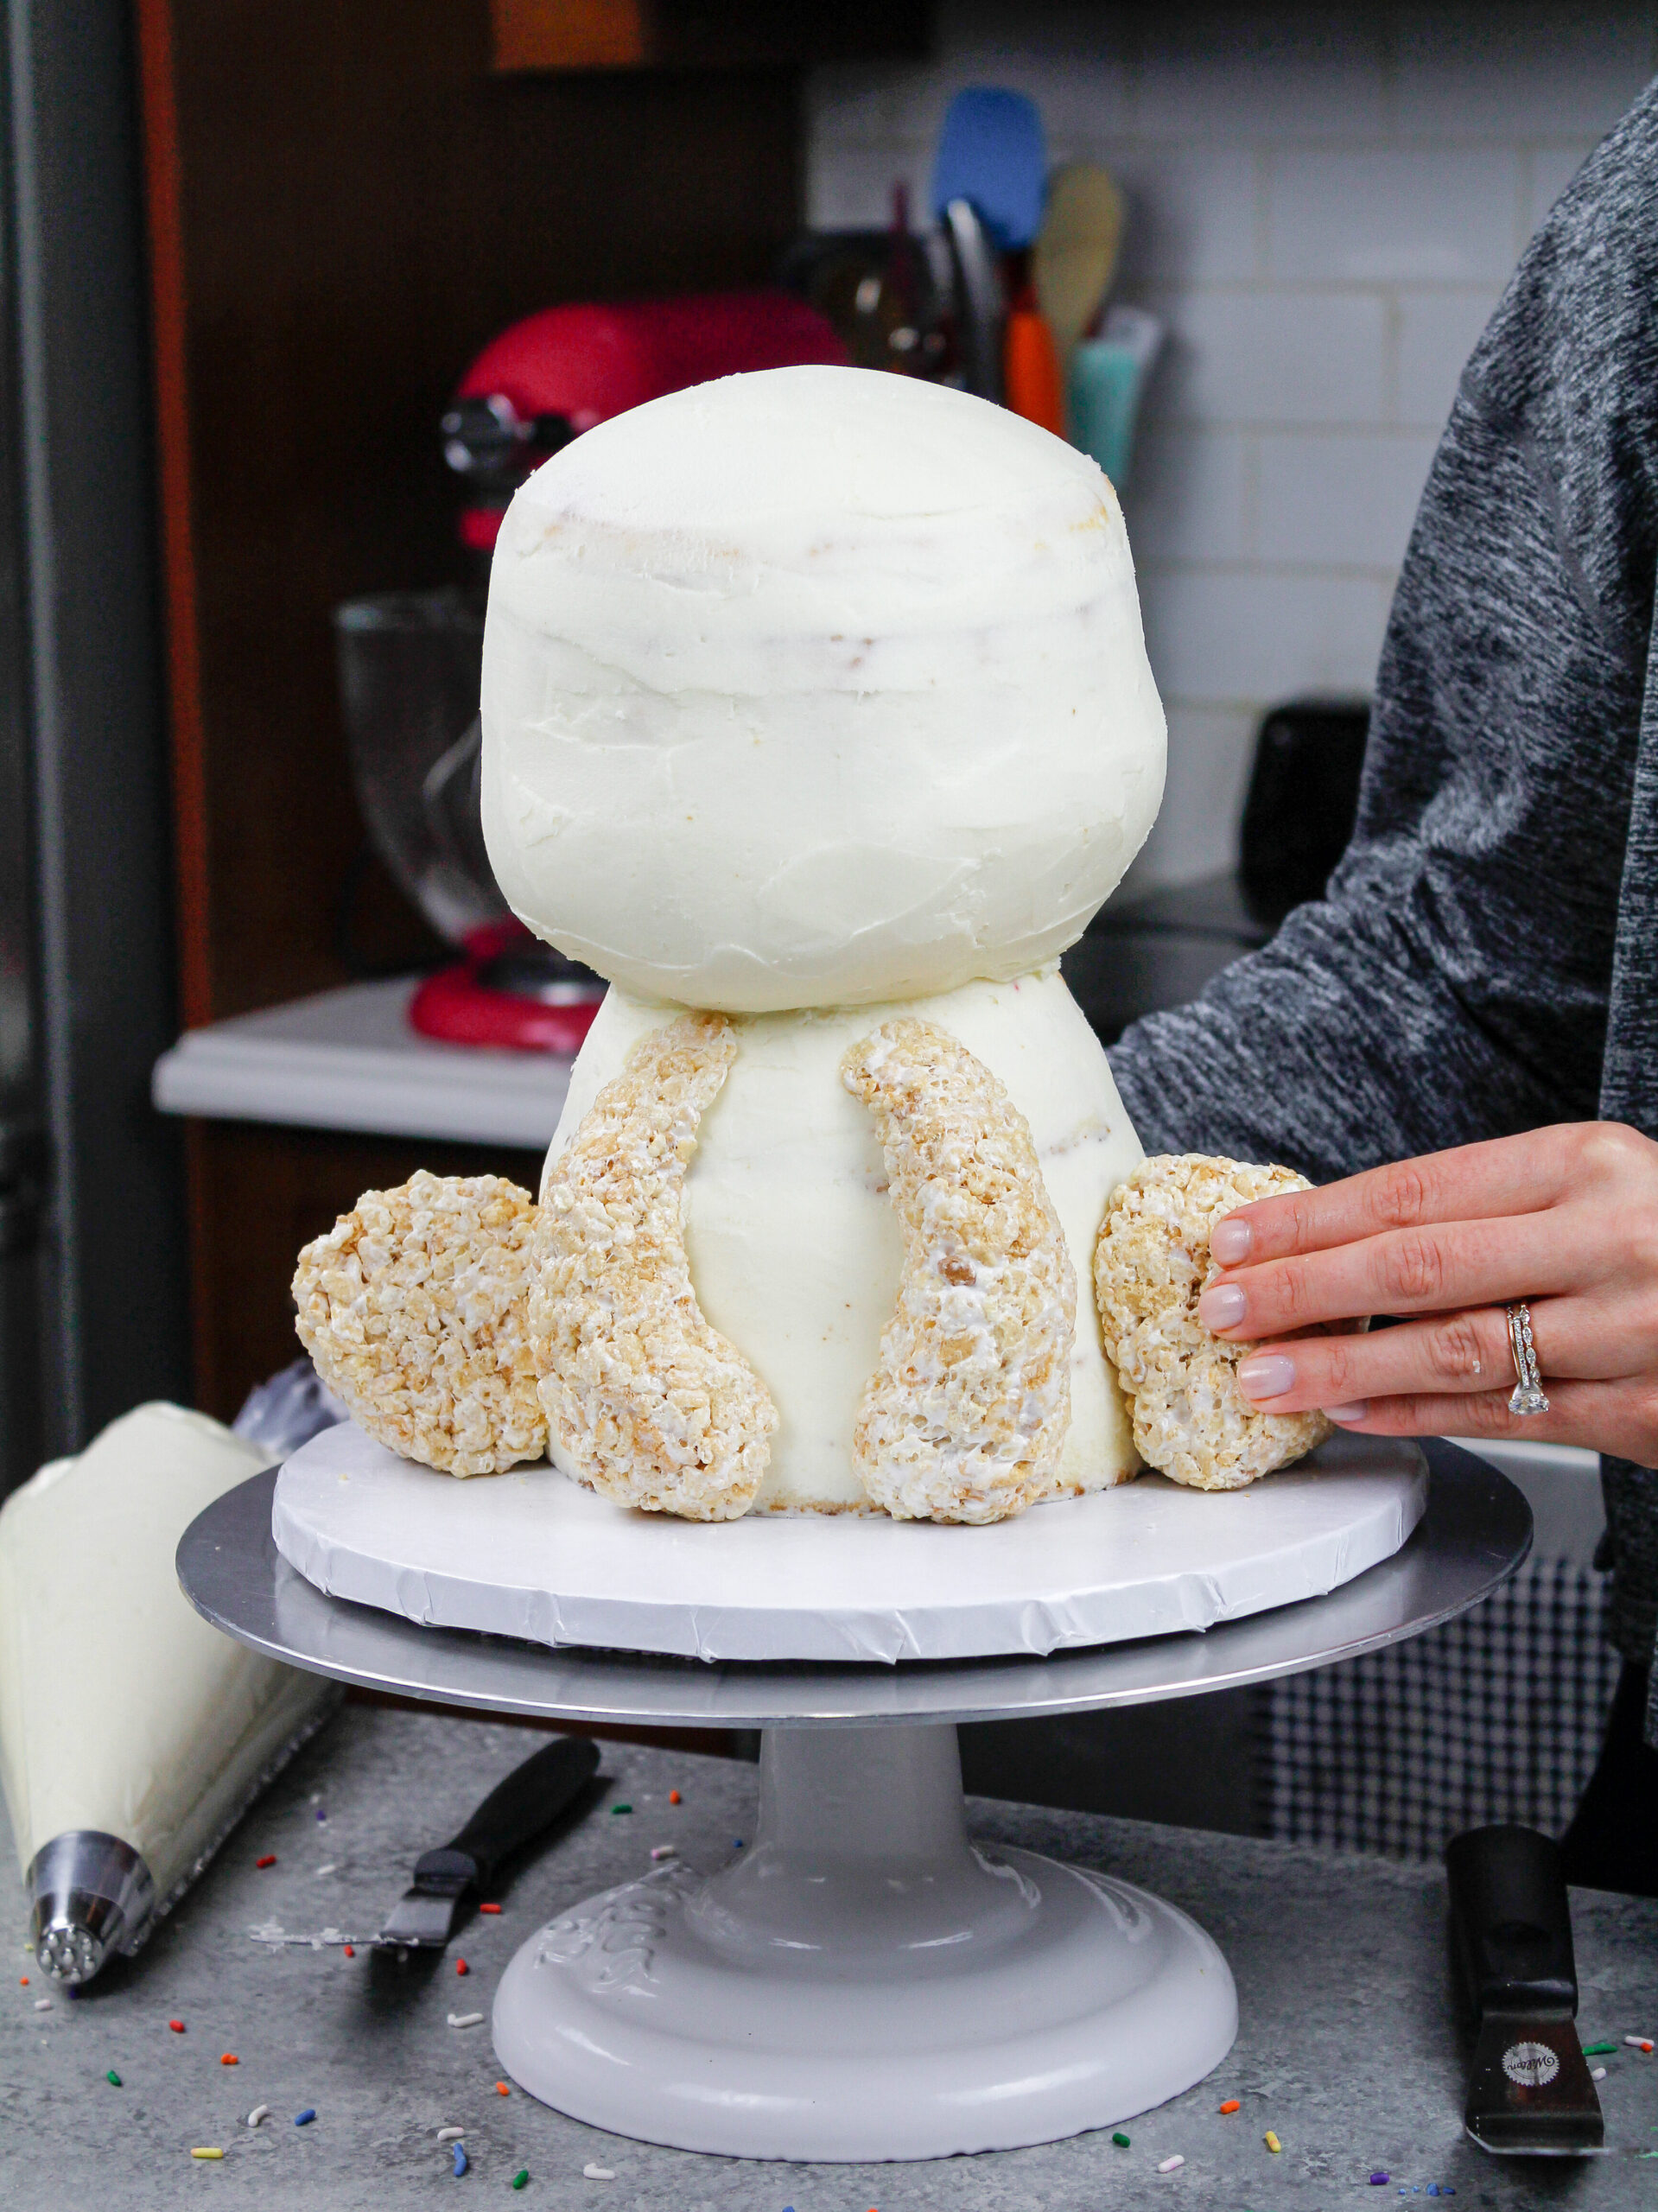
Step 5: Decorate the Polar Bear Cake
- Press the rice krispie arms, legs, and tail into place on the chilled cake. If they aren't staying in place, use a little buttercream to help them stay put.
- Spread a thin, even layer of white buttercream over the rice krispies. Then smooth on a thick layer of white buttercream on the bottom half of the polar bear's face to look like a muzzle (like in the pictures above).
- Next, press the ears, eyes, nose, and foot pads into place on the cake with small dabs of buttercream to help them stick.
- Place the remaining buttercream in a large piping bag fitted with a small grass piping tip and cover the cake in buttercream "fur." Be sure to pipe around the fondant features and the muzzle.
- Then enjoy! If you make this cake in advance, store the frosted cake in the fridge and let the cake sit at room temperature for 1-2 hours before serving to make it easier to cut.
Video
Notes
Tips for Making The Best Polar Bear Cake
- Properly measure the flour (spoon into the cup measure, then level) or use a kitchen scale to measure your dry ingredients.
- Ingredients at room temp mix together better. Set out any cold ingredients ahead of time.
- Mix your cake batter just until the ingredients are incorporated. This will ensure your cake layers are tender and fluffy.
- Chill your cake layers in the freezer for about 20 minutes before assembling the cake. This makes it easier to stack and frost.
- Make this polar bear cake vegan or dairy-free if needed! Use your favorite type of dairy-free milk to replace the buttermilk and heavy cream, and use vegan butter sticks in place of the butter. For the eggs, I recommend using an egg replacer like this.
- Insert a thick bubble tea straw or wooden dowel through the layers once they're stacked to help keep the cake stable as you decorate it.
- Shape the fondant ears before you start assembling the cake. This will give them a chance to firm up before you have to add them to your cake.
- If your hands run hot, wrap a paper towel or thin kitchen towel around your piping bag to prevent the transfer of heat from your hands into the frosting.
- Take breaks as you pipe on the buttercream fur to prevent hand cramps and keep your sanity!
Making this Polar Bear Cake in Advance
I highly recommend making the cake layers in advance and freezing them. It breaks the process up and makes it more approachable. You can also make the frosting ahead of time or save any leftover frosting! It can be stored in an airtight container in the fridge for up to a month or in the freezer for up to 3 months. Be sure to give it a good stir once it thaws to get the consistency nice and smooth again. A frosted cake can last in the fridge for up to a week, or in the freezer for up to a month. The buttercream locks in all the moisture, keeping the cake fresh and delicious! If you cut into the cake and have leftovers, use any remaining frosting to cover the cut section to keep it moist and store it in the fridge for up to a week.Nutrition
Other Recipes You Might Like:

Hello! If I only have all-purpose flour, how much baking powder should I add?
Hi! So I used to bake quite a lot of cupcakes, so the buttercream consistency is a bit thicker/tougher. I was wondering to completely frost the cake what are the tips and hints to note? Like how should my butter be before I add the sugar? And how long should I leave it to mix after everything has been incorporated? Is there such a thing as overmixing your frosting? Thank you!!
Hi!
This is so adorable! I’m considering trying it for my niece’s 10th bday next month but making it look a bit more like her beloved teddy “Bear” (that’s his actual name.) Unless you also have a teddy bear cake that I just didn’t look far enough back in the archives for.
Anyway, I was curious…how does one go about cutting and serving a sculpted cake such as this without completely hacking it to pieces in a completely uncivilized manner? Any pointers would be greatly appreciated as I know I will be asked since I’m the one with the baking degree. ?
Thanks!
I just made this gorgeous cake and it has turned out amazing !