
Rainbow Marble Cake
I’ve made rainbow cakes before, but I’ve never made a rainbow marble cake! I swirled together two shades of colorful cake batter in each layer to create this cheerful cake design.
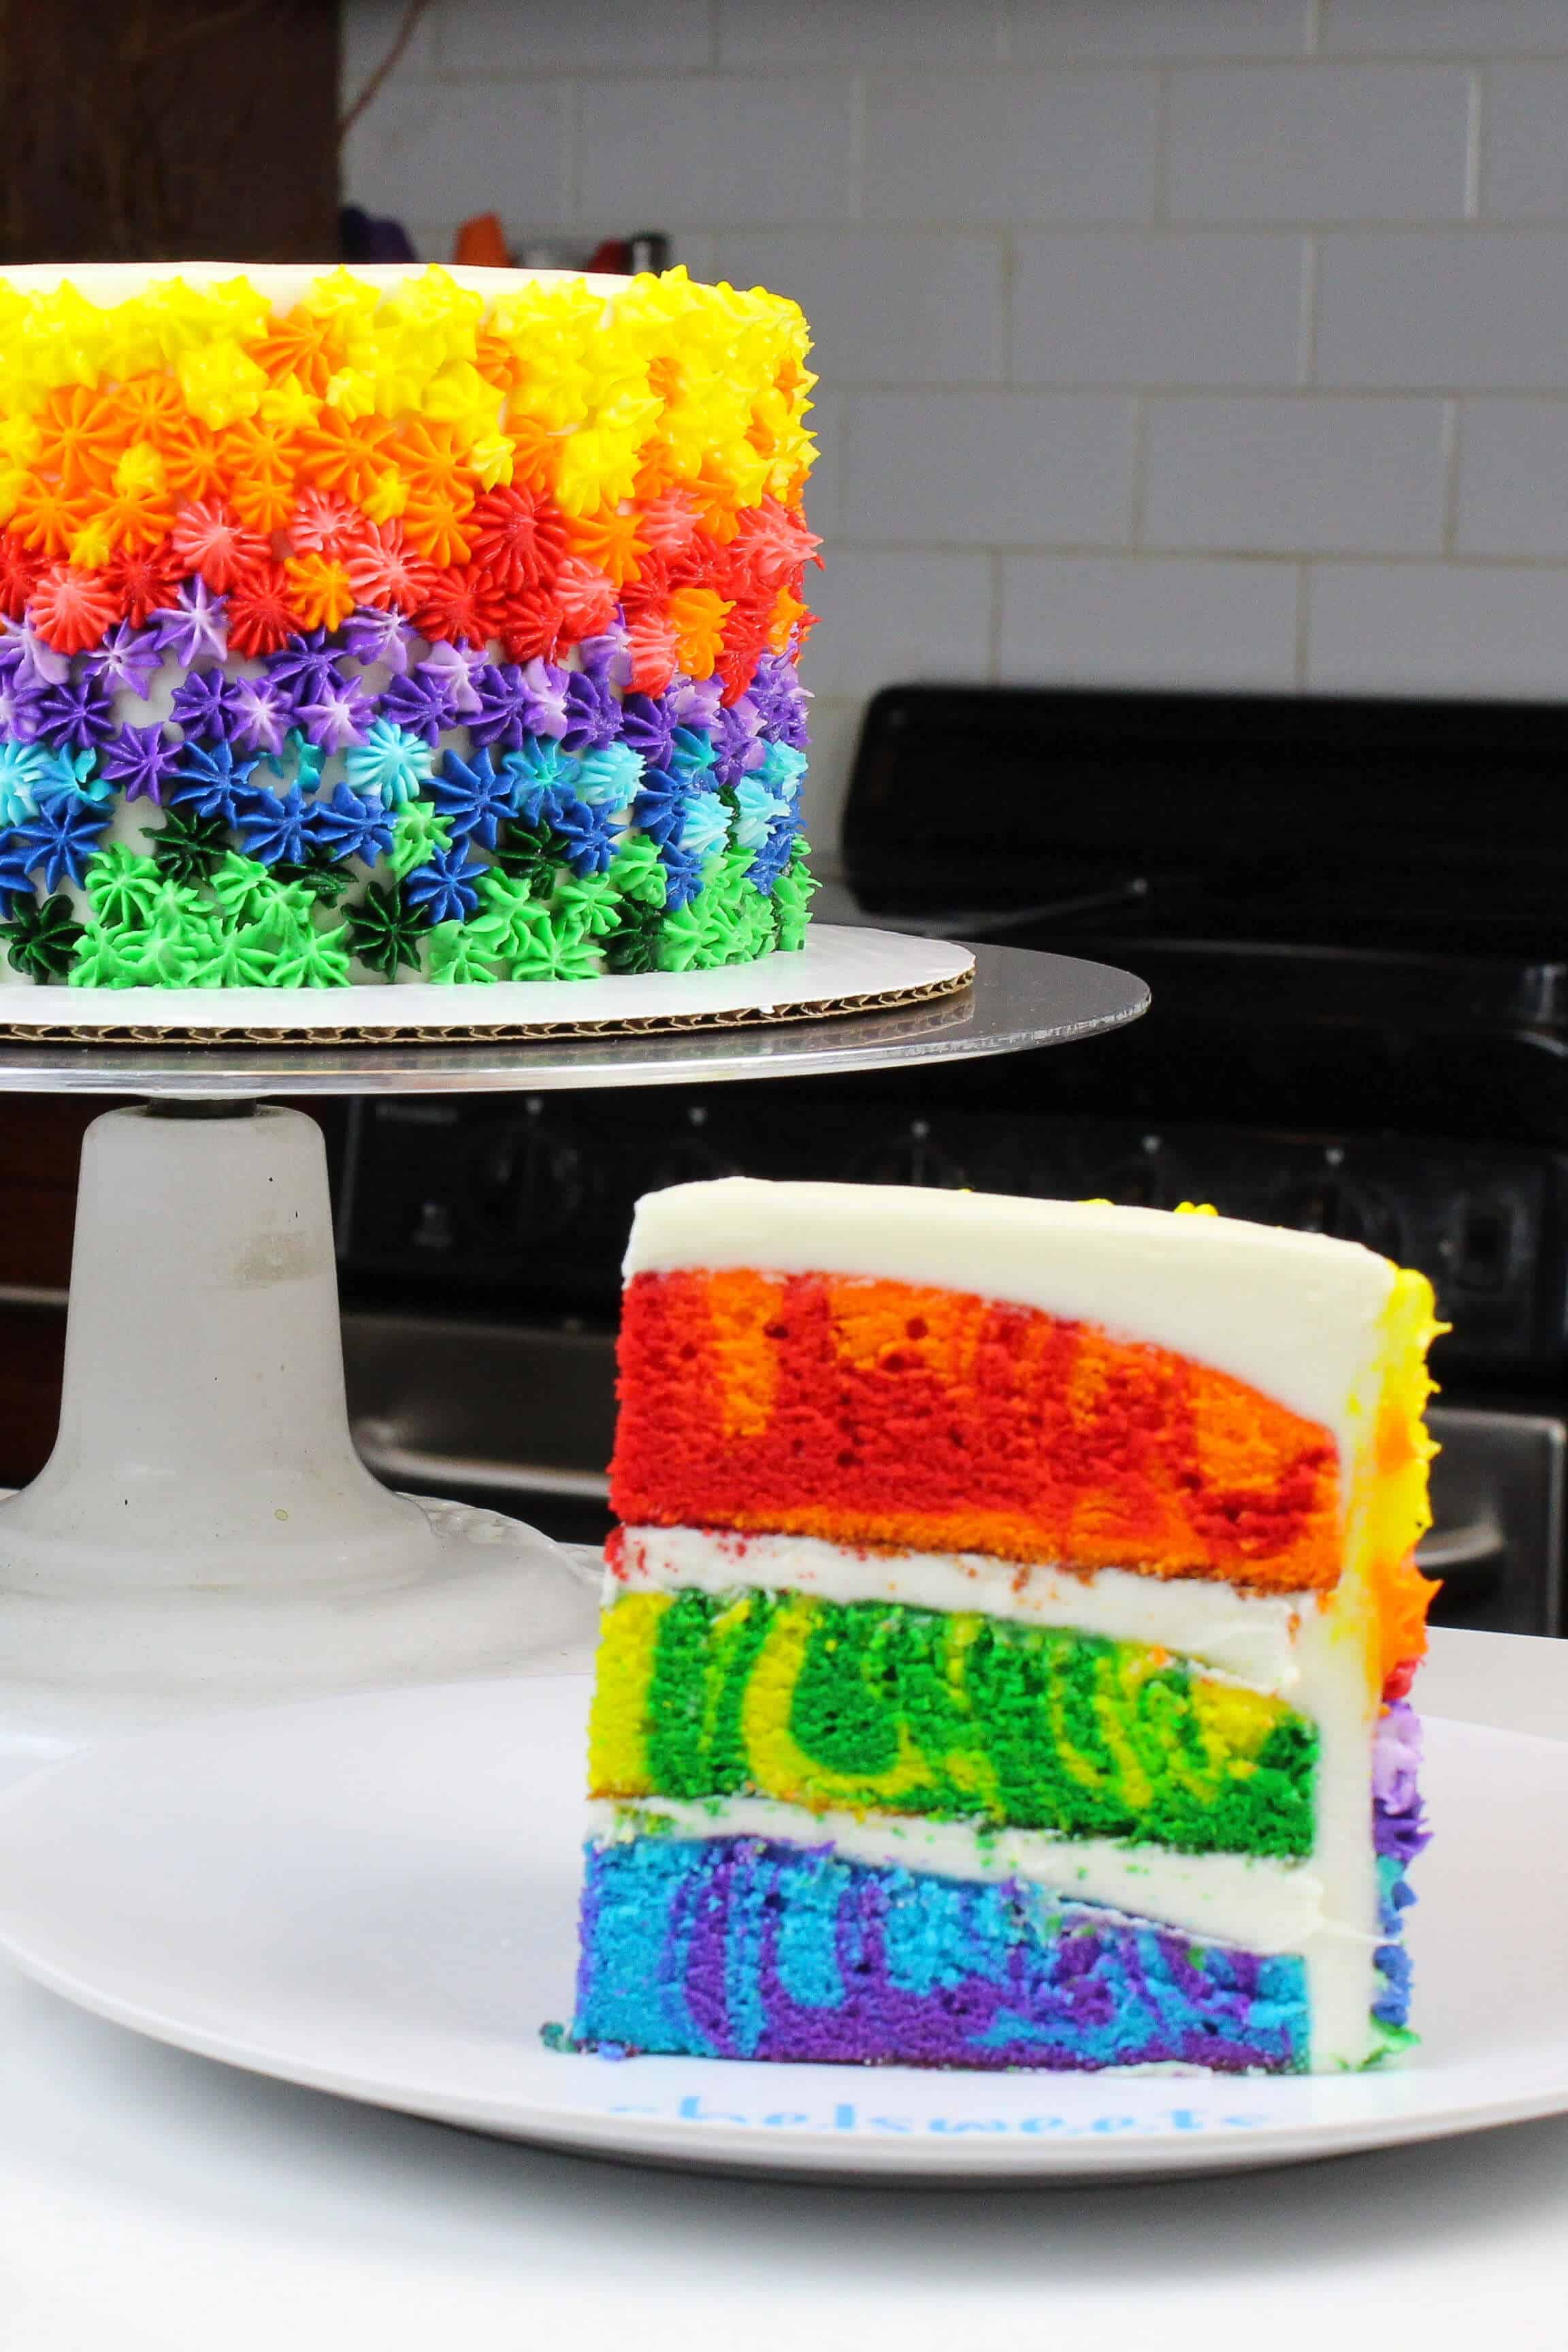
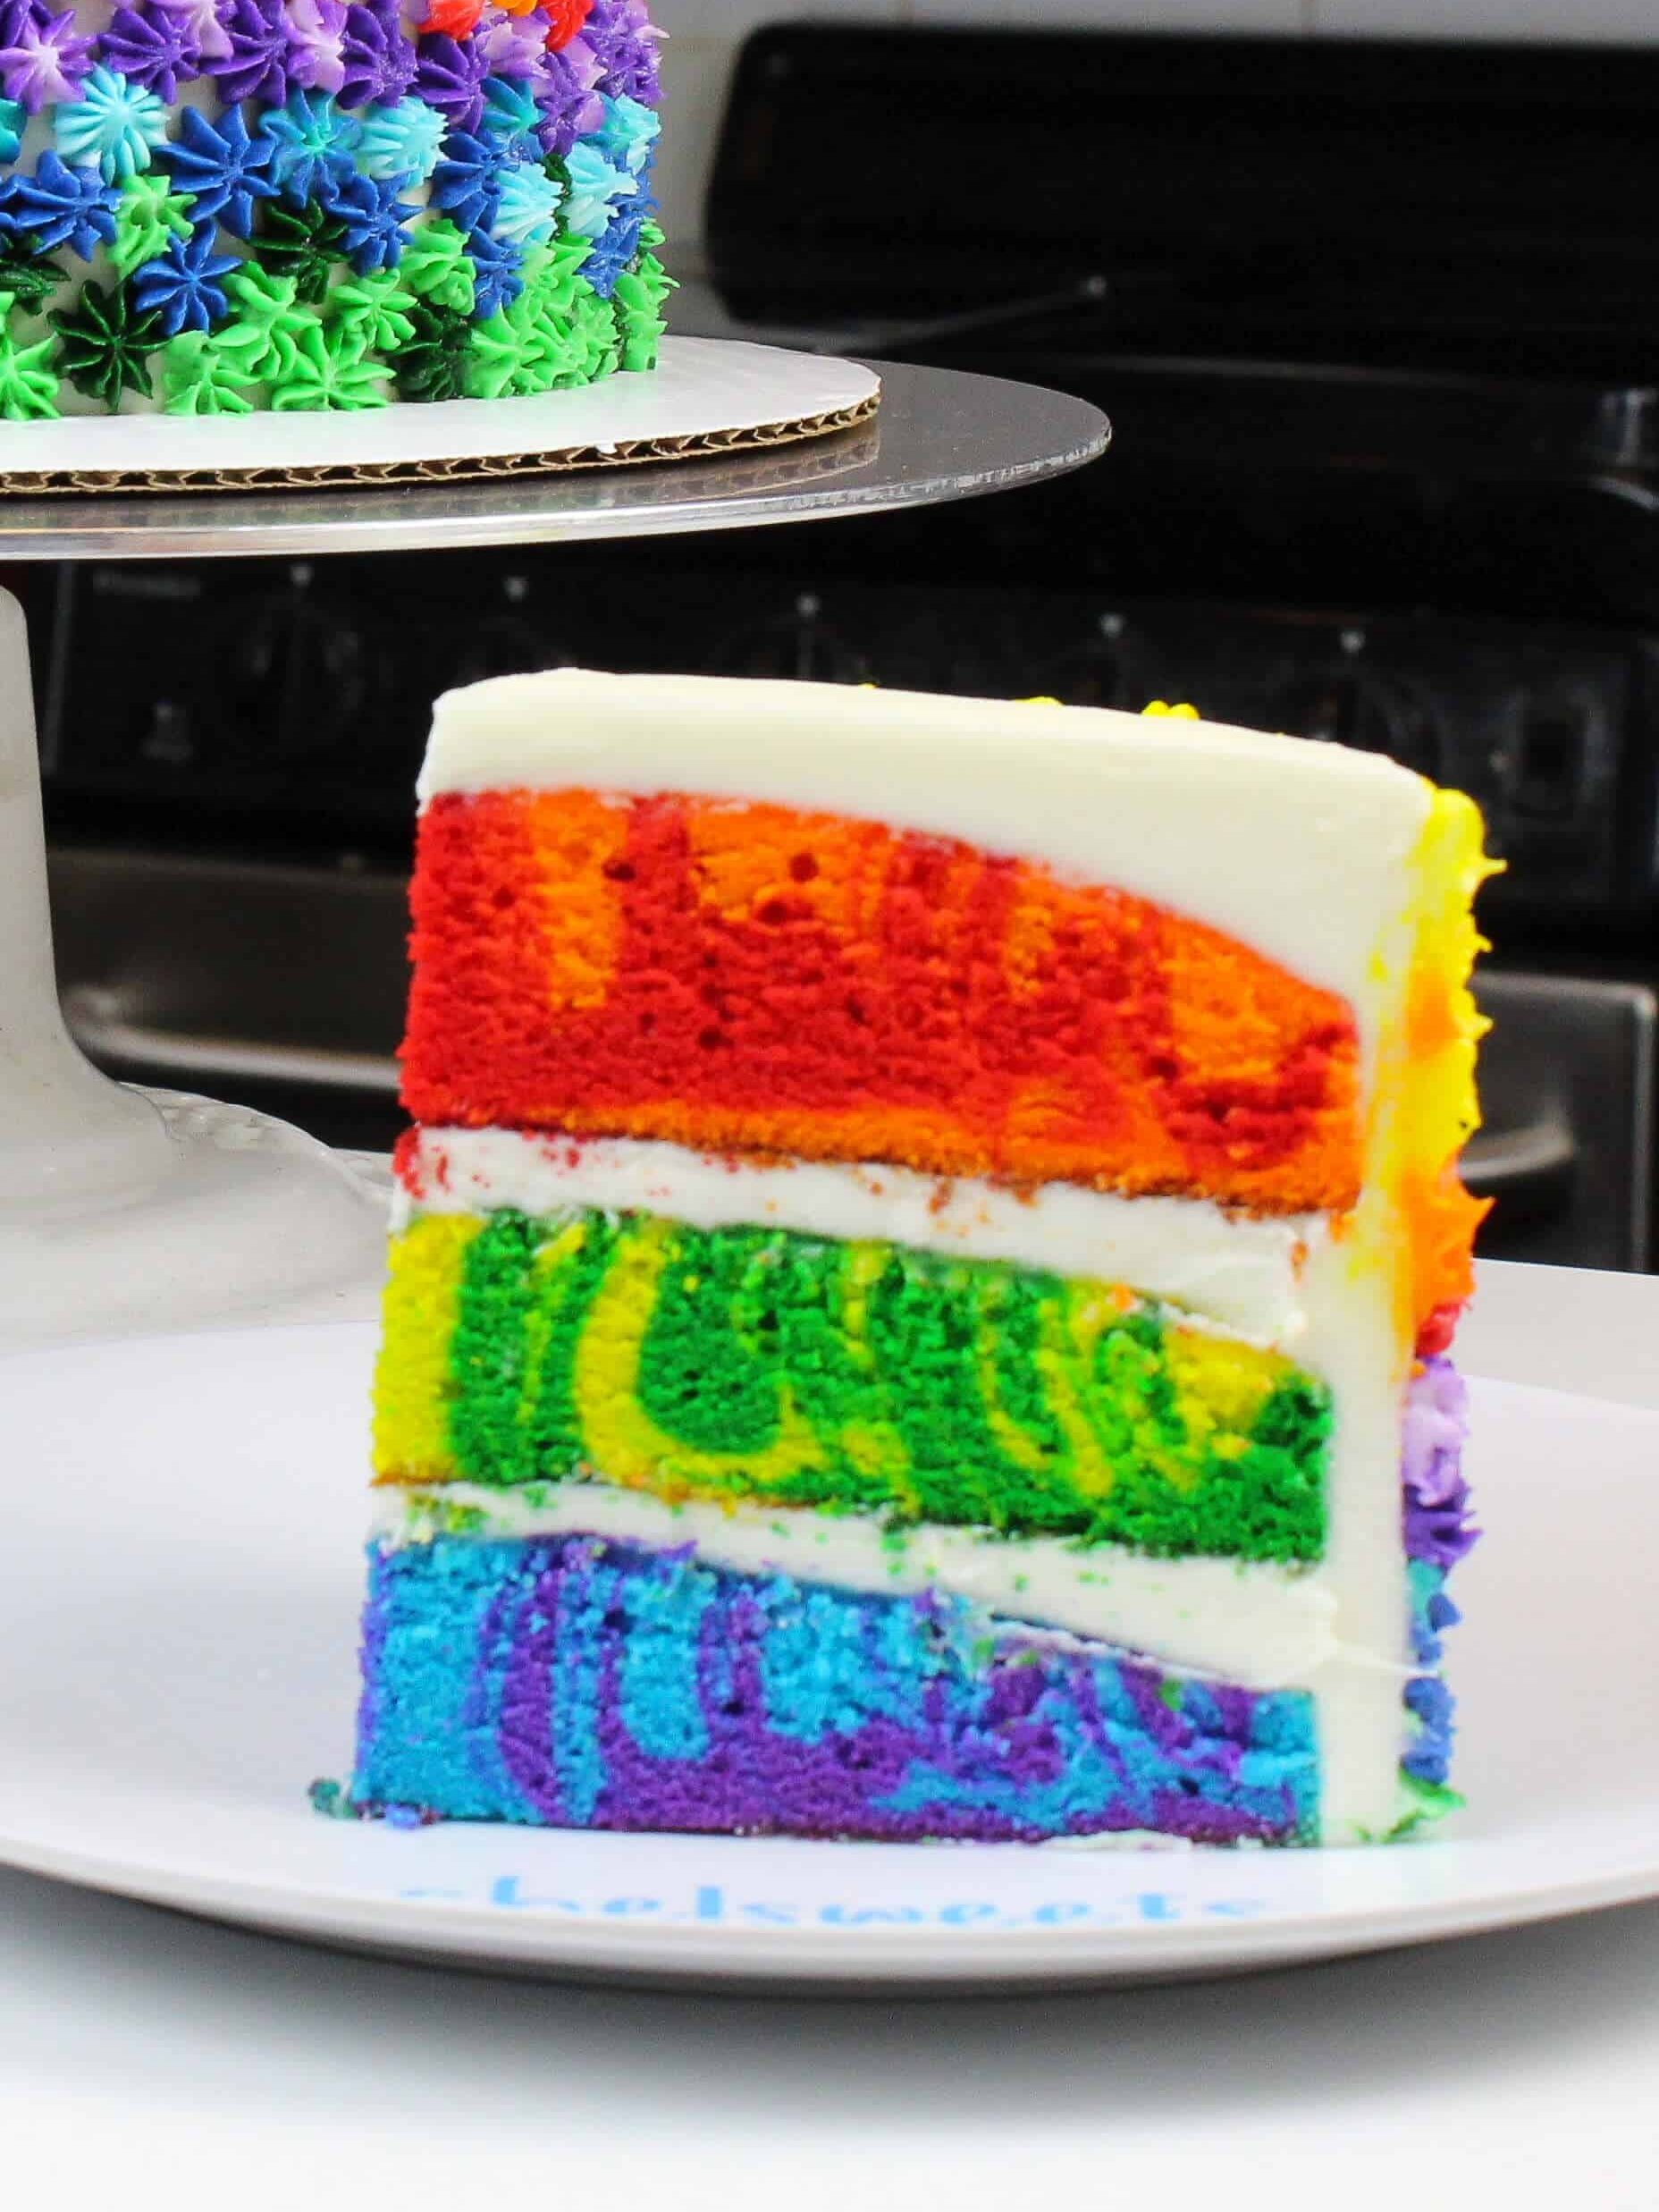
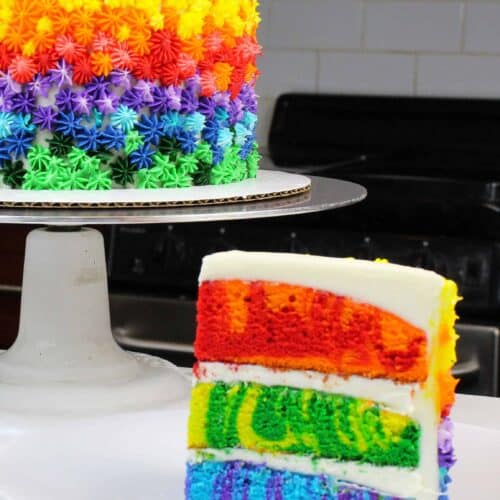
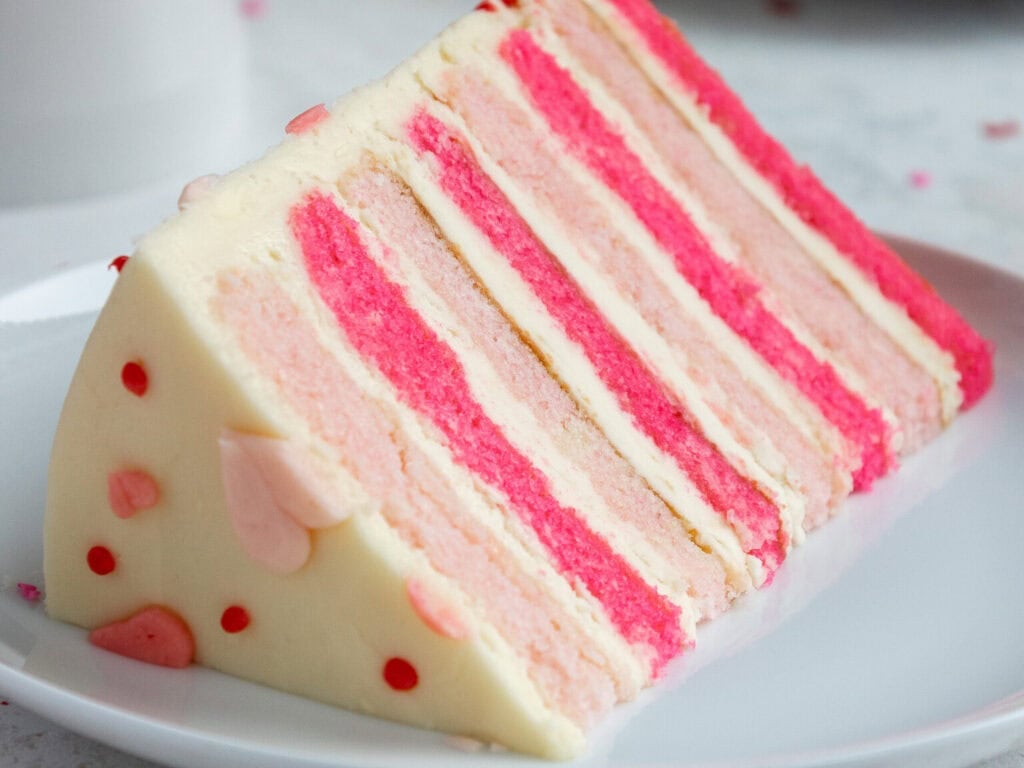
The marble cake layers create a beautiful pattern, and make it so much fun to cut into this cake! Each slice is like a little work of art.
This cake is made with moist vanilla cake layers, and a delicious buttercream frosting.
Rainbow Marble Cake Layers
To make these gorgeous cake layers, I chose to only swirl together two colors at at time.
Traditional marble cake recipes use a mixture of two batters, vanilla and chocolate. That’s one of the reason why I wanted to combine just two colors at a time.
I also thought it would help the inside of the cake match the frosting pattern on the side of the cake.
The joke was on me though, because I forgot the colors of the cake layers once I frosted it. I ended up accidentally frosting the cake in a completely different order!!
It was a real face/palm moment. You have no idea how upset I was when I cut into the cake!! Sometimes you just have to take a step back, and laugh a little. In retrospect, it wasn’t the worst kitchen blunder I’ve had!
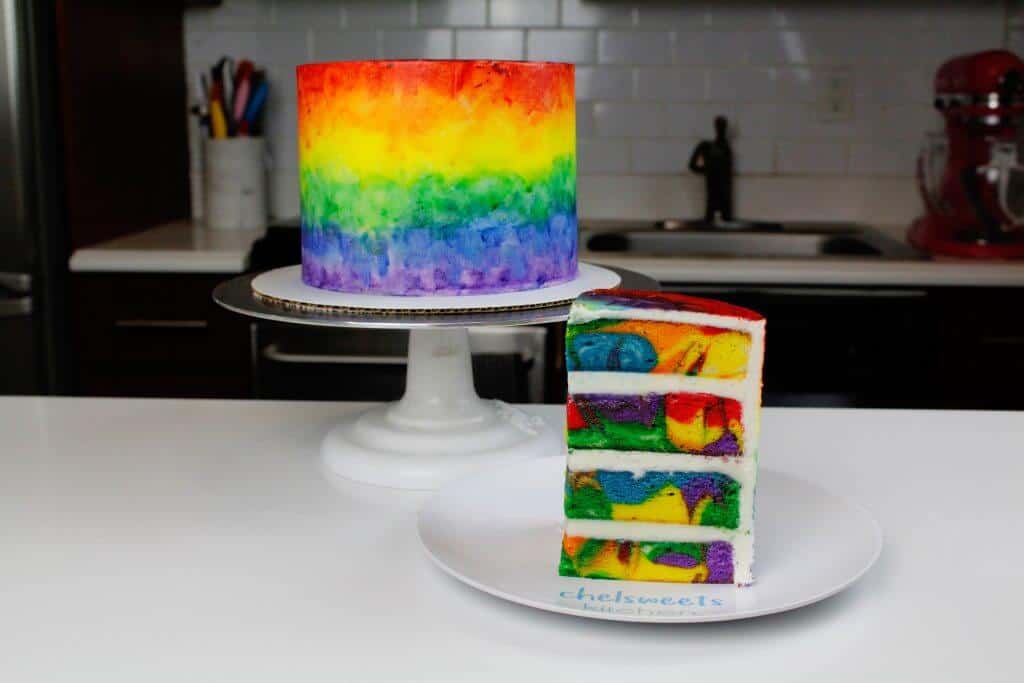
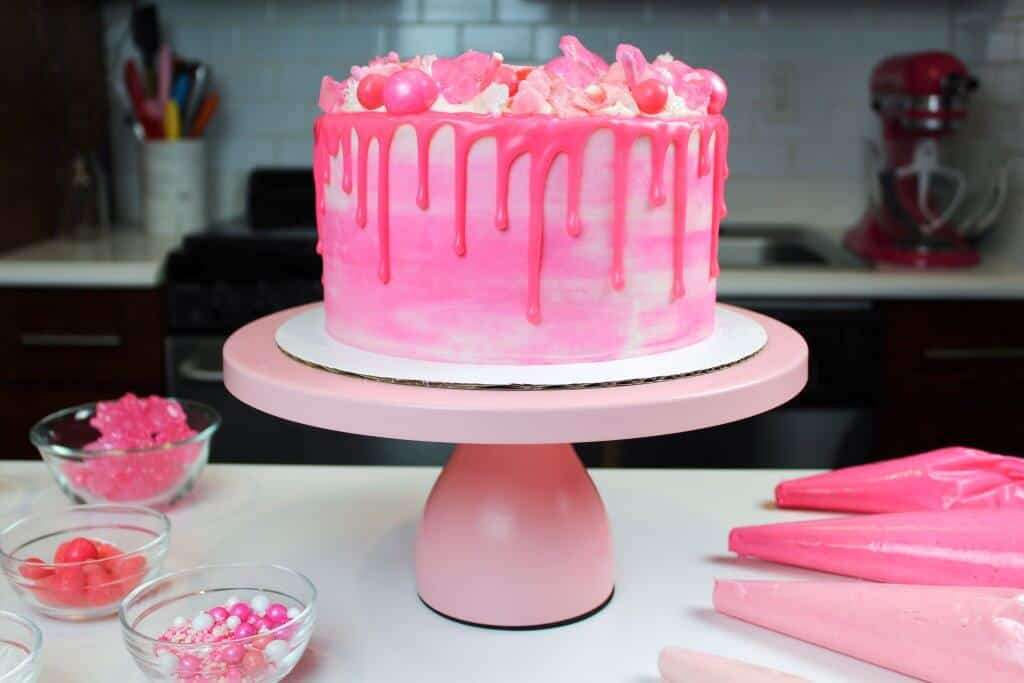
That being said, feel free to combine whatever colors you want, or heck, you can even mix them all together! That’s what I did for the painted rainbow cake shown below, and it looked great too!
Do note that the rainbow cake pictured below cake has four cake layers, because it was made with seven inch cake layers.
However, this rainbow marble cake recipe makes three, eight-inch cake layers. This is intentional, since we’re making six colors of batter, and we want to swirl two together in each layer.
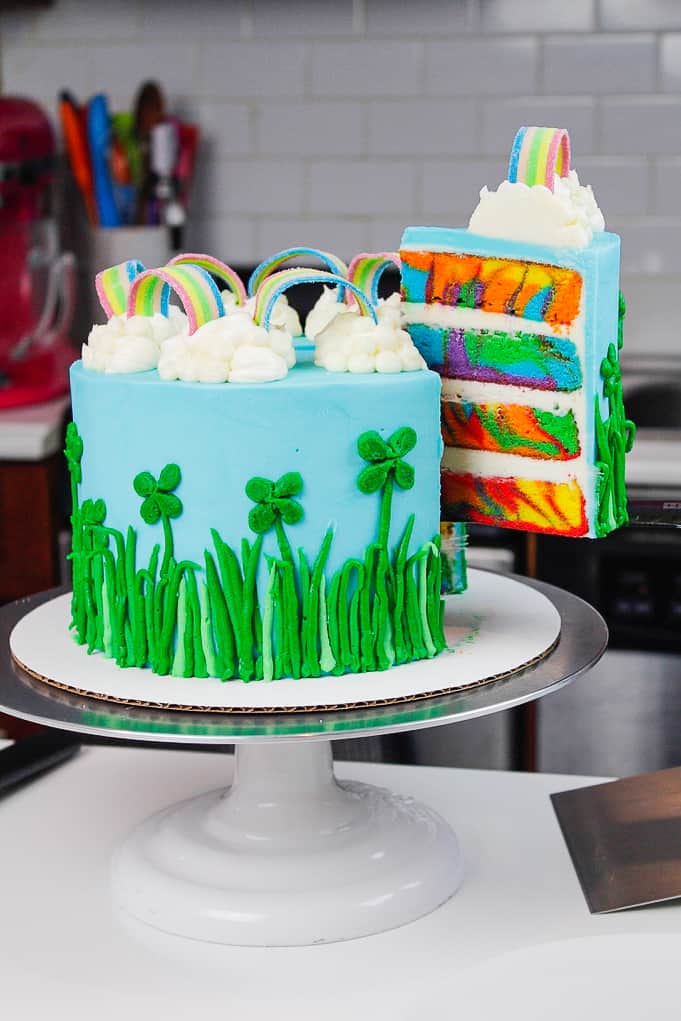
I also made a fun St. Patrick’s day rainbow cake for the Food Network, and used the same technique as the cake above!
Vibrant Buttercream Frosting
Once you’ve tackled the rainbow cake layers, all that’s left is coloring the frosting.
I prefer to fill and frost the cake completely before coloring the buttercream to decorate the cake. This ensures you have enough white buttercream for the cake assembly.

To make your buttercream really vibrant, I highly recommend using gel food coloring! When it comes to coloring your frosting, this is an absolute must.
Liquid food coloring can throw off the consistency of your frosting, especially if you have to add a ton to achieve the color you’re after.
Gel food coloring is much more concentrated, so you can add less and still get a bright color.
The brand you use can affect the color too, as some are more true to color than others. I always use the Americolor brand (not sponsored, just my very favorite food coloring)!
Mountains Of Rainbow Dishes
Rainbow cakes always seem like a great idea, until you’ve actually colored all your cake batter and frosting.
Any cake design that involves different colors is going to make a mountain of dishes. It’s the price you must pay as a color-loving baker.

My best advice for this is to clean as you go. My sink is super shallow, so I’m forced to do the dishes as I make a cake. To be fair, it’s kind a blessing.
Heaven forbid if I had a sink full of dirty dishes behind me in my cake videos!! I can’t even begin to imagine the comments I’d get. I’m giggling just thinking about it.
Colorful Yet Simple Design
You may end up with a lot of dishes, but this cake design has a bright side too!
It is super easy to create, and a great technique for anyone who struggles to get smooth sides on their cakes.
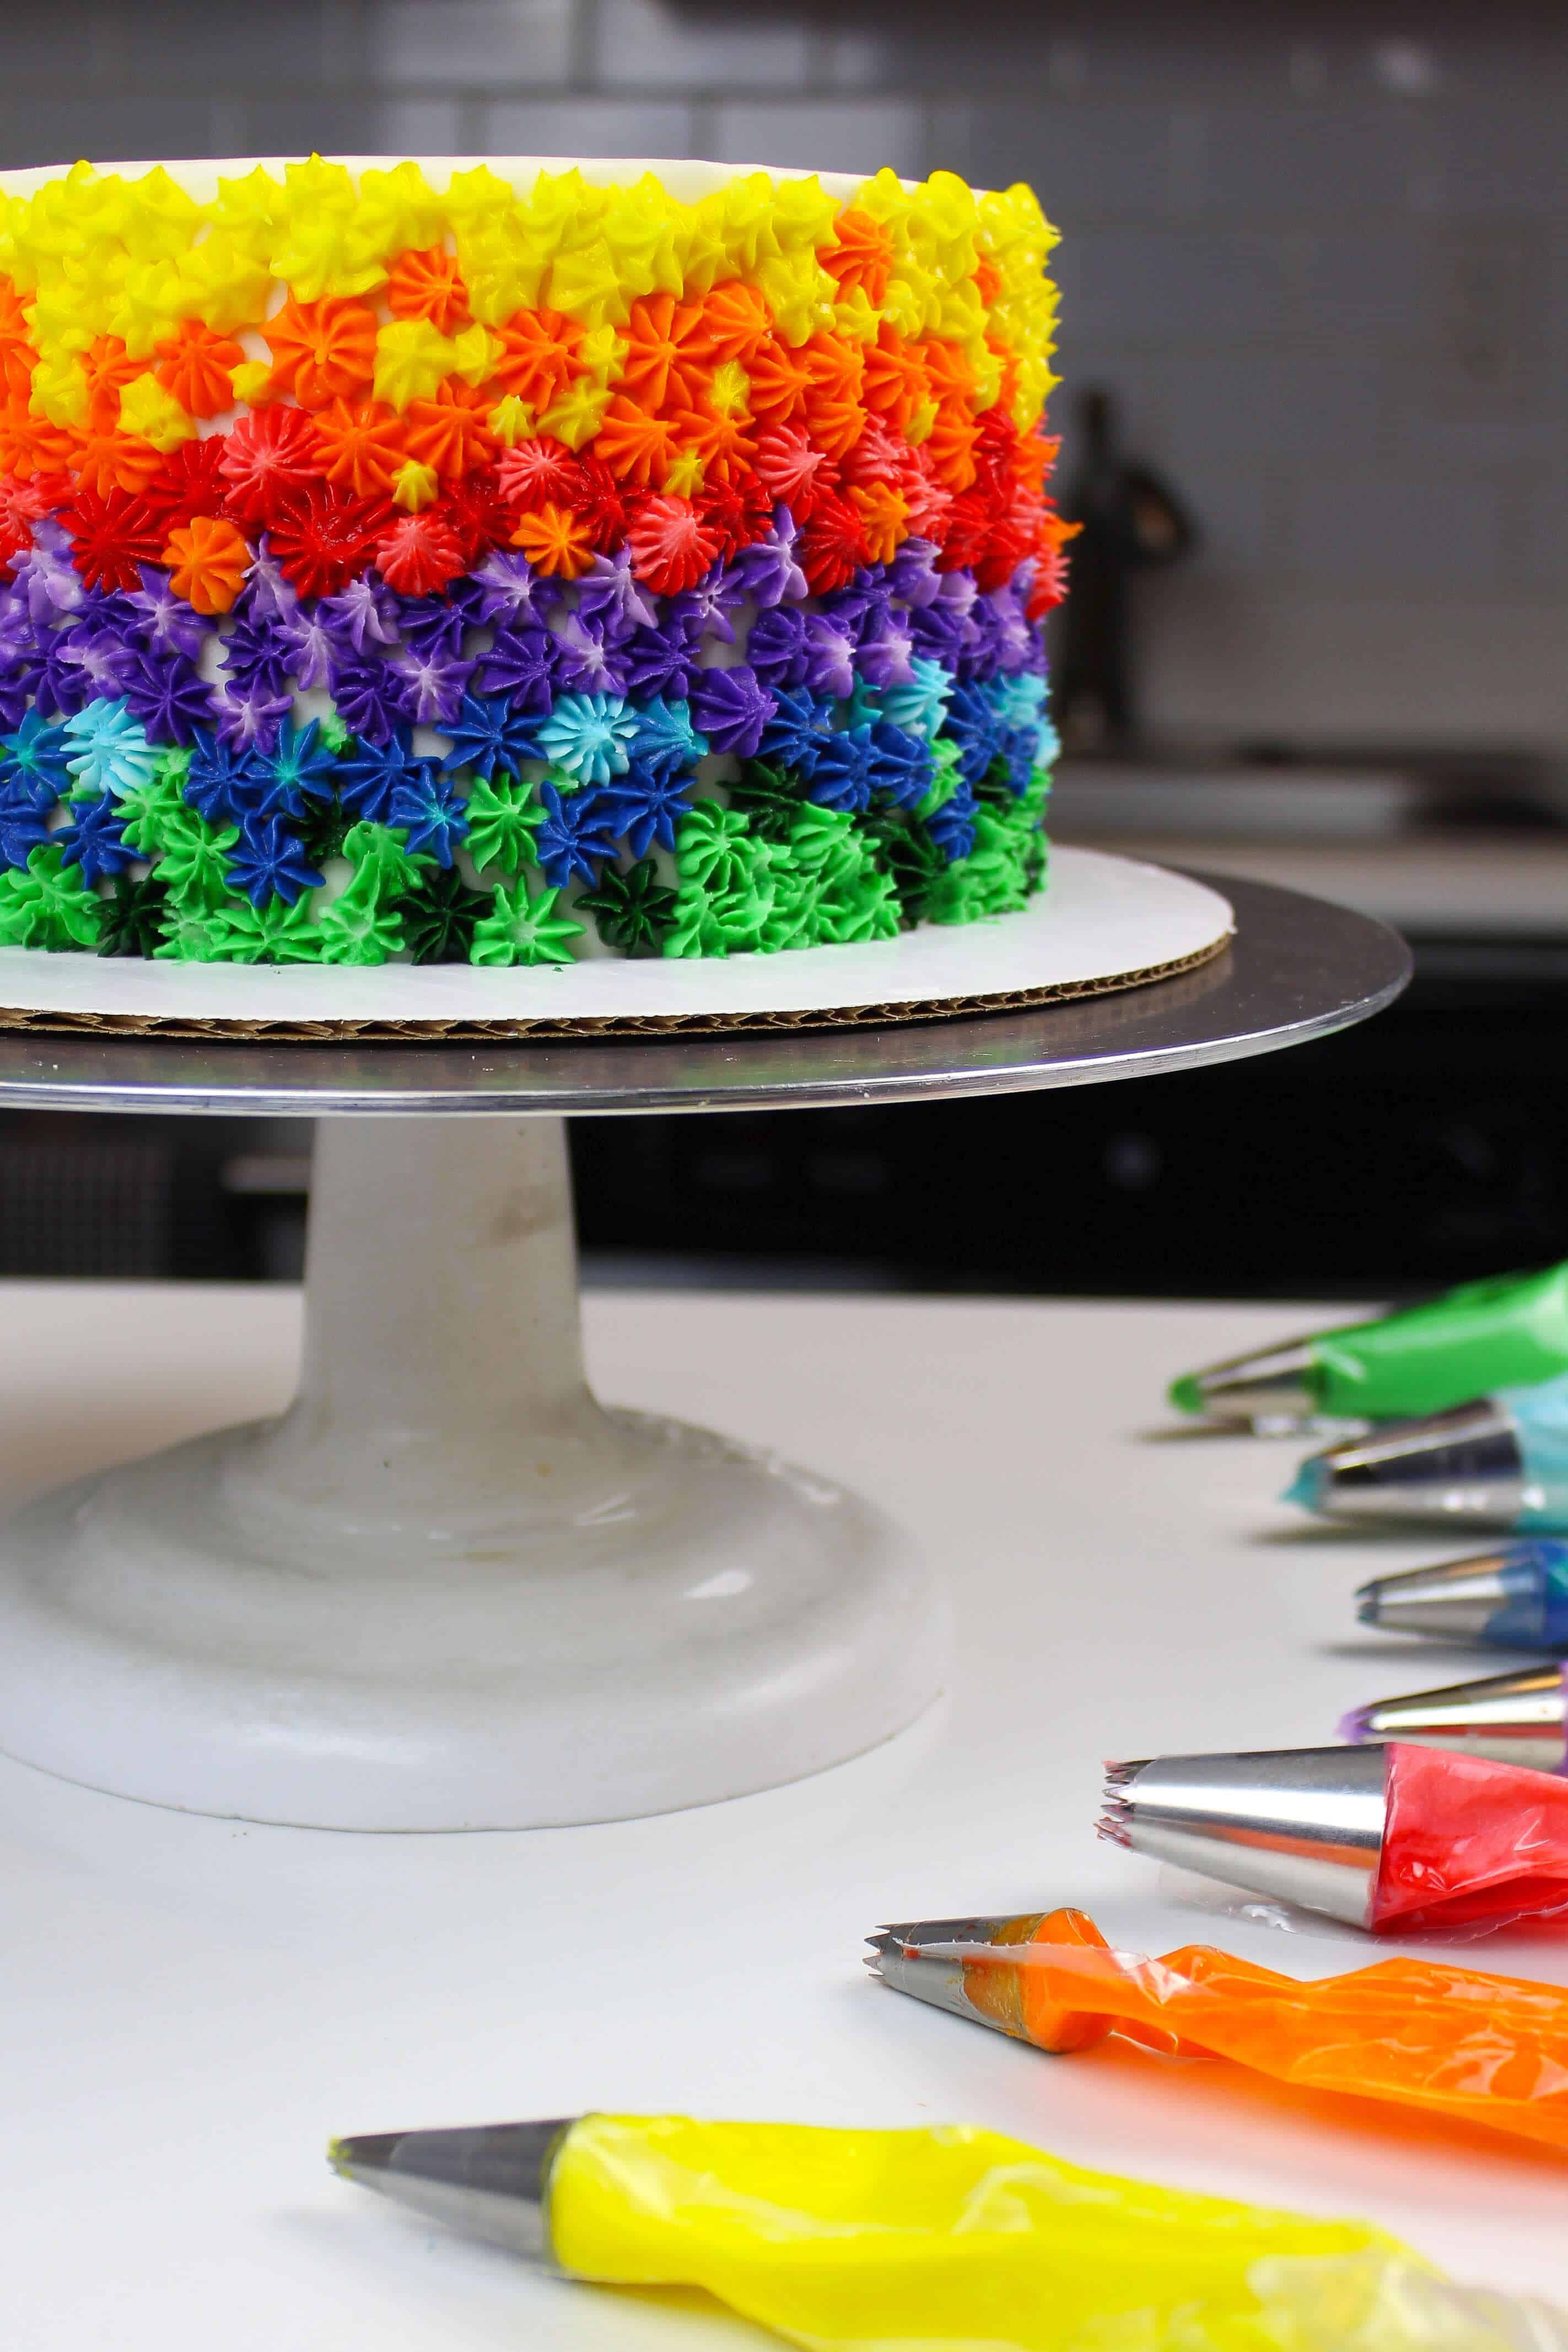
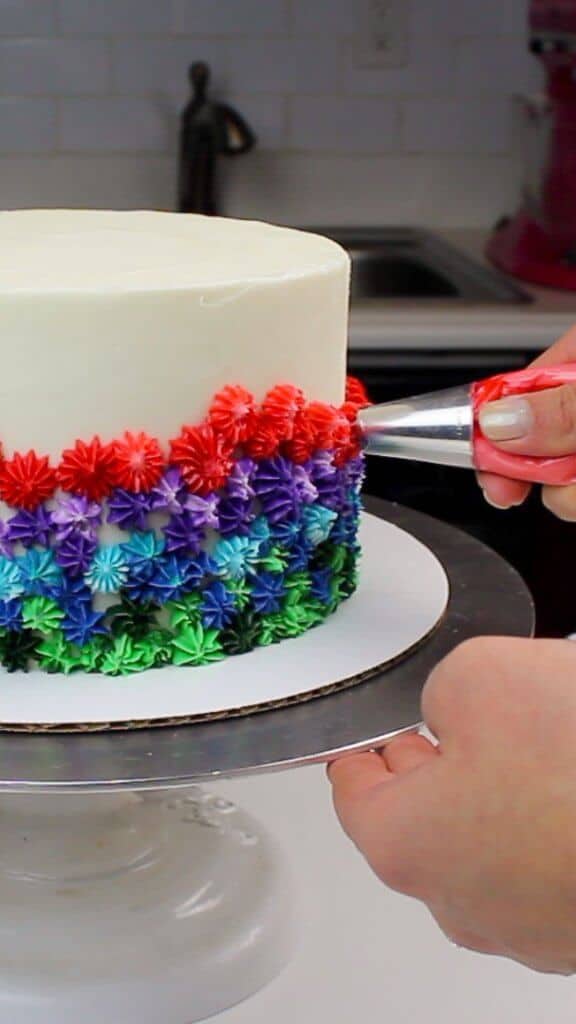
Piping rainbow frosting on the side of the cake with french piping tips gives it great texture, and a playful look.
This cake would be perfect for a kids birthday party, celebrating pride, or any other colorful celebrations in your life!
Tips for Making the Best Rainbow Marble Cake
- Properly measure your flour. Either spoon it into the cup measure, then level with a knife or use a kitchen scale.
- Don’t overmix your batter! Mix on the speed the recipe recommends until the ingredients are just combined.
- Make sure your ingredients are at room temperature to help them mix together better.
- Don’t level your cake layers until they are completely cooled.
- Make sure your buttercream is the right consistency before frosting your cake! It will help give your cake proper structure and make it easier to decorate.
- If your cake layers turn out less than perfect, I recommend reading my cake troubleshooting guide to see where things might’ve gone awry.
Making This Marbled Rainbow Cake in Advance and Storage Tips
- Make your cake layers in advance and freeze them. It breaks the process up and make it more approachable.
- Make your frosting ahead of time too or save any leftover frosting! It can be stored in an airtight container in the fridge for up to 2 weeks, or in the freezer for up to a month. Be sure to give it a good stir once it thaws to get the consistency nice and smooth again.
- A frosted cake can last in the fridge for up to a week or in the freezer for up to a month. The frosting locks in all the moisture, keeping the cake fresh and delicious!
- If you cut into the cake and have leftovers, use any remaining frosting to cover the cut section to keep it moist and store in the fridge for up to a week.
Let Me Know What You Think!
If you try this rainbow marble cake recipe, please tag me @chelsweets and use the #chelsweets so I can see your beautiful creations!!
Also leave a comment below and/or a rating to let me know your thoughts.
Rainbow Marbled Cake
Ingredients
Rainbow Marble Cake
- 3 cups all-purpose flour 390 grams
- 3 cups granulated sugar 600 grams
- 2 1/2 tsp baking powder 10 grams
- 1 tsp fine salt 6 grams
- 1 cup (2 sticks) unsalted butter, room temperature 226 grams
- 2 tsp vanilla extract or vanilla bean paste 8 grams
- 1 cup carton egg whites or 7 large egg whites, room temperature 280 grams
- 1 1/2 cups buttermilk, room temperature 360 grams
- 1/8 cup vegetable or canola oil 28 grams
- purple, blue, green, yellow, orange, and red gel food coloring
Vanilla Buttercream Frosting
- 3 cups unsalted butter, room temperature 678 grams
- 11 cups powdered sugar 1375 grams
- 1 tsp fine salt 6 grams
- 1/3 cup heavy whipping cream, room temperature 75 grams
- 1 1/2 Tbsp vanilla extract or vanilla bean paste 18 grams
- purple, blue, green, yellow, orange, and red gel food coloring
Instructions
Vanilla Cake Layers:
- Preheat oven to 350°F. Line three 8 inch round pans with parchment rounds, and grease with non-stick cooking spray.
- Mix together all dry ingredients (flour, baking powder, sugar, and salt) in a stand mixer with a paddle until fully combined.
- Mix chunks of room-temperature butter slowly into the dry mix, on a low speed. Continue to mix until no large chunks of butter remain, and the mixture becomes crumbly.
- Pour in egg whites, and mix on low until just incorporated. Mix in the buttermilk in two installments, on a low speed.
- Add in vanilla and oil, and mix at a low speed until fully incorporated. Scrape down the sides of the bowl with a spatula, then beat on medium speed for about 30 seconds.
- Divide the batter evenly between six bowls. Color each bowl a different shade (red, orange, yellow, green, blue, & purple) using gel food coloring. Mix until the batter is evenly colored.
- Add spoonfuls of blue and purple batter into one cake pan. Once all the batter is in the pan, drag a small offset spatula or butter knife through the batter in horizontal and vertical lines to create a marbled pattern.
- Repeat with the remaining two pans, creating a green and yellow cake layer, and a red and orange cake layer.
- Bake for 34-37 minutes, or until a toothpick comes out clean. Allow the pans to cool for 10 minutes, then run an offset spatula around perimeter of the pan to separate the cake from the pan.
- Place cake layers into the freezer for 45 minutes, to accelerate the cooling process. Once the layers are fully cooled, carefully flip and remove the layers from the pans.
- Use a serrated knife to level the tops of the layers.
Vanilla Buttercream Frosting:
- While the cake layers bake and cool, make the vanilla buttercream frosting.
- Beat the butter on a medium speed for 30 seconds with a paddle attachment, until smooth. Slowly add in the powdered sugar, 1 cup at a time. Alternate with small splashes of cream.
- Once fully mixed, add in the vanilla and salt, and beat on low until the ingredients are fully incorporated, and the desired consistency is reached.
- If the frosting is too thick, add in additional cream (1 teaspoon at a time). If the frosting is too thin, add in more powdered sugar (quarter of a cup at a time).
- Wait to color the remaining buttercream until the cake is assembled and frosted.
To Assemble The Cake:
- Stack and frost cake layers on a greaseproof cake board, using a dab of frosting to help stick the first cake layer to the board.
- Add an even layer of buttercream between each cake layer.
- Apply a thin coat of frosting around the the cake, to fully cover the cake layers. Smooth using a bench scraper, then chill the cake in the fridge (10 minutes) or freezer (5 minutes) until the frosting is firm to the touch.
- Add a second, thicker layer of frosting to the cake, and smooth using a bench scraper.
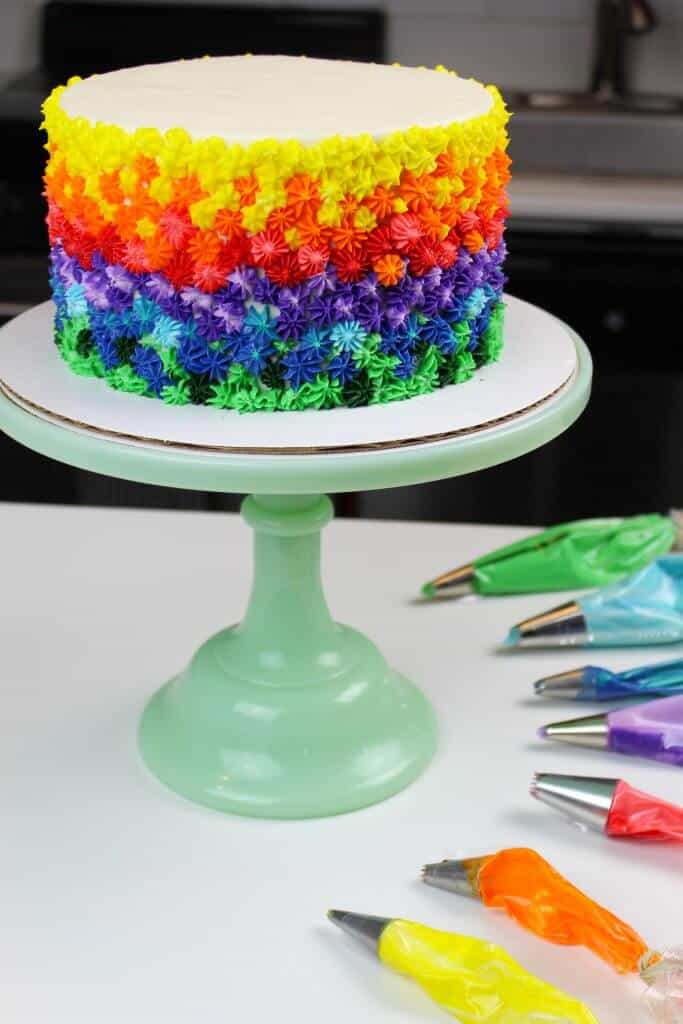
- Divide the remaining buttercream between several bowls, and add gel food coloring to create the same colors as the cake layers. If desired, you can create different shades of some of the colors.
- Fit several small piping bags with french frosting tips, and fill with the different colored frostings.
- Pipe frosting around the sides of the cake, to cover it in a rainbow pattern.
Video
Notes
Nutrition
Other Recipes You Might Like:
I love love love this cake! I always want to make a rainbow cake but the thought of that many layers is kind of exhausting, lol. The marble look is a brilliant way to get around so many layers!
It’s definitely a great alternative 🙂 and thanks Heather!!!
This is a great recipe all around and the vanilla cake recipe is my new go to. Thank you.
So happy to hear that Nikki!!! <3 Thank you for sharing 🙂
When dabbing color onto your crusted buttercream, did you use cosmetic sponge wedges? Thank you.
Hi Paula,
It is! I ordered mine on amazon, these are the ones I like to use: https://amzn.to/31L0e3L
hope that helps, happy baking!
Hi! I’ve tried this technique twice, and both times the cake doesn’t rise rise properly. I think this is due to the release of the carbon dioxide from mixing in the food coloring. Do you have any tips on how to fully incorporate the colors and have a risen cake too? Thank you!
I was looking for a marbled cake recipe for a dozen people and your is perfect. Everyone raved about it- kids and adults were all so impressed! I found your tips and tricks very helpful. I do need to work on my decorating skills… your designs are so inspiring?
I am so excited to make a rainbow cake for my twins’ 5th birthday! I see this makes 3 8-inch layers. Are those layers 1 inch tall each? or 2? Thank you!
Hi Jenn,
These layers end up being a little over 1 inch tall once they’re baked! hope that helps and that their bday cake turns out amazing!
I haven’t eaten this cake yet – I’ve tried baking it two times now and both times the cakes fall in the center while baking…the first time I thought I didn’t let the ingredients get to room temperature before mixing so tried a second time and also altered the oven temperature and bake time because of my altitude (around 5000 feet) but the cakes still fell…any tips?