I’ve made quite a few rainbow cakes in the past, but this is my first pride cake. There’s a lot going on in the world right now, but I didn’t want to just let pride pass by this year.
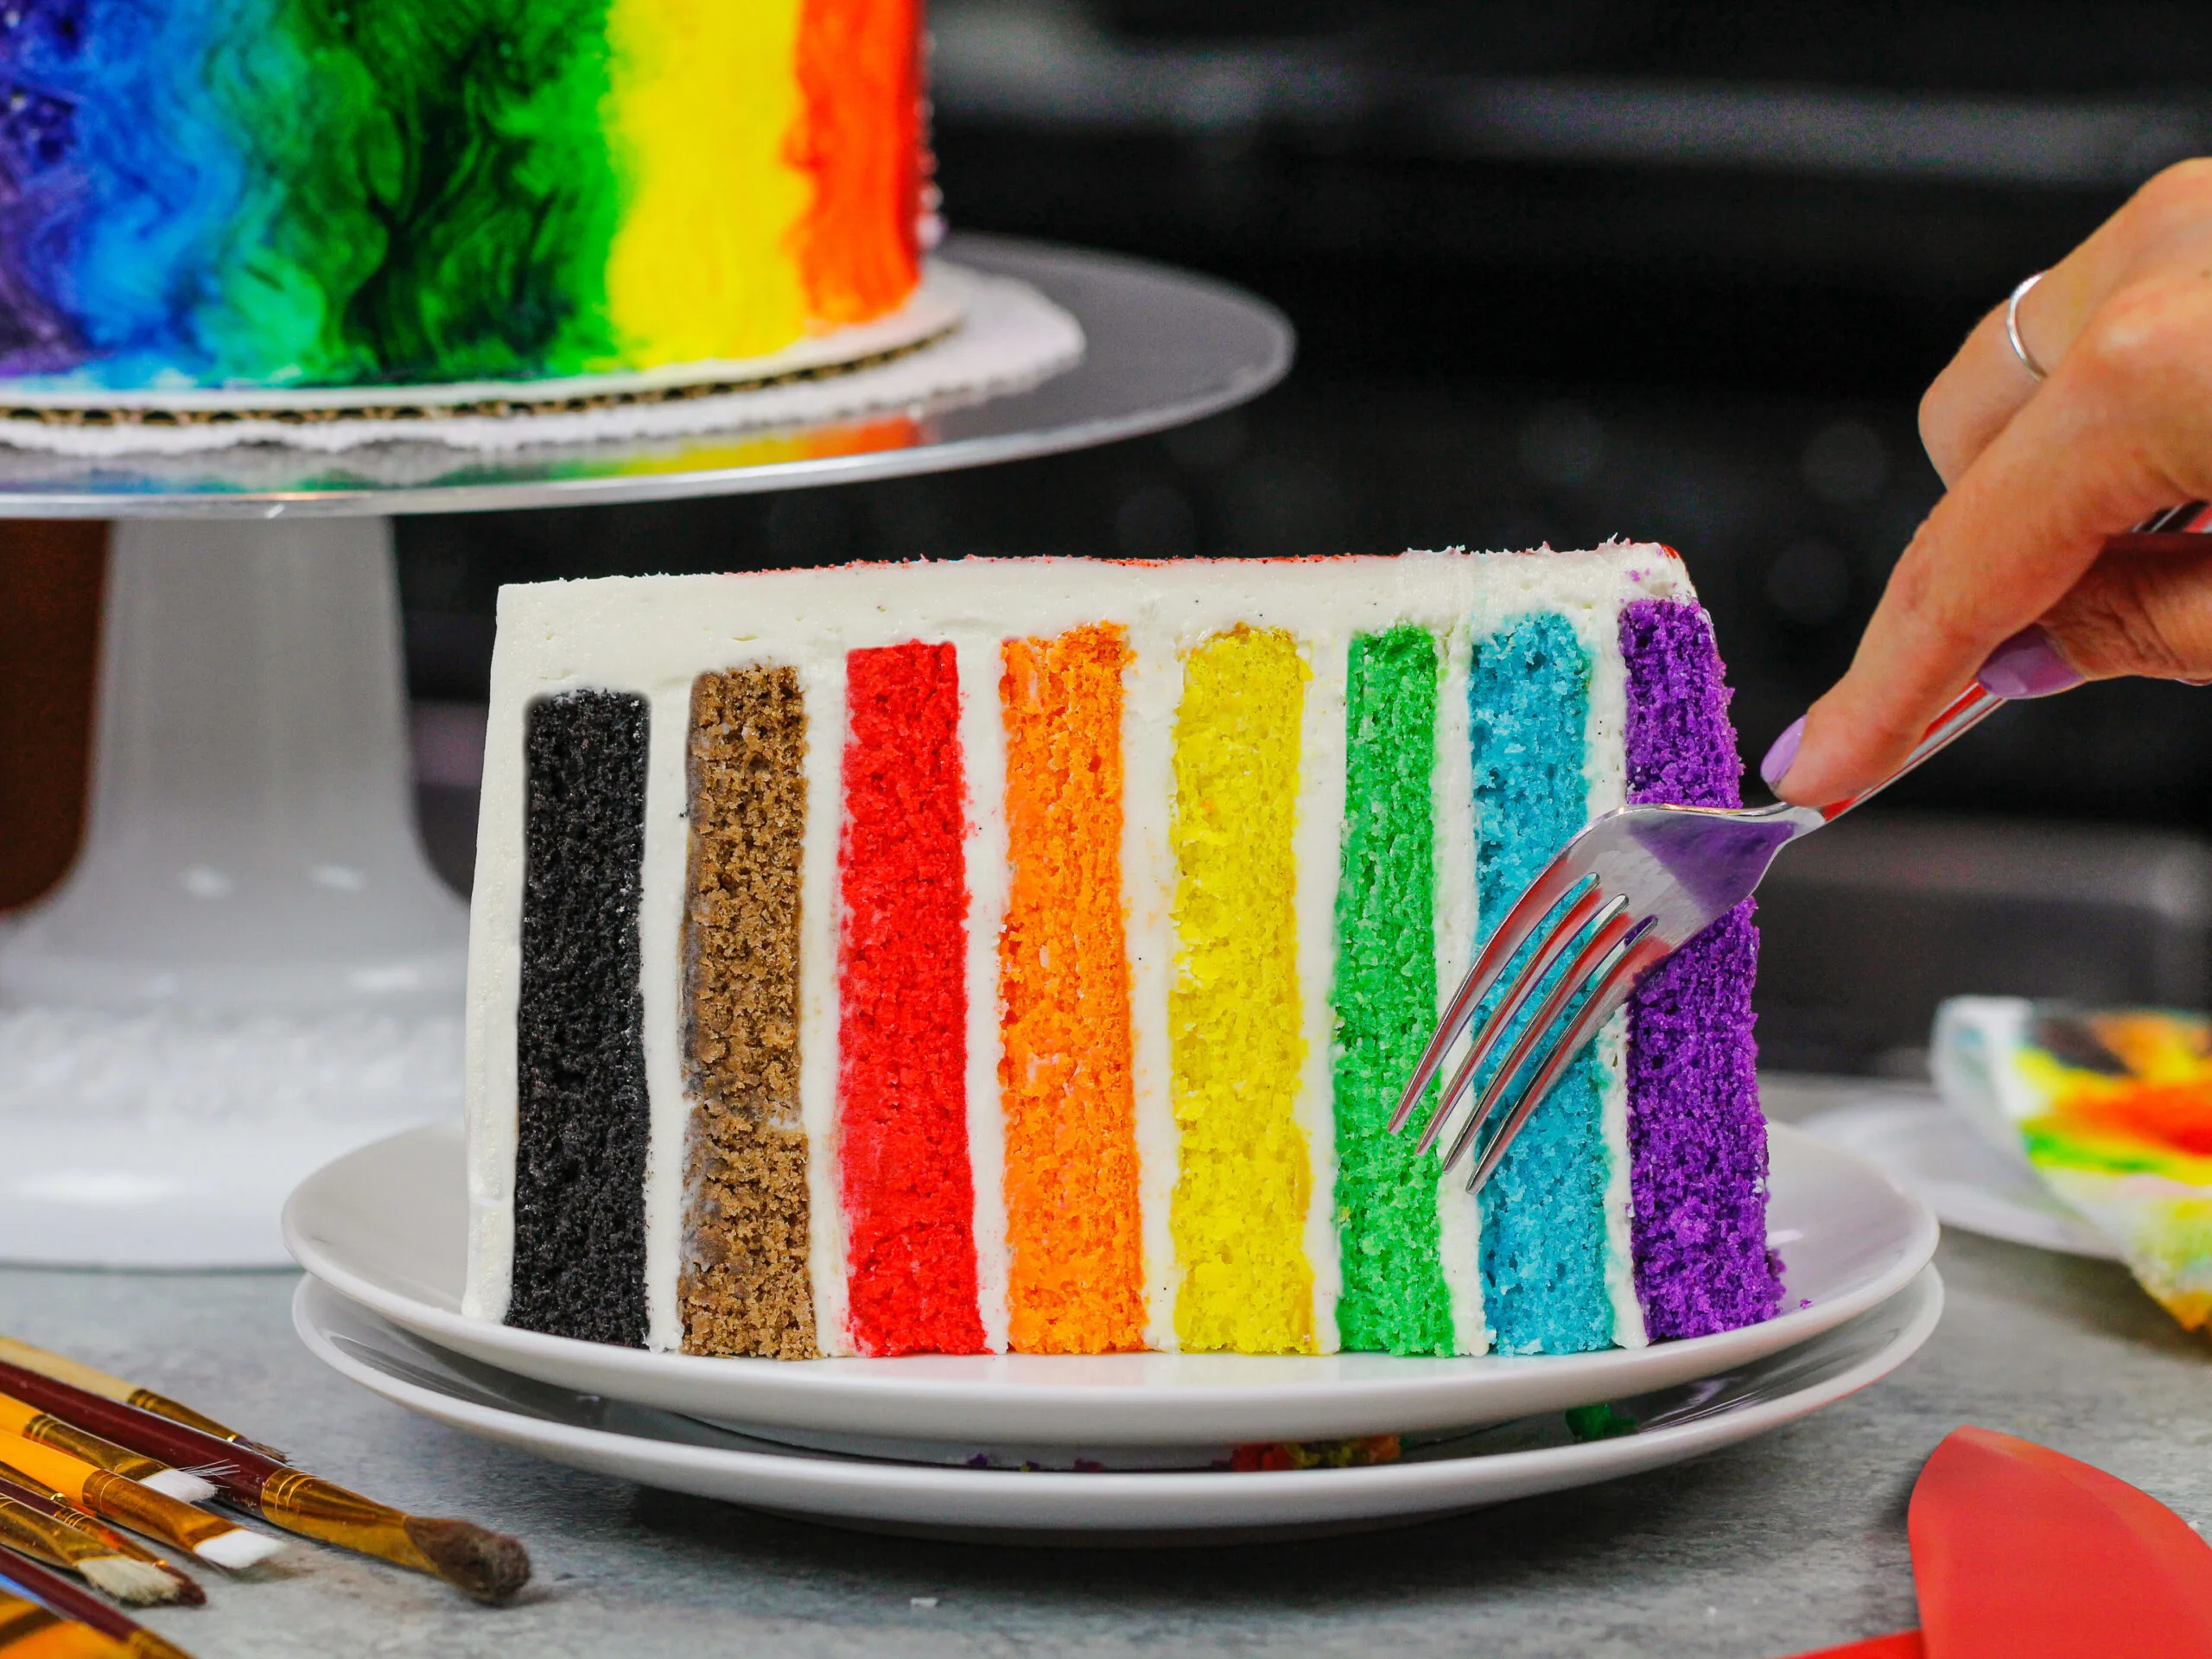
Pride Month is all about lifting up LGBTQ voices, celebrating LGBTQ culture and the supporting LGBTQ rights.
Parades, protests, drag performances and live theater usually take place throughout the US during the month of June. It’s also an important time to remember those who lost their lives to HIV/AIDS.
The origins of Pride Month trace back to the Stonewall Riots, which happened on June 28th, 1969. These riots inspired demonstrations across the country, which evolved into annual pride celebrations.
Pride month is also about political activism and celebrating the progress the LGBTQ community has made.
Celebrating Pride & Honoring the LGBTQ Community
Most cities have had to cancel their pride parades and events due to the pandemic. While baking is by no means the same as attending or participating in pride events, it’s a fun and creative way to celebrate or show your support.
With that in mind, I want to highlight that just wearing rainbow clothing or making a pride cake doesn’t really support the LGBTQ community.
If you want to support Pride and the LGBTQ community, donate to LGBTQ causes, vote for LGBTQ issues, and educate yourself on LGBTQ history.

Keep Learning To Show Your Support
An important way you can continue to support a cause you care about (other than donating) is to learn as much as you can about it.
However, everyone likes to learn differently. I’m partial to documentaries, and watched Disclosure while I made this cake.
Disclosure is an awesome documentary that focuses on how transgender people are portrayed in movies and on TV.
It highlights the damaging impact that Hollywood has had on our views of transgender people, as well as the disparity between trans representation on screen, society’s beliefs, and the reality of trans lives. I highly recommend watching it.
Netflix has a ton of other great LGBTQ centric documentaries too.
If you love listening to podcasts, here’s a list of awesome LGBTQ podcasts.
Of if you’re a voracious reader, here are some great books about LGBTQ life, culture, history, and politics.
Substitutions and Swaps – Rainbow Cake Layers
This rainbow pride recipe uses quite a few ingredients, and I know you might not have them all on hand. Or if you have food allergies or restrictions, I’ve got you covered.
Below are some swaps and substitutions that can be made in this rainbow pride cake recipe:
- All Purpose Flour – This recipe turns out best with AP flour, but you can use a gluten free flour blend (be sure to also follow my tips below) or cake flour if that’s all you have on hand. I don’t recommend using straight almond flour though!
- Granulated Sugar – I do not recommend reducing the amount of sugar or changing the type of sugar, as it will change the texture of the cake layers.
- Baking Powder – If you only have baking soda on hand use 3/4 tsp of baking soda (it’s much more potent than baking soda) and add a teaspoon of white or apple cider vinegar to activate it.
- Unsalted Butter – If you only have salted butter on hand, you can use it in place of the unsalted butter in this recipe. Just be sure to omit the salt that this frosting recipe calls for. You can also use vegan butter in its place!
- Egg whites – If you don’t have egg whites on hand (I use the type out of the carton), you can use 4 whole eggs in place of the egg whites. Or you have an egg allergy you can use flaxseed eggs in their place or 1 cup of unsweetened applesauce.
- Buttermilk – You can also use full fat yogurt, sour cream, whole milk, or an alternative yogurt or milk (almond, soy, oat) if you’re dairy free.
- Vegetable Oil – You can use any flavorless oil in this recipe. Canola or even sunflower oil would work great!
- Gel food coloring – Natural food coloring (either liquid or powder) can be used in place of the gel food coloring to make this cake! The colors won’t be quite as vibrant, but it will still be beautiful.
Substitutions and Swaps – Vanilla Buttercream Frosting
- Unsalted Butter – If you only have salted butter on hand, you can use it in place of the unsalted butter in this recipe. Just be sure to omit the salt that this frosting recipe calls for. You can also use vegan butter in its place!
- Heavy Cream – Whole milk or alternative milk (soy, almond, oat) will work fine in this frosting recipe if that’s what you have on hand.
Coloring These Rainbow Cake Layers
I used gel food coloring to color these rainbow cake layers. Liquid food coloring can work too, but you won’t be able to get the same vibrant colors.
You also can throw off the consistency of the cake batter if you add too much liquid food coloring.
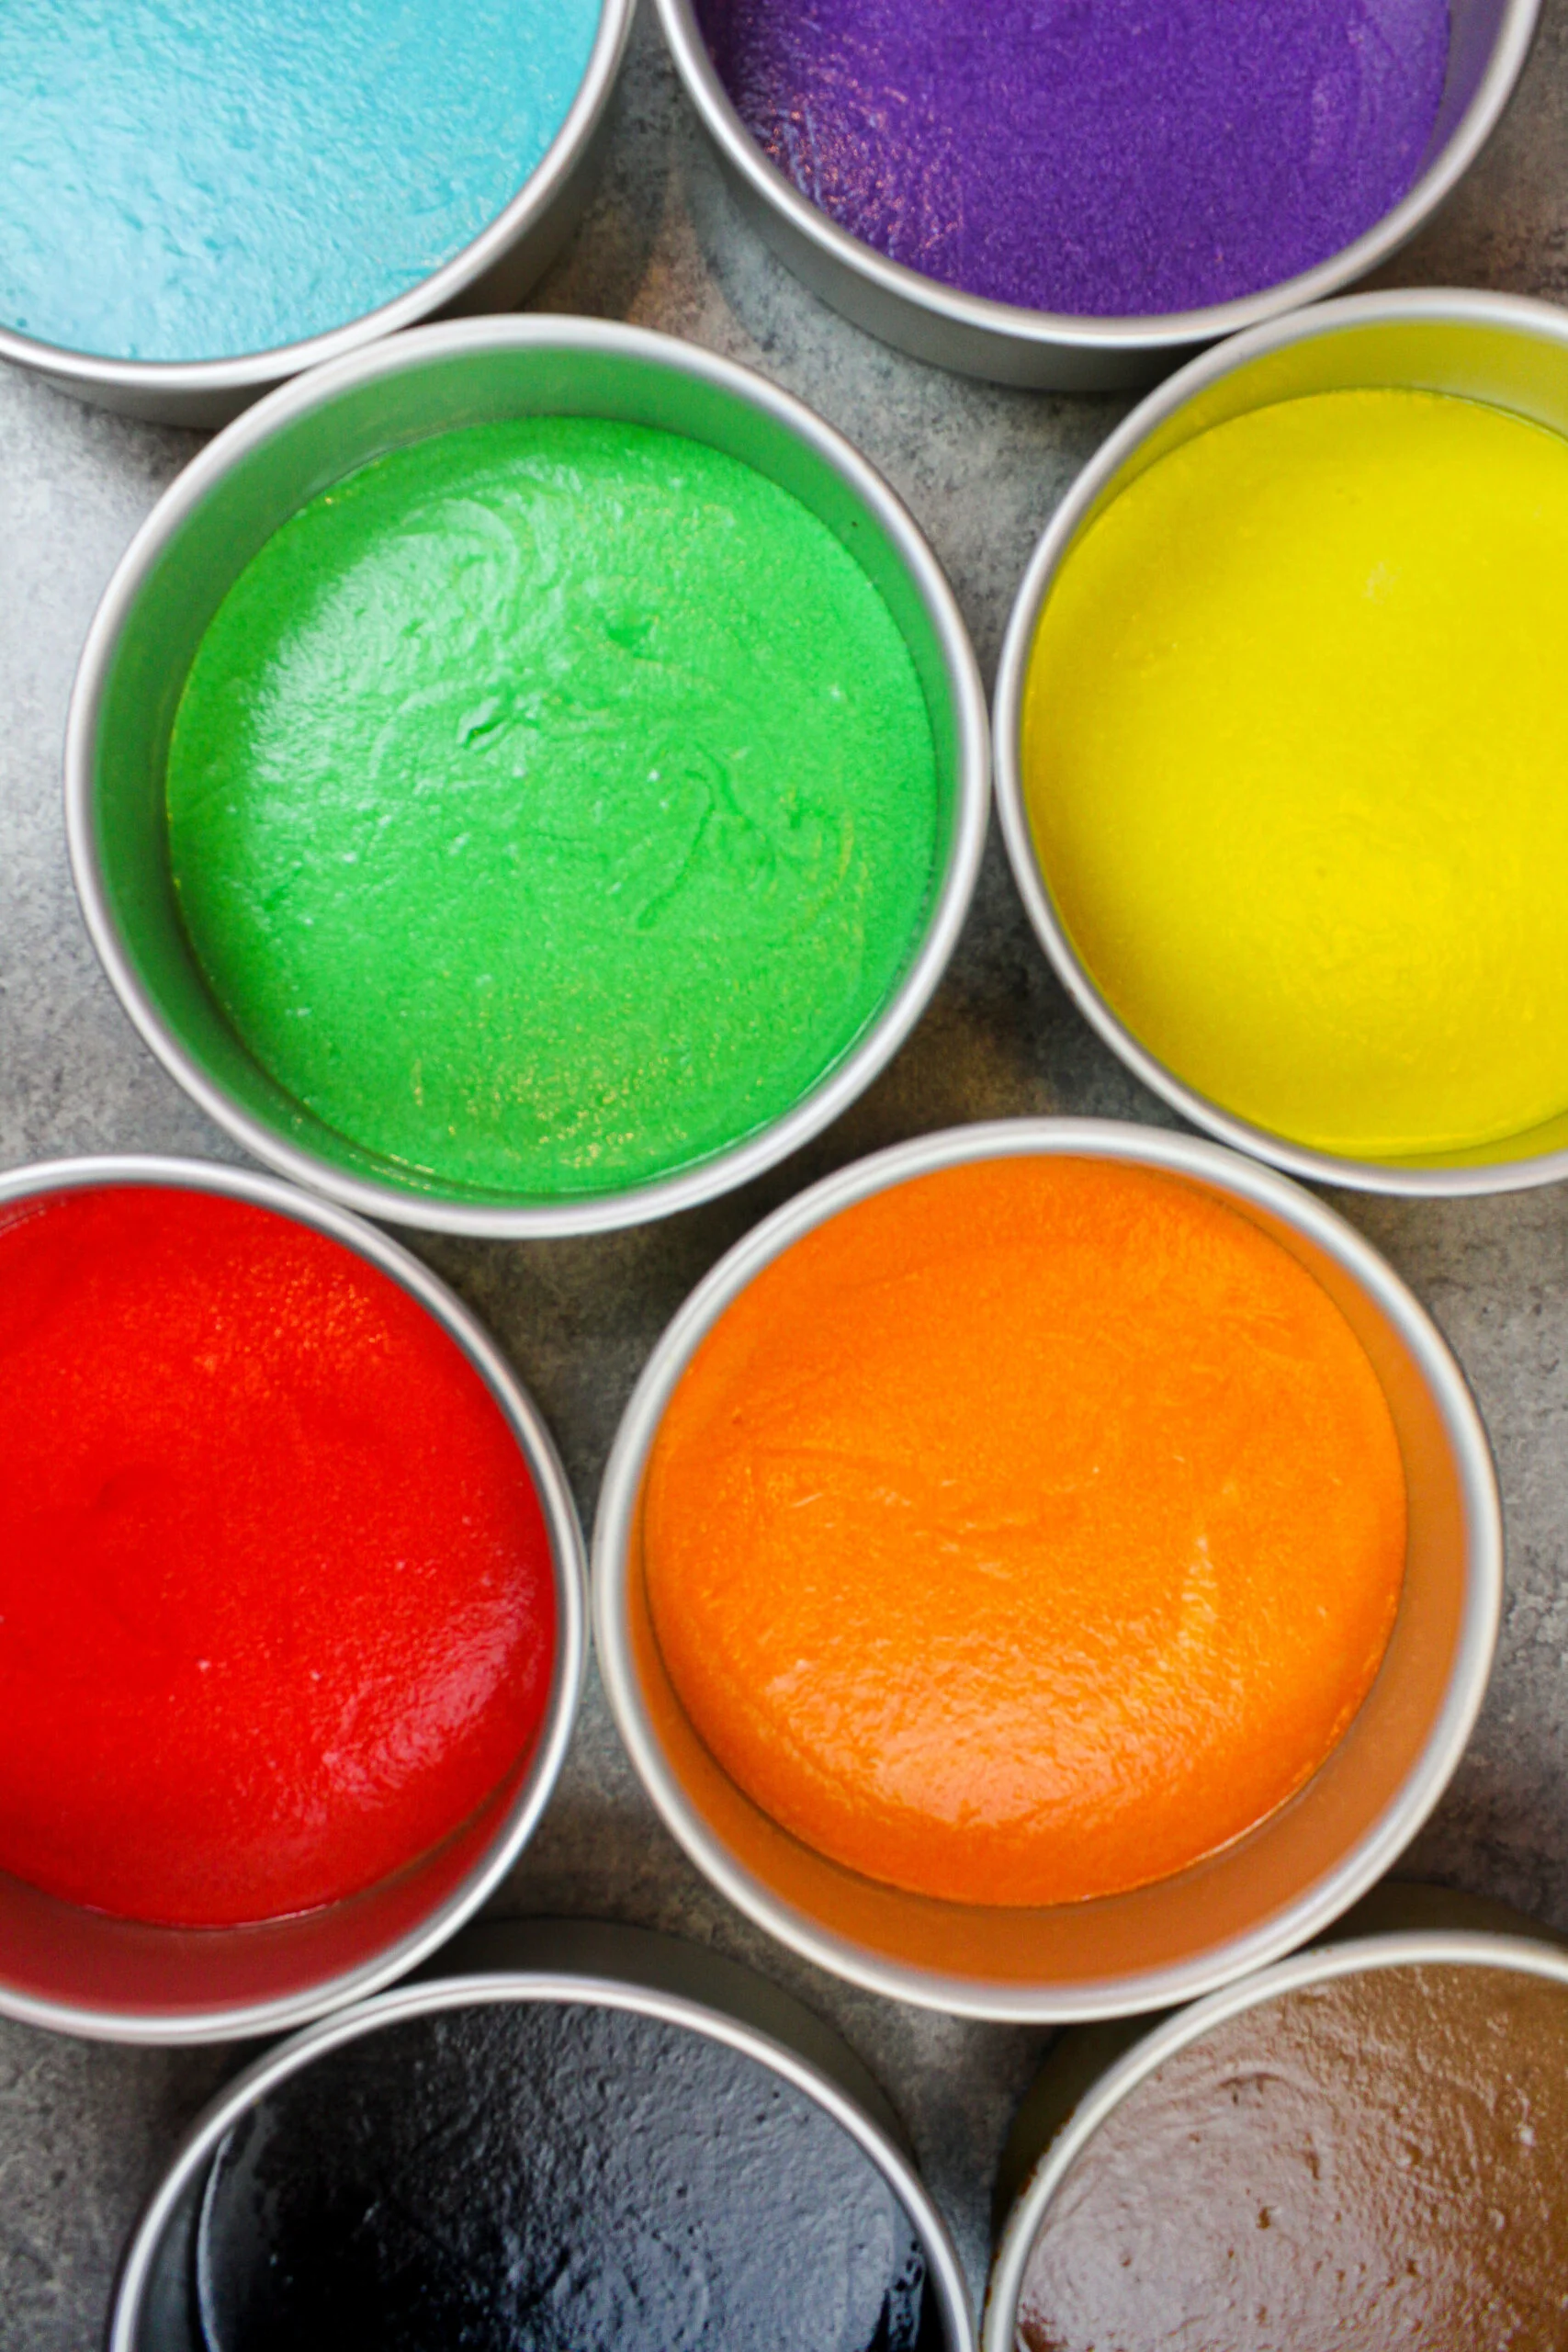
I highly recommend using gel food coloring. Gel food coloring is incredibly concentrated, so it allows you to use less. A couple drops will create beautiful, bright colors.
Gel food coloring is also thicker, and won’t change the consistency of the cake batter. Americolor gel food coloring is my favorite brand and I order bottles of it on amazon.
Natural food coloring (either liquid or powder) can be used in place of the gel food coloring to make this cake too though! The colors won’t be quite as vibrant, but it will still be beautiful.
Tips for Making the Best Rainbow Pride Cake:
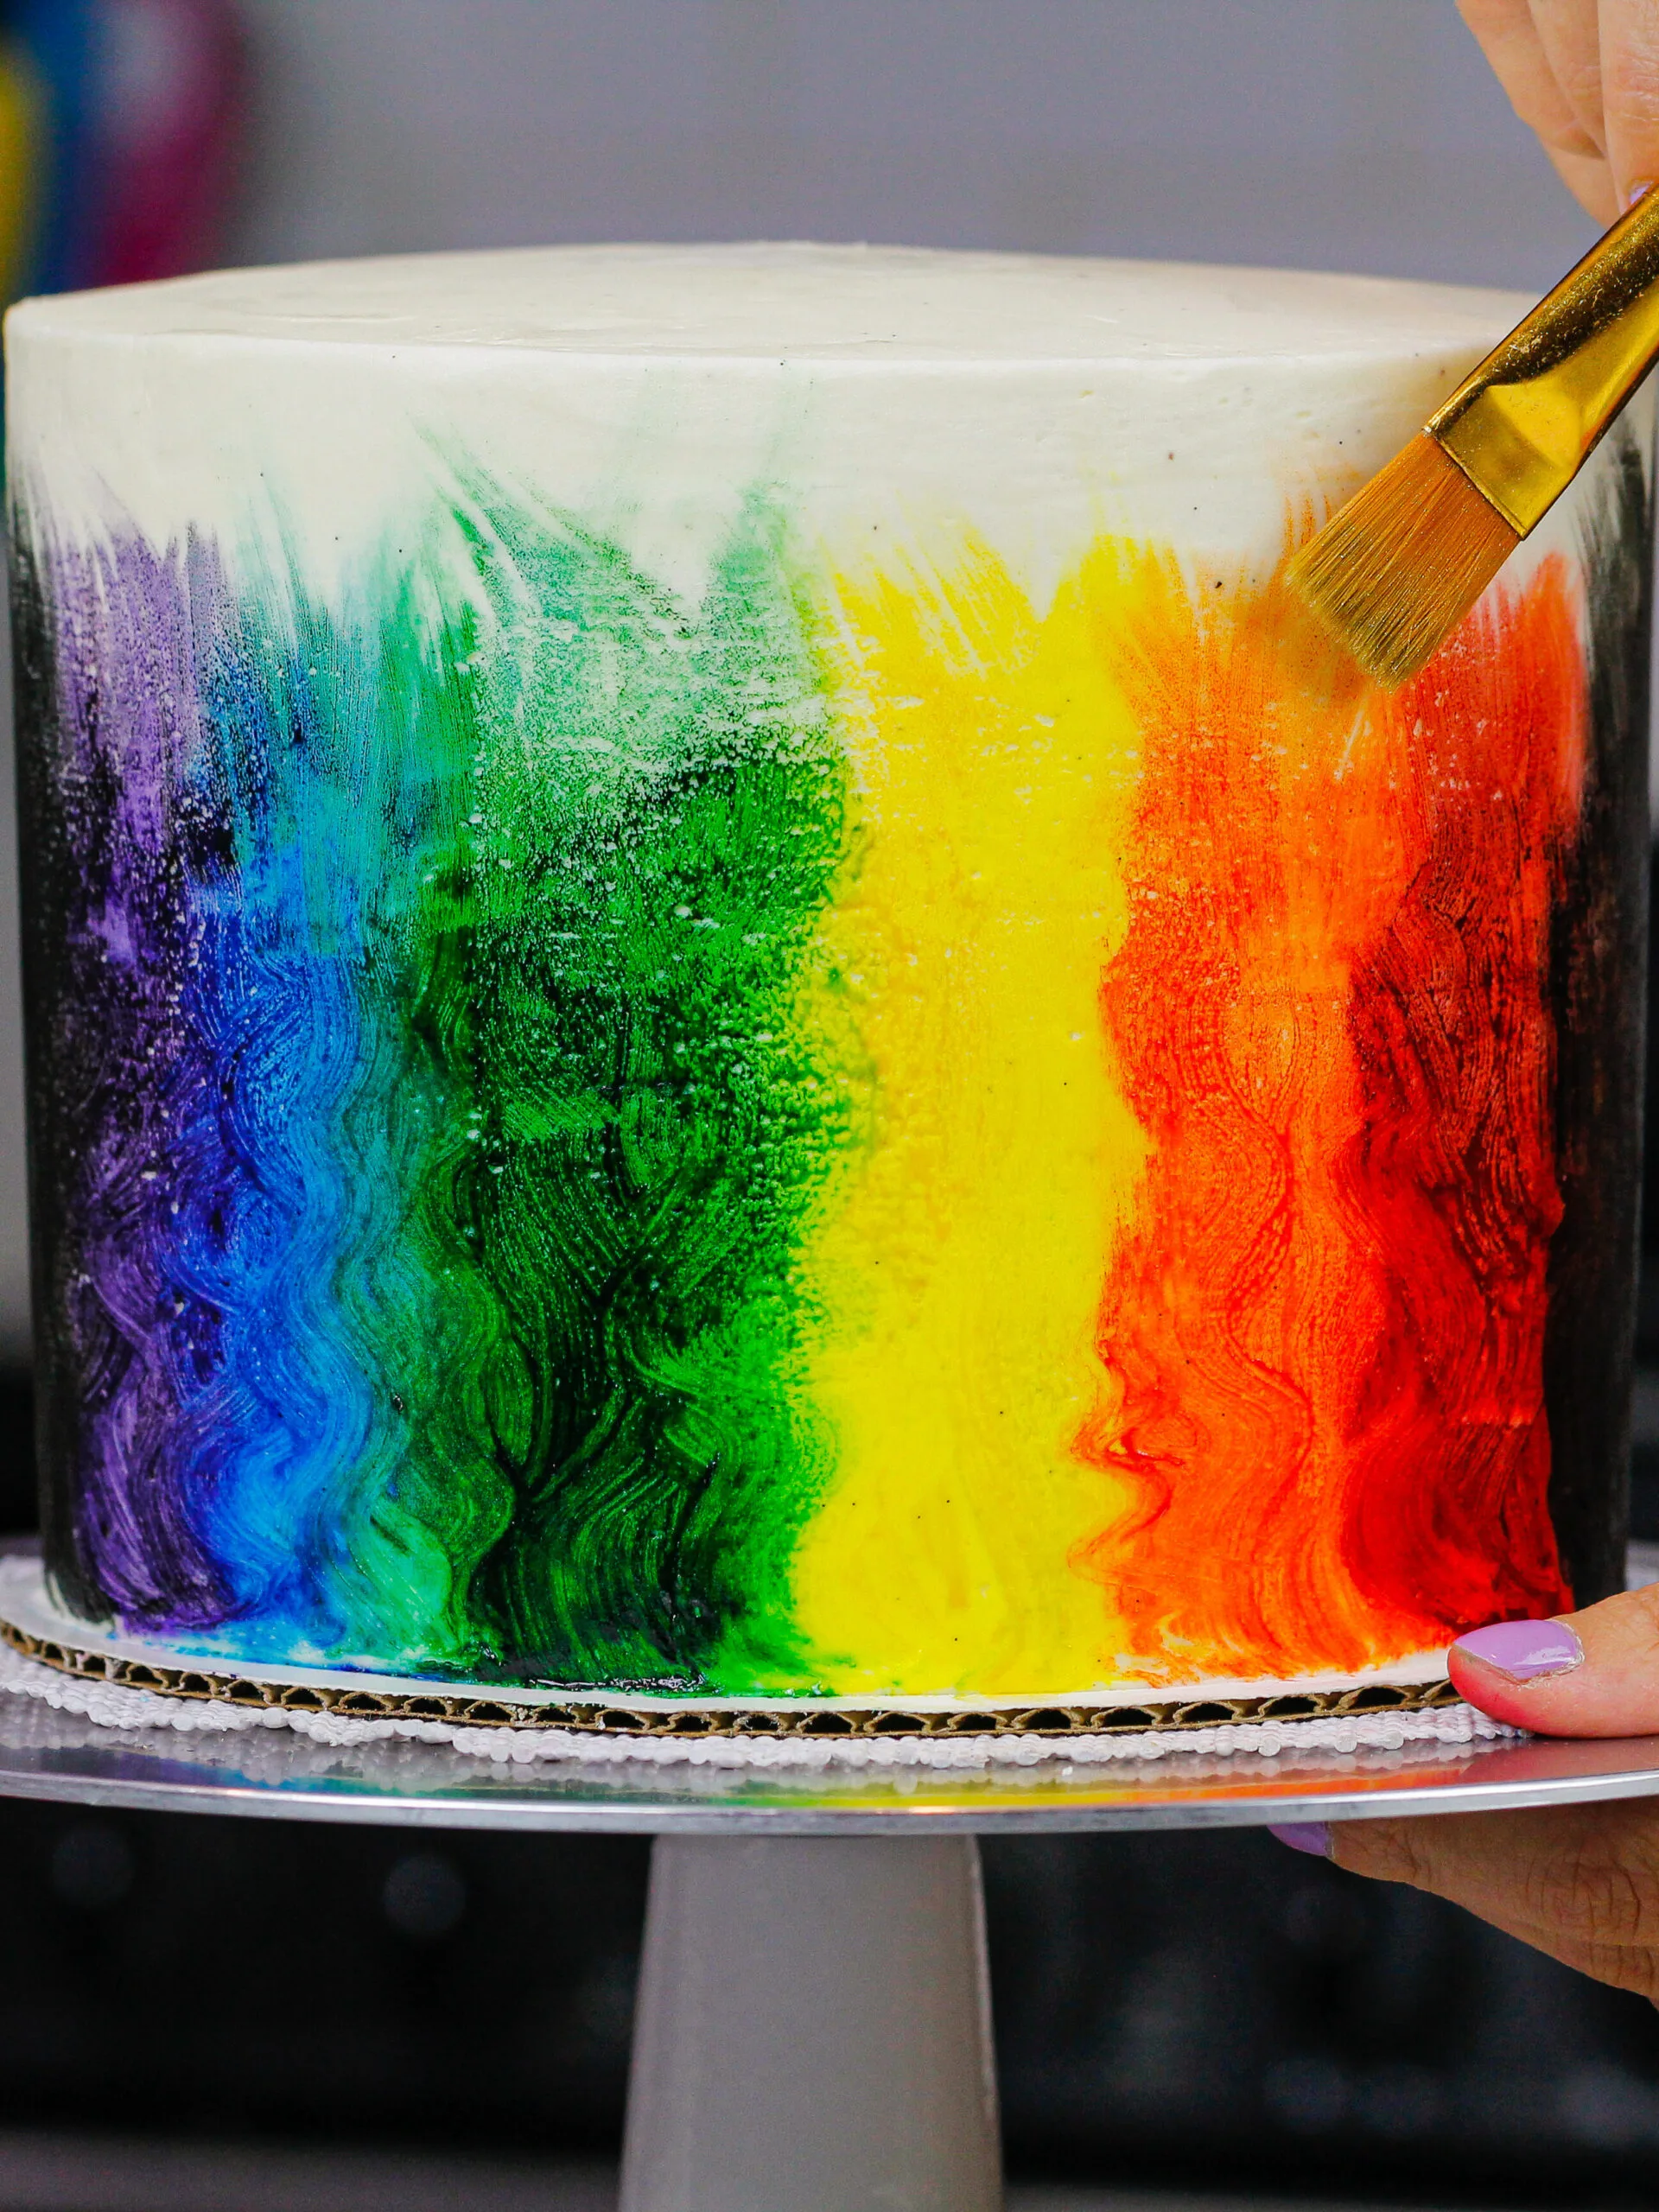
- Get creative with the decoration! I painted my pride cake with a mixture of gel food coloring and vodka, but you can do whatever you want!
- Make your own buttermilk if you don’t any! Add 1 Tbsp of lemon juice or vinegar to 1 cup of whole milk
- Properly measure your flour (spoon into the cup measure, then level) or use a kitchen scale to measure your dry ingredients.
- Use vanilla bean paste to really amp up the flavor of your buttercream.
- Ingredients at room temp mix together better. Set out any cold ingredients ahead of time.
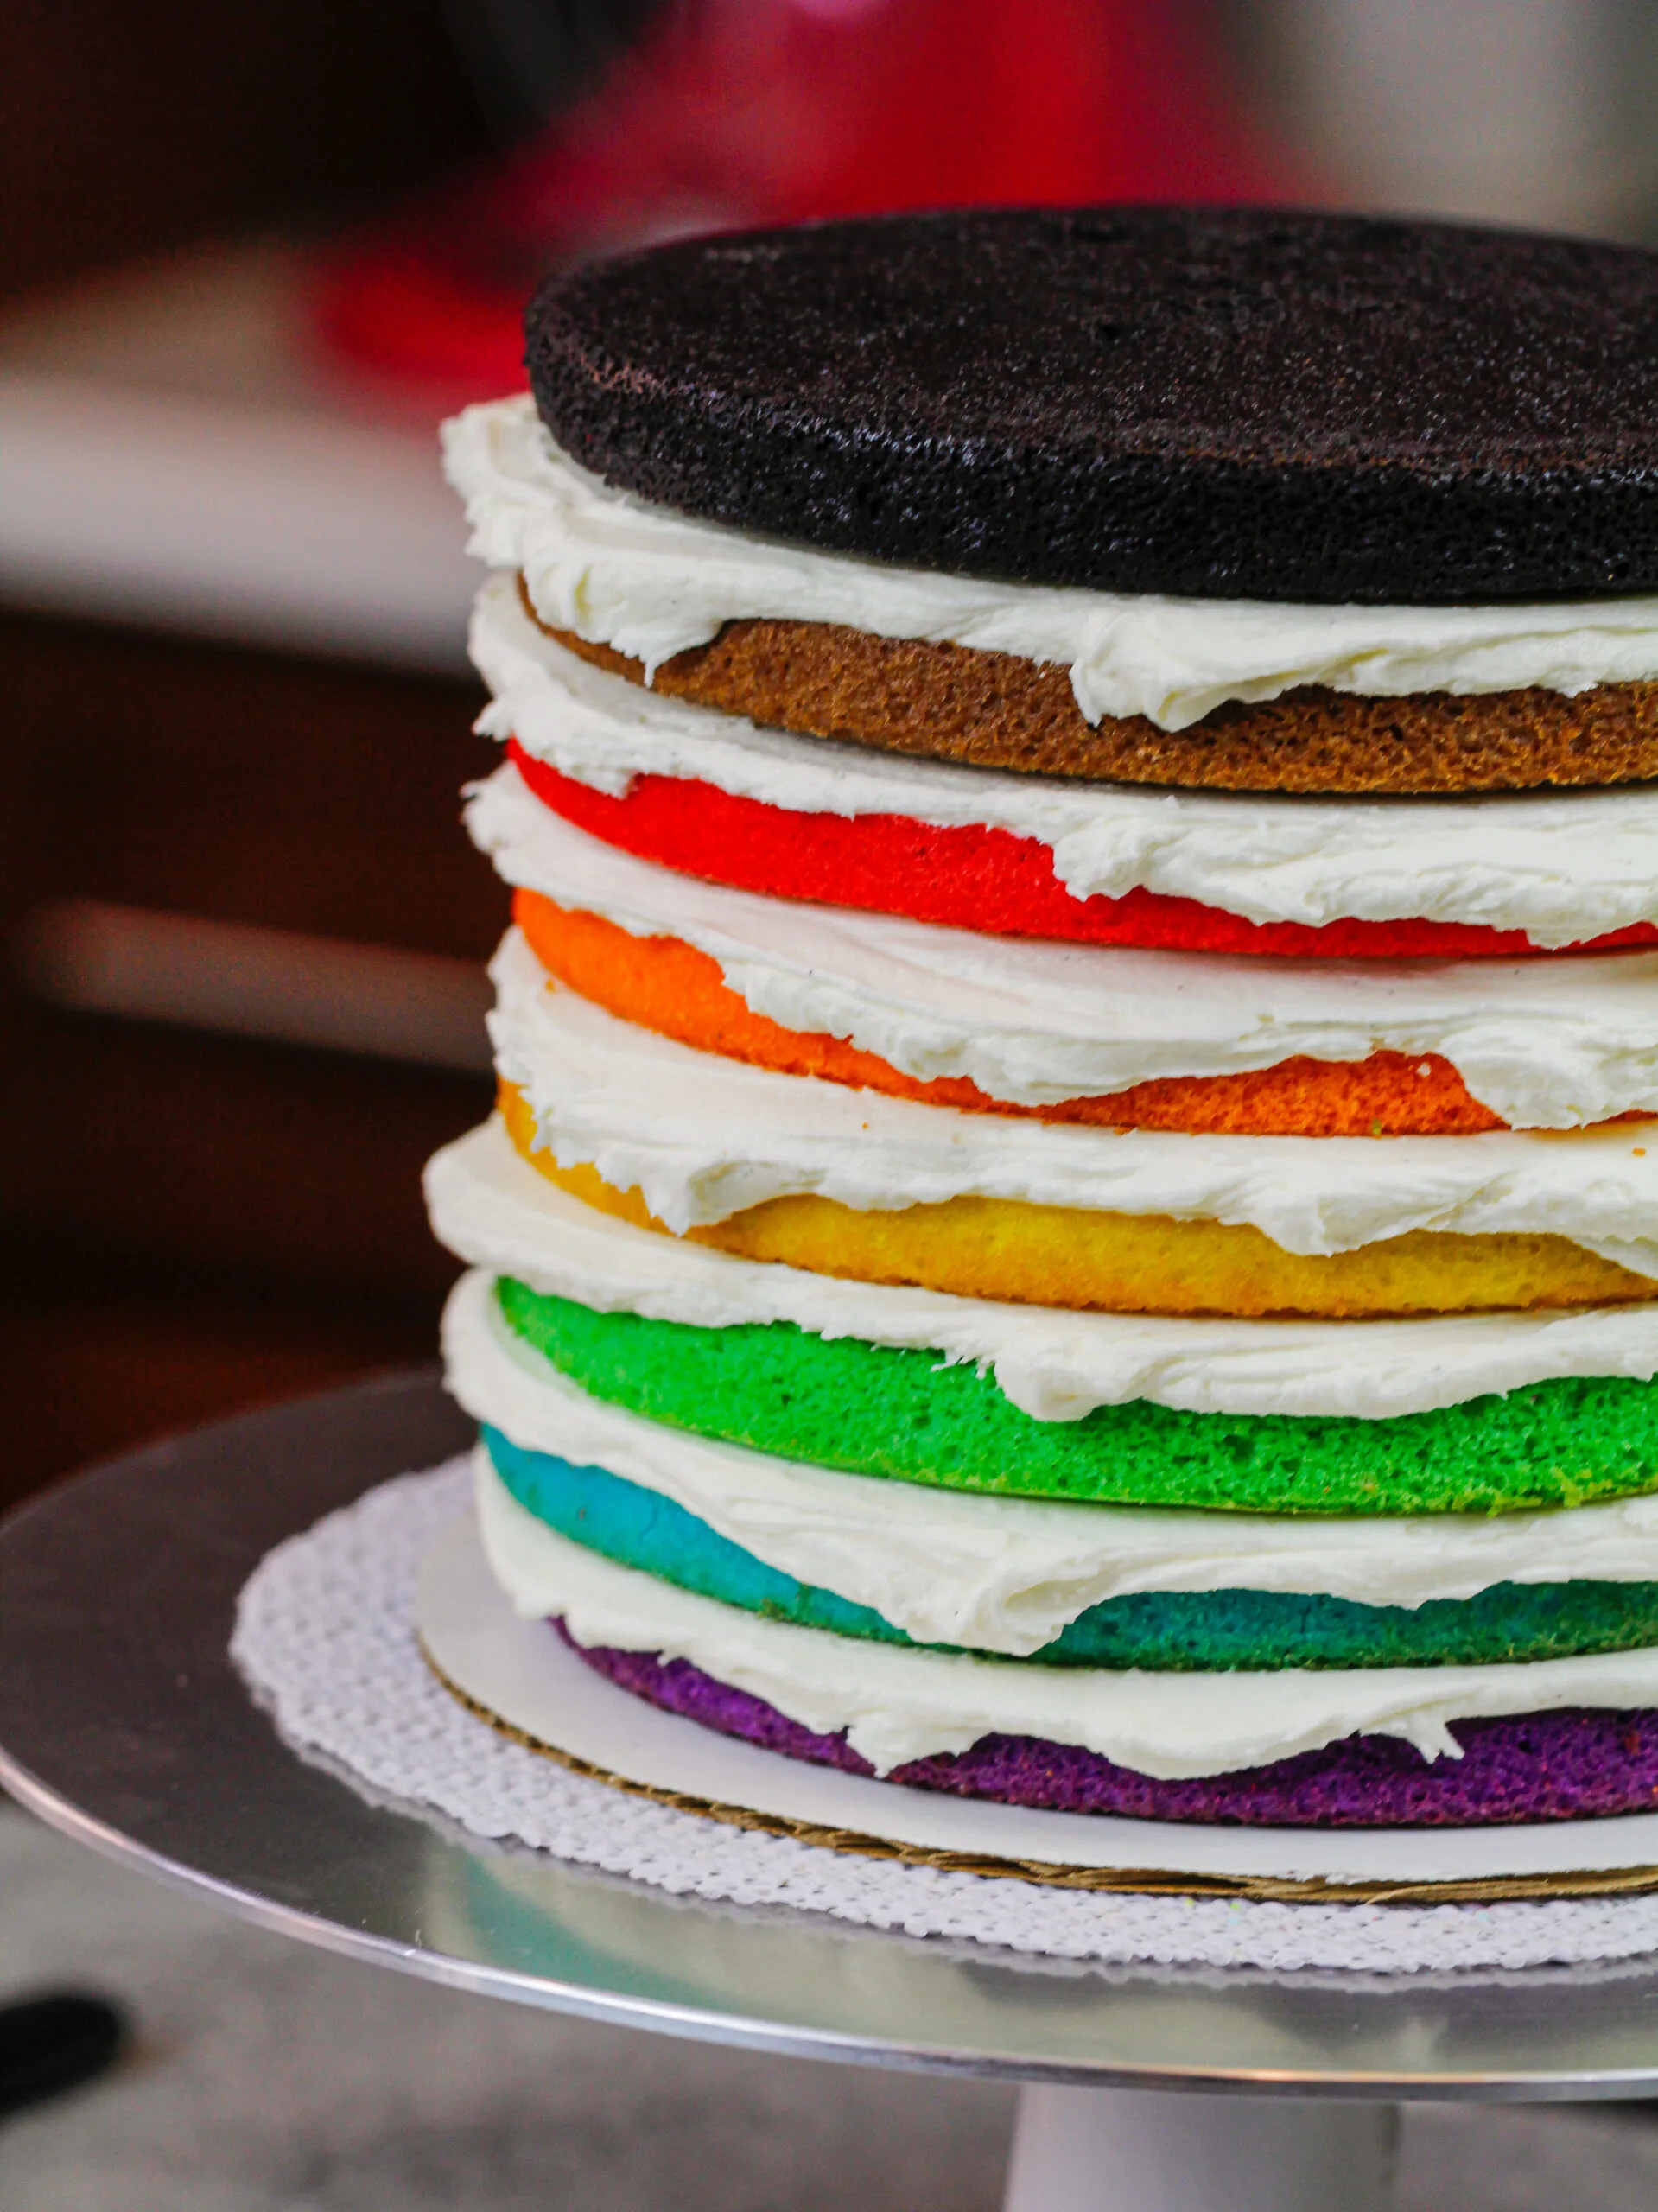
- Chill your cake layers in the freezer for about 20 minutes before assembling the cake. This cake has 8 layers and it’s much easier to stack if the cake layers are cold to the touch.
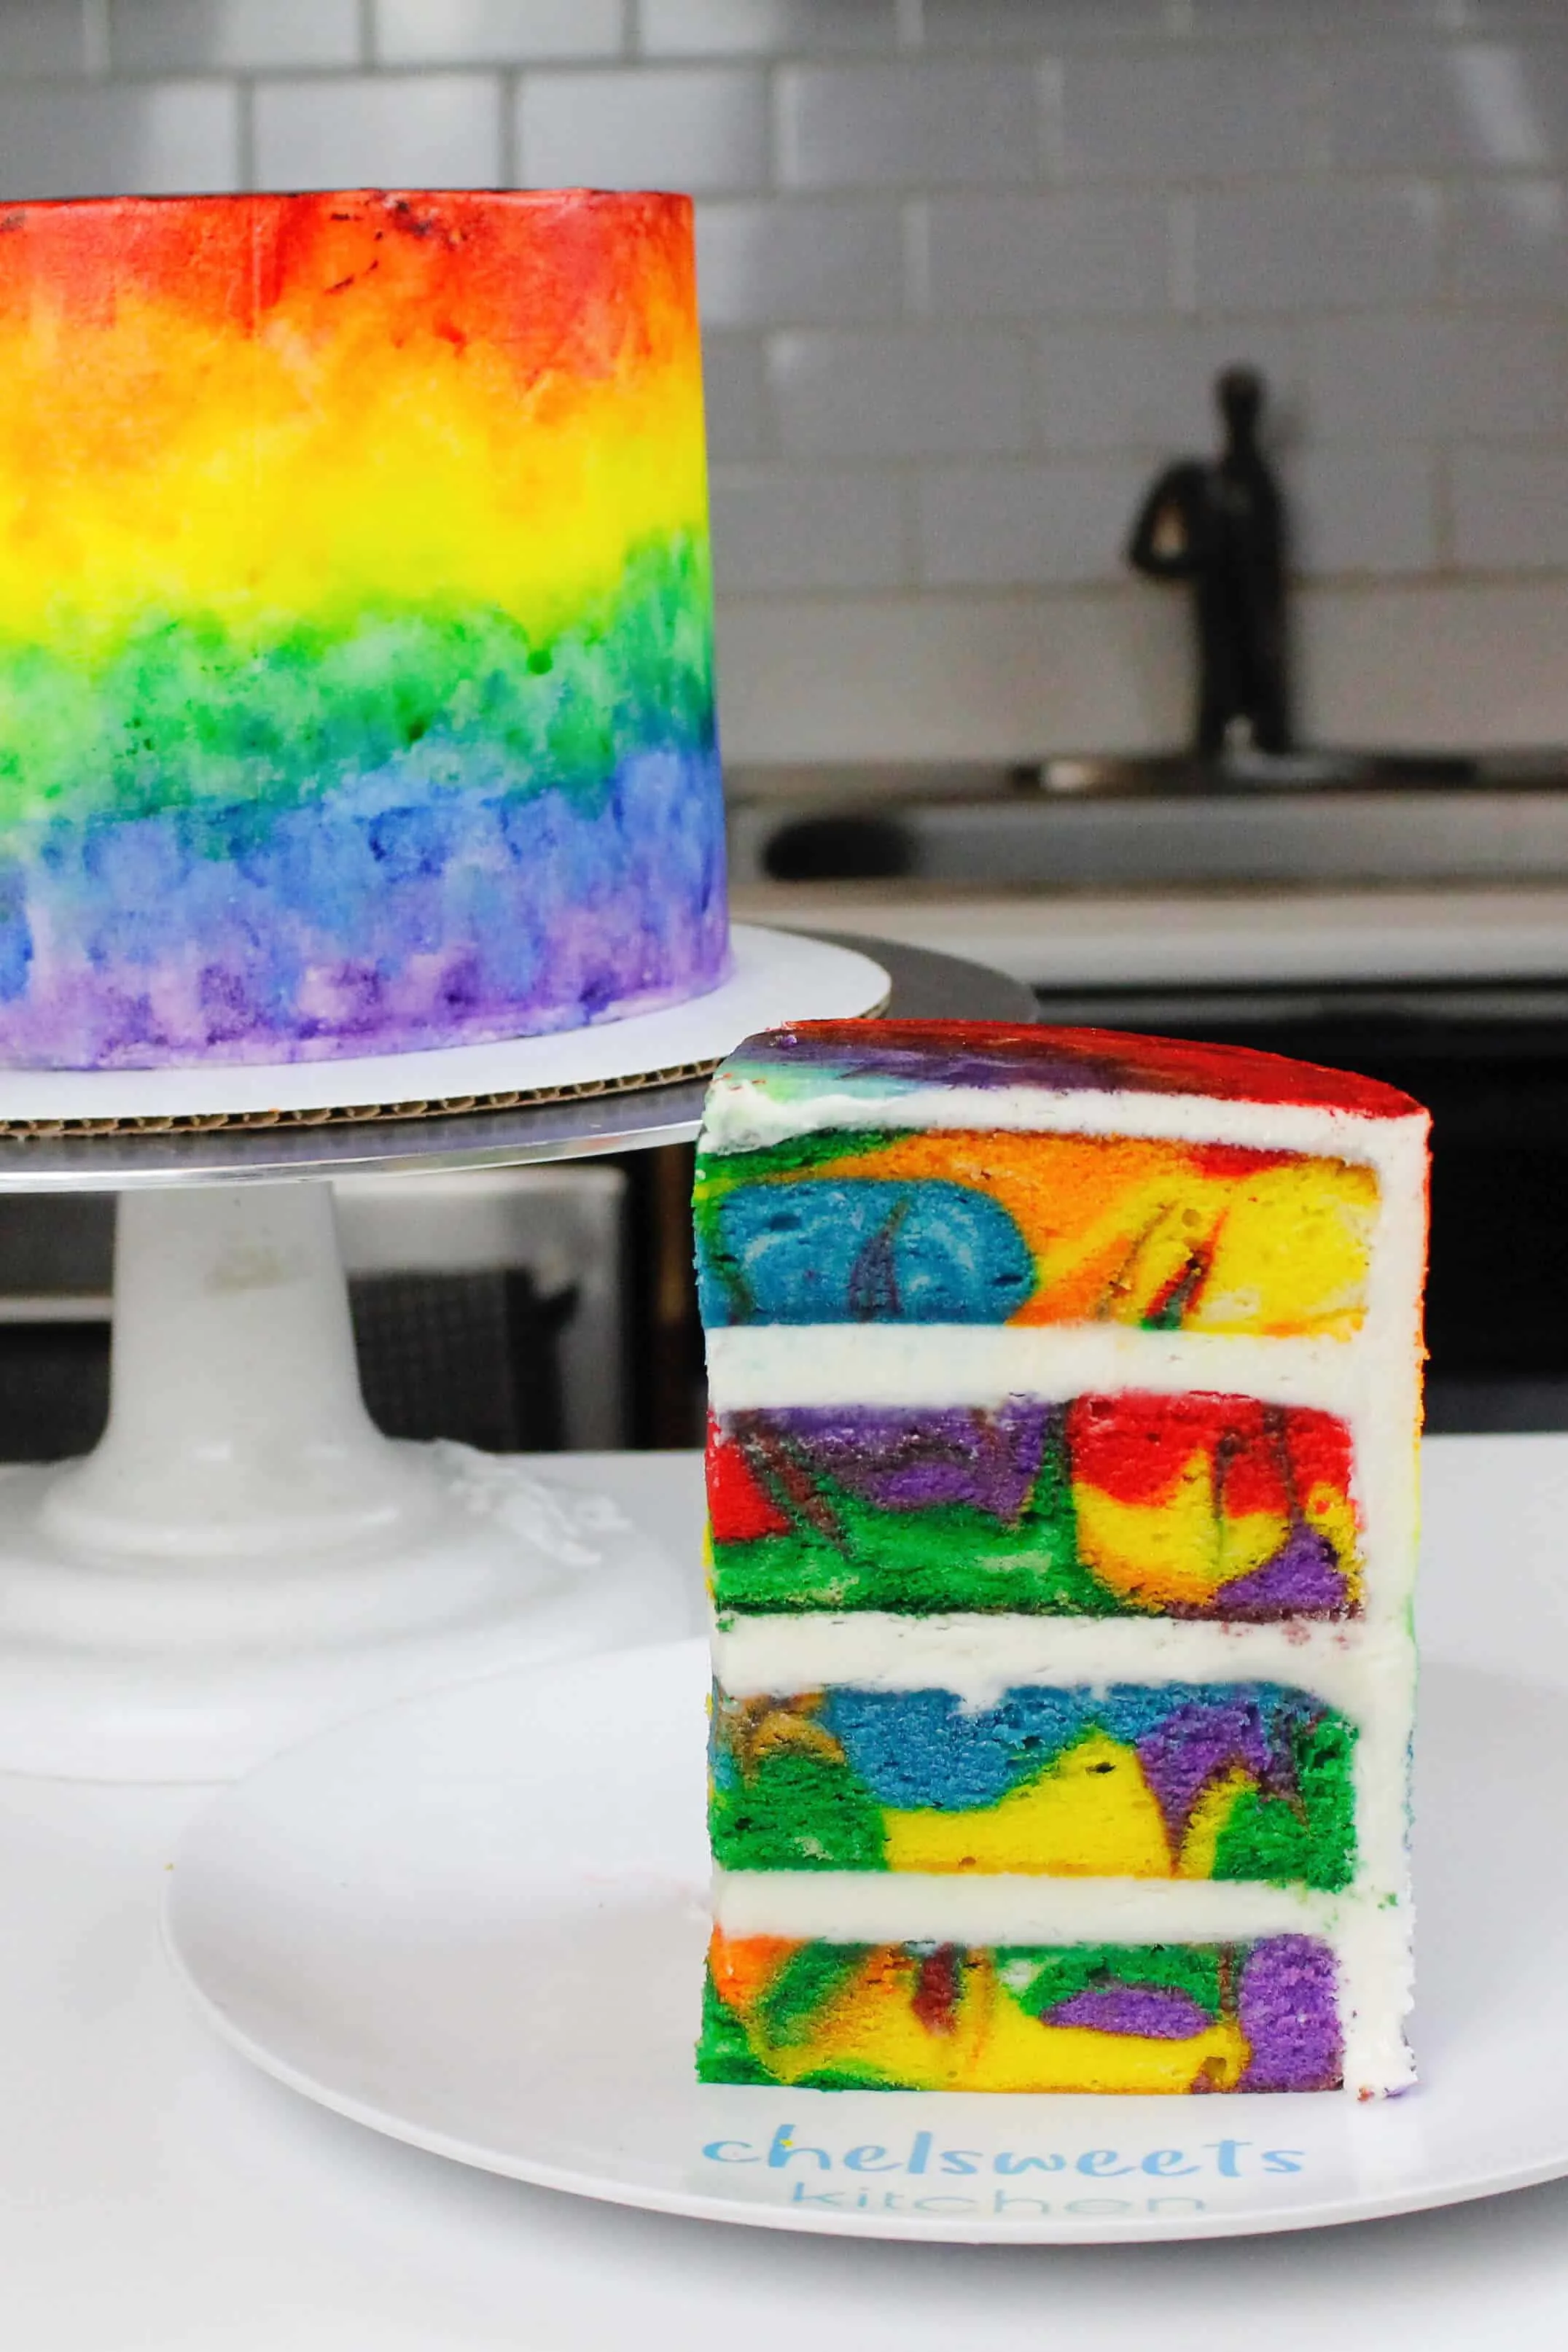
- One batch of batter can also be used to make two 9×13″ sheet cake. Bake them at 325F for 33-38 minutes. You can marble the cake batter together to make swirly rainbow cake layers like this.
- Make this pride cake vegan or dairy free! Use your favorite type of dairy free milk to replace the buttermilk and heavy cream and use vegan butter sticks in place of the butter in the cake and frosting.
Making This Cake in Advance & Storage Tips:
- Make your cake layers in advance and freeze them. It breaks the process up and makes it more approachable.
- Make your frosting ahead of time too or save any leftover frosting! It can be stored in an airtight container in the fridge for up to a month. Or store it in the freezer for up to 3 months. Be sure to give it a good stir once it thaws to get the consistency nice and smooth again.
- A frosted cake can last in the fridge for up to a week, or in the freezer for up to a month. The buttercream locks in all the moisture, keeping the cake fresh and delicious!
- If you cut into the cake and have leftovers, use any remaining frosting to cover the cut section to keep it moist and store in the fridge for up to a week.
Let Me Know What You Think!
If you try this rainbow pride cake recipe, I’d love to hear what you think of it! Please leave a rating and comment below.
And don’t forget to tag me @chelsweets and use #chelsweets so that I can see your delicious creations!
Other Recipes You Might Like:
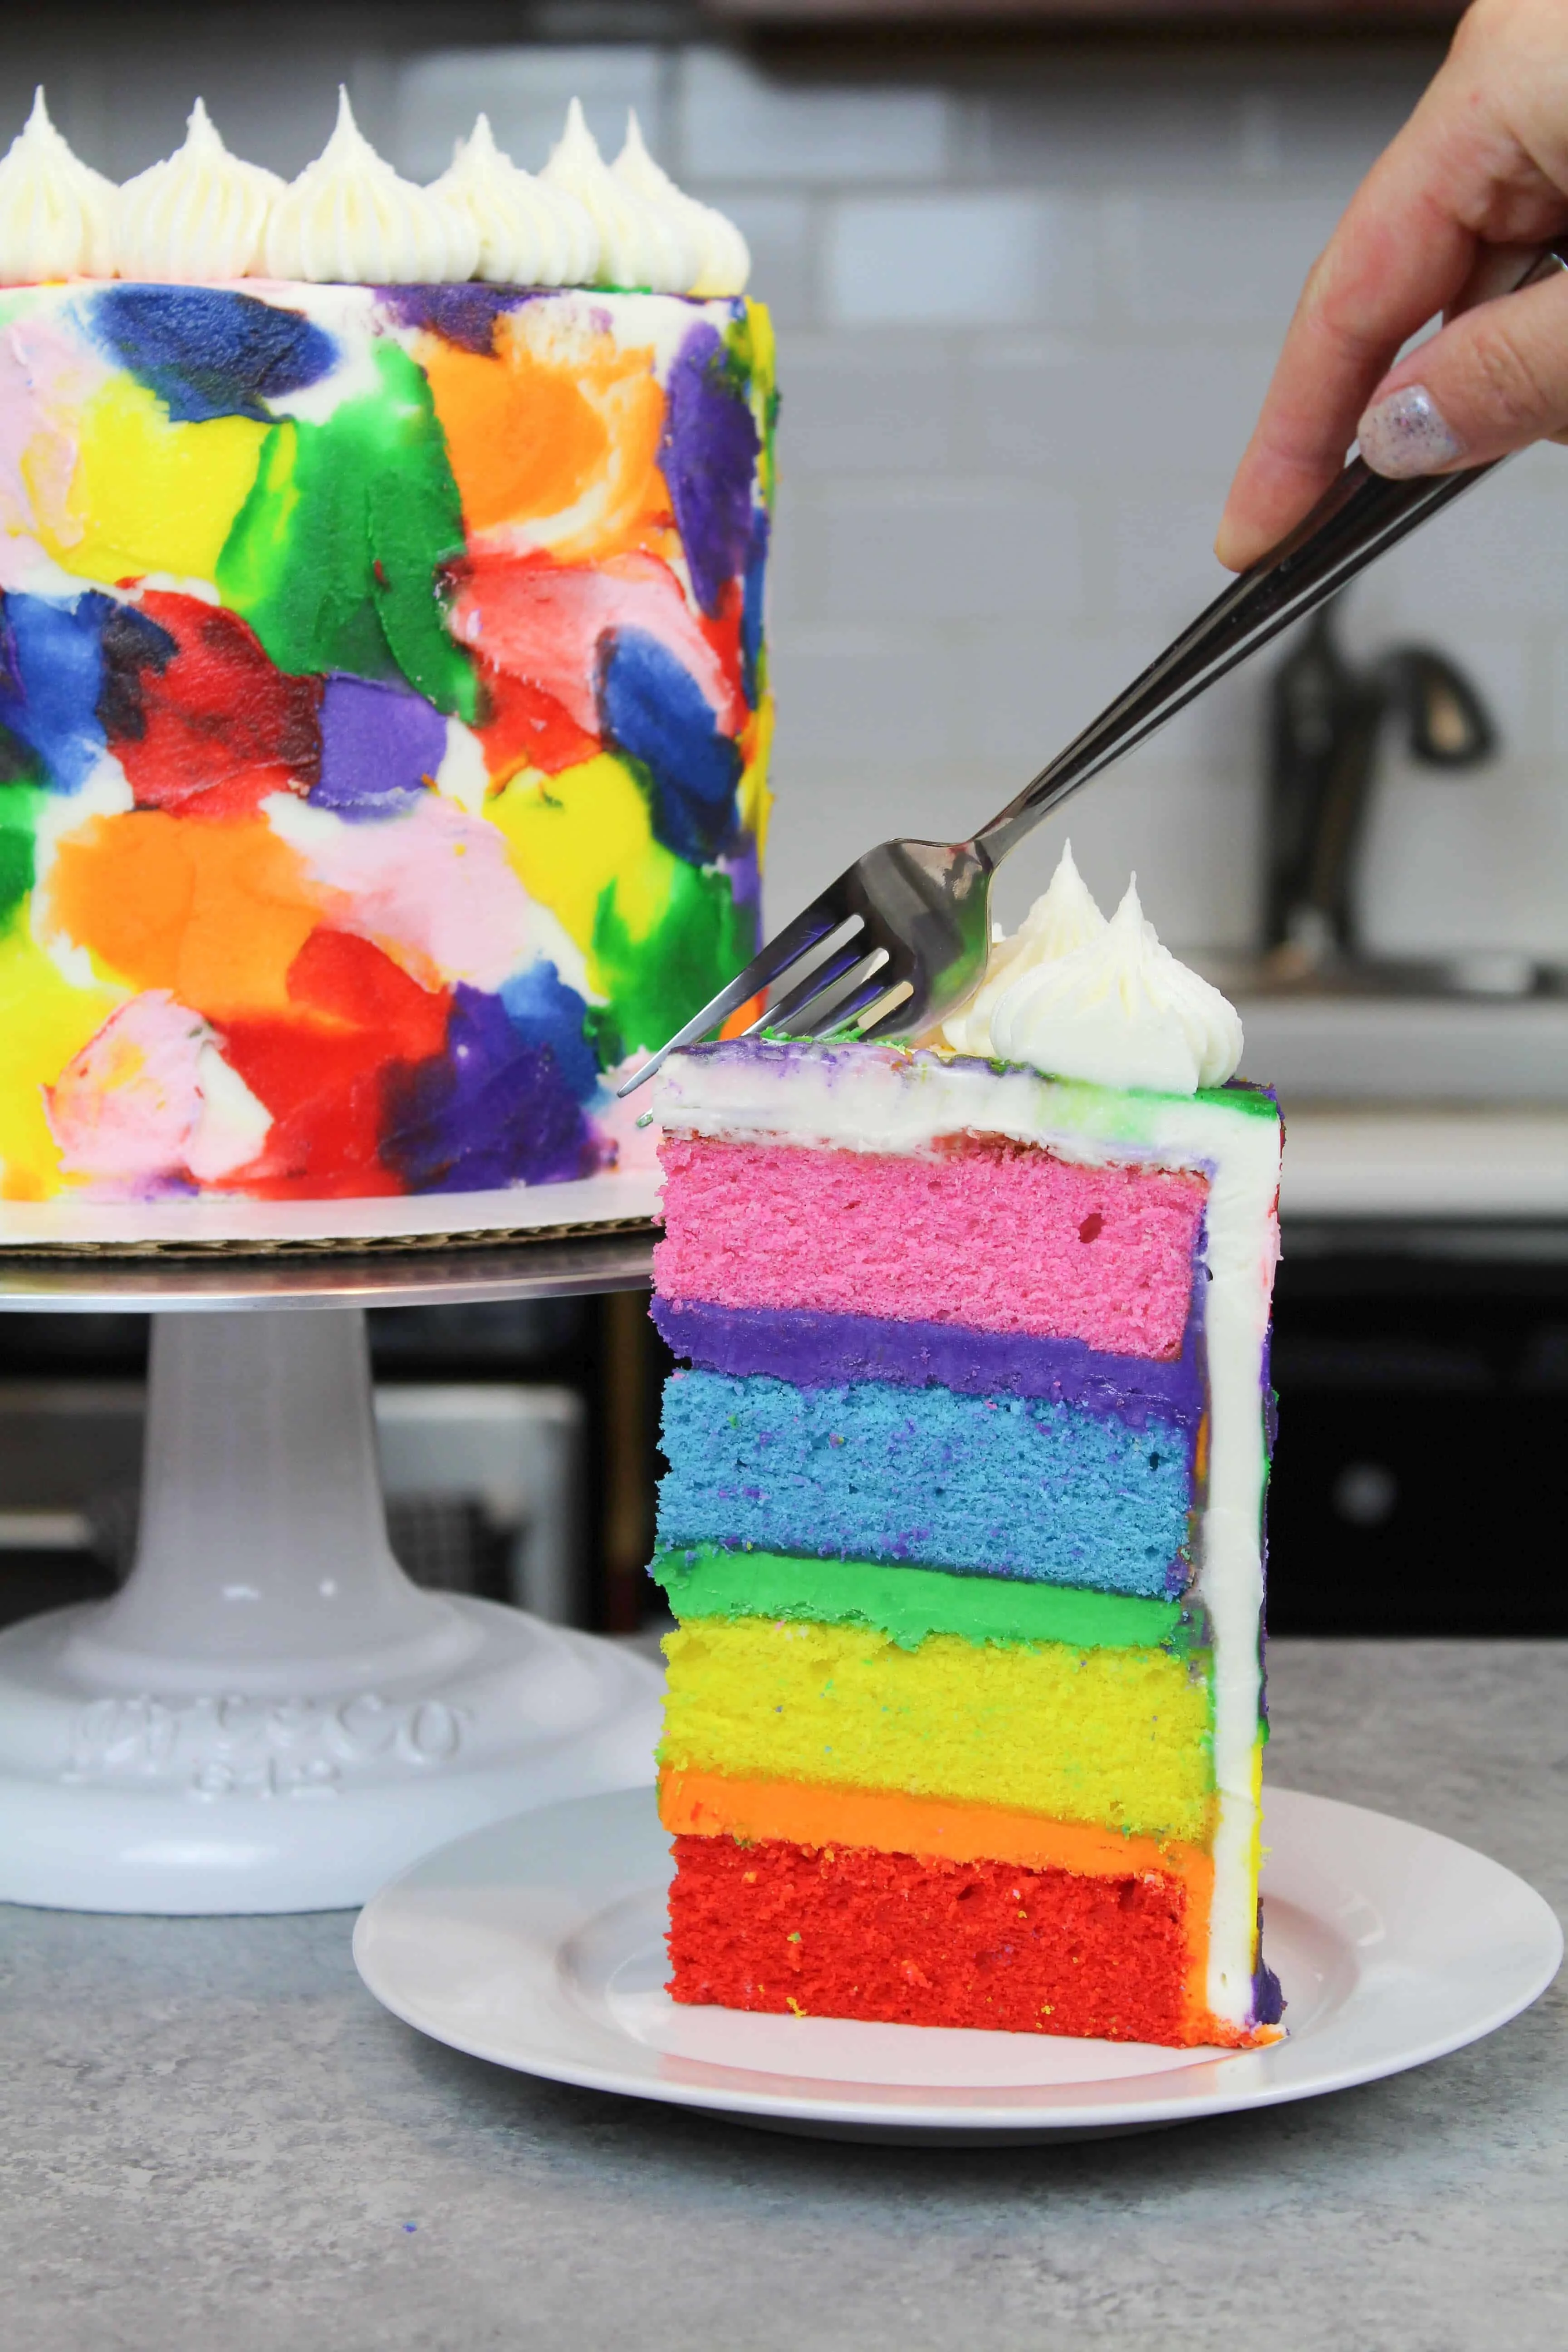
Rainbow Pride Cake
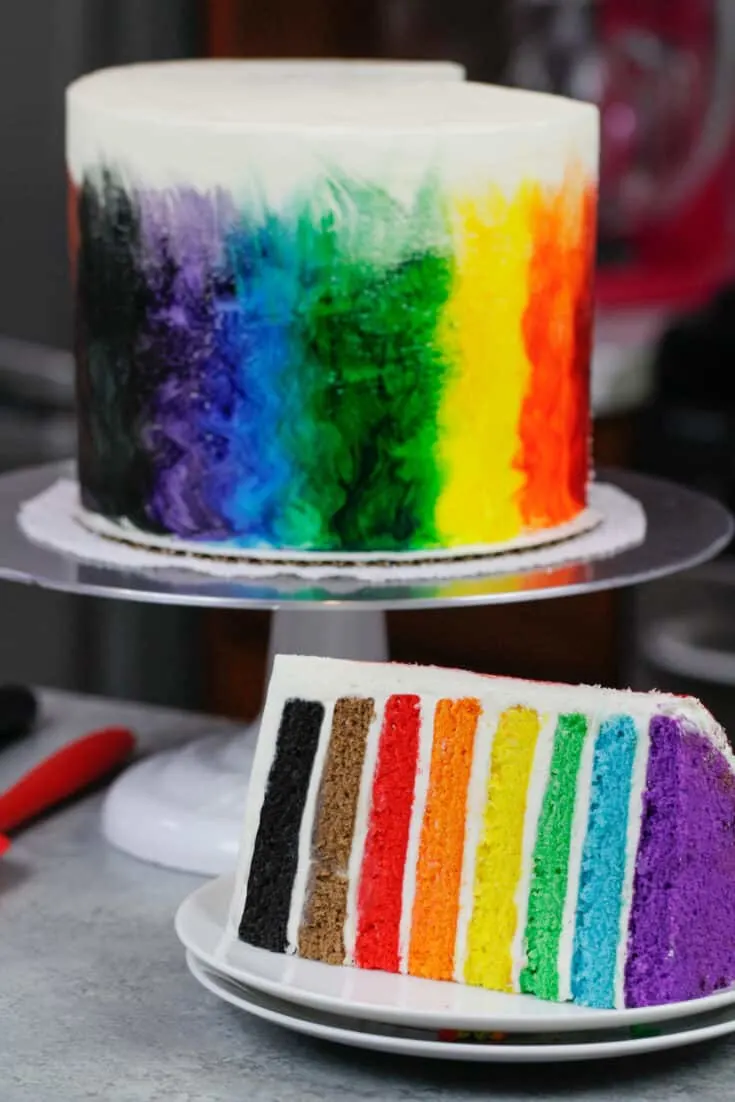
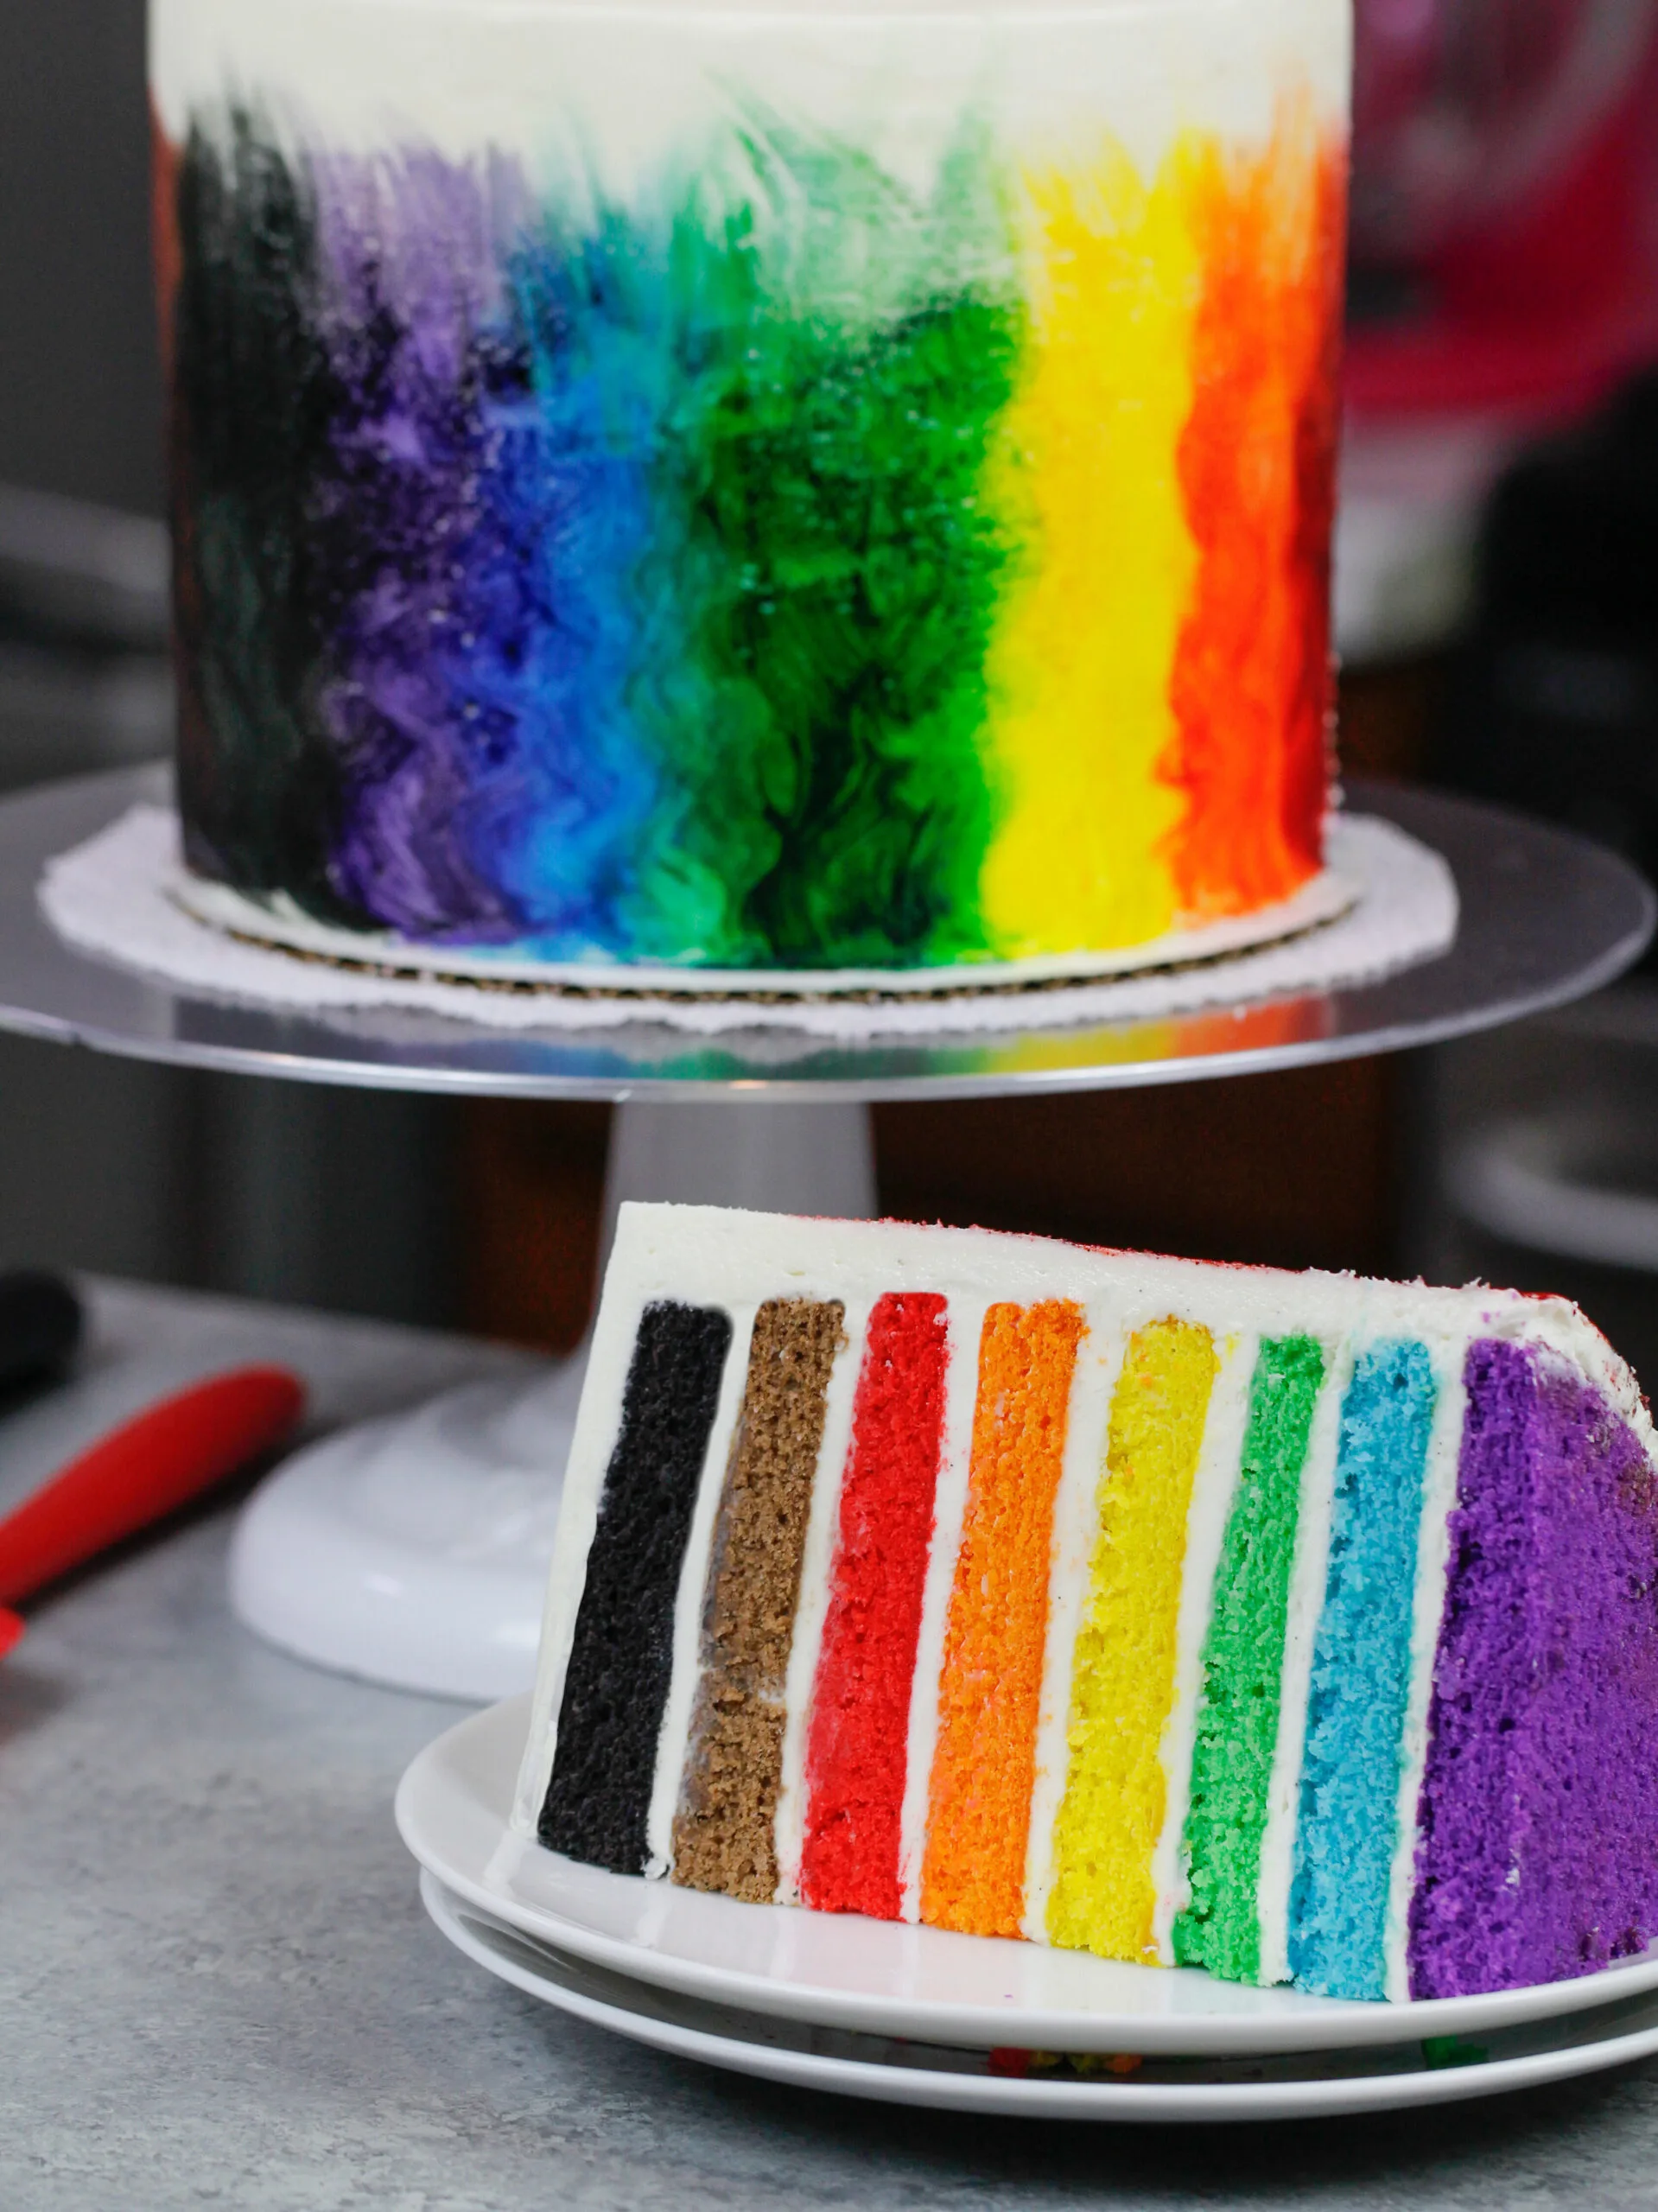
This colorful rainbow cake is an amazing way celebrate Pride! It's made with 8 rainbow cake layers and a fluffy vanilla buttercream.
Ingredients
Rainbow Cake Layers
- 3 cups all-purpose flour (375g)
- 3 cups granulated sugar (600g)
- 2 1/2 tsp baking powder (10g)
- 1 tsp fine salt (6g)
- 1 cup unsalted butter, room temp (226g)
- 1 cup egg whites from a carton or about 7 egg whites, room temp (235g)
- 1 1/2 cups buttermilk, room temp (360g)
- 2 Tbsp vegetable oil (30g)
- 2 tsp vanilla extract (8g)
- purple, blue, green, yellow, orange, red, brown, and black gel food coloring (if desired)
Vanilla Buttercream Frosting
- 3 cups unsalted butter, room temperature (678g)
- 1 Tbsp vanilla extract or vanilla bean paste (12g)
- 1 tsp fine salt (6g)
- 10 cups powdered sugar (200g)
- 1/2 cup heavy cream or whipping cream, room temperature (120g)
Optional Decorations
- rainbow gel food coloring
- 4 tsp of vodka or clear extract like lemon or almond extract
- clean paint brush
Instructions
Rainbow Cake Layers:
- Preheat oven to 325°F. Line eight, 6-inch or 7-inch pans with parchment rounds, and grease with a light spray of non-stick cooking spray. If you don't have 8 pans, don't worry! Grease & line however many you have and bake the cake layers in a couple rounds.
- Mix 3 cups all purpose flour, 3 cups sugar, 2 1/2 tsp baking powder and 1 tsp salt together in a stand mixer with a paddle attachment or hand mixer until fully combined.
- Mix in 1 cup of room temperature, unsalted butter slowly into the dry ingredients on a low speed. Continue to mix until no large chunks of butter remain, and the mixture looks like moist sand.
- Pour in 1 cup of egg whites and mix on low until just incorporated. Mix in 1 1/2 cups buttermilk in two installments, on a low speed.
- Add in 2 Tbsp of vegetable oil and 2 tsp of vanilla extract and mix at a low speed until fully incorporated. If you plan to color your cake layers, add in the gel food coloring with the oil and vanilla.
- Scrape down the sides of the bowl with a rubber spatula, then beat on a medium speed for about a minute to make sure everything is properly mixed together. This also helps lighten the texture of the cake layers a bit.
- Divide the batter evenly between 8 bowls. I like to use a digital scale to make sure each bowl has the same amount of batter, so that each cake layer is the same height.
- Color each bowl a different color using purple, blue, green, yellow, orange, red, brown, and black gel food coloring. You can also use 1 tsp baking cocoa and 1 tsp black cocoa to naturally color the brown and black cake layers.
- Bake for 18-21 minutes, or until a toothpick comes out with a few moist crumbs.
- I couldn't fit all 8 pans in my oven at once, so I baked the cake layers in two batches. It's fine to let the batter sit out at some of the cake layers bake! Just cover the bowls or pans with a kitchen towel as they sit.
- Let the pans cool for 10 minutes, then run a small offset spatula around perimeter of the pan to separate the cake from the pan.
- Place cake layers into the freezer for 15 minutes to accelerate the cooling process. Once the layers are fully cooled, carefully flip the pans and remove the layers.
- If you make these cake layers in advance and freeze them, let them thaw for about 10 minutes before making your cake. The cake layers should still be slightly cold to the touch, which will make it easier to assemble your cake.
Fluffy Vanilla Buttercream Frosting:
- While the cake layers bake and cool, make the vanilla buttercream frosting.
- Beat 3 cups of unsalted butter on a high speed for 3 minutes with a whisk attachment. It should become lighter in color and increase in volume as air is incorporated into the butter.
- Mix in 1 Tbsp of vanilla extract or vanilla bean paste and 1 tsp salt on a medium speed.
- Slowly mix in 10 cups of powdered sugar on a low speed. Halfway through add 1/2 cup of heavy cream or milk to make the frosting easier to mix.
- Continue to mix on low speed for a few minutes, until the desired consistency is reached.
- If the frosting seems too thick, add in additional cream (1 TBSP at a time). If the frosting is too thin, add in more powdered sugar (quarter of a cup at a time).
To Assemble This Rainbow Pride Cake:
- Stack and frost the rainbow cake layers on a greaseproof cake board using a dab of frosting to help stick the first cake layer to the board. Start with the purple cake layer.
- Spread an even layer of fluffy vanilla buttercream between each cake layer.
- Repeat and stack the cake layers in color order: purple, blue, green, yellow, orange, red, brown, black.
- Cover the cake in a thin coat of frosting, being sure you fully cover the cake layers. Smooth using a bench scraper, then chill the cake in the fridge (10 minutes) or freezer (5 minutes) until the frosting is firm to the touch.
- Add a second, thicker layer of frosting to the cake and smooth using a bench scraper. Place the cake in the freezer to chill for 10-15 minutes, or in the fridge for 30 minutes.
- In a plastic paint palette or small ramekin, combine a couple drops of each color of gel food coloring with 1/2 tsp of vodka or clear extract to create edible paint.
- Use a clean, thick paintbrush to paint the food coloring mixture up the sides of the cake, then enjoy!
Notes
Recipe Variations
This recipe can also be used to make a sheet cake! One batch will make 2, 9-inch x 13-inch cake layers that are about 1 inch tall.
One batch of cake batter makes about 1800 grams. If you plan use four circular cake pans, add 450 grams of batter into each pan.
Tips for Making the Best Rainbow Pride Cake
- Ingredients at room temp mix together better! Set out any cold ingredients ahead of time.
- Properly measure your flour (spoon into the cup measure, then level). Or better yet, use a kitchen scale to measure your dry ingredients.
- Use a scale to weigh your cake pans as you fill them. It will make your cake layers bake to the same height and bake more evenly.
- Bang your cake pans on the counter before putting it in the oven. This brings any big air bubbles that are trapped in the batter to the surface.
- Level your room temperature or thawed cake layers with a serrated knife to make them easier to stack.
- Chill your cake layers in the freezer for about 20 minutes before assembling the cake. It makes it so much easier to stack and frost them!
Making This Rainbow Pride Cake in Advance & Storage Tips
Make your cake layers in advance and freeze them. It breaks the process up and makes it more approachable.
Make your frosting ahead of time too or save any leftover frosting! It can be stored in an airtight container in the fridge for up to a month, or in the freezer for up to 3 months. Be sure to give it a good stir once it thaws to get the consistency nice and smooth again.
A frosted cake can last in the fridge for up to a week, or in the freezer for up to a month. The buttercream locks in all the moisture, keeping the cake fresh and delicious!
If you cut into the cake and have leftovers, use any remaining frosting to cover the cut section to keep it moist and store in the fridge for up to a week.
Nutrition Information
Yield
24Serving Size
1Amount Per Serving Calories 660Total Fat 33gSaturated Fat 20gTrans Fat 0gUnsaturated Fat 11gCholesterol 86mgSodium 297mgCarbohydrates 89gFiber 1gSugar 75gProtein 4g

Trans Flag Cake - Delicious Recipe & Step-By-Step Tutorial
Thursday 23rd of June 2022
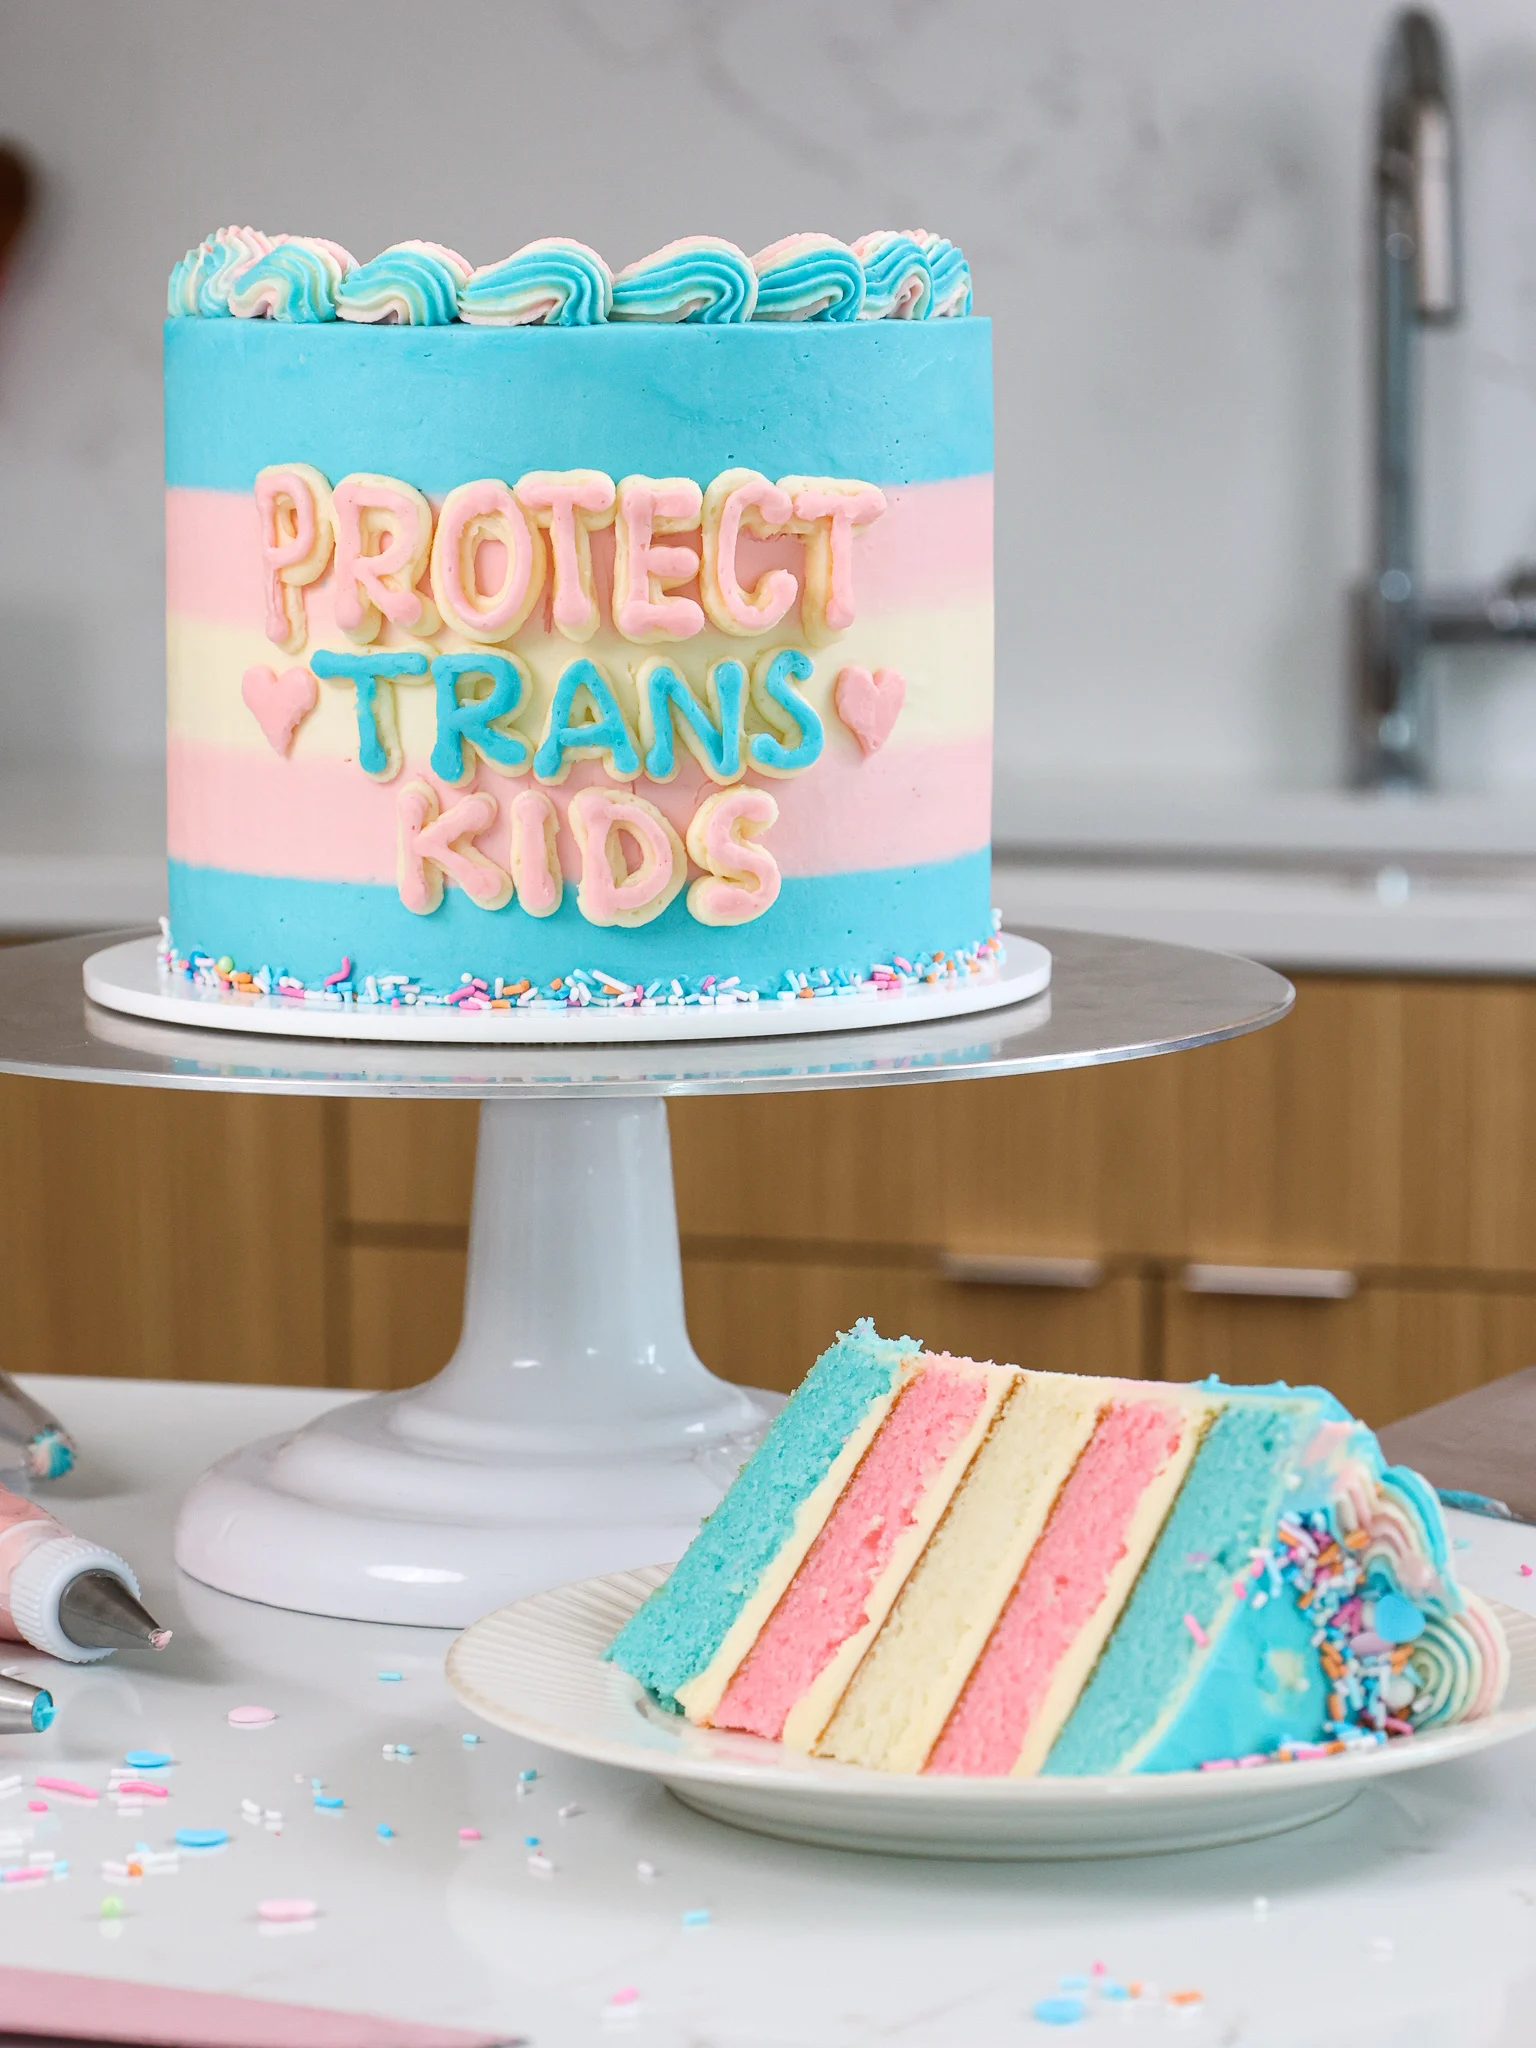
[…] Rainbow Pride Cake Lunch Box Cake Sunflower Cupcakes Buttercream Rosette Tutorial {"@context":"http://schema.org","@type":"Recipe","name":"Trans Flag Cake","author":{"@type":"Person"," […]
Hazel (she/them)
Tuesday 8th of June 2021
What should I do if I don't have eight pans?
Tamara
Tuesday 8th of June 2021
Hi! Do we level the cakes before or after cooling (if they dome)?
Also, I’ll be using 6” cake pans that are 2” deep - is this what you used? Or should we use, for example, the 6” set from Wilton that are 3/4” deep? Thank you!
18 t?czowych tortów, które wygl?daj? bajecznie. Na kolorowe dzie?a a? mi?o popatrze? - Pyszno?ci
Monday 25th of January 2021
[…] chelsweets.com […]
Sveina
Friday 11th of September 2020
Looking forward to baking this for my daughters birthday! Thank you for the tips on how to make it dairy free as that means nobody has to be excluded from getting a smashing birthday cake ? (one of her classmates has a dairy allergy)