
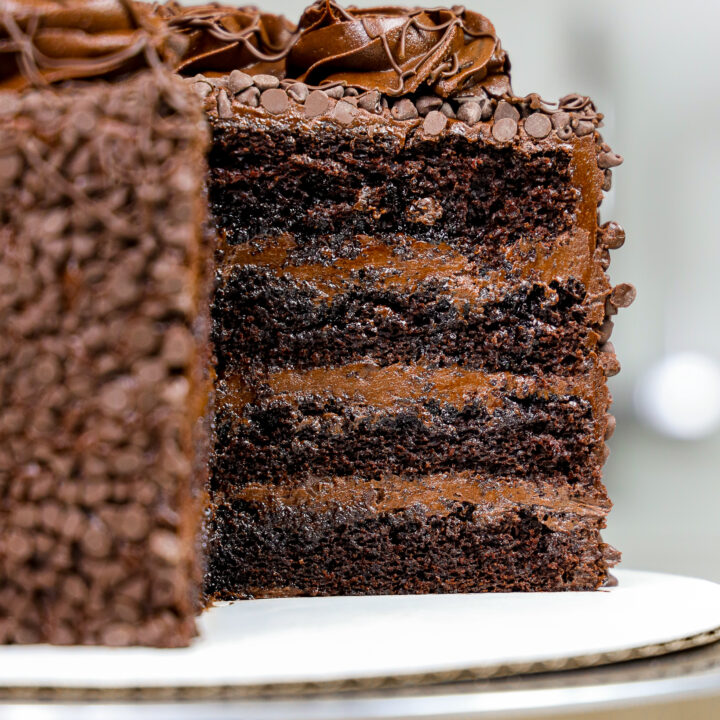
Small (4-inch) Chocolate Cake
My 4-inch vanilla cake recipe was such a big hit it inspired me to make a chocolate version! Cue this small chocolate cake.
I love this small chocolate cake recipe because it’s so easy to make, and absolutely delicious.
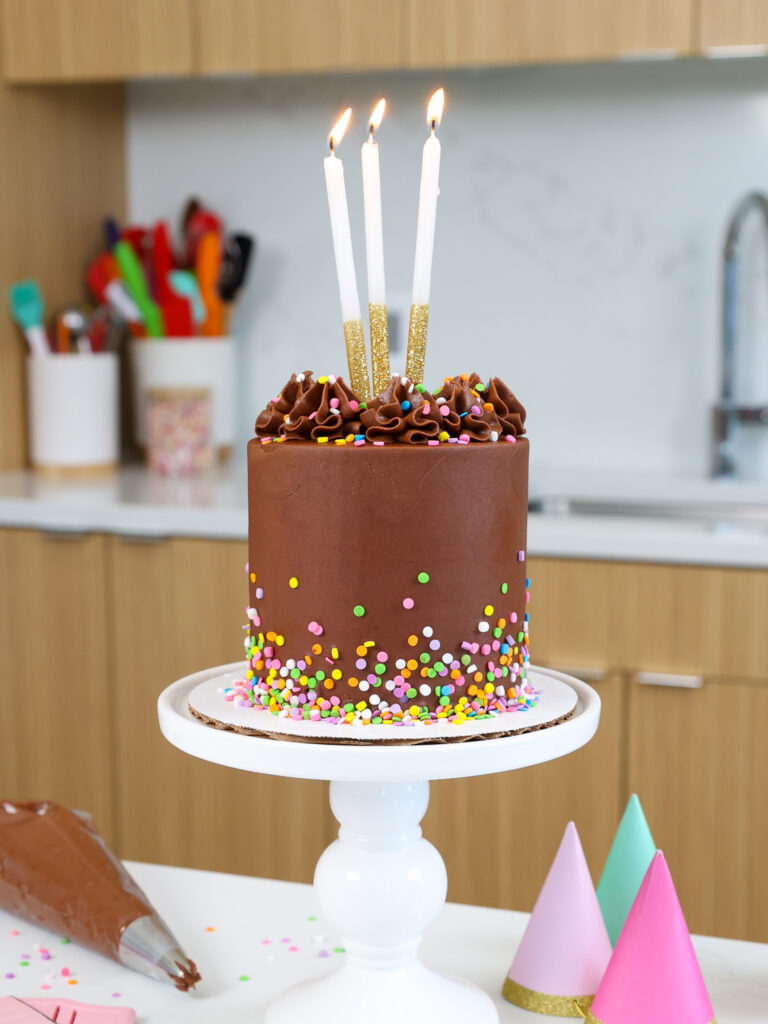
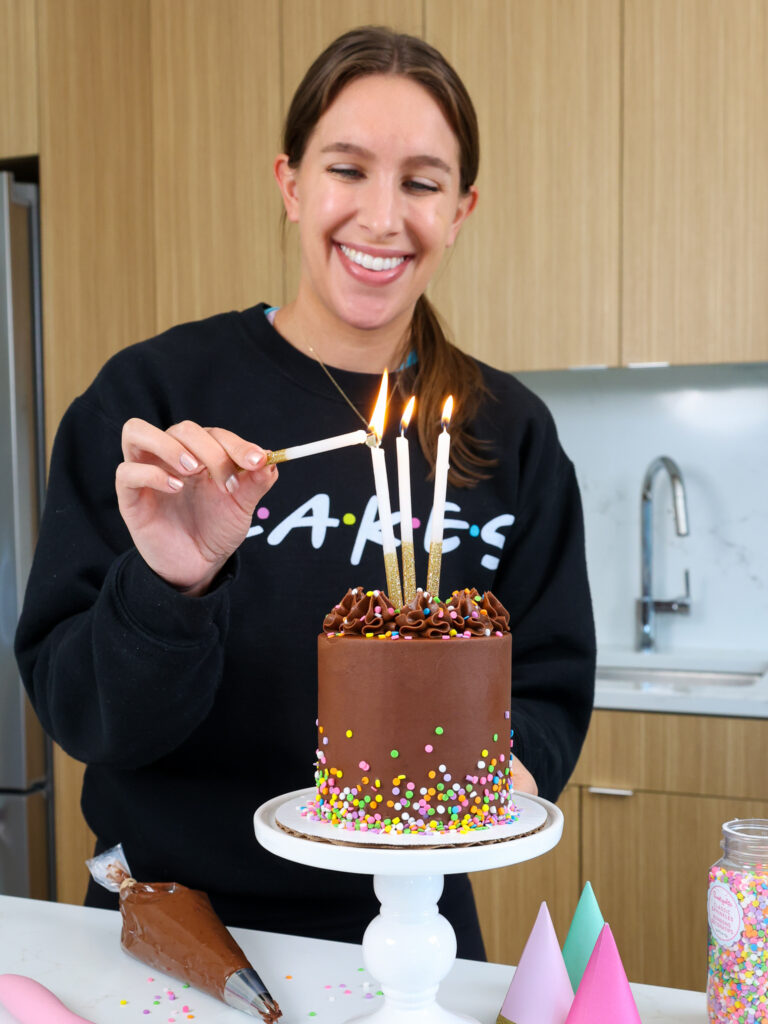
It’s perfect for a small celebration and would also make the cutest smash cake!
How Much Batter Does this Small Chocolate Cake Recipe Make?
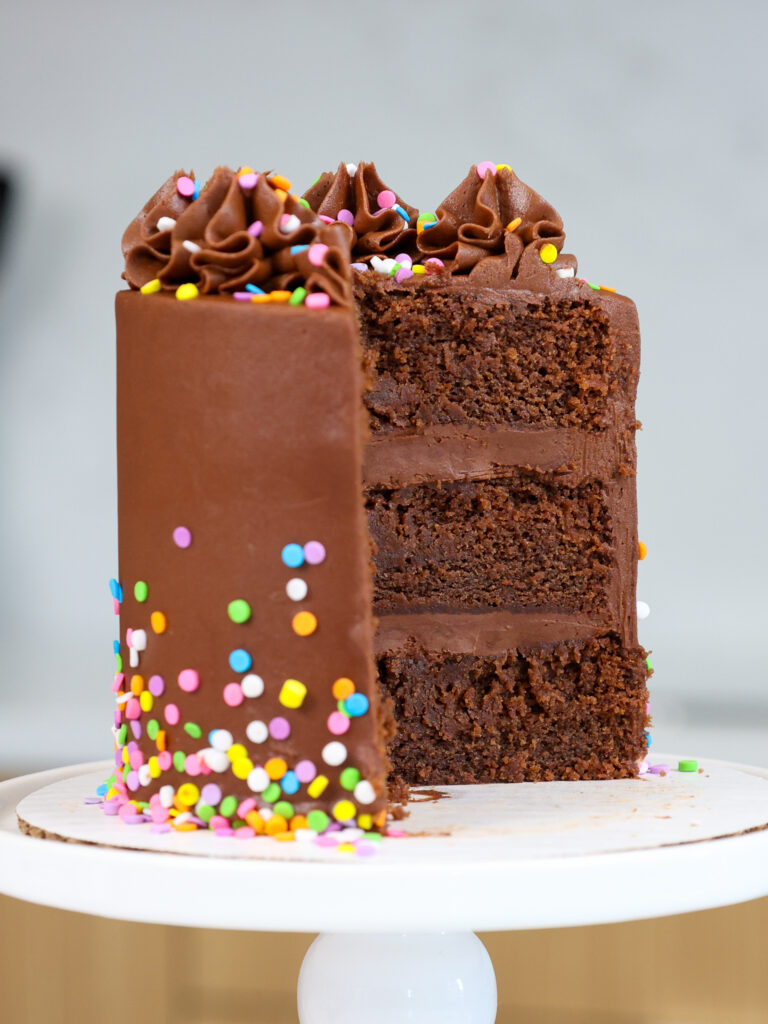
One batch of this recipe makes enough batter to make 3, 4-inch cake layers, or 2, 6-inch cake layers.
I like to make cute little 4-inch cake layers, but I know that’s an odd pan size that not everyone has on hand.
Decorating This Small Chocolate Cake
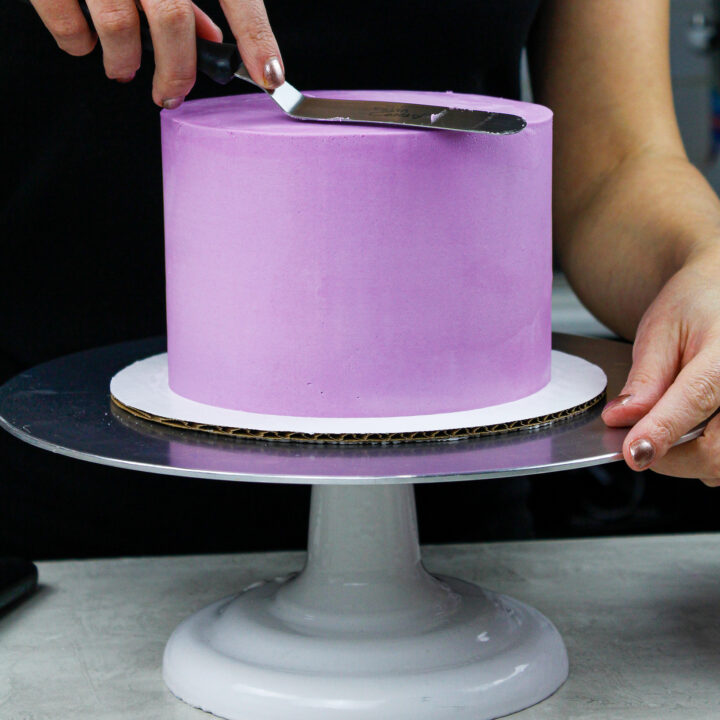
When I was recipe testing, I challenged myself to decorate this cake without a spinning cake stand!
I wanted to see what styles and decorations are doable if you don’t have tons of baking tools on hand.
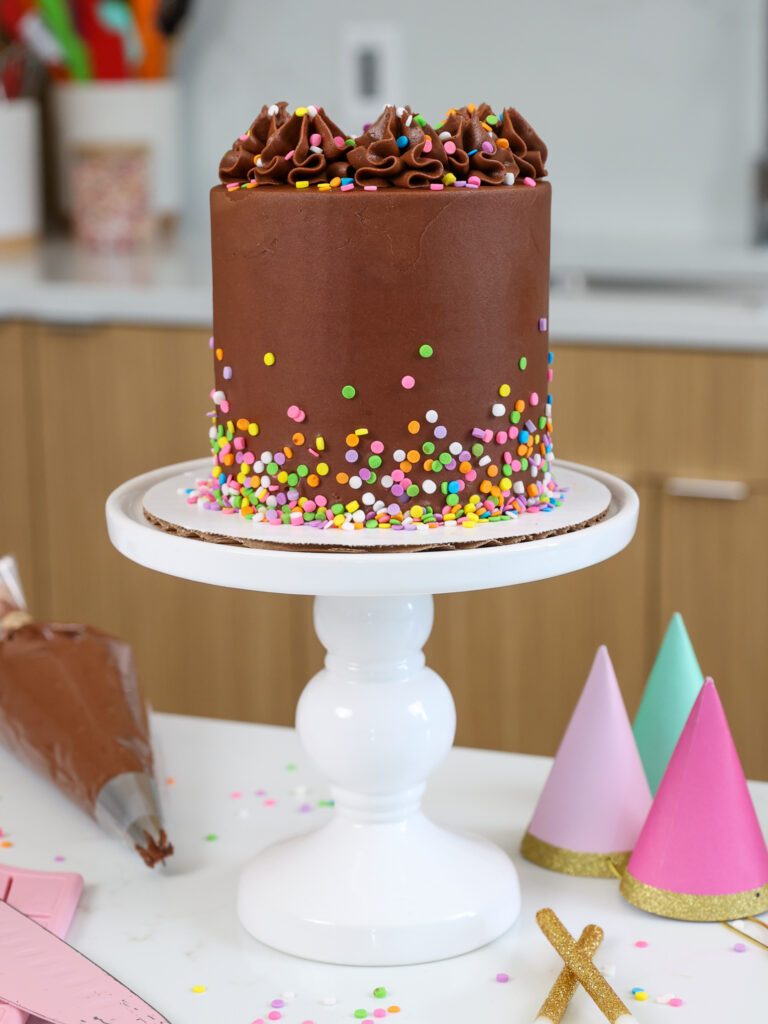
The easiest style was a textured look with a small offset spatula or the back of a spoon.
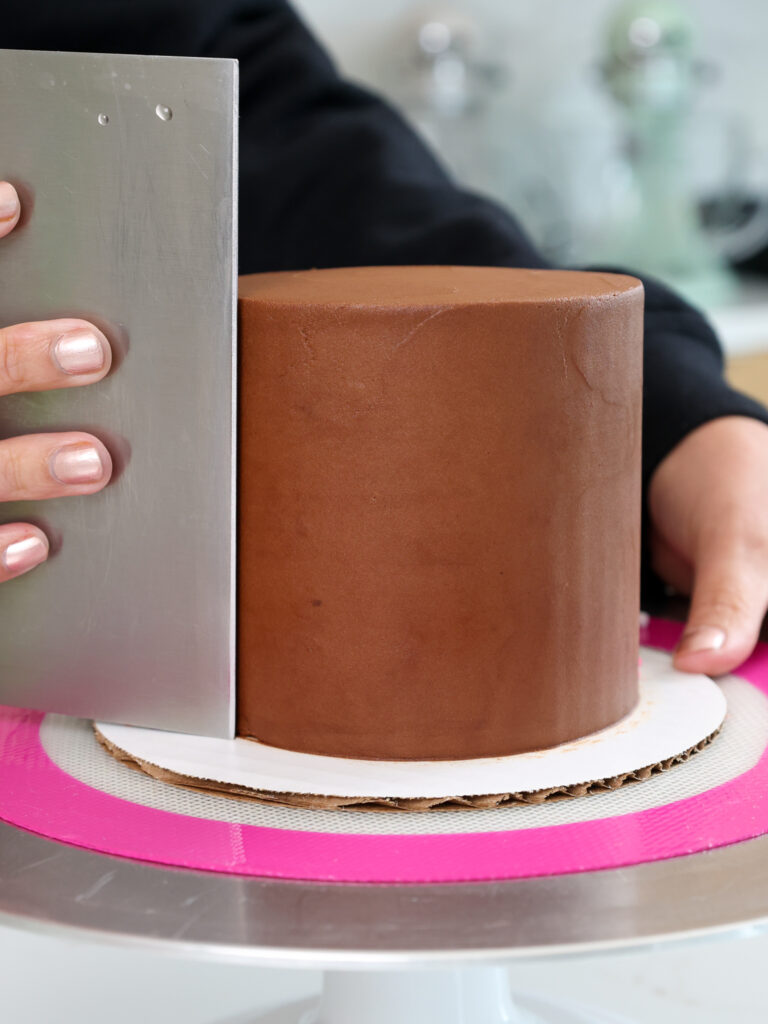
If you’re after a more classic look, you can also smooth with a bench scraper and add some buttercream swirls.
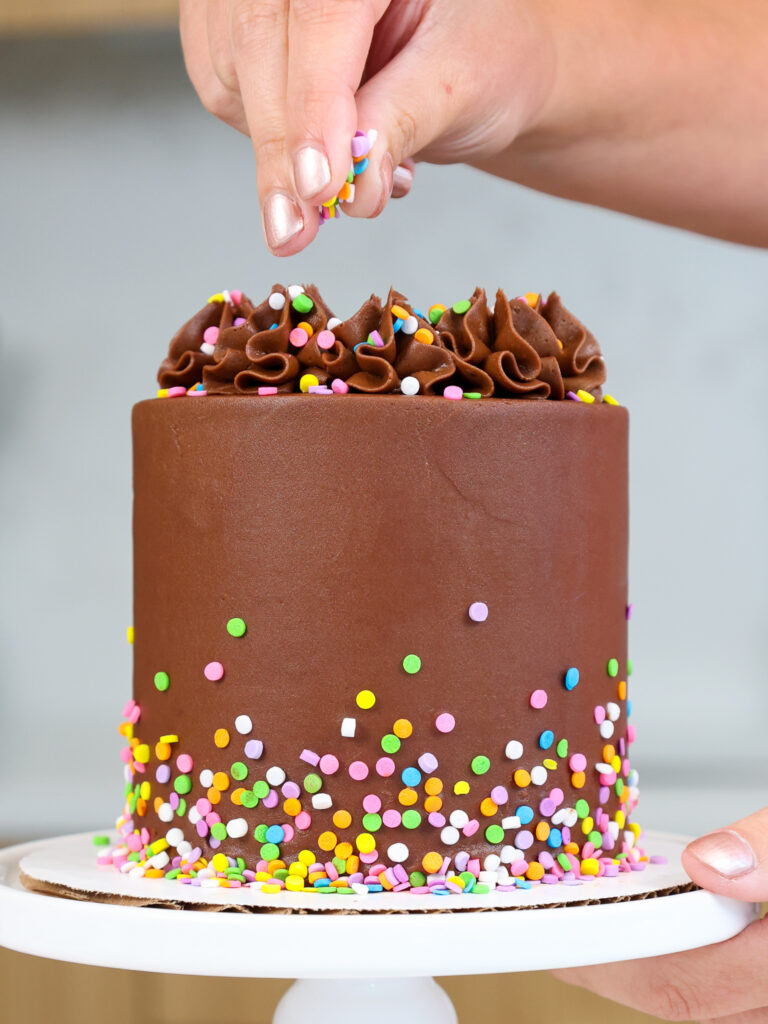
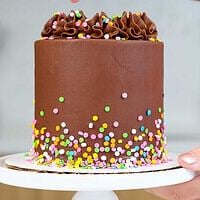
I also topped my cake with some small round sprinkles. I figured a mini cake should have some mini sprinkles.
They give this cake a nice pop of color that makes it perfect to celebrate any occasion.
Substitutions and Swaps – Small Chocolate Cake Layers
This small chocolate birthday cake uses quite a few ingredients and I know you might not have them all on hand. Or if you have food allergies or restrictions, I’ve got you covered.
Below are some swaps and substitutions that can be made in this cake recipe.
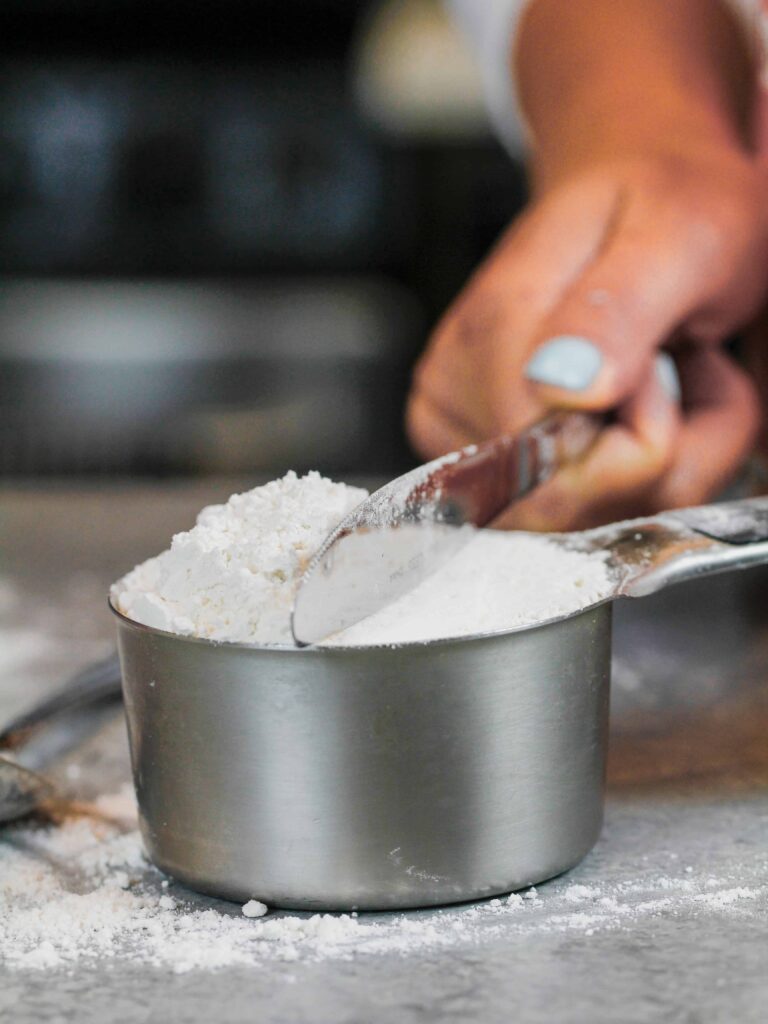
- All Purpose Flour – This recipe turns out best with AP flour, but you can use a gluten free flour blend or cake flour if that’s all you have on hand.
- Granulated Sugar – I do not recommend reducing the amount of sugar or changing the type of sugar, as it will change the texture of the cake layers.
- Cocoa Powder – I like to use regular, unsweetened cocoa powder in this recipe. However, it would also taste great with dark cocoa powder or Dutch-processed cocoa powder.
- Unsalted Butter – If you only have salted butter on hand, you can use it in place of the unsalted butter in this recipe. Just be sure to omit the salt that this cake recipe calls for. You can also use vegan butter in its place (and also omit the salt)!
- 1 Large Egg– If you have an egg allergy you can use a flaxseed egg or an egg replacer.
- Buttermilk – You can also use full fat yogurt, sour cream, whole milk, or an alternative yogurt or milk (almond, soy, oat) if you’re dairy free.
- Vegetable Oil – You can use any flavorless oil in this recipe. Canola or even sunflower oil would work great!
Substitutions and Swaps – Chocolate Buttercream
This recipe uses a chocolate American buttercream frosting.
If you want to use a less sweet frosting, I recommend making a half batch of my chocolate Russian buttercream or my chocolate Italian meringue buttercream.
Or if you’re unsure about the ingredients, below are some substitutions that can be made in this frosting recipe.
- Unsalted Butter – If you only have salted butter on hand, you can use it in place of the unsalted butter. Just be sure to omit the salt that this frosting recipe calls for. You can also use vegan butter in its place (and omit the salt)!
- Heavy Cream – Whole milk or alternative milk (soy, almond, oat) will work fine in this frosting recipe if that’s what you have on hand.
- Chocolate Chips – I like to use dark chocolate chips, but you can also use semi-sweet or milk chocolate chips. You can also use chocolate bars or couverture chocolate.
Making This Small Chocolate Cake Gluten Free
You can swap in your favorite gluten free flour blend cup for cup in this recipe!
I personally prefer King Arthur’s gluten free flour blend, and find that 1 cup of GF flour weighs about 120 grams.
In addition to swapping the flour, there are two additional steps you need to take when making this mini cake gluten free.
Gluten Free Baking Tip #1: Over-Mix the Batter
The first step is to vigorously whisk your batter for a few minutes once it’s made. This helps give your cake layers structure.
I know this goes against everything you’ve ever heard about baking, but over mixing your batter is key when making anything gluten free.
It helps the cake layers rise better as they bake and gives the cake a more tender crumb.
Gluten Free Baking Tip #2: Let the Batter Rest
The second step I recommend is letting your batter rest for about 30 minutes before baking your cake layers.
Gluten free flour blends can have a hard time absorbing moisture and fats.
Letting the batter sit before baking it gives the flour more time to absorb all that goodness.
This helps thicken the batter and prevents your cake layers from having a gritty texture.
Tips for Making the Best Small Chocolate Cake:
- Chill your cake layers in the freezer for about 20 minutes before assembling the cake. It makes it so much easier to stack and frost.
- If your cake layers turn out less than perfect, please check out my cake troubleshooting guide.
- Use a serrated knife to level your cake layers once they’re fully cooled. It makes this mini cake so much easier to assemble and frost.
- I do NOT recommend using this recipe to make cupcakes! Instead, I highly recommend trying my favorite chocolate cupcake recipe. I like the texture better for cupcakes.
Making These Cake Layers in Advance and Storage Tips
Make your cake layers in advance and freeze them. It breaks the process up and makes it more approachable.
These cake layers can be frozen for up to 3 months, and as long as they’re wrapped right I promise they’ll taste just like they did the day you baked them.
Make your frosting ahead of time too or save any leftover frosting! It can be stored in an airtight container in the fridge for up to a month, or in the freezer for up to 3 months.
Be sure to give it a good stir once it thaws to get the consistency nice and smooth again.
A frosted cake can last in the fridge for up to a week, or in the freezer for up to a month. The buttercream locks in all the moisture, keeping the cake fresh and delicious!
If you cut into the cake and have leftovers, use any remaining frosting to cover the cut section to keep it moist and store in the fridge for up to a week.
Let Me Know What You Think!
If you try this small chocolate cake recipe, I’d love to hear what you think of it! Please leave a rating and comment below.
Tag me @chelsweets and use #chelsweets on social media so that I can see your amazing creations!
Other Recipes You Might Like:
Small (4-inch) Chocolate Cake Recipe
Ingredients
Small Chocolate Cake Recipe
- 3/4 cup all-purpose flour 94g
- 1 cup granulated sugar 200g
- 1/4 cup unsweetened cocoa powder, sifted 25g
- 1 tsp baking powder 4g
- 1/4 tsp fine salt 1g
- 1/4 cup (1/2 stick) unsalted butter, melted and cooled 56g
- 1/4 cup vegetable or canola oil 56g
- 1 large egg, room temperature 56g
- 1/2 cup buttermilk, room temperature 120g
- 1 tsp vanilla extract or vanilla bean paste 4g
Chocolate Buttercream Frosting
- 1/2 cup milk or dark chocolate chip, melted and cooled 90g
- 3/4 cup unsalted butter, room temperature 169g
- 2 tsp vanilla extract or vanilla bean paste 8g
- 1/4 tsp fine salt 1g
- 2 1/2 cups powdered sugar 310g
- 1/2 cup unsweetened cocoa powder, sifted 50g
- 1/4 cup heavy whipping cream, room temperature 60g
Instructions
4-Inch Chocolate Cake Layers:
- Preheat oven to 350°F/175°C. Line three 4-inch or two 6-inch round pans with parchment rounds and grease with non-stick baking spray.
- This recipe can be made by hand with a whisk or with a hand mixer. I prefer making it with a whisk.
- In a large bowl, whisk together 3/4 cup flour, 1 cup sugar, 1/4 cup unsweetened cocoa powder, 1 tsp baking powder, and 1/4 tsp salt.
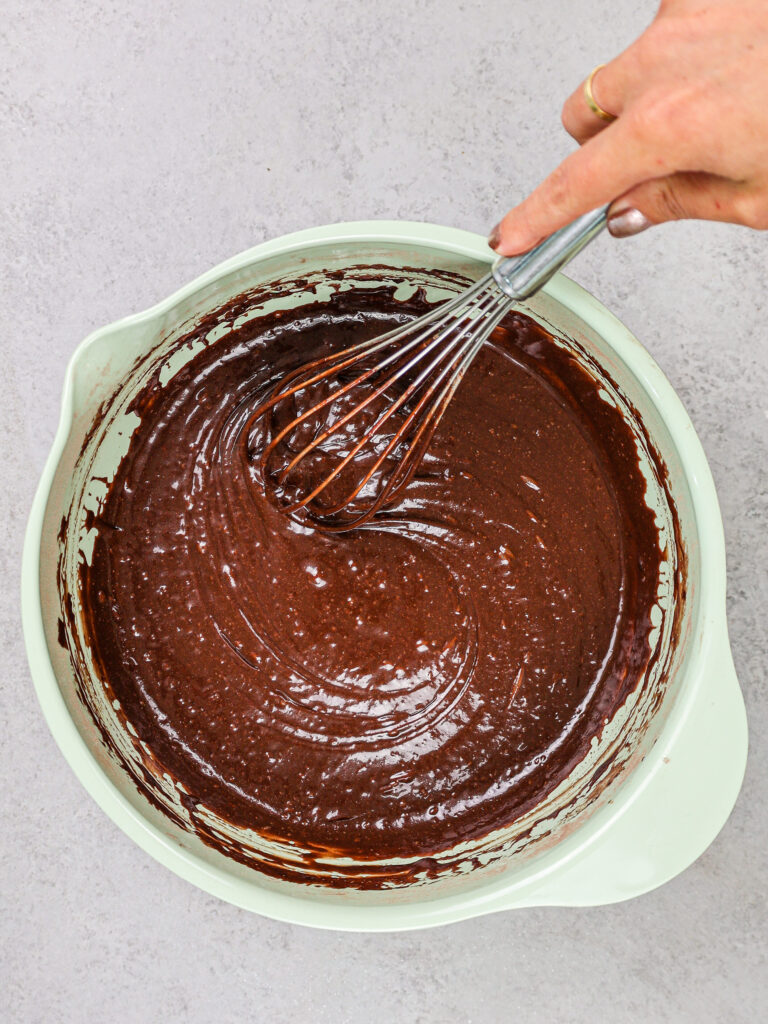
- Add 1/4 cup of melted butter, 1/4 cup oil, and 1 egg into the dry ingredients and whisk until combined. The batter will be thick.
- Then mix in 1/2 cup buttermilk and 1 tsp vanilla extract until combined. Whisk the batter together for an additional 30 seconds to make sure everything is properly combined. This will also help lighten up the texture of the cake layers.
- Divide batter evenly between the prepared cake pans.
- Bake for 32-35 minutes, or until a toothpick comes out with a few moist crumbs. Let the pans cool for 10 minutes, then run an offset spatula around the perimeter of the pan to separate the cake from the pan.
- Place cake layers (pan and all) into the freezer for 20 minutes, to accelerate the cooling process. Once the layers are fully cooled, carefully flip the pans and remove the layers from the pans.
- Use a serrated knife to level the tops of the layers, then set aside. If you're making these in advance, wrap and freeze them at this point.
Chocolate Buttercream Frosting:
- While the cake layers bake and cool, make the chocolate buttercream frosting.
- Melt 1/2 cup of chocolate first so that it has time to cool off before it's added to the frosting. Heat it in 15-second intervals, stirring between each interval until the chocolate is fully melted. Set aside.
- Beat 3/4 cup butter on medium speed for 30 seconds with either a hand mixer or a stand mixer fitted with a paddle attachment.
- Mix in 2 tsp vanilla extract or vanilla bean paste and 1/4 tsp salt on a low speed.
- Gradually mix in 2 1/2 cups of powdered sugar, 1/2 cup unsweetened cocoa powder, and 1/4 cup of heavy cream.
- Continue to mix on low speed for a few minutes, then add in the 1/2 cup of melted and cooled chocolate. Mix until the desired consistency is reached. If the frosting seems too thick, add in additional cream (1 tsp at a time). If the frosting is too thin, add in more powdered sugar (a quarter of a cup at a time).
- Cover the frosting flush with plastic wrap and set aside.
Assembling This Small Chocolate Cake:
- Stack and frost cake layers on a small plate or cake stand using a dab of frosting to help stick the first cake layer in place.
- Add an even layer of buttercream between each cake layer with a large offset spatula.
- Add a thin coat of frosting around the cake to fully cover the cake layers.
- Smooth using a bench scraper, then chill the cake in the fridge (20 minutes) or freezer (5 minutes) until the frosting is firm to the touch.
- Add a second, thicker layer of frosting to the cake, and smooth using a bench scraper. Then decorate as desired! I used a Wilton 1M frosting tip to pipe some fun swirls on top of the cake and added some round sprinkles.
Video
Notes
Tips for Making the Best Small Chocolate Cake:
- Chill your cake layers in the freezer for about 20 minutes before assembling the cake. It makes it so much easier to stack and frost.
- If your cake layers turn out less than perfect, please check out my cake troubleshooting guide.
- Use a serrated knife to level the cake layers once they’re fully cooled. It makes this mini cake so much easier to assemble and frost.
- I do NOT recommend using this recipe to make cupcakes! Instead, I highly recommend trying my favorite chocolate cupcake recipe. I like the texture better for cupcakes.
Hi chels i can only find low fat yogurt close to me will that cause a huge problem with the end result of the cake?
Hi Ren,
Plain low fat yogurt should work just fine! Hope that helps, happy baking!
The instructions for the buttercream do not tell when to add the melted chocolate. I didn’t notice until all the other ingredients were in so just added it at the end. When should the chocolate have gone in?
It doesn’t look anywhere as pretty as your cake but all components are yummy.
Hi Phyllis,
Apologies for the confusion!! I’ve updated the recipe to make that step more clear. Thank you for letting me know, I appreciate it!
Hi Chels,
Is your recipe correct when it comes to the flour and sugar ratio? Looking at your other chocolate cake and cupcake recipes, the two are 1:1, plus cocoa powder. This recipe is slightly short, and when I tested it out exactly as is, the cake layers were very underbaked and almost seemed to have no structure. Any ideas?
I’m so sorry to hear that G!
This is essentially the chocolate version of my mini vanilla cake, so it swaps out 1/4 cup of flour for cocoa powder. The ratio of flour/cocoa powder to sugar is 1:1 in this recipe, which is the same as my go-to vanilla layer cake recipe. This recipe is a butter cake recipe, and the ratios are different than my other chocolate cake recipes.
They should bake up with a tender, slightly dense crumb that makes then super easy to stack.
Sadly I’m not totally sure what might have happened with your layers. Is there a chance they just needed a few more minutes in the oven? Did you use 4-inch cake pans? Did the centers sink as the layers cooled? Hopefully we’ll be able to figure it out together!
We are no longer in need of big birthday cakes, and this one fits the bill. It’s actually a lot of cake! The layers are chocolaty and dense, and I used another chocolate frosting recipe- delicious! A few rainbow sprinkles added a festive flair for my husband’s birthday yesterday. I will be making it again!
This cake is easy to make and very moist. Decorating for me was a little challenging but I made it. I highly recommend this recipe for any occasion. First time for a small cake.
Hi Debi,
Thank you so much for sharing 🙂 That’s so great to hear!!
Hi is it possible to use 5 inch pans for thise recipe?
Hi Norma,
Great question! You can, but I’d recommend that you make 2, 5-inch cake layers. Hope that helps, happy baking!
Hello,
I d like to make this cake using 3 6inch round tins instead of 2 – should I double the recipe or just 1.5 times the original recipe will do for 3 6inch tins? Thank you! 🙂
Hi Fani,
Great question! I would recommend making doubling the recipe to make 3, 6-inch cake layers using this recipe. Hope that helps, happy baking!!
I followed the recipe to a T and I noticed that my cake layers sunk a bit in the middle. The toothpick inserted came out clean but the bottom layer wasn’t firm when I took it out of the cake pan after letting it cool for 10 mins as directed. I noticed there were many crumbs stuck to the sides pan (I lined the bottom with parchment paper). The taste of the cake itself was really good and I love how easy and quick it is to make. Also is it normal for the top layer to be “crunchy and hard”? The remainder of the cake was fine when I cut that part off. I am just hoping to get answers with troubleshooting the other issues I had.
Hi Summer,
I’m so sorry to hear your layers sunk a bit in the middle! Did you grease the sides of the pans? What did you use to grease them? What types of pans are you using? Were the ingredients fully at room temperature before you made the batter? Hopefully we’ll be able to figure out what happened.
The top is usually a bit caramelized, but it shouldn’t be like hard! I usually level my cake layers before stacking them, so the top bit gets cut away (I like to snack on it – it’s my favorite part of any cake!).
I hope we’re able to troubleshoot so that your next cake turns out amazing!
@Chelsweets,
Hi Chelsea, thanks for your response. I had taken out the milk and eggs about 15 mins before baking not sure if that was enough time or not. I also used olive oil to grease my cake pans. I used 4 inch stainless steel cake pans that were purchased on amazon. The cake was extremely moist even a week later which was nice. I also felt that the taste was great. I didn’t ice them as I simply wanted to test out the cake portion. My concern was the sinking in the middle (didn’t happen when I baked your mini vanilla cake) and the bottom losing its shape when being removed from the pan 10 mins later. Should I let it cool in the pan longer? Put it in the fridge? I’m scared that if it does it next time and I go to ice it that it will all fall apart. Thanks for your help!
Hi Summer,
Gotcha, I think I see what the issue is! I don’t actually remove the layers from the pans 10 mins after baking! I run an offset spatula around the layer to help it release more easily after 10 minutes when it’s still warm, but then I pop the layers (pans and all) into the freezer after 10 minutes to let them fully cool. I only remove the cake layers from the pans once they’re no longer warm. If you tried to remove the layers from the pans after 10 minutes, they would still be quite warm and def would crumble / be difficult to handle! I think if you let them cool fully before removing them you’ll have a much easier time with them 🙂 Hope that helps for the future, happy baking!
Thank you so much for this great recipe! I followed your recipe as written (except used almond milk + vinegar in place of buttermilk b/c that’s what I had on hand) and it made a perfect mini chocolate cake. Delicious, chocolatey flavor and moist texture. I like that it was a little more dense than a standard sized cake because it held together better for this small size. Mine did bake up quite domed, but that’s OK because I just leveled it off and got to taste it! (The cake was for a birthday party, so I wouldn’t have been able to taste it if there wasn’t the part I could cut off.) Looking forward to trying your WASC cake soon!
So happy to hear that Mariko!!! The cake tops are my favorite part too 🙂 I always say it’s the mandatory taste test!! Hope you love my WASC cake recipe as much as this one <3
I followed all steps correctly and baked 2 × 6 inch tins with the batter that came out of it but each layer is low and tiny tand when the cake is assembled looks so small… Very very different from the picture above. Where have I gone wrong here??
Hi Federica,
The cake in the pictures of this recipe has three layers, and was made with 3, 4-inch cake layers rather than 2, 6-inch cake layers. If you made the larger option for the cake layers, the overall cake will be only about half as tall as the smaller layers. I’d recommend making the smaller cake layers if you want a taller cake similar to mine. Hope that helps, happy baking!
Hi, do you just have 1 4 inch smash cake instead of 3 cake pans I just need to make 1 single layer for a smash cake.
Hi Briana,
Sadly I don’t, it gets a little tricky making that small of a batch of batter! But you can 1/3 this recipe to do that if needed. If you have a small food scale, I’d recommend using it and weighing the ingredients in grams to make that small of a batch, it’ll help you be more accurate. Hope that helps, happy baking!
This turned out amazing! The flavor if that cake and how moist! My mouth watered the second serving ?
So happy to hear that Kathleen 🙂 Thank you for sharing!
Greetings! I have one 6″ pan. Do you think I could bake half of the batter at a time? Of course, I’d have to let the first layer cool before baking the second layer. Thoughts? Thanks!
Hi Susan,
You absolutely can do that! The batter is fine to sit at room temp for a few hours. I’d just recommend covering it flush with plastic wrap to prevent it from forming a skin as it sits. Hope that helps, happy baking!
Can this be made in two 6” pans? I know baking times will need to be adjusted.
Hi Pat,
You can make this recipe in two, 6-inch pans! Bake time will actually be about the same, I’d suggest baking them for 31-34 minutes, or until a toothpick inserted into the center comes out with a few moist crumbs. Hope that helps, happy baking!
Hi Chels!
I want to make this cute cake for my son’s first birthday, the only problem is I only have one 4 inch cake tin. Is this a problem? Am I able to pour the entire mixture in the pan and cut into layers whilst it’s cooled?
And if so, how long would you recommend to bake for?
Thank you so much!
Hi Jaimie,
Not a problem at all! The batter can sit at room temperature for a few hours while you let the layers bake and cool one at a time. I would not recommend making one, super thick layer though with all the batter, it would take forever to bake through and would get overbaked on the edges. Hope that helps, happy baking!
How many would this feed?
Hello, I want to make this recipe with a 6×4 pan. Do you recommend lowering the temperature?
Hi Lizzie,
You can lower the temperature by 25 F, and bake it a bit longer. I’m not sure quite how long it’ll take as I’ve never baked this recipe in that size of pan, but I’d recommend checking the center of the cake with a toothpick, and once it comes out with a few moist crumbs, it’s ready! Hope that helps, happy baking!
This is the PERFECT recipe for 4” pans! I’ve tried so many recipes and this one is IT!! Divinely moist.
Hi Denise,
Ahhh this makes me so happy to hear!! I’m so glad the recipe worked perfectly for your 4” pans — and “divinely moist” is the highest praise!! Thank you for taking the time to share this, and happy baking!
I’ve made this twice and both times it was a hit. It’s pretty rich so after dinner it serves quite a few people. Love this cake and so did everyone else.
Hi Debi,
That makes me so happy to hear!! I totally agree, it’s definitely a rich one so a little slice goes a long way (perfect for sharing!). I’m so glad it was a hit both times and that everyone enjoyed it. Thanks so much for coming back to leave a review! <3