
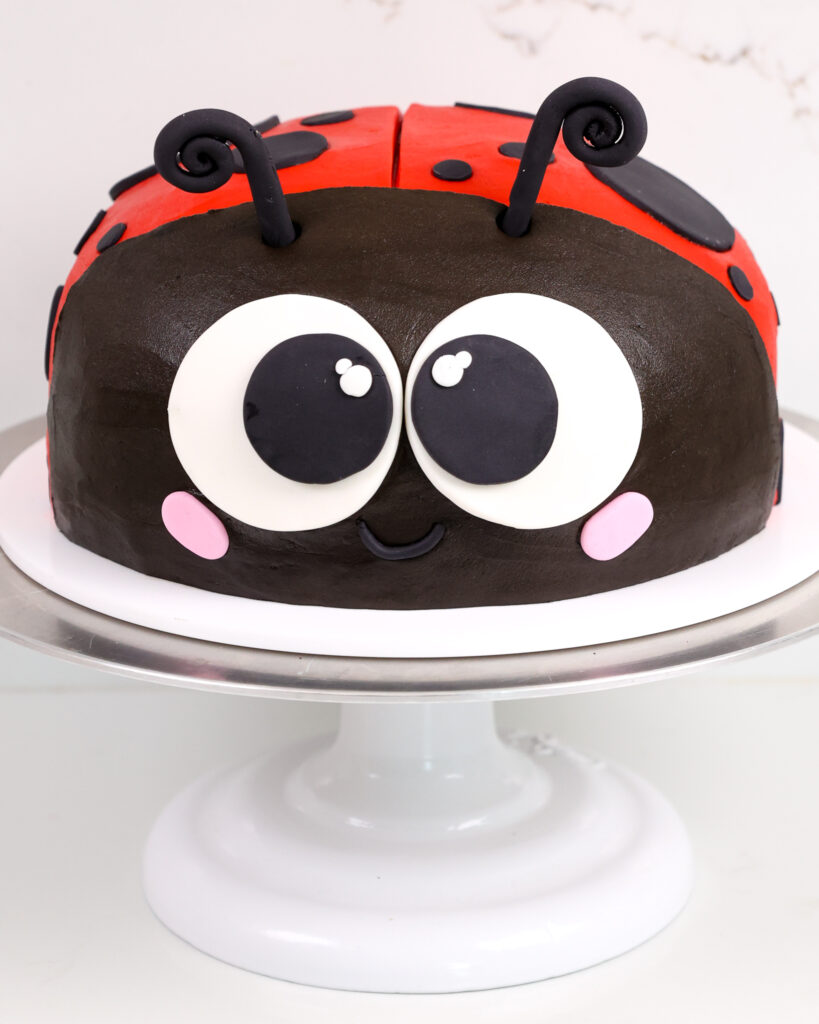
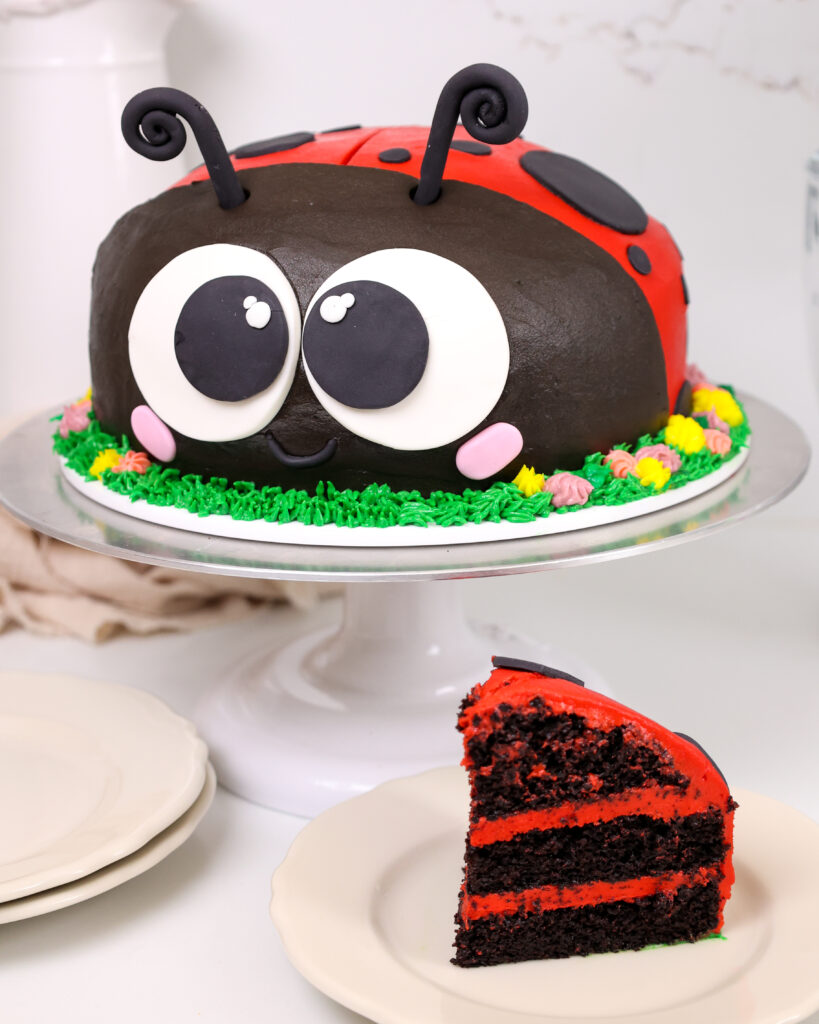
Ladybug Cake
It’s been a while since I made an animal cake, but I’m picking back up with this adorable ladybug cake.
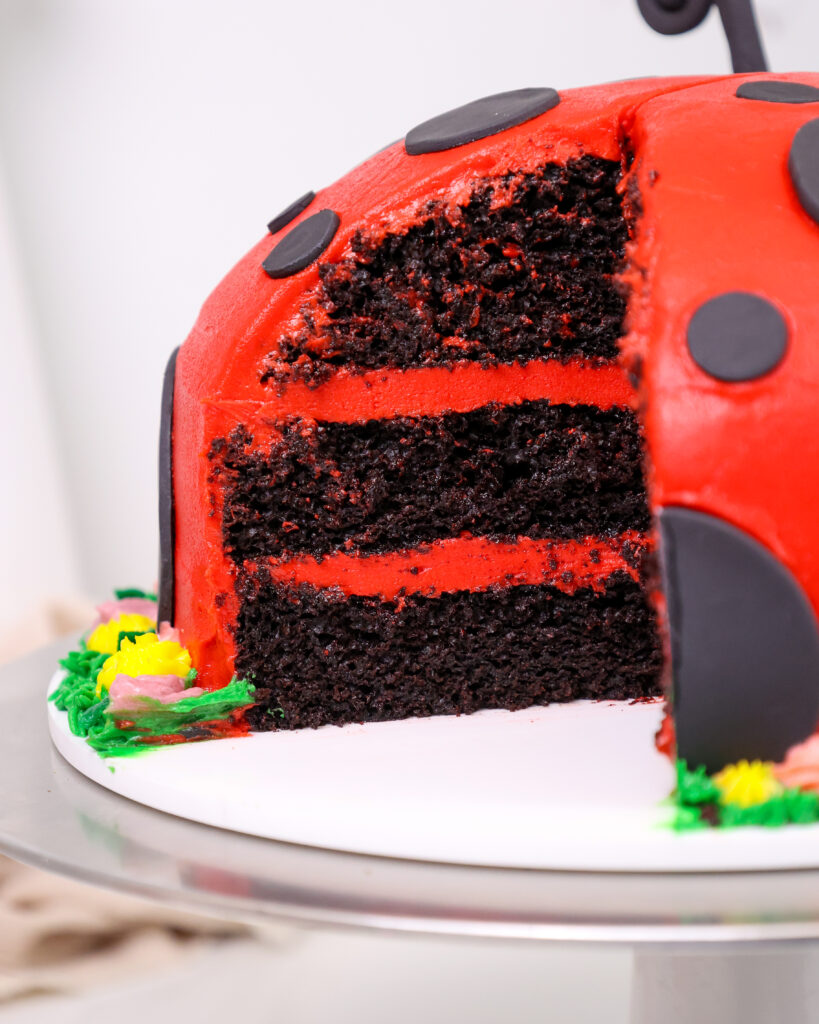
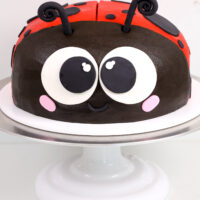
This cake is made with dark chocolate cake layers, buttercream frosting, and an adorable little fondant face.
Making this Ladybug Cake: Step-by-Step Tutorial
Let’s walk through each step of this cake together to make sure it turns out as amazing as possible!
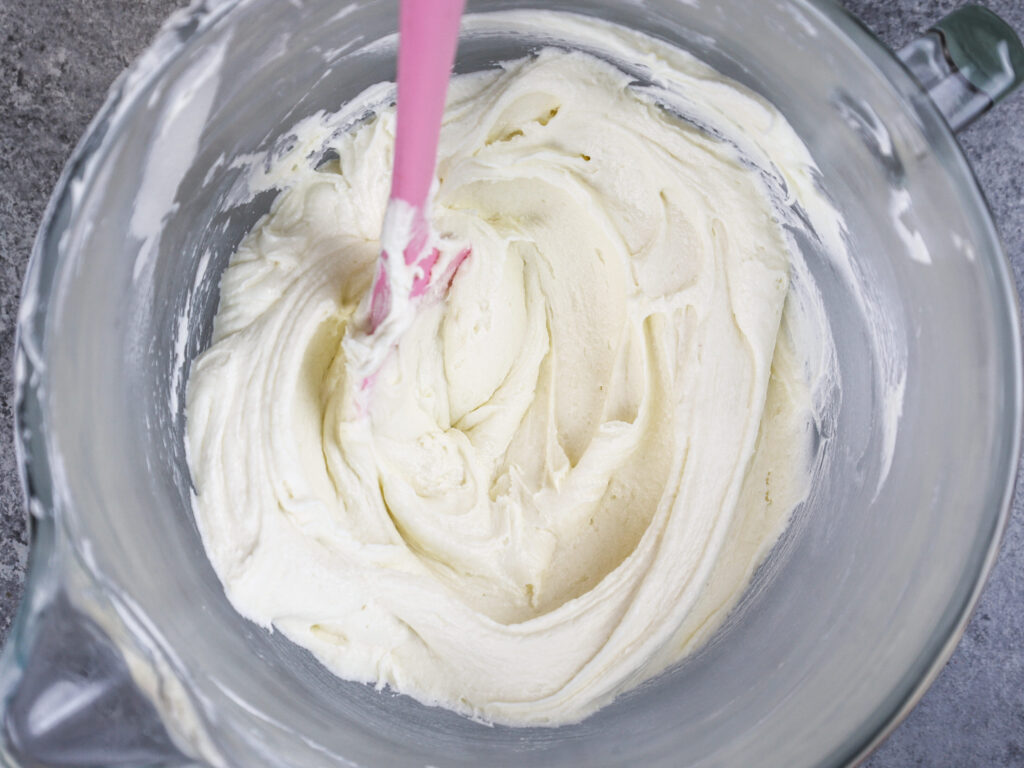
Step 1: Make the Buttercream Frosting
To help intensify the color of the frosting, make it a day in advance (if possible) and let it sit out at room temperature overnight.
It sounds crazy but it really helps deepen the color of the buttercream!
If the frosting seems too thick after mixing all the ingredients, add in additional heavy cream or milk (1 tablespoon at a time). Or if the frosting is too thin, add in more powdered sugar (1/4 cup at a time).
If you’re unsure how thick your frosting should be, you can learn what consistency you’re looking for in my frosting consistency post.
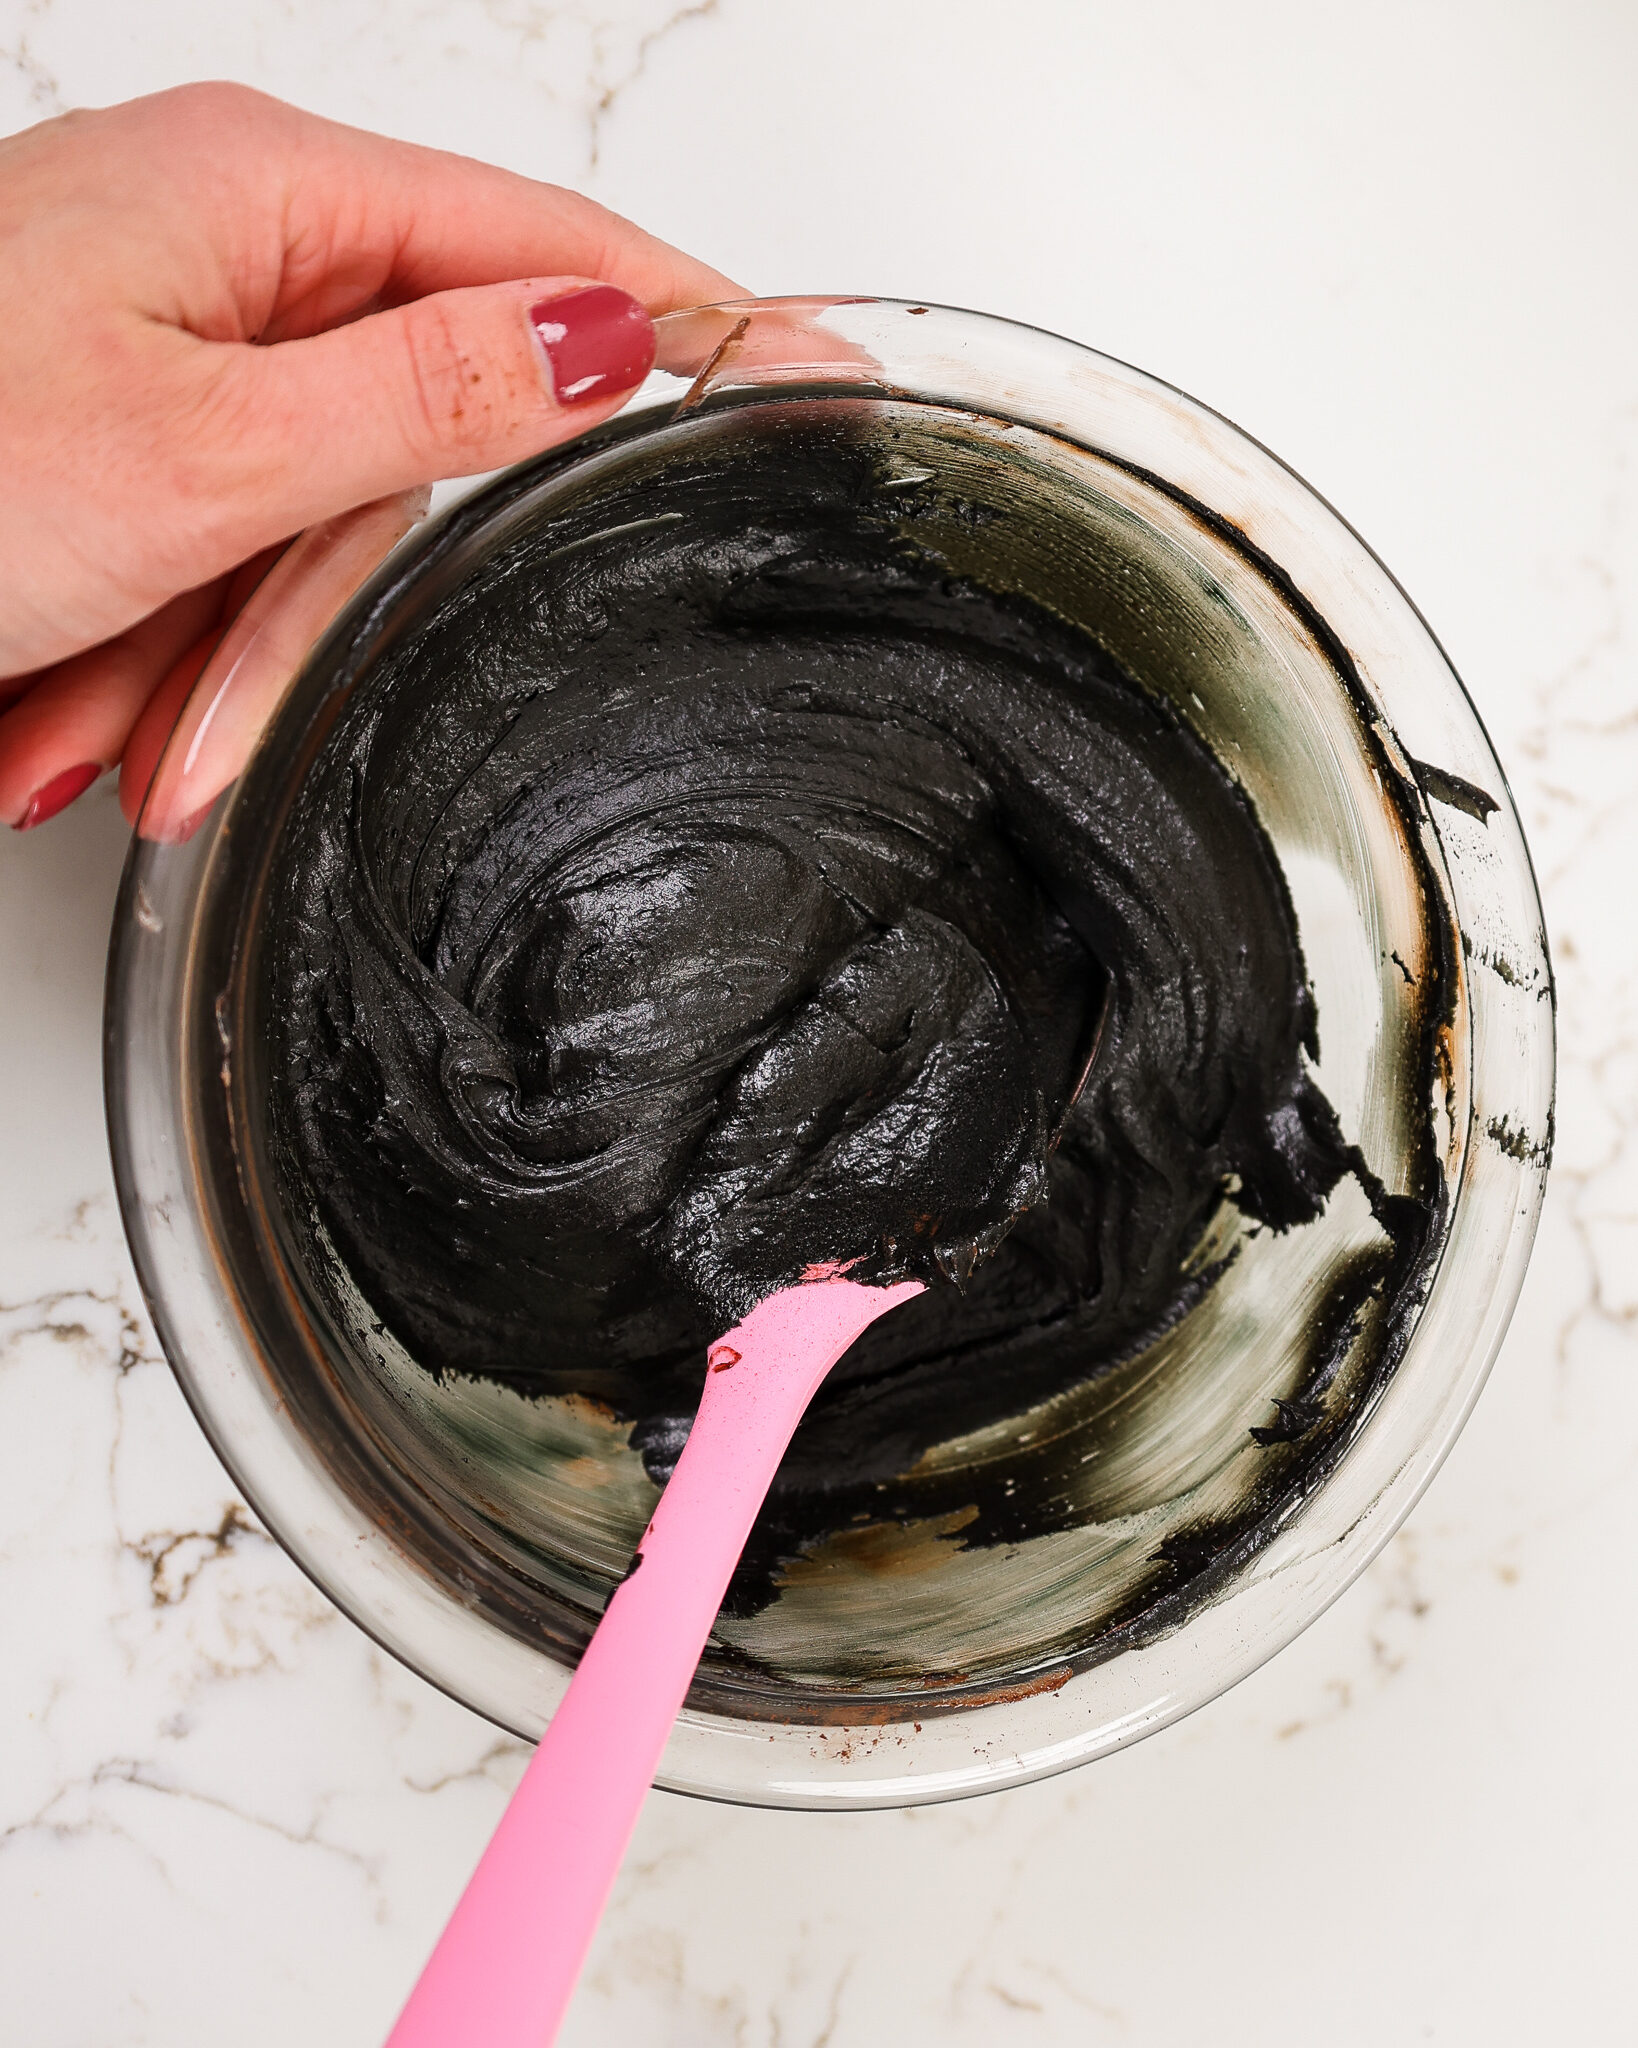
Scoop about a quarter of the frosting into a separate bowl. Mix in 1/2 cup of melted and cooled dark chocolate, 1/4 cup dark or black cocoa powder, and 1/4 heavy cream.
Place in a piping bag fit with a large round tip or cut open to have a 2 cm opening and set aside.
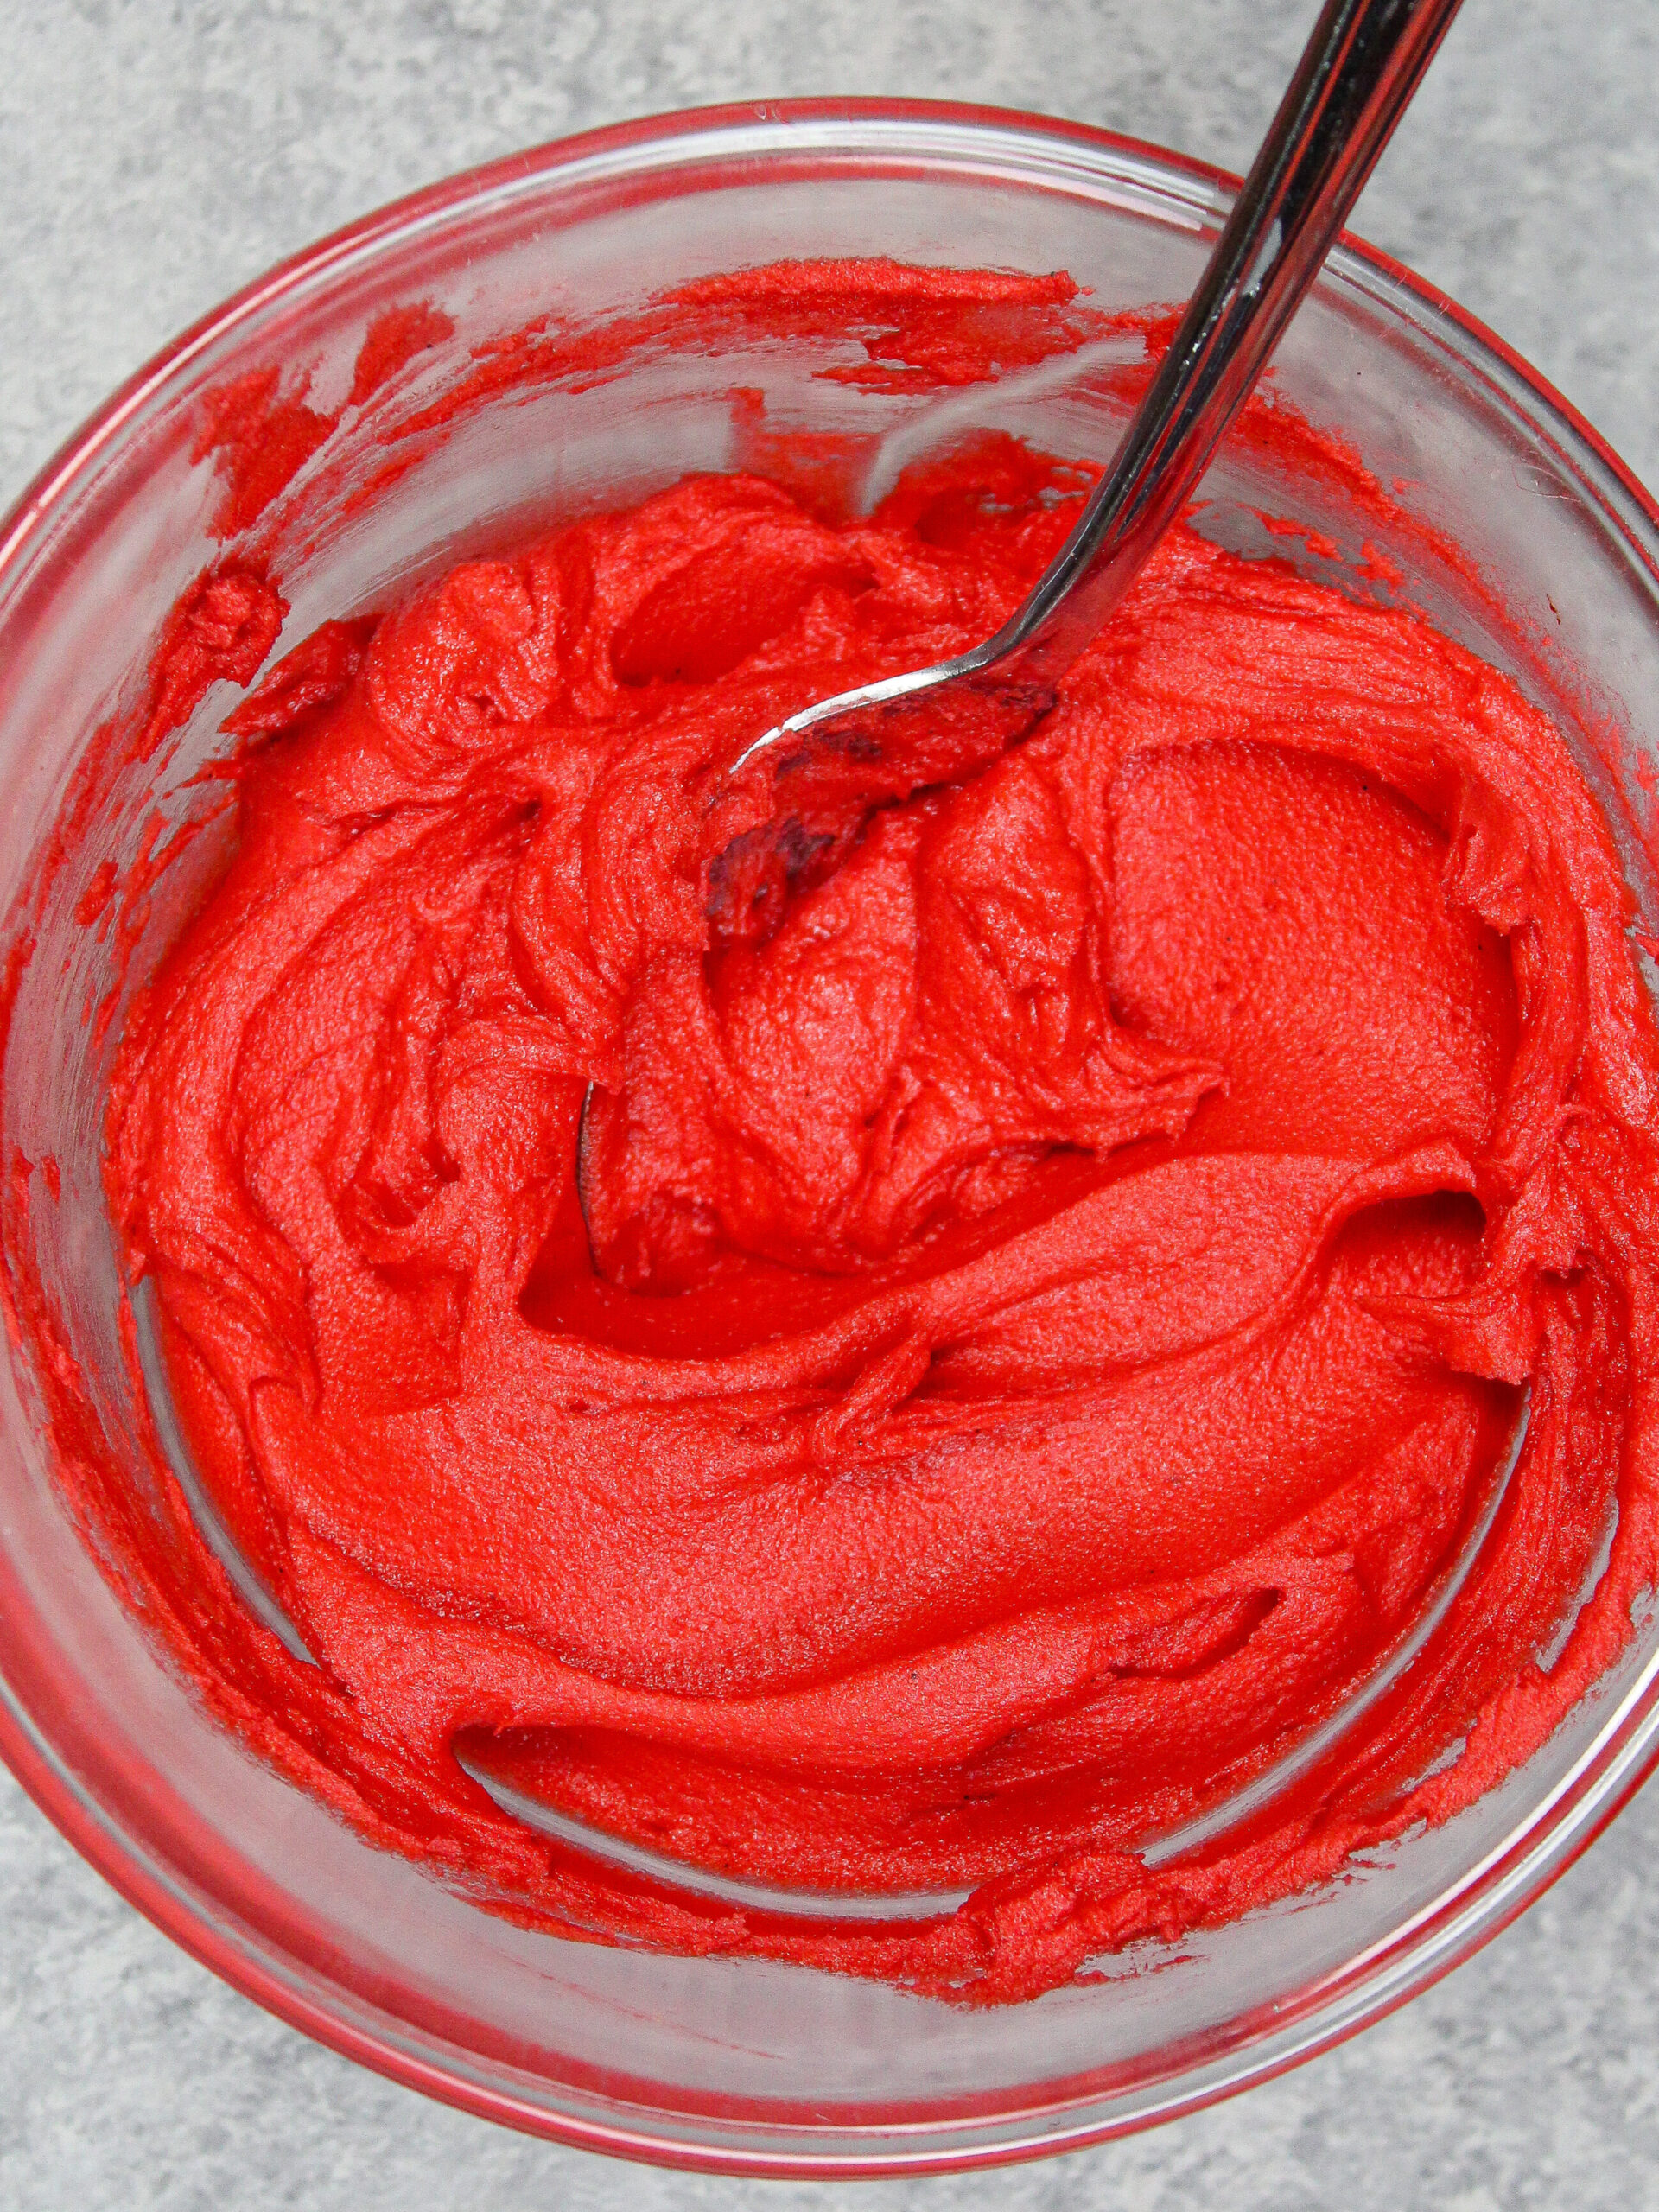
Color the remaining buttercream red with a generous squirt of red gel food coloring.
Mix until evenly colored, then cover flush with plastic wrap and set aside.
Step 2: Bake and Level Your Cake Layers
Then we set to work on the cake layers. Line three, 8-inch round cake pans with parchment rounds and grease with non-stick baking spray or homemade cake release.
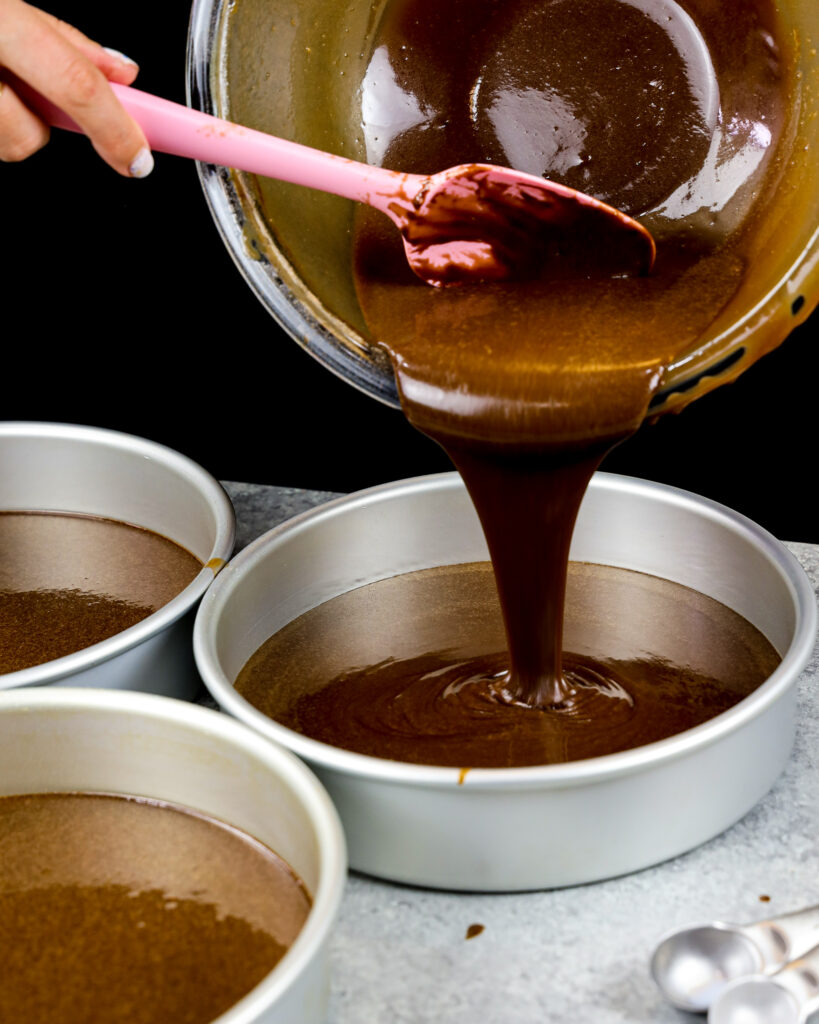
Divide the batter evenly between the cake pans and bake for 24-27 minutes.
Let the layers cool for 10 minutes, then run an offset spatula around the perimeter of the pan to separate the cake from the pan.
Flip the cake layers onto a wire rack to finish cooling.
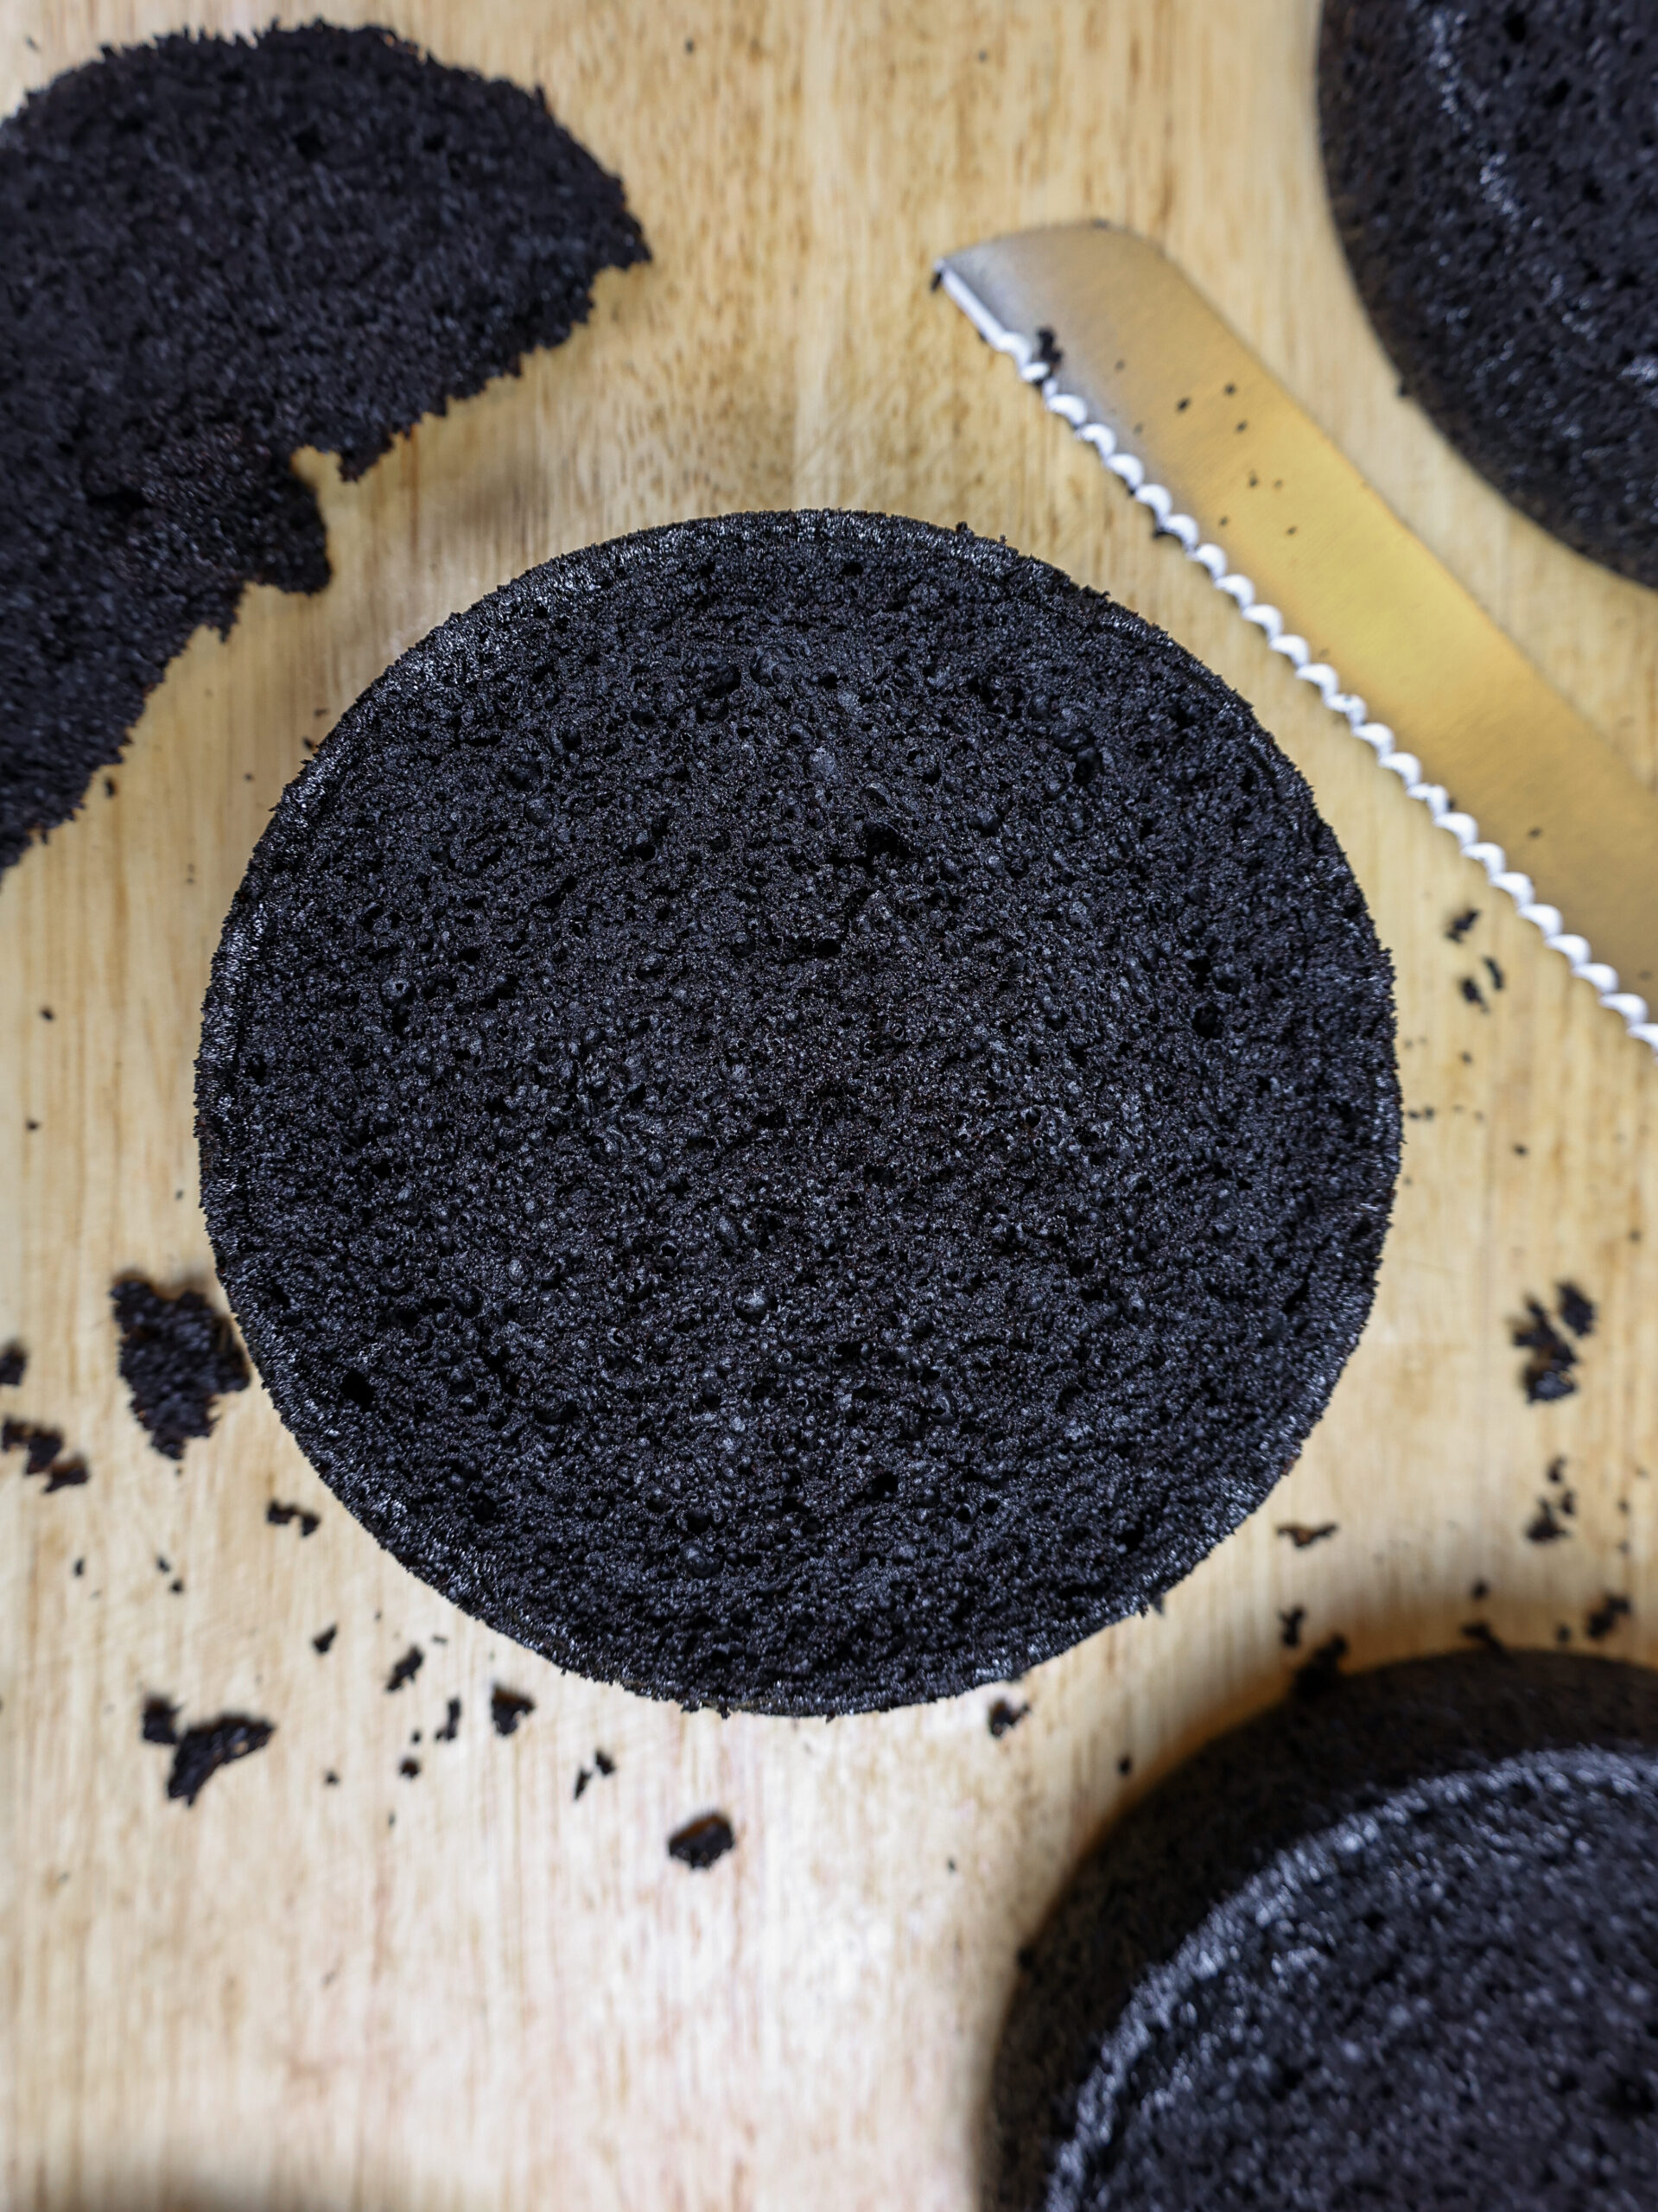
Once cooled, use a serrated knife to level two of the cake layers (leave one unleveled).
If you make these in advance, wrap and freeze them at this point. Take them out of the freezer about 20 minutes before you want to assemble the cake.
Step #3: Stack and Frost the Cake Layers
Stack and frost the cake layers on a greaseproof cake board or flat plate.
Spread a tablespoon of red buttercream onto the cake board to help keep the first cake layer in place.
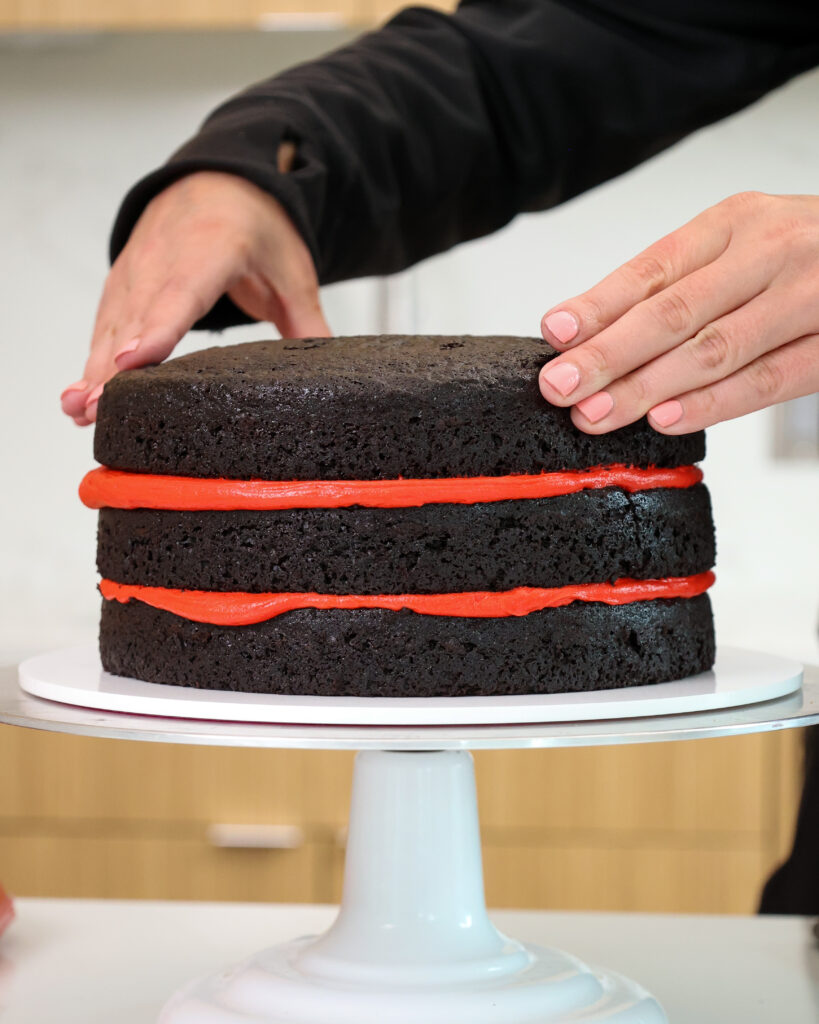
Stack the leveled cake layers first. Spread an even layer of red buttercream on top of the cake layer with an offset spatula.
Repeat with the remaining cake layers and top with the unleveled cake layer.
Chill the cake for about 10 minutes in the freezer. This will help the buttercream between the cake layers firm up and make the cake easier to trim.
Use a serrated or sharp knife to trim the top cake layer to have rounded sides and give the cake a dome-like shape.

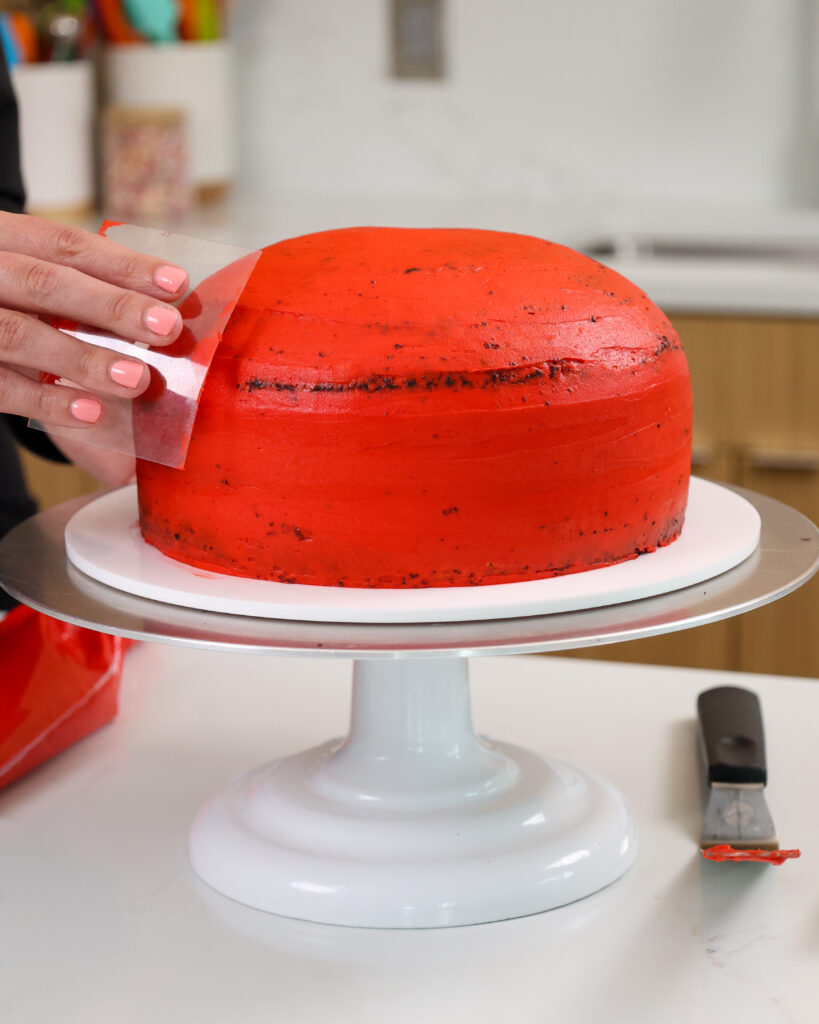
Cover the cake with a thin layer of red buttercream and smooth using an acetate sheet or small offset spatula.
Chill the cake again in the fridge for 30 minutes or freezer for 10 minutes, until the frosting is firm to the touch.
Step 4: Add the Second Layer of Frosting
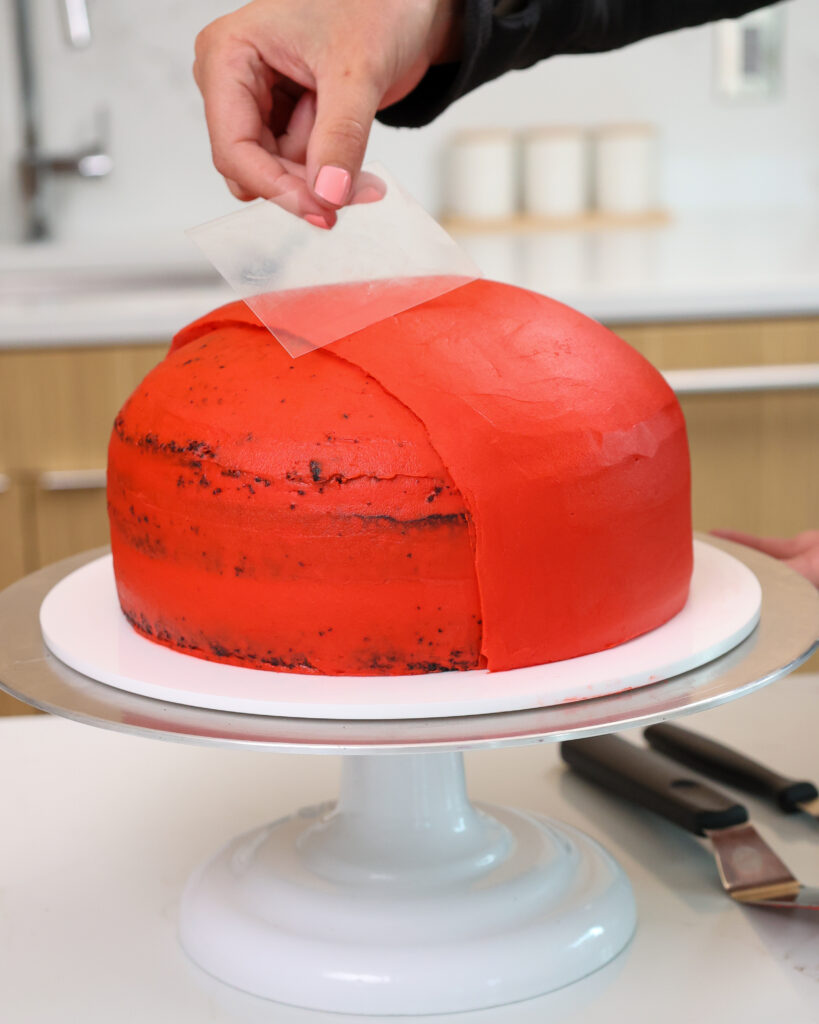
Cover 2/3 of the cake in a second, thicker layer of red buttercream. Smooth using an acetate sheet or small offset spatula.
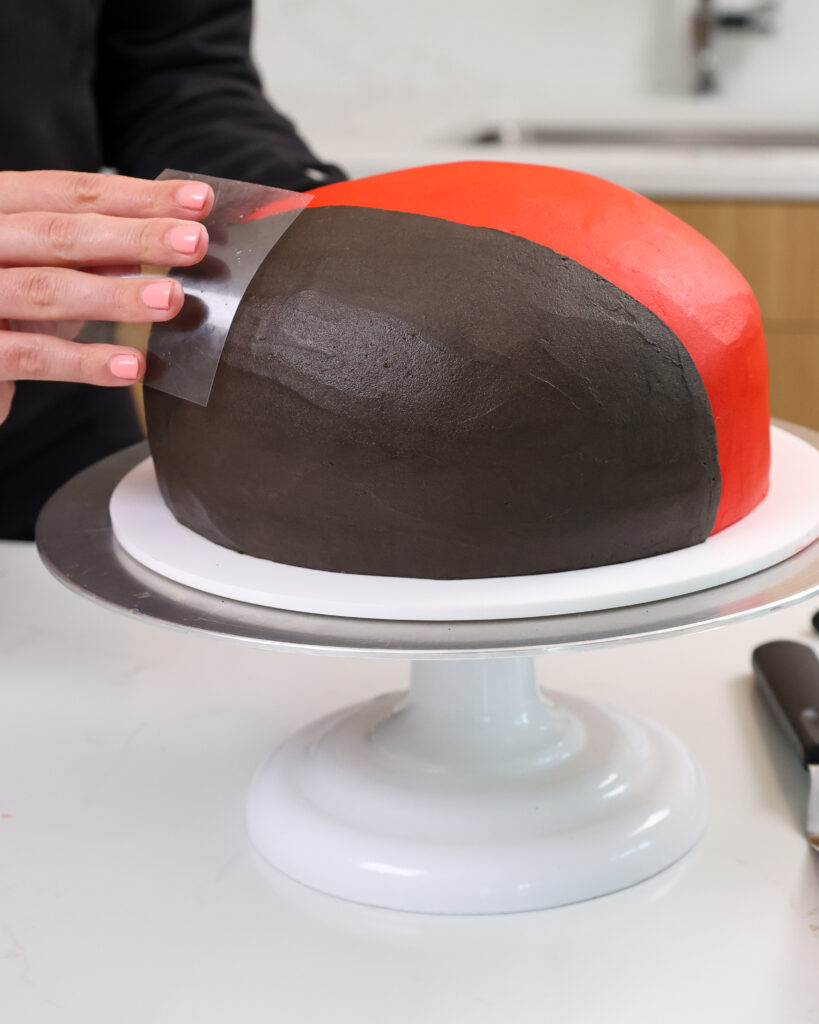
Pipe a thick layer of black buttercream on the remaining portion of the cake.
This will be the ladybug’s head. Smooth with an acetate sheet or small offset spatula.
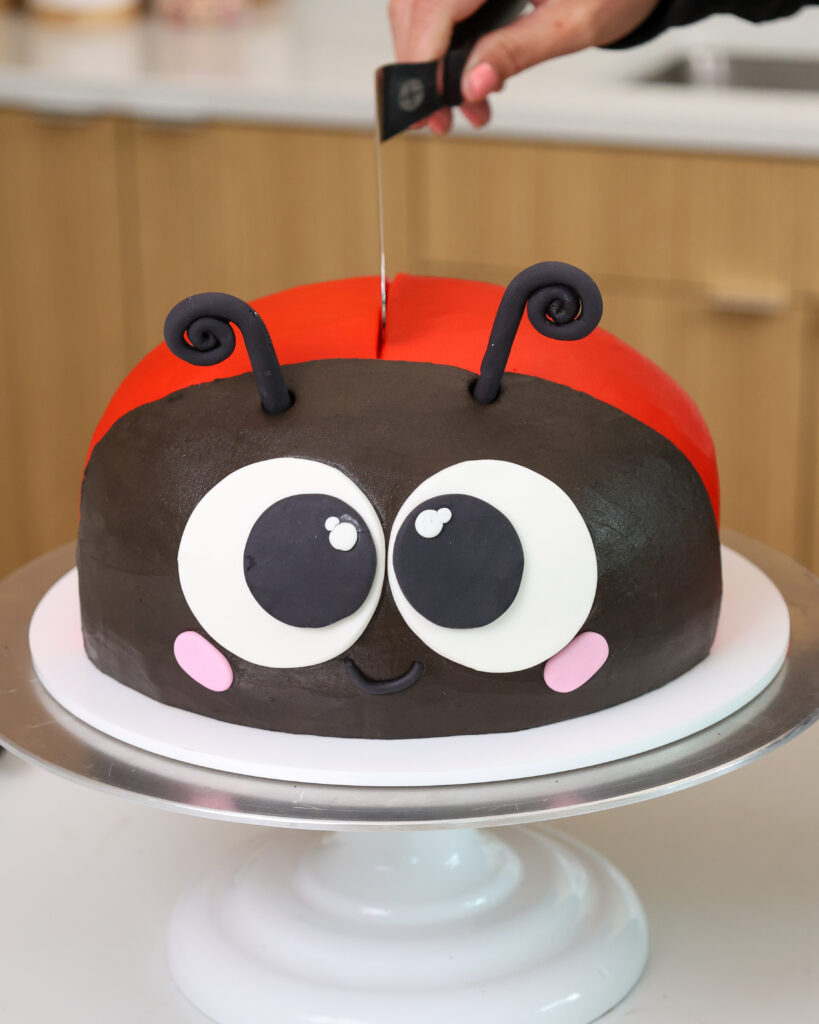
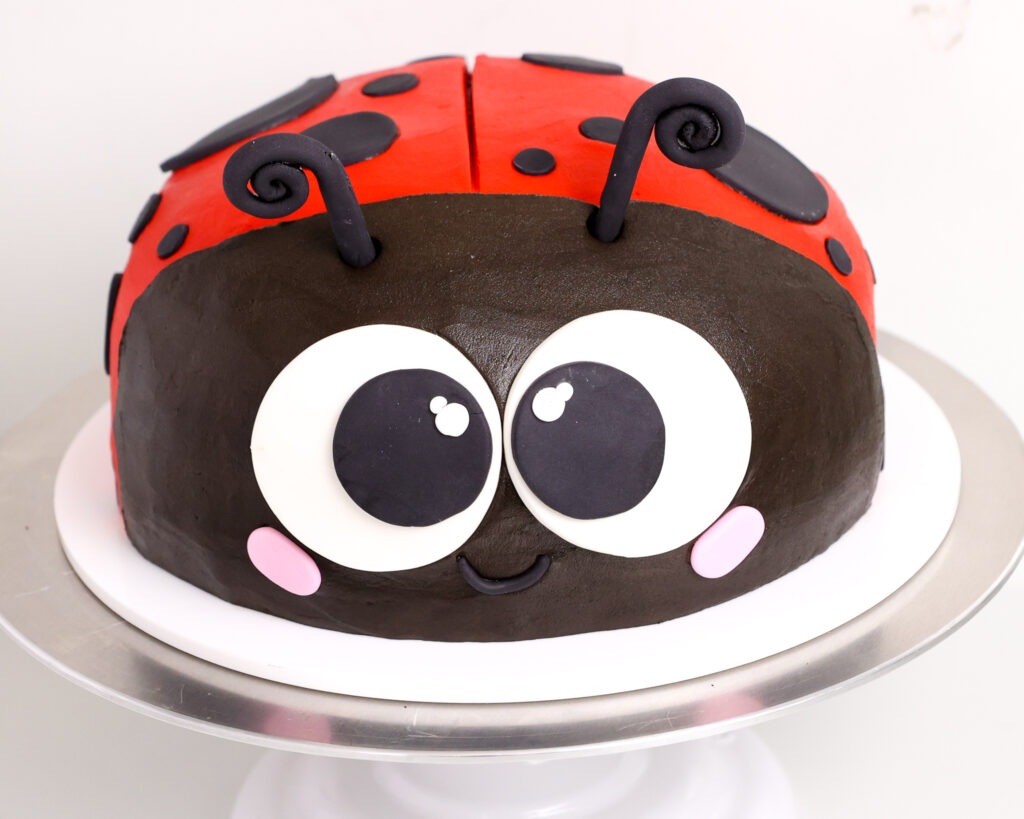
Step 5: Make the Face & Spots for this Ladybug Cake
Use white and black fondant to make the ladybug’s eyes, antennae, and spots.
If you don’t want to use fondant, you can use black and white buttercream to make the eyes and spots, but it will take a lot longer!
If you have them on hand, I highly recommend using circle cookie cutters for the eyes and spots. I made the eyes pretty big (about 2.5 inches) and made the spots a variety of sizes.

Insert a toothpick into each antenna to make it easier to stick into the cake.
Gently press the fondant features into the frosting.
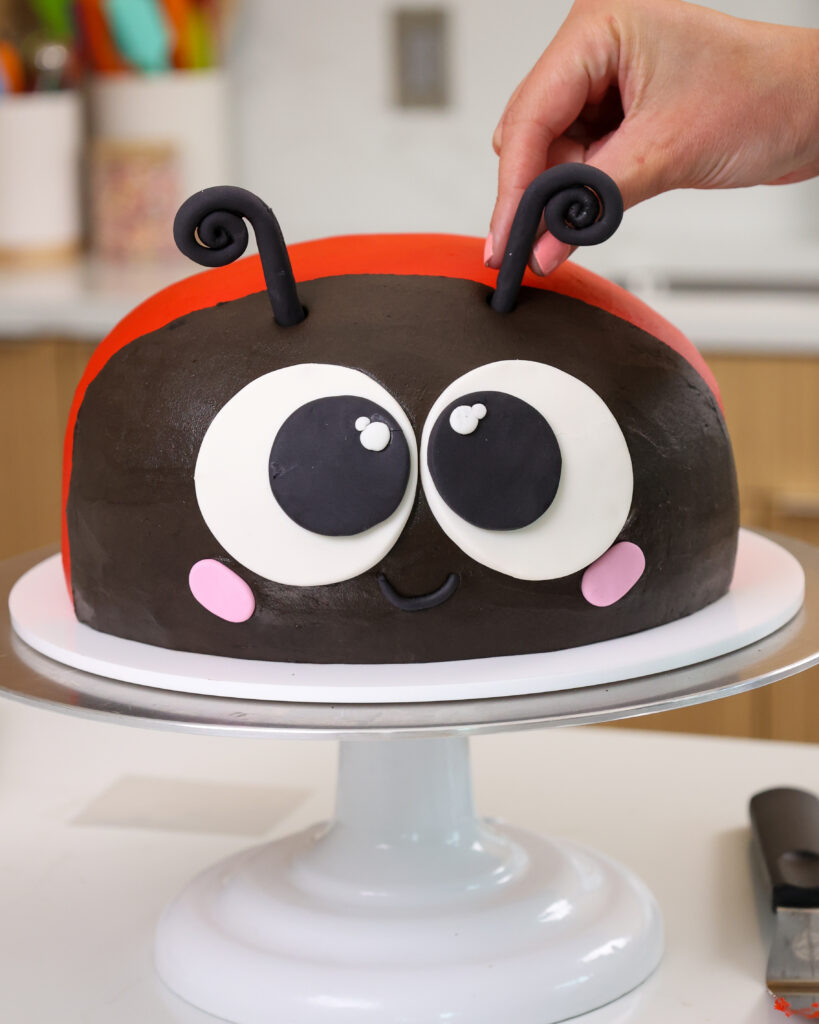
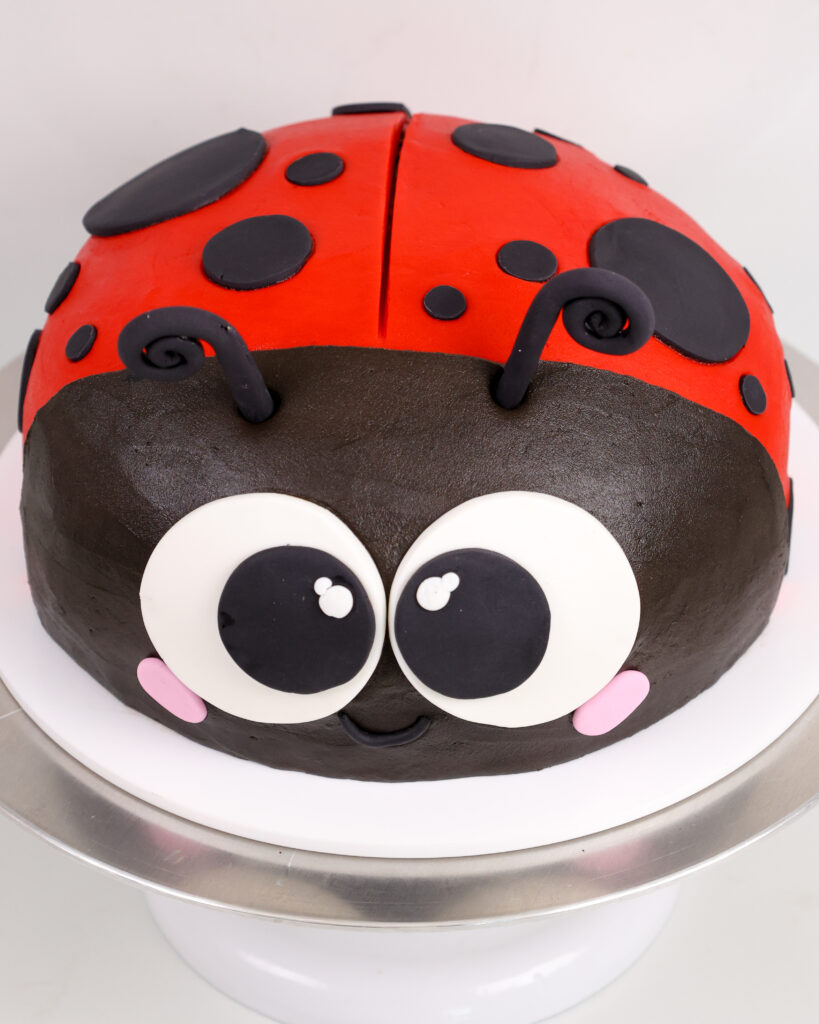
Use a large offset spatula to make a line through the center of the red frosting to make it look like the ladybug has wings.
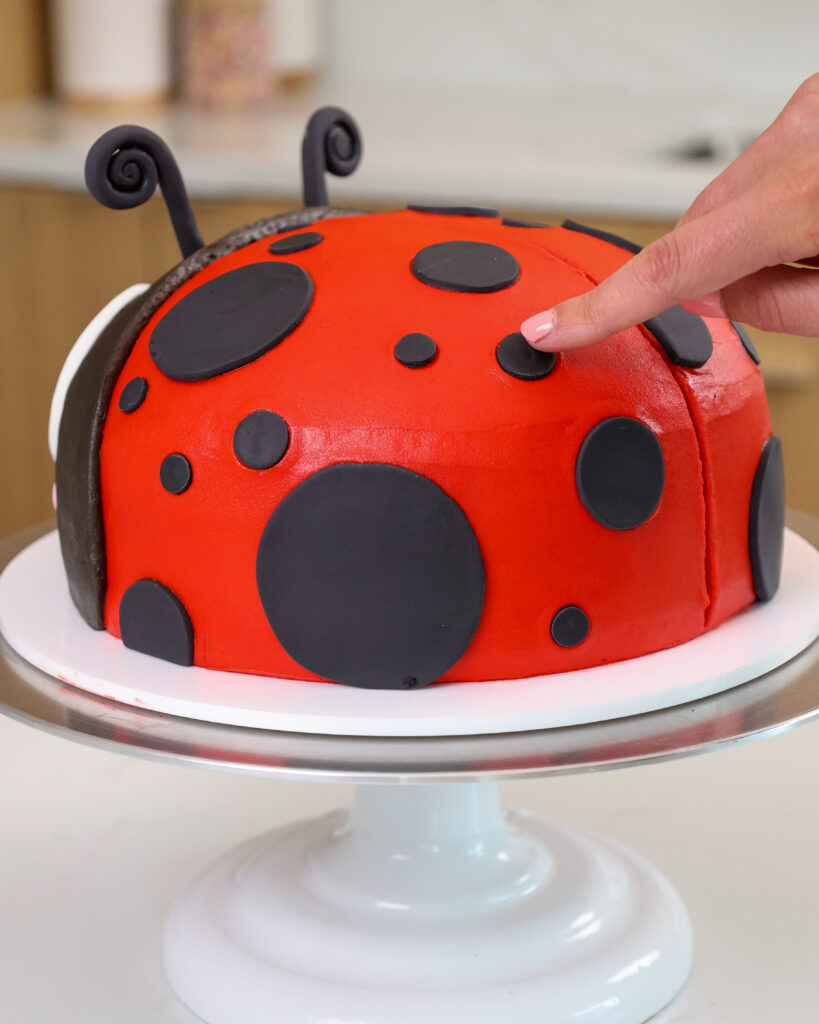
The last step is to add on the spots! If they aren’t sticking on their own, you can always use a little dab of buttercream to help them stay in place. Then enjoy!
Ladybug Substitutions and Swaps
Below are some swaps and substitutions that can be made in this recipe.
- All Purpose Flour – This recipe turns out best with AP flour, but you can use a gluten free flour blend if needed.
- Granulated Sugar – I do not recommend reducing the amount of sugar or changing the type of sugar, as it will change the texture of the cake layers.
- Black Cocoa – This recipe turns out best with black cocoa (I get mine on Amazon), but you can also use dark cocoa powder or regular unsweetened baking cocoa in this cake recipe.
- Eggs – If you have an egg allergy you can try using flaxseed eggs or an egg replacer.
- Buttermilk – You can also use full fat yogurt, sour cream, whole milk, or an alternative yogurt or milk (almond, soy, oat) if you’re dairy free.
- Unsalted Butter – If you only have salted butter on hand, you can use it in place of the unsalted butter in this recipe. Just be sure to omit the salt that this recipe calls for. You can also use vegan butter in its place!
- Heavy Cream – Whole milk or alternative milk (soy, almond, oat) will work fine in this frosting recipe if that’s what you have on hand.
Tips for Making the Best Ladybug Cake
- Make the buttercream a day in advance! It helps naturally deepen the color of the frosting to create vibrant shades. If you’re having a hard time making bright red frosting, check out my red buttercream tutorial.
- Use gel food coloring to make the red buttercream. Liquid food coloring can throw off the consistency of the frosting and won’t make as vibrant of a color.
- Ingredients at room temp mix together better! Set out any cold ingredients ahead of time.
- Properly measure your flour (spoon into the cup measure, then level) or use a kitchen scale to measure the dry ingredients.
- Bang your cake pans on the counter before putting them in the oven. This brings any air bubbles that are trapped in the batter to the surface.
- Use an acetate sheet to make the frosting super smooth.
- Make this ladybug cake vegan or dairy free if needed! Use your favorite type of dairy free milk to replace the buttermilk and heavy cream and use vegan butter sticks in place of the butter. For the eggs I recommend using an egg replacer like this.
Making This Ladybug Cake in Advance & Storage Tips
Make your cake layers in advance and freeze them. It breaks the process up and makes it more approachable.
Make your frosting ahead of time or save any leftover frosting! It can be stored in an airtight container in the fridge for up to a month, or in the freezer for up to 3 months. Be sure to give it a good stir once it thaws to get the consistency nice and smooth again.
A frosted cake can last in the fridge for up to a week or in the freezer for up to a month. The buttercream locks in all the moisture, keeping the cake fresh and delicious!
If you cut into the cake and have leftovers, use any remaining frosting to cover the cut section to keep it moist and store in the fridge for up to a week.
Let Me Know What You Think!
If you make this ladybug birthday cake, I’d love to hear what you think! Let me know by leaving a rating below.
If you plan to share on social media, you can tag me @chelsweets and #chelsweets so that I can see your amazing creations on social media.
Other Recipes You Might Like:

Ladybug Cake
Ingredients
Buttercream Frosting
- 2 cups unsalted butter, room temperature 434g; 1 lb. box
- 1 Tbsp vanilla extract or vanilla bean paste 12g
- 1/2 tsp fine salt 3g
- 7 cups powdered sugar 907g; 2 lb. bag
- 1/2 cup heavy whipping cream, divided 120g
- 1/2 cup dark chocolate chips, melted and cooled 90g
- 1/4 cup dark or black cocoa powder 25g
- squirt of red gel food coloring
Moist Chocolate Cake Layers
- 2 cups all-purpose flour 260g
- 2 cups granulated sugar 400g
- 3/4 cup dark or black cocoa powder 75g
- 2 tsp baking powder 8g
- 1 1/2 tsp baking soda 9g
- 1 tsp fine salt 6g
- 1 cup very hot water 240g
- 2 tsp instant espresso of coffee 5g
- 1 cup buttermilk, room temperature 240g
- 1/2 cup vegetable or canola oil 110g
- 2 large eggs, room temperature 112g
- 2 tsp vanilla extract or vanilla bean paste 8g
Ladybug’s Face
- 1 cup black fondant
- 1/3 cup white fondant
Recommended Tools
- 8- inch cake pans
- Spinning cake stand
- 10- inch greaseproof cake board
- small offset spatula
- Electric hand mixer or stand mixer
- 2 Large Piping Bags
- Circle Cutters
Instructions
Buttercream Frosting
- To help intensify the color of the frosting, make it a day in advance (if possible) and let it sit out at room temperature overnight. It sounds crazy but it really helps deepen the color of the buttercream!!
- Beat 2 cups of unsalted butter on a medium speed for 30 seconds until smooth with a paddle attachment / stand mixer or a hand mixer.
- Mix in 1 Tbsp vanilla extract and 1/2 tsp salt on a low speed.
- Slowly add in 7 cups of powdered sugar while mixing slowly on the lowest setting. Halfway through add in 1/4 cup of heavy cream to make it easier to mix. I like to place a kitchen towel over my mixer to contain any powdered sugar clouds.
- Mix on low until the ingredients are fully incorporated and the desired consistency is reached.
- If the frosting seems too thick, add in additional cream (1 Tbsp at a time). If the frosting is too thin, add in more powdered sugar (quarter of a cup at a time).
- Scoop about a quarter of the frosting into a separate bowl. Mix in 1/2 cup of melted and cooled dark chocolate, 1/4 cup dark or black cocoa powder, and 1/4 heavy cream. Place in a piping bag fit with a large round tip or cut open to have a 2 cm opening and set aside.
- Color the remaining buttercream red with a generous squirt of red gel food coloring. Mix until evenly colored, then cover flush with plastic wrap and set aside.
Chocolate Cake Layers
- Next, make the chocolate cake layers. Preheat the oven to 350 F/ 175 C. Line and grease three, eight-inch cake pans. Set aside.
- Combine 2 cups all-purpose flour, 2 cups sugar, 3/4 cup dark or black baking cocoa, 2 tsp baking powder, 1 1/2 tsp baking soda, and 1 tsp of salt in a large bowl. Whisk together until combined.
- In a separate, medium-sized bowl, add 1 cup of hot water and 2 tsp instant espresso. Stir until dissolved.
- Add in 1 cup buttermilk, 1/2 cup oil, 2 eggs and 2 tsp vanilla extract into the instant espresso mixture. Give the mixture a quick stir to combine the ingredients.
- Pour the wet ingredients into the dry ingredients. Mix by hand until fully incorporated. The batter will be on the thin side, but that’s the consistency you're after!
- Divide the batter evenly between the cake pans and bake for about 24-27 minutes. I like to use a kitchen scale to weigh the pans. It makes sure each pan has the exact same amount of batter and helps the cake layers bake up to be the same height.
- Remove the cake layers from the oven and let them cool in the pans for about 10 minutes. Gently run an offset spatula around the rim of the cake pans to loosen them, then flip them into wire racks to finish cooling.
- Once cooled, use a serrated knife to level two of the cake layers (leave one unleveled). If you make these in advance, wrap and freeze them at this point. Take them out of the freezer about 20 minutes before you want to assemble the cake.
Assembling this Ladybug Cake
- Stack and frost the cake layers on a greaseproof cake board or flat plate. Spread a tablespoon of red buttercream onto the cake board to help keep the first cake layer in place.
- Stack the leveled cake layers first. Spread an even layer of red buttercream on top of the cake layer with an offset spatula. Repeat with the remaining cake layers and top with the unleveled cake layer.
- Chill the cake for about 10 minutes in the freezer. This will help the buttercream between the cake layers firm up and make the cake easier to trim.
- Use a serrated or sharp knife to trim the top cake layer to have rounded sides and give the cake a dome-like shape.
- Cover the cake with a thin layer of red buttercream and smooth using an acetate sheet or small offset spatula. Chill the cake again in the fridge for 30 minutes or freezer for 10 minutes, until the frosting is firm to the touch.
- Cover 2/3 of the cake in a second, thicker layer of red buttercream. Smooth using an acetate sheet or small offset spatula. Pipe a thick layer of black buttercream on the remaining portion of the cake. This will be the ladybug's head. Smooth with an acetate sheet or small offset spatula.
- Use white and black fondant to make the ladybug's eyes, antennae, and spots. If you don't want to use fondant, you can use black and white buttercream to make the eyes and spots, but it will take a lot longer! If you have them on hand, I highly recommend using circle cookie cutters for the eyes and spots. I made the eyes pretty big (about 2.5 inches) and made my spots a variety of sizes. Insert a toothpick into each antenna to make it easier to stick into the cake.
- Gently press the fondant facial features into the frosting. Use a large offset spatula to make a line through the center of the red frosting to make it look like the ladybug has wings.
- Then add the spots! If they aren't sticking on their own, you can always use a little dab of buttercream to help them stay in place. Then enjoy!
Video
Notes
My Tips for Making the Best Ladybug Cake
- Make the buttercream a day in advance! It helps naturally deepen the color of the frosting to create vibrant shades. If you're having a hard time making bright red frosting, check out my red buttercream tutorial.
- Use gel food coloring to make the red buttercream. Liquid food coloring can throw off the consistency of the frosting and won't make as vibrant of a color.
- Ingredients at room temp mix together better! Set out any cold ingredients ahead of time.
- Properly measure your cake flour (spoon into the cup measure, then level). Or better yet, use a kitchen scale to measure your dry ingredients.
- Bang your cake pans on the counter before putting them in the oven. This brings any air bubbles that are trapped in the batter to the surface.
- Use an acetate sheet to make the frosting super smooth.
Making this Ladybug Cake in Advance & Storage Tips
- Make your cake layers in advance and freeze them. It breaks the process up and makes it more approachable.
- Make your frosting ahead of time or save any leftover frosting! It can be stored in an airtight container in the fridge for up to a month.
- This frosting can also be stored in the freezer for up to 3 months! Just be sure to give it a good stir once it thaws to make it nice and smooth again.
- A frosted cake can last in the fridge for a week, or in the freezer for a month. The buttercream locks in the moisture and keeps the cake fresh and delicious!
Do you use melted dark chocolate chips in butter cream?
Can you use black gel color?
Hi Sandra,
I did use melted dark chocolate chips in the buttercream. You can also use black gel food coloring. Happy baking!!
@Chelsweets,
Well made today. Wish I cod show a puc not real good 1st one I ever made birthday cake plus I had to think up some ideas to make work because didn’t have tool or item but fun to make and I am not a character cake baker
Hi Sandra,
I know, I wish we could share pictures in the comments – I’d love to see it! I’m sure it turned out super cute 🙂 So happy to hear you loved this recipe!!
When does the 2 eggs go into the cake mixture? It doesn’t say ???
Nevermind ???? I see it!
I’ve made this cake twice. It’s very cute and pretty easy to make
Hi Laura,
So happy to hear that!! Thank you for sharing 🙂
I have made this cake batter to specs and both times my cake collapsed in the middle? What am I doing wrong
Hi Sandra,
I’m so sorry to hear that! There are a lot of different reasons why cakes can sink in the center, which I walk through here: https://chelsweets.com/why-do-cakes-sink-in-the-middle/
The other thing that can impact it is if you are baking at any type of altitude? Hopefully we’ll be able to troubleshoot together!
Wooow!! This is my second cake ever and the result is mind blowing!! Thank you so much for the very detailed explanation of everything, could not imagine the end result would look like something done by a professional!
I am so happy to hear that Teodora!! It sounds like it turned out fantastic 🙂 Thank you for sharing!!
I was curious, can a cake with fondant on it go in the fridge? I was always told that fondant in the fridge wasn’t good
Can you make the layers in 9 inch springforms? I have those at home
Hi Aleksandra,
Yes, you can! You can totally make the layers in 9-inch springform pans. I’d suggest making 2, 9-inch cake layers. These layers will be a little thicker and may take a bit longer to bake. I’d start checking around the 25-30 minute mark—test it with a toothpick in the center. You’ll know it’s done when it comes out with a few moist crumbs.
Also, since springforms can sometimes leak a little batter, I recommend placing them on a baking sheet just in case. And don’t forget to line the bottoms with parchment paper for easy release!
The cake will still be just as cute and delicious—especially once it’s all stacked and decorated like a ladybug. Hope that helps, happy baking!