
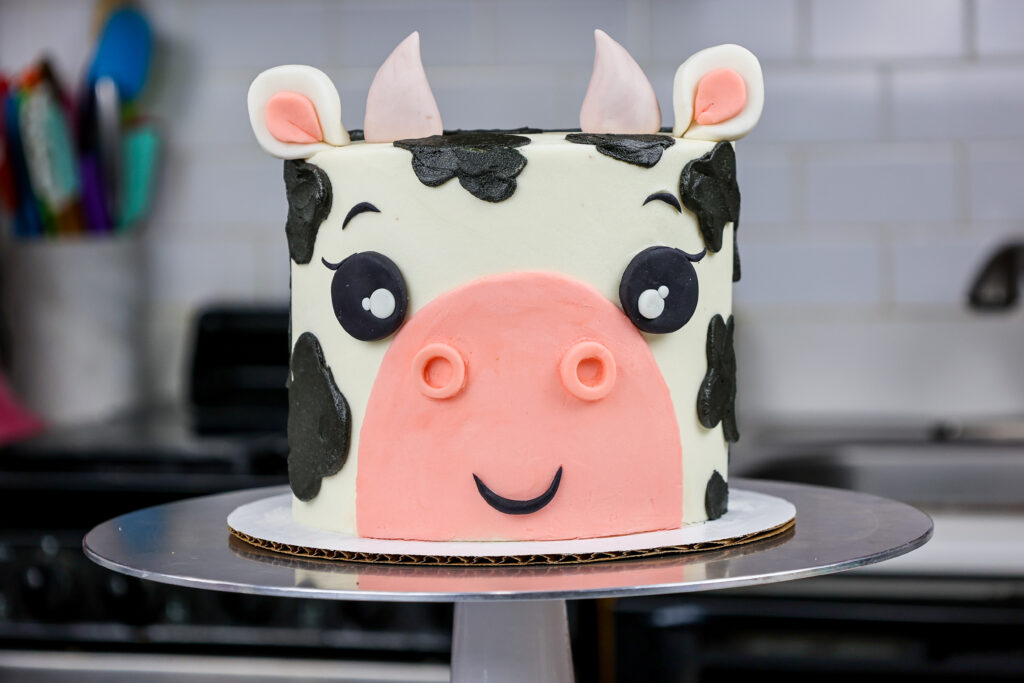
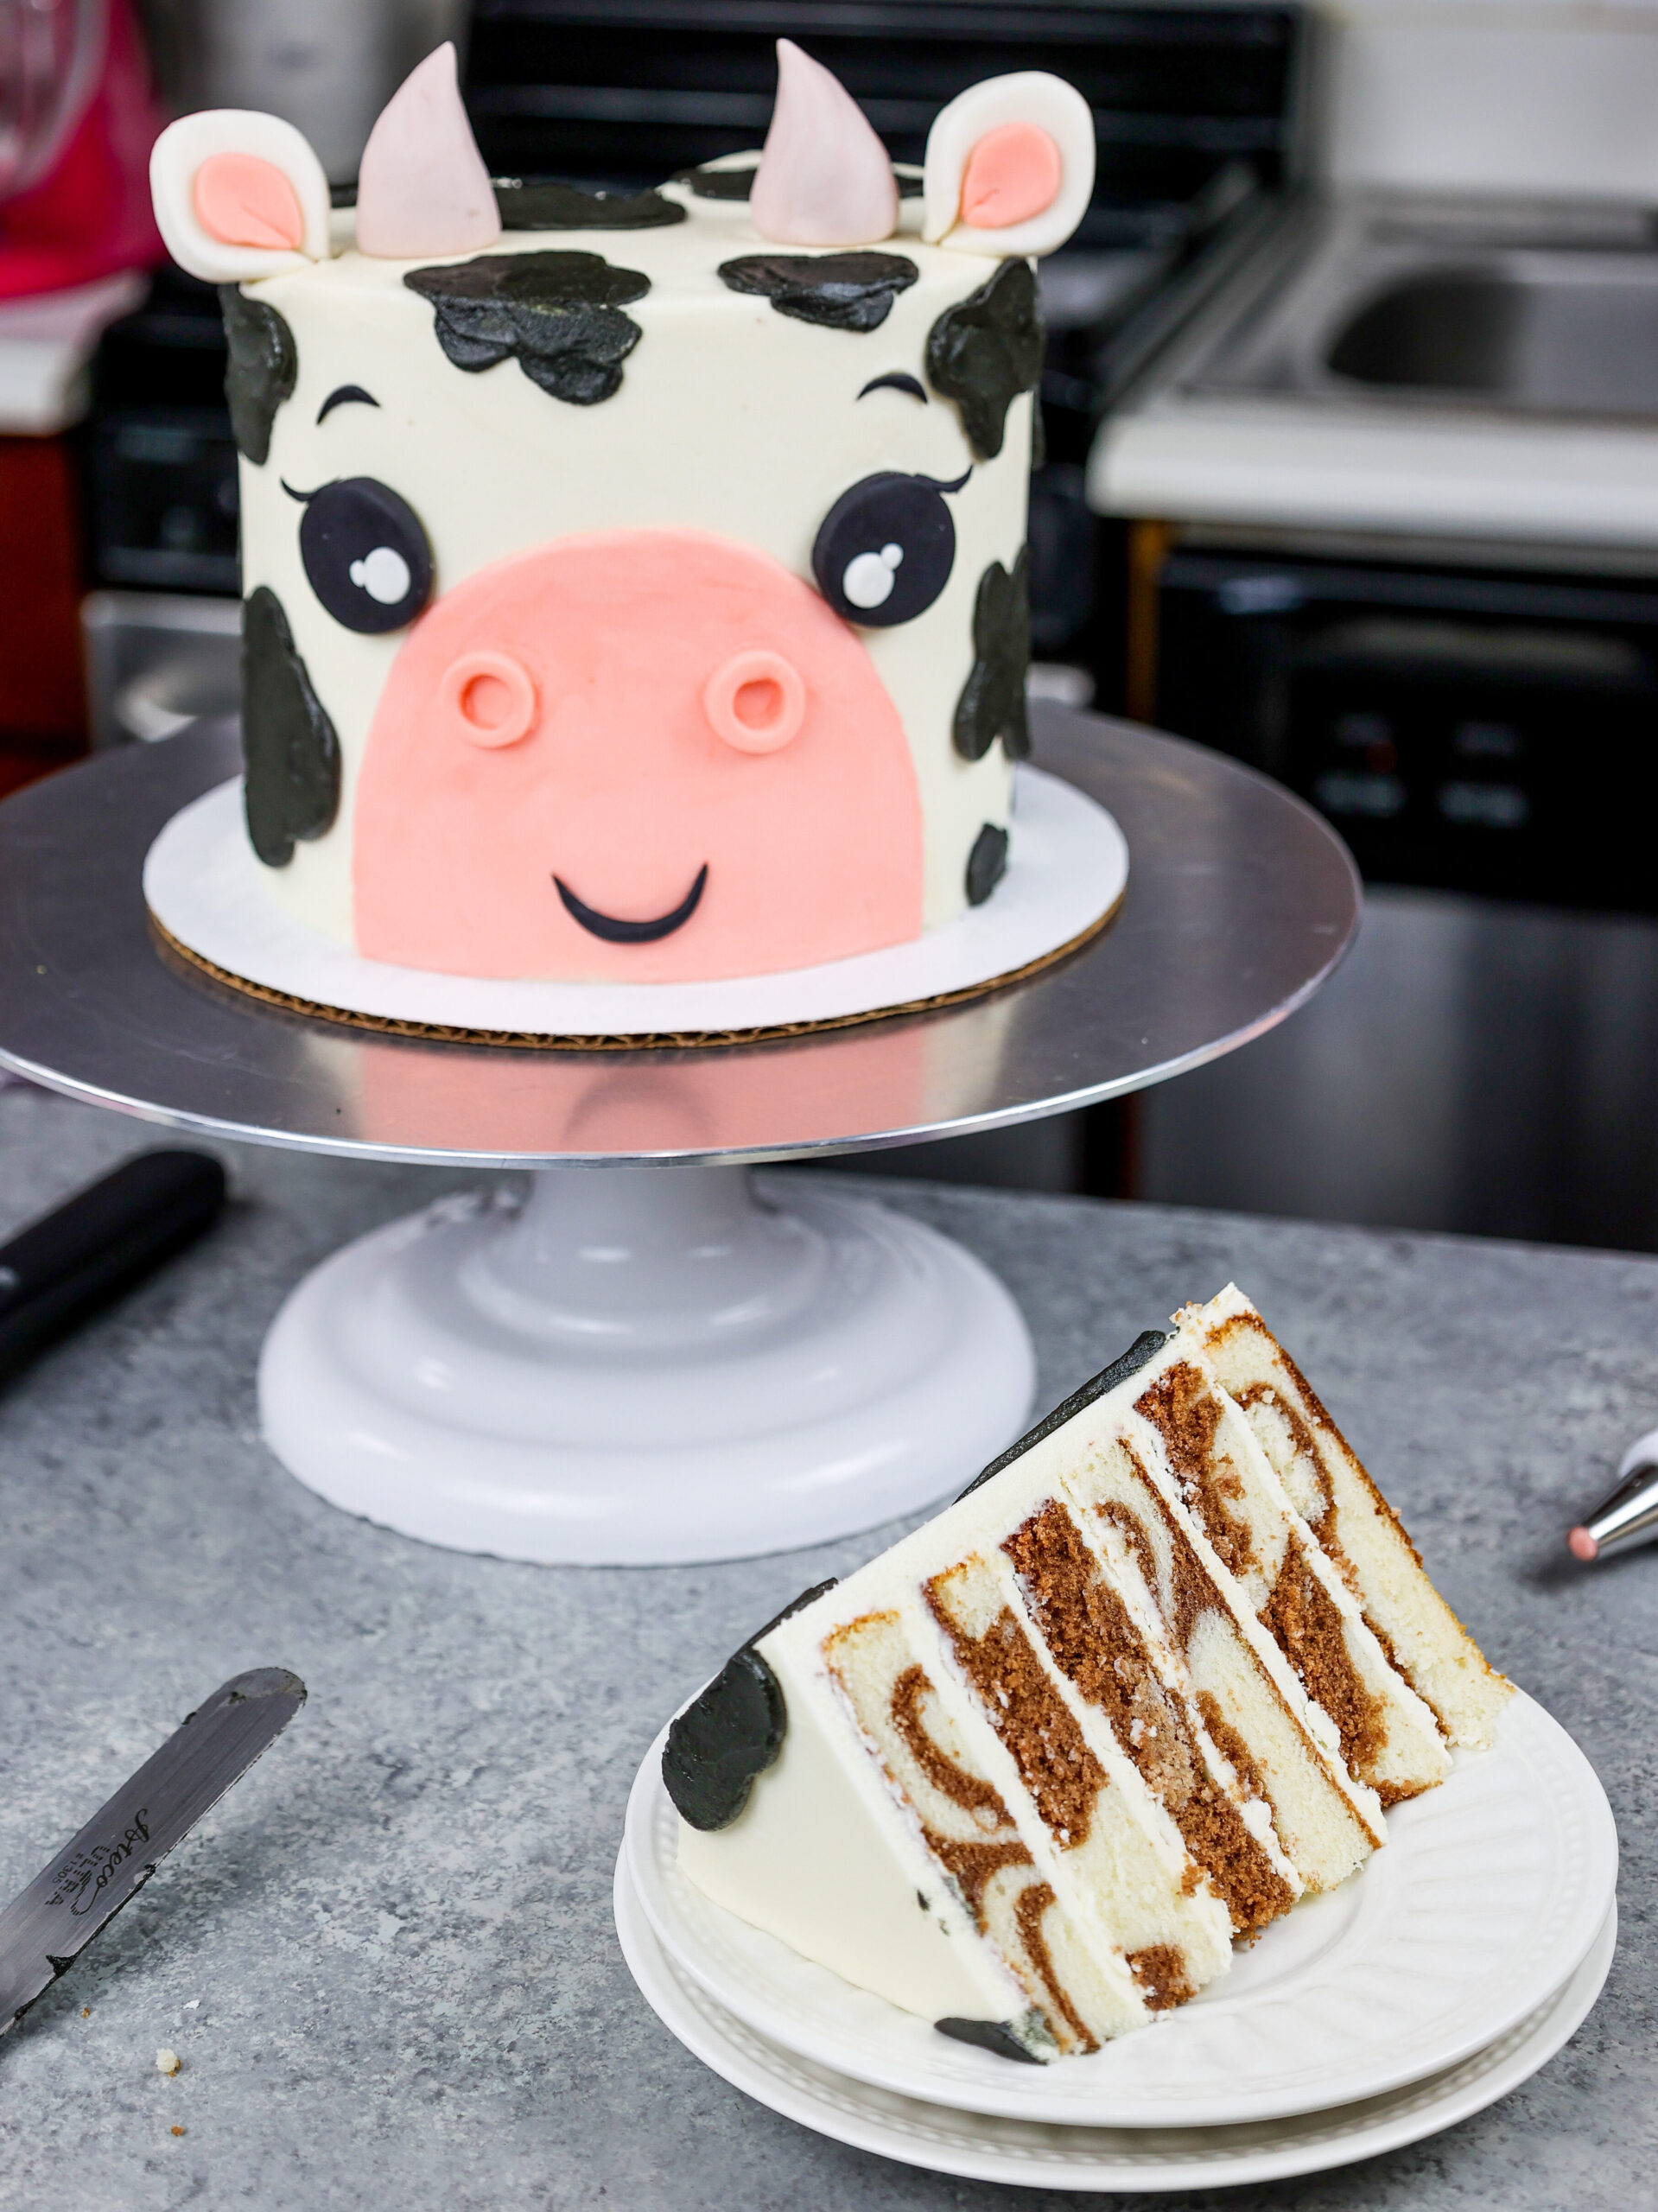
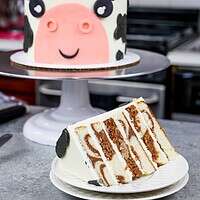
Cow Cake
I’m continuing my animal cake series with this adorable cow cake!
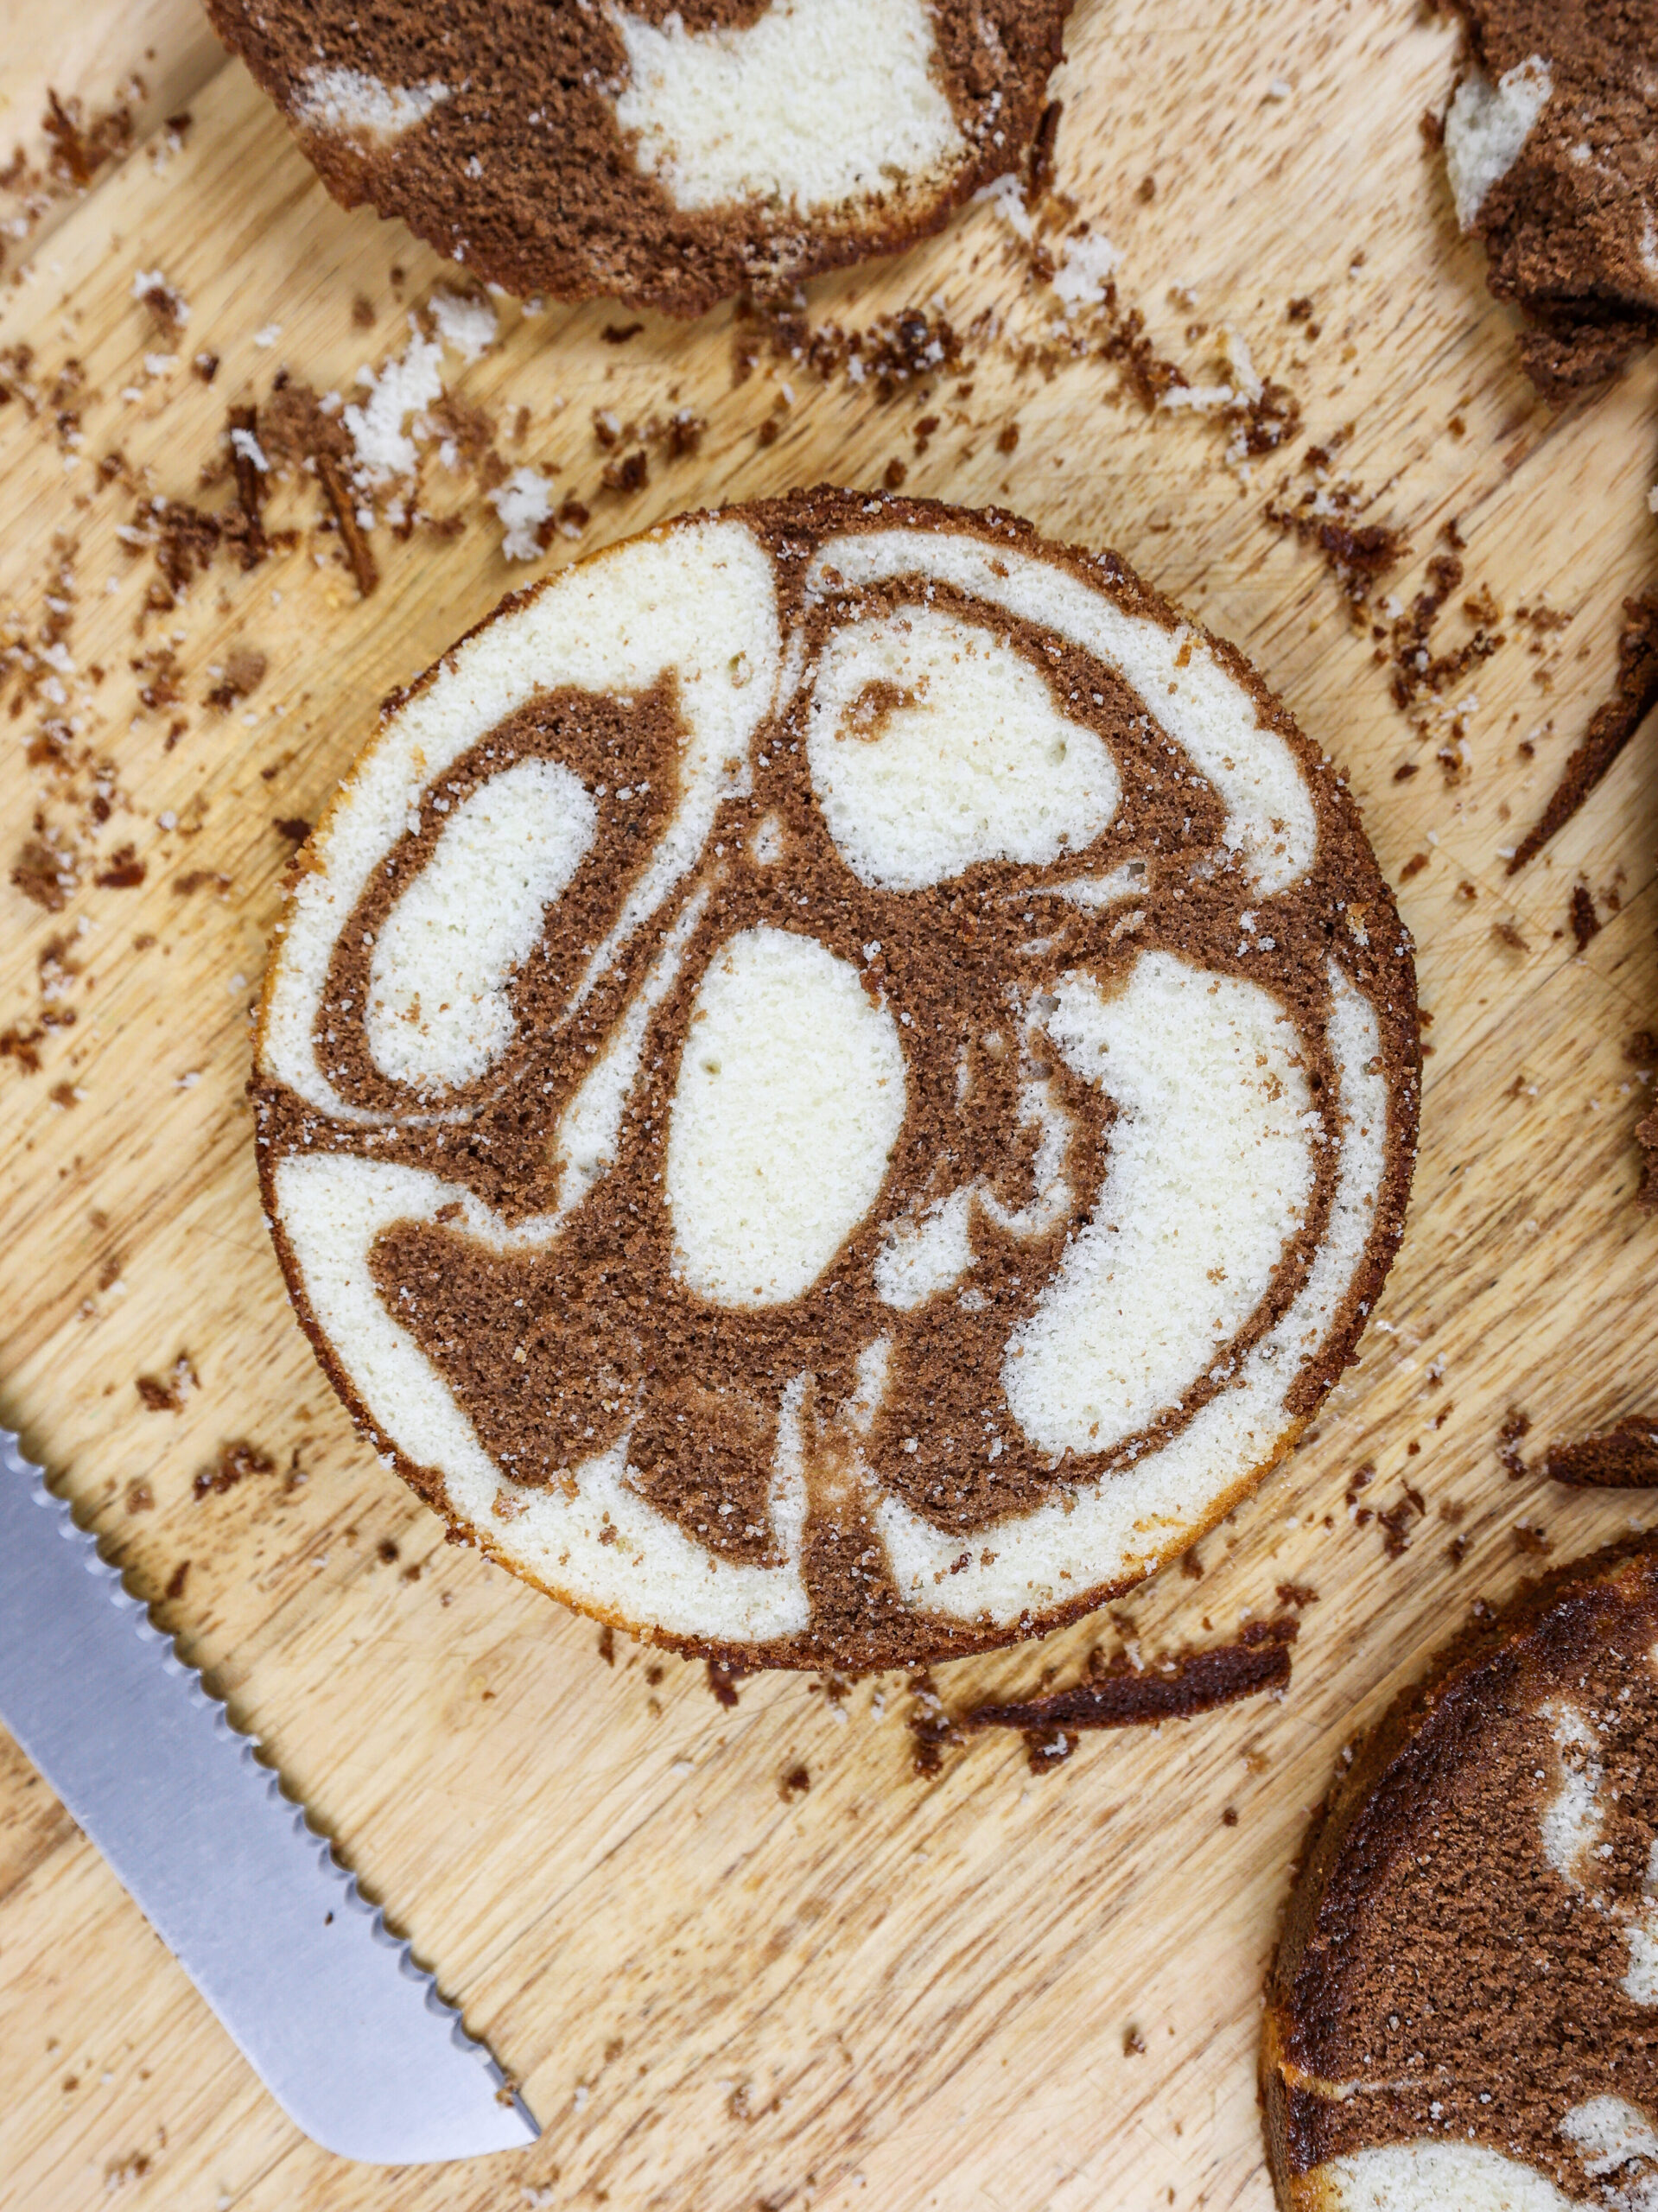
It’s made with moist, 6-inch marble cake layers and delicious vanilla buttercream. It’s just as cute as it is tasty!

Making this Cow Cake: Step by Step Tutorial
Let’s walk through each step of this cake together to make sure it turns out as amazing as possible!
Step 1: Bake and Trim Your Cake Layers
Line three 6-inch round cake pans with parchment rounds and grease with non-stick baking spray or homemade cake release.
Alternate spoonfuls of chocolate and vanilla cake batter into the prepared cake pans, filling them roughly one inch high with batter.
Bake for 33-35 minutes or until a skewer comes out with a few moist crumbs. Let them cool for 10 minutes, then run an offset spatula around perimeter of the pan to separate the cake from the pan. Flip the cake layers onto a wire rack to finish cooling.
Level the cake layers with a serrated knife once they’re fully cooled. I also chose to torte each cake layer to turn my 3, thicker cake layers in 6 thinner cake layers, but this is totally optional!
Step #2: Make the Buttercream Frosting
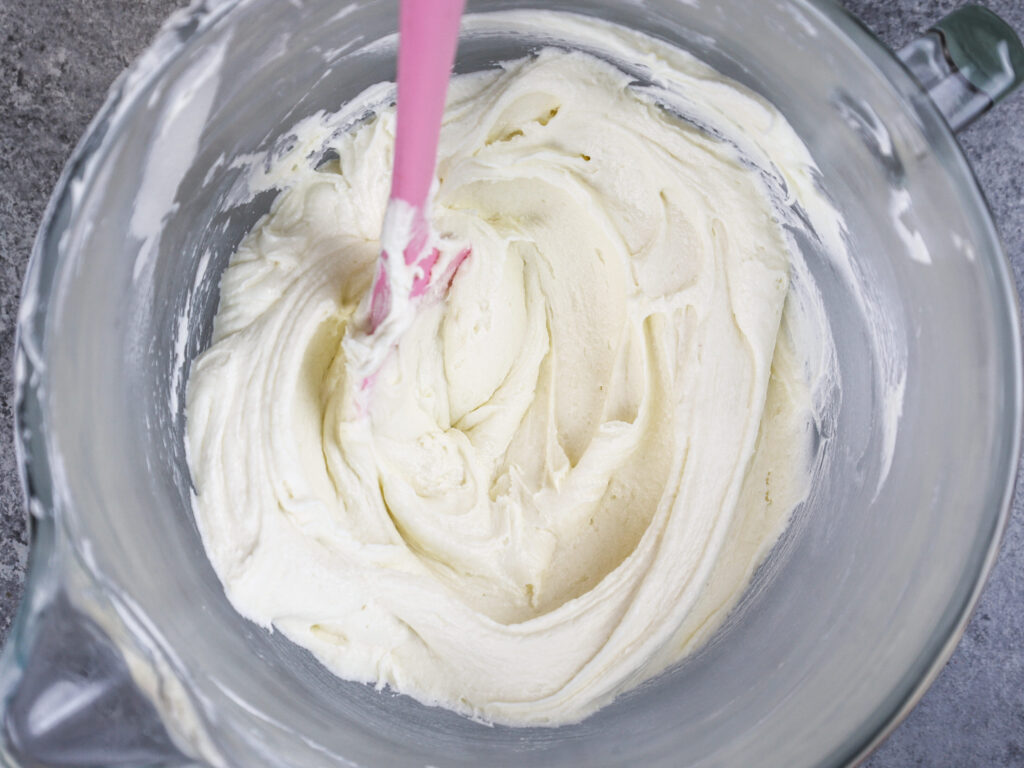
While the cake layers bake and cool, make the vanilla buttercream frosting. You can use either an electric hand mixer or a stand mixer.
If the frosting seems too thick, add in additional cream (1 teaspoon at a time). Or if the frosting is too thin, add in more powdered sugar (1/4 cup at a time).
If you’re unsure how thick your frosting should be, you can learn what consistency you’re looking for in my frosting consistency post.
Once you’ve finished making the frosting, you will have a large bowl of vanilla buttercream, and two small piping bags filled with pink and black buttercream.
Step 3: Assemble and Frost the Cake Layers
Next, it’s time to assemble the cake! I recommend freezing your cake layers for about 20 minutes before stacking them. It will make them was easier to handle and frost.
Stack and frost the cake layers on an 8-inch greaseproof cake board. I recommend using a dab of frosting to help stick the bottom cake layer to the board.
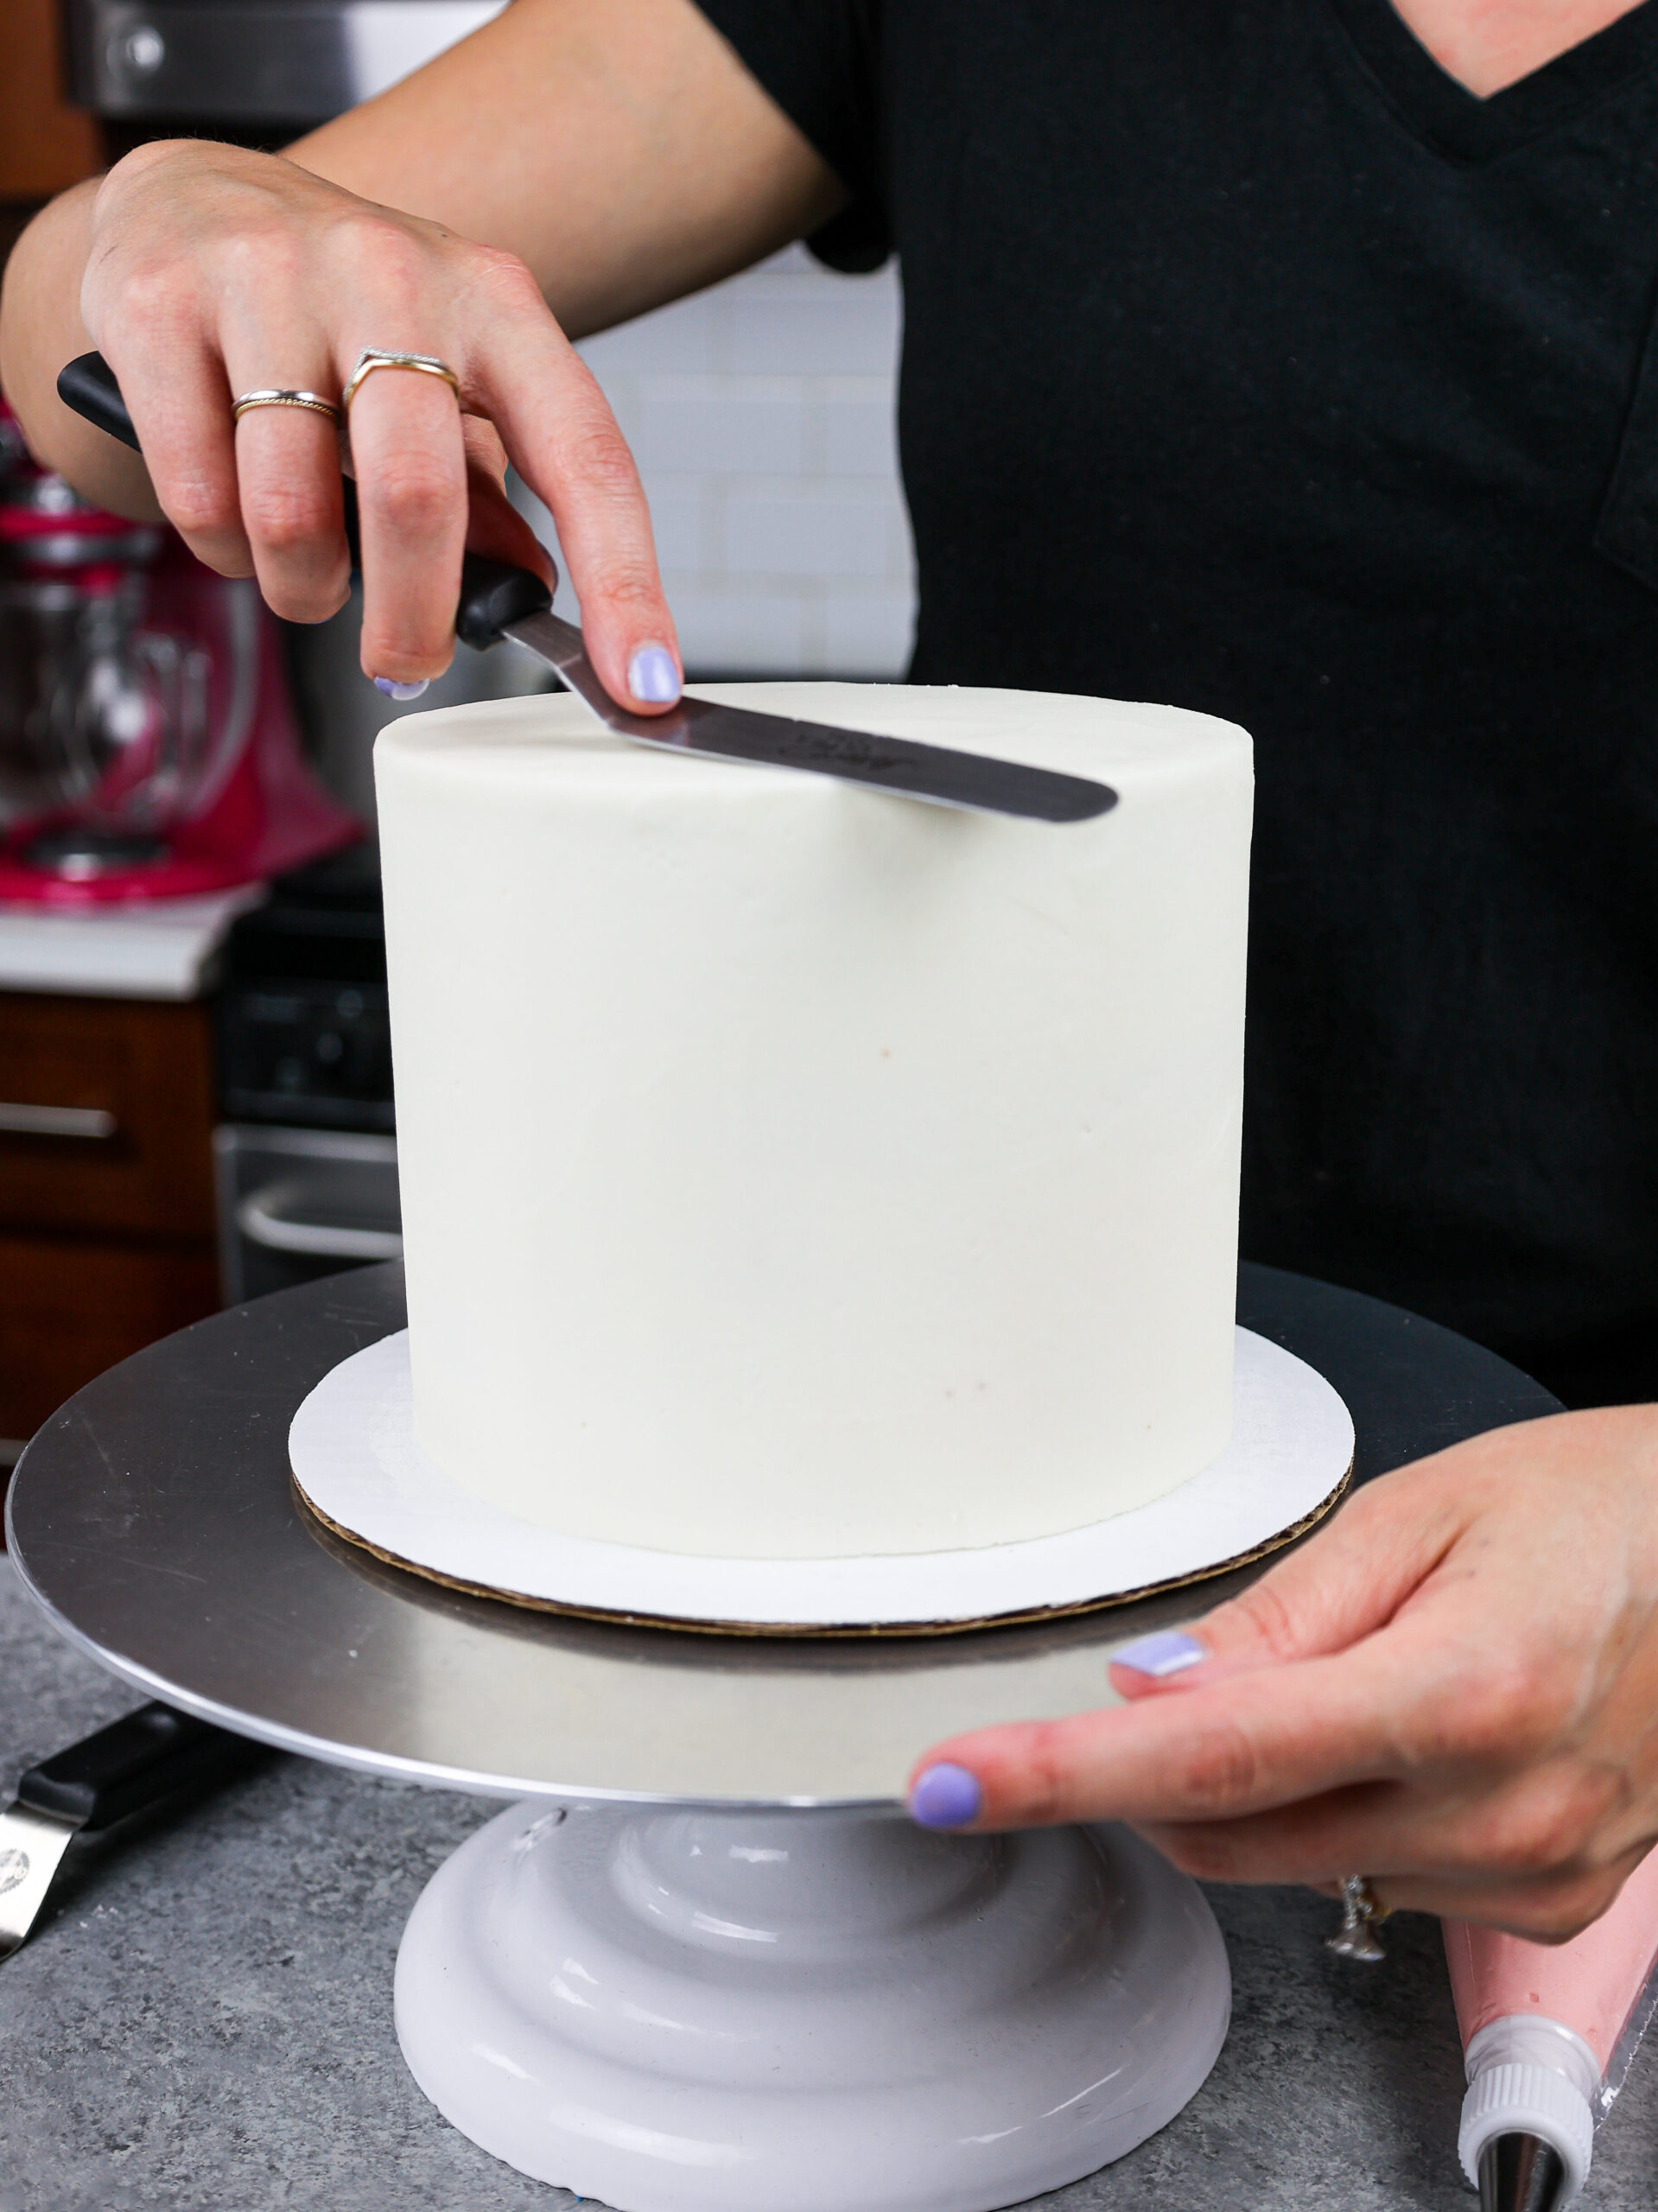
Spread an even layer of frosting between each cake layer with an offset spatula. Add a thin coat of frosting (crumb coat) around the cake to fully cover the cake layers.
Smooth using a bench scraper, then chill the cake in the fridge (30 minutes) or freezer (10 minutes) until the frosting is firm to the touch.
Cover the cake in a thicker layer of the vanilla buttercream and smooth using a bench scraper. Chill the cake again until the frosting is firm to the touch. This will make it much easier to add on the cow’s spots and snout!
Step 4: Making this Little Cow’s Face
While the cake chills, color 1/4 cup of white fondant an ivory color using a small drop of brown gel food coloring. Knead the fondant until it is evenly colored.
I like to do this in a plastic bag so that I don’t dye my hands. Shape two horns using the ivory-colored fondant and set aside.
Color 1 Tbsp of white fondant the same shade of pink as your buttercream using a small drop of pink gel food coloring. Cut out two small rings to be the cow’s nostrils and cut out two 1-inch circles to be the inside of the cow’s ears.
Roll out the remaining white fondant and use a 1 1/2-inch circle cutter to cut the ears. Place the pink circles on top of the white fondant.
Pinch together the bottom of the circles to give them a bit more shape, then insert toothpicks into the base of each ear to make them easier to add to the cake.
Roll out the black fondant and use a circle cutter or bottle cap to cut out two 1-inch circles to make the eyes, and three thin arches to make the cow’s eyebrows and mouth.
I recommend using small circle cutters to get the shape of the ears and eyes just right.

Step 5: Add the Finishing Touches
The final step is to cover the cake is spots and add on its facial features!
Remove the cake from the freezer or fridge. Use the pink buttercream to pipe and smooth a large, oblong, semi-circle onto the cake to make the cow’s snout.
Next add the fondant eyes, nostrils, mouth, ears, and horns. Use the black buttercream to pipe spots around the cake and smooth them with a small offset spatula.
Cow Cake Substitutions and Swaps
Below are some swaps and substitutions that can be made in this marble cake recipe.
- All Purpose Flour – This recipe turns out best with AP flour, but you can use a gluten free flour blend or cake flour if that’s all you have on hand.
- Granulated Sugar – I do not recommend reducing the amount of sugar or changing the type of sugar, as it will change the texture of the cake layers.
- Buttermilk – You can also use full fat yogurt, sour cream, whole milk, or an alternative yogurt or milk (almond, soy, oat) if you’re dairy free.
- Eggs – If you don’t have eggs on hand or you have an egg allergy you can use a flaxseed egg in its place or 1/4 cup of unsweetened applesauce.
- Vegetable Oil – You can use any flavorless oil in this recipe, so canola or even sunflower oil would work great!
- Vanilla Extract – Other extracts can also be used in place of the vanilla extract like coconut extract or hazelnut extract.
- Unsalted Butter – If you only have salted butter on hand you can use it in place of the unsalted butter in this recipe. Just be sure to omit the salt that this frosting recipe calls for. You can also use vegan butter in its place!
- Heavy Cream – Whole milk or alternative milk (soy, almond, oat) will work fine in this frosting recipe if that’s what you have on hand.
Tips for Making the Best Cow Cake:
- Be sure to properly measure your flour (spoon into the cup measure, then level) or use a kitchen scale to measure your dry ingredients.
- Ingredients at room temp mix together better, so be sure you set out any cold ingredients ahead of time.
- Mix your cake batter just until the ingredients are incorporated. This will ensure your cake layers are tender and soft.
- Use a bench scraper to help you get your final coat of frosting super smooth.
- Chill your cake layers in the freezer for about 20 minutes before assembling the cake. This makes it easier to stack and frost.
- Make this cow cake vegan or dairy free if needed! Use your favorite type of dairy free milk to replace the buttermilk and heavy cream and use vegan butter sticks in place of the butter. For the eggs I recommend using an egg replacer like this.
Making this Cow Cake in Advance & Storage Tips:
- Make your cake layers in advance and freeze them. It breaks the process up and makes it more approachable.
- Make your frosting ahead of time too or save any leftover frosting! It can be stored in an airtight container in the fridge for up to a month, or in the freezer for up to 3 months. Be sure to give it a good stir once it thaws to get the consistency nice and smooth again.
- A frosted cake can last in the fridge for up to a week, or in the freezer for up to a month. The buttercream locks in all the moisture, keeping the cake fresh and delicious!
- If you cut into the cake and have leftovers, use any remaining frosting to cover the cut section to keep it moist and store in the fridge for up to a week.
Other Recipes You Might Like:
Let Me Know What You Think!
If you make this cow birthday cake, I’d love to hear what you think of it! Let me know by leaving a rating below.
If you plan to share on social media, you can tag me @chelsweets and use #chelsweets so I can see your amazing creations on social media.
Cow Cake
Ingredients
Vanilla Cake Recipe*
- 2 cup all-purpose flour 260g
- 2 cups granulated sugar 400g
- 1 1/2 tsp baking powder 6g
- 1/2 tsp fine salt 3g
- 2/3 cup (1 1/3 sticks) unsalted butter, room temperature 150g
- 2/3 cup carton egg whites or 5 large egg whites, room temperature 155g
- 1 cup buttermilk, room temperature 240g
- 1 1/2 Tbsp vegetable or canola oil 20g
- 1 tsp vanilla extract or vanilla bean paste 4g
- *additional ingredients for the chocolate cake are listed below
Additional Ingredients: (to be added after the vanilla cake batter is made, to change it into chocolate batter)
- 1/4 cup unsweetened baking cocoa 20g
- 3 Tbsp granulated sugar 38g
- 1/4 tsp baking powder 1g
- 1 large egg, room temperature 56g
- 3 Tbsp buttermilk, room temperature 40g
Vanilla Buttercream Frosting
- 2 cups unsalted butter, room temperature 434g; 1 lb box
- 1 Tbsp vanilla extract or vanilla bean paste 12g
- 1/2 tsp fine salt 3g
- 7 cups powdered sugar 907g; 2 lb bag
- 3 Tbsp heavy whipping cream, room temperature or whipping cream (45g)
- 2 Tbsp unsweetened baking cocoa – added later 10g
- 1/4 cup dark chocolate chips, melted and cooled 45g – added later
- Black gel food coloring – added later
Decorations
- 2 small piping tips
- 1/2 cup white fondant
- 2 Tbsp black fondant
- Pink, orange, and brown gel food coloring
- 2 toothpicks
Suggested Equipment
Instructions
Marble Cake Layers
- Preheat oven to 350°F. Line three 6-inch round cake pans with parchment rounds and grease with non-stick baking spray or homemade cake release.
- Begin by making the vanilla cake batter. Mix together all dry ingredients (flour, sugar, baking powder and salt) in a stand mixer with a paddle attachment until fully combined.
- Mix chunks of room-temperature butter slowly into the dry mix on a low speed. Continue to mix until no large chunks of butter remain, and the mixture looks like sand.
- Mix in the egg whites on a low speed until incorporated, then mix in the buttermilk on a low speed. Scrape the sides and bottom of the bowl with a rubber spatula as needed.
- Add in oil and vanilla and mix at a low speed until fully incorporated, then beat on medium speed for about 30 seconds.
- Pour half of the batter into a separate bowl (roughly 625 grams) and set aside.
- Now it’s time to transform our other bowl of vanilla batter into chocolate cake batter. Mix the additional 1/4 cup baking cocoa, 3 Tbsp sugar, and 1/4 tsp baking powder into the remaining batter.
- Add in the additional egg and 3 Tbsp buttermilk. Mix on a low speed until smooth.
- Alternate spoonfuls of chocolate and vanilla cake batter into the prepared cake pans, filling them roughly one inch high with batter (I like to use a digital kitchen scale to make sure each pan has the same amount of batter).
- Bake for 33-35 minutes (or until a skewer comes out with a few moist crumbs).
- Let the layers cool for 10 minutes, then run an offset spatula around perimeter of the pan to separate the cake from the pan. Flip the cake layers onto a wire rack to finish cooling.
- Level the cake layers with a serrated knife once they’re fully cooled. I also chose to torte (cut horizontally) each cake layer to turn my 3, thicker cake layers in 6 thinner cake layers but this is totally optional!
Vanilla Buttercream Frosting
- Beat 2 cups of unsalted butter on a medium speed for 30 seconds until smooth with a paddle attachment / stand mixer or a hand mixer.
- Mix in 1 Tbsp vanilla extract and 1/2 tsp salt on a low speed.
- Slowly add in 7 cups of powdered sugar. Half way through add in 3 Tbsp of heavy cream or milk to make it easier to mix. I like to place a kitchen towel over my mixer to contain any powdered sugar clouds.
- Mix on low until the ingredients are fully incorporated and the desired consistency is reached.
- If the frosting is too thick, add in additional cream (1 Tbsp at a time). If the frosting is too thin, add in more powdered sugar (quarter of a cup at a time).
- Place 1 cup of buttercream into a separate bowl and mix in 2 Tbsp of baking cocoa, 1/4 cup melted and cooled chocolate, and a squirt of black gel food coloring in to the frosting. This will be used to make the cow’s black spots. Place in a small piping bag fit with a small piping tip and set aside.
- Place 1/2 cup of buttercream in another bowl, and color it a warm shade of pink using a squirt of pink gel food coloring and a tiny drop of orange gel food coloring. Place in a small piping bag fit with a small piping tip and set aside.
- Cover the remaining uncolored frosting with plastic wrap to prevent crusting and set aside.
Assembling this Cow Cake
- Stack the cake layers on a greaseproof cardboard cake round or flat plate.
- Spread a thin dab of buttercream on the center of the board, to help your cake layer stay in place.
- Next, center the first cake layer the cake board.
- Spread an even layer of white buttercream on top of the cake layer with a large offset spatula. Repeat with remaining cake layers.
- Place the top cake layer upside down to make it easier to frost.
- Cover the cake in a thin layer of white buttercream and smooth using a bench scraper.
- Chill the cake in the fridge (30 minutes) or freezer (10 minutes) until the frosting is firm to the touch.
- Cover the cake in a thicker layer of the vanilla buttercream and smooth using a bench scraper. Chill the cake again in the fridge (30 minutes) or freezer (10 minutes) until the frosting is firm to the touch. This will make it much easier to add on the cow’s spots and snout!
Decorating this Cow Cake
- While the cake chills, color 1/4 cup of white fondant an ivory color using a small drop of brown gel food coloring. Knead the fondant until it is evenly colored. I like to do this in a plastic bag so that I don’t dye my hands. Shape two horns using the ivory colored fondant and set aside.
- Color 1 Tbsp of white fondant the same shade of pink as your buttercream using a small drop of pink gel food coloring. Knead the fondant until it is evenly colored. Cut out two small rings to be the cow’s nostrils, and cut out two-1 inch circles to be the inside of the cow’s ears.
- Roll out the remaining white fondant and use a 1 1/2-inch circle cutter to cut the ears. Place the pink circles on top of the white fondant, and pinch together the bottom of the circles to give them a bit more shape, and insert toothpicks into the base of each ear to make them easier to add to the cake.
- Roll out the black fondant and use a circle cutter or bottle cap to cut out two 1-inch circles to make the eyes, and three thin arches to make the cow’s eye brows and mouth.
- Remove the cake from the freezer or fridge and use the pink buttercream to pipe and smooth a large, oblong, semi-circle onto the cake to make the cow’s snout. Pipe two small circles at the top of the semi-circle to make the cow’s nostrils.
- Add the fondant eyes, mouth, ears and horns. Use the black buttercream to pipe spots around the cake, and smooth them with a small offset spatula.
Hi! Thank you so much for posting such cute ideas and delicious recipes! I have tried to get black buttercream before and have had poor results. What is the best way to achieve black?? Certain brand of gel coloring? How much?? I feel like I used a tonnn with little result.
Thank you so much!!
Bryce
Hi Bryce,
So sorry to hear that! It can definitely be tricky, and a lot of people struggle making black frosting. I actually have a post where I share all my tips and tricks for making super black frosting, here’s the link: https://chelsweets.com/how-to-make-black-frosting/
Hope that helps, happy baking!
I wish I could add a picture of mine! Not as tall or as beautiful as the original but it was the first cake I’ve ever made! I suck with buttercream & got frustrated… so I made some marshmallow fondant and covered the entire thing & made everything out of fondant. Turned out cute though! Crazy how talented the author is.
Hi Alexa,
I know, it’s such a bummer that we can’t share pictures in the comments on here! Smoothing frosting can definitely be frustrating, I feel ya!! But it sounds like your cake turned out so cute, that’s a great work around 🙂 Thank you for sharing!!
Making a cake based off of this idea tomorrow for a birthday. The mom sent me this exact photo and I was SO excited when I saw it on Pinterest and you showed how to make it. I did get Cheerios for the nose lol to put under the fondant. I’m not going to make it exactly the same, but I do plan to use yours as a guideline. Thank you so much for sharing and your cakes are beautiful and sound amazing. I did use my own recipe for mine 🙂 Birthday girl wanted a different flavor <3
Hi Brittany,
I love that!! In my mind, cake decorating is all about improvising and making it work with what you have or what makes the most sense for you! I hope that her cake turned out amazing 🙂 Thank you for sharing!