
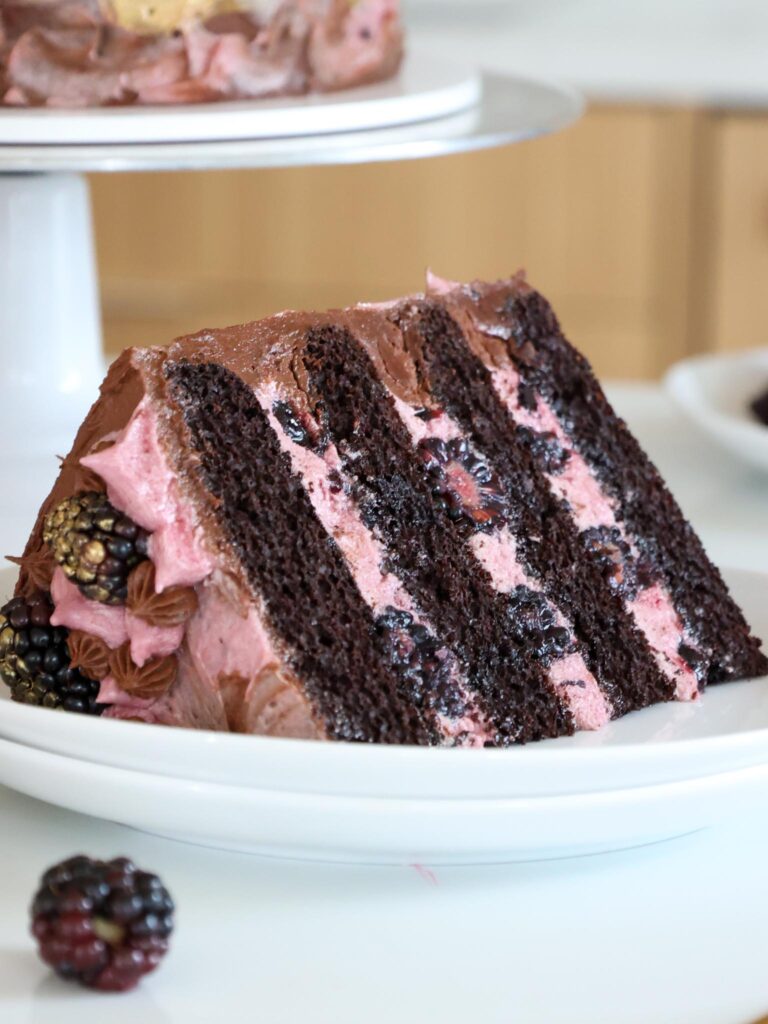
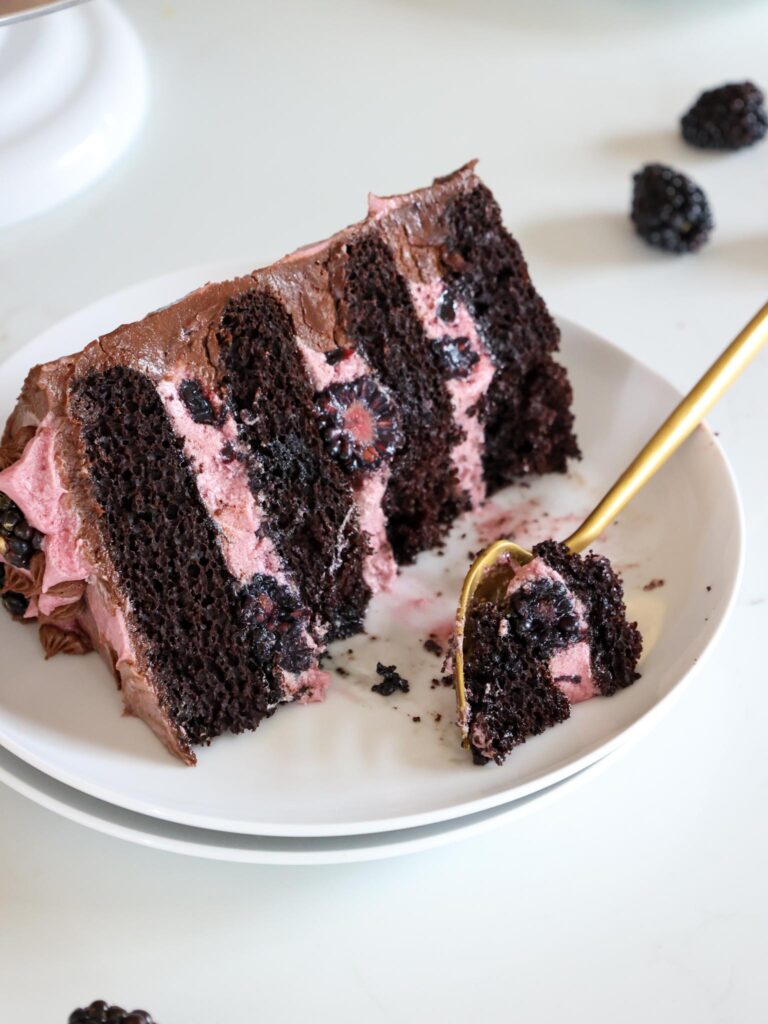
Chocolate Blackberry Cake
There’s something so delicious about rich chocolate and sweet, juicy berries. While I’ve made a chocolate raspberry cake and a chocolate strawberry cake before, I realized that I had never made a chocolate blackberry cake!
And it was high time we fixed that. I look forward to blackberry season every year, and I wanted those delicious blackberries to be the star of the show.
I’m happy to report that they totally are in this cake!
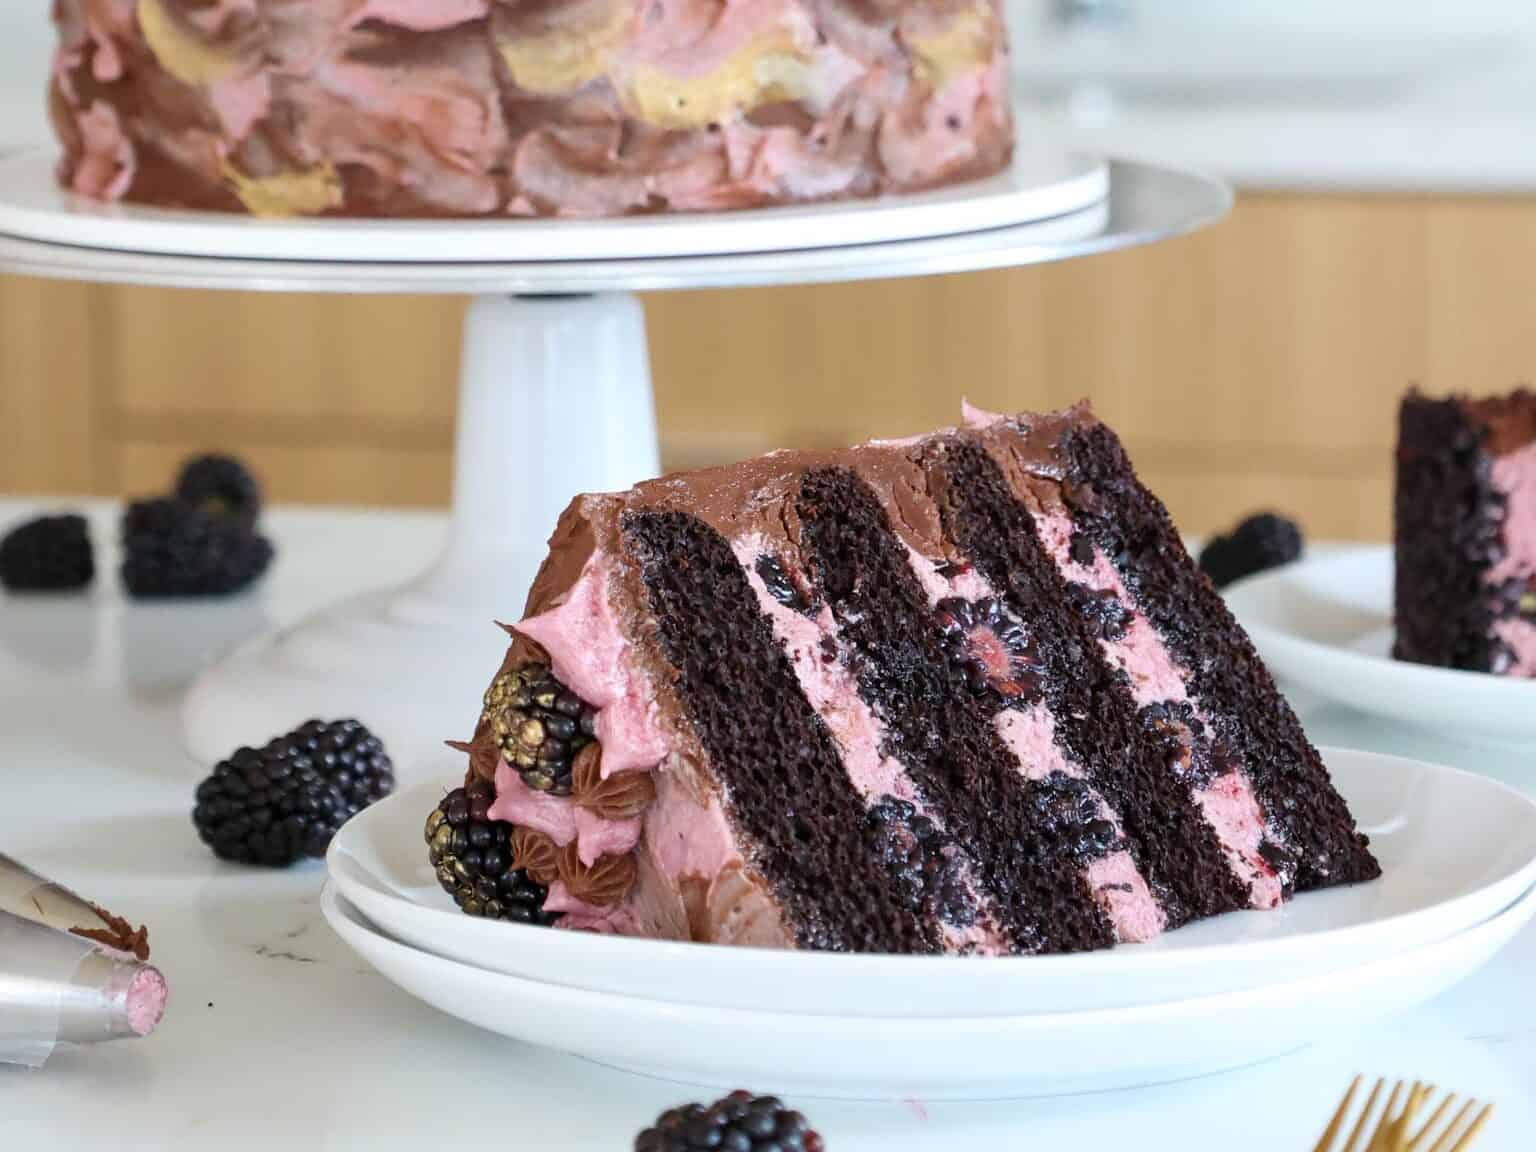
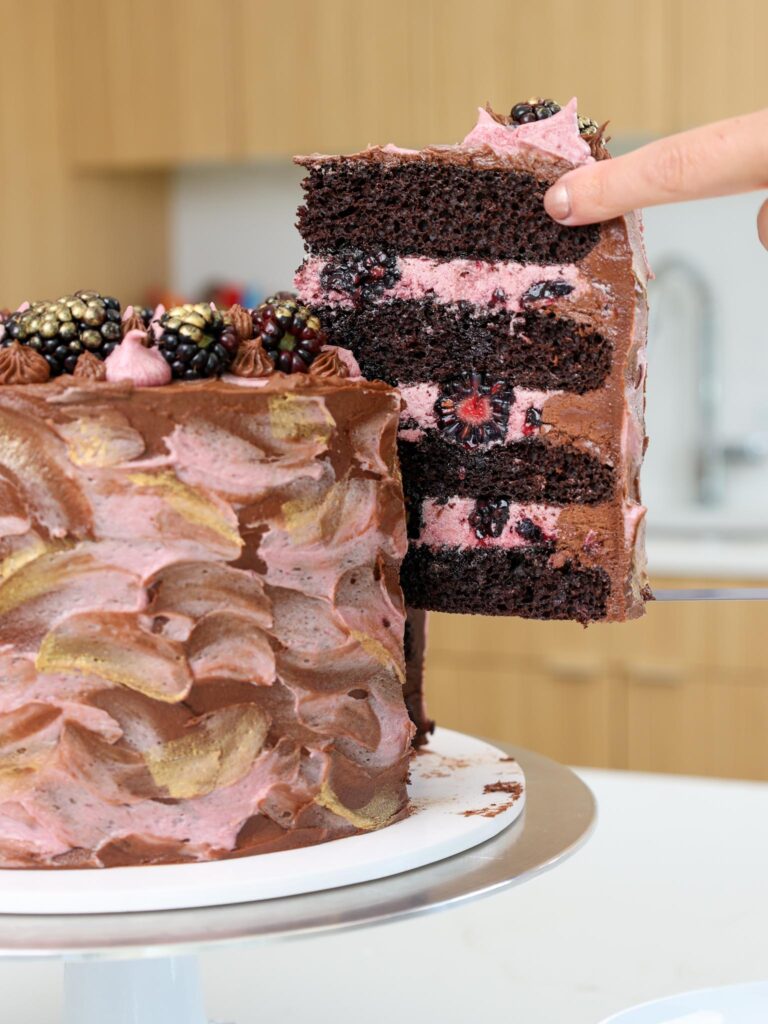
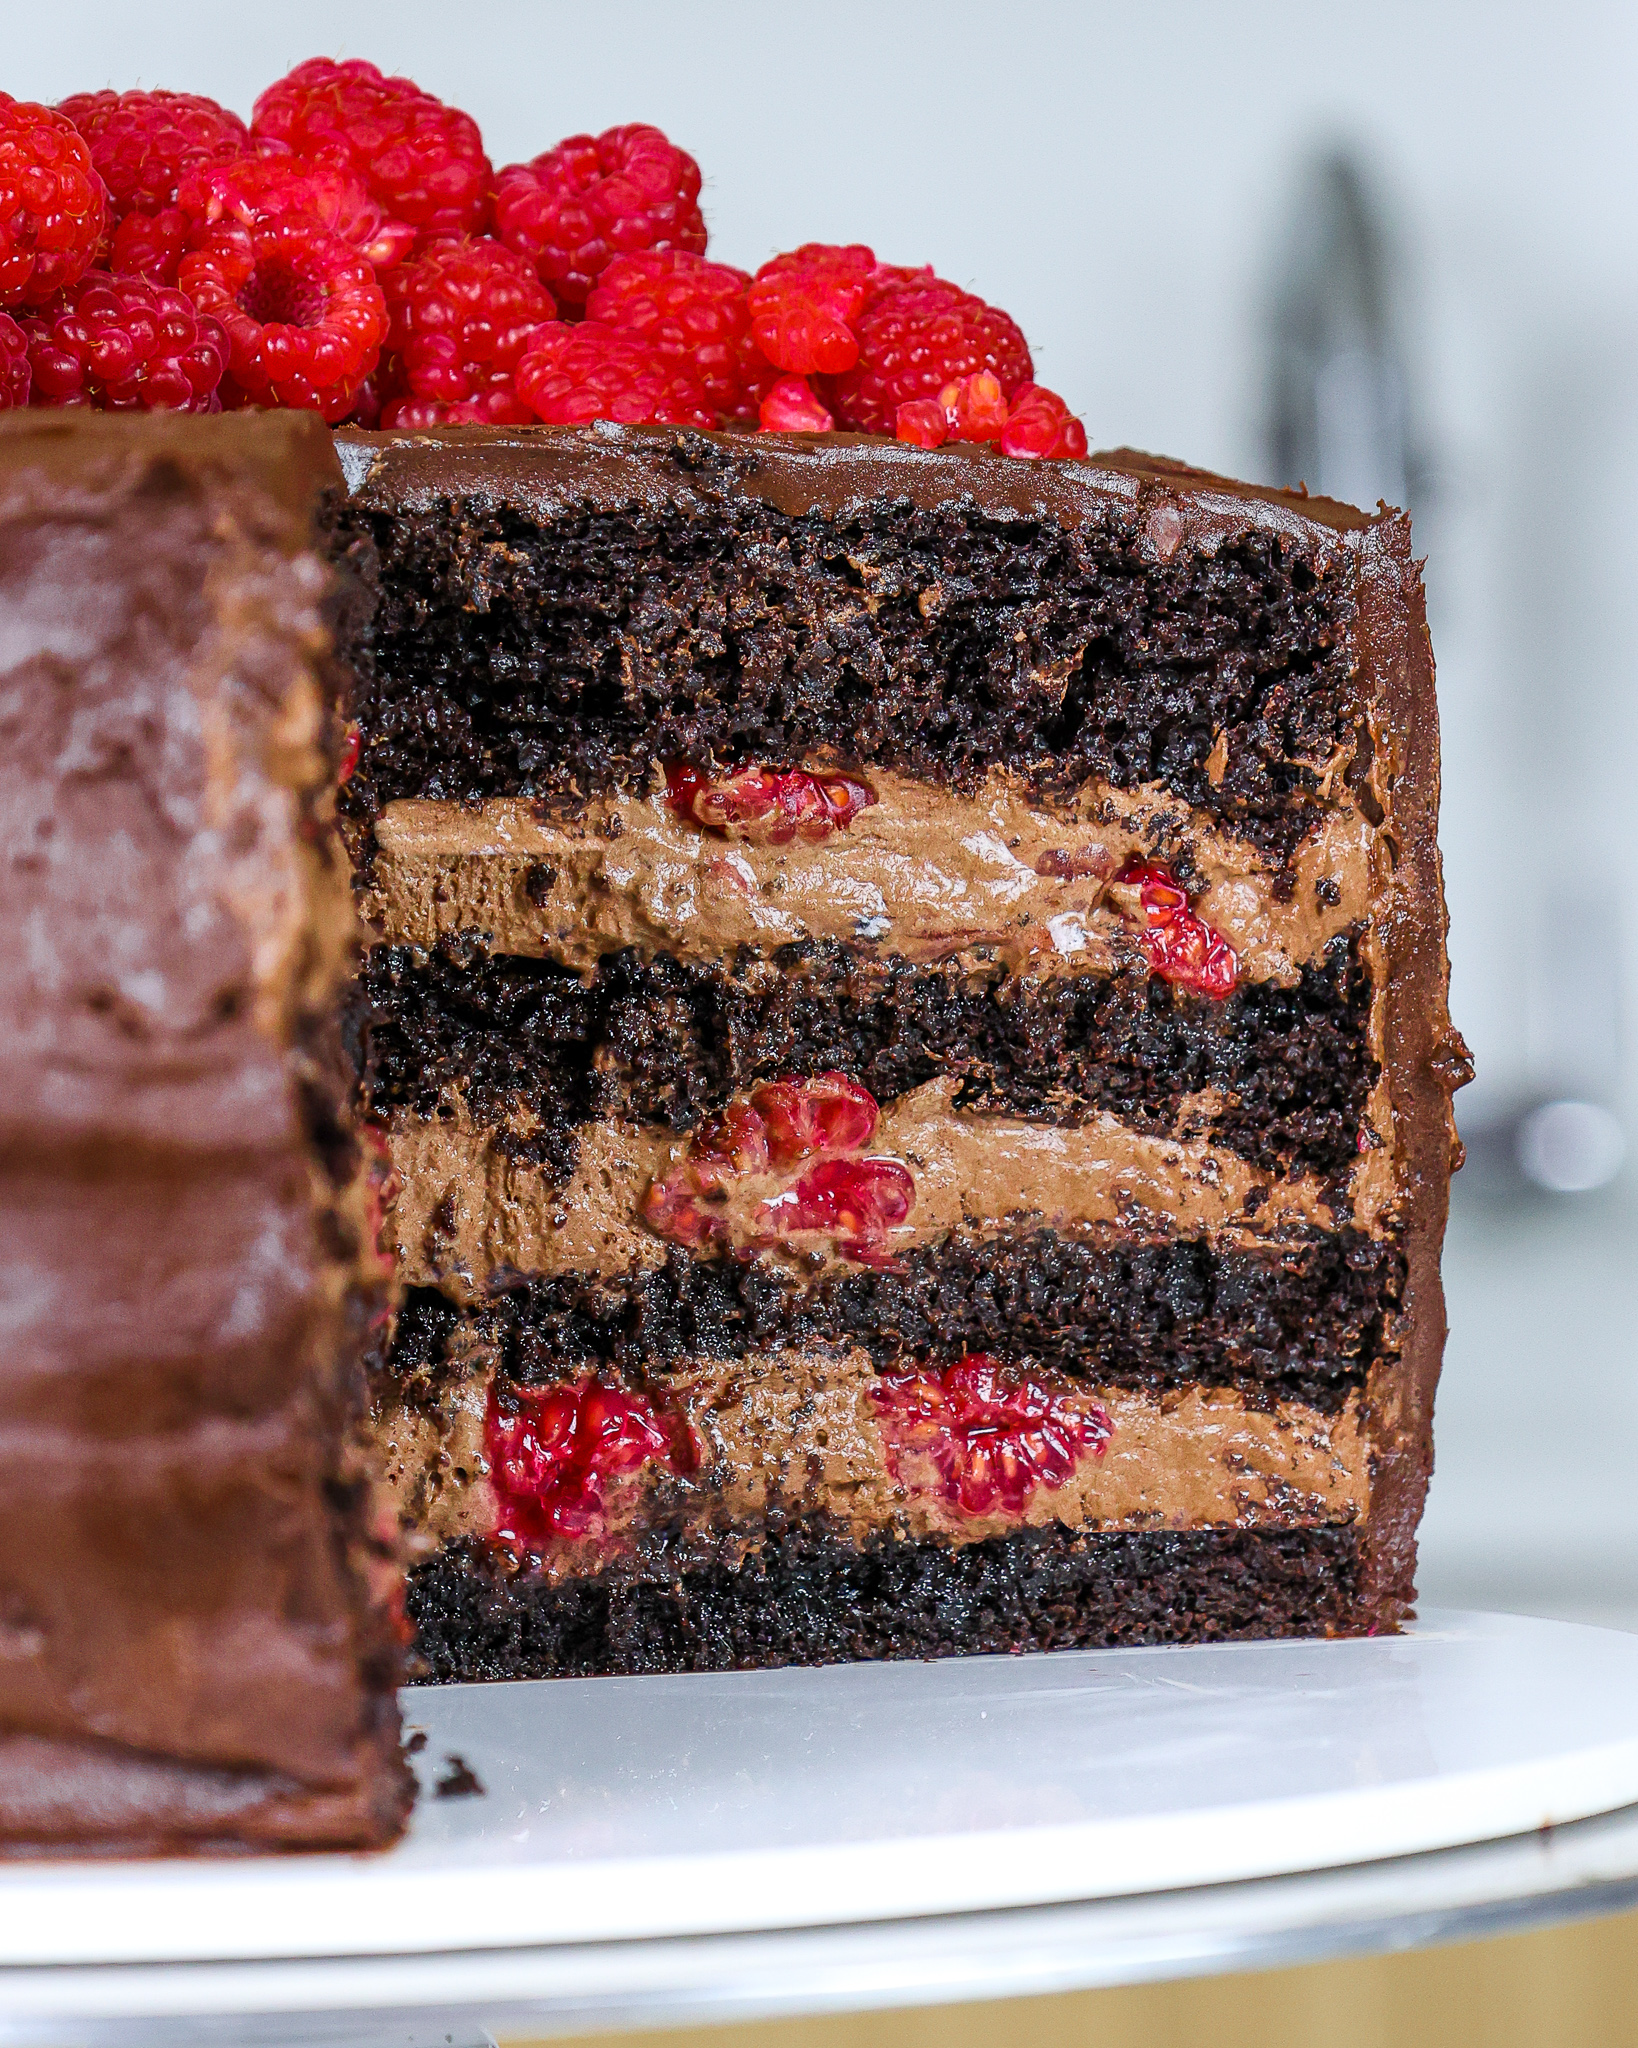
It’s made with moist, dark chocolate cake layers, frosted with blackberry and chocolate buttercream, and filled with blackberry buttercream, blackberry jam, and fresh blackberries.
How to Make This Chocolate Blackberry Cake
To make sure your chocolate blackberry layer cake turns out as amazing as possible, let’s walk through each step together!
I’ve also included a video tutorial of the process in the recipe card at the bottom of this post.
Step 1: Bake the Dark Chocolate Cake Layers
The first step is to make the dark chocolate cake batter following the recipe card at the bottom of the post.
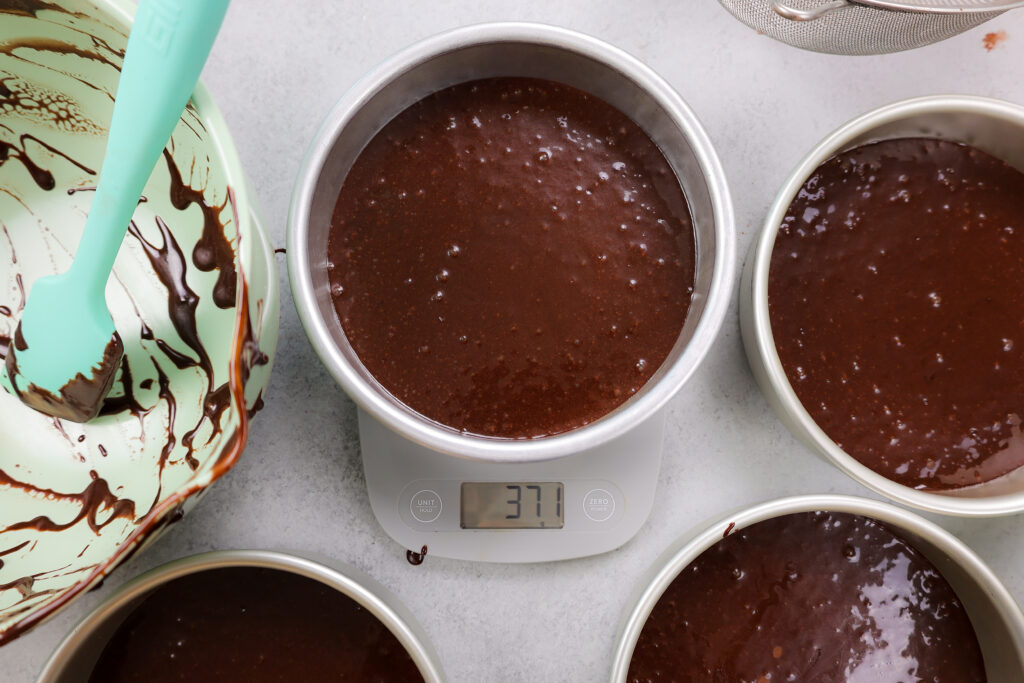
Divide the batter evenly between the prepared cake pans and bake for 20-22 minutes or until a toothpick comes out with a few moist crumbs.
Remove the cake layers from the oven and let them cool in the pans for about 10 minutes.
Gently run an offset spatula around the rim of the cake pans to loosen them, then flip them into wire racks to finish cooling.
These cake layers bake up pretty flat, so I usually don’t level them. However, you can level them with a serrated knife if you want to!
If you’re making these in advance, you can wrap and freeze them at this point.
Step 2: Make the Blackberry and Chocolate Buttercream
While the cake layers bake and cool, make the blackberry and chocolate buttercream.
I love this recipe because it uses one frosting base to make both flavors of frosting!
I like to use an American buttercream because I think it’s the easiest to make, and I love eating it. However, it is quite sweet!
If you want to use a less-sweet frosting, I’d recommend making a batch of my Swiss meringue buttercream or my hybrid buttercream.
This frosting can also be made in advance if needed and kept in the fridge for up to a month!
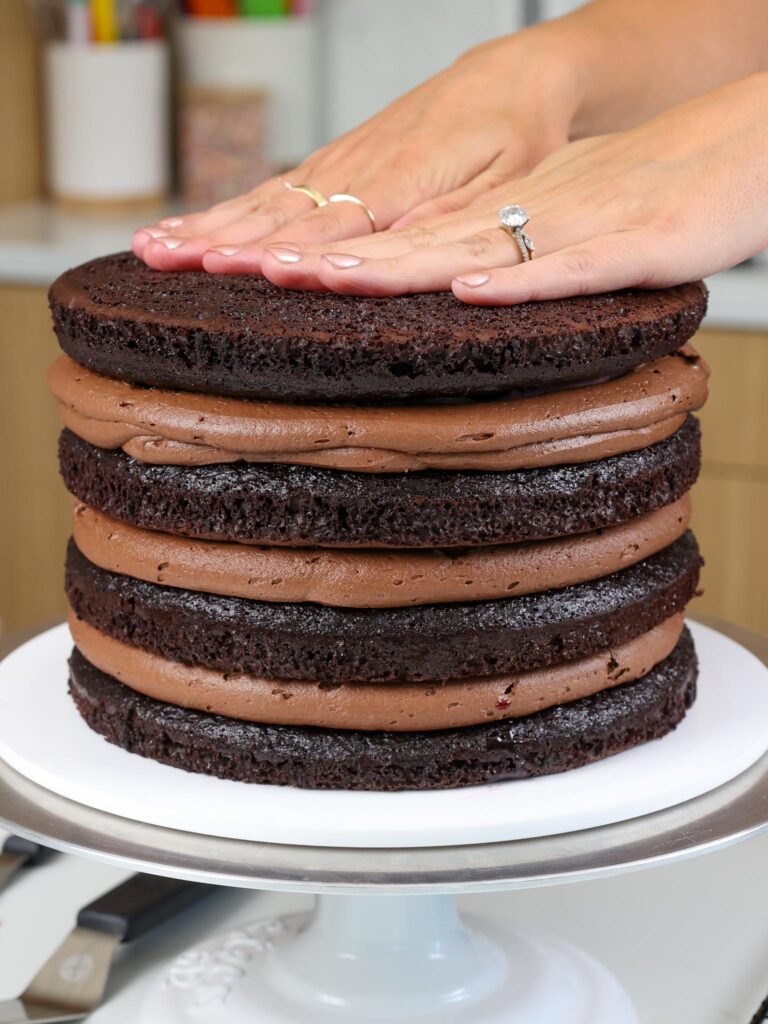
Step 3: Stack and Fill the Cake Layers
Then stack and frost cake layers on a greaseproof cake board. Use a dab of chocolate buttercream to help stick the first cake layer to the board.
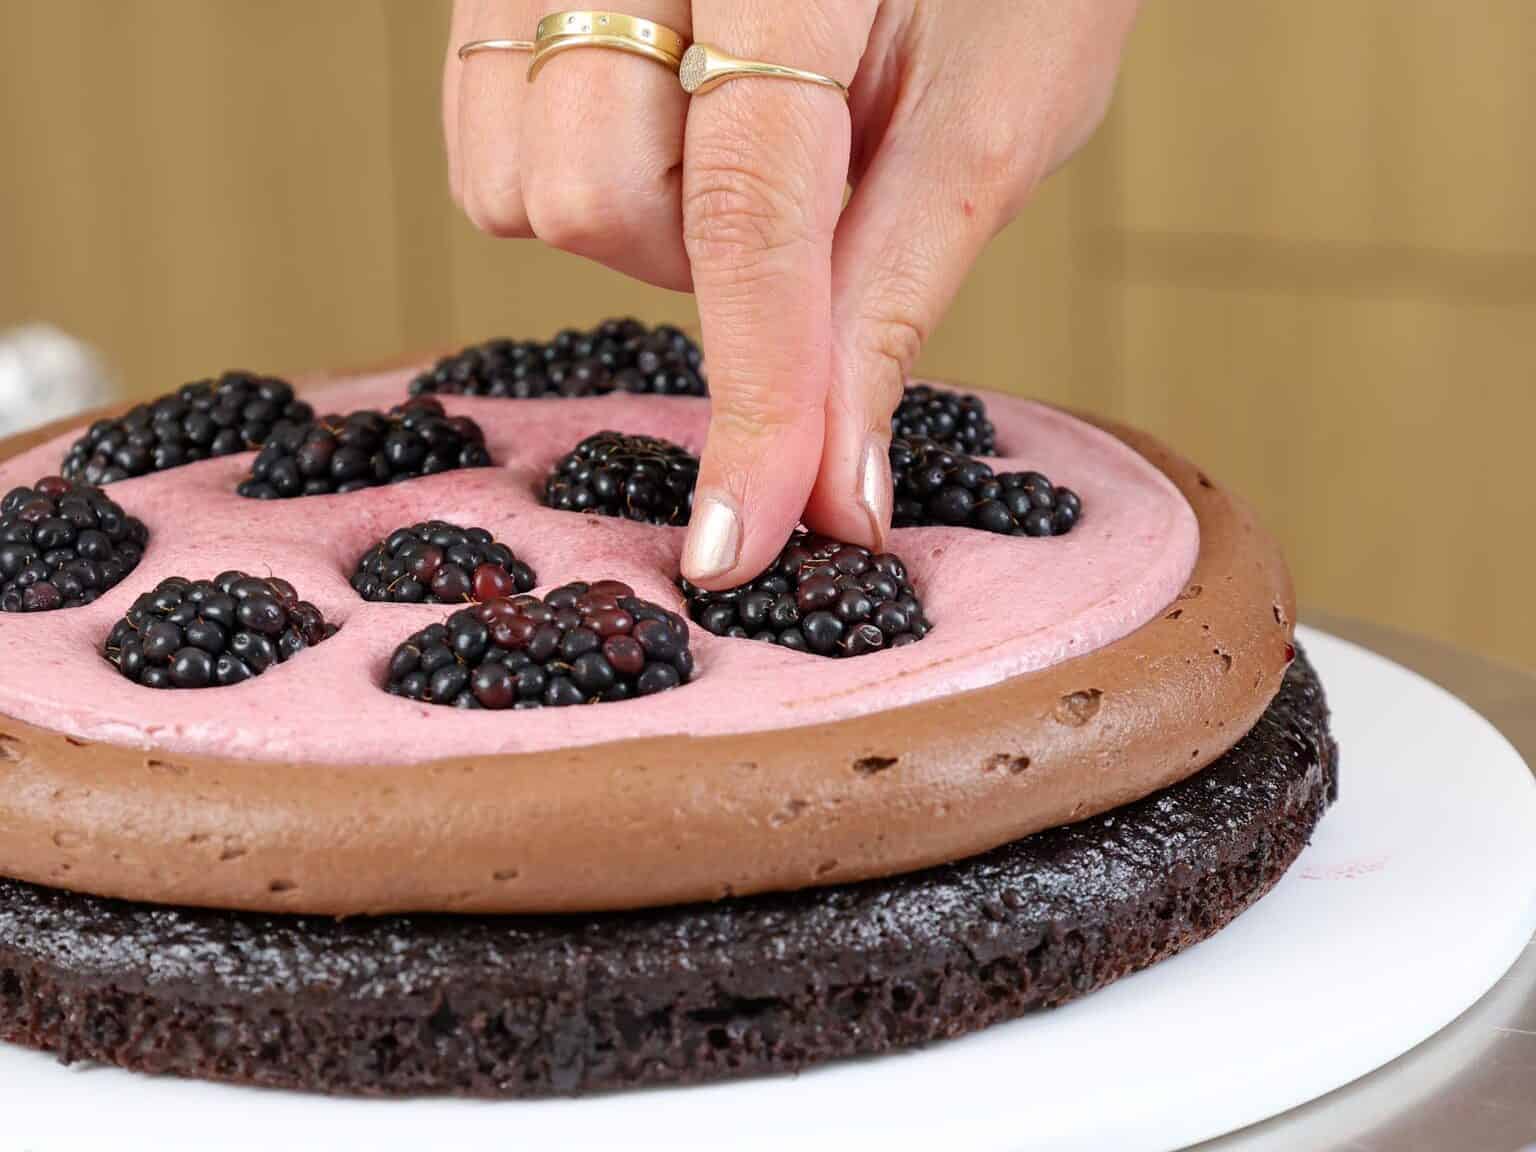
Pipe a ring of chocolate buttercream around the perimeter of the cake, then spread about 1/3 cup of blackberry jam on the cake layer inside the buttercream ring.
Top it with a layer of blackberry buttercream (use about 1/5 of the blackberry buttercream) and press a third of the blackberries into the frosting.
Repeat with the remaining cake layers and place the top cake layer upside down to make it easier to frost.
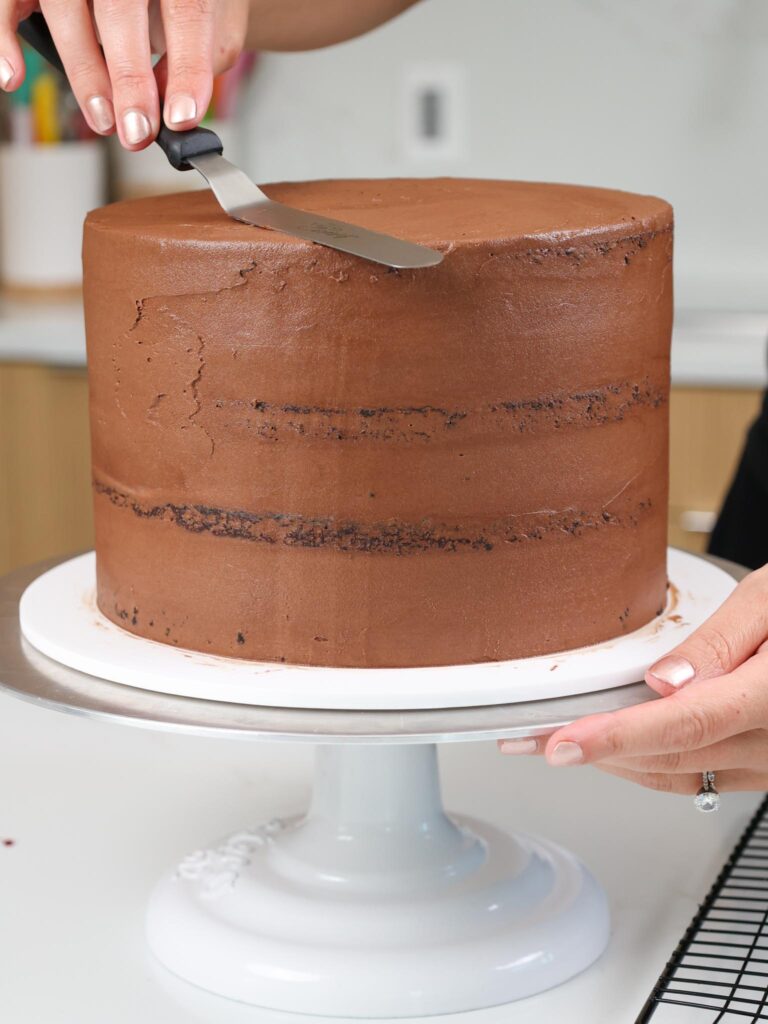
Step 4: Crumb Coat the Cake
Spread a thin coat of chocolate frosting around the cake to fully cover the cake layers.
If you find the cake layers are sliding around, pop the cake into the freezer for 10 minutes to chill the filling and lock the cake layers in place.
Smooth using a bench scraper, then chill the cake in the fridge (10 minutes) or freezer (5 minutes) until the frosting is firm to the touch.
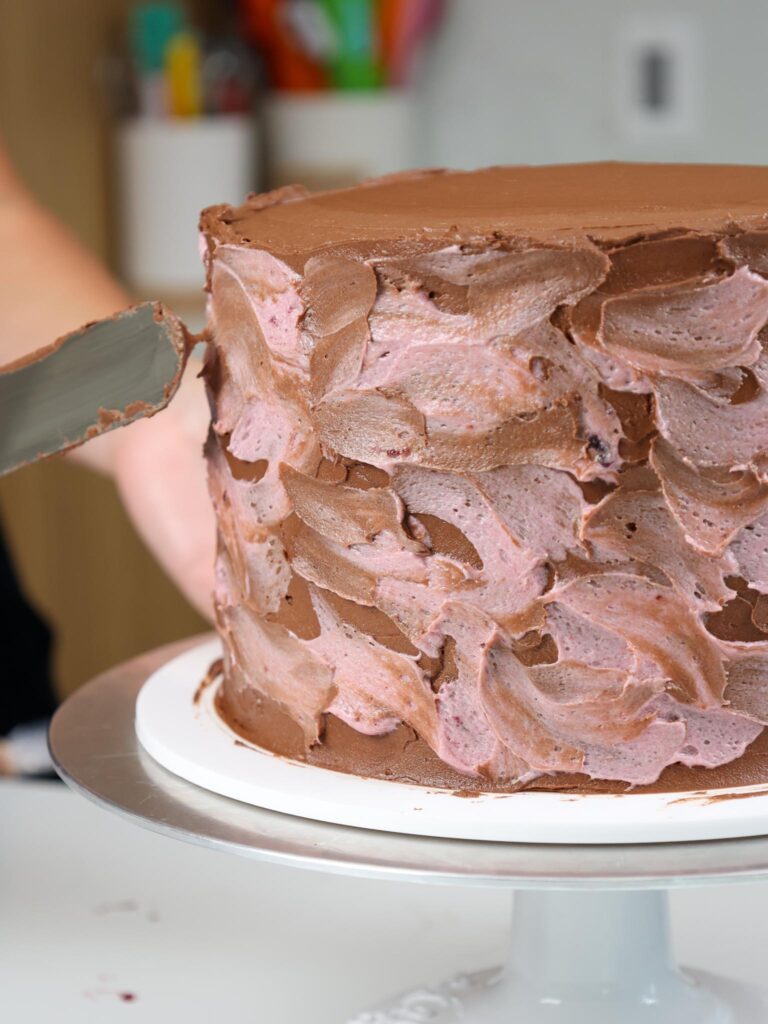
Step 5: Add the Second Layer of Frosting & Decorate
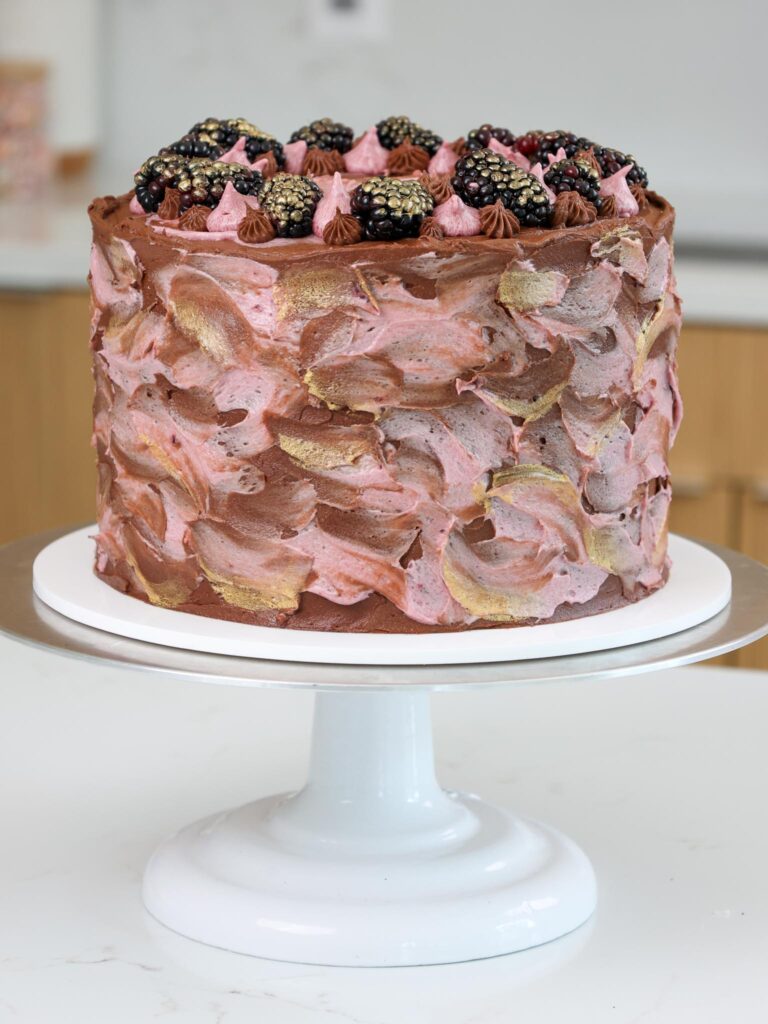
Next, add a second, thicker layer of chocolate frosting to the cake. Add texture to the buttercream by making some swoops with either a large offset spatula or the back of a spoon.
Spread swipes of the remaining blackberry buttercream over the chocolate buttercream and add a ring of buttercream dollops and fresh blackberries around the top of the cake.
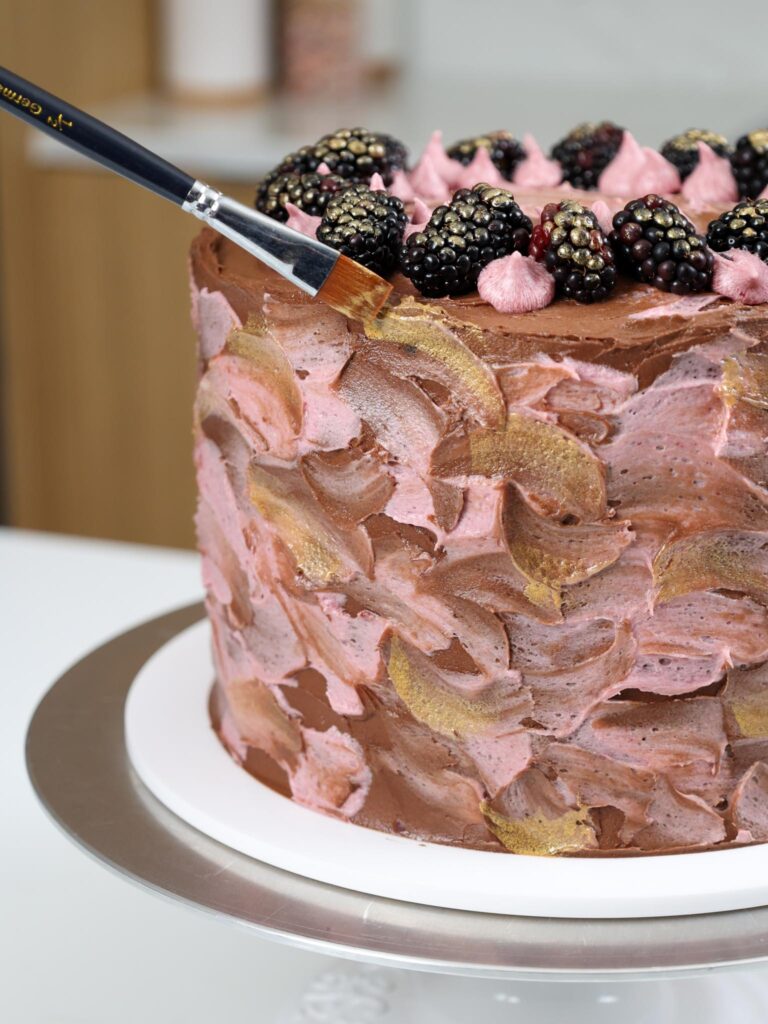
Chill the cake until the frosting is firm to the touch, then use a sterile paintbrush to paint the berries and the side of the cake with streaks of edible gold paint or gold luster dust mixed with clear liquor or extract.
This is optional, but it really elevates the look of this cake!
Substitutions & Swaps: Dark Chocolate Cake Layers
While I love this cake recipe just the way it is, I know some of you might not have all of these ingredients on hand.
Below are some swaps and substitutions that can be made in this recipe:
- All-purpose flour – This recipe turns out best with all-purpose flour. However, you can swap in a good gluten-free flour blend (like this) if needed. Just be sure to stir the batter longer than normal to help give the cake proper structure, and let the batter sit for about 20 minutes before baking it if you opt to make a gluten-free version.
- Granulated Sugar – I do not recommend reducing the amount of sugar or changing the type of sugar, as it will change the texture of the cake layers.
- Dark Baking Cocoa – I like to use the Ghirardelli or Hershey’s brand of dark baking cocoa, but you can use any brand of unsweetened cocoa powder. You can also use black cocoa powder.
- Buttermilk – You can also use full-fat yogurt, sour cream, whole milk, or an alternative yogurt or milk (almond, soy, oat).
- Vegetable Oil – Any flavorless oil can be used in this recipe. Canola, vegetable, or even sunflower oil would all work great. I don’t recommend olive oil, as it has a strong flavor and will change the taste of the cake.
- Eggs – This recipe uses 2 large eggs. If you have an egg allergy, you can try using a vegan egg replacer.
Substitutions & Swaps: Blackberry and Chocolate Buttercream
Below are some swaps and substitutions that can be made in this buttercream recipe.
- Unsalted Butter – If you only have salted butter on hand, you can use it in place of the unsalted butter. Just be sure to omit the salt that this frosting recipe calls for. You can also use vegan butter in its place!
- Blackberry Jam – You can use seedless or regular blackberry jam. I like to use my own blackberry jam, but store-bought is fine too!
- Dark Baking Cocoa – I like to use the Ghirardelli or Hershey’s brand of dark baking cocoa, but you can use any brand of unsweetened cocoa powder. You can also use black cocoa powder.
- Heavy Cream – Whole milk or alternative milk (soy, almond, oat) can also be used to make the frosting.
- Dark Chocolate Chips – You can use chocolate chips, baking chocolate, or good-quality chocolate bars to melt and add to the frosting. I like to use dark chocolate, but you can also use milk or semi-sweet chocolate if you have a strong preference.
Making This Chocolate Blackberry Cake in Different Sizes
I used 8″ cake pans to make this cake, but this recipe can be used to make different-sized cakes. You can also half or double the ingredients to make a half or double batch!
You can make four 7″ or 6″ cake layers with one batch of batter. Bake the cake layers at 350°F/175°C for 23-28 minutes or until a toothpick comes out with a few moist crumbs. The cake will end up being quite a bit taller than mine.
One batch of batter can also be used to make one 9×13-inch sheet cake. Bake it at 350°F/175°C for 35-45 minutes and use flower nails or heating cores to help the cake bake evenly. It should end up being about 2 inches tall.
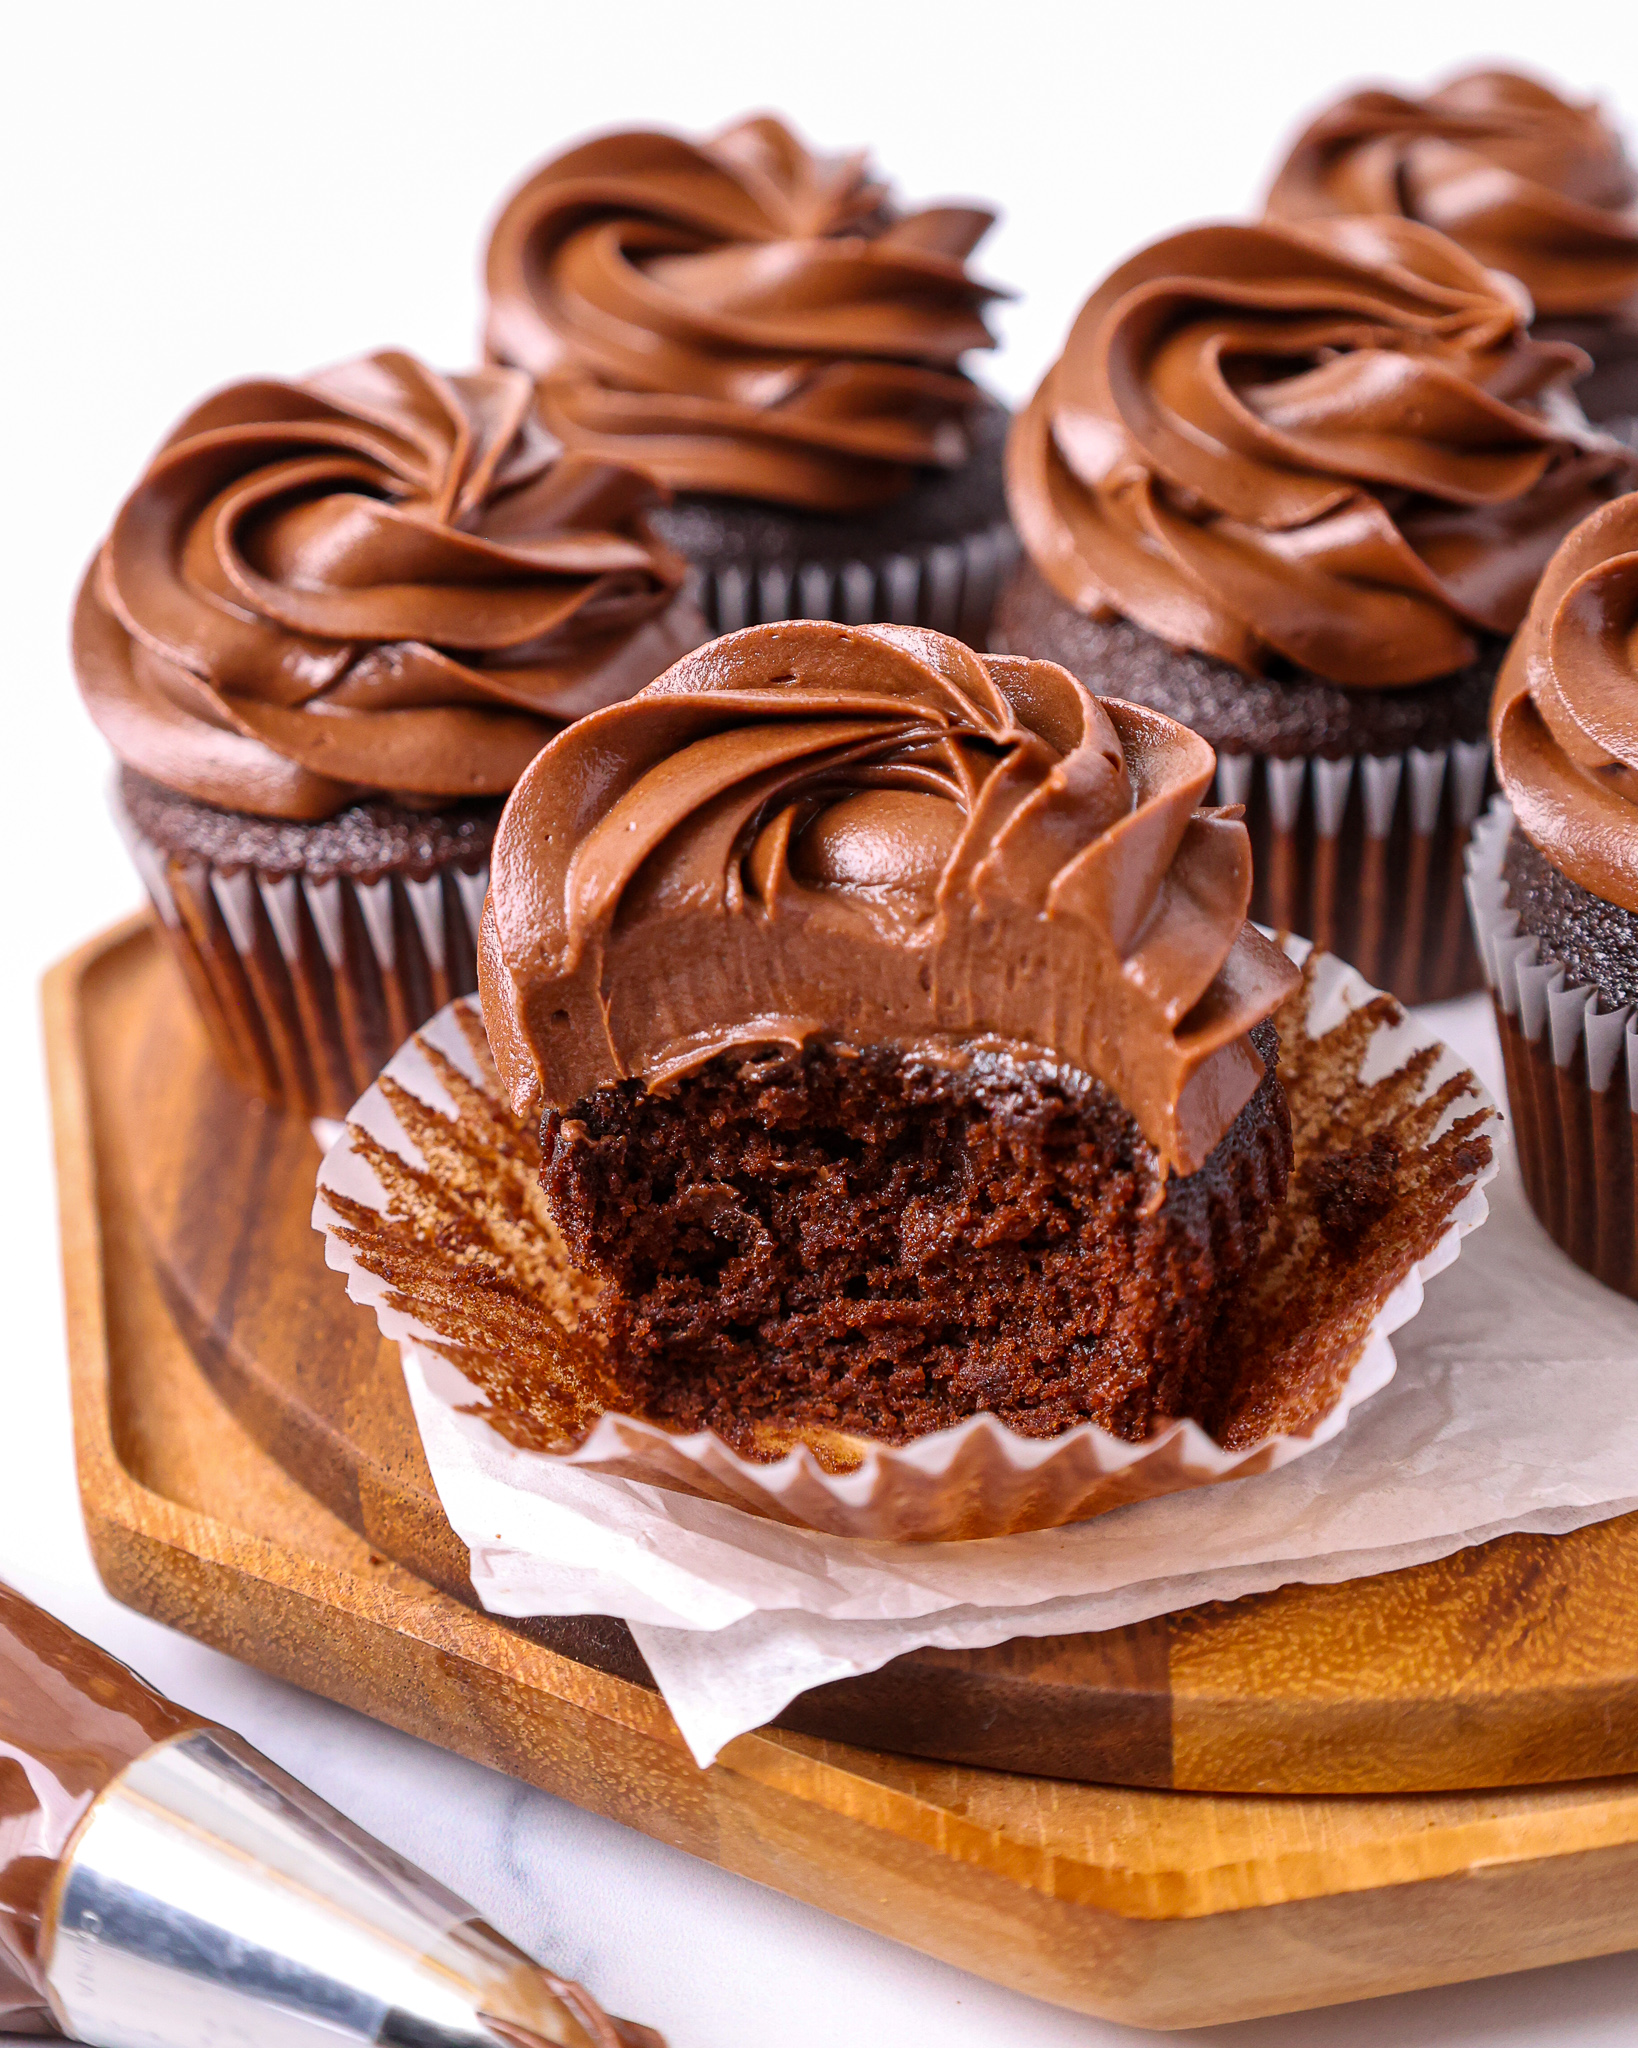
If you want to make cupcakes, I highly recommend using my chocolate cupcake recipe as a base! One batch makes 12 moist chocolate cupcakes, which can be filled with blackberry jam.
Making This Chocolate Blackberry Cake in Advance and Storage Tips
Make your cake layers up to a month in advance and freeze them. It breaks the process up and makes it more approachable.
Make the frosting ahead of time or save any leftover frosting! It can be stored in an airtight container in the fridge for up to a month.
This frosting can also be stored in the freezer for up to 3 months. Just be sure to give it a good stir once it thaws to make it nice and smooth again.
A frosted cake can last in the fridge for 3 days. However, I recommend waiting to add the blackberries to the top of the cake until the day you plan to serve the cake.
Tips for Making the Best Chocolate Blackberry Cake
- Ingredients at room temperature mix together better! Set out any cold ingredients ahead of time.
- Properly measure your cake flour (spoon into the cup measure, then level). Or better yet, use a kitchen scale to measure your dry ingredients.
- Mix your cake batter just until the ingredients are incorporated. This will ensure your cake layers are tender and fluffy.
- Use a scale to weigh your cake pans as you fill them. Make sure each pan has the same amount of batter will make your cake layers bake to the same height and bake more evenly.
- Chill your cake layers in the freezer for about 20 minutes before assembling the cake. It makes it so much easier to stack and frost them!
Let Me Know What You Think
If you try this chocolate blackberry cake recipe, I’d love to hear what you think! Please leave a rating and comment below.
And don’t forget to tag me @chelsweets and #chelsweets so that I can see your delicious creations!
Chocolate Blackberry Cake
Ingredients
Dark Chocolate Cake Recipe
- 2 cups all-purpose flour 260g
- 2 cups granulated sugar 400g
- 3/4 cup dark or Dutch-processed cocoa powder 75g
- 2 tsp baking powder 8g
- 1 1/2 tsp baking soda 9g
- 1 tsp fine salt 6g
- 1 cup warm water 240g
- 1 cup buttermilk, room temperature 240g
- 1/2 cup vegetable or canola oil 110g
- 2 large eggs, room temperature 112g
- 2 tsp vanilla extract or vanilla bean paste 8g
Blackberry and Chocolate Buttercream Frosting
- 2 1/2 cups (5 sticks) unsalted butter, room temperature 565g
- 2 tsp vanilla extract or vanilla bean paste 8g
- 1 tsp fine salt 6g
- 7 cups powdered sugar 904g or a 2 lb. bag
- 1/2 cup blackberry jam 160g
- 1/3 cup heavy whipping cream, room temperature 80g
- 2/3 cup dark or Dutch-processed cocoa powder 66g
- 1 cup dark chocolate chips, melted and cooled 180g
Chocolate Blackberry Cake Filling:
- 1 cup blackberry jam 315g
- 2 pints blackberries
Optional Decoration
- 1 pint blackberries
- Edible gold paint of gold luster dust mixed with clear liquor or extract
Instructions
Dark Chocolate Cake Layers
- Preheat the oven to 350 F/ 175 C. Line and grease four, eight-inch cake pans with parchment rounds and non-stick baking spray. Set aside.
- Combine 2 cups all-purpose flour, 2 cups sugar, 3/4 cup dark cocoa powder, 2 tsp baking powder, 1 1/2 tsp baking soda, and 1 tsp of salt in a large bowl. Whisk together until combined.
- In a separate, large bowl, add 1 cup of warm water, 1 cup buttermilk, 1/2 cup oil, 2 eggs, and 2 tsp vanilla extract. Give the mixture a quick whisk to combine the ingredients.
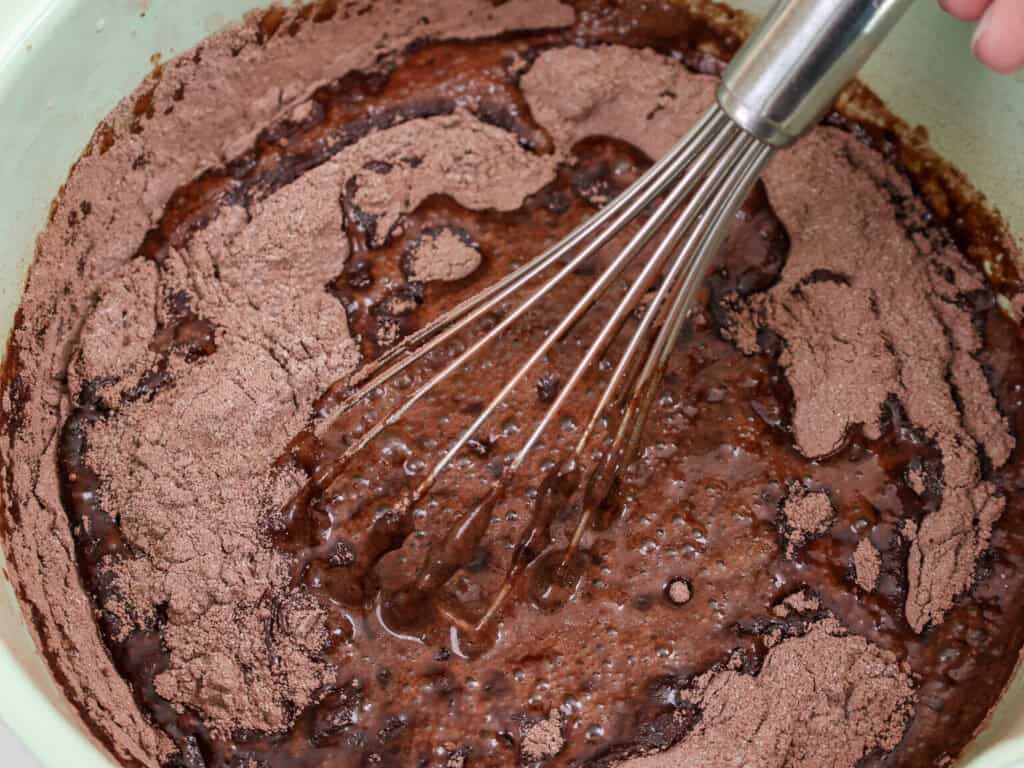
- Pour the dry ingredients into the wet ingredients. Mix by hand until fully incorporated. The batter will be on the thin side, but that’s the consistency you're after!
- Divide the batter evenly between the cake pans and bake for about 20-22 minutes. I like to use a kitchen scale to weigh the pans. It makes sure each pan has the same amount of batter and helps the cake layers bake up to be the same height.
- Remove the cake layers from the oven and let them cool in the pans for about 10 minutes. Gently run an offset spatula around the rim of the cake pans to loosen them, then flip them onto wire racks to finish cooling.
- These cake layers bake up pretty flat, so I usually don't level them. However, you can level them with a serrated knife if you want to! And if you make these cake layers in advance, wrap and freeze them at this point.
Blackberry and Chocolate Buttercream Frosting
- While the cake layers bake and cool, make the blackberry and chocolate buttercream frosting.
- Beat 2 1/2 cups of butter, 2 tsp vanilla extract, and 1 tsp fine salt on a medium speed for 30 seconds with a paddle attachment until smooth.
- Gradually mix in 7 cups of powdered sugar on a low speed. The frosting should be quite thick at this point.
- Place 1/2 of the buttercream in a separate bowl and mix 1/2 cup of blackberry jam into it. Cover it with plastic wrap and set aside.
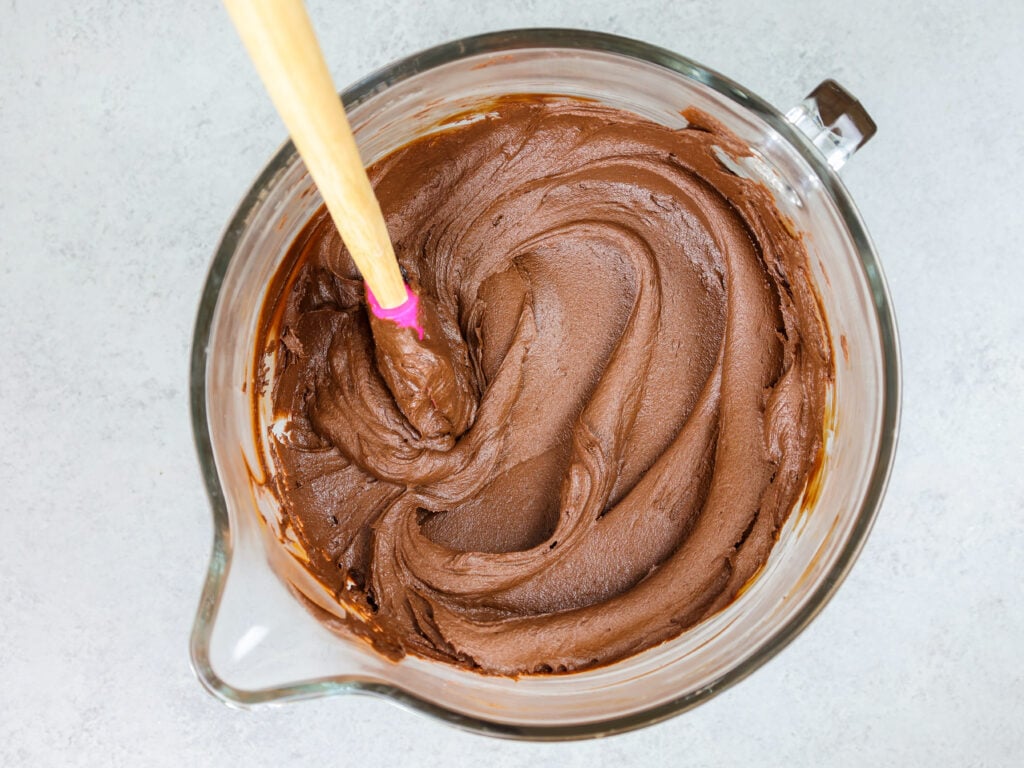
- Add in 2/3 cup of dark cocoa powder and 1/3 cup heavy cream into the remaining buttercream. Mix on low until the cocoa powder is fully incorporated and no clumps remain. Then mix in 1 cup of melted and cooled dark chocolate.
- Beat on low until the ingredients are fully combined and the desired consistency is reached. If the frosting seems too thick, add an extra Tbsp of heavy cream. If it's too thin, add in another 1/4 cup of powdered sugar.
- Place the chocolate buttercream in a large piping bag and cut a 1-inch opening at the bottom of the bag. Set aside.
Assembling this Chocolate Blackberry Cake
- Stack and frost cake layers on a greaseproof cake board using a dab of frosting to help stick the first cake layer to the board.
- Pipe a ring of chocolate buttercream around the perimeter of the cake, then spread about 1/3 cup of blackberry jam on the cake layer inside the buttercream ring. Top it with a layer of blackberry buttercream (use about 1/5 of the blackberry buttercream) and press a third of the blackberries into the frosting.
- Repeat with the remaining cake layers and place the top cake layer upside down to make it easier to frost.
- Spread a thin coat of chocolate frosting around the cake to fully cover the cake layers. If you find the cake layers are sliding around, pop the cake into the freezer for 10 minutes to chill the filling and lock the cake layers in place.
- Smooth using a bench scraper, then chill the cake in the fridge (10 minutes) or freezer (5 minutes) until the frosting is firm to the touch.
- Then add a second, thicker layer of chocolate frosting to the cake. Add texture to the buttercream by making some swoops with either a large offset spatula or the back of a spoon. Spread swipes of the remaining blackberry buttercream over the chocolate buttercream and add a ring of buttercream dollops and fresh blackberries around the top of the cake.
- Chill the cake until the frosting is firm to the touch, then use a sterile paintbrush to paint the berries and the side of the cake with streaks of edible gold paint or gold luster dust mixed with clear liquor or extract. This is optional but it really elevates the look of this cake!
Video
Notes
Recipe Variations
I used 8" cake pans to make this cake, but this recipe can be used to make different sized cakes. You can also half or double the ingredients to make a half or double batch! You can make four 7" or 6" cake layers with one batch of batter. Bake the cake layers at 350 F / 175 C for 23-28 minutes or until a toothpick comes out with a few moist crumbs. The cake will end up being quite a bit taller than mine. One batch of batter can also be used to make one 9×13-inch sheet cake. Bake it at 350 F / 175 C for 35-45 minutes and use flower nails or heating cores to help the cake bake evenly. It should end up being about 2 inches tall. If you want to make cupcakes, I highly recommend using my chocolate cupcake recipe cupcake recipe as a base and making a half batch of the frosting in this recipe! One batch makes 12 moist chocolate cupcakes, which can be filled with blackberry jam.Tips for Making the Best Chocolate Blackberry Cake
- Ingredients at room temperature mix together better! Set out any cold ingredients ahead of time.
- Properly measure your flour (spoon into the cup measure, then level). Or better yet, use a kitchen scale to measure your dry ingredients.
- Use a scale to weigh your cake pans as you fill them. It will make your cake layers bake to the same height and bake more evenly.
- Bang your cake pans on the counter before putting them in the oven. This brings any big air bubbles that are trapped in the batter to the surface.
- Chill your cake layers in the freezer for about 20 minutes before assembling the cake. It makes it so much easier to stack and frost them!
Making This Blackberry Chocolate Layer Cake in Advance & Storage Tips
Make your cake layers up to a month in advance and freeze them. It breaks the process up and makes it more approachable. Make your frosting ahead of time too or save any leftover frosting! It can be stored in an airtight container in the fridge for up to a month, or in the freezer for up to 3 months. Be sure to give it a good stir once it thaws to get the consistency nice and smooth again. A frosted cake can last in the fridge for up to 3 days. However, I recommend waiting to add the blackberries to the top of the cake until the day you plan to serve the cake. If you cut into the cake and have leftovers, use any remaining frosting to cover the cut section to keep it moist and store it in the fridge for up to 3 days.Nutrition
Other Recipes You Might Like:
I am making a cake for a friend’s party and to go with the theme I need a white frosted cake, but she wants chocolate with fruit filling. Any recommendation for a frosting for the outside instead of the chocolate? Cream cheese butter cream? Regular buttercream? Not to sweet buttercream? Thanks!
Hi KC,
I think my not too sweet buttercream would be perfect for this cake!! I’d go with that or my American buttercream (if everyone that’s going to eat it likes sweet frosting). Happy baking!
Wondering, if make the choc/black berry cake in 9×13 pan (easier to ‘take’ or a larger gathering) we do not use the filling? just spread layer of blackberry icing, let set then use the choc icing and maybe swirl together??? Maybe place berries on cake or on first icing layer or just totally on top? thanks mh
Hi Mimi,
Totally get that, I think that sounds like a great plan! It would make the cake easier to make and cut / serve too. Happy baking!
Hi, can I use Dutch processed cocoa in this cake? I’m unsure if the brands you mentioned are Dutch processed cocoa powder.
Thank you.
Hi Marilyn,
Great question! You can use Dutch processed cocoa in this cake 🙂 Hope that helps, happy baking!
This cake looks amazing but do you recommend fresh or frozen blackberries for this cake?
I usually use fresh when they’re in season, frozen when they’re not! Hope that helps, happy baking!
Hello, I’m going to be making my first wedding cake the end of September. It will also be my first tiered cake, and it’ll be 3 tiers! I’ll be making your swirled marble cake with a swiss meringue buttercream. I was planning on having a blackberry compote for the filling but not sure anymore due to assembling the cake and wanting it to be fresh for the wedding day. So I thought maybe a blackberry buttercream instead, and then I found this recipe! Do you think I wouldn’t have any problems with freshness if I put blackberry buttercream between the layers? Not sure if I’d be putting the whole blackberries in the cake. Also how much blackberry buttercream would you recommend me making? Since it’ll be just for the filling, for a 6″, 9″, and 12″ cakes each with 3 layers. To make just the blackberry buttercream I just wouldn’t add the cocoa and chocolate chips, right? Thank you so much!
Hi Emily,
That’s so exciting, congratulations on your first wedding cake!! You’re thinking about all the right details. A blackberry buttercream is a perfect choice here. It’ll give you the flavor you want, but it’ll be stable, easier to work with, and much more reliable for freshness than a compote (which can leak or make the layers slide). I’d recommend straining your blackberry puree before mixing it into the buttercream so you get a smooth consistency.
And yes, you’d just skip the cocoa powder and chocolate chips from that recipe to make it straight blackberry buttercream. You may want to add less heavy cream too, since the blackberry compote will probably make the frosting a bit looser. Mix in a little bit of compote at a time, to make sure the flavor and consistency end up just right!
As for the quantity for filling only, you’ll want around 1 cup of buttercream per 6-inch tier, 2 cups for the 9-inch, and 3 cups for the 12-inch. So in total about 6 cups of blackberry buttercream just for the filling. I’d still make extra (closer to 7–8 cups) to give yourself wiggle room. If you’re also using it to frost the outside, you’d need quite a bit more. I actually have a fun buttercream chart that walks through how much you need for different sized cakes here: https://chelsweets.com/how-much-buttercream-do-i-need/
I think your plan sounds wonderful, and the blackberry buttercream will hold up beautifully for a wedding cake. Hope the cake turns out amazing, let me know if you have any other questions!
how much sour cream should I use if I’m using it as a substitute for the butter milk
Hi Chen,
You can use the same amount of sour cream as buttermilk in the recipe. Hope that helps, happy baking!