
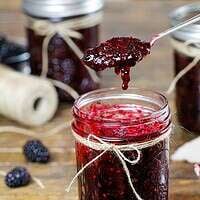
Blackberry Freezer Jam
My mom has been making freezer jam for as long as I can remember. Every year when the berries start to ripen all I can think is JAM SEASON!! This summer I made a few batches with my mom, which inspired me to share the recipe for blackberry freezer jam.
I think it’s a loose adaptation from the recipe on the Certo box, but what really makes it so delicious is how she makes it.
That’s what separates this homemade jam from store bought jam. The perfect, sun-ripened berries and the love. It’s also why her jam is famous among our friends and family, who beg for a container every summer.
What Is Freezer Jam?
Freezer jam is by far and away the easiest type of jam to make. It doesn’t involve water baths or complicating canning techniques like some recipes do. In fact, most freezer jam recipes don’t require any cooking at all!
And that’s what makes freezer jam taste so incredible. It gives it a wonderfully bright flavor and color. It’s like biting into a perfectly ripe summer blackberry everytime you taste this jam.
To make freezer jam, you just mash down your fruit and mix it with sugar, then stir in some liquid pectin and lemon juice and you’re good to go.
The hardest part is just waiting for it to set. Then it’s into the freezer for a year’s worth (in our case – we make several batches) of homemade, delicious jam.
Blackberry Freezer Jam Troubleshooting
While this jam is incredibly easy to make, it doesn’t mean that things can’t go wrong. The most common problems people encounter are jam with a grainy texture or jam that doesn’t set.
Why Is My Jam Grainy?
Sometimes even if your jam sets, the texture can be a bit off. If you find your freezer jam has a grainy or sandy texture, it means that the sugar didn’t have a chance to fully dissolve.
The easiest way to prevent this from happening is to let the mashed fruit and sugar sit for about 20 minutes before adding in the pectin.
During this 20-minute window, you want to stir the fruit and sugar occasionally to helps the sugar dissolve.
It’s equally important to vigorously stir the jam for at least three minutes once you’ve added in the pectin and lemon juice. Not only will you get a great arm workout, but you’ll also help the sugar break down even more.
My mom would have us do this as kids and I always thought my arm was going to pop off by the end. But now I understand why!
I recommend setting a timer to make sure the sugar has enough time to dissolve properly.
Why Didn’t My Jam Set?
The other common issue with freezer jam is that sometimes it doesn’t set. Freezer jam is supposed to have a thick, pudding-like consistency but if it doesn’t set it will be runny and much thinner.
If your jam doesn’t properly set, it’s usually because the ratio of fruit to sugar was off, your pectin was old, or because your sugar didn’t fully dissolve.
We already discussed how to fully dissolve the sugar, so we’ll focus on the fruit to sugar ratio now.
While you might think 4 cups of sugar is a lot, please resist the temptation to use less. You need 2 cups of sugar for every cup of mashed fruit.
It’s imperative that you use the full amount of sugar and that you don’t add in extra fruit if you want your jam to set.
While it is a lot of sugar, I promise it’s less than you’d find in most store-bought jams or jellies. You also have to remember that you’re only eating a few tablespoons at a time, so the amount of sugar isn’t as crazy as it seems.
Substitutions & Swaps
This recipe is pretty straight forward and doesn’t use many ingredients. There are a few substitutions you can make, but you need to be careful!
Like I mentioned above, if the ratio of fruit to sugar is changed the jam won’t set properly.
Below are some swaps and substitutions that can be made in this blackberry freezer jam recipe.
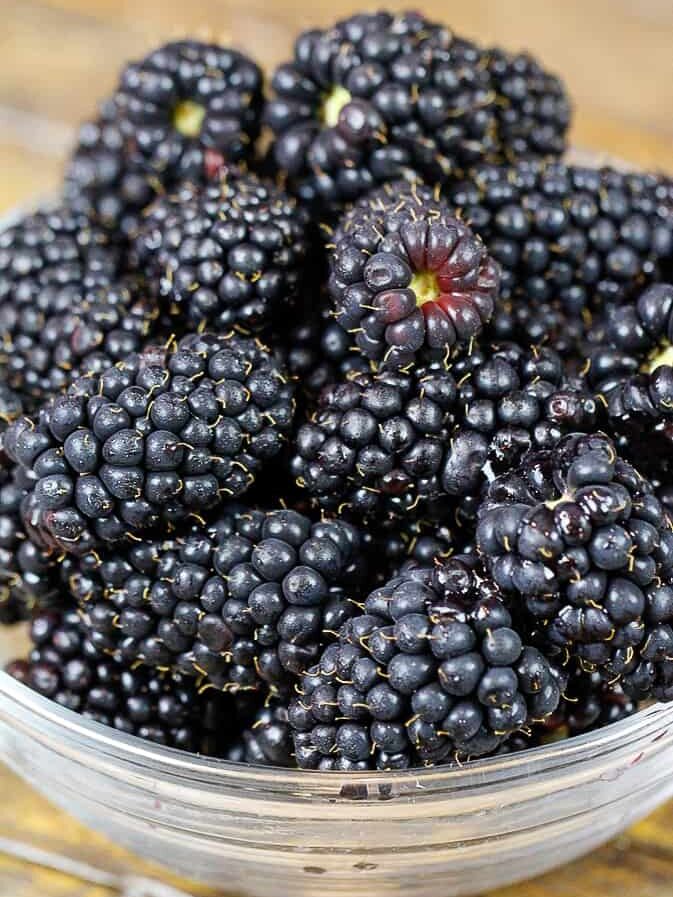
- Blackberries – You can use pretty much any berry that’s in season! The key thing is using fresh, ripe fruit. Bramble berries, raspberries, boysenberries or even marionberries would work wonderfully in this recipe.
- Granulated Sugar – I do not recommend changing the amount or type of sugar in this recipe.
- Lemon Juice – Usually I am all about using fresh lemon juice when I’m baking, but my mom uses bottled lemon juice in this recipe. Bottled lemon juice actually works better than fresh lemon juice because the acidity level is controlled and consistently the same. This helps ensures the pectin will set properly!
- Liquid Fruit Pectin – I’ve only tried this recipe with Certo, but any liquid fruit pectin should work like Sure Jell or Ball liquid pectin. I find Certo is sold at most grocery stores, or you can order it online.
Tips for Making the Best Blackberry Freezer Jam
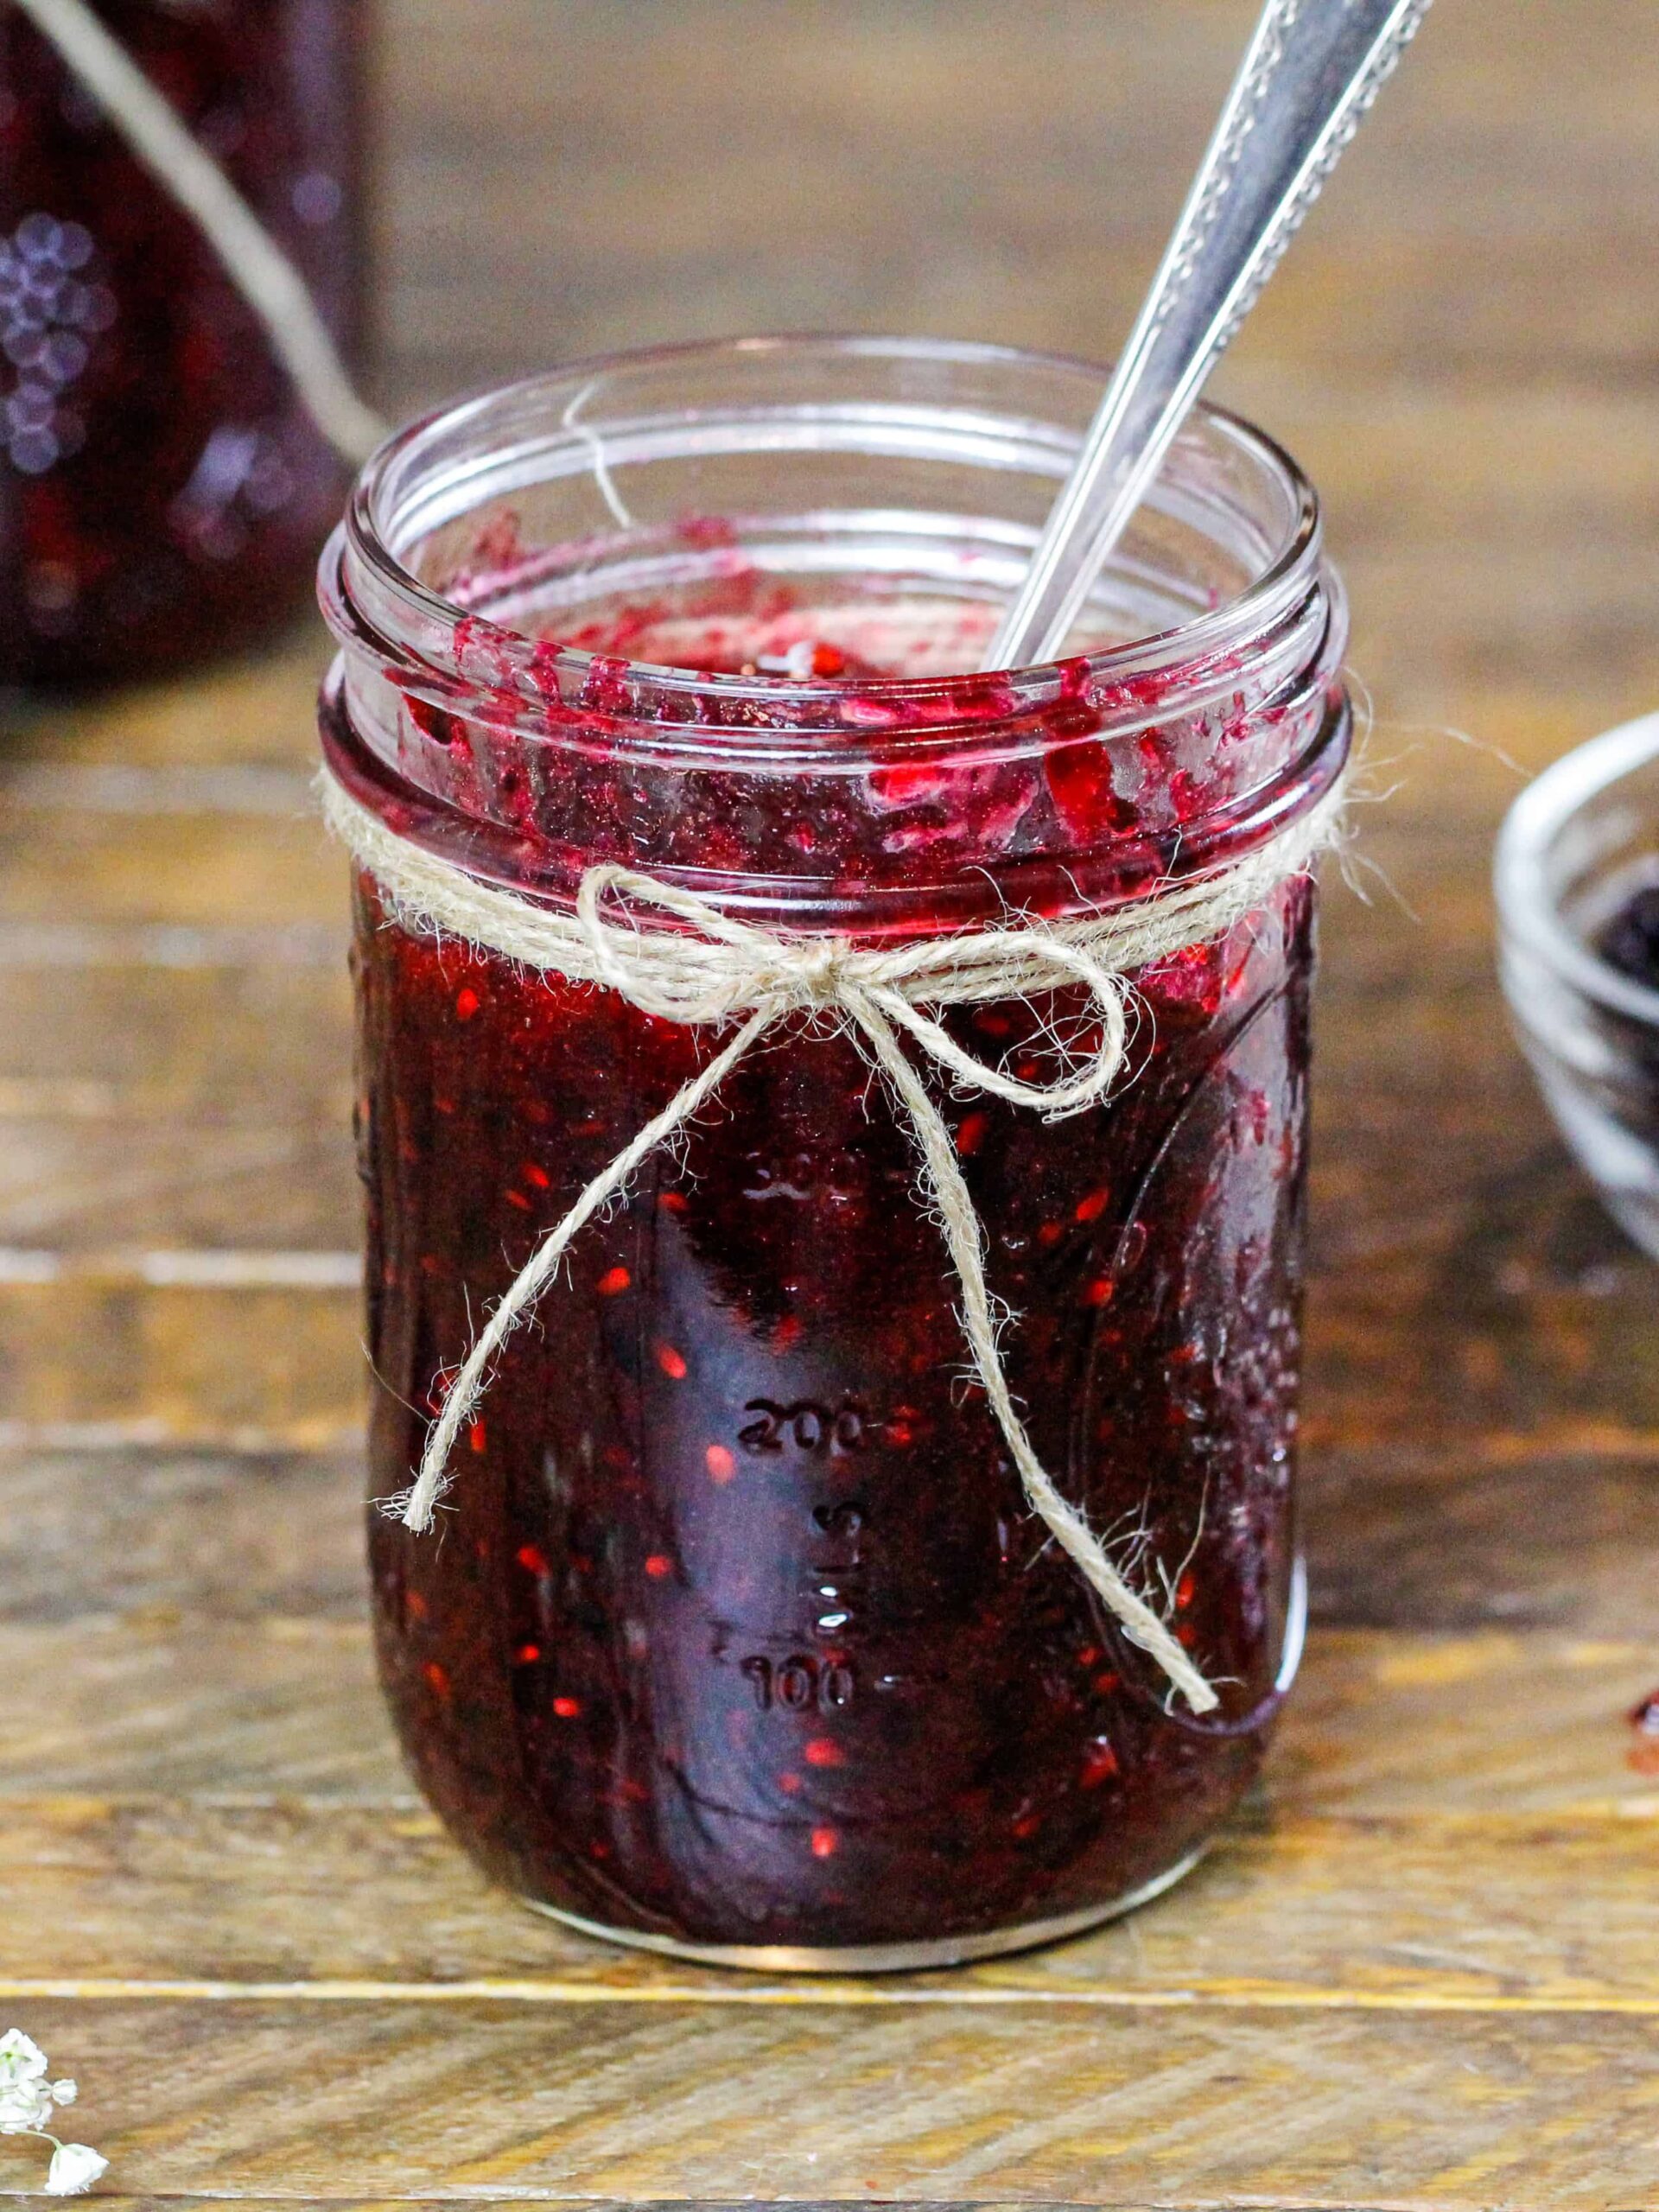
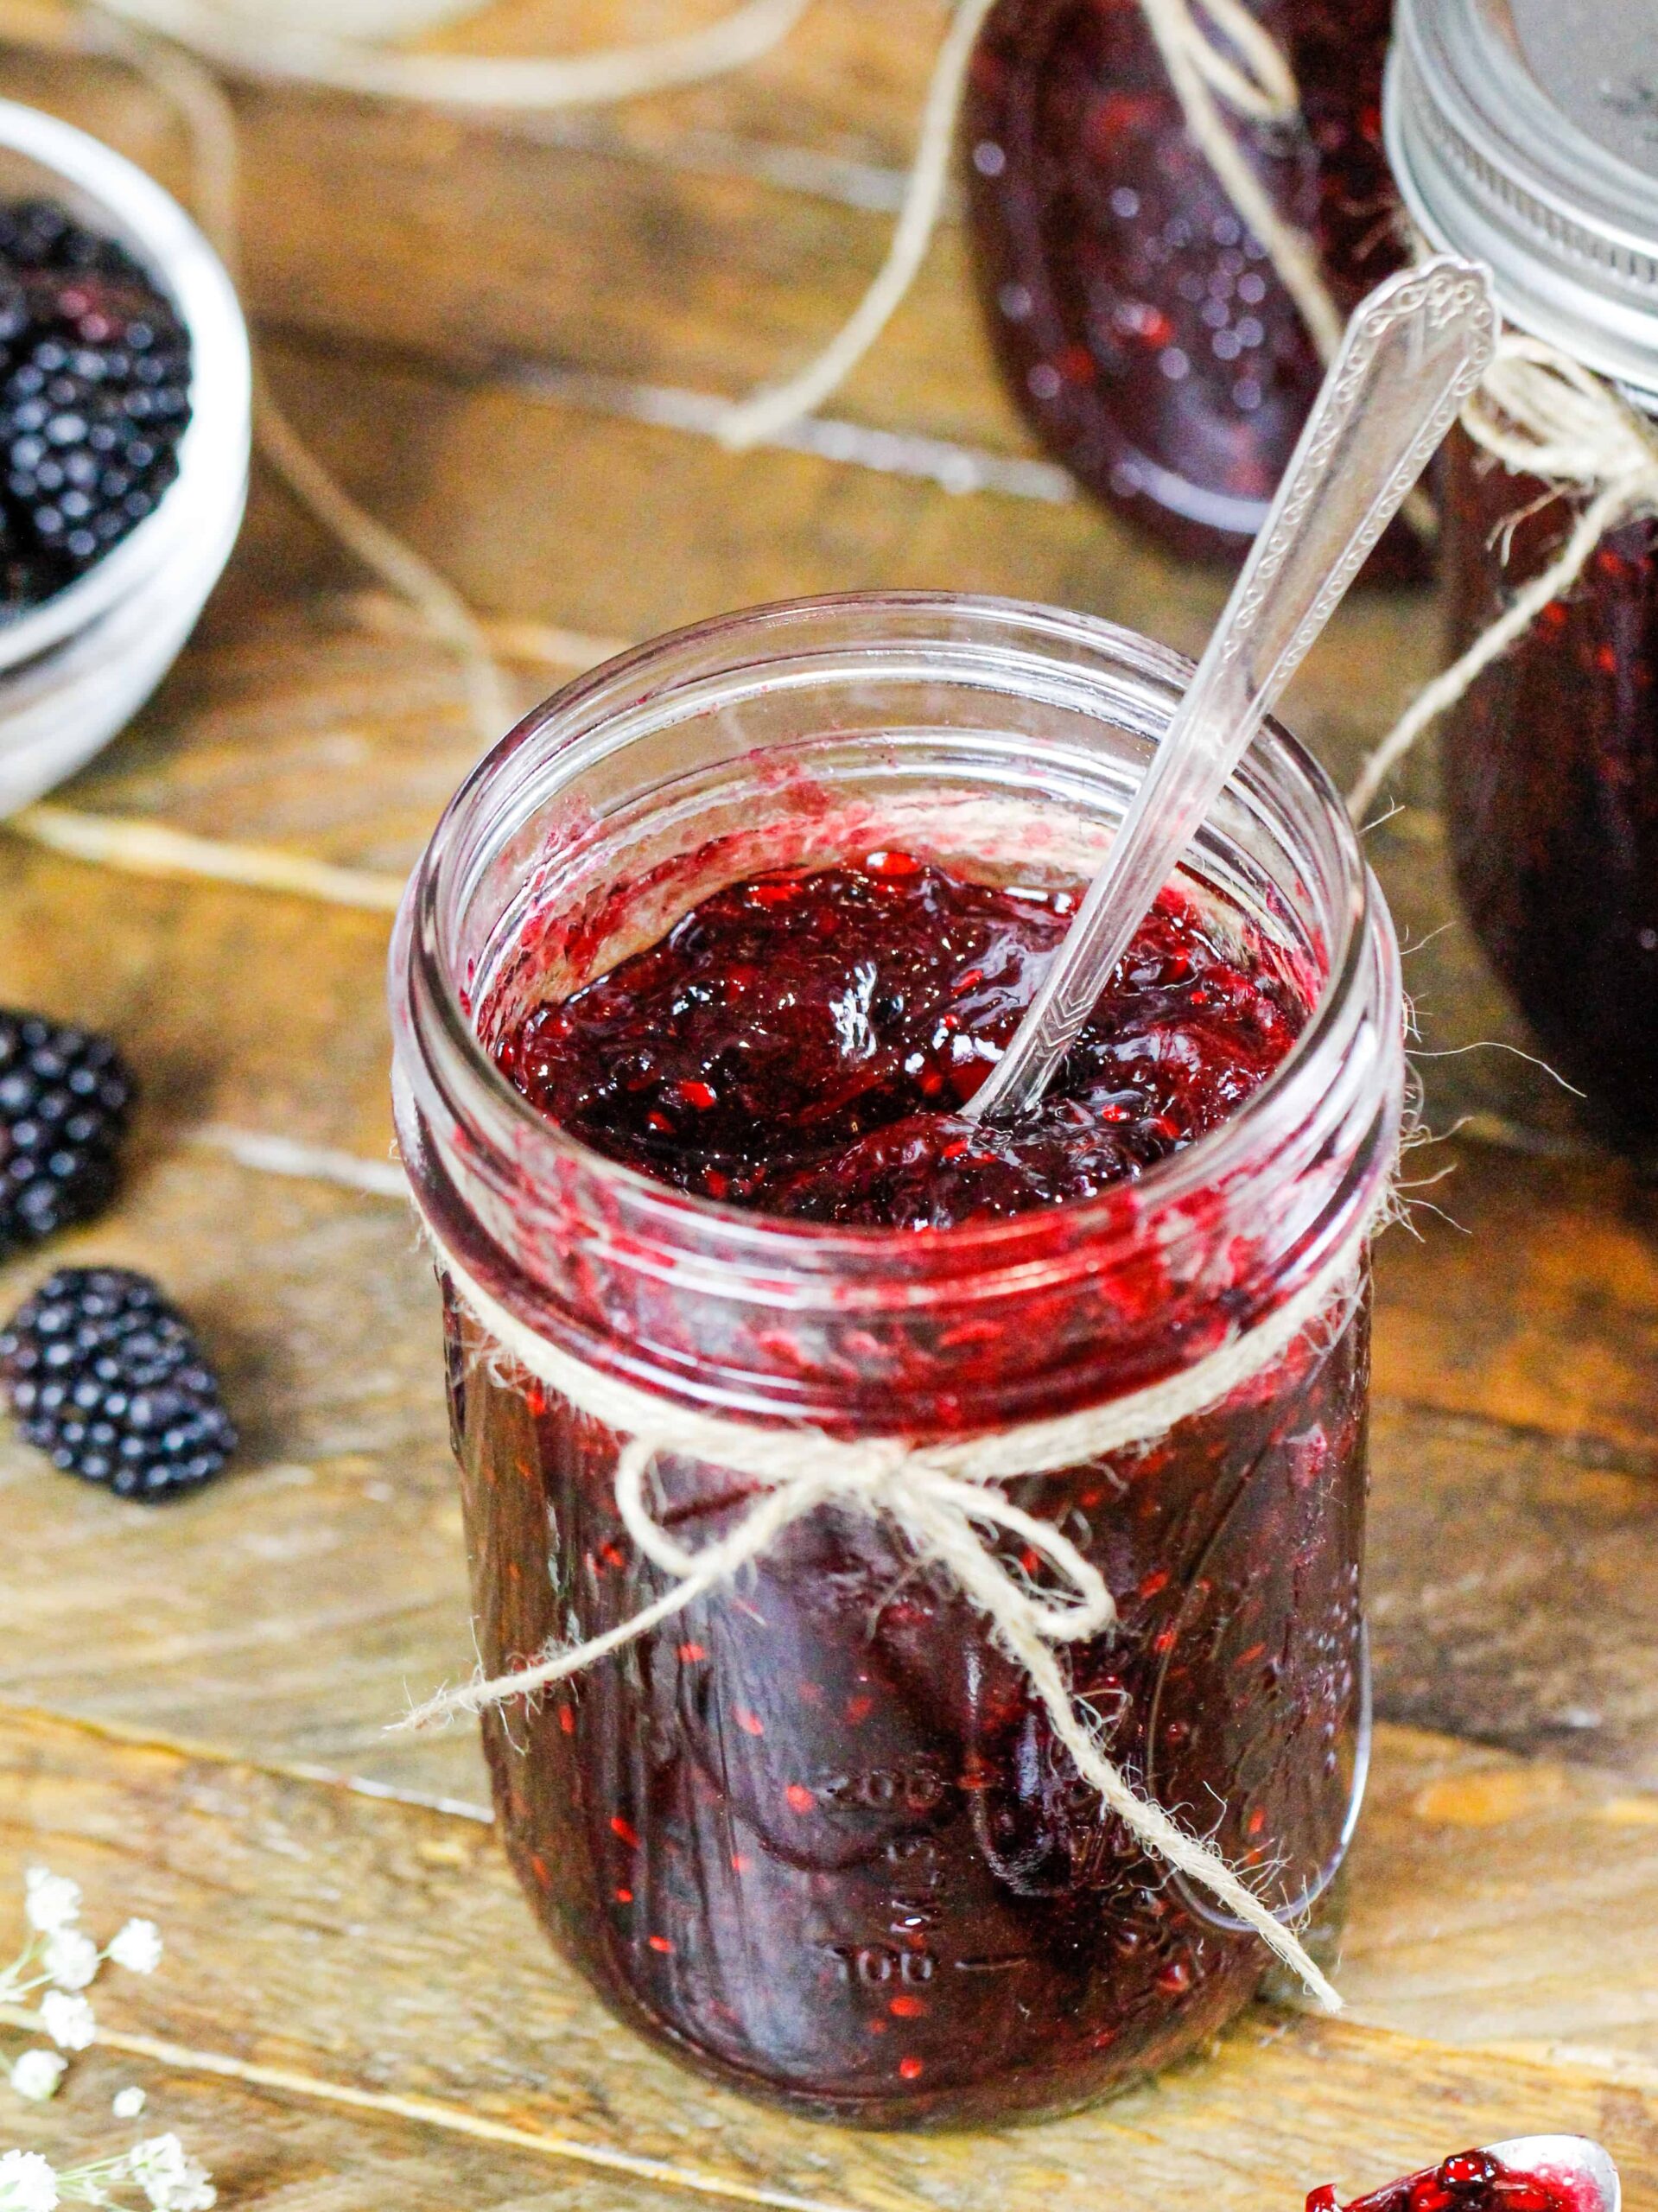
- Use wide-mouthed glass jars for your jam. They’re easier to fill and freeze well! You can also use plastic containers with a rubber seal, but I find glass works best.
- Thoroughly clean and dry your jars before you fill them with jam.
- The quality of your jam is heavily based on the quality of your berries! It’s best to use freshly picked berries.
- Make sure your pectin isn’t expired! Check the expiration date on the box to be safe.
- Use liquid pectin in this recipe not powdered! This recipe will not turn out with powdered pectin.
- Let the mashed blackberries and sugar sit for at least 20 minutes to allow the sugar to dissolve before adding in the pectin and lemon juice.
- Use bottled lemon juice instead of fresh lemon juice to ensure the pectin sets properly.
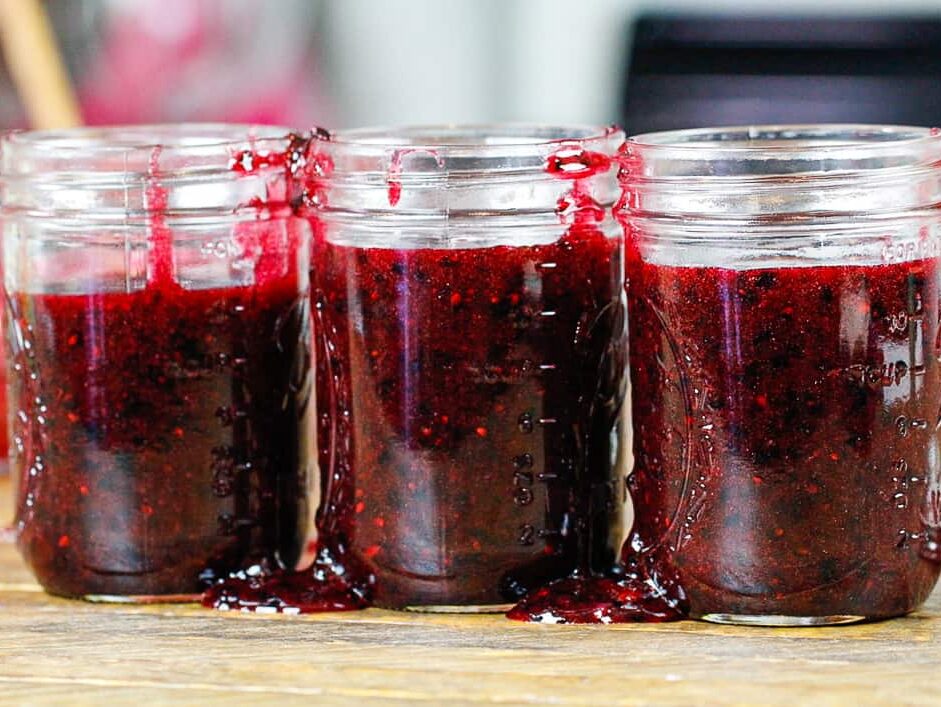
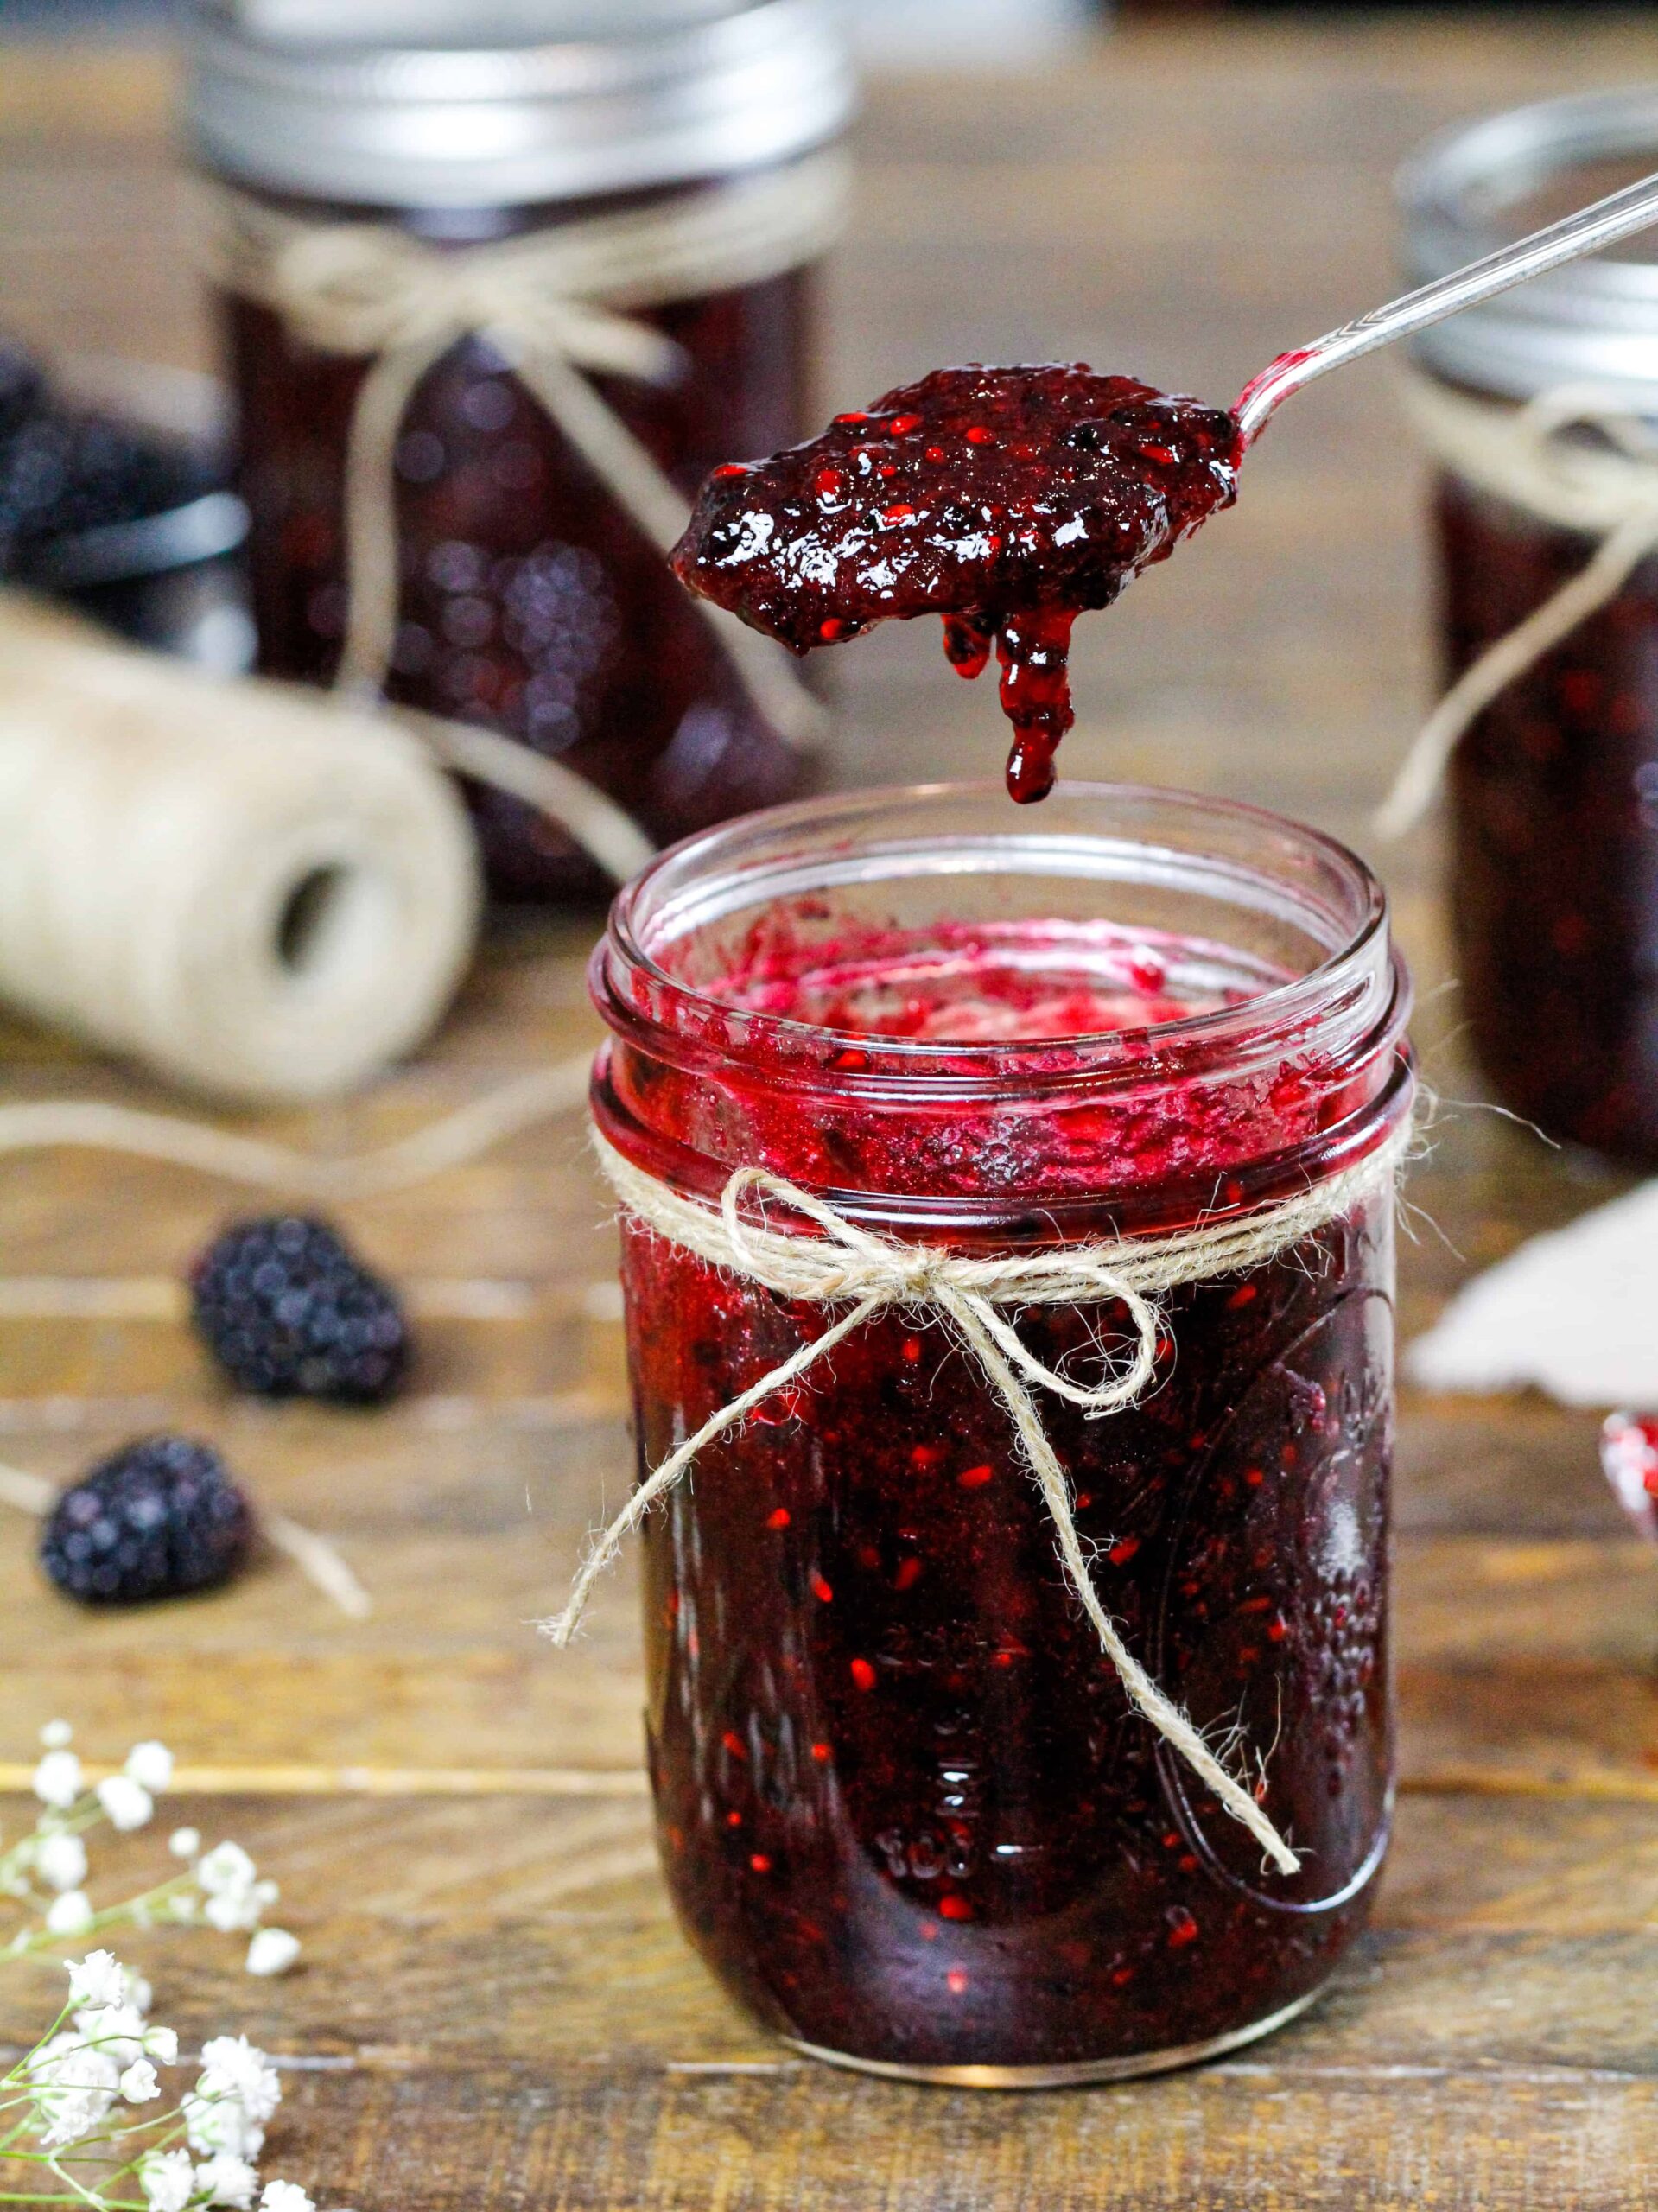
- Make the jam in a bowl with a spout or use a funnel or ladle to easily filly the jars. I didn’t and you can see the mess I made!!
- Don’t fill your containers to the top! Leave at least half an inch because the jam will expand as it freezes.
- Set the filled containers somewhere safe and allow them sit at room temperature for 24 hours without being touched. This allows the pectin to work its magic and helps the jam set properly.
- Label your jars with the date the jam was made. My mom always uses a bit of tape and a sharpie!
- You can use fresh bramble berries, raspberries, boysenberries, or marionberries in place of the blackberries in this recipe.
How Long Does Blackberry Freezer Jam Stay Good?
Like the name implies, this jam freezes incredibly well! It can be frozen for up to a year. While it stays good for a long time, I doubt it’ll last that long 😛
When you’re ready to eat a jar of frozen jam, remove it from the freezer and place it in your fridge overnight. It should be thawed and ready to enjoy by the following morning.
You can also put a container straight into the fridge once it’s set. We usually put one in the fridge to enjoy immediately, and the rest in the freezer for later. This jam lasts up to a month in the fridge.
In full disclosure, I’ve eaten a container we found in the back of the freezer that was 2 years old, and it actually still tasted great! But I think it’s better to stay on the safe side and aim to eat this jam within a year of when it’s made.
Let Me Know What You Think!
If you try this blackberry freezer jam recipe, I’d love to hear what you think! Please leave a comment and rating below.
And don’t forget to tag me @chelsweets and use #chelsweets so that I can see your delicious creations!
Other Recipes You Might Like:

Blackberry Freezer Jam
Ingredients
Blackberry Freezer Jam
- 2 cups mashed blackberries – about 3 pints 460g
- 4 cups granulated sugar 800g
- 1 pouch Certo liquid Fruit Pectin 3 Fl oz.
- 2 Tbsp bottled lemon juice 30g
Instructions
Blackberry Freezer Jam
- Begin by washing and drying the containers or jars. Set aside.
- Rinse your berries and either dry them gently with a towel or place them in a colander to help drain any excess water.
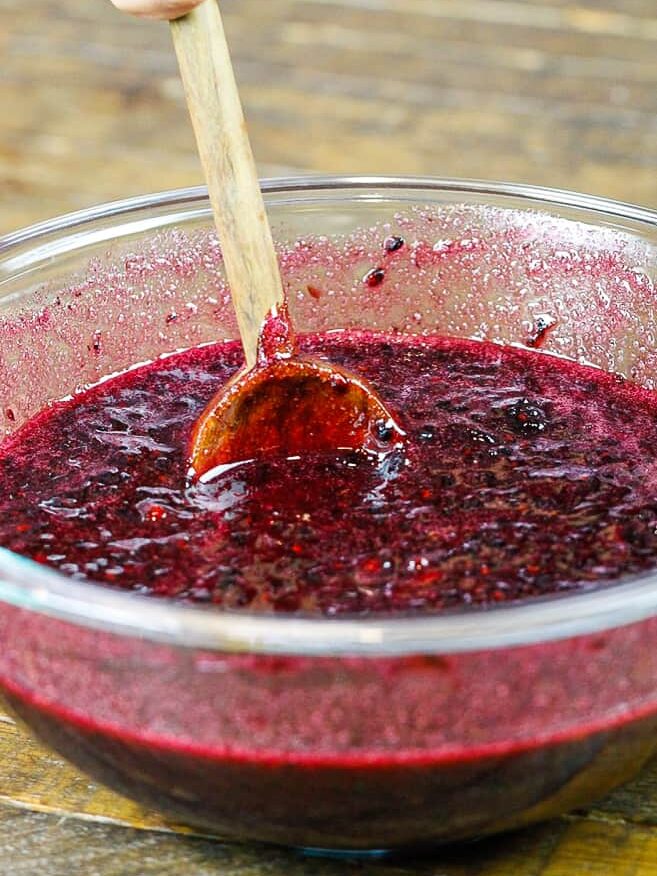
- Mash the blackberries with a potato masher until the mixture looks soupy. This will leave some small bits of the blackberries intact and give the jam a bit of texture.
- Use a measuring cup to add exactly 2 cups of mashed blackberries into a separate large bowl.
- Add in 4 cups of granulated sugar and stir until the sugar is fully incorporated.
- Set a timer for 20 minutes and let the mixture sit, stirring every few minutes to help the sugar dissolve.
- Pour 3 Fl oz. or 1 pouch of liquid pectin into the blackberry mixture, being sure to squeeze out every last drop of pectin! Fold the packet down as you go to get all of it out.
- Add in 2 Tbsp of bottled lemon juice, then set your timer for 3 minutes and stir the mixture somewhat aggressively. I like to switch arms halfway through so that they don't feel like they're going to fall off.
- Pour the mixture into your cleaned and dried jars, leaving at least 1/2 inch at the top of the container. The jam will expand as it freezes, so it's important to leave a little room!
- Wipe away any spills, then close the jars with their lids and let them sit for 24 hours at room temperature. Be sure to place them in a safe area where they won't be touched or bumped.
- Once the jam has set, place a bit of tape onto each jar and write the date it was made.
- Then either freeze or refrigerate the jam! It can be frozen for up to a year or kept in the fridge for up to a month.
- To thaw frozen jam, move the container from the freezer to the fridge, then enjoy the following morning once it's thawed.
Video
Notes
Yield
This recipe makes about 5 cups or 40 oz. of freezer jam.Tips for Making The Best Blackberry Freezer Jam
- Use wide-mouthed glass jars for your jam. They're easier to fill and freeze well. You can also use plastic containers with a rubber seal, but I find glass works best.
- Mix the jam in a bowl with a spout to make it easier to pour into the jars.
- Thoroughly clean and dry your glasses before you fill them with jam.
- The quality of your jam is heavily based on the quality of your berries! It's best to use freshly picked berries if possible.
- Make sure your pectin isn't expired! Check the expiration date on the box to be safe.
- Use liquid pectin in this recipe, not powdered! This recipe will not turn out with powdered pectin.
- Let the mashed blackberries and sugar sit for at least 20 minutes to allow the sugar to dissolve before adding in the pectin.
- Use bottled lemon juice instead of fresh lemon juice to ensure the pectin sets properly.
- Make the jam in a bowl with a spout or use a funnel or ladle to easily filly the jars. I didn't and you can see the mess I made!!
- Don't fill your containers to the top! Leave at least 1/2 an inch, because the jam will expand as it freezes.
- Set the filled containers somewhere safe and allow them sit for 24 hours without being touched. This allows the pectin to work its magic and helps the jam set properly.
- Label your jars with the date the jam was made. Use a bit of masking tape and a sharpie!
- You can use fresh bramble berries, raspberries, boysenberries, or marionberries in place of the blackberries in this recipe.
Hello, Your freezer jam looks and sounds so delicious! I plan on making both of them when my local fruit farm sells the fruit in season. I did want to get the glass jars ahead of time. One question – these jars won’t crack in the freezer? I had frozen something in a glass jar awhile back and went to retrieve it from the freezer, it was all ruined by several cracks.
Thank you for sharing your recipes.
Have a happy & Blessed Easter
Denise
I do not want to have pieces of berry in my jam. Will this recipe work if I run my berries through a food processor before mixing with the sugar?
I’m worried my jars may break since it’s glass?
Hi Just made your jam and it didn’t set . Now what can I do to fix it?
I made this today. After the blackberries were placed into a bowl, I used an immersion blender to mash them initially. Then I used the potato masher to further crush the berries. I used a rubber spatula with the sieve and removed seeds from about 3/4 of the berries. After I added the sugar I let them set for 20-25 minutes and added the lime juice and pectin. Stirred them a few times again and placed the jam into jars. About 2 hours later I tried some of the jam and it was set and wonderful. I believe i shall purchase a barber’s cape to use in the future because the immersion blender splattered the front of my clothing.
Thank you for your great recipe
Hi Marie,
So happy to hear that (minus the splatter – that’s the worst)!! Wearing an apron or cape is a good idea, especially if you’re using nice and juicy berries. It sounds like it turned out perfectly other than that though 🙂 Thank you for sharing!!
The sugar is not dissolving in the berries. I doubled the recipe because of having so many fresh berries. I’ve stirred every five minutes for about an hour and the granules are still present in taste. I measured exactly 8 cups of granulated sugar for the doubled recipe.
I am so sorry to hear that Connie! Big batches can take a really long time to dissolve the sugar :/ I usually don’t make double batches for that reason! But eventually the sugar should dissolve?! Please let me know how it ended up turning out!!
Can I use frozen berries?
Wonderful and detailed
Hi Benjamin,
So glad to hear you loved this recipe! Thanks for sharing 🙂
I made this today. Thank you for sharing your recipe. Easy to follow directions. Delicious! Thanks so much! I tried to leave a 5 star rating but it the app wouldn’t let me.
Hi Carolyn,
There’s a weird glitch going on with the rating system right now when you try to leave a star rating from your phone, so sorry about that! But so happy to hear you loved this recipe!!