
Chocolate and Salted Caramel Cake
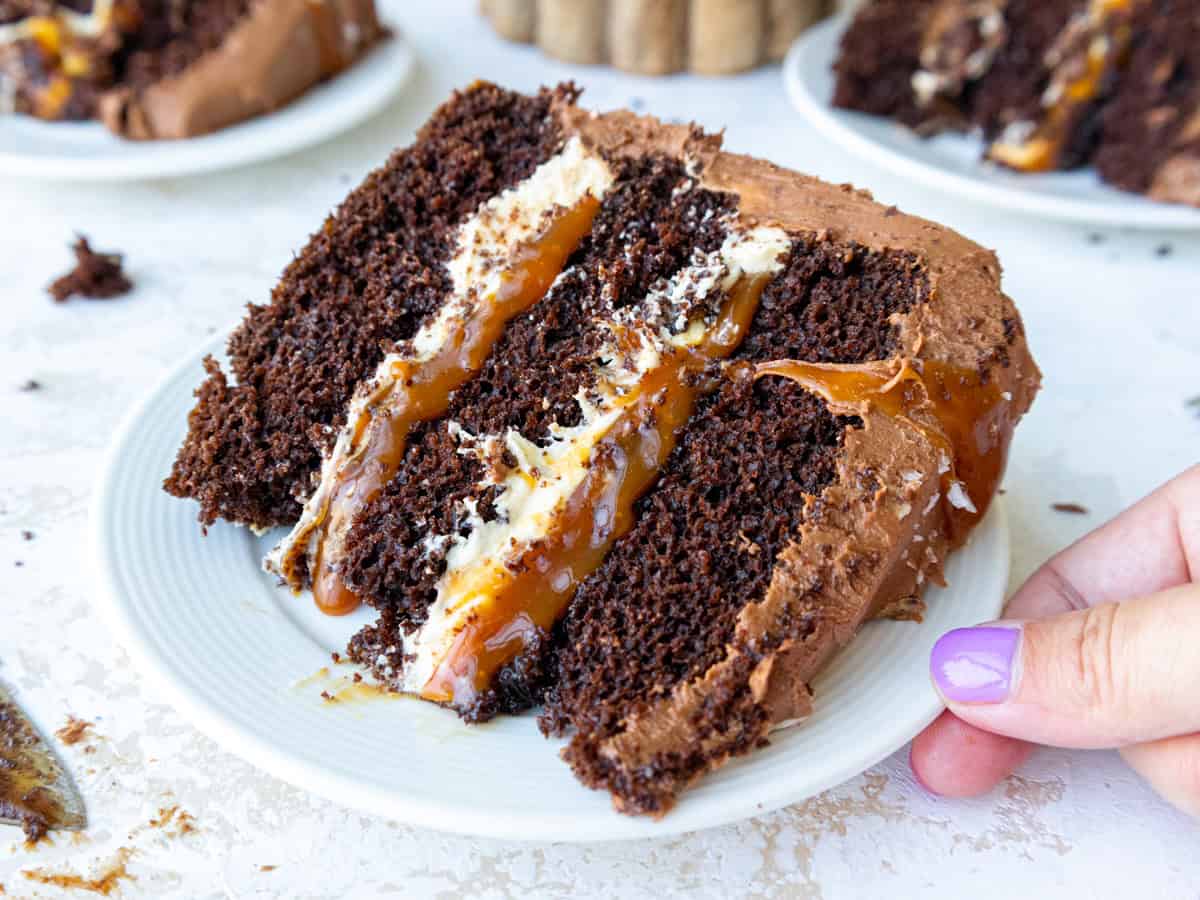
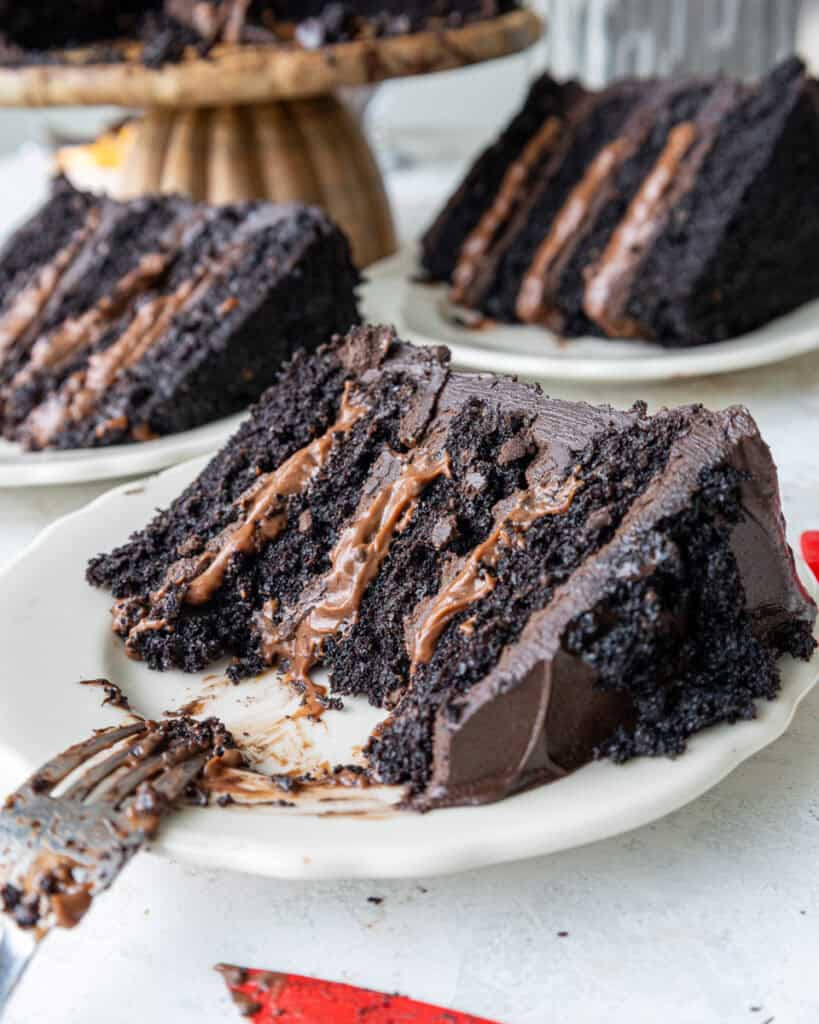
This chocolate and salted caramel cake is made with moist chocolate cake layers and filled with fluffy caramel buttercream and a buttery caramel filling.
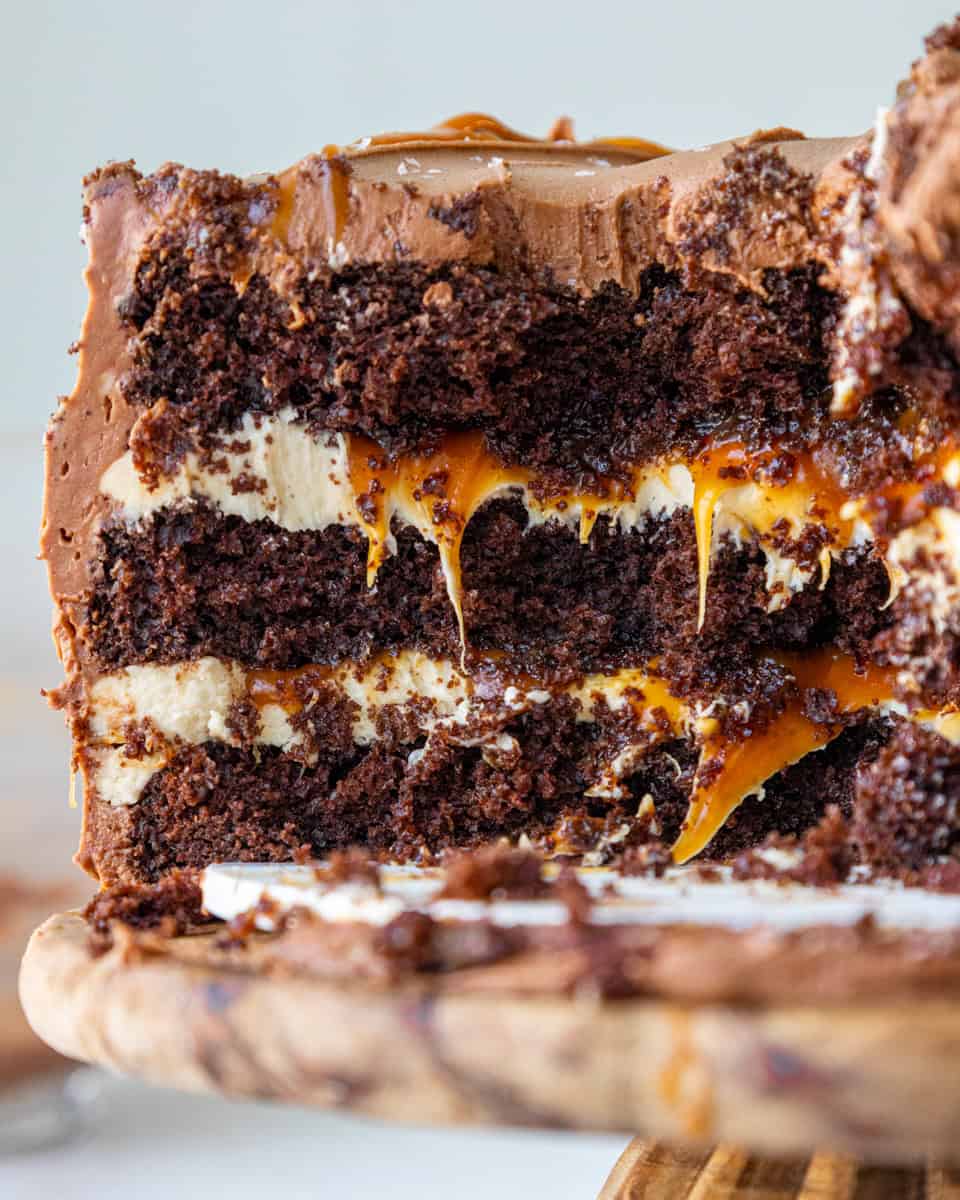
How to Make This Chocolate & Salted Caramel Cake
To make sure this cake turns out as amazing as possible, let’s walk through each step together! I’ve also included a video tutorial of the process below.
Step 1: Bake the Chocolate Cake Layers
The first step is to make the chocolate cake batter following the recipe card at the bottom of this post.
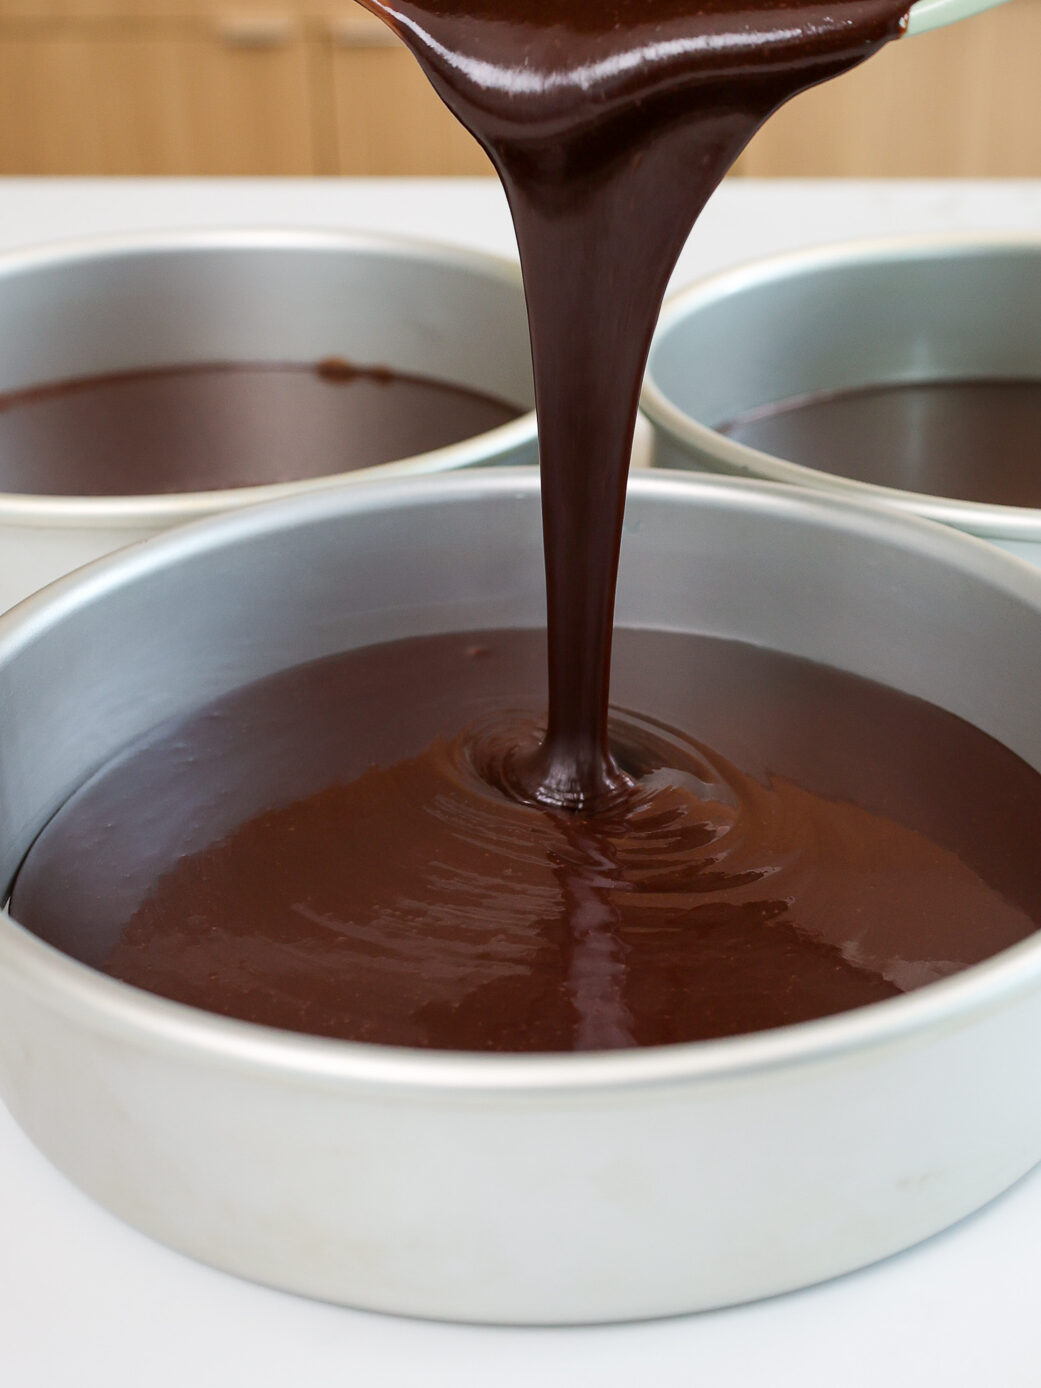
Divide the batter evenly between the prepared cake pans. Bake the layers for 22-25 minutes or until a toothpick comes out with a few moist crumbs.
Let the pans cool for 10 minutes, then run a small offset spatula around the perimeter of the pan to separate the cake from the pan.
Place the cake layers into the freezer for 30 minutes to accelerate the cooling process. This helps lock in the steam and makes the layers extra moist. If you don’t have room in the freezer, place the cake pans on a wire rack and let them cool fully before removing them.
Once the layers are fully cooled, carefully flip the pans and remove the layers. These cake layers bake up pretty flat, so leveling them is optional, but I like to level them with a serrated knife to make the cake easier to fill and frost.
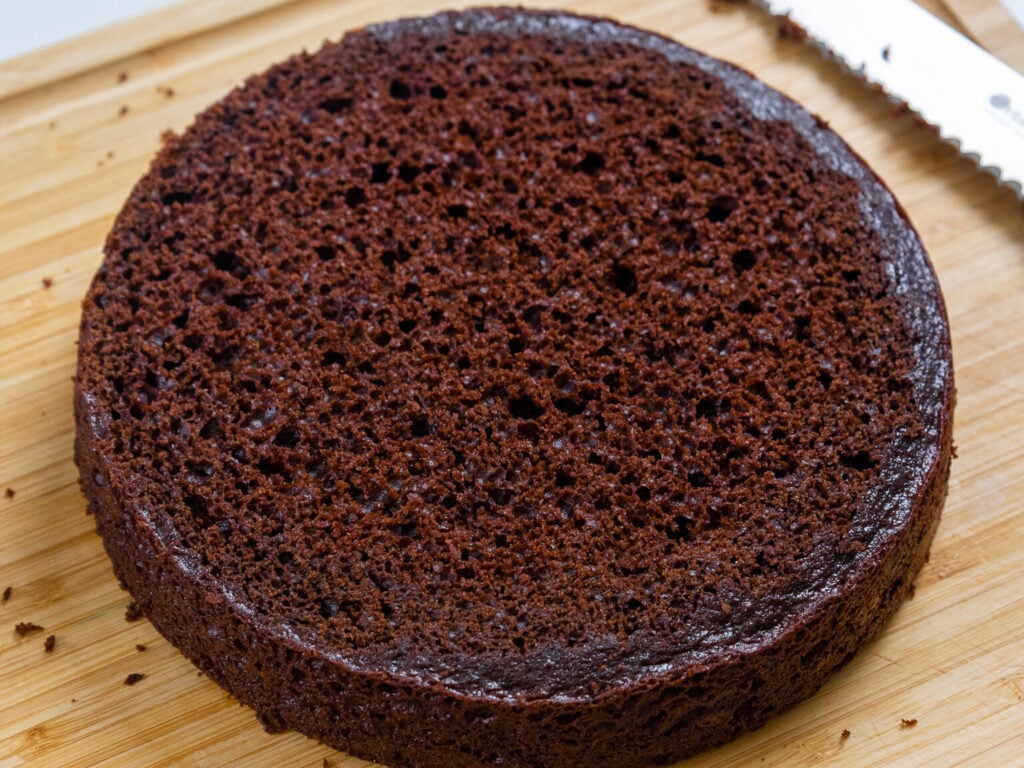
If you make these cake layers in advance and freeze them, let them thaw for about 15 minutes before making the cake. The cake layers should still be slightly cold to the touch, which will make it easier to assemble the cake.
If you’re making these in advance, you can wrap and freeze them at this point.
Step 2: Make the Homemade Salted Caramel
Then it’s time to work on the homemade caramel. Making caramel from scratch might seem a little intimidating, but I promise it’s easier than you’d think!
Place a heavy-bottomed saucepan over medium heat. Once the saucepan has warmed up, gradually pour in the sugar, adding 1/4 cup at a time.
Wait until the sugar is mostly liquefied, then add in the next bit of sugar. Stir as needed with a rubber spatula. As the sugar melts, it will slowly deepen in color.
If you feel like the sugar might be burning or getting too dark, remove the pan from heat and turn down the temperature a bit.
Stir as needed until the sugar is fully dissolved and is an amber color. Turn off the heat.
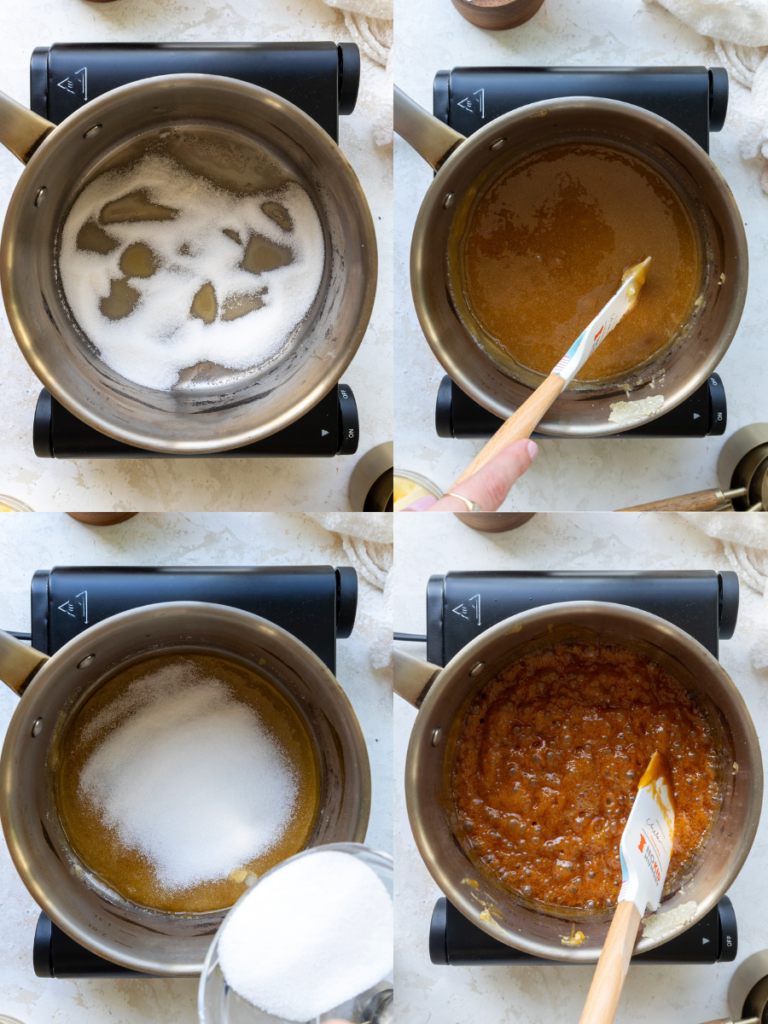
Slowly mix in the room-temperature butter, then stir in the heavy cream and salt. The mixture will be very thin at this point, but it will thicken as it cools.
Pour the caramel into a separate container and set aside to cool.
Step 3: Make the Salted Caramel Buttercream Frosting
As the cake layers cool, make the caramel buttercream. I like to use my American buttercream (ABC) as a base because it is super easy to make.

If you aren’t a fan of ABC, I’d recommend adding 1/2 cup of caramel to a batch of my Swiss meringue buttercream or 1 1/2 batches of my hybrid buttercream.
This frosting can also be made in advance if needed and kept in the fridge for up to a month.
Step 4: Stack and Fill the Cake Layers
Then it’s time to assemble this cake! Stack and frost the cake layers on a greaseproof cake board or flat plate. Use a dab of buttercream to help stick the first cake layer to the board.
Spread an even layer of caramel buttercream on top of the cake layer. Then pipe a buttercream ring around the edge and drizzle slightly less than half of the caramel on top of the buttercream (I like to save a little caramel to drizzle on top of the cake).
If the caramel has firmed up as it’s cooled off, heat it in 10-second intervals in the microwave until it becomes more fluid.
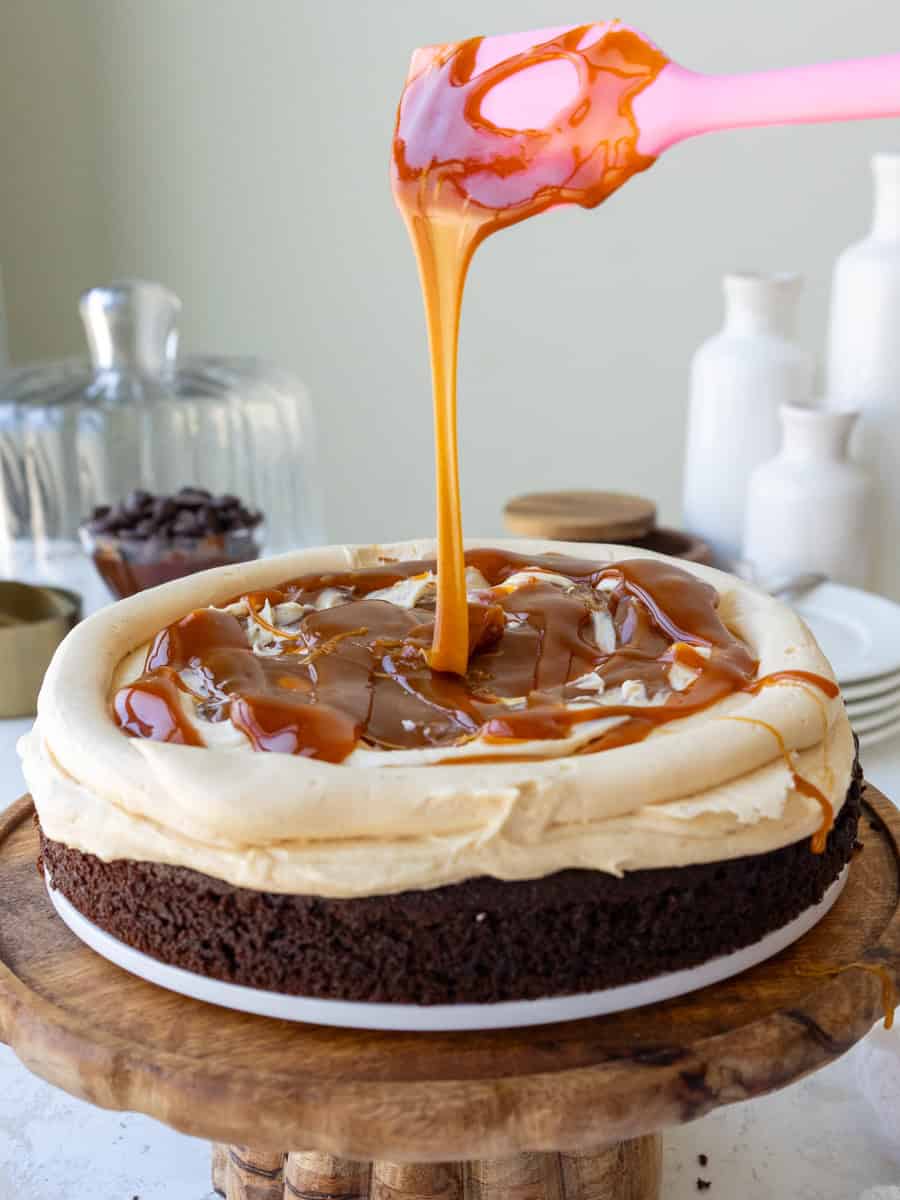
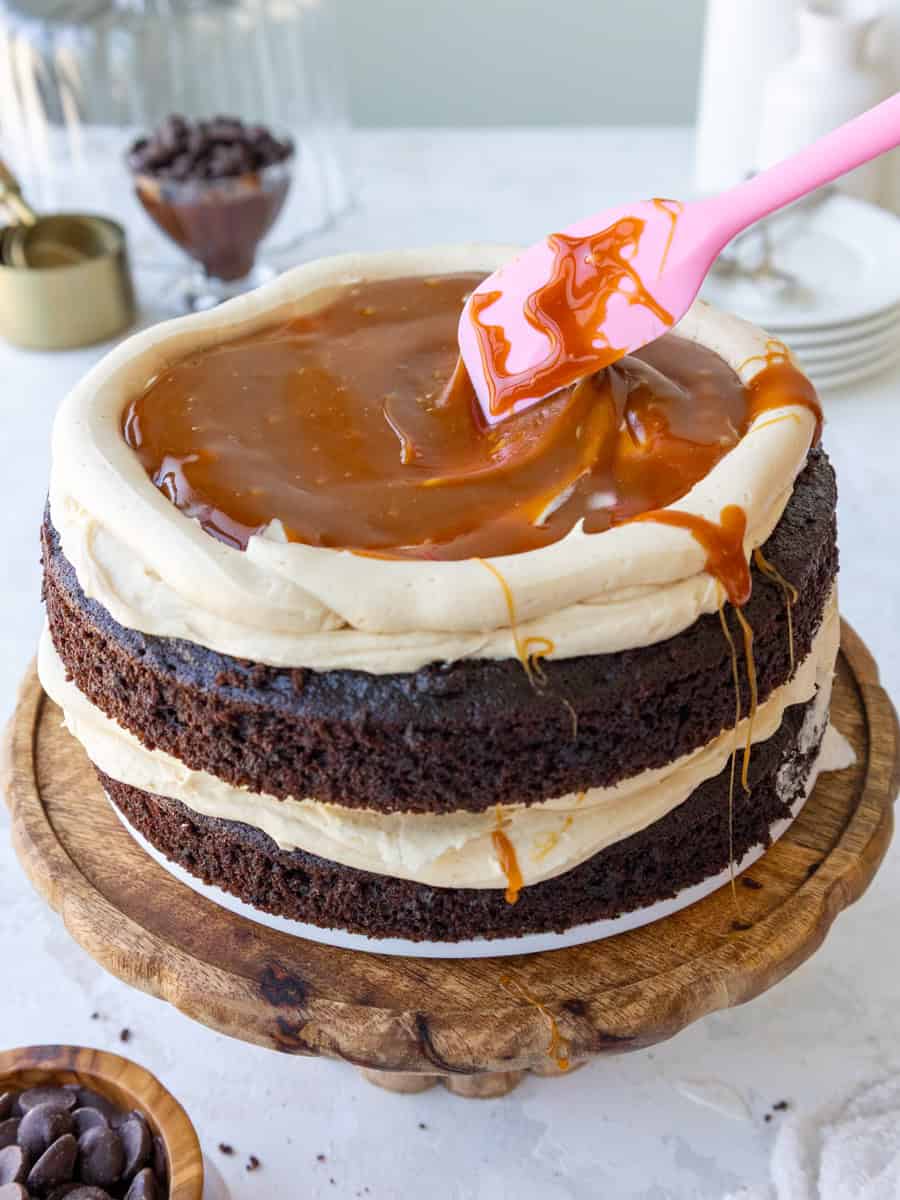
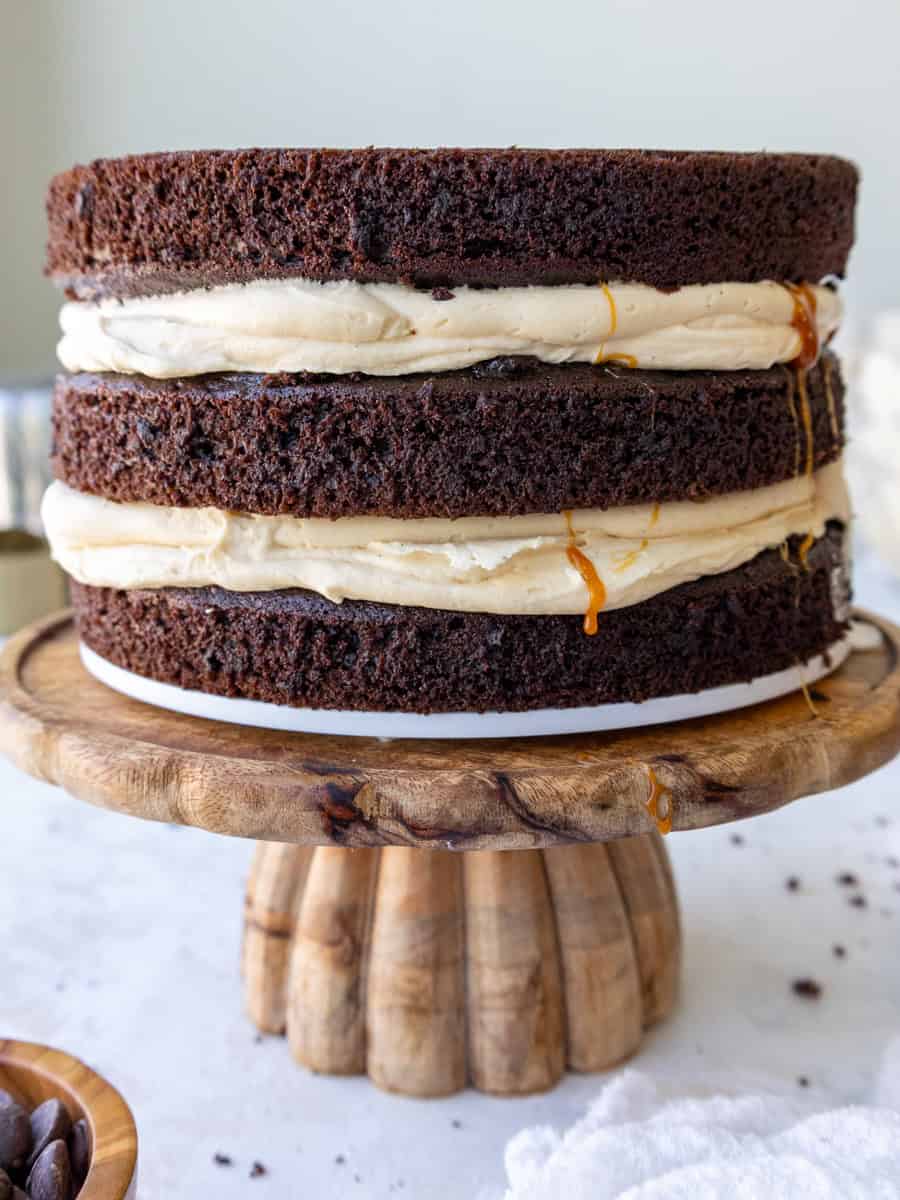
Repeat with the remaining cake layers. Flip the top cake layer upside down to make the cake easier to frost and minimize crumbing.
Step 5: Chill and Frost the Cake
Once the layers are stacked, chill the cake in the freezer for 20 minutes or the fridge for 30 minutes to prevent the layers from sliding. Then use the remaining frosting to cover the cake.
While the cake chills, mix 1 cup of dark chocolate that’s been melted and cooled for about 10 minutes into the remaining buttercream.
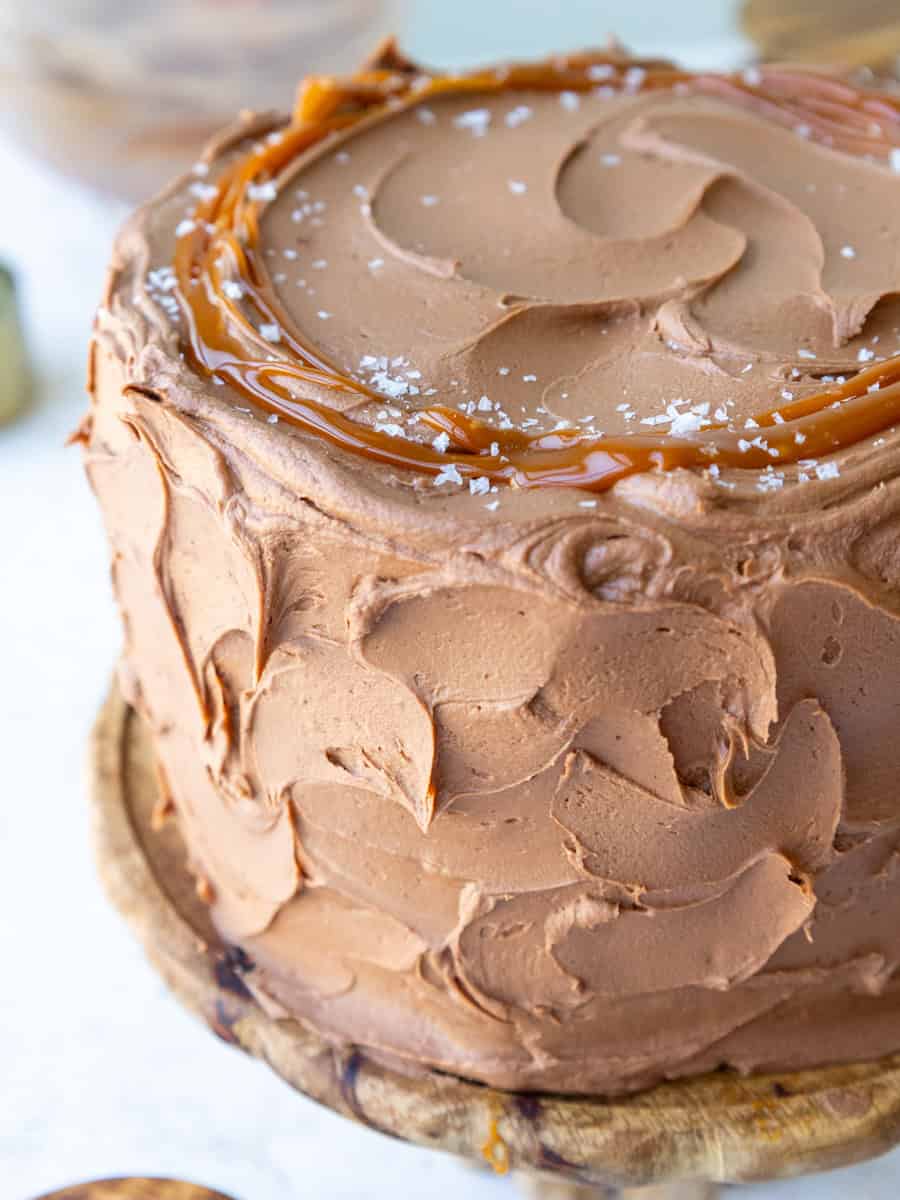
Remove the cake from the fridge or freezer and cover it in a thick layer of chocolate caramel buttercream. Use a large offset spatula or the back of a spoon to give the frosting a textured look, then drizzle any remaining caramel on top of the cake, add a sprinkle of flaky sea salt, and enjoy.
Substitutions and Swaps – Chocolate Cake Layers
This cake recipe uses quite a few ingredients, and I know you might not have them all on hand. Or if you have food allergies or restrictions, I’ve got you covered.
Below are some swaps and substitutions that can be made in this cake recipe.
- All-Purpose Flour – This recipe turns out best with all-purpose flour. However, you can swap in a good gluten-free baking flour blend if needed. Just be sure to stir the batter longer than normal to help give the cake proper structure, and let the batter sit for about 20 minutes before baking it if you opt to make a gluten-free version.
- Granulated Sugar – I do not recommend reducing the amount of sugar or changing the type of sugar, as it will change the texture of the cake layers.
- Baking Cocoa – I like to use the Ghirardelli or Hershey’s brand of unsweetened baking cocoa, but you can use any brand! You can also use dark or black cocoa powder.
- Buttermilk – You can also use full-fat yogurt, sour cream, whole milk, or an alternative yogurt or milk (almond, soy, oat).
- Vegetable Oil – Any flavorless oil can be used in this recipe. Canola, vegetable, or even sunflower oil would all work great. I don’t recommend olive oil, though, as it has a strong flavor and will change the taste of the cake.
- Eggs – If you have an egg allergy, you can try using a vegan egg replacer in place of the eggs, but this recipe turns out best with large eggs.
Substitutions and Swaps – Caramel Buttercream
- Unsalted Butter – If you only have salted butter on hand, you can use it in place of the unsalted butter. Just be sure to omit the salt that this frosting recipe calls for. You can also use vegan butter in its place.
- Heavy Cream – Whipping cream, coconut cream, or alternative milk (soy, almond, oat, coconut) will work fine in this frosting recipe if that’s what you have on hand.
- Vanilla Extract – Other extracts can also be used in place of the vanilla extract if needed, or it can be omitted.
Making This Chocolate and Salted Caramel Layer Cake in Different Sizes
One batch of batter is about 1450g, so I add roughly 475g to each of my cake pans when using 3, 8-inch cake pans.
You can also use one batch of batter to make 2, 9-inch cake layers or 4, 6-inch cake layers. Bake time will be a few minutes longer at 350°F/175°C.
If you want to make cupcakes, this recipe can be used to make about 3 dozen cupcakes. Fill the liners 3/4 full and bake for 18-21 minutes at 350°F/175°C. Or if you want to make one dozen, use my chocolate caramel cupcake recipe.
If you want to make a tiered cake with this recipe, check out my cake batter calculator to see how many batches of batter you’ll need.
Can This Chocolate Caramel Cake Be Made in Advance?
Short answer, yes! I highly recommend making the components of this cake in stages. It breaks the process up and makes it so much more approachable!
The cake layers can be made in advance and frozen. They taste just as great when they’re frozen as when they’re fresh, I promise!
You can also make the frosting ahead of time or save any leftover frosting! It can be stored in an airtight container in the fridge for up to a month.
Be sure to give it a good stir once it thaws to get the consistency nice and smooth again.
A frosted cake can be stored for up to a week in the fridge. The buttercream will lock all the moisture in and keep it fresh.
If you cut into the cake and have leftovers, use any remaining frosting to cover the cut section to keep it moist and store it in the fridge for up to a week.
Frequently Asked Questions
Can I use store-bought caramel sauce?
Yes, you can use store-bought caramel sauce in a pinch, but homemade caramel will give this cake the best flavor and texture. If you use store-bought caramel, choose a thick caramel sauce rather than a thin caramel syrup or ice cream topping. A thinner caramel can leak out between the cake layers and make the cake harder to stack and frost.
How do I keep the caramel filling from leaking out?
The key is to use thick caramel and pipe a sturdy buttercream ring around each cake layer before adding the caramel. Don’t overfill the layers, and make sure the caramel stays inside the buttercream ring. I also recommend chilling the stacked cake for 20 minutes in the freezer or 30 minutes in the fridge before frosting it to help everything firm up and stay in place.
Can I make this chocolate salted caramel cake ahead of time?
Yes! This cake is great for making in stages. The chocolate cake layers can be baked in advance, wrapped in plastic wrap, and frozen. The caramel filling and buttercream can also be made ahead of time and stored in the fridge. When you’re ready to assemble the cake, let the buttercream come back to room temperature and give it a good stir so it’s smooth again.
Why did my caramel seize?
Caramel usually seizes when cold ingredients are added to the hot, melted sugar. Make sure the butter and heavy cream are at room temperature before mixing them in. It can also happen if the sugar gets too hot or cooks unevenly. If your caramel seizes, don’t panic! Keep stirring it gently over low heat, and it should gradually smooth back out as everything melts together.
Tips for Making the Best Chocolate Caramel Cake
- Properly measure the flour. Either spoon it into the cup measure, then level with a knife, or use a kitchen scale to measure your dry ingredients.
- Ingredients at room temperature mix together better, so be sure to set out any cold ingredients ahead of time.
- Use a scale to weigh your cake pans as you fill them. It helps the cake layers bake to the same height and bake more evenly.
- Level the room temperature or thawed cake layers with a serrated knife to make them easier to stack and fill.
- Chill the cake layers in the freezer for about 20 minutes before assembling the cake. This makes them easier to stack and frost.
- If your cake layers turn out less than perfect, check out my cake troubleshooting guide to try to figure out what happened.
Let Me Know What You Think!
If you make this chocolate and salted caramel cake recipe, I’d love to hear what you think! Let me know by leaving a rating and comment below.
And don’t forget to tag me @chelsweets and use #chelsweets if you share on social media so that I can see your amazing creations.
Chocolate and Salted Caramel Cake
Equipment
Ingredients
Moist Chocolate Cake Recipe
- 2 cups all-purpose flour 260g
- 2 cups granulated sugar 400g
- 3/4 cup unsweetened cocoa powder, sifted 75g
- 2 tsp baking powder 8g
- 1 1/2 tsp baking soda 9g
- 1 tsp instant coffee or espresso, optional
- 1 tsp fine salt 6g
- 1 cup water, warm 240g
- 1 cup buttermilk, room temperature 240g
- 1/2 cup vegetable or canola oil 110g
- 2 large eggs, room temperature 112g
- 1 tsp vanilla extract or vanilla bean paste 4g
Homemade Salted Caramel Filling
- 2 cups granulated sugar 400g
- 3/4 cup (1 1/2 sticks) unsalted butter, room temperature 170g
- 1/2 cup heavy whipping cream, room temperature 120g
- 1/2 tsp fine salt 3g
Caramel Buttercream Frosting
- 2 cups (4 sticks) unsalted butter, room temperature 454g
- 1 tsp vanilla extract or vanilla bean paste 4g
- 1/2 tsp fine salt 3g
- 7 cups powdered sugar 904g or 2 lb. bag
- 1/3 cup heavy whipping cream, room temperature 80g
- 1/2 cup caramel filling, room temperature (made above) 160g
- 1 cup dark chocolate, melted – to be added later 175g
Garnish
- Flaky sea salt, for decorating
Instructions
Chocolate Cake Layers
- Preheat oven to 350°F/175°C. Line 3 8-inch cake pans with parchment paper rounds and spray the sides of the pans with non-stick cooking spray or baking spray. If you don't have 3 cake pans, the batter can sit at room temperature while the first layer(s) bake. Bake as many layers at a time as you can.
- Sift or whisk together 2 cups flour, 2 cups granulated sugar, 3/4 cup cocoa powder, 2 tsp baking powder, 1 1/2 tsp baking soda, 1 tsp fine salt, and 1 tsp instant espresso or coffee (optional) in a large bowl. Set aside.
- In a separate, large bowl, add 1 cup warm water, 1 cup buttermilk, 1/2 cup oil, 2 eggs, and 1 tsp vanilla and whisk together until fully incorporated.
- Whisk the dry ingredients into the wet ingredients until they're just combined, and the batter is smooth.
- Divide the batter evenly between the prepared cake pans (about 475g per pan if you're making 3 layers) and bake for 23-25 minutes or until a toothpick comes out with a few moist crumbs.
- Let the pans cool for 10 minutes, then run a small offset spatula around the perimeter of the pan to separate the cake from the pan.
- Place the cake pans into the freezer for 30 minutes to accelerate the cooling process. This helps lock in the steam and makes the layers extra moist. If you don't have room in the freezer, place the cake pans on a wire rack and let them cool fully before removing them.
- Once the layers are fully cooled, carefully flip the pans and remove the layers. These cake layers bake up pretty flat, so leveling them is optional, but I like to level them with a serrated knife to make the cake easier to fill and frost.
- If you make these cake layers in advance and freeze them, let them thaw for about 15 minutes before making the cake. The cake layers should still be slightly cold to the touch, which will make it easier to assemble the cake.
Homemade Salted Caramel Filling
- Make the caramel while the cake layers bake and cool. This can be made up to 2 weeks in advance.
- Place a heavy-bottomed saucepan over medium heat. Once the pan has warmed up, pour in 2 cups of sugar gradually, adding 1/4 cup at a time. Stir as needed with a rubber spatula. Wait until the sugar is mostly dissolved, then add in the next bit of sugar. As the sugar melts, it will gradually deepen in color.
- Stir occasionally until the sugar is fully dissolved and has become an amber color, then turn off the heat.
- Slowly mix in 3/4 cup (1 1/2 sticks) of room temperature butter (2 Tbsp at a time), then stir in 1/2 cup of room temperature heavy cream and 1/2 tsp salt. If these aren't at room temperature, they can cause the sugar to seize and make it more difficult to mix together.Note: sometimes the butter also has a hard time incorporating into the sugar if it's been cooked a bit too long or at too high a heat! If this happens to you, you may want to turn the heat down a bit the next time you make it or use a heavier-bottomed pan that can help the sugar cook more evenly. But don't worry! You can gradually stir the butter into the caramel as it cools, and it should incorporate back together. The mixture will be thin but will thicken as it cools. Pour into a separate container, then set aside to cool.
Caramel Buttercream Frosting
- While the cake layers and caramel cool, make the buttercream frosting. In a large bowl or the bowl of a stand mixer, beat 2 cups of butter on a medium-high speed for 1 minute with a paddle attachment or hand mixer until smooth and fluffy.
- Mix in 1 tsp vanilla extract and 1/2 tsp salt on a low speed until the ingredients are incorporated.
- Gradually mix in 7 cups of powdered sugar and 1/3 cup of heavy cream on a low speed. Scrape the sides and bottom of the bowl as needed with a rubber spatula. Then mix in 1/2 cup of homemade caramel (made above). Wait to add the melted dark chocolate until the cake has been assembled.
- Mix on low until the desired consistency is reached. If the frosting seems too thick, add additional cream (1 Tbsp at a time). If the frosting seems too thin, add in more powdered sugar (1/4 cup at a time).
- Place about 1 cup of the caramel buttercream into a large piping bag and cut an opening about 3/4-inch at the base of the bag. Cover the remaining frosting with plastic wrap to prevent crusting and set aside.
Assembling this Chocolate Caramel Cake
- When you're ready to assemble the cake, stack and frost the cake layers on a greaseproof cake board or flat plate using a dab of buttercream to help stick the first cake layer to the board.
- Spread an even layer of caramel buttercream on top of the cake layer. Then pipe a buttercream ring around the edge and drizzle slightly less than half of the remaining caramel on top of the buttercream (I like to save a little caramel to drizzle on top of the cake). If the caramel has firmed up as it's cooled off, heat it in 10-second intervals in the microwave until it becomes more fluid.
- Repeat with the remaining cake layers. Flip the top cake layer upside down to make the cake easier to frost and minimize crumbing.
- Once the layers are stacked, chill the cake in the freezer for 20 minutes or in the fridge for 30 minutes to prevent the layers from sliding.
- While the cake chills, mix 1 cup of dark chocolate that's been melted and cooled for about 10 minutes into the remaining buttercream.
- Remove the cake from the fridge or freezer and cover it in a thick layer of chocolate caramel buttercream. Use a large offset spatula or the back of a spoon to give the frosting a textured look, then drizzle any remaining caramel on top of the cake, add a sprinkle of flaky sea salt, and enjoy.
Video
Notes
Substitutions and Swaps
If you need to make any substitutions or swaps in this recipe, please check out the section on ingredient substitutions in the post above.Making this Chocolate Caramel Cake in Different Sizes
One batch of batter is about 1450g, so I add roughly 475g to each of my cake pans when using 3, 8-inch cake pans. You can also use one batch of batter to make 2, 9-inch cake layers or 4, 6-inch cake layers. Bake time will be a few minutes longer at 350°F/175°C. If you want to make a tiered cake with this recipe, check out my cake batter calculator to see how many batches of batter you’ll need. If you want to make cupcakes, this recipe can be used to make about 3 dozen cupcakes. Fill the liners 3/4 full and bake at 350°F/175°C for 18-21 minutes.My Tips for Making the Chocolate Caramel Cake
- Ingredients at room temperature mix together better! Be sure you set out any cold ingredients ahead of time.
- Properly measure your flour (spoon into the cup measure, then level). Or better yet, use a kitchen scale to measure your dry ingredients.
- Mix your cake batter just until the ingredients are incorporated. This will ensure your cake layers are tender and fluffy.
- Use a scale to weigh your cake pans as you fill them. This makes sure each pan has the same amount of batter and will make your cake layers bake to the same height and bake more evenly.
- Level your room temperature or thawed cake layers with a serrated knife to make them easier to stack.
- Chill your cake layers in the freezer for about 20 minutes before assembling the cake. It makes it so much easier to stack and frost them!
Making This Chocolate Caramel Cake in Advance & Storage Tips
I highly recommend making the components of this cake in stages. It breaks the process up and makes it so much more approachable! The cake layers can be made in advance and frozen. They taste just as great when they’re frozen as when they’re fresh, I promise! You can make the frosting ahead of time or save any leftover frosting! It can be stored in an airtight container in the fridge for up to a month or in the freezer for 3 months. Be sure to give it a good stir once it thaws to get the consistency nice and smooth again. A frosted cake can last in the fridge for a week or in the freezer for a month. The buttercream locks in the moisture and keeps the cake fresh and delicious! If you cut into the cake and have leftovers, use any remaining frosting to cover the cut section to keep it moist and store it in the fridge for up to a week.Nutrition
Other Recipes You Might Like:
I wish you had Pinterest available to save recipes to. Your recipes are outstanding and I wish I could save them to make at a later date.
I visited this website on a browser, then shared the site to my Pinterest folder! That way I have all my recipes in on app
This looks absolutely delicious. Can I use this recipe for cupcakes?
I did! Made 24 standard size cupcakes and baked for 19 minutes. Turned out AMAZING!
Thanks for sharing Jamie 🙂 So happy to hear this recipe turned out great as cupcakes!
Hi!!! I’ll make your recipe ?? I’m studying it and it seems perfect, thank you!
Thank you, hope it turns out great Ermelinda 🙂
I made this for a birthday and everyone absolutely loved it, myself included, of course, haha! ?? The cake was incredibly moist and chocolatey and with the salted caramel it honestly looked and tasted like something you’d get from a bakery ?? I swapped the buttercream for a mascarpone frosting to make it a bit lighter and added some toasted hazelnuts for extra crunch. It’s definitely one of the best cakes I’ve ever made and it’s going straight into my “make again” list! Thank you for sharing this recipe.I can’t wait to try more of your recipes! ??
I made this for a birthday and everyone absolutely loved it, myself included, of course, haha! ?? The cake was incredibly moist and chocolatey and with the salted caramel it honestly looked and tasted like something you’d get from a bakery ?? I swapped the buttercream for a mascarpone frosting to make it a bit lighter and added some toasted hazelnuts for extra crunch. It’s definitely one of the best cakes I’ve ever made and it’s going straight into my “make again” list! Thank you for sharing this recipe.I can’t wait to try more of your recipes! ??
Thank you so much! I’m so happy the cake was such a hit. The mascarpone frosting and toasted hazelnuts sound like a delicious combination with the chocolate and salted caramel. I really appreciate you sharing how it turned out, and I’m so glad this one made it onto your make again list! 🙂
I made this for a large family gathering, and it was a hit! It’s probably one of the tastiest things I’ve ever made. If you’ve never made caramel before, be sure to follow the directions exactly. Make things are room temp, cut up the butter into 2 Tablespoons sizes to you can grab it the second you need it. Have your cream measured and at room temp. Caramel is tricky for even a seasoned cook. You can end up with a rock hard lump in a second if you don’t watch it every minute. If you’ve never made follow directions exactly you will be rewarded with wonderful caramel, and the best tasting cake ever.
I’m thrilled the cake was such a hit with your family. Your caramel tips are spot on, too. Having everything measured, at room temperature, and ready to go makes such a difference since caramel can change so quickly. I really appreciate you sharing this for other bakers, and I’m so glad the finished cake was worth the effort! 🙂
After adding the caramel, is the frosting still a pipe-able consistency for decorating?
Hi Elizabeth,
The frosting is definitely still pipe-able once you add in the caramel and can be used for piping on decorations. Hope that helps, happy baking!
What a beautiful and delicious looking Cake! On my list to make!
How do I sign up for your newsletters?
Aw thank you Lisa, it is so good!! I actually stopped sending out a newsletter a few months ago, so I don’t currently have my sign up available. I’m so sorry! But I do share all my new recipes on social media (FB, Instagram, TikTok, and Pinterest) 🙂
This was delicious but very veeery sweet. The chocolate cake is perfect and very moist, I think it will be my new go-to recipe. I’m not sure if I did something wrong but my caramel turned out very thick. I had to add an extra 1/2 cup of cream and it was still not runny like the video/pictures. The instructions are super clear and the tips are very helpful. The only thing I wasn’t sure about is how much buttercream I should use for the layers and how much I needed to reserve for mixing with the chocolate and frosting the whole cake. I will definitely do it again but next time I think I’ll do a cream cheese frosting instead to balance out the sweetness.
Hi Betty,
I’m so happy to hear that you loved the chocolate cake layers and that the recipe and tips were helpful 🙂
For the caramel, it sounds like it may have cooked just a little too long or reached a slightly higher temperature, which can make it quite thick once it cools. Adding extra warm cream was exactly the right way to loosen it.
And thank you for the note about the buttercream amounts! For the filling, I’d use about 1 to 1 1/4 cups of buttercream between each cake layer, then reserve the rest for the outside of the cake. A cream cheese frosting would also be delicious next time and would definitely help balance the sweetness, hope it turns out amazing!
If I bake in two 9 inch pans should I slice the cakes in half to layer icing and caramel between more layers than just between the two cakes?
Hi Megan,
Hi! Yes, if you bake this recipe in two 9-inch pans, you can slice each cake horizontally to make four thinner cake layers if you’d like more layers of buttercream and caramel.
I’d chill the cake layers really well before slicing them so they’re firm and easier to cut evenly. Since you’ll have three filling layers instead of the two in the original cake, keep each layer of buttercream and caramel a little thinner.
You can also leave the two 9-inch layers whole if you prefer. The cake will still taste delicious, you’ll just have one thicker layer of filling in the center. Hope that helps, happy baking!!