
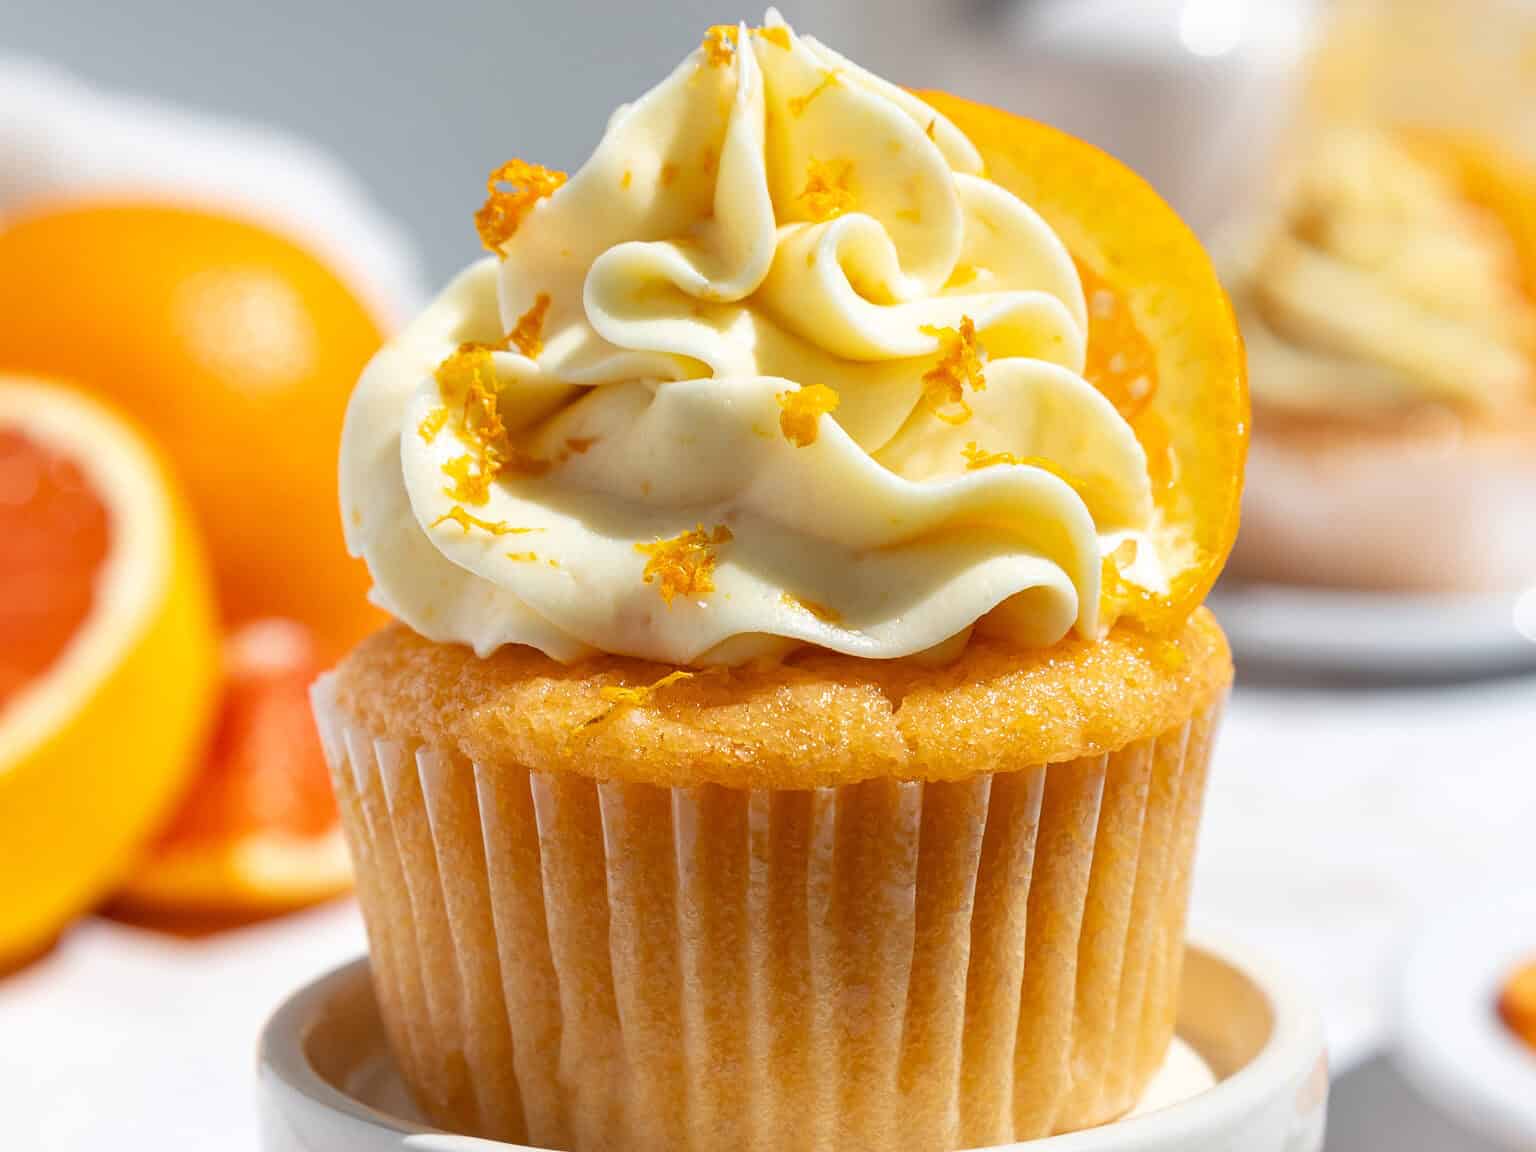
Orange Cupcakes
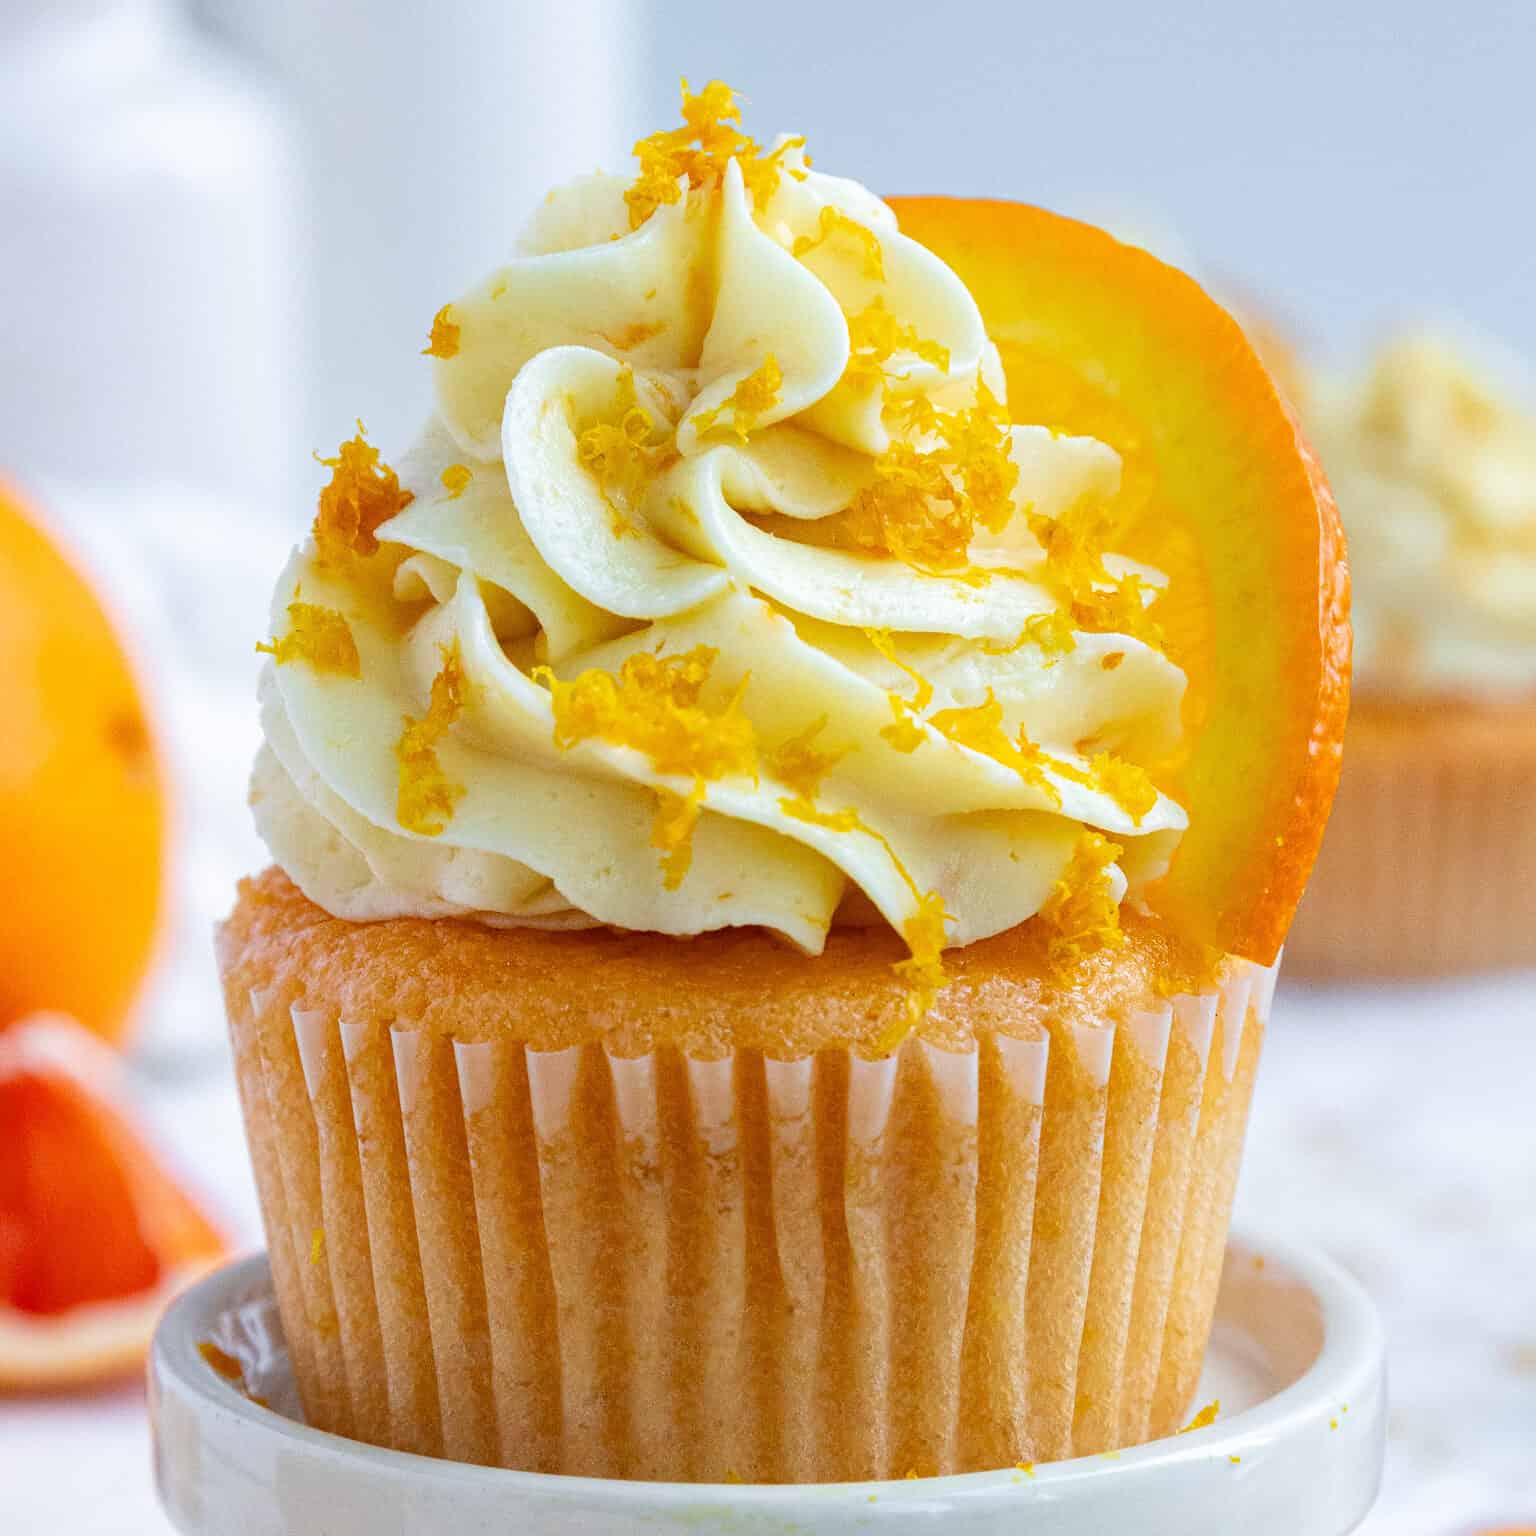
These orange cupcakes are absolutely packed with citrus flavor! They’re made with tender orange zest cupcakes, filled with silky smooth orange curd, and topped with fresh orange frosting!!
They are just as good as they sound and are perfect for summer!
Let’s Make These Orange Cupcakes Together
Let’s walk through each step of these orange cupcakes to make sure they turn out as amazing as possible!
Step #1: Bake the Orange Cupcakes
Bake the orange cupcakes first! Preheat the oven to 350°F / 175°C and place 12 cupcake liners in a cupcake pan.
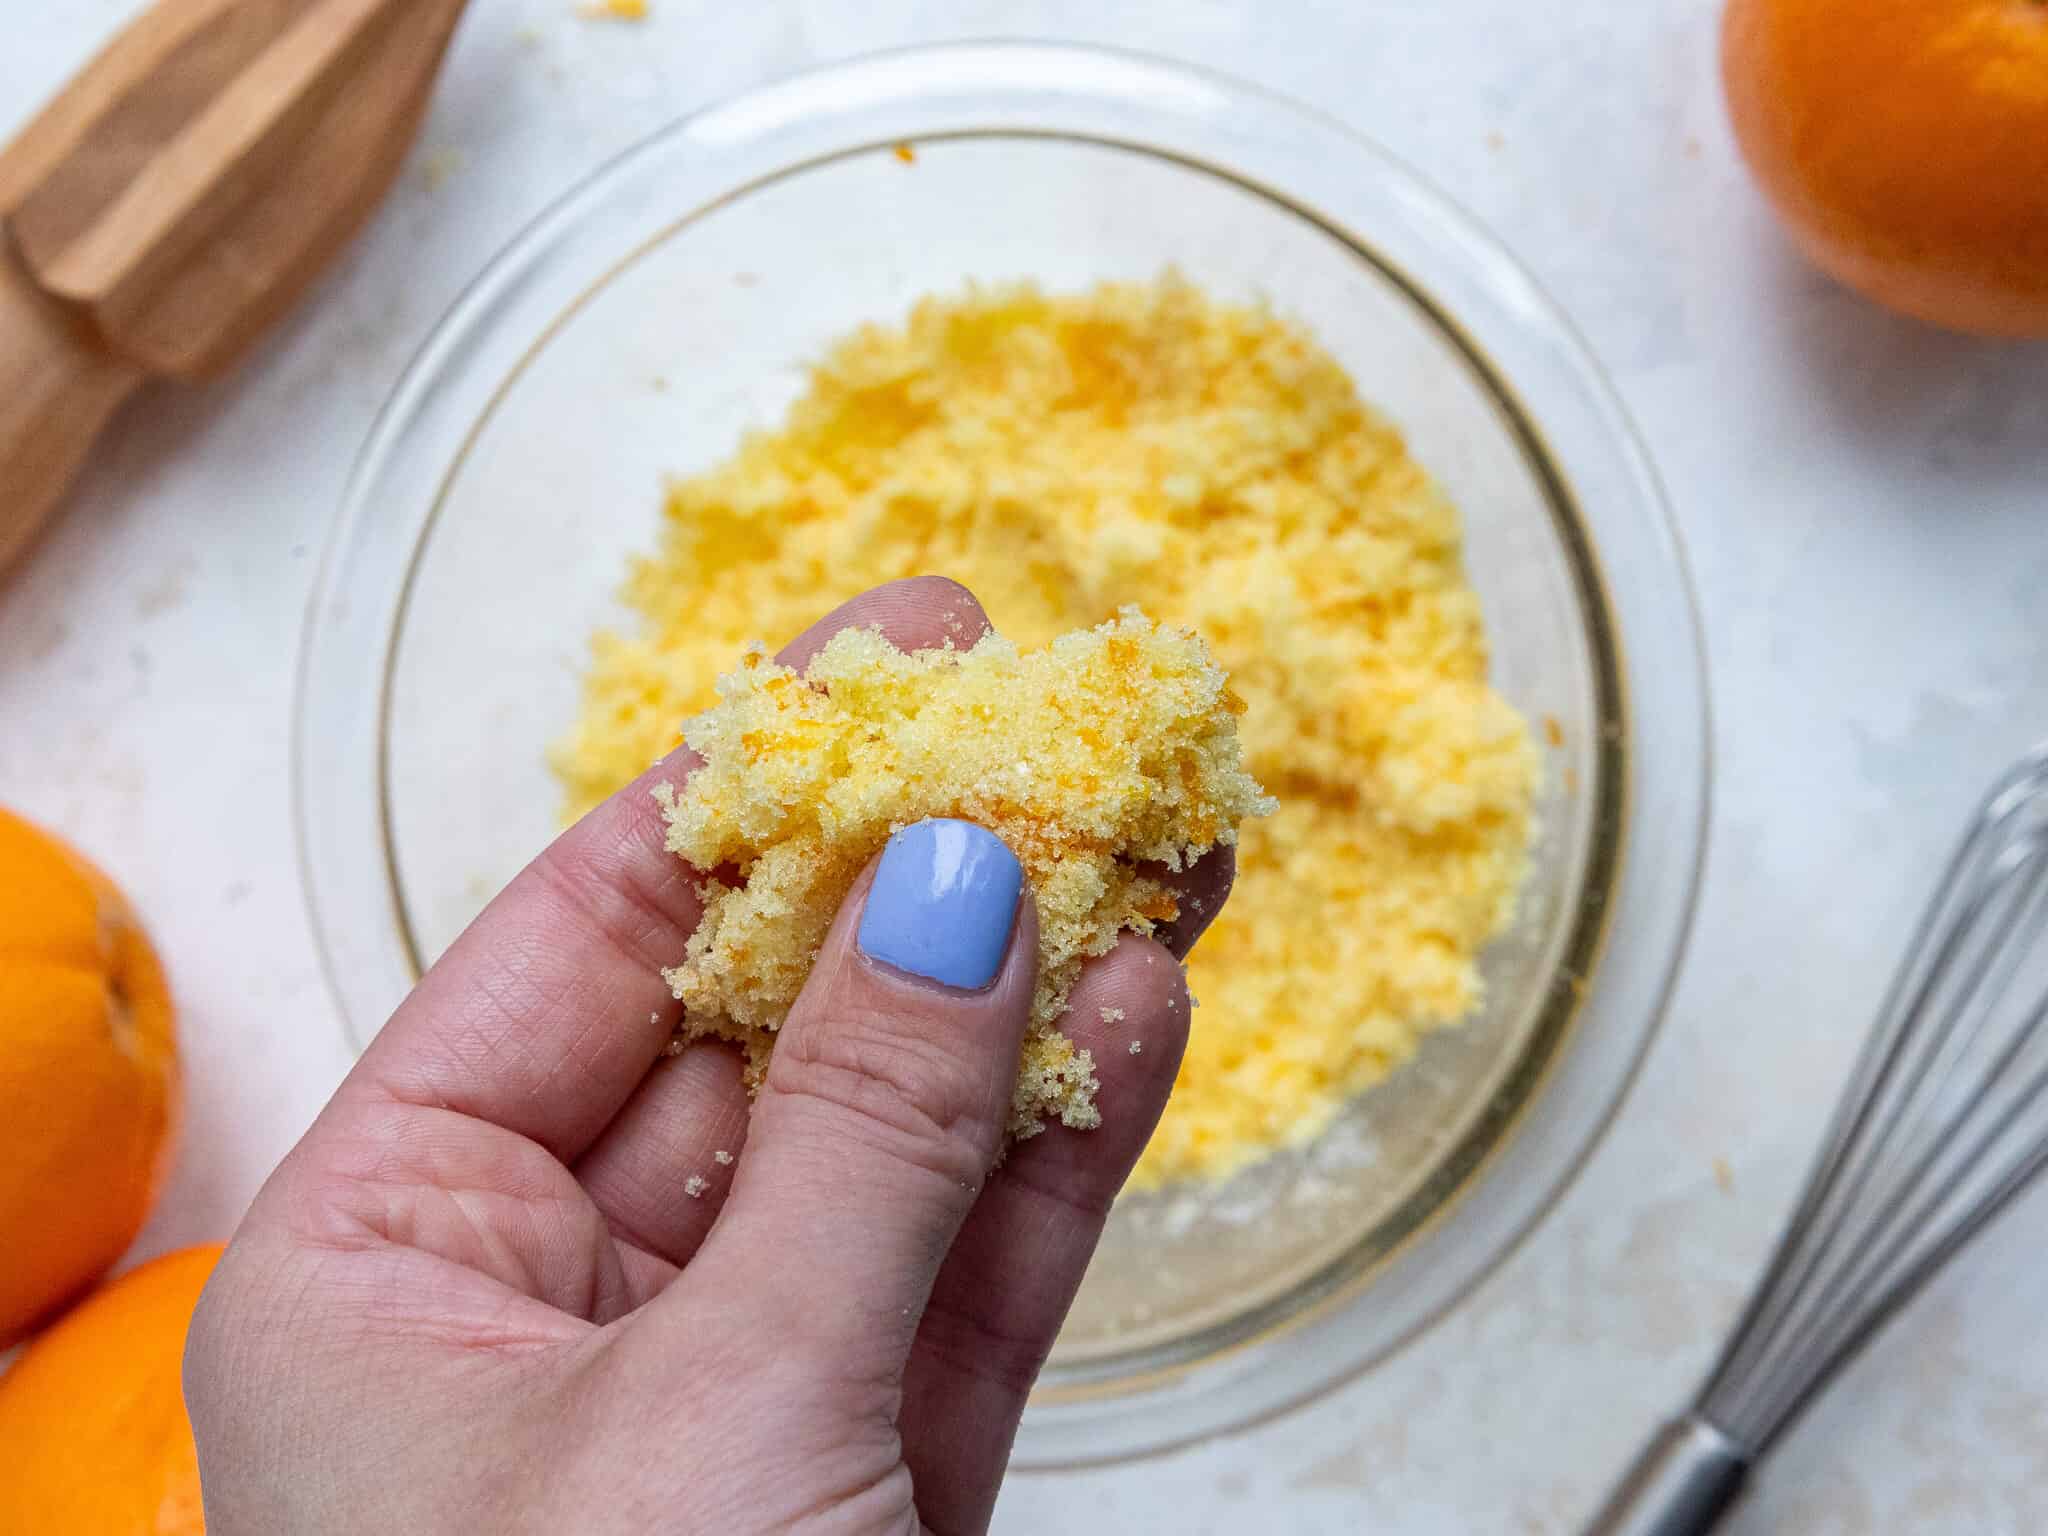
As you start to make the batter, use your fingertips to massage 1 cup of granulated sugar with the zest of 1 large orange in a large bowl.
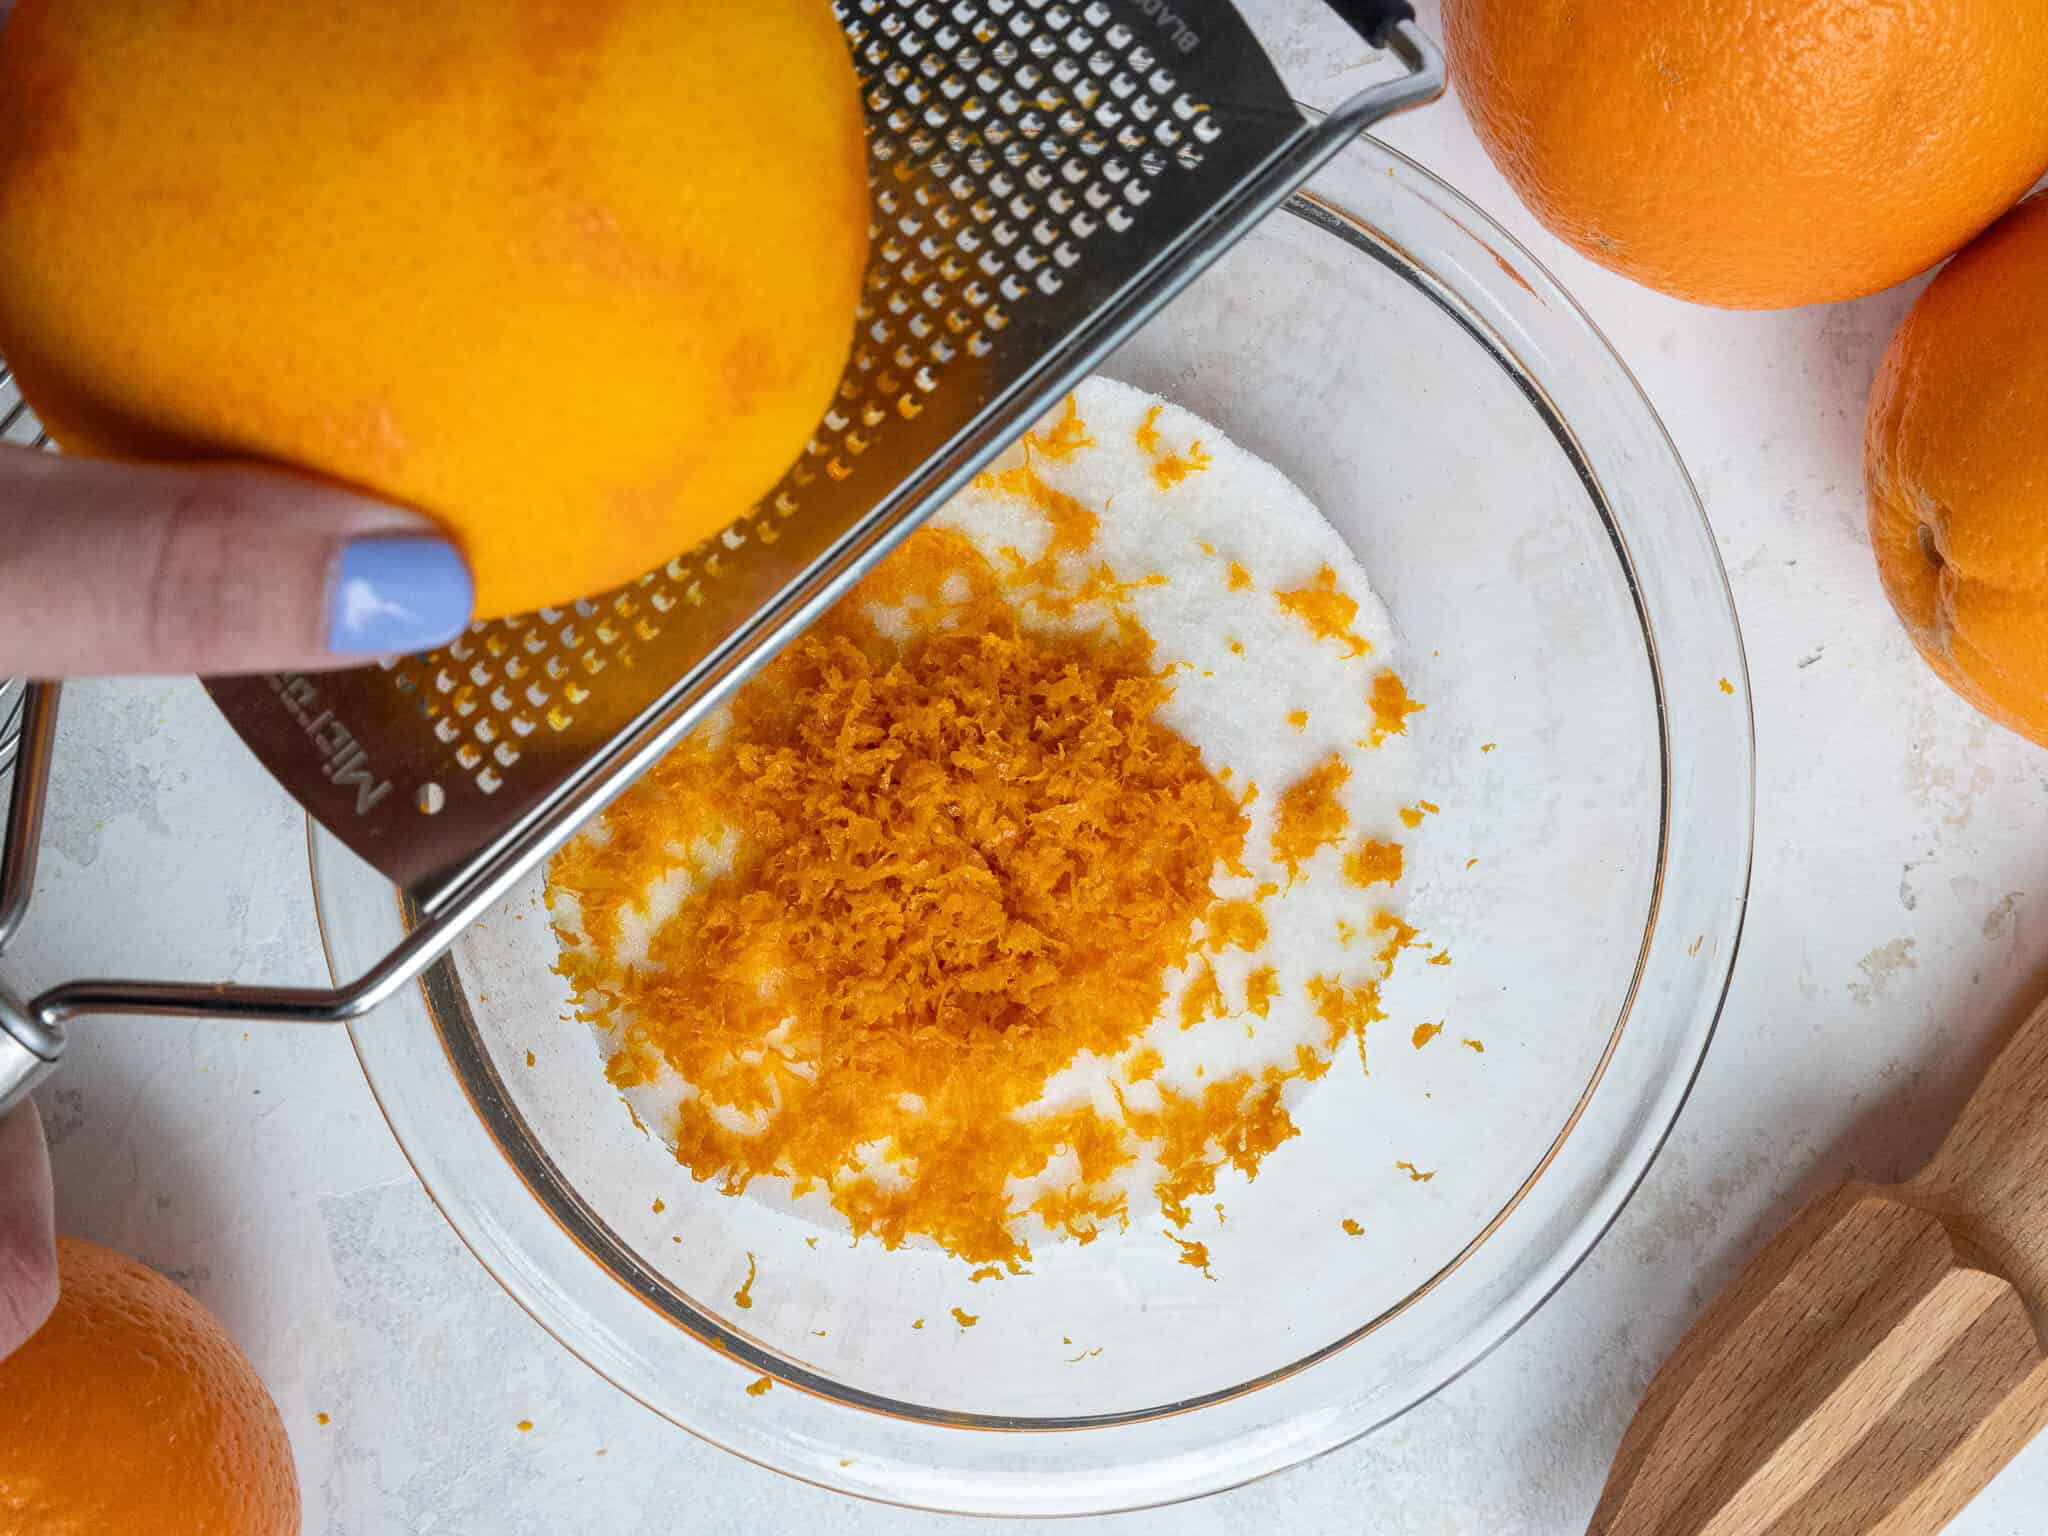
This helps release the oil from the orange zest. It sounds weird, but it really packs these cupcakes with fresh citrus flavor!
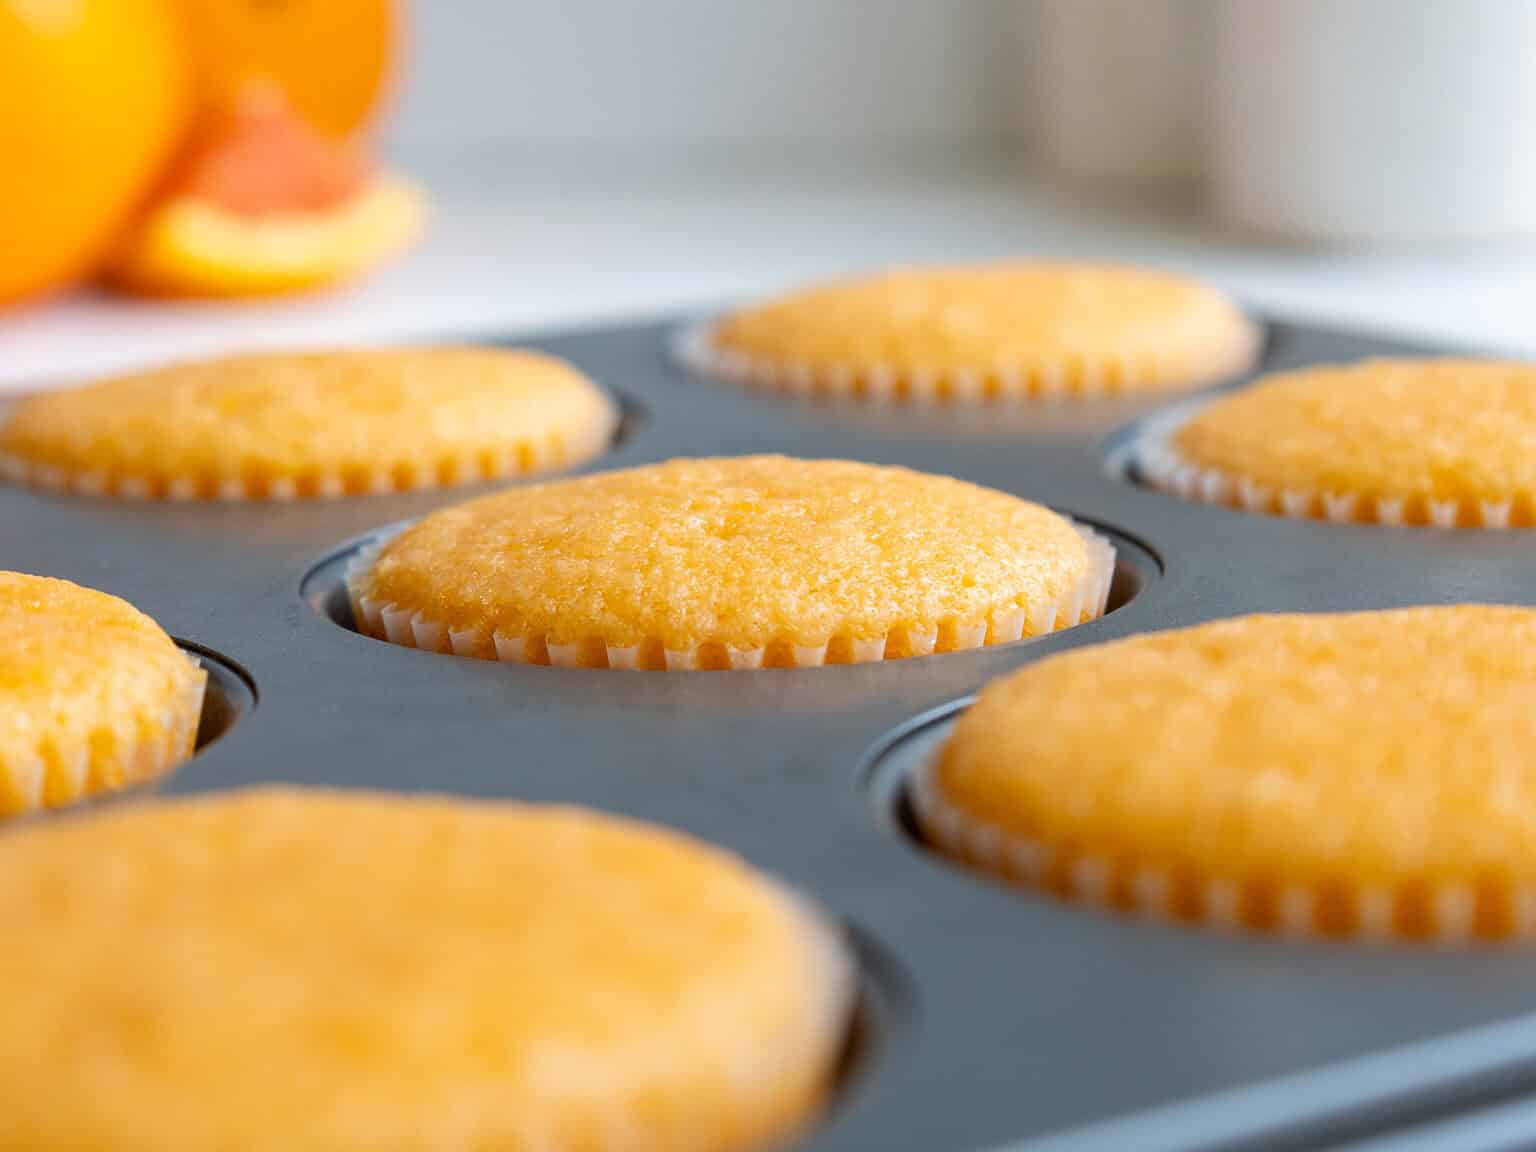
Once you’ve finished making the batter, divide it evenly between the cupcake liners and fill them about 3/4 full.
Bake for about 18-21 minutes or until a toothpick comes out with a few moist crumbs.
Let the cupcakes cool for 15 minutes in the pan before moving them to a wire rack to finish cooling.
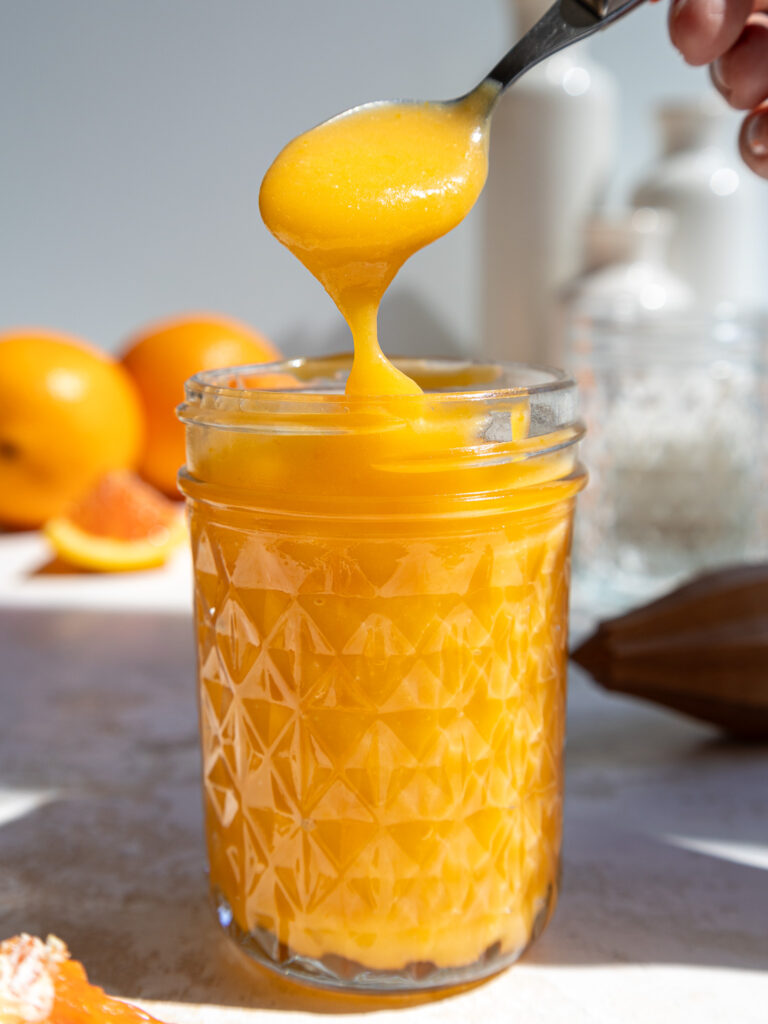
Step #2: Make the Orange Curd Filling
Make the orange curd next, because it needs time to cool to room temperature. This can be made up to 2 weeks in advance and stored in the fridge.
Once it’s been cooked and has had a chance to fully cool, it should thicken and have a scoopable consistency like the photo below.
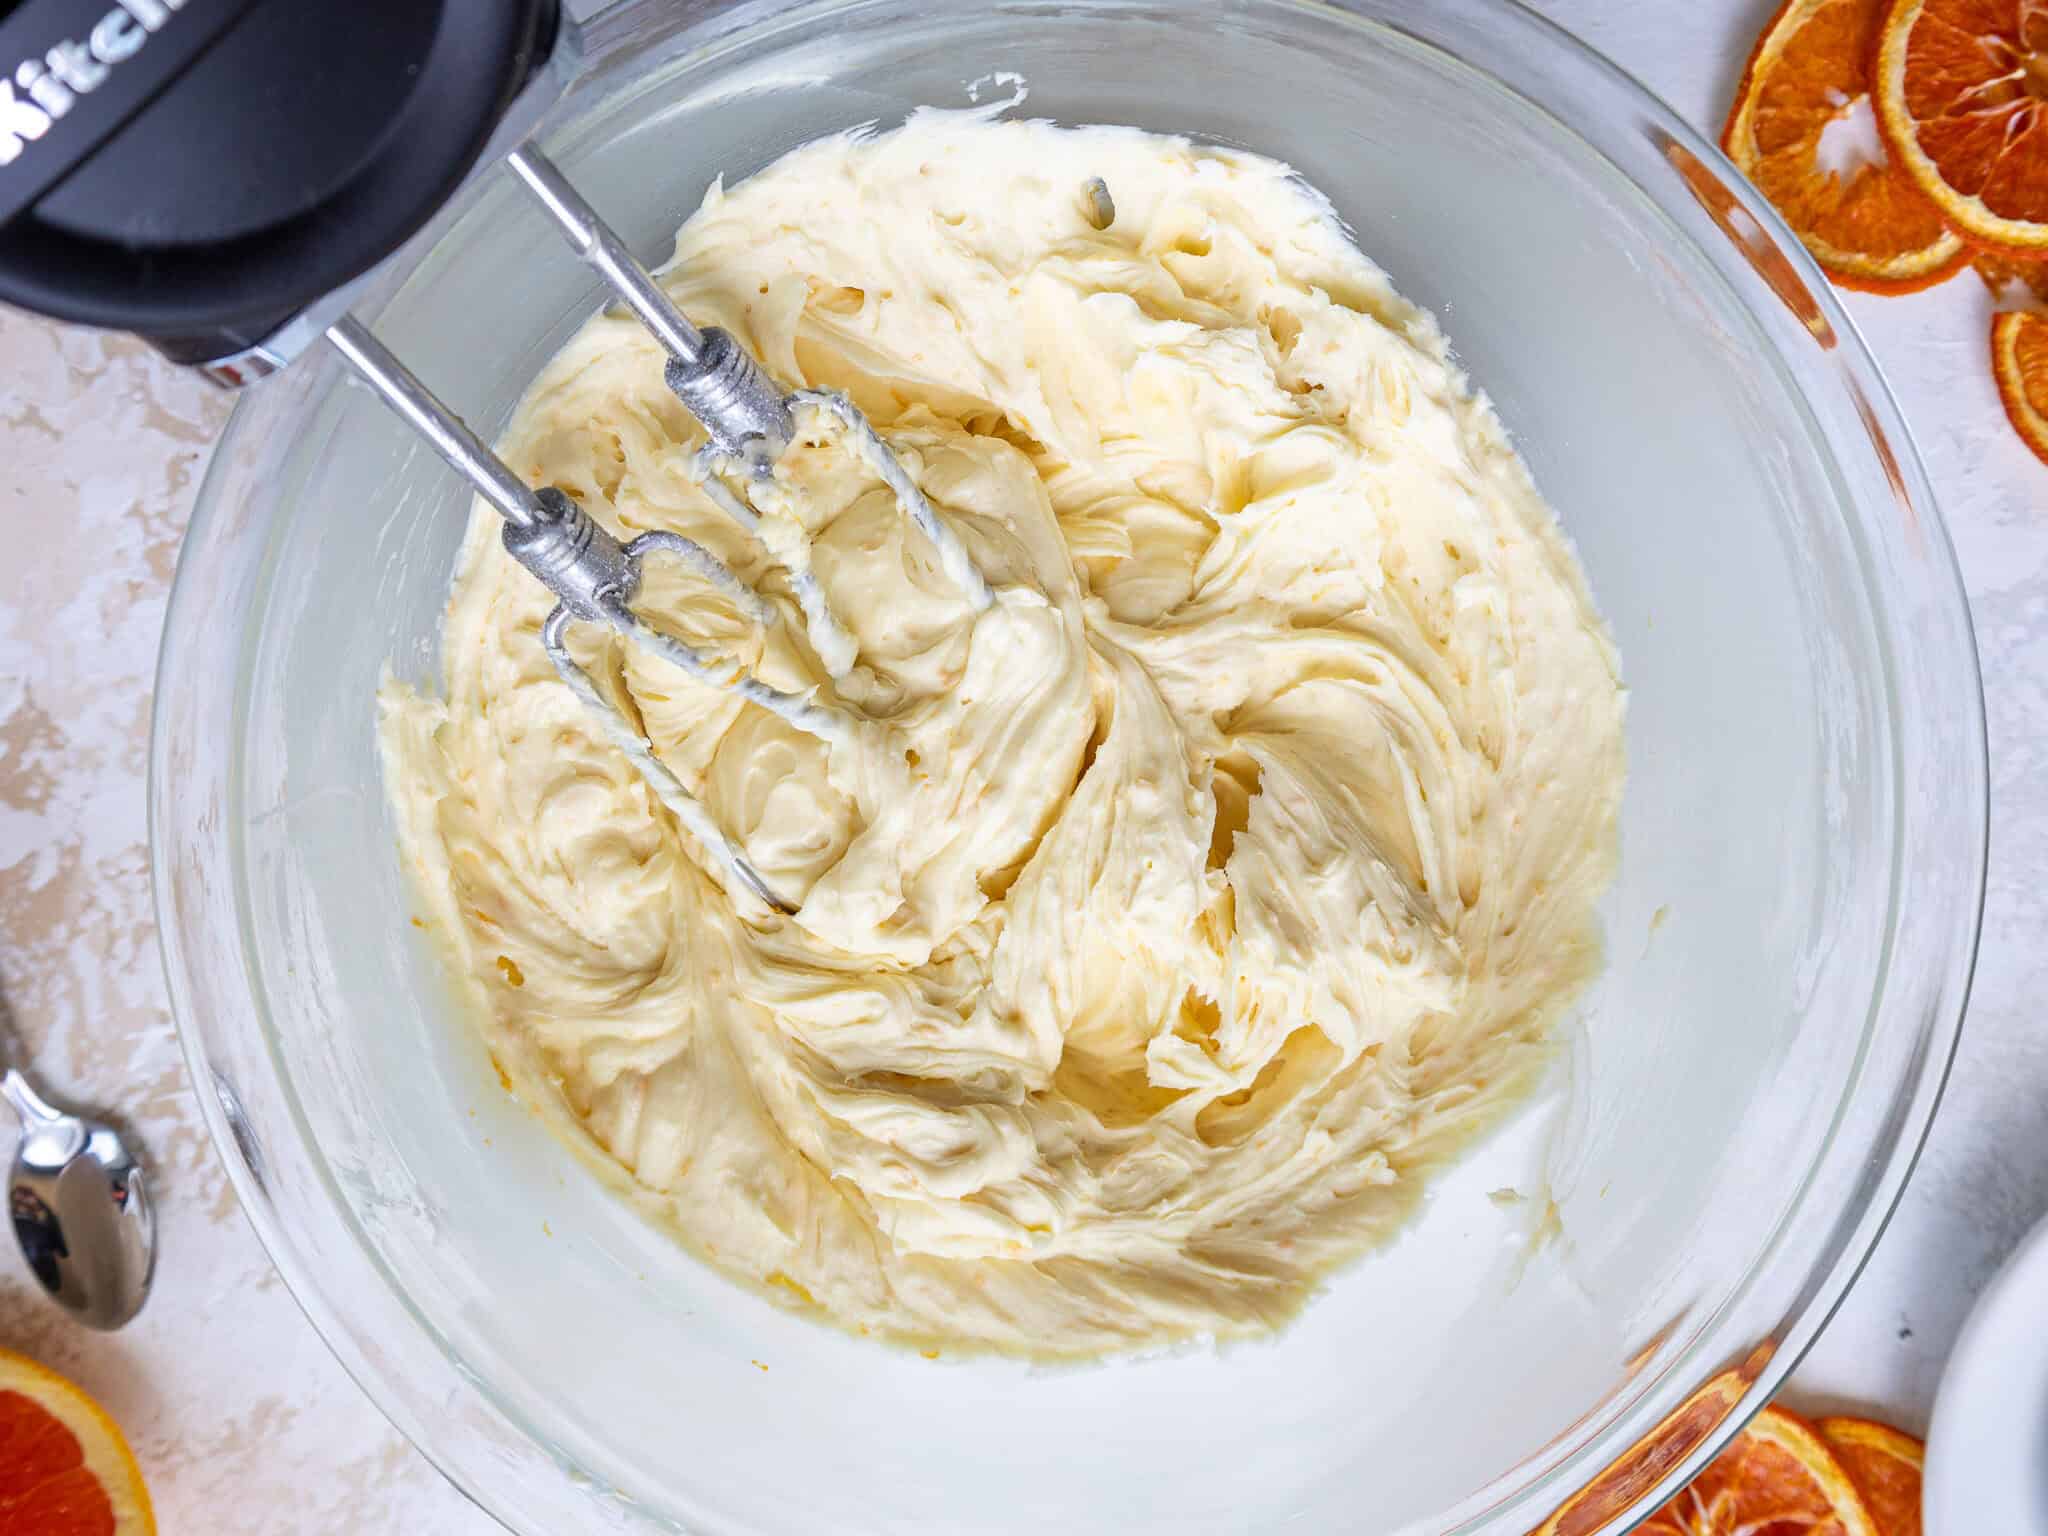
Step #3: Make the Fresh Orange Buttercream
The last component of these cupcakes is the fresh orange buttercream!
I like to stir the buttercream by hand with a rubber spatula once it’s fully made. This makes the frosting silky smooth and easier to pipe on each cupcake.
This frosting can also be made in advance if needed and kept in the fridge for up to a month.
Place the frosting into a large piping bag fitted with a Wilton 1M frosting tip.
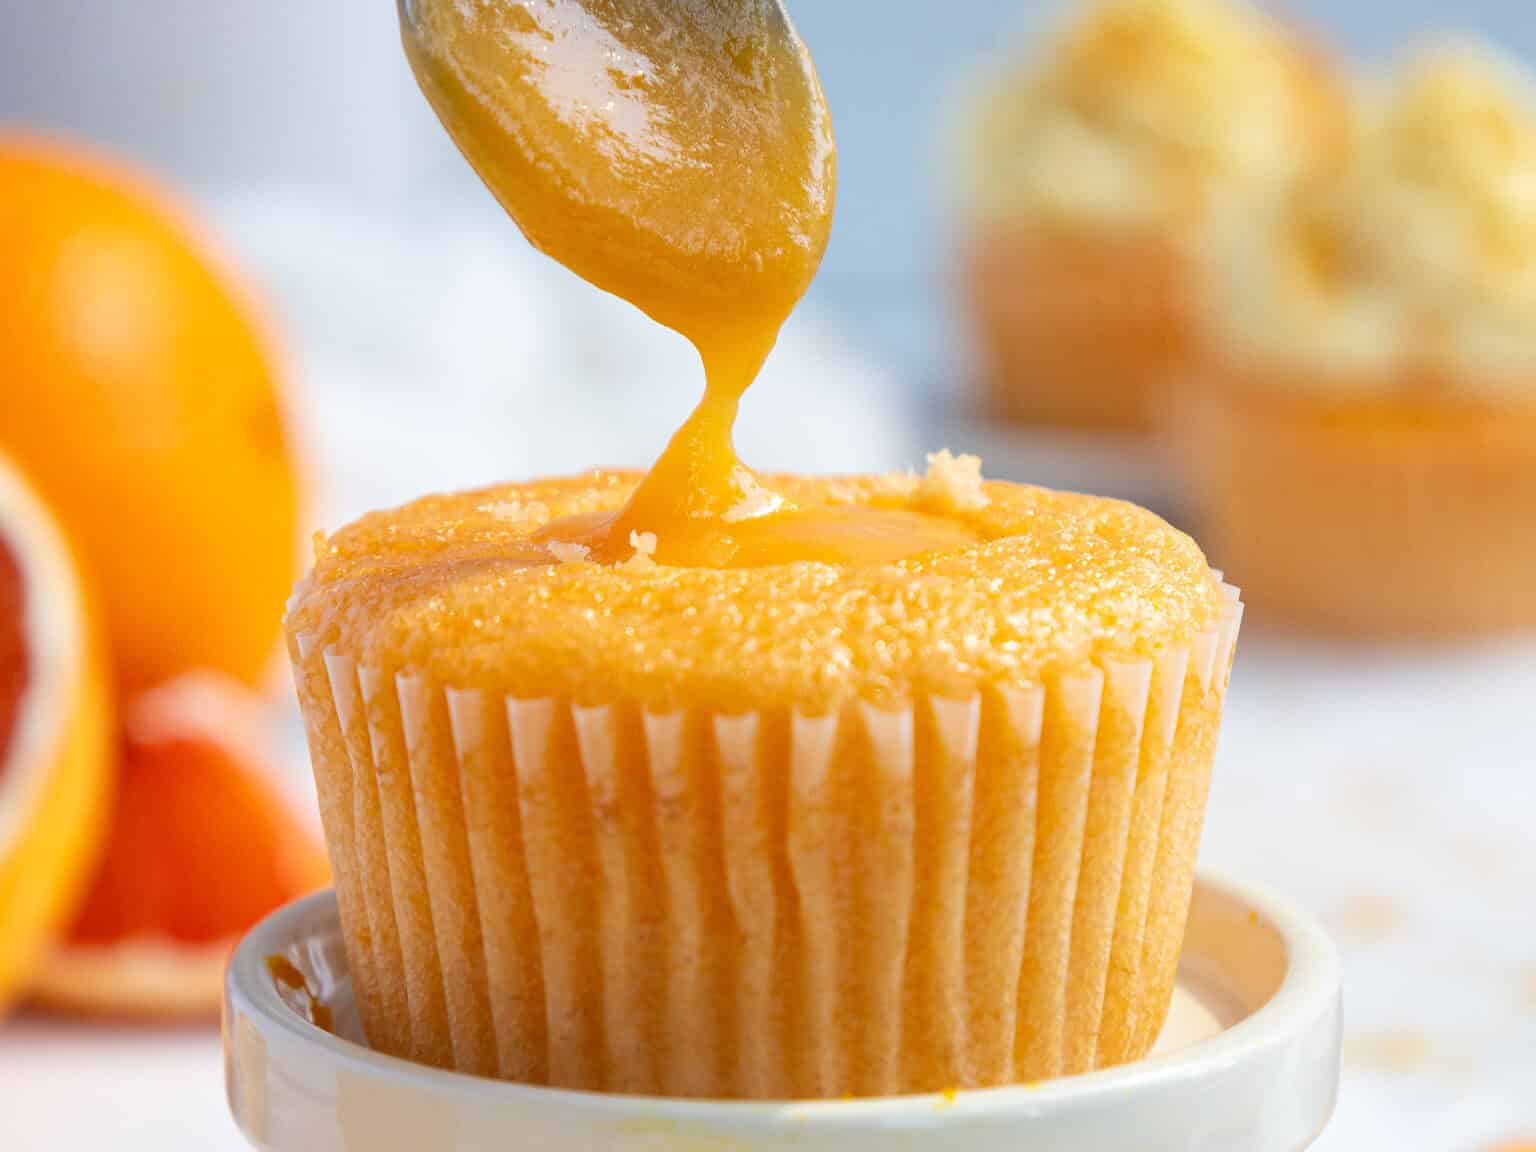
Step #4: Fill and Frost These Orange Cupcakes
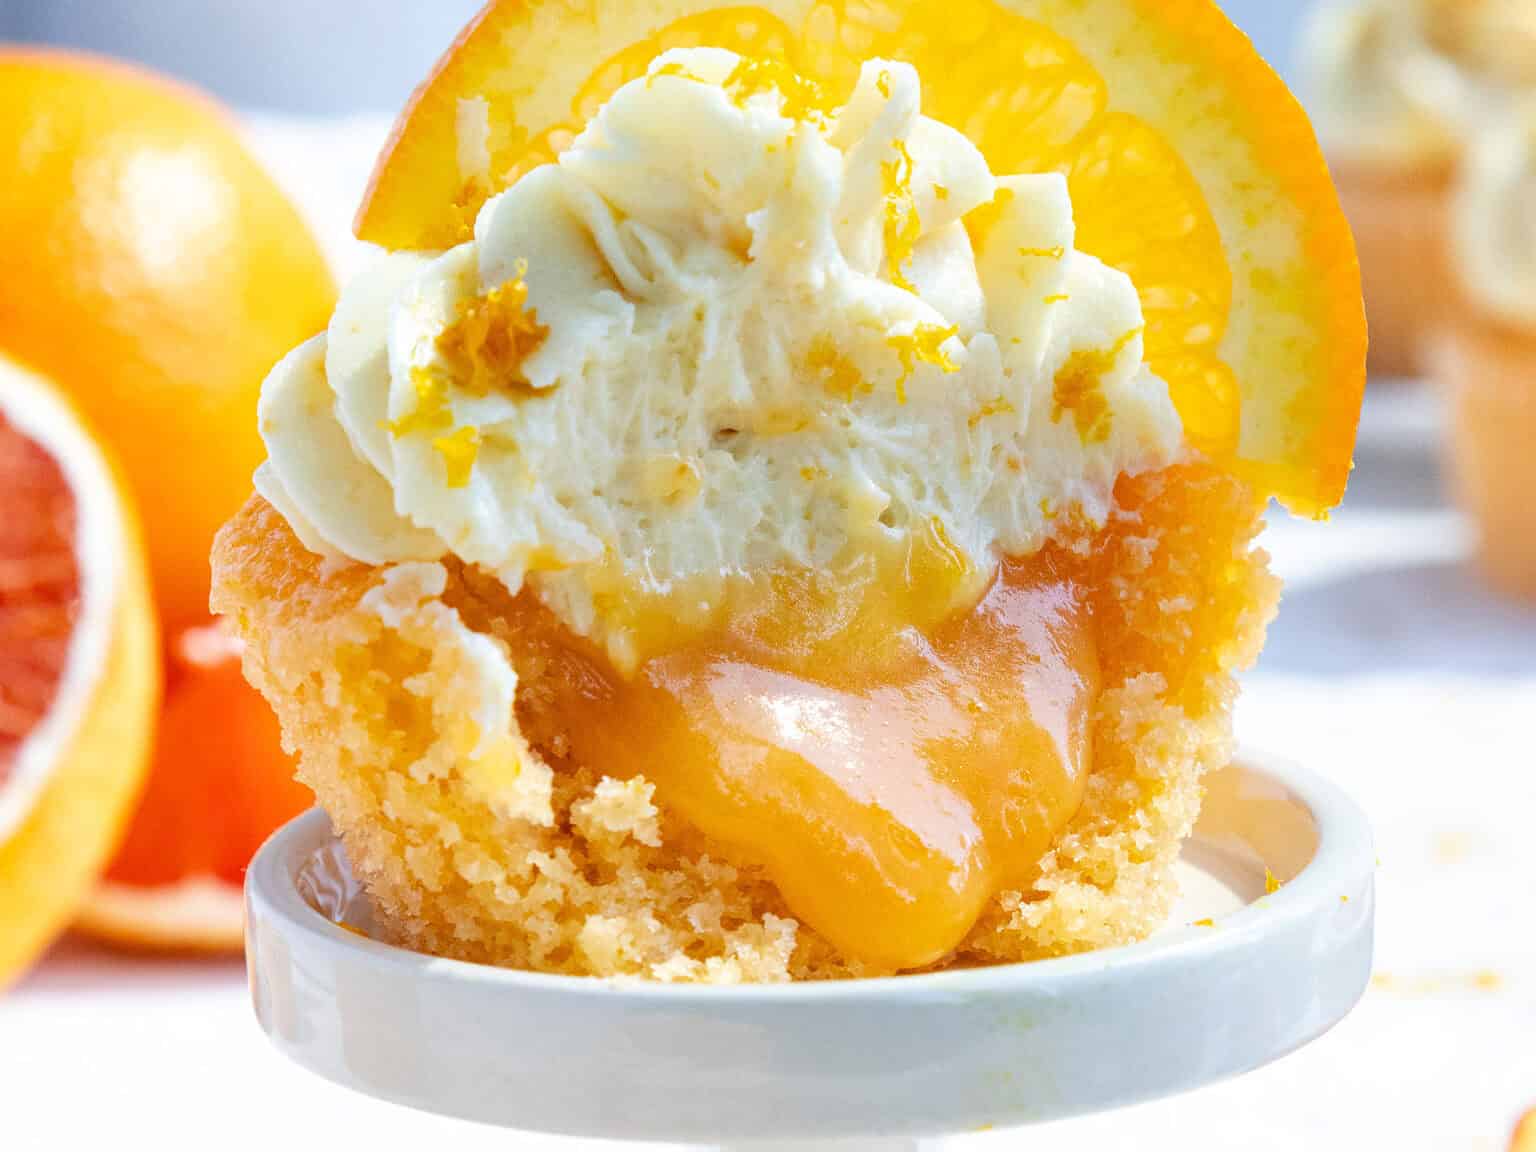
Then it’s time to fill and frost these cupcakes! Remove the center of each cupcake and fill it with about 1 Tbsp of orange curd.
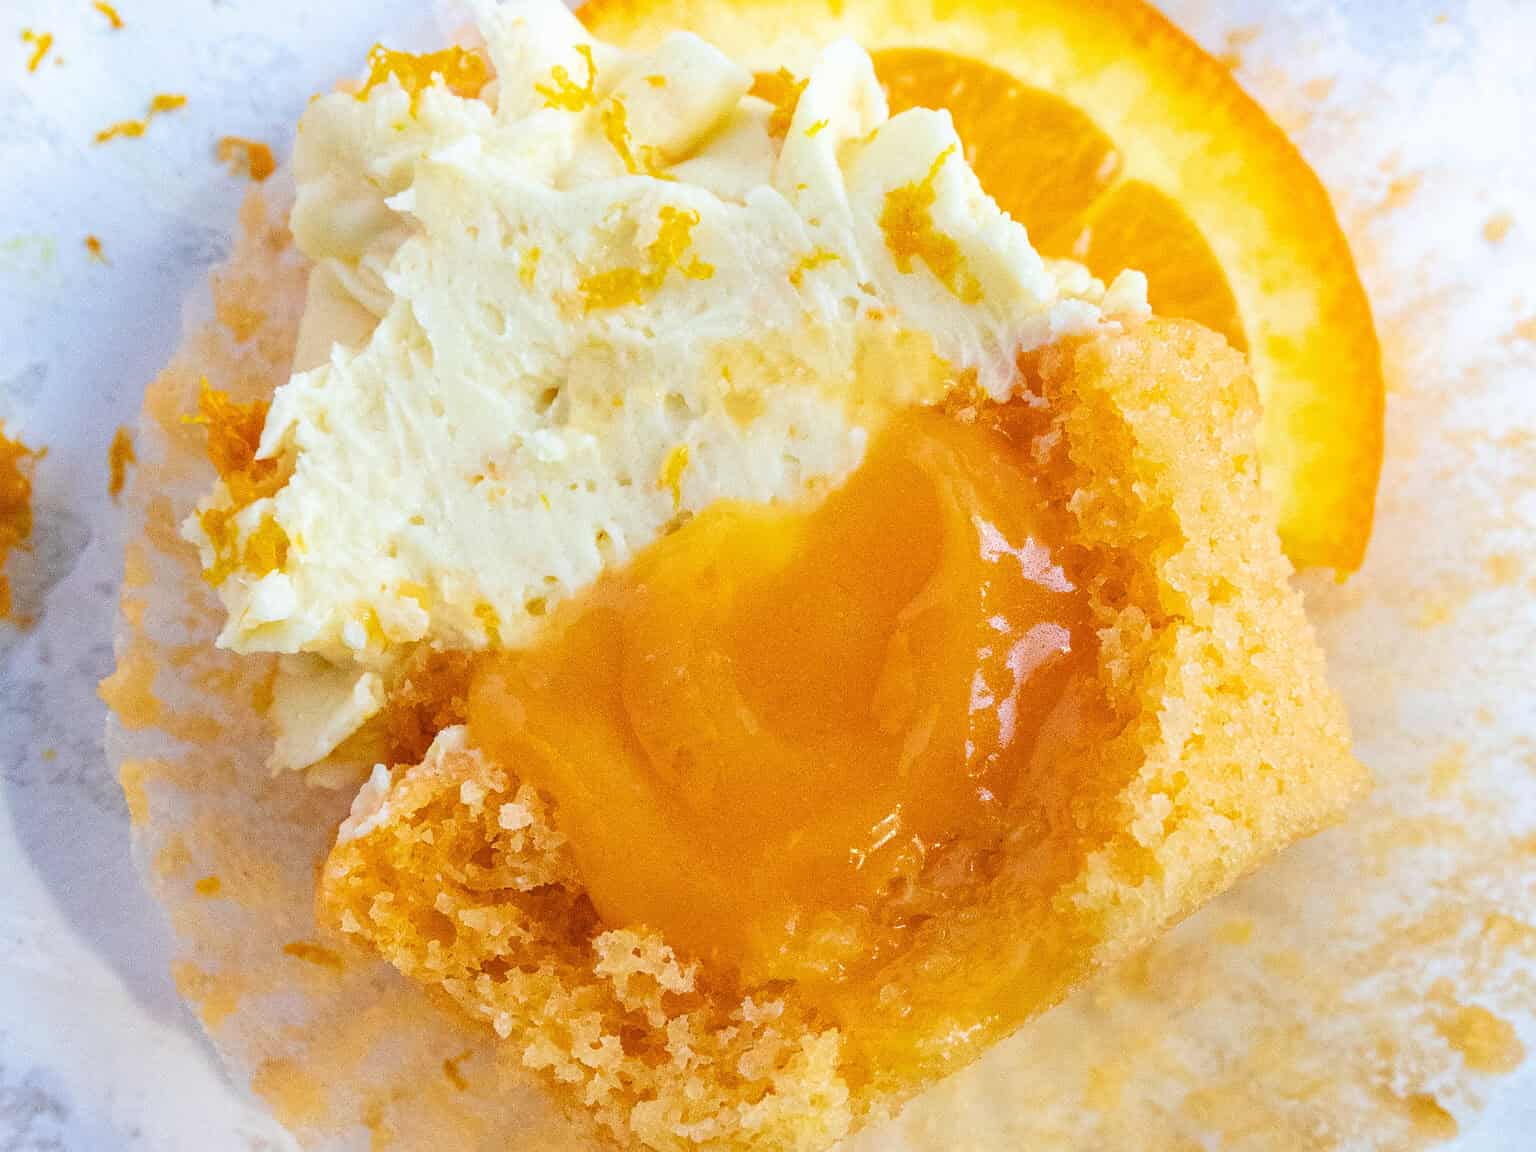
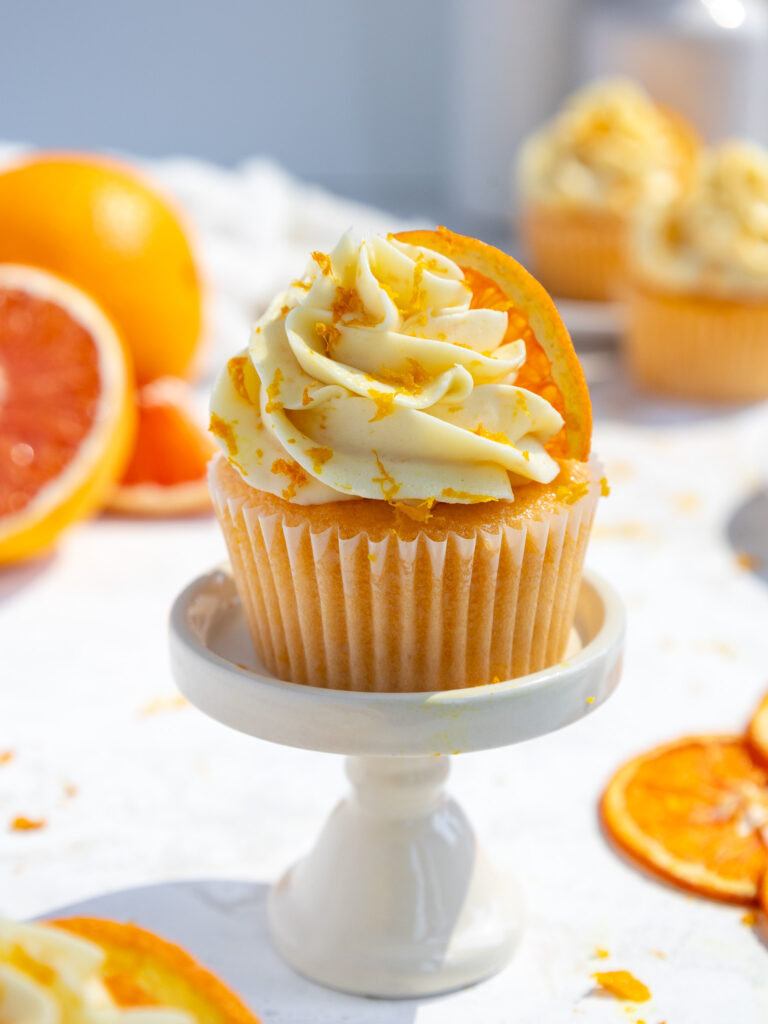
Pipe a generous swirl of orange buttercream frosting on top of each cupcake. Garnish with a fresh orange slice and a dusting of orange zest, then enjoy!

Substitutions and Swaps – Orange Cupcakes
Now that we’ve covered how to make these orange cupcakes, let’s talk about the ingredients!!
This recipe uses quite a few ingredients, and I know you might not have them all on hand.
Or if you have food allergies or restrictions, I’ve got you covered. Below are some swaps and substitutions that you can make.
- Unsalted Butter – If you don’t have unsalted butter, use salted butter, and omit the salt in this recipe. You can also use vegan butter in its place.
- Granulated Sugar – I do not recommend reducing the amount of sugar or changing the type of sugar as it will change the texture of these cupcakes.
- Large Egg – If you have an egg allergy, you can try using 1 flaxseed egg or a vegan egg replacer like this one made by Bob’s Red Mill.
- Fresh Orange Juice and Zest– These are an absolute must in this recipe. I don’t recommend substituting it with bottled orange juice or orange extract. I prefer using Cara Cara oranges for their color and flavor, but you can use whatever oranges you can find – naval, Valencia, or even blood oranges!
- All-Purpose Flour – This recipe turns out best with AP flour, but you can use a gluten-free flour blend if needed.
- Orange Curd – I love to make the filling for these cupcakes from scratch, and it only takes about 10 minutes. However, if you’re short on time, feel free to use store-bought orange curd or orange marmalade.
- Gel Food Coloring – I like to use a tiny drop of orange gel food coloring to give these cupcakes a delicate orange color. This can be omitted if you don’t want to use food coloring, though!
Orange Curd Ingredients and Substitutions:
- Egg yolks or a whole egg – I always have leftover egg yolks from making macarons, so I like to use egg yolks in this recipe! If you don’t have any on hand, you can use 1 whole egg. The mixture will turn out slightly thicker, but it will still taste great.
- Granulated Sugar – This recipe turns out best with granulated sugar. You can use less processed sugar if you want, but the consistency might not be as smooth.
- Fresh Orange Juice and Zest– Fresh orange juice is a must in this recipe. Make sure you use freshly squeezed orange juice. You can also swap in any other citrus!
- Unsalted Butter – Unsalted butter adds richness and helps balance the sweet citrus flavor of the orange. If you don’t have unsalted butter, use salted butter, and omit the salt in this recipe.
Making These Orange Cupcakes in Advance & Storing Them
You can make these cupcakes in advance! Frosted cupcakes can sit at room temperature for a few hours or be stored in the fridge for up to 5 days in an airtight container.
However, they taste best when they’re freshly baked!
These cupcakes can also last up to a month in the freezer. If you plan to freeze them, I suggest waiting to fill and frost them until they’re thawed.
You can also make your buttercream ahead of time or save any leftovers. The buttercream frosting will last in the fridge for up to a month.
Be sure to give the frosting a good stir once it thaws to get the consistency nice and smooth again.
You can also store buttercream in piping bags in the fridge. I find they keep their consistency well in piping bags and don’t require any mixing after they’ve thawed.
Tips for Making the Best Orange Cupcakes
- Ingredients at room temperature mix together better. Set out any cold ingredients ahead of time.
- Properly measure the flour (spoon into the cup measure, then level) or use a kitchen scale to measure your dry ingredients.
- Mix the cupcake batter just until the ingredients are incorporated once you add in the flour. This will ensure your cupcakes are tender and fluffy.
- Use a large cookie scoop to easily fill your cupcake liners. It also makes sure your cupcakes end up being the same height.
- Seal off the top of the piping bag with a rubber band to prevent any frosting from coming out of the top of the bag and make the piping bag easier to use.
- Pour the orange curd through a fine mesh strainer once it’s done cooking to remove any bits of cooked egg, zest, or orange seeds. This will give it a perfectly smooth texture.
- Use Cara Cara or blood oranges to give the orange curd a stronger, naturally orange color.
Let Me Know What You Think
If you make this orange cupcake recipe, I’d love to hear what you think! Please leave a rating and comment below.
Don’t forget to tag me @chelsweets and #chelsweets so that I can see your amazing creations on social media.
Orange Cupcakes
Ingredients
Orange Cupcakes
- 1 cup granulated sugar 200g
- 1 Tbsp orange zest – zest of 1 large orange 6g
- 1/4 cup unsalted butter, room temperature 56g
- 1/2 cup full-fat sour cream, room temperature 125g
- 1/4 cup water, room temperature 60g
- 1/4 cup freshly squeezed orange juice 60g
- 1 large egg, room temperature 56g
- 1 tsp vanilla extract or vanilla bean paste 4g
- orange gel food coloring – optional
- 1 1/4 cup all-purpose flour or gluten free flour blend 150g
- 1 1/2 tsp baking powder 6g
- 1/2 tsp fine salt 3g
Orange Curd Filling
- 1/3 cup granulated sugar 67g
- 1 Tbsp orange zest – zest of 1 large orange 6g
- 2 large egg yolks or 1 large egg 56g
- 3 Tbsp freshly squeezed orange juice 45g
- 1/4 tsp fine salt 2g
- 2 Tbsp unsalted butter, cut into small pieces 30g
Fresh Orange Buttercream
- 1 cup unsalted butter, room temperature 226g
- 1 Tbsp orange zest – zest of 1 large orange 6g
- 1 tsp vanilla extract or vanilla bean paste 4g
- 1/4 tsp fine salt 1g
- 3 1/2 cups powdered sugar 454g or a 1 lb. box
- 3 Tbsp fresh orange juice 45g
Tools & Decorations
Instructions
Orange Cupcakes:
- Preheat oven to 350°F / 175°C, and place 12 cupcake liners in a muffin pan.
- Use your fingertips to massage 1 cup of granulated sugar with the zest of 1 large orange in a large bowl. This helps release the oil from the orange zest. The mixture should become aromatic and become a yellow/orangeish color.
- Add 1/4 cup of room-temperature butter. Mix on a medium-high speed with a hand mixer for a minute to cream together the butter and sugar. Scrape the sides and bottom of the bowl with a rubber spatula as needed to make sure everything is properly combined.
- Add 1/2 cup sour cream, 1/4 cup water, 1/4 cup of orange juice, 1 large egg, 1 tsp vanilla extract, and a small drop of orange gel food coloring (optional) into the butter/sugar mixture. Mix on a medium speed until combined. Don't worry if the mixture looks broken at this point, it'll come together once we mix in the wet ingredients.
- Then add 1 1/4 cups all-purpose flour, 1 1/2 tsp baking powder, and 1/2 tsp salt into the wet ingredients. Mix the batter until the ingredients are just combined and you can’t see any streaks of flour.
- Divide the batter evenly between the cupcake liners, filling them about 3/4 full. Bake for 18-21 minutes or until a toothpick comes out with a few moist crumbs.
- Let the cupcakes cool for 15 minutes before moving them onto a cooling rack to finish cooling.
Orange Curd Cupcake Filling:
- Make the orange curd next! It needs time to cool to room temperature. Fill a saucepan with 2 inches of water and heat over medium-low heat.
- Add 1/3 cup sugar and 1 Tbsp of orange zest into a heat-proof bowl. Massage the zest and sugar together with your fingertips until the sugar is a yellow/orangeish color.
- Then mix in 2 egg yolks or 1 large egg, 3 Tbsp of orange juice, and 1/4 tsp of fine salt in a medium-sized, heat-proof bowl. Whisk until combined and smooth.
- Once the water begins to simmer, place the bowl on top of the saucepan to make a double boiler. Leave the heat on medium-low heat and make sure the water isn't touching the bottom of the bowl. Continuously whisk the mixture until it thickens. This usually takes me about 3-5 minutes. You'll know it's ready when the mixture is thick enough to coat the back of a spoon.
- Remove the bowl from the pan and turn off the stove. Add 2 Tbsp of butter and whisk until incorporated. The mixture should be relatively thick and smooth at this point. Pour the mixture through a fine mesh sieve to remove any potential bits of cooked egg and orange pulp.
- Then place the orange curd in the fridge to cool. It should thicken and be chilled in 15-30 minutes. Leftover orange curd can be covered and stored in the fridge for up to 2 weeks.
Fresh Orange Buttercream:
- Then it's time to make the fresh orange buttercream. Beat 1 cup of unsalted butter on a medium speed for 30 seconds with a hand mixer until smooth.
- Add in the zest of 1 large orange, 1 tsp vanilla extract, and 1/4 tsp salt. Mix on a low speed until the ingredients are incorporated.
- Mix in 3 1/2 cups of powdered sugar and 3 Tbsp of fresh orange juice on a low speed. Scrape the sides and bottom of the bowl as needed.
- Once fully mixed, if the frosting seems too thick, add additional orange juice (1 tsp at a time). If the frosting is too thin, add more powdered sugar (a quarter of a cup at a time). Or if the frosting looks broken, add in more room-temperature butter, 1 Tbsp at a time until it comes back together.
- Stir the frosting by hand with a rubber spatula once it's made for a minute or two to make the frosting super smooth. Then cut off the tip of the bag and fit it with an open star piping tip (like a Wilton 1M).
- Place the buttercream in the piping bag and seal the top with a rubber band.
Decorating these Orange Cupcakes:
- Once the cupcakes have fully cooled, remove the centers with a small sharp knife or a 3/4-inch circle cutter.
- Fill the center of each cupcake with about 1 Tbsp of orange curd.
- Then pipe a generous swirl of orange buttercream frosting on top of each cupcake, and garnish with an orange slice and a dusting of orange zest.
Video
Notes
Substitutions and Swaps
If you need to make any substitutions or swaps in this recipe, please check out the section on ingredient substitutions in the post above.Yield:
One batch of this recipe makes 12 standard-sized cupcakes. It can also be used to make about 30 mini cupcakes (bake for 8-10 minutes at 350 F/175 C). This recipe can also be doubled or halved if needed.Variations:
- To make eggless, dairy-free orange cupcakes, use dairy-free yogurt (almond, oat, or soy) in place of the sour cream and vegan butter in place of the unsalted butter (and omit the salt in this recipe).
- To make gluten-free orange cupcakes, swap in your favorite gluten-free flour blend for the AP flour this recipe calls for, and be sure to over-mix your batter and let it sit for at least 30 minutes before baking for best results.
Making these Orange Cupcakes in Advance & Storage Tips:
You can make these cupcakes in advance! Frosted cupcakes can sit at room temperature for a few hours or be stored in the fridge for up to 5 days in an airtight container. However, they taste best when they're freshly baked! These cupcakes can also last up to a month in the freezer. If you plan to freeze them, I suggest waiting to fill and frost them until they're thawed. You can also make your buttercream ahead of time or save any leftovers. The buttercream frosting will last in the fridge for up to a month. Be sure to give the frosting a good stir once it thaws to get the consistency nice and smooth again. You can also store buttercream in piping bags in the fridge. I find they keep their consistency well in piping bags and don't require any mixing after they've thawed.Nutrition
Other Recipes You Might Like:

Can this be converted into a layer cake? What would the yield be as written?
Hi Alicia,
Great question! I haven’t tested this particular recipe, but you should be able to double it to make a 9×13-inch sheet cake. I’d recommend baking it for 35-40 minutes, or until a toothpick inserted in the center comes out with a few moist crumbs. If you try it, please let me know how it turns out!
@Alicia, I have doubled this recipe and it’s very successful! It yields about 1,425 grams batter; this is enough to make one 1″ high 9×13 layer or two 1″ high 8″ round layers. I made a few minor modifications after making the original cupcake recipe: 1) needs more zest for my taste; I used zest of three large oranges for the double version. 2) use 1 tablespoon orange extract. 3) if you really like a big orange flavor, also add 1/4 to 1/2 teaspoon oil of orange (such as LorAnn Gourmet Super Strength Orange Oil – tiny bottles packaged in pairs and available at Hobby Lobby stores). I have also made this with King Arthur Measure 4 Measure gluten free flour; the texture is light and airy.
Thank you so much for sharing Eileen, that is super helpful 🙂 Appreciate it!
@Alicia,
P.S. You might consider reducing the baking temperature to 335 F for a 9×13 layer and extending time by 5-8 minutes. I find more even results this way with larger sizes.
Making these cupcakes for the first time, what things do I need to buy. I’ve never used a piping for the cream cheese frosting and what kind do I need to get? I’m also a visual learner and I love step by step instructions with a video.
Hi Kellie,
That so exciting! I buy big rolls of piping bags because I use them quite a bit, but this is the type I order on Amazon: https://amzn.to/4eWAfLB
You can get 12 inch or 18 inch bags! I usually use the 18 inch bags for frosting. Hope that helps, happy baking!