
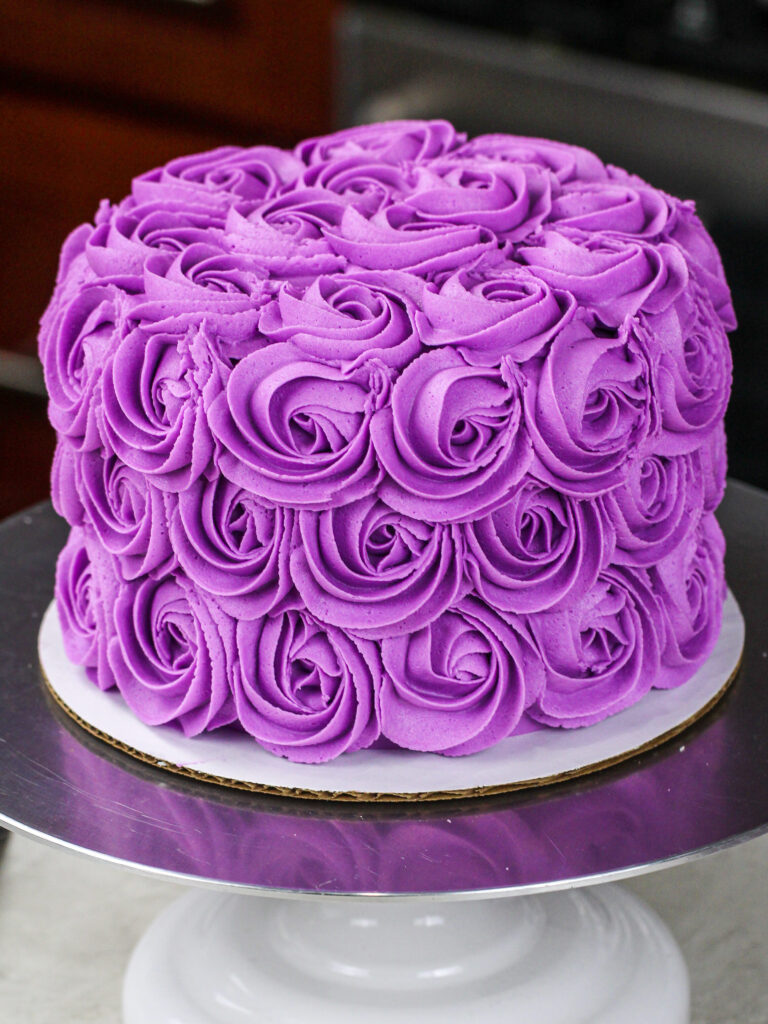
Flower Cake
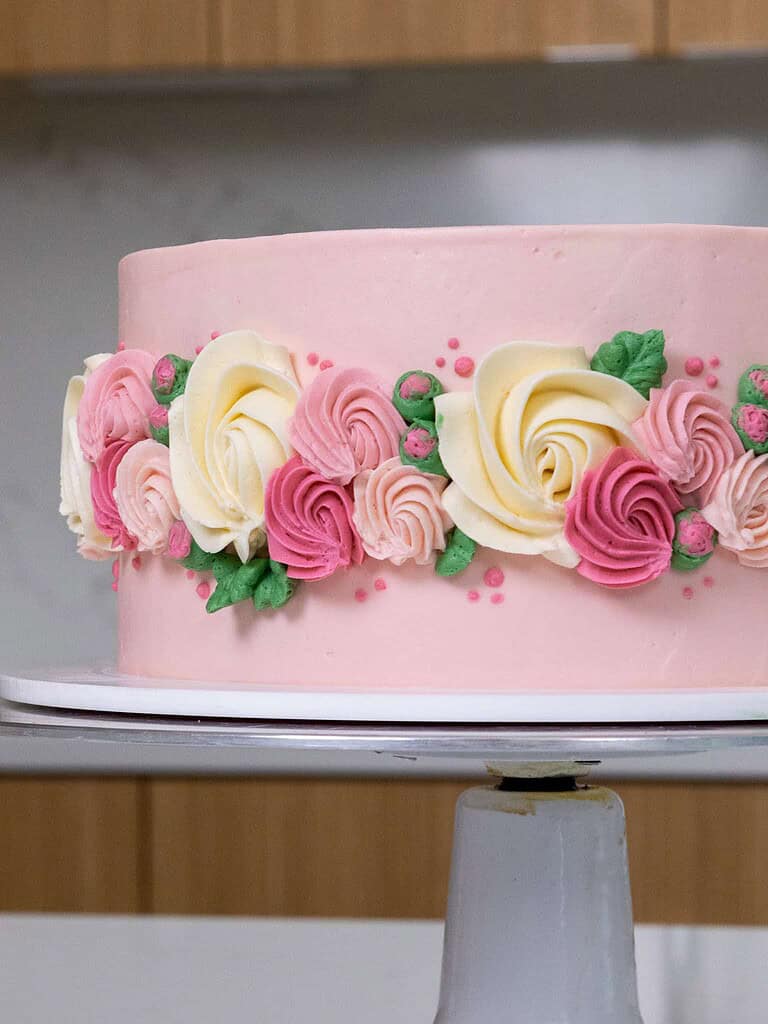
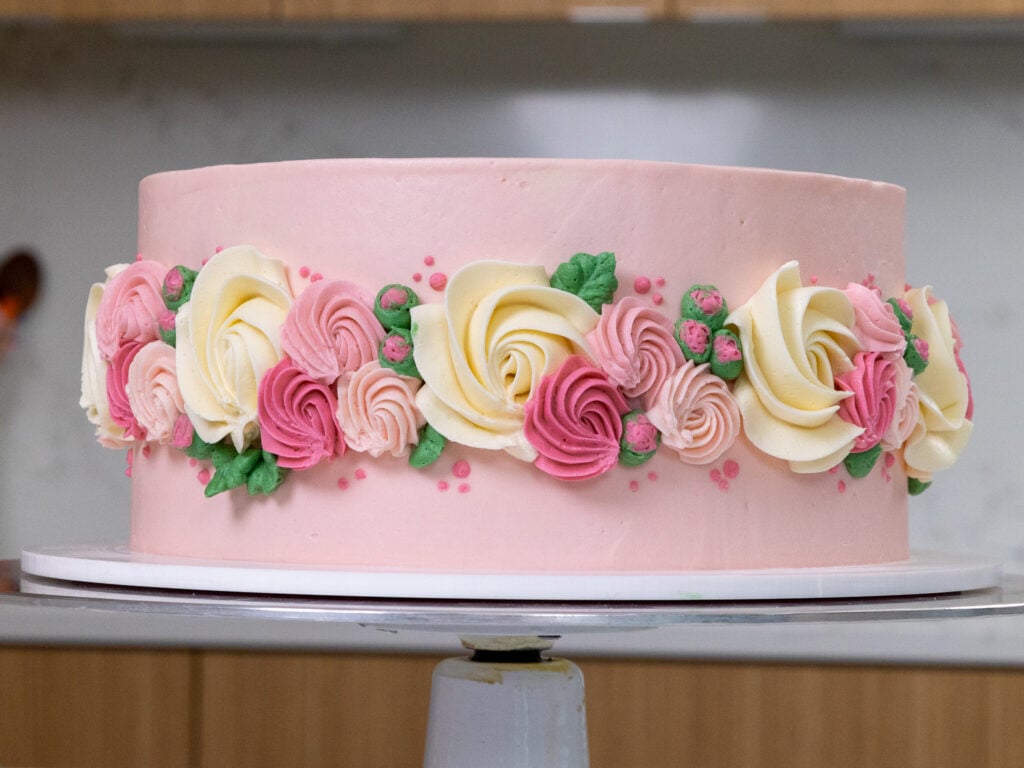
This flower cake is decorated with simple buttercream flowers and made with soft vanilla cake layers and homemade buttercream frosting. It looks elegant and detailed, but it is much easier to make than you might think.
The best part about this design is that you only need a few piping tips and two main piping motions to create the flowers.
That makes it a great flower cake for birthdays, bridal showers, Mother’s Day, spring celebrations, or anytime you want a cake that looks beautiful without needing super advanced decorating skills.
This Flower Cake at a Glance
- Style: buttercream flower cake
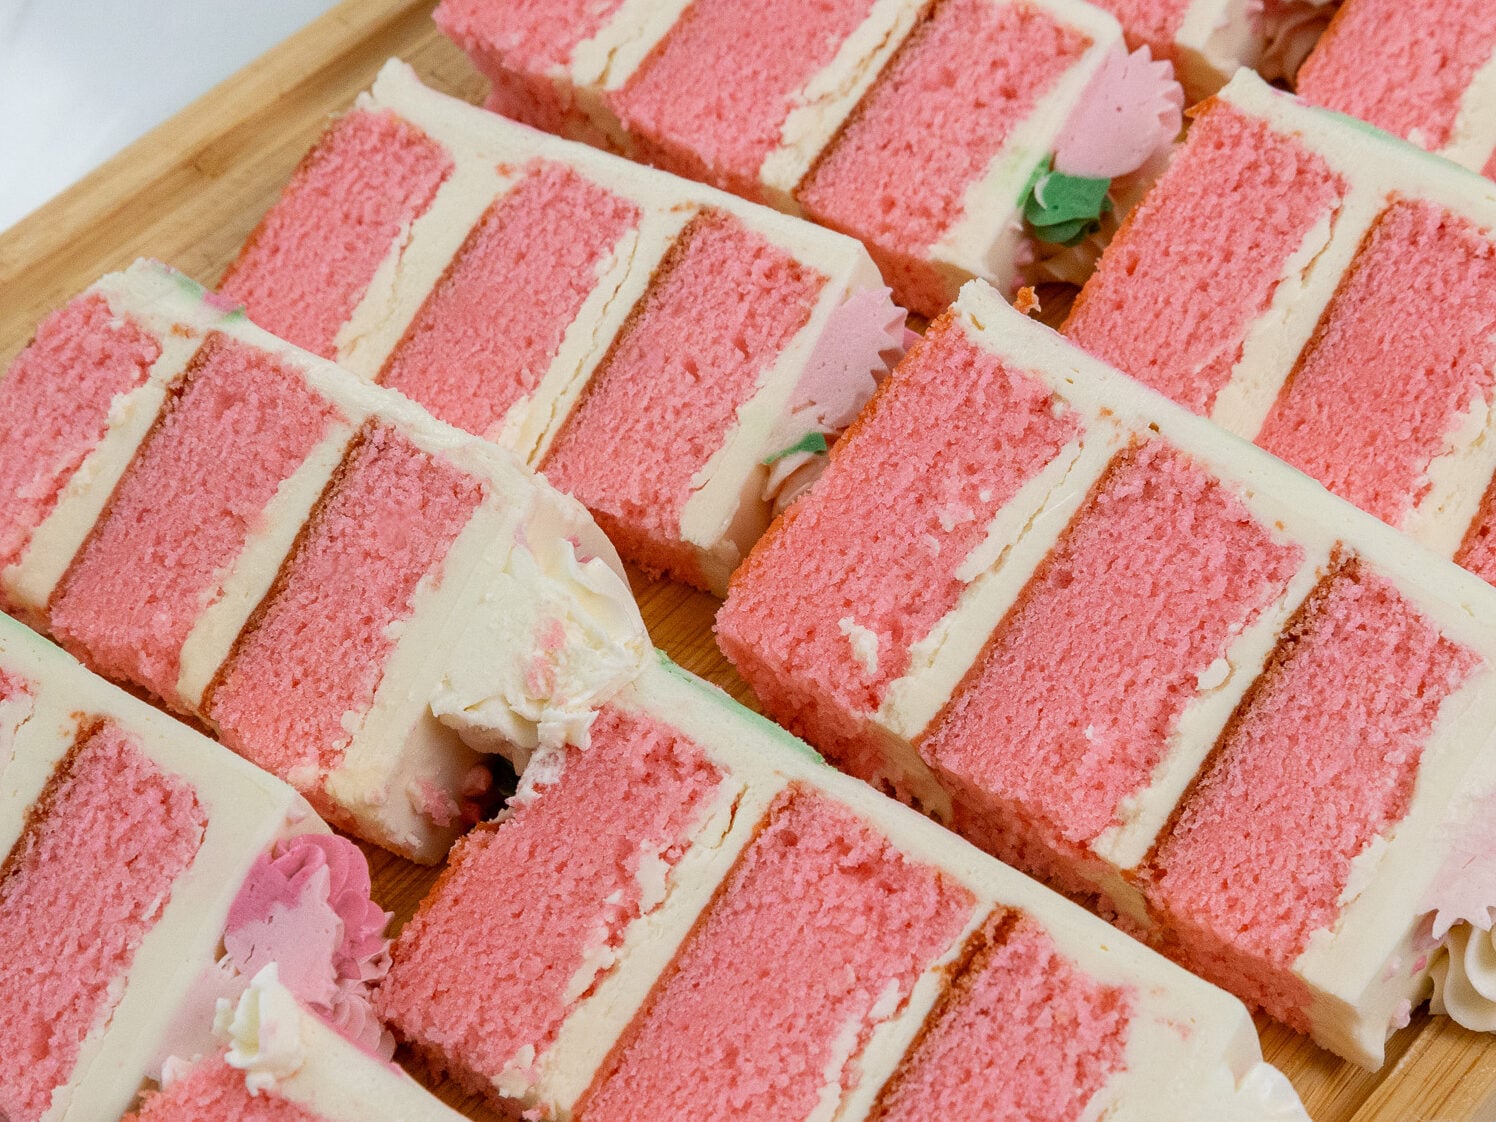
- Cake flavor: vanilla cake
- Skill level: beginner to intermediate
- Best for: birthdays, showers, spring parties, Mother’s Day
- Serves: about 24
- Make-ahead friendly: yes
Why This Flower Cake Is Easier Than It Looks
This flower cake looks fancy, but it’s actually made with just a few simple piping techniques. The large flowers are classic buttercream rosettes, and the smaller flowers and buds are piped with small star and round tips to fill in the gaps.
That means you do not need to learn a dozen flower styles to make this cake. Once you get the hang of the large rosettes and smaller swirls, the whole design comes together quickly.
What You’ll Need to Make this Buttercream Flower Cake
To make this cake, you’ll need a few different frosting tips! While this list might seem long, most (if not all) of the tips can be found in a majority of beginner frosting kits.
I’ve listed a couple of brands that make some of these tips, but there are tons of other brands that make them as well!
The most important thing is just that the shape and size of the tip you use are similar to what I recommend below.
- Stand mixer or electric hand mixer
- Whisk attachment
- Greaseproof Cake Board
- Spinning Cake Stand
- Large Offset Spatula
- Bench Scraper
- 4 Small Piping Bags
- Open Star Piping Tip like a Wilton 1M (for the buttercream rosettes)
- Small French Tip like an Ateco 862 (for the smaller buttercream swirls)
- Small Round Piping Tip like a Wilton 10 (for the flower buds)
- Leaf Piping Tip like a Wilton 366 (for the leaves)
- Very Small Round Piping Tip like a Wilton 3 (to add little dots as pops of color)
- 3 Frosting Couplers
How to Make This Buttercream Flower Cake Recipe
To make sure this cake turns out as amazing as possible, let’s walk through each step together!
I’ve also included a video tutorial of the process in the recipe card at the bottom of this post.
Step 1: Make the Fluffy Vanilla Cake Layers
I recommend making the cake layers first! It gives them time to bake and cool before you assemble the cake.
Once that batter is ready, divide it evenly between the prepared cake pans.
I like to use a digital kitchen scale to weigh my pans, to make sure my layers will be the same height.

Bake for 33-35 minutes or until a toothpick comes out with a few moist crumbs. Rotate pans halfway through to help them bake evenly.
Allow the pans to cool for 10 minutes, then run an offset spatula around the perimeter of the pan to separate the cake from the pan.
Place cake layers into the freezer for 30 minutes to accelerate the cooling process.
Once the layers are fully cooled, carefully flip the pans and remove the layers from the pans.
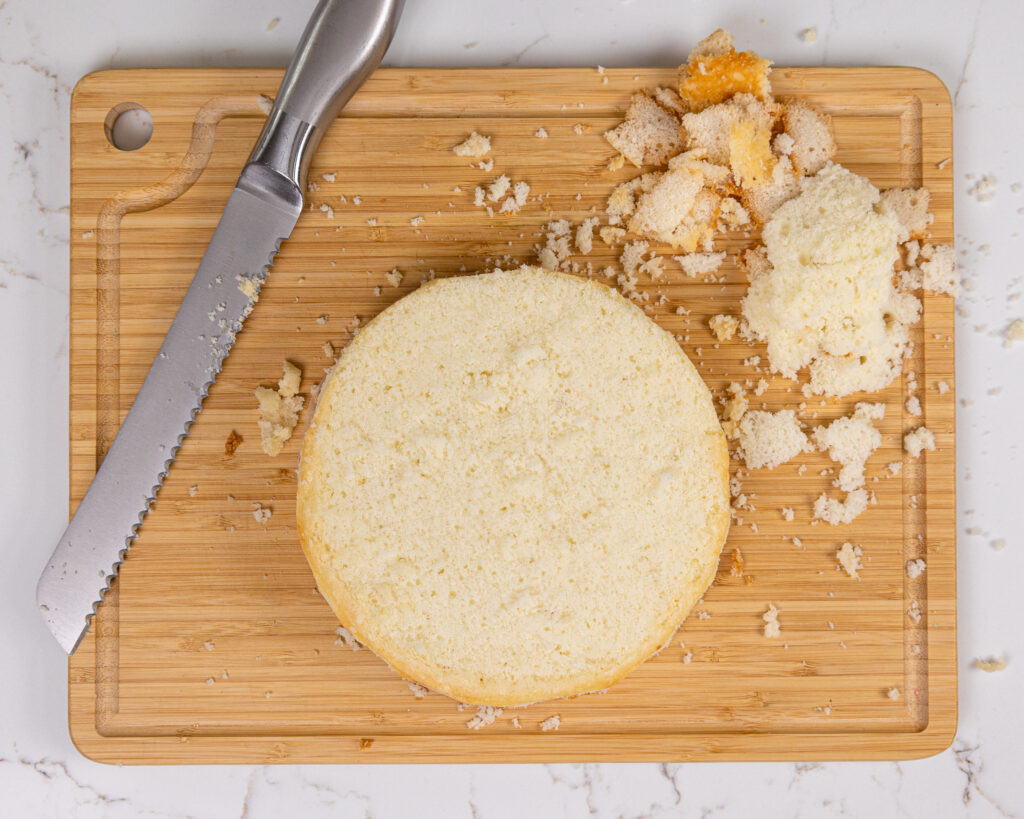
Use a serrated knife to level the top of each cake layer, then set aside. If you make these in advance, wrap and freeze them at this point.
Step 2: Make the Vanilla Buttercream Frosting
While the cake layers bake and cool, make the buttercream frosting.
I firmly believe that the best type of frosting for piping buttercream flowers is American buttercream!
It is super easy to make, it is one of the most stable types of buttercream, and it’s the easiest to color.
However, if you think American buttercream is too sweet, you can also use Swiss meringue buttercream or Italian meringue buttercream.
Wait to color the buttercream until the cake is crumb-coated.
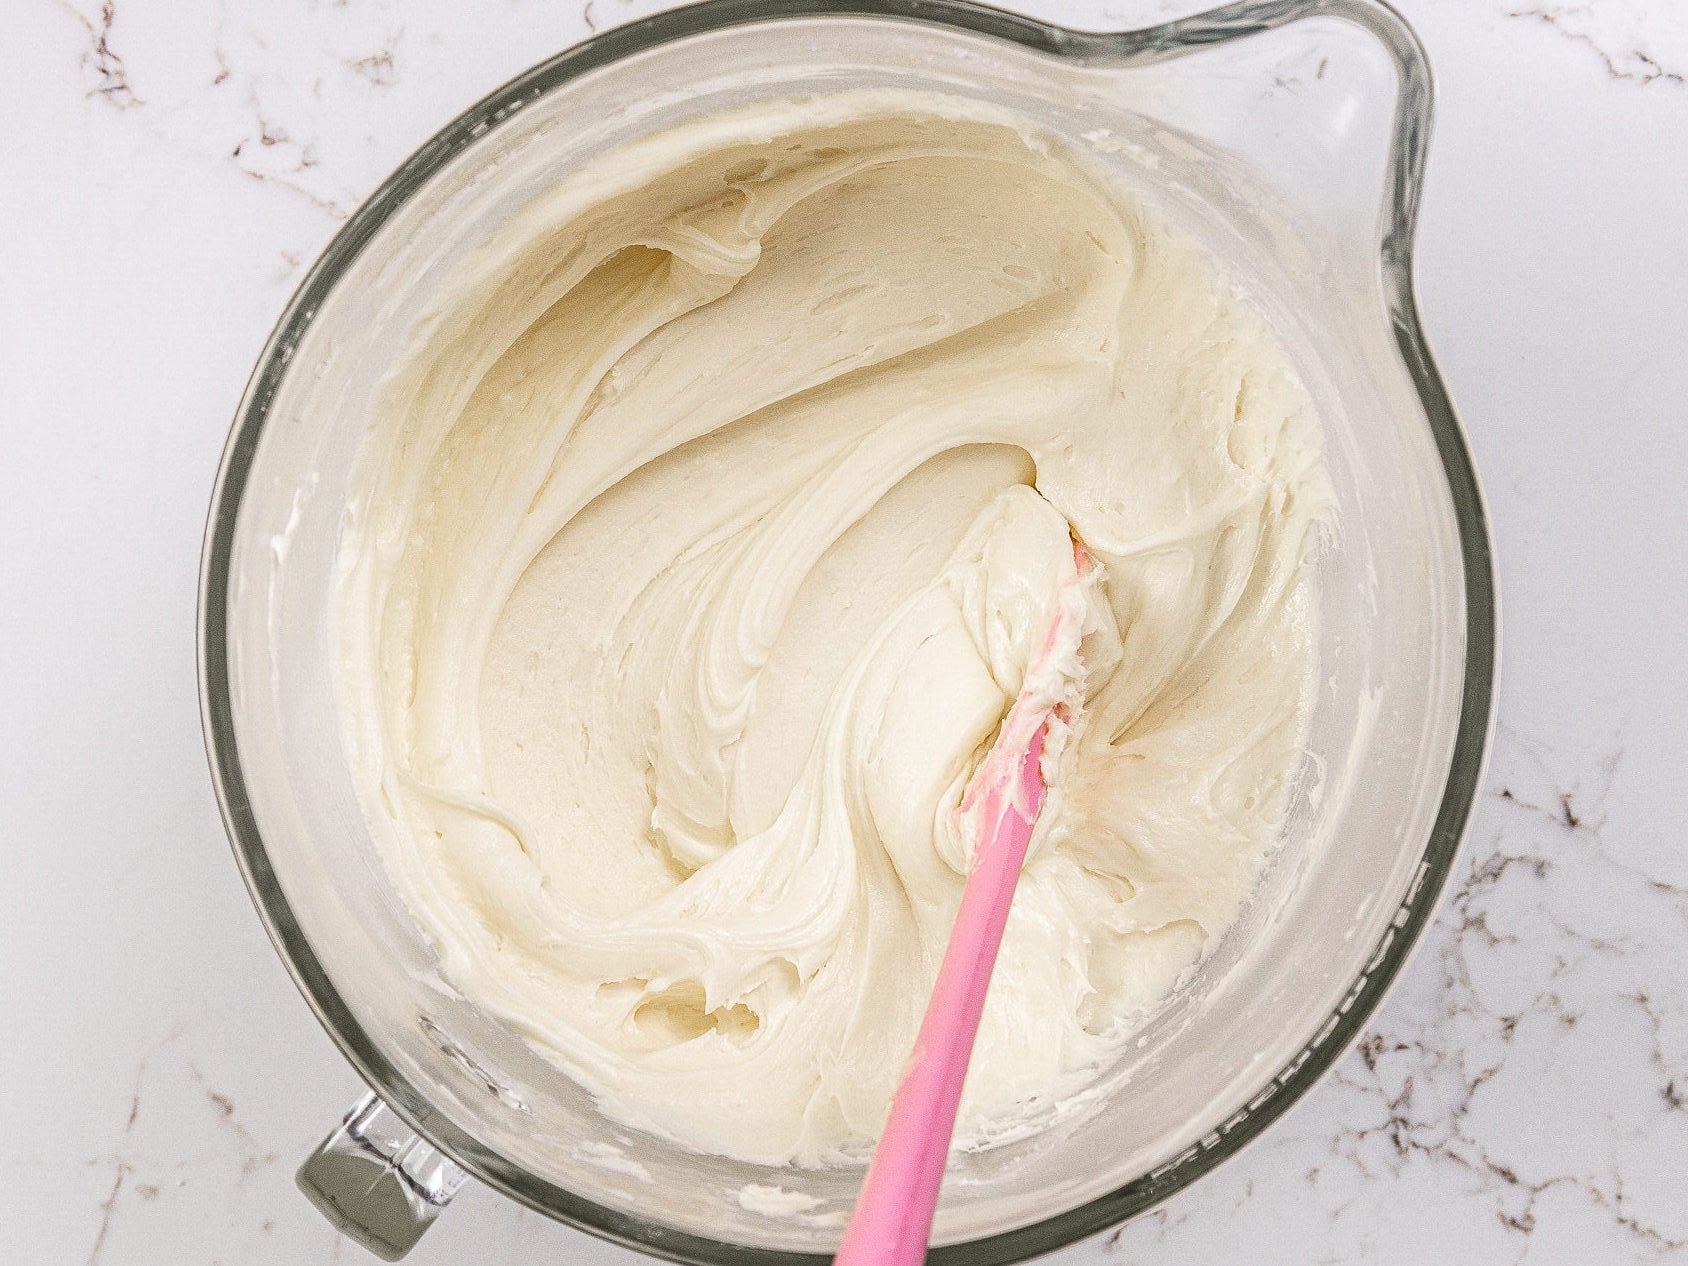
Mix the frosting by hand with a rubber spatula for a couple of minutes once it’s made. This will give it a silky smooth consistency that makes it easier to pipe with.
If the frosting seems too thick, add additional cream (1 Tbsp at a time). Or if the frosting is too thin, add in more powdered sugar (1/4 cup at a time).
If you’re not sure what consistency you’re looking for, check out my buttercream consistency guide.
Cover the frosting with plastic wrap to prevent it from crusting and set aside.
Step 3: Stack and Frost the Cake Layers
If possible, chill your cake layers in the freezer for 20 minutes before assembling the cake.
It makes them cold to the touch, which minimizes crumbing and makes them so much easier to frost and stack.
Spread about 1 Tbsp of frosting onto a greaseproof cake board or plate, then place your first cake layer on top of the frosting smear. This helps the layer stay in place as you assemble the cake.
Spread a thick, even layer of buttercream on top of the cake layer. Repeat with the remaining cake layers and flip the top cake layer upside down (cut side down). This makes it easier to frost your cake!
Once all the cake layers are stacked, spread a thin coat of frosting around the cake. Smooth using a bench scraper and/or large offset spatula, then chill the cake in the fridge (30 minutes) or freezer (10 minutes) until the frosting is firm to the touch.
If you’re struggling to get smooth sides, I share all my tips in this post on how to frost a cake smoothly.
Scoop about 1 cup of uncolored/white buttercream into a small piping bag fitted with an open star tip like a Wilton 1M, seal the top with a rubber band or clip, and set aside.
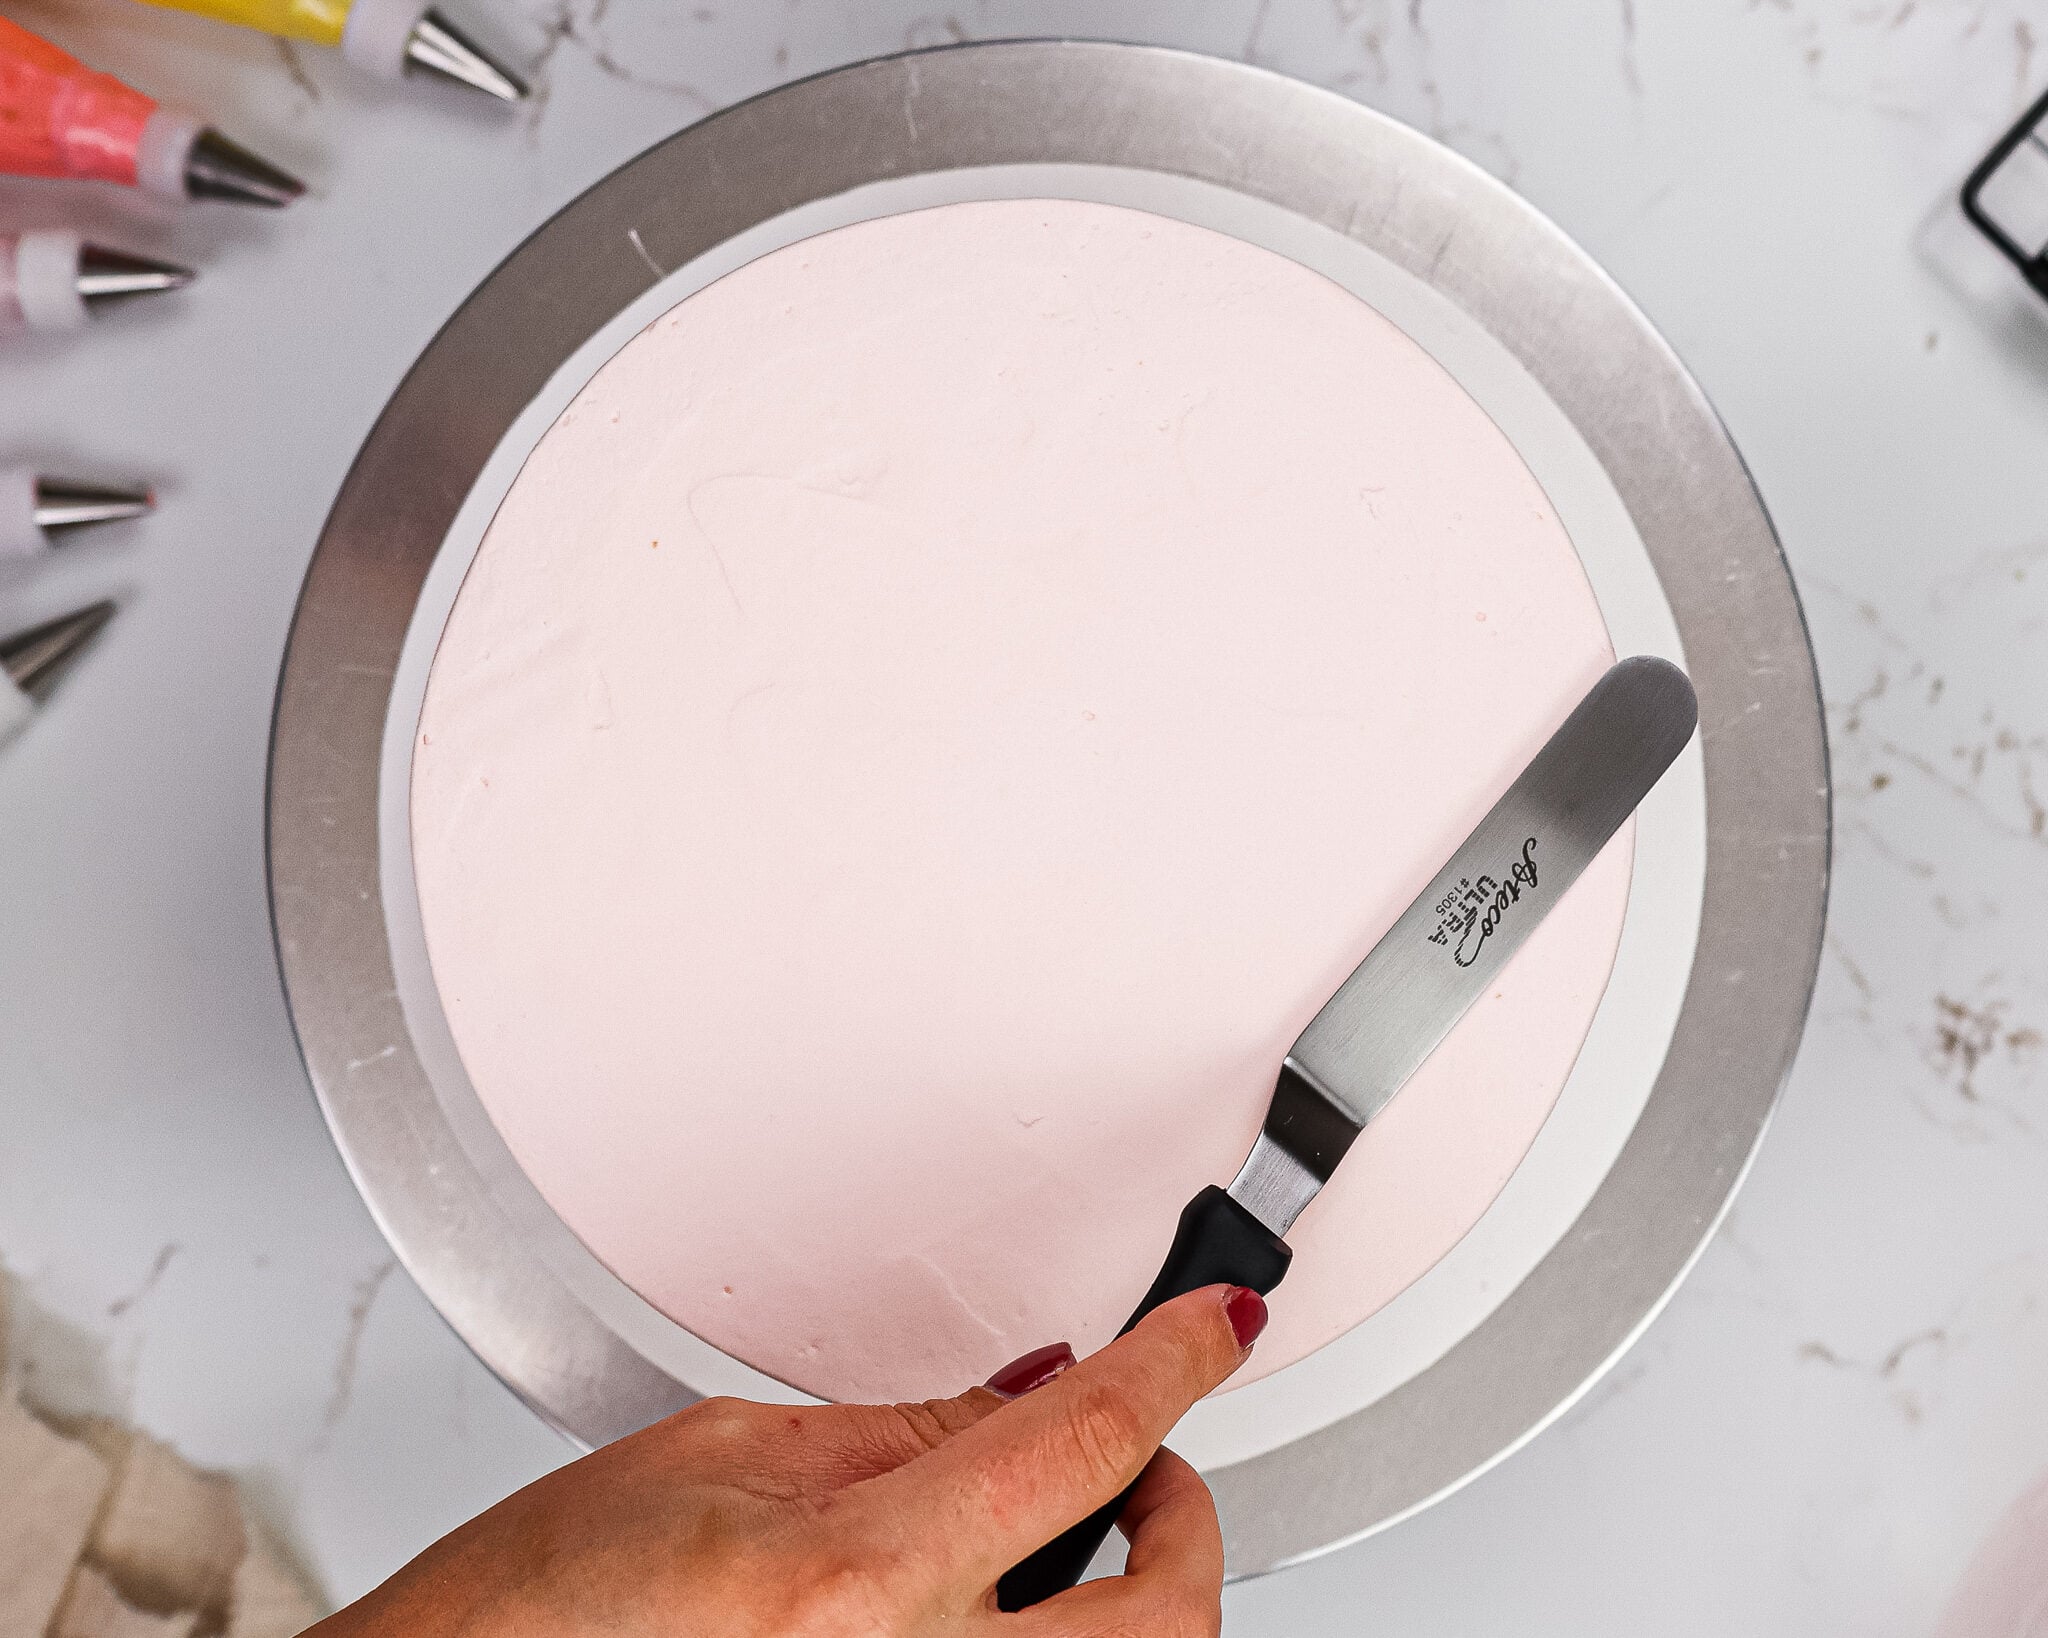
Color the remaining buttercream a light pink using a small squirt of gel food coloring. Stir until the frosting is evenly colored.
Use the pink buttercream to cover the chilled cake in a second layer of frosting. Use a large offset spatula and bench scraper to smooth the frosting. Place the cake in the fridge to chill while you color the remaining buttercream.
Scoop a quarter of the remaining buttercream into a small piping bag fitted with a coupler, seal the top, and set aside.
Divide the remaining buttercream evenly between three bowls, and color one of them green with gel food coloring.
Mix in a tiny bit of pink gel food coloring to make it more of a muted green. This will give the cake a more cohesive look (color theory is so cool!). Scoop the frosting into a small piping bag fitted with a coupler, seal the top, and set aside.
Color one of the bowls of frosting a medium pink using pink gel food coloring. Scoop the frosting into a small piping bag fitted with a coupler, seal the top, and set aside.
Color the last bowl a deep pink using more pink gel food coloring. Scoop the frosting into a small piping bag fitted with a coupler, seal the top, and set aside.
Step 4: Pipe the Flowers on This Flower Cake
Once your cake is smoothly frosted and chilled, it’s time to add the flowers and little finishing details. I like to start with the largest flowers first, then work down to the smaller rosettes, buds, leaves, and filler dots. That makes it much easier to build a balanced design without overcrowding the cake.
Large Rosettes
Start with the white buttercream fitted with a large open star tip, like a Wilton 1M. Pipe the large rosettes around the side or top edge of the cake, leaving a couple of inches between each one so you have room to add the smaller flowers and details later.
These larger rosettes are the anchor flowers in the design, so try to space them out first before adding anything else. They do a lot of the visual heavy lifting and make the whole cake look more polished right away.
Small Rosettes
Next, use the smaller French tip, like an Ateco 862, with the three shades of pink buttercream to pipe smaller rosettes between the larger white flowers.
I like to vary the shades as I go so the design feels a little softer and more dimensional. These smaller rosettes help fill in the open spaces and make the floral border look fuller without needing a bunch of different piping techniques.
Buds
Once the larger flowers are in place, use the green buttercream fitted with a small round tip, like a Wilton 10, to pipe little round buds in some of the remaining gaps.
These are meant to look like tiny flower buds that have not opened yet, so they do not need to be perfectly uniform. A few small buds tucked between the flowers helps the whole design feel more natural and layered.
Leaves
After piping the buds, swap the round tip for a leaf tip, like a Wilton 366, and pipe leaves around the flowers and buds.
I like to add leaves wherever the floral border needs a little more shape or movement. They help break up all the pink tones and make the flowers stand out more against the cake.
Filler Dots and Bloom Centers
To make the green buds look like they are just starting to bloom, fit one of the pink frosting bags with a small round tip, like a Wilton 10, and pipe a little pink dot into the center of some of the green buds.
Then use the darkest pink frosting fitted with a very small round tip, like a Wilton 3, to pipe tiny filler dots above and below the floral border. These little dots take up the last open spaces and help the whole design feel finished.
Final Tip
The easiest way to make this flower cake look balanced is to work in layers: pipe the large rosettes first, then the small rosettes, then the buds and leaves, and finish with the tiny dots. That way, you are building the design gradually instead of trying to decorate every inch of the cake all at once.
Substitutions & Swaps – Buttercream Flower Cake
Some swaps and substitutions that can be made in this recipe include:
- Unsalted Butter – If you only have salted butter on hand, you can use it in place of the unsalted butter. Just be sure to omit the salt that this recipe calls for. You can also use vegan butter in its place!
- Cake Flour – If you can’t find cake flour, you can make your own makeshift cake flour using this method or use all-purpose flour. You can also swap in all-purpose flour or a good gluten-free flour blend (like this) if needed. Just be sure to stir the batter longer than normal to help give the cake proper structure, and let the batter sit for about 20 minutes before baking it if you opt to make a gluten-free version.
- Egg whites – I like to use the type that comes in a carton so that I don’t have to separate my eggs, but you can also use fresh egg whites or 4 large whole eggs. If you have an egg allergy, you can try using a vegan egg replacer in the cake batter.
- Buttermilk – You can also use full-fat yogurt, sour cream, whole milk, or an alternative yogurt or milk (almond, soy, oat).
- Vegetable Oil – Use any flavorless oil in this recipe.
Substitutions & Swaps: American Buttercream Frosting
- Unsalted Butter – If you only have salted butter on hand, you can use it in place of the unsalted butter. Just be sure to omit the salt that this frosting recipe calls for. You can also use vegan butter in its place!
- Heavy Cream – You can use whole milk or alternative milk (soy, almond, oat) instead of heavy cream or whipping cream. This will thin the frosting out, so I recommend using about half the amount the recipe calls for.
- Gel Food Coloring – Natural food coloring or liquid food coloring can be used if needed to color the frosting. However, I find gel food coloring works best!
Tips for Making the Best Buttercream Flower Cake
- Ingredients at room temp mix together better! Set out any cold ingredients ahead of time.
- Properly measure your flour (spoon into the cup measure, then level). Or better yet, use a kitchen scale to measure your dry ingredients.
- Use a scale to weigh your cake pans as you fill them. It will make your cake layers bake to the same height and bake more evenly.
- Level your room temperature or thawed cake layers with a serrated knife to make them easier to stack.
- Chill your cake layers in the freezer for about 20 minutes before assembling the cake. It makes it so much easier to stack and frost them!
- Use gel food coloring to create brightly colored frosting. It works best because it doesn’t throw off the consistency of the frosting or give it a bitter taste.
- If your hands run hot, wrap a paper towel or thin kitchen towel around your piping bag to prevent the transfer of heat from your hands into the frosting.
Frequently Asked Questions
Is this flower cake beginner-friendly?
Yes, I think this flower cake is beginner-friendly to intermediate. The finished cake looks detailed, but the design is mostly made with a few simple buttercream piping techniques. If you can pipe a basic rosette and a few small swirls, you can make this cake.
What buttercream works best for a flower cake?
I think American buttercream is the easiest option for a flower cake because it is stable, easy to color, and holds its shape well.
If you prefer a less sweet frosting, Swiss meringue buttercream or a hybrid buttercream can also work, but they tend to be a little softer and can be trickier to pipe if your kitchen is warm.
Which piping tips do I actually need?
The most important piping tips for this design are a large open star tip for the big rosettes, a smaller star tip for the smaller flowers, a round tip for the buds, and a leaf tip for the leaves. If you do not have the exact brands or numbers I used, similar sizes and shapes will usually work just fine.
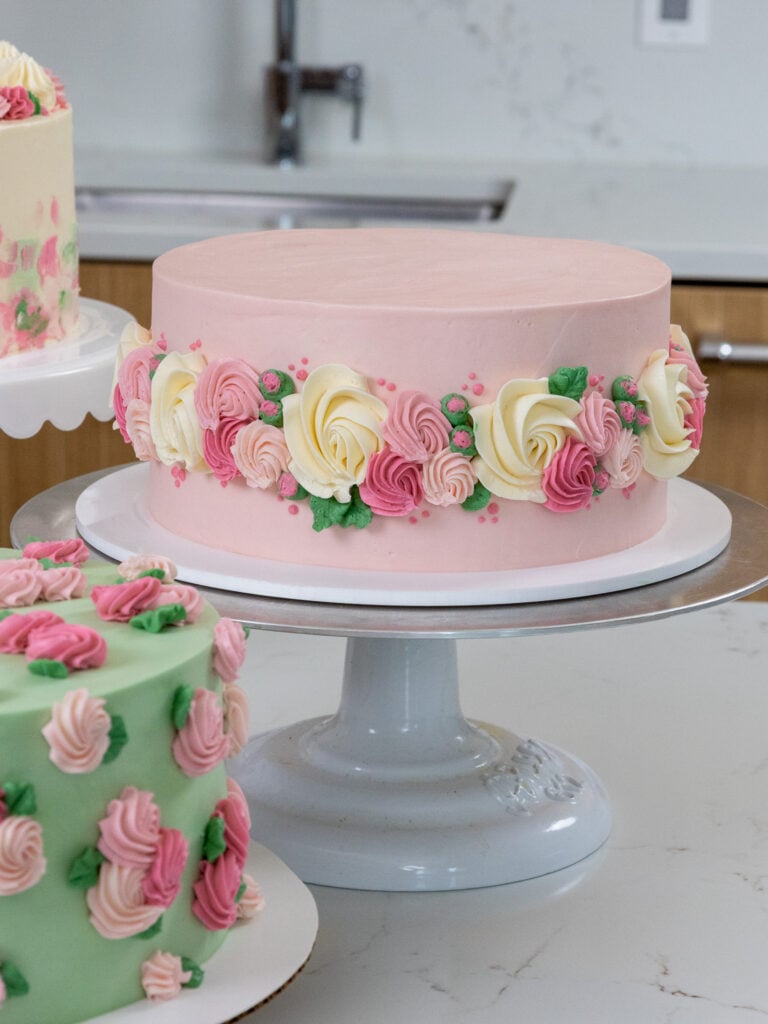
Can I pipe the flowers on top of the cake instead of the side?
Absolutely. This flower cake design would also look beautiful with the flowers piped across the top edge, clustered in one section, or arranged in a crescent shape. The side border just gives it a clean, elegant look and leaves plenty of negative space on the cake.
Can I make this flower cake ahead of time?
Yes. You can make the cake layers ahead of time and freeze them, and you can also make the buttercream in advance. Once the cake is fully decorated, it can be stored in the fridge until you are ready to serve it.
How do I keep buttercream flowers from getting too soft while piping?
If your buttercream starts to feel soft or hard to control, chill the cake or the piping bags for a few minutes before continuing. It also helps to use buttercream that is the right consistency and to keep your hands from warming the piping bags too much while decorating.
Can I use a different cake flavor?
Yes. Vanilla works really well because it keeps the focus on the buttercream flowers, but you can absolutely use another cake flavor if you prefer. Just make sure the cake layers are stable enough to stack and frost cleanly.
Do I need to make every flower look perfect?
Not at all. The nice thing about a flower cake like this is that the overall design is very forgiving. Once all the flowers, buds, leaves, and little details are added, everything comes together beautifully, even if each individual swirl is not perfect.
Can I change the colors?
Definitely. This design would look lovely in all pink, soft pastels, bright spring colors, white and green, or even deeper jewel tones, depending on the occasion. The same piping pattern works with almost any color palette.
What is the easiest way to make this cake look polished?
The easiest way to make this cake look polished is to start with a smoothly frosted base, chill the cake before decorating, and space the large flowers out first before filling in the gaps with smaller swirls, buds, and leaves. That makes the design feel balanced and intentional.
Making This Buttercream Flower Cake in Advance and Storage Tips
You can make these cake layers in advance and freeze them! It breaks the process up and makes it more approachable.
Make the frosting ahead of time or save any leftover frosting. Store it in an airtight container in the fridge for up to a month. Just be sure to give it a good stir once it thaws to make it nice and smooth again. This cake can last in the fridge for up to a week.
A frosted cake can last in the fridge for up to a week, or in the freezer for up to a month. If you freeze the cake, transfer it to the fridge the night before you plan to eat it.
This will help it gradually thaw and minimize any temperature shock. Remove the cake from the fridge about 30 minutes before you plan to cut into it.
Let Me Know What You Think
If you make this buttercream flower cake, I’d love to hear what you think! Please leave a rating and comment below with your thoughts.
Don’t forget to tag me @chelsweets and use #chelsweets on social media so I can see your amazing creations!
Buttercream Flower Cake
Ingredients
Vanilla Cake Recipe
- 3 cups cake flour 375g
- 3 cups granulated sugar 600g
- 2 1/2 tsp baking powder 10g
- 1 tsp fine salt 6g
- 1 cup unsalted butter, room temperature 226g
- 1 cup carton egg whites or 7 large egg whites, room temperature 240g
- 1 1/2 cups buttermilk, room temperature 360g
- 2 Tbsp vegetable or canola oil 30g
- 2 tsp vanilla extract or vanilla bean paste 10g
- gel food coloring – if desired
Vanilla Buttercream Frosting
- 2 cups unsalted butter, room temperature 454g; 1 lb
- 1 tsp vanilla extract or vanilla bean paste 5g
- 1/2 tsp fine salt 3g
- 7 cups powdered sugar 907g; 2 lb bag
- 1/3 cup heavy whipping cream, room temperature 80g
- Pink and green gel food coloring
Tools and Equipment Needed
- Stand mixer or electric hand mixer
- Whisk attachment
- Greaseproof Cake Board
- Spinning Cake Stand
- Large Offset Spatula
- Bench Scraper
- 4 Small Piping Bags
- Open Star Piping Tip (like a Wilton 1M) for the large rosettes
- Small French Tip (like an Ateco 862) for the small rosettes
- Small Round Piping Tip (like a Wilton 10) for the flower buds
- Leaf Piping Tip (like a Wilton 366) for the leaves
- Very Small Round Piping Tip (like a Wilton 3) for the small accent dots
- 3 Frosting Couplers
Instructions
Fluffy Vanilla Cake Layers
- Preheat the oven to 350°F / 175°C. Line four 7" or three 8" round cake pans with parchment rounds and grease with non-stick baking spray or homemade cake pan release.
- Mix 3 cups cake flour, 3 cups sugar, 2 1/2 tsp baking powder, and 1 tsp salt together in a stand mixer with a paddle attachment or hand mixer until fully combined.
- Mix in 1 cup of room temperature, unsalted butter slowly into the dry ingredients on a low speed. Continue to mix until no large chunks of butter remain and the mixture looks like moist sand.
- Pour in 1 cup of egg whites and mix on low until just incorporated. Mix in 1 1/2 cups of buttermilk in two installments at a low speed.
- Add in 2 Tbsp of vegetable oil and 2 tsp of vanilla extract and mix at a low speed until fully incorporated. If you plan to color your cake layers, add in the gel food coloring with the oil and vanilla.
- Scrape down the sides of the bowl with a rubber spatula, then beat on a medium speed for about a minute to make sure everything is properly mixed together. This also helps lighten the texture of the cake layers a bit.
- Divide the batter evenly between your prepared pans. I like to use a scale to make sure each pan has the same amount of batter and will bake up to the same height.
- Bake for 33-35 minutes or until a toothpick comes out with a few moist crumbs.
- Let the pans cool for 10 minutes, then run a small offset spatula around the perimeter of the pan to separate the cake from the pan.
- Place the cake layers into the freezer for 30 minutes to accelerate the cooling process. Once the layers are fully cooled, carefully flip the pans and remove the layers.
- Use a serrated knife to level the tops of the layers right before you plan to assemble your cake, or you can wrap and freeze them if you're making them in advance.
- If you make these cake layers in advance and freeze them, let them thaw for about 20 minutes before making your cake. The cake layers should still be slightly cold to the touch, which will make it easier to assemble your cake.
Vanilla Buttercream Frosting
- While the cake layers bake and cool, make the buttercream frosting.
- Beat 2 cups of unsalted butter on a medium-high speed for 1-2 minutes with a paddle attachment until the butter becomes lighter in color.
- Mix in 1 tsp vanilla extract and 1/2 tsp salt on a low speed.
- Slowly add in 7 cups of powdered sugar. Halfway through, add 1/3 cup of heavy cream to make the frosting easier to mix.
- Beat on low until the ingredients are fully incorporated and the desired consistency is reached.
- If the frosting is too thick, add additional cream (1 Tbsp at a time). If the frosting is too thin, add more powdered sugar (1/4 cup at a time). Wait to color the buttercream until the cake is crumb-coated. Cover the frosting with plastic wrap to prevent it from crusting and set aside.
Assembling This Buttercream Flower Cake
- If possible, chill your cake layers in the freezer for 20 minutes before assembling the cake. It makes them cold to the touch, which minimizes crumbing and makes them so much easier to frost and stack.
- Spread about 1 Tbsp of frosting onto a greaseproof cake board or plate, then place your first cake layer on top of the frosting smear. This helps the layer stay in place as you assemble the cake.
- Spread a thick, even layer of buttercream on top of the cake layer. Repeat with the remaining cake layers and flip the top cake layer upside down (cut side down). This makes it easier to frost your cake!
- Once all the cake layers are stacked, spread a thin coat of frosting around the cake. Smooth using a bench scraper and/or large offset spatula, then chill the cake in the fridge (30 minutes) or freezer (10 minutes) until the frosting is firm to the touch.
- Scoop about 1 cup of uncolored/white buttercream into a small piping bag fitted with an open star tip like a Wilton 1M, seal the top with a rubber band or clip, and set aside.
- Color the remaining buttercream a light pink using a small squirt of gel food coloring. Stir until the frosting is evenly colored.
- Use the pink buttercream to cover the chilled cake in a second layer of frosting. Use a large offset spatula and bench scraper to smooth the frosting. Place the cake in the fridge to chill while you color the remaining buttercream.
- Scoop a quarter of the remaining buttercream into a small piping bag fitted with a coupler, seal the top, and set aside.
- Divide the remaining buttercream evenly between three bowls, and color one of them green with gel food coloring. Mix in a tiny bit of pink gel food coloring to make it more of a muted green. This will give the cake a more cohesive look (color theory is so cool!). Scoop the frosting into a small piping bag fitted with a coupler, seal the top, and set aside.
- Color one of the bowls of frosting a medium pink using pink gel food coloring. Scoop the frosting into a small piping bag fitted with a coupler, seal the top, and set aside.
- Color the last bowl a deep pink using more pink gel food coloring. Scoop the frosting into a small piping bag fitted with a coupler, seal the top, and set aside.
Decorating This Buttercream Flower Cake
- Remove the cake from the fridge. Use the white buttercream and a Wilton 1M tip to pipe large buttercream rosettes around the side or top of the cake, spacing them about a couple of inches apart.
- Then use the three shades of pink fitted and a small French tip like an Ateco 862 to pipe small buttercream rosettes between the larger white rosettes.
- Next, use the green buttercream and a small round tip like a Wilton 10 to pipe dots to look like flower buds in some of the remaining open spaces. Open the coupler and swap the round tip for a leaf tip like a Wilton 366, then pipe some leaves around the flowers.
- Fit one of the pink frosting bags with a small round piping tip like a Wilton 10, and pipe inside the green frosting "buds" to look like the flower is just starting to bloom.
- Fit the dark pink frosting bag with a very small piping tip like a Wilton 3, and pipe small dots above and below the buttercream flowers, like in the pictures above. Then enjoy!
Video
Notes
Tips for Making the Best Buttercream Flower Cake:
- Ingredients at room temp mix together better! Set out any cold ingredients ahead of time.
- Properly measure your flour (spoon into the cup measure, then level). Or better yet, use a kitchen scale to measure your dry ingredients.
- Use a scale to weigh your cake pans as you fill them. It will make your cake layers bake to the same height and bake more evenly.
- Level your room temperature or thawed cake layers with a serrated knife to make them easier to stack.
- Chill your cake layers in the freezer for about 20 minutes before assembling the cake. It makes it so much easier to stack and frost them!
- Use gel food coloring to create brightly colored frosting. It works best because it doesn’t throw off the consistency of the frosting or give it a bitter taste.
- If your hands run hot, wrap a paper towel or thin kitchen towel around your piping bag to prevent the transfer of heat from your hands into the frosting.
Making This Cake in Advance and Storage Tips
You can make these cake layers in advance and freeze them. It breaks the process up and makes it more approachable. You can also make your frosting ahead of time, or save any leftover frosting! It can be stored in an airtight container in the fridge for up to a month, or in the freezer for up to 3 months. Be sure to give it a good stir once it thaws to get the consistency nice and smooth again. A frosted cake can last in the fridge for up to a week, or in the freezer for up to a month. The buttercream locks in all the moisture, keeping the cake fresh and delicious! If you cut into the cake and have leftovers, use any remaining frosting to cover the cut section to keep it moist and store it in the fridge for up to a week.Nutrition
Other Recipes You Might Like:

I’ve been making your vanilla cake for a while now. How does this fluffy vanilla cake compare to the original vanilla cake recipe? Which would you recommend for a wedding cake?
Hi Elizabeth,
Great question! This cake has a slightly lighter crumb (thanks to the cake flour) and a more neutral flavor thanks to the sour cream it uses instead of buttermilk.
It really comes down to you preference in flavor! I love the texture of this cake, but I like a little tang in my cake to balance out the sweetness of the frosting (which is why my classic vanilla cake recipe with buttermilk is usually my go to). Both would taste great as a wedding cake!
The list of ingredients says “cake flour,” but the directions refer to “self-rising cake flour” AND 1 tablespoon of baking powder. Which is correct?
I’ve been baking for over 30 years, and have noticed layer cake recipes now require the same amount of sugar as flour. This seems like an excessive proportion of sugar to flour, plus the cake tastes way too sweet. Why do these new layer cake recipes require so much more sugar than before?
Hi Christine,
Apologies, that is a typo! The ingredients list is correct and I’ve updated the instructions portion.
I can’t speak to other recipes you’ve tried, but this recipe uses the reverse creaming method which requires a bit more sugar to give it a tender texture. You can reduce the sugar by 1/2 cup if you find this recipe too sweet, but if you reduce it any more it will negatively impact the texture of the cake.
Great tips! It’s so helpful to know that a frosted cake can last up to a week in the fridge and a month in the freezer. I love the idea of using leftover frosting to cover the cut section and keep it fresh. Will definitely be using this method next time I have cake leftovers!