
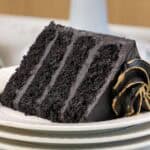
Black Velvet Cake
Red velvet is such a classic cake flavor. Not only is it delicious, it’s also stunning! With October upon us once again, I wanted to put a fun and spooky spin on this beloved cake flavor by making a black velvet cake.

The Power of Black Cocoa
One of my favorite ingredients is black cocoa. It’s not the most common ingredient, and sadly it’s hard to find in grocery stores.
I like to order it on Amazon, and love the black cocoa made by King Arthur.
Black cocoa has a slightly higher pH than Dutch-processed cocoa (8 vs.7) and is much less acidic than natural baking cocoa (5-6).
The best comparison of how it tastes is to think of the bittersweet, chocolaty taste of an Oreo cookie! It’s absolutely delicious.
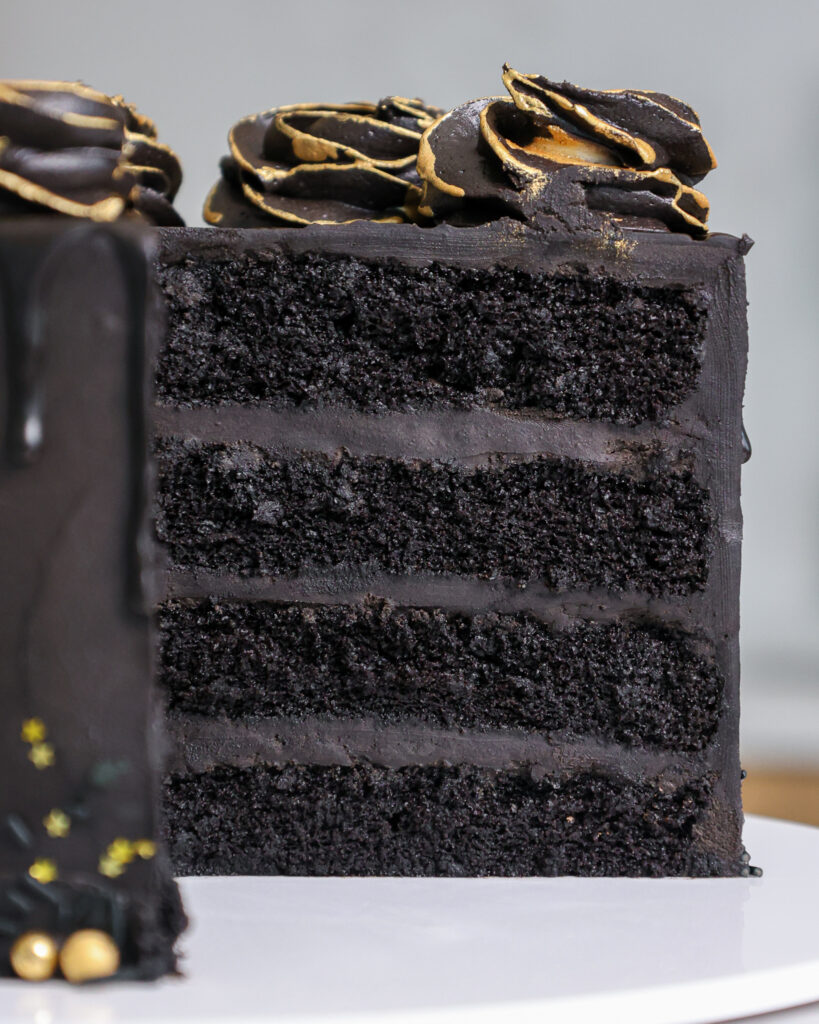
Black cocoa has a beautifully dark color, which naturally colors this cake batter and the frosting black! It’s kind of like magic. Maybe black magic?
If you’re in a pinch or don’t like ordering things online, you can always use dark cocoa powder in its place. Hershey makes a dark cocoa powder that you can find at most grocery stores!
It tastes slightly different, but will give a similar end result of delicious chocolate flavor and a deep color.
Chocolate Cake vs. Black Velvet
At this point in time, you might be thinking, “If we’re using THAT much cocoa in this recipe, isn’t it just a chocolate cake?”
And to be fair, you’re right! Most red velvet cake recipes call for 1 or 2 Tbsp of cocoa powder, which you can barely taste once it bakes up!
But the reason so little cocoa powder is used is that you want the batter to be bright red. Adding more cocoa powder would make it a creepy red-brown color.
On the other hand, white velvet cake recipes don’t use any cocoa! So, I figure if some velvet recipes use less, this one can use more!!

In my mind, the most notable characteristics of a red velvet cake are its color, moisture, and tangy flavor.
In this recipe, we’ve got the color covered thanks to the black cocoa. To make sure this cake lives up to the moist and delicious reputation of a velvet cake recipe, it uses buttermilk.
Buttermilk is a key ingredient! Some people try to use regular milk in place of buttermilk, but I don’t recommend doing that with this recipe.

Black Gel Food Coloring
I love making colorful cakes with a bit of gel food coloring, but this cake batter is already so dark from the black cocoa powder it really doesn’t need any artificial food coloring.
However, if you use dark cocoa powder instead of black cocoa, you may want to add a squirt of black gel food coloring to make sure your cake layers are black.
Picking the Right Frosting
If you’re making a black velvet cake, you might want to frost it with cream cheese frosting to stay true to the classic combination. I fully support that decision, or really any excuse to use cream cheese frosting.
My cream cheese buttercream has the delicious tang of cream cheese but is sturdy like my classic American buttercream. This means you can easily use it to frost a layer cake like this.
I made this cake around Halloween and wanted to match my frosting to the color of my cake. I used my deep black frosting recipe to give the cake a wonderfully spooky vibe!
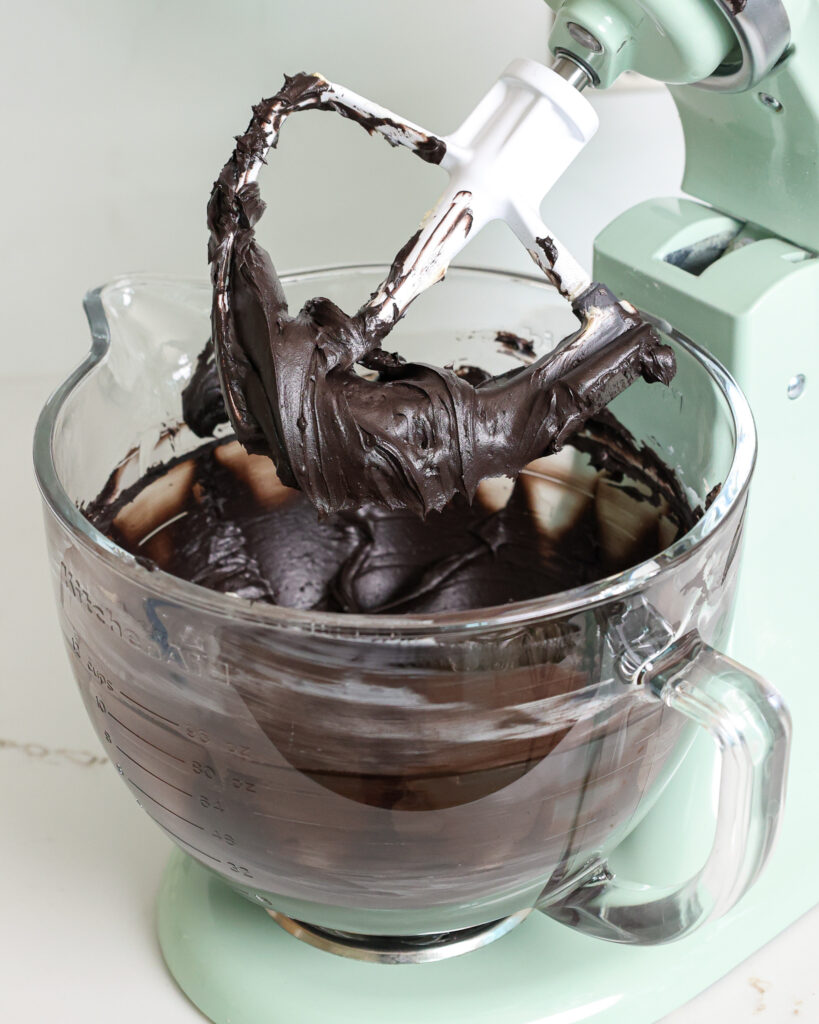
It can be difficult to make a deep black frosting. If you’re struggling to get the color right, here are all of my tips and tricks for making super dark black frosting.
Tips for Making This Black Velvet Cake
- Try to get your hands on some black cocoa for this recipe– it’s delicious and totally worth it!
- Ingredients at room temp mix together better! Set out any cold ingredients ahead of time.
- Properly measure your flour (spoon into the cup measure, then level). Or better yet, use a kitchen scale to measure your dry ingredients.
- Level your room temperature or thawed cake layers with a serrated knife to make them easier to stack.
- Chill your cake layers in the freezer for about 20 minutes before assembling the cake. It makes it so much easier to stack and frost them!
Making This Black Velvet Cake in Advance and Storage Tips
I highly recommend making your cake layers in advance and freezing them. It breaks the process up and makes it more approachable.
You can also make the chocolate frosting ahead of time or save any leftover frosting! It can be stored in an airtight container in the fridge for up to a month.
This frosting can also be stored in the freezer for up to 3 months! Just be sure to give it a good stir once it thaws to make it nice and smooth again.
A frosted cake can last in the fridge for a week, or in the freezer for a month. The buttercream locks in the moisture and keeps the cake fresh and delicious!
Let Me Know What You Think
If you try this black velvet cake recipe, I’d love to hear what you think! Please leave a rating below and comment below.
Don’t forget to tag me @chelsweets and use #chelsweets on social media so I can see your amazing creations!
Note: I updated this recipe in May 2022 to make the texture a bit more tender. If you want the original recipe, please email hello@chelsweets.com.
Black Velvet Cake
Ingredients
Black Velvet Cake Recipe
- 2 cups all-purpose flour 260g
- 2 cups granulated sugar 400g
- 3/4 cup black cocoa powder 75g
- 2 tsp baking powder 8g
- 1 1/2 tsp baking soda 9g
- 1 tsp fine salt 6g
- 1 cup hot water 240g
- 2 tsp instant espresso of coffee 5g
- 1 cup buttermilk, room temperature 240g
- 1/2 cup vegetable or canola oil 110g
- 2 large eggs, room temperature 112g
- 2 tsp vanilla extract or vanilla bean paste 8g
Black Dark Chocolate Buttercream Frosting
- 2 cups (4 sticks) unsalted butter, room temperature 454g
- 1 cup black cocoa powder 100g
- 1 tsp vanilla extract or vanilla bean paste 4g
- 1/2 tsp fine salt 3g
- 5 cups powdered sugar 625g
- 2/3 cup heavy whipping cream, room temperature 180g
- 1 1/3 cups dark chocolate chips, melted and cooled 230g
Recommended Tools
- 8- inch cake pans
- Spinning cake stand
- 10- inch greaseproof cake board
- Large offset spatula
- Bench Scraper
- Electric hand mixer or stand mixer
- Small Piping Bag
- Open Star Frosting Tip like a Wilton 1M
Instructions
Black Velvet Cake Layers
- Preheat the oven to 350 F/ 175 C. Line and grease three, eight-inch cake pans, or four, seven-inch pans.
- Combine 2 cups all-purpose flour, 2 cups sugar, 3/4 cup black cocoa powder, 2 tsp baking powder, 1 1/2 tsp baking soda, and 1 tsp salt in a large bowl. Whisk together until combined.
- Add 1 cup of hot water and 2 tsp instant espresso or coffee in a separate, medium-sized bowl. Stir until dissolved.
- Add 1 cup buttermilk, 1/2 cup oil, 2 eggs, and 2 tsp vanilla extract to the instant espresso mixture. Give the mixture a quick stir to combine the ingredients.
- Pour the wet ingredients into the dry ingredients. Mix by hand until fully incorporated. The batter will be on the thin side, but that’s the consistency you're after!
- Divide the batter evenly between the cake pans, and bake for about 24-27 minutes. I like to use a kitchen scale to weigh the pans. It makes sure each pan has the exact same amount of batter and helps the cake layers bake up to the same height.
- Remove the cake layers from the oven and let them cool in the pans for about 10 minutes. Gently run an offset spatula around the rim of the cake pans to loosen them, then flip them into wire racks to finish cooling.
- Once cooled, use a serrated knife to level the top of each cake layer. If you make these in advance, wrap and freeze them at this point.
Black Dark Chocolate Buttercream Frosting
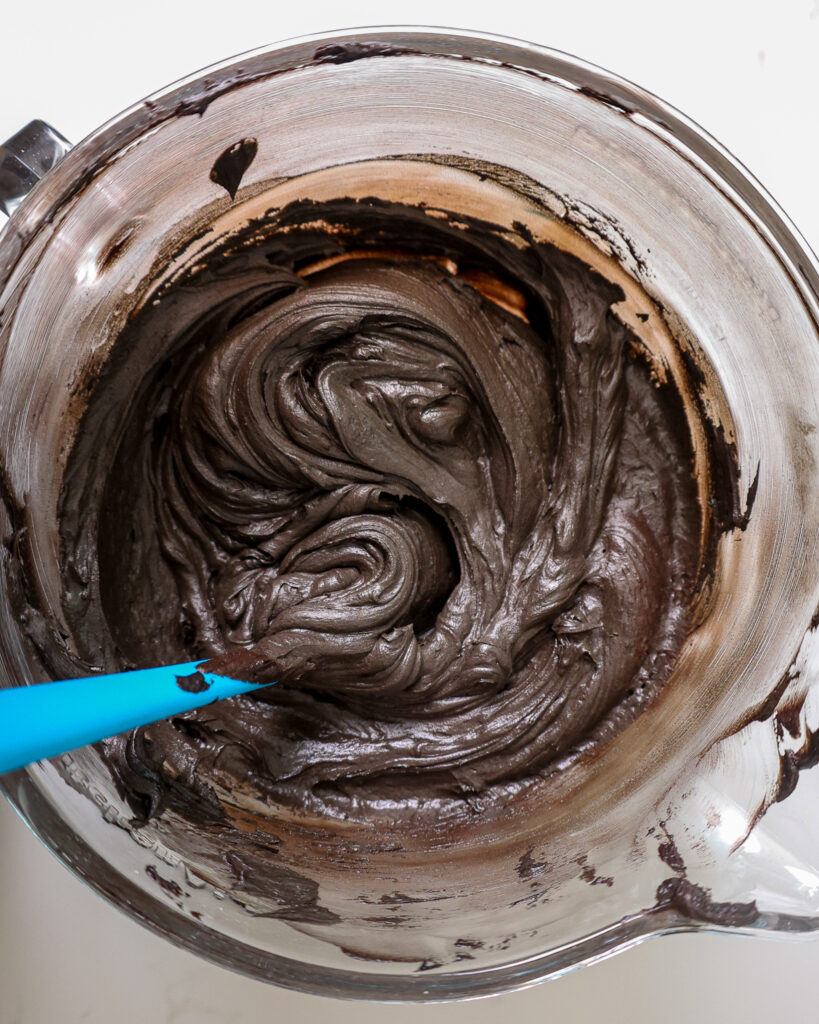
- Beat 2 cups of unsalted butter on a medium speed for 30 seconds with a paddle attachment until smooth.
- Add 1 cup black cocoa powder, 1 tsp vanilla extract, and 1/2 tsp fine salt. Mix on low until the ingredients are fully incorporated.
- Slowly mix in 5 cups of powdered sugar. Halfway through, add in 2/3 cup of heavy cream to make the frosting easier to mix.
- Mix in 1 1/3 cups of melted and cooled dark chocolate on a low speed. I let the chocolate sit for about 10 minutes after melting it – it should still be completely liquid, but not hot to the touch. Mix until the ingredients are fully incorporated and the desired consistency is reached. Scrape the sides and bottom of the bowl with a rubber spatula as needed.
- If you want the buttercream to be a darker shade of black, you can mix in a squirt of black gel food coloring. Then cover with plastic wrap to prevent crusting and set aside.
Assembling This Black Velvet Cake
- Stack and frost cake layers on a greaseproof cake board, using a dab of frosting to help stick the first cake layer to the board.
- Add an even layer of buttercream between each cake layer with a large offset spatula.
- Then spread a thin coat of frosting around the cake, fully covering the cake layers. Smooth using a bench scraper, then chill the cake in the fridge (30 minutes) or freezer (10 minutes) until the frosting is firm to the touch.
- Add a second, thicker layer of frosting to the cake and smooth using a bench scraper. Then decorate as desired and enjoy!
Video
Notes
Tips for Making the Best Black Velvet Cake
- Ingredients at room temp mix together better! Set out any cold ingredients ahead of time.
- Properly measure your cake flour (spoon into the cup measure, then level). Or better yet, use a kitchen scale to measure your dry ingredients.
- Mix your cake batter just until the ingredients are incorporated. This will ensure your cake layers are tender and fluffy.
- Use a scale to weigh your cake pans as you fill them. Make sure each pan has the same amount of batter will make your cake layers bake to the same height and bake more evenly.
- Bang your cake pans on the counter before putting it in the oven. This brings any air bubbles that are trapped in the batter to the surface.
- Level your room temperature or thawed cake layers with a serrated knife to make them easier to stack.
- Chill your cake layers in the freezer for about 20 minutes before assembling the cake and before adding the simple syrup. It makes it so much easier to stack and frost them!
Making this Black Velvet Cake in Advance and Storage Tips
I highly recommend making your cake layers in advance and freezing them. It breaks the process up and makes it more approachable. You can also make the chocolate frosting ahead of time or save any leftover frosting! It can be stored in an airtight container in the fridge for up to a month. This frosting can also be stored in the freezer for up to 3 months! Just be sure to give it a good stir once it thaws to make it nice and smooth again. A frosted cake can last in the fridge for a week, or in the freezer for a month. The buttercream locks in the moisture and keeps the cake fresh and delicious!Nutrition
Other Recipes You Might Like:

Can this be made into cupcakes?
It can, but i’d recommend using my chocolate cupcake recipe instead with black cocoa! It’ll be the same look and taste, but they will rise better. My cake recipes are formulated not to rise much, so that they bake relatively flat. Hope that helps, here’s the link:
https://chelsweets.com/2017/07/08/the-best-one-bowl-chocolate-cupcake-recipe/
@Amy, since I was testing the recipe, I made a small 15cm cake and 12 cupcakes. Once baked I made a little well in the middle filled it with forest berry jam I made myself then piped it with lashings of black cocoa cream cheese/mascarpone cream. So so so so soooooo good!
@Anthony Dunstan, oohhh can I have Your recipe please?
Do you absolutely need a stand mixer or can everything be done by hand? I’m still a novice and I’ve seen stand mixers in many recipes and it almost doesn’t seem optional. Thanks in advance.
Hi! Sadly for this recipe you do need some kind of electric mixer, because you have to cream together the butter and granulated sugar. However, here is a delicious and moist chocolate cake recipe of mine that can be made by hand:
https://chelsweets.com/2016/09/15/the-best-chocolate-cake-recipe/
Hope that helps!!
@Cloud, I’m no novice and I’ve been using a handheld mixer my entire life. I’ll soon upgrade to a gold plated kitchen aid, but before then, I’ll continue to do almost everything with my double pronged mixer. I picked mine up a few years ago for €40 or so. Has a beefy 450w motor! 😉
Do you think it’s important if you’re doing black velvet layers and red frosting that you do your crumb coat in white so that the red frosting is brighter? Or do you think it doesn’t matter when you have darker layers?
Hi Jessica,
If you’re adding a thick, second layer of frosting (I’m usually quite generous with it) it shouldn’t really matter! Hope that helps, happy baking <3
Hi! I was wondering how much black cocoa would you use to color only 1 layer black of the typical 4 layer cake you make? I’ve attempted a black cake before but just with gel coloring and it wasn’t as black as I was hoping for.
Hi Mercedes,
It would just be 1/4 the amount called for in the recipe, since it makes 4 layers 🙂
Could I add pumpkin or will it mess up the consistency of the cake?
she took the words right out of my mouth. I needed a super black cupcake recipe this weekend. Just in time Chelsweets, YAY!!
Hi,
Can this recipe be used for craving for fondant cakes?,thanks
Hi Nnedi,
Do you mean for making fondant cakes? Yes, it works great with both buttercream and fondant!
How much of which color food coloring do you use to make the red frosting?
Hi Amanda! I used americolor super red, which I ordered on Amazon! Here’s the link: https://amzn.to/2nQg8dv
thank you for all of your recipes and ideas! I love trying to replicate them. I have been using three 8 inch cake pans, but do you use 7 inch cake pans?
Of course! I usually use 4, 7-inch cake pans with one batch of batter, but you can also use 3, 8-inch cake pans! The cake will just be slightly less tall.
I just tried making the cake. i think it may have burned. The tops are kind of hard and the sides. I think I might have to try and trim the sides like you were saying an cut a thicker layer off the top. I’m hoping that will work I cooked them on the temp you have for the length. I rotated one of them to the back is it was still liquidy. inside.it didn’t take long for it to cook. I just hope the rest of the cake doesn’t taste burnt and I don’t mess it up trying to trim it
I redid the cake. Didn’t want to risk it tasting burnt. The 2nd batch was done in 25 min. I rotated them after 10 min then again the last 5. The tops turned out soft this time.. Dot them in the freezer. I’m going to make the frosting we were talking about tomorrow c And put the cake together Sunday then leave it in the fridge until an hour b4 I have to leave. Out will be 2 1/2 hours before it is cut. Hopefully it will never room temp by that time.
Thank you so much for replying! I actually tried this recipe but my cake seemed to come out a little dry. I did realize after the fact that my buttermilk and eggs were not completely at room temp, could that have affected it? The batter did look slightly grainy when I poured them into the cake pans.
Hey,
Do you think this cake could be converted into a red velvert and carrot cake? I.e. adding carrots to the batter?
Hi Azrah! I’d recommend just using my carrot cake recipe! Do you want to make a black carrot cake? If so, I’d say swap out about 1/2 cup of flour for black cocoa, and then you should be good to go! you can also add a tiny bit of gel food coloring if you want too <3
Here’s the link: https://chelsweets.com/2019/04/17/moist-carrot-cake/
Thanks for sharing so much with us! Do you think this recipe would come out the same texture if it where made into a larger size cake? Like a 12″ or even 14″ round cake? Or would it maybe be not so fluffy and soft? If so do you think doubling or tripling they recipe would be enough for each cake round of those sizes? Thanks.
The texture should be the same, even if you make it into larger cake layers! If you make that big of layers, just be sure to use flower nails in the center of your pan, to help the cake layers bake more evenly and quickly. Hope that helps, happy baking Lisa!
Thanks. In this recipe is the red just ut american butter cream or was a flavor added? Or did you make it the cream cheese?
I made your black velvet cake and used black cocoa in place of regular cocoa in your chocolate buttercream frosting to make a Toothless character cake from ‘How to Train your Dragon’ . It came out so black and looked great! Thank you for the recipe. I added about a teaspoon more black food coloring to the frosting and let it sit for two days. Worked like a charm! I tagged you on Facebook so I don’t know if you can look at it or not.
Hi Priscilla,
I am so happy to hear that!! I will have to take a look, I’d love to see it 🙂 Thank you for sharing!!! <3
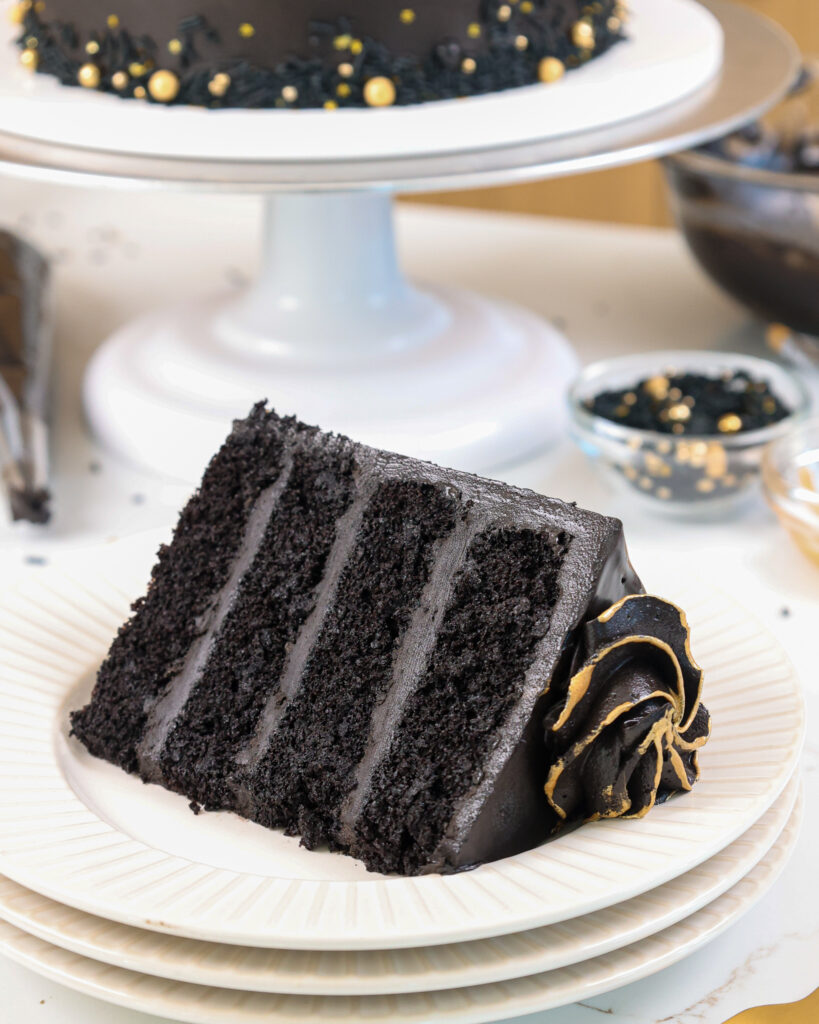
Hi! I love this cake! I saw it on Instagram, looking for ideas to add gold to a cake. How did you “paint” the gold up the sides of the cake?? Thank you in advance 🙂
Hi Rachel!
Great question. I chill a frosted cake, and once the buttercream is firm to the touch I use a thick paint brush to paint edible gold paint up the sides in streaks! I use edible art paint (I get it on amazon: https://amzn.to/3620sDR), but you could also mix together luster dust and vodka to make your own edible gold paint. Hope that helps, happy baking! <3
I’m so excited to try baking this cake next week! I was wondering if you could tell me how much frosting this recipe makes. I’d like to use a different recipe for the frosting (your cream cheese buttercream, although I’d be adding some white chocolate) but I want to be sure I have enough to frost the whole 3-layer, 8-inch cake. Thanks in advance!
One batch of buttercream should be enough for a 3 layer, 8 inch cake, which is how much my cream cheese buttercream recipe makes.
I usually recommend making 1 1/2 batches though just to be safe ( which is the amount of frosting included with this black velvet cake recipe), and in case you want to add some big swirls or other buttercream decoration to the cake. I hope that helps, happy baking!!
HI! I want to try baking this for my husband. He loves red velvet and thought this was a good mix of something he loves with something a bit different! Im definitely a beginner but your videos interest me so much I thought id give it a try. Do you use the same type of recipe for both colors of frosting you used? or is one the buttercream frosting and the other is cream cheese frosting with gel food coloring?
I’ve done similar recipes by hand — and I had a neighbor who loved baking and would even whip up egg whites by hand (therapeutic, she said!). As long as you know you’ll need to do extra work by hand, it’s not as though you can’t get similar results. People did in fact manage to cream butter and sugar before the advent of electricity!
Thank you for sharing this wonderful recipe! It is a keeper. I appreciated the additional advice you included. I baked this for my husband’s birthday. He’d told the kids that black is his favourite colour so the pressure was on to find a black (unburnt) cake ? .He is a bit of a tough crowd but he was very impressed! I used a different frosting though: strawberry between the layers and black cocoa cream cheese frosting over the whole cake. Thank you again!
Hi.. I want to make this for my dads 70th. I am a lockdown baker aka beginner. So I am a bit scared and feeling the pressure. What if I want to make a tiered cake- 1 8 inch and 1 6 inch, can I half the recipe? And what about the buttercream – keep it the same or half it too? Super excited to try it! Also any tips to help keep the buttercream frosting sturdy (I live in India and it’s super hot and humid)..
Thanks
Hi! Can i use a hand mixer instead of a stand mixer?
How many layers of cake does this recipe make? I’m looking to make 3 layers in a 9-inch cake pan.
Hi there I’m just wondering if I could substitute the butter for canola or veg oil, this is the recipe I’d like to use for a Halloween cake and it’s due tmr -oops- I have enough butter for the frosting but not the actual cake
I’m so excited I found this recipe. My son has requested a Rubik’s Cube cake that is all black when he cuts it. I am going to spread the assembly over a couple days. How should I store the layers before I frost them, and how should I store the cake for a day before his birthday? Thanks in advance!
I am looking at this recipe and very interested in trying it. But when I looked at the icing you mentioned a cream cheese buttercream, but when I look down in the ingredients there is no cream cheese listed? How is it a cream cheese buttercream if there is no cream cheese? (Or did I miss something lol) Also I love how you turn it black. The gel and black Cocoa is genius!! Please help!!
Thanks.
What is the substitute of eggs. Would love to try this cake
Just a tip, if you don’t have buttermilk on hand, squeeze some lemon juice into whole milk (or a pinch of citric acid if you have it). It gives it the acidity that buttermilk has and works great in a pinch.
Hi Chelsea I was wondering if this recipe would work with 3 6inch cake pans. If so what do you recommend for cook time
Thanks
I’m going to make this cake. Is it OK to use vanilla extract? If so, how much? I didn’t notice vanilla in the ingredients. Thank you.
Hello
I have made your black velvet cake a few times in the past and is my mums favourite. I’ve noticed you’ve changed the recipe slightly by adding coffee and I was wondering if you still had your previous recipe you posted as it was sooooo nice.
Thank you
Beki
Hi Rebeca,
Absolutely!! I just sent you an email with the original recipe. Hope that helps, happy baking 🙂
Just came here to say I made this cake for our family’s annual pumpkin Carving day. It was a hit with everyone! I made the cake and frosting as instructed and they turned out beautifully. But! I also added your cream cheese buttercream recipe and dyed that a deep purple and so my inner layers were purple and my rosettes were half black frosting and half purple. I was so pleased. Thank you so much for your expertise, time and willingness to share with others. I will be writing this one day to keep in my “keepers” book.
I have your original recipe and absolutely love the flavor. It tastes just like and Oreo. With this version calling for oil, vanilla and coffee will the taste and texture be the same?
Hi Erika,
The texture is definitely different, but the flavor is pretty similar because most of the flavor comes from the black cocoa. I like the updated recipe because I think it’s easier to make the batter and I think it’s more moist. Hope that helps, happy baking!
Your black velvet cupcakes are delicious and have chocolate chips in them ..why not here too?
Hi Fiona,
My black velvet cupcake recipe is based on my chocolate cupcake recipe, and this recipe is based on my moist chocolate cake recipe, so they are just two different recipes! The crumb of this cake needs to be slightly stronger than my black velvet cupcakes for you to be able to pick up, stack, and frost the layers. Hope that helps, happy baking!
Hello Chelsey,
Just wanted to know what you used for the drip? I can’t seem to find it in the recipe.
Thanks LaNae
Hi Lanae,
The recipe for my black drip cake (which includes the black drip) can be found here: https://chelsweets.com/black-drip-cake/
Hope that helps, happy baking!
Hi! If I use the cream cheese frosting, how many drops of black food coloring do I need to add? Thank you!
Oh.my.god. This is delicious! I believe it’s the best cake I ever made, for my dad’s 96th birthday. Thank you!
SO happy to hear that Rick!!! Thank you for sharing 🙂
I am so excited to try this cake! I attempted a different recipe today. It was my first makeling a cake from scrach but it wasn’t too bad. Your recipe looks way easier and looks yummy with the espresso. I just had two questions. One can I use 9in cake pans. Two, can I leave the black cocao out of the frosting but still use the black food color gel? My husband wants not chocolate frosting, and I am a newbie. Thanks
Hi Nicole,
That is so exciting! And great questions. You can use this recipe to make either 2, 9 inch cake layers that are a little bit thicker, or you can make 3, 9 inch cake layers that are a little bit thinner than the layers in the pictures. Bake time will be a few minutes longer if you make 2, 9 inch layers and it will be a little bit shorter if you make 39 inch layers.
You can leave the cocoa out of the frosting and just use black gel food coloring but it can be hard to get a really deep color without a naturally dark base. However, if you make this frosting in advance it usually deepens in color over time but when you first make it, it might look a little bit Gray. Hope that helps and that your cake turns out great. Happy baking!
hi, i only have springform pans, and the batter is leaking out of the bottom of my pans. i’m wondering if there’s anyway to thicken it, without messing up the texture/flavor?
Hi Aislyn,
Ahh yes — springform pans can be tricky with thinner batters! I haven’t tried this before, but I’ve heard you can try wrapping the outside of the pan with a double layer of foil to catch leaks (and save your oven!). If you want to thicken the batter just slightly, you could try adding 1–2 extra tablespoons of flour, but I’d test it with just 1 first to avoid changing the texture too much. Alternatively, if you have regular cake pans, that’s always the safer route for this recipe. Hope that helps!
Can I make this without the coffee in it?
Totally! Just skip it and use the warm water. Hope that helps, happy baking Nadine!
Love the recipe. Is there a way to use cream cheese icing and still get it this black color? Thank you!
Hi Lynette,
So happy to hear you love this recipe! You can swap out 1 cup of butter for 1 cup of cream cheese in the buttercream recipe to make black cream cheese frosting 🙂 Hope that helps, happy baking!
Does the flour and cocoa need to be sifted?
Hi Linda,
Great question! I usually don’t unless my cocoa powder is really chunky. But you can if you want to or think you need to based on the type of flour and cocoa powder you’re using. Hope that helps, happy baking!
Is this recipe enough for 3 8 inch pans?
I was skeptical because ive never put so many liquids in a cake batter as I usually use a classic Victoria sponge as my base. This recipe is amazing. Its going in my permanent collection. The flavour is great, its moist and springy, the temperature and bake time spot on. My mouth wasn’t big enough, nor was my stomach.
Thanks for the recipe. ???
Aw that is such an honor!!!! So happy to hear you love this recipe Laura 🙂 Thanks for sharing!!!!
Your black velvet cupcakes use melted chocolate, but your black velvet cake is an entirely different recipe. Can I use the cupcake recipe for cake layers?
Hi Amanda,
They are definitely two different recipes! I think that this recipe bakes batter cake layers, but if you really want to use my cupcake recipe to make cake layers you can!
I love this recipe and have used it many times! Can it be used for 9×13 size cake pan? If so do you know how long it might take to bake?
Hi Randi,
I am so happy to hear that! You can make a 9×13-inch sheet cake using one batch of this recipe, the bake time can vary based on the type of metal the pan is made of, and whether you use heating cores! I usually do use heating cores, and it takes me about 40-45 minutes. The bake time cane vary based on your oven too! I’d recommend checking the center with a toothpick for doneness after 40 minutes. Once it comes out out with a few moist crumbs, you know it’s ready 🙂 Hope that helps, happy baking!