
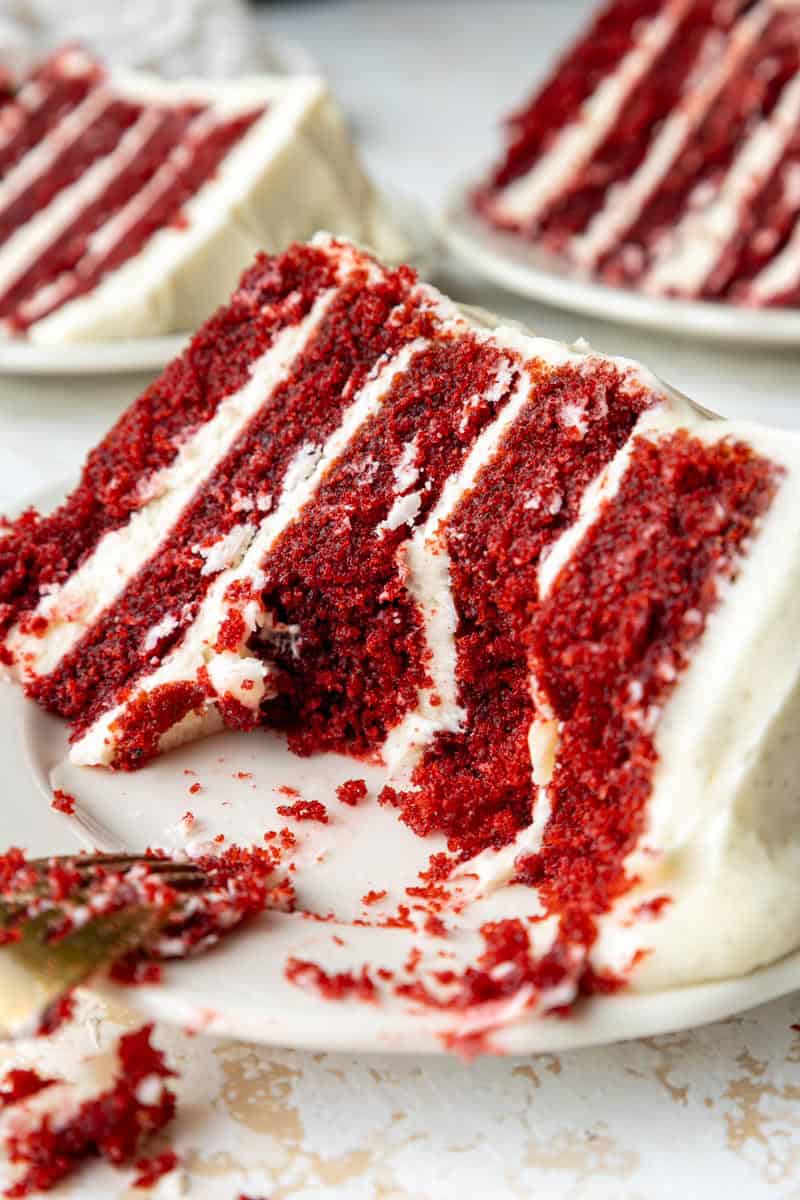
Red Velvet Oreo Cake
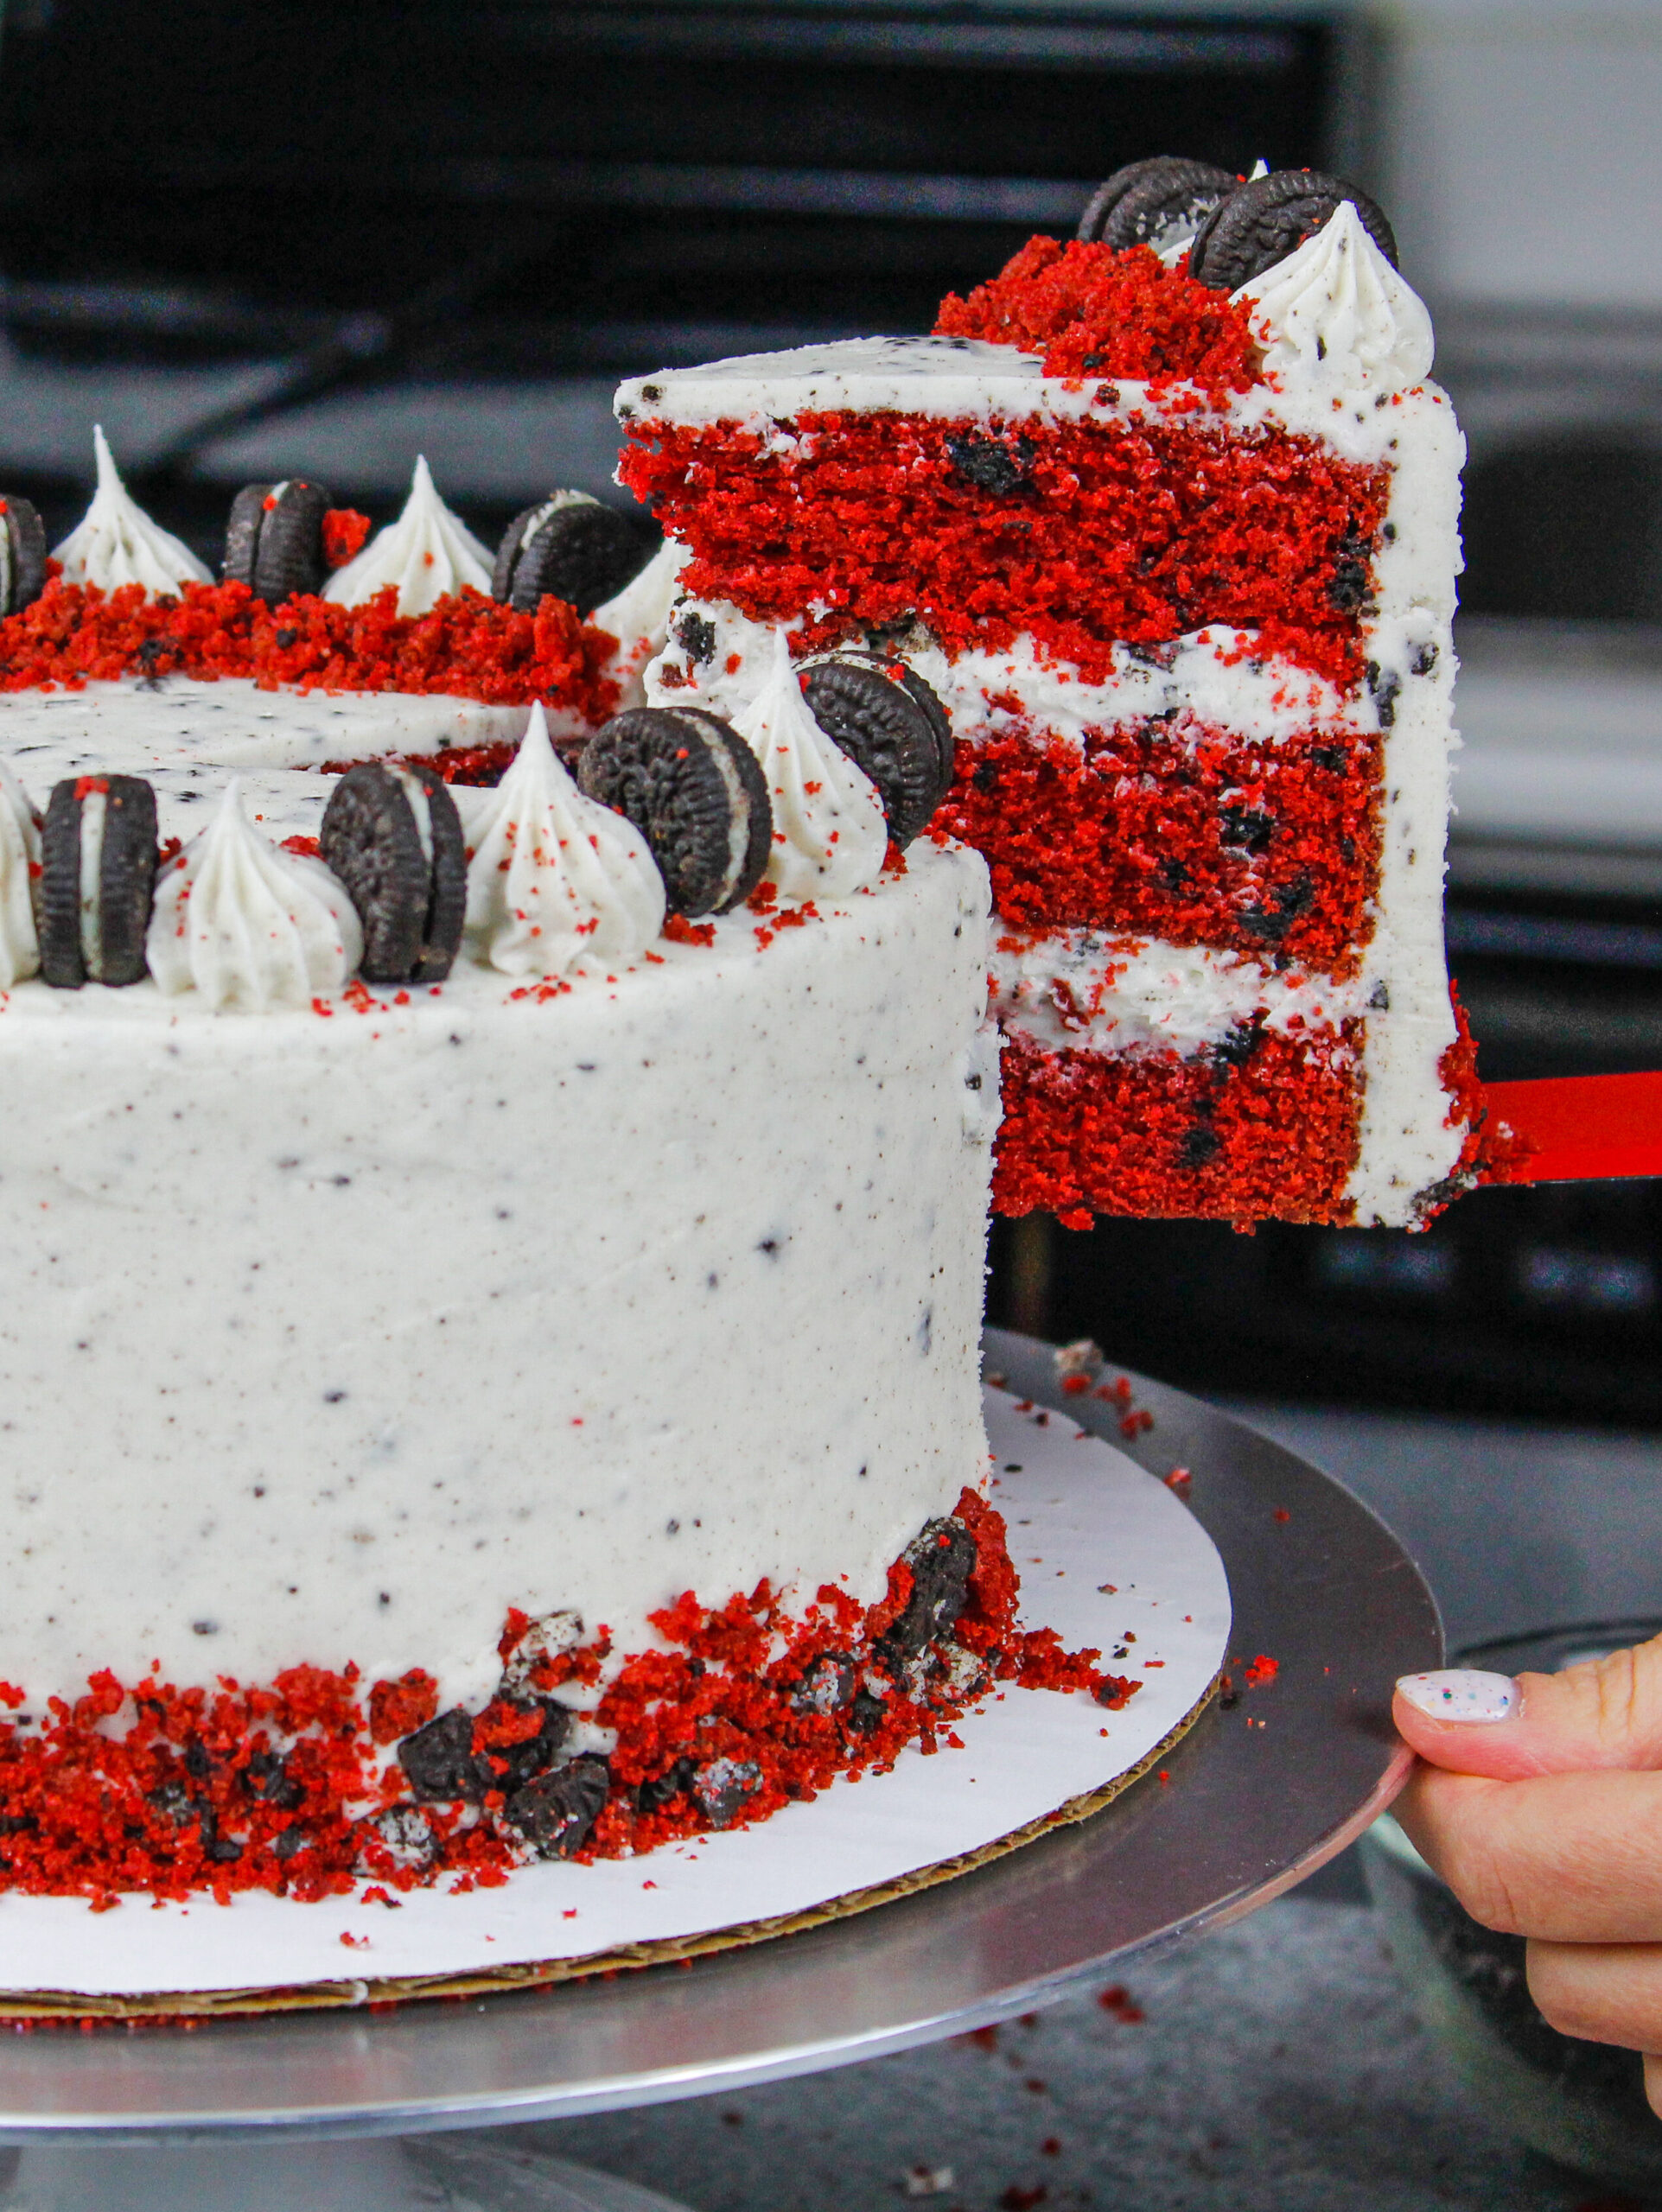
Red velvet and Oreo truly are a match made in heaven, and that’s why I’m so excited to share this red velvet Oreo cake!
From its tender red velvet Oreo cake layers to its Oreo cream cheese frosting, this cake recipe is sure to be a new favorite!!
What Food Coloring Should I Use to Make this Red Velvet Oreo Cake?
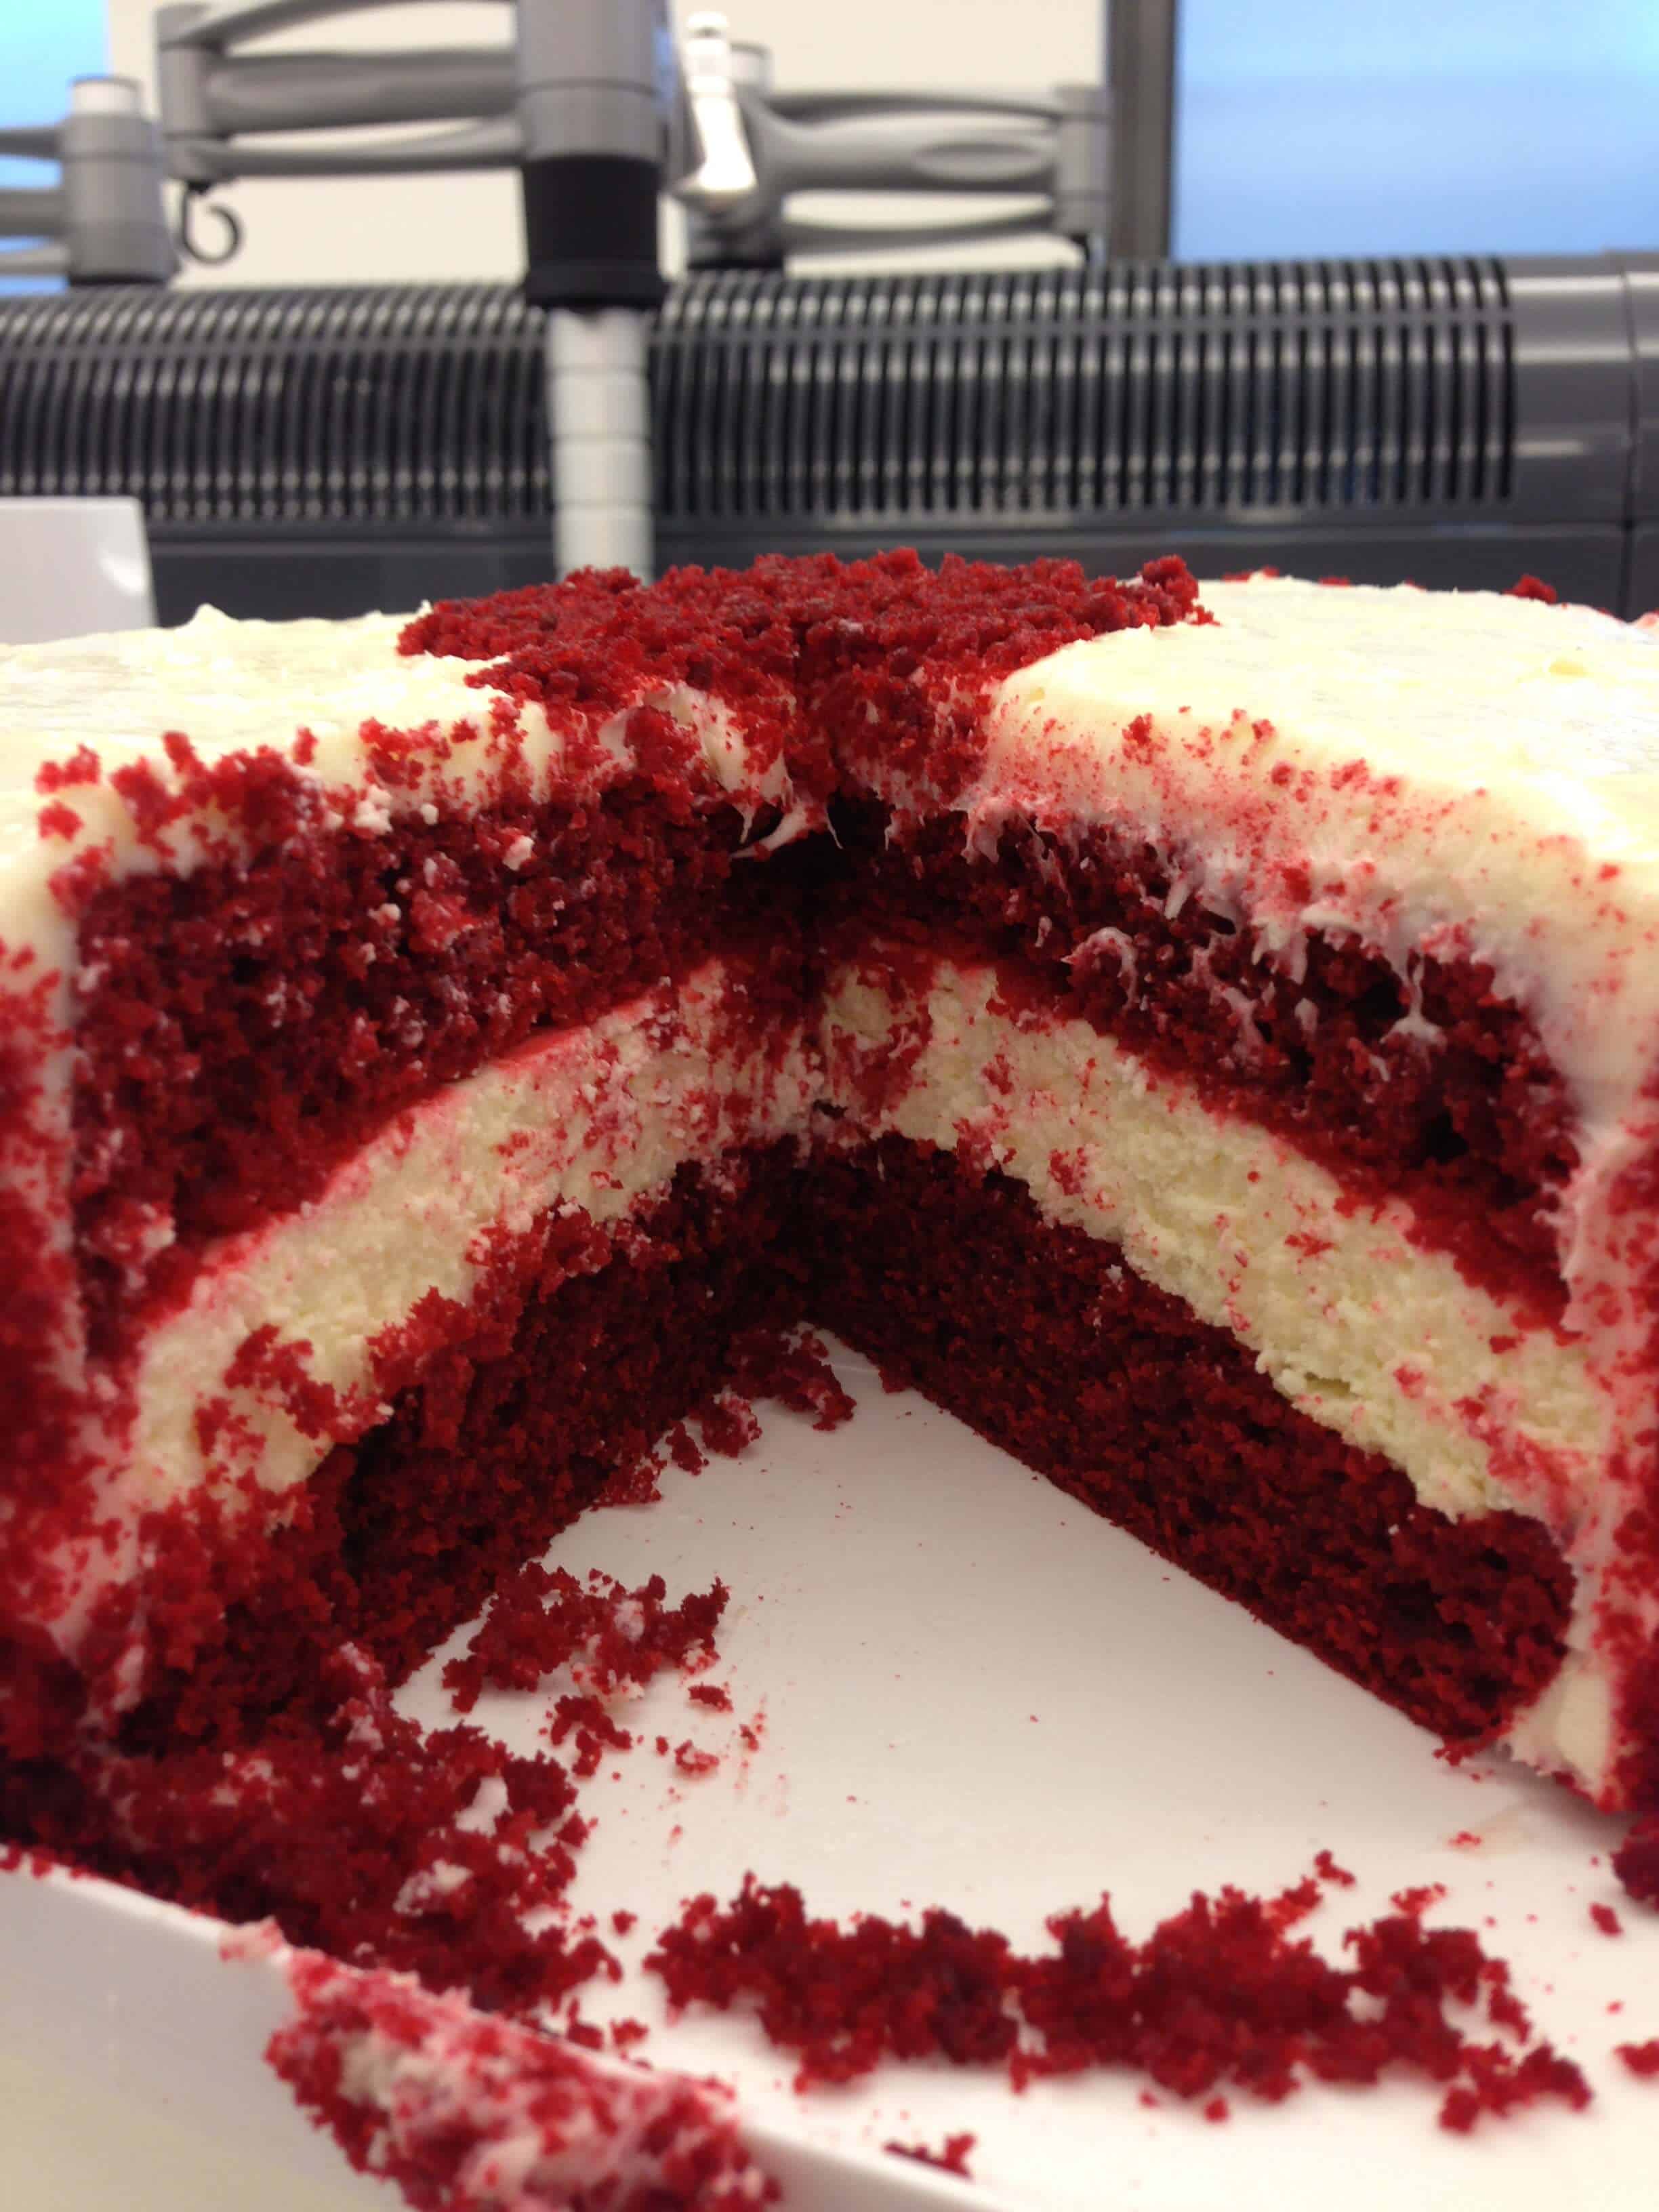
When you make any type of red velvet cake, you expect it to have that gorgeous, deep red color when you cut in. I’ve found that it’s a lot easier to achieve that using gel food coloring.
I prefer Americolor, but any red gel food coloring will work! If you don’t have gel food coloring on hand, you can also use liquid food coloring.
I’ve found that you need to use an entire bottle of liquid food coloring to get the deep red color, so be sure you have a full bottle if you go this route.
The Oreo Cream Cheese Frosting
This red velvet Oreo cake recipe would taste great with just about any frosting, but I wanted to stick with the classic pairing of cream cheese frosting and red velvet cake.
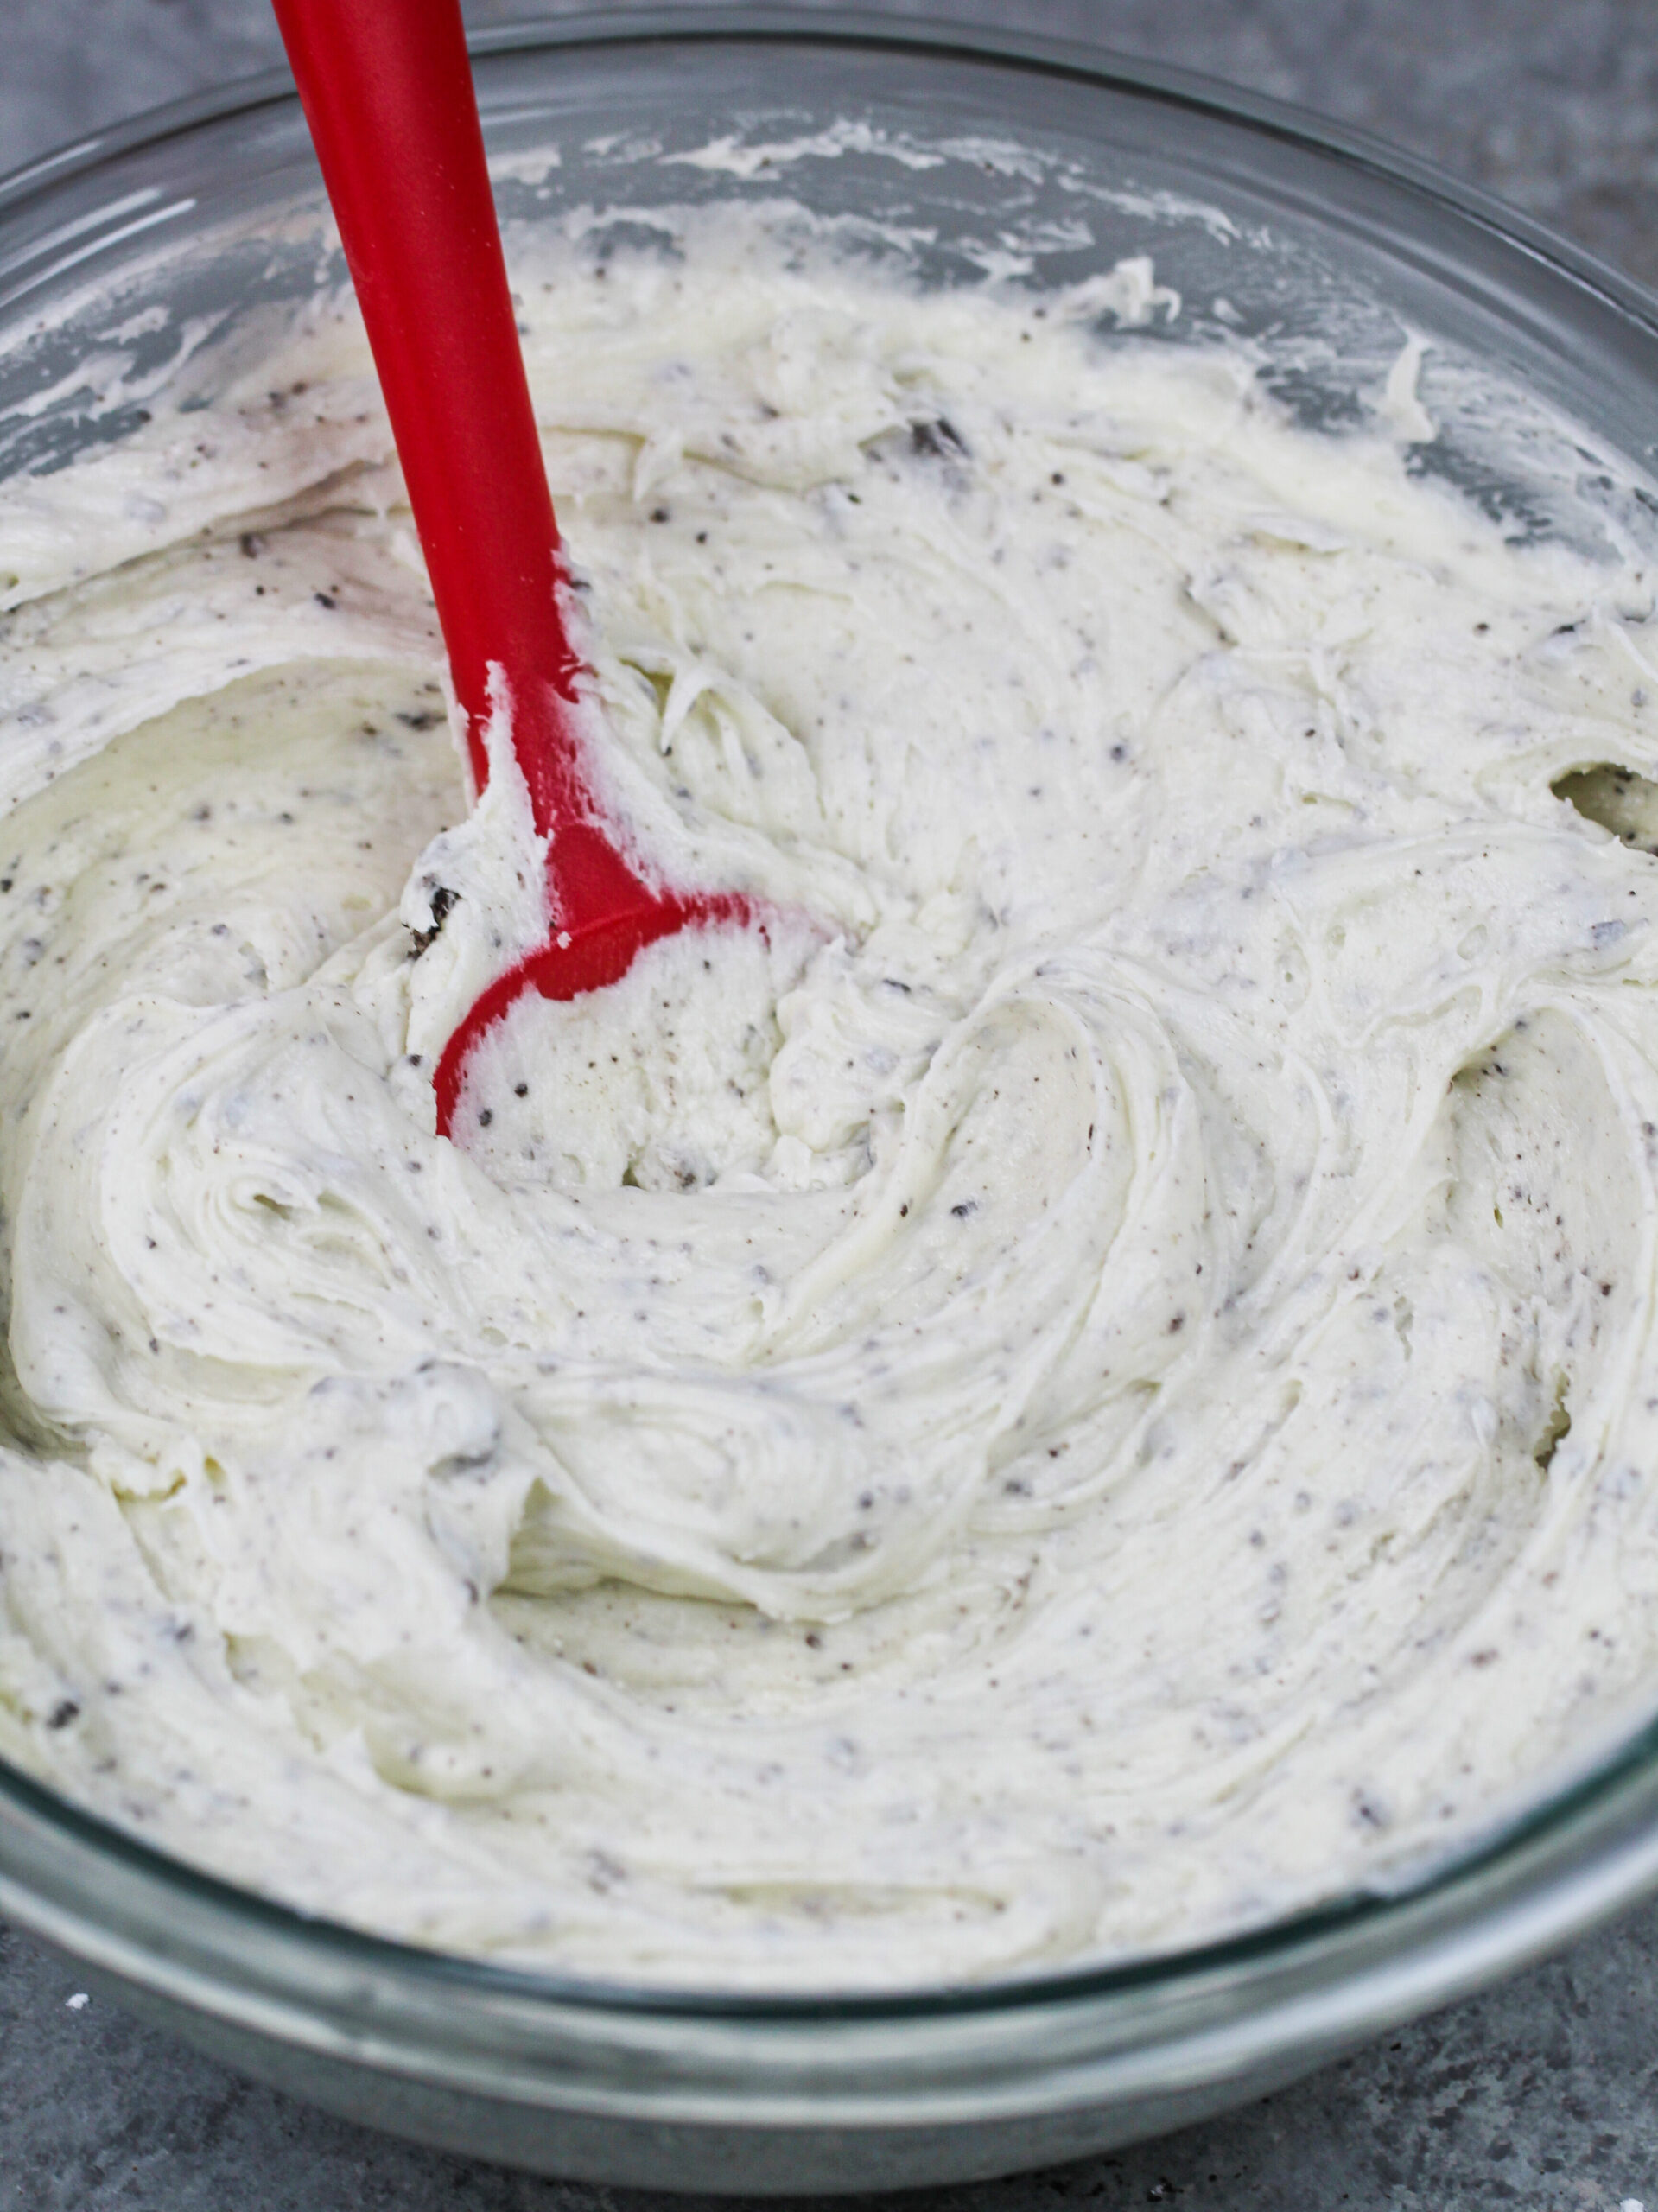
My cream cheese buttercream is a dream when it comes to decorating cakes.
It’s thick, has great structure, and is wonderful for layer cakes because it is stiff enough to support the weight of the cake layers.
Throw in some crushed Oreos and you have one epic frosting!!
Substitutions & Swaps – Red Velvet Oreo Cake Layers
Below are some swaps and substitutions that you can make in this recipe.
- Vegetable Oil – You can use any flavorless oil in this recipe. Canola or even sunflower oil would work great!
- Eggs – If you have an egg allergy, you can use flaxseed eggs or an egg replacer.
- Buttermilk – You can also use full-fat yogurt, additional sour cream, whole milk, or an alternative yogurt or milk (almond, soy, oat) if you’re dairy-free.
- Sour Cream – You can also use full-fat yogurt, additional buttermilk, whole milk, or an alternative yogurt or milk (almond, soy, oat) if you’re dairy-free.
- White Vinegar – The vinegar in this recipe is crucial because it activates the baking soda and helps the cake layers rise! Most types of vinegar should work, including apple cider or white wine vinegar.
- Vanilla Extract – Other extracts can also be used in place of the vanilla extract, or you can omit it if you don’t have any on hand.
- Granulated Sugar – I do not recommend reducing the amount of sugar or changing the type of sugar, as it will change the texture of the cake layers.
- All-purpose flour – This recipe turns out best with AP flour, but you can use a gluten-free flour blend or cake flour if that’s all you have on hand. I don’t recommend using straight almond flour, though!
- Gel food coloring – Natural food coloring (either liquid or powder) or liquid food coloring can be used if needed.
- Chopped Oreos – If you don’t want to add chopped Oreos into the cake layers, simply omit them.
Substitutions and Swaps – Cream Cheese Oreo Frosting
- Unsalted Butter – If you only have salted butter on hand, you can use it in place of the unsalted butter. You can also use vegan butter in its place!
- Cream Cheese – If you don’t like cream cheese frosting, use additional butter in place of the cream cheese.
- Vanilla Extract – Vanilla helps enhance the flavor of this frosting! However, other extracts can also be used in place of the vanilla extract, or you can omit it if you don’t have any on hand.
- Heavy Cream – Whole milk or alternative milk (soy, almond, oat) will work fine in this frosting recipe, too.
- Crushed Oreos – If you don’t want to add chopped Oreos into the buttercream, you can omit them.
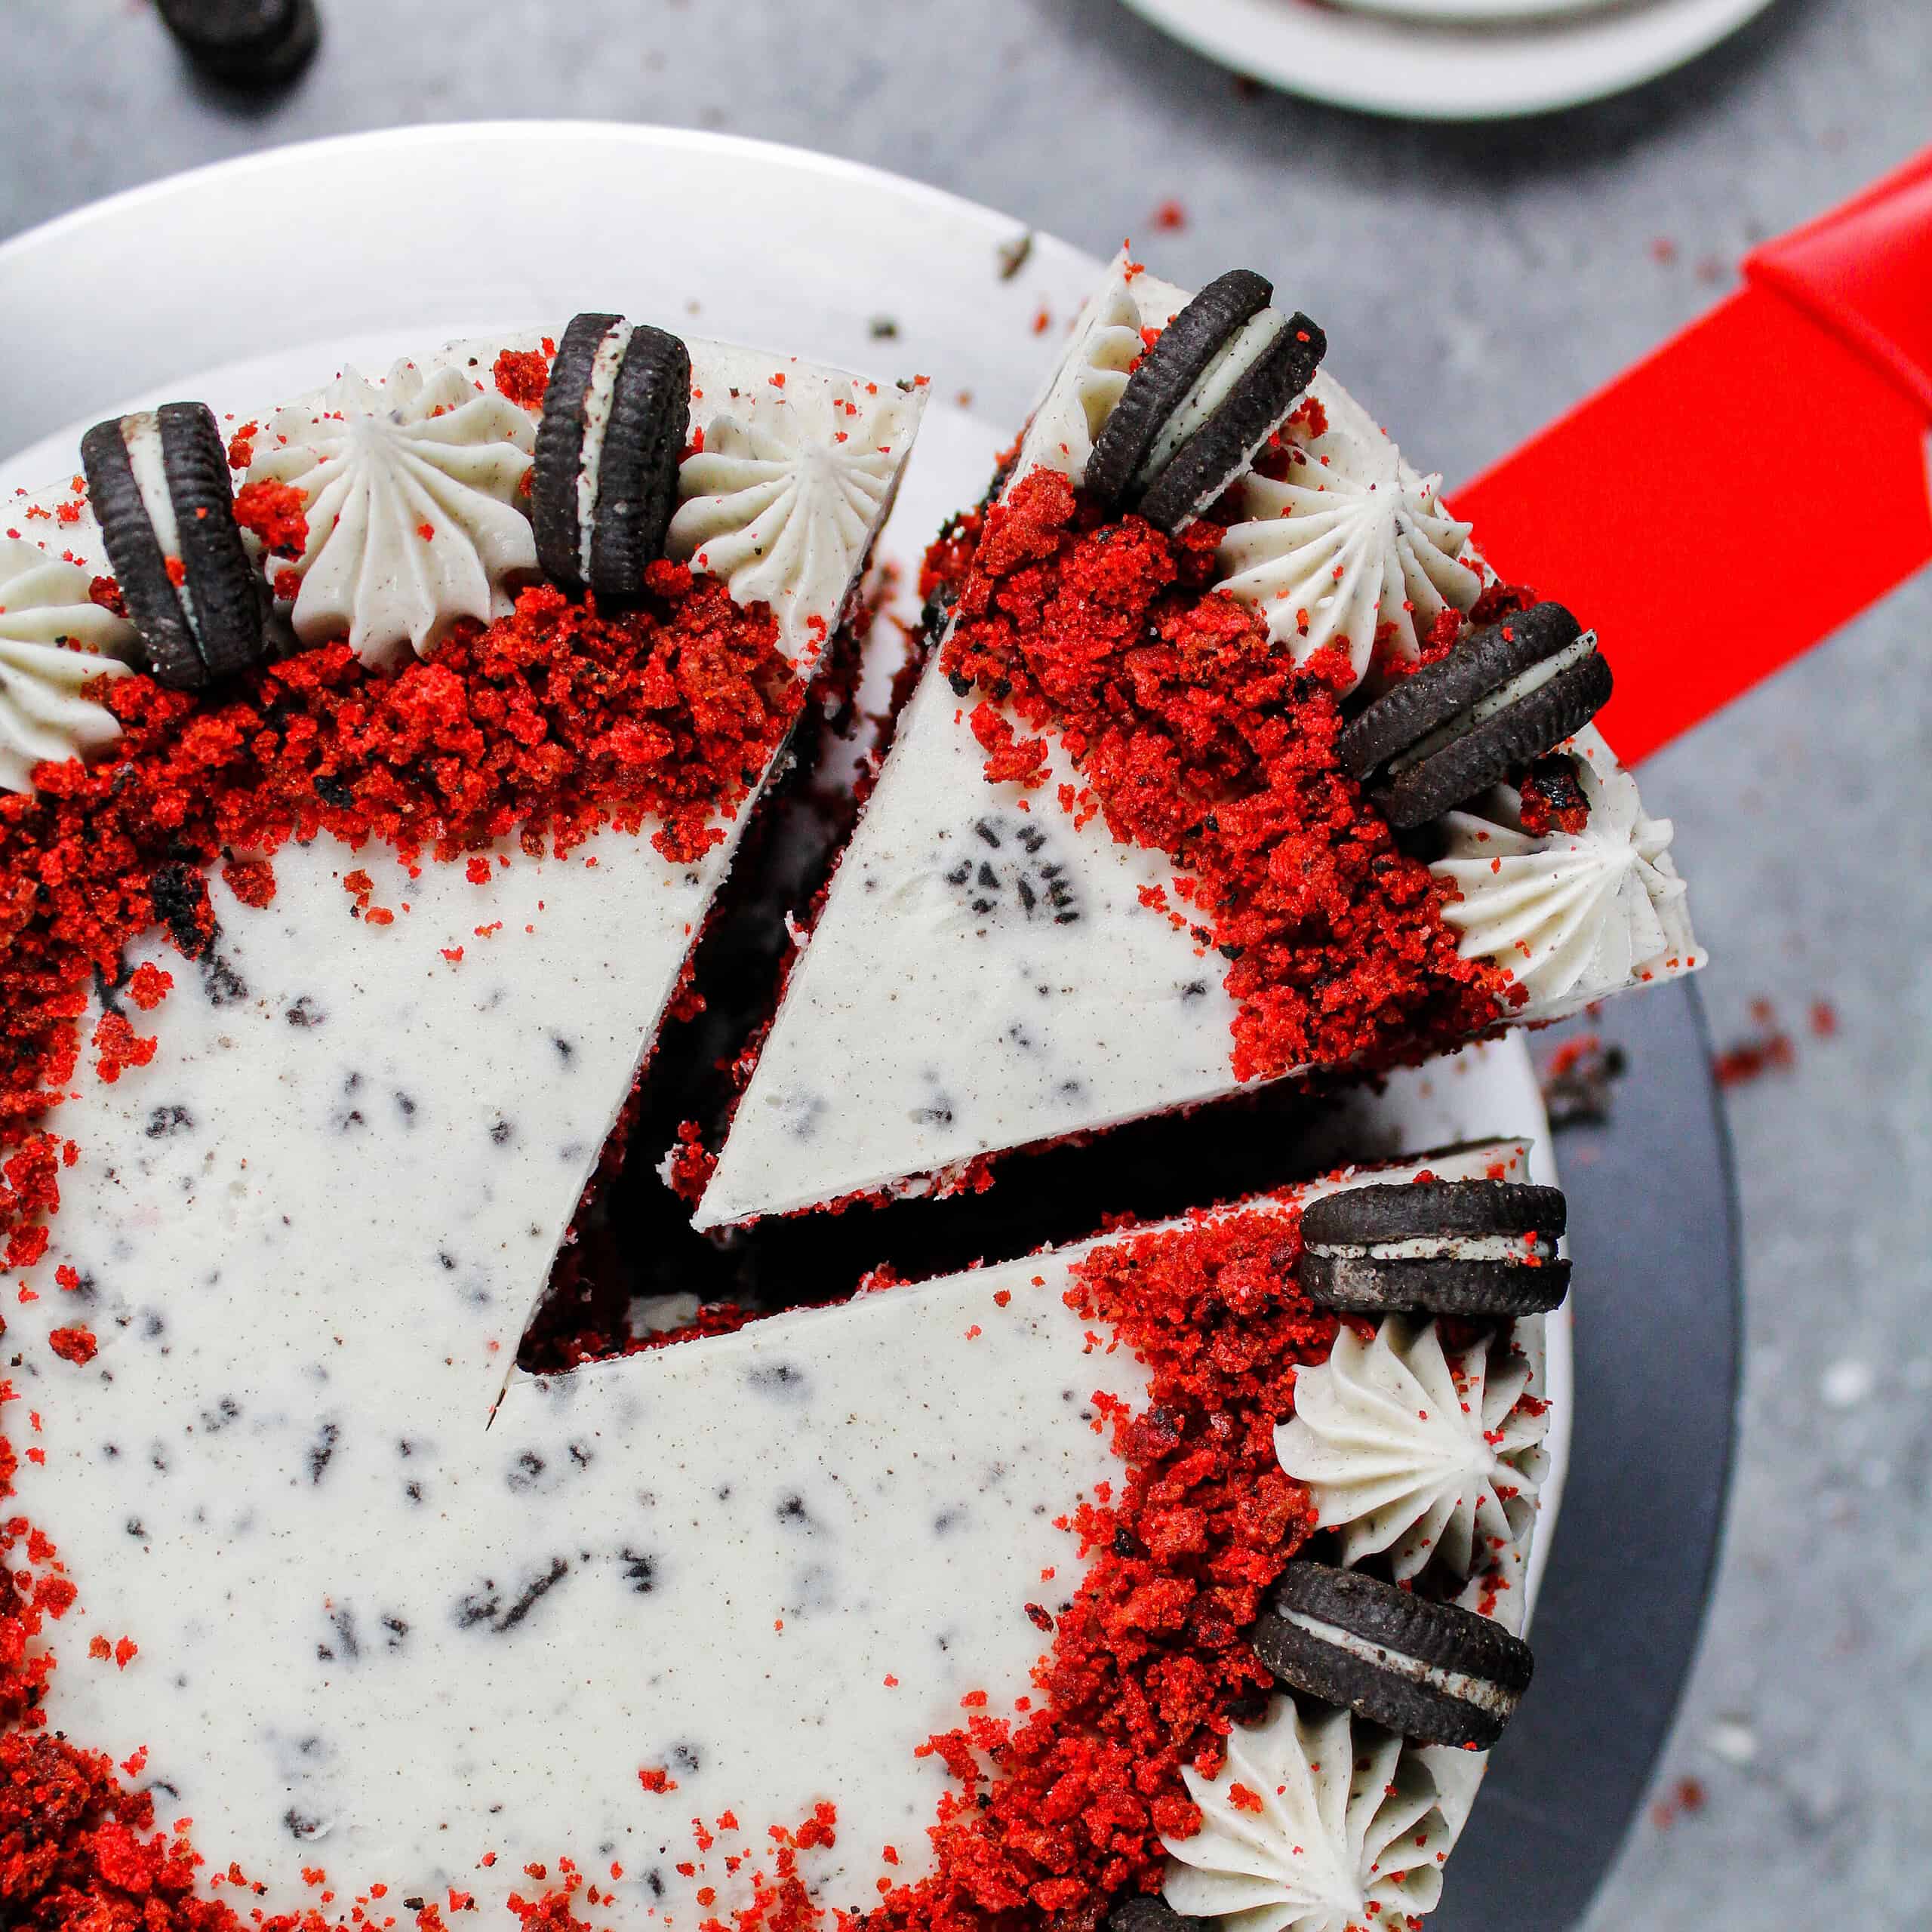
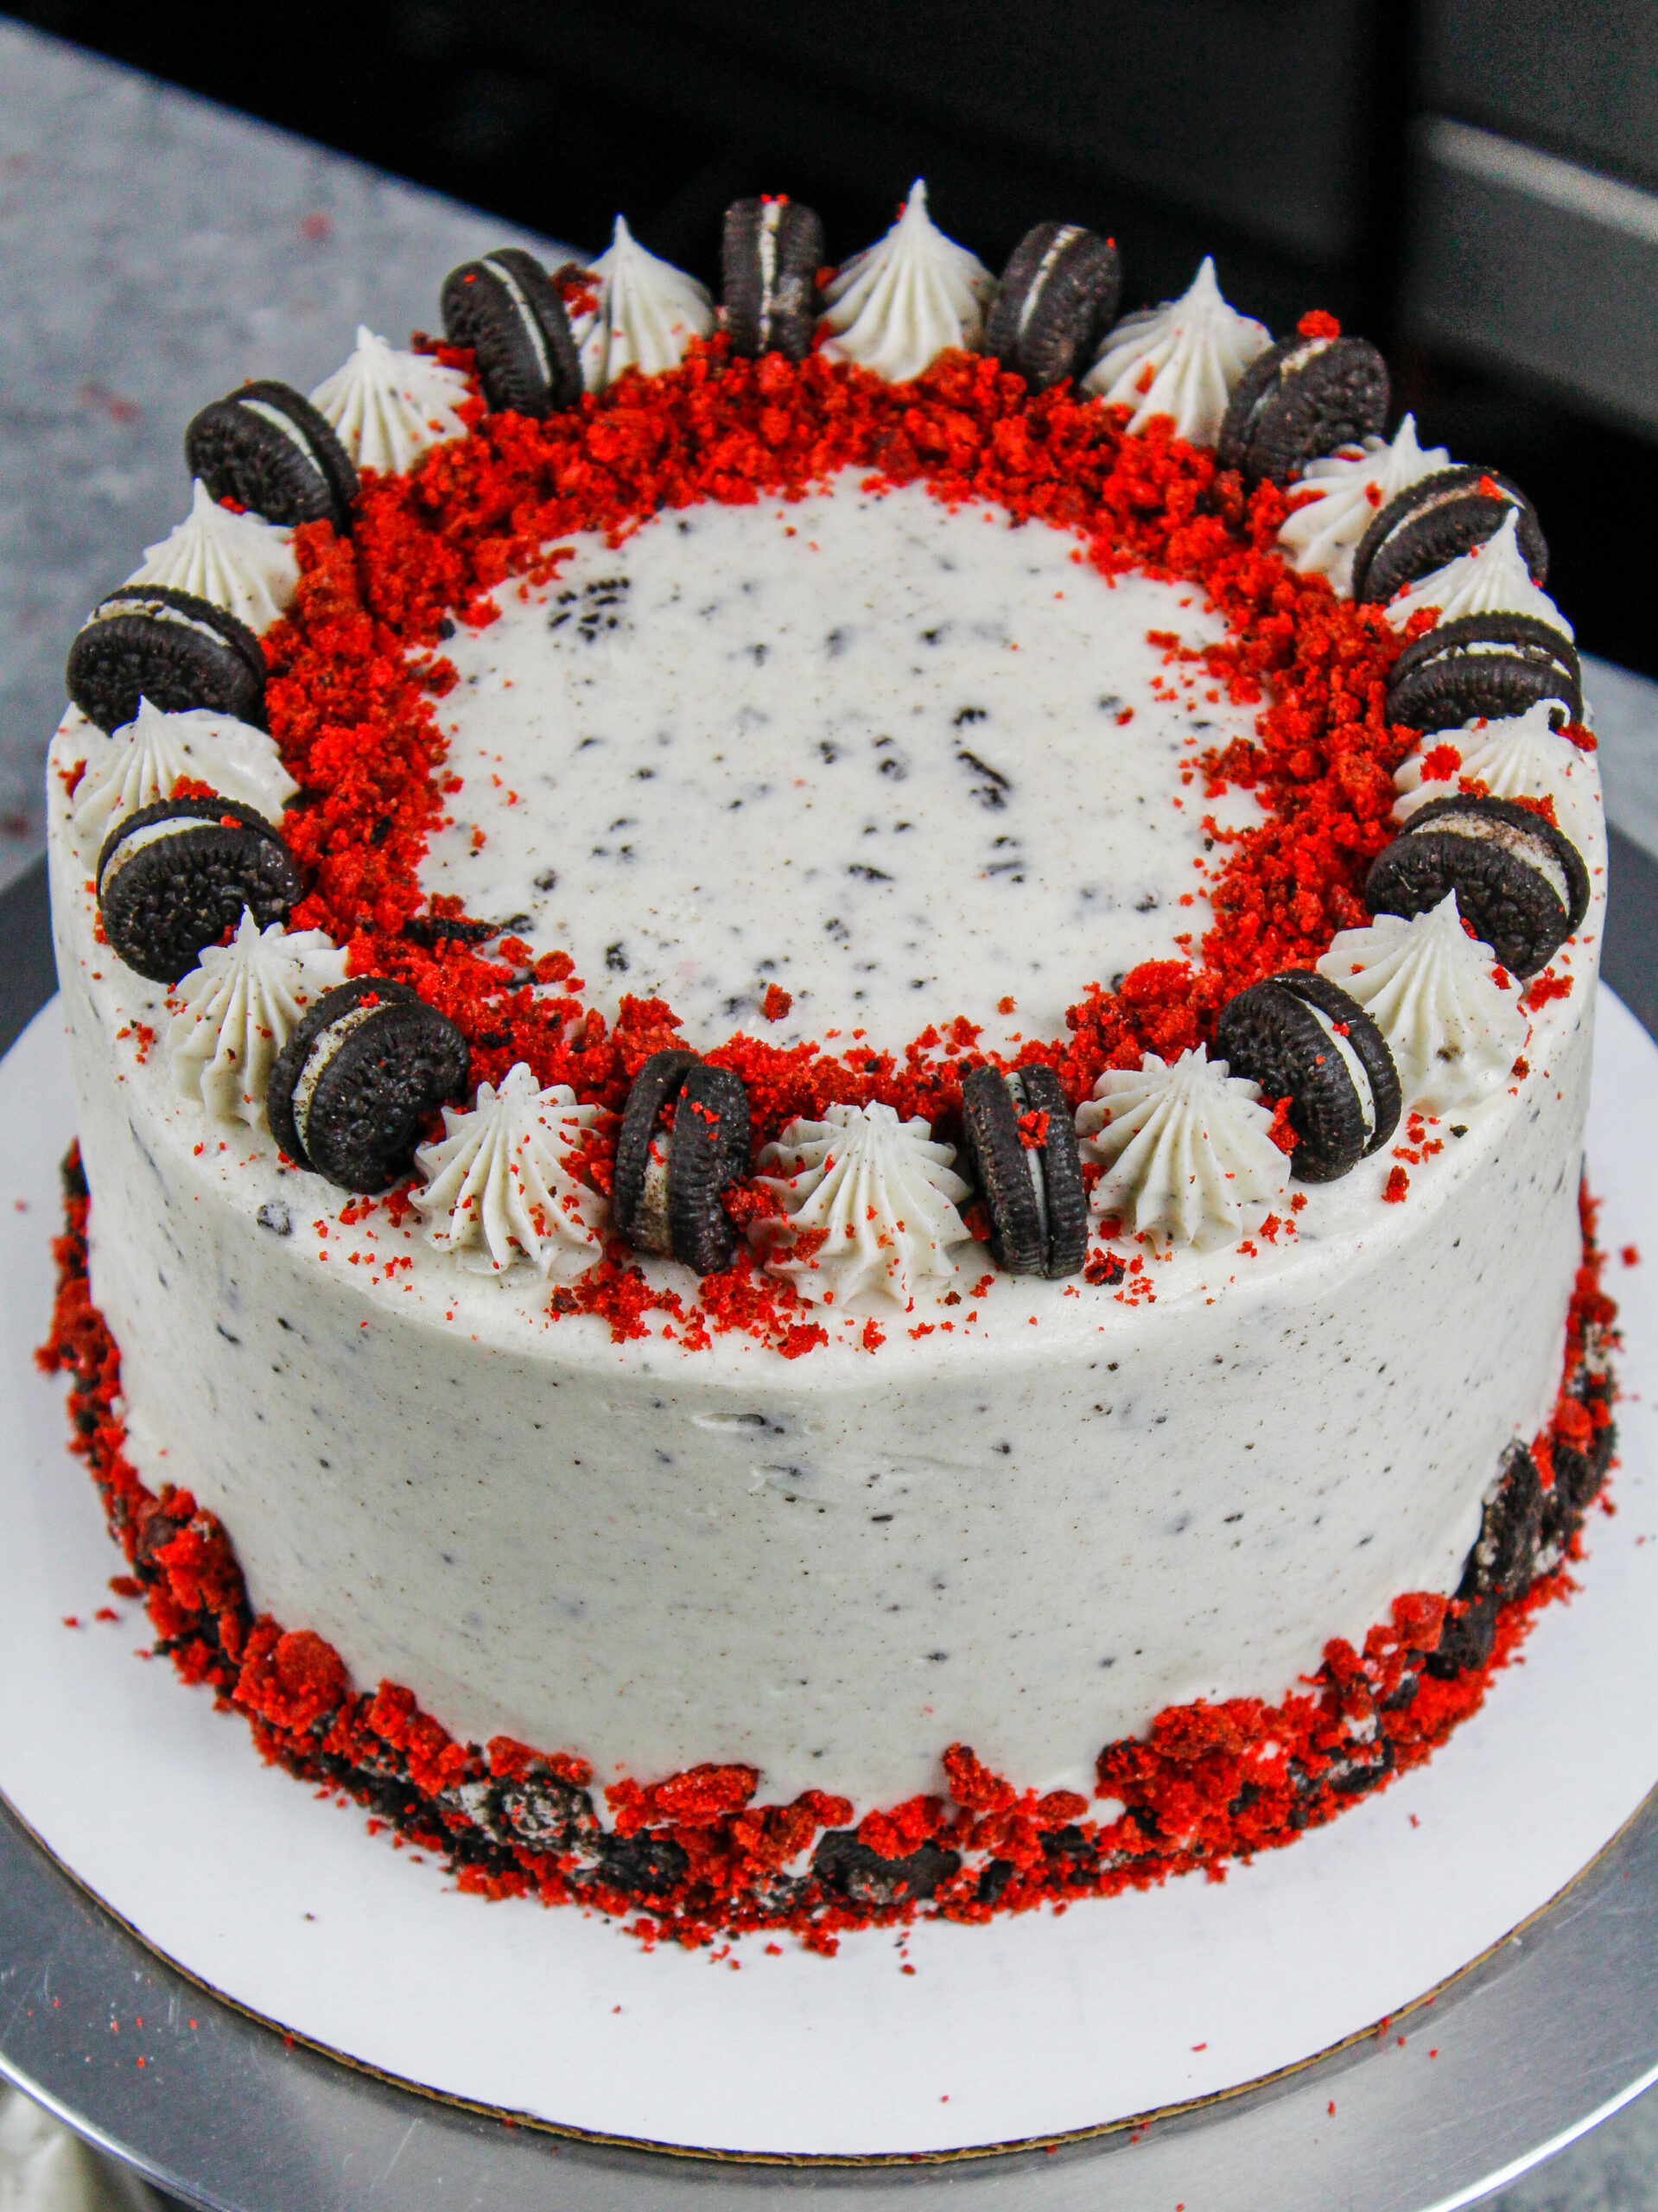
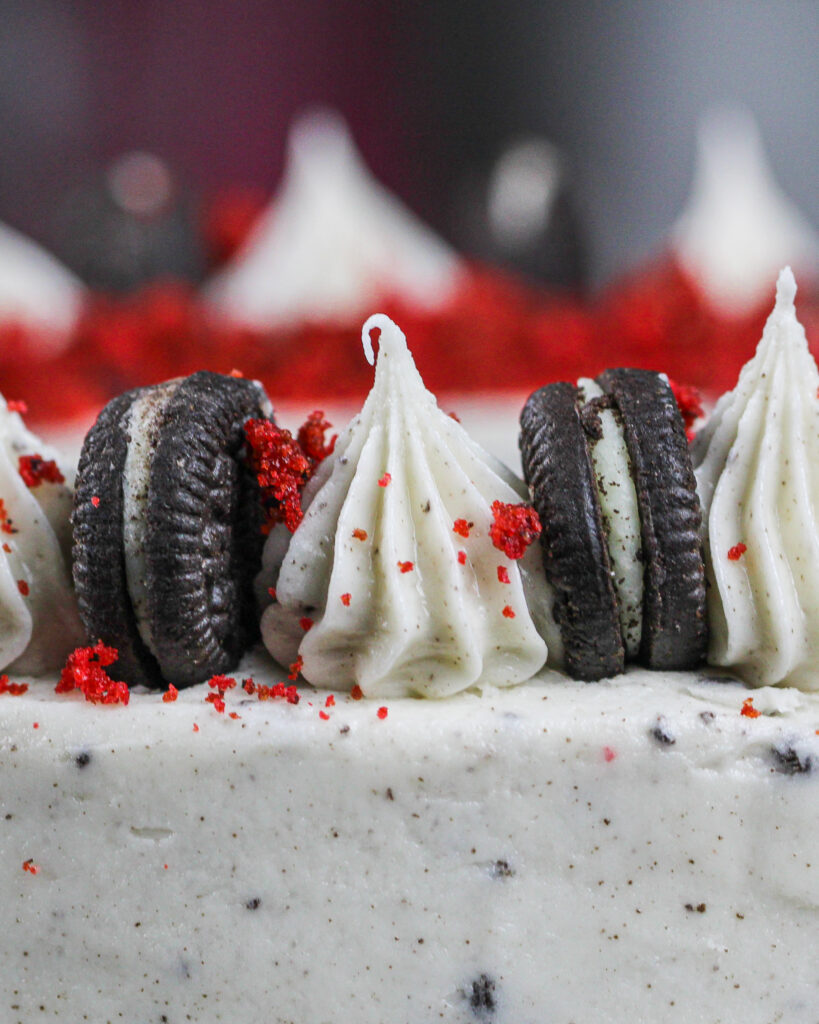
Decorating This Red Velvet Oreo Cake
While I love making challenging cake designs, sometimes it’s nice to just make a classic layer cake.
I kept things simple with this cake and used crumbled cake tops and crushed Oreos to decorate the base of the cake.
This cake decoration screams red velvet and Oreo and gives the cake such a classic look.
Tips for Making the Best Red Velvet Oreo Cake
- Properly measure the flour (spoon into the cup measure, then level). Or better yet, use a kitchen scale to measure your dry ingredients.
- Ingredients at room temperature mix together better. Set out any cold ingredients ahead of time.
- Use a scale to weigh your cake pans as you fill them. It will make your cake layers bake to the same height and bake more evenly.
- Use red gel food coloring to make your cake layers a deep, beautiful shade of red.
- Level your room temperature or thawed cake layers with a serrated knife to make them easier to stack.
- Chill your cake layers in the freezer for about 20 minutes before assembling the cake. It makes it so much easier to stack and frost them!
- I highly recommend that you use a food processor or blender to crush the Oreos for this frosting! If there are any large bits of cookie, it will make the frosting challenging to smooth or pipe with.
Making This Red Velvet Oreo Cake in Advance & Storage Tips
I highly recommend making the cake layers in advance and freezing them. It breaks the process up and makes it more approachable.
You can also make the frosting ahead of time too or save any leftover frosting. It can be stored in an airtight container in the fridge for up to a month or in the freezer for up to 3 months.
Wait to fold in the crushed Oreos until the buttercream has thawed and been stirred to a smooth consistency again, or else the Oreos can lose their texture and shape and turn the frosting gray.
A frosted cake can last in the fridge for up to a week. The buttercream locks in all the moisture, keeping the cake fresh and delicious.
If you cut into the cake and have leftovers, use any remaining frosting to cover the cut section to keep it moist. It can be stored in the fridge like this for up to a week.

Let Me Know What You Think!
If you try this red velvet Oreo cake recipe, I’d love to hear what you think of it! Please leave a rating and comment below.
Don’t forget to tag me @chelsweets and use #chelsweets if you share on social media so I can see all your amazing creations!

Red Velvet Oreo Cake
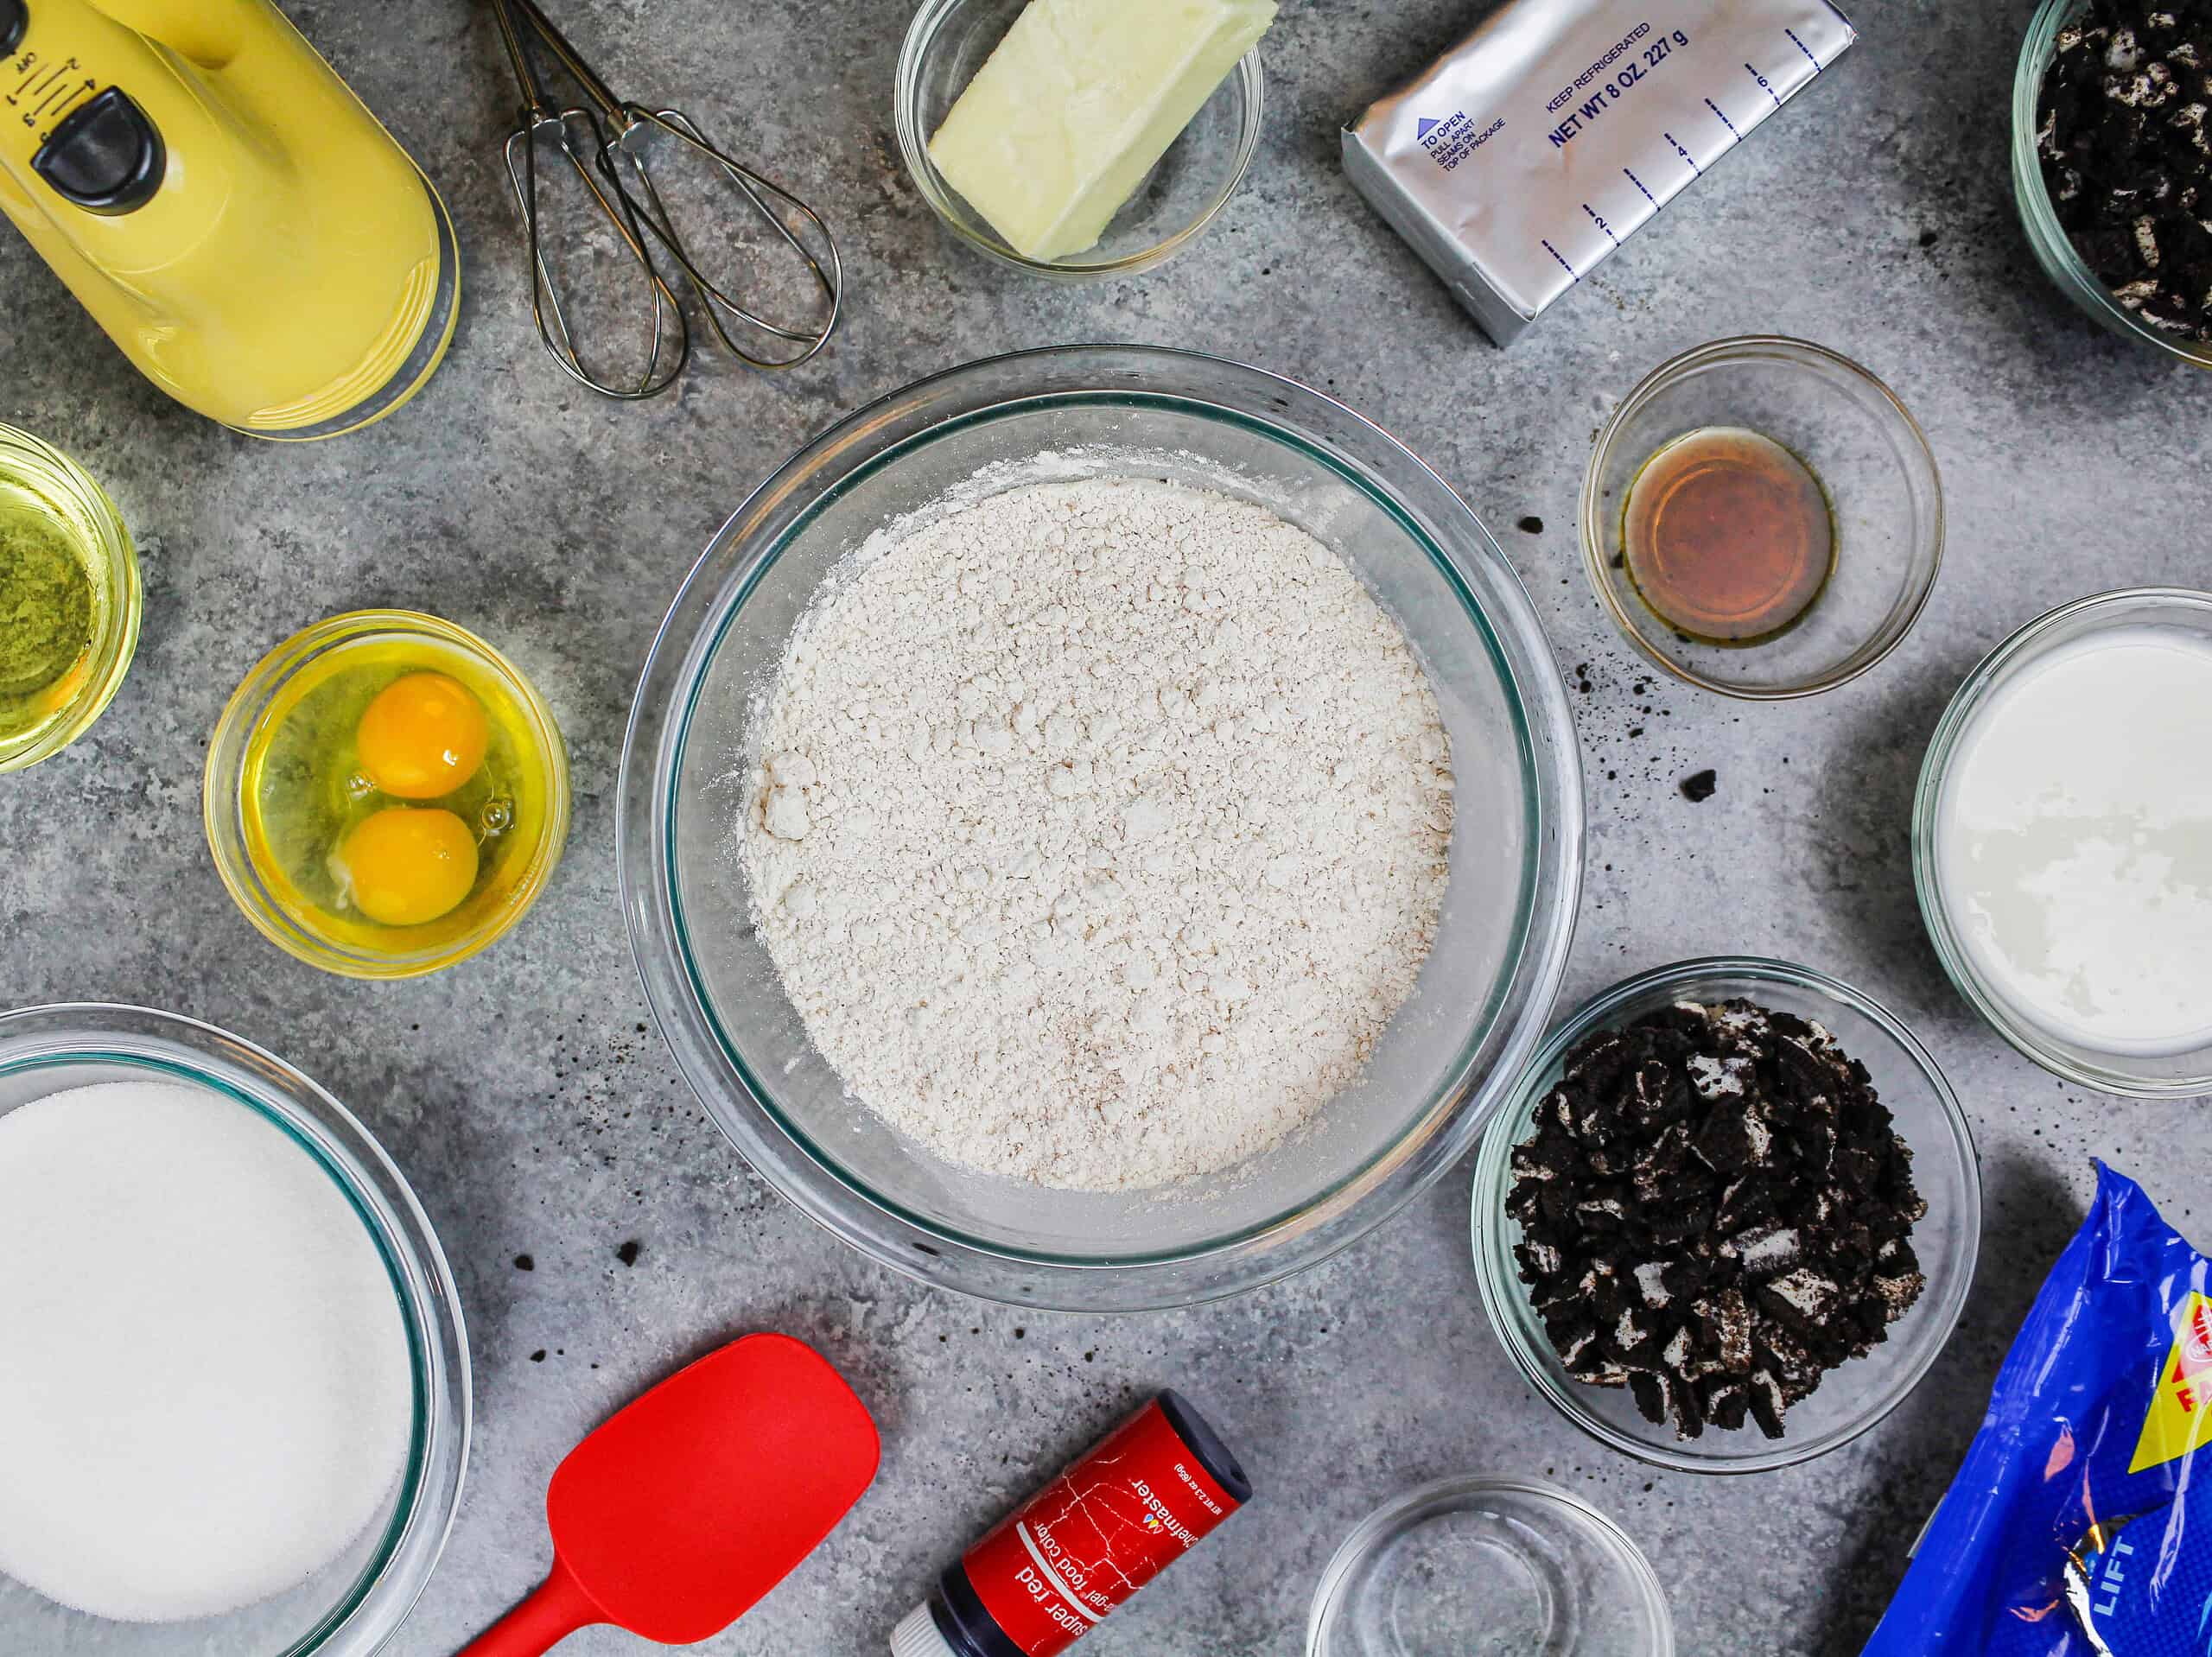
Ingredients
Red Velvet Oreo Cake
- 1 cup vegetable or canola oil 225g
- 1 cup buttermilk, room temperature 240g
- 1/2 full-fat sour cream, room temperature 125g
- 3 large eggs, room temperature 170g
- 2 tsp vanilla extract or vanilla bean paste 8g
- 1 tsp white vinegar 4g
- red gel food coloring or 1 Tbsp liquid food coloring
- 2 1/2 cups granulated sugar 500g
- 3 cups all-purpose flour 375g
- 2 Tbsp unsweetened cocoa powder, sifted 12g
- 1 tsp baking soda 6g
- 1 tsp baking powder 4g
- 1 tsp fine salt 6g
- 1 cup chopped Oreos 90g
Cream Cheese Buttercream Frosting
- 1 1/2 cups (3 sticks) unsalted butter, room temperature 339g
- 1 cup full-fat cream cheese, room temperature 226g
- 1 Tbsp vanilla extract or vanilla bean paste 12g
- 1/2 tsp fine salt 3g
- 7 cups powdered sugar 875g
- 1 Tbsp heavy whipping cream, room temperature 15g
- 1/2 cup Oreo cookie crumbs, pulverized in a food processor or super finely chopped 45g
Optional Filling
- 3/4 cup Oreos, roughly chopped 68g
Additional Tools / Equipment
- Electric Mixer
- small piping bag
- small French frosting tip
- mini Oreos
Instructions
Red Velvet Oreo Cake:
- Preheat the oven to 350°F / 175°C. Line and grease 3, 8-inch pans. Set aside.
- In a large bowl, whisk together 1 cup vegetable oil, 1 cup buttermilk, 1/2 cup sour cream, 3 large eggs, 2 tsp vanilla extract, 1 tsp white vinegar, and a generous squirt of red gel food coloring. Mix until combined and the batter is evenly colored.
- Add 2 1/2 cups of granulated sugar and whisk for 30 seconds to help dissolve the sugar.
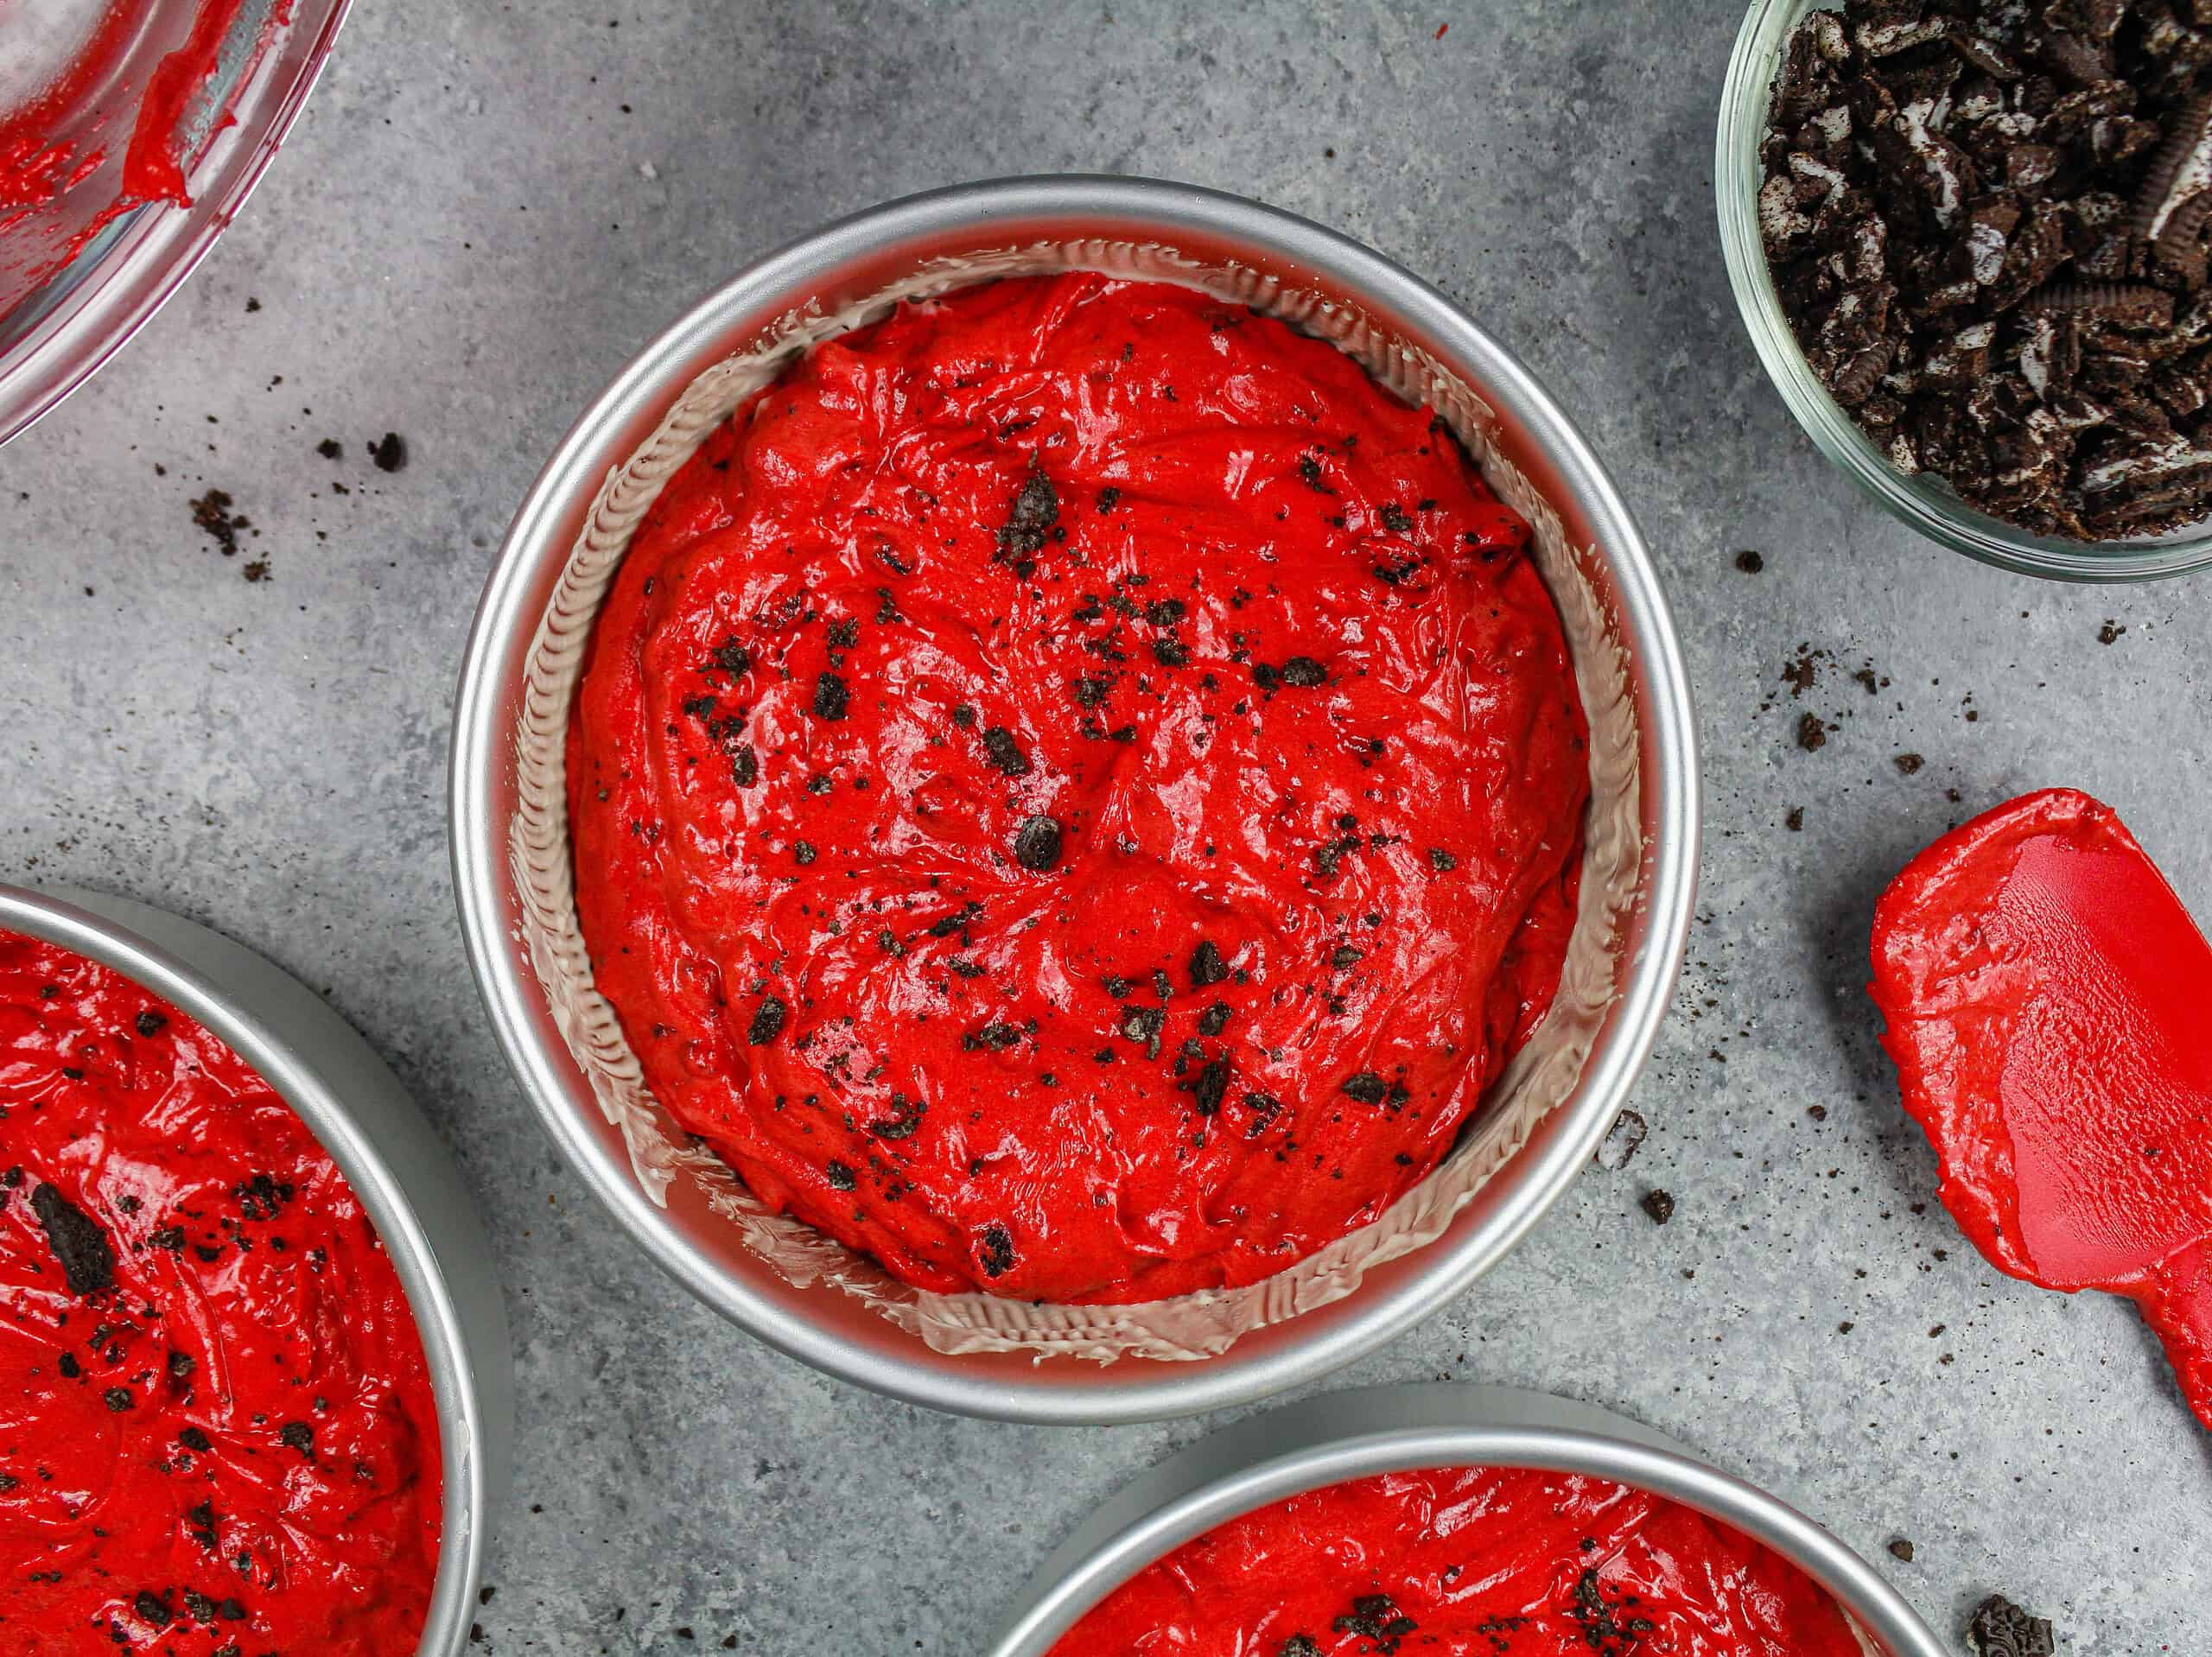
- Then mix in 3 cups flour, 2 Tbsp cocoa powder, 1 tsp baking soda, 1 tsp baking powder, and 1 tsp salt. Whisk until just combined. Fold in 1 cup of roughly chopped Oreos.
- Divide the batter evenly between the prepared pans and bake for 27-30 minutes.
- Remove pans from oven and let them cool in the pans for 15 minutes.
- Carefully flip the layers out of the pans, and place on a wire rack to finish cooling.
- Level the cake tops with a serrated knife once they're fully cooled. Use a fork to crumble the cake tops. Cover and set aside. If you're making these in advance, wrap and freeze them at this point.
Oreo Cream Cheese Buttercream Frosting:
- Beat 1 1/2 cups of butter and 1 cup cream cheese on a medium speed for 30 seconds with a paddle attachment until smooth.
- Add in 1 Tbsp vanilla and 1/2 tsp salt. Beat on low until combined.
- Slowly mix in 7 cups powdered sugar on a very low speed. About halfway through add in 1 Tbsp of heavy cream to make the frosting easier to mix.
- Mix until the frosting reaches the right consistency. If the frosting seems too thick, add in additional cream (1 Tbsp at a time). If the frosting is too thin, add in more powdered sugar (1/4 cup at a time).
- Then mix in 1/2 cup of Oreos crumbs on a low speed, mixing just until they're evenly distributed throughout the frosting. If you mix the Oreos in for too long, it can make your frosting look kind of gray.
- Cover the Oreo cream cheese frosting with a piece of plastic wrap to prevent a crust from forming until you're ready to use it. This frosting can sit at room temperature for a few hours, but if you make this in advance refrigerate it.
Red Velvet Oreo Cake Assembly:
- Stack and frost the red velvet Oreo cake layers on a greaseproof cake board, using a dab of frosting to help stick the first cake layer to the board.
- Add an even layer of Oreo cream cheese buttercream between each cake layer, and top with 1/4 cup of chopped Oreos.
- Add a thin coat of frosting around the cake to fully cover the cake layers. Smooth using a bench scraper, then chill the cake in the fridge (20 minutes) or freezer (5 minutes) until the frosting is firm to the touch.
- Add a second, thicker layer of frosting to the cake, and smooth using a bench scraper.
- Carefully press the reserved red velvet crumbs and remaining chopped Oreos along the base of the cake with your hand.
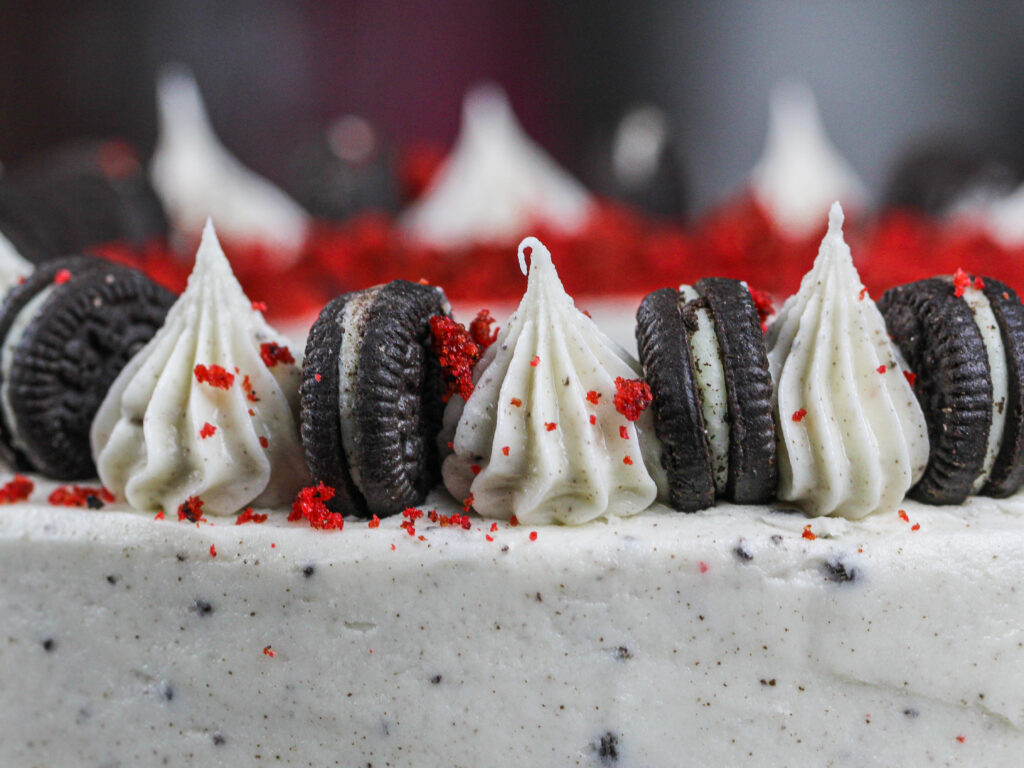
- Place the remaining cream cheese buttercream into a frosting bag fit with a small French frosting tip.
- Pipe a border around the top of the cake, add mini Oreos, and enjoy!
Video
Notes
Tips for Making Best Red Velvet Oreo Cake:
- Ingredients at room temp mix together better! Set out any cold ingredients ahead of time.
- Properly measure your flour (spoon into the cup measure, then level). Or better yet, use a kitchen scale to measure your dry ingredients.
- Mix the cake batter just until the ingredients are incorporated once you add in the flour. This will ensure your cake layers are tender and fluffy.
- Use a scale to weigh your cake pans as you fill them. It will make your cake layers bake to the same height and bake more evenly.
- Level your room temperature or thawed cake layers with a serrated knife to make them easier to stack.
- Chill your cake layers in the freezer for about 20 minutes before assembling the cake. It makes it so much easier to stack and frost them!
- Use gel food coloring to create brightly colored cake layers. It works best because it doesn't throw off the consistency of the batter or give it a bitter taste.
- I highly recommend that you use a food processor or blender to crush the Oreos for this frosting! If there are any large bits of cookie it will make the frosting challenging to smooth onto the cake and pipe with.
- If your cake layers don't turn out quite how you'd hoped, check out my cake troubleshooting guide to see what might have gone wrong.
Making This Red Velvet Oreo Cake in Advance & Storage Tips:
I highly recommend making the cake layers in advance and freeze them. It breaks the process up and makes it more approachable. You can also make the frosting ahead of time too or save any leftover frosting. It can be stored in an airtight container in the fridge for up to a month or in the freezer for up to 3 months! Wait to fold in the crushed Oreos until the buttercream has thawed and been stirred to a smooth consistency again, or else the Oreos can lose their texture and shape and turn the frosting gray! A frosted cake can last in the fridge for up to a week. The buttercream locks in all the moisture, keeping the cake fresh and delicious. If you cut into the cake and have leftovers, use any remaining frosting to cover the cut section to keep it moist. It can be stored in the fridge like this for up to a week.Nutrition
Other Recipes You Might Like:
Hi! How are you. I love all your recipes and I have seen a publication of “Red velvet oreo cake” to make it on Valentine’s Day and I wanted to ask you if the dough can be divided into two 20-centimeter molds because I don’t have three 15-inch molds. I hope you can answer me. I am Spanish and I do not understand English, I am using the Google translator. A greeting!! thank you very much.
Hi Chelsea! Would halving this recipe be the right amount for one 9×13 cake layer?
I could not wait to make this cake, and I did last night. I have to tell you, it did not disappoint. ? thank you for sharing this recipe early!
How much cocoa powder do I use? The ingredient list says 1 tablespoon and the directions say 2 teaspoons. Thanks in advance.
Hi there – in the recipe it says to grease and line three 6 inch or 7 inch pans. And so I made this recipe into 3 6inch pans and they took way longer to bake than indicated and I had some issues with sinking because they came out under baked. I then saw in where you discuss other sizes that you say this recipe could make 4 six in cakes of baked 36-38 minutes. Does this mean the recipe is a type and should’ve said 3 eight or seven inch cakes? That would explain my issue. Thanks!
@Rebekah Lukins, I did 3 – 8 inch pans cooked for 35 mins. Got worried about burning the bottoms so I stopped there. They fell in the center too.
@Rebekah Lukins, I’ve had the same issue. Just tried it for the third time! I’m a totally novice when it comes to baking and I blamed the middles sinking due to my inexperience… but it’s only now having been through the recipe for the third time that I noticed the contradiction on the 6” pans. I have always split it into three 6” pans and now I wonder if it should be four. The three I have done are currently cooling and haven’t dropped yet. But it would be useful to have clarity for future attempts!
@Rebekah Lukins, it’s definitely too much batter for (3) 6″ rounds. I was thinking it seemed like a lot, but I was following the recipe exactly so I figured it was correct. I didn’t see these comments until I was getting ready to pull out the cakes and the center was still completely uncooked. Just FYI if anyone finds themselves in the same situation, I lowered the temp slightly, pulled them out and quickly covered them in foil and put them back in (it helps trap heat and bake the center). It took another 10-15 minutes to just barely bake in the center, the edges were a bit overdone and the center sank a little, but nothing burnt thankfully. I bake pretty often, so I think it definitely should be (4) 6″ pans. Hope that helps!
Hi Chelsey! Can’t wait to try this delicious looking recipe!:) Before I start, can you please clarify the cocoa powder? The ingredients call for 1 tbsp, but the instructions say 2 tsp. Which one is correct? Thank you!:)
hi! would this recipe work for two 9 inch cake pans? thanks!
my cake did not rise
tried it twice 🙁
Hi, in the recipe list, it states 1 tbsp cocoa powder but in the preparation it states 2 tsp cocoa powder. Where’s the remaining 1 tsp?
Love your recipes! In ingredient list it says to use 2 squirts of red gel food coloring, but in the instructions it says 1 squirt. Which is correct?
I must say that I used your icing recipe and it was to die for it was absolutely amazing. I used it for a birthday cake that I was making for a 12 year old and all the kids loved it thank you so much for a great recipe.
Wow! Just popped my 3-6” pans with batter in the oven and came to get clarification on the difference in coca powder…guess that’s not here. I really should have read the comments first because my cake is likely not gonna work. Really wish I would have read these first. Not sure what to do to help the center bake and not the edges. Grrrr so disappointing
@Ashley, don’t understand why clarification or edits haven’t been done by now.
Hey bakers, I tried this recipe as written with only a change to the temperature and time I baked my cake. I did 3 – 6inch layers and I have 3 inch pans which can hold about 3 cups of mix, this recipe gave me enough for 2+ cups per dish which felt perfect for me. I put the temp down to 320F since my cake pans were new and stated to bring the temp down 25 degrees from recommended recipes. I also baked it for 50 minutes. At 30 minutes the toothpick came out soaked with batter. Mine came out slightly firm on the edges I’d recommend a 45ish minute bake. I only checked at 40 mins and 50.
Hope this helps!!
I’m trying 24 cupcakes next!
@Tiana Lee, hi, how did the cupcakes turn out? What temp and how long did you bake them on?
Hi Chelsea,
I’m wanting to bake this cake for a birthday party coming up and I need it to be gluten free. Can I just swap out the AP flour for a gluten free flour blend or are there other steps I have to adjust?
Thanks
Hi Paige,
I haven’t tested this recipe with gluten free flour, but in theory it should work. I’d recommend also letting the batter rest for 30 minutes before baking, and giving the batter an extra minute of mixing once it’s made to help give the right structure. Other than that you should be good to go! I hope it turns out delicious ? I’d love to hear how it goes! Happy baking!
I’ve made this recipe twice now. It’s amazing. The cake is so moist and the frosting is delicious. It’s a heavy cake but the oil and sour cream makes it so chewy and fresh. I would highly recommend. It’s absolutely perfect. I really don’t write reviews but I had to give credit here. It also stays fresh for days.
Can this recipe be made into cupcakes?
Hi Jaimie,
I haven’t tried it, but it should work as cupcakes too. However, I’d probably recommend adding oreos to my red velvet cupcake recipe! Here’s the link: https://chelsweets.com/red-velvet-cupcakes-with-buttermilk/
Hope that helps, happy baking!
Made this cake for my daughter ‘s birthday and its a winner. Both of her favorite flavors in one cake
Hi Allison,
So happy to hear that!! It really is such a delicious combination 🙂 Happy belated birthday to your daughter!!
Could I make this recipe as an 8in 3 layer red velvet without the oreos? Love your regular 6in recipe but need an 8in! Thanks!
Hi Samantha,
You totally can, that will work just fine 🙂 Hope that helps, happy baking!
@Samantha, how did this turn out? I am also looking to make an 8 inch red velvet cake
@Zeezee, it worked! I did put a flower nail in the centers to help with baking time.
I want to make this as a sheet cake. Would the time or temp need to be adjusted?
Could you tell me how to make this a 6” mini cake
Made this cake for myself on my birthday. A solid 10/10 🙂
Yesssss!!! This is the perfect birthday cake! Happy belated birthday Temi, so happy to hear you loved this recipe!!!