
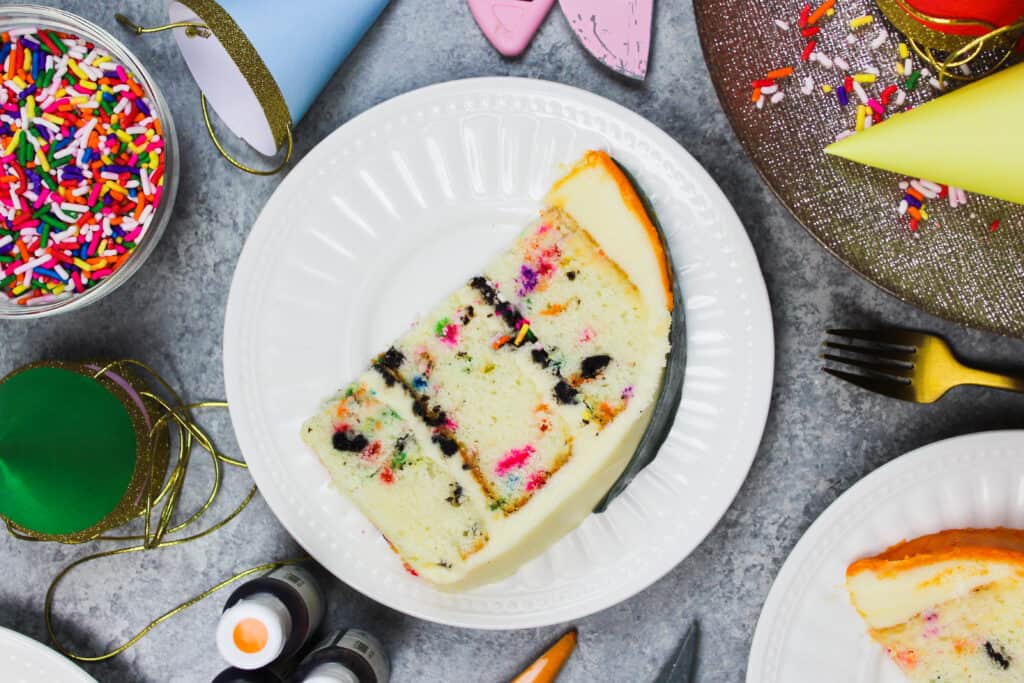
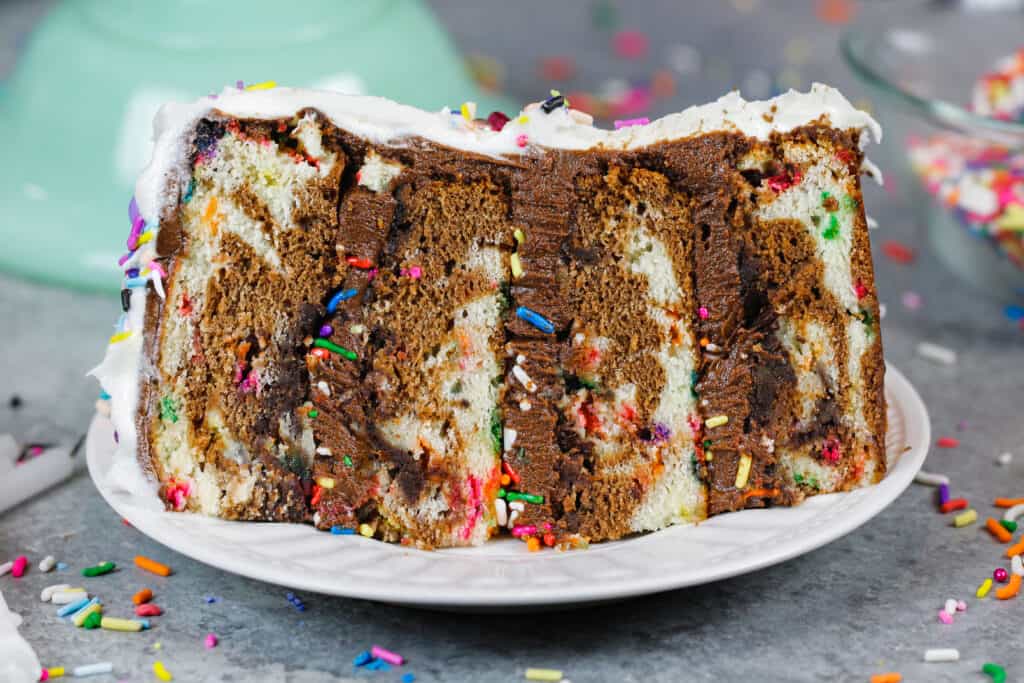
Oreo Funfetti Cake
The inspiration for this oreo funfetti cake is my Husband. He loves Oreos and funfetti cake, and I wanted to make him a special cake for his birthday.
I was gone for his birthday last year, so I hoped this year’s cake would make up for that!
What Types Of Sprinkles Should I Use To Make This Oreo Funfetti Cake?
While you might think all sprinkles are created equal, sadly you’re wrong. When making a funfetti cake, you have to be sure you use the right type of rainbow sprinkle.
The best sprinkles for this are rainbow jimmies. They are the longer sprinkles that you used to (and may still) put on your ice cream.
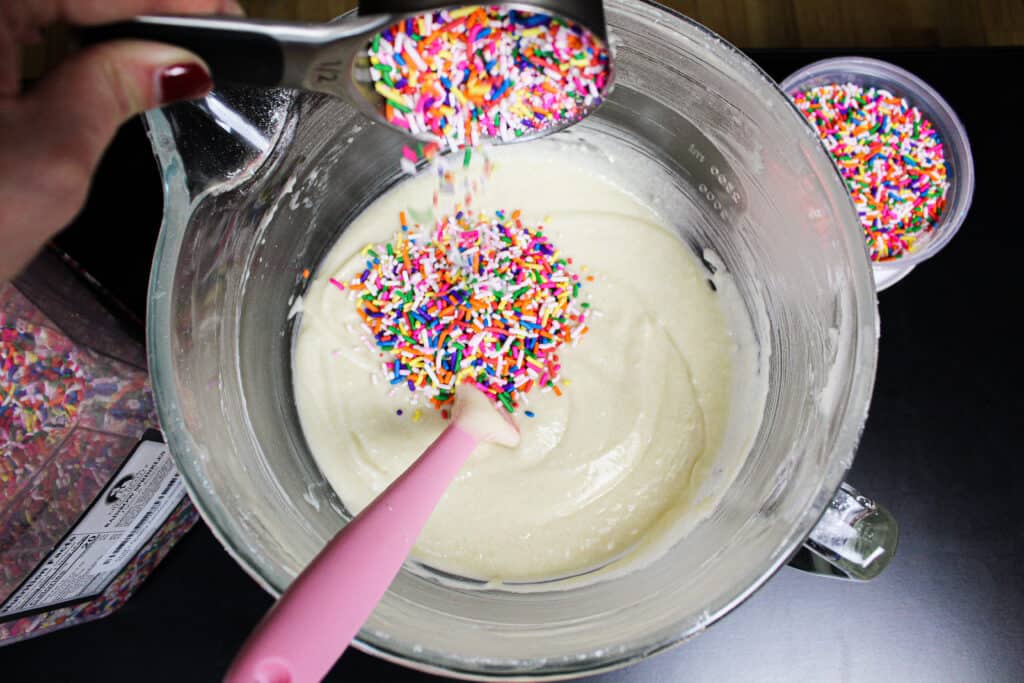
These sprinkles keep their color, and won’t immediately bleed into your batter.
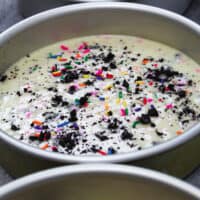
This is important, because it will help your batter say white while you add it to your pans. This will allow the color of the sprinkles to really shine through once the layers are baked.
The type of sprinkle you should NOT use are the tiny, round, rainbow sprinkles. They’re called nonpareils, and they are the true enemy of funfetti cakes.
Nonpareils will start to bleed their colors the second they’re stirred into your batter, resulting in a creepy, pink/grayish batter.
This can also happen if you let your rainbow jimmies sit in your batter for too longer, and then try to stir it.
The key takeaways? Only use rainbow jimmies in this oreo funfetti cake recipe, and immediately pour the batter into your cake pans once it’s made.
Why Use Caramel Buttercream on This Oreo Funfetti Cake?
Why NOT is the better question!! Just kidding…kind of.
My husband is quite a picky eater, and is equally selective when it comes to cake flavors. He only really likes a few flavors of frosting, and caramel buttercream is at the top of that list.
So yes, this is a funfetti oreo cake frosted with caramel buttercream.
It might seem like there’s a lot going on in this cake, but I promise all the flavors actually come together quite nicely.
If this is too many flavors for you, you can always frost this cake with my vanilla buttercream recipe instead.
The Inspiration Behind This Cat Cake Decoration
It’s no secret that my husband loves cats. I’m sure down the road we’ll get a nice little kitty, but we aren’t allowed to have pets in the building we currently live in.
For the time being, a cat cake is about the best I can do. I’ve never been great at making super realistic cakes which usually use lots of fondant or modeling chocolate.
I like to make cakes inspired by cute cartoons with buttercream. They’re more fun to eat, and a heck of a lot more fun for me to make.

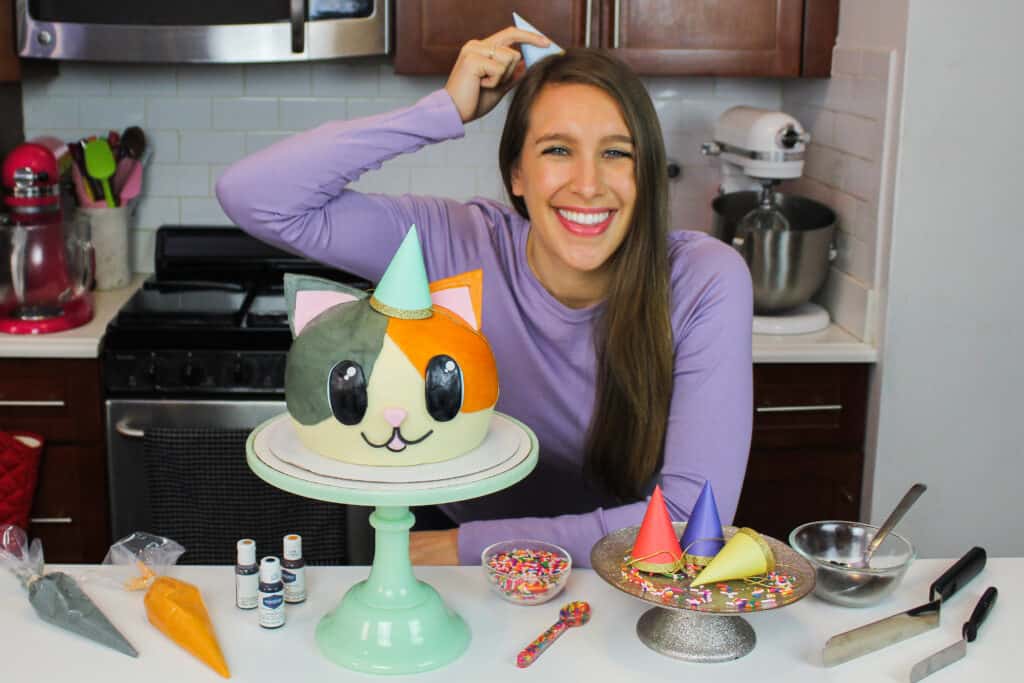
That was my game plan for this cake, and I’m in love with how it turned out! It’s equal parts adorable and silly, and I’m here for it.
How to Make This Adorable Cat Cake
This cat cake isn’t too complicated to make, but it was a process! Below are the steps I took create this look.
Step #1: Trim Your Cake Layers
After your cake layers have baked are fully cooled, I recommend leveling them with a serrated knife.
Once they’re leveled, you can trim the sides of two of the layers to begin to create the round shape of the cat’s head.
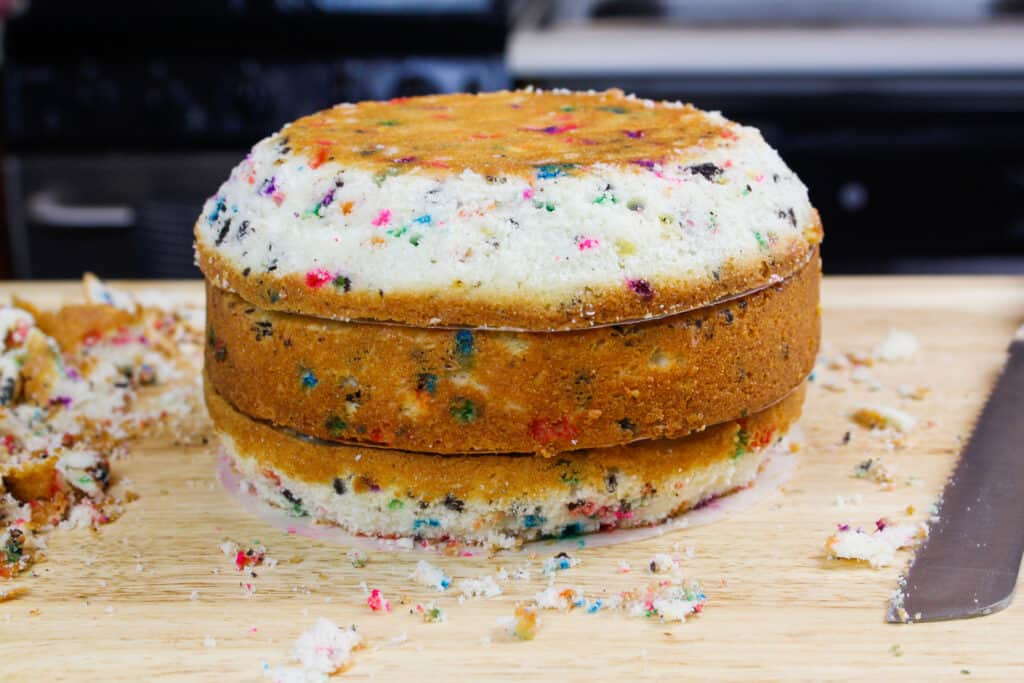
This makes it a lot easier to get the shape you’re after, and makes frosting the cake a lot simpler.
Step #2: Fill and Frost The Cake
Next I used the caramel buttercream to fill and crumb coat the cake. I chilled it for 10 minutes in the freezer, and then added a second thicker layer of frosting.
After that I smoothed the curved sides with an acetate sheet. You can use a small offset spatula if you don’t have acetate sheets on hand.
I divided the remaining frosting into two bowls. Then using gel food coloring, I colored one bowl gray and the other orange. I placed each frosting in its own piping bag, and cut a 1 cm opening.
With both colors of frosting I piped overlapping patches on top of the cat’s head to look like big spots. Then I cut out triangles of fondant and secured them on top of the cake with toothpicks.
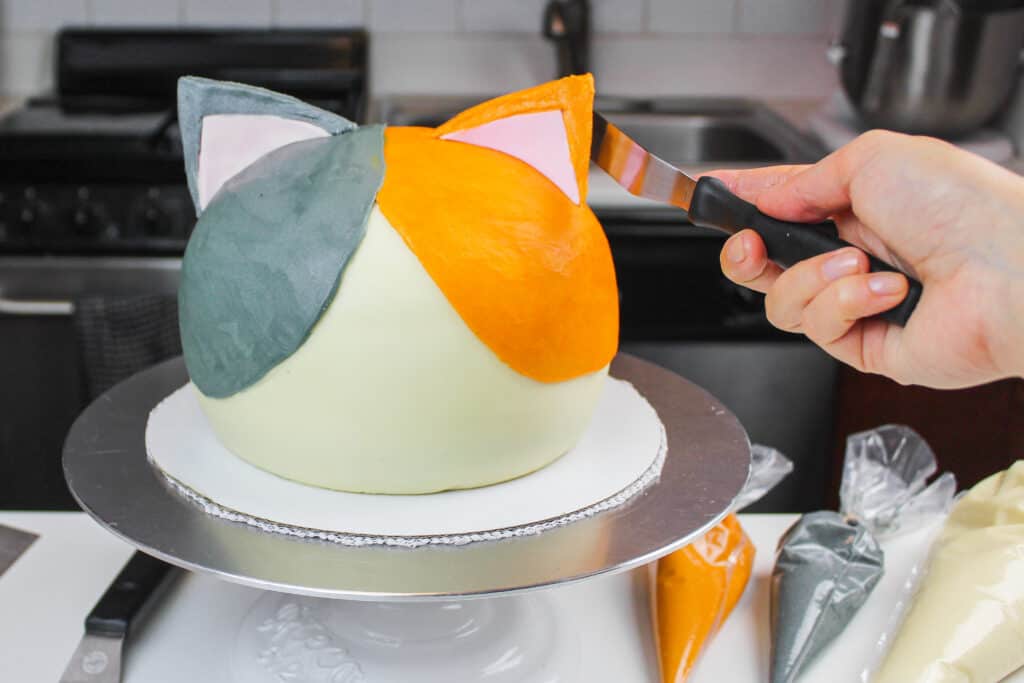
Once the ears were in place, I covered them with matching buttercream and smoothed it out using a small offset spatula.
Step #3: Make the Cat’s Cute Little Face
While I’m a buttercream girl through and through, there is a time and place for fondant. This is it.
Piping buttercream details for a face can be extremely challenging. While it can be done (I somehow managed to on my Grinch cake), I thought it would look better to use fondant for the cat’s face.
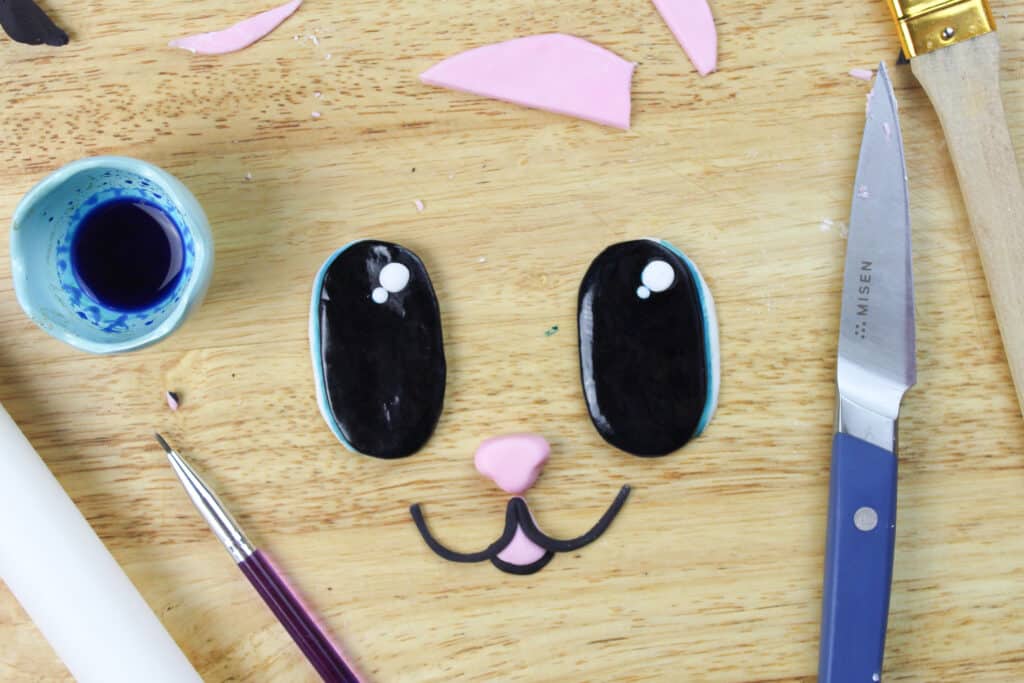
I used a bit of black, pink, and white fondant to make the cat’s eyes, nose and mouth.
Step #4: Celebrate and Enjoy!
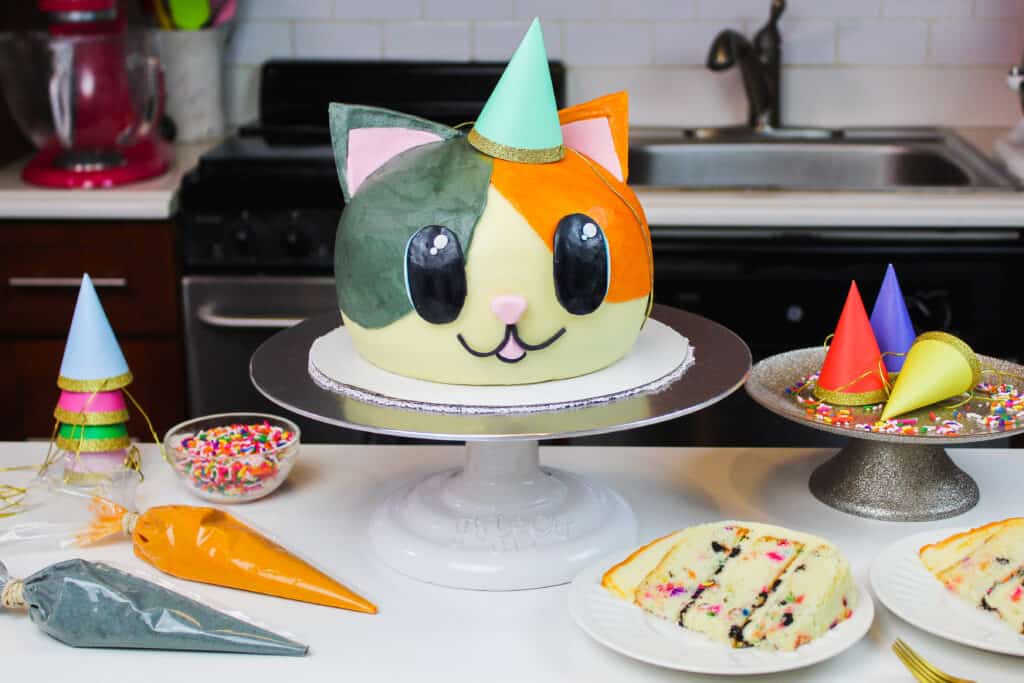
The last step was to add the fondant features onto the buttercream cake with a tiny bit of extra buttercream.
Then it was time to cut in and enjoy! And yes, party hats were involved 🙂
Tips for Making This Oreo Funfetti Cake Recipe:
- Chill your cake layers in the freezer for about 20 minutes before assembling the cake, to make it easier to stack and frost.
- Mix your cake batter just until the ingredients are incorporated; this will ensure your cake layers are tender and fluffy
- Use a serrated knife to level your cake layers once they’re fully cooled, to make it easier to assemble and frost your cake
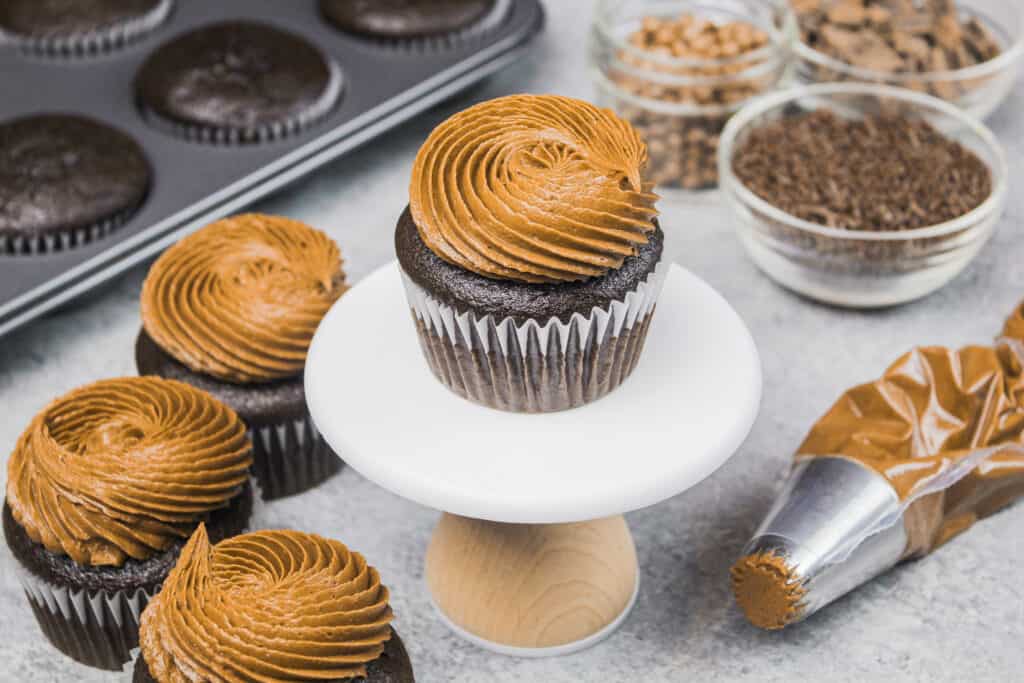
- I do NOT recommend using this recipe to make cupcakes! Instead, I highly recommend trying my funfetti cupcake recipe (I like the texture better for cupcakes). Swap out half the sprinkles for crushed oreos
- Use my small batch funfetti cake recipe to make a 6-inch layer cake, and swap out half the sprinkles for crushed oreos
Making These Cake Layers in Advance and Storage Tips:
- Make your cake layers in advance and freeze them: It breaks the process up and make it more approachable.
- Make your frosting ahead of time too, or save any leftover frosting! It can be stored in an airtight container in the fridge for up to a month, or in the freezer for up to 3 months. Be sure to give it a good stir once it thaws to get the consistency nice and smooth again.
- A frosted cake can last in the fridge for up to a week, or in the freezer for up to a month. The buttercream locks in all the moisture, keeping the cake fresh and delicious!
- If you cut into the cake and have leftovers, use any remaining frosting to cover the cut section to keep it moist and store in the fridge for up to a week.
Let Me Know What You Think!
I’d love to hear your thoughts on this oreo funfetti cake recipe! Please leave a comment to let me know what you think.
If you try this recipe please tag me @chelsweets and use the #chelsweets so that I can see your amazing creations.
Other Recipes You Might Like:
Oreo Funfetti Cake
Ingredients
Oreo Funfetti Cake
- 3 cups all-purpose flour 390 grams
- 3 cups granulated sugar 600 grams
- 2 1/2 tsp baking powder 10 grams
- 1 tsp fine salt 6 grams
- 1 cup unsalted butter, room temperature 226 grams - 2 sticks
- 1 cup carton egg whites, room temperature or about 7 egg whites (235 grams)
- 1 1/2 cups buttermilk, room temperature 345 grams
- 1/8 cup vegetable or canola oil 28 grams
- 2 tsp. vanilla extract or vanilla bean paste 8 grams
- 1/3 cup rainbow jimmies or long strand sprinkles 130 grams
- 1/3 cup chopped oreos 33 grams - about 5 Oreos
Caramel Buttercream Frosting
- 2 cups unsalted butter, room temperature 434 grams
- 7 cups powdered sugar 907 grams - or a 2 lb bag
- 1 tsp fine salt 6 grams
- 1 Tbsp heavy whipping cream, room temperature or whipping cream (15 grams)
- 1 tsp vanilla extract or vanilla bean paste 4 grams
- 1/3 cup caramel sauce 108 grams
Decorations (optional)
- 1/4 cup white fondant
- 1/4 cup black fondant
- Fondant cutter
- piping bags
Instructions
Oreo Funfetti Cake :
- Preheat oven to 350°F. Line three or three 8 inch round pans with parchment rounds, and grease with non-stick cooking spray.
- Mix together all dry ingredients (flour, baking powder, sugar, and salt) in a stand mixer with a paddle attachment or hand mixer until fully combined.
- Mix chunks of room-temperature butter slowly into the dry mix, on a low speed. Continue to mix until no large chunks of butter remain, and the mixture becomes crumbly.
- Pour in egg whites, and mix on low until just incorporated. Mix in the buttermilk in two installments, on a low speed.
- Add in vanilla extract and oil, and mix at a low speed until fully incorporated.
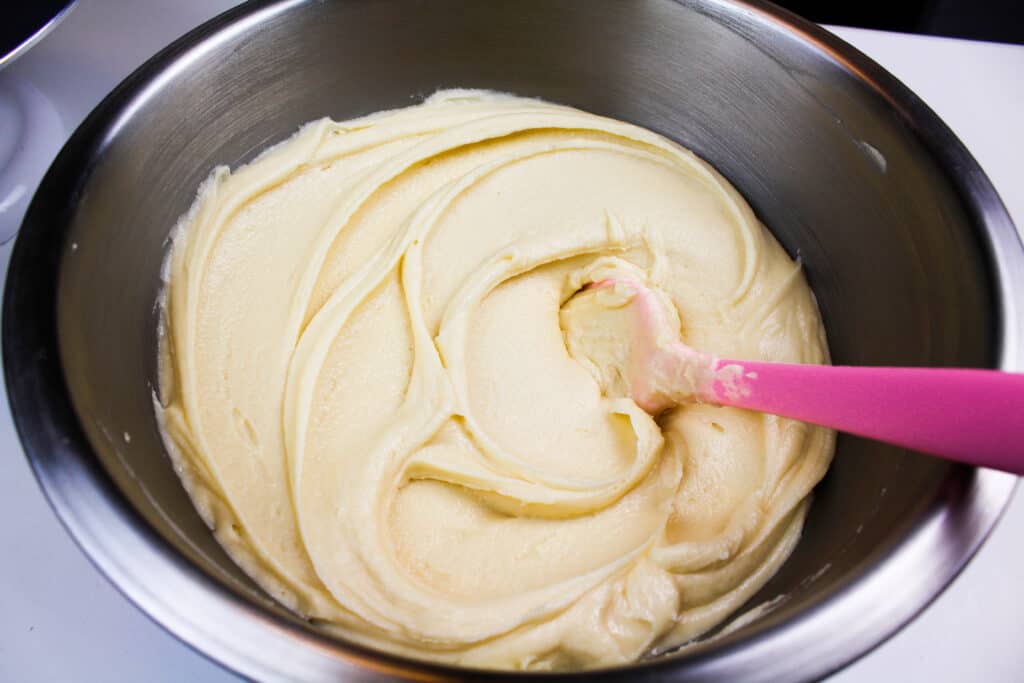
- Scrape down the sides of the bowl with a spatula, then beat on low speed for about 15 seconds (the key is to mix until the ingredients are JUST incorporated, so that the batter isn't over-mixed).
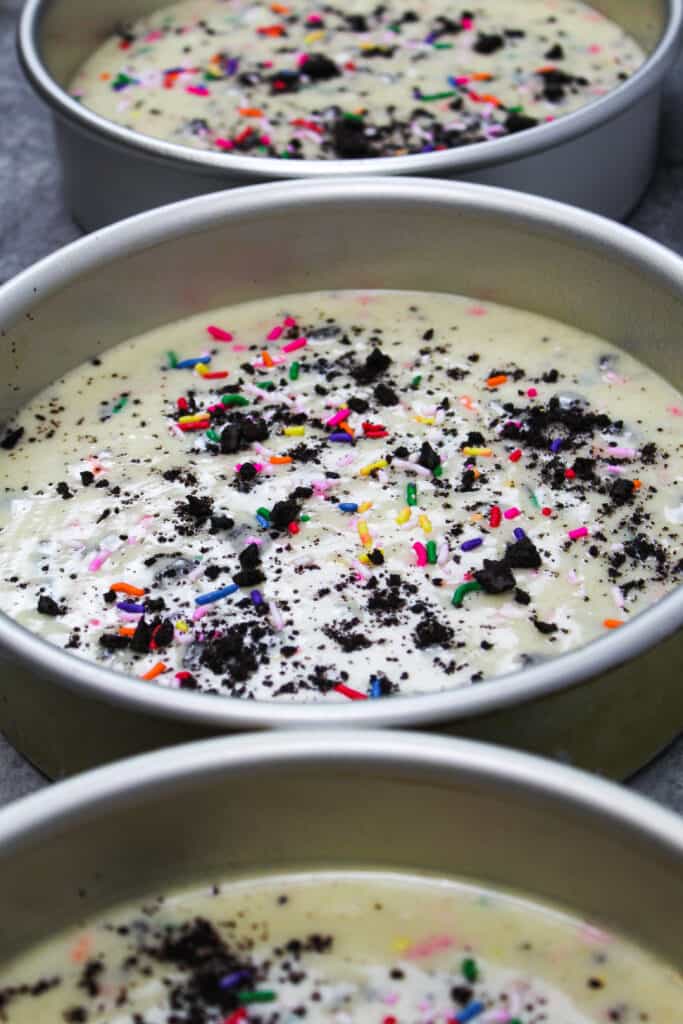
- Fold the rainbow sprinkles sprinkles and crushed oreos into the cake batter using a rubber spatula, just they've evenly distributed.
- Divide batter evenly between the prepared cake pans.
- Bake for 34-35 minutes, or until a toothpick comes out clean. Allow the pans to cool for 10 minutes, then run an offset spatula around perimeter of the pan to separate the cake from the pan.
- Place cake layers into the freezer for 45 minutes, to accelerate the cooling process. Once the layers are fully cooled, carefully flip the pans and remove the layers from the pans.
- Use a serrated knife to level the tops of the layers, and then frost as desired.
Caramel Buttercream Frosting:
- While the cake layers bake and cool, make the vanilla buttercream frosting.
- Beat the butter on a medium speed for 30 seconds with a paddle attachment or hand mixer, until smooth.
- Mix in the vanilla extract and salt on a low speed.
- Slowly add in the powdered sugar, 1 cup at a time.
- Alternate with the heavy cream and caramel, which will help thin the frosting. You can use homemade caramel sauce (I linked my recipe above), or you can use store bought caramel sauce.
- Beat on low until the ingredients are fully incorporated, and the desired consistency is reached.
- Once fully mixed, beat on low until for a couple extra minutes to make the frosting super smooth and push any extra air out of the frosting.
- If the frosting is too thick, add in additional cream (1 Tbsp at a time). If the frosting is too soft, add in more powdered sugar (quarter of a cup at a time).
- Cover with plastic wrap to prevent crusting, and set aside.
To Assemble This Oreo Funfetti Cake:
- Stack and frost cake layers on a greaseproof cake board, using a dab of frosting to help stick the first cake layer to the board.
- Add an even layer of buttercream between each cake layer with a large offset spatula.
- Spread a thin coat of frosting around the the cake, to fully cover the cake layers. Smooth using a bench scraper, then chill the cake in the fridge (20 minutes) or freezer (10 minutes) until the frosting is firm to the touch.
- Add a second, thicker layer of frosting to the cake, and smooth using a bench scraper. Then decorate as desired!
- I decorated this cake as a cat for my husband's birthday, and if you want to create the same look please refer to the steps in my video 🙂
How can I make this cupcakes??
Hi Samantha,
I recommend just adding 1/2 cup of sprinkles to my oreo cupcake recipe instead! I like the texture of them better for cupcakes <3 Hope that helps, here’s the link:
https://chelsweets.com/2020/01/13/oreo-cupcakes/
How would i make this recipe to fill three 6 inch pans instead?
Hi Carolina,
I would recommend making 2/3 of a batch of batter to make 3, 6″ cake layers. Hope that helps, happy baking!
Tried the cake and it was so good but dense and not as moist. Followed the recipe. Any suggestions?
Hi Brittany,
If your cake turns out dry, sometimes that can be because it’s over baked! Remember, the cake will continue to bake a bit more once it’s out of the oven! Maybe try taking it out of the oven a couple minutes earlier next time?The other thing that could cause that is if you are over mixing your batter. Hopefully it’s one of those two, and it’s an easy fix. Hope that helps!
If I am doing three 9inch pans will the results be basically the same?
Hi Kara,
The cake layers will be quite a bit shorter/ thinner if you make 3, 9 inch cake layers. One batch of batter makes 2 9-inch cake layers, so I’d recommend making 1.5 batches to make 3, 9-inch cake layers. Hope that helps, happy baking!
Hey can the butter be substituted for coconut oil?
Hi Tee,
The flavor will definitely change a bit, but you can in the cake batter!
Have you tried using this cake recipe with the cookies and cream icing? How did that turn out?
Hi Cocoa,
I have! It tastes great with plain vanilla frosting, or plain chocolate frosting too 🙂
What if you are wanting a vanilla based oreo cupcake instead of the chocolate one listed above?
Hi Allison,
You can add 1/2 cup of crushed oreos to my vanilla cupcake recipe if you want a vanilla base <3 Here’s the link: https://chelsweets.com/2020/01/13/oreo-cupcakes/
I see that you recommend that weuse the cupcake recipe what adjustments should I use some it doesn’t come out with a chocolate base and has the same vanilla base? Do I just take all the chocolate products out? Would I adjust how much flour I would use? Sorry for all the questions.
Hello ??
I see there is a recipe of a chocolate cookies and cream cupcakes how would I adjust the recipe for it to have a vanilla base. Do I just take all the chocolate components out?
Hi Cocoa,
I’d suggest making my vanilla cupcakes and adding 1/2 cup of crushed oreos to them! That’s prob easier and I think would turn out better 🙂 Happy baking!
Here’s the recipe: https://chelsweets.com/2017/07/03/classic-vanilla-cupcake-recipe/
Hi! Would I be able to make this cake in a Bundt cake pan? Thank you!
Hi Lexee,
I haven’t tested it, but it should work! It should bake up just fine, but I’m not sure exactly how long it would take to bake. Let me know how it goes if you try it, I’d love to know!
Hello
I see there is a recipe of a chocolate cookies and cream cupcakes how would I adjust the recipe for it to have a vanilla base. Do I just take all the chocolate components out?
About how many people would this recipe serve?
If I only have one 8 inch pan, can I still do this? Would I just refrigerate the batter while one layer cooks?
Thank you! Looks great!
Hey. I’d like to make this recipe but in 3 7” round pans. I want the cake to rise a lil more than indicated in your photos. Can I use additional baking powder?
Love the combination. Can this work in a 9×13 pan?
Hello, can I use whole milk instead of buttermilk?
Your instructions say you can freeze the cake. When I’m ready to frost it, do I frost it frozen or let it thaw first? Thanks!
@Stephanie, You can thaw or frost frozen. I usually frost my cakes while they are frozen.
Can I make this cake into a 10” cake, would I have to make 1 1/2 batches?
Love your cakes! All amazing.
Thanks
Hi, I want to make this but using (2) 4 inch tins. How would I go about converting the amount of ingredients?
The edges of my cakes always turn out super crispy- is there a remedy for this? The cakes have correct done-ness in all other area except the edges. So confused- help!
Made this cake for my husband’s birthday. Used coconut oil and followed the rest of the cake recipe pretty closely. Used 3×9” pans. Didn’t do the kitty design (tho sooo cute). Crumb coated then mixed crushed cookies into the icing and it was amazing. I only had a 1.5 c butter so used only 6c icing sugar and had just enough to ice and embellish the cake. The key to this cake is eating it at room temp. We had it in the fridge before our first serving and it was very heavy and dense. The next serving at room temperature was a game changer. Totally brought out the flavours and was fluffy yet moist. Will definitely make this again!!
Would store bought sea salt caramel make the frosting taste salty? That’s what I currently have in my pantry.
Hi Chelsey! I love your blog and your delicious recipes! just a question on your cakes: how do you get your buttercream so smooth? do you freeze until solid and then smooth with an acetate sheet?
Hello, I love your cakes !! And when I saw that cake and buttercream combo, I thought I’m definitely going to give this one a go for a Pokemon birthday party for my son. I have 3 x 9 inch pans, question is how long do I bake the cakes for? Thank you for allowing me to bring these beautiful cakes to life in my home!
Hi Joanna,
Thank you, you’re too sweet! And omg yes, this is such a yummy cake recipe!! I’d recommend making 2, 9-inch cake layers in those pans and baking them for 38-42 minutes. Bake time can vary a bit based on the type of pans you use and your oven, so just be sure to check the center of the cakes with a toothpick when you think they’re done. They should come out with a few moist crumbs when they’re done baking. Hope that helps, happy baking!!
Hi Chelsea! I bake both traditional and gluten free. I know that switching between those methods can really change a recipe. I was wondering if you ever made a gluten free version of the Oreo Funfetti cake? Could i just swap out the gluten for a Bob’ 1 to 1 or The King Arthur cup for cup? I do have a gf white cake recipe and just applying your Oreo and sprinkle ratio accordingly. Thanks so much for your time! My daughter wants this cake for her 10th bday!
@Emi,
sorry the King Arthur measure for measure. 🙂
Hello, is there a substitution for buttermilk?