
Banoffee Cake
I recently tried Banoffee pie for the first time and immediately knew I had to make a Banoffee cake!!
Banoffee pie comes from England. Traditionally, it’s made with bananas, cream, and toffee.
The crust can either be a buttery biscuit base or a mixture of crushed cookies and butter. Some variations even add in coffee or chocolate.
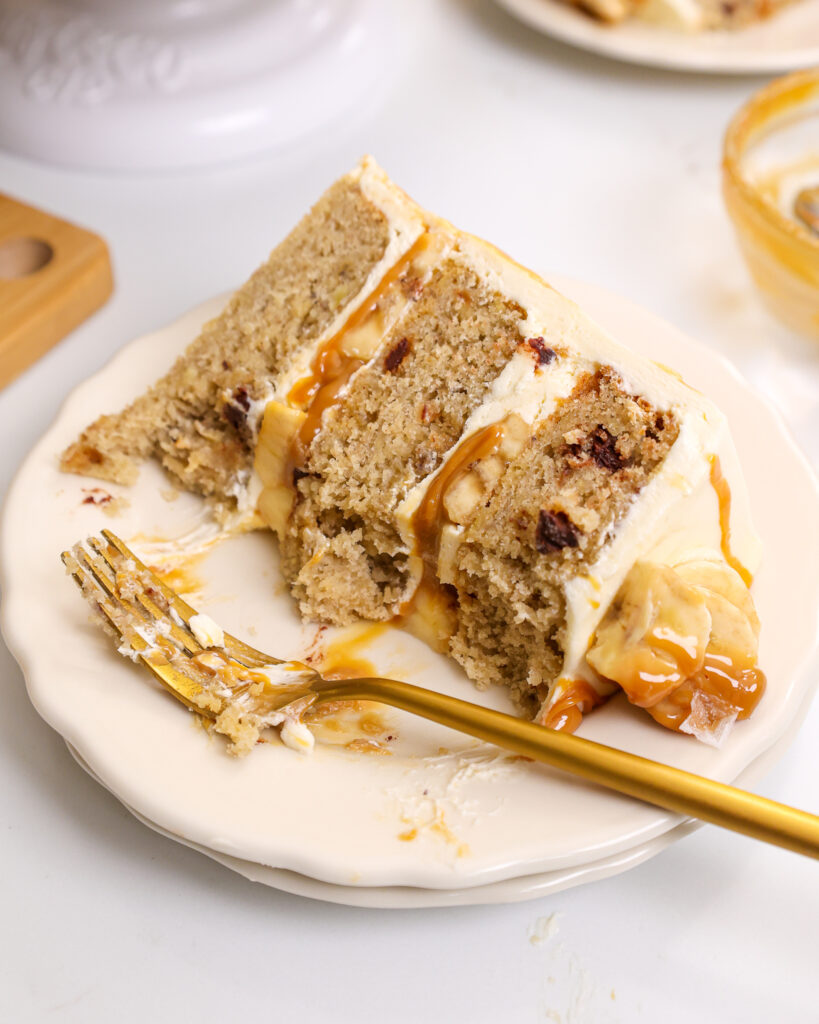
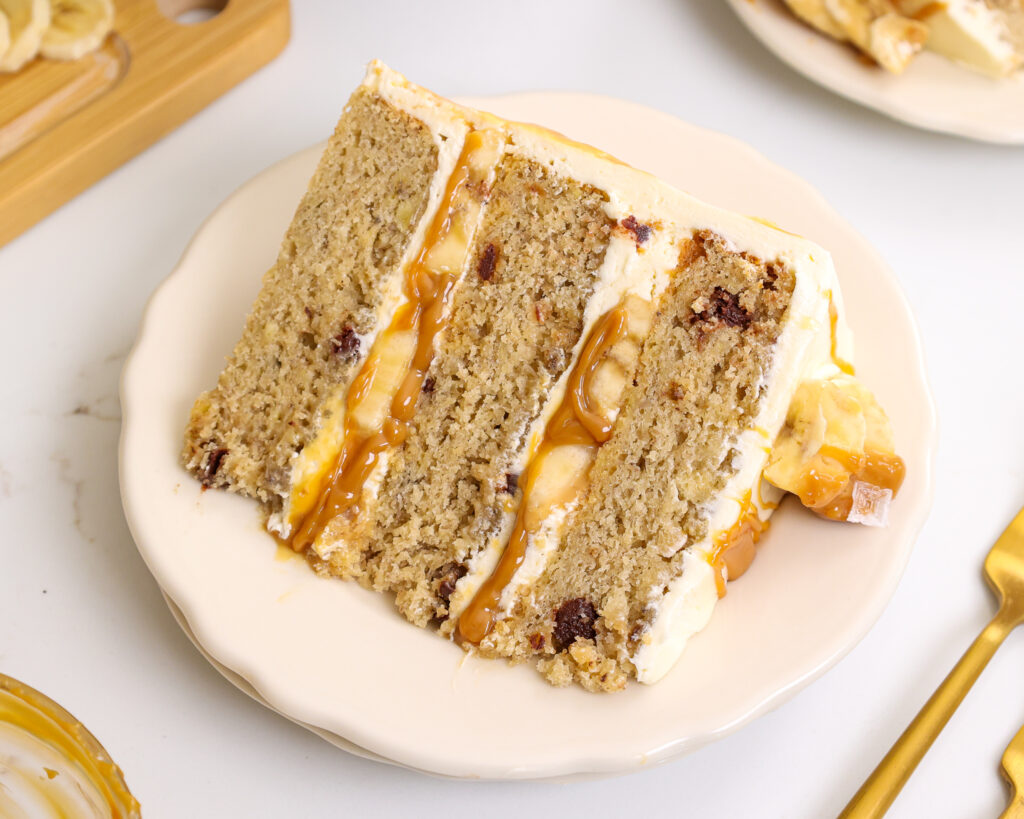
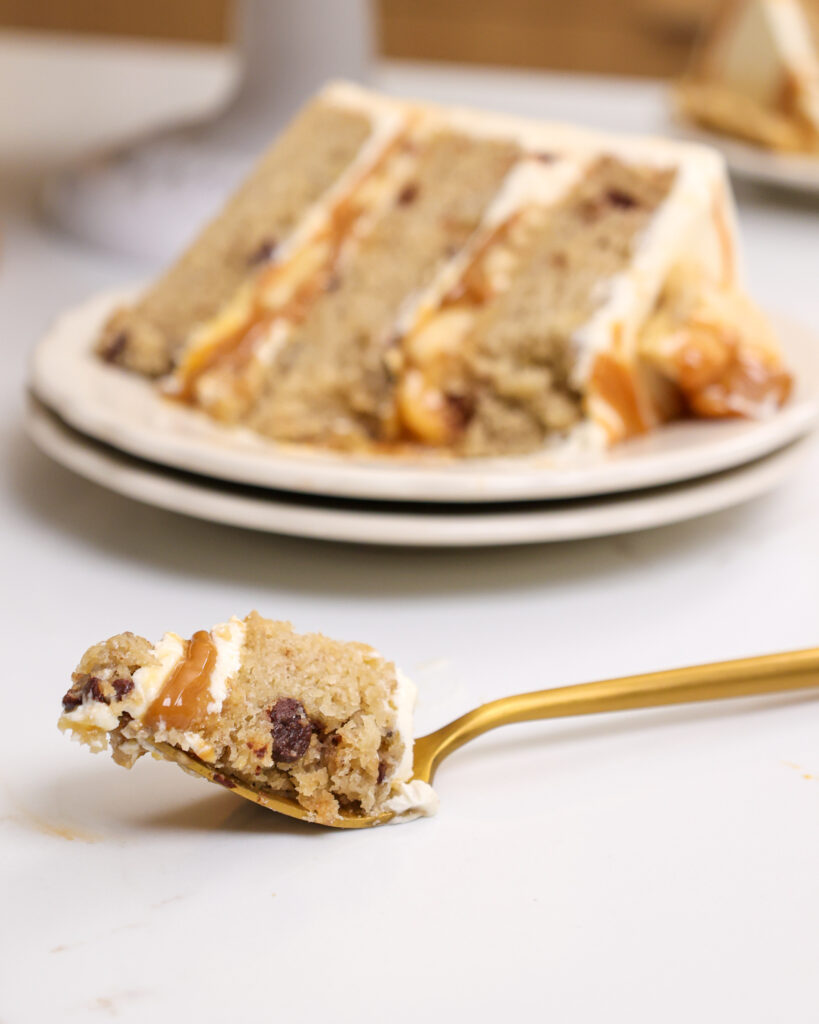
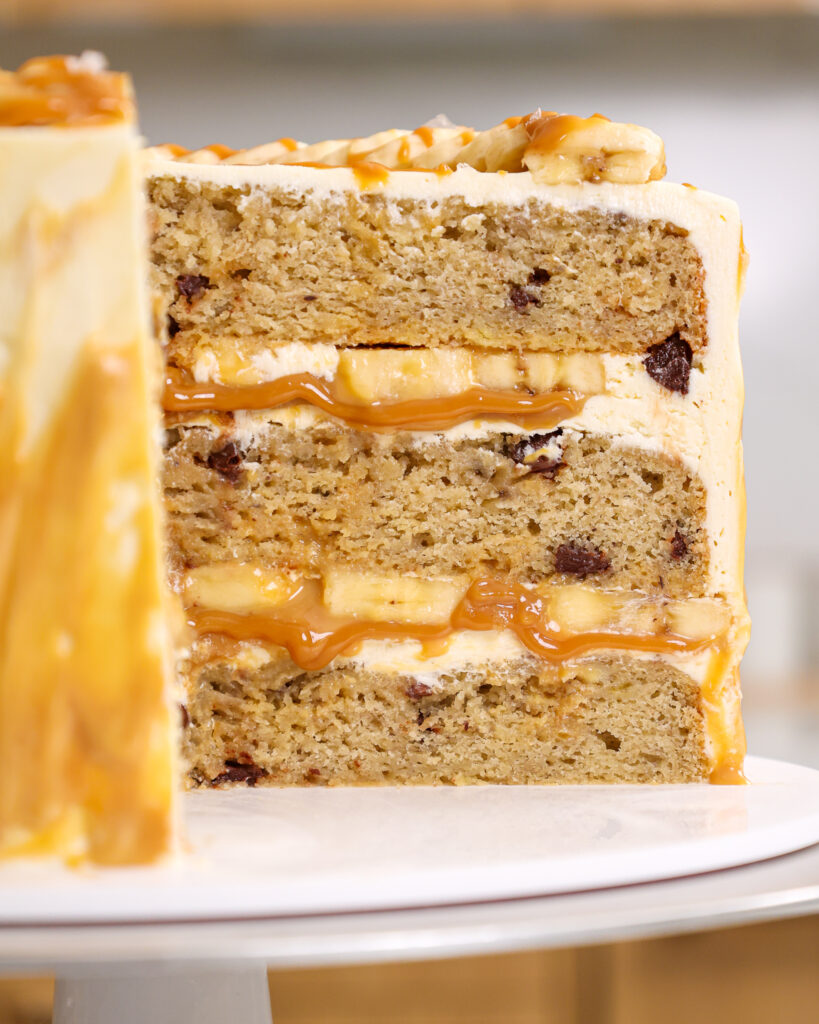
To stay true to these flavors, I made this cake with tender banana cake layers, a rich toffee filling, fresh banana slices, and whipped vanilla buttercream.
It’s such a fun cake flavor year-round, but I especially love it in the summer! I think the bananas make me think of sunshine and warm weather 🙂
Why is it Better to Use Overripe Bananas to Make Banana Cake?
Most banana cake recipes insist on using only the ripest bananas, including this one. But why are overripe bananas better to bake with??
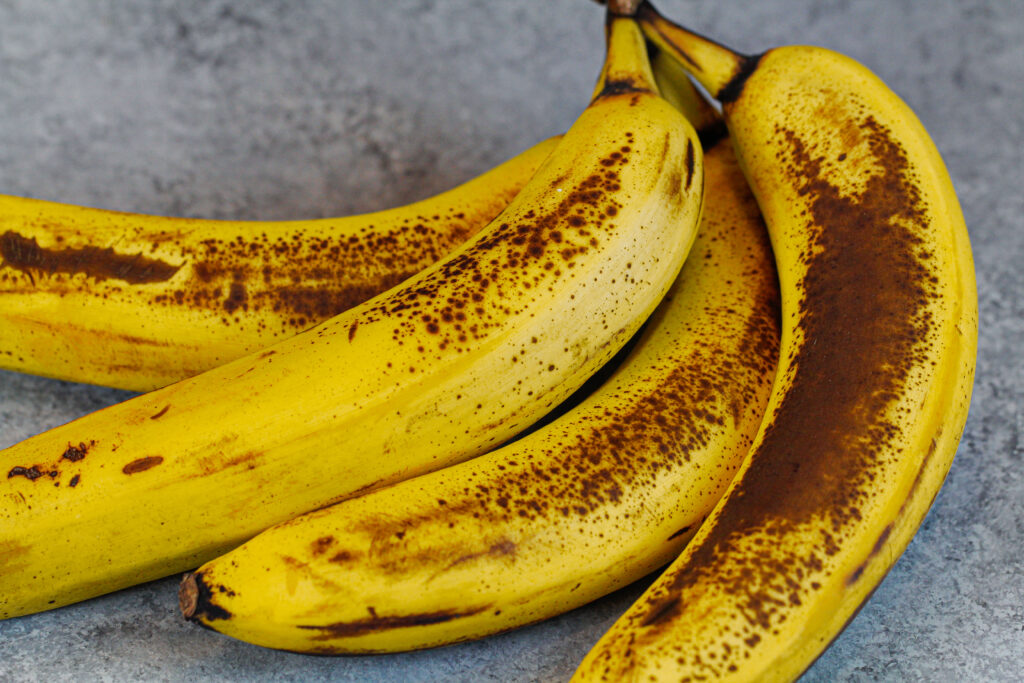
There are actually several reasons! The first is that as a banana ripens, more of its starch is converted into sugar. This creates sweeter, more tender baked goods.
Another benefit of baking with super-ripe bananas is that they’re super easy to mash up. This ensures your banana cake layers have a uniform, even texture without any unexpected chunks of banana.
Overripe bananas are also more aromatic and give baked goods a more intense banana flavor than yellow bananas.

The final and best reason (in my opinion) is that it uses up overripe fruit that would otherwise go to waste!
With all that in mind, this recipe will still turn out if you use yellow bananas. It just won’t have as intense of a banana flavor!
Baking Hack: How to Quickly Ripen Bananas
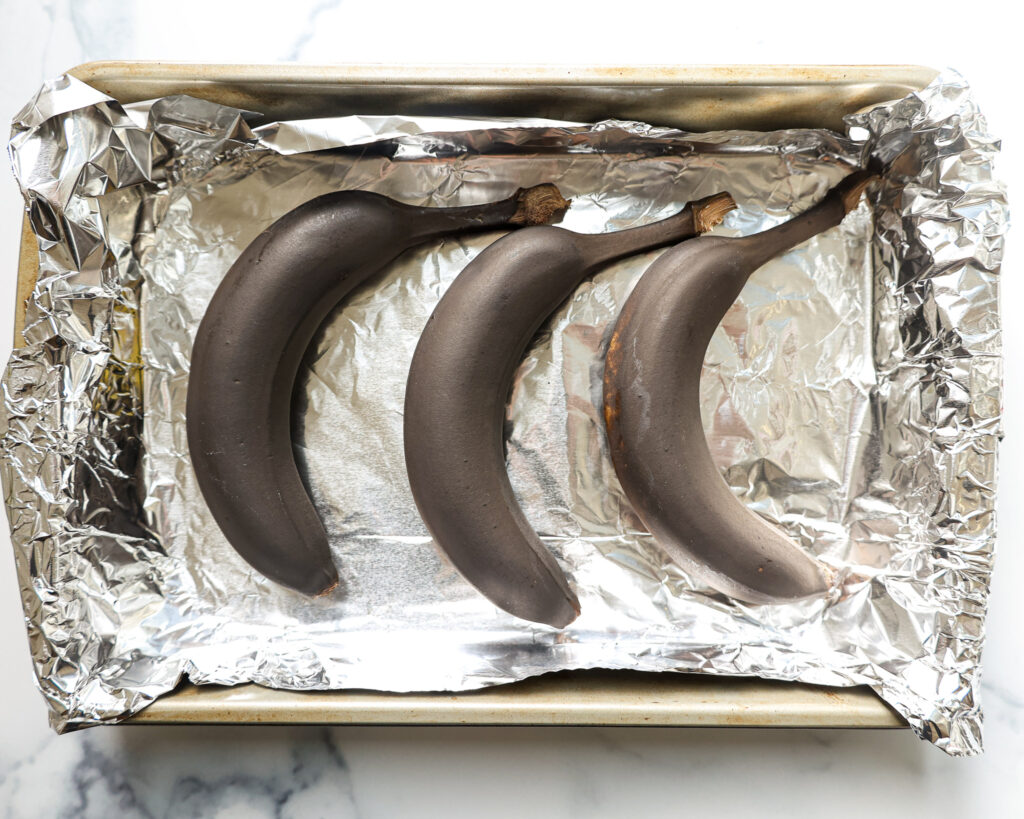
If you only have yellow bananas and want that intense banana flavor, don’t worry!
You can easily turn yellow bananas brown in a matter of minutes. Preheat your oven to 300 F / 150 C and place your unpeeled bananas on a foil-lined baking sheet.

Bake them for about 15 minutes, or until the banana skin is uniformly dark in color.
Let them cool on that pan for 10 minutes, then carefully peel and mash them.
I use this hack all the time for banana bread and it works like a charm.
Substitutions and Swaps
While I love this banoffee cake recipe just the way it is, I know some of you might not have all these ingredients on hand!
Below are some swaps and substitutions that can be made in this recipe:
- Sweetened Condensed Milk – The toffee filling is a crucial part of this cake! If you can’t find any, try purchasing premade toffee/dulce de leche online or at the store.
- Overripe Bananas – If you don’t have overripe bananas on hand, bake your bananas at 300 F for about 15 minutes or until the skins of the bananas are black.
- Lemon Juice – Fresh lemon juice really enhances the banana flavor in this recipe and prevents the mashed bananas from browning. It can be left out if needed though!
- All-Purpose Flour – This recipe turns out best with AP flour, but you can use a cup-for-cup gluten-free flour blend in its place if needed.
- Unsalted Butter – If you only have salted butter on hand, you can use it in place of the unsalted butter in this recipe. Just be sure to omit the salt that this recipe calls for. You can also use vegan butter in its place!
- Baking Powder / Baking Soda – This recipe uses both leavening agents, and both are important to help this recipe rise correctly! Make sure both types of leavening agents are properly measured and haven’t expired.
- Buttermilk – You can also use whole milk, full-fat yogurt, sour cream, or alternative yogurt or milk (almond, soy, oat) if you’re dairy-free.
- Eggs – If you don’t have eggs on hand or can’t eat eggs, you can try using flaxseed eggs.
Banoffee Cake Decoration
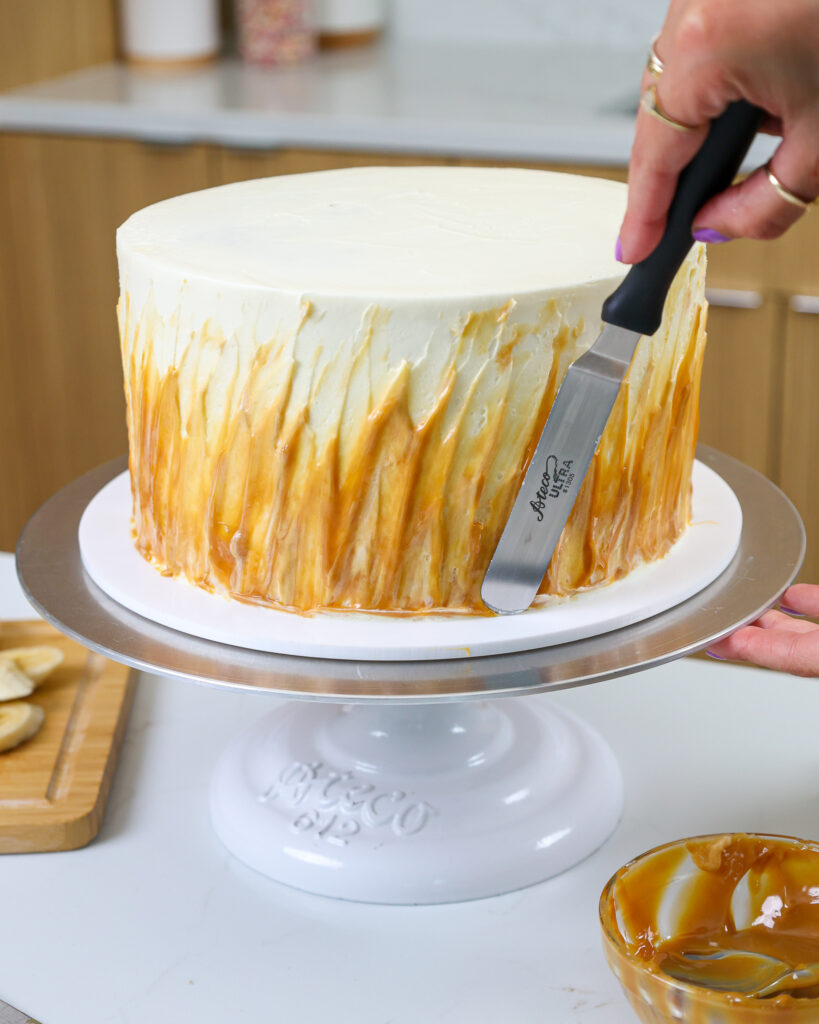
Now onto my favorite part of any cake, the decoration! I chose to use the leftover toffee and spread a thin ring of toffee around the base of the cake.
Then I drug the toffee up the side of a cake with a large offset spatula.
As I did this, I focused on keeping the angle of each frosting drag the same. This helps give the cake a cohesive look.
I also ended up going around the cake twice, to really blend together all my toffee swoops.
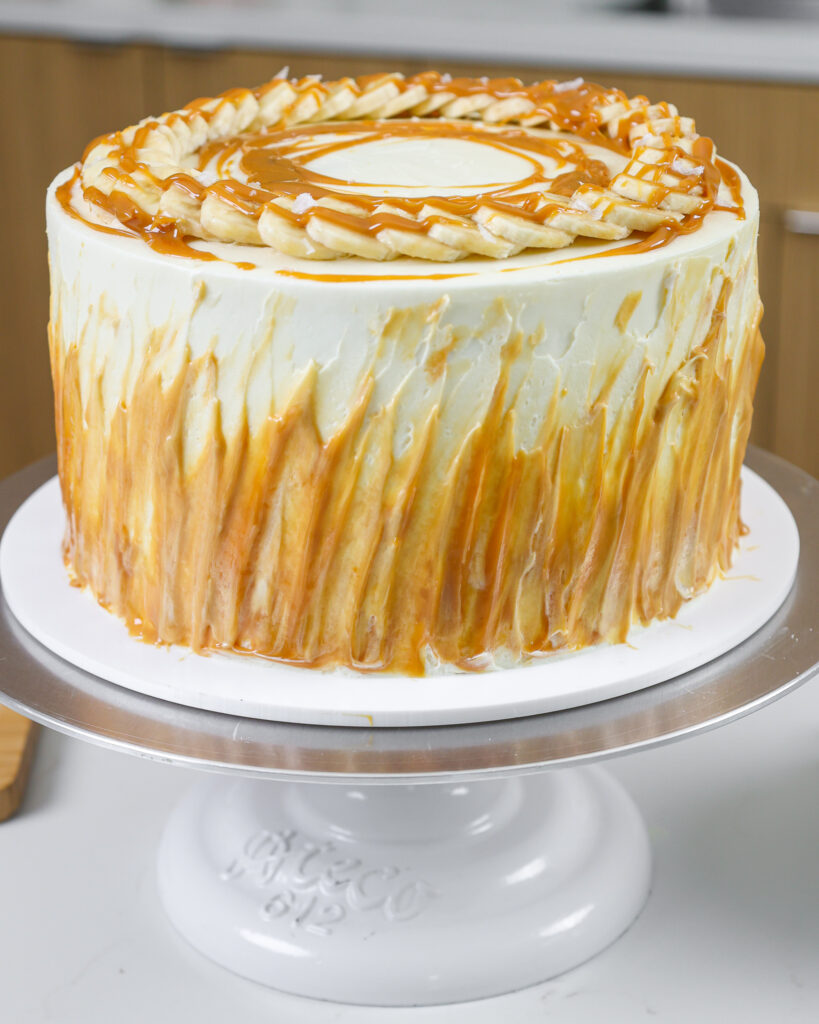
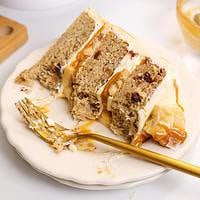
I decorated the top of the cake with a ring of freshly sliced bananas and a drizzle of warm toffee.
If you don’t plan to eat this cake immediately, wait to add the bananas to the top of the cake or use banana chips.
Tips for Making the Best Banoffee Cake:
- Properly measure your flour (fluff, then spoon into the cup measure and level) or use a kitchen scale to measure your dry ingredients.
- Ingredients at room temp mix together better! Set any cold ingredients ahead of time.
- Use a scale to weigh your cake pans as you fill them. Make sure each pan has the same amount of batter so that cake layers bake to the same height and bake more evenly.
- Bang the cake pans on the counter before putting them in the oven. This brings any air bubbles that are trapped in the batter to the surface.
- Level the room temperature or thawed cake layers with a serrated knife to make them easier to stack.
- Chill the cake layers in the freezer for about 20 minutes before assembling the cake. It makes it so much easier to stack and frost them!
Making This Banoffee Cake in Different Sizes
One batch of this recipe makes about 10 cups of batter.
I used 8″ cake pans to make this cake, but this recipe can be used to make different sized cakes. You can also half or double the ingredients to make a half or double batch!
You can make four 7″ or 6″ cake layers with one batch of batter. Bake the cake layers at 350 F / 175 C for 29-33 minutes or until a toothpick comes out with a few moist crumbs.
One batch of batter can also be used to make one 9×13-inch sheet cake. Bake it at 350 F / 175 C for 40-50 minutes and use flower nails or heating cores to help the cake bake evenly.
You can also use this recipe to make a Bundt cake! Bake time can vary based on the size and type of pan you use and can take anywhere from 45-75 minutes. I recommend using a toothpick to test for doneness and checking on it every 5-10 minutes once it’s been in the oven for 45 minutes.
The final variation of this recipe is cupcakes!! This recipe makes about 36 regular-sized cupcakes. Fill 3/4 full and bake for 17-19 minutes or until a toothpick comes out with a few moist crumbs.
Making This Banoffee Cake in Advance & Storage Tips
To speed up this process, make the toffee filling a day in advance!! An unopened can will stay good in the fridge for up to 3 months.
Make the cake layers in advance and freeze them. It breaks the process up and makes it more approachable.
Make the whipped frosting ahead of time or save any leftover frosting! It can be stored in an airtight container in the fridge for up to a month.
This frosting can also be stored in the freezer for up to 3 months! Just be sure to give it a good mix once it thaws to make it nice and smooth again.
A frosted cake can last in the fridge for up to 3 days. The buttercream locks in the moisture and keeps the cake fresh and delicious!
I don’t recommend freezing this cake, it gives the bananas a strange texture.
Let Me Know What You Think!
If you try this banoffee cake recipe, I’d love to hear what you think of it! Please leave a rating and comment below.
Don’t forget to tag me @chelsweets and use the #chelsweets so that I can see your amazing creations on social media!
Banoffee Cake
Ingredients
Toffee Filling / Dulce de leche
- 14 oz. can of sweetened condensed milk, label removed 397g
Banana Cake Layer Recipe (adapted from Sally’s Baking Addiction)
- 1 1/2 cups ripe bananas, mashed – about 3 large bananas 450g
- 2 tsp lemon juice 8g
- 3 cups all-purpose flour 375g
- 1 tsp baking powder 4g
- 1 tsp baking soda 6g
- 1/2 tsp fine salt 3g
- 1 cup unsalted butter, room temperature 226g
- 1 cup granulated sugar 200g
- 2/3 cup packed light brown sugar 133g
- 3 large eggs, room temperature 168g
- 2 tsp vanilla extract or vanilla bean paste 8g
- 1 1/2 cups buttermilk, room temperature 360g
- 3/4 cup mini chocolate chips or chopped up chocolate – optional 135g
Whipped Vanilla Frosting Recipe
- 2 cups unsalted butter, room temperature 452g
- 3 Tbsp heavy whipping cream, room temperature 45g
- 2 tsp vanilla extract or vanilla bean paste 8g
- 1/2 tsp fine salt 3g
- 6 cups powdered sugar 750g
- 1/4 cup pasteurized egg whites – optional 60g
Additional Filling and Decorations
- 4-5 fresh bananas optional
Instructions
Toffee Filling
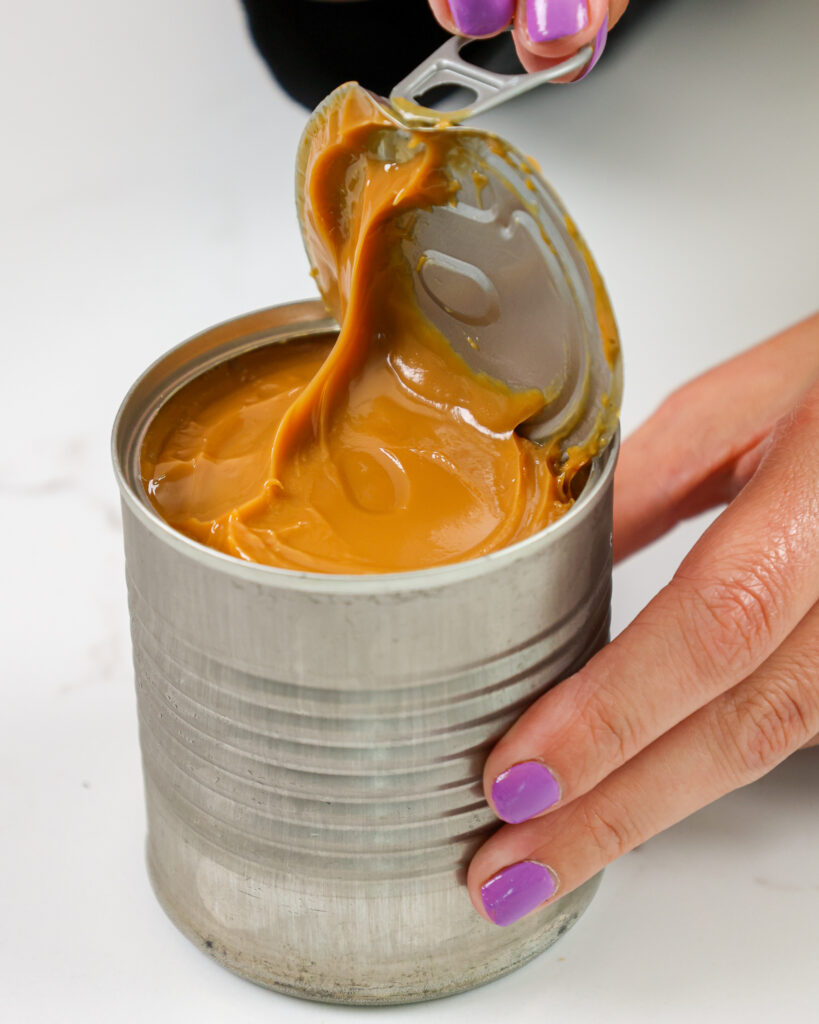
- The toffee filling needs time to cook and cool, so I recommend making it first or in advance. Remove the label from a can of sweetened condensed milk and place the can on its side in a large pot or large saucepan. Fill with water so that the water level is at least 2 inches above the can.
- Set the pot over high heat and let the water come to a simmer.
- Reduce heat and simmer for 2 hours. Check the pot every 30 minutes to make sure the water level stays above the can. Add hot water as needed to top it off.
- Carefully remove the can from the water using tongs or a large spoon. Set the can on a wire rack and let FULLY COOL to room temperature. It is super important that the can is fully cooled before opening, otherwise the can can explode due to the heat and pressure!
- Once the can is fully at room temperature, you can either open it and pour it into an airtight container and keep it in the fridge for up to 2 weeks or store the unopened can in the fridge for up to 3 months.
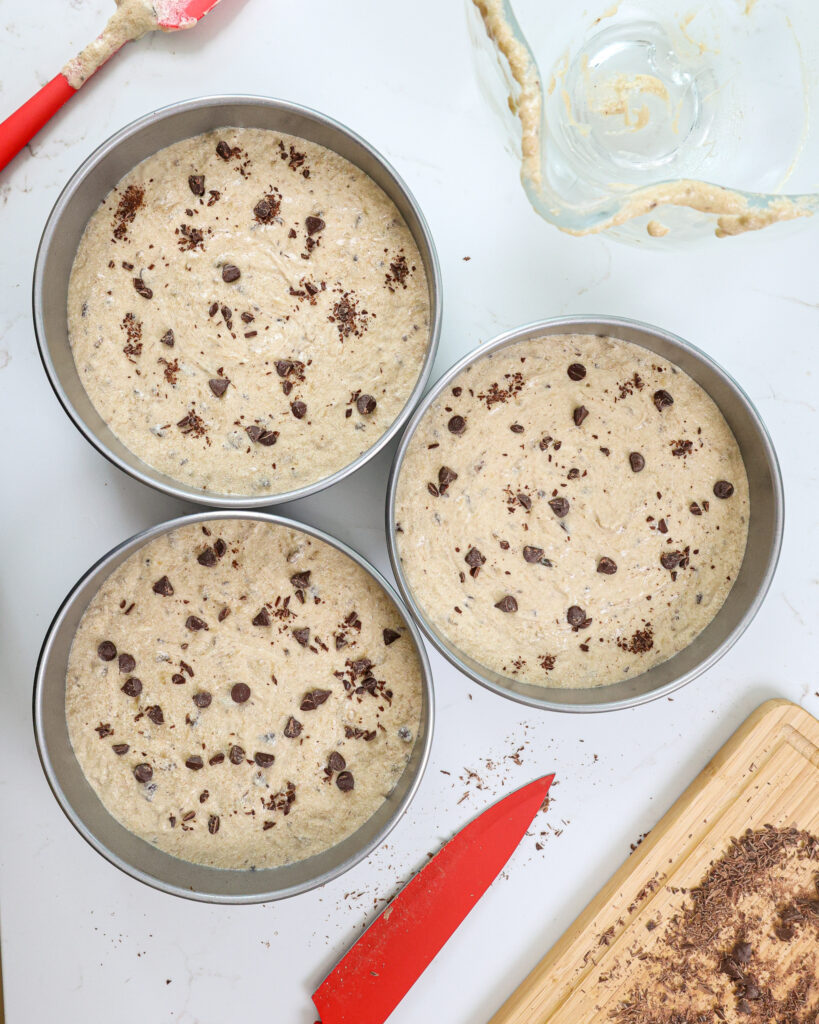
Banana Cake Layer
- Next, make the banana cake layers. Preheat the oven to 350°F/175°C and grease and line 3, 8-inch cake pans. Set aside.
- Mash 3 large bananas with either a fork or a mixer and stir together with 2 tsp of lemon juice. This prevents the bananas from browning. Set aside.
- In a large bowl, whisk 3 cups flour, 1 tsp baking powder, 1 tsp baking soda, and 1/2 tsp salt together. Set aside.
- Use a hand mixer or stand mixer fitted with a whisk attachment to beat 1 cup of butter, 1 cup of granulated sugar, and 2/3 cup of brown sugar together. Mix on a high speed for about 3 minutes. The mixture should get lighter in color as air is whipped into it. Use a spatula to scrape the sides and bottom of the bowl as needed.
- Mix in 3 large eggs and 2 tsp of vanilla extract on a medium speed.
- Mix in half of the dry ingredients on a low speed until just combined.
- Add in 1 1/2 cups of buttermilk and mix until incorporated, then mix in the remaining dry ingredients on a low speed. Be careful not to over-mix the batter once you've added in the flour. The batter will be on the thick side.
- Mix in the mashed bananas on a medium speed until just combined.
- If desired, carefully fold in 3/4 cup mini chocolate chips.
- Divide the batter evenly between the prepared pans. Bake for 28-32 minutes, or until a toothpick inserted in the center comes out (relatively) clean.
- Remove the cakes from the oven and set on a wire rack. Run an offset spatula around the edge of the pan to help release the cake layers from the pan. Let the cakes cool fully in the pan.
Whipped Vanilla Buttercream Frosting
- As the cake layers bake and cool, make the whipped vanilla buttercream frosting. This is a pretty sweet frosting (American buttercream base), and if you prefer a less sweet frosting, I'd recommend my Swiss meringue buttercream or my hybrid buttercream.
- In the bowl of a stand mixer, beat 2 cups of butter on a medium-high speed for 2 minutes with a whisk attachment. The butter should become lighter in color.
- Mix in 3 Tbsp heavy cream, 2 tsp vanilla, and 1/2 tsp salt on a medium speed until combined.
- Gradually mix in 6 cups of powdered sugar on a low speed. Scrape the sides and bottom of the bowl as needed.
- Once all the powdered sugar has been mixed in, add in 1/4 cup of pasteurized egg whites (sounds weird but gives the frosting an amazingly smooth, light texture). Whip the frosting on high for about 1 minute to make it nice and fluffy. The frosting should be rather thick, like whipped topping!
- Cover flush with plastic wrap to prevent crusting and set aside.
Banoffee Cake Assembly
- Stack and frost the cake layers on a 10-inch, grease-proof, cardboard cake round or flat plate.
- Spread a tablespoon of frosting in the center of the board to help keep the first cake layer in place.
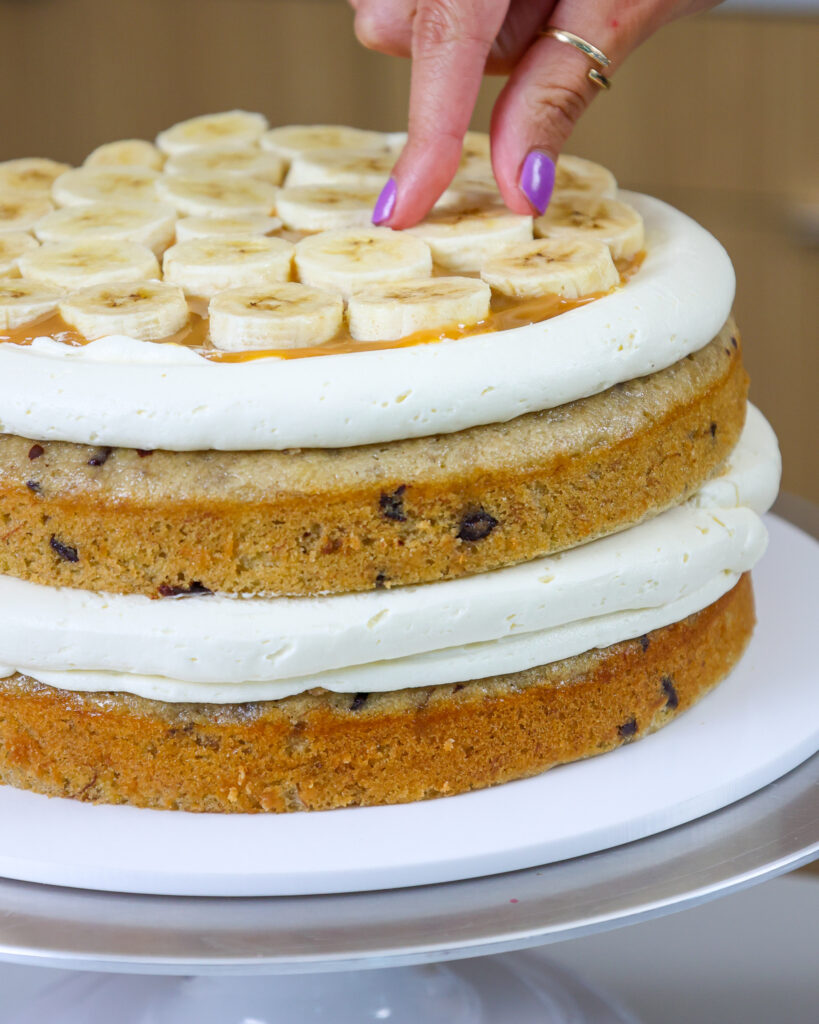
- Spread a layer of vanilla frosting on top of the cake layer, then pipe a thick ring of whipped vanilla frosting around the perimeter of the layer. Chill the cake in the freezer for about 5 minutes, until the frosting it firm to the touch. This will make it so much easier to spread the toffee on top of it!
- Use about 1/3 of the toffee filling to spread an even layer on top of the frosting. Top with fresh banana slices.
- Repeat with remaining layers. Make sure the toffee filling and bananas stay inside the frosting ring.
- Cover the cake in a thin layer of vanilla frosting. Smooth using a large offset spatula and bench scraper, then chill in the freezer (5 mins) or fridge (30 mins) until the frosting is firm to the touch. This helps lock in all the filling and makes it easier to get a perfect, 2nd coat of frosting.
- Next, add a second, thicker layer of frosting around the cake. Smooth using a bench scraper. You can see a full tutorial on how to frost a cake with smooth sides here.
- Spread a thin ring of toffee around the base of the cake, then use a large offset spatula to drag the toffee up the side of a cake at an angle.
- Top the cake with a circle of freshly slice bananas or banana chips and a drizzle of warm toffee (I heated the toffee in the microwave for about 15 seconds). Then enjoy!
Video
Notes
Tips for Making the Best Banoffee Layer Cake
- Ingredients at room temp mix together better! Set out any cold ingredients ahead of time.
- Properly measure the flour (spoon into the cup measure, then level). Or better yet, use a kitchen scale to measure your dry ingredients.
- Use a scale to weigh your cake pans as you fill them. Make sure each pan has the same amount of batter so that cake layers bake to the same height and bake more evenly.
- Bang the cake pans on the counter before putting them in the oven. This brings any air bubbles that are trapped in the batter to the surface.
- Level the room temperature or thawed cake layers with a serrated knife to make them easier to stack.
- Chill the cake layers in the freezer for about 20 minutes before assembling the cake. It makes it so much easier to stack and frost them!
Making this Banoffee Cake in Advance and Storage Tips
- To speed up this process, make the toffee filling a day in advance!! It can sit in the fridge for up to 3 months.
- Make the cake layers in advance and freeze them. It breaks the process up and makes it more approachable.
- Make the whipped frosting ahead of time or save any leftover frosting! It can be stored in an airtight container in the fridge for up to a month.
- This frosting can also be stored in the freezer for up to 3 months! Just be sure to give it a good mix once it thaws to make it nice and smooth again.
- A frosted cake can last in the fridge for up to 3 days. The frosting locks in the moisture and keeps the cake fresh and delicious!
- I don’t recommend freezing this cake, it gives the bananas a strange texture.
Nutrition
Other Recipes You Might Like:
Hi Chelsey, this cake sounds amazing! I’m a huge banana and toffee fan so I’m really excited to try this. I have a question about the whipped vanilla buttercream. Your instructions say to add in melted chocolate but I don’t see chocolate on the ingredients list. Can you clarify? Thanks so much and keep on baking! Allison
just updated the recipe! you can disregard that part!!
Hey Missy
I love love your column and Instagram sites , ???
Can’t wait to make your banana cake shown here but am confused as to how much chocolate and type????
Please help me out here and keep on baking. ??
just updated the recipe! you can disregard that!!
Looks like it didn’t update – chocolate is still in there. Also you mention vanilla twice – when does it get added?
the recipe is now updated.
I can’t wait to try and make this cake , just one question how much melted chocolate should I use and what kind ? It doesn’t seem to be in the ingredients list 🙁
Thank you !! Launa
just updated the recipe, you can ignore that part!
Quick question! How long can you leave the whipped vanilla buttercream at room temp? Thanks!
About 1 day!
Are egg whites necessary to add to the vanilla buttercream? I’ve never added them to frosting unless it was sm buttercream. If I wanted to omit them would I just use more cream? Thank you, can’t wait to assemble and eat this tonight!!?
Hi, I just love looking at your amazing cakes! Just would like to know if the whipped vanilla buttercream is too sweet? You’ve included 8 cups of icing sugar. Is there an alternative? Thanks!
It is pretty sweet, similar to american buttercream! To cut the sweetness, I sometimes add in a but more whipped cream, to make if richer and fluffier 🙂
These cakes are amazing! I’ve got to ask, though…what do you do with them all after they’re made!?!?
I bring them into work for my coworkers to eat!
I can’t wait to make this, do you have the cake recipe in grams version? Thank you! 🙂
sadly I don’t so sorry!!
Sadly I don’t :/
Hi! I’m a huge banofee fan. One question, the bananas on top for decoration, won’t they turn black after sometime?
you can brush them with a little banana juice to prevent browning!
This looks amazing! Do you think I could make the same effect with chocolate ganache instead of dulce de leche for that angled finish!??
I think that would probably work too!! 🙂 I think that wold look awesome!!
3 1/4 cups of flour sounds a lot – is that correct?
it also has three cups of sugar! this recipe makes a pretty large cake!
Hey! Your recipe shows only 1.5 cups of sugar, not 3. So with 1.5 cups sugar, isn’t 3.25 cups of flour a bit too much?
There also are a ton of bananas! They add a lot of sugar to the recipe, so it all balances out in the end 🙂
So I’ve recently been really into baking and I want to bake this for my own birthday cake this year! I figure I won’t need 4 layers though, and I only have 2 8-inch cake pans anyway. Do you see any issue with cutting this recipe in half? Everything looks pretty easy to half besides the 3 eggs. Should I whisk an egg and try to put only half of it in the batter, or should I do one egg and one egg white?
Thanks in advance, and I love love love your website!
I think cutting the recipe in half should be fine! If you want to be precise, you can whisk an egg and add half the mixture to get 1 1/2 eggs:) That’s probably your best bet!! I hope your cake turns out wonderfully, and that you have an awesome bday!! Happy early birthday Elena!!
Hello,
I don’t see the chocolate except for the chocolate chips. Where is the melted chocolate in the recipe.
Also, I wanted to make this like the Go Bananas Cake, if that was the case do you think I could do a cream cheese frosting for the layers and an American buttercream to decorate?
Beautiful work!
Hi Joanna,
The mini chocolate chips in the cake layers are how I chose to incorporate chocolate into this recipe 🙂 However, if you wanted to add more, you could melt some additional chocolate and drizzle it over the bananas, between each cake layer! That would be delicious!
I’m not sure what a go bananas cake is, but I think that decorating / filling the cake with a cream cheese an American buttercream would taste great!!
Hello,
Is it possible to make this cake in advance and freeze it? Or will impact the toffee (harden) and bananas (soggy) inside the cake?
Hi Sabrina,
You can, but with some alterations. The toffee would be fine, but the bananas wouldn’t keep well. If you want to make it in advance I’d skip adding any bananas between the layers. Hope that helps, happy baking!
can you make the cake layers in advance?
How can I do this for 9 inch cake pans? Thanks Chelsea!
Can this frosting be made without egg whites? Or is there a substitution? My daughter has an egg white allergy. Thank you!
Hi. Could you please tell me what is the easiest way to access my saved recipes. Do you have an app that i can download please?
Thank you.
Julia
Hi Julia,
There is a small icon in the bottom right corner of the screen. It’s an app called grow and once you create an account you can click the heart icon on posts to favorite them, it will store all of them on your grow account! Hope that helps 🙂
Ps. I am not even sure how I am going to find this message later. Would you mind sending me an email please? My apolagies for any inconvenience.
Julia Newell.
Does the toffee have to be put in the fridge? Or can I leave it at room temp overnight?
Hi Jenna,
I would recommend putting the cake in the fridge overnight, just because the filling is soft, especially with the bananas! It can budlge as it sits otherwise. Hope that helps, happy baking!
This is seriously one of the best cakes I’ve ever eaten. And I make cakes regularly! I do have a question, I’m wondering if this would hold up as the bottom tier in a two layer cake?
So happy to hear that Allesandra!! This recipe should work great in a tiered cake as long as it’s properly supported with dowels or thick plastic straws. Hope that helps, happy baking!
This cake looks insane! I am making my best friends wedding cake and I’m going to do a trial run tomorrow and get her to taste it. It will be one of the tiers of a 3 tier cake. I just wanted to know how long can this be out the fridge for with the fresh bananas inside? Would it be better not put the slices in between the layers or reckon it would be ok? I also might swap the whipped cream for standard buttercream/Swiss/white choc ganache so it’s more stable. Especially with the weather in June on a boat in London hahaha
Thank you! 🙂
Hi Becky,
That is the tricky part!! The fresh bananas do not keep well, and get kinda slimy / oozy if they sit for a bit. This is one of those cakes that best eaten as soon as possible after its made :/ However, if you skip the fresh banana slices between the layers it would hold up a lot better!
I definitely think it’s a good idea to use a standard SMBC or white choc ganache instead of the whipped frosting to help the cake hold up in the heat. Hope that helps, happy baking!
Hi, can I bake the whole dough in one pan and then slice it? I have only a one cake pan I don’t know what to do in this situation
Hi Tartelette,
Great question! I wouldn’t recommend doing that with this cake recipe because it would take forever to bake and would over-brown on the sides.
You can bake one layer at a time and let the batter sit on the counter at room temperature for a few hours as you bake each layer. Hope that helps, happy baking!
Made this cake for my daughter’s birthday today, unfortunately it was very dense & looked like it hadn’t cooked enough but didn’t taste like it. According to my skewer it had. I not sure if the problem was me or the cake?
Hi Dawn,
I’m so sorry to hear that! This cake doesn’t rise much, so it does have a denser, more tender crumb that a classic sponge cake. But based on what you’re saying, I’m assuming the layers were dense in an unpleasant way.
Dense cake layers can be caused by a few different things. The most common culprits are using ingredients that aren’t fully at room temperature, over-mixing the batter, or using too much flour (if should be fluffed and leveled if using a measuring cup, or weighed with a scale). Do you think it could be any of those? If not, hopefully we’ll be to figure out what it is together!
Hi Chelsey,
I just made the cake but the toffee didn’t turn out how you described above. Is there another way? Can I just put it directly in a pan & warm it up?
Hi Heather,
It’s hard to know without seeing your toffee / knowing what you mean by saying it’s different than how mine turned out. Was it too thick? Too thin? Hard? It needs to be cooked like the recipe card instructs to caramelize the mixture, or else you’ll just have warm sweetened condensed milk. Sorry I can’t be of more help!
Could I brown the butter instead then let it cool to room temp for the frosting? I would love the “whipped” part but customer wants a brown butter for these.
Hi Mindy,
You can totally do that! Just add in an extra couple Tbsp of butter before you brown the butter to make up for the liquid that will bake off when it’s cooked down. Hope that helps, happy baking!
Can you tell me approximately how much batter the recipe makes?
Hi Cheryl,
For sure! One batch makes about 10 cups of batter. Hope that helps, happy baking!
Hi. How are you? How would I incorporate coffee? Switch out half the buttermilk for coffee? Thank you
Hi Christine,
I’m doing well, I hope you are too! That is exactly what I’d do, half buttermilk half coffee! You also could use coffee buttercream, I have a great recipe for it here: https://chelsweets.com/coffee-buttercream/
Or you could mix a couple teaspoons (you can increase or decrease the amount based on how strong of a coffee flavor you’re after) of instant coffee or espresso into the heavy cream in the frosting. You can also do that with the buttermilk! Hope that helps, happy baking!
Loved this recipe! It really tasted like bananas and toffee, and adding banana in between each cake layer was a nice touch. I only made 1/4 of the buttercream recipe and diluted it heavily with heavy cream, since the cake was so sweet already and didn’t need that much frosting, imo. It was so good!
We are vegetarian don’t eat eggs so pls suggest substitute for eggs and also the measurements
Thanks
This recipe is incredible and a hit at all our family events! I personally cut the chocolate chip quantity in half, and I use a cream cheese frosting vs butter cream (simply due to preference) and it is so amazing. The recipe is easy to follow and turns out perfect every time.
THIS CAKE IS INCREDIBLE! I made it for my boyfriend’s birthday after he requested a banoffee flavoured cake this year, and I’m so glad I went for this recipe. It’s sooo banana-ey, the sponge is perfect and the icing is super sweet (in only the best way). I made it with the chocolate chips included in the batter and I’d say these were essential – every bite was better for having a chocolate chip in it! Goes AMAZING with a cup of breakfast tea. Five stars all the way.
I am so happy to hear that Helen 🙂 Thank you for sharing!!!!
I’ve just made all the elements in advance for this cake but I’m concerned the buttercream isn’t thick enough and that it’s going to ooze out from between the layers when I assemble it. It’s more the consistency of sort of a slightly thick custard maybe. It’s currently sat in the fridge as I’m hoping it hardens a little when cold. Any suggestions please? 🙂
Hi Élise,
The frosting should be thick enough to stay in place and once the cake is frosted and you chill it, it should definitely be firm. If it does seem too thin you can always add additional room temperature butter to help thicken it up and give it better structure. I hope it helps for the future, and that your cake this time around turned out great!!
Hi! This sounds amazing and I can’t wait to try making the full cake. But I’m looking to try making this into cupcakes. How would I incorporate the layers of filling into a cupcake?
Thank you!
Monika
Hi Monika,
Turning this Banoffee Cake into cupcakes is a fantastic idea! One batch makes around 36 regular-sized cupcakes. Fill cupcake liners about 3/4 full, then bake at 350°F (175°C) for 17-20 minutes, or until a toothpick inserted comes out clean or with just a few moist crumbs. Once cooled, cut out the center of the cupcakes, add a spoonful of that delicious toffee filling, and pop in a fresh banana slice. Finish with a swirl of whipped vanilla buttercream on top 🙂
Hope that helps, happy baking!
Yummm. Can’t wait to make this! Two questions please – cannot find pasteurized eggs whites. What do I use as a substitute?
What is your suggestion for the cupcake version? Fill them with the caramel?
Thanks!
Hi Mimi,
Yay! I’m so excited you’re going to make this—it’s such a fun flavor combo! ??
If you can’t find pasteurized egg whites, you can omit them or add in a couple extra TBSP of heavy cream! They basically just lighten up the frosting and make it a bit fluffier, but you can achieve similar results with some extra cream 🙂
And yes, these make amazing cupcakes! You can hollow out the center of each cupcake and fill them with caramel, then top them with the frosting!
Let me know how they turn out—I’d love to hear what you think!
Help! I’m confused. The recipe directions say add layer of “frosting” and then to pipe the “buttercream.” But there is only one recipe for the buttercream. Where is the recipe for the frosting? Or are they both the same?
Apologies for any confusion Mimi! I use the words frosting and buttercream interchangeably, because all my recipes use buttercream frosting. It’s referring to the same thing 🙂 I’ve reworded the recipe to avoid any confusion in the future. Hope that helps for the future, happy baking!
2 stars.
I was looking forward to this recipe and its fun twist on the classic banoffe pie: it had good reviews and the instructions seemed quite straighforward. Indeed, the instructions were very clear and I had no difficulties in following it. It even made quite a pretty cake.
But oh my God was it sweet! My guests were left feeling sick to their stomach after just a few bites! And this was after reducing the sugar in the layers by 30%, and only adding half of the toffee!!! The buttercream looked great. It was smooth, held well, but was sickeningly sweet, to the point of being almost inedible!
This was a very promising recipe, so its quite a shame. It would be very much appreciated if was at least stated in the recipe that it would produce a very very sweet cake, and that there were less sickeningly sweet alternatives offered.
Would not recommend, will not make again, unless any alternatives are given (especially for the buttercream)
Hi Anais,
Thank you for taking the time to leave such a thoughtful and honest review, I really appreciate it. I’m so sorry to hear the sweetness was overwhelming, especially after you made adjustments to reduce it. That definitely sounds frustrating, and I can completely understand how disappointing that must’ve been when you were excited about trying something new.
You’re absolutely right, everyone’s sweetness tolerance is different, and it’s super helpful to call this out more clearly in the recipe. I’ll make a note to include a heads-up and offer alternative buttercream options that are less sweet, like a Swiss meringue buttercream or a stabilized whipped cream, which can really balance out the richness of the toffee and banana layers.
Thank you again for your feedback. It’s incredibly helpful and will absolutely be taken into account for future updates. I’m really sorry it missed the mark for your guests, but I hope your next bake is a much better experience!
Hi! The cake looks so good.
Can you please tell me if I can use whipped cream instead of buttercream to frost the cake?
Thanks!
Hi Neha,
Great question! You totally can use whipped cream instead of frosting! If possible, I’d recommend using a stabilized whipped cream (with either cream cheese or gelatin) if possible, just because the cake layers are heavy and I wouldn’t want to filling to ooze out of the sides. I have a great whipped cream frosting that’s made with cream cheese that I love, here’s the link: https://chelsweets.com/whipped-cream-frosting-with-cream-cheese/
Hope that helps, happy baking!