I recently tried Banoffee pie for the first time and immediately knew I had to make a Banoffee cake!!
Banoffee pie comes from England. Traditionally, it’s made with bananas, cream, and toffee.
The crust can either be a buttery biscuit base or a mixture of crushed cookies and butter. Some variations even add in coffee or chocolate.
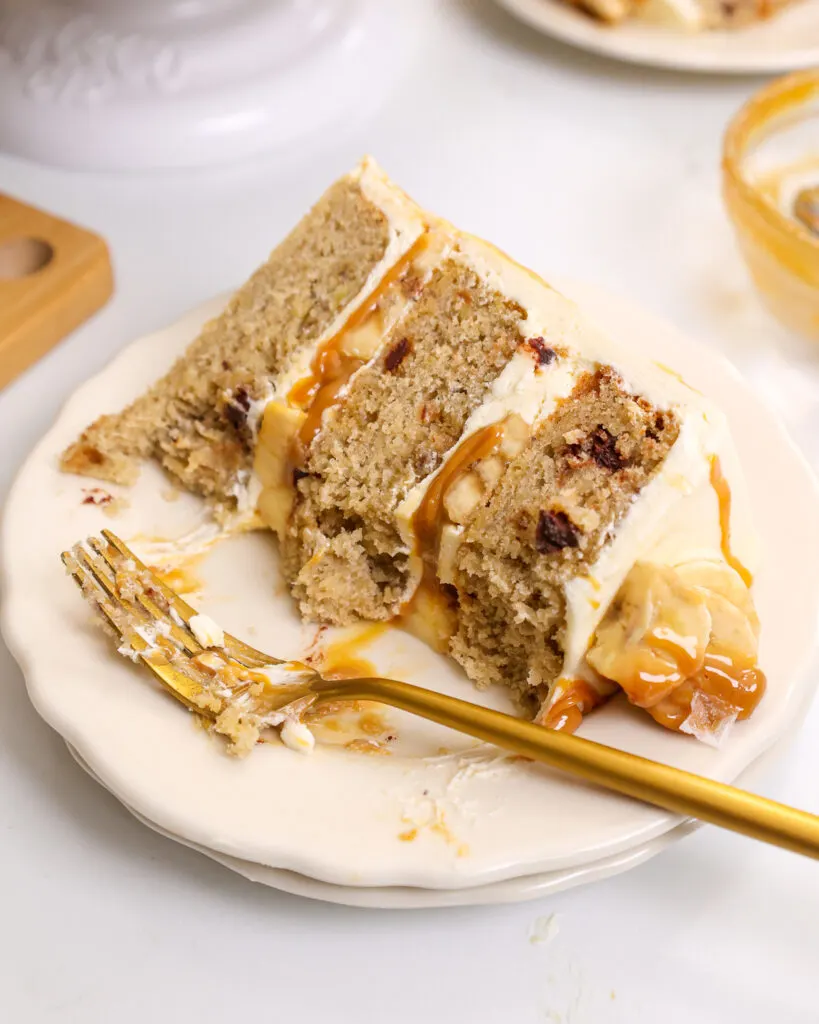
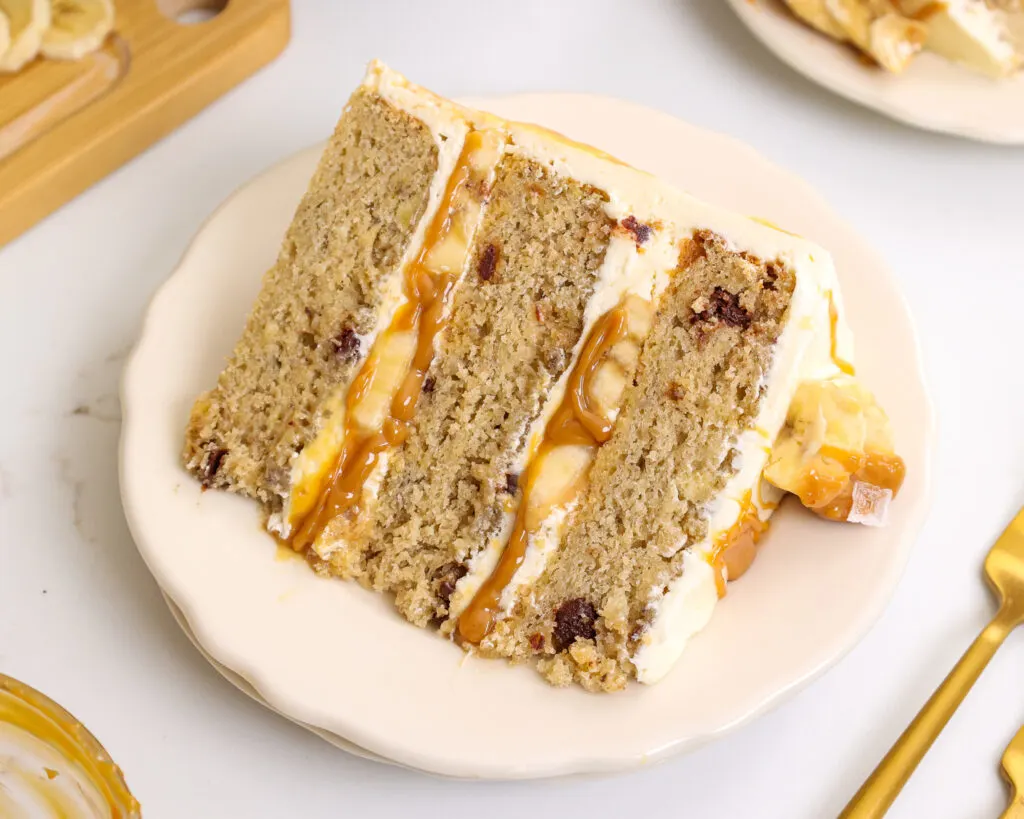
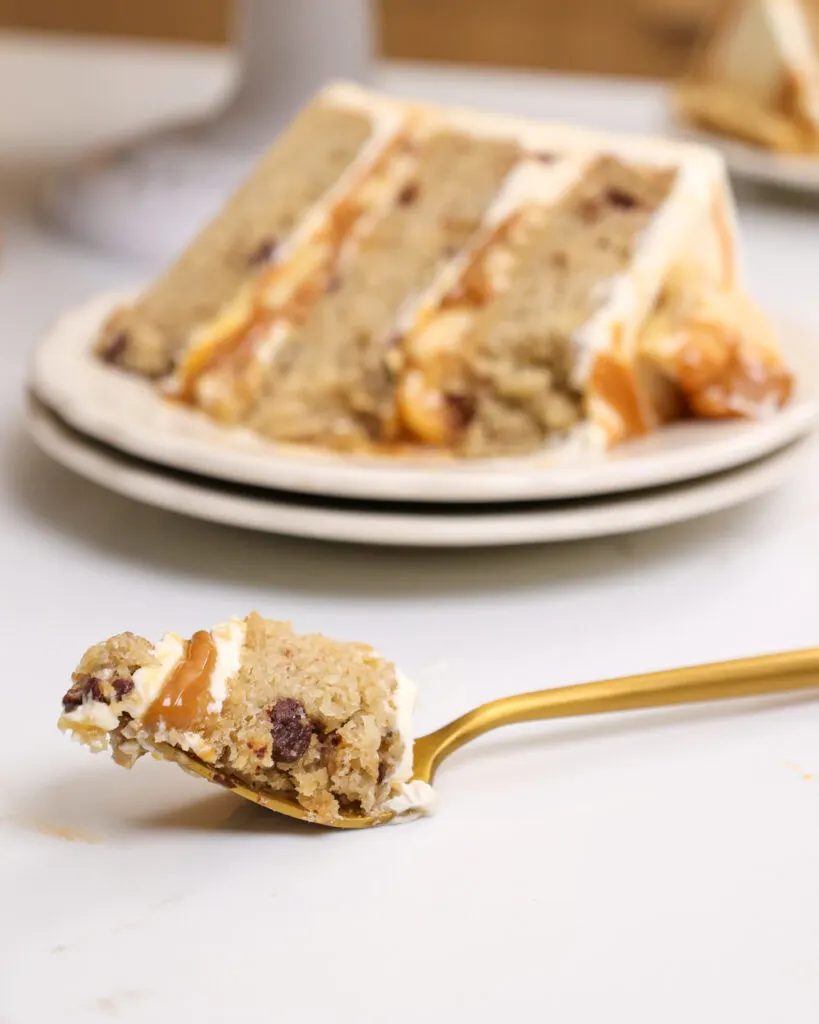
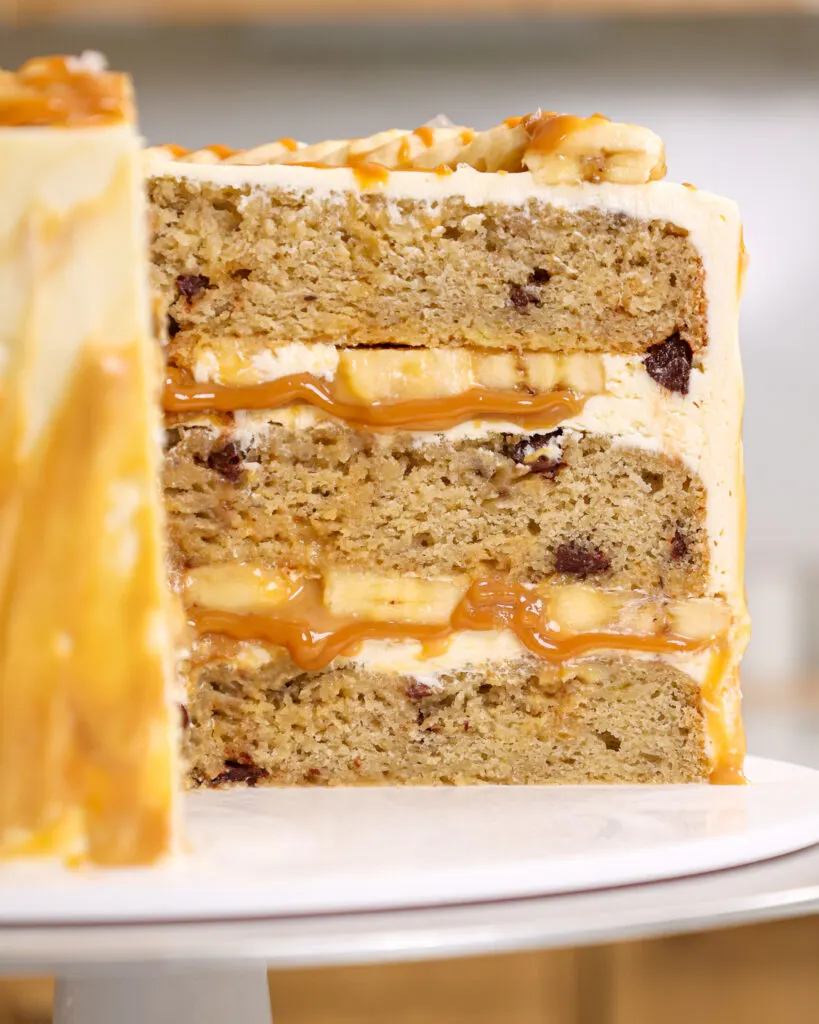
To stay true to these flavors, I made this cake with tender banana cake layers, a rich toffee filling, fresh banana slices, and whipped vanilla buttercream.
It’s such a fun cake flavor year-round, but I especially love it in the summer! I think the bananas make me think of sunshine and warm weather 🙂
Why is it Better to Use Overripe Bananas to Make Banana Cake?
Most banana cake recipes insist on using only the ripest bananas, including this one. But why are overripe bananas better to bake with??
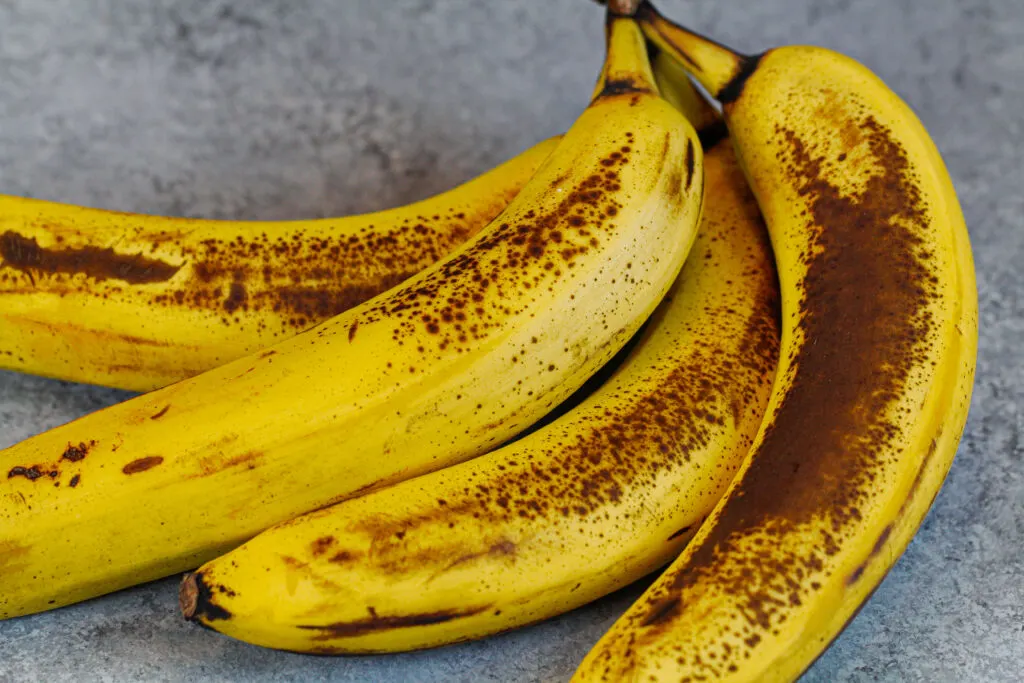
There are actually several reasons! The first is that as a banana ripens, more of its starch is converted into sugar. This creates sweeter, more tender baked goods.
Another benefit of baking with super-ripe bananas is that they’re super easy to mash up. This ensures your banana cake layers have a uniform, even texture without any unexpected chunks of banana.
Overripe bananas are also more aromatic and give baked goods a more intense banana flavor than yellow bananas.
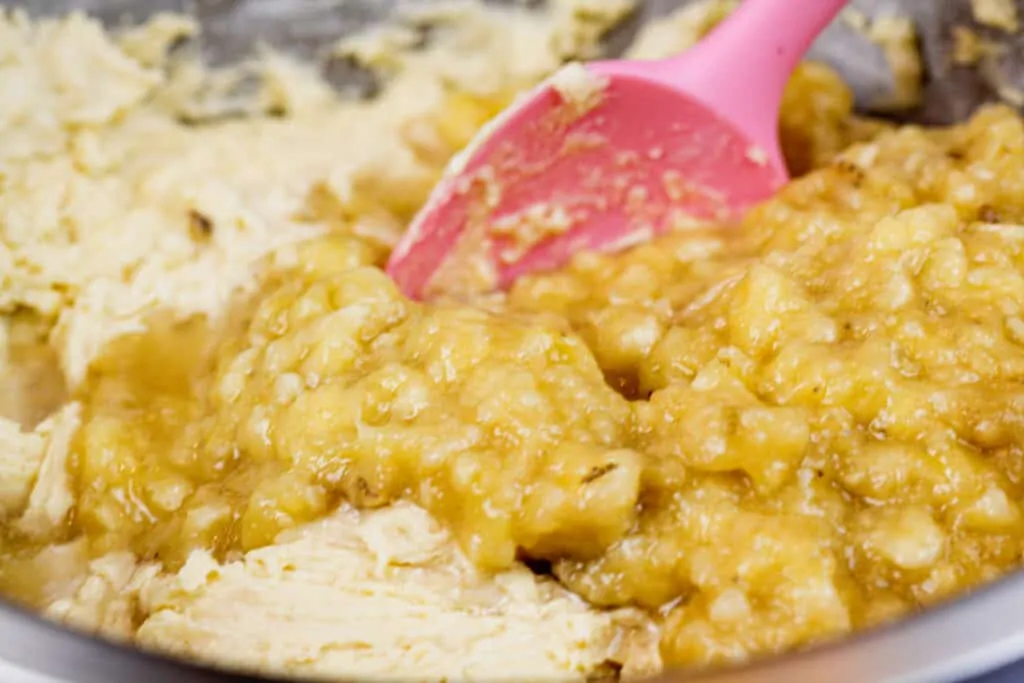
The final and best reason (in my opinion) is that it uses up overripe fruit that would otherwise go to waste!
With all that in mind, this recipe will still turn out if you use yellow bananas. It just won’t have as intense of a banana flavor!
Baking Hack: How to Quickly Ripen Bananas
If you only have yellow bananas and want that intense banana flavor, don’t worry!
You can easily turn yellow bananas brown in a matter of minutes. Preheat your oven to 300 F / 150 C and place your unpeeled bananas on a foil-lined baking sheet.
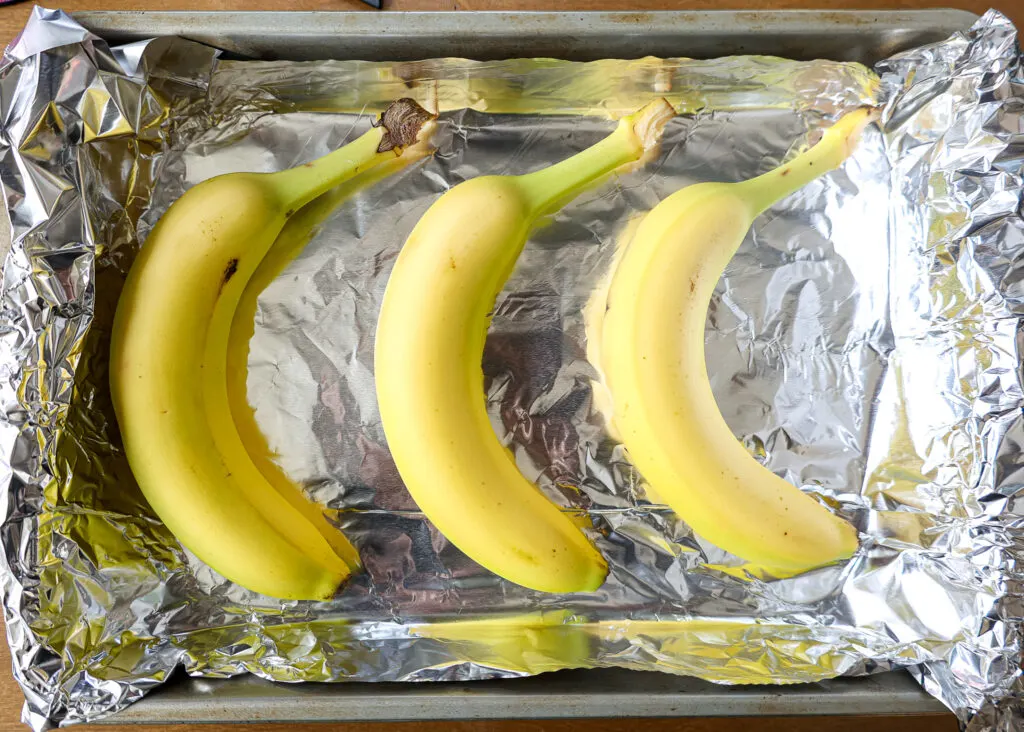
Bake them for about 15 minutes, or until the banana skin is uniformly dark in color.
Let them cool on that pan for 10 minutes, then carefully peel and mash them.
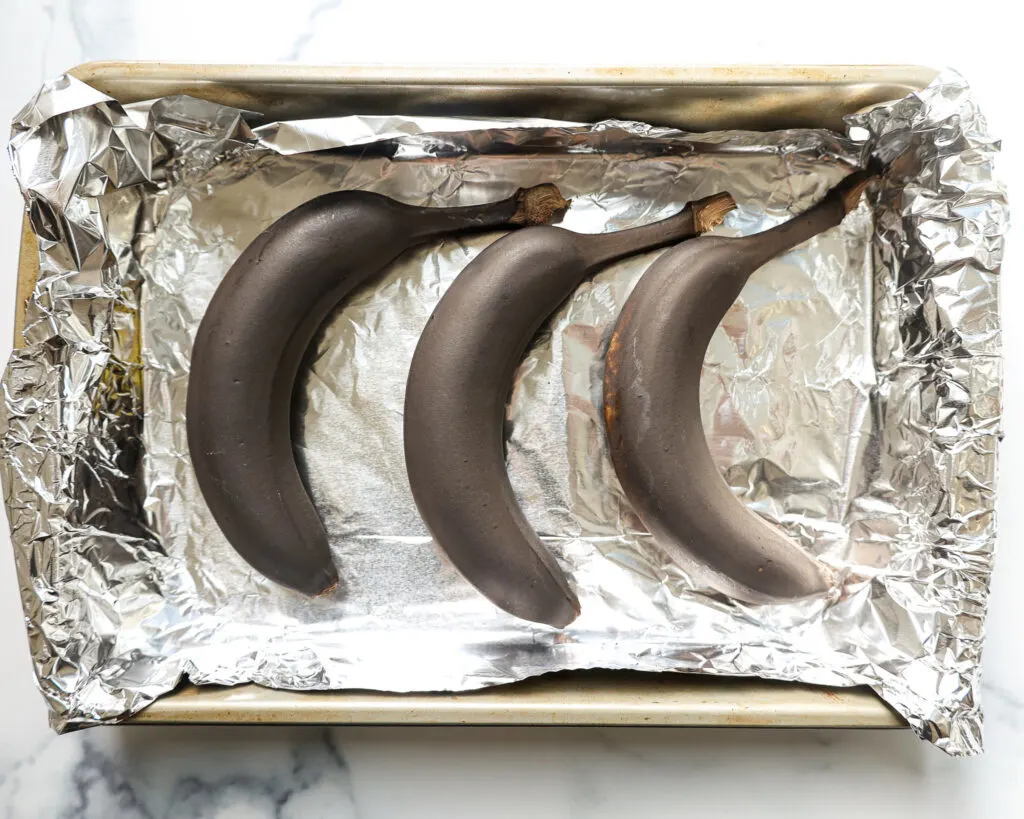
I use this hack all the time for banana bread and it works like a charm.
Substitutions and Swaps
While I love this banoffee cake recipe just the way it is, I know some of you might not have all these ingredients on hand!
Below are some swaps and substitutions that can be made in this recipe:
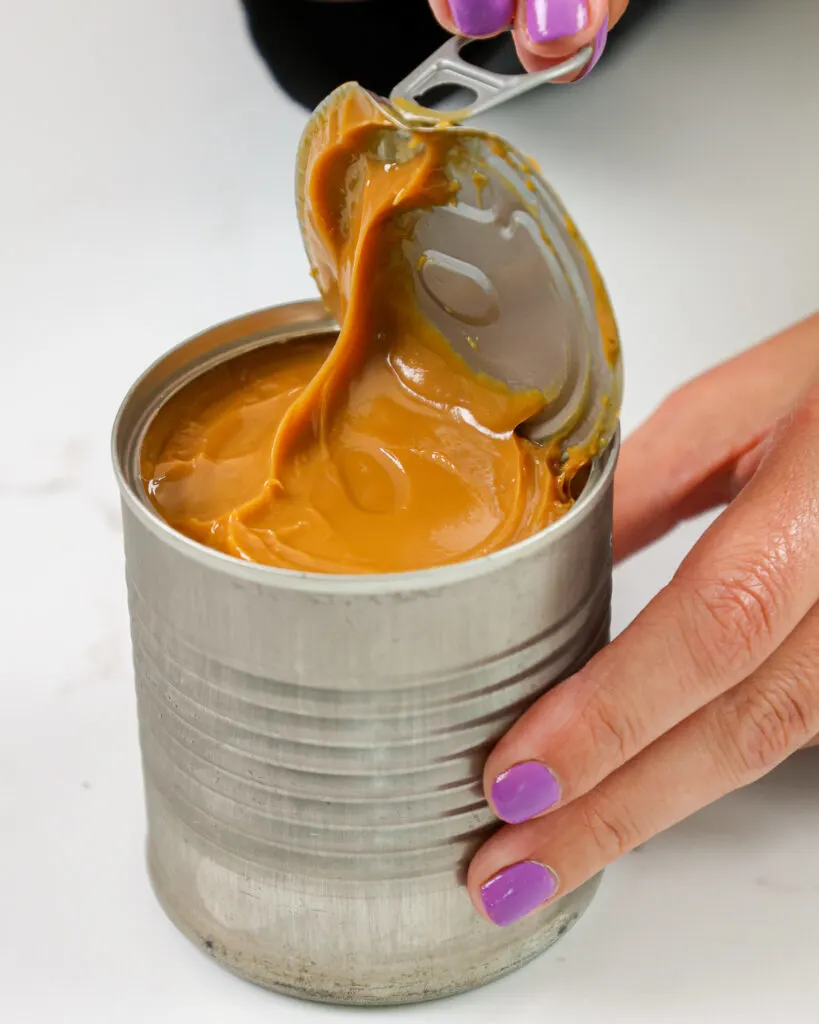
- Sweetened Condensed Milk – The toffee filling is a crucial part of this cake! If you can’t find any, try purchasing premade toffee/dulce de leche online or at the store.
- Overripe Bananas – If you don’t have overripe bananas on hand, bake your bananas at 300 F for about 15 minutes or until the skins of the bananas are black.
- Lemon Juice – Fresh lemon juice really enhances the banana flavor in this recipe and prevents the mashed bananas from browning. It can be left out if needed though!
- All-Purpose Flour – This recipe turns out best with AP flour, but you can use a cup-for-cup gluten-free flour blend in its place if needed.
- Unsalted Butter – If you only have salted butter on hand, you can use it in place of the unsalted butter in this recipe. Just be sure to omit the salt that this recipe calls for. You can also use vegan butter in its place!
- Baking Powder / Baking Soda – This recipe uses both leavening agents, and both are important to help this recipe rise correctly! Make sure both types of leavening agents are properly measured and haven’t expired.
- Buttermilk – You can also use whole milk, full-fat yogurt, sour cream, or alternative yogurt or milk (almond, soy, oat) if you’re dairy-free.
- Eggs – If you don’t have eggs on hand or can’t eat eggs, you can try using flaxseed eggs.
Banoffee Cake Decoration
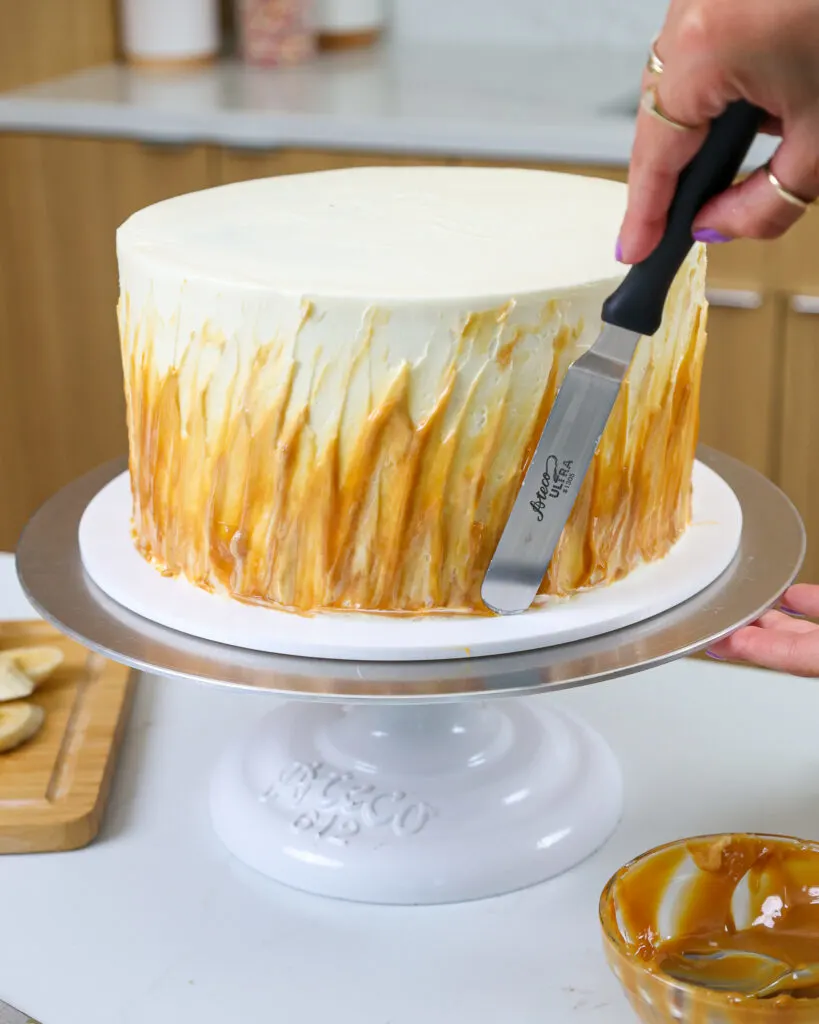
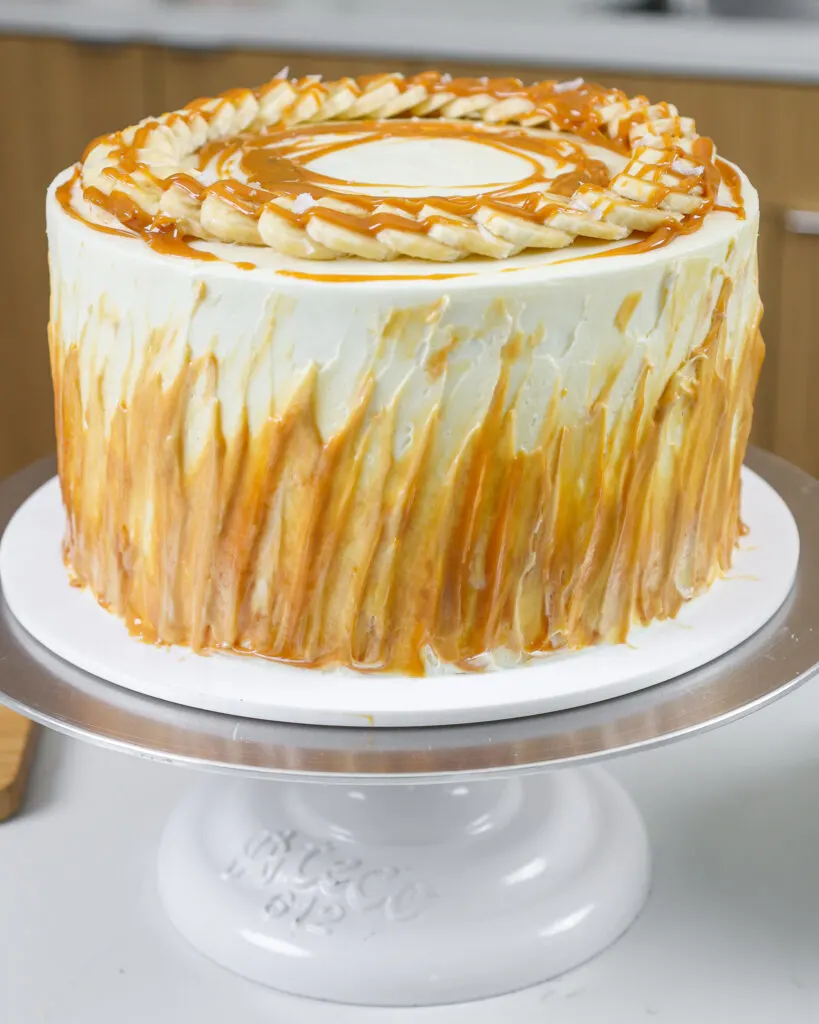
Now onto my favorite part of any cake, the decoration! I chose to use the leftover toffee and spread a thin ring of toffee around the base of the cake.
Then I drug the toffee up the side of a cake with a large offset spatula.
As I did this, I focused on keeping the angle of each frosting drag the same. This helps give the cake a cohesive look.
I also ended up going around the cake twice, to really blend together all my toffee swoops.
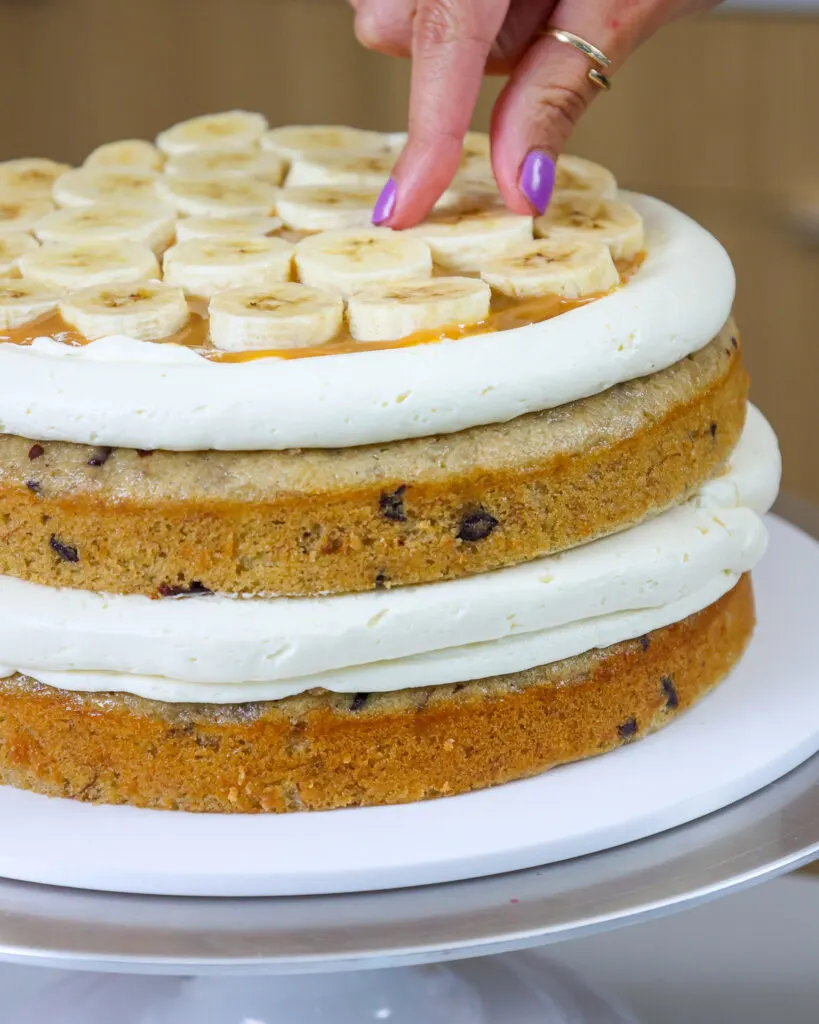
I decorated the top of the cake with a ring of freshly sliced bananas and a drizzle of warm toffee.
If you don’t plan to eat this cake immediately, wait to add the bananas to the top of the cake or use banana chips.
Tips for Making the Best Banoffee Cake:
- Properly measure your flour (fluff, then spoon into the cup measure and level) or use a kitchen scale to measure your dry ingredients.
- Ingredients at room temp mix together better! Set any cold ingredients ahead of time.
- Use a scale to weigh your cake pans as you fill them. Make sure each pan has the same amount of batter so that cake layers bake to the same height and bake more evenly.
- Bang the cake pans on the counter before putting them in the oven. This brings any air bubbles that are trapped in the batter to the surface.
- Level the room temperature or thawed cake layers with a serrated knife to make them easier to stack.
- Chill the cake layers in the freezer for about 20 minutes before assembling the cake. It makes it so much easier to stack and frost them!
Making This Banoffee Cake in Different Sizes
One batch of this recipe makes about 10 cups of batter.
I used 8″ cake pans to make this cake, but this recipe can be used to make different sized cakes. You can also half or double the ingredients to make a half or double batch!
You can make four 7″ or 6″ cake layers with one batch of batter. Bake the cake layers at 350 F / 175 C for 29-33 minutes or until a toothpick comes out with a few moist crumbs.
One batch of batter can also be used to make one 9×13-inch sheet cake. Bake it at 350 F / 175 C for 40-50 minutes and use flower nails or heating cores to help the cake bake evenly.
You can also use this recipe to make a Bundt cake! Bake time can vary based on the size and type of pan you use and can take anywhere from 45-75 minutes. I recommend using a toothpick to test for doneness and checking on it every 5-10 minutes once it’s been in the oven for 45 minutes.
The final variation of this recipe is cupcakes!! This recipe makes about 36 regular-sized cupcakes. Fill 3/4 full and bake for 17-19 minutes or until a toothpick comes out with a few moist crumbs.
Making This Banoffee Cake in Advance & Storage Tips
To speed up this process, make the toffee filling a day in advance!! An unopened can will stay good in the fridge for up to 3 months.
Make the cake layers in advance and freeze them. It breaks the process up and makes it more approachable.
Make the whipped frosting ahead of time or save any leftover frosting! It can be stored in an airtight container in the fridge for up to a month.
This frosting can also be stored in the freezer for up to 3 months! Just be sure to give it a good mix once it thaws to make it nice and smooth again.
A frosted cake can last in the fridge for up to 3 days. The buttercream locks in the moisture and keeps the cake fresh and delicious!
I don’t recommend freezing this cake, it gives the bananas a strange texture.
Let Me Know What You Think!
If you try this banoffee cake recipe, I’d love to hear what you think of it! Please leave a rating and comment below.
Also don’t forget to tag me @chelsweets and use the #chelsweets so that I can see your amazing creations on social media!
Banoffee Cake
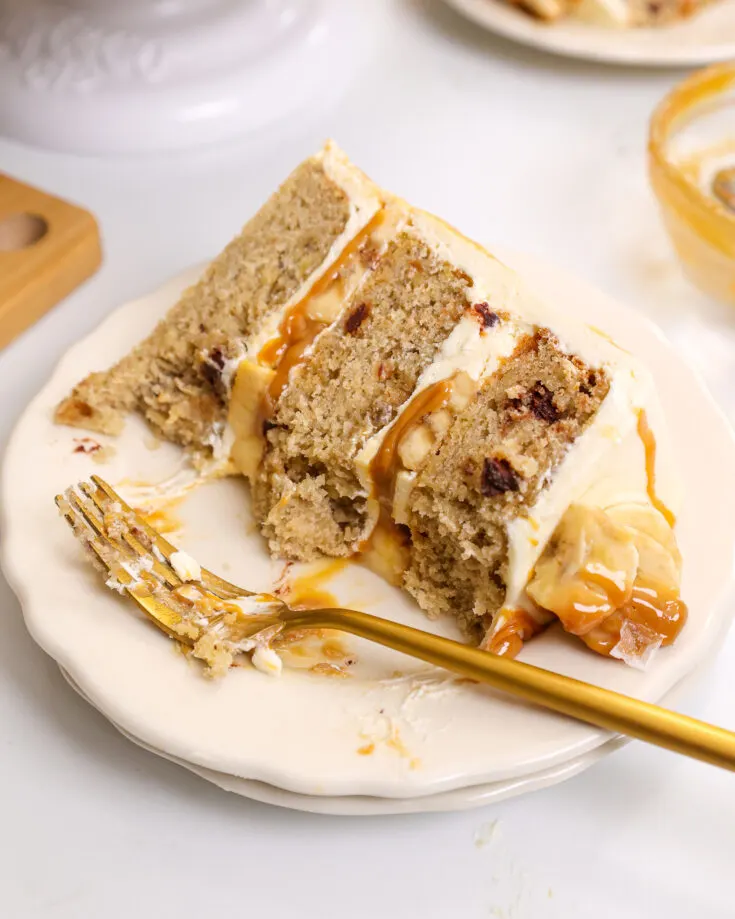
If you love banoffee pie, you'll love this banoffee cake!! It's made with fluffy banana cake layers, a delicious toffee filling, and whipped vanilla frosting!
Ingredients
Toffee Filling / Dulce de leche
- 14 oz. can of sweetened condensed milk, label removed (397g)
Banana Cake Layer Recipe (adapted from Sally's Baking Addiction)
- 1 1/2 cups ripe bananas, mashed - about 3 large bananas (450g)
- 2 tsp lemon juice (8g)
- 3 cups all-purpose flour (375g)
- 1 tsp baking powder (4g)
- 1 tsp baking soda (6g)
- 1/2 tsp fine salt (3g)
- 1 cup unsalted butter, room temperature (226g)
- 1 cup granulated sugar (200g)
- 2/3 cup light brown sugar, packed (133g)
- 3 large eggs, room temperature (168g)
- 2 tsp vanilla extract (8g)
- 1 1/2 cups buttermilk, room temperature (360g)
- 3/4 cup mini chocolate chips or chopped up chocolate - optional (135g)
Whipped Vanilla Buttercream Recipe
- 2 cups unsalted butter, room temperature (452g)
- 3 Tbsp heavy cream or heavy whipping cream (45g)
- 2 tsp vanilla extract (8g)
- 1/2 tsp fine salt (3g)
- 6 cups powdered sugar (750g)
- 1/4 cup pasteurized egg whites from a carton - optional (60g)
Additional Filling and Decorations
- 4-5 fresh bananas (optional)
Instructions
Toffee Filling
- The toffee filling needs time to cook and cool, so I recommend making it first or in advance. Remove the label from a can of sweetened condensed milk and place the can on its side in a large pot or large saucepan. Fill with water so that the water level is at least 2 inches above the can.
- Set the pot over high heat and let the water come to a simmer.
- Reduce heat and simmer for 2 hours. Check the pot every 30 minutes to make sure the water level stays above the can. Add hot water as needed to top it off.
- Carefully remove the can from the water using tongs or a large spoon. Set the can on a wire rack and let FULLY COOL to room temperature. It is super important that the can is fully cooled before opening, otherwise the can can explode due to the heat and pressure!
- Once the can is fully at room temperature, you can either open it and pour it into an airtight container and keep it in the fridge for up to 2 weeks or store the unopened can in the fridge for up to 3 months.
Banana Cake Layers
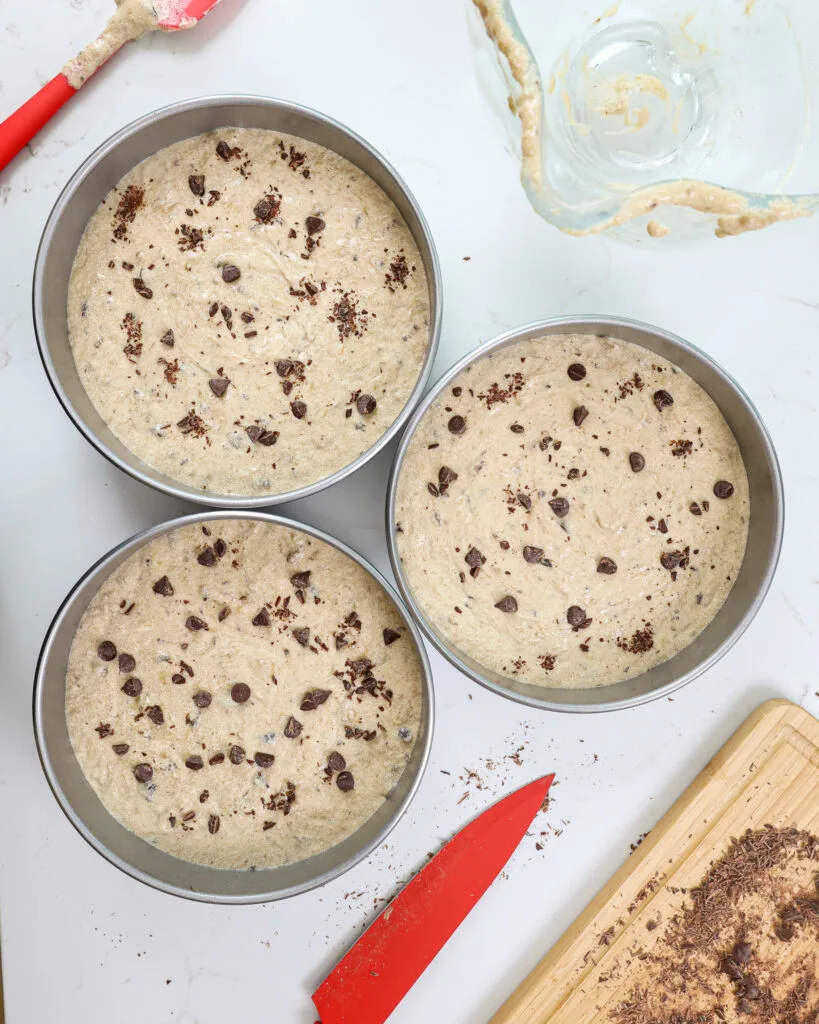
- Next, make the banana cake layers. Preheat the oven to 350°F/175°C and grease and line 3, 8-inch cake pans. Set aside.
- Mash 3 large bananas with either a fork or a mixer and stir together with 2 tsp of lemon juice. This prevents the bananas from browning. Set aside.
- In a large bowl, whisk 3 cups flour, 1 tsp baking powder, 1 tsp baking soda, and 1/2 tsp salt together. Set aside.
- Use a hand mixer or stand mixer fitted with a whisk attachment to beat 1 cup of butter, 1 cup of granulated sugar, and 2/3 cup of brown sugar together. Mix on a high speed for about 3 minutes. The mixture should get lighter in color as air is whipped into it. Use a spatula to scrape the sides and bottom of the bowl as needed.
- Mix in 3 large eggs and 2 tsp of vanilla extract on a medium speed.
- Mix in half of the dry ingredients on a low speed until just combined.
- Add in 1 1/2 cups of buttermilk and mix until incorporated, then mix in the remaining dry ingredients on a low speed. Be careful not to over-mix the batter once you've added in the flour. The batter will be on the thick side.
- Mix in the mashed bananas on a medium speed until just combined.
- If desired, carefully fold in 3/4 cup mini chocolate chips.
- Divide the batter evenly between the prepared pans. Bake for 28-32 minutes, or until a toothpick inserted in the center comes out (relatively) clean.
- Remove the cakes from the oven and set on a wire rack. Run an offset spatula around the edge of the pan to help release the cake layers from the pan. Let the cakes cool fully in the pan.
Whipped Vanilla Buttercream
- As the cake layers bake and cool, make the whipped vanilla buttercream.
- In the bowl of a stand mixer, beat 2 cups of butter on a medium-high speed for 2 minutes with a whisk attachment. The butter should become lighter in color.
- Mix in 3 Tbsp heavy cream, 2 tsp vanilla, and 1/2 tsp salt on a medium speed until combined.
- Gradually mix in 6 cups of powdered sugar on a low speed. Scrape the sides and bottom of the bowl as needed.
- Once all the powdered sugar has been mixed in, add in 1/4 cup of pasteurized egg whites (sounds weird but gives the frosting an amazingly smooth, light texture). Whip the buttercream on high for about 1 minute to make it nice and fluffy. The frosting should be rather thick, like whipped topping!
- Cover flush with plastic wrap to prevent crusting and set aside.
Banoffee Cake Assembly
- Stack and frost the cake layers on a 10-inch, grease-proof, cardboard cake round or flat plate.
- Spread a tablespoon of frosting in the center of the board to help keep the first cake layer in place.
- Spread a layer of vanilla frosting on top of the cake layer, then pipe a thick ring of whipped vanilla buttercream around the perimeter of the layer. Chill the cake in the freezer for about 5 minutes, until the frosting it firm to the touch. This will make it so much easier to spread the toffee on top of it!
- Use about 1/3 of the toffee filling to spread an even layer on top of the frosting. Top with fresh banana slices.
- Repeat with remaining layers. Make sure the toffee filling and bananas stay inside the frosting ring.
- Cover the cake in a thin layer of vanilla frosting. Smooth using a large offset spatula and bench scraper, then chill in the freezer (5 mins) or fridge (30 mins) until the frosting is firm to the touch. This helps lock in all the filling and makes it easier to get a perfect, 2nd coat of frosting.
- Next, add a second, thicker layer of frosting around the cake. Smooth using a bench scraper. You can see a full tutorial on how to frost a cake with smooth sides here.
- Spread a thin ring of toffee around the base of the cake, then use a large offset spatula to drag the toffee up the side of a cake at an angle.
- Top the cake with a circle of freshly slice bananas or banana chips and a drizzle of warm toffee (I heated the toffee in the microwave for about 15 seconds). Then enjoy!
Notes
If you want to make this recipe in a different sized pan, please see the "Making This Banoffee Cake in Different Sizes" section above 🙂
Tips for Making the Best Banoffee Layer Cake
- Ingredients at room temp mix together better! Set out any cold ingredients ahead of time.
- Properly measure the flour (spoon into the cup measure, then level). Or better yet, use a kitchen scale to measure your dry ingredients.
- Use a scale to weigh your cake pans as you fill them. Make sure each pan has the same amount of batter so that cake layers bake to the same height and bake more evenly.
- Bang the cake pans on the counter before putting them in the oven. This brings any air bubbles that are trapped in the batter to the surface.
- Level the room temperature or thawed cake layers with a serrated knife to make them easier to stack.
- Chill the cake layers in the freezer for about 20 minutes before assembling the cake. It makes it so much easier to stack and frost them!
Making this Banoffee Cake in Advance and Storage Tips
- To speed up this process, make the toffee filling a day in advance!! It can sit in the fridge for up to 3 months.
- Make the cake layers in advance and freeze them. It breaks the process up and makes it more approachable.
- Make the whipped frosting ahead of time or save any leftover frosting! It can be stored in an airtight container in the fridge for up to a month.
- This frosting can also be stored in the freezer for up to 3 months! Just be sure to give it a good mix once it thaws to make it nice and smooth again.
- A frosted cake can last in the fridge for up to 3 days. The buttercream locks in the moisture and keeps the cake fresh and delicious!
- I don't recommend freezing this cake, it gives the bananas a strange texture.
Note: If you don't plan to eat this cake immediately, the bananas on the top of the cake will brown! To prevent this, you can either brush the bananas with lemon juice to prevent browning or use banana chips.
Nutrition Information
Yield
24Serving Size
1Amount Per Serving Calories 595Total Fat 29gSaturated Fat 18gTrans Fat 0gUnsaturated Fat 10gCholesterol 96mgSodium 248mgCarbohydrates 82gFiber 2gSugar 63gProtein 6g

MONIKA
Wednesday 2nd of April 2025
Hi! This sounds amazing and I can't wait to try making the full cake. But I'm looking to try making this into cupcakes. How would I incorporate the layers of filling into a cupcake? Thank you! Monika
Élise
Tuesday 18th of March 2025
I've just made all the elements in advance for this cake but I'm concerned the buttercream isn't thick enough and that it's going to ooze out from between the layers when I assemble it. It's more the consistency of sort of a slightly thick custard maybe. It's currently sat in the fridge as I'm hoping it hardens a little when cold. Any suggestions please? :)
Chelsweets
Tuesday 18th of March 2025
Hi Élise, The frosting should be thick enough to stay in place and once the cake is frosted and you chill it, it should definitely be firm. If it does seem too thin you can always add additional room temperature butter to help thicken it up and give it better structure. I hope it helps for the future, and that your cake this time around turned out great!!
Helen
Monday 3rd of March 2025
THIS CAKE IS INCREDIBLE! I made it for my boyfriend's birthday after he requested a banoffee flavoured cake this year, and I'm so glad I went for this recipe. It's sooo banana-ey, the sponge is perfect and the icing is super sweet (in only the best way). I made it with the chocolate chips included in the batter and I'd say these were essential - every bite was better for having a chocolate chip in it! Goes AMAZING with a cup of breakfast tea. Five stars all the way.
Chelsweets
Tuesday 4th of March 2025
I am so happy to hear that Helen :) Thank you for sharing!!!!
Molly
Tuesday 26th of November 2024
This recipe is incredible and a hit at all our family events! I personally cut the chocolate chip quantity in half, and I use a cream cheese frosting vs butter cream (simply due to preference) and it is so amazing. The recipe is easy to follow and turns out perfect every time.
Hetal Paliwal
Friday 9th of August 2024
We are vegetarian don’t eat eggs so pls suggest substitute for eggs and also the measurements Thanks