
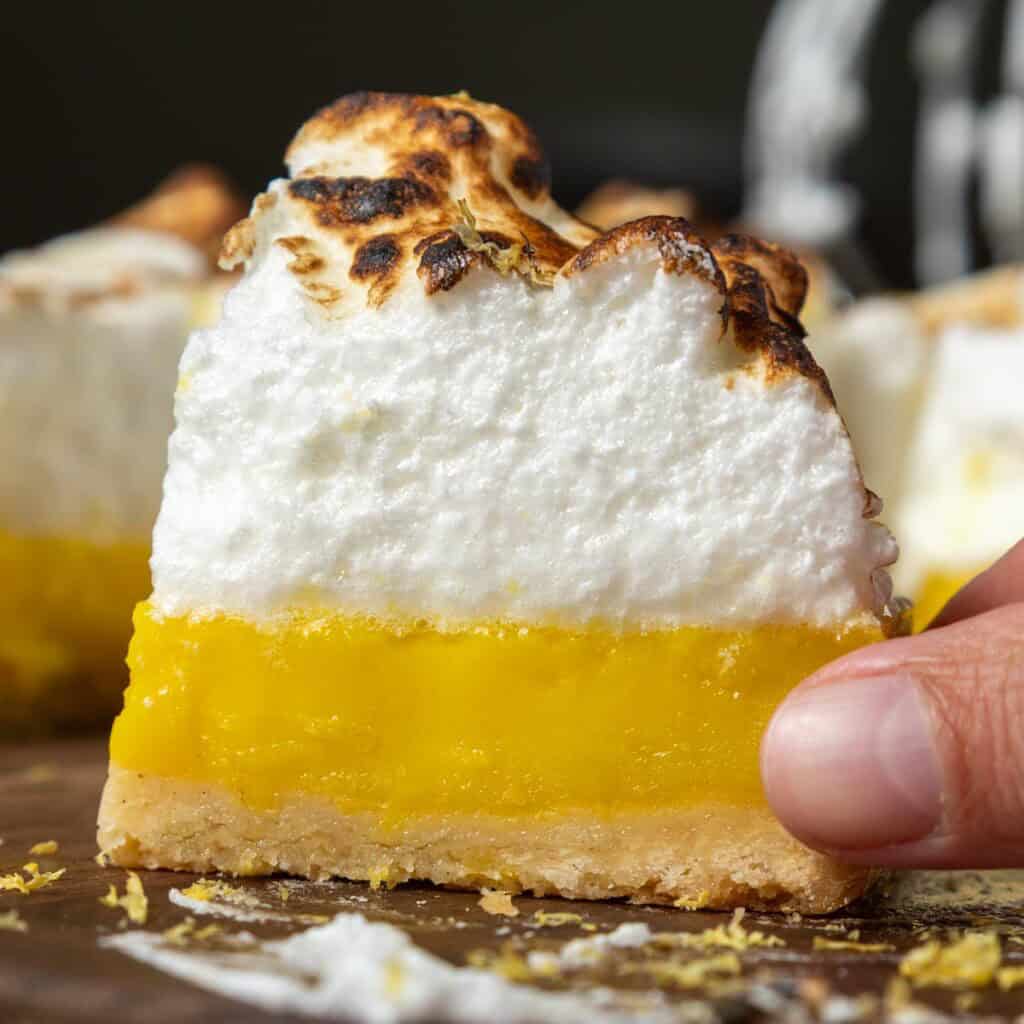
Lemon Meringue Pie Bars
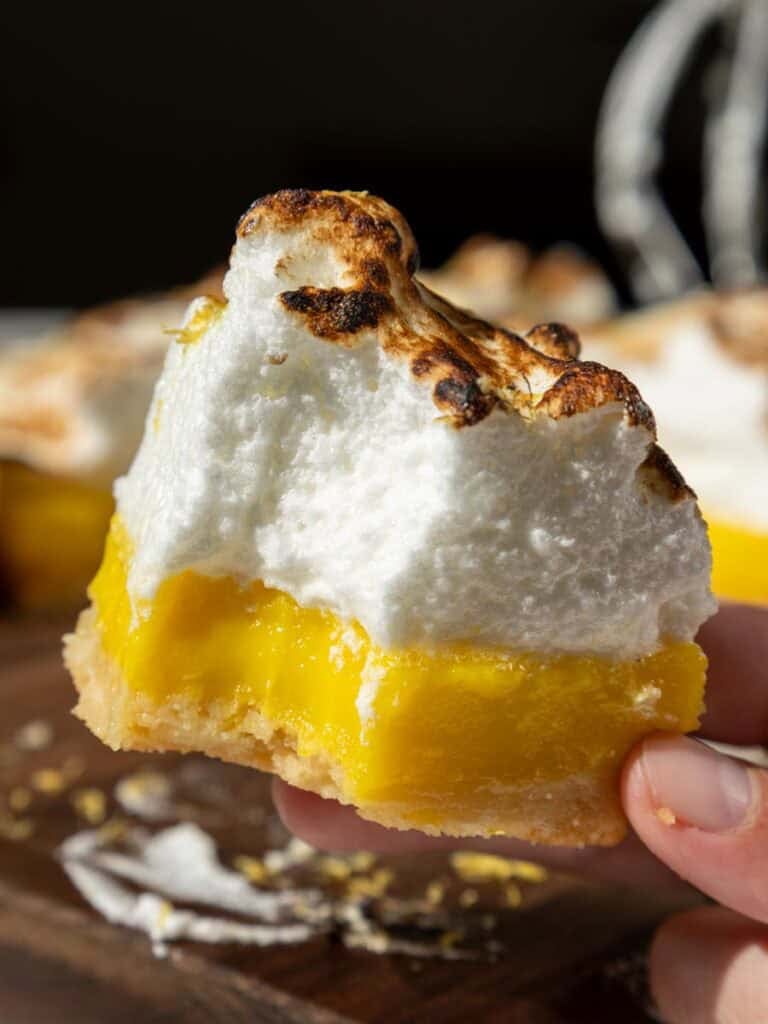
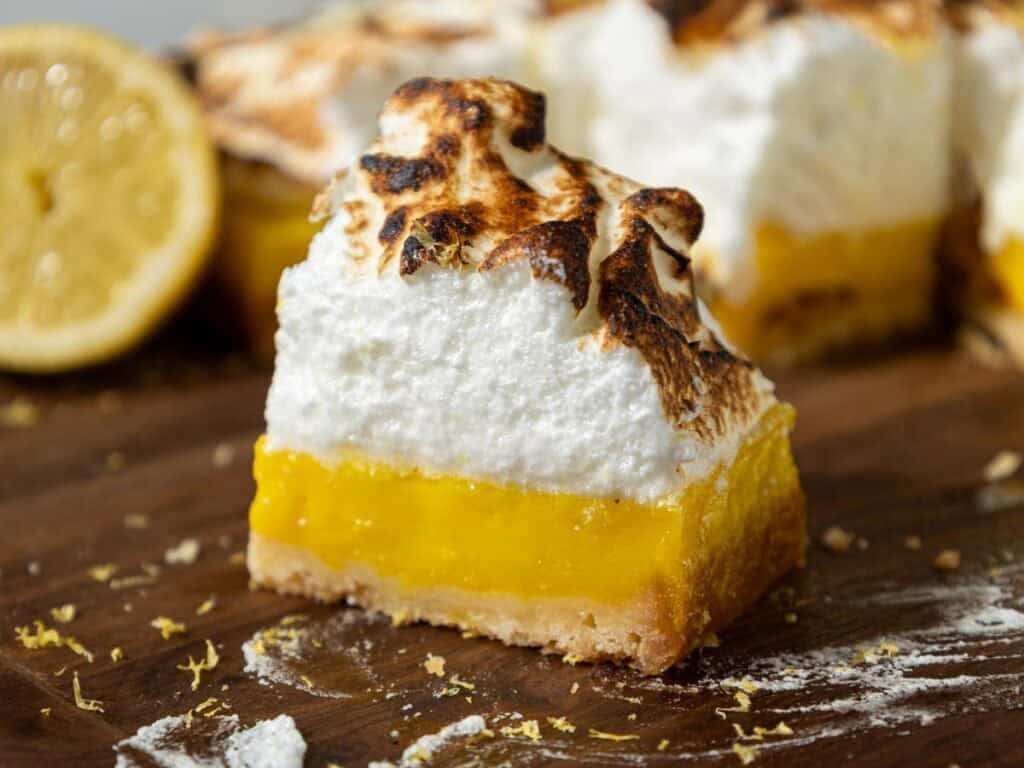
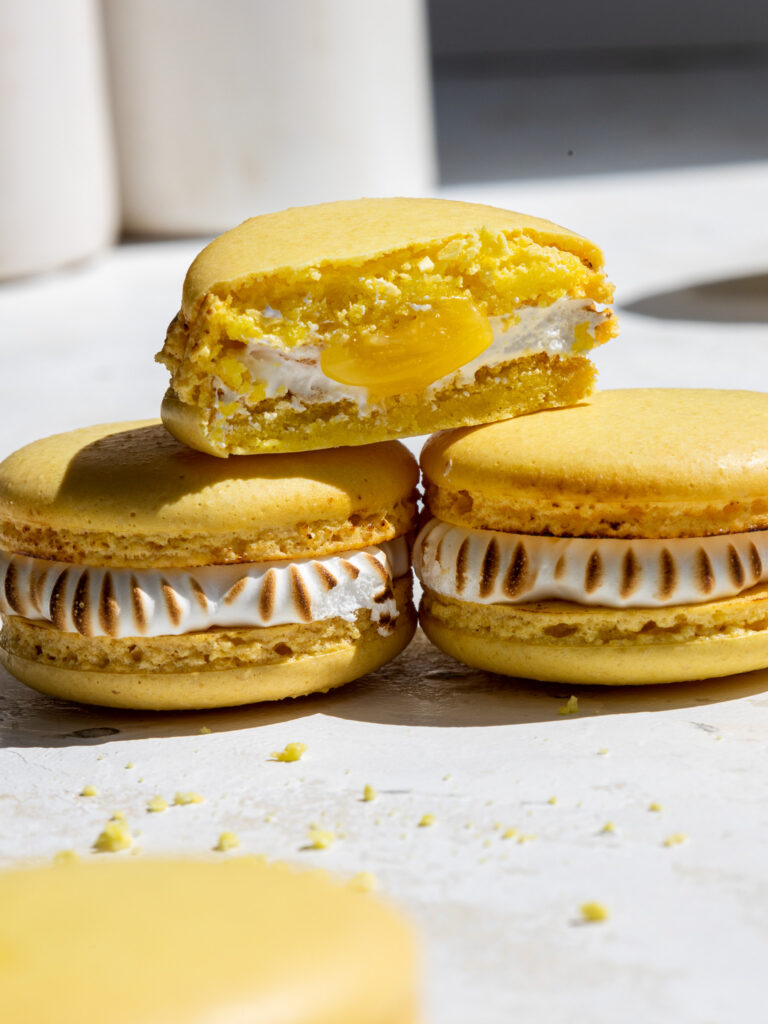
These lemon meringue pie bars taste just like summer, with a buttery, shortbread crust, bright lemon filling, and swirls of perfectly toasted, airy meringue.
How to Make Lemon Meringue Pie Bars
Let’s walk through each step of this recipe together to make sure these bars turn out as amazing as possible!
Below is a list of equipment I used to make these, but feel free to improvise if you don’t have all of these on hand.
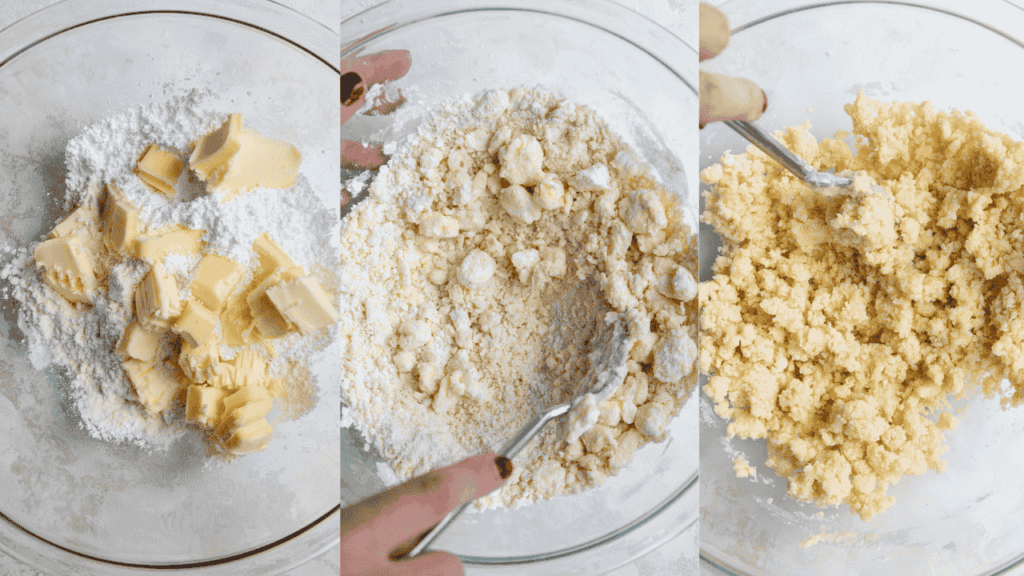
Step 1: Make the Shortbread Crust
I originally tested these with an all-butter pie crust as the base, but the chill time needed for the pie crust made the process so long! I ended up switching to a shortbread crust and am really happy with the end result! It’s way faster, a lot easier, and just as delicious.
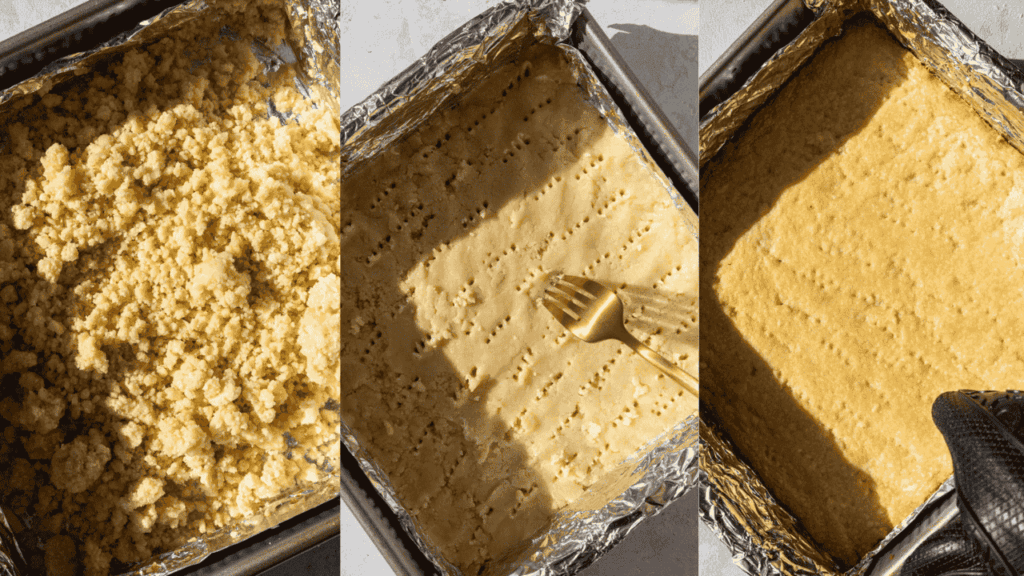
To make the crust, start by preheating the oven to 350°F/175°C. Line an 8-inch or 9-inch square pan with foil, then spray with non-stick baking spray. Don’t use parchment paper – it can catch on fire when you toast the meringue!
Use a fork or pastry cutter to combine 1 cup flour, 1/4 cup powdered sugar, 1/4 tsp fine salt, and 1/2 cup softened butter. It should form a slightly crumbly dough once combined.
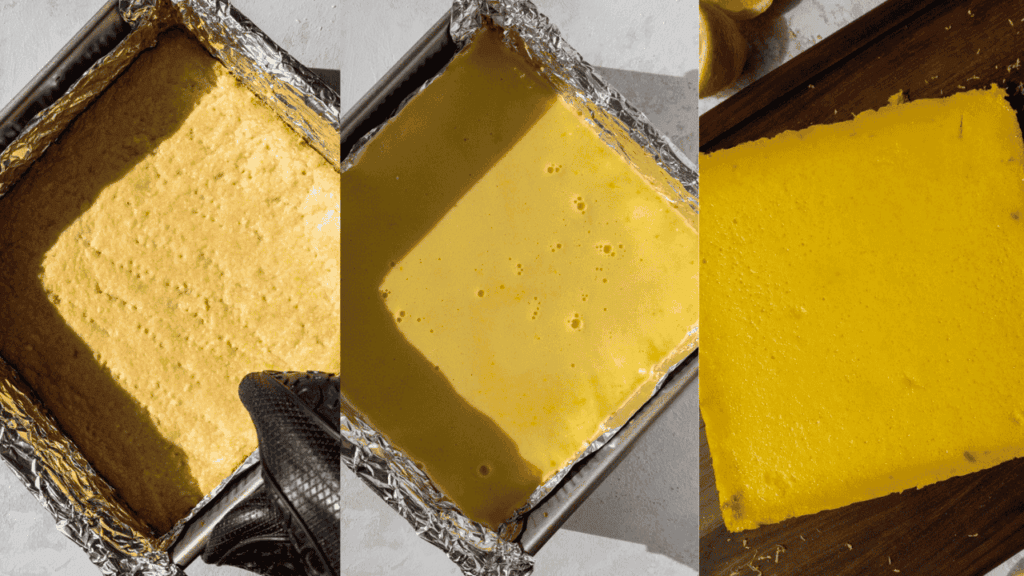
Press into the bottom of the prepared pan with your fingers to create an even layer. Prick the crust thoroughly with a fork, then bake for 22-25 minutes, or until the edges are just starting to brown.
Place the pan on a wire rack to cool. Keep the oven on but lower the temperature to 300°F/150°C.
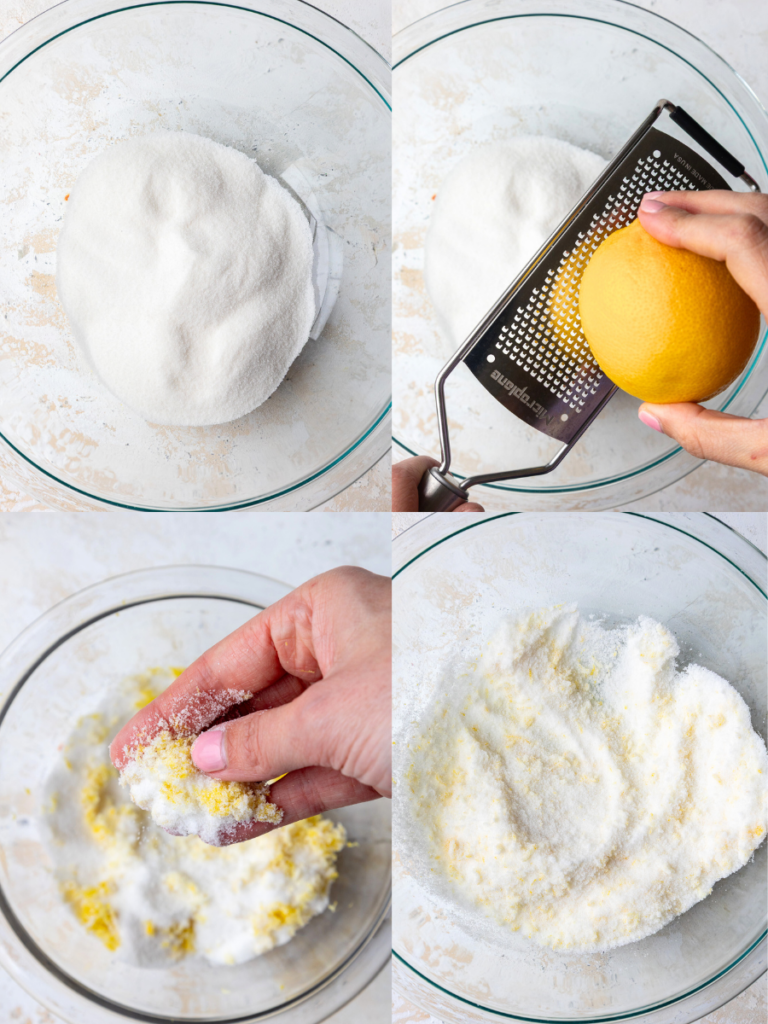
Step 2: Make the Lemon Filling
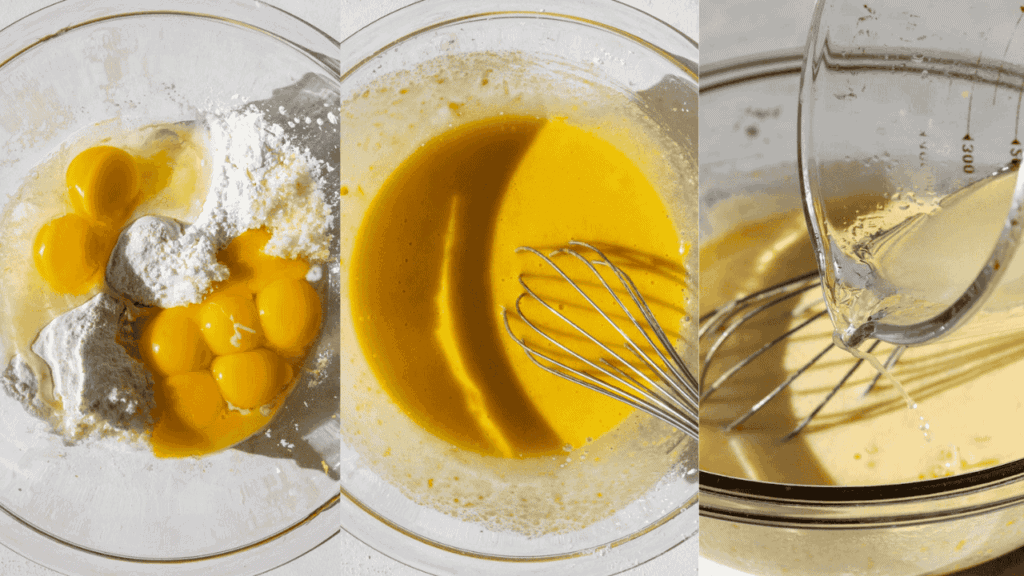
Add 1 1/4 cups of sugar and 2 Tbsp lemon zest to a large bowl. Use your fingertips to rub the zest into the sugar for about 2 minutes. The mixture should become quite aromatic.
Next, add 6 large egg yolks, 2 large eggs, 1/4 cup AP flour, 1 Tbsp + 2 tsp cornstarch, and 1/2 tsp fine salt, and whisk together until smooth.
Then whisk in 1 cup of fresh lemon juice. Mix until fully combined.
Then pour the filling over the baked crust and bake at 300°F/150C° for 35-42 minutes, or until the filling is just set. Remove from the oven and place on a wire rack to cool fully.
Once it’s fully cooled, place the pan in the fridge to chill for 1 hour (or overnight).
Step 3: Make the Meringue Topping
While the bars chill, work on the meringue topping. In a medium-sized pot, add about 1 inch of water and bring to a simmer.
Add 3 egg whites, 2/3 cup of granulated sugar, and a pinch of fine salt into a large metal or heat-proof metal bowl.
Place the bowl on top of the pot filled with simmering water. The bowl should create a seal over the pot. Make sure the water isn’t actually touching the bottom of the bowl, or it can cook the egg whites.
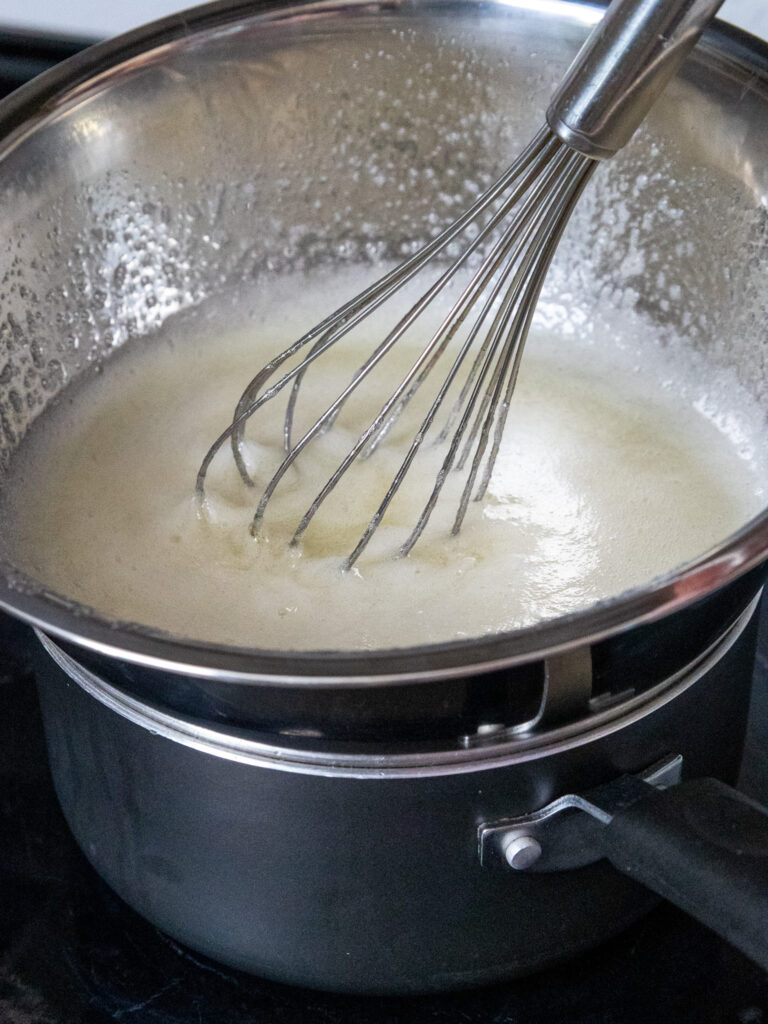
Whisk the mixture constantly for about 3 minutes, until it reaches 160°F/71°C. You can test the mixture to see if it’s ready by rubbing a tiny bit between your fingertips.
The sugar should be fully dissolved, and it should feel super smooth and hot to the touch.
Once it reaches this stage, lift the bowl away from the pot and dry the bottom with a towel.
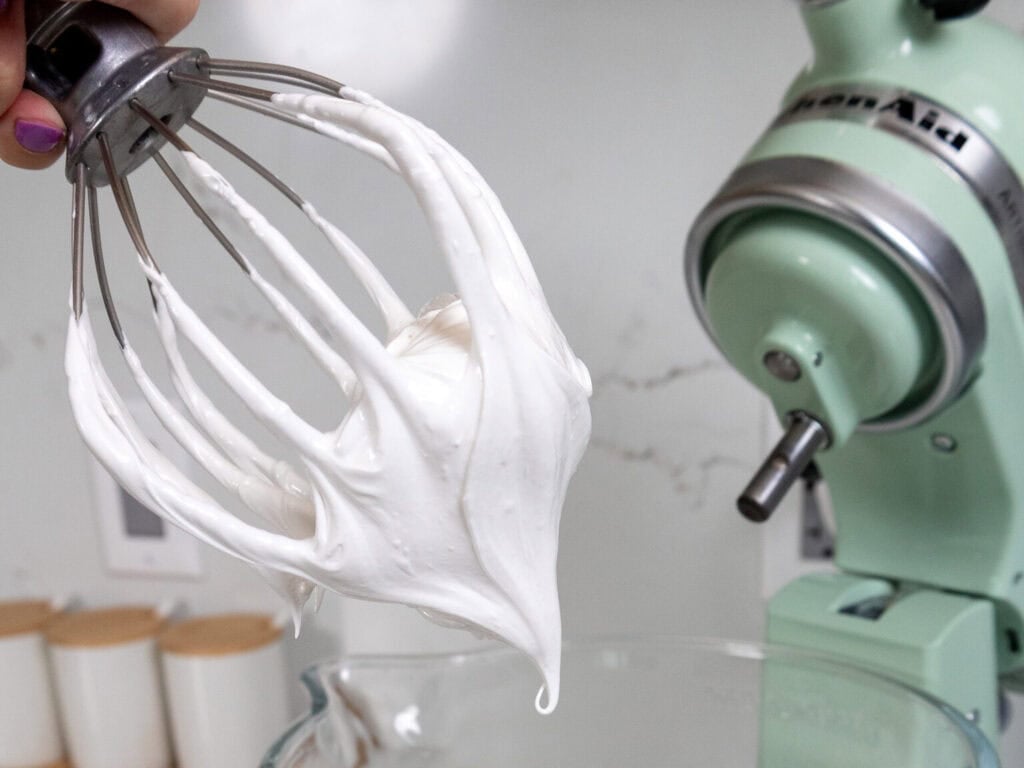
Pour the mixture into the bowl of a stand mixer and beat on a medium-high speed with a whisk attachment. Mix for about 10 minutes, or until you have stiff, glossy peaks that stick straight up.
Step 4: Top and Toast the Lemon Meringue Bars
Spread the meringue into an even layer on top of the cooled lemon bars. Use the back of a spoon or a small offset spatula to create swirls in the meringue.
Then use a kitchen torch to brown the top of the meringue.
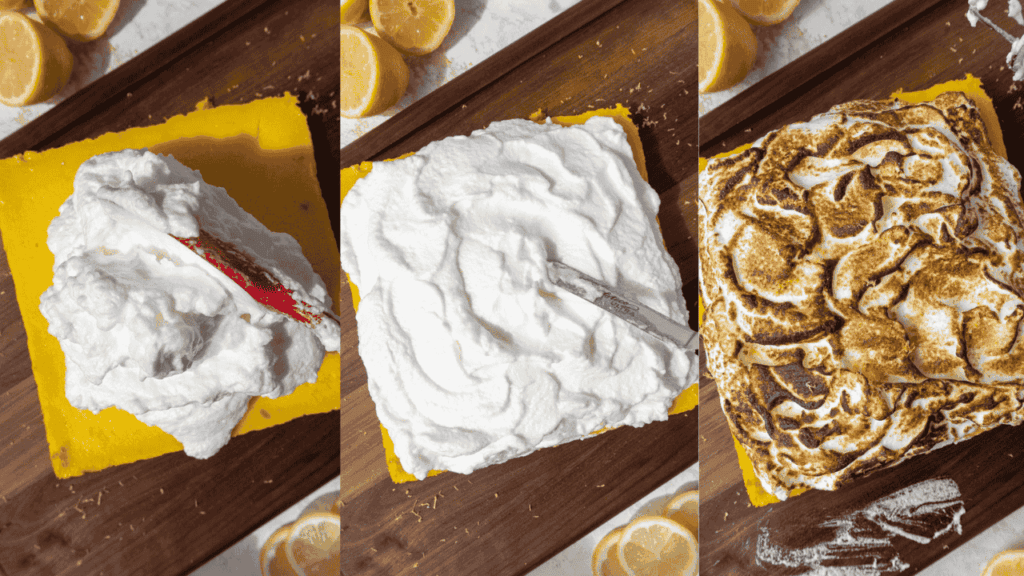
If you don’t have a kitchen torch, preheat the broiler to high. Set the lemon bars under the broiler for about 30 seconds, or until the meringue is evenly toasted and golden brown.
Then use a sharp knife to cut the bars into squares and enjoy!
Ingredient Substitutions in This Lemon Meringue Pie Bar Recipe
Below are some substitutions that can be made in this recipe:
- All-Purpose Flour (Crust & Filling): You can use gluten-free 1:1 baking flour (like Bob’s Red Mill or King Arthur) for a gluten-free version. The texture may be slightly more delicate, but still delicious.
- Powdered Sugar (in Crust): Swap with an equal amount of granulated sugar if needed. The crust may be a bit less tender, but it will still hold together well.
- Unsalted Butter: You can use salted butter if needed; just omit the added salt in the crust to balance the flavor.
- Fresh Lemon Juice: While fresh is best for flavor, in a pinch you can use bottled lemon juice (look for one with 100% lemon juice and no additives), but the flavor may be less bright and slightly more acidic.
- Cornstarch (in Filling): Can be swapped with arrowroot starch or tapioca starch in a 1:1 ratio to help thicken the filling.
- Egg Yolks (in Filling): If you don’t want to separate eggs, you can use liquid egg yolks from a carton—just make sure they’re 100% yolks and not a yolk/white blend.
- Egg Whites (for Meringue): Carton egg whites (pasteurized) can work in the meringue, but they may not whip up quite as fluffy. For best results, use fresh egg whites.
Can Lemon Meringue Bars Be Made in Advance?
Yes! Lemon meringue bars can absolutely be made ahead of time, with a couple of caveats to keep their texture intact.
The meringue topping is delicate and can weep or deflate over time, so these bars are best enjoyed within 24 hours of being made for peak freshness.
If you’re looking to prep ahead, you can make the lemon curd base (crust + filling) up to 2 days in advance.
Just bake, cool completely, cover with plastic wrap, and store it in the fridge. When you’re ready to serve them, whip up the meringue, spread it on top, and either torch it or give it a quick broil to set the topping.
How to Store Lemon Meringue Bars
Once assembled, lemon meringue bars should be stored in the refrigerator.
Place them in an airtight container and refrigerate for up to 2 days. Note that after the first day, the meringue may start to soften or release a bit of moisture.
Don’t worry, this is totally normal, just blot gently with a paper towel before serving if needed.
If you’re serving them the same day, you can leave the bars at room temperature (in a cool spot) for a few hours, but they really do hold up best when chilled.
Freezing isn’t ideal for meringue, so I don’t recommend it for this recipe.
Tips for Making the Best Lemon Meringue Bars
- Before whipping up the meringue, wipe down your tools with lemon juice or vinegar to make sure they’re grease-free. Traces of grease in the mixing bowl can prevent the meringue from forming stiff peaks!
- Separate the eggs when they’re cold. It makes it way easier, and they’ll be heated before being whipped, so there’s no need to bring them to room temperature.
- Heat the egg white/sugar mixture to 160°F/71°C and check to make sure all the sugar is dissolved before removing it from the double boiler.
- Use fresh lemons! Bottled juice won’t give you that vibrant, tart flavor. Fresh lemon juice and zest make all the difference.
- Let the curd cool before topping – Spreading meringue onto hot filling can make it melt or separate. Let the base cool to room temperature first!
- Spread meringue all the way to the edges to seal it to the crust and prevent it from shrinking or weeping as it cools.
- Torch or broil gently! Just a light browning is all you need for that classic toasted meringue look. Keep a close eye if you’re broiling—it can go from golden to burnt fast!
- Avoid making meringue on humid days. Meringue doesn’t love moisture in the air and can turn sticky or collapse if the weather’s too damp.
- Serve within a day or two. These bars are at their best within 24–48 hours. The crust stays crisp, the curd is silky, and the meringue stays light and fluffy.
Let Me Know What You Think
If you make these lemon meringue pie bars, I’d love to hear what you think! Please leave a rating and comment below.
Tag me @chelsweets and use #chelsweets if you share on social media so I can see all your amazing creations!

Lemon Meringue Pie Bars
Equipment
Ingredients
Shortbread Crust
- 1 cup all-purpose flour, spooned and leveled 130g
- 1/4 cup powdered sugar 30g
- 1/4 tsp salt 3g
- 1/2 cup (1 stick) unsalted butter, room temperature 113g
Lemon Filling
- 1 1/4 cups granulated sugar 250g
- 2 Tbsp finely grated lemon zest (zest of 2 large lemons or 4 small lemons)
- 6 large egg yolks, room temperature – save 3 of the egg whites for the meringue 156g
- 2 large eggs, room temperature 112g
- 1/4 cup all-purpose flour 35g
- 1 Tbsp +2 tsp cornstarch
- 1/2 tsp fine salt
- 1 cup fresh lemon juice (juice of 5-6 small lemons) 240g
Meringue Topping
- 3 egg whites – saved when making the filling 90g
- 2/3 cup granulated sugar 133g
- 1/8 tsp or a pinch of fine salt
Instructions
Shortbread Crust
- Use a fork or pastry cutter to combine 1 cup AP flour, 1/4 cup powdered sugar, 1/4 tsp fine salt, and 1/2 cup softened butter. It should form a slightly crumbly dough once combined.
- Press into the bottom of the prepared pan with your fingers to create an even layer. Prick the crust thoroughly with a fork, then bake for 22-25 minutes, or until the edges are just starting to brown.
- Place the pan on a wire rack to cool. Keep the oven on but lower the temperature to 300°F/150°C.
Lemon Filling
- Add 1 1/4 cups of sugar and 2 Tbsp lemon zest to a large bowl. Use your fingertips to rub the zest into the sugar for about 2 minutes. The mixture should become quite aromatic.
- Next, add 6 large egg yolks (save 3 of the egg whites for the meringue), 2 large eggs, 1/4 cup AP flour, 1 Tbsp + 2 tsp cornstarch, and 1/2 tsp fine salt and whisk together until smooth. Then whisk in 1 cup of fresh lemon juice. Mix until fully combined.
- Pour the filling over the baked crust and bake at 300°F/150C° for 35-42 minutes, or until the filling is just set. To test if they're done, I like to do the shake test! When you think they're done, open the oven door and gently shake the pan. If the filling is mostly set and doesn't jiggle significantly (a tiny bit of jiggle in the center is ok), the bars are done baking.
- Remove from the oven and place on a wire rack to cool fully. Once it's fully cooled, place the pan in the fridge to chill for 1 hour (or overnight).
Meringue Topping
- While the bars chill, work on the meringue topping. In a medium-sized pot, add about 1 inch of water and bring to a simmer.
- Add 3 egg whites, 2/3 cup of granulated sugar, and a pinch of fine salt into a large metal or heat-proof metal bowl.
- Place the bowl on top of the pot filled with simmering water. The bowl should create a seal over the pot. Make sure the water isn’t actually touching the bottom of the bowl, or it can cook the egg whites.
- Whisk the mixture constantly for about 3 minutes, until it reaches 160°F/71°C. You can test the mixture to see if it’s ready by rubbing a tiny bit between your fingertips. The sugar should be fully dissolved, and it should feel super smooth and hot to the touch.
- Once it reaches this stage, lift the bowl away from the pot and dry the bottom with a towel. Pour the mixture into the bowl of a stand mixer and beat on a medium-high speed with a whisk attachment. Mix until you have stiff, glossy peaks that stick straight up. As it mixes, I like to check the consistency a few times by turning off the mixer and flipping the whisk upside down to avoid overwhipping it.
- Spread the meringue into an even layer on top of the cooled lemon bars. Use the back of a spoon or a small offset spatula to create swirls in the meringue. Then use a kitchen torch to brown the top of the meringue. If you don't have a kitchen torch, preheat the broiler to high. Set the lemon bars under the broiler for about 30 seconds, or until the meringue is evenly toasted and golden brown.
- Then use a sharp knife to cut the bars into 16 squares and enjoy!
Video
Notes
Can Lemon Meringue Bars Be Made in Advance?
Yes! Lemon meringue bars can absolutely be made ahead of time, with a couple of caveats to keep that amazing texture intact. Because the meringue topping is delicate and can weep or deflate over time, these bars are best enjoyed within 24 hours of assembling for peak freshness.
If you’re looking to prep ahead, you can make the lemon curd base (crust + filling) up to 2 days in advance. Just bake, cool completely, and store it in the fridge tightly covered. When you’re ready to serve, whip up the meringue, spread it on top, and either torch it or give it a quick broil to set the topping.
How to Store Lemon Meringue Bars
Once assembled, lemon meringue bars should be stored in the refrigerator to keep the curd firm and the meringue safe. Place them in an airtight container and refrigerate for up to 2 days. Note that after the first day, the meringue may start to soften or release a bit of moisture—that’s totally normal, just blot gently with a paper towel before serving if needed.
If you’re serving them the same day, you can leave the bars at room temperature (in a cool spot) for a few hours, but they really do hold up best when chilled. Freezing isn’t ideal for meringue, so I don’t recommend it for this recipe.
Tips for Making the Best Lemon Meringue Bars
- Before whipping up the meringue, wipe down your tools with lemon juice or vinegar to make sure they’re grease-free. Traces of grease in the mixing bowl can prevent the meringue from forming stiff peaks!
- Separate the eggs when they’re cold! It makes it way easier, and they’ll be heated before being whipped, so there’s no need to bring them to room temperature.
- Heat the egg white/sugar mixture to 160°F/71°C and check to make sure all the sugar is dissolved before removing it from the double boiler.
- Use fresh lemons!! Bottled juice won’t give you that vibrant, tart flavor. Fresh lemon juice and zest make all the difference.
- Let the curd cool before topping. Spreading meringue onto hot filling can make it melt or separate. Let the base cool to room temperature first!
- Whip the meringue to stiff peaks. For a fluffy, stable meringue that holds its shape, whip those egg whites until they form glossy, stiff peaks.
- Spread meringue all the way to the edges to seal it to the crust and prevent it from shrinking or weeping as it cools.
- Torch or broil gently! Just a light browning is all you need for that classic toasted meringue look. Keep a close eye if you’re broiling—it can go from golden to burnt fast!
- Don’t overbake the curd. The filling should be just set with a slight jiggle. Overbaking can cause it to crack or become rubbery.
- Avoid making meringue on humid days! Meringue doesn’t love moisture in the air and can turn sticky or collapse if the weather’s too damp.
- Serve within a day or two. These bars are at their best within 24–48 hours. The crust stays crisp, the curd is silky, and the meringue stays light and fluffy.
Nutrition
Other Recipes You Might Like:


Came out perfectly and they taste amazing!
YAY!! So happy to hear that Grace, thank you so much for sharing!!!! 🙂