
Red Velvet Cupcakes with Buttermilk
When I shared my favorite red velvet cake recipe, it led to lots of questions about red velvet cupcakes. After a bit of recipe testing, I’m finally happy with this recipe for red velvet cupcakes with buttermilk.
I made a few tweaks to this recipe in July 2022, which included adding a bit more cocoa powder, swapping out the AP flour for cake flour, and decreasing the amount of oil.
The end result? An incredibly soft, tender cupcake that’s full of red velvet flavor!!

The Secret Ingredient: Buttermilk
Anyone who has made my cake recipes before knows I am obsessed with buttermilk.
I love baking with it and use it in most of my recipes! It makes such tender cake layers and adds so much moisture! It also gives my baked goods a delicious tang.
While I love using it in other recipes, I think it absolutely essential in any red velvet recipe.
It’s a quintessential part of the classic red velvet taste we know and love. That’s why I named this recipe red velvet cupcakes with buttermilk!!
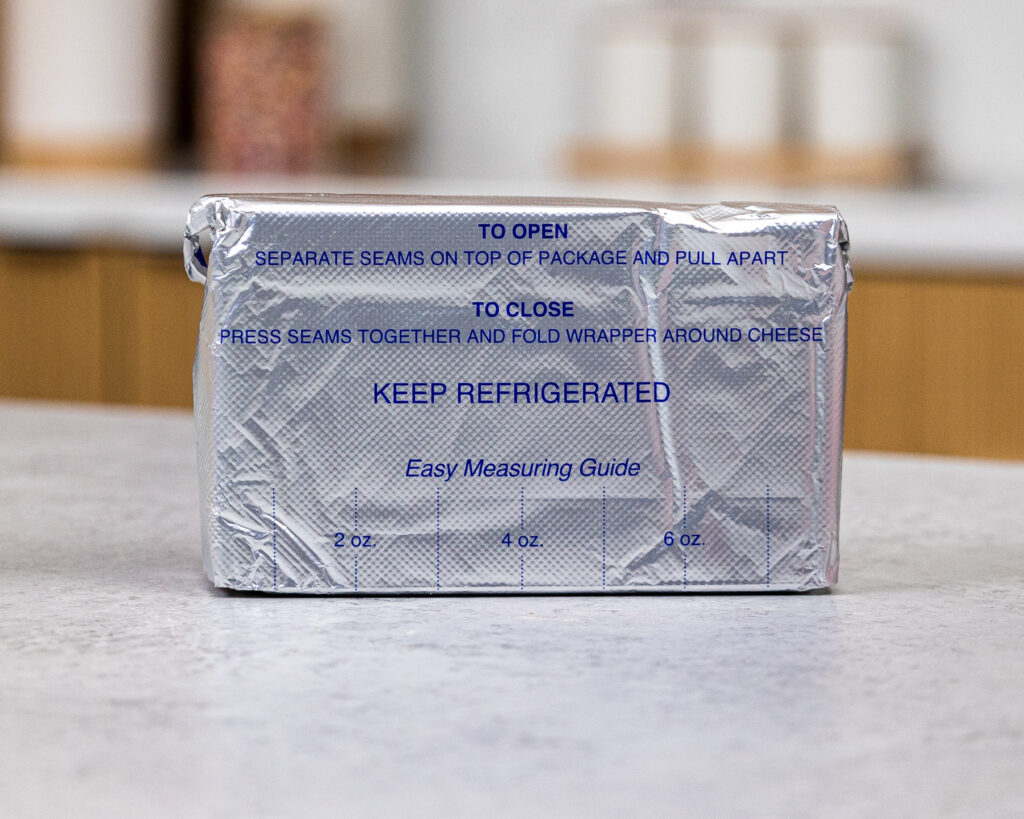
While buttermilk can be found in most grocery stores, some parts of the country or foreign countries don’t sell it. If you’re having a hard time getting your hands on buttermilk, don’t worry.
You can make your own buttermilk! Add 1 1/2 tsp of white vinegar or lemon juice into a 1/2 cup measure, then top it off with enough whole milk to fill the cup measure.
Let’s Make These Red Velvet Cupcakes Together!
Let’s walk through each step of this red velvet cupcake recipe with buttermilk to make sure it turns out as amazing as possible!
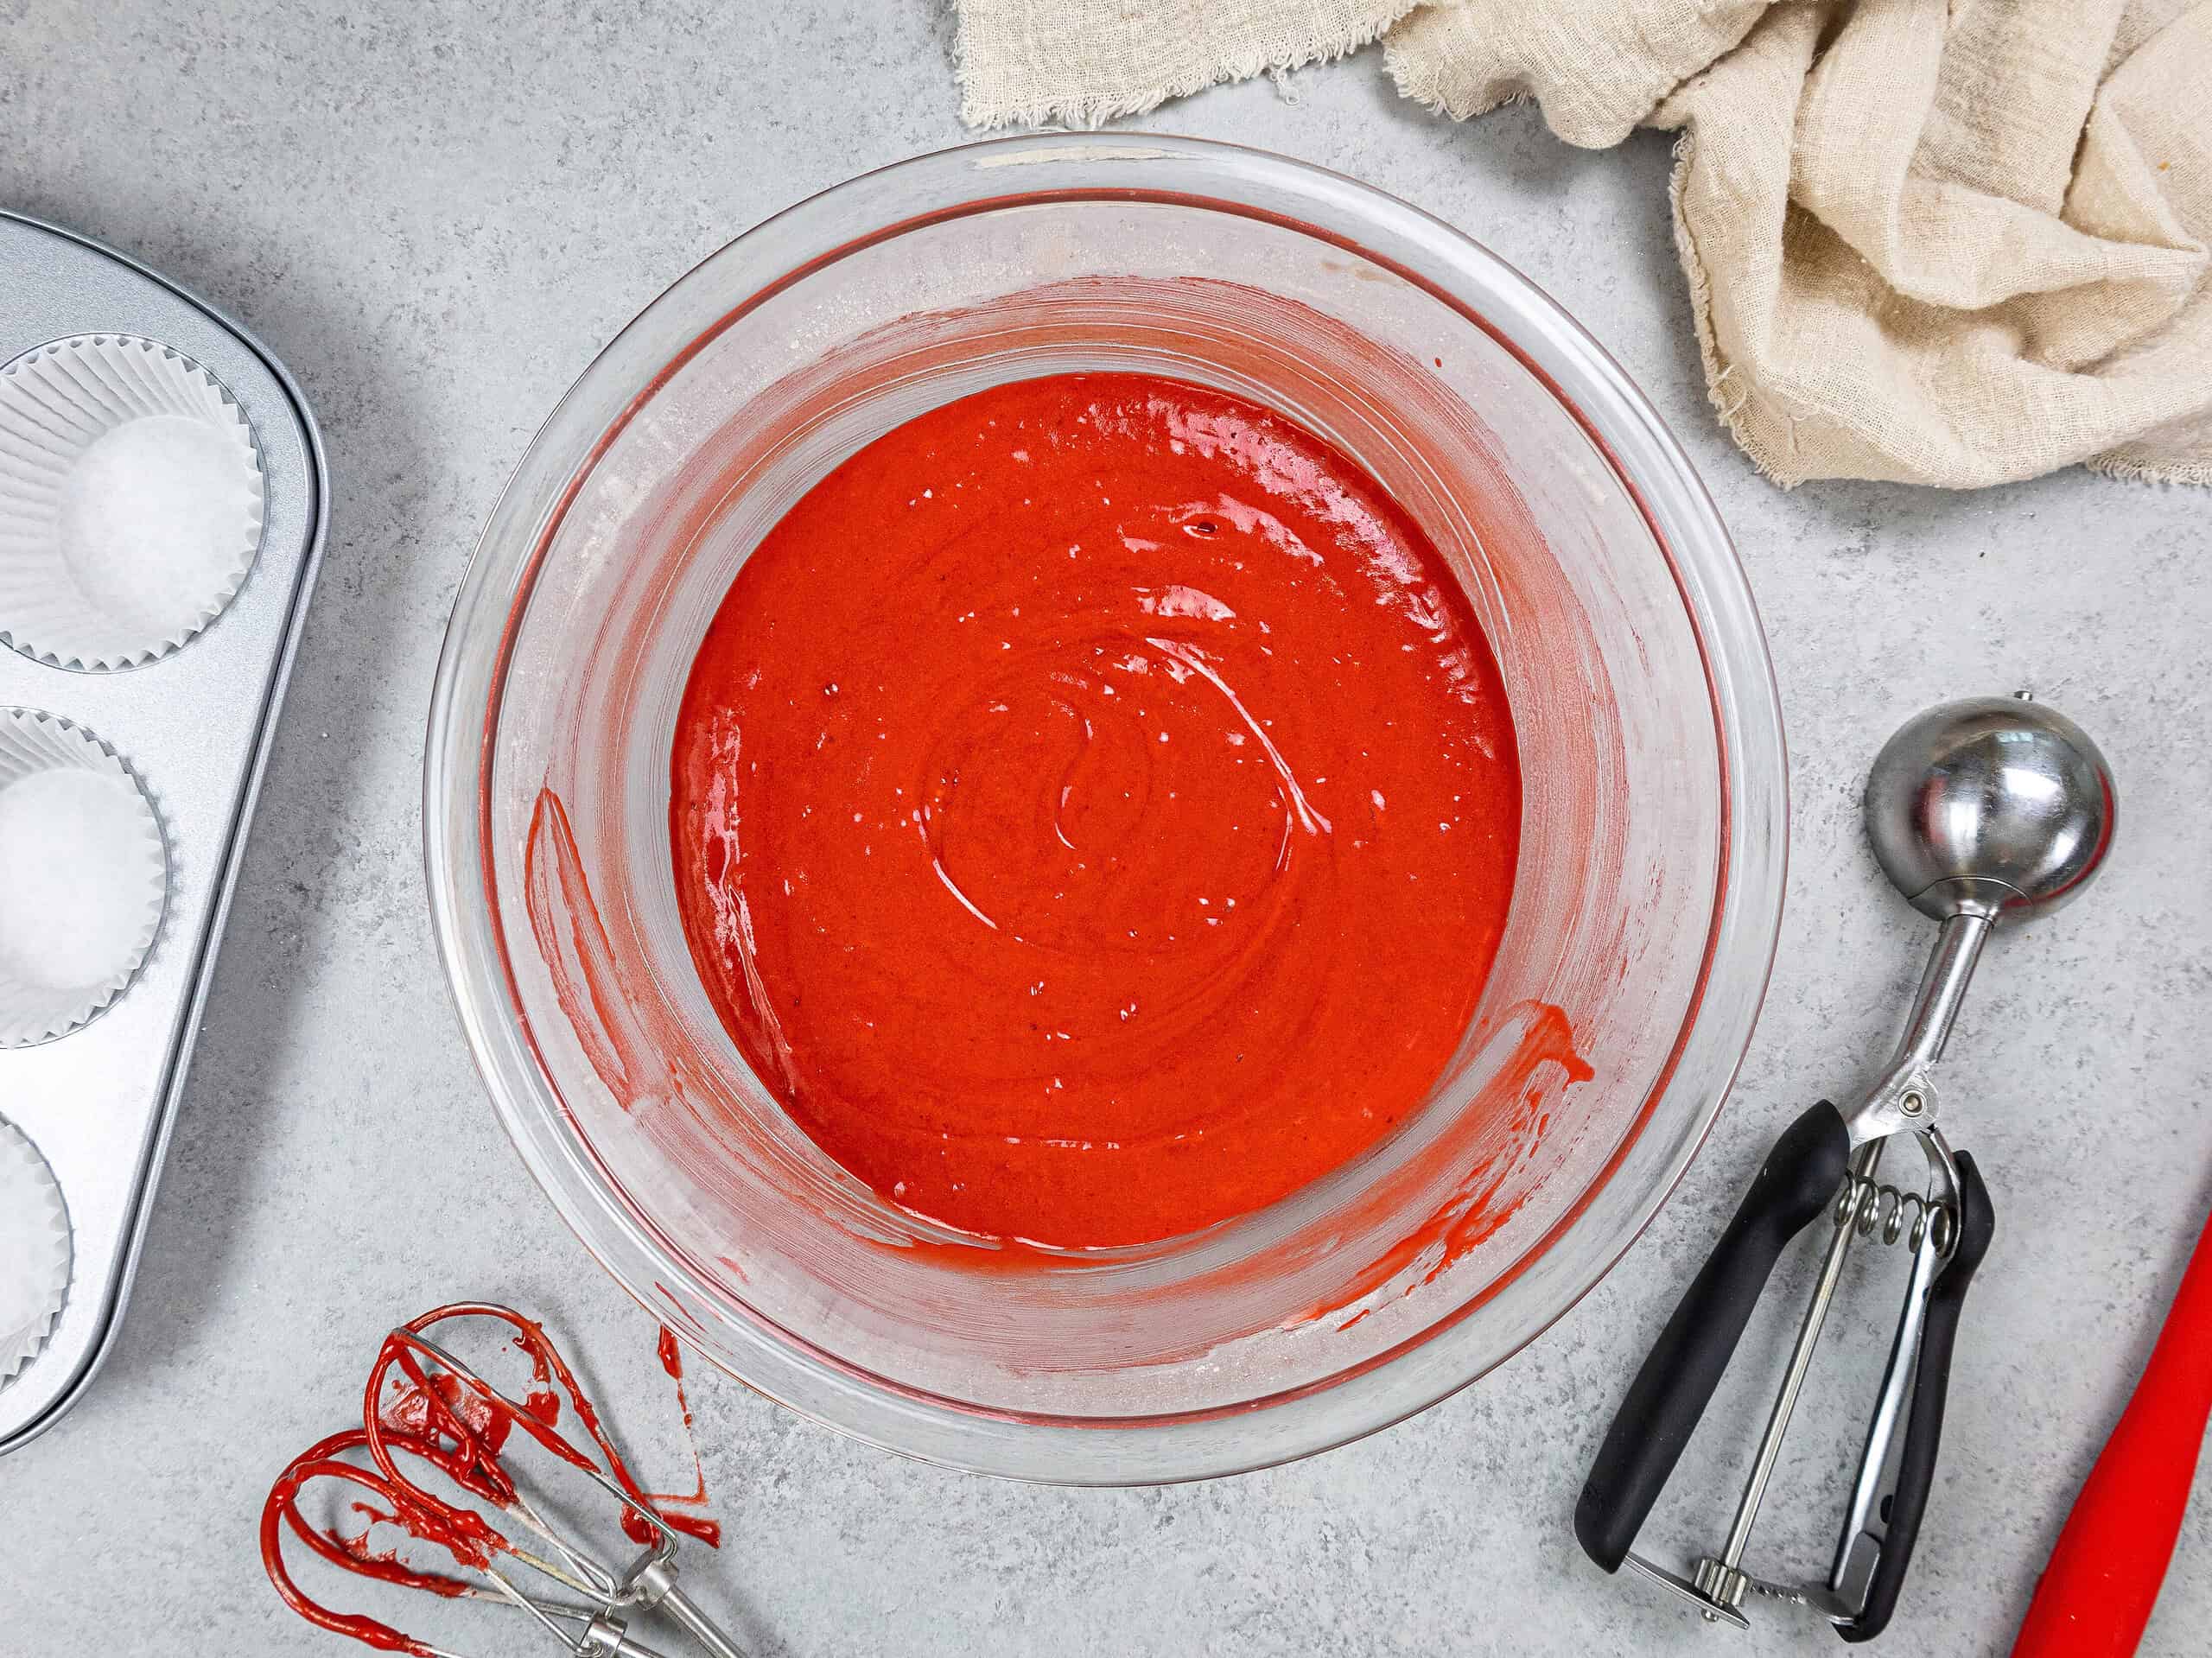
Step 1: Make the Red Velvet Cupcake Batter
Begin by preheating the oven to 350°F/175°C and lining a muffin pan with 12 cupcake liners.
This recipe can be made with either a stand mixer and a whisk attachment or a hand mixer.
Combine the ingredients following the recipe card below.
Make sure that you properly cream together the butter and sugar. This will help the cupcakes bake up fluffy and tender.
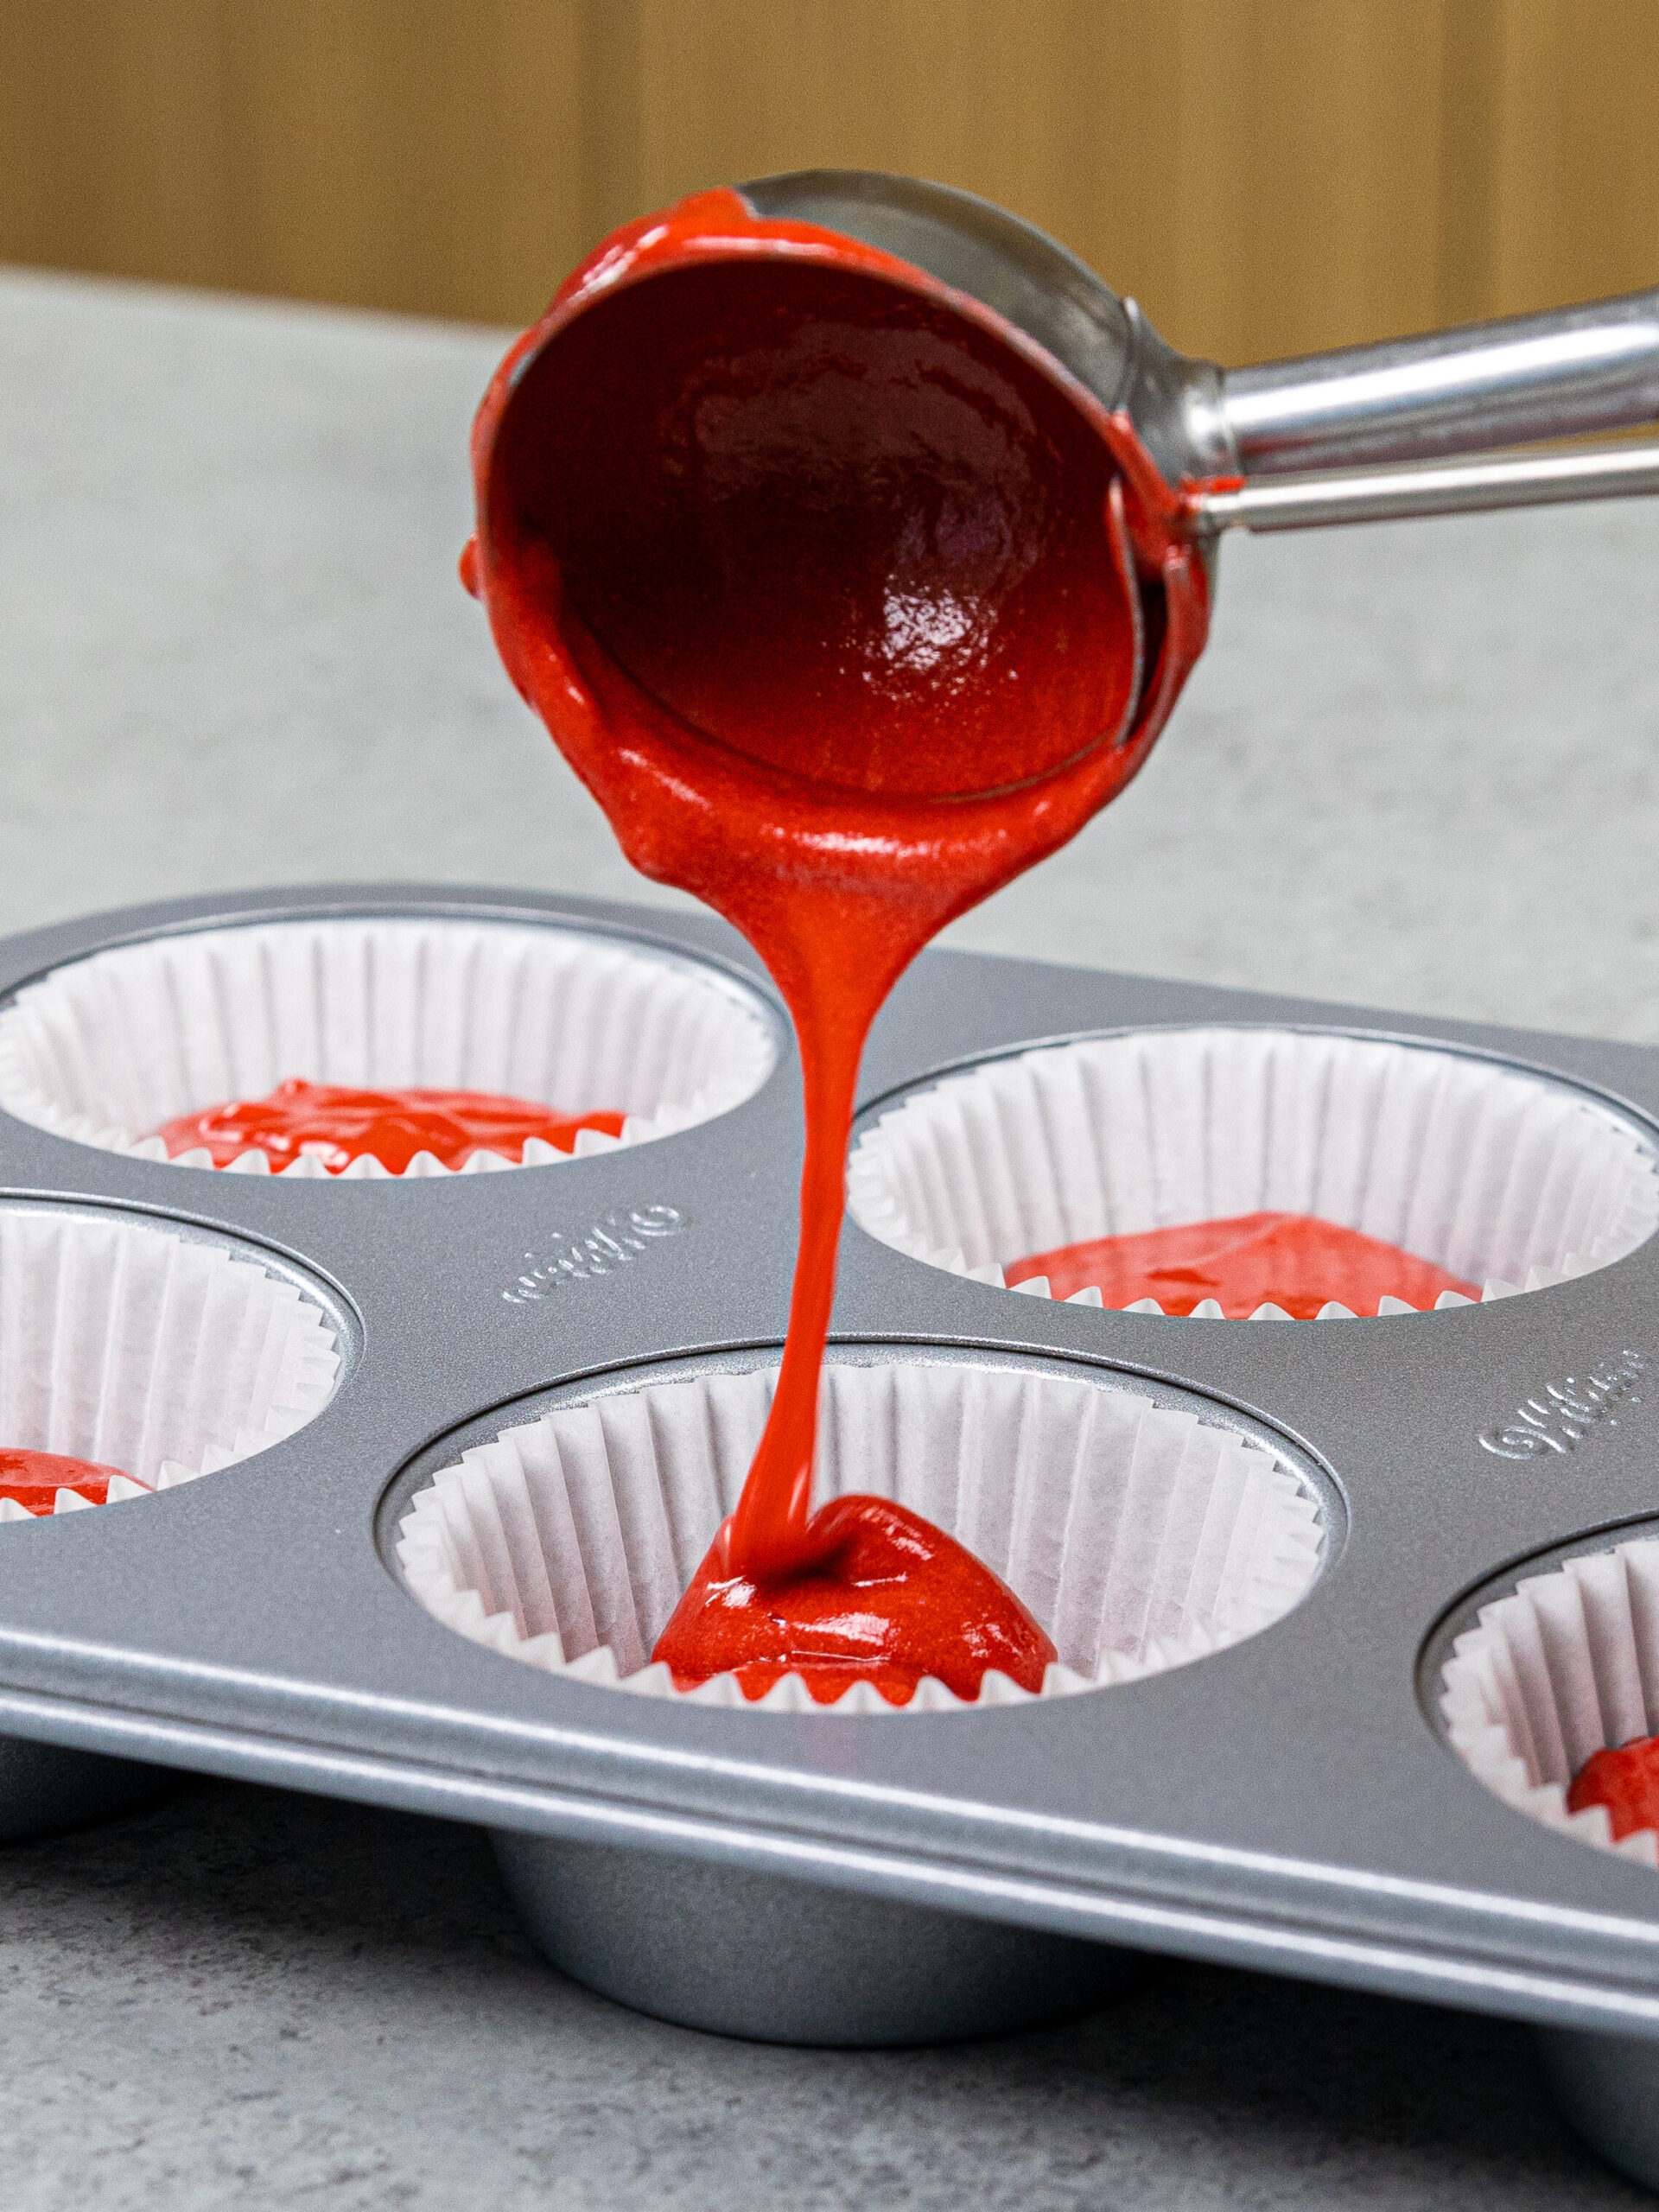
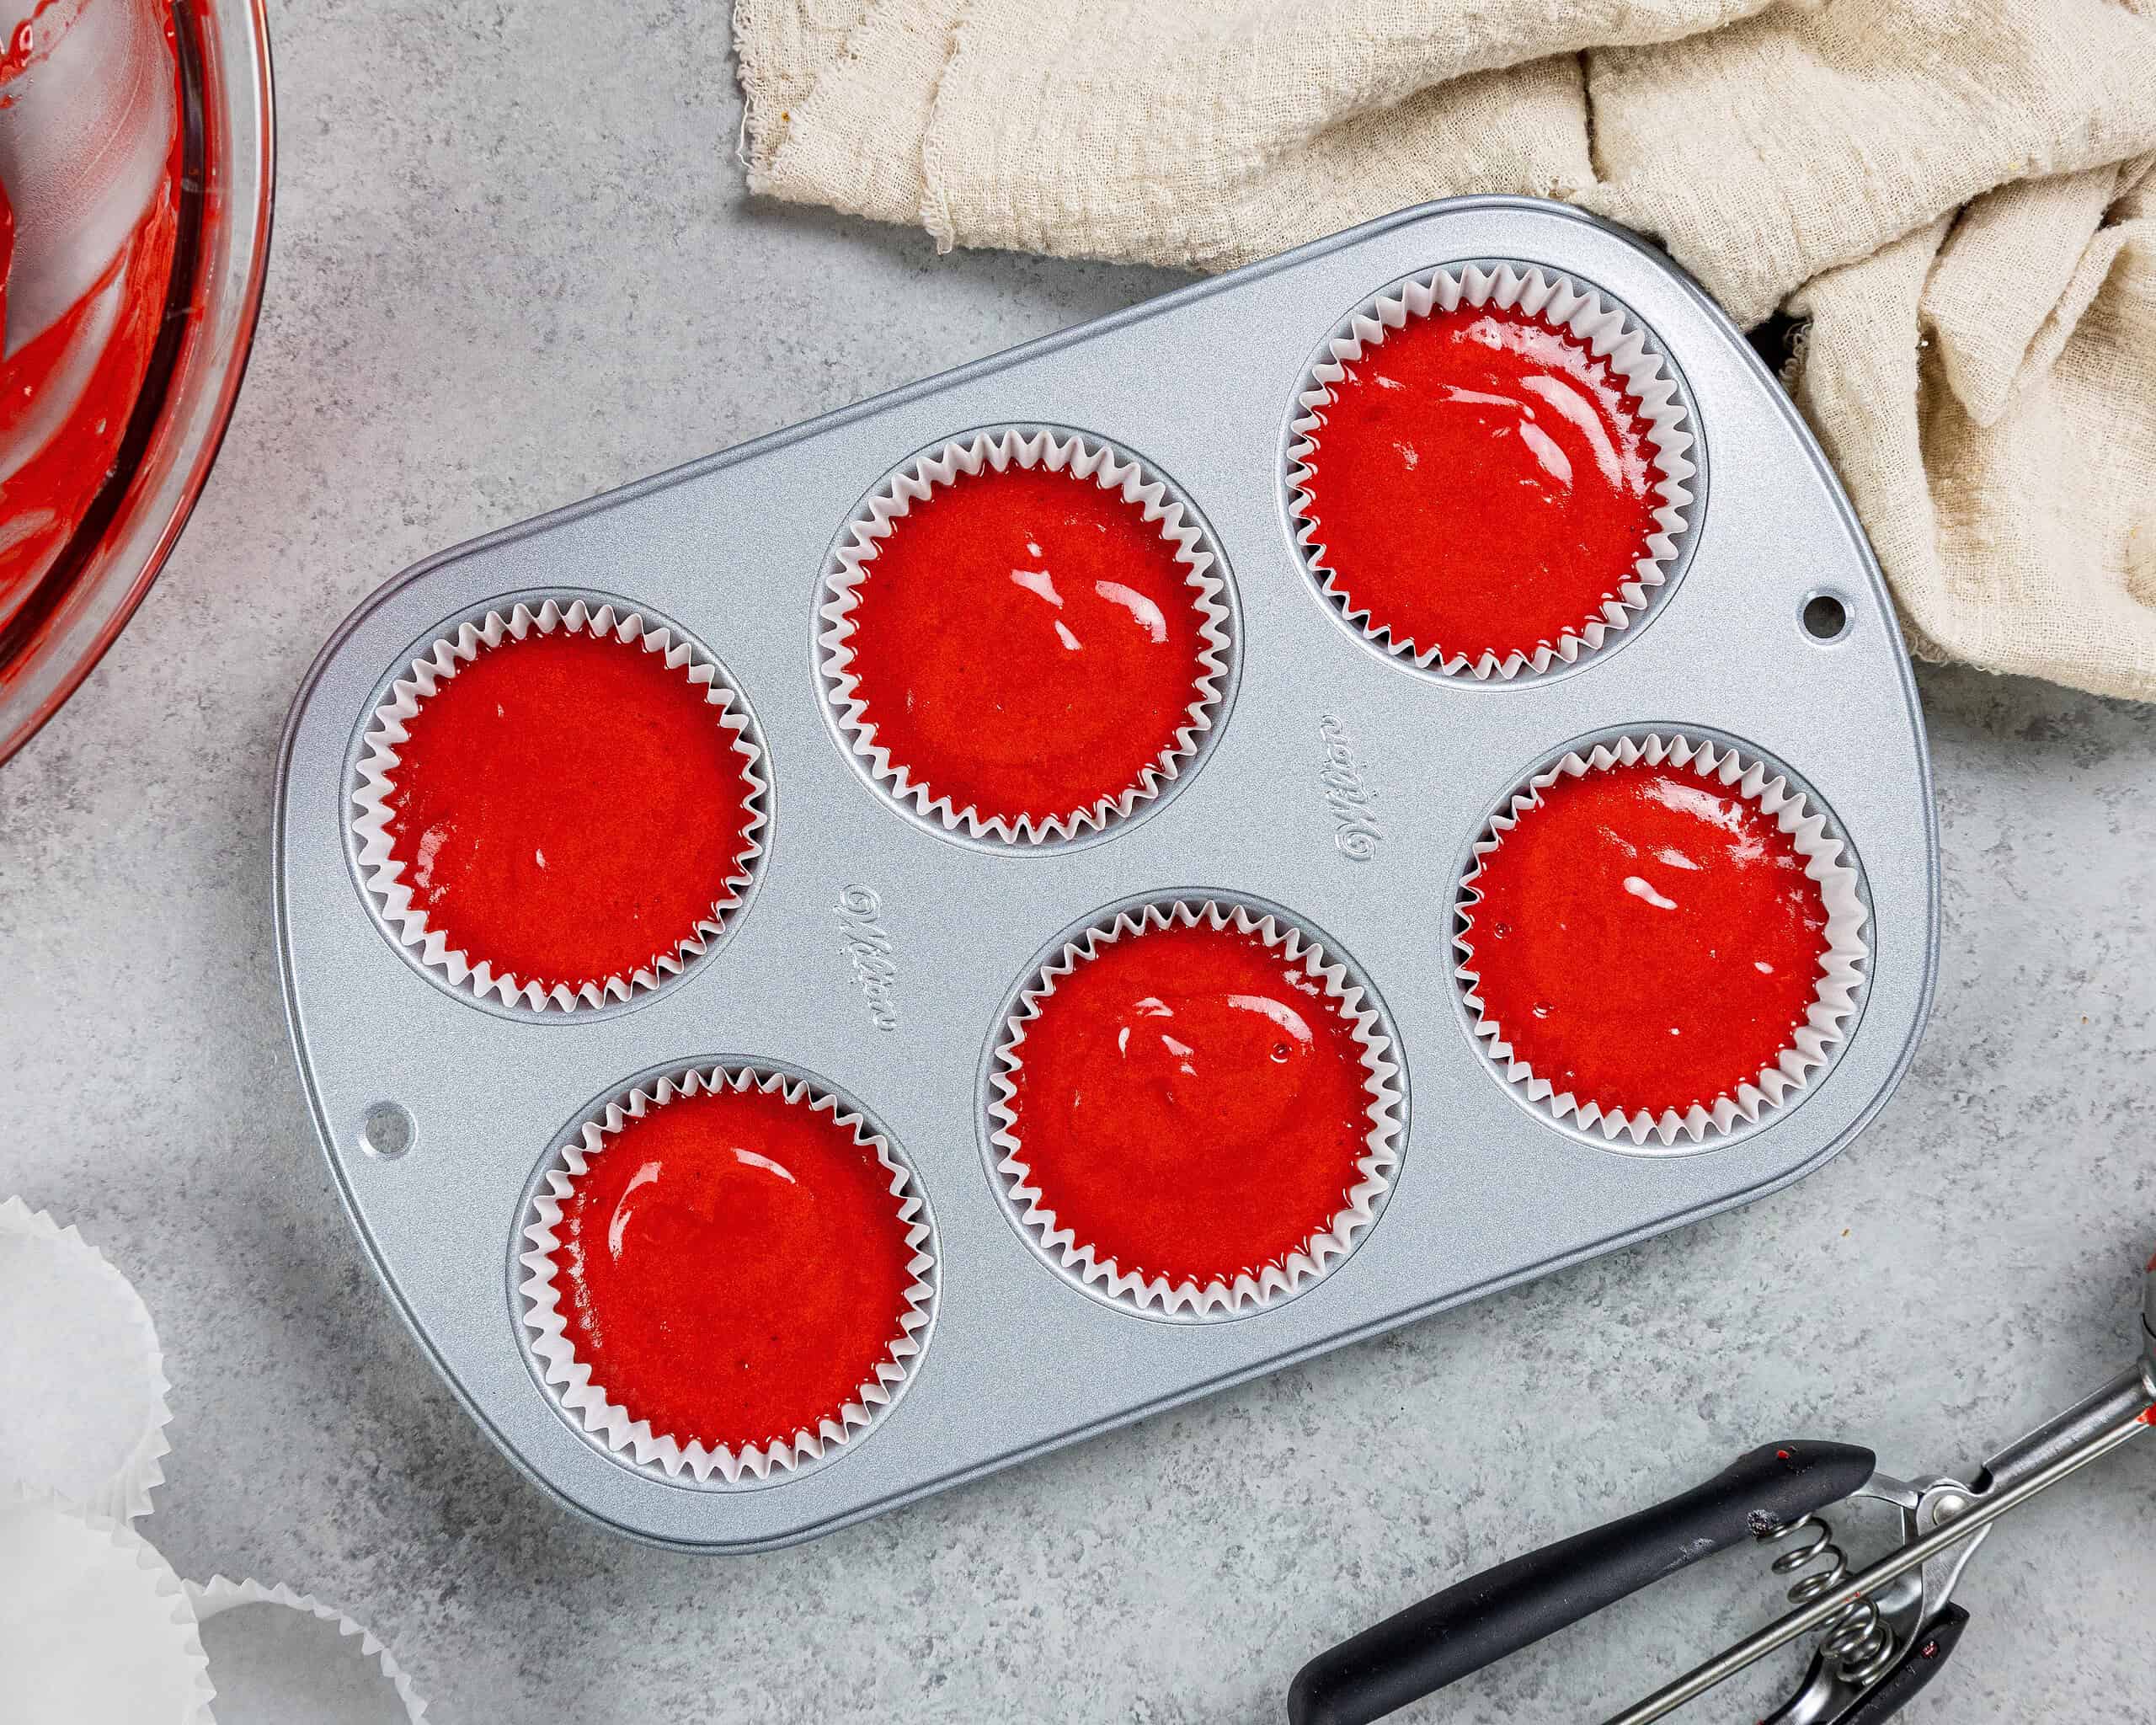
Step 2: Bake the Red Velvet Cupcakes
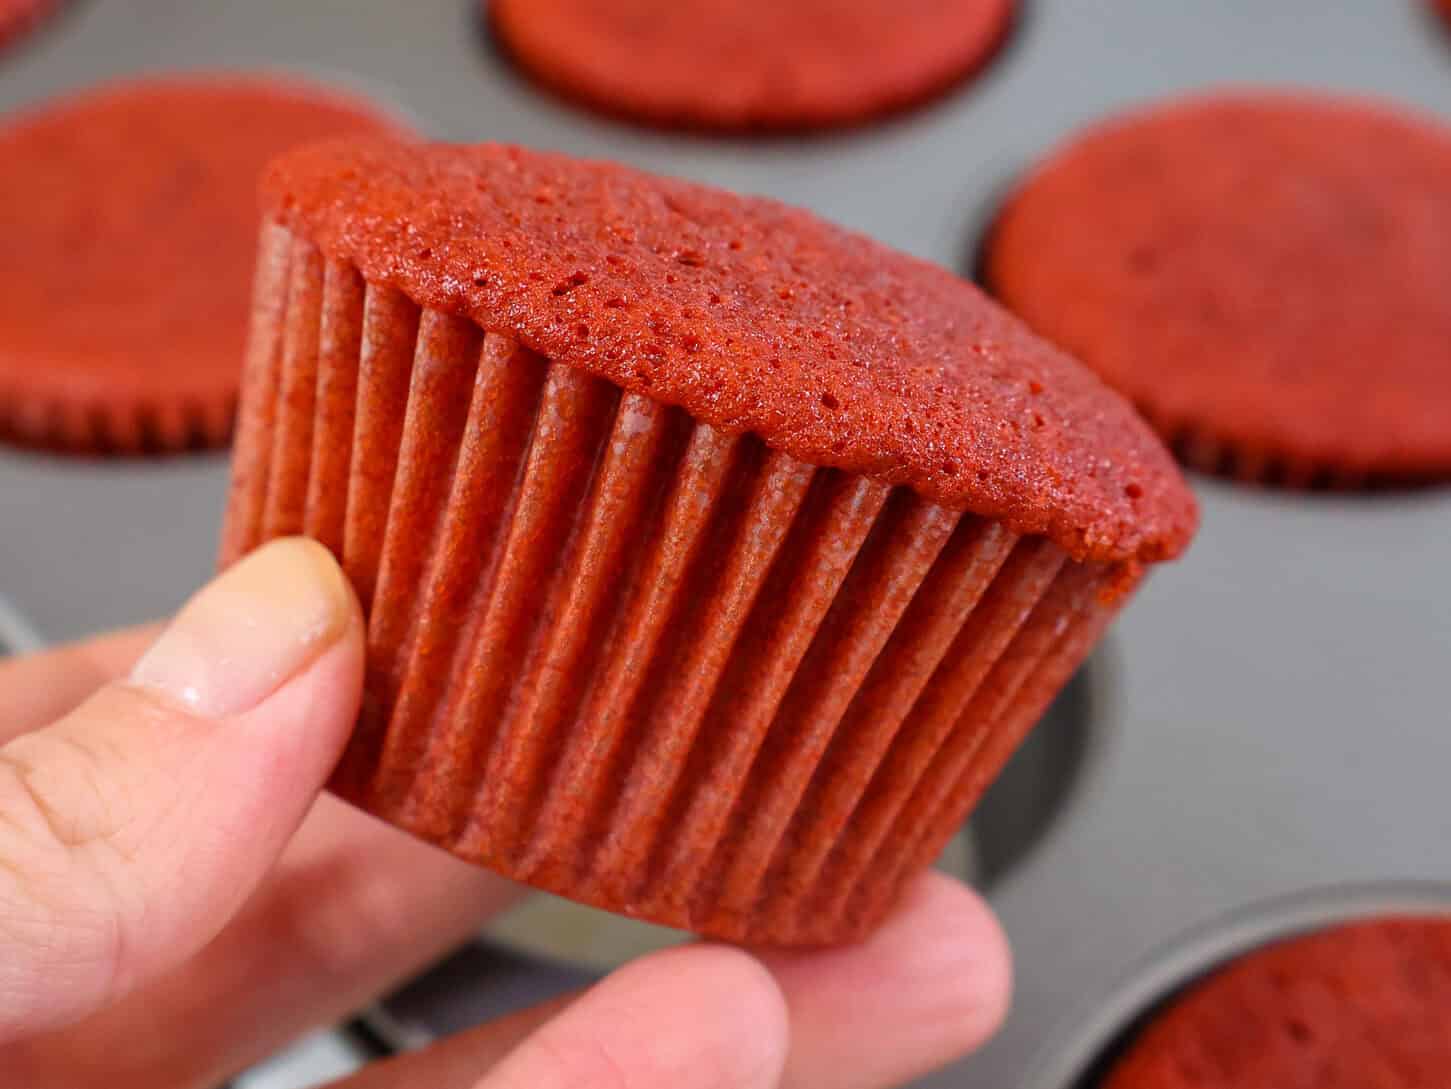
Fill 12 cupcake liners 2/3 full and bake for 16-19 minutes or until a toothpick comes out with a few moist crumbs. Remove from the oven.
Let the cupcakes cool in the pan for 10 minutes, then remove and place on a wire rack to finish cooling.
If you’re in a rush, place the entire pan in the freezer for 15 minutes to accelerate the cooling process
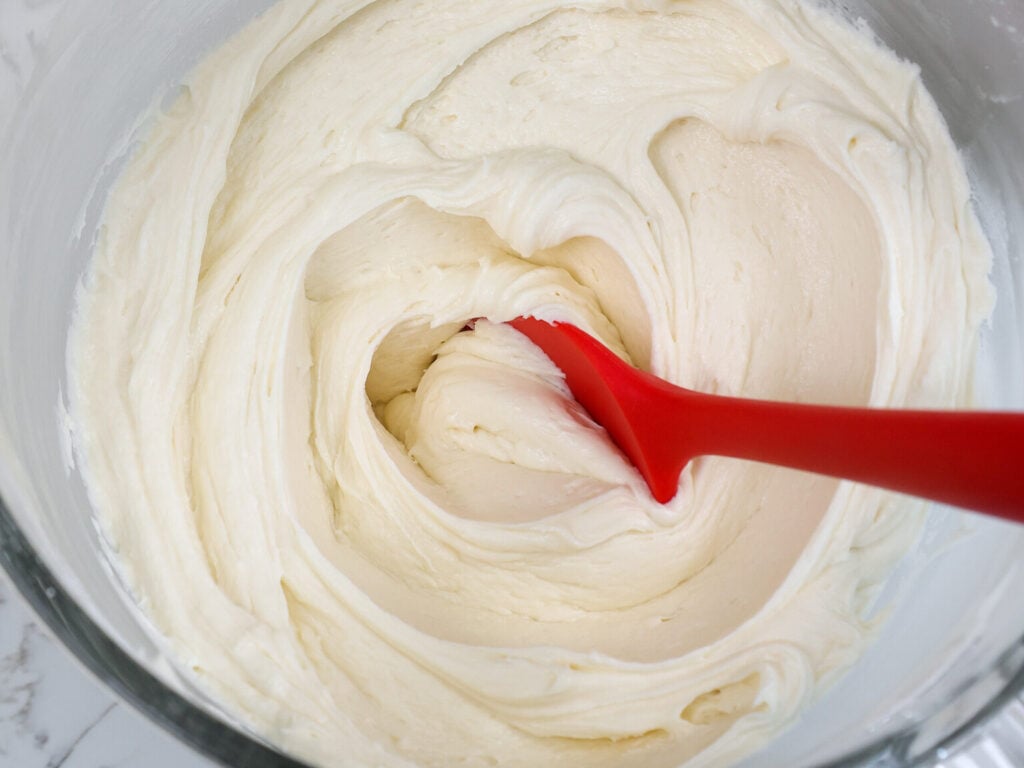
Step 3: Make the Cream Cheese Buttercream
While the cupcakes bake and cool, make the cream cheese buttercream frosting.
This red velvet cupcake recipe would taste great with just about any frosting, but I wanted to stick with the classic combination of red velvet and cream cheese frosting.
My cream cheese buttercream is a dream to frost with. It’s thick, has great structure, and pipes like a dream.
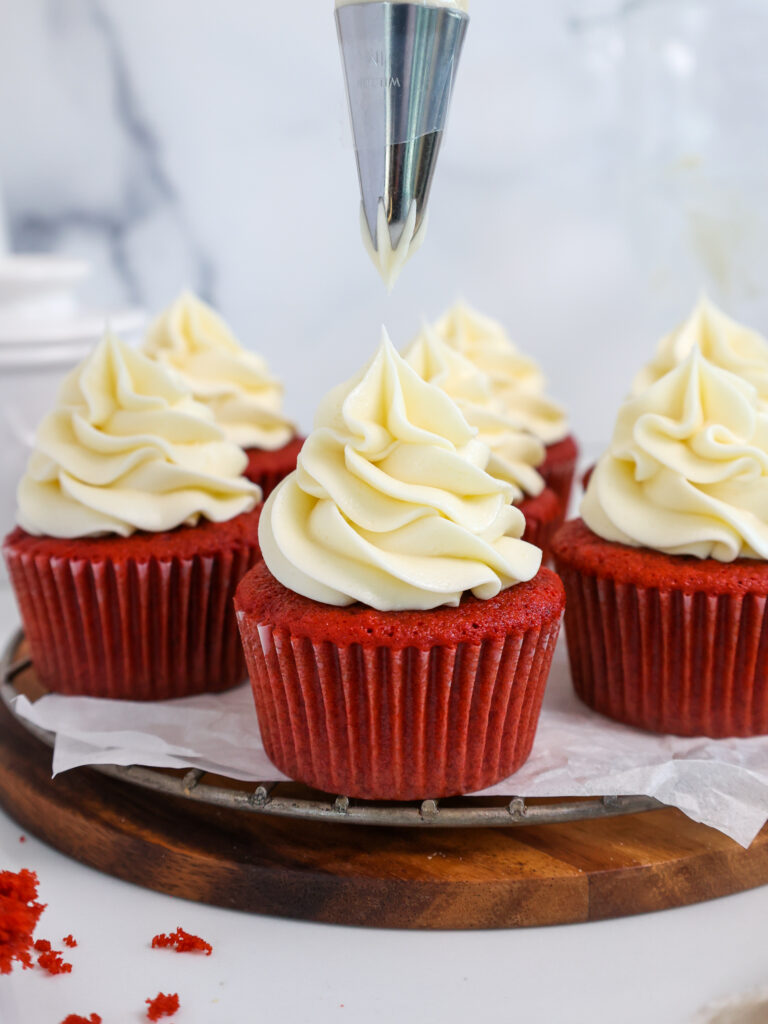
I love frosting cupcakes with it because it’s stiff enough to pipe a big, beautiful swirl on top of a cupcake. And that is exactly what I did for these red velvet cupcakes with buttermilk!
If the frosting seems too thick, add an extra Tbsp of heavy cream. If it seems too thin, add another 1/4 cup of powdered sugar.
Once the frosting is made, stir it by hand with a rubber spatula to get the frosting SUPER smooth.
Then place the buttercream in a piping bag fitted with your favorite piping tip and seal the top with a rubber band or clip.
Step 4: Frost the Cooled, Red Velvet Cupcakes
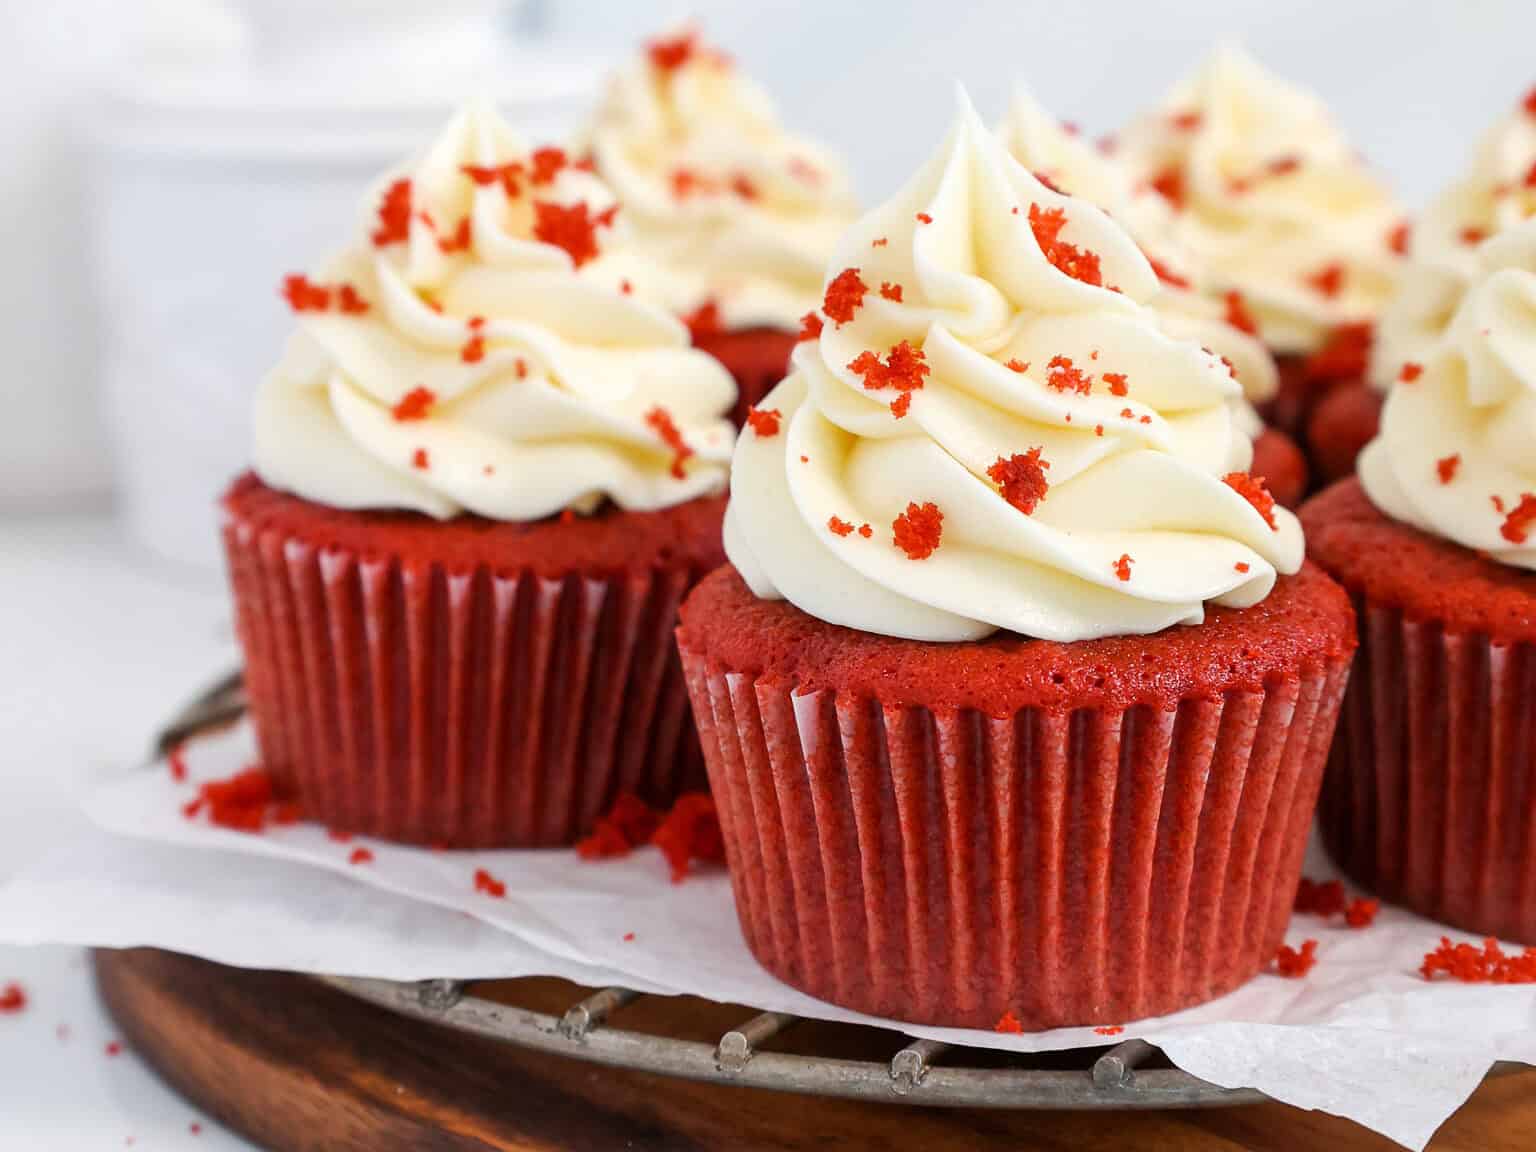
The final step is to pipe on a frosting swirl! I used an open star frosting tip (like a Wilton 1M) to pipe these massive swirls of cream cheese frosting.
However, when I was done, I felt like they needed a little something else. I ended up crumbling one cupcake with a fork to create some red velvet crumbs.
I sprinkled these over the top of my frosted cupcakes, almost like sprinkles. The crumbs add a great pop of color.
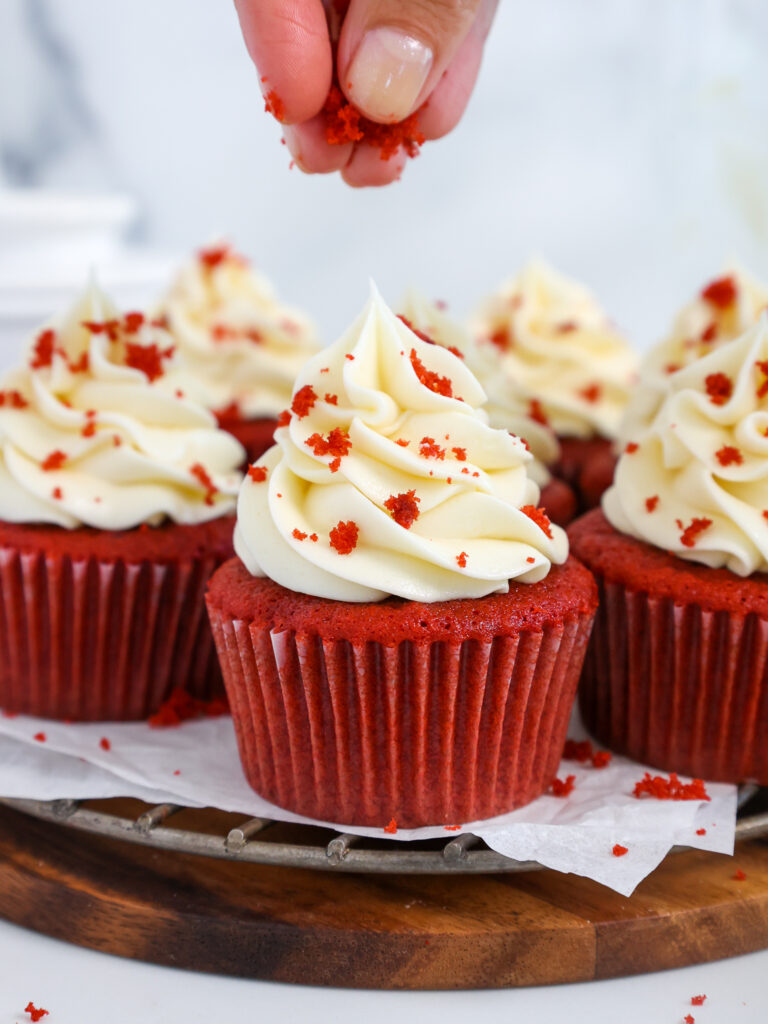
This decoration is super easy and gives the cupcakes such a classic look.
If you don’t have any frosting tips or piping bags, you can also use a Freezer ziplock bag and trim the corner to have a 2 cm opening.
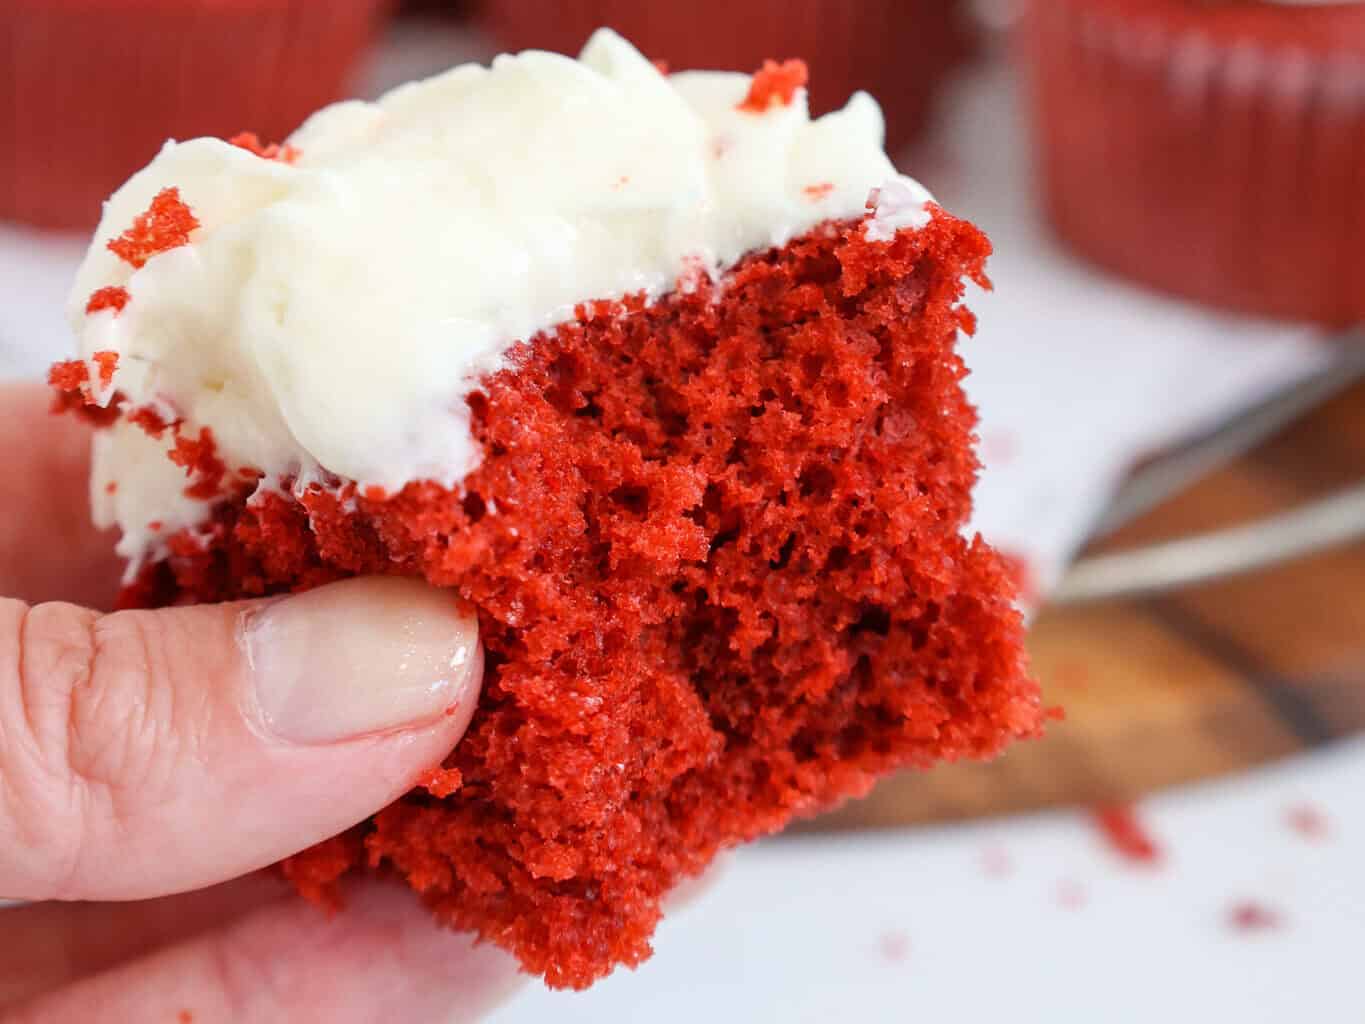
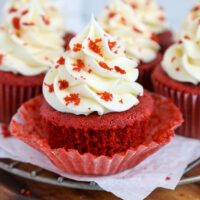
No matter how you decorate them, they’re going to be incredibly moist and delicious. I mean, just look at that crumb!!
Red Food Coloring
When you make anything red velvet, you expect it to have that gorgeous, deep red color. I’ve found that it’s a lot easier to achieve that using gel food coloring.
I prefer Americolor, but any gel food coloring will work! If you don’t have gel food coloring on hand, you can also use liquid food coloring.
I’ve found that you need to use about half a bottle of liquid food coloring (1 Tbsp) to get that deep red color, so be sure you have enough on hand if you go this route.
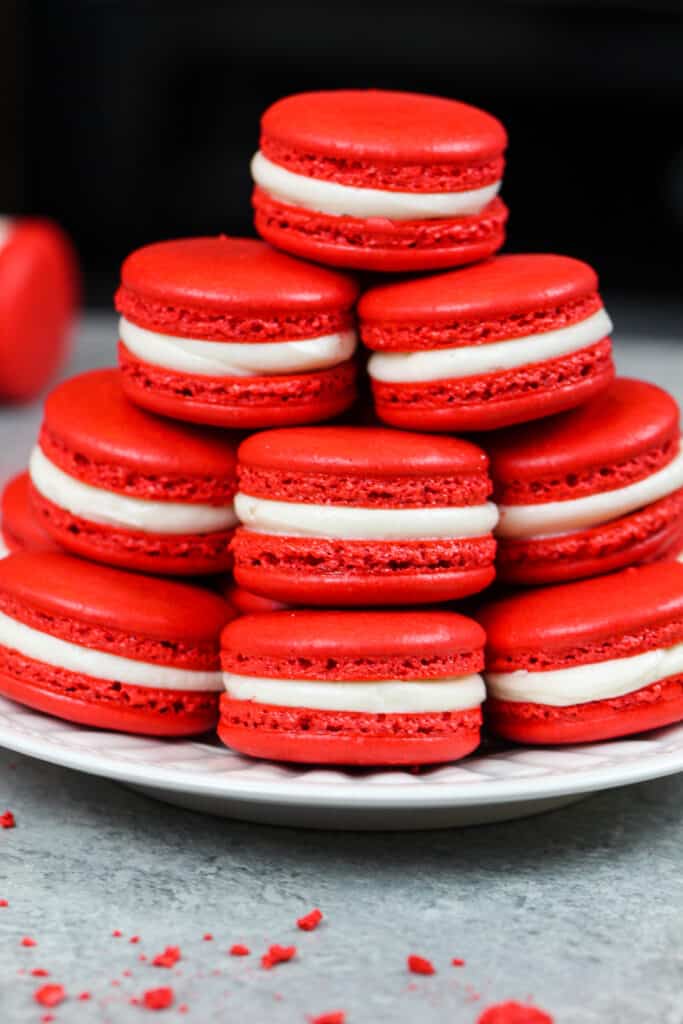
Any Color Velvet Cupcakes
While we’re on the topic of color, these cupcakes aren’t limited to just being red. Baking for a baby shower? Make pink velvet or blue velvet!
Or maybe your favorite color is purple (like me)? Purple velvet cupcakes it is!!
This cupcake recipe can be made in any color; just be sure you have that shade of food coloring on hand.
I used this recipe to make both red and green velvet cupcakes for my Grinch cupcakes, and they turned out perfectly.
Don’t be afraid to get creative and taste the rainbow!!
Substitutions and Swaps – Red Velvet Cupcakes
This recipe uses quite a few ingredients, and I know you might not have them all on hand.
Or if you have food allergies or restrictions, I’ve got you covered. Below are some swaps and substitutions that you can make.
- Cake Flour – This recipe turns out best with cake flour. If you can’t find any, use this trick to make your own. You can use a gluten-free flour blend if needed.
- Unsweetened Cocoa Powder – I use natural unsweetened cocoa powder like this. I don’t recommend using Dutch-processed or dark cocoa powder in this recipe. It’ll throw off the color of the cupcakes.
- Unsalted Butter – If you only have salted butter on hand, you can use it in place of the unsalted butter. Just be sure to omit the salt that this cupcake recipe calls for. You can also use vegan butter in its place.
- Granulated Sugar – I do not recommend reducing the amount of sugar or changing the type of sugar, as it will change the texture of these cupcakes.
- Large Egg – If you have an egg allergy, try using a flaxseed egg or a vegan egg replacer like this one made by Bob’s Red Mill.
- Vegetable Oil – You can use any flavorless oil in this recipe. Canola or sunflower oil would work great!
- Vinegar – This recipe needs a bit of white vinegar because it activates the baking soda and helps the cupcakes rise. You can also use apple cider vinegar.
- Red Gel Food Coloring – Red gel food coloring works best in this recipe. It gives the cupcakes a vibrant color without throwing off the consistency of the cupcake batter. Liquid food coloring can be used in its place if needed, and I recommend using 1 Tbsp.
- Buttermilk – If you’re having a hard time getting your hands on buttermilk, you can make your own buttermilk! Add 1 1/2 tsp of white vinegar or lemon juice into a 1/2 cup measure, then top it off with enough whole milk to fill the cup measure.

Substitutions and Swaps – Cream Cheese Buttercream Frosting
- Unsalted Butter – If you only have salted butter on hand, you can use it in place of the unsalted butter. Just be sure to omit the salt that this frosting recipe calls for. You can also use vegan butter in its place!
- Cream Cheese – This frosting turns out best using full-fat cream cheese that comes in a brick. However, low-fat cream cheese or Neufchatel cheese can be used too.
- Heavy Cream – Whipping cream, coconut cream, or alternative milk (soy, almond, oat, coconut) will work fine in this frosting recipe if that’s what you have on hand.
Making These Red Velvet Cupcakes in Advance & Storage Tips
You can make these cupcakes in advance! Unfrosted cupcakes can sit at room temperature overnight or be stored in the fridge for up to 5 days in an airtight container.
They can also last up to a month in the freezer. If you plan to freeze them, I suggest waiting to frost them until they’re thawed.
Make your frosting ahead of time, too, or save any leftover frosting! It can be stored in an airtight container in the fridge for up to 2 weeks, or in the freezer for up to a month.
Be sure to give the frosting a good stir once it thaws to get the consistency nice and smooth again.
Frosted cupcakes can sit out at room temperature for up to 3 hours or be stored in the fridge for up to 3 days in an airtight container. However, I find frosting them right before serving is best.
Tips for Making the Best Red Velvet Cupcakes with Buttermilk:
- Ingredients at room temperature mix together better. Set out any cold ingredients ahead of time.
- Properly measure your flour (spoon into the cup measure and then level) or use a kitchen scale to measure your dry ingredients.
- Once you add the cake flour, mix your cupcake batter just until the ingredients are incorporated. This will ensure your cupcakes are tender and fluffy.
- Use a cookie scoop to easily fill your cupcake liners. It also makes sure your cupcakes end up being the same height.
- Bang your cupcake pan on the counter before putting it in the oven. This brings any air bubbles that are trapped in the batter to the surface.
- Seal off the top of your piping bag with a rubber band to prevent any frosting from seeping out the top of the bag and make the piping bags easier to use.
Let Me Know What You Think!
If you try these red velvet cupcakes with buttermilk, I’d love to hear what you think of them! Please leave a rating and let me know your thoughts in the comments section.
Don’t forget to tag me @chelsweets and use #chelsweets on social media so I can see your delicious creations!
Red Velvet Cupcakes
Ingredients
Red Velvet Cupcakes
- 1 cup cake flour 120g
- 1 Tbsp unsweetened cocoa powder, sifted 6g
- 1/2 tsp baking soda 3g
- 1/4 tsp fine salt 2g
- 3 Tbsp unsalted butter, room temperature 38g
- 3/4 cup granulated sugar 150g
- 1 large egg, room temperature 56g
- 3 Tbsp vegetable or canola oil 42g
- 1 tsp vanilla extract or vanilla bean paste 4g
- 1/2 tsp white vinegar 2g
- 1 squirt of red gel food coloring or 1 1/2 tsp liquid food coloring
- 1/2 cup buttermilk, room temperature 120g
Cream Cheese Buttercream Frosting
- 1/2 cup + 5 Tbsp unsalted butter, room temperature 180g
- 1/4 cup full-fat cream cheese, room temperature 56g
- 1 tsp vanilla extract or vanilla bean paste 4g
- 1/2 tsp fine salt 3g
- 3 cups powdered sugar 375g
- 1 Tbsp heavy whipping cream, room temperature 15g
Additional Tools
- Piping bag
- Wilton 1M frosting tip
Instructions
Red Velvet Cupcakes:
- Preheat the oven to 350°F / 175°C and line a standard-sized muffin tin with 12 cupcake liners.
- In a large mixing bowl, sift 1 cup of cake flour, 1 Tbsp cocoa powder, 1/2 tsp baking soda, and 1/4 tsp salt. Set aside.
- Cream 3 Tbsp butter and 3/4 cup sugar together on medium speed for 2-3 minutes in the bowl of a stand mixer and whisk attachment or in a large bowl with a hand mixer.
- Mix in 1 large egg and mix on a medium speed until fully combined. Scrape the sides and bottom of the bowl as needed with a rubber spatula.
- Next, mix in 3 Tbsp oil, 1 tsp vanilla extract, 1/2 tsp vinegar, and a generous squirt of red gel food coloring on a medium-low speed.
- Add half of the dry ingredients and mix on low until just combined, then mix in 1/2 cup of buttermilk. Mix in the last half of the dry ingredients on a low speed, taking care not to over-mix the batter. Scrape the sides and bottom of the bowl as needed with a rubber spatula.
- Divide the batter evenly between 12 cupcake liners and bake for about 16-19 minutes, or until a toothpick comes out with a few moist crumbs. Rotate the pan halfway through to help the cupcakes bake evenly.
- Remove the cupcake pan from the oven and let them cool in the pan for 10 minutes.
- Carefully remove the cupcakes from the pan and place them on a wire rack to finish cooling.
Cream Cheese Buttercream Frosting:
- Beat 3/4 cup butter and 1/4 cup cream cheese on a medium speed for 30 seconds with a paddle attachment or hand mixer until smooth.
- Add 1 tsp vanilla extract and 1/2 tsp salt. Beat on a medium speed until the ingredients are fully incorporated.
- Mix in 3 cups of powdered sugar and 1 Tbsp of heavy cream on a low speed.
- If the frosting is too thick, add cream (1 tablespoon at a time). If the frosting is too thin, add in more powdered sugar (1/4 cup at a time).
- Place frosting in a piping bag fitted with an open star piping tip (like a Wilton 1M) frosting tip. Seal the top of the bag with a rubber band or clip and set aside.
Red Velvet Cupcake Decoration:
- Once the cupcakes are fully cooled, remove one cupcake from its liner and use a fork to crumble it into tiny pieces in a small bowl. If you don't want to crumble an entire cupcake, trim the tops off of a few cupcakes and crumble. Set aside.
- Pipe large swirls of buttercream frosting on top of each cupcake.
- Sprinkle the red velvet cupcake crumbs on top of the frosting and enjoy!
Video
Notes
Making Mini Red Velvet Cupcakes
If you want to make mini red velvet cupcakes, this recipe can be baked in mini muffin tins! It makes about 36 mini cupcakes, and they only need to bake for 10-12 minutes at 350 F / 175 C.Tips for Making the Best Red Velvet Cupcakes
- Ingredients at room temp mix together better. Set out any cold ingredients ahead of time.
- Properly measure your flour (spoon into the cup measure and then level) or use a kitchen scale to measure your dry ingredients.
- Once you add the flour, mix your cupcake batter just until the ingredients are incorporated. This will ensure your cupcakes are tender and fluffy.
- Use a large cookie scoop to easily fill your cupcake liners. It also makes sure your cupcakes end up being the same height.
- Bang your cupcake pan on the counter before putting it in the oven. This brings any air bubbles that are trapped in the batter to the surface.
- Seal off the top of your piping bag with a rubber band to prevent any frosting from seeping out the top of the bag and make the piping bags easier to use.
Red Velvet Cupcake Variations
To make gluten free red velvet cupcakes, swap in your favorite gluten free flour blend for the AP flour this recipe calls for and be sure to over-mix your batter and let it sit for at least 30 minutes before baking for best results.Making These Red Velvet Cupcakes in Advance & Storage Tips
Make your cupcakes in advance! If stored unfrosted in an airtight container, they can sit overnight at room temp, up to a week in the fridge, or up to 3 months in the freezer. Make your frosting ahead of time too or save any leftover frosting! It can be stored in an airtight container in the fridge for up to 2 weeks, or in the freezer for up to a month. Be sure to give the frosting a good stir once it thaws to get the consistency nice and smooth again. Frosted cupcakes can sit out at room temperature for up to 3 hours or be stored in the fridge for up to 3 days in an airtight container. However, I find frosting them right before serving is best.Nutrition
Other Recipes You Might Like:


Would you also use this recipe to make mini Bundt cakes?
Hi Katy,
I haven’t tried this specific recipe in a mini bundt pan yet, but I think it should work as long as you grease them well. If you try it, please let me know how it turns out 🙂
Hi Katy!
Your comment made laugh so hard!!! I love your dedication to this! I’m going to make a red velvet bundt cake later this year, but not for another month. I’m already scared of that series of recipe testing 😛
I also just ordered a mini bundt pan, so expect lots more bundt cake recipe this year 🙂
Can you share eggless cakes or cupcakes
I have a great eggless cake recipe (which is also vegan), which can be found here: https://chelsweets.com/2015/05/29/vegan-almond-birthday-cake/
How do I add chocolate chips to the cupcakes without them sinking
Hi Samantha,
I like to use mini chocolate chips, and I toss them in flour to help prevent them from sinking! I gently fold them into the batter at the end, after tossing them in the flour. Hope that helps, happy baking!
Can i.double this recipe?
Hi Keisha,
You can! Just be sure not to overmix the batter! 🙂
How many cupcakes can this recipe make?
This recipe makes about 12 cupcakes, but can vary based on the cupcake tin and liners you use <3
Could you use this same recipe for cake layers? I’ve made your other red velvet recipe that didn’t call for butter. Also I was wondering your red velvet layer cake recipe says 1 cup of buttermilk but in your video you say a cup and a half I was just curious which one it was. Thanks so much!
Hi Lacey,
My recipe cards are always the most up to date! Sometimes I continue to make tweeks to a recipe, even after I make a video for it. That’s what happened with this recipe.
I usually recommend making my red velvet layer cake recipe instead if you want to make a cake. This recipe was designed to bake great cupcakes, not necessarily layer cakes. You can try it, but I don’t think they’ll bake up as well as my layer cake recipe. Hope that helps, happy baking!
Can you make the frosting with a hand mixer?
Hi Alejandra,
You can definitely make this frosting with a hand mixer! It’ll be a little bit more work, but that should be just fine 🙂 happy baking!
Anyone ever used this recipe for mini cupcakes?
Hi Shannon,
Sadly I haven’t, but hopefully someone else out there has!!
These taste an look great! I made them the day before the dinner but I went ahead and frosted them with the cream cheese buttercream. Do I have to store them in the refrigerator overnight?
Hi Carla,
I would recommend refrigerating them in an airtight container overnight, because the cream cheese can spoil if left out overnight. Hope that helps, happy baking!
Hi!! This looks like an amazing recipe and i cant wait to try it. But i just wanted to know if i can put milk instead of buttermilk or is there anything else i can put instead of buttermilk. Thanks in advance
I used this recipe on yesterday! Amazing results! I’m a self-taught baker as well! Thank you so much for giving back!
Yay!! So happy to hear that Shanomia 🙂
But what would happen if you cut out the vinegar?
Hi Destiny,
You need the vinegar to activate help activate the baking soda, which helps the cupcakes rise properly. Without the acidity from the vinegar, the cupcakes end up being dense and less fluffy. Hope that helps, happy baking!!
I’ve followed the recipe and they keep coming out crunchy on top. I’ve made your funfetti cupcake several times and they are the best. Is it possible to make these with the sour cream? I’m assuming that’s the difference. What else can I try and what do I need to substitute for sour cream?
Hi Samantha,
You can definitely swap out the buttermilk for sour cream, 1:1! My other suggestion would be to try baking them at 325F, and letting them bake a couple minutes longer. Hope one of those helps happy baking!
Can I leave out the heavy whipping cream? I’m in quarantine and I can’t go out and get it. Also, if you see this, I have been following you on TikTok and you always bring me joy. So today I’m finally going to try out a recipe. I’m a self-taught baker and I can’t wait to see how this turns out. Thank you for bringing me all this joy while I’m in quarantine.
Hi Ellie,
You can, but you’ll need something else to help thin out the frosting! You can use regular milk in its place if you have any on hand. Hope that helps!!
And that’s so sweet, I love TikTok!! So happy you’re trying one of my recipe! 🙂
@Ellie, You can use half and half creamer, you can also use powdered creamer with added water. 1:1 ratio
I’m a beginner and I don’t know much. When I was baking my cupcakes they rose up and also broke from the top and I don’t know why. Do you have a tip on how they can bake without breaking them?
Hi Vanessa,
If the tops cracked it most likely means that either your oven temp was too high or you used too much baking soda! That causes them to rise really quickly and crack. I’d suggest measuring your baking soda super carefully next time, and hopefully that will fix it <3
Can I use dutch cocoa instead of regular cocoa? What difference does it make? 🙂
Hi Michelle,
You can use dutch cocoa instead of regular cocoa! This recipe should still taste great, it won’t materially change the texture or taste 🙂
I just made these cupcakes and they came out perfectly! Super excited to try out your other recipes!! ?
So happy to hear that Simone 🙂 Thank you for sharing!!
Thanks soooo much for this recipe! It’s definitely a keeper! Next time, I’ll take them out a little earlier to avoid crispy edges… Other than that – THIS RECIPE IS AWESOME!
Thank you so much for sharing this recipe!! It is delicious! Unfortunately, my cupcakes came out completely deflated!!! Any tips on how to avoid this problem???
I made these just the other week and they were a huge hit! Turned out beautifully! Now I’m doing them again and the middles have sunken in and are completly undercooked. I cooked a few different batches so some did that and others look fine. Did I miss the baking soda?
Made these this week as i was craving something sweet and i loved them. I hate creaming method as i dnt have a mixer. This is super easy to make and my little ones even helped.
These were heavenly!! I made them gluten free and my family and friends raved over them! Your recipes are awesome…thank you for sharing!
I’m a huge fan of your gluten-free cupcake recipes. Do you have a gluten-free version of these red velvet ones? Or recommended modifications to make them gluten-free? TIA!
shut up fake comments bots, you just bought nothing but fake comment bots lmaoo miserable lowlife u are, and this recipe is crap, and you need comment bots for attention how sad, you need help. Dry nasty cupcakes. U h**
@samantha, I’m sorry, who needs attention?
Love all your recipes, they never fail! Enjoy the attention, it’s well deserved!
Hi, my cupcakes came out super oily. The cupcake liners were completely wet at the bottom. I used powder food coloring that was very concentrated. The frosting came out fine though.
I’ve been using your small batch cake recipes for a while and knew you’d have a red velvet recipe for cupcakes I could trust! I love that it’s only a dozen, so for me and my husband (and any lucky sharers), it’s perfect. Also, the cream cheese frosting recipe was spot-on; I’ve tried a few times but finally found yours to be the best for piping! Your recipes always come out perfect for me and they taste wonderful.
Tried these as well as the cake. And these are by far the best red velvet recipe I’ve tried. Loved it.
Hi Chelsea,
I tried this recipe several times and it’s the best. My question is can i make around 30 cake pops out of it?And can i use cream cheese frosting to bind the cake crumbs together or should i use regular ABC? TIA
Hi Chelsea, I’ve tried your cupcakes and it came out very good and sponge. However, it didn’t come out flat like yours, mine has a dome. Would you please tell me where did I go wrong. Thanks
Hi Chelsweets!!
Silly question… is it really only one teaspoon of cocoa powder in this recipe?
I would think it would need a little more no?
I want to make these this weekend
Thanks!!!
Wasn’t sure if I was seeing a typo!!
Hi, Chelsey.
First, let me tell you how much I LOVE your recipes and watching your posts. It’s been fun following your journey from this being a hobby, to allowing you to quit your full-time job, to getting married… You are very talented. Thank you for sharing with us.
I have been asked to make red velvet cupcakes for my nephews wedding and, not having a recipe of my own, went to your website to try yours out. One of the biggest problems I have with any cupcakes is finding a recipe that DOESN’T stick causing you to lose half of the cake as you pull the liner away. Unfortunately, it happened again with your recipe.
What am I doing wrong? Is it the liner or the recipe?
I purchased foil liners in four different colors for the wedding to help distinguish between the flavors, but if I can’t find recipes that don’t stick, it’s going to be a disaster.
Any suggestions?
p.s. Feel free to respond privately. You don’t have to post this to the site.
THANK YOU for any insight you might provide.
Gena
p.s. The wedding is June 25th!! Less than 2 weeks away.
Hi there. Just wanted to know if this recipe can be cut in half so that I could make 6 cupcakes instead of 12 ?
Moist and delicious! I love Sprinkles red velvet cupcakes and bought their baking book but it can get pricey to use Plugra butter. Chelsea, these taste exactly like Sprinkles cupcakes but maybe yours is just a tad bit more moist. I love oil-based cupcakes because it stays moist and your recipe uses oil + butter and wow the depth. I weighed all the ingredients and it came perfect. Thank you so much for the recipe! You amaze me.
How will i mix my powdered buttermilk to make red velvet cup cake .what is the procedure to mix the powdered buttermilk? Can you help me ?
@Katy, was it really as red as the photos? I’m having doubts that so little food colouring can have such an effect
Made these yesterday…finally had a chance to frost them.
The best red velvet ! I’ve tried many recipes….most very complicated….and this recipe is amazing.
Perfect balance of flavor and moist, tender crumb – Thank-you!
love this recipe ! every time i make it they are gone in minutes! thank you! gonna keep doing others!
Is this meant to be 1 tbsp not 1 tsp cocoa powder because this did not taste like red velvet. Was delicious but not red velvet! I think if you say 1 tsp, I’ll add more cocoa on my own and see! Great cupcake but its def a vanilla cupcake flavored red bc it doesn’t taste or smell like red velvet.
This was the most disappointing recipe I have made in years. I bought speciality items as you prescribed; the cake batter itself is blah, no chocolate taste, no moistness. I haven’t made a scratch batter in years;
I had planned on ‘special treat’ for my husband, my neighbor, my daughter & family. Don’t have the slightest idea why you had a good rating.
Far too much frosting for 16 cupcakes; even that couldn’t save the recipe.
I’ve made this recipe twice and for some reason they keep sinking in the middle, I don’t know what I’m doing wrong.
Hi,
Can I cream the butter and sugar instead of melting the butter?
Hi Shernelle,
Sure! You can definitely cream room temp butter and the sugar before adding in the oil and the other ingredients <3
This recipe tastes phenomenal, but every time I have made them they have sunk ?. My flour and baking soda are good, and I wait until everything is room temp. Do you know what could be causing this? I am not at a high altitude either.
Hi Sarah,
So happy you love the way these taste! Sometimes that can happen if the cupcake liners are filled a little bit too full. Some cupcake pans and liners have slightly different volumes, and this might be the reason.
I’d suggest filling your liners a tiny bit less full (and maybe having a small amount of leftover batter) and see if that helps! Let me know if it does 🙂 If that’s not it, we’ll figure it out together! Happy baking!!
Hello is 1tsp cocoa correct? Seems like it wouldn’t be enough so want to check before I try the recipe out. Thank you in advance.
Hi Lisa,
I know it seems like a small amount, but if you add more it gives the cupcakes a brownish-red color. You could add in an additional tsp if you wanted, but the color wouldn’t be quite as vibrant.
I like using a small amount so that my cupcakes end bake up bright red 🙂 Happy baking!
Your recipes are typically my go-to, fool proof, always turn out perfect recipes! This one I struggled with. My cupcakes turned out slightly crisp on the edges, and sunk in the middle. It was difficult to remove the wrappers from the cupcakes without the cupcakes falling apart. I don’t know where I went wrong. Any ideas?
I’m so sorry to hear that Jodi! I’ve heard a few people running into this issue, and I’m going to retest and tweak this recipe this coming Tuesday to get to the bottom of it!! Hoping no one will have any issues with this recipe in the future <3 Stay tuned!!
I’ve been using this recipe for awhile now…..when I logged on this time, the directions are totally different! Did you make some changes to this recipe?
Thank you!
Hi Jennifer!
A lot of people were having issues with this recipe (centers sinking in, oily liners, liners sticking to the cupcakes) so I made a few tweaks to this recipe this past week! These included adding a bit more cocoa powder, swapping out the AP flour for cake flour, and decreasing the amount of oil.
The end result is an incredibly soft, tender cupcake that’s full of red velvet flavor!! I think the updated version takes a tiny bit longer to make but it’s worth it. If you want to make the old version of this recipe, you can find it here: https://chelsweets.com/eyeball-cupcakes/
Hope that helps, happy baking!
Hello, my family has always loved the recipe before you tweaked it. Are you able to send me the original recipe? They will definitely know if I change it up. LOL.
Thank you in advance!
Hi Jennifer,
For sure! Just emailed it to you 🙂 Happy baking!!
The cupcakes take a few hours to make, but are totally worth it.
Could I use this recipe to make cake pops, with the frosting to bind it? If yes, how many cake pops do you think this recipe would make? Thank you!
Hi Noella,
Great question! You can use this recipe to make cake pops, that would be delicious! The number of cake pops it will make can vary a ton based on the size of them. I usually make cakesicles, so I’m having a hard time guessing how many this recipe might make. Sorry I can’t be of more help!
These taste delicious but every single one sank so badly in the middle I was heart broken. I followed everything to a T, and even used approved modifications. I did use a silicone muffin pan tho, but it doesn’t seem like it would cause such an issue. ?
Hi Danielle,
I’m so sorry to hear that :/ There is nothing worse than putting in all that time and effort to not have a recipe turn out!
Usually you don’t need to adjust bake time or temp when using a silicone muffin pan, but I haven’t tested this recipe in one of those so I’m not sure if that would be the issue. Sometimes if cupcake liners are filled too full they’ll overflow a bit over the sides and sink in the middle. Is there a chance that the capacity of the silicone liner pockets is smaller than a regular muffin tin and they were overfilled?
In general, if they sank in the middle I would guess that they needed to be baked longer.
What ingredients modifications did you make? Have you tested you oven with a thermometer to make sure it bakes accurately? Hopefully we’ll be able to figure out what went wrong together!
Hey Chelsea! I love your recipes and have been making the red Velvet cupcakes since the you posted them way back when. The revamped recipe is not my friend. Anyway I can find the original. I printed it and can’t find after a move.
Hi Aika,
I am dying because I like the revamped recipe like a million times better!!! But I totally understand where you’re coming from and will email you the original recipe 🙂 Happy baking!!
I made a lot of different red velvet cupcakes recipes but i love the taste and texture of your cupcakes the most. The only thing is they collapse when i get them out of the oven. How can i prevent that?
Hi Sharona,
I’m so sorry to hear that! Did you test the center with a toothpick when you pulled them out? Is it coming out clean or with a few moist crumbs? It might be that they needed a little bit longer to bake if the centers are sinking. It also might be that your ingredients are a little bit colder than normal this time of year because it’s winter, which can cause the cupcakes to take longer to bake. My final guess would be that you might be at a slight altitude, which can impact the rise of baked goods! I’m basically at sea level. Hopefully we’ll be able to figure out what’s going on together!
I know this is an older recipe but I just wanted to comment that I also had some issues with the cupcakes sinking. I made three batches, and I filled the last batch the least and that helped some but they were still a little sink-y. They also stuck to the paper liners a ton, and I’ve never had that issue before. Not sure if I did something wrong, but the only change I made was using the suggested cake flour substitute and I’m guessing that’s the culprit. They do taste absolutely delicious- just the right amount of cocoa and very moist!
I’m so sorry to hear that Stacy!! The cake flour shouldn’t cause them to sink. Do you know what elevation you’re at by chance? Sometimes even a couple thousand feet can impact the rise (and sadly the fall) of baked goods! Hopefully we’ll be able to figure it out together!
Can I substitute the red food coloring for blue? Would it affect the taste?
Hi Jakesi,
You can totally swap out the red food coloring for blue food coloring! It won’t affect the taste at all. Hope that helps, happy baking!
Help! Every time I make this recipe, my cupcakes overflow horribly. I have made this exact recipe about 5 times and it keeps happening ?
Hi Sarah,
What type of pan are you using, and what size of liners? It sounds like you might be overfilling the liners. I’d recommend adding less batter into each liner! That should fix the problem. You might have enough batter to make 13 cupcakes if your liners are a bit smaller than mine.
One batch of batter should be the perfect amount for 12 dozen cupcakes though! Are you using a scale to measure the ingredients?
Can this recipe also be baked in 2 4 inch cake pans? I am making a half dozen of cupcakes & mini cake but do not need as much batter as a normal red velvet cake layer recipe.
Your grams measurements are off especially for the 1 cup of flour (just in case you hadn’t noticed it’s vastly under)
1 cup of cake flour is 120 grams, you can google it to confirm.
I used this recipe and they originally came out kinda dry. I then made a second batch right after and added two tablespoons of sour cream and baked It for 15 minutes, so much better! They were very soft and moist and everyone loved them
Bake time can definitely vary from oven to oven, and I’m happy you adjusted it to make these as delicious as possible 🙂 Thanks for sharing Bree!
Can I make jumbo cupcakes using this recipe? If so, how? Thanx for your help
Hi Ginny,
Yes, you can definitely use this recipe to make jumbo cupcakes! Just fill each jumbo liner about ? full (you’ll get fewer cupcakes, of course — probably around 6–8 depending on the size). Bake them at the same temperature, but increase the baking time to about 22–26 minutes, or until a toothpick comes out with just a few moist crumbs. Keep an eye on them around the 20-minute mark just to be safe! Hope you love them — jumbo red velvet sounds so good!
These are so easy to make and so yum! I made the mini cupcakes and took them to work, they were a hit. Got too much buttermilk so froze some for future batches ?
Hi Meg,
LOVE THAT! Mini cupcakes are always so fun 🙂 And yessss!! That’s a great way to prevent it from spoiling, so smart 🙂 Thank you for sharing!
Would there be any any changes for high altitude? Thanks in advance!
Hi Samantha,
High-altitude baking definitely needs a few tweaks, but luckily this recipe adjusts pretty easily. If you’re above about 3,000 ft, I’d reduce the leavening slightly (about 1/4 teaspoon less baking soda), add 1–2 extra tablespoons of flour, and bake a couple minutes shorter since things set faster up high. You may also need a tiny splash more buttermilk if the batter feels thicker than usual. Nothing major, just little adjustments to help the cupcakes rise evenly and stay tender. Hope that helps, happy baking!!