
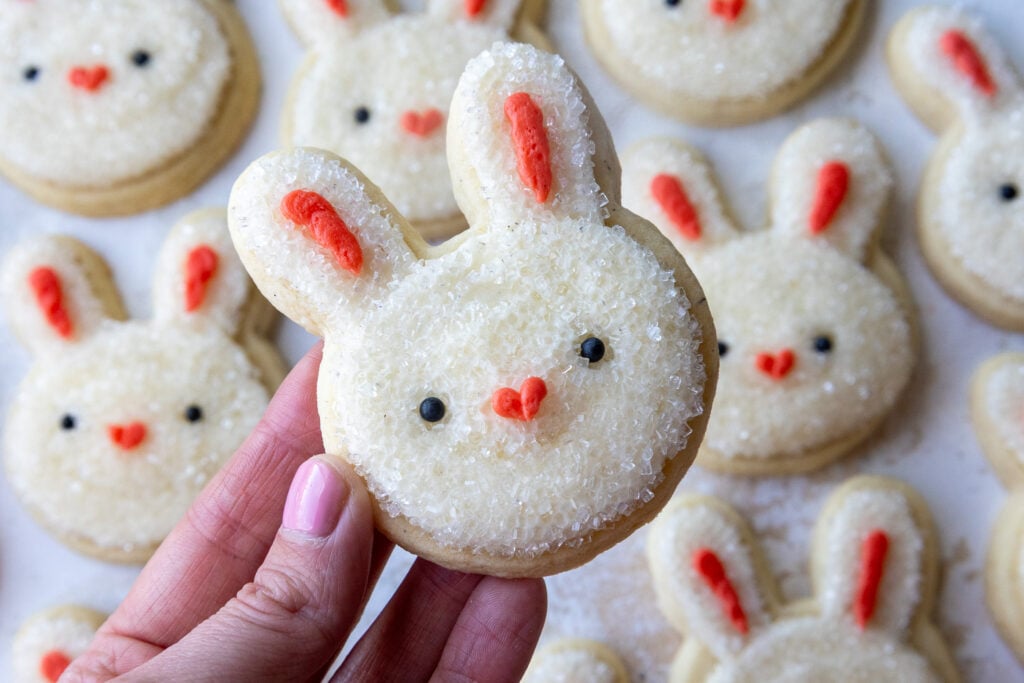
Bunny Rabbit Sugar Cookies
My sister had a bunny rabbit-themed baby shower, so I decided to make these adorable rabbit cookies for the dessert table! Of course, I also made a matching bunny cake and bunny cupcakes.
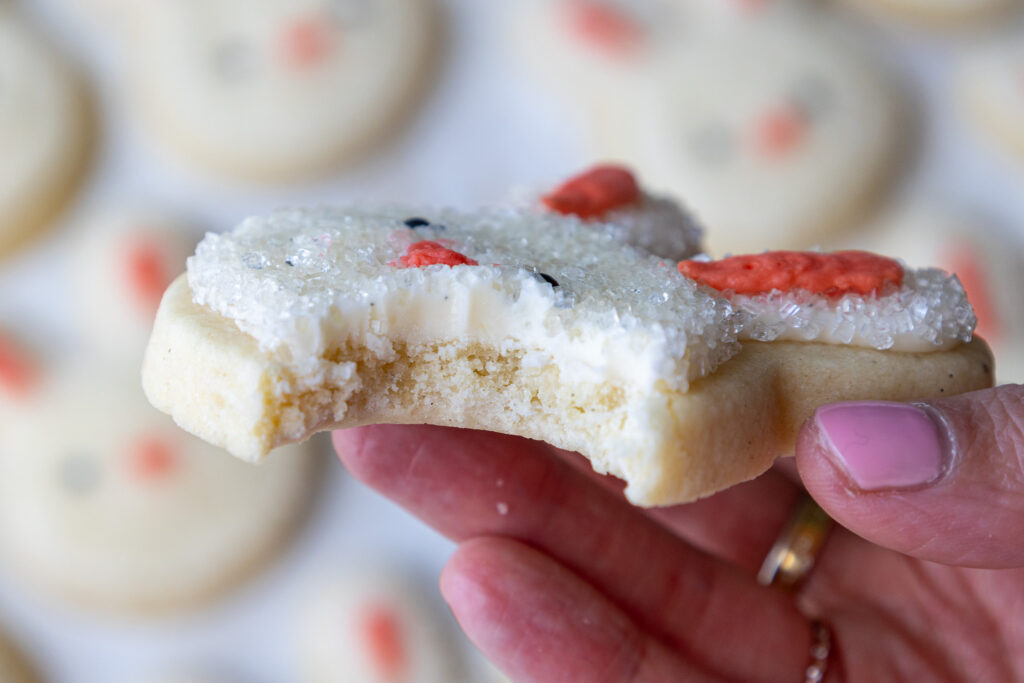
These soft-batch cookies are frosted vanilla buttercream and will totally knock your socks off. They’re not too sweet on their own, which makes them the perfect base for my sweet buttercream frosting.
The Secret Ingredient(s) in These Rabbit Buttercream Cookies
What gives these cream cheese cookies that unique texture and taste? We can thank a bit of cream cheese and cornstarch for making these cookies so great.
Both help the cookies bake up soft, so they’re still chewy once they’re baked and have cooled.
Now, I know cream cheese is probably not an ingredient you’d expect to find in a cookie recipe. But trust me, it makes all the difference.
It also brightens the color of the cookies by giving them a lighter color. I love this because it really helps highlight the buttercream once the cookies are frosted.
And the cornstarch? It helps soften cookies by softening the proteins in the all-purpose flour.
The result is almost like you’re using cake flour in this recipe! It creates a super tender, melt-in-your-mouth cookie.
Making Sure Your Bunny Rabbit Cookies Are Soft & Fluffy
While I love getting caught up in the decoration of my desserts, it’s super important that my recipes are just as delicious.
When I eat a cookie like this, I want it to be thick, soft, and buttery.
Now, this isn’t the easiest thing to accomplish. Even if you have the best sugar cookie recipe, so much comes down to your technique and how you make the cookie dough.
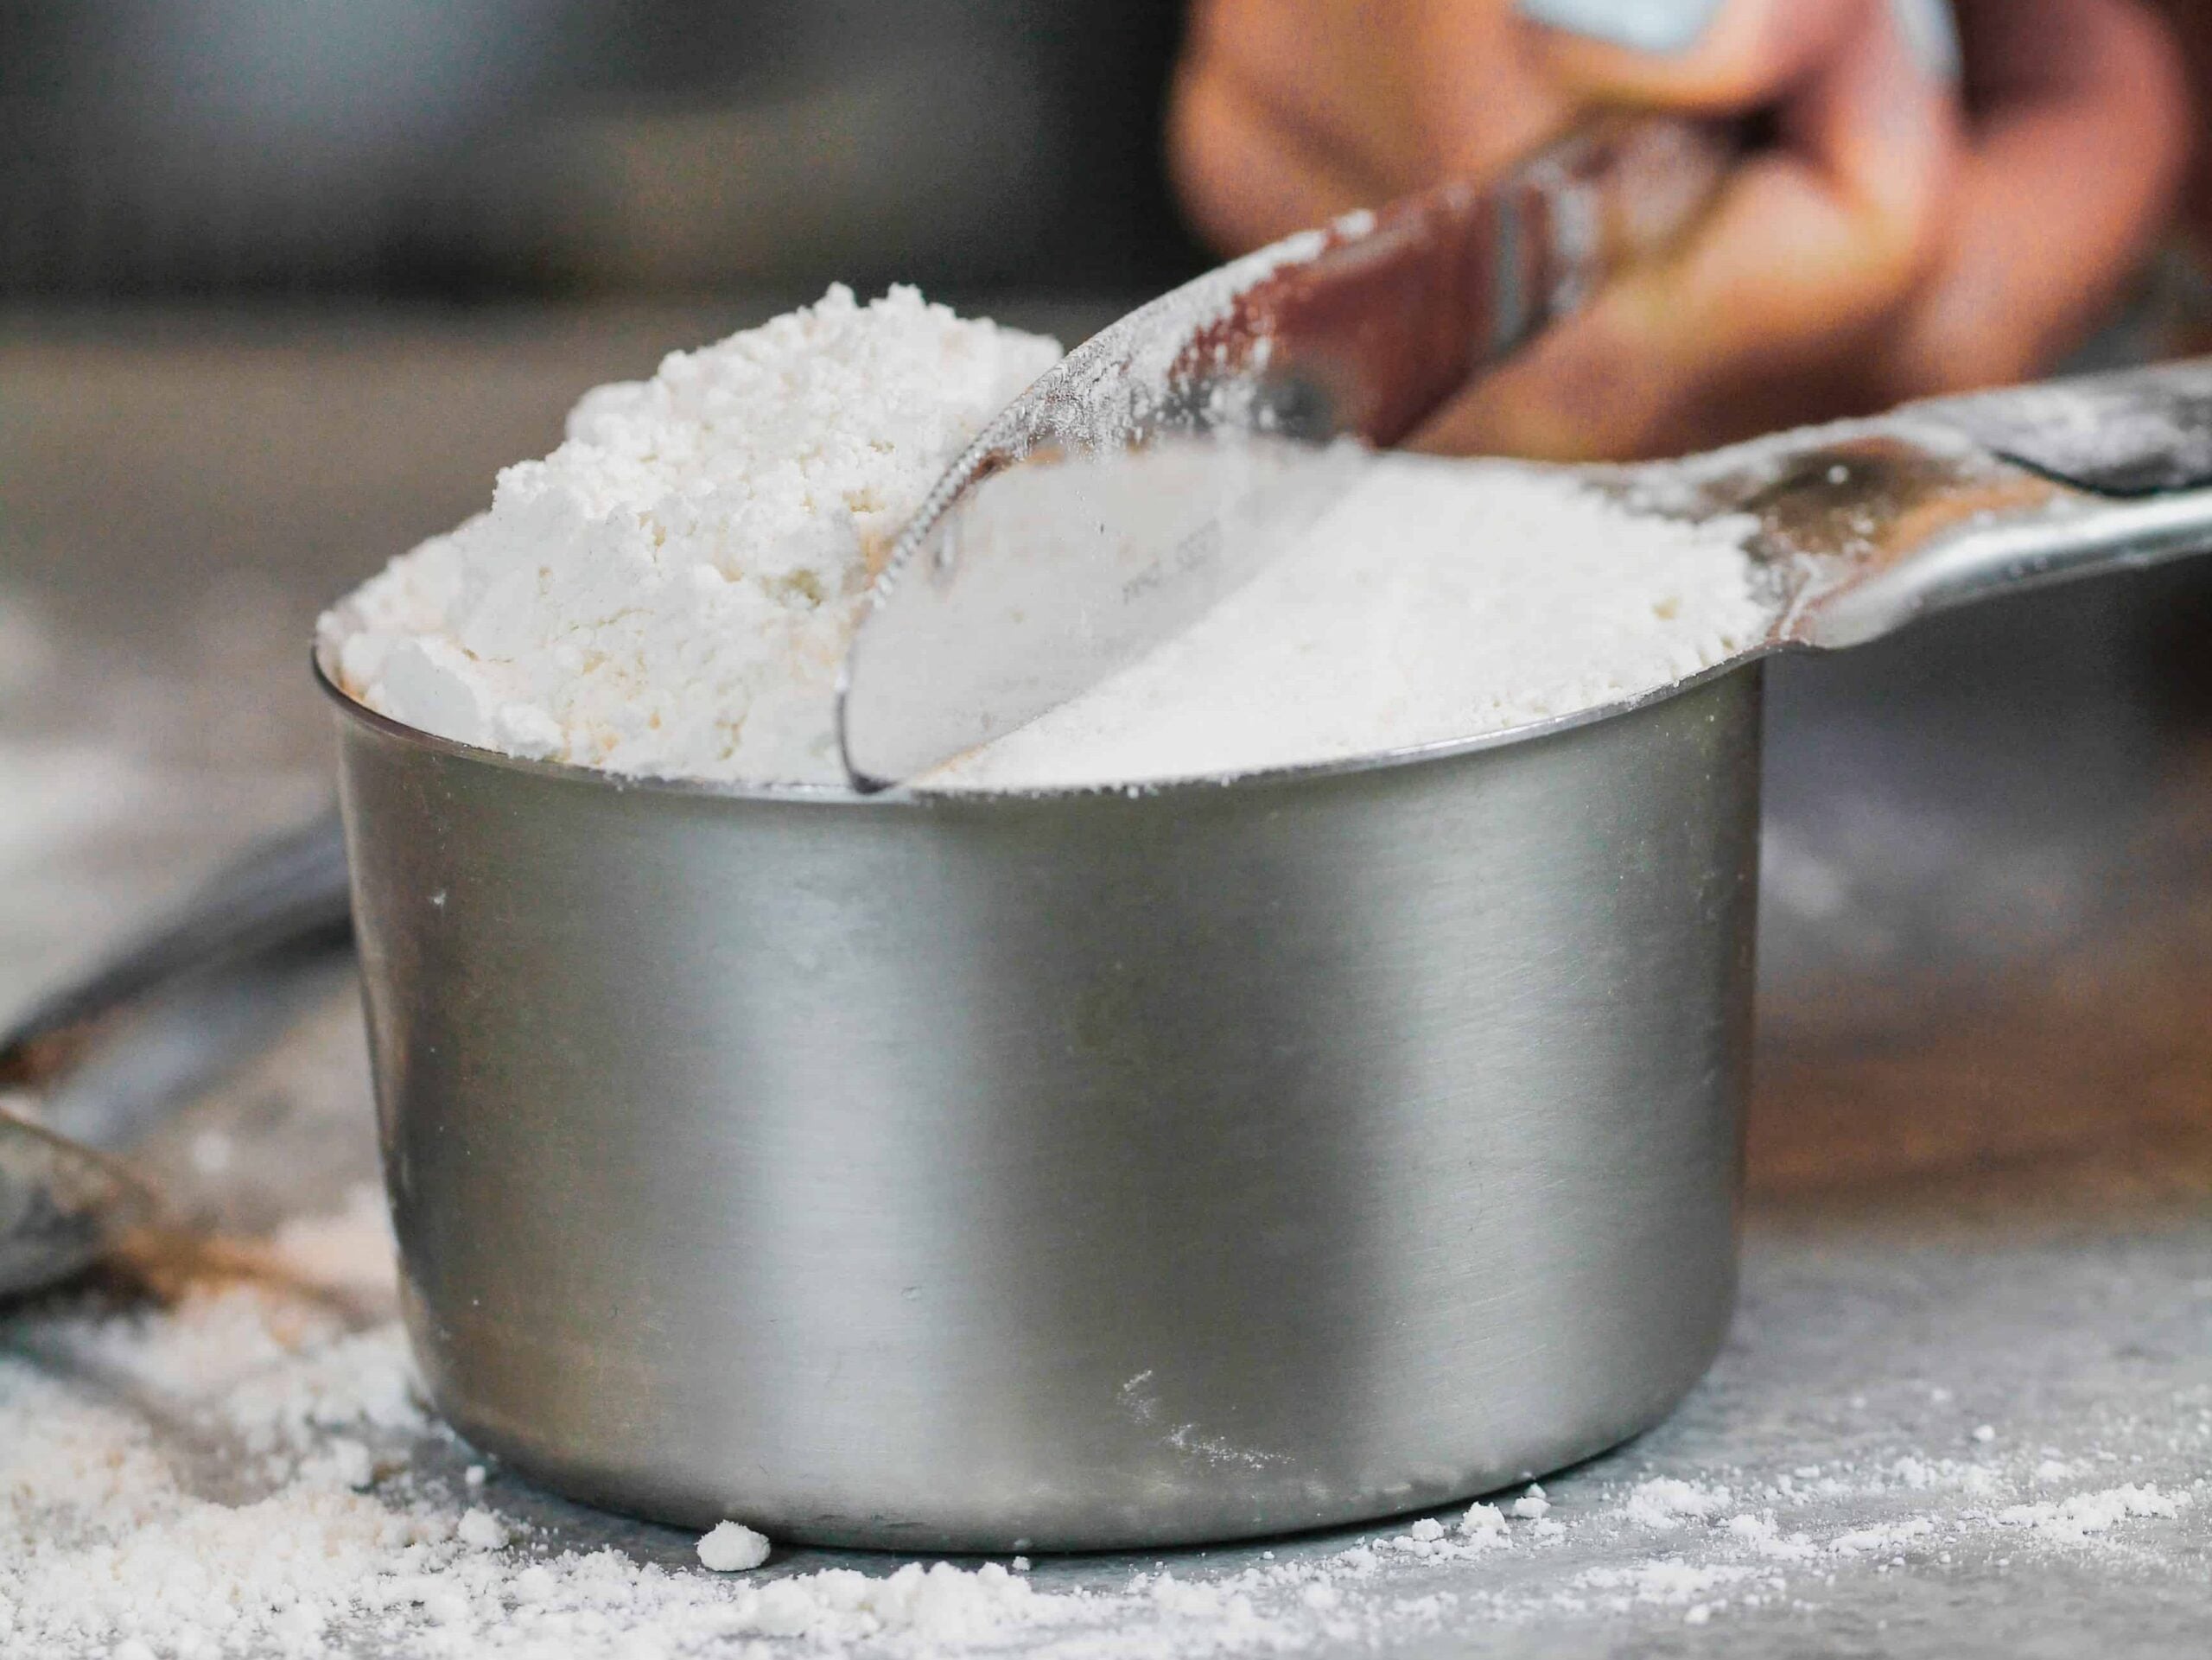
The first thing to keep in mind is measuring the right amount of flour. Some home bakers really pack flour into their measuring cups. Unfortunately, this can cause a person to add a lot more flour to a recipe than it calls for.
I like to use a kitchen scale to be exact, but you can also fluff your flour up in your bag with a spoon, then add spoonfuls into a measuring cup and level it off with a knife.
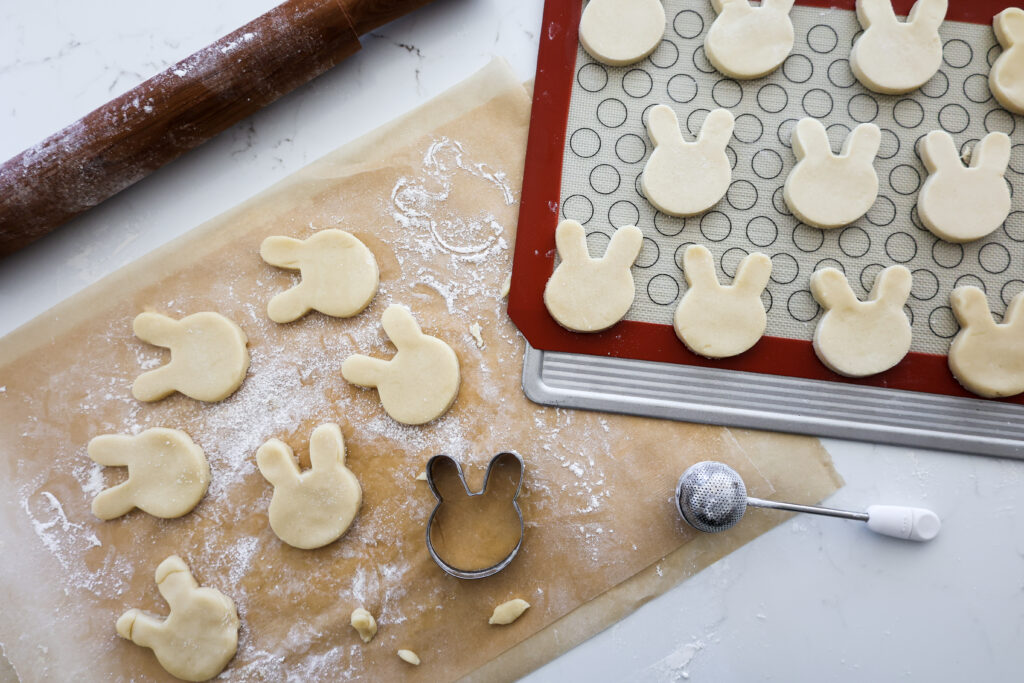
It’s also important that you chill your dough and liberally flour your counter and cookie cutters.
This makes the dough so much easier to roll out and cut.
The final and absolutely imperative part of this recipe is the double chill. This recipe chills the dough before it’s rolled out and one more time once the cookies are cut out.
However, the dough usually warms to room temperature once I’m done cutting out my cookies.

I pop the tray of cut cookies into the freezer for about 10 minutes before baking them. The second chill ensures the cookies are still cold when they go into the oven. This really helps them keep their shape.
Decorating these Rabbit Cookies
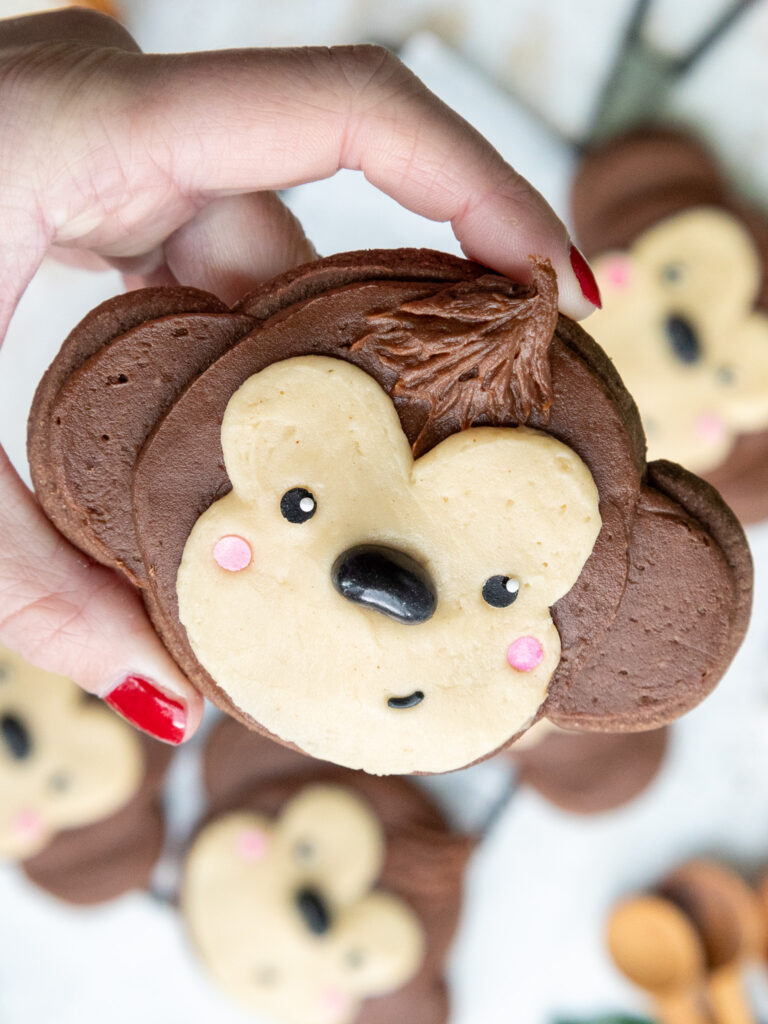
Now it’s time to discuss my favorite part: decorating these cookies!
If we’re going to spend a bunch of time baking these rabbit cookies from scratch, we should take a little extra time to make them look as cute as possible!
All you need are some piping bags and a bit of gel food coloring. This recipe makes quite a few cookies, so you can invite your friends or kids into the kitchen with you and have some fun.
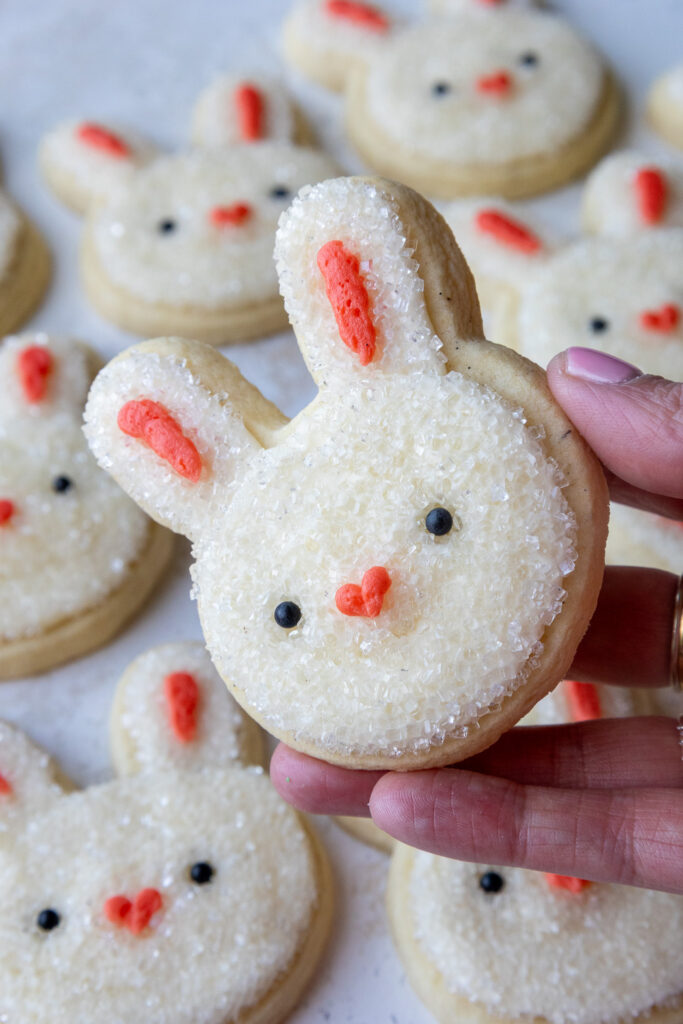
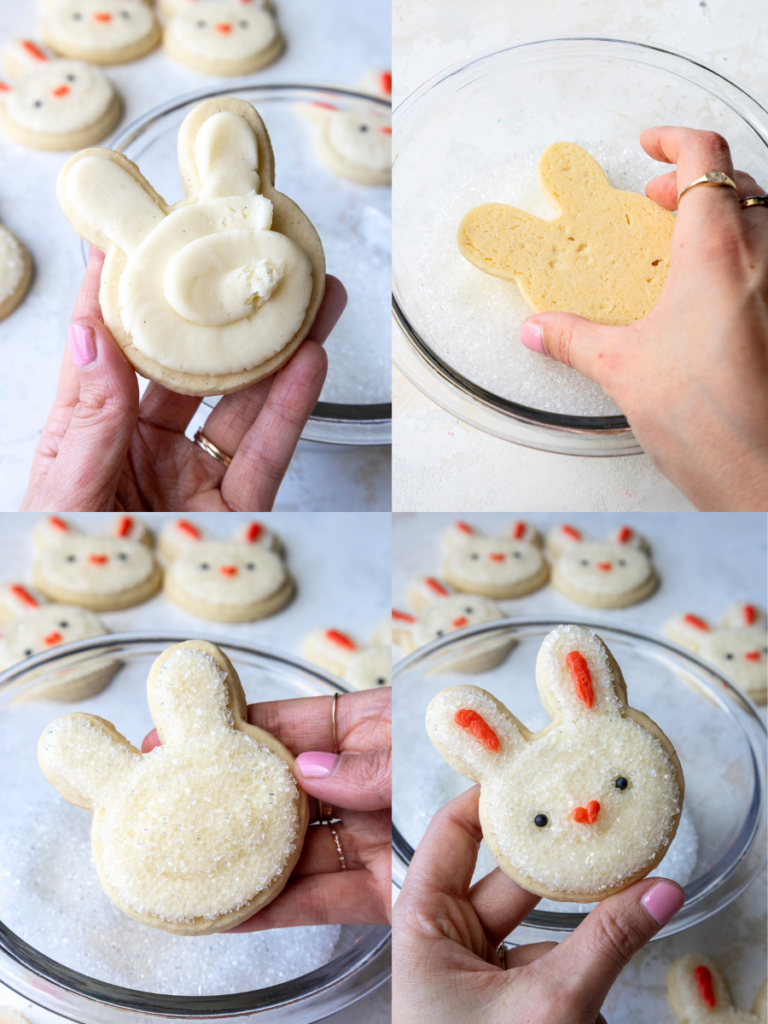
Use white, pink, and black buttercream to create each rabbit’s face. Start by piping white buttercream on top of a cookie.
Dunk the frosted cookie in white sanding sugar or granulated sugar, gently tapping it to help flatten out the frosting and fully cover the frosting in sanding sugar.
Pipe a small pink heart in the center of the cookie, and pipe a pink line in the center of each ear. Use the black buttercream or black sprinkles to pipe two circles on the sides of the nose to be the bunny’s eyes.
Repeat with the remaining cookies, then enjoy!
Tips for Making the Best Bunny Rabbit Cookies:
- Flour your cookie cutter before each cut! It helps the dough easily pop out of the cutter and helps the cookies keep their shape.
- Really cream together the butter, cream cheese, and granulated sugar for a couple of minutes in the first step of this recipe. It helps incorporate air into the dough which makes tender and soft cookies.
- Don’t over-mix your cookie dough once you add in the flour! It can over-work the gluten and result in tough and dense cookies
- Roll your cookie dough out to a consistent thickness of 1/3 inch. If some are thicker or thinner than others, they may over or under-bake in the oven.
- Chill your cookie dough. It helps prevent your cookies from spreading while they bake and helps them bake up soft and chewy.
- Don’t overbake your cookies. Err on the side of under-baking your cookies, and remember that the cookies continue to bake for a few minutes once they’re out of the oven and firm up as they cool.
- If you’re using frosting to make the eyes, wait to pipe on the eyes until right before you plan to serve the cookies. The black frosting can sometimes bleed into the sprinkles if the cookies have been chilled or if you live in a humid environment.
Making these Bunny Cookies in Advance and Storage Tips
You can store frosted cookies in an airtight container for up to 2 days at room temperature or for up to 5 days in the fridge.
If you want to stack the cookies on top of one another, I recommend adding a layer of parchment paper between them.
This cookie dough can also be frozen for up to 1 month if wrapped tightly in plastic wrap and stored in an airtight container. I like to move the cookie dough to the fridge the night before I plan to roll it out and bake the cookies.
Baked, unfrosted cookies can also be frozen! These cookies last for up to a month if frozen in an airtight container. I recommend waiting to frost them until they’ve thawed to room temperature.
Move them to the fridge the day before you plan to eat them, then let them sit out at room temperature for a few hours before frosting them.
Let Me Know What You Think!
If you make these bunny rabbit cookies, I’d love to hear what you think! Please leave a rating and let me know your thoughts by sharing a comment below.
Other Recipes You Might Like

Bunny Rabbit Sugar Cookies
Ingredients
Cream Cheese Sugar Cookies
- 3/4 cup (1 1/2 sticks) unsalted butter, room temperature 170g
- 1/2 cup or 4 oz. full fat cream cheese, room temp 113g
- 1 1/2 cups granulated sugar 300g
- 1 large egg, room temperature 56g
- 2 tsp almond extract, optional 8g
- 2 tsp vanilla extract or vanilla bean paste 8g
- 3 cups all-purpose flour 390g
- 1 Tbsp cornstarch 8g
- 1 tsp fine salt 6g
- 1/2 tsp baking powder 2g
Buttercream Frosting for Rabbit Cookies
- 1 cup unsalted butter, room temperature 226g
- 1 Tbsp vanilla extract or vanilla bean paste 12g
- 1/2 tsp fine salt 3g
- 3 1/2 cups powdered sugar 454g
- 2 Tbsp heavy whipping cream, room temperature 30g
Instructions
Cream Cheese Sugar Cookies
- In a large bowl or the bowl of a stand mixer, beat 3/4 cup butter and 1/2 cup cream cheese on medium speed with a hand mixer or whisk attachment until smooth.
- Next, add 1 1/2 cups granulated sugar and mix on a medium-high speed for a couple of minutes, until the mixture becomes lighter in color.
- Add in 1 egg, 2 tsp almond extract (optional), and 2 tsp vanilla bean paste or vanilla extract. Mix on a medium speed until incorporated.
- In a separate bowl, whisk together 3 cups flour (use a scale or fluff the flour in the bag, then spoon it into the measuring cup and level it), 1 Tbsp cornstarch, 1 tsp fine salt, and 1/2 tsp baking powder.
- Mix the dry ingredients into the butter mixture on a low speed until it is JUST incorporated. Scrape the sides of the bowl with a rubber spatula between additions.
- At this point, the dough should still be pretty thick and sticky. Divide the dough in half and wrap each portion of dough in a piece of plastic wrap. I like to flatten the dough out into a rectangle that's about 1/2 inch thick to make it easier to roll out once it's chilled.
- Chill the dough in the fridge for about 2 hours or in the freezer for 30 minutes. It can also be chilled overnight. Preheat the oven to 350 F / 175 C for about 30 minutes before you plan to roll out the dough, and line two large baking sheets with silicone baking mats or parchment paper. Set aside.
- Take one piece of dough out of the fridge, leaving the other in there to continue to chill. If you put the cookie dough in the freezer, let it sit at room temperature for 5-10 minutes to soften up a bit before trying to roll it out. Unwrap the cookie dough and lay the plastic wrap out flat on your counter. We will be rolling out the cookie dough on the plastic wrap to make cleanup a breeze and make cutting out the cookies easier. Dust both sides of the cookie dough and your rolling pin with flour.
- Roll the chilled dough to be 1/3 inch thick (these rolling pin rings help a ton with getting a consistent thickness) and use a 2- or 3-inch cookie bunny cookie cutter (I used one from this set) to cut out as many cookies as you can. The cookies don't spread much as they bake, so you can place them about 1/2 inch apart.
- Chill the cut-out cookies one more time in the fridge for 15 minutes or the freezer for 5 minutes to help them keep their shape as they bake.
- Bake one sheet of cookies at a time for about 10 minutes on the middle rack of your oven (bake time can vary based on the cookies' size and the dough's thickness). Keep a close eye on the cookies and be sure to pull them out before the edges start to brown.
- Let the baked cookies cool on the pan for about 15 minutes, then transfer to a wire rack to finish cooling.
- While the first batch bakes and cools, knead together the cookie dough scraps and rewrap them in plastic wrap. Pop them back in the fridge to chill.
- Pull out the 2nd chilled portion of dough and repeat steps 9-11. Then repeat with the chilled dough scraps.
Buttercream Frosting
- Beat 1 cup of butter on a medium speed for 30 seconds with a paddle attachment, until smooth.
- Mix in 1 Tbsp vanilla extract and 1/2 tsp salt on a low speed
- Slowly add in 3 1/2 cups powdered sugar, 1 cup at a time. Halfway through add in 2 Tbsp of heavy cream or milk to make it easier to mix.
- Beat on low until the ingredients are fully incorporated and the desired consistency is reached.
- If the frosting seems too thick, add in additional cream (1 Tbsp at a time). If the frosting is too thin, add more powdered sugar (a quarter of a cup at a time).Scrape the sides and bottom of the bowl with a rubber spatula as needed.
- Place 1/4 cup of frosting into two separate bowls, and use gel food coloring to one pink, and the other black. Alternatively, you can use round black sprinkles for the eyes and skip making the black buttercream.
- Place the remaining white buttercream in a large piping bag with a large round tip (like an Ateco 806).
- Place the pink and black frosting into small piping bags fitted with small round piping tips (like a Wilton 3).
Decorating these Bunny Cookies
- Pipe white buttercream on top of one of the cookies. Dunk the cookie in white sanding sugar or granulated sugar, gently pressing it into the sugar to help flatten out the frosting, and fully cover it in sanding sugar.
- Pipe a small pink heart in the center of the cookie, and pipe a pink line in the center of each ear. Use the black buttercream or round black sprinkles to pipe two circles on the sides of the nose to be the bunny's eyes.
- Repeat with the remaining cookies, then enjoy! Frosted cookies can be stored in an airtight container for up to 1 day at room temperature or up to 5 days in the fridge.
Video
Notes
Yield
This recipe can be used to make 24 3-inch bunny cookies. The yield and bake time will vary based on the size and shape of the cookie cutter you use. This recipe can be halved or doubled to make more or less cookies.Making These Bunny Rabbit Cookies in Advance and Storage Tips
You can store frosted cookies in an airtight container for up to 2 days at room temperature or for up to 5 days in the fridge. If you want to stack the cookies on top of one another, I recommend adding a layer of parchment paper between them. This cookie dough can be frozen for up to a month if wrapped tightly in plastic wrap and stored in an airtight container. I like to move the cookie dough to the fridge the night before I plan to roll it out and bake the cookies. Baked, unfrosted cookies can also be frozen! These cookies last for up to a month if frozen in an airtight container. I recommend waiting to frost them until they’ve thawed to room temperature. Move them to the fridge the day before you plan to eat them, then let them sit out at room temperature for a few hours before frosting them.Tips for Making the Best Bunny Rabbit Sugar Cookies:
- Flour your cookie cutter before each cut! It helps the dough easily pop out of the cutter and helps the cookies keep their shape.
- Really cream together the butter, cream cheese, and granulated sugar in the first step of this recipe. It helps incorporate air into the dough, which makes tender and soft cookies.
- Don’t over-mix your cookie dough once you add in the flour! It can over-work the gluten and result in tough and dense cookies
- Roll your cookie dough out to a consistent thickness of 1/3 inch. If some are thicker or thinner than others, they may over or under-bake in the oven.
- Chill your cookie dough. It helps prevent your cookies from spreading while they bake and helps them bake up soft and chewy.
- Don’t overbake your cookies. Err on the side of under-baking your cookies, and remember that the cookies continue to bake for a few minutes once they’re out of the oven.
- If you use frosting to make the eyes, wait to pipe on the eyes until right before you plan to serve the cookies. The black frosting can sometimes bleed into the sprinkles if they've been chilled or if you live in a humid environment.
I want to make this a little bit ahead of time. Can the dough stay in the fridge a couple of days?
Your cut-out cookie recipe is my favorite go to, so of course I had to give these bunnies a try. I knew they would be delicious but they turned out super cute too! I didn’t have a bunny head cookie cutter so I improvised. I used my round cutter for the head and my candy cane cutter to make ears (one floppy and one standing up), it worked really well. Thank you for yet another cute seasonal cookie idea!
Hi Ashley,
This just made me smile so—thank you!! I’m so glad the cut-out cookie recipe is your go-to, and I love your creativity with the bunny ears! Using a candy cane cutter for one floppy and one standing up? Genius.
It seriously makes me so happy to know they turned out both delicious and super cute. Thanks for trusting another one of my recipes—I’m always so honored when people bake along with me!
I made a version of these- essentially cutting into rounds versus using a rabbit cutter. Overall they were good. The dough chills great so you can make it ahead. I will say the flavor is a bit underwhelming. It feels a bit bland on its own, but you can certainly make up for that with the frosting and sugar on top. I ended up having to bake them for much longer than the recipe said, so just keep an eye on them. Otherwise, they were successful.
Hi Dominic,
Thanks so much for taking the time to share your experience—I really appreciate the thoughtful feedback! I love the idea of cutting them into rounds instead of using a rabbit cutter—such a smart and simple swap.
Totally hear you on the flavor being more subtle. I kept the base pretty mellow so it could pair well with sweet frostings or festive toppings, but I totally get wanting a little extra oomph! You could absolutely add a splash of vanilla, almond extract, or even a bit of citrus zest next time to amp things up a bit.
And great note on the bake time—ovens can be so finicky, so I always recommend keeping a close eye toward the end. I’m so glad they were still a success overall, and I hope the decorating part was extra fun!
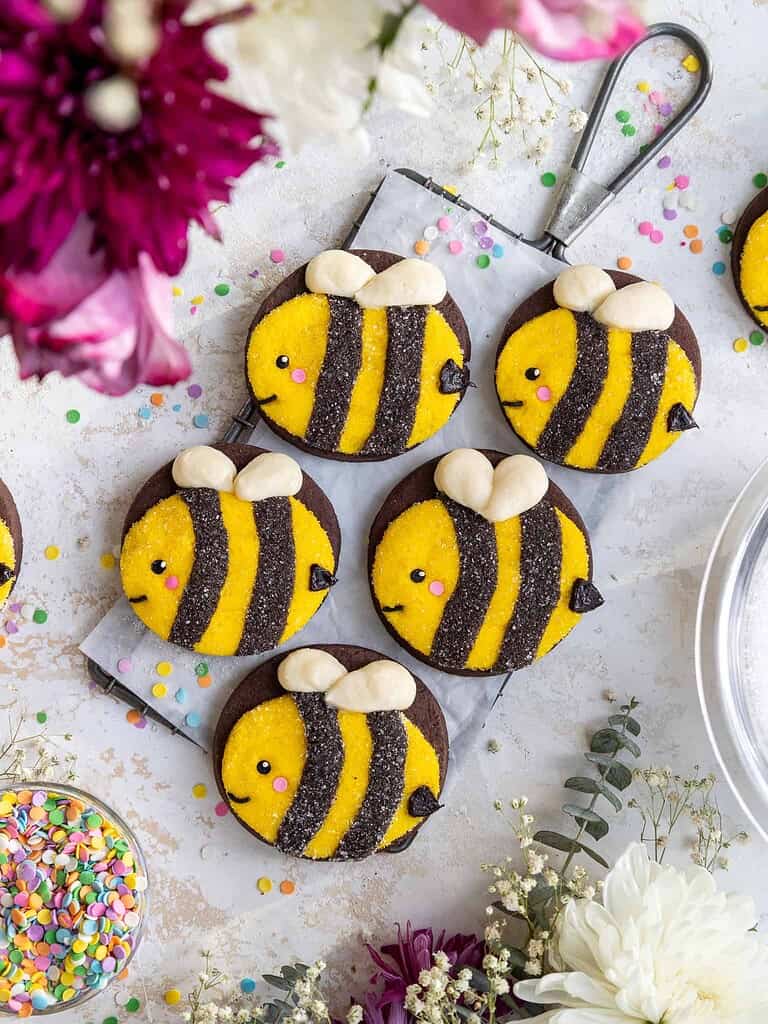
These cookies were so soft and great flavor. I used a cream cheese buttercream frosting so they were less sweet and might also appeal to adults. They were truly delicious! I also made the chick meringues, which blew everyone away on cuteness and they were easy (though some of mine looked like ducks!)
Hi Jacki,
So happy to hear both recipes were hits 🙂 These would be delicious with cream cheese frosting. Thank you for sharing!!
These bunny cookies were a hit. All my sugar cookie friends were very excited to devour these cute cookies. I did opt for the vanilla almond combo as I believe almond adds the right pop of flavor to an iced sugar cookie. Thanks again for another delicious recipe. I appreciate all the tips and alt suggestions you added.
I totally agree, I love the almond in these!! That is great to hear, thanks for sharing Amelia 🙂