
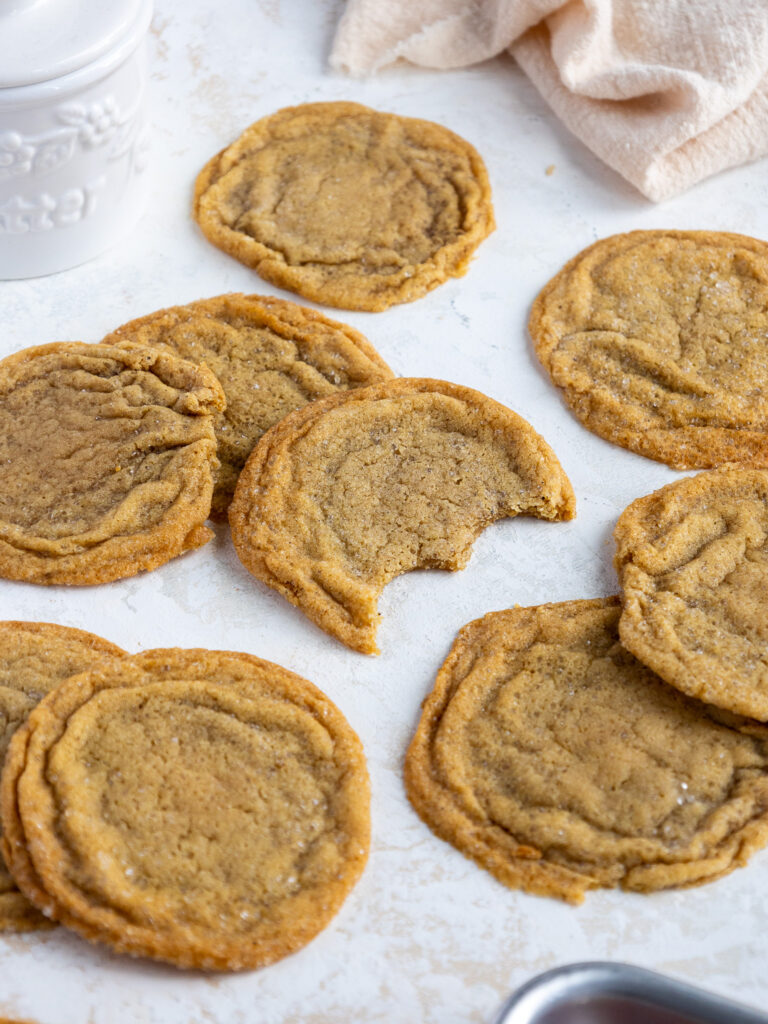
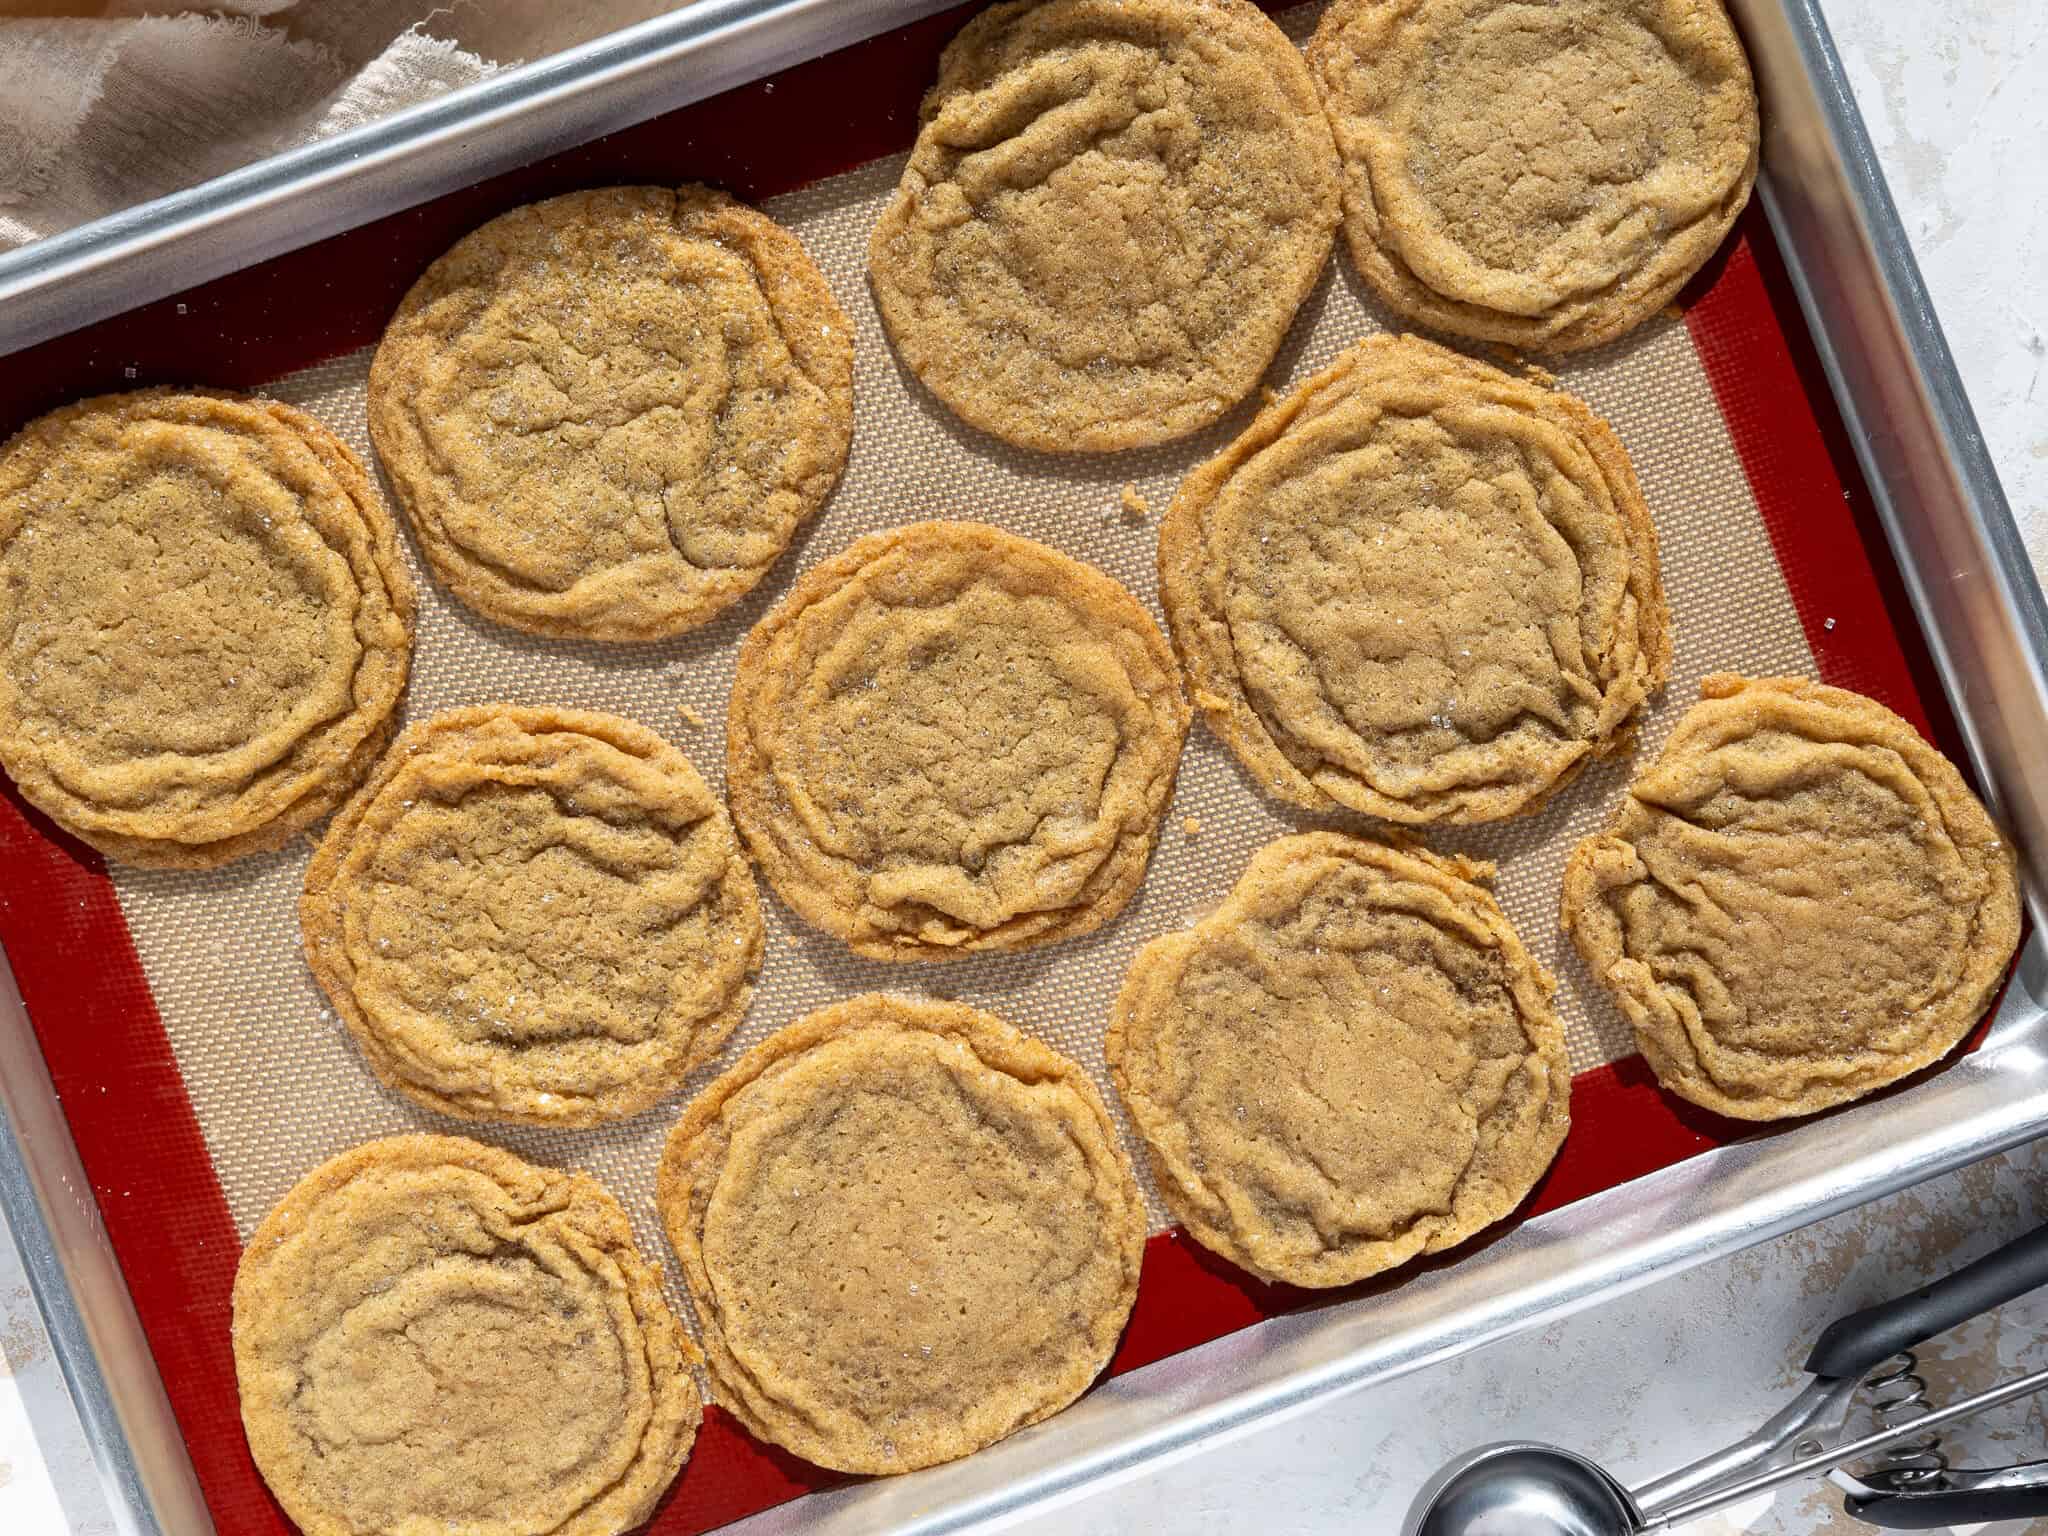
Brown Butter Sugar Cookies
These brown butter sugar cookies have chewy centers, crisp edges, and that delicious, nutty, brown butter flavor in every bite.
The key to getting those perfectly crinkly edges is letting the brown butter fully cool and chilling the dough. Both steps control the spread and deepen the flavor of the cookies.

This Recipe At a Glance
- Flavor: Buttery, nutty, caramel-like brown butter
- Texture: Chewy centers + crisp edges
- Skill level: Easy (just needs chill time)
- Time: ~15 min prep + 1 hr chill + 11–13 min bake
- Makes: 12 cookies (2 Tbsp scoops)
How to Make Brown Butter Sugar Cookies
Let’s walk through each step of this recipe to make sure it turns out as amazing as possible!
I’ve also included a video tutorial in the recipe card below.
Step 1: Brown the Butter
The first step is to brown the butter. This can be done in advance to speed up the cooling process. I usually do it the night before or a few hours before I want to make these cookies.
Place 1/2 cup of unsalted butter, cut into Tbsp-sized pieces, in a light-colored pan over medium heat. Stir the butter the entire time with a rubber spatula to keep it moving.
Once melted, the butter will begin to foam and sizzle around the edges. Keep stirring.
The butter will turn golden brown in about 5-6 minutes from when you start. Some foam will subside, and the milk solids at the bottom of the pan will be toasty brown. It should have a strong, nutty aroma.
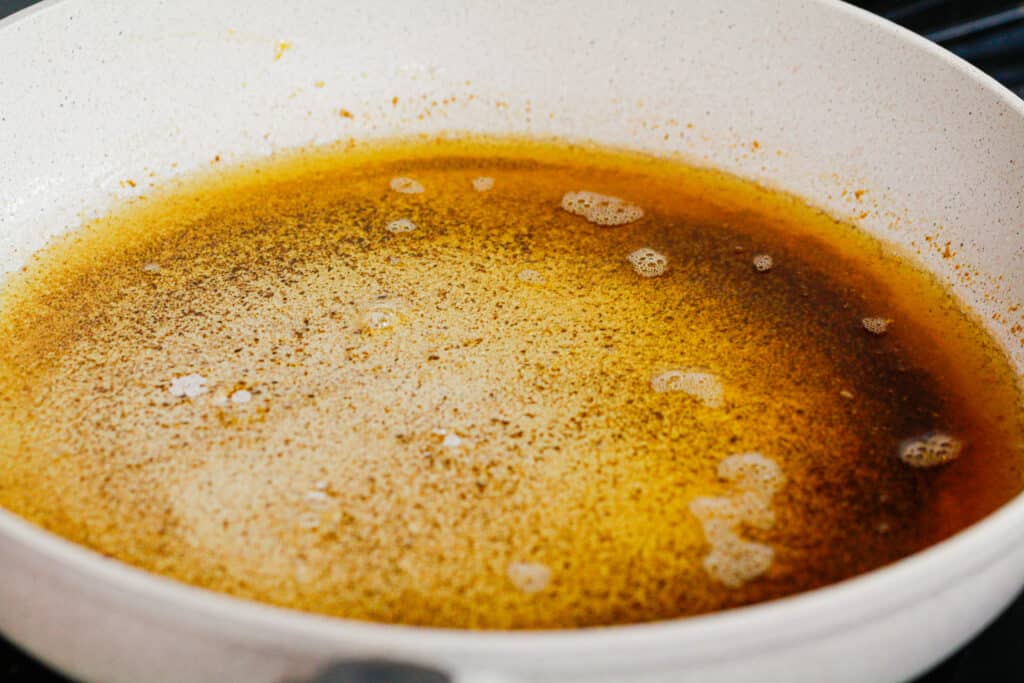
Immediately remove the pan from heat and pour the butter into a heatproof bowl to stop the cooking process. If left in the hot pan, the butter will burn.
Place the bowl in the fridge for 45 minutes to accelerate the cooling process, or until it solidifies and reaches room temperature.
Step 2: Cream the Butter and Sugar Together
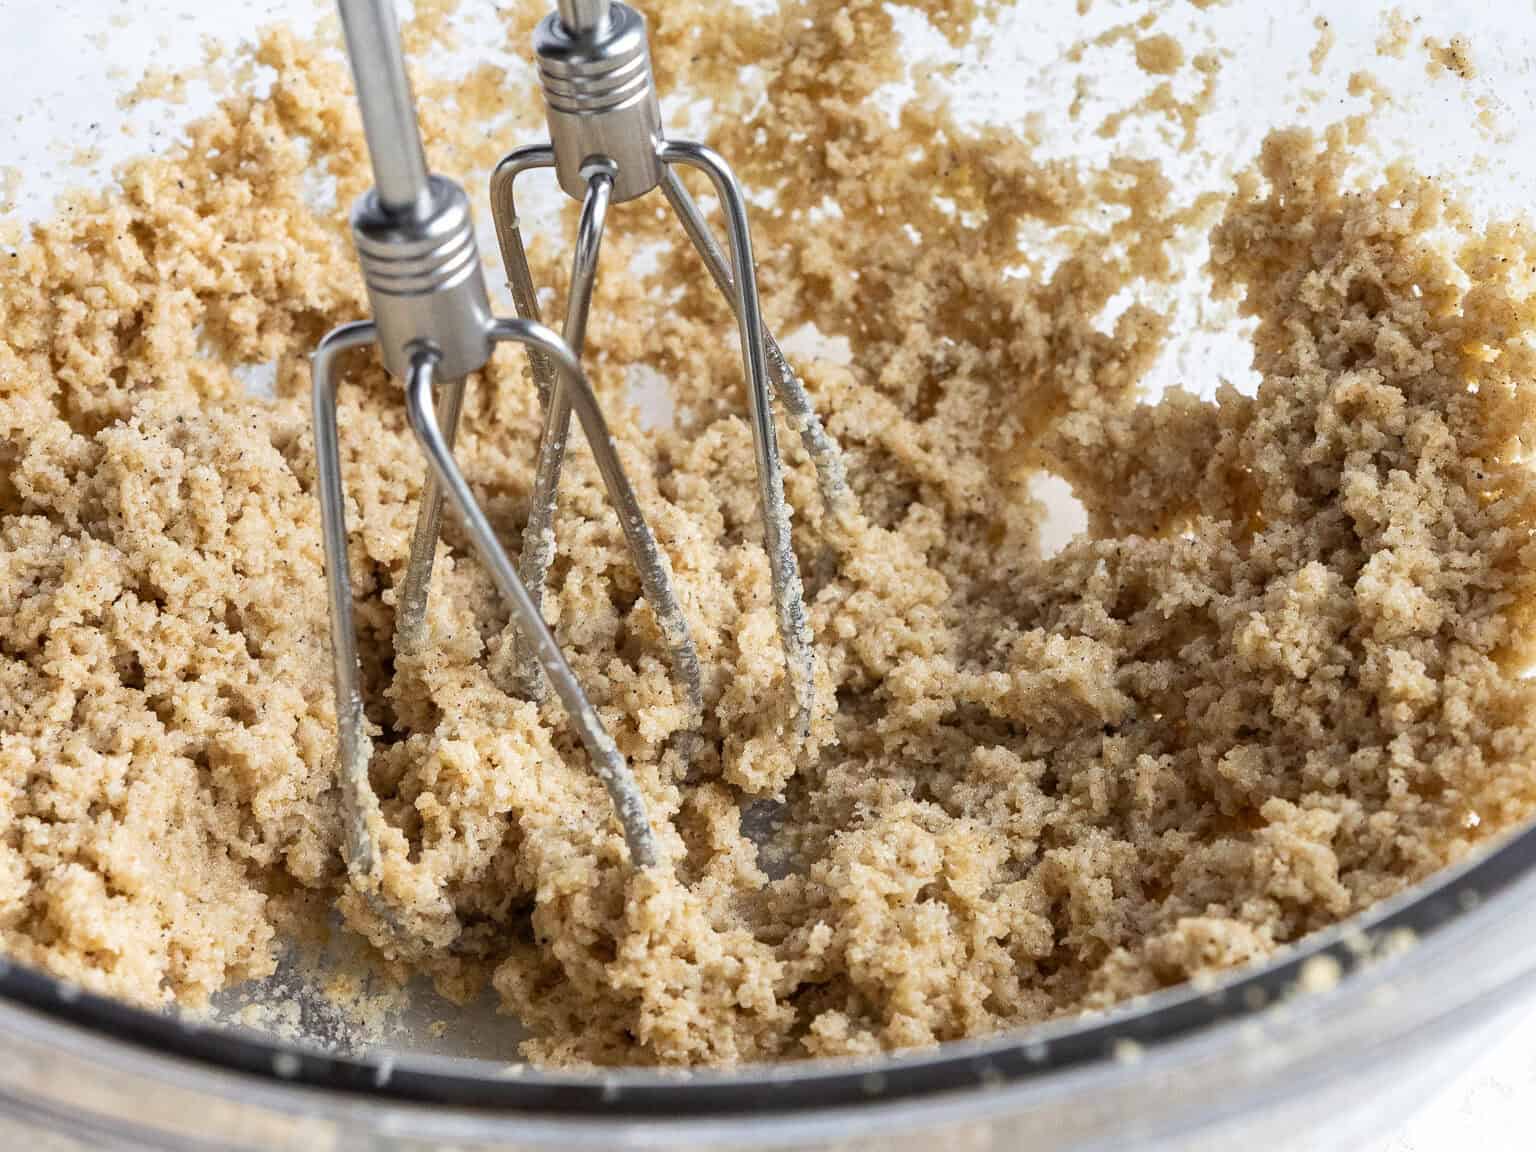
Once the brown butter has solidified and reached room temperature, place it in a large bowl with the granulated sugar and packed light brown sugar.
Cream together with an electric hand mixer for 2 minutes, until the mixture becomes lighter in color.
If you don’t have an electric mixer, whisk the mixture together vigorously for 3 minutes until it becomes lighter in color.
Step 3: Mix in the Remaining Wet Ingredients
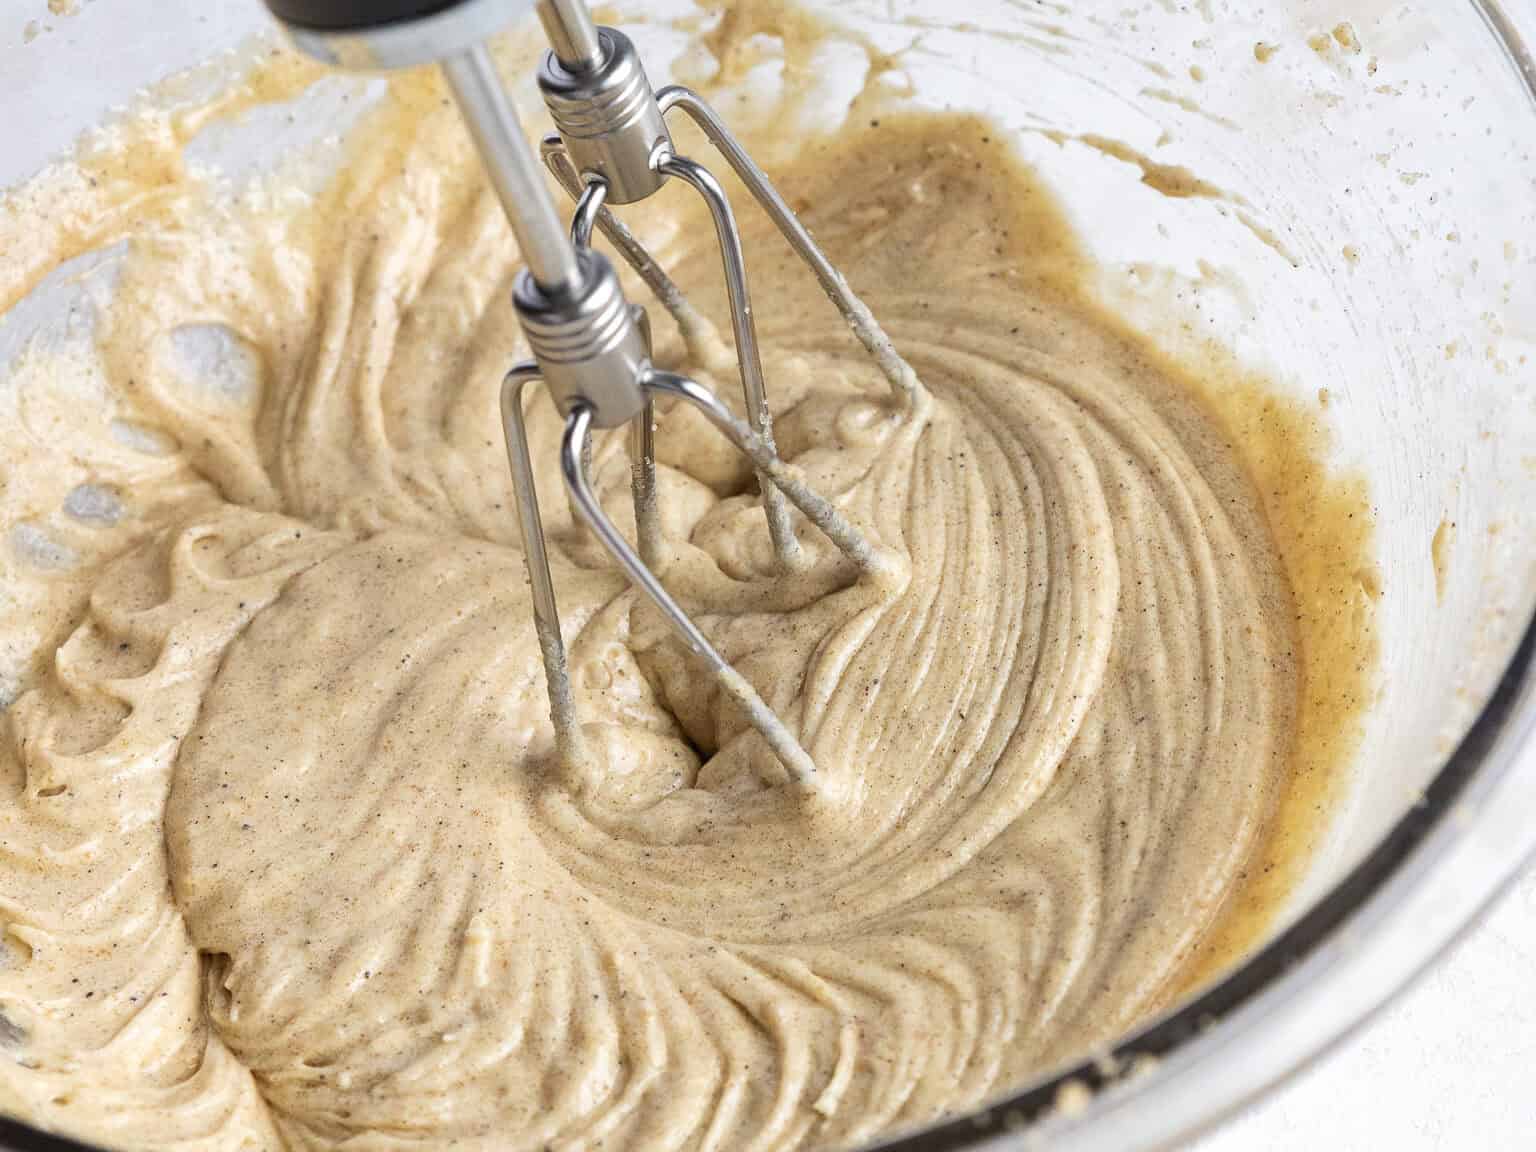
Add the egg and vanilla to the brown butter mixture. Mix on a medium speed until combined. Scrape the sides and bottom of the bowl as needed with a rubber spatula.
Step 4: Mix in the Remaining Dry Ingredients
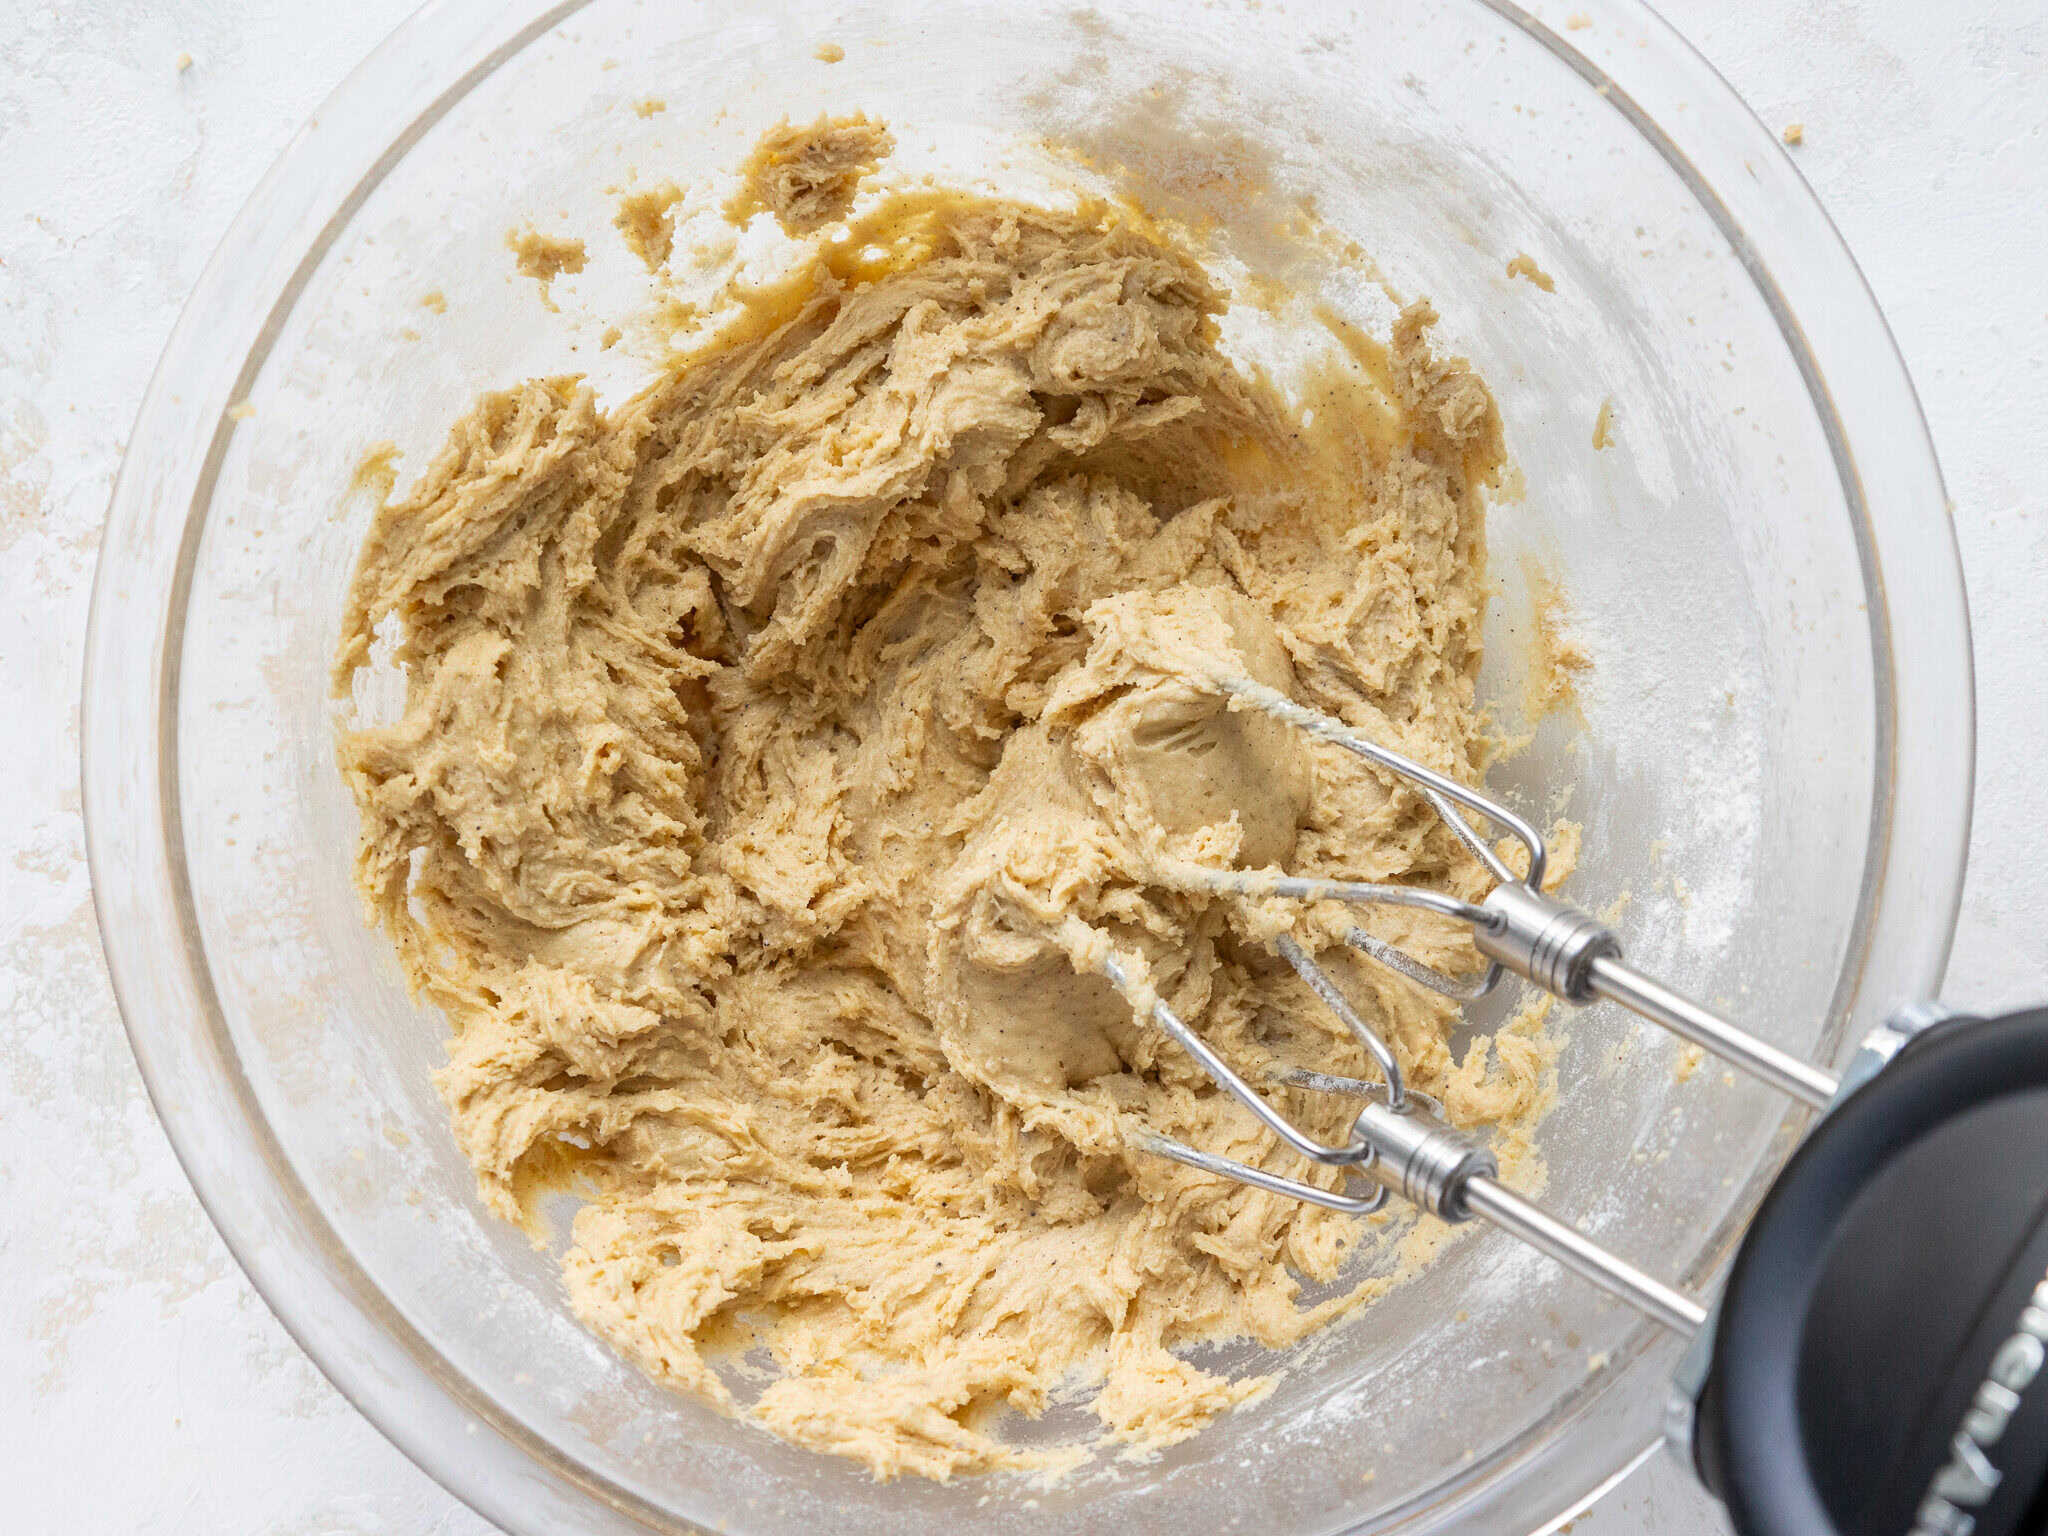
Next, mix in the flour, baking soda, and fine salt on a low speed until combined. The dough should be pretty sticky at this point.
Mix the dry ingredients into the wet ingredients at a low speed until just combined.
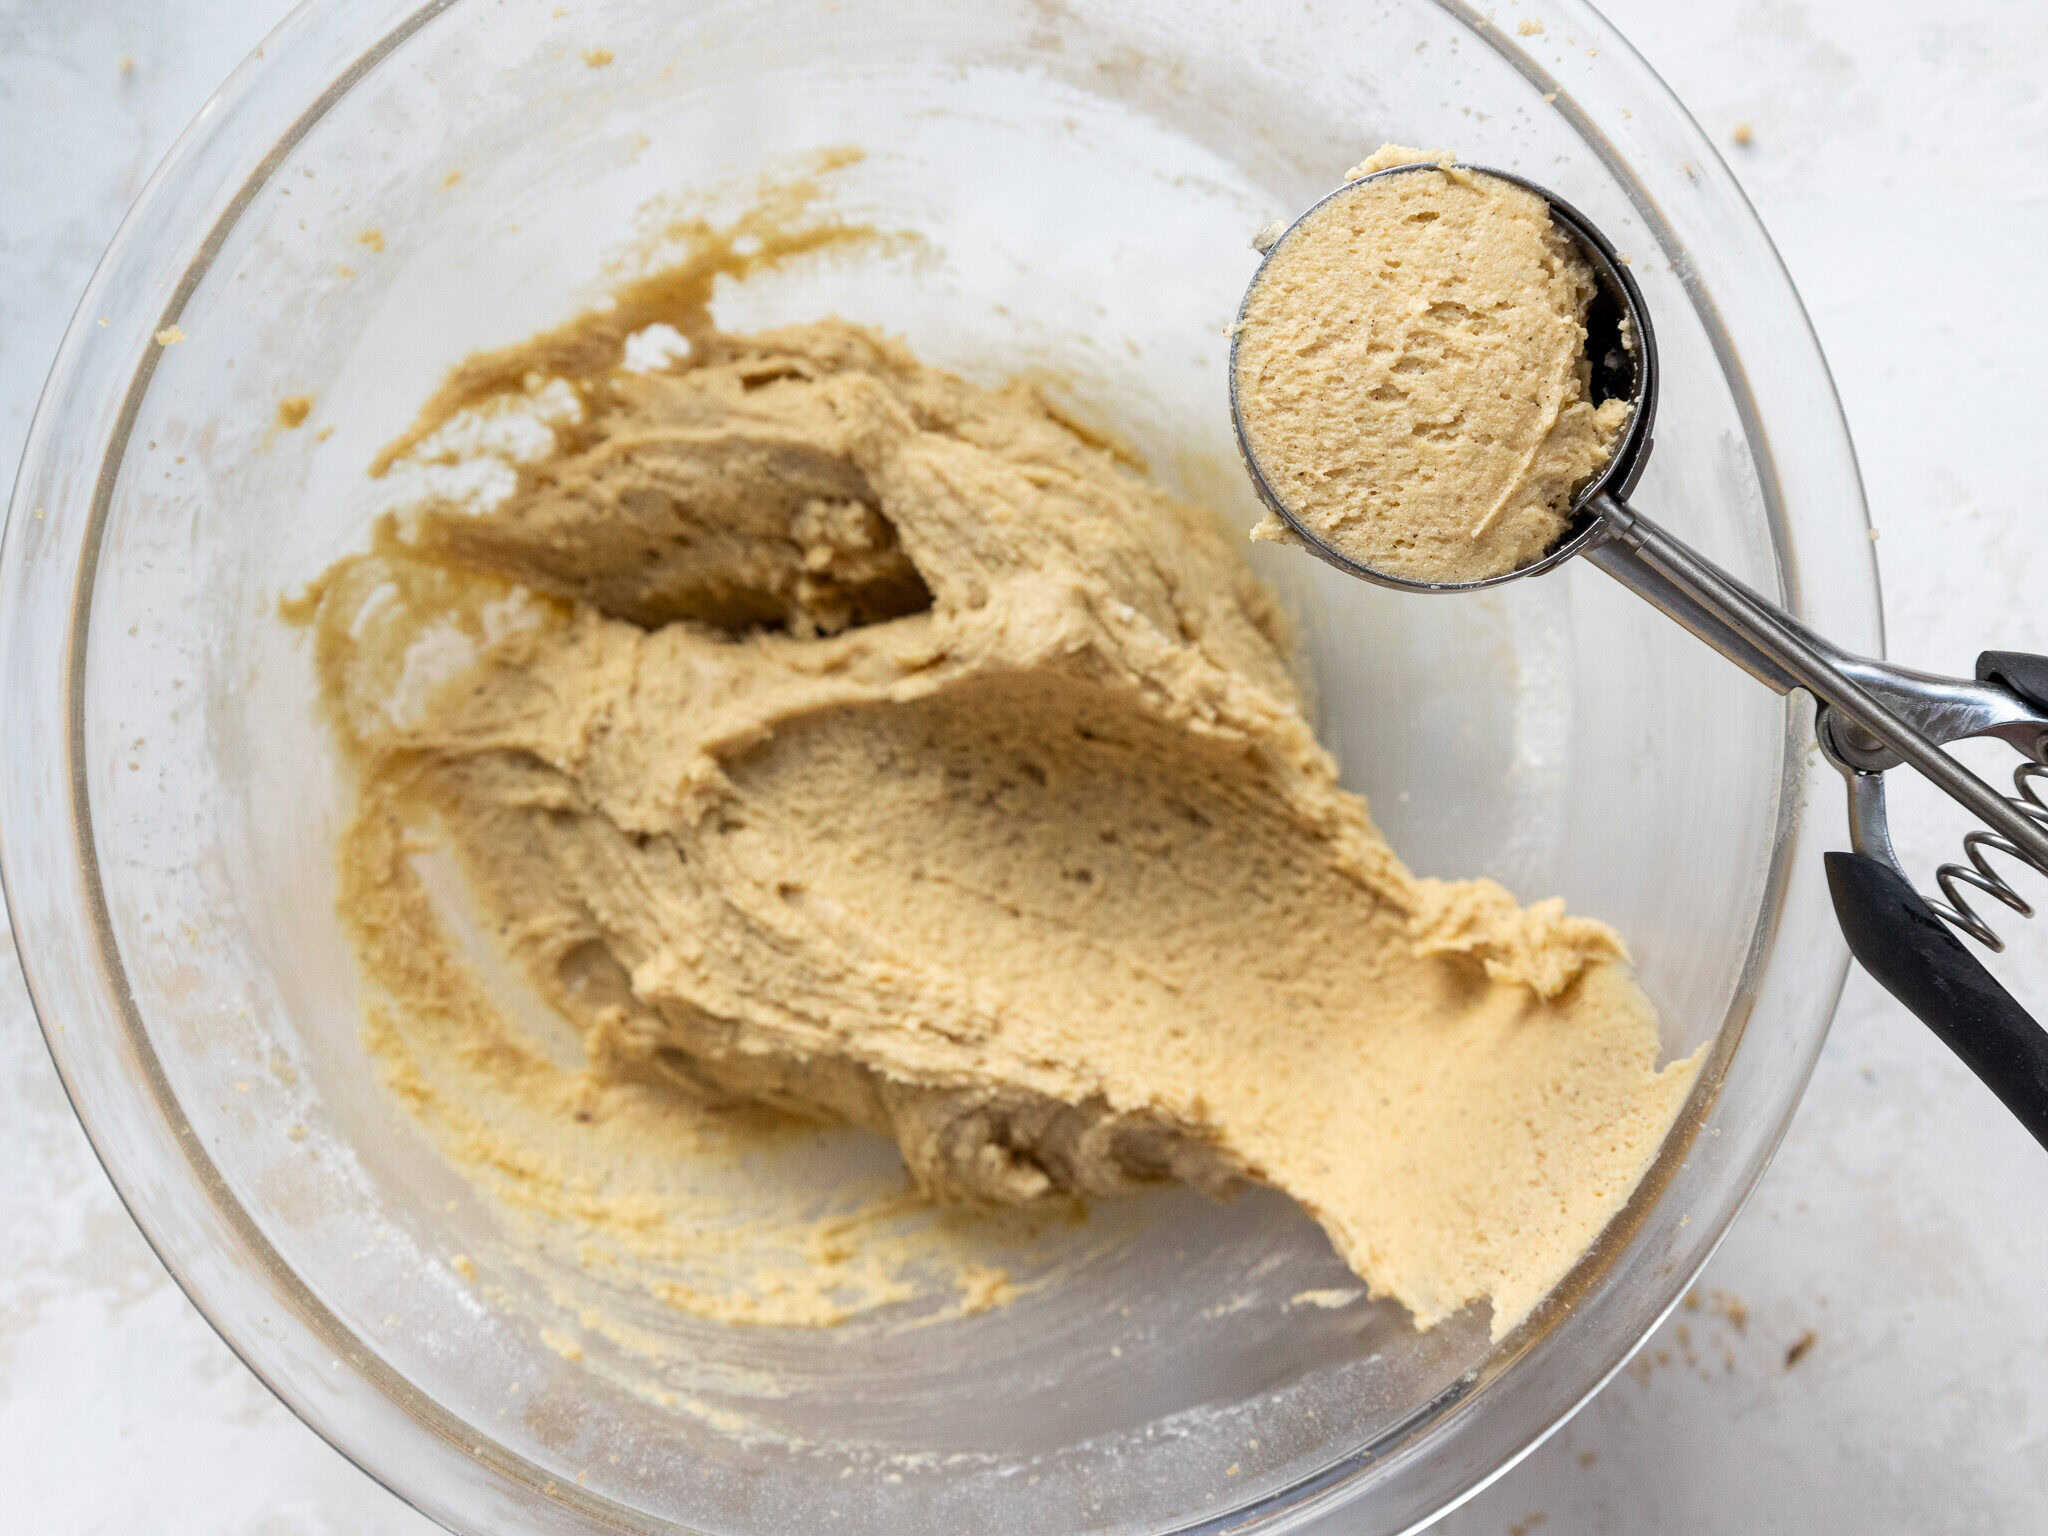
Step 5: Scoop & Chill the Dough
Scoop cookie dough balls that are about 2 Tbsp of dough each onto a parchment-lined dish. You should end up with about 12 cookie dough balls.
Chill the cookie dough in the fridge for at least an hour, or overnight. The longer the cookies chill, the more time they have to develop their flavor.
While the cookie dough chills, preheat the oven to 350°F/175°C. Line 2 large baking pans with parchment paper or a silicone mat.
Step 6: Coat and Bake the Cookies
Remove the chilled cookie dough from the fridge and roll the dough in a small bowl of sanding sugar or granulated sugar until it’s completely coated.
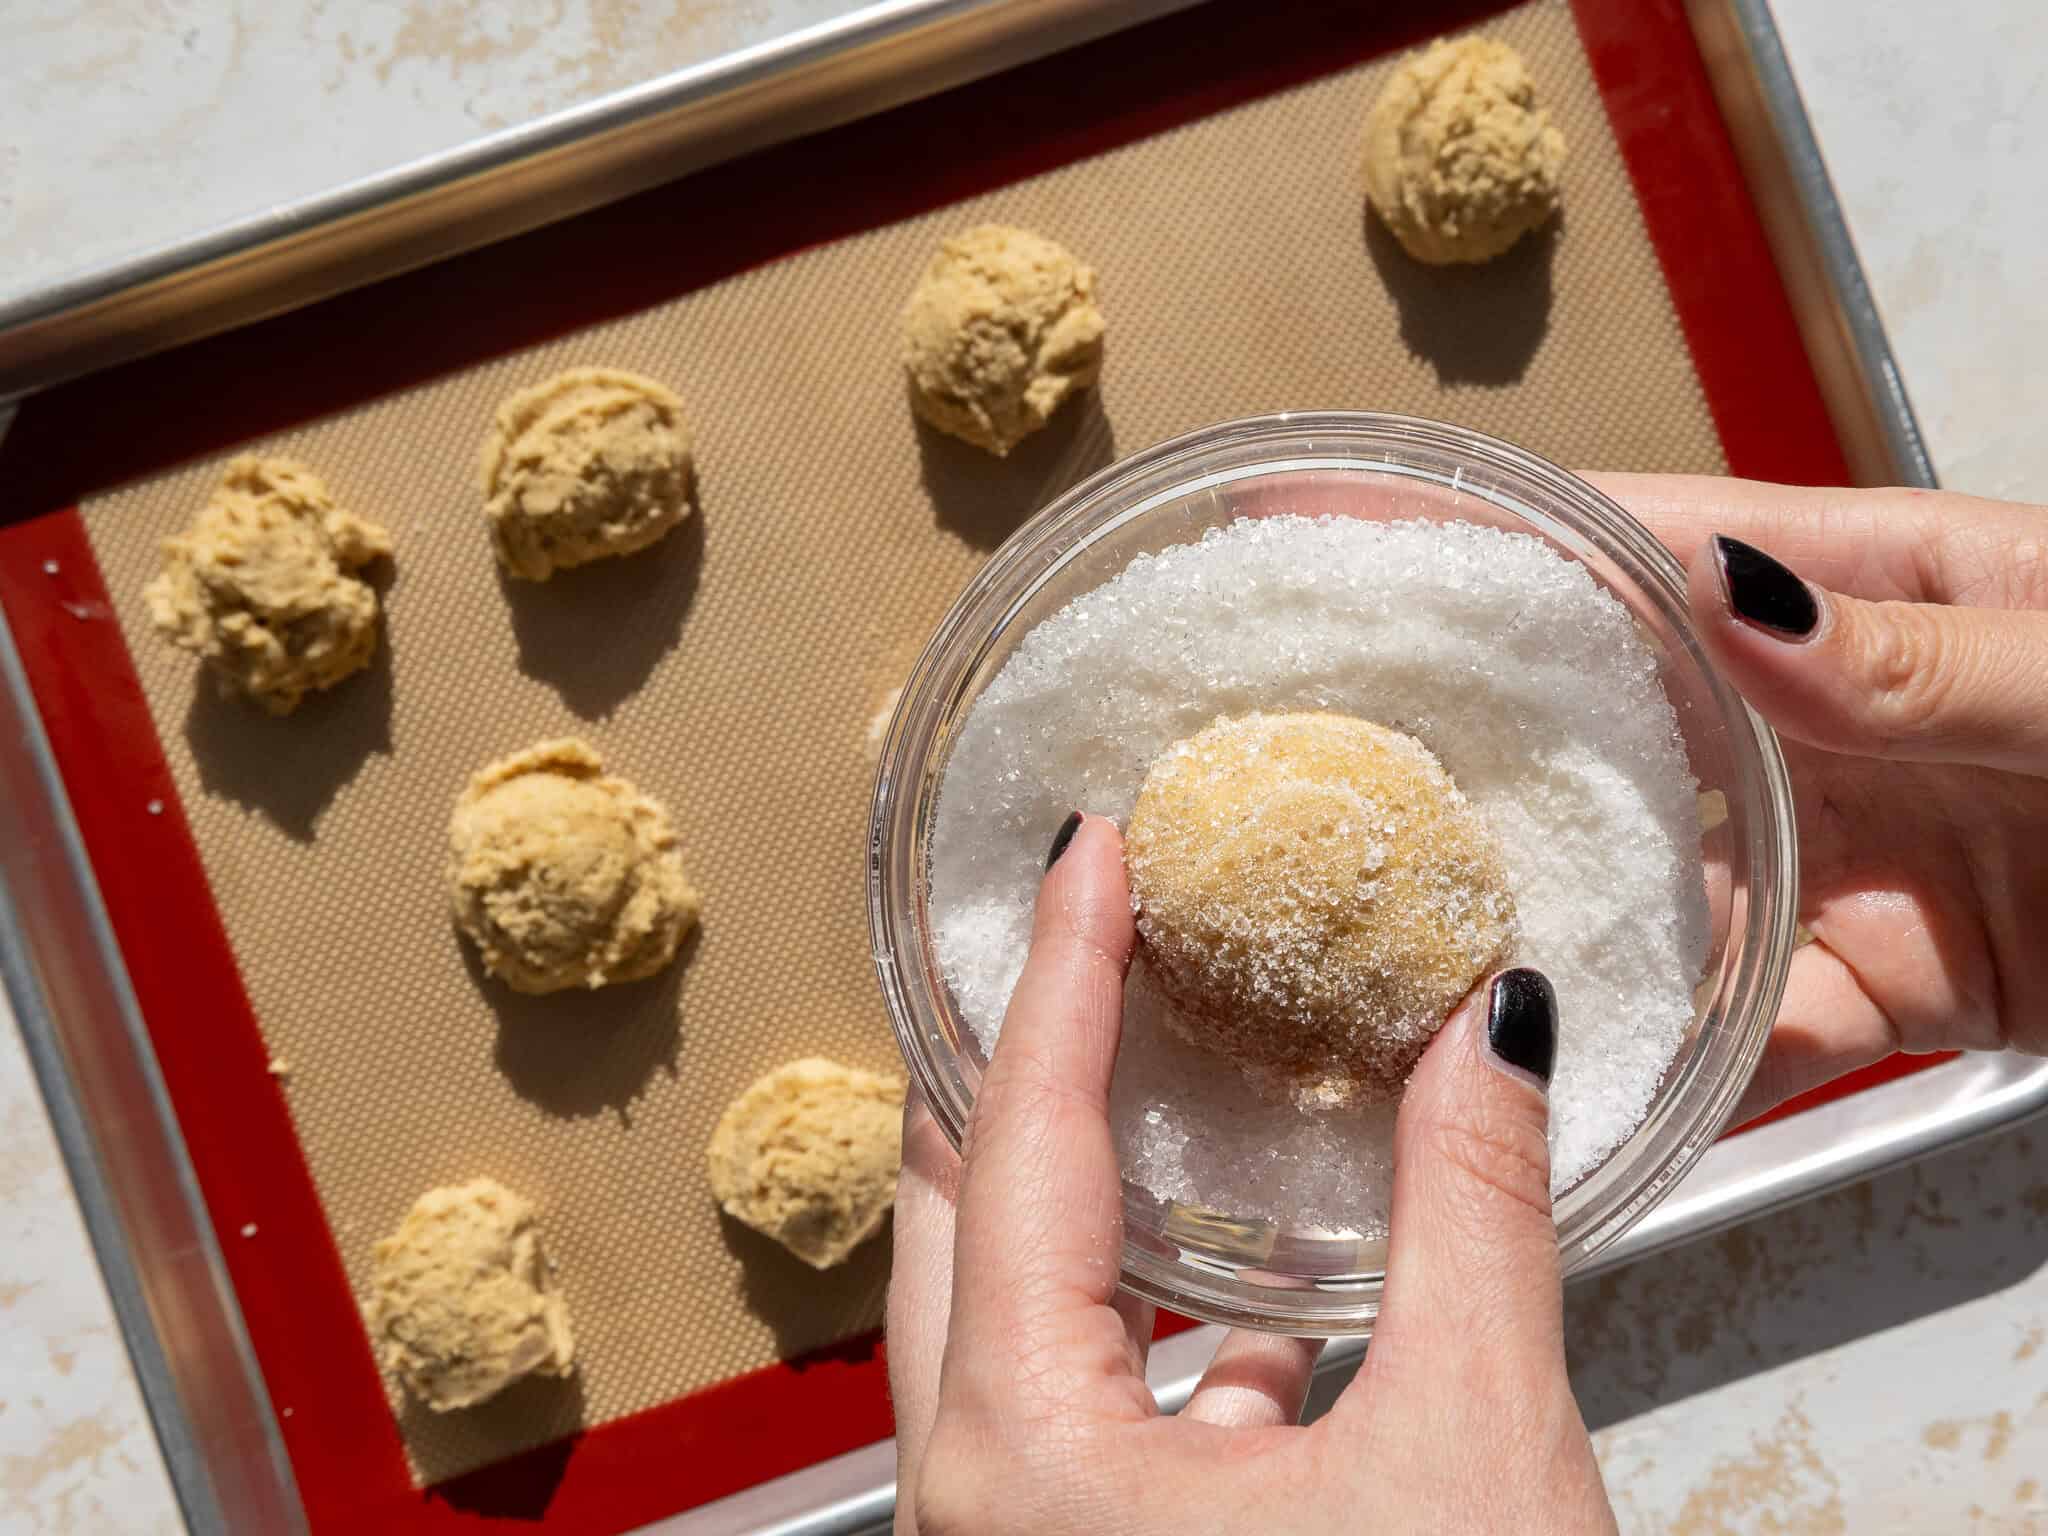
Place the cookie dough balls on the prepared baking pans about 3 inches apart from each other, with 6 on each pan.
Bake one pan at a time (place the second pan in the fridge while the first bakes) for 11-13 minutes, or until the edges are just beginning to brown. Then bake the second pan.
Let the cookies cool on the pan for 5 minutes, then transfer them to a wire rack to finish cooling.
Substitutions and Swaps – Brown Butter Cookies
This cookie recipe uses quite a few ingredients, and I know you might not have them all on hand. Or if you have food allergies or restrictions, I’ve got you covered.
Below are some swaps and substitutions that you can make.
- Unsalted Butter – I prefer using unsalted butter and adding a set amount of salt to ensure that this recipe tastes just right, no matter what brand of butter you use. However, if you only have salted butter on hand, you can use it and omit the salt in this recipe.
- Granulated Sugar – I do not recommend reducing the amount of sugar or changing the type of sugar, as it will change the texture and spread of these cookies.
- Light Brown Sugar – This recipe turns out best with light brown sugar, but you can use dark brown sugar if needed.
- 1 Large Egg – If you have an egg allergy, you can try using a flaxseed egg or a vegan egg replacer like this one made by Bob’s Red Mill.
- AP Flour – This recipe turns out best with AP flour, but you can use a gluten-free flour blend if needed.
How to Make Gluten-Free Brown Butter Sugar Cookies
If you need to make gluten-free brown butter cookies, here’s what I recommend doing:
- Use a 1:1 gluten-free flour blend (King Arthur is a great option)
- Mix a little longer than usual
- Rest the dough 30 minutes before baking
Brown Butter Sugar Cookies Troubleshooting & FAQs
While I’d love to think everyone’s cookies will turn out perfectly every time, I know that sometimes things don’t go to plan. Below are some tips and advice to help!
Why are my cookies flat / why did they overspread?
- Dough wasn’t chilled long enough (chill is non-negotiable for spread control).
- Cookies were underbaked. They need structure before cooling, or they’ll collapse flatter.
- Too much baking soda. Level your baking soda and measure carefully.
- Butter wasn’t properly re-solidified after browning (warm/soft butter = extra spread).
Why didn’t my cookies spread (they stayed in a ball)?
- Brown butter was too cold/firm (especially if it was chilled in the fridge) to be creamed properly.
- Too much flour (packed cups vs spoon-and-level).
- Baking soda is old (it loses strength over time).
- Your oven runs cool. Cookies won’t spread the same if the temp is low.
Frequently Asked Questions
Do I use the brown butter solids at the bottom of the pan?
Yes, use all of it. That’s where the flavor is!
Can I double this recipe?
Yes, it doubles well.
Can I use this recipe for cut-out cookies?
Sadly, I don’t recommend it! This dough spreads and bakes thinner, so it won’t hold sharp cut-out shapes well. If you try anyway, chill longer, roll thicker, and expect some spread.
Can I add mix-ins like chocolate chunks, Heath bits, or toasted pecans?
Yes. Mix-ins can change the spread slightly, so start with 1/2-3/4 cup add-ins and chill the dough well before baking.
How far ahead can I make the dough?
You can chill dough balls in the fridge up to 1 week or freeze them up to 1 month.
Can I Make These Brown Butter Sugar Cookies in Advance?
You can make this cookie dough in advance! The cookie dough balls can be stored in the fridge for up to a week in an airtight container or the freezer for up to a month.
If you freeze the cookie dough, transfer it to the fridge the night before you want to bake the cookies, then roll them in sugar and bake them following the instructions in the recipe card below.
Leftover cookies can sit at room temperature for 5 days in an airtight container.
You can also freeze baked cookies for up to a month. I like to thaw them overnight in the fridge, then let them come to room temperature the next day.
Tips for Making the Best Brown Butter Cookies
- Ingredients at room temperature mix together better. Set out any cold ingredients ahead of time.
- Properly measure the flour (spoon into the cup measure, then level) or use a kitchen scale to measure the dry ingredients.
- Mix the dry ingredients into the wet ingredients until they’re *just* combined.
- Use a cookie scoop to make sure the cookies are uniformly sized.
- Don’t over-bake your cookies! Even if they seem a bit soft coming out of the oven, they will continue to bake and set on the tray once they’re out of the oven.
Let Me Know What You Think!
If you try this brown butter sugar cookie recipe, I’d love to hear what you think of it! Please leave a rating and comment below.
Don’t forget to tag me @chelsweets and use #chelsweets so that I can see your delicious creations on social media!
Brown Butter Sugar Cookies
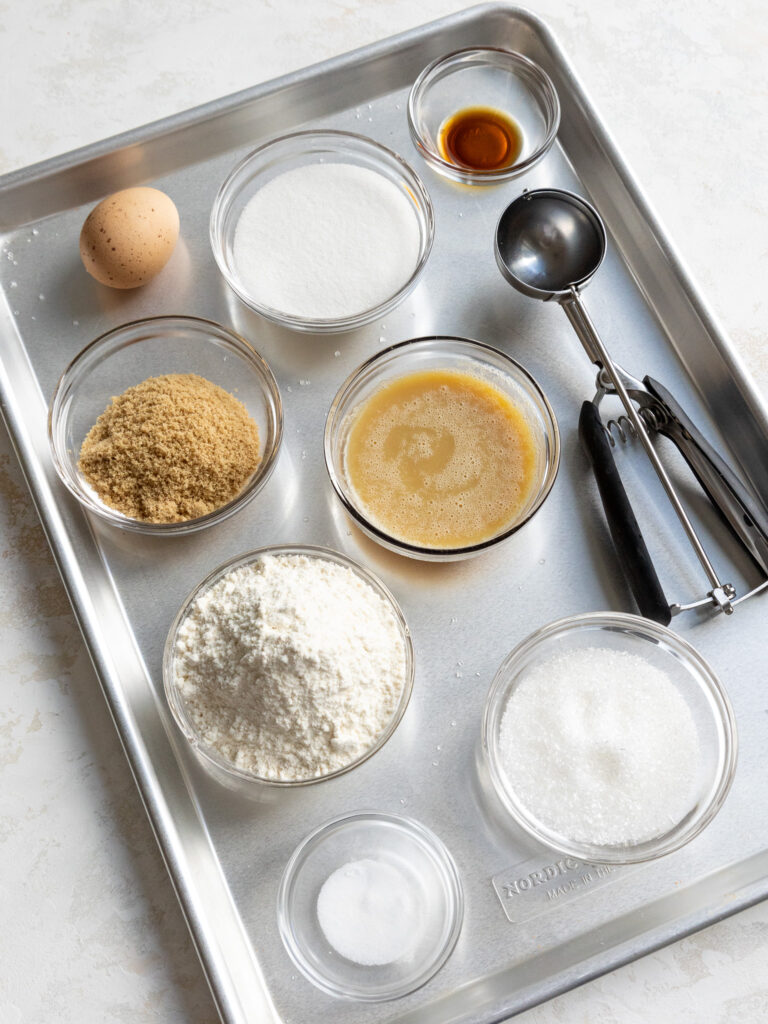
Ingredients
Brown Butter Sugar Cookies
- 1/2 cup unsalted butter, cut into 1 Tbsp-size pieces 113g
- 1/2 cup granulated sugar 100g
- 1/4 cup packed light brown sugar 50g
- 1 large egg, room temperature 56g
- 1 tsp vanilla extract or vanilla bean paste 5g
- 1 cup all-purpose flour 125g
- 1/2 tsp baking soda 3g
- 1/2 tsp fine salt 3g
- White sanding sugar or additional granulated sugar for rolling
Instructions
Brown Butter Sugar Cookies
- The first step is to brown the butter. This can be done in advance to speed up the cooling process. Place 1/2 cup of unsalted butter, cut into Tbsp-sized pieces, in a light-colored pan over medium heat. Stir the butter the entire time with a rubber spatula to keep it moving. Once melted, the butter will begin to foam and sizzle around the edges. Keep stirring. The butter will turn golden brown in about 5–6 minutes from when you start. Some foam will subside, and the milk solids at the bottom of the pan will be toasty brown. It should have a strong, nutty aroma.
- Immediately remove the pan from heat and pour the butter into a heatproof bowl to stop the cooking process. If left in the hot pan, the butter will burn. Chill for about 45 minutes, or until the butter is solid but spreadable.
- Once the brown butter has solidified and reached room temperature, place it in a large bowl with 1/2 cup of granulated sugar and 1/4 cup packed light brown sugar. Cream together with an electric hand mixer for 2 minutes, until the mixture becomes lighter in color. If you don't have an electric mixer, whisk the mixture together vigorously for 3 minutes until it becomes lighter in color.
- Add 1 large egg and 1 tsp vanilla to the brown butter mixture. Mix on a medium speed until combined. Scrape the sides and bottom of the bowl as needed with a rubber spatula.
- Next, mix 1 cup of flour, 1/2 tsp baking soda, and 1/2 tsp fine salt on a low speed until just combined. The dough should be pretty sticky at this point.
- Scoop cookie dough balls that are about 2 Tbsp of dough each onto a parchment-lined plate. You should end up with about 12 cookie dough balls. Chill the cookie dough in the fridge for at least an hour, or overnight. The longer the cookies chill, the more time they have to develop their flavor.
- While the cookie dough chills, preheat the oven to 350 F/175 C. Line 2 large baking pans (light-colored aluminum works best) with parchment paper or a silicone mat.m
- Remove the chilled cookie dough from the fridge and roll the dough in a small bowl of sanding sugar or granulated sugar until it's completely coated. Place the cookie dough on the prepared baking pans about 3 inches apart from each other, with 6 on each pan. Bake one pan at a time (place the second pan in the fridge while the first bakes) for 11-13 minutes, or until the edges are just beginning to brown. Then bake the second pan.
- Let the cookies cool on the pan for 5 minutes, then transfer them to a wire rack to finish cooling.
Video
Notes
How Many Cookies Does This Recipe Make?
This recipe makes about 12 cookies (2 Tbsp of dough per cookie). However, you can also make bigger brown butter cookies! Scoop 8 cookie dough balls (about 3 Tbsp each) and chill them for an hour, then bake for 12-14 minutes at 350°F / 175°C.Tips for Making the Best Brown Butter Sugar Cookies
- Properly measure the flour (spoon into the cup measure, then level) or use a kitchen scale to measure your dry ingredients.
- Ingredients at room temperature mix together better. Set out any cold ingredients ahead of time.
- Mix the dry ingredients into the wet ingredients until they’re *just* combined.
- Use a cookie scoop to make sure the cookies are uniformly sized.
- Don’t over-bake your cookies! Even if they seem a bit soft coming out of the oven, they will continue to bake and set on the tray once they’re out of the oven.
Making These Brown Butter Sugar Cookies in Advance and Storing Them
You can make this cookie dough in advance! The cookie dough balls can be stored in the fridge for up to a week in an airtight container or the freezer for up to a month. If you freeze the cookie dough, transfer it to the fridge the night before you want to bake the cookies, then roll them in sugar and bake them following the instructions in the recipe card above. These cookies can sit at room temperature for 5 days in an airtight container or be frozen for up to a month.Nutrition
Other Posts You Might Like:
Thank you so much for all your recipes! I especially love to make your cookies!!! Your detailed instructions are so appreciated.
I’m so happy to hear that!! Thank you for using my recipes Ramona 🙂
These were so so so good! Great recipe!
So happy to hear that Stacey 🙂 Thank you for sharing!!!
These were incredibly good. In one week I have made them twice.
I absolutely love that, they are so good!! Thank you for sharing Zac 🙂
Oh wow, these were amazing! I did everything the same with the exception of using King Arthur gluten free flour because my daughter can’t have gluten. They were eaten so fast. I’m making a double batch tonight!
Oh I love that!! I just made a batch of these yesterday, so we’re baking twins! Thank you so much for sharing, they really are so delicious!!!
What didn’t my cookies flatten out? They stayed in a ball.
Hi Hiday,
That can be caused by a few different things! If your butter wasn’t fully at room temp (if your kitchen was cold or you made it in advance and stored it in the fridge), that would have a big impact on how much the cookies spread. Are you measuring your flour by fluffing and leveling it or using a scale? Sometimes if you’re packing the flour into the measuring cup that can also cause the cookies to spread less. One other thing could be that your baking soda is old (it looses its strength after 6 months)! The baking soda causes the cookies to rise up and then spread out as they bake, so if it isn’t at full potency, the cookies wouldn’t spread much.
Do you think it could be one of those? Hopefully we’ll be able to figure it out together!
You don’t have to stir the butter at all until the steam stops coming off it. Oil is lighter than water so it’s not touching the bottom of the pan until all the water boils out. Making these cookies for the second time now. My mom really likes them. She’d never heard of browned butter
I absolutely love these, they’re crispy and chewy and just overall so good! They’re easy to make and freeze well, I love everything about them!
Although I’m not a fan of flat cookies, I will try these! I always use parchment paper, so that might help. I know Stella Parks says cookies spread more on silicone mats.
These are delicious! Cant wait to add some heath pieces or dark chocolate chunks in my next batch!
I know I’m sounding like a know-it-all & I’m very far from it! But re flat cookies that spread too much, I’m reminded of a video made by baking guru Stella Parks, which demonstrated silicone sheets are a major culprit.
These cookies are absolutely delicious, they truly have that delectable, nutty browned butter flavor! They were easy to make and worth the time, my family thought they were amazing. 😀 Thank you so much for sharing this recipe, I’ll definitely be making them again!
Can you use this recipe for cut out cookies?
These were so amazing, a ton of compliments from family and friends. %100 would recommend
the best type of comment!! Thank you Rose!!!!!! 🙂
do these cookies do okay with the recipe doubled?
@nicole, yes I doubled it & was perfect
They do!! You can absolutely double the recipe 🙂 Hope that helps, happy baking!
Yes it absolutely MUST be doubled because they will be gone!! They are so good! In the after notes did you mean the 3 tbsp cookies (8 balls in the batch) should cook for 12-14 minutes at 350? You put that they cook a minute less at 9-12…. I think mine aren’t cooking fully cause they are a little larger… or colder… do u let them come to room temp before baking or straight from the fridge?
Hi Jackie,
I am so sorry about that, I just updated that part of the notes section for the larger cookie size to be 12-14 minutes!! I used to have a not about making smaller/mini brown butter cookies, and I think that’s what caused that. So sorry for any confusion!! Hope that helps for the future, happy baking!
Omg these cookies were so delicious! Literally absolutely perfect! I always thought sugar cookies were boring but the brown butter adds the perfect touch! Soft, chewy, hint of nuttiness! I’m so tempted to eat the whole batch in one setting! My new go to cookie recipe!
Your comment made my day Bre!!! Thank you for sharing 🙂
oh my gosh these cookies are so tasty! Normally when when I make cookies that are thin and wrinkled they never flatten out, I was so pleased when it actually flattened out with this recipe! It tastes a little bit like caramelly popcorn lol
Aw I am so happy to hear that Annie!! Thank you for sharing 🙂
I made these for my girlfriend on our six year anniversary. She loves soft-baked cookies and these made her smile like crazy. So thanks for a recipe I’ll definitely be making again!
Hi Joe,
This is the sweetest message!! I’m so glad you GF loved them and that they helped make your anniversary extra special 🙂 Congrats on six years together!!
These are phenomenal! For the first time, I can bake a cookie perfectly without it being too cakey or too flat!! Thank you for such an amazing recipe!
Hi Jennifer,
Yay!! I’m so happy to hear that 🙂 Finding that sweet spot between cakey and flat can be tricky, so it makes me so glad this recipe gave you exactly what you were looking for. Thanks for baking and sharing the love!
What do you think about adding some toasted pecans?
Hi Julie,
I think that would taste amazing!!! Let me know how it turns out if you try it 🙂
Hello! I’d like to try making these cookies in a dinosaur shaped cakelet pan. How would you suggest I go about doing that? Each cakelet cavity is 1.4in in depth and holds about 1/3 cup. Thanks for your help!
Hi Miriana,
Oh my gosh, that sounds so cute! I’ve never tried something like that with this recipe, but I’d lightly grease the cakelet pan so the details release cleanly.
I’d say press the dough into each cavity filling it like 1/2 way up?? As for the bake time, I honestly have no clue! But you’ll know they’re done when the edges look set and the tops lose their shine. I’d test one at a time, to play around with how full you want to fill them and how long you need to bake them. Once you’ve figured that bit out, you can bake the rest of them!
If this is for a party or something, I’d make a test batch the weekend before just to figure it all out and make the process less stressful! I know making an extra batch is more work and time, but I think you’ll thank yourself when it’s go time and you need perfect little dino cookies 🙂 Or if you can’t get the mold to work, you can figure out a plan B without the stress!
I’d also let them cool in the pan for at least 20 minutes before popping them out so they don’t break. They should come out with really cute details and a soft, chewy cookie texture. Hope that helps, and that the cookies turn out great!!
Do you put the browned butter solids in that is left in the bottom of the pan? or just the liquid part?
Hi Laney,
YES! That’s the best part!!! 🙂 Hope that helps, happy baking!
Best sugar cookie I’ve ever had!! The brown butter is essential, really makes the flavor so rich!
Hi Cee,
YESSSSS!! SO happy to hear you loved this recipe, it’s one of my faves 🙂 Thanks for sharing!
Hi!
I just have one quick question! Would this dough be good for a “base/master” cookie dough recipe? Like I could add mix-ins such as Oreo’s and such to create different flavors/type of cookies? Thank you so much I can’t wait to try these!
Hi Kennedy,
These cookies spread a decent amount as they bake, and bake up somewhat thin/they’re not super thick. I think they would be with delicious with different mix-ins, but I haven’t tested it to see how it affects the spread of the cookies. If you try it, let me know how they turn out!
how can i turn it into a chocolate or matcha or red velvet version?
Hi Lauren,
You can definitely play around with different flavors, but I’d start with small tweaks so the texture and spread don’t change too much. For a chocolate version, I’d try replacing 2 Tbsp of the flour with 2 Tbsp unsweetened cocoa powder. For matcha, I’d add 1-2 tsp matcha powder, depending on how strong you want the flavor. For red velvet, I’d replace 1 Tbsp of the flour with 1 Tbsp cocoa powder and add red gel food coloring with the egg and vanilla. I’d avoid liquid food coloring because it can throw off the dough texture. For any of these versions, chill the dough really well before baking and maybe test-bake one cookie first to see how it spreads. Hope that helps, happy baking!!