
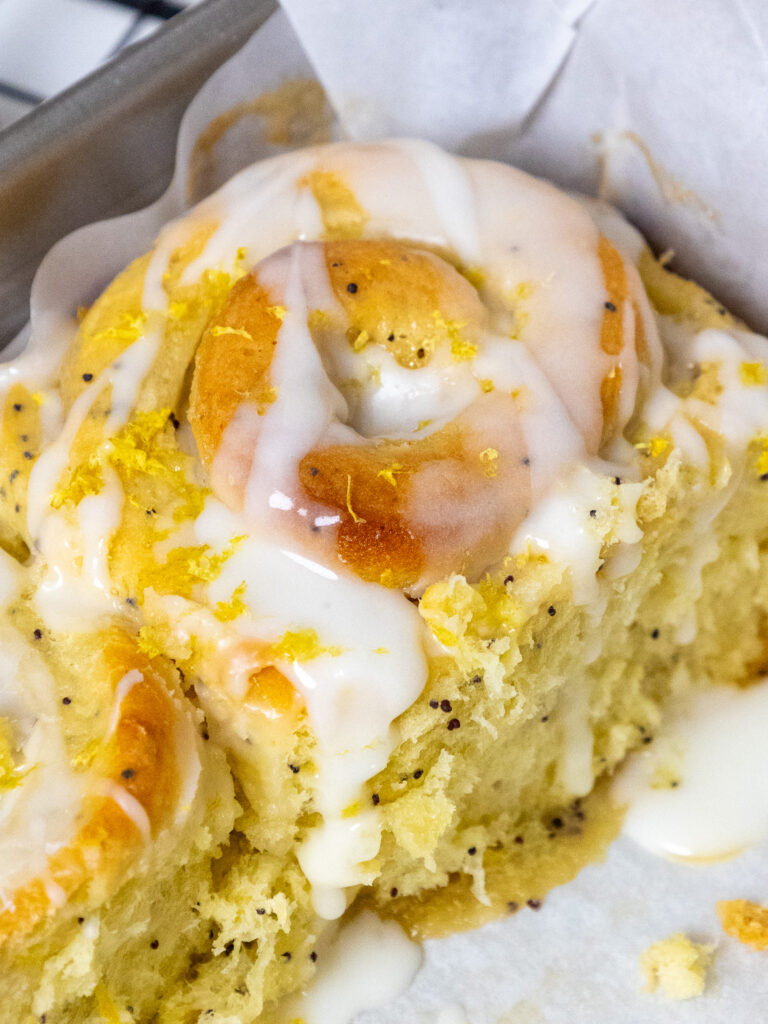
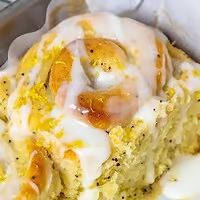
Lemon Rolls
These lemon rolls are ready in 90 minutes, bake up soft and fluffy with gooey centers, and are topped with the best lemon icing!
They’re bursting with lemon flavor and are the perfect summer breakfast or brunch!
How to Make These Lemon Rolls
Let’s walk through each step of this recipe to make sure it turns out as amazing as possible!
I’ve also included a video of the process in the recipe card at the bottom of this post, along with the tools I used. If you don’t have all of these on hand, feel free to get creative and work with what you’ve got!
Tools / Equipment
- 9×13-inch Pan
- Parchment Paper
- Stand Mixer w/ Dough Hook or Danish Dough Whisk
- Ruler
- Dental Floss
Step 1: Make the Lemon Roll Dough
Preheat your oven to 200 F / 95 C. In a large bowl or the bowl of a stand mixer, combine the flour, instant dry yeast, poppyseeds, and salt.
In a separate bowl, combine the buttermilk, granulated sugar, and butter. Heat for 1 minute in the microwave, then stir to combine the ingredients. The butter should be mostly melted, and the mixture should feel warm but not hot to the touch. If it’s too hot, it can kill the yeast!
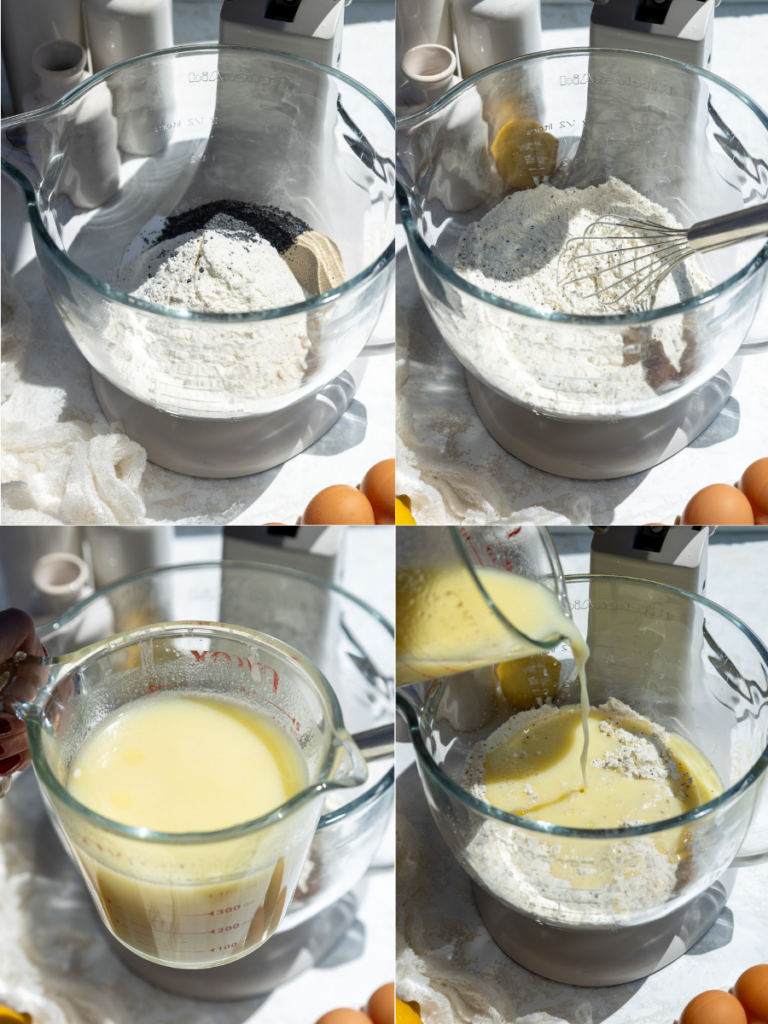
Slowly pour the warm buttermilk mixture into the dry ingredients and mix on medium speed with a dough hook or by hand with a dough whisk.
If you don’t have a dough whisk, you can use a large wooden spoon.
Add the eggs one at a time and mix on a medium-low speed until a sticky dough ball forms. Continue to mix on a medium-low speed for a couple of minutes until the dough becomes more elastic.
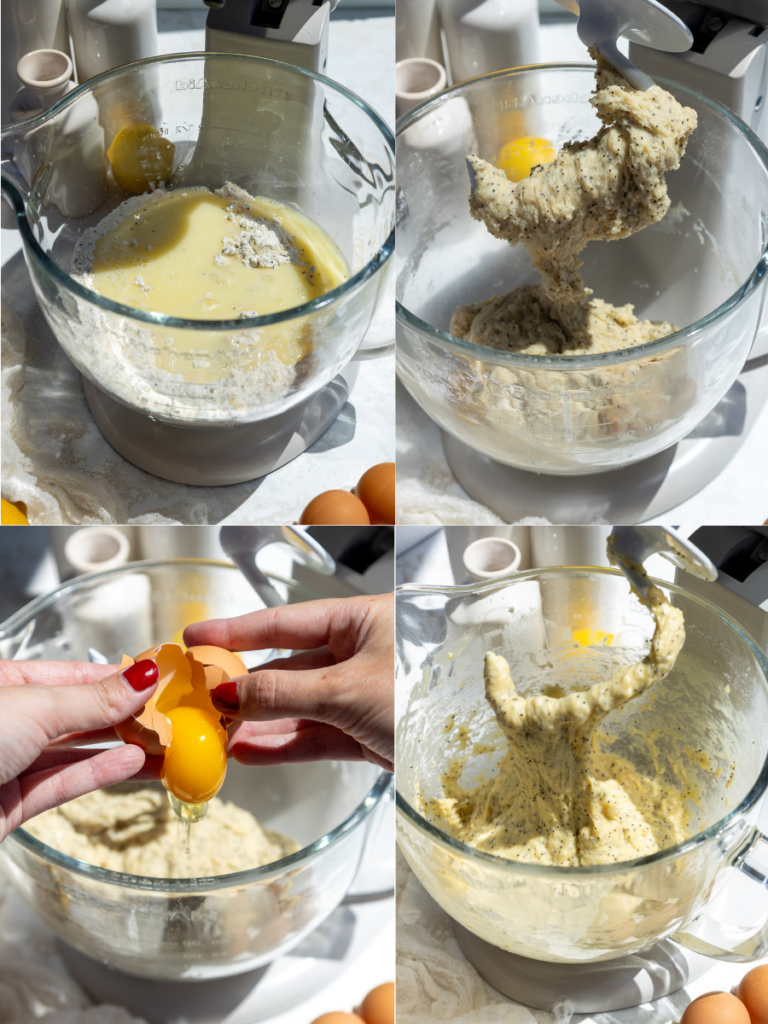
Once combined, mix in the zest of 2 large lemons on a medium speed until incorporated.
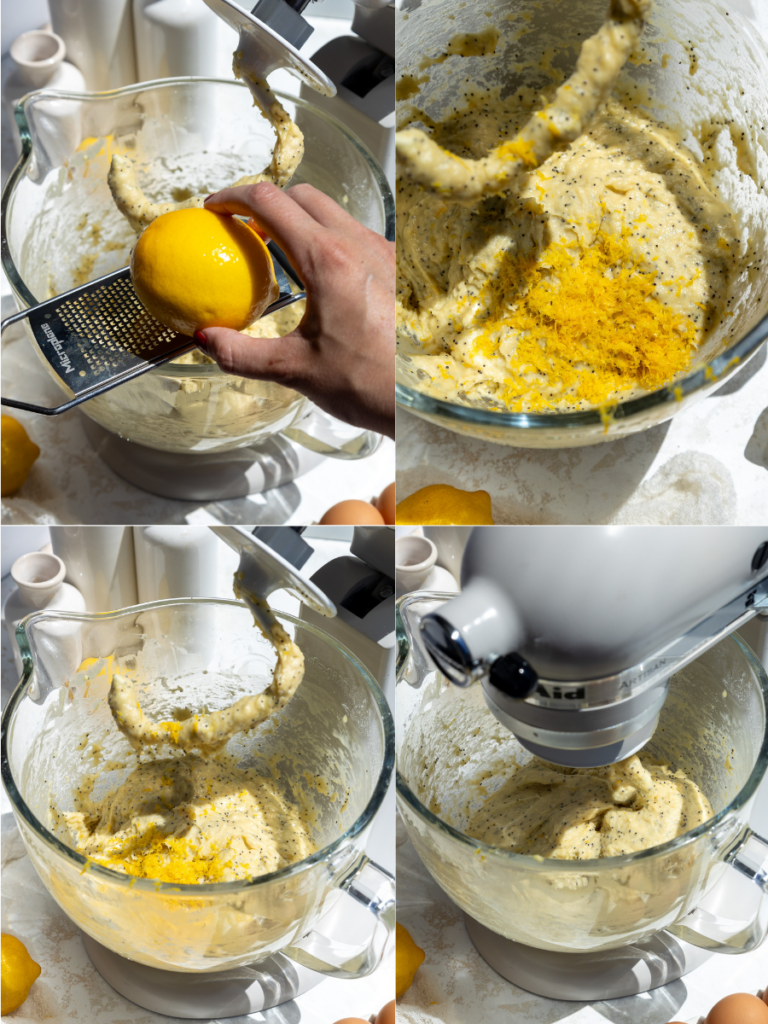
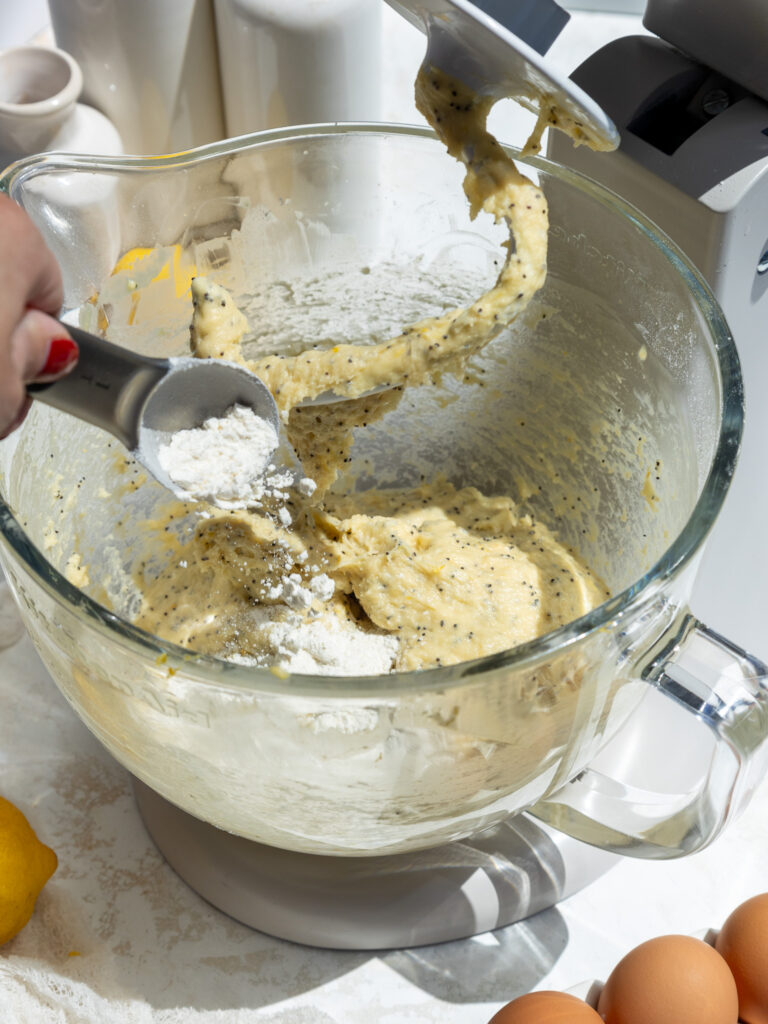
As the dough mixes, add additional flour 1 Tbsp at a time until the dough begins to leave the sides of the bowl. I usually add about 3 additional tablespoons of flour.
My favorite way to know if my dough is ready is to poke it with my finger. It should feel tacky but not sticky. As you pull your finger away, there should be no residue on your finger.
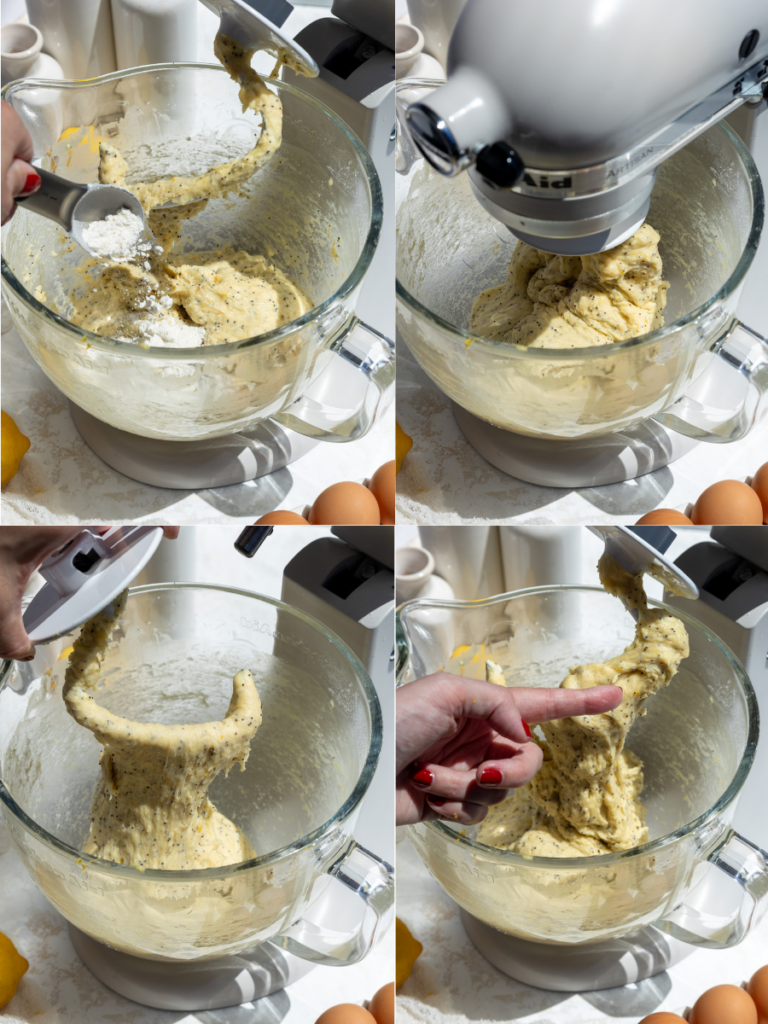
Cover the bowl with plastic wrap and set aside to let the dough rest for 10-20 minutes. This will make it easier to roll out.
Step 2: Make the Lemon Roll Filling
As the dough rests, make the lemon roll filling.
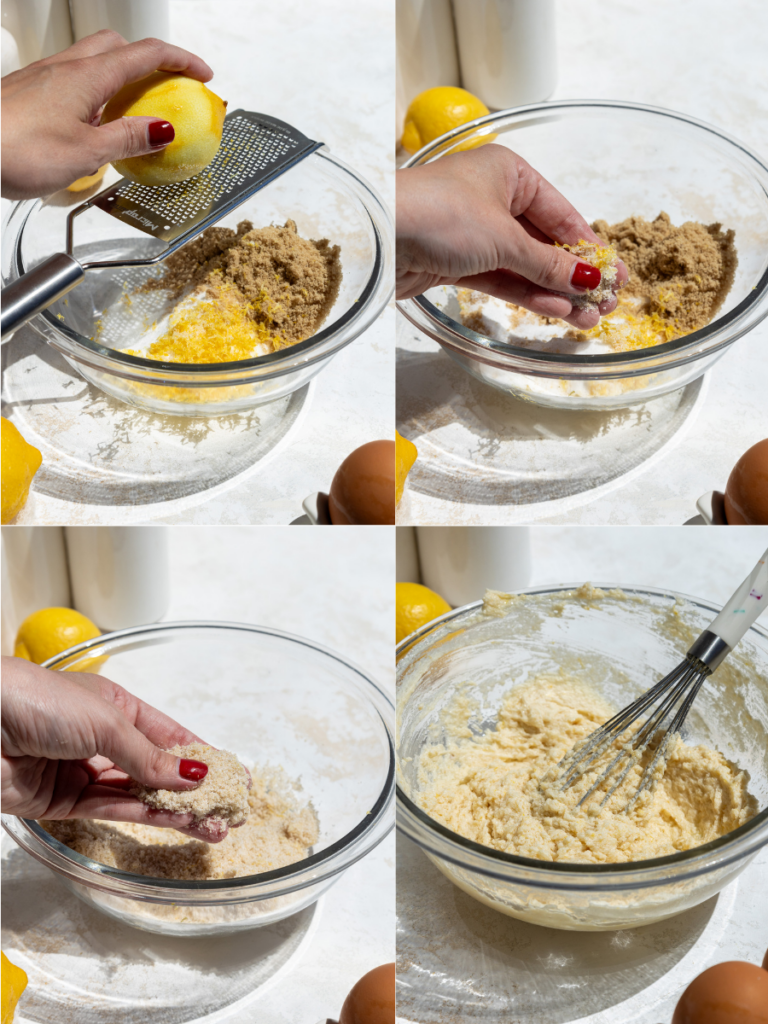
In a medium-sized bowl, add the granulated sugar, light brown sugar, and fresh lemon zest.
Massage the zest into the sugar with your fingertips to help release the oil from the zest. The mixture should be aromatic as you do this.
Then add the softened butter and whisk together until combined. Set aside.
Step 3: Roll Up and Bake the Lemon Rolls
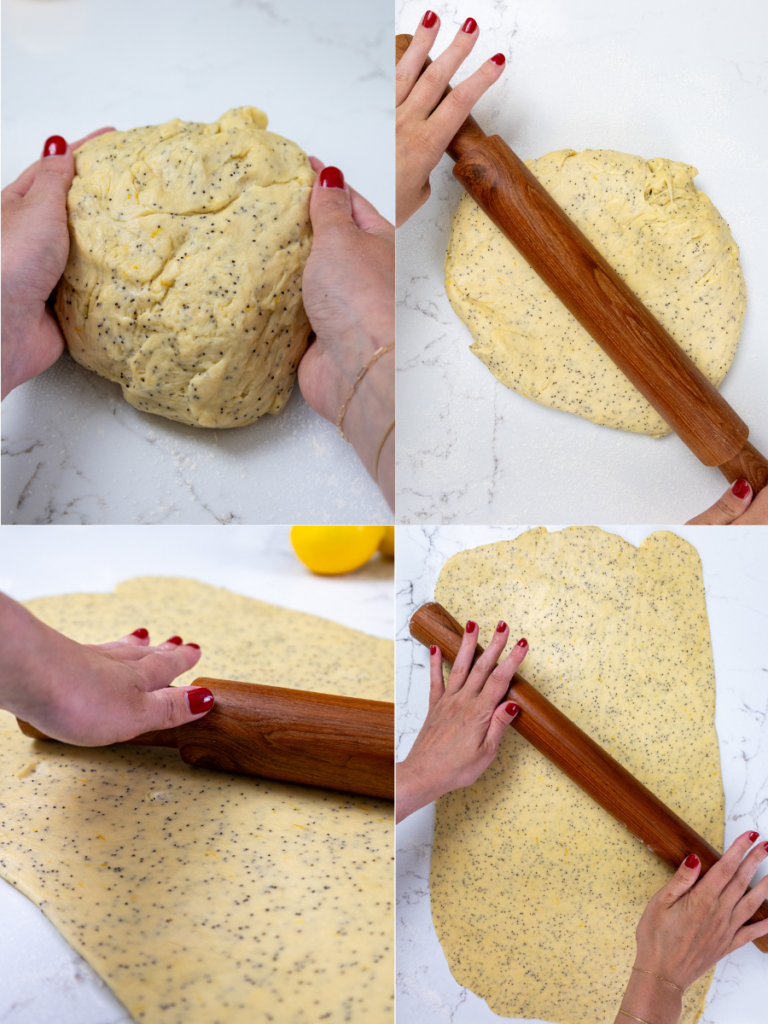
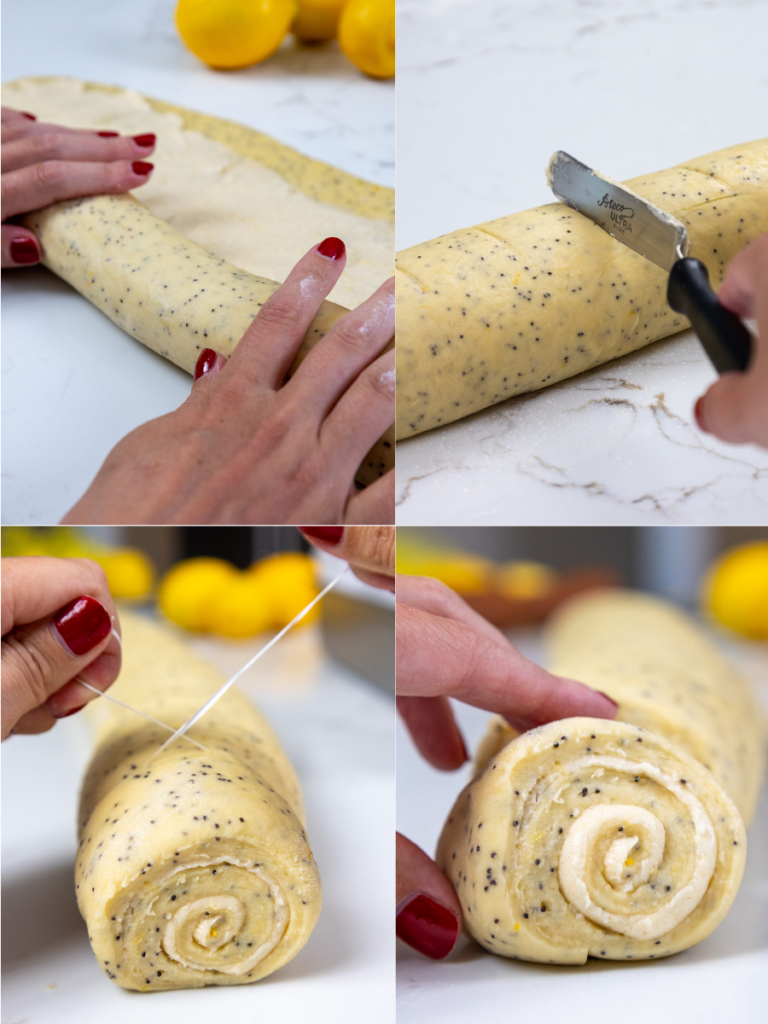
Once the dough has had a chance to rest, place it on a lightly floured surface and roll it into a large rectangle that’s roughly 12 in x 18 in. It should be about 1/2 cm thick.
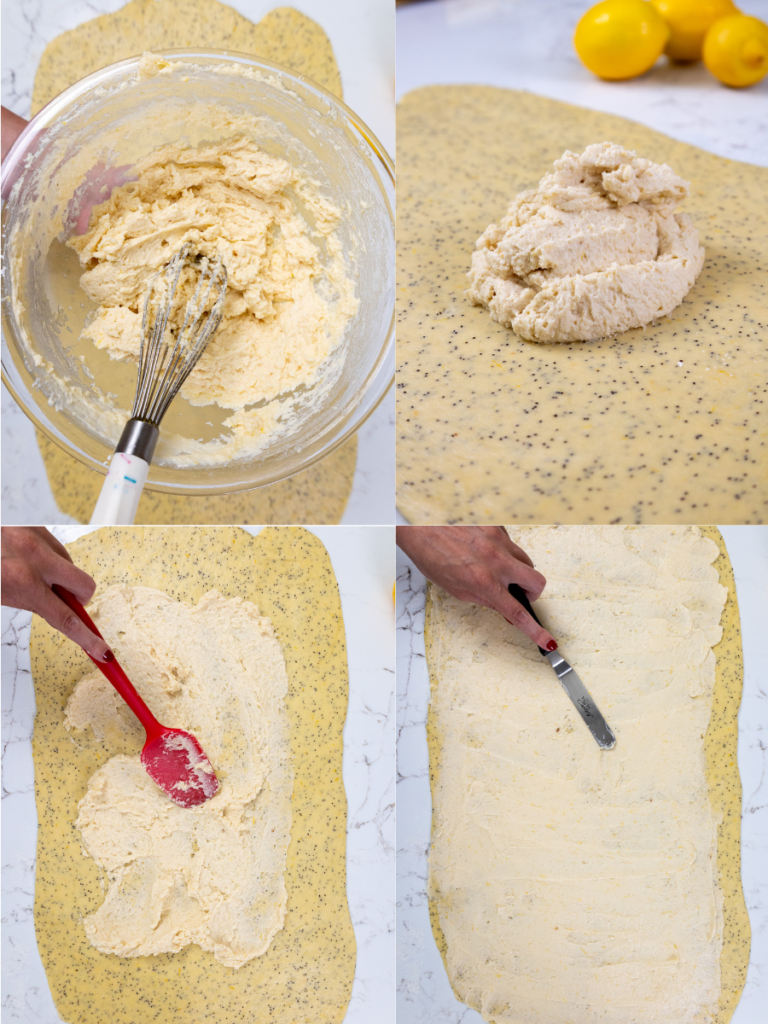
Spread the lemon roll filling over the dough, leaving 1/2 inch of dough on the long side of the rectangle uncovered (this will help you seal off the roll and keep it tight).
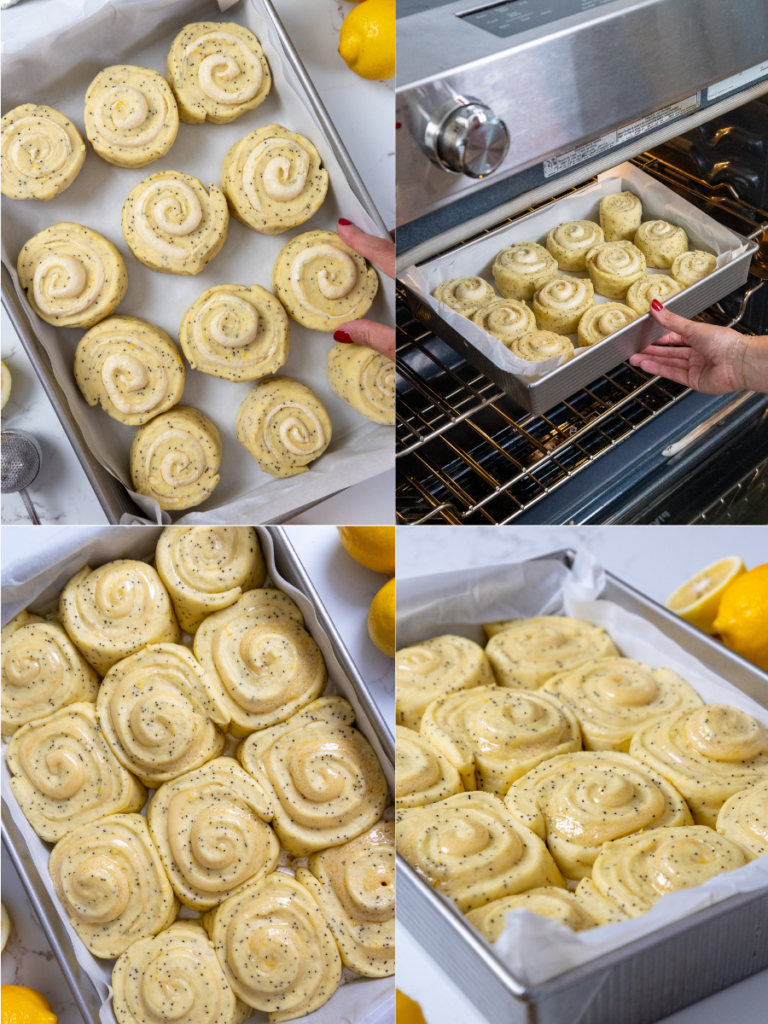
Then roll the dough horizontally, toward the uncovered strip and cut 12 equal pieces using dental floss. Place the rolls in a greased or lined 9×13-inch pan
Turn the oven off! I REPEAT, TURN THE OVEN OFF. Then cover the rolls with foil and place them in the oven for about 30 minutes to give them an assisted rise.
They should look puffier and have grown in size once they’ve risen.
Remove them from the oven and take off the tinfoil. Turn the oven back on and heat it to 350°F / 175°C.
Once the oven is preheated, bake the rolls for 28-32 minutes or until the rolls are golden brown.
Step 4: Make the Lemon Icing
The last step is to make the lemon icing. Whisk the powdered sugar, fresh lemon juice, and melted butter until combined.
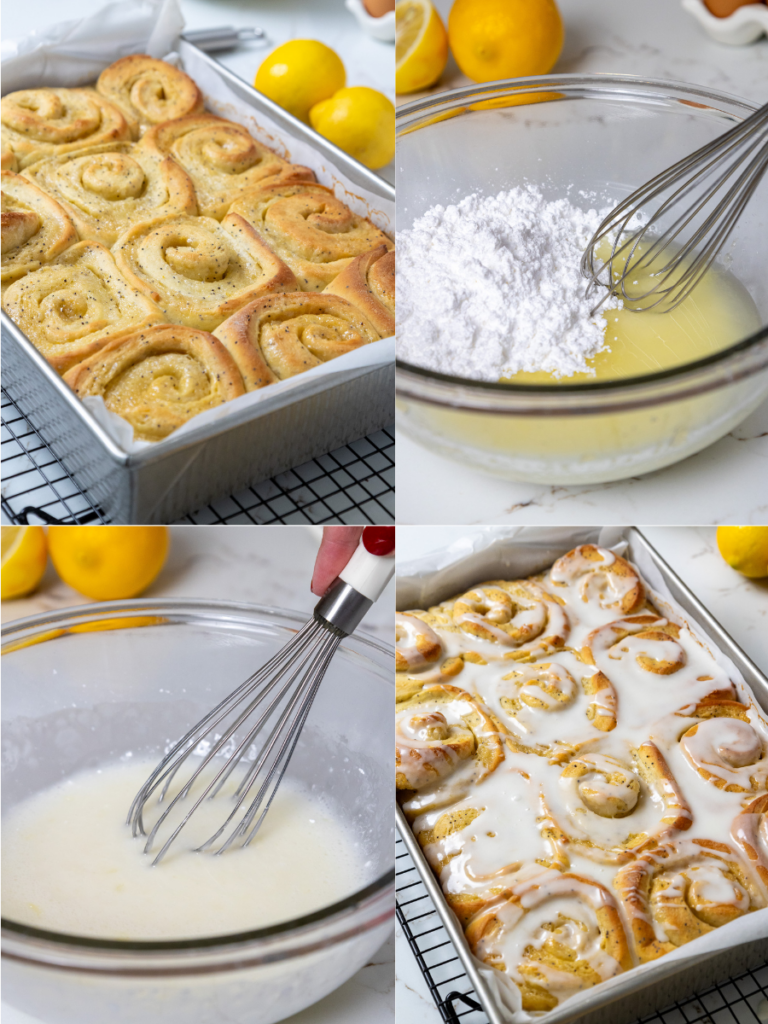
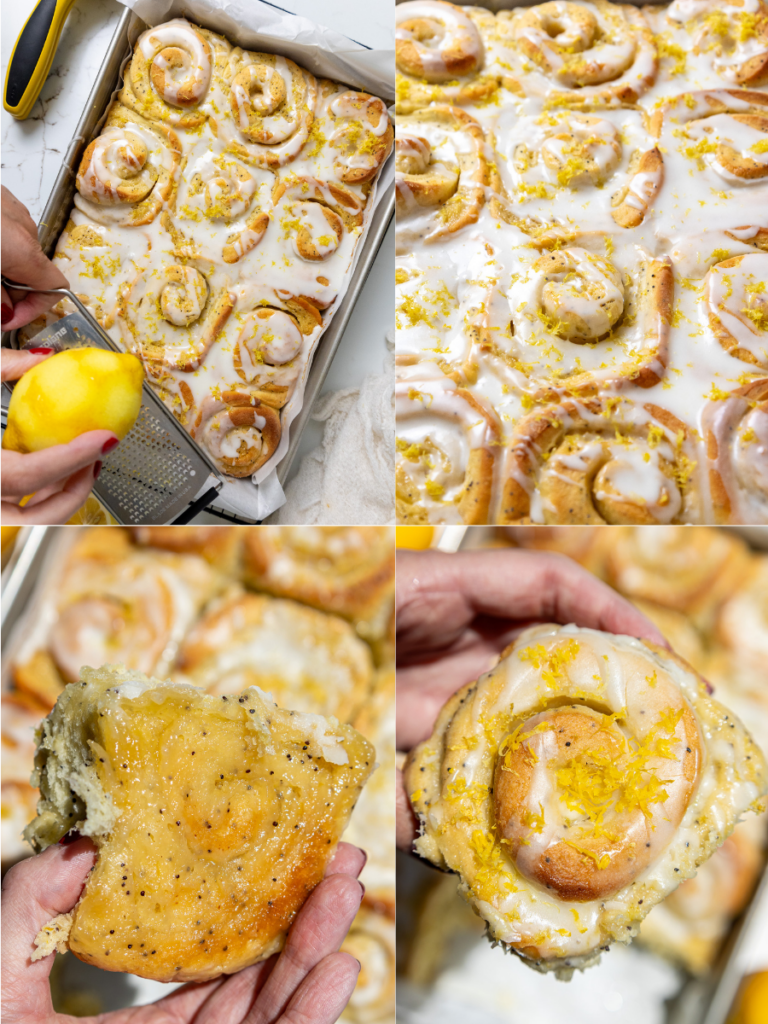
Let the rolls cool for 10-20 minutes, then spoon the icing over the rolls and top with fresh lemon zest.
How Much Flour Am I Supposed to Use?
One part of this recipe that can be a bit daunting is the amount of flour this recipe uses.
I tried so hard to find the perfect amount, but the truth is it will vary from batch to batch and kitchen to kitchen.
I’ve made these by hand and in a stand mixer, and each time I use a slightly different amount of flour.
Now, the amount of flour you start with is set at 4 1/4 cups of all-purpose flour.
But as you add in your wet ingredients and the eggs, a sticky dough ball forms and you will need to add additional flour.
I add 1 Tablespoon of flour at a time as I knead the dough. You need to add enough flour to create an elastic, workable dough that you can roll out.
However, if you add too much flour you can end up with dense, chewy rolls.
This is why it’s a range. When using my stand mixer, I usually add about 3 additional tablespoons of flour. Sometimes I end up using less than that, and occasionally I use more!
Making These Lemon Rolls By Hand vs. Using a Stand Mixer
This recipe can be made by hand or with a stand mixer and a dough hook.
It is definitely easier to make using a stand mixer, but a little elbow grease never hurt anyone.
Whichever method you use to make the dough, just be sure to knead or mix the dough until it gets an elastic texture and pulls away from the sides of the bowl or counter.
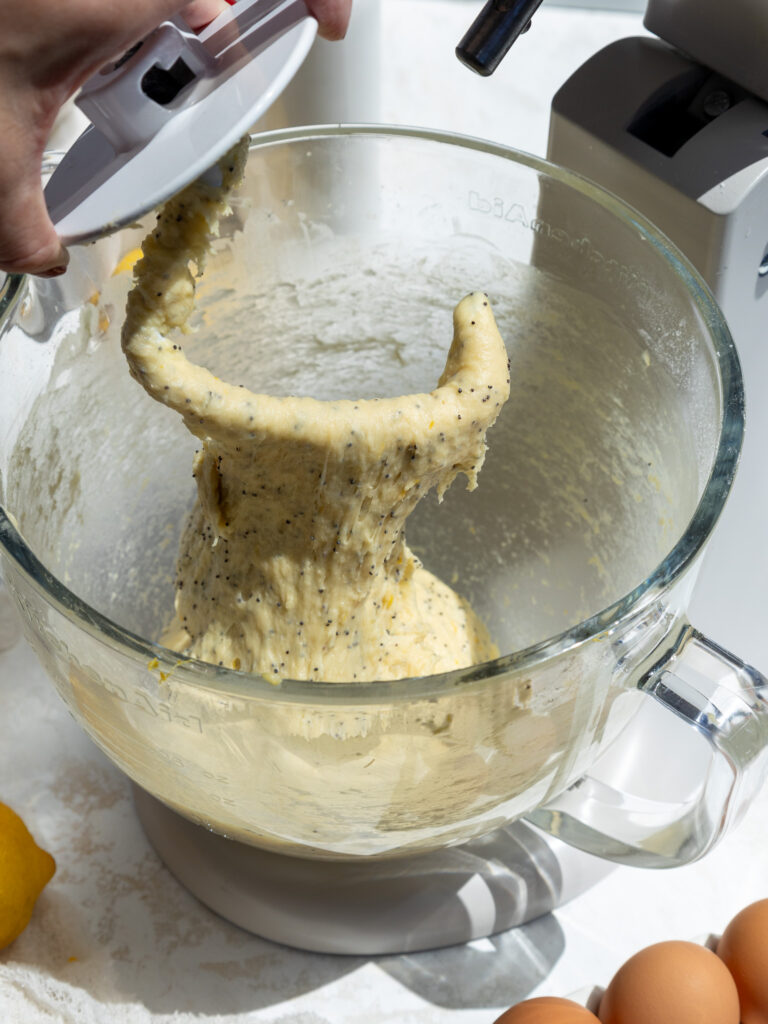
Once you get to this point, stop and let the dough rest for about 10 minutes. This little break lets the gluten relax and makes the dough easier to roll out.
If you continue to work the dough, the gluten strands can become too tight. Just like adding in too much flour, this can also lead to dense rolls.
It’s pretty easy to sense when the dough is ready if you’re kneading by hand. However, if you’re using a stand mixer, keep a close eye on your dough to ensure you don’t accidentally overwork it.
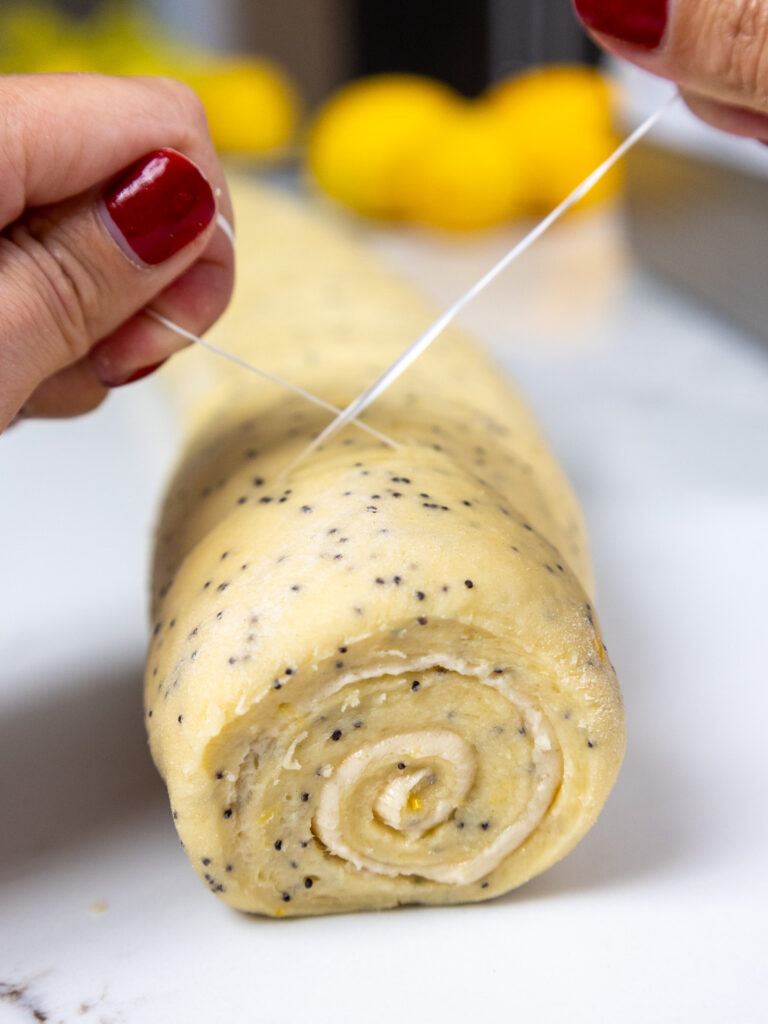
The Best Way to Cut These Lemon Rolls: Dental Floss
Now I know this sounds weird, but I highly recommend using floss to cut your rolls.
Most knives don’t cut the rolls as cleanly and tend to kind of smush them.
On the other hand, a piece of floss cuts through the dough smoothly. It takes hardly any effort, and you get perfectly cut rolls every time!! Try it just once and you’ll never look back.
The Assisted Rise
Another thing that helps these lemon rolls turn out soft, fluffy, and tall is an assisted rise.
This recipe uses your oven to help the yeast rise. Don’t worry, the oven is preheated at a low temperature (200 F/ 95 C) and then turned off before you place the rolls in there to rise.
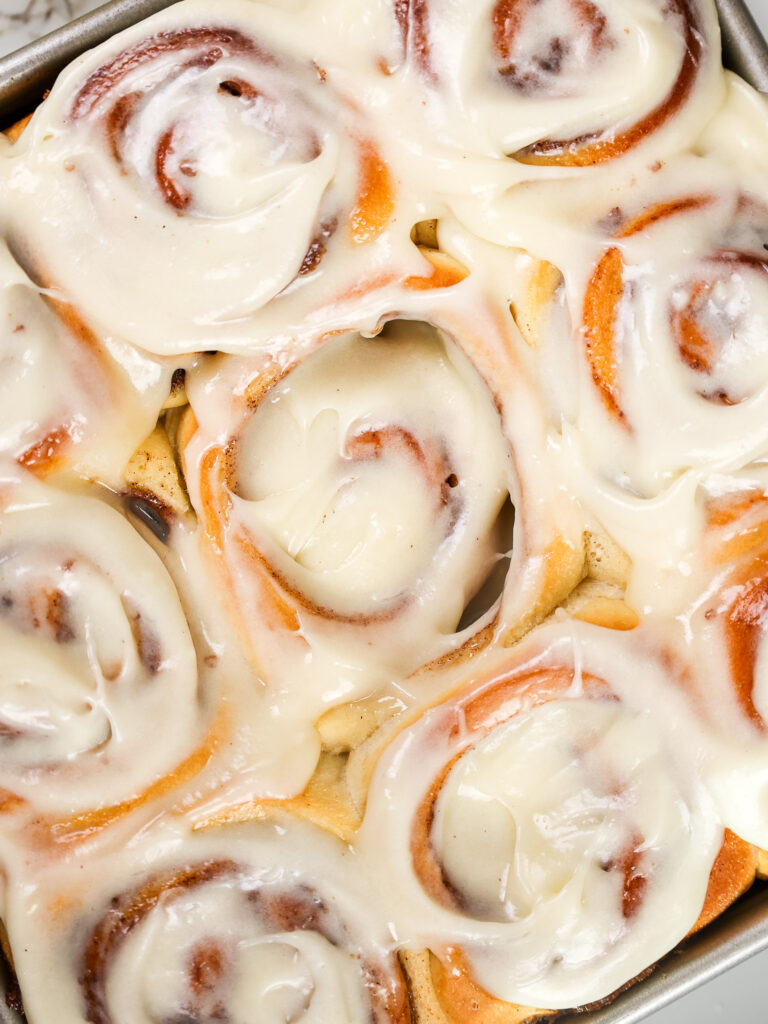
Below is a picture of my rolls after popping them into the oven to rise.
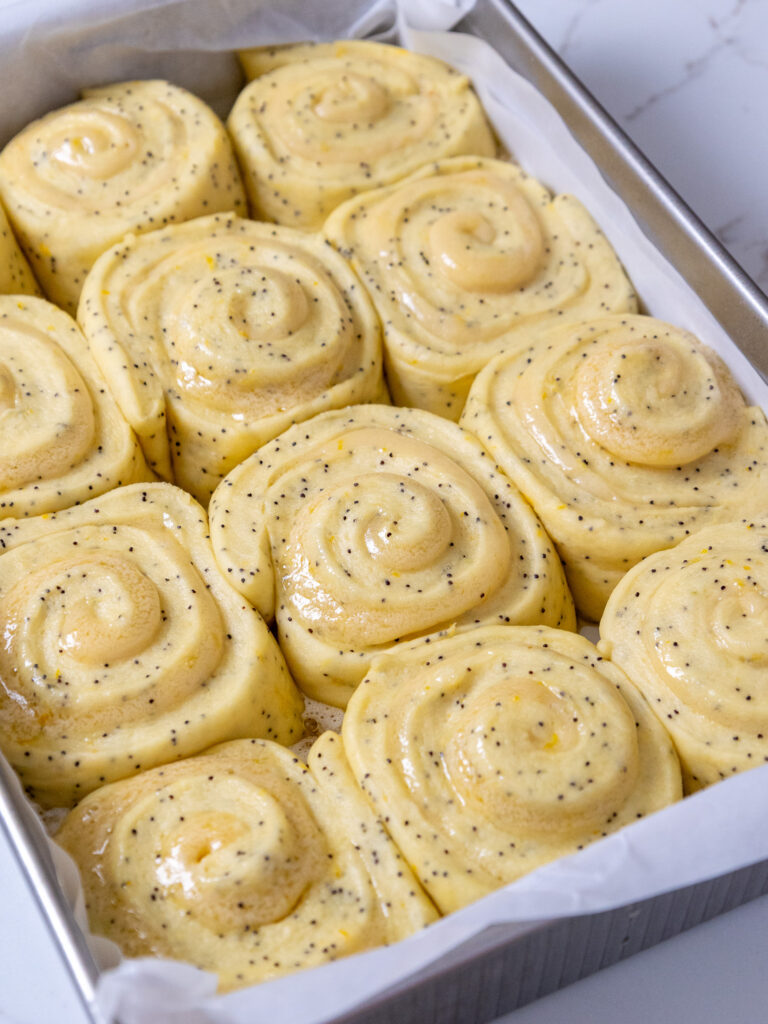
The pan is also covered with foil to ensure no actual baking takes place.
I love this method because in the winter, my house is always cold. It’s almost impossible to find a warm spot for the rolls to rise.
No matter what temperature your kitchen is, your rolls are guaranteed to rise and puff up with this method.
You also know how long it will take for them to rise (about 30 minutes), rather than anxiously checking on them every 10 minutes to see if they’ve risen.
If your oven has a proof setting, you can also simply turn that on and place the rolls uncovered in the oven for about 30 minutes.
Substitutions and Swaps in This Recipe
While I love this recipe just the way it is, I know you might not have all these ingredients on hand!
Below are some swaps and substitutions that can be made in this recipe.
- All-Purpose Flour – I haven’t tested this recipe out with gluten-free flour, but it should work if you use a good blend like King Arthur’s GF flour. Just be sure to knead the dough a bit longer to help give it structure, and bake the rolls for a few extra minutes.
- Instant / Rapid Rise Yeast – You can use active dry yeast in place of the instant yeast in this recipe, just be sure to activate the yeast with a little bit of warm water and sugar before adding it, and allow the dough to rise for a bit longer (active yeast takes longer to rise than instant).
- Unsalted Butter – If you only have salted butter on hand, you can use it in place of the unsalted butter in this recipe. Just be sure to omit the salt that this recipe calls for. You can also use vegan butter in its place!
- Buttermilk – Whole milk or most alternative milk (soy, oat, and almond milk) can be used in place of the buttermilk.
- Granulated Sugar – I don’t recommend changing the type or amount of sugar used in the dough.
- Large Egg – This is an enriched dough, so it uses eggs. For best results, use large, room-temperature eggs.
- Brown Sugar – I recommend using light brown sugar if possible. It has a more subtle flavor than dark brown sugar, which helps the lemon flavor shine.
- Lemons – Fresh lemon juice and zest is a must in this recipe!! You will need 4 large lemons. Limes can be used in place of lemons if needed.

How to Make These Lemon Rolls in Advance
If you want to make these lemon rolls ahead of time, be my guest! I’m all about working ahead and making life easier.
This recipe can be made the evening before and then baked the following morning.
You can refrigerate the rolls overnight once they have been cut and placed in a greased or lined pan. Cover the roll pan tightly with plastic wrap, making sure the seal is airtight.
Take them out 1-2 hours and place them somewhere warm before you plan to bake them to help them rise a bit. Preheat the oven to 350 F / 175 C as the rolls warm up.
Once the oven is fully preheated, bake the rolls for 28-32 minutes or until the rolls are golden brown.

You can also bake the lemon rolls, then let them cool and freeze them individually.
This is what I do with our leftover lemon rolls. I tightly wrap each roll in a layer of plastic wrap, then foil.
I move individual lemon rolls from the freezer to the fridge the night before I want to eat them.
Then in the morning, I unwrap the roll and heat it up in the microwave until it’s warm and gooey. This usually takes about 30 seconds in my microwave.
Tips for Making the Best Homemade Lemon Rolls
- Don’t add too much flour! Add in additional flour 1 Tbsp at a time, and check the dough using the finger test. When you poke the dough with your finger, it should feel tacky but not sticky. As you pull your finger away, there should be no residue on your finger.
- Use a ruler to make sure your dough is rolled out to the right size (12 in x 18 in) and cut into 12 even pieces.
- Use dental floss to easily cut each roll rather than a knife.
- Cut 12 equally-sized rolls from your log to make sure they all bake evenly.
- Bake the rolls in a metal, 9×13-inch pan if possible! If you need to use a glass tray, reduce the temperature to 325 F/ 162 C.
- Try to let the rolls cool for about 10-20 minutes, then add the icing. This will allow it to perfectly melt over the rolls!
- Store leftover rolls or rolls made ahead of time in an airtight container to keep them fresh.

Let Me Know What You Think
If you try this recipe for lemon rolls, I’d love to hear what you think! Please leave a rating and comment below.
You can also tag me on social media @chelsweets or use #chelsweets so I can see everything you’re baking up!!
Lemon Rolls
Ingredients
Lemon Roll Dough
- 4 1/4 cups all-purpose flour + addition flour added later in the process 530g
- 4 1/2 tsp or 2 packets instant dry yeast 14g, 1/2 oz.
- 1 Tbsp + 1 tsp poppy seeds – optional
- 1 tsp fine salt 6g
- 1 cup buttermilk, room temperature 240g
- 1/2 cup granulated sugar 100g
- 1/2 cup unsalted butter, room temperature 113g
- 2 large eggs, room temperature 112g
- 2 Tbsp fresh lemon zest, or the zest of 2 large lemons 6g
Lemon Roll Filling
- 1/2 cup granulated sugar 100g
- 1/2 cup packed light brown sugar 100g
- 2 Tbsp fresh lemon zest, or the zest of 2 large lemons 6g
- 1/2 cup unsalted butter, softened 113g
Lemon Icing
- 2 cups powdered sugar 250g
- 1/4 cup fresh lemon juice 60g
- 2 Tbsp unsalted butter, melted 28g
Additional topping
- Fresh Lemon Zest
Recommended Tools / Equipment
- 9 x13-inch Pan
- Parchment Paper
- Stand Mixer w/ Dough Hook or Danish Dough Whisk
- Ruler
- Dental Floss
Instructions
Lemon Roll Dough
- Preheat your oven to 200 F / 95 C. In a large bowl or the bowl of a stand mixer, combine 4 1/4 cups flour, 4 1/2 tsp or 2 packets of instant dry yeast, 1 Tbsp + 1 Tsp poppy seeds, and 1 tsp salt.
- In a separate bowl, combine 1 cup buttermilk, 1/2 cup granulated sugar, and 1/2 cup butter (cut into Tbsp-sized pieces). Heat for 1 minute in the microwave, then stir to combine the ingredients. The butter should be mostly melted, and the mixture should feel warm but not hot to the touch. If it's too hot, it can kill the yeast!
- Slowly pour the warm buttermilk mixture into the dry ingredients and mix on medium speed with a dough hook or by hand with a dough whisk. If you don't have a dough whisk, you can use a large wooden spoon. The dough should be quite sticky at this point.
- Mix in 2 large eggs, one at a time, on a medium-low speed until a sticky dough ball forms. It will take a while for each egg to get incorporated, but keep mixing until they are fully combined. Then continue to mix on a medium-low speed for a couple of minutes until the dough becomes more elastic. Once combined, mix in the zest of 2 large lemons on a medium speed until incorporated.
- As the dough mixes, add additional flour 1 Tbsp at a time until the dough begins to leave the sides of the bowl. I usually add about 3 additional Tbsps of flour. My favorite way to know if my dough is ready is to poke it with my finger. It should feel tacky but not sticky. As you pull your finger away, there should be no residue on your finger.
- Cover the bowl with plastic wrap or a towel and set aside to let the dough rest for 10-20 minutes. This will make it easier to roll out.
Lemon Roll Filling
- As the dough rests, make the lemon roll filling. In a medium-sized bowl, add 1/2 cup granulated sugar, 1/2 cup light brown sugar, and the zest of 2 large lemons. Massage the zest into the sugar with your fingertips to help release the oil from the zest. The mixture should be aromatic as you do this.
- Add 1/2 cup softened butter (the butter should be soft to the touch, and almost a bit melted) to the mixture. Whisk until combined, then set aside.
Roll Up & Bake the Lemon Rolls
- Once the dough has rested, place it on a lightly floured surface and roll it into a large rectangle that's roughly 12 in x 18 in. It should be about 1/2 cm thick.
- Spread the lemon roll filling over the dough, leaving 1/2 inch of dough on the long side of the rectangle uncovered (this will help you seal off the roll and keep it tight).
- Then roll the dough horizontally, toward the uncovered strip and cut 12 equal pieces using dental floss. Place the rolls in a greased or lined 9×13-inch pan.
- Turn the oven off! I REPEAT, TURN THE OVEN OFF. Then cover the lemon rolls with foil and place them in the oven for about 30 minutes to give them an assisted rise. They should look puffier and have grown in size once they've risen.
- Remove them from the oven and take off the tinfoil. Turn the oven back on and heat it to 350 F / 175 C.
- Once the oven is preheated, bake the lemon rolls for 28-32 minutes or until the rolls are golden brown.
Lemon Roll Icing
- The last step is to make the icing! Whisk 2 cups of powdered sugar, 1/4 cup of fresh lemon juice, and 2 Tbsp melted butter until combined.
- Let the rolls cool for 10-20 minutes, then spoon the icing over the rolls and top with fresh lemon zest.
Video
Notes
Using the Right Type of Yeast: Active vs. Instant Yeast
Make sure you are using instant yeast! It comes in small packets that can usually be found in the refrigerated section of your grocery store. You can use active dry yeast in place of the instant yeast in this recipe, just be sure to activate it with a bit of warm water and sugar before adding it to the dough and allow the dough to rise for longer (active yeast takes longer to rise than instant).Tips for Making the Best Lemon Rolls
- Use a ruler to make sure your dough is rolled out to the right size (12 in x 18 in) and cut into even pieces.
- Use dental floss to easily cut each lemon roll rather than a knife.
- If you're struggling to cut your rolls, place the lemon roll log on a baking sheet and chill it in the fridge for 20-30 minutes. It will make it easier to cut.
- Cut 12 equal-sized rolls from your log to make sure they all bake evenly.
- Bake the rolls in a metal, 9×13-inch pan if possible! If you need to use a glass tray, reduce the temperature to 325 F/ 162 C.
- Try to let the rolls cool for about 10-20 minutes, then add the icing. This will allow it to perfectly melt over the rolls!
Making these Lemon Rolls in Advance
This recipe can be made the evening before and baked the following morning. You can refrigerate these rolls overnight once they have been cut and placed in a greased or lined pan. Cover the pan tightly with plastic wrap, making sure the seal is airtight. Take them out 1-2 hours before you plan to bake them the following morning to let them warm up and rise a bit. Preheat the oven to 350 F / 175 C as the rolls warm up. Once the oven is fully preheated, bake the rolls for 26-30 minutes or until the rolls are golden brown.Nutrition
Other Recipes You Might Like:
Just made this and it was great! Super fluffy w/great flavor!
YAY! So happy to hear that Robbi, thank you for sharing 🙂
I love the cinnamon ones from the grocery but sometimes they are overbaked and even close to being stale. Real let down. I love ? ? ?. Soon as it cools down outside these will be 1st on my list. Great instructions. Thank you for sharing this recipe.
My rolls got completely cremated in the oven after only 28 minutes. ?
I am so sorry to hear that Gabby! It sounds like your oven might run a little bit hot, my oven also runs 25° hot.
I’d recommend getting an oven thermometer if you don’t already have one – you can get them for like $7 on Amazon (this is the one that I have: https://amzn.to/3QzprrX). You may need to adjust the temperature in your oven down to help your baked goods cook more evenly or you may have hot spots in your oven. Those are my best guesses, if you don’t think that that could be what happened I’m happy to keep troubleshooting until we figure out what might have caused it. Hope that helps, happy baking!
Made these and they were perfect!! Fluffy dough, perfect flavor, I will definitely be making these again. I only baked them for 20 minutes and that ended up being perfect, but I baked in a ceramic baking dish so that could have affected it. I also added some poppyseeds to the icing and it was delicious. 10/10 from me and my family!!
So happy to hear that Ella!! Thank you for sharing 🙂