
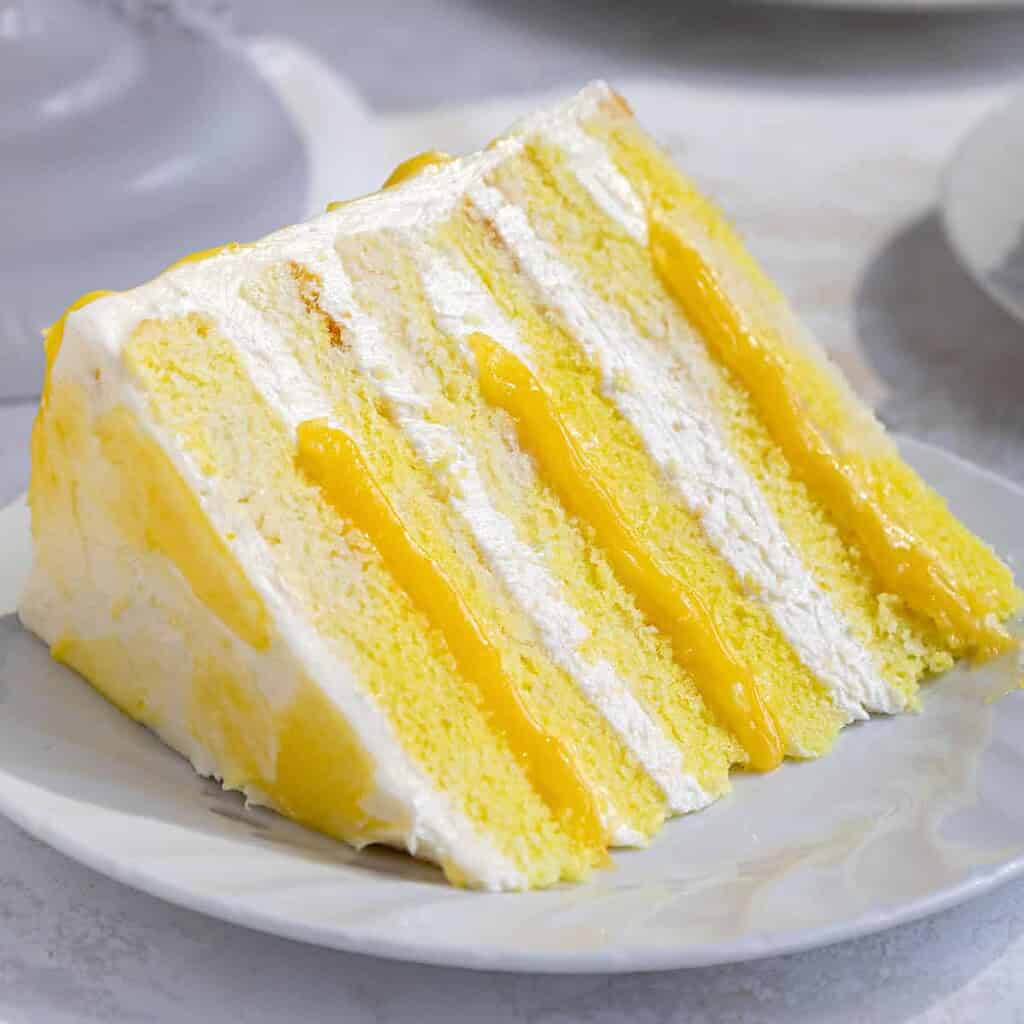
Lemon Curd Cake
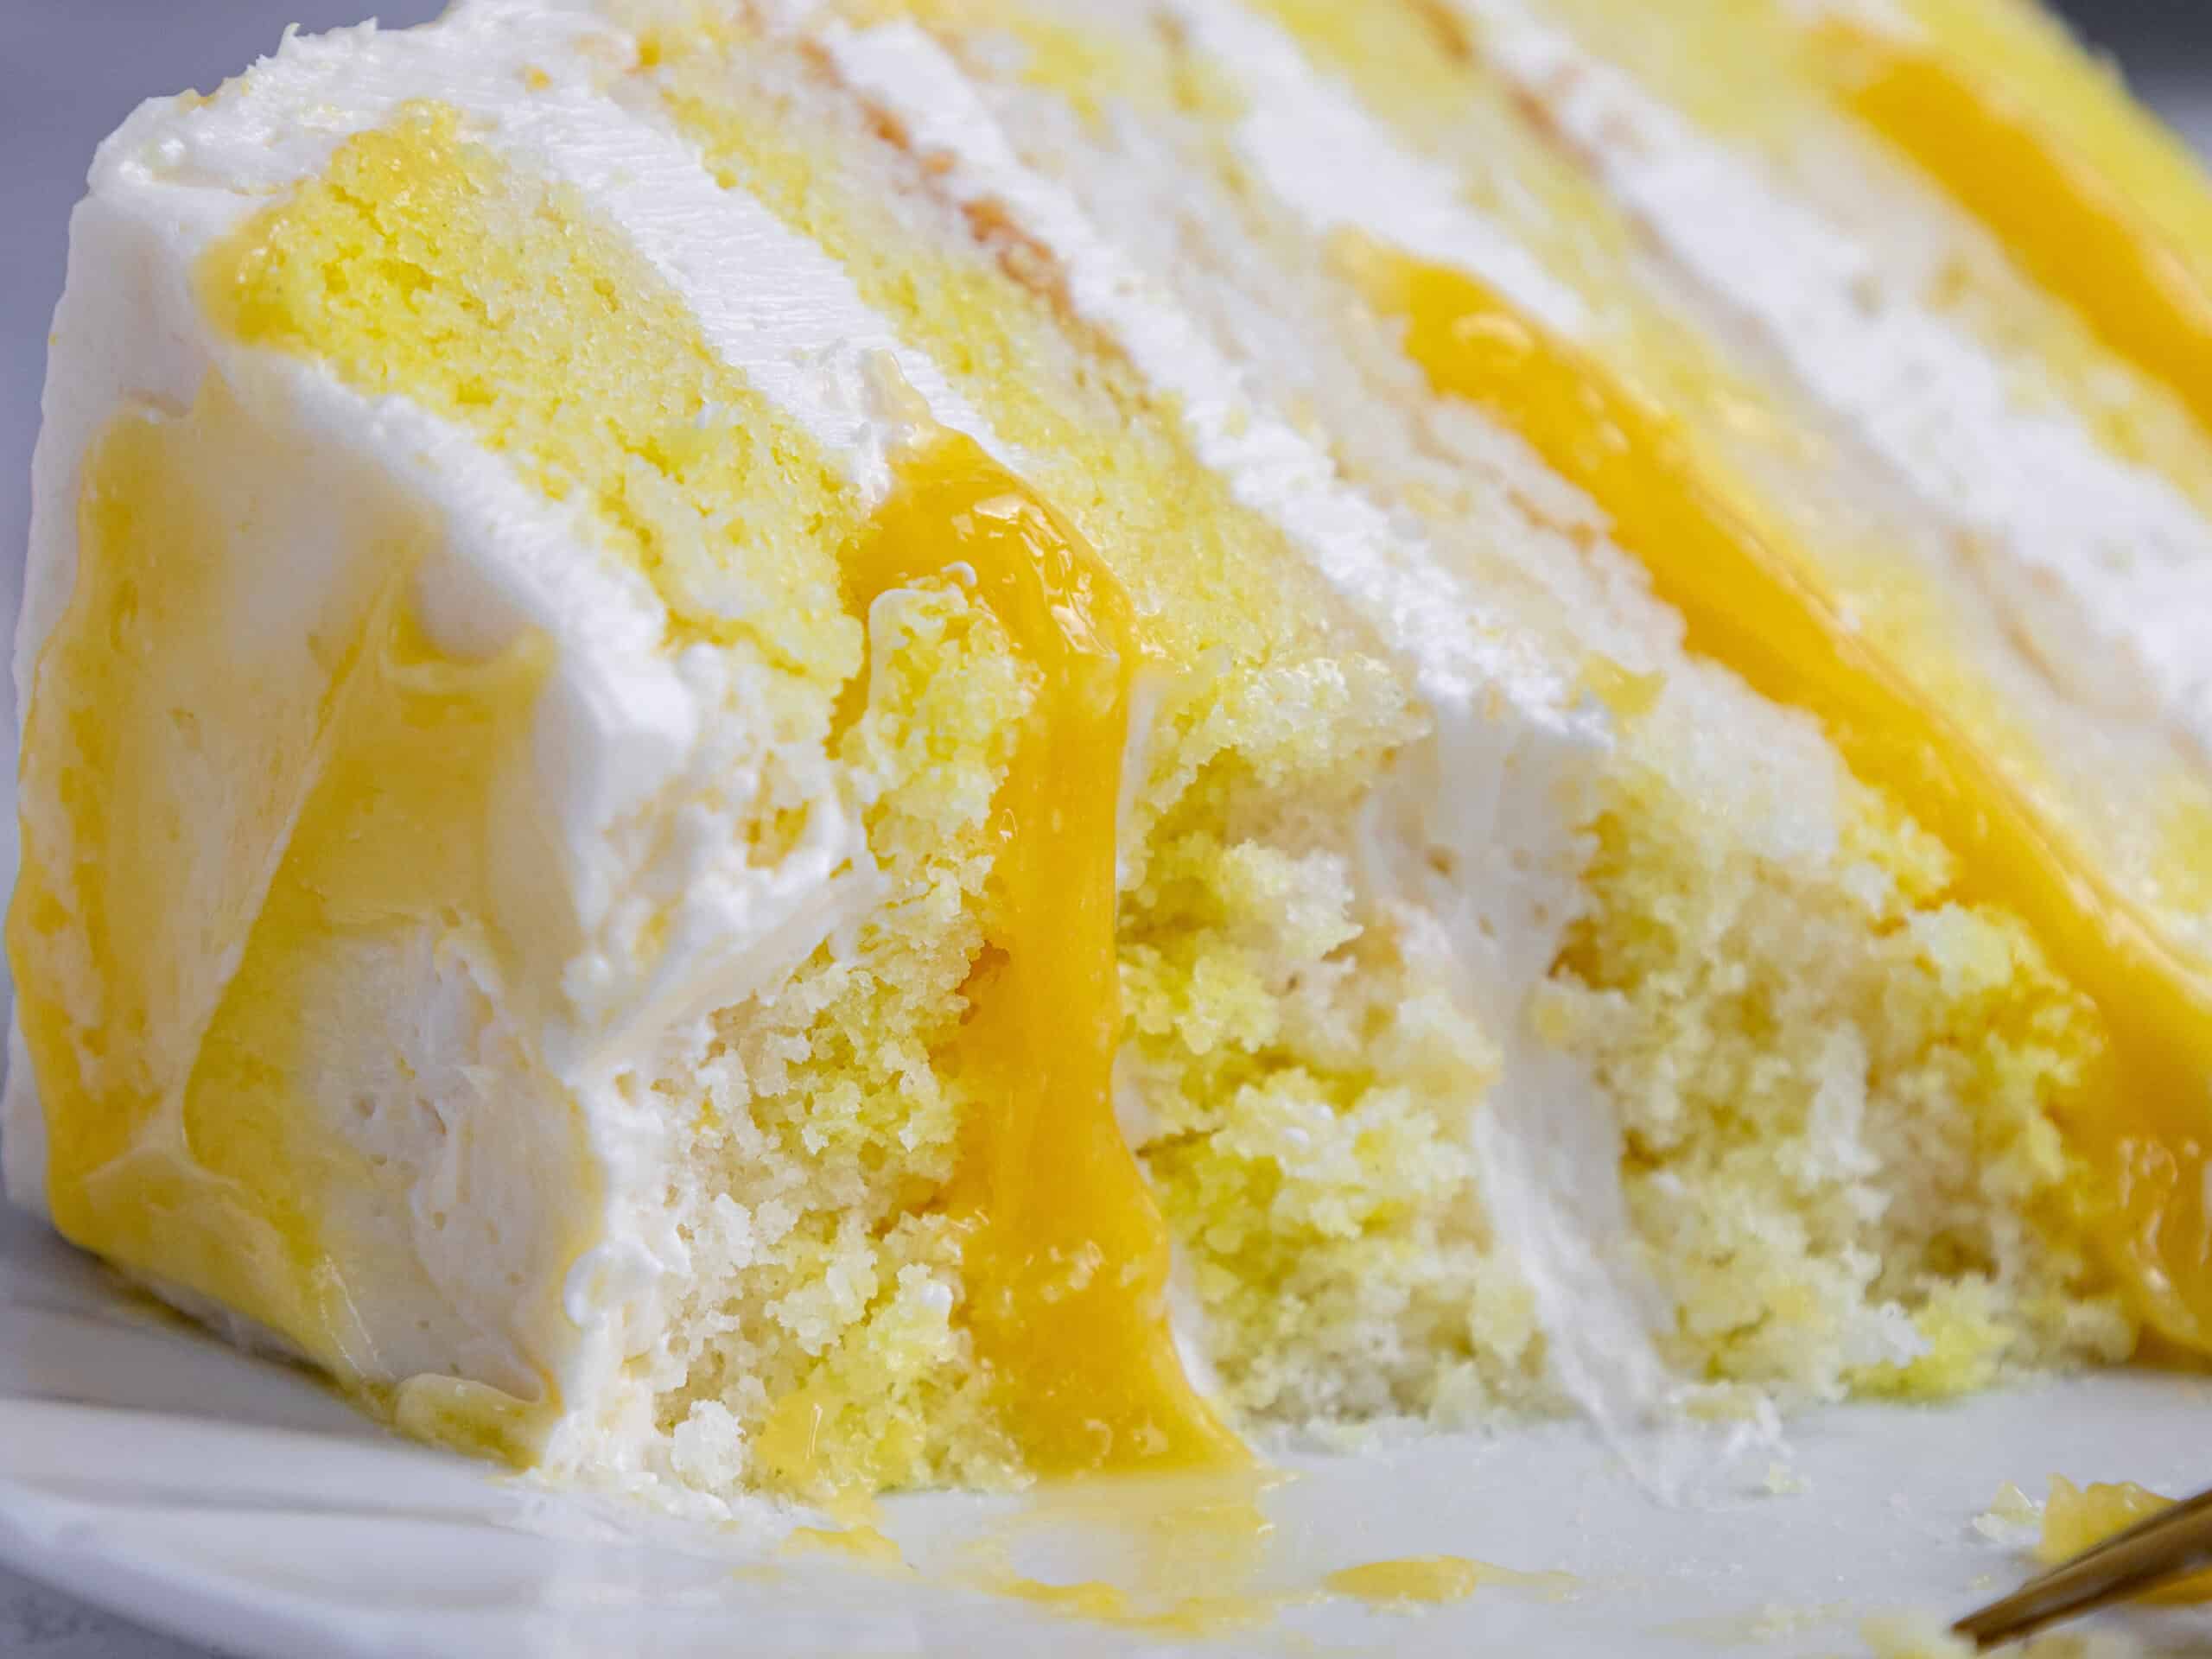
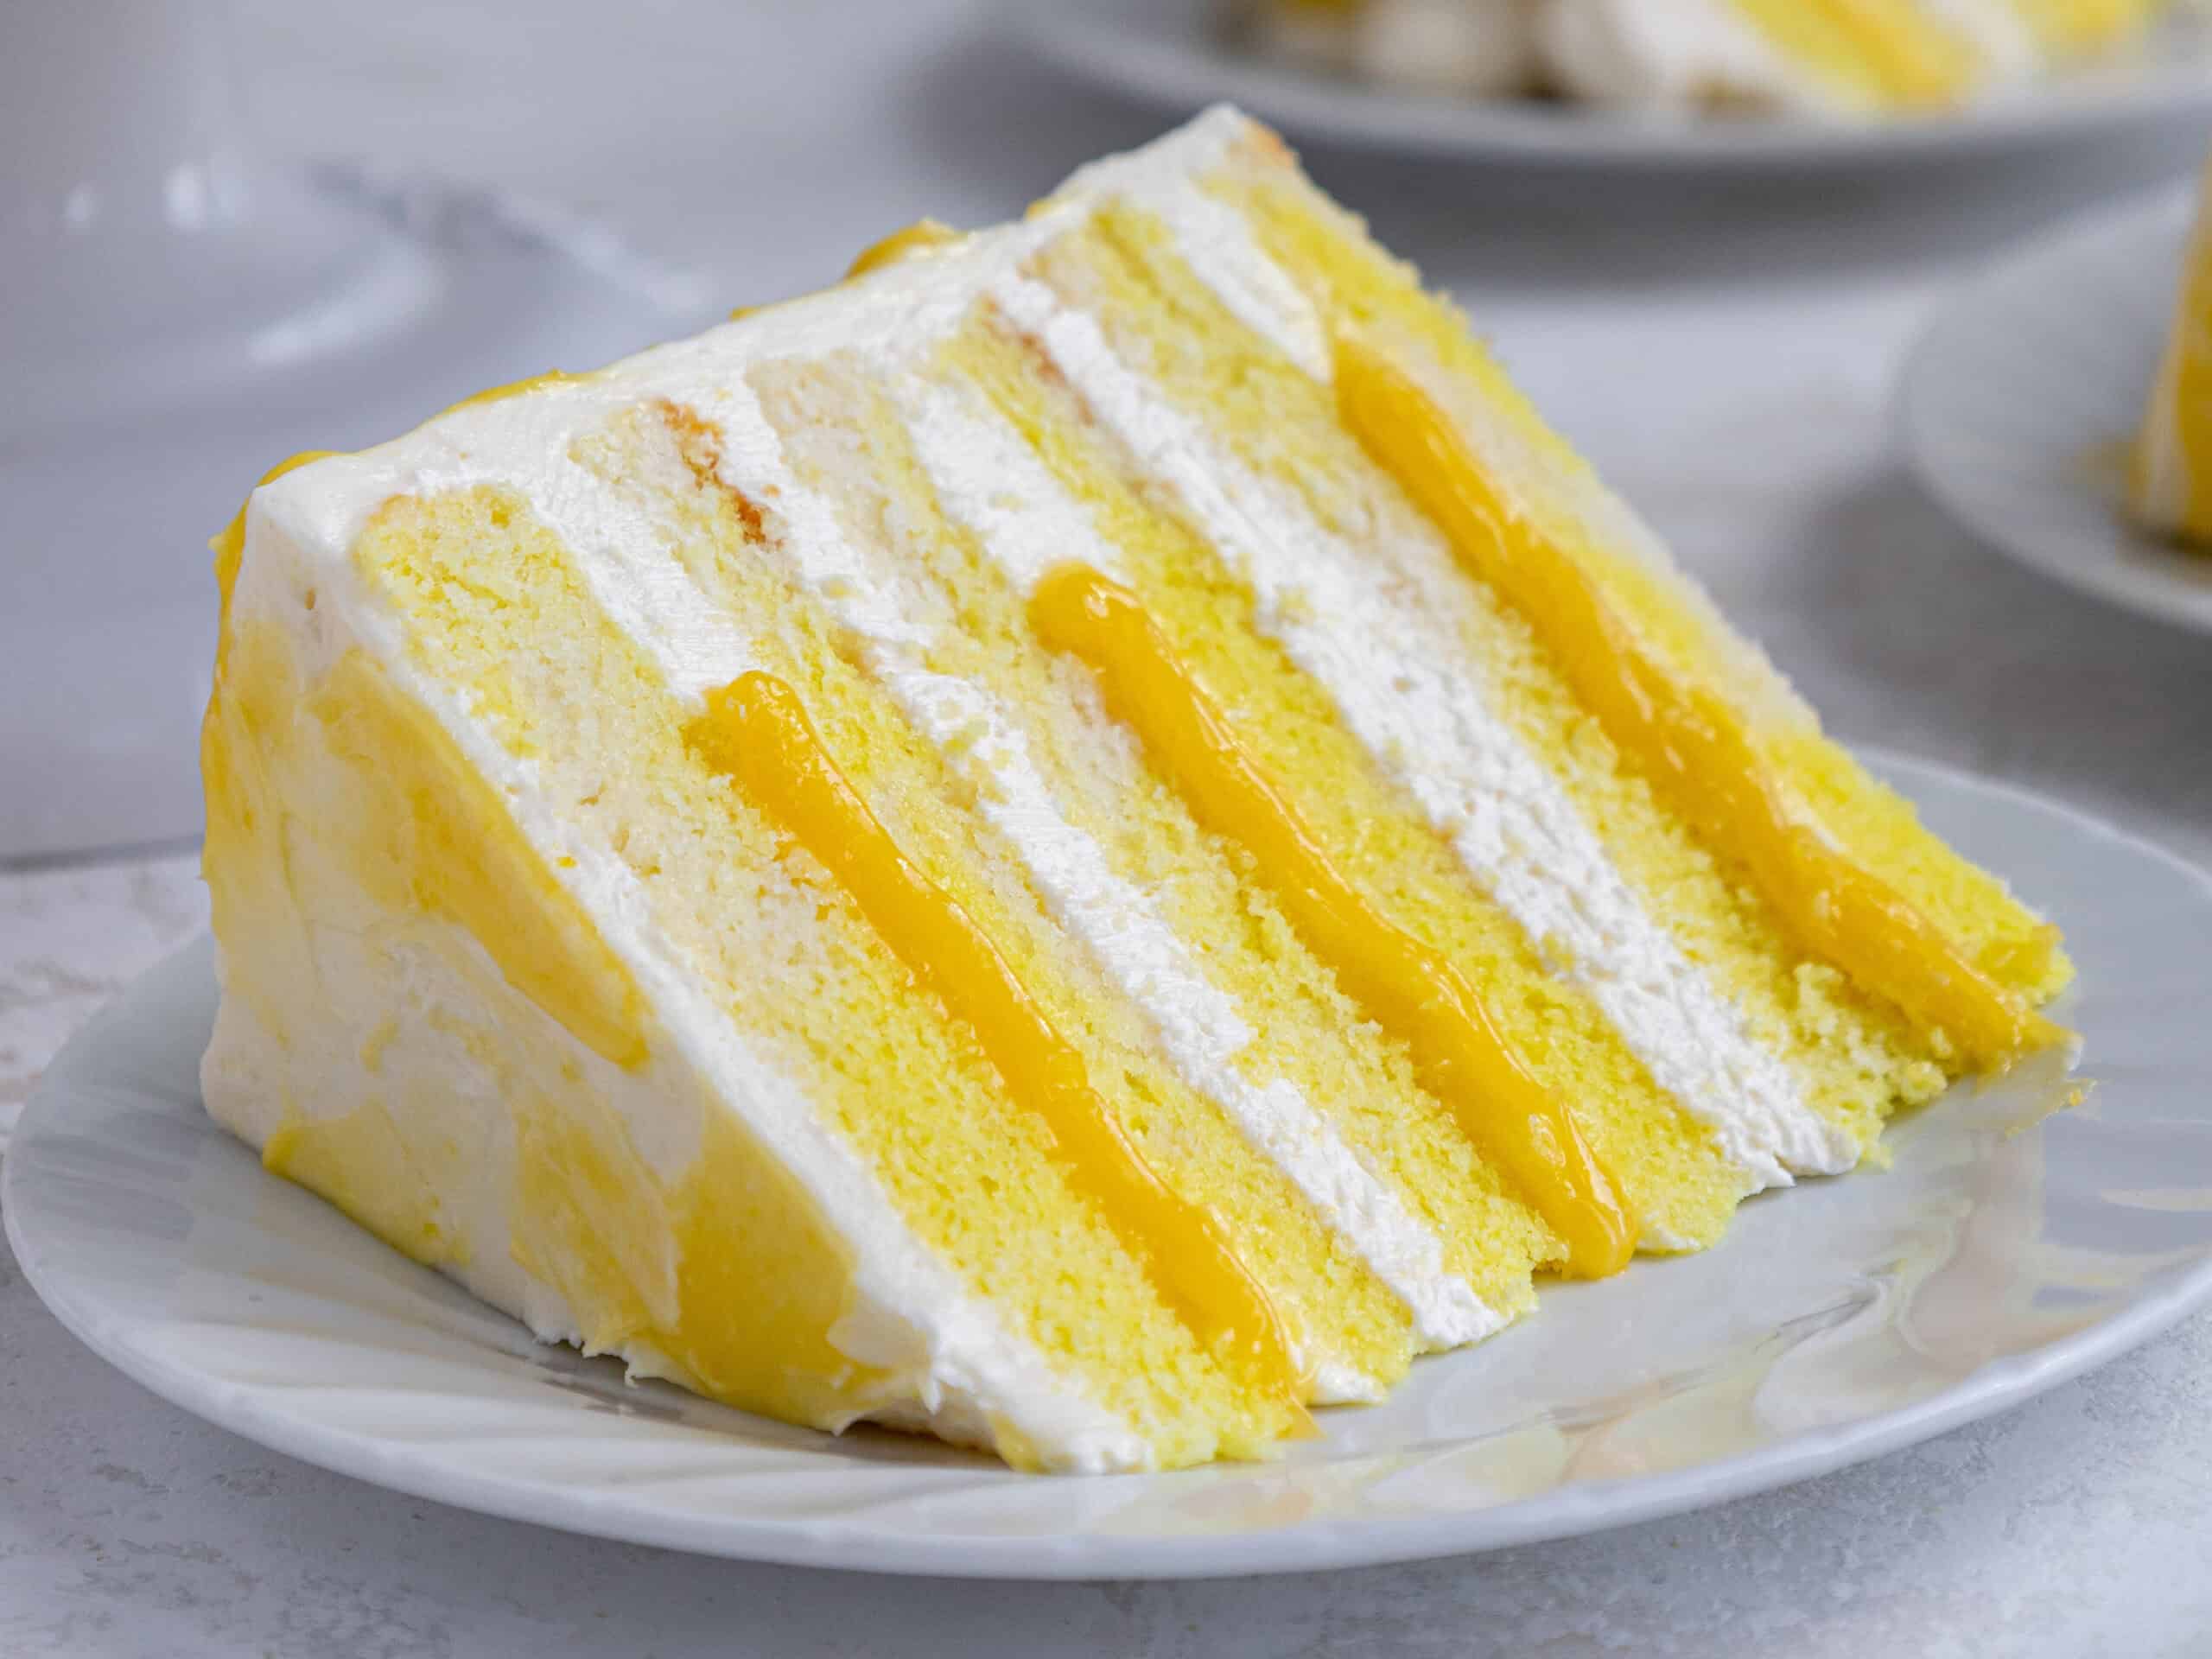
This lemon curd cake has the perfect balance of bright, tart lemon curd and fluffy buttercream.
It’s lemon-forward without being sour, and the tender cake layers hold up beautifully for stacking and decorating.
This Recipe At a Glance
- Flavor: bold lemon + fluffy buttercream
- Texture: tender, sturdy layers (great for stacking)
- Filling: lemon curd + buttercream dam (prevents sliding)
- Frosting: lemon Swiss meringue buttercream (or American/hybrid option)
- Pan size: 3×8-inch layers (base recipe)
- Make ahead: curd + frosting can be made ahead; layers freeze well
How to Make This Lemon Curd Cake
This cake has a few components (curd, cake layers, buttercream), so I recommend making it in stages. It makes the whole process feel way easier!
I’ve also included a video tutorial of the process below.
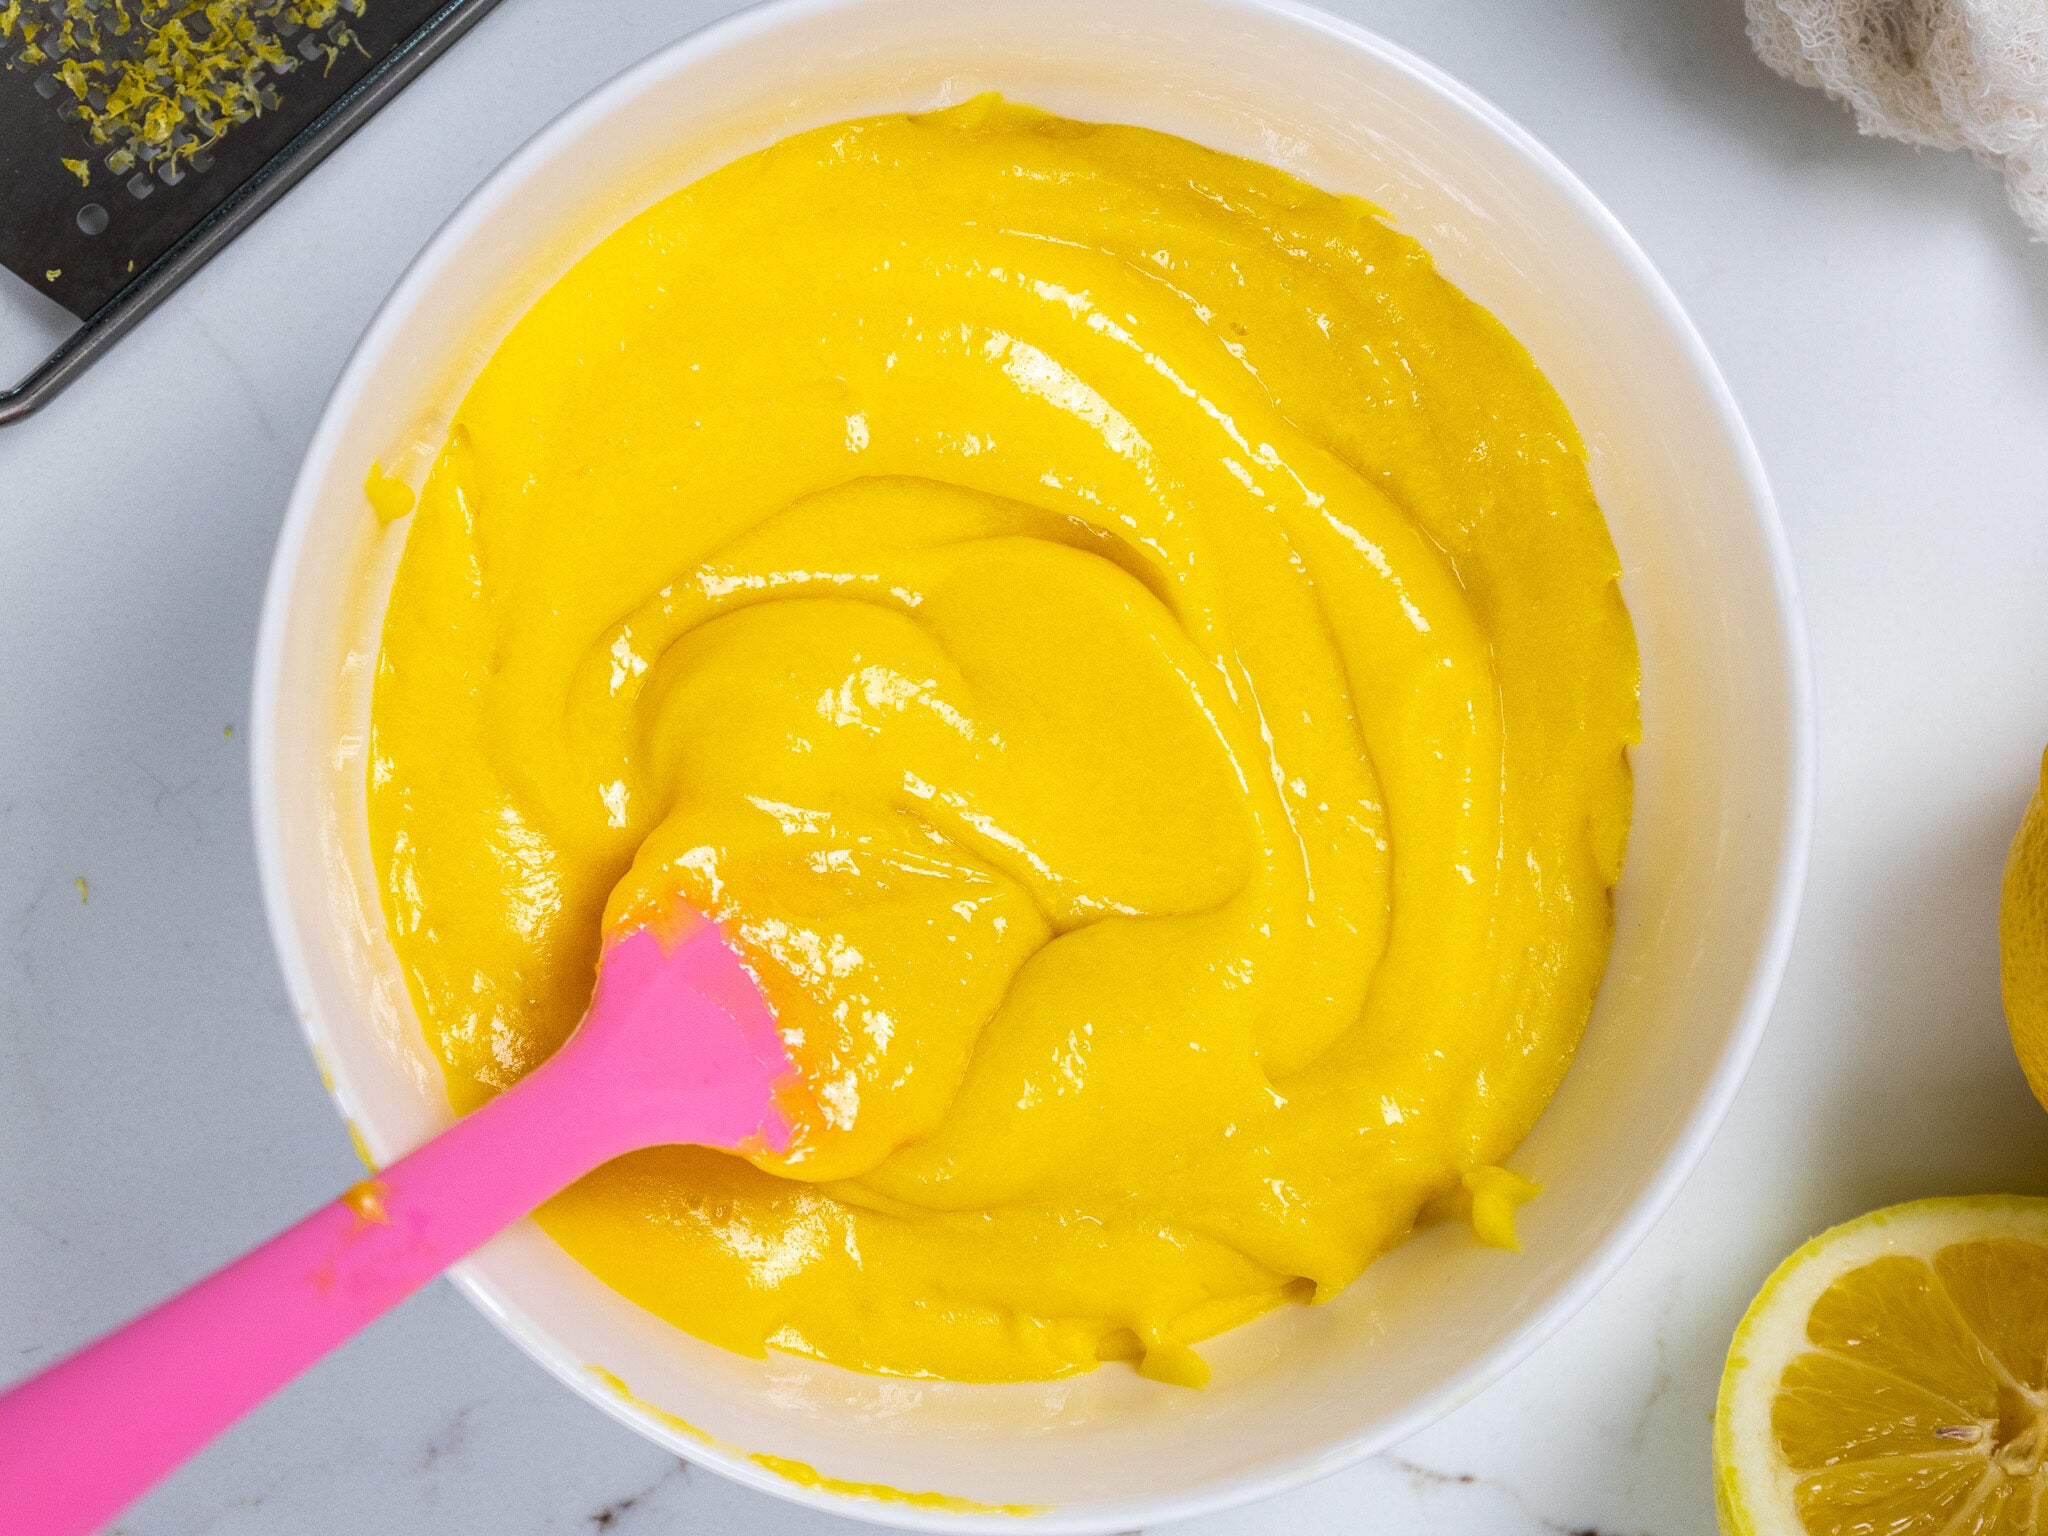
Step 1: Make the Lemon Curd
Make the lemon curd first so that it has time to cool and thicken.
I love making lemon curd for this recipe because the leftover egg whites can be used to make the Swiss meringue buttercream.
Note: You’ll need 8 total egg whites for the frosting. Use the 6 saved from the curd + 2 extra egg whites (I usually use carton egg whites for the cake layers to keep it simple).
Step 2: Bake the Lemon Cake Layers
Then it’s time to make the lemon cake batter. This cake uses the reverse-creaming method (butter mixed into the dry ingredients first), which gives the layers a super tender, sturdy crumb.
Bake the layers for 33-36 minutes or until a toothpick comes out with a few moist crumbs.
Remove the cake layers from the oven and let them cool in the pans for about 15 minutes.
Gently run an offset spatula around the rim of the cake pans to loosen them, then flip the cake layers onto wire racks to finish cooling. If you’re in a rush (or impatient like me), you can pop the cake pans into the freezer for 30 minutes to accelerate the cooling process.
Once cooled, use a serrated knife to level the top of each layer and remove the caramelization around the sides of the layers.
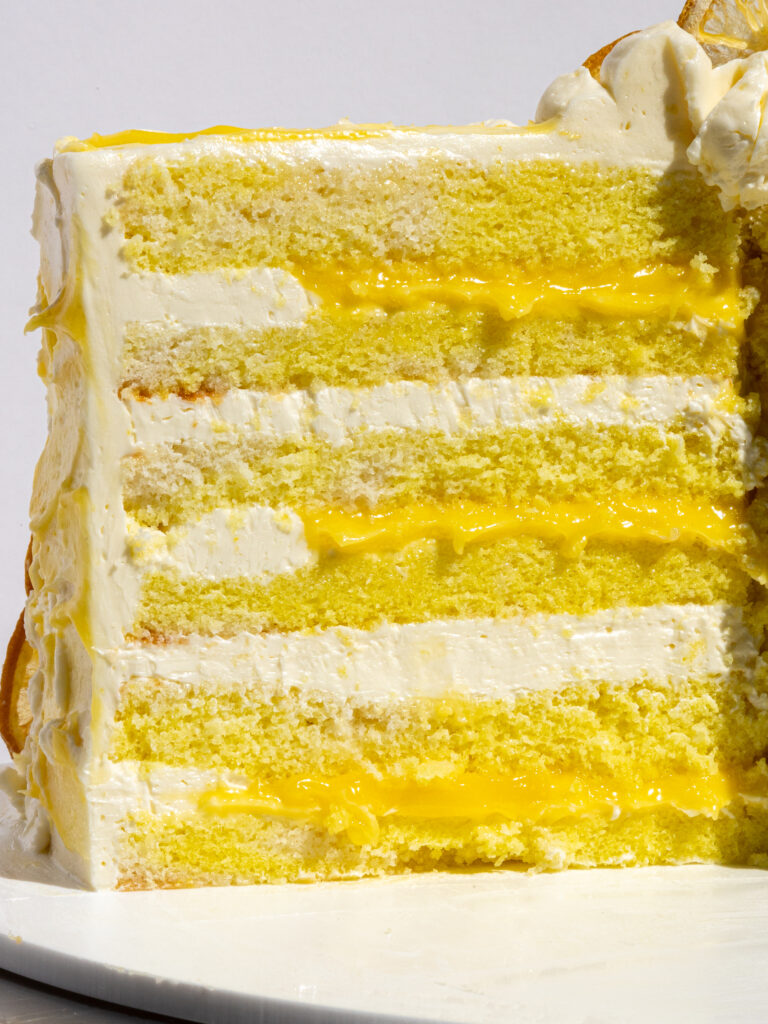
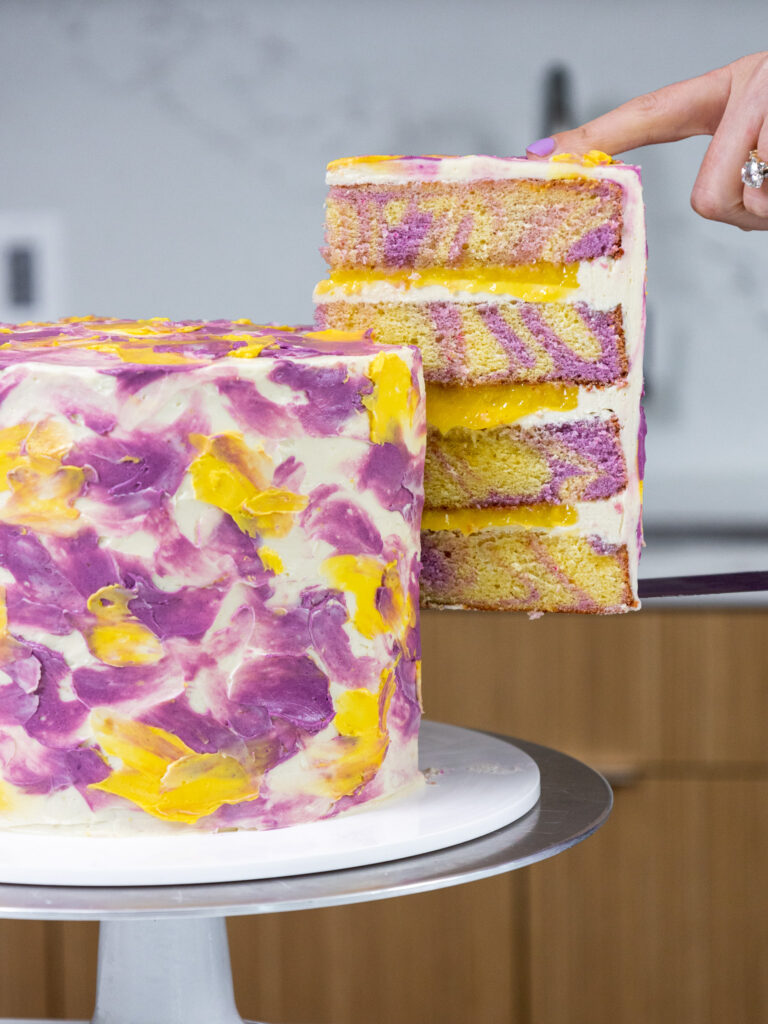
I also like to torte the cake layers horizontally to create 6 thinner cake layers, but this is optional.

Step 3: Make the Lemon Frosting
While the cake layers bake and cool, make the lemon frosting.
I like to use my Swiss meringue buttercream (SMBC) as a base because it isn’t too sweet and really lets the lemon shine through!
If you aren’t a fan of SMBC, I’d recommend adding the lemon zest and extract to a batch of my American buttercream or 1.5 batches of my hybrid buttercream.
This frosting can also be made in advance if needed and kept in the fridge for up to a month.
Step 4: Stack and Fill the Cake Layers
Then it’s time to assemble this cake! Stack and frost the cake layers on a greaseproof cake board or flat plate. Use a dab of buttercream to help stick the first cake layer to the board.
Spread a thin layer of buttercream on top of each cake layer.
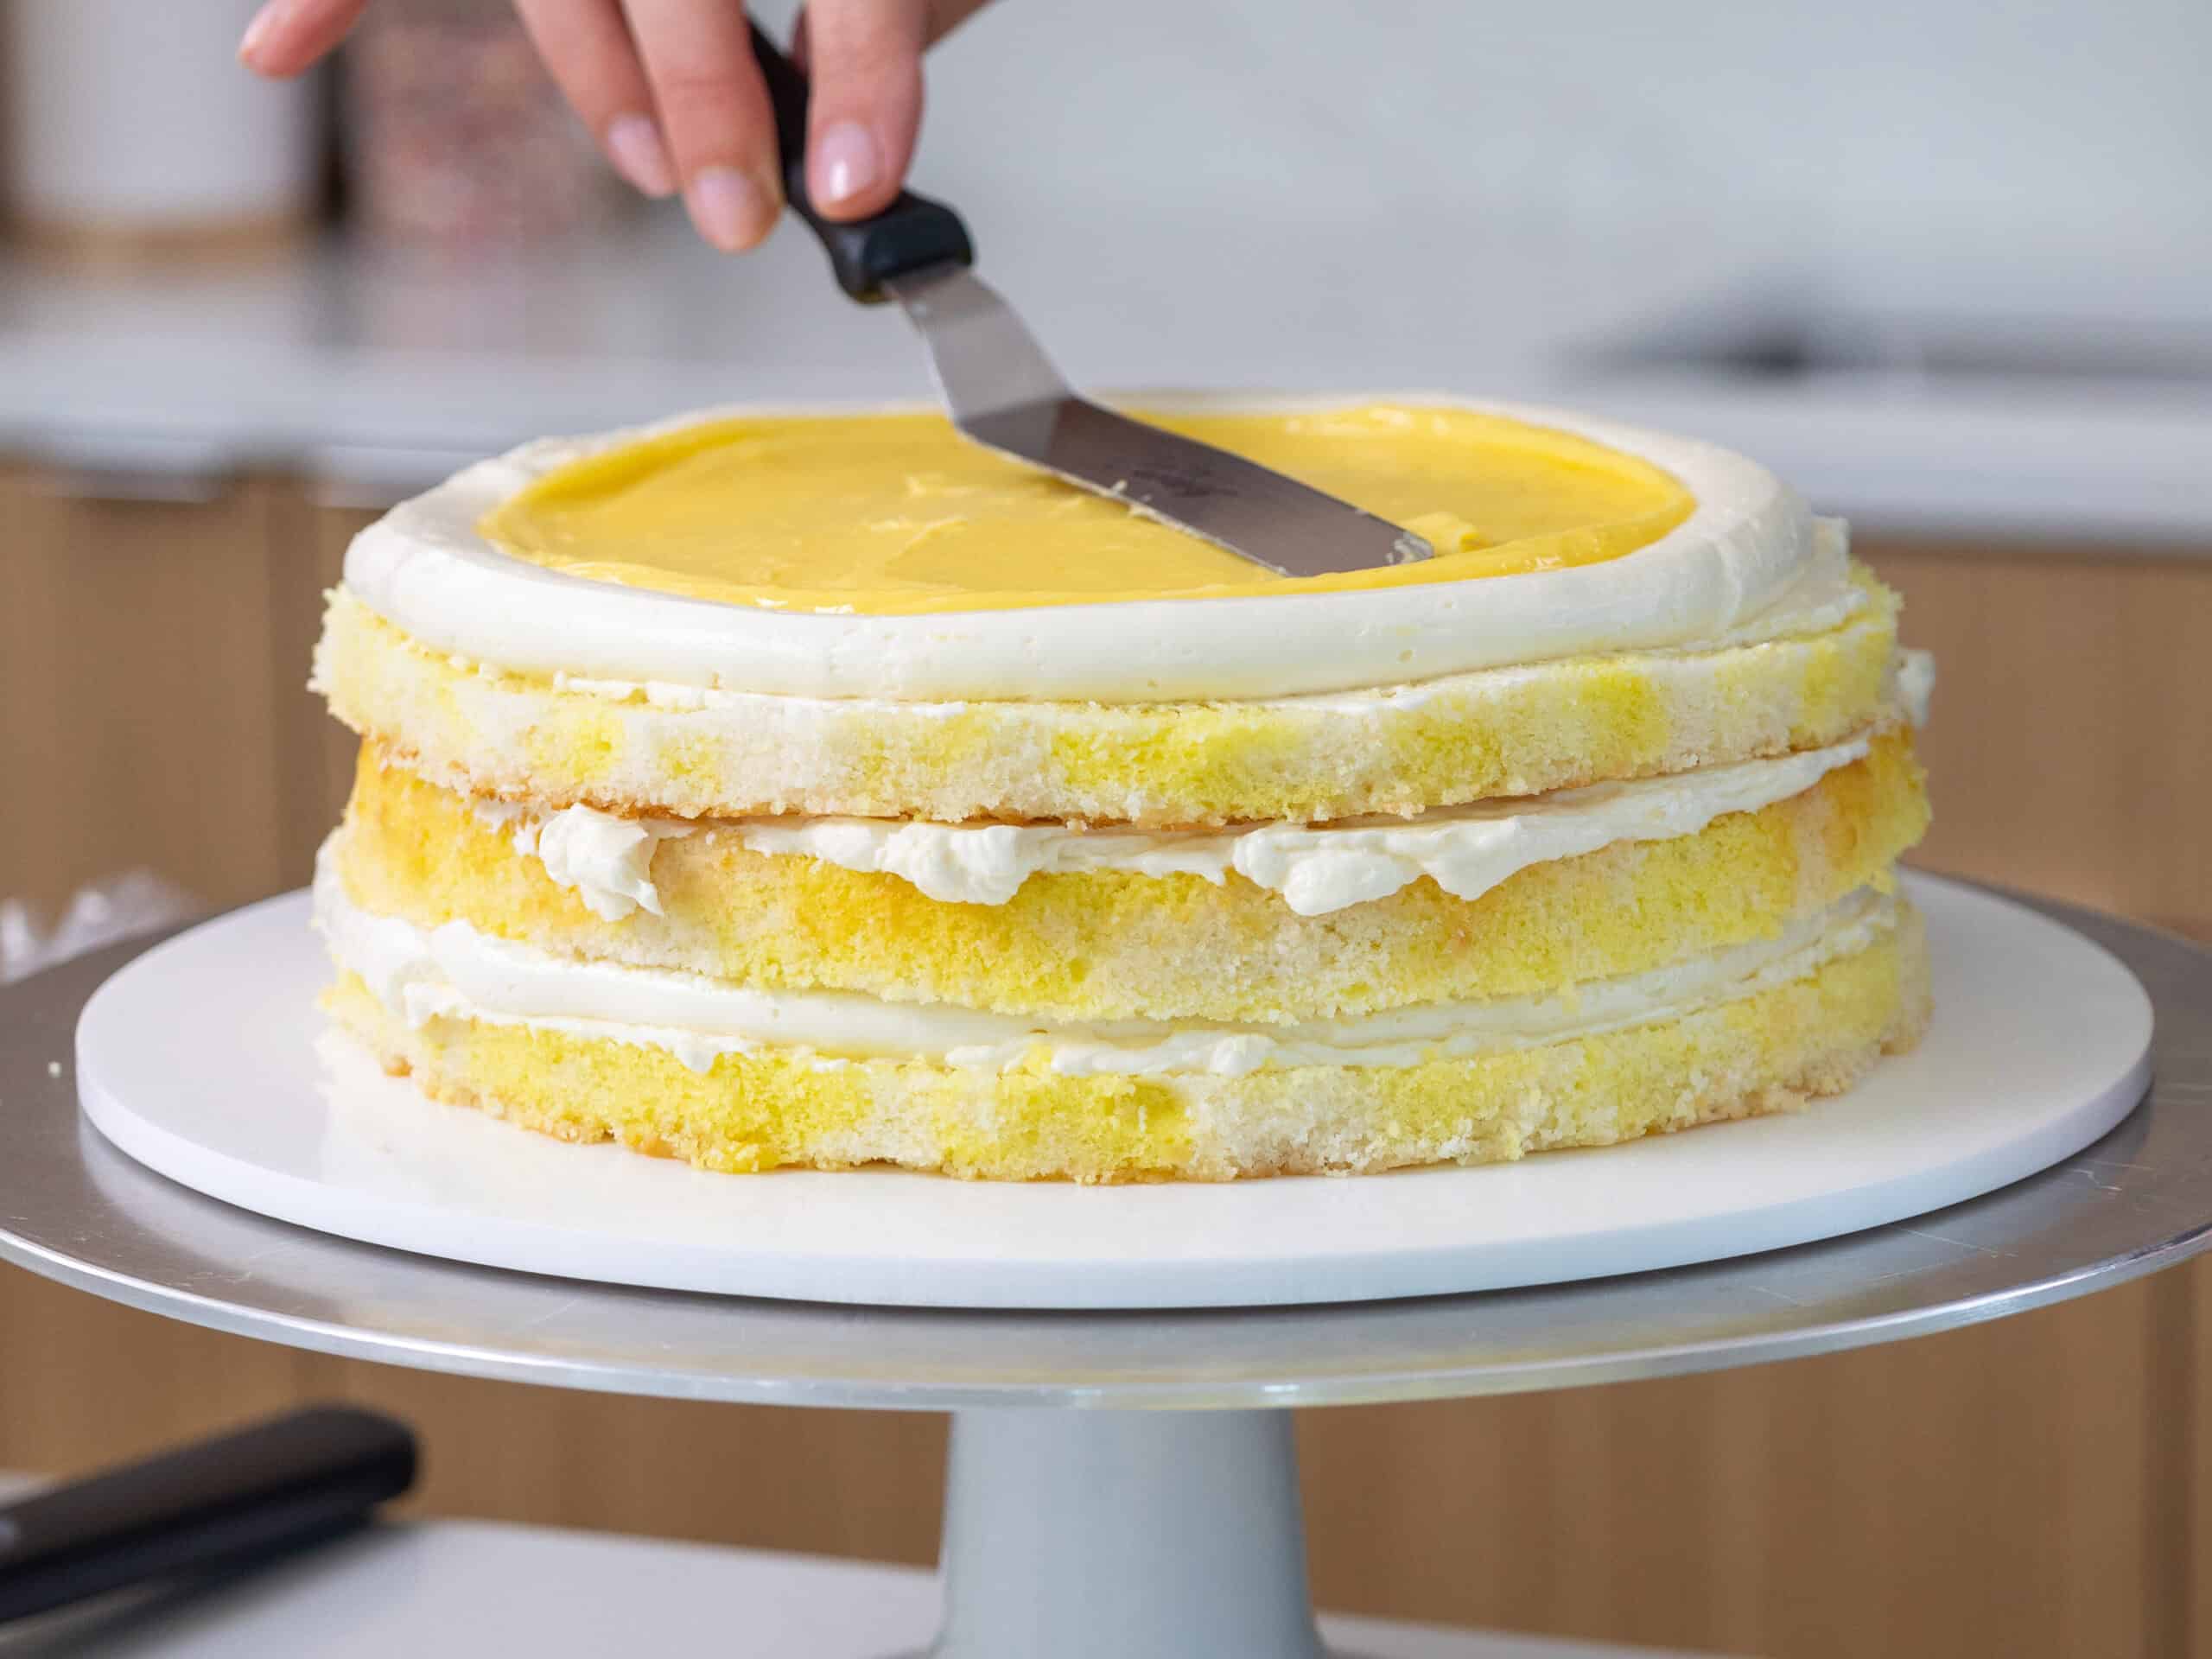
Pipe a thick ring of buttercream around the edge of the cake layer and fill the center with lemon curd.
I like to add about 1/3 cup of lemon curd between each layer. Make sure you reserve about 1/4 cup of lemon curd to decorate the cake later.
If you torte the layers like I did, alternate filling the cake with layers of lemon curd and a thick layer of frosting.
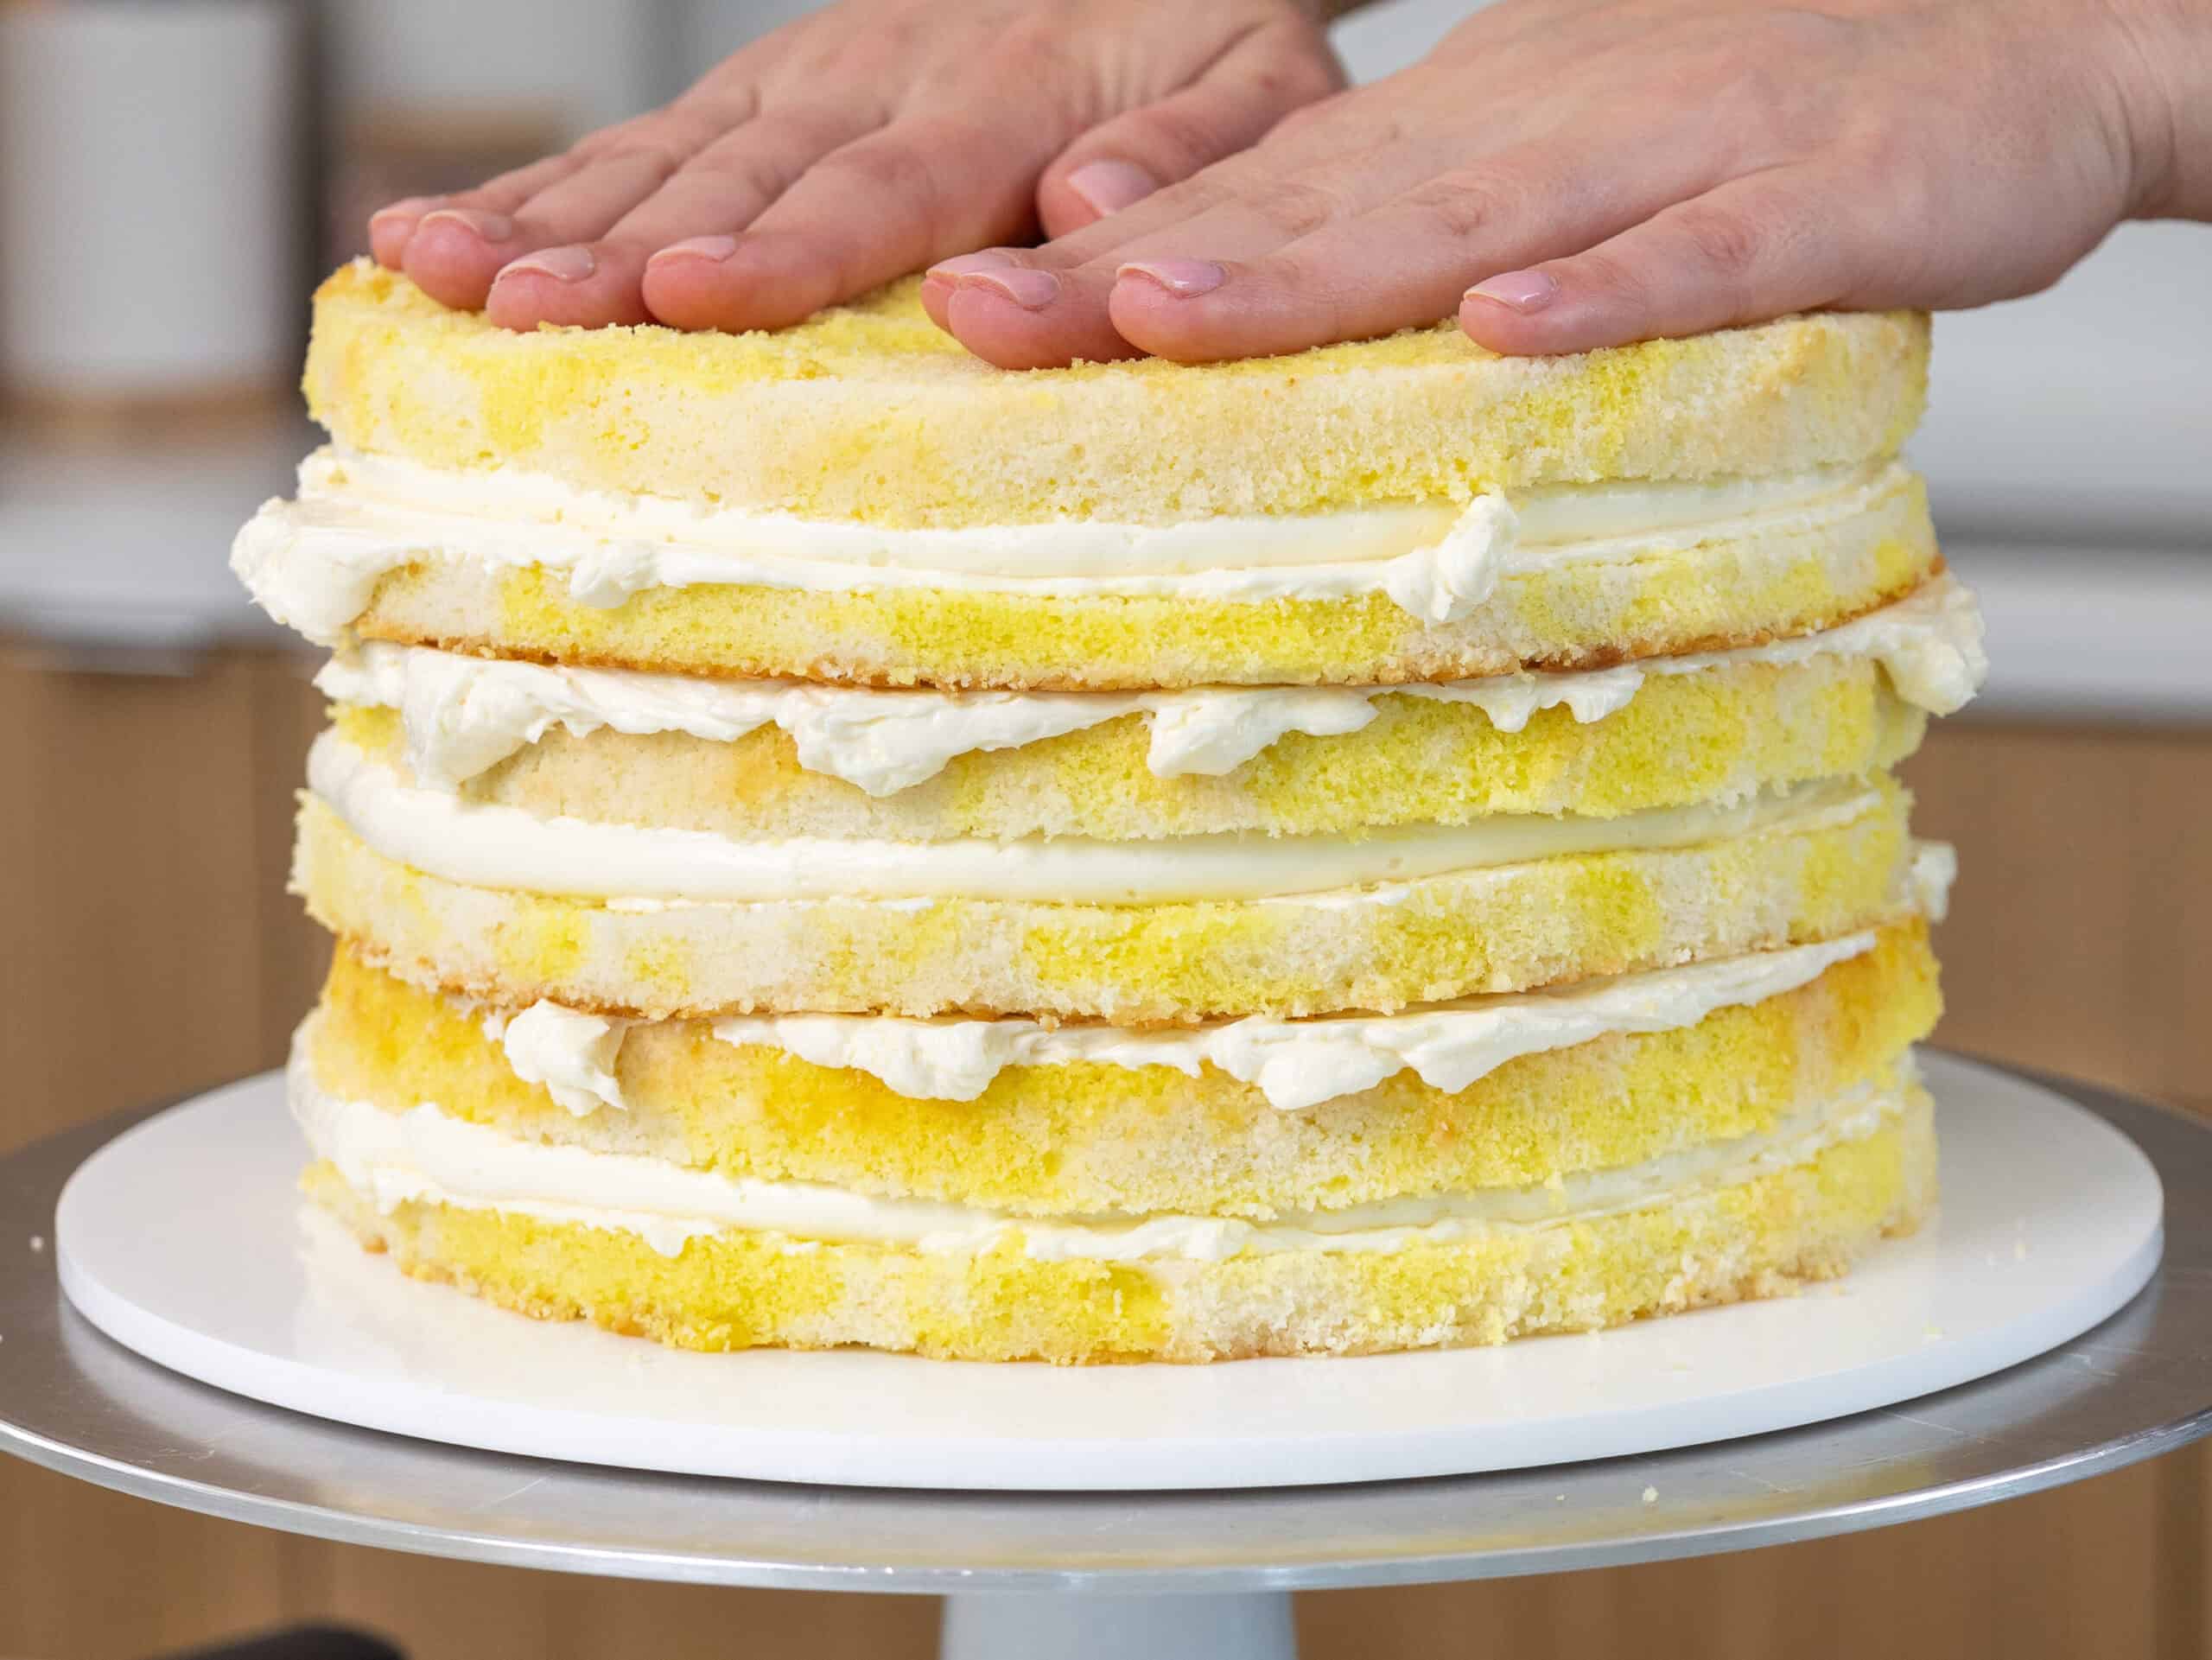
Once all the layers are stacked, gently press down on top of the cake with both of your hands to help them settle and to press out any trapped air between the cake layers.
Step 5: Chill and Crumb Coat the Cake
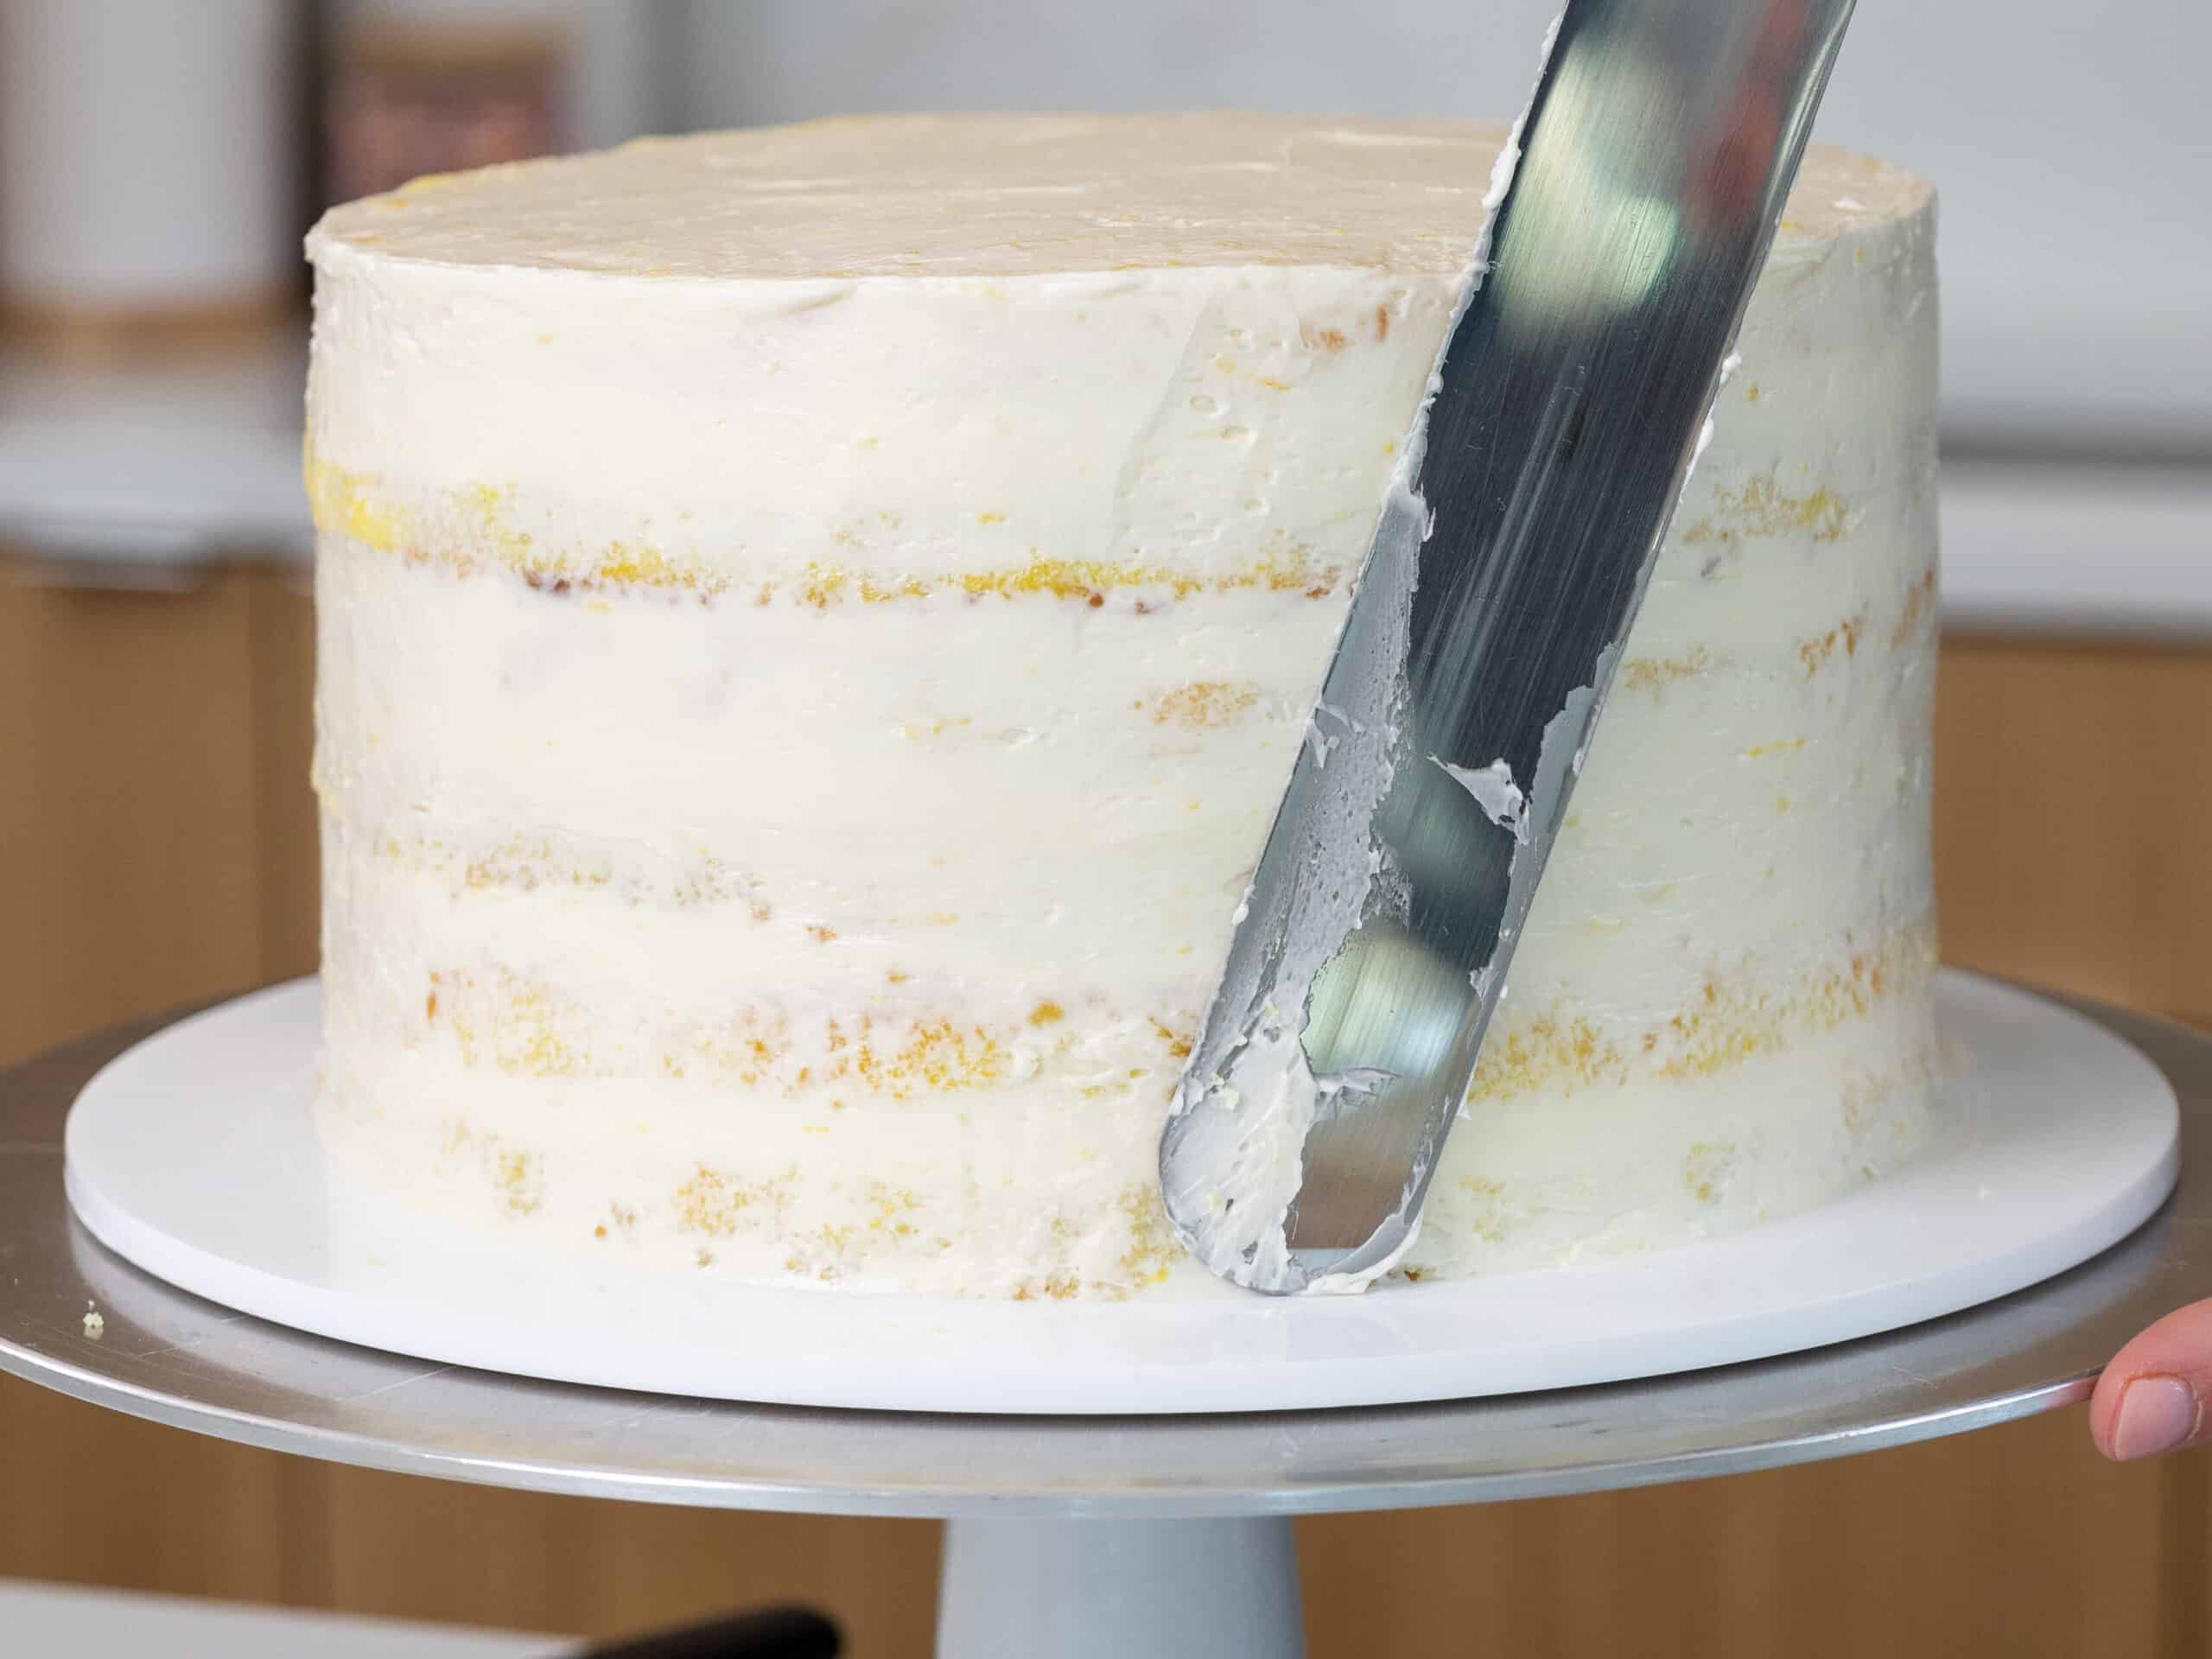
Chill the cake in the freezer for 5-10 minutes to prevent the layers from sliding, then add a thin coat of frosting around the cake that fully covers the cake layers.
Smooth using a large offset spatula and/or bench scraper, then chill the cake again in the fridge (30 minutes) or freezer (10 minutes) until the frosting is firm to the touch.
Step 6: Add the Second Layer of Frosting & Decorate
Then add a second layer of frosting to the cake with the remaining buttercream. Use a large offset spatula to give the frosting a textured look.
Use a small offset spatula to add swipes of lemon curd around the cake and blend it into the frosting.
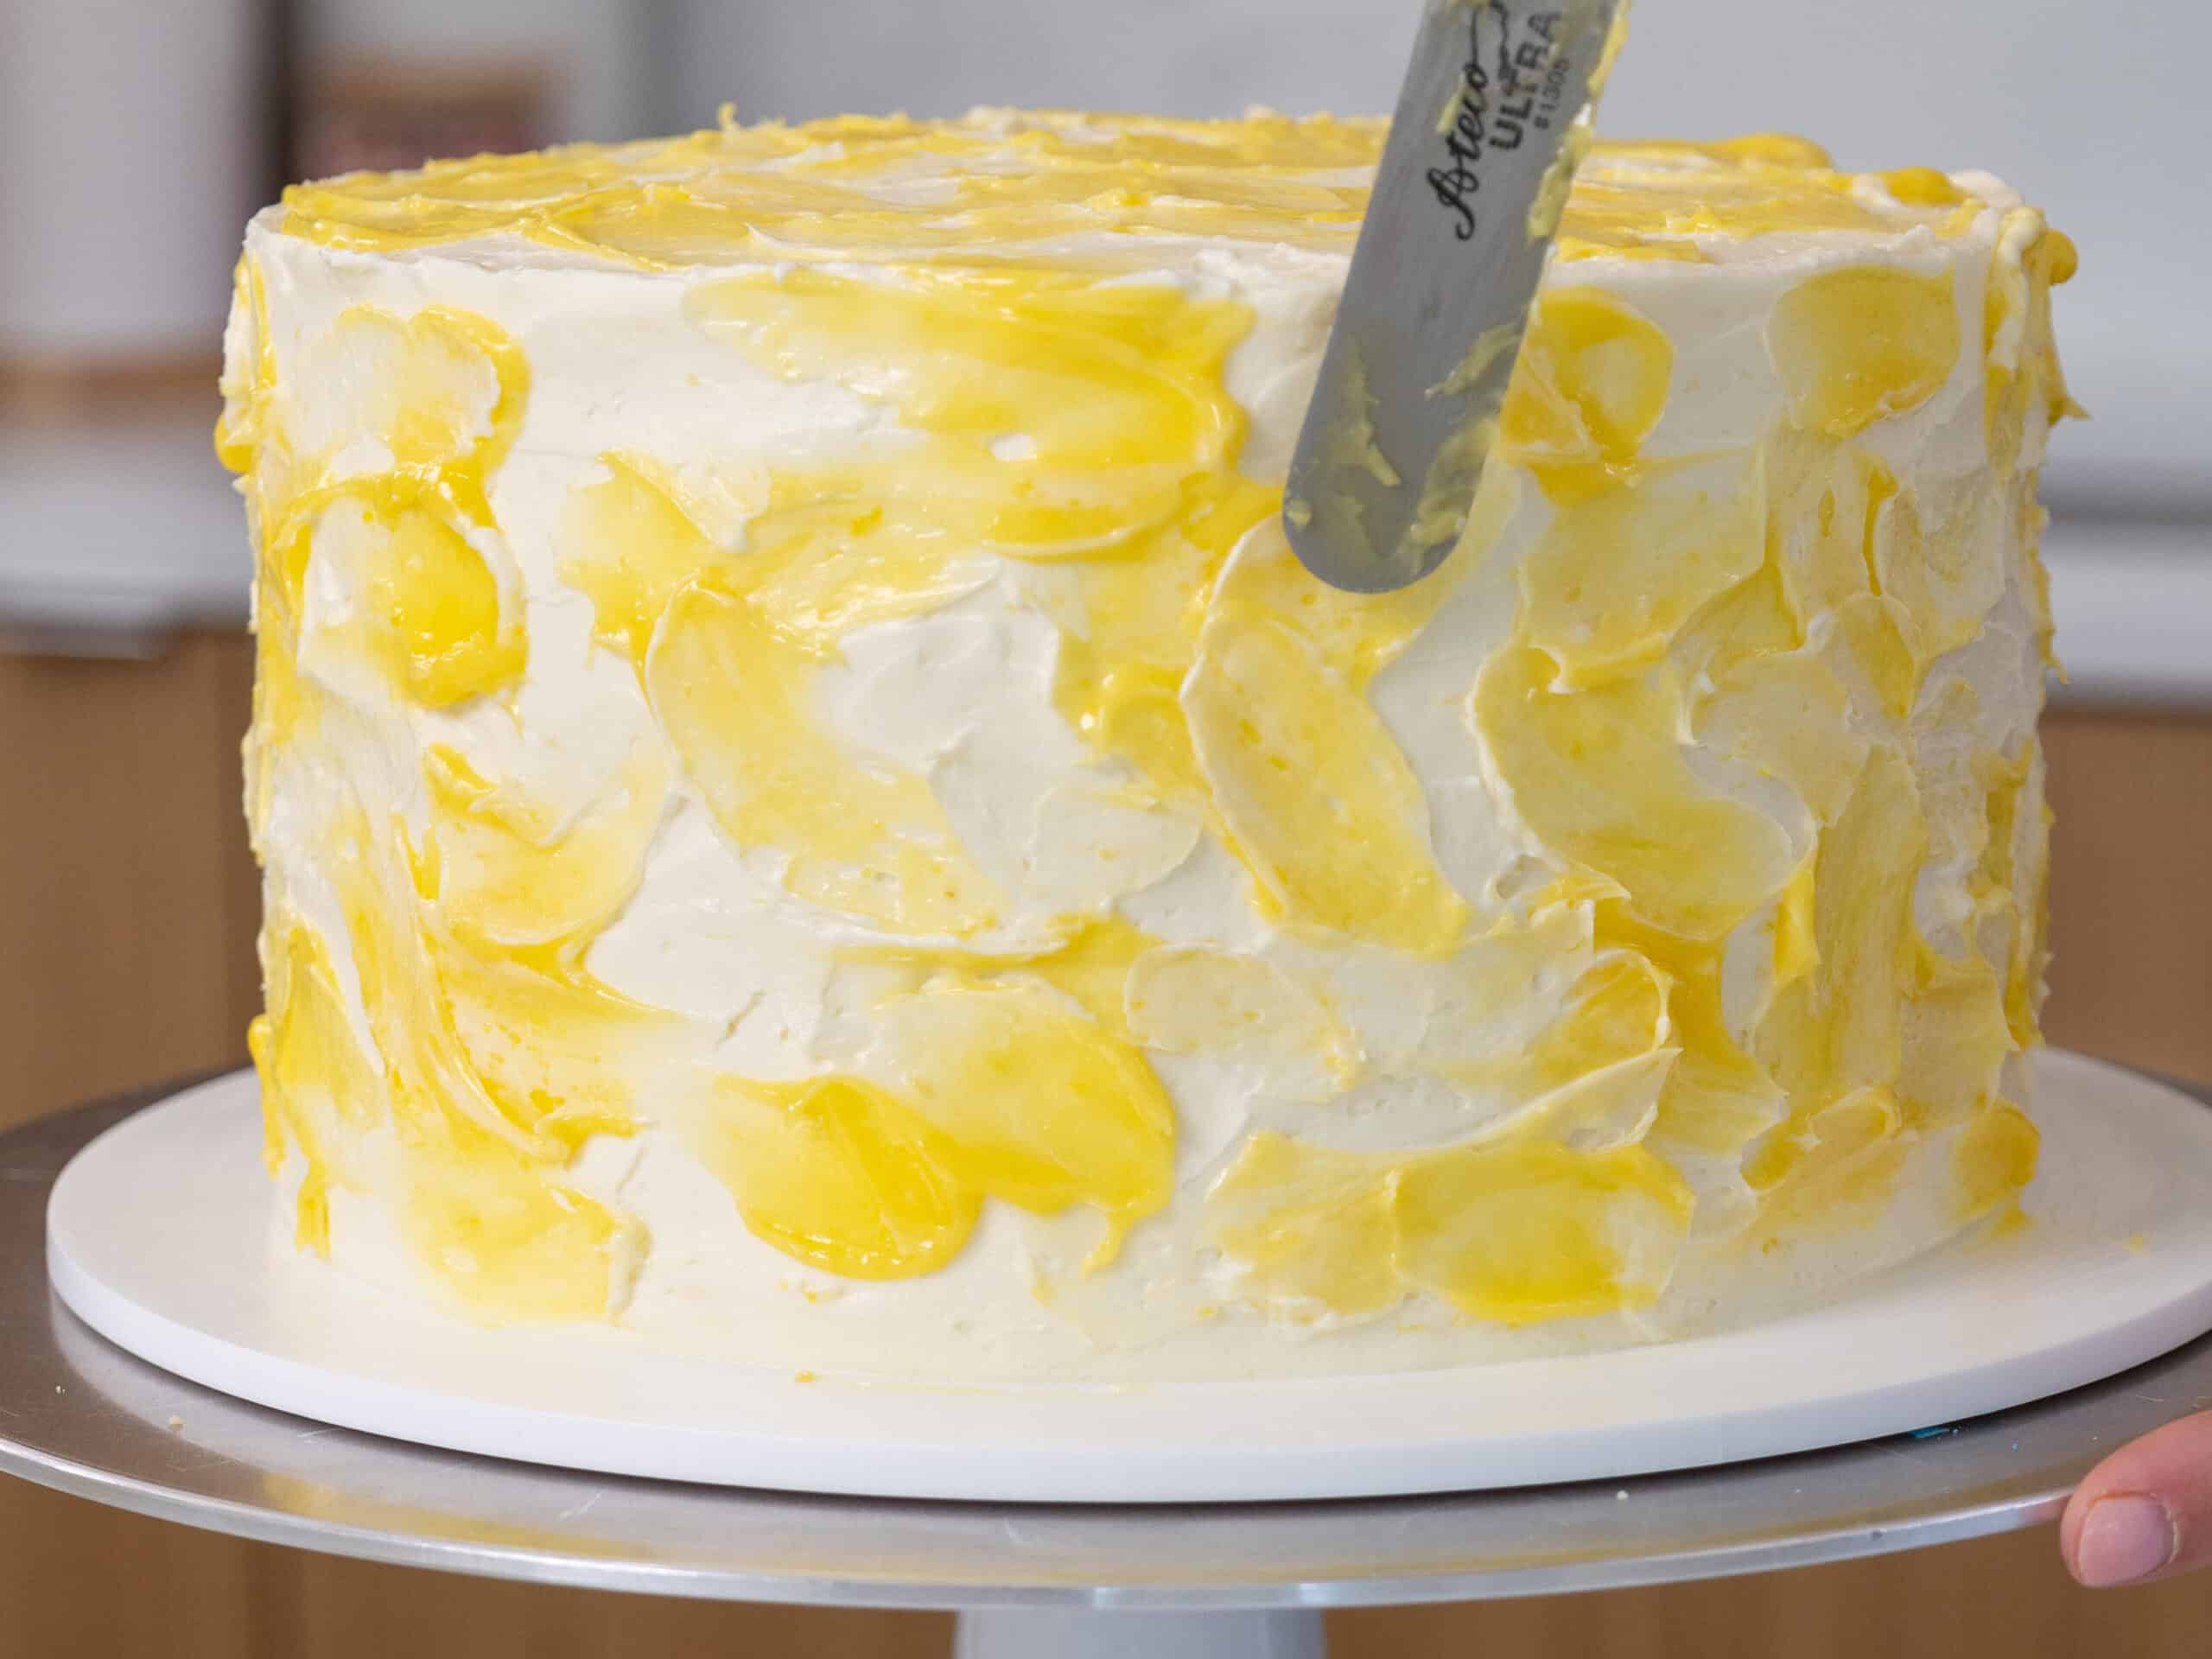
Then decorate as desired and enjoy! I added some dried lemon slices as a garnish.

Substitutions and Swaps – Lemon Cake Layers
Below are some swaps and substitutions that can be made in this cake recipe.
- Cake Flour – This recipe turns out best with cake flour, but you can use a gluten-free flour blend if needed or all-purpose flour if that’s all you have on hand.
- Granulated Sugar – I do not recommend reducing the amount of sugar because it will change the texture of the cake layers.
- Unsalted Butter – If you only have salted butter on hand, you can use it in place of the unsalted butter in this recipe. Just be sure to omit the salt that this cake recipe calls for. You can also use vegan butter in its place (and also omit the salt)!
- Egg whites – I like to use the pasteurized egg whites that come in a carton, but you can also use 7 fresh egg whites or 4 whole, large eggs + 1 egg white. If you have an egg allergy, you can try using flaxseed eggs or an egg replacer.
- Buttermilk – You can also use full-fat yogurt, sour cream, or an alternative yogurt or milk (almond, soy, oat) if you’re dairy-free.
- Vegetable Oil – Any flavorless oil can be used in this recipe. Canola or even sunflower oil would work great!
Substitutions and Swaps – Lemon Buttercream
- Unsalted Butter – If you only have salted butter on hand, you can use it in place of the unsalted butter. Just be sure to omit the salt that this frosting recipe calls for. You can also use vegan butter in its place (and omit the salt)!
- Granulated Sugar – I like my SMBC to be a little bit sweet, so I add in slightly more granulated sugar than most SMBC recipes call for. If you want the frosting to be less sweet, you can reduce the sugar in the frosting by 1/2 cup.
Troubleshooting
Why does my lemon curd taste metallic?
Lemon is very acidic, so even small contact with metal can cause a metallic flavor, and chilling can make it taste stronger. Use a nonreactive saucepan, avoid metal tools/bowls when possible, and strain through a nonreactive strainer if you have one.
My lemon curd is still soupy after chilling. How do I fix it?
It likely needed more cooking time. Put it back on medium-low, whisk constantly, and cook until it coats the back of a spoon (or reaches about 170°F), then chill again.
If you need an emergency rescue for a big batch, you can add a tiny cornstarch slurry (start small), but cooking longer usually solves it.
Why is my Swiss meringue buttercream soupy?
Most often, the meringue didn’t reach stiff, glossy peaks, or it was too warm (butter/kitchen/bowl).
Chill the bowl 10-20 minutes in the fridge, then re-whip. If it’s still loose after the butter goes in, a quick chill usually brings it back.
Why are my cake layers sinking?
This usually happens if the layers are underbaked or your oven runs cool. Bake until a toothpick comes out with a few moist crumbs, and consider using an oven thermometer if this happens often.
Why are my layers sliding?
This filling is soft, so you need to pipe a thick buttercream dam to keep it in place. Use the same amount of curd between each layer, and chill the cake as you stack it.
Frequently Asked Questions
Do I need to whip the egg whites before adding them to the batter?
Nope, you can add them unbeaten. This cake uses the reverse-creaming method, so the structure comes from the mixing method, not whipped whites.
Can I use whole eggs instead of egg whites?
Yes. Use 240g whole eggs (or 4 large eggs + 1 egg white) instead of 240g egg whites. The cake will be slightly more yellow.
Can I make the frosting with a hand mixer?
Yes. It works, but it can take longer to reach stiff peaks and may not get quite as fluffy as with a stand mixer. Just be patient and watch for true stiff, glossy peaks before adding butter.
Can I make this in 2 (9-inch) pans?
Yes, just know the layers will be thicker, so the bake time will be longer. Start checking around the mid-30-minute mark and bake until the center is set.
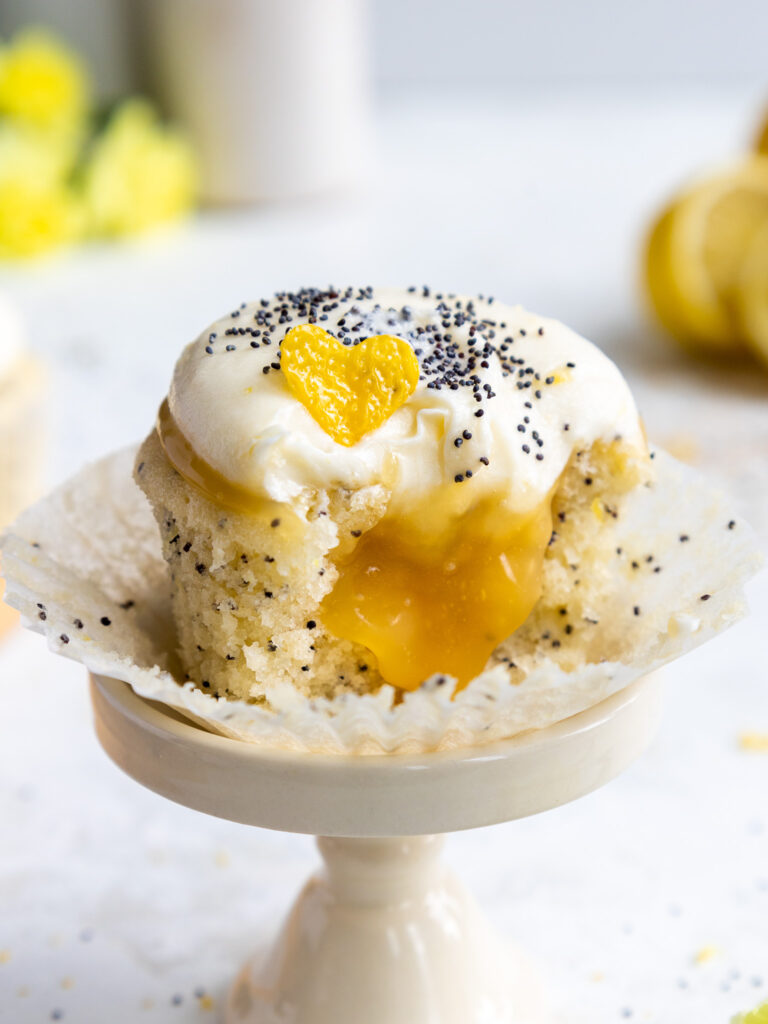
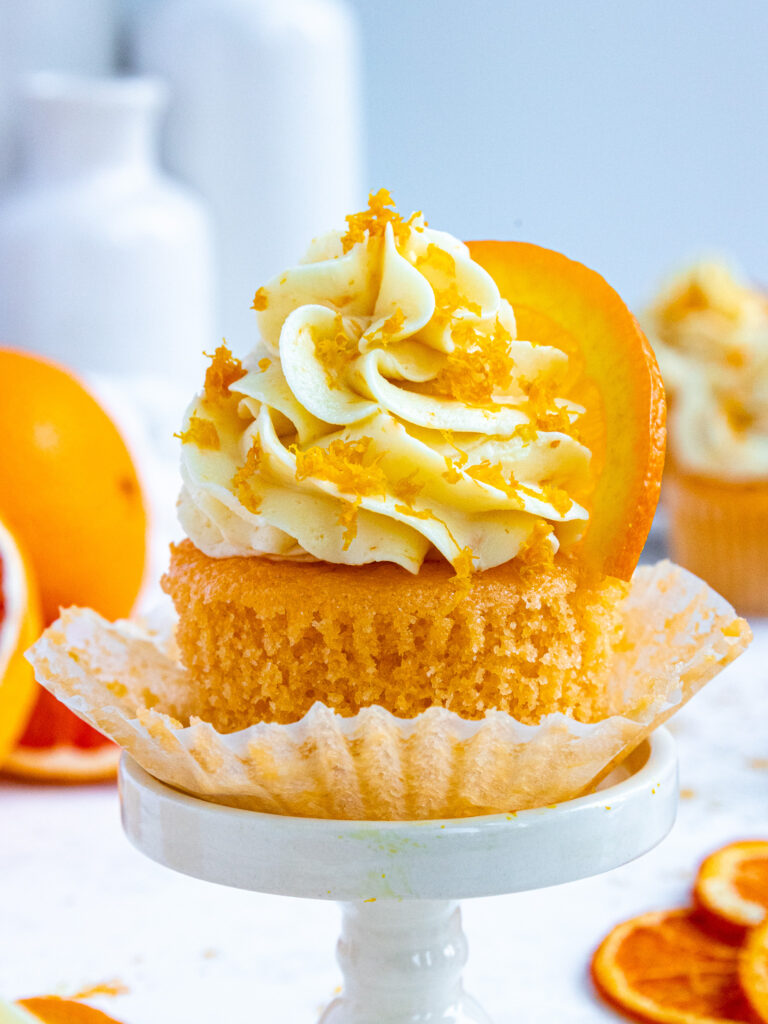
Can I make it as cupcakes?
Yup, bake at 350°F for 18-21 minutes and fill liners about 2/3-3/4 full.
Can I swap lemon for lime or orange?
Yes, you can swap the zest and juice 1:1 for lime or orange in the curd, cake, and frosting.
Can I make this as a tiered cake?
Yes, it holds up fine with a thick dam and proper dowel support. Just be sure to chill it as you go!
Tips for Making the Best Lemon Curd Cake
- Properly measure the flour. Either spoon it into the cup measure, then level with a knife, or use a kitchen scale to measure your dry ingredients.
- Ingredients at room temperature mix together better, so be sure to set out any cold ingredients ahead of time.
- Chill the cake layers in the freezer for about 20 minutes before assembling the cake. This makes them easier to stack and frost.
- Chill the cake before adding the crumb coat. This will help lock all the lemon curd filling in place and prevent the cake layers from sliding.
- If your cake layers do seem to be sliding, insert a wooden dowel or chopstick through the center of the cake to help keep the layers in place.
Let Me Know What You Think!
If you make this lemon curd cake recipe, I’d love to hear what you think! Let me know by leaving a rating and comment below.
Tag me @chelsweets and use #chelsweets if you share on social media so that I can see your amazing creations.

Lemon Curd Cake
Equipment
Ingredients
Lemon Curd
- 1 cup granulated sugar 200g
- 2 tbsp lemon zest – zest of 2 large lemons 10g
- 6 large egg yolks (save the egg whites to make the frosting) 150g
- 1/2 cup lemon juice – juice of 2 large lemons 120g
- 1/2 cup butter unsalted, cold and cut into Tbsp-sized pieces 113g
Lemon Cake Layers
- 3 cups granulated sugar 600g
- 2 Tbsp lemon zest – about 2 large lemons 10g
- 3 cups cake flour 360g
- 2 1/2 tsp baking powder 10g
- 1 tsp fine salt 6g
- 1 cup (2 sticks) unsalted butter, room temperature 226g
- 1 cup carton egg whites or 7 large egg whites, room temperature 240g
- 1 1/2 cups buttermilk, room temperature 360g
- 2 Tbsp vegetable or canola oil 28g
- 1 tsp vanilla extract or vanilla bean paste 4g
- yellow gel food coloring optional
Lemon Buttercream Frosting
- 8 large egg whites, room temperature (use the 6 egg whites from curd + 2 extra) 240g
- 2 1/2 cups granulated sugar 500g
- 2 cups (4 sticks) unsalted butter, room temperature 454g
- Zest of 2 large lemons
- 1/4 cup fresh lemon juice or the juice of 1 large lemon 60g
- 2 tsp vanilla extract or vanilla bean paste 8g
- 2 tsp lemon extract 8g
- 1/2 tsp fine salt 3g
Optional Garnish
Instructions
Lemon Curd:
- Make the lemon curd first so that it has time to cool and thicken. Separate 6 yolks from the whites and set aside the egg whites to make the Swiss meringue buttercream later. Make sure the eggs are cold when you separate them; it makes the process easier.
- Add 1 cup of sugar into a small saucepan. One quick thing to note! When making the lemon curd, it's best to use a saucepan that's ceramic as opposed to metal. Some metal pans and sometimes even metal whisks can give the curd a metallic taste.
- Zest 2 lemons into the saucepan and massage the zest into the sugar with your fingertips. This helps release the oil in the zest and gives this curd a bright, citrusy flavor.
- Add in 6 egg yolks and whisk the mixture together until combined. Then mix in the juice of 1/2 cup of fresh lemon juice.
- Heat on medium-low, stirring constantly with a wire whisk until the mixture thickens. It should be thick enough to coat the back of a spoon and keep its shape. This usually takes me 5-7 minutes.
- Remove the pan from heat, then add in 1/2 cup of cold butter that's been cut into smaller pieces. Mix until the butter is fully melted and the ingredients are combined.
- Pour the lemon curd through a fine mesh strainer into a separate bowl to remove any bits of cooked egg, clumps of zest, or lemon seeds. This gives it a perfectly smooth texture! Set aside to cool. If you make the curd in advance, cover it with plastic wrap to prevent it from forming a skin and store in the fridge for up to a month.
Lemon Cake Layers:
- Then it's time for the cake layers! Preheat the oven to 350°F/175°C and line and grease three 8-inch cake pans with parchment rounds and non-stick spray.
- Add 3 cups of sugar and zest 2 large lemons into a large bowl or the bowl of a stand mixer. Use your fingertips to massage the zest into the sugar to help release the oil in the zest.
- Add 3 cups cake flour, 2 1/2 tsp baking powder, and 1 tsp salt into the bowl with the sugar and whisk together until combined.
- Then mix in 1 cup (2 sticks) of unsalted butter with a paddle attachment or hand mixer on a low speed. Continue to mix until no large chunks of butter remain, and the mixture looks like moist sand.
- Mix in 1 cup of egg whites on a medium speed until incorporated. The batter should be quite thick at this point.
- Then add in 1 1/2 cups buttermilk, 2 Tbsp vegetable oil, and 1 tsp vanilla extract. Mix on a low speed until incorporated.
- Scrape down the sides and bottom of the bowl with a rubber spatula, then beat on medium speed for about 30 seconds to make sure everything is properly mixed together. This cake recipe uses the reverse creaming method, so this step is important to help give the cake layers a lighter texture.
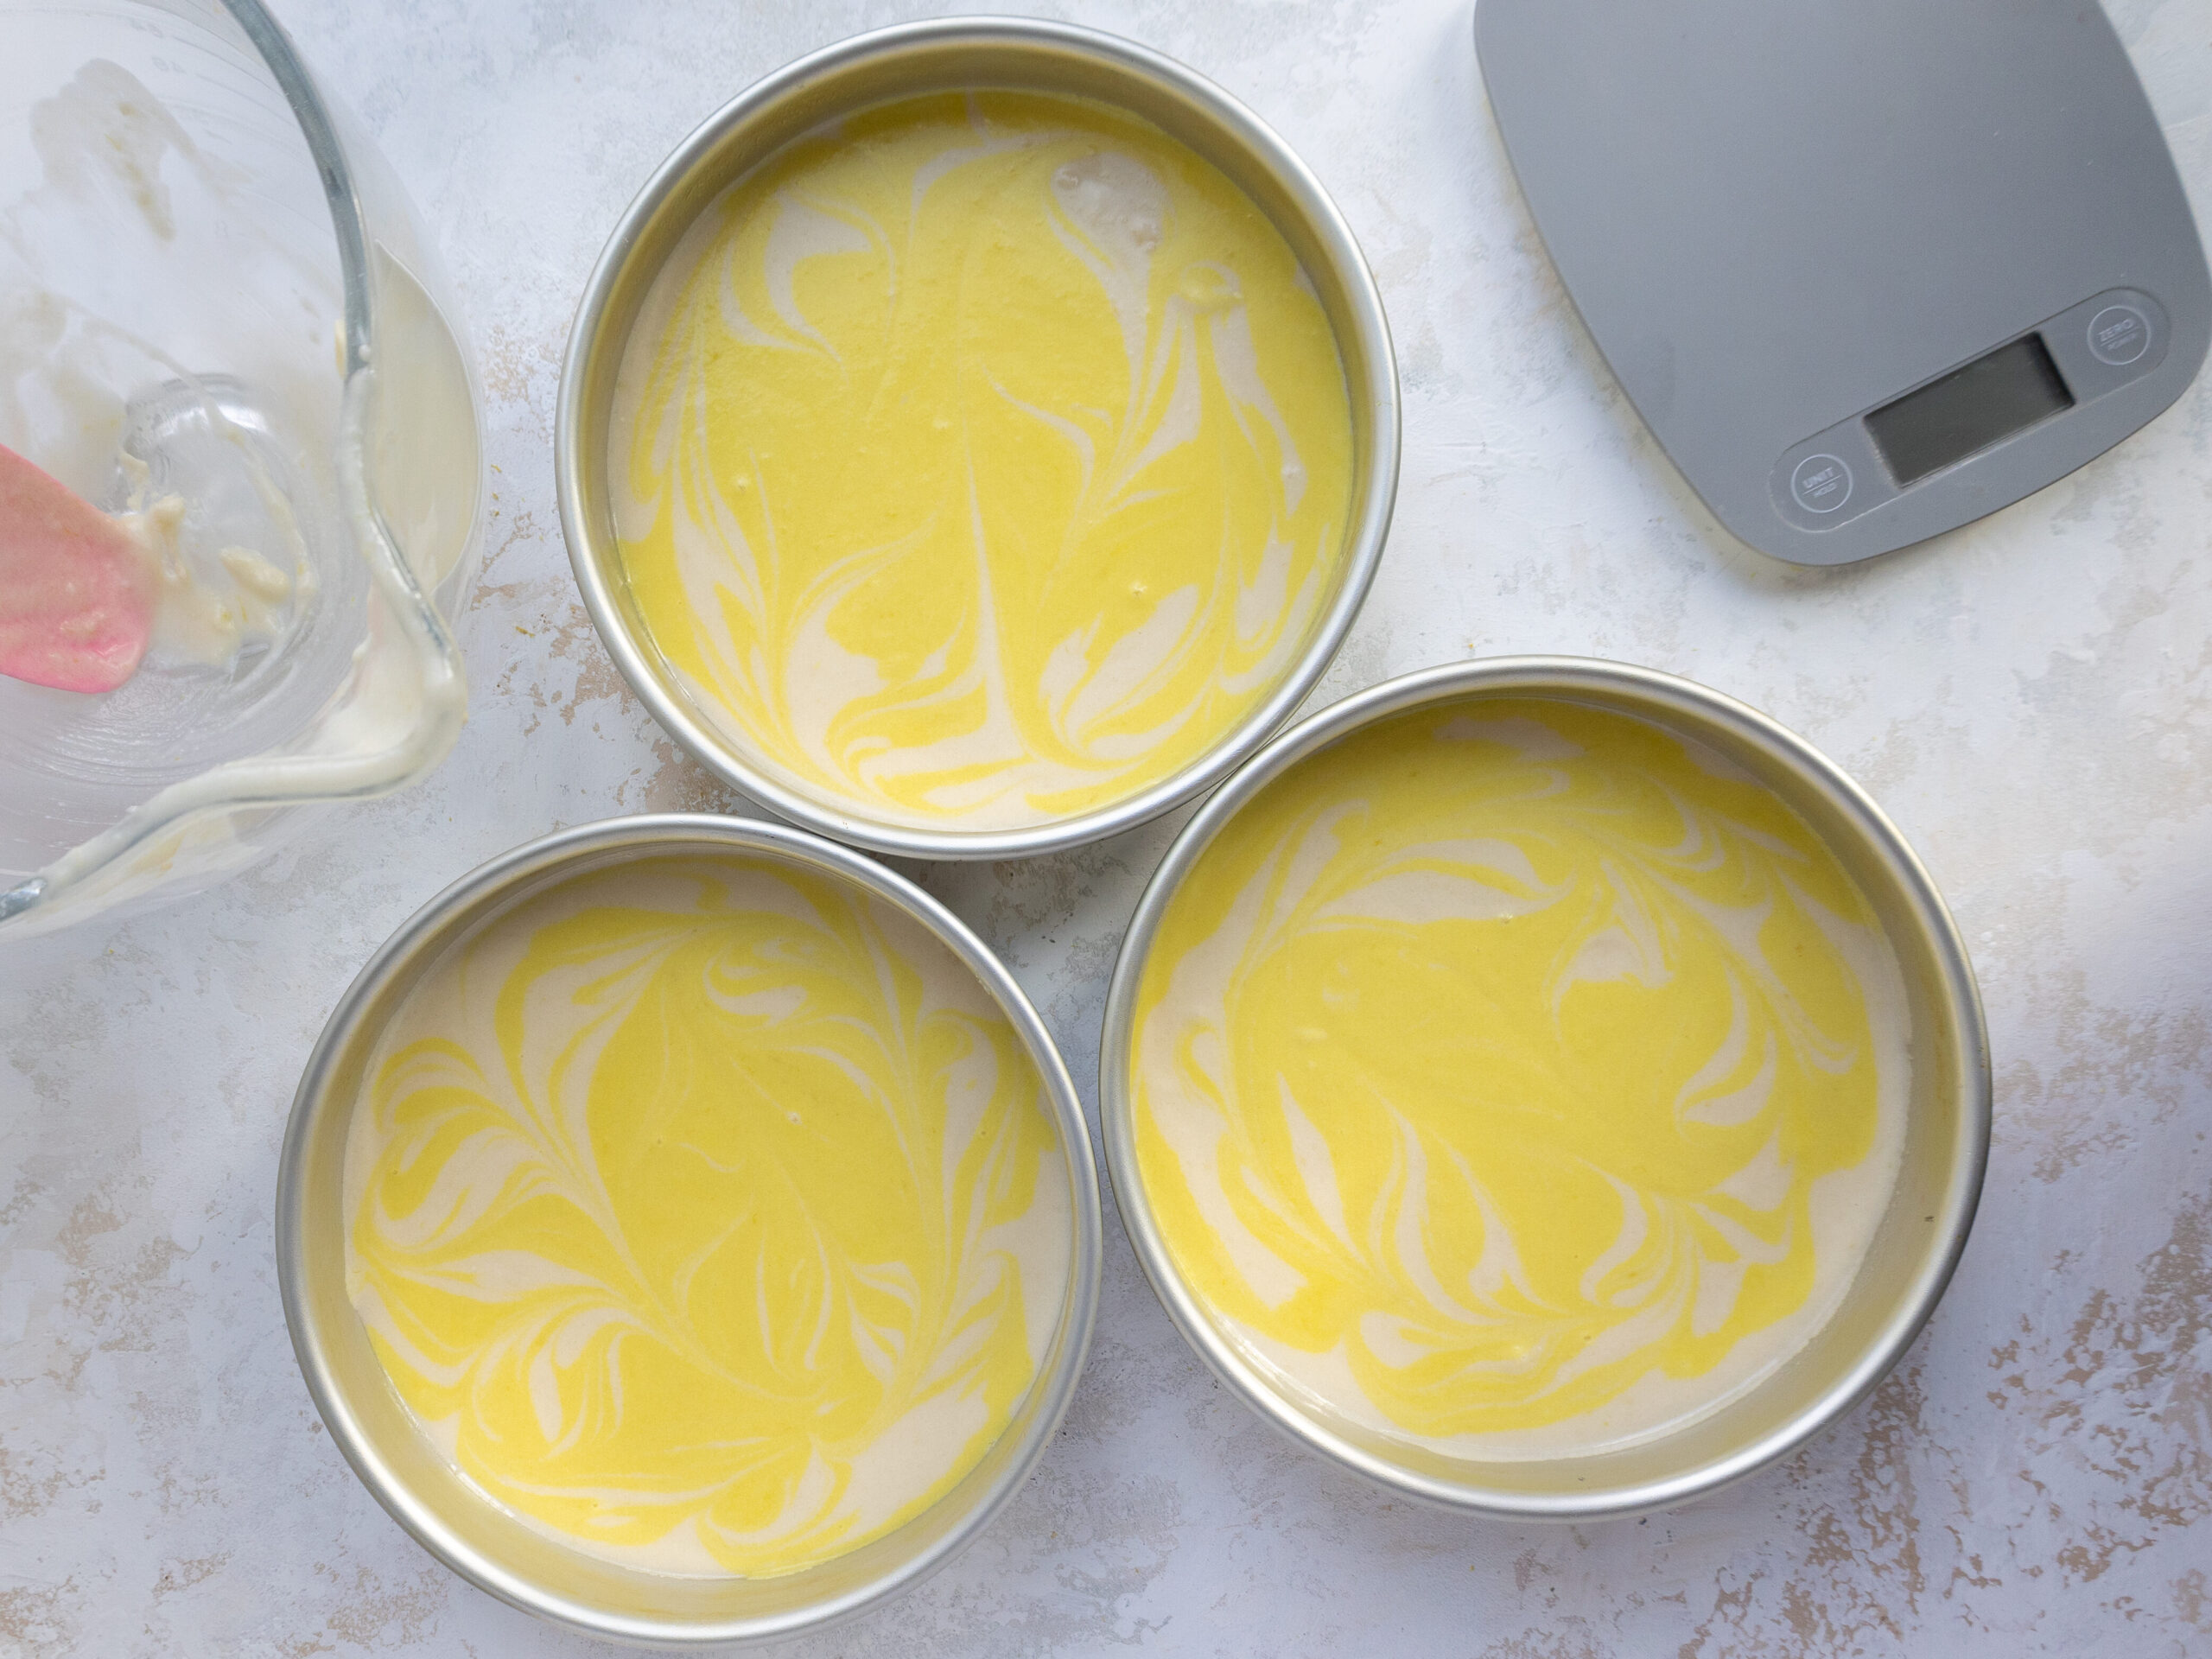
- Pour half of the cake batter (about 900g) into a separate bowl. Use a small drop of gel food coloring to color one bowl of batter light yellow.
- Alternate pouring the uncolored and yellow batter into the prepared pans to give the cake layers a marbled look. Use a butter knife or a small offset spatula to swirl the batter together. Bake for 33-36 minutes or until a toothpick comes out with a few moist crumbs. Let the cake layers cool in the pans for 15 minutes, then run a small offset spatula around the perimeter of the pan to separate the cake from the pan.
- Flip the cake layers onto a wire rack to cool. Use a serrated knife to level the tops and remove the caramelization around the sides of the layers. I also like to torte the cake layers horizontally (see picture above) to create 6 thinner cake layers, but this is optional. You can also trim the layers, then wrap and freeze them if you're making them in advance.
- If you make these cake layers in advance and freeze them, let them thaw for about 20 minutes before assembling your cake. The cake layers should still be cold to the touch, which will make it easier to assemble your cake.
Lemon Swiss Meringue Frosting:
- While the cake layers bake and cool, make the lemon buttercream frosting.
- Before making the frosting, be sure to thoroughly clean your mixing bowl. If there’s any grease, it can make it difficult to whip up the meringue.
- In a medium-sized pot, add 1 inch of water and bring to a simmer.
- Add 8 egg whites (use the 6 egg whites saved from making the lemon curd, plus two additional egg whites) and 2 1/2 cups of granulated sugar into a large metal bowl.
- Place the bowl on top of the pot filled with simmering water. The bowl should create a seal over the pot. Make sure the water isn’t actually touching the bottom of the bowl, or it can cook the egg whites.
- Whisk the mixture constantly for about 3 minutes, until it reaches 160°F / 71°C. You can test the mixture to see if it’s ready by rubbing a tiny bit between your fingertips. The sugar should be fully dissolved, and it should feel super smooth and hot to the touch.
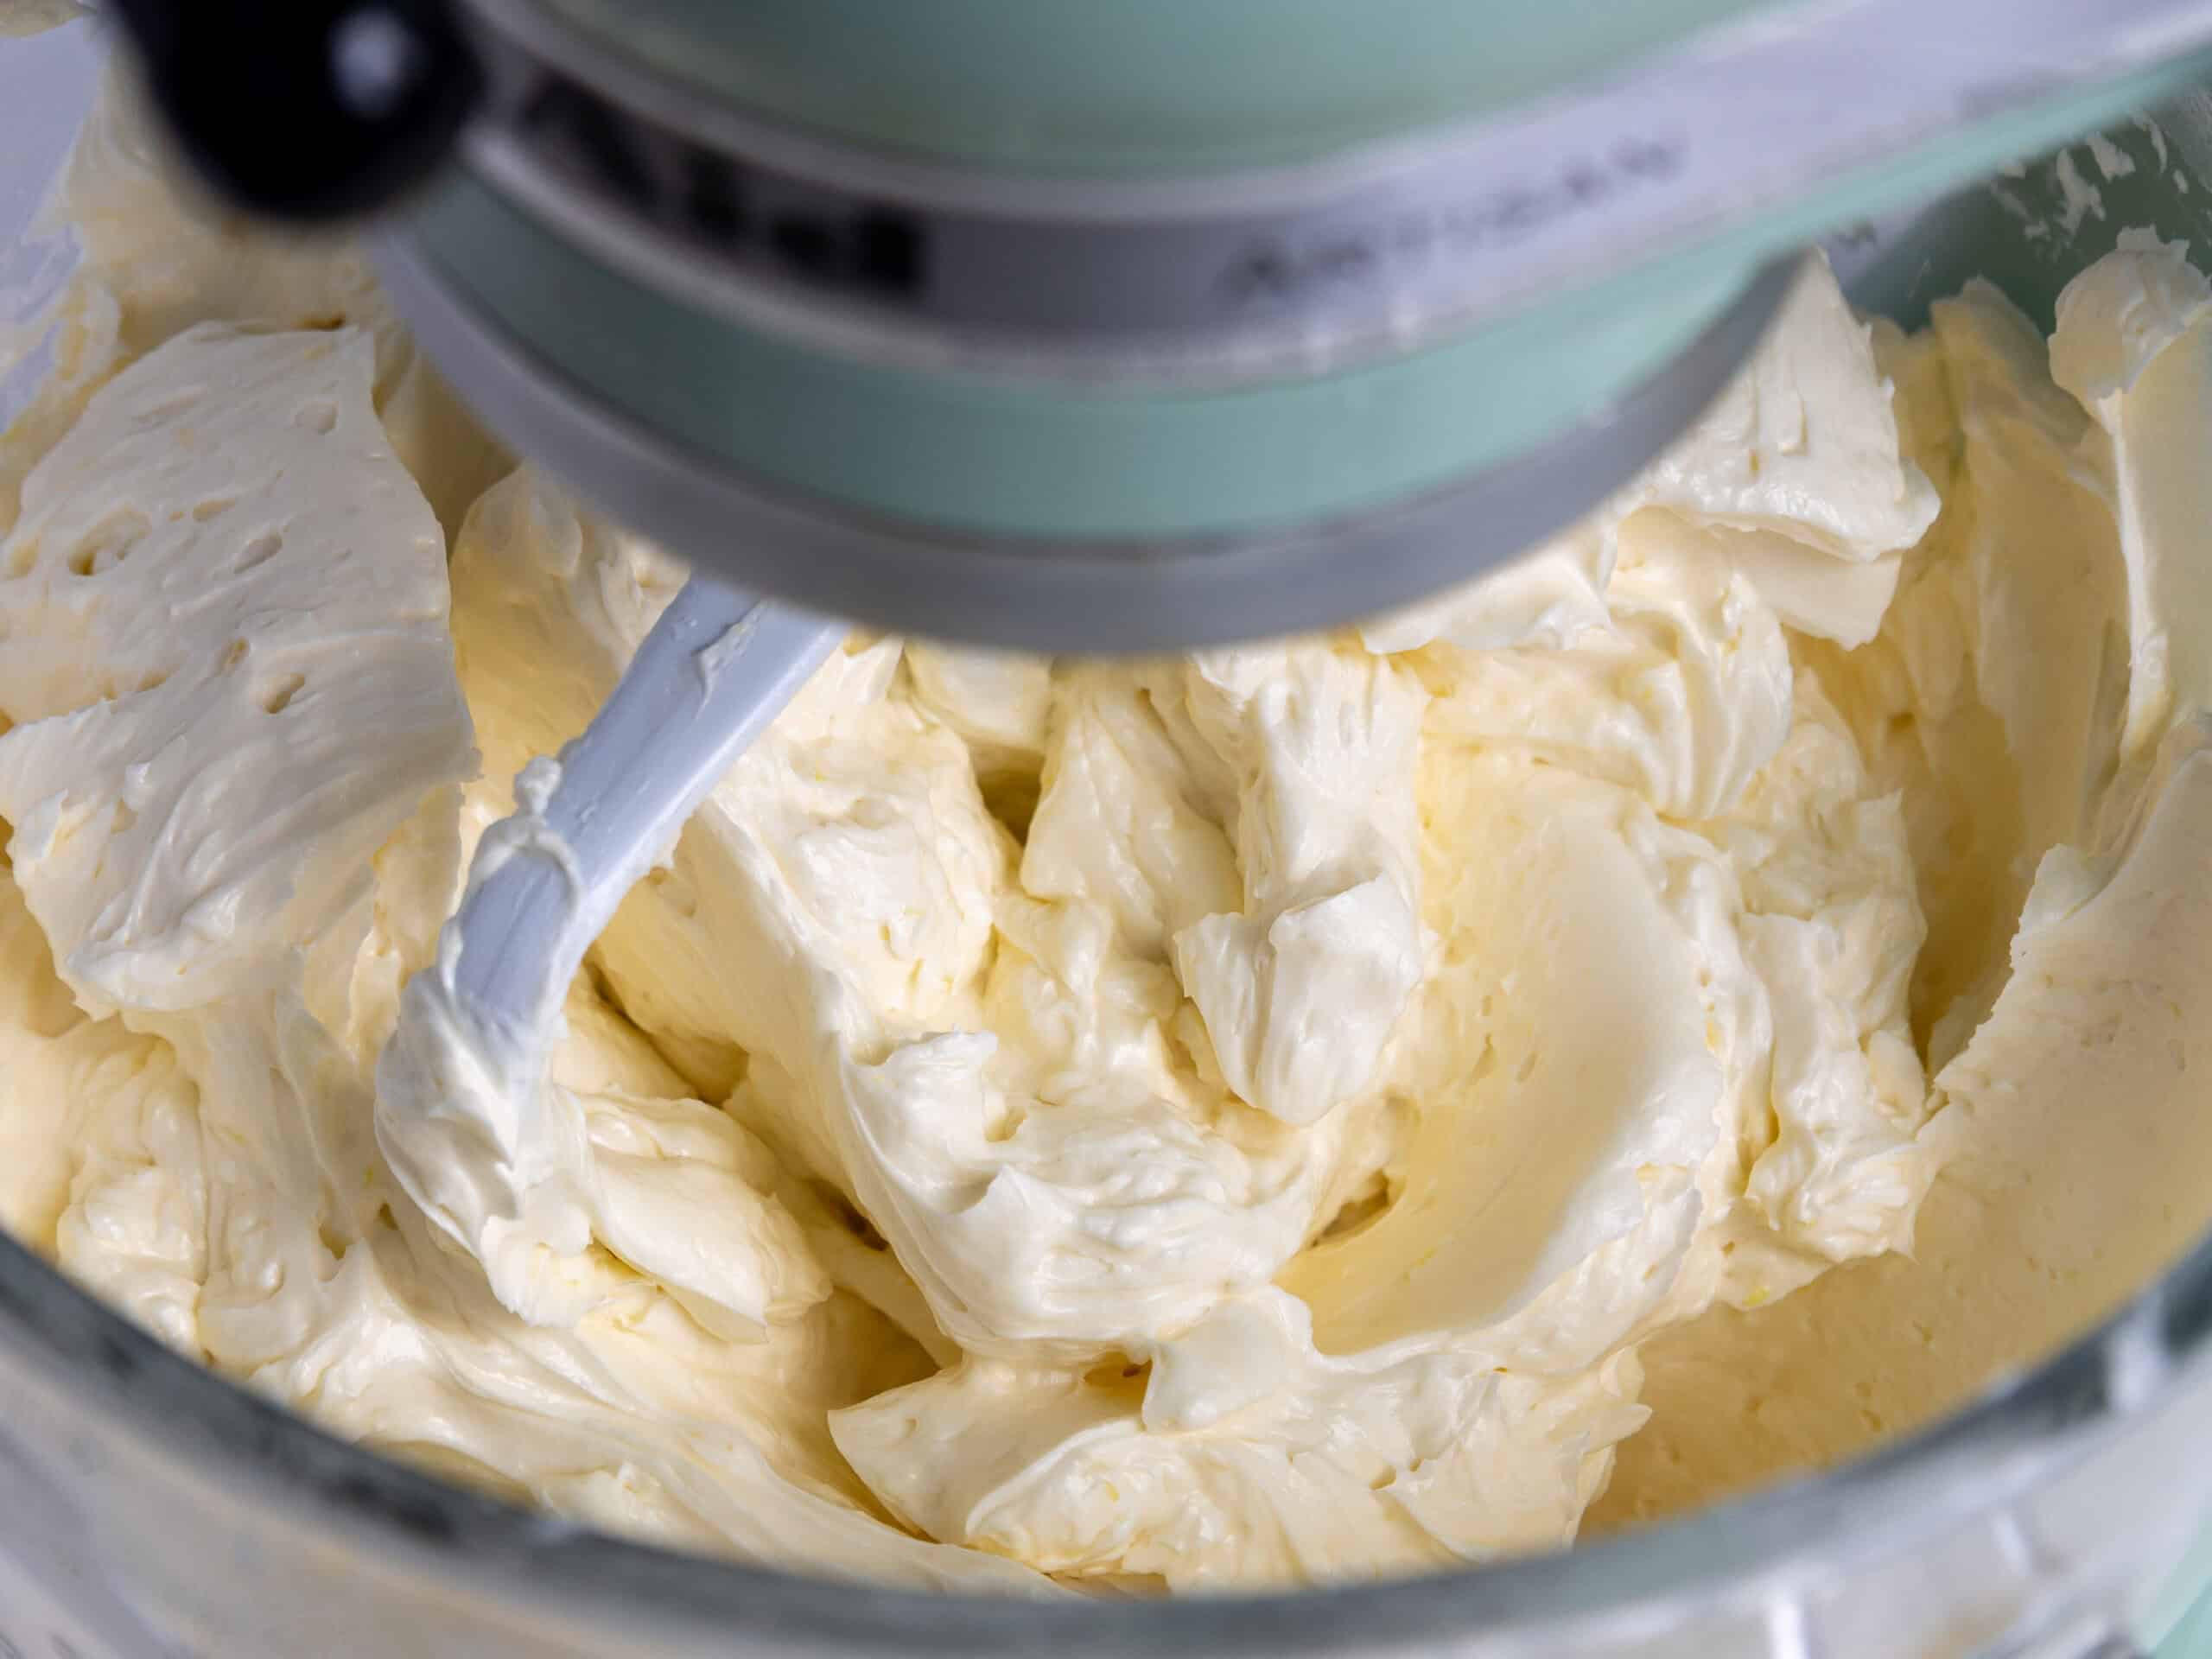
- Lift the bowl away from the pot and dry the bottom with a towel. Pour the mixture into the bowl of a stand mixer and beat on a medium-high speed with a whisk attachment. Mix for about 10 minutes, or until you have stiff, glossy peaks.
- Mix in 2 cups of unsalted butter at a medium speed, 1 stick at a time. The frosting should have a thick, whipped consistency at this point. If it looks lumpy or broken, keep mixing until it looks smooth and thick. If it doesn't seem to come together after an additional 10 minutes of mixing, check out my Swiss meringue troubleshooting guide.
- Once the consistency is right, swap out the whisk attachment for a paddle attachment and add in the zest of 2 large lemons, 1/4 cup fresh lemon juice, 2 tsp vanilla extract, 2 tsp lemon extract, and 1/2 tsp fine salt.
- To make the frosting extra smooth, swap out the whisk attachment for a paddle attachment and continue mixing on a low speed for a couple of minutes.
- Place half of the frosting in a large piping bag and cut a 1-inch opening at the base of the bag. Set aside.
Assembling this Lemon Curd Cake:
- Stack and frost the cake layers on a greaseproof cake board or flat plate using a dab of frosting to help stick the first cake layer to the board.
- Spread a thin layer of buttercream on top of each cake layer. Pipe a thick ring of buttercream around the edge of the cake layer and fill the center with lemon curd. I like to add about 1/3 cup of lemon curd between each layer. Make sure you reserve about 1/4 cup of lemon curd to decorate the cake later. Note: If you torte the layers like I did, alternate filling the cake with layers of lemon curd and a thick layer of frosting.
- Once all the layers are stacked, gently press down on top of the cake with both of your hands to help them settle and to press out any trapped air between the cake layers.
- Chill the cake in the freezer for 5-10 minutes to prevent the layers from sliding, then add a thin coat of frosting around the cake that fully covers the cake layers. Smooth using a large offset spatula and/or bench scraper, then chill the cake again in the fridge (30 minutes) or freezer (10 minutes) until the frosting is firm to the touch.
- Then add a second layer of frosting to the cake with the remaining buttercream. Use a large offset spatula to give the frosting a textured look. Use a small offset spatula to add swipes of lemon curd around the cake and blend it into the frosting. Then decorate as desired and enjoy! I added some dried citrus slices as a garnish.
Video
Notes
How Many People Does This Cake Feed?
This cake feeds about 24 people. For more information on cake sizes and servings, check out my cake portion guide.Substitutions and Swaps
If you need to make any substitutions or swaps in this recipe, please check out the section on ingredient substitutions in the post above.Making this Lemon Curd Layer Cake in Different Sizes
One batch of batter is about 1800g or 10 cups, so I add roughly 600g to each of my cake pans when using 3, 8-inch cake pans. You can also use one batch of batter to make 2, 9-inch cake layers or 4, 6-inch cake layers. Bake time will be a few minutes longer at 350°F/175°C. If you want to make a tiered cake with this recipe, check out my cake batter calculator to see how many batches of batter you’ll need. This recipe can also be used to make a lemon curd sheet cake! One batch will make a 1, 9×13-inch cake layer that’s about 1.5 inches tall once leveled. Bake for 45-55 minutes at 350°F/175°C, or until a toothpick inserted in the center comes out with a few moist crumbs. Bake time can vary a lot based on the type of pan you use, if you use heating cores, and your oven. I recommend using heating cores if you have them, they help sheet cake layers bake more evenly and quickly. Once the sheet cake is baked and cooled, spread a thick layer of lemon curd straight onto the cake, chill the cake in the freezer for 10 minutes to help it set, then top it with buttercream. For more details on how to convert this cake recipe and others into sheet cakes, check out my sheet cake guide. If you want to make lemon curd cupcakes, bake them at 350°F/175°C for 18-21 minutes. One batch of batter will make about 3 dozen cupcakes (yield will vary based on the size of your liners).Tips for Making the Best Lemon Curd Layer Cake
- Properly measure your flour (spoon into the cup measure, then level) or use a kitchen scale to measure your dry ingredients.
- Ingredients at room temperature mix together better. Set out any cold ingredients ahead of time.
- Chill the cake layers in the freezer for about 20 minutes before assembling the cake. This makes it a lot easier to stack and frost.
- Chill the entire cake before adding the crumb coat. This will help lock all the lemon curd filling in place and prevent the cake layers from sliding.
- If your cake layers seem to be sliding, insert a wooden dowel or chopstick through the center of the cake to help keep the layers in place.
- If your cake layers turn out less than perfect, read my cake troubleshooting guide to see where things might’ve gone awry.
Making This Cake in Advance and Storage Tips
I highly recommend making the components of this cake in stages. It breaks the process up and makes it so much more approachable! The lemon curd can be made up to a month in advance and stored in the fridge. Just be sure you save the egg whites to make the Swiss meringue buttercream. The cake layers can also be made in advance and frozen. They taste just as great when they’re frozen as when they’re fresh, I promise! In addition, you can make the frosting ahead of time or save any leftover frosting. It can be stored in an airtight container in the fridge for up to a month. Be sure to give the frosting a good stir once it thaws to get the consistency nice and smooth again. If you cut into the cake and have leftovers, use any remaining frosting to cover the cut section to keep it moist and store it in the fridge for up to a week.Nutrition
Other Recipes You Might Like:

Hi Chels. Can you plz consider making a healthy chocolate cake recipe for diabetics who cant have refined sugar plz
This was an excellent recipe! Made this for Mother’s Day dessert and just about everyone had a second slice. The cake was soft and springy yet held up strong to the curd and frosting; the curd came together super easy and was the perfect amount of tart and sweet; and the SMBC – wow! It was my first time making it and I ended up with soup at first, but I followed your directions to fix and it turned about heavenly. I would recommend this recipe 100x!!
Hi Liz,
I am so happy to hear that, that’s wonderful!!! Thank you so much for sharing 🙂
Tried the lemon SMBC twice and made soup both times 🙁 Whipped to stiff, non-drooping peaks, tried chilling, added extra butter the second time. Never was able to get something useable. At the best it was a whipped cream type of soft. A very tasty whipped cream though!
Hi Tim,
So sorry to hear that, that’s so frustrating! It sounds like your kitchen, your butter, or the meringue itself was too warm! Did you try chilling the bowl for 10-20 minutes, then rewhipping it? That usually helps my frosting come back together when it’s too warm / soupy. If you run into any trouble with it again, I have a great troubleshooting section on SMBC in this post: https://chelsweets.com/swiss-meringue-buttercream-frosting/
Hope that helps for next time!
@Chelsweets, thanks for the advice, I’ll keep that in mind with my next batch! Was still able to make something out of the components and it was very good!
Phew!! Good to hear that!!!!
Thanks for this recipe!! My 10 year old requested this cake for his birthday. I followed your instructions to a T, but made a lemon whipped cream for the outside to counter some of the sweet-tartness on the inside. It turned out great! And, most importantly, my son was thrilled with it!
YAY! So happy to hear that Tesia!! Thank you for sharing 🙂
This looks delicious! Would the cake hold up in tiers? I’m making a friend a two tier lemon engagement party cake and this looks lovely, would the cake be sturdy enough?
Hi Sarah,
Great question! This cake should hold up just fine as a tiered cake as long as you make a nice thick frosting dam and support it properly with dowels. Hope that helps happy baking!
The cakes fell in the middle and I followed the recipe exactly as it’s shown. I do live in high altitude. Any suggestions?
Hi Py,
I’m not an expert at high alt baking, but here’s a great post that addresses that: https://blog.wilton.com/high-altitude-baking/
Hope that helps, happy baking!
Hi, Chels,
I was wondering if you can help me with the recipe for a SMALL Swiss Meringue Buttercream Cake, please.
Thank you!
Hi Mihaela,
Sadly I don’t have a recipe quite like that, but you can totally make a half batch of my SMBC recipe!
Can I make this lemon cake. Into a smaller 6 inch three layer cake?thank you
Hey! I tried this recipe of yours for my little ones first birthday and Oh My!!! It turned out just perrrfect! The cake, the curd, the frosting everything was top notch! Thankyou for the ahmazing recipe! I wish I could post the picture along
Aw I am so happy to hear that, YAY!!! 🙂 Happy belated birthday day to your little one!!
Looks delicious! If I want to make them a day or two in advance, do I still have to freeze them (and 20 minutes will be enough to thaw?), or should I just put them in the fridge?
Hi Lizzy,
Great question! I personally think that the freezer keeps cake layers more moist, so I almost always chose it over the fridge. But you can also put them in the fridge if you prefer that! Just make sure they’re cold when you assemble the cake to make it easier to stack and frost 🙂 Hope that helps, happy baking!
YUM! This turned out fabulously! We love lemon! Thank you for the detailed instructions.
What is the ceramic-looking round that you have between the cake and the cake stand? Can you provide a link, please?
Hi Kelly,
I’m so happy to hear that 🙂 That is an acrylic cake board, I use it like a re-useable cakeboard when I film content or am making cakes at home. This particular one I ordered from overseas and took a while to ship, but here is a super similar one you can order on Amazon: https://amzn.to/3v4jr2Y
Hope that helps, happy baking!
Thank you Chelsey. Made this for a friend’s birthday and she said it was the best cake she ever had! And she turned 77!
I did struggle with the SMBC a bit. I had the opposite timing for egg whites. It took almost 20 minutes to get them to 160 degrees and whipping to peaks took less than 5 minutes. Then the frosting curdled after adding the lemon and flavoring but heating in the double boiler then beating with paddle brought it back. It was pretty soupy but I held some frozen veggies around the bowl and it came out great. Thanks for the trouble shooting tips.
Great cake!
Hi Terri,
Omg that is wonderful to hear 🙂 SMBC can be so finicky, but I’m glad you were able to get it to come back together!! The frozen bags of vegetables really do work wonders!!! Thank you so much for sharing!
Hi Chel, I discovered your site while I am searching on how to price the customized cake. I started to start baking 4 years ago when I made a cake for a friend and they loved it and even the designed I made. That’s when I know that I have a talent in cake making. My friends started to order everytime there is a birthday. I was glad that I able to practice and develop my skills and also with the help of you tube. I am just pricing my cake according to what is the budget that my friends can afford, even the design is sometimes difficult to make. Now I am thinking to really put on my standard and worth. Thanks to your advice. It really help me. By the way, thank you for sharing your recipes, I would definitely try it.
Hi Shella Jane,
I am so happy that you found my post on how to price a cake helpful 🙂 It can be a difficult adjustment to make but it is definitely worth taking into account your skill and time when pricing out a cake!! Keep up the amazing baking!
I made this in the shape of a 2 for my daughters birthday and everyone loved it! Never made lemon curd or SMBC, definitely doing them again as they were delicious!
Hi Bethany,
I am so happy to hear that!!! Thank you so much for sharing ? Happy baking!
Do you think this would work using white cake layers if i don’t wanna go too too crazy with all the lemon? So white cake but lemon curd and lemon frosting?
I think that would be delicious Olga! And a great option if you don’t want too intense of a lemon flavor (this cake is very lemon forward – I’m a big fan of lemons!!) Hope that helps, happy baking!
OMG. This cake was phenomenal. I made it for a colleague/friends graduation and it was loved by all. The amount of lemon you get in every bite is perfection. The cake itself wasn’t overly sweet. I made the smbc with less sugar and think it came out fantastic! And the curd was simply delicious. 10/10!
So happy you loved this recipe!! It is one of my faves 🙂 Thank you so much for sharing Jen!
I would like to know if you could substitute “orange” for the lemon flavor of the cake? If so, would it be an even trade off throughout the recipe of lemon to orange? Thanks! It looks delish!
Hi Terri,
Great question! You absolutely can, I love that idea! I might just need to make an orange curd cake too 🙂 Yes, I’d recommend doing an even swap of orange juice/zest for the lemon juice/zest. Hope that helps, happy baking!!
Hi,
Tried this recipe and the cake LOOKS absolutely stunning- sadly I won’t be tasting it until tomorrow ? Just wondering the best way to store it overnight- I know buttercream is often ok to leave out overnight but wasn’t sure with the lemon curd on the outside, too?
Thanks so much, thrilled with the recipe!
Hi Merrie,
Great question! I’d recommend storing it in the fridge overnight because of the lemon curd. The frosting will keep all the moisture locked in, I promise! You can take it out a couple hours before you plan to serve it tomorrow to let it come to room temperature. Hope that helps, happy baking!
@Chelsweets, thanks for the tip, it was absolutely fantastic- the cake was so stunning, so delicious, and I even had a few people at the party tell me they don’t typically like lemon desserts but loved this one! Thank you again, can’t wait to try more of your recipes!!!
Aw what a compliment!!!!!! So happy to hear that Merrie!! 🙂
Hi Chels! Can I substitute the lemon for lime on all 3 parts of the recipe (curd, cake and buttercream)? Will the measurements be the same?
I want to make this recipe to celebrate my baby´s monthversary 🙂 Thanks in advance!
You absolutely can swap all the lemon for lime in this recipe! Hope it turns out great, and congrats on your baby’s monthversary!! 🙂
I made this my BFF’s birthday, she loved it and so did everyone else ! Delicious! I love her step by step instructions and she always reply’s to questions.
I am so happy to hear that Renea!!! You have on lucky BFF 🙂 Thank you for sharing!!
Hi, I’m hoping to make this for my mums 50th birthday. She had around 30 people coming and I saw this serves around 24. Would I be able to divide this recipe by 3 and make another layer. I’d rather have too much than not enough. Would it stack ok?
Hi Jasmine,
Great question, and yes!! You can totally do that, that’s what I’d recommend! It should stack just fine!! Hope that helps and that your Mom’s cake turns out amazing!! 🙂
when adding egg whites to the dry ingreds, do they first need to be whipped to soft peaks, or just pour unbeaten whites to dry? Also, it sez that instead of egg whites you can use 4 whole eggs. Which is better? I am making tiered wedding cake for my daughter.
This cake recipe is absolutely perfect!! All your recipes work out perfectly! I’ve used the vanilla cake recipe and this one for tiered cakes and people go nuts over them! I’m going to try make this with orange juice and zest high a passion fruit ganache next. Thank you so much for sharing with us!
Meringue didn’t come together in spite of refrigerating it. Aside from that—it didn’t taste that great.
The cakes were crumbly—and really didn’t taste that great.
Will never use this recipe again.
Was using the lemon curd portion of this recipe. It’s been in the fridge overnight and I still have soup.
Any way to save this? I made a batch of 4 times the amount for a wedding cake this weekend.
Hi, I’m planning on making this cake for my niece. My question is, I don’t have a stand mixer…only an electric beater. You mention the whisk attachment and paddle…I have neither. Will that create problems and should I forgo the recipe??
Hi Cheryl,
You can totally make this recipe with a hand mixer, it might just take a little longer to mix everything! Hope that helps, happy baking!
@Chelsweets, Thanks. Layers are in the freezer waiting to be assembled tomorrow. Unfortunately all of the layers fell after I removed them from the oven 🙁 I’m sure the taste will be fine even if it isn’t as high. I was reading and I wonder if I over mixed. I felt like it was odd to mix the sugar and butter with the flour instead of mixing the sugar and butter first and then adding the flour.
I don’t bake much so this is a big endeavour for me.
(The curd turned out great and tomorrow I make the buttercream).
Also, my oven thermometer (sitting near front of the over) showed I was about 25 degrees lower than how it was set…but the thermometer itself may be old.
Lots to learn with baking 🙂
That is such a bummer Cheryl, but luckily once you add frosting i don’t think anyone will be able to tell and they should still taste great!
This recipe uses the reverse crumbing method so even though it feels really weird mixing butter into all the dry ingredients it actually gives the cake a really tender texture and you really can’t over mix this recipe – it is super forgiving.
If the layer is sunk in the middle my best guess is that they were actually a little bit underbaked, especially if your thermometer said that your oven probably was about 25° lower than what you set it to. My oven also runs 25° off and it’s super common for ovens not to bake at the temperature you set them to. Next time I’d recommend testing the center with a toothpick and once it comes out with a few moist crumbs the cake layers will be ready. You also could try bumping your temperature up to 25° so that way it bakes at 350° like the recipe calls for or you can just bake them a few minutes longer. Hope that helps for the future, happy baking!!
I made this for my partner’s birthday and it was an absolute hit! The tanginess of the curd paired perfectly with the sweetness of the meringue buttercream — it truly elevated the whole cake. I’ve baked a lot of cakes using different recipes over the years, and this one is hands down the best I’ve ever made!
Big thanks to Chelsey White for publishing their recipe to the world!
Hi Megan,
This makes me so happy to hear! 🙂 I’m thrilled it was such a hit for your partner’s birthday, and that you loved the curd + meringue buttercream combo. Thank you so much for the incredibly kind words!
How do you change the recipe to do a 10 x 10 square pan
Hi Amanda,
For a 10×10 square pan, you’ll want to scale the recipe up a bit since it holds more batter than an 8-inch round. My lemon curd cake recipe makes three 8-inch layers (about 10 cups of batter total). A single 10×10 square pan needs around 12 cups of batter if you want the layer to bake up nice and tall.
If you want just one layer in the 10×10, increase the recipe by about 1.25x. If you’d like to bake multiple layers and stack them (to get the same look as the original cake), you’d need to make the recipe 2.5x and divide evenly between two 10×10 pans. Hope that helps, happy baking!!
I am making an engagement cake & they want lemon cake with fruit filling with a chocolate cake for the 2nd tier. Will I have a time with the weight of the chocolate cake seeping?
Thanks!
Hi Lorraine,
As long as each cake is built on it’s own cardboard base the tiers are properly supported with wooden dowels or thick plastic straws (like bubble tea straws), the cake should hold up just fine!! It’s always a bit of a production making sure it’s properly supported, but it’s so worth it for the peace of mind! Hope that helps, happy baking!
I tried this recipe out the day before my son’s bday. The cake was very tasty and moist, the lemon curd was slightly metallic- even after using a ceramic coated pot and a plastic whisk, and the frosting was soupy. I beat the frosting for the allotted time, but maybe I became overly excited because the meringue thickened, but not to the point of stiff peaks. After adding a stick of butter, one at a time, then the juice, it never thickened up. The curd tasted much more metallic after chilling. I wanted to salvage it, so I turned it into a trifle. It would have been ok, but the lemon curd was so metallic that it was inedible. Had everything turned out, I think this would have tasted great.
Hi Amber,
I am so sorry to hear that, this cake is a lot of a work and that is so disappointing that that happened :/
The metallic taste in lemon curd almost always comes from the acid reacting with metal somewhere along the way, and it’s sneaky. Even if you used a ceramic-coated pot and plastic whisk, it can still happen if the lemon juice sat in a metal bowl, was zested with a metal grater that wasn’t fully clean, or if the curd was strained through a metal sieve. Chilling can intensify that reaction, which explains why the flavor got worse overnight. Once it’s metallic, sadly there’s no saving it.
For the frosting, that diagnosis is spot on too. If the meringue doesn’t reach true stiff, glossy peaks before the butter goes in, the whole thing stays loose no matter how long you beat it afterward. The lemon juice then just pushes it over the edge. Totally understandable to get excited when it thickens and it looks ready before it actually is! Next time, I’d really wait for those firm peaks where the tip stands straight up, and if it still looks soupy after the butter, a quick chill (15–20 minutes) can sometimes help it come together.
You were incredibly resourceful turning it into a trifle, even though I know that’s not the win you were hoping for. I appreciate you taking the time to share such thoughtful feedback, you’re absolutely right that when everything does behave, this combo should be amazing, and your notes will help other bakers avoid the same issues <3
Hi, I am having a problem with the swiss buttercream. I followed the recipe as instructed, but when making the buttercream, it was nothing but disaster. The buttercream camwe together ok, but when I started putting the ingredients (lemon zest, lemon juice, vanilla and lemon extract) that made the buttercream very thin and I could not get it back to a spreading consistency. I tried putting it in the refrigerator for 30 minutes to stabilize the buttercream, but when I took it out it still not spreadable. I don’t know what I did wrong. The lemon curd was excellent
I am so sorry to hear that Gary! Is there a chance that the buttercream may have been too cold, not too hot? Did it look curdled at all? If it’s too cold, it breaks and gets thin! But you can heat up a small portion in the microwave and mix it back in, and that usually does the trick!
That would be my first guess! If you don’t think it was that, let me know and we can keep trouble shooting!
hey Chelsey,
thanks so much! I ve made this cake so many times and it never disappoints! last time I tried it with passion fruit/lemon curd and it was perfect!
I was wondering I want to make it as a 10 inch square layered cake – and ideally I d want 2 layers of cake – how much batter do you think I need? is a double batch enough?
thank you!
Hi Fani,
I am so happy to hear you have been putting this recipe to such good use 🙂 You can definitely make this as a two-layer 10-inch square cake. I’d recommend making about 1.5 batches of the cake batter, which would give you roughly 15 cups total, or about 7 to 7 1/2 cups of batter per pan.
A full double batch would make about 20 cups of batter, which I think would be more than you need for two 10-inch square layers and could make the pans too full. I’d bake them at 350°F and start checking around 35 minutes, although they may need closer to 40-50 minutes depending on the depth and material of your pans. And if you have then, using a flower nail or heating core will help the layers bake more quickly and evenly. You’ll know they’re done when a toothpick comes out with a few moist crumbs.
Hope that helps, happy baking!!