
Meringue Roses
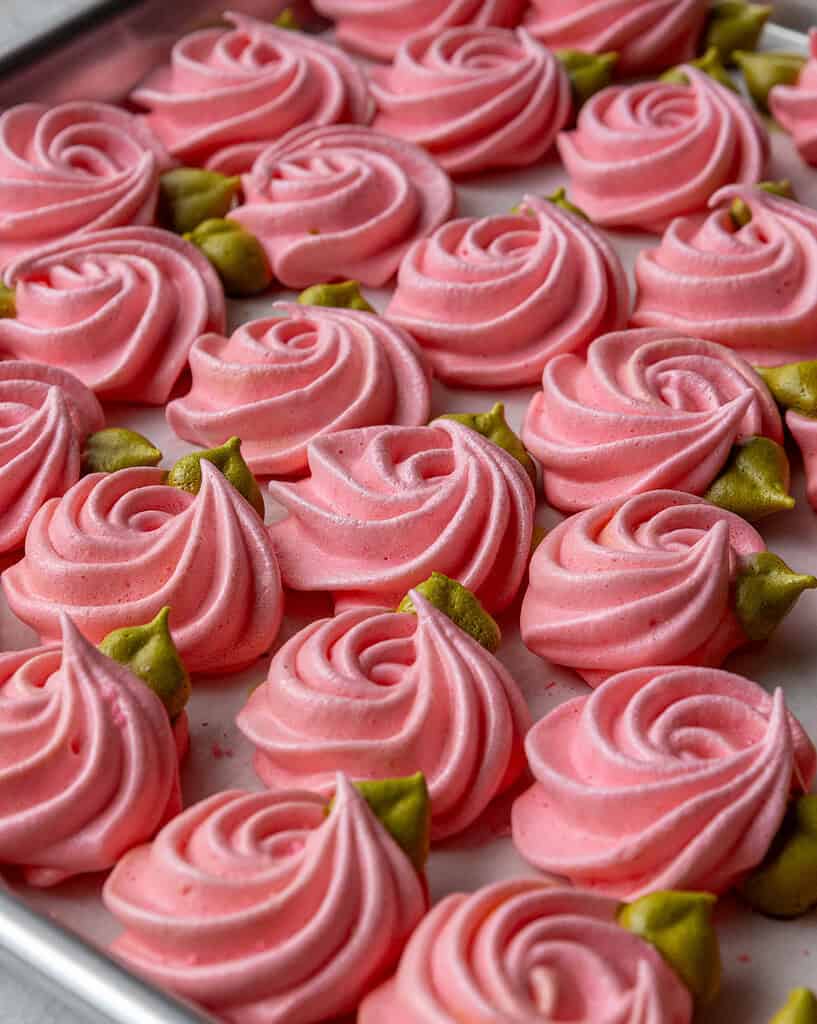
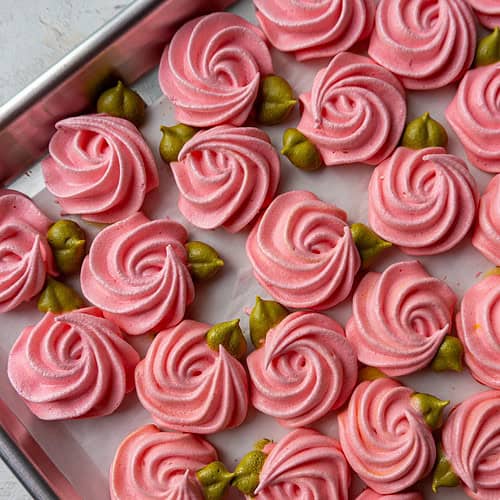
These meringue roses bake up so beautifully! They’re light, airy, and perfectly crisp.
How Many Meringues Does This Recipe Make?
The yield can vary a lot based on how large you pipe each rose and what piping tip you use. Mine ended up being about 1.5 inches in diameter, and I was able to make 36 roses.
Tips for Making the Best Meringue Roses
- Note that with the total bake and cool time, these need to bake for 75 minutes + cool in the oven for 60 minutes minimum (or overnight for best results). I like to make these at the end of the day, so it doesn’t get in the way of any other baking/cooking I need the oven for.
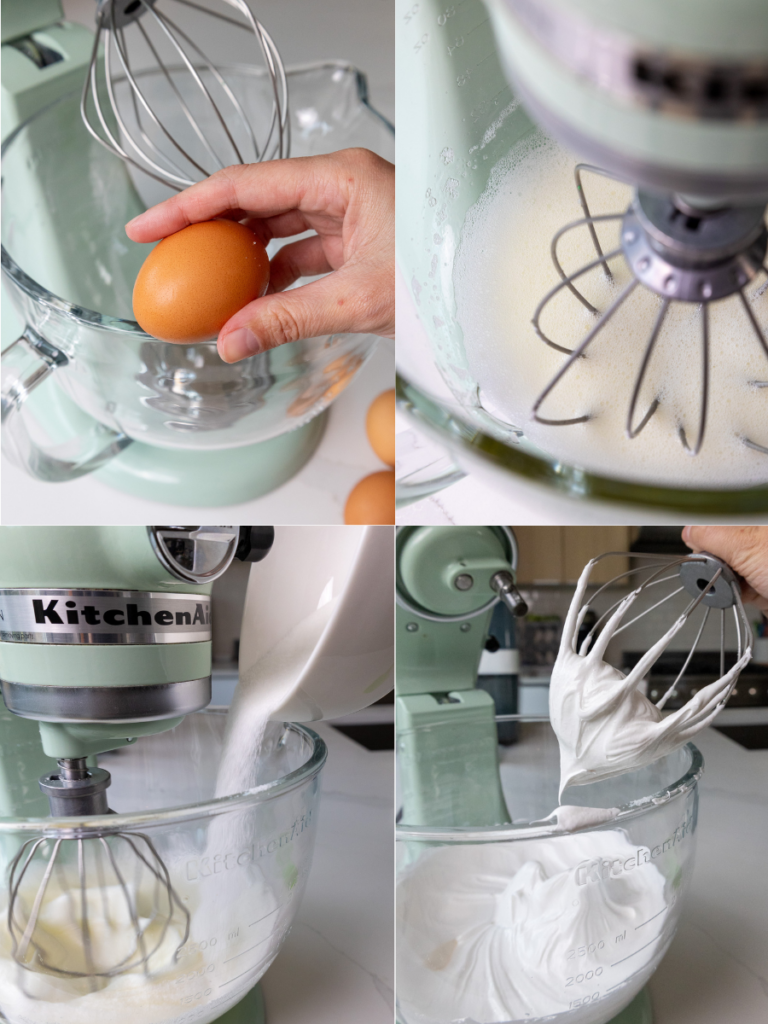
- Separate your eggs while they’re still cold! While we want the egg whites to be room temperature when we whip them up, it’s easiest to separate them when they’re still cold.
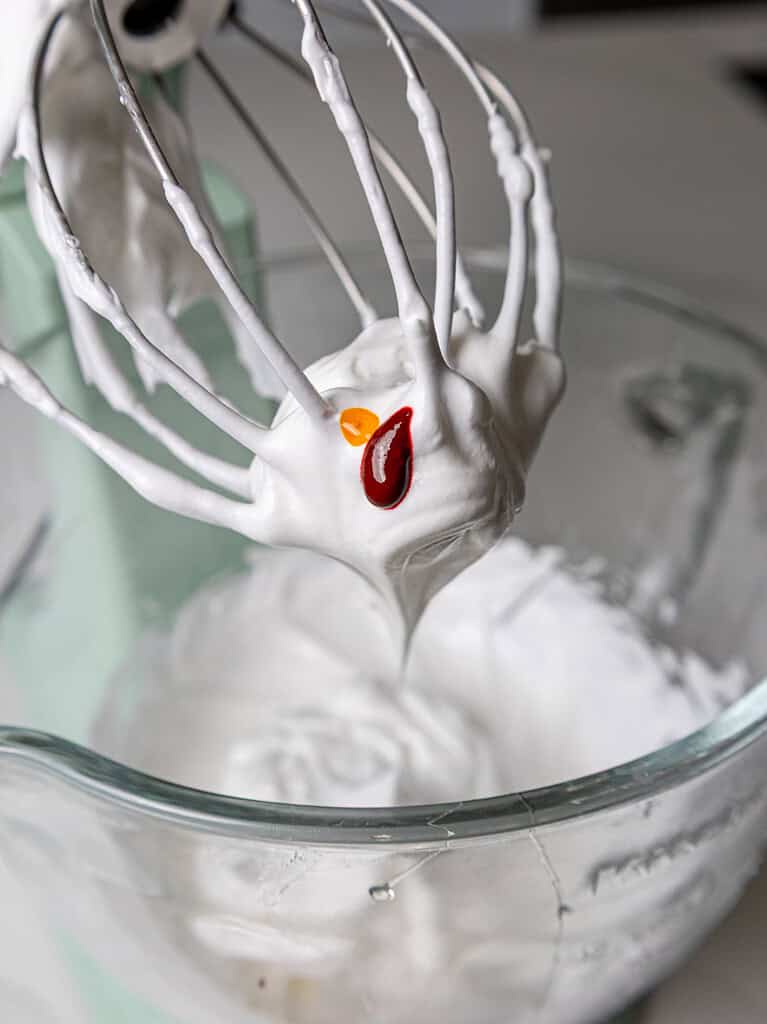
- Use gel food coloring to color the meringue. If you try to use liquid food coloring, it can throw off the consistency and cause the meringue to be less stable.
- Beat the meringue on a medium-high speed instead of the highest speed. This will help you create a more stable meringue with smaller air bubbles that will be easier to pipe.
- Bake time can vary based on how large you pipe the meringues and what piping tip you use. After they’ve baked and cooled in the oven, test them for doneness by gently trying to peel one off the baking mat or parchment paper. It should peel off cleanly.
- If you make these in advance and they get sticky or soft, don’t worry! Pop them in a preheated 200°F oven for 10–15 minutes, then let them cool completely in the turned-off oven. They’ll crisp right back up.
How to Make These Meringue Roses: Step-by-Step Process
While the recipe below is quite detailed, I find visual cues to be super helpful! Below are some photos of the process to help guide you through this recipe.
I’ve also included a video in the recipe card at the bottom of this post.
Step 1: Preheat the Oven
Preheat the oven to 200°F/93°C and line two large, light-colored (preferably aluminum) baking sheets with parchment paper or silicone mats. Set aside.
Step 2: Make the Meringue
Add 4 large, room-temperature egg whites into the bowl of a stand mixer and add 1/4 tsp cream of tartar. Mix on medium speed with a whisk attachment until the surface is covered in tiny bubbles. Note: Make sure the egg whites are fully at room temperature. If they’re cold, they won’t whip up half as well.
Gradually mix 1 cup of granulated sugar, 1 Tbsp at a time, into the egg whites over a few minutes while mixing on a medium-low speed. Adding the sugar gradually makes a huge difference in the stability of the meringue. Increase the mixing speed to a medium-high speed (6 on a KitchenAid).
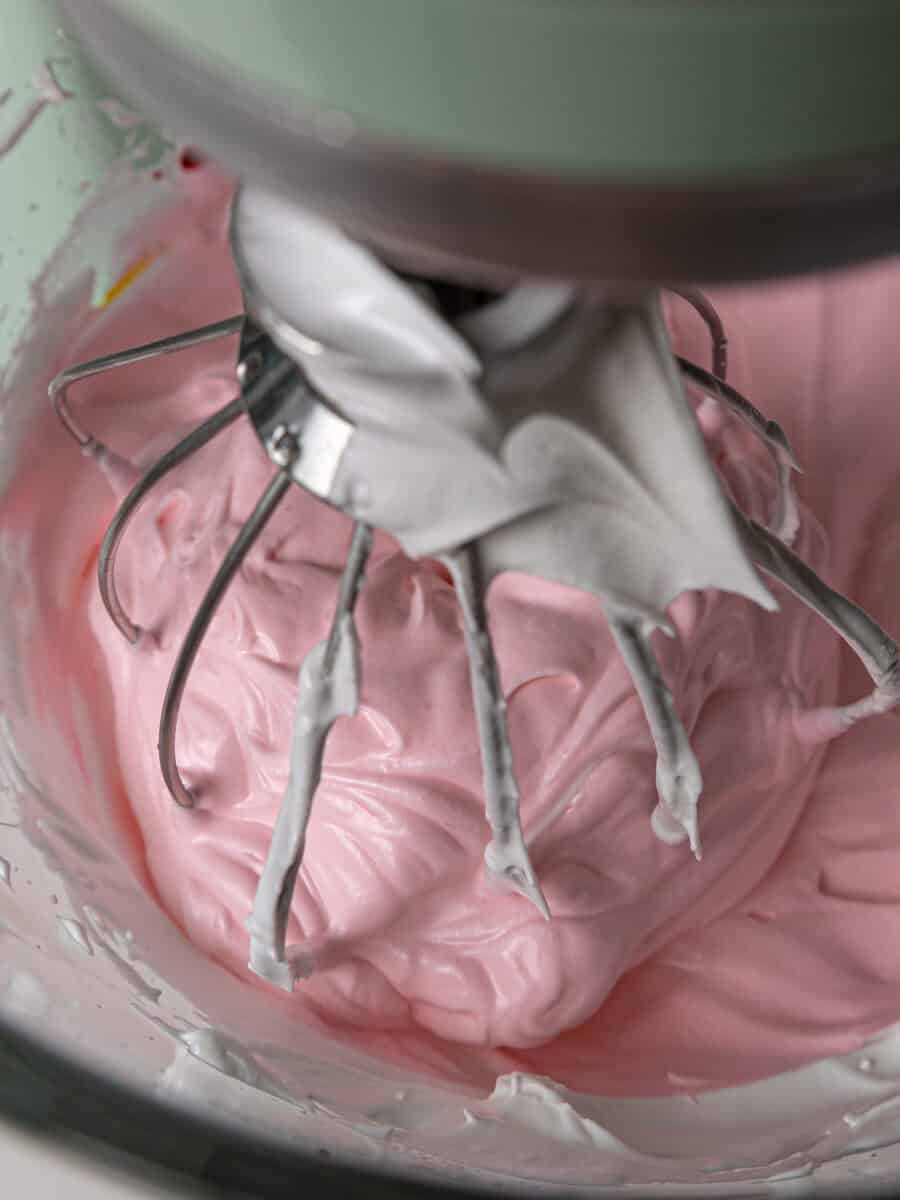
When the meringue gets close to reaching stiff peaks, add 1/4 tsp of rose water or vanilla extract and a drop of pink gel food coloring.
If you want a slightly warmer pink, you can also add a tiny drop of yellow gel food coloring (about 1/4 of the amount of pink food coloring). Keep mixing until stiff, glossy peaks form.
Scoop almost all of the pink meringue into a large piping bag fitted with an open star piping tip (like a Wilton 1M), leaving about 1/4 cup of meringue in the bowl. Seal the top of the bag with a clip or rubber band.
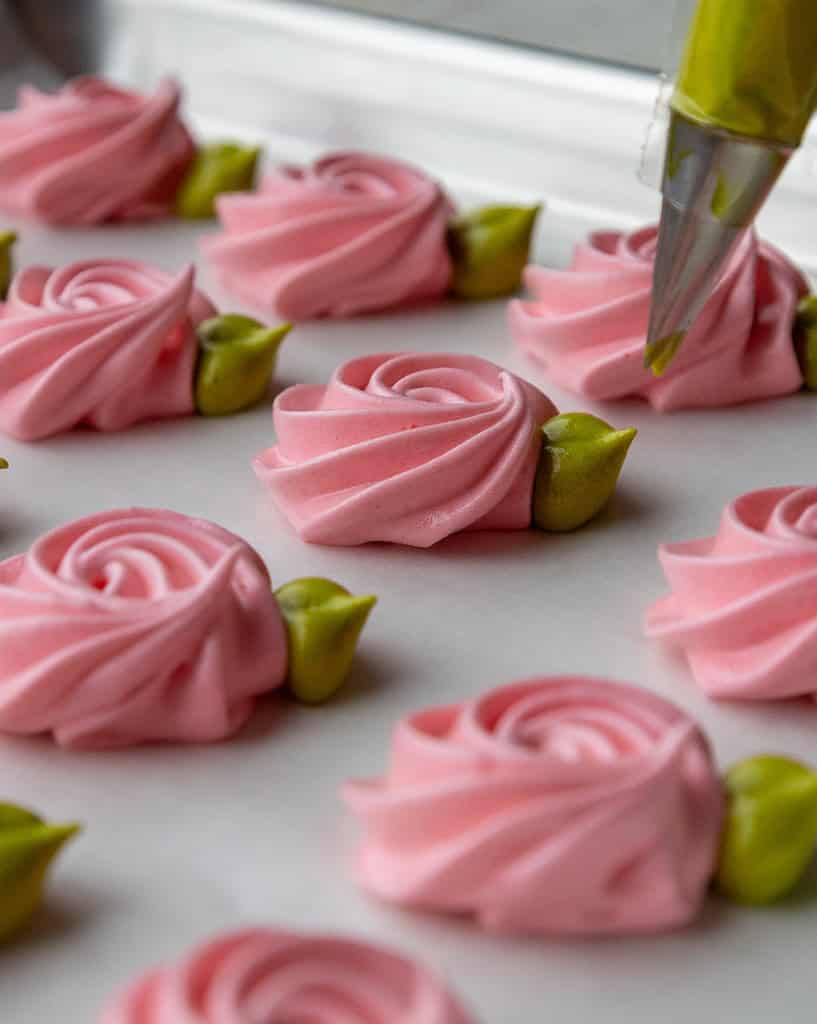
Color the remaining meringue a warm green using a generous squirt of neon green gel food coloring. Scoop it into a piping bag fitted with a leaf piping tip (like a Wilton 352). Seal the top of the bag with a clip or rubber band.
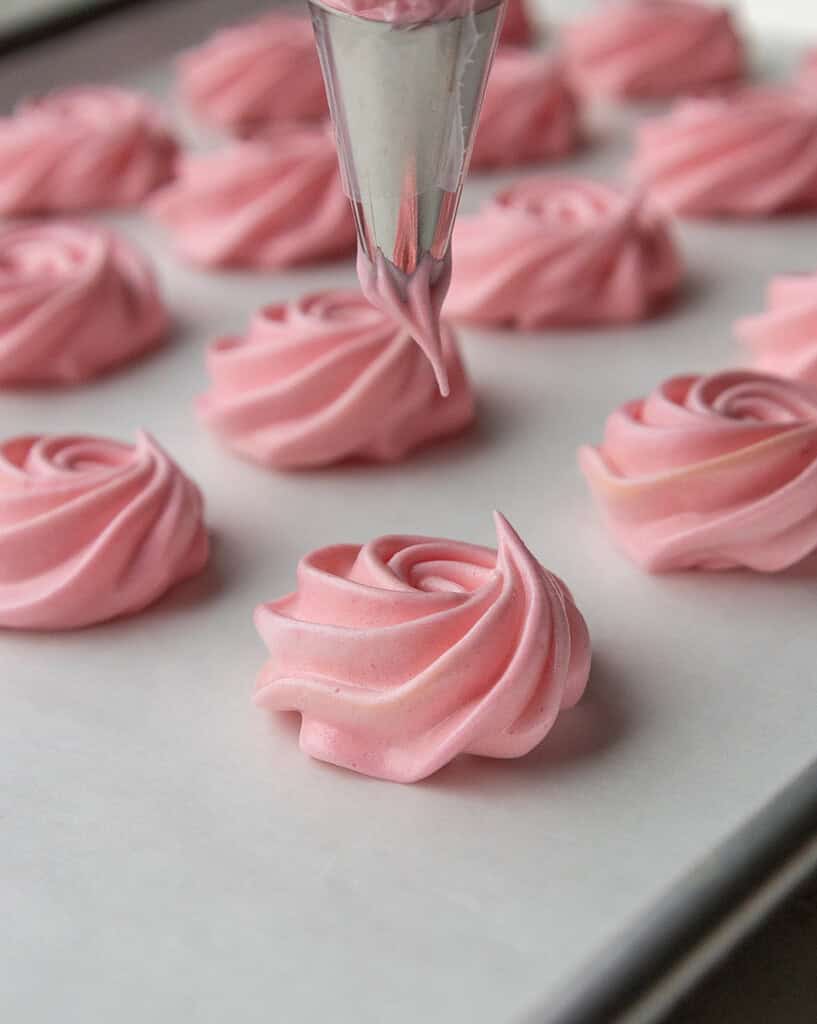
Step 3: Pipe the Meringue Roses
Immediately pipe the roses once the meringue is colored. The meringue loses its structure as it sits, so you want to pipe it right away.
Start in the center, then slowly pipe a swirl, working your way out from the center (see pictures below for reference). These don’t spread as they bake, so they can be piped about 1 inch apart.
Then, use the green meringue to pipe a leaf on the side of each rose.
Bake both trays in your preheated oven for 1 hour and 15 minutes, then turn the oven off and let the meringue sit in the oven for another hour. You can also leave them in the oven overnight once you turn the oven off (I usually do this and find I have the best results this way.
Letting them gradually cool helps prevent them from cracking. At this point, the meringue should be fully cooked and look and feel dry to the touch. If they still seem wet or moist, leave them in the oven for another hour.
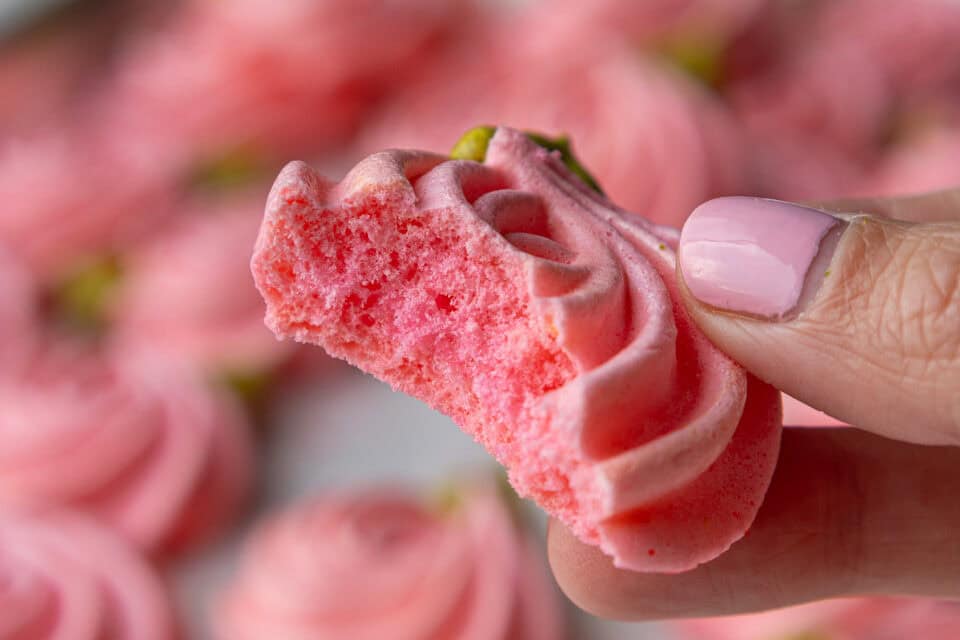
Remove the tray from the oven. They should have a crunchy exterior and a light, airy center. Let the meringues cool fully to room temperature, then enjoy!
These can be stored at room temperature in an airtight container for up to a week. Avoid refrigerating them! It will make them soft and sticky.
Let Me Know What You Think!
If you try this recipe for meringue roses, I’d love to hear what you think! Please leave a rating and comment below.
Tag me @chelsweets and use #chelsweets on social media so that I can see your amazing creations!
Meringue Roses
Equipment
- 1 Leaf Piping Tip (like a Wilton 352)
Ingredients
Santa Meringues
- 4 large egg whites, room temperature 120g
- 1/4 tsp cream of tartar – optional
- 1 cup superfine caster or granulated sugar 200g
- 1/4 tsp rose water or vanilla extract – optional
- Pink, yellow, and neon green gel food coloring
Instructions
Santa Meringues
- Preheat the oven to 200°F/93°C and line a large baking sheet with parchment paper or a silicone mat. Set aside.
- Before you whip up the meringue, make sure there are no traces of grease on the whisk attachment or in your bowl. Grease can prevent the meringue from whipping up properly. If you see or feel any grease, moisten a paper towel with vinegar and wipe the inside of the bowl and the whisk attachment to remove any grease.
- Then add 4 large, room-temperature egg whites into the bowl of a stand mixer and add 1/4 tsp cream of tartar. Mix on medium speed with a whisk attachment until the surface is covered in tiny bubbles. Note: Make sure the egg whites are fully at room temperature. If they're cold, they won't whip up half as well.
- Gradually mix 1 cup of granulated sugar, 1 Tbsp at a time, into the egg whites over a few minutes while mixing on a medium-low speed. Adding the sugar gradually makes a huge difference in the stability of the meringue. Increase the mixing speed to a medium-high speed (6 on a KitchenAid). When the meringue gets close to reaching stiff peaks, add 1/4 tsp of rose water or vanilla extract and a drop of pink gel food coloring. If you want a slightly warmer pink, you can also add a tiny drop of yellow gel food coloring (about 1/4 of the amount of pink food coloring). Keep mixing until stiff, glossy peaks form.
- Scoop almost all of the pink meringue into a large piping bag fitted with an open star piping tip (like a Wilton 1M), leaving about 1/4 cup of meringue in the bowl. Seal the top of the bag with a clip or rubber band.
- Color the remaining meringue a warm green using a generous squirt of neon green gel food coloring. Scoop it into a piping bag fitted with a leaf piping tip (like a Wilton 352). Seal the top of the bag with a clip or rubber band.
- Immediately pipe the roses once the meringue is colored. The meringue loses its structure as it sits, so you want to pipe it right away. Start in the center, then slowly pipe a swirl, working your way out from the center (see pictures above for reference). These don't spread as they bake, so they can be piped about 1 inch apart.
- Bake both trays in your preheated oven for 1 hour and 15 minutes, then turn the oven off and let the meringue sit in the oven for another hour. You can also leave them in the oven overnight once you turn the oven off (I usually do this and find I have the best results this way. Letting them gradually cool helps prevent them from cracking. At this point, the meringue should be fully cooked and look and feel dry to the touch. If they still seem wet or moist, leave them in the oven for another hour.
- Remove the tray from the oven. They should have a crunchy exterior and a light, airy center. Let the meringues cool fully to room temperature, then enjoy! These can be stored at room temperature in an airtight container for up to a week. Avoid refrigerating them! It will make them soft and sticky.
Video
Notes
How Many Meringue Roses Does This Recipe Make?
The yield can vary a lot based on how large you pipe each rose and what piping tip you use. Mine ended up being about 1.5 inches in diameter, and I was able to make 36 roses.Tips for Making the Best Rose Meringues
- Note that with the total bake and cool time, these need to bake for 75 minutes + cool in the oven for 60 minutes minimum (or overnight for best results). I like to make these at the end of the day, so it doesn’t get in the way of any other baking/cooking I need the oven for.
- Separate your eggs while they’re still cold! While we want the egg whites to be room temperature when we whip them up, it’s easiest to separate them when they’re still cold.
- Use gel food coloring to color the meringue. If you try to use liquid food coloring, it can throw off the consistency and cause the meringue to be less stable.
- Beat the meringue on a medium-high speed instead of the highest speed. This will help you create a more stable meringue with smaller air bubbles that will be easier to pipe.
- Bake time can vary based on how large you pipe the meringues and what piping tip you use. After they’ve baked and cooled in the oven, test them for doneness by gently trying to peel one off the baking mat or parchment paper. It should peel off cleanly.
- If you make these in advance and they get sticky or soft, don’t worry! Pop them in a preheated 200°F oven for 10–15 minutes, then let them cool completely in the turned-off oven. They’ll crisp right back up.
Nutrition
Other Recipes You Might Like:
Fabulosa tus presentaciones
Thank you Carolina!!
I made these for a bridal shower at work and they were a hit! I’ve been making meringues for years but this recipe is superior to my old one and what a cute idea! I’m going to try the chicks next. Thank you!
Hi Judy,
Yay, I am so happy to hear that!! I hope the chicks turn out great happy baking!