
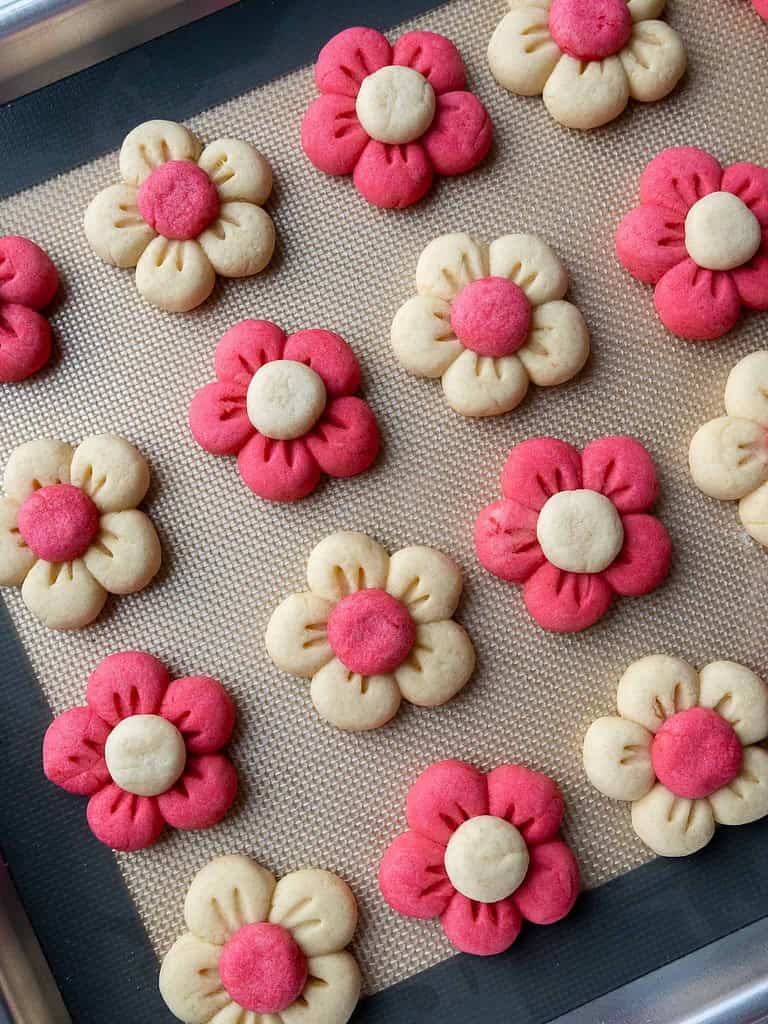
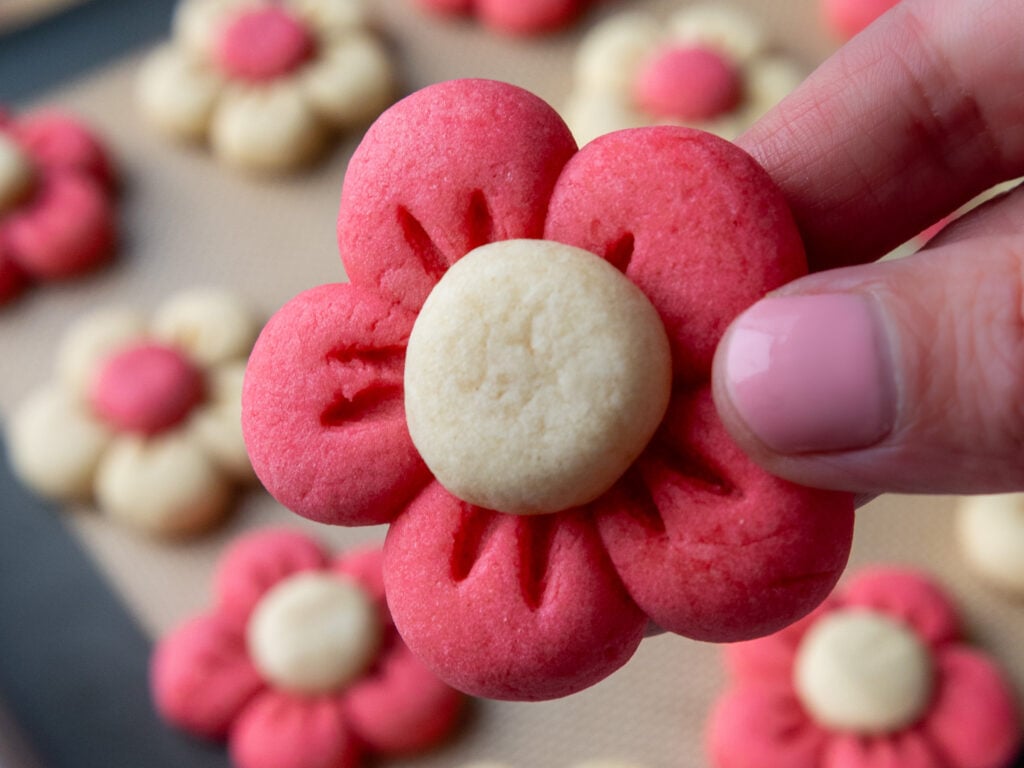
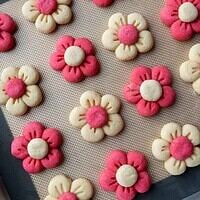
Flower Cookies
These flower cookies are the perfect way to welcome Spring! And the best part? They’re surprisingly simple to create. No fancy equipment or piping skills needed!
How to Make These Adorable Flower Cookies
Let’s walk through each step of this recipe to make sure it turns out as amazing as possible.
I’ve also included a video tutorial in the recipe card below, along with a list of the tools I used to make these.
Not all of these are mandatory, but they make the process a lot easier. If you don’t have all these things on hand, feel free to improvise and work with what you have.
- Electric stand or hand mixer
- 2 Large Bowls
- Rubber Spatula
- 2 Large Baking Sheets
- Parchment Paper or Silicone Baking Mat
Step 1: Make the Cookie Dough
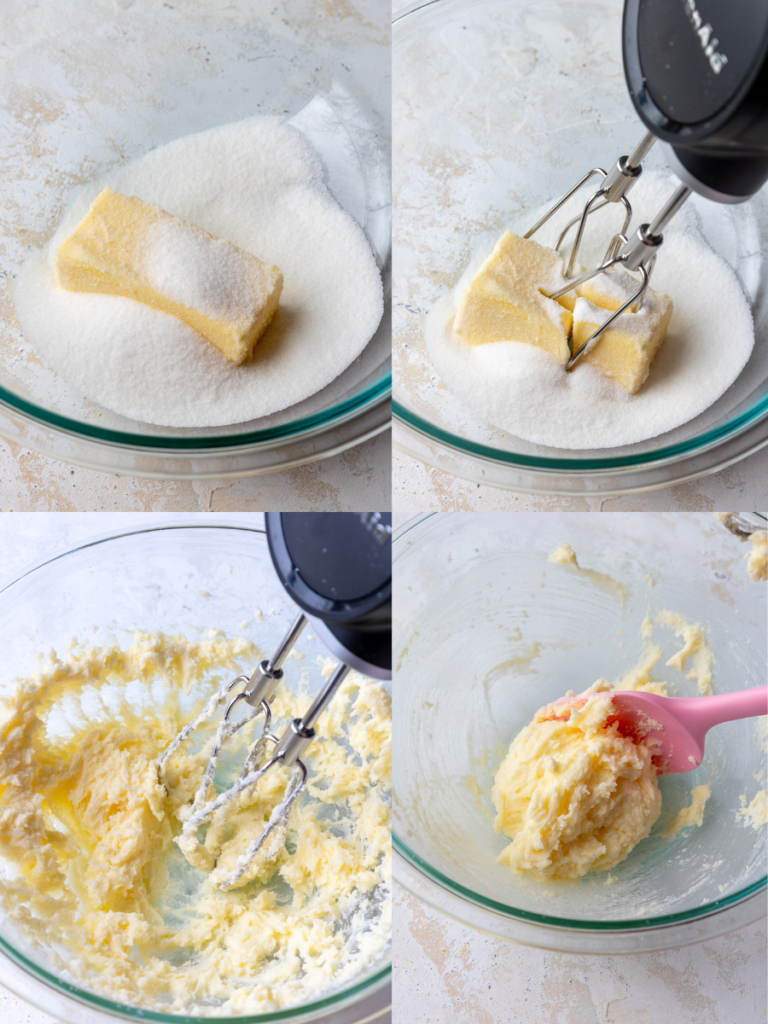
We start by creaming butter and sugar together until the mixture becomes light and fluffy. This incorporates air to the dough, which helps give the cookies their tender texture.
Then, we mix in one large egg and almond and vanilla extract before incorporating the dry ingredients (listed in the recipe card at the bottom of this post).
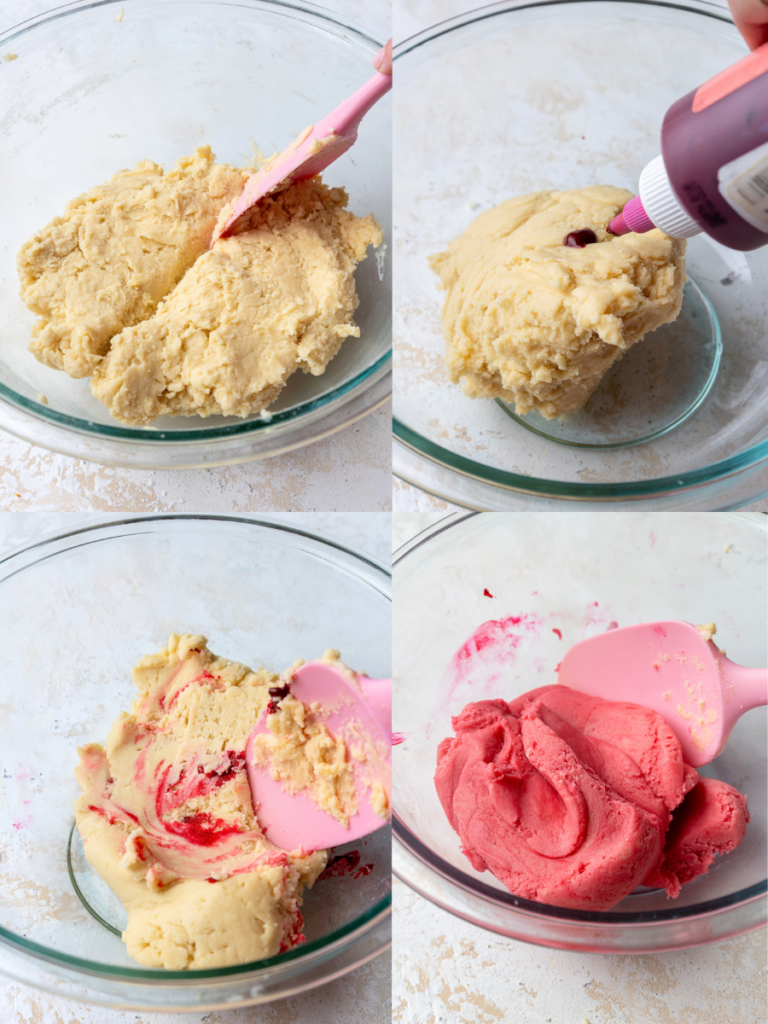
The secret to these cookies’ perfect consistency is not overworking the dough once you add the flour. Mix just until combined for the most tender texture!
Scrape around the sides and bottom of the bowl with a rubber spatula to make sure everything is properly combined.

Step 2: Scooping the Dough and Creating the Flowers
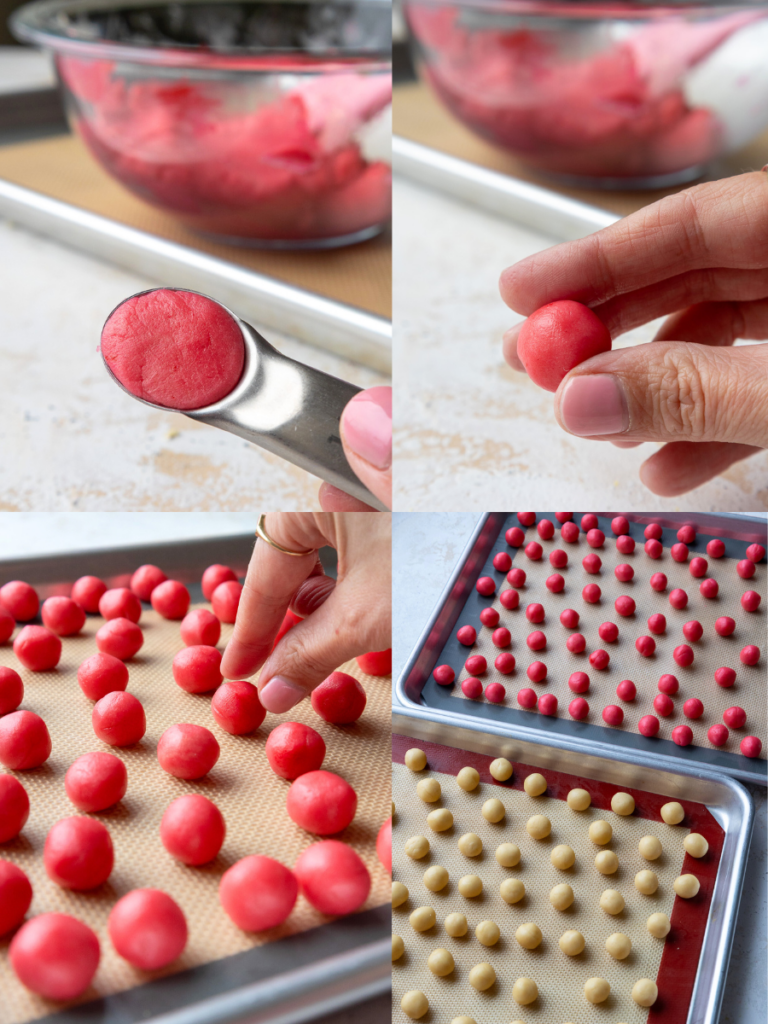
Divide the dough in half with a rubber spatula and use a 1/2 tsp measuring spoon to scoop out uniformly sized bits of dough. Repeat until you’ve portioned out half of the uncolored dough.
Then, roll the bits of uncolored dough into balls with your hands and place them on one of the prepared baking sheets.
Then, mix a squirt of pink gel food coloring into the remaining dough with a rubber spatula and mix until the dough is evenly colored.
I like to do this by hand, but it can also be done with an electric mixer.
Repeat the scooping and rolling process with the pink cookie dough, using 1/2 tsp to scoop out uniformly sized bits of dough.
Then, roll the bits of dough into balls with your hands and place them on the other prepared baking sheet.
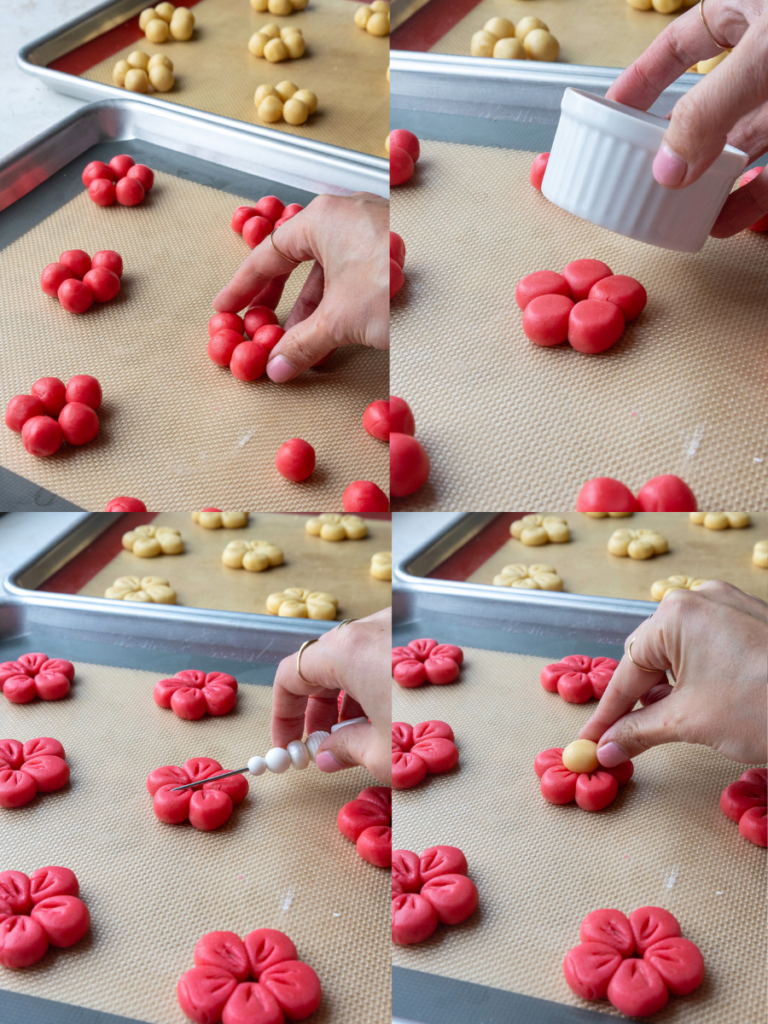
For each flower, arrange 5 dough balls of the same color in a circle with a small space in the middle.
After a gentle press with a greased glass to help them hold together, use a toothpick to draw two thin lines on each petal from the center outward to add dimension.
Count out the remaining balls of dough and make sure you have enough to make a center for each flower – you want to use the opposite color of dough for the center of each flower.
If you’re short on either color, you can divide the dough into smaller portions to make it work or break up one of the flowers and use the petals to be centers. Gently press a dough ball into the center of each flower.
Step 3: Chilling and Baking the Cookies
After the cookies are assembled, they’ll need a quick chill in the refrigerator for 30 minutes or the freezer for 10 minutes, pan and all! This step is absolutely essential – it prevents the cookies from spreading in the oven and helps them keep their shape.
While the cookies chill, preheat the oven to 350°F / 175°C.
Once the oven is fully preheated, bake the chilled cookies for 11-12 minutes. The key is to take them out before they start to brown – we want those colors to stay bright and vibrant!
Substitutions and Variations
Need to tweak the ingredients? Here are some easy swaps to make this recipe work for different dietary needs.
- Unsalted Butter – For a dairy-free version, use plant-based butter sticks (not the tub kind) at room temperature. If it contains salt, omit the salt the recipe calls for. You can also use salted butter and omit the salt the recipe calls for.
- Almond Extract – If you have nut allergies or simply don’t care for the flavor, you can just omit it.
- Egg – For an egg-free version, use 3 tablespoons of aquafaba (the liquid from a can of chickpeas) or a commercial egg replacer.
- All-purpose flour – For a gluten-free version, substitute with a 1:1 gluten-free baking flour blend that contains xanthan gum.
- Cornstarch – If you don’t have cornstarch, you can use an equal amount of arrowroot powder or add an extra 2 tablespoons of flour.
- Gel Food Coloring – I like to use Americolor or Chef Master gel food coloring to color these cookies. However, there are natural food coloring options, too! These include beet powder for pink, matcha for green, or turmeric for yellow.
Making These Flower Cookies in Advance
These cookies can easily be made in advance if you’re short on time.
The dough can be refrigerated for up to 3 days before shaping, or you can refrigerate shaped dough for 3 days.
You can also freeze the dough for up to a month (just thaw it overnight in the fridge).
Baked cookies will keep in an airtight container at room temperature for 5 days.
Baked cookies can also be frozen for up to 3 months (layer with parchment if stacking).
How Many Cookies Does This Recipe Make?
This recipe makes about 24 cookies if you use a 1/2 tsp measure to scoop the cookie dough.
You can also make larger cookies by using a 1 tsp measure, and you’ll end up with 12 cookies.
If you want to double this recipe, go for it! Simply double the ingredients and follow the directions.
Flavor Variations
I love using almond extract to flavor these cookies, but it is a super versatile recipe, and you can flavor them in so many different ways. Below are a few variations I recommend:
- Add 1 Tablespoon of lemon or orange zest to the dough for a citrus twist
- Mix in 1/4 teaspoon of ground cinnamon for a subtle spice
- Replace the almond extract with coconut extract and add 1/4 cup of finely shredded coconut
Color Variations
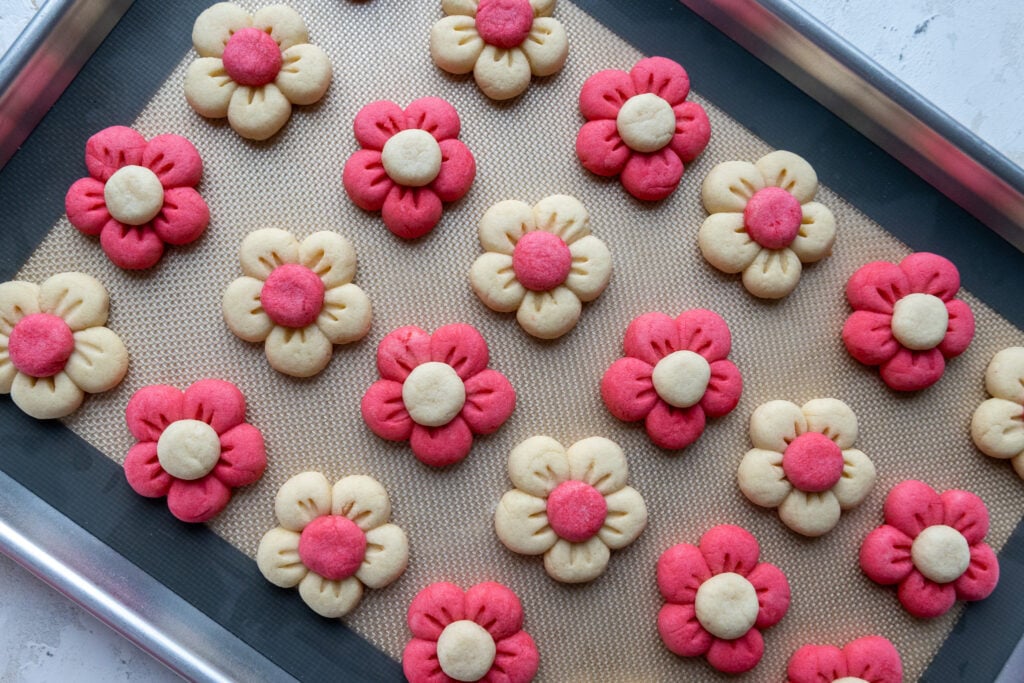
In addition to different flavors, you can also make these in just about any color! While I love the classic pink and white combination, don’t be afraid to play with other colors!
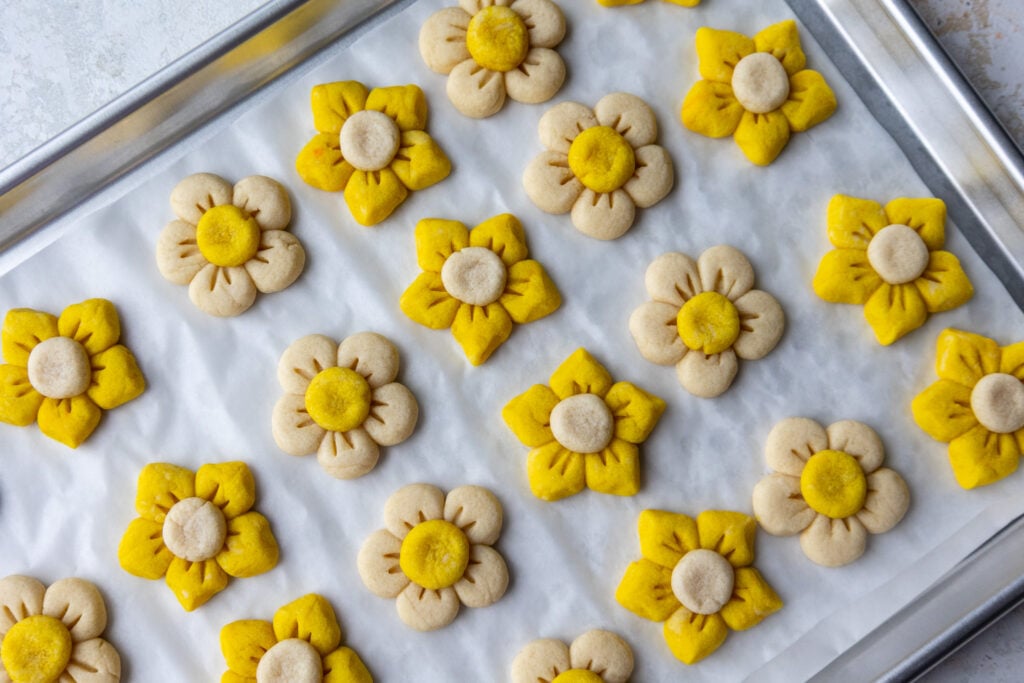
Below are a few different versions I’ve made that turn out so cute!
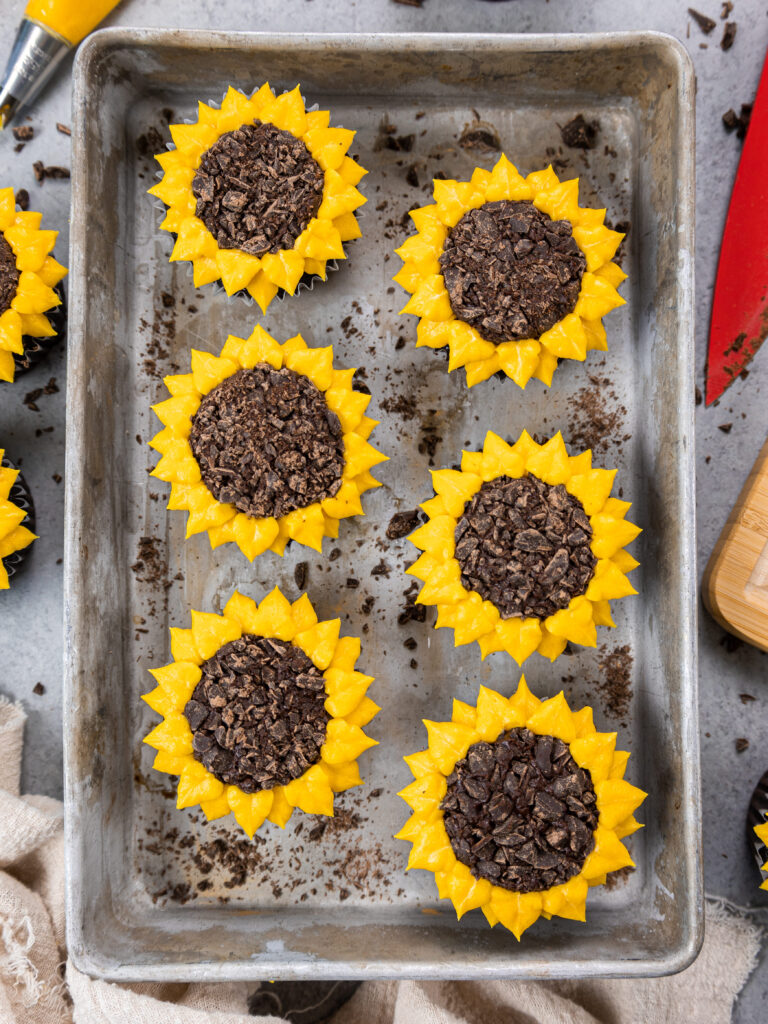
- Yellow and White to make daffodil-inspired cookies
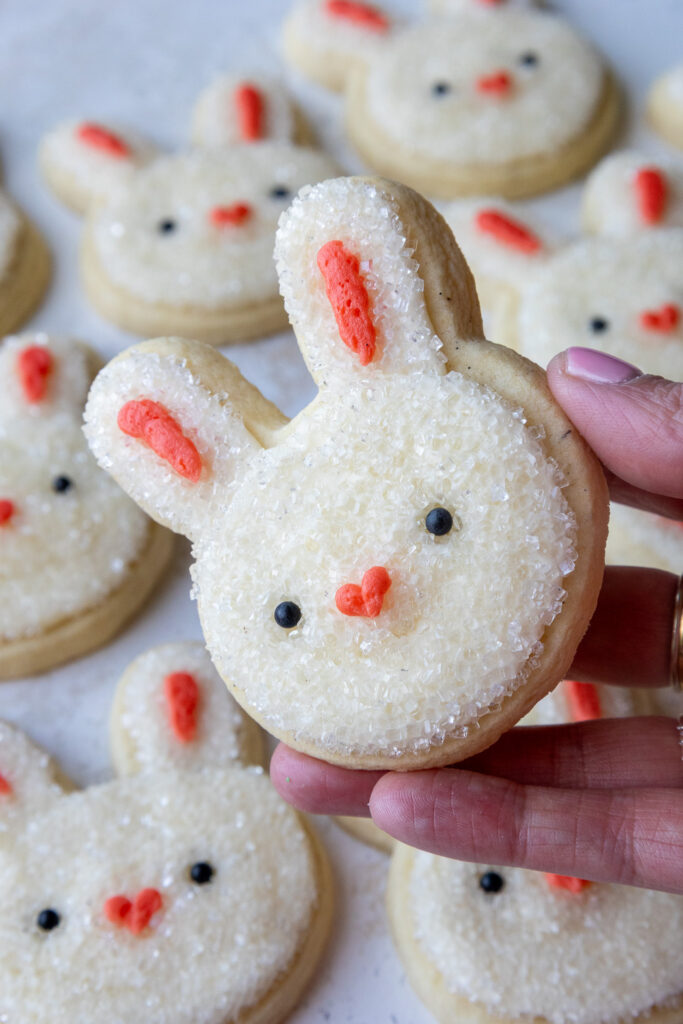
- Pastel colors for Easter
- Red and white for Valentine’s Day or Christmas
- School colors for graduation celebrations
- Multi-colored flowers with different colored “petals”
Tips for Making the Best Flower Cookies
- Room temperature ingredients are a must – especially the butter and egg. It helps the dough mix together more easily and gives the cookies a more tender texture.
- Use gel food coloring rather than liquid for the most vibrant color.
- Don’t skip the chilling step! It’s what helps these cookies keep their shape.
- Watch closely during baking – you want to pull the cookies out before they start to brown!
- Use a 1/2 teaspoon measuring spoon for consistent dough ball size.
- When pressing with the glass, do so gently – we’re just helping the petals stick together.
Let Me Know What You Think!
If you make these flower cookies, I’d love to hear what you think! Please leave a rating and comment below.
Don’t forget to tag me @chelsweets and #chelsweets if you share on social media! I love seeing your delicious creations.
Other Recipes You Might Like:
Flower Cookies
Ingredients
Flower Cookies
- 1/2 cup (1 stick) unsalted butter, softened 113g
- 1/2 cup granulated sugar 100g
- 1 large egg, room temperature 56g
- 1 1/2 tsp almond extract 8g
- 1 tsp vanilla extract or vanilla bean paste 5g
- 2 cups all-purpose flour 260g
- 2 Tbsp cornstarch 16g
- 1 tsp fine salt 6g
- Deep Pink food coloring
Instructions
Flower Cookies
- Wait to preheat the oven until the cookies are chilling (step 12). Line two large baking sheets with parchment paper or silicone mats. Set aside.
- Use a large mixing bowl and hand mixer or the bowl of your stand mixer fitted with a paddle attachment to combine 1/2 cup (1 stick) unsalted butter and 1/2 cup granulated sugar. Beat at medium-high speed for 1-2 minutes until the mixture lightens in color and looks fluffy.
- Add 1 large egg, 1 1/2 tsp almond extract, and 1 tsp vanilla extract and beat until combined. Scrape the sides and bottom of the bowl with a rubber spatula as needed.
- Then add 2 cups of all-purpose flour, 2 Tbsp cornstarch, and 1 tsp fine salt. Mix at low speed until the dry ingredients are just incorporated. Scrape around the sides and bottom of the bowl with a rubber spatula to make sure everything is properly combined.
- Divide the dough in half with a rubber spatula. Use a 1/2 tsp measuring spoon to scoop out uniformly sized bits of dough, repeating the process until you've portioned out half of the uncolored dough. Then, roll the bits of uncolored dough into balls with your hands and place them on one of the prepared baking sheets.
- Next, mix a squirt of pink gel food coloring into the remaining dough with a rubber spatula and mix until the dough is evenly colored. I like to do this by hand to avoid overimxing, but it can also be done with an electric mixer.
- Repeat the scooping and rolling process with the pink cookie dough, using 1/2 tsp to scoop out uniformly sized bits of dough. Then, roll the bits of dough into balls with your hands and place them on the other prepared baking sheet.
- Arrange 5 dough balls that are the same color in a circle with a small opening in the center (see pictures above). Repeat this process until you have 12 white flower cookies and 12 pink flower cookies, spacing them out a couple of inches apart. These cookies don't spread much as they bake, and you should be able to fit 12 cookies on a 9×13-inch baking sheet. You should still have some leftover dough balls of each color, which will end up being the centers of the flowers in a few steps!
- Spray the bottom of a flat-bottomed glass or ramekin with a bit of non-stick spray, then gently press the glass on top of each flower to just slightly flatten it. If you don't have non-stick spray, you can also place a small piece of paper between the cookie dough and the glass. The goal isn't to completely flatten the dough, we just want to help the petals of the flower stick together once the cookies are baked (see pictures above).
- Then, use a toothpick or scribe to make 2 thin lines on each petal to give it a bit of dimension. Start in the center and make the lines go about halfway up each petal.
- Count out the remaining balls of dough and make sure you have enough to make a center for each flower – you want to use the opposite color of dough for the center of each flower. If you're short on either color, you can divide the dough into smaller portions to make it work or break up one of the flowers and use the petals to be centers. Gently press a dough ball into the center of each flower.
- Chill the cookies in the fridge for 30 minutes or in the freezer for 10 minutes, pan and all! This helps the cookies keep their shape. While the cookies chill, preheat the oven to 350°F / 175°C.
- Once the oven is fully preheated, bake the chilled cookies for 11-12 minutes. I recommend baking one tray at a time. The edges should be set, but they shouldn't have any browning. Let the cookies cool fully on the baking sheet, then enjoy! Leftover cookies can be stored in an airtight container at room temperature for up to 5 days.
Video
Notes
How Many Cookies Does This Recipe Make?
This recipe makes about 24 cookies if you use a 1/2 tsp measure to scoop the cookie dough. You can also make larger cookies by using a 1 tsp measure, and you'll end up with 12 cookies.Making These Flower Cookies in Advance and Storage Tips
The cookie dough can be made up to 3 days in advance and stored in the refrigerator. The dough can also be frozen for up to a month. Thaw it overnight in the refrigerator the night before you plan to use it. Baked cookies can be stored in an airtight container at room temperature for up to 5 days. You can also freeze baked cookies for up to 3 months in an airtight container. I recommend placing parchment paper between the cookies if you plan to stack them on top of each other.Tips for Making the Best Flower Cookies
- Make sure the butter and egg are at room temperature to give these cookies the best texture.
- Don't overwork the dough once you've added in the flour.
- Try to make all the dough balls the same size to help the cookies bake evenly.
- When pressing down with the glass, don't press too hard – you want to slightly flatten the cookies.
- Chilling the dough is a must! It helps the cookies keep their shape while baking.
- Use gel food coloring rather than liquid for a more concentrated color without affecting the consistency of the dough.
- Watch the cookies closely near the end of their bake time – they should still have a bright color and have hardly any browning.
I made these last night! Absolutely love the recipe (who doesn’t love anything with almond extract!!), was really simple and quick to make the dough, and I appreciate how cute it turned out for just requiring rolling! I’m not artistic but with these my office now thinks I am!
Hi Mimi,
Ahhh this made my day!! I’m so happy you loved the recipe—and totally agree, almond extract just makes everything better!
I love that your coworkers think you’re a cookie artist now! These are one of my favorite “look fancy but are secretly easy” bakes, so I’m thrilled they were a hit for you. Thanks so much for trying them and for sharing such kind words!
I’ve made these twice now. I used less almond extract the second time only because I’m not a huge fan. But I was wondering how these should be texture wise? Are they supposed to be on the dryer side?
Hi Alexis,
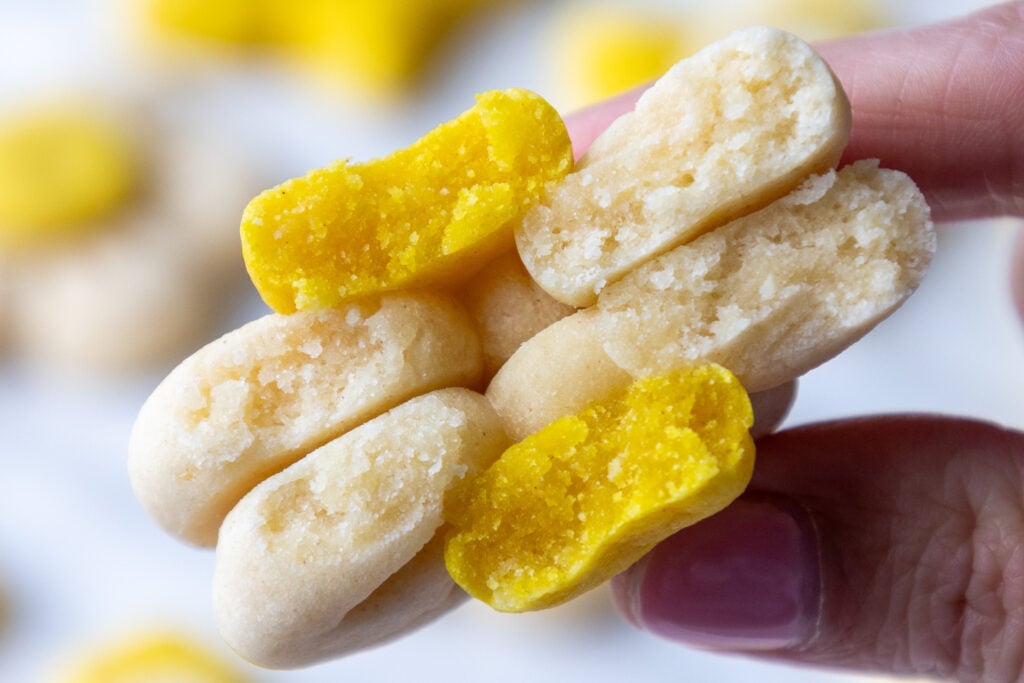
I’m so glad you’ve made them twice already—and I love that you adjusted the almond extract to suit your taste! These cookies are meant to be soft and tender, and they shouldn’t be super dry. If they’re turning out a little drier than expected, here are a few things that might help:
Try slightly underbaking them—just a minute or two can make a big difference in keeping them soft.
Make sure you’re not packing the flour when measuring. I recommend spooning it into your measuring cup and leveling it off to avoid adding too much.
You can also store them in an airtight container with a slice of bread—sounds weird, but it helps keep them soft longer!
Thanks so much for baking them and sharing your feedback! Let me know if you try them again—I’d love to hear how it goes!
HIII, I’m new to baking and was wondering there was any substitutes for the almond extract? And can I use two normal sized eggs if I don’t have any large ones?
Hi Titi,
Welcome to baking!! You can definitely swap the almond extract—extra vanilla, lemon, or even coconut extract would all work great as a substitute! As for the eggs, two regular (medium) eggs should be just fine. The batter might be slightly thicker or thinner depending on the size, but it won’t make a huge difference for this recipe. So excited for you to try these cookies—have so much fun baking!!
Hi there! I made these once but didnt love the almond flavor (though I normally do like almonds, maybe it’s the type of extract I used?). I was thinking of trying to make these with either raspberry or strawberry powder instead. How much do you think I should put in? I also use powdered vanilla FYI not sure if that makes a difference in texture if I also add more powder with raspberry or strawberry!
Hi Kira,
That totally makes sense—almond extract can vary a lot by brand and intensity, so it might’ve just been a strong one!
I love the idea of using raspberry or strawberry powder instead. I’d recommend starting with 1–2 tablespoons, depending on how bold you want the flavor to be. Adding it will make the dough a bit sweeter and thicker, but at that amount it should still be easy to mix and roll out. If you want to add more than that, you may want to reduce the amount of sugar a bit.
Since you’re already using powdered vanilla, you’re right to consider the texture—I’d lean closer to 1 tablespoon to start, then adjust next time if needed. Just be sure to sift the powder in to avoid any clumping. Let me know how they turn out, I bet they’ll be so pretty and delicious!
@Chelsweets, thank you!!! 🙂
If my dough seems dry can I add water to help make the balls before refrigerating? I am making a large quantity and the dough seems to dry out a bit as I go making the cookies crack when baked.
Hi Tracie,
You totally can! Add a little water at a time — start with 1 teaspoon at a time until it comes together more easily. Also if you aren’t already, make sure you’re measuring your flour properly. The way flour is measured can make a huge difference! For best results, I recommend spooning the flour into your measuring cup and leveling it off with a knife (instead of scooping straight from the bag, which can pack in too much flour and dry out the dough). Hope that helps, and good luck with your big batch — sounds like a delicious project!
Hi! I would advise others to underfill flour and use water based food colorant! I measured to 2 cups flour and it made the dough too dry so I restarted and did like 1 3/4 and it was perfect. Also the recipe advises we use 2 bowls but never instructs for a second.
Hi Cat,
How are you measuring you flour? Measuring flour correctly makes such a big difference in baking, and especially in this recipe. If you aren’t already, the best method is to fluff, spoon, and level. Start by fluffing up the flour in your container or bag with a spoon to loosen it (flour tends to pack down). Then gently spoon the flour into your measuring cup until it’s heaping, and use a straight edge (like the back of a knife) to level it off. You want to avoid dipping the measuring cup straight into the bag or container, because that compacts the flour and you’ll end up with quite a bit more than the recipe calls for—sometimes as much as 20–30% extra! Extra flour can make cakes dense, cookies dry, and breads tougher than they should be.
For the most accurate results, weighing flour with a kitchen scale is even better, but the spoon-and-level method will get you very close. Hope that helps for the future, happy baking!!
These cookies are so cute and yummy! It took me a while to roll up all of the little balls so I ended up using some plastic wrap to make sure the dough didn’t dry out while I was rolling and assembling. Thanks for the recipe!
Hi Ana,
So smart! That is a great tip, because it does take a while!!! Thank you for sharing 🙂
hello! im wanting to make these as part of my easter cookie boxes and i was wondering if you think a little cherry extract would taste good or work in this recipe. thank you so much!
Hi Tiffany,
I think that would be delicious!! Hope your cookie boxes turn out amazing 🙂 Happy baking!!
I really liked your recipe ? and I’m going to make it, can you tell me how long should I preheat the oven? Should I turn on the ups and down heat? And which shelf of the oven should I bake it on?
Hi Sanjida,
I usually bake these on the middle shelf of my oven, and the preheat time will vary based on your oven! Mine usually takes about 15 minutes to preheat, but it can vary based on the size and type of your oven. I’m not sure what the up and down heat is, is that similar to convection? I don’t usually turn that on when I bake cookies. Hope that helps, and that your cookies turn out great 🙂
Took me nearly an hour to roll out the balls? How is your prep time only 30 minutes?
Hi Rosemary,
I think I’ve gotten pretty quick with this type of dough prep over the years, but I could totally see it taking a bit longer! I will update the prep time to reflect this, and appreciate your feedback!