Believe it or not, I’ve never made a basket weave cake before…let alone an Easter basket cake! I’ve seen basket weave cakes for years, but never really had a reason to make one.
This Easter the timing finally seemed right, and I plucked up the courage to try out the basket weave frosting technique for the first time.
To stay true to the Easter theme of this cake, I decided to make coconut cake layers by altering my vanilla layer cake recipe. I also used a coconut american buttercream recipe, which was easy to make and piped wonderfully!!

Carving and Flipping The Cake
The sides of the cake are carved with a serrated knife, to make the perfect basket shape. This tapered shape also makes it easier to pipe the basket weave onto the cake.
Once the cake is carved and crumb coated, the basket weave is piped onto the cake. After the sides of the cake are fully decorated, the cake is inverted to flip it upright. This part is always a bit nerve wracking, but with two solid cake rounds I promise it’s a breeze!
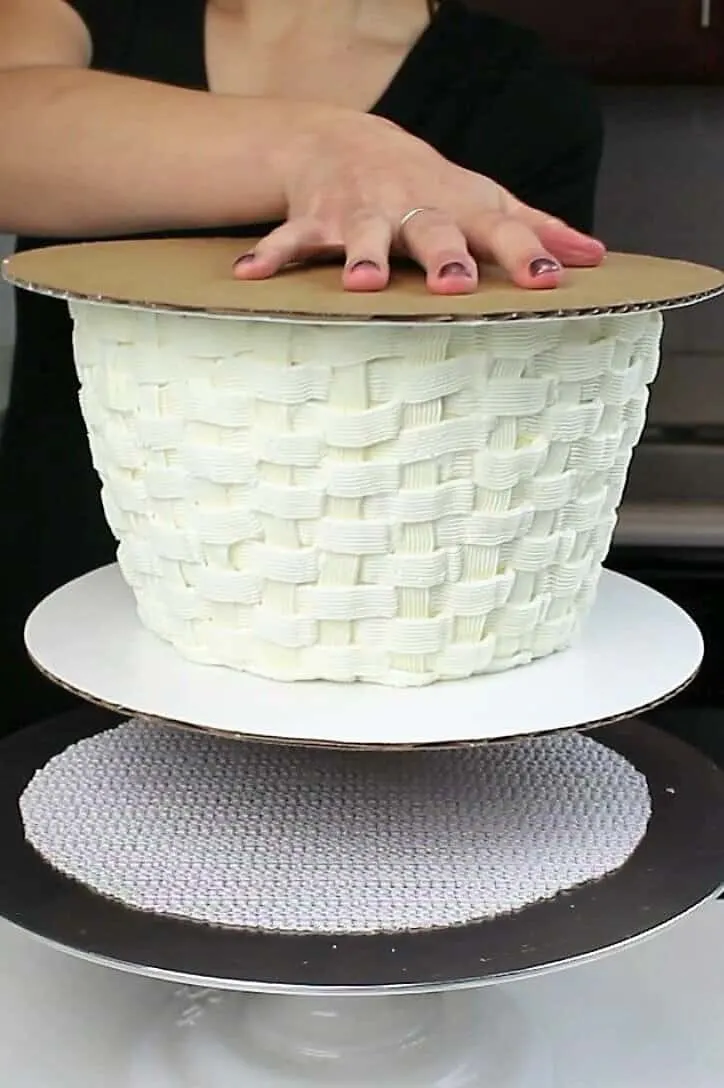
However, if you want to simplify this cake, you can omit the carving of this cake.
How To Make A Basket Weave Pattern With Frosting
While this cake might look complicated at first glance, I promise it isn’t as challenging as it may seem. In fact, I was quite surprised how forgiving this cake design ended up being.
All you need is some type of flat tip with a textured side. For this cake I used a Wilton 47 frosting tip, but there are lots of others out there that would work as well.
I started by piping a vertical line up the cake. I then piped short lines over the vertical line, leaving a space the width of my frosting tip between them.
Next, I piped another vertical line, and added horizontal lines in the empty spaces. This creates an alternating pattern, which I repeated around the entire cake.
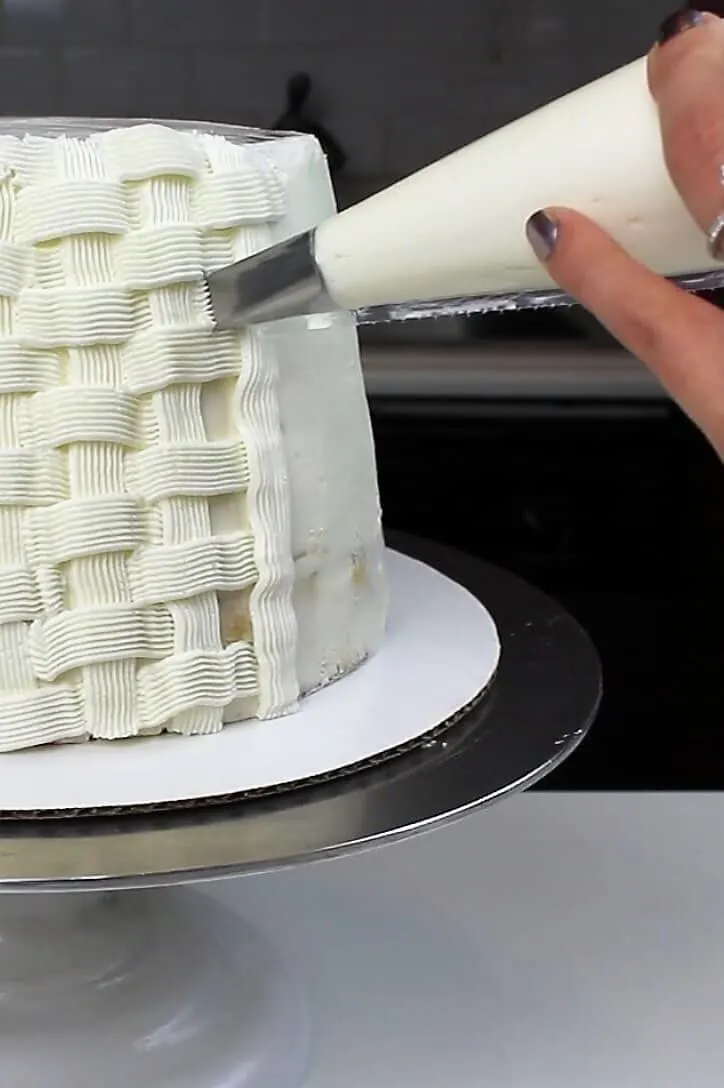
The first few lines I piped were a bit rough, but the pattern became much easier to do as I worked my way around the cake.
Always keep in mind that there will be a front and a back to your cake. Any part of the cake that turns out less perfect than you may have hoped can always go in the back!!
Decorating The Top Of This Easter Basket Cake
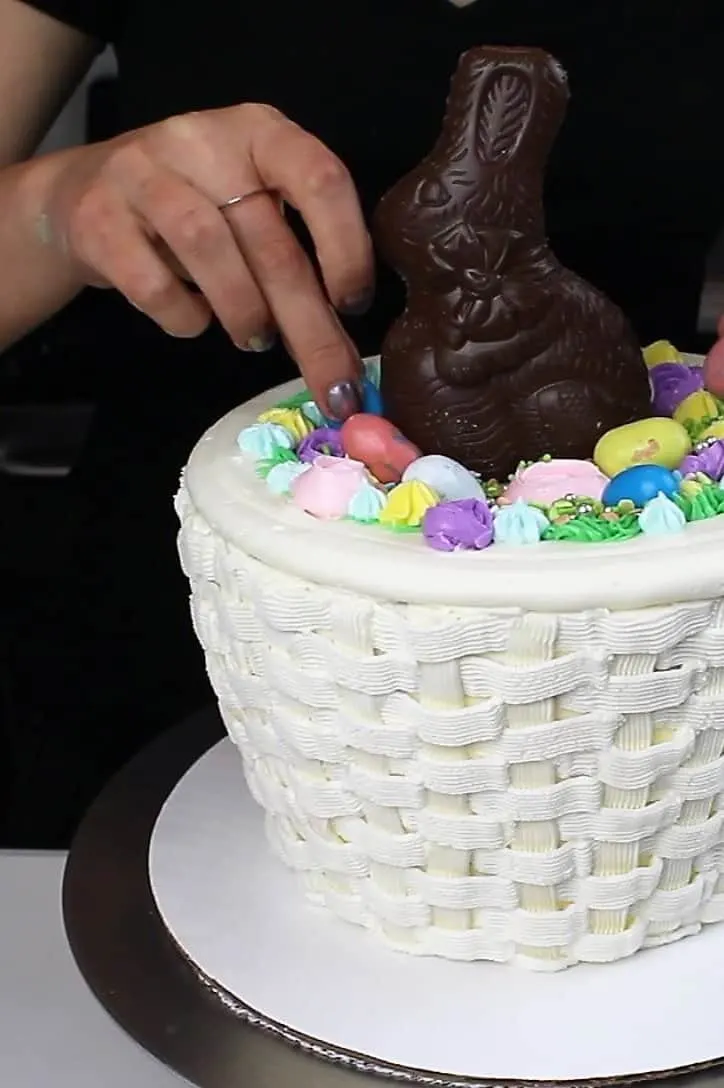
Once the basket weave is frosted and the cake is flipped, the real fun begins! Since this is an Easter basket, you can top the cake with all your favorite easter treats!
I used some whopper chocolate eggs, peeps, and a massive chocolate bunny.
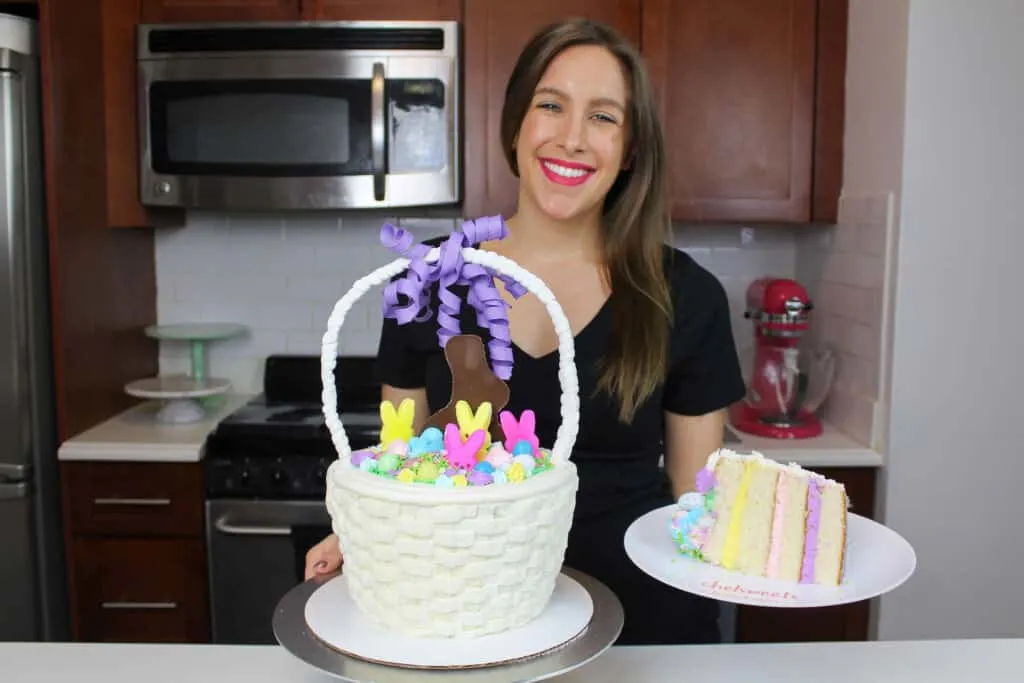
It felt wrong to make an Easter Basket cake without a handle. I usually avoid fondant, but there are some situations where you really have to use it.
This was one of them. I rolled out an extremely long cord of white fondant, and wrapped it around a thick wire. I was actually the most nervous about about this step, because I still feel so uncomfortable working with fondant.
It ended up working out quite well, and I even added a fun little bow on top of it. The one thing I do want to note is that you shouldn’t simply insert the wire straight into the cake.
To be safe, you should coat the wire in white chocolate or use straws to help keep the wire from coming in contact with the cake.
Share Your Creations With Me!
If you try this Easter Basket Cake recipe, please tag me @chelsweets, and use the #chelsweets so that I can see your amazing creations!
Nothing makes me happier than when I get emails or DMs with photos of your amazing cakes, so please don’t hesitate to reach out to me with your triumphs, or questions <3
Easter Basket Cake
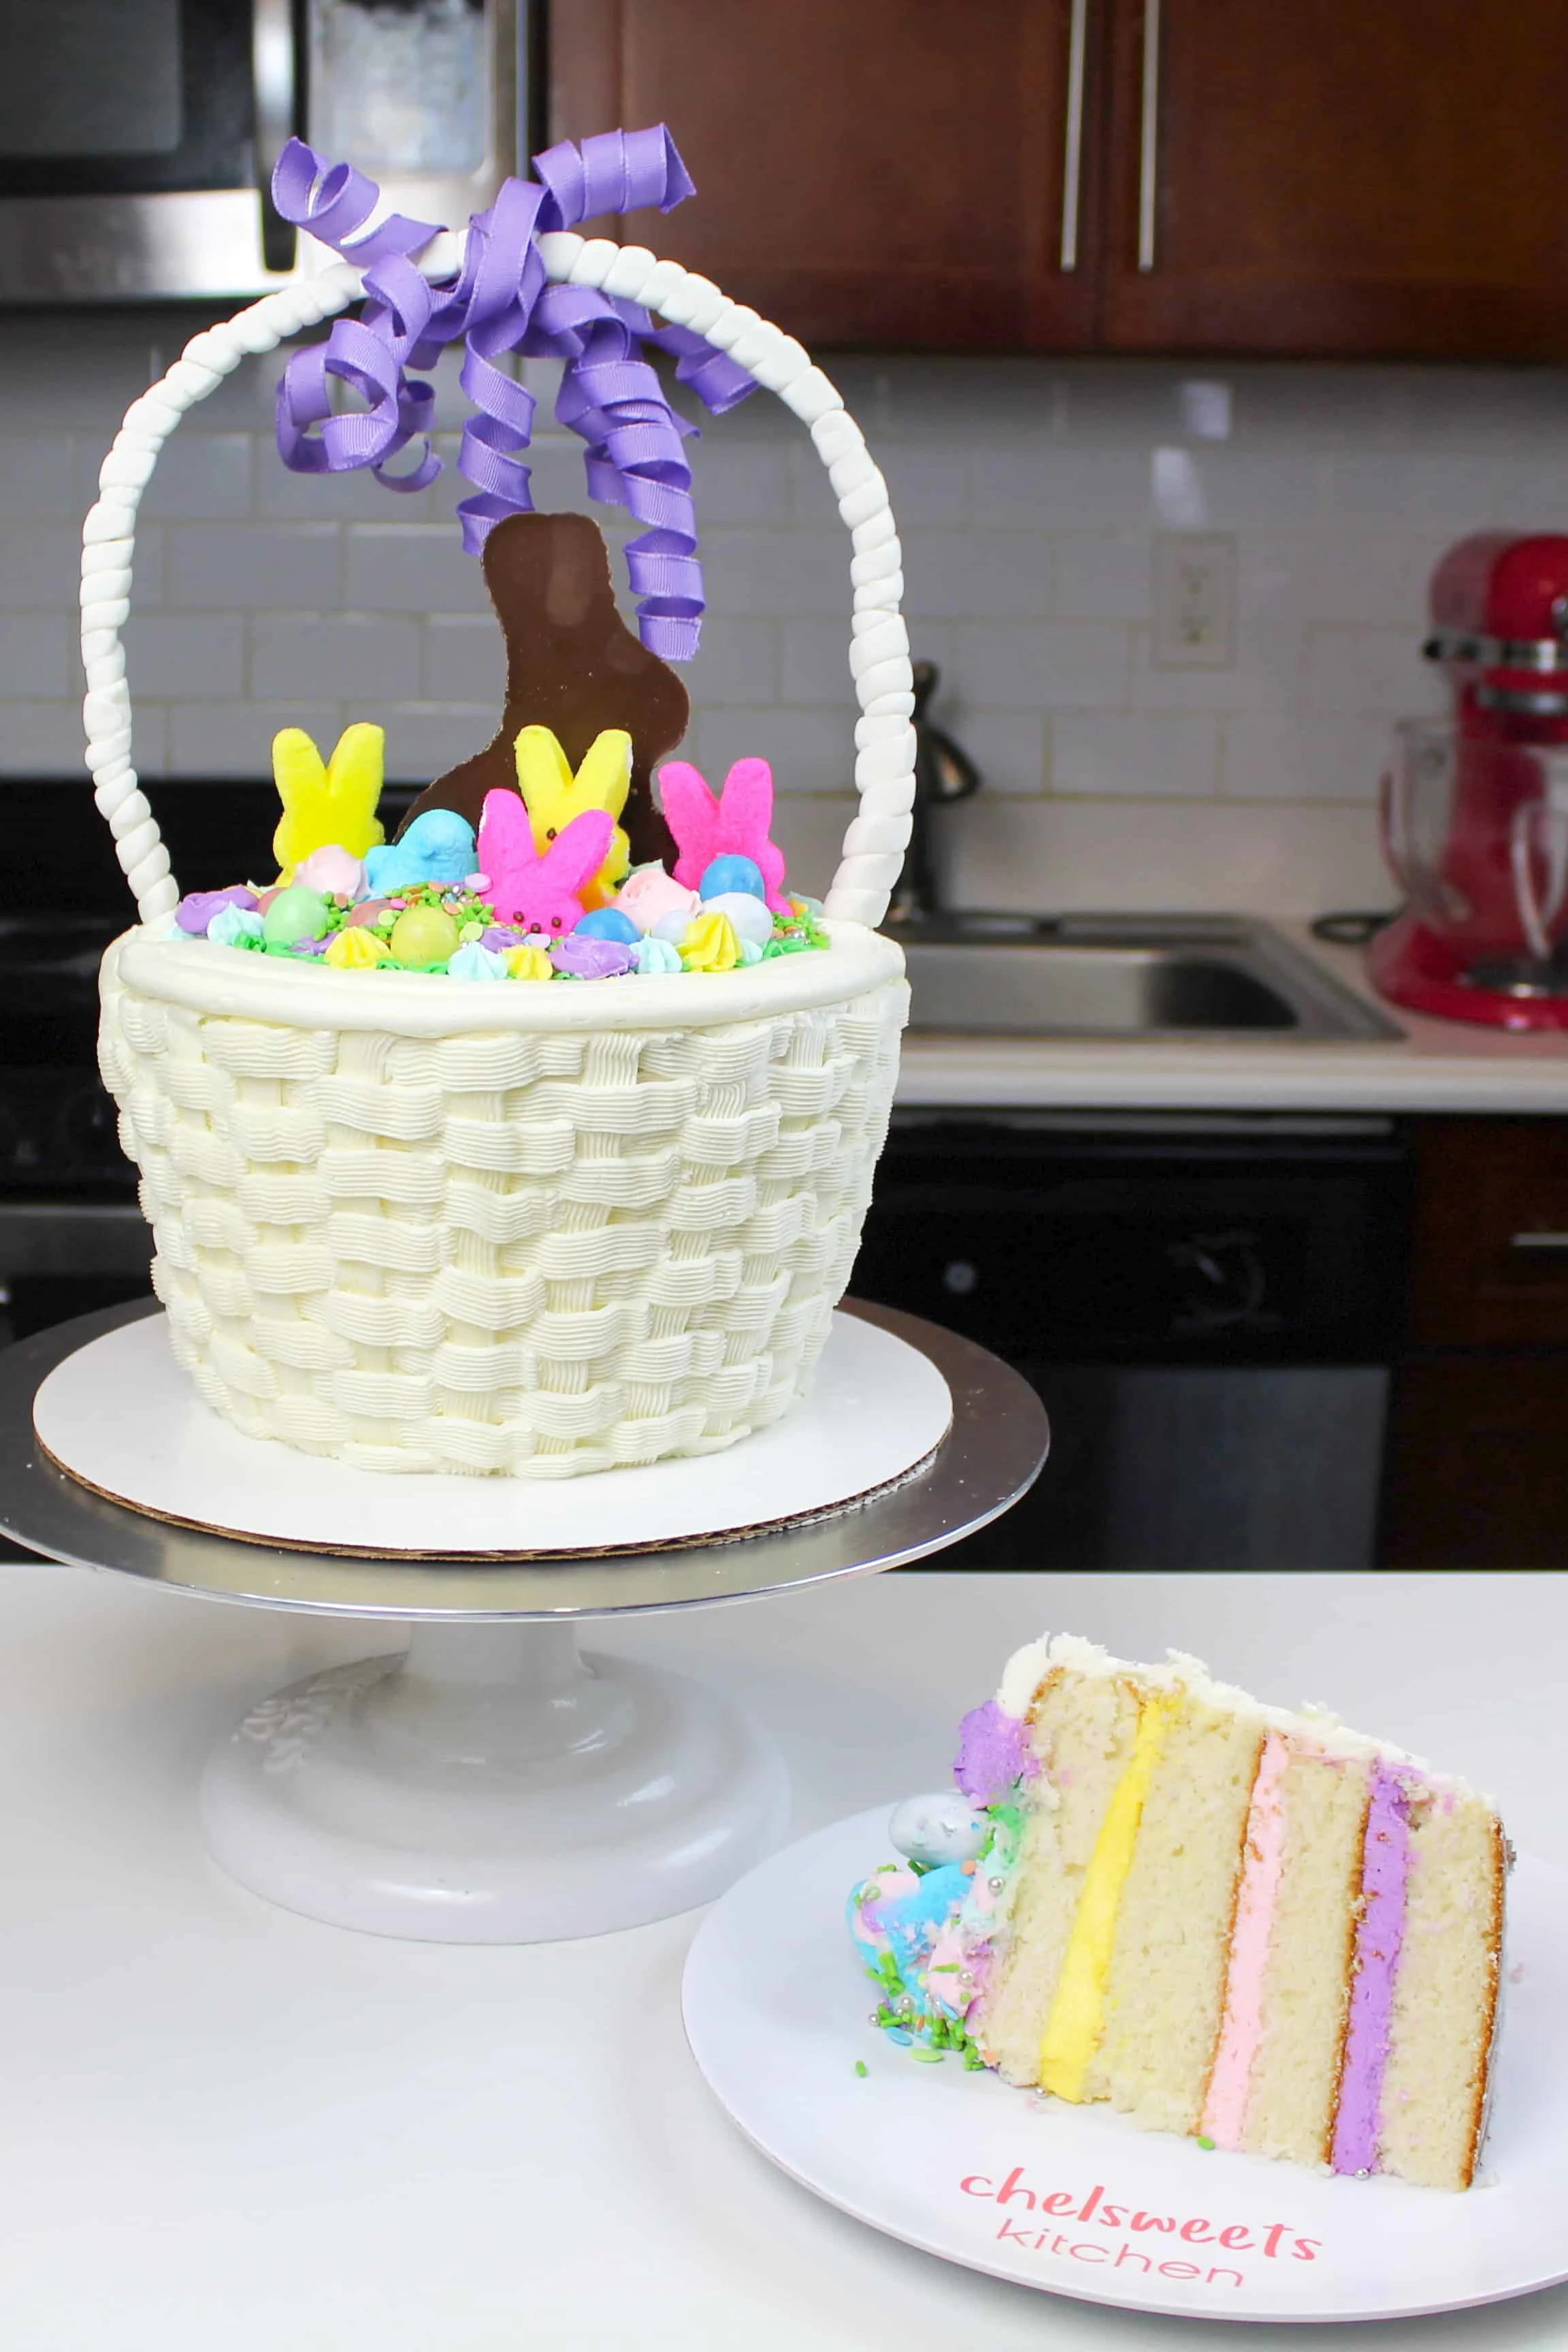
The Easter basket cake is simply the perfect Easter! It's made with coconut cake layers, and is topped with all your favorite treats, just like a real Easter basket
Ingredients
Coconut Cake Layers
- 3 cups all-purpose flour (390 grams)
- 3 cups granulated sugar (600 grams)
- 2 1/2 tsp baking powder (10 grams)
- 1 tsp salt (6 grams)
- 1 cup unsalted butter, room temperature (226 grams) - 2 sticks
- 1 Tbsp coconut extract (12 grams)
- 1 cup pasteurized egg whites from a carton (or about 7 egg whites) (235 grams)
- 1 1/2 cups buttermilk, room temperature (345 grams)
- 1/8 cup vegetable oil (28 grams)
Coconut Buttercream Frosting
- 3 cups unsalted butter, room temperature (678 grams)
- 11 cups powdered sugar (1375 grams)
- 1 tsp salt (6 grams)
- 1/3 cup heavy cream (or whipping cream) (60 grams)
- 1 Tbsp coconut extract (12 grams)
- pink, purple, and yellow gel food coloring
Additional Decorations
- piping bags
- wilton 47 frosting tip
- colorful peeps
- your favorite easter candies (I used candy eggs)
- large chocolate bunny
- shaved coconut - colored with gel food coloring
- 1 cup white fondant
- 1 1/2 feet sturdy wire
Instructions
Coconut Cake Layers:
- Preheat oven to 350°F. Line two 8 inch pans, and two 7 inch pans with parchment rounds, and grease with a light spray of non-stick cooking spray.
- Mix together all dry ingredients (flour, baking powder, sugar, and salt) in a stand mixer with a paddle with a few gentle pulses.
- Mix chunks of room-temperature butter slowly into the dry mix, on a low speed. Continue to mix until no large chunks of butter remain, and the mixture becomes crumbly.
- Pour in egg whites, and mix on low until just incorporated. Mix in the buttermilk in two installments, on a low speed.
- Add in coconut extract and oil, and mix at a low speed until fully incorporated. Scrape down the sides of the bowl with a spatula, then beat on low speed for about 15 seconds.
- Divide the batter evenly between the prepared cake pans.
- Bake for 32-35 minutes, or until a toothpick comes out clean. Allow the pans to cool for 10 minutes, then run an offset spatula around perimeter of the pan to separate the cake from the pan.
- Place cake layers into the freezer for 45 minutes, to accelerate the cooling process. Once the layers are fully cooled, carefully flip the pans and remove the layers from the pans.
- Use a serrated knife to level the tops of the layers.
Coconut Buttercream Frosting:
- While the cake layers bake and cool, make the vanilla buttercream frosting.
- Beat the butter on a medium speed for 30 seconds with a paddle attachment, until smooth. Slowly add in the powdered sugar, 1 cup at a time. Alternate with small splashes of cream.
- Once fully mixed, add in the coconut extract and salt, and beat on low until the ingredients are fully incorporated, and the desired consistency is reached.
- If the frosting is too thick, add in additional cream (1 teaspoon at a time). If the frosting is too thin, add in more powdered sugar (quarter of a cup at a time).
- To create the colorful the buttercream used to fill the cake, place 3/4 cup of frosting into three separate bowls. Color them pink, yellow, and purple with a couple drops of gel food coloring.
- Leave the rest of the buttercream white, and place 2 cups of frosting into a large piping bag fitted with a wilton 47 frosting tip.
To Assemble This Peeps Cake:
- Stack and frost the cake layers on a greaseproof cake board, using a dab of frosting to help stick the first cake layer to the board.
- Place one of the 8 inch cake layers on the board, and spread a thick layer of purple buttercream.
- Repeat with the second cake layer, adding a layer of pink buttercream.
- Top this with one of the seven inch cake layers with the yellow buttercream.
- Place the remaining seven inch cake layer on top, and then use a serrated knife to trim the cake into a tapered shape.
- Apply a thin coat of frosting around the the cake, to fully cover the cake layers. Smooth using a bench scraper, then chill the cake in the fridge (10 minutes) or freezer (5 minutes) until the frosting is firm to the touch.
- Pipe a basket weave pattern around the cake using a Wilton 47 piping tip.
- Place a cake board on top of the cake, and flip over, so that the smaller part of the cake is now the base of the cake.
- Pipe a line around the top edge of the cake to look like the edge of the basket, and fill top of the cake with your favorite Easter candies, some colored shredded coconut, and a chocolate rabbit.
- If you have any remaining colored buttercream, you pipe small buttercream flowers and place them on top of the cake as well.
- The optional finishing touch is to wrap a thin cord of white fondant around a metal wire. Leave at least 1.5 inches of wire on each end, to give the handle some stability once pressed into the cake.
- Dip the exposed ends of the wire into white chocolate, to prevent the wire from coming in direct contact with the cake.
- Press the handle into place, and your Easter basket cake is complete!!
Notes
These cake layers can be made in advance!! Learn more about how far in advance they can be made, and how to properly wrap them in my post on how to make cake layers ahead of time.
Since this frosting will be used to decorate a cake, it is important to mix the buttercream on the lowest speed at the end of the process for a couple minutes, to get out any extra air that might have be incorporated during the mixing process.
You can also stir the frosting in a bowl with a rubber spatula, pushing it from side to side, to get rid of any air bubbles. This will make it easier to get super smooth sides on your cake!
Nutrition Information
Yield
30Serving Size
1Amount Per Serving Calories 684Total Fat 33gSaturated Fat 19gTrans Fat 0gUnsaturated Fat 13gCholesterol 69mgSodium 307mgCarbohydrates 97gFiber 1gSugar 84gProtein 3g

25 Cute Easter Cake Ideas Even The Kids Can Help With
Thursday 23rd of February 2023
[…] Easter Basket Cake | Chelsweets […]
Terri Smith Ellis
Thursday 30th of April 2020
Oh my gosh! I cannot even explain how delicious this was. This was my first cake ever to make. You have inspired me to do what I've always wanted to but had excuse after excuse not to. I have been watching you and learning from you for several months. I halved the recipe and made a simple 6 inch 3 layer cake. For those of you wondering if this is worth baking, quit wondering. Thank you, Chelsea!
Chelsweets
Friday 8th of May 2020
Aw I am so happy to hear that Terri! That is so wonderful to hear :) haha happy baking!!
KaSondra Wiederich
Monday 6th of April 2020
What if I want to make the basket a lot smaller. How would you suggest I do that? No matter the size of the pan should there be a 1 inch size difference?
Chelsweets
Monday 6th of April 2020
Hi KaSondra
How much smaller do you want it to be? You can half the recipe and make 3, 6-inch cake layers! They'll bake up a bit faster though, and should be done after 30-33 minutes. Hope that helps, happy baking!
Azeema
Sunday 6th of October 2019
Hiii, can this be used for cupcakes?
Chelsweets
Sunday 6th of October 2019
Hi Azeema,
My cake recipes are designed to bake pretty flat, so it isn’t ideal for cupcakes! It still works, but they’ll make super flat cupcakes! I suggest just using my vanilla cupcake recipe instead, and adding 2 tsp of coconut extract! It’s delicious, and I highly recommend it! :) Here’ the link: https://chelsweets.com/2017/07/03/classic-vanilla-cupcake-recipe/
Amber
Monday 15th of July 2019
So I tried it with 1 cup coconut cream, 1/2c sour milk and replace oil with unrefined coconut oil and even added some shredded coconut and about 3 tsp of imitation coconut but it made the cake dry and didn’t rise as much. Still a very light coconut flavor. Think I’ll just go with imitation flavoring and some toasted coconut in there next time!
Chelsweets
Tuesday 23rd of July 2019
Hi Amber! Good to know, I would've thought the coconut cream would add moisture, but it's so sad that it doesn't really! Thank you for sharing <3