
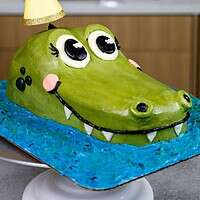
Crocodile Cake
I took a little hiatus but I’m back at my animal cake series with this cute crocodile cake!
The snout of this cake ended up being a bit more rounded than I originally planned, so it kind of looks more like an alligator cake than a crocodile cake.
But that’s the beauty of making cakes, you can make the snout on your cake as round or as pointed as you want!
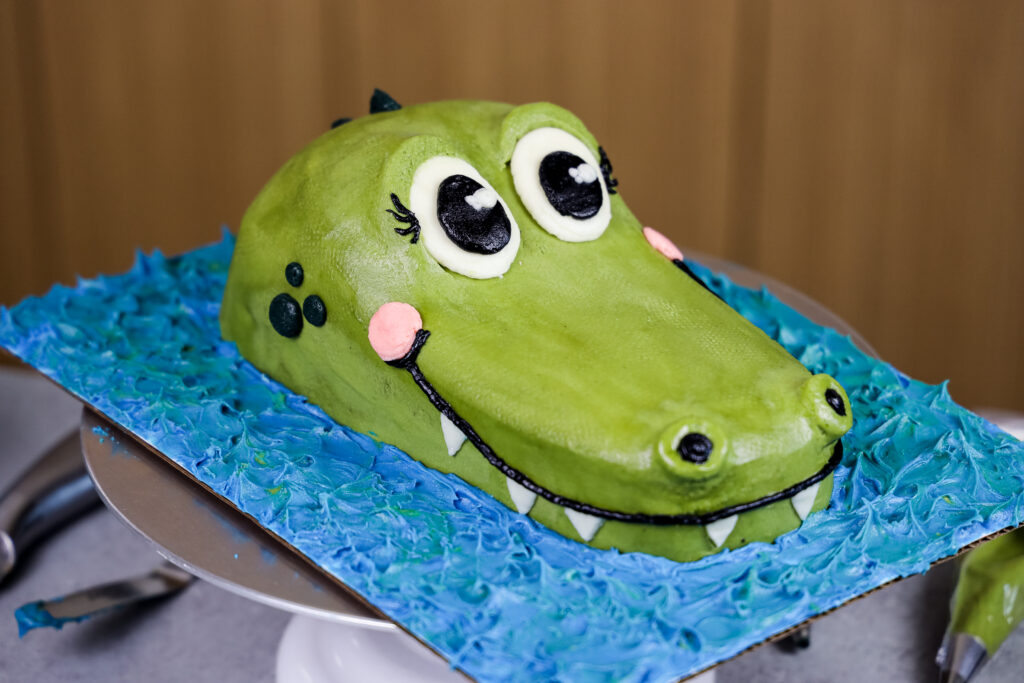
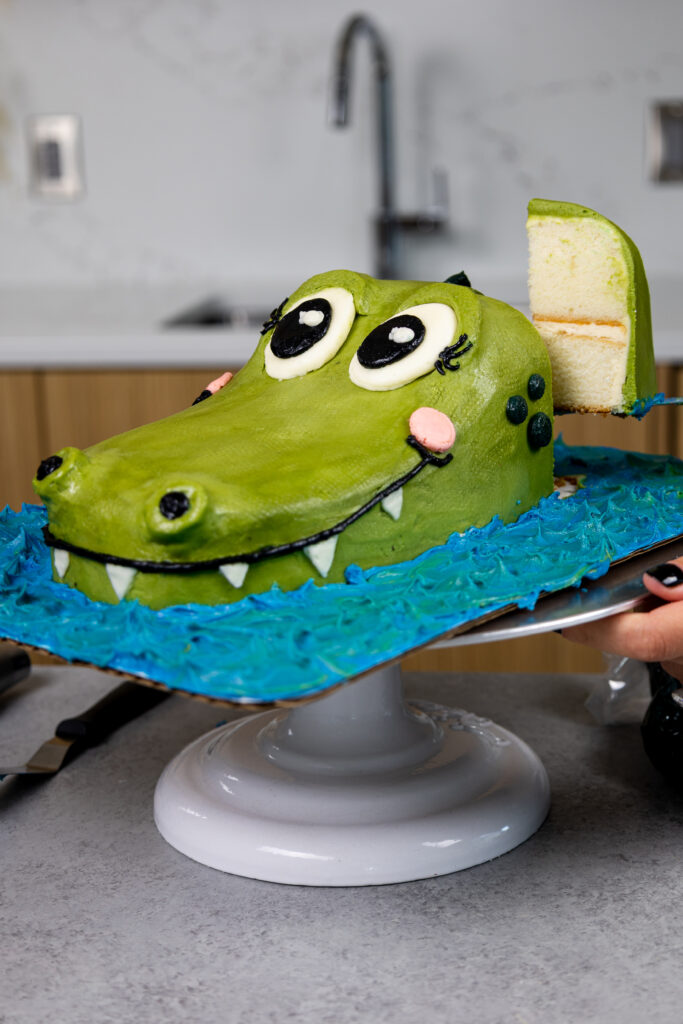
To make this adorable crocodile cake, I used a vanilla cake base and green and blue buttercream. I wanted her to look like she was just peeking her head up out of the water to say hi.
Making this Crocodile Cake: Step-by-Step Tutorial
Let’s walk through each step of this crocodile cake together to make sure it turns out as amazing as possible!
Step 1: Bake the Vanilla Cake
Fill a greased 8-inch square cake pan with vanilla cake batter and bake for 35-45 minutes, or until a toothpick comes out with a few moist crumbs.
Bake time can vary quite a bit based on your oven and if you use a heating core, so keep an eye on the cake once it’s been in the oven for 35 minutes.
Allow the cake to cool in the pan for 20 minutes, then run a small offset spatula around the perimeter of the pan to separate the cake from the pan and flip the cake onto a wire rack to finish cooling. Gently remove the heating core from the cake layer.
Once the cake layer has cooled fully use a sharp knife to level the top of the cake layer.
Cut the cake to make a piece that is 6″ x 8″, and 2″ x 8″. Take the 2″ x 8″ piece of cake and cut into a 2″ x 5″ and 2″ x 3″ piece. If you’re making these in advance, wrap and freeze them at this point.
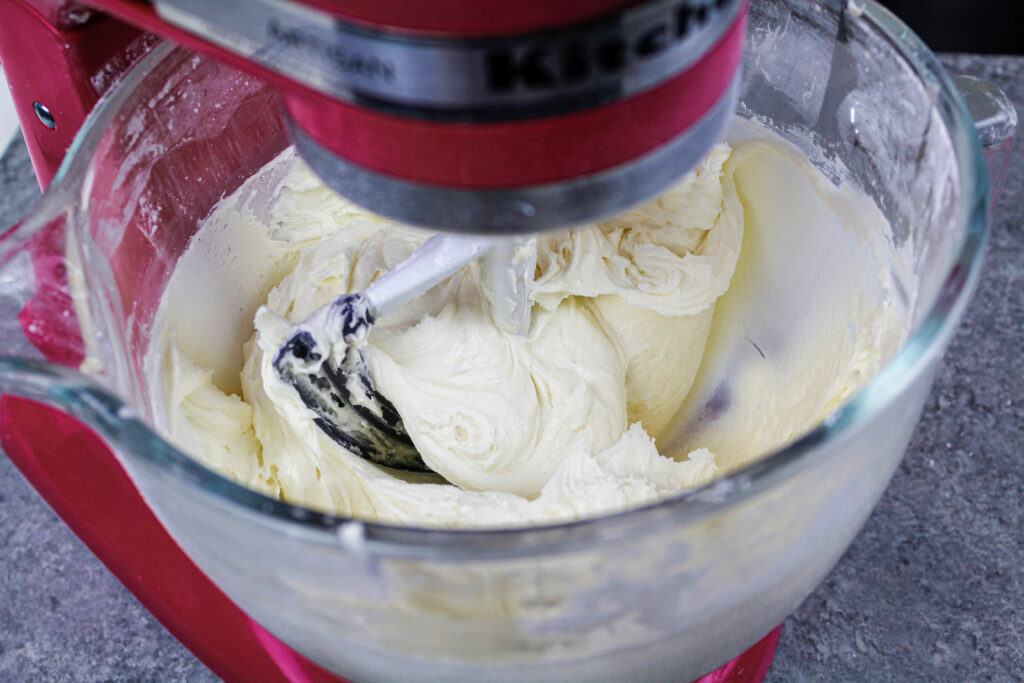
Step 2: Make the Buttercream Frosting
While the cake layers bake and cool, make the vanilla buttercream frosting with either an electric hand mixer or a stand mixer.
If your frosting seems too thick after mixing together all your ingredients, add in additional cream (1 teaspoon at a time). Or if the frosting is too thin, add in more powdered sugar (quarter of a cup at a time).
If you’re unsure how thick your frosting should be, you can learn what consistency you’re looking for in my frosting consistency post.
I like to wait to color the buttercream until the cake is crumb coated. While colorful buttercream is fun, I enjoy using uncolored buttercream inside this cake!
Step 3: Assemble and Crumb Coat the Cake Layers
Stack and frost this cake on a rectangular greaseproof cake board or large rectangular plate using a dab of frosting to help stick the first cake layer to the board. Place the 6″ x 8″ cake layer in the center of the board.
Spread an even layer of buttercream on one of the shorter ends of the cake layer and press the 2″ x 5″ piece of cake on top of the frosting at the same end of the cake. This will be the crocodile’s eyes.
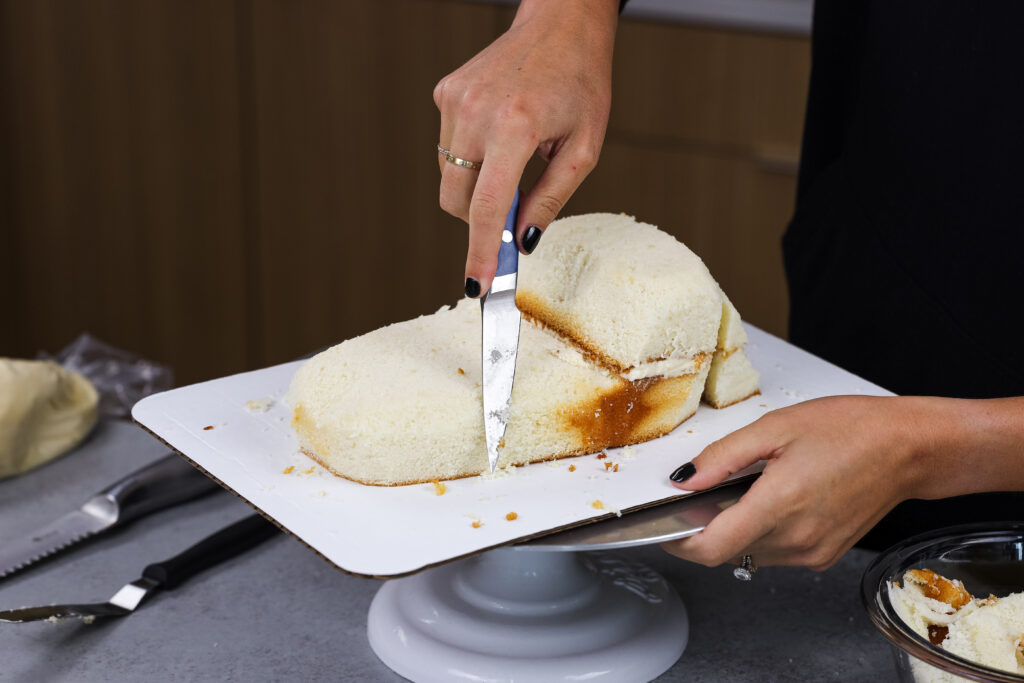
Use a small, sharp knife to trim the cake layers to give the crocodile a rounded snout and to round out its eyes (see the video and pictures above). Use the leftover 2″ x 3″ piece of cake to make the back of the crocodile’s neck.
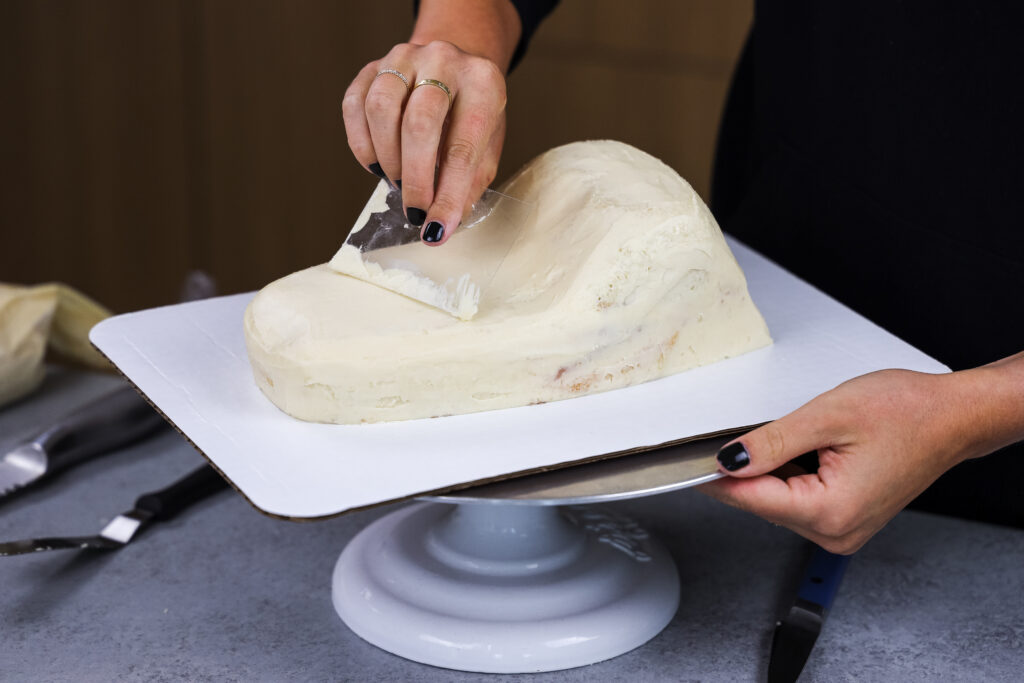
Add a thin coat of frosting around the cake to fully cover the cake layers.
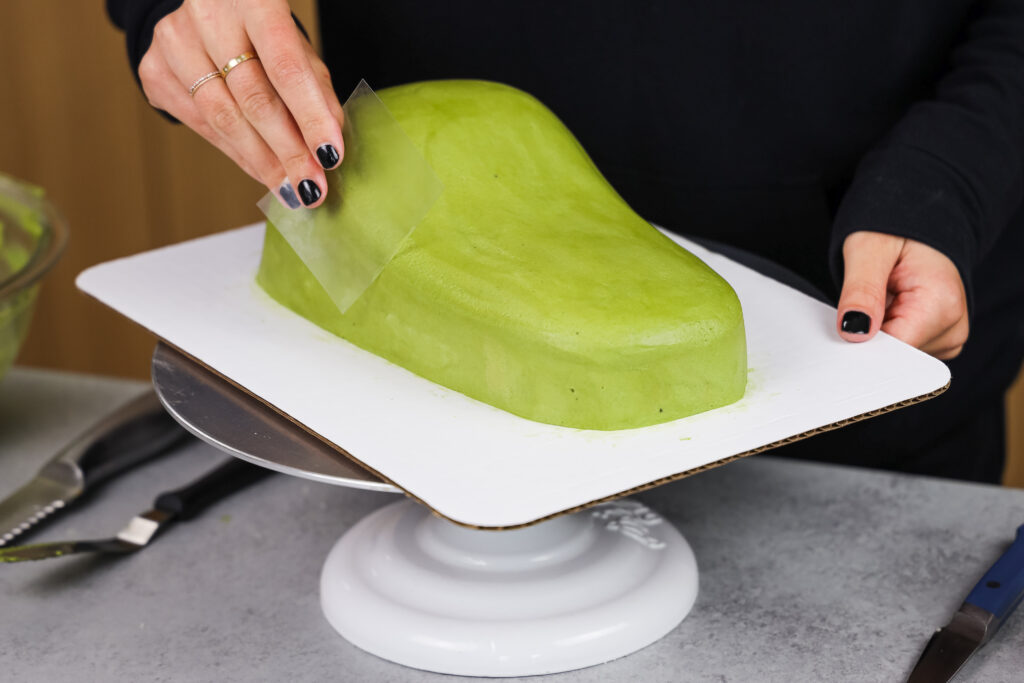
Smooth using a bench scraper or a small acetate sheet, then chill the cake in the fridge (20 minutes) or freezer (10 minutes) until the frosting is firm to the touch.
Step 4: Color Your Buttercream & Frost the Chilled Cake
While the cake chills, color about 1 cup of the uncolored buttercream blue with gel food coloring. Cover and set aside. This will be the water you add around the crocodile’s head later.
Now it’s time to color some of the frosting to make the crocodile’s face. Use gel food coloring to color 1/2 cup of frosting black, leave 1/2 cup of frosting white, color 1/3 cup of frosting dark green and 1/4 cup of frosting light pink.
Place each color of frosting in small piping bags. Snip a small opening in the bottom of each bag and set aside. You can also use couplers and small piping tips if you have them on hand!
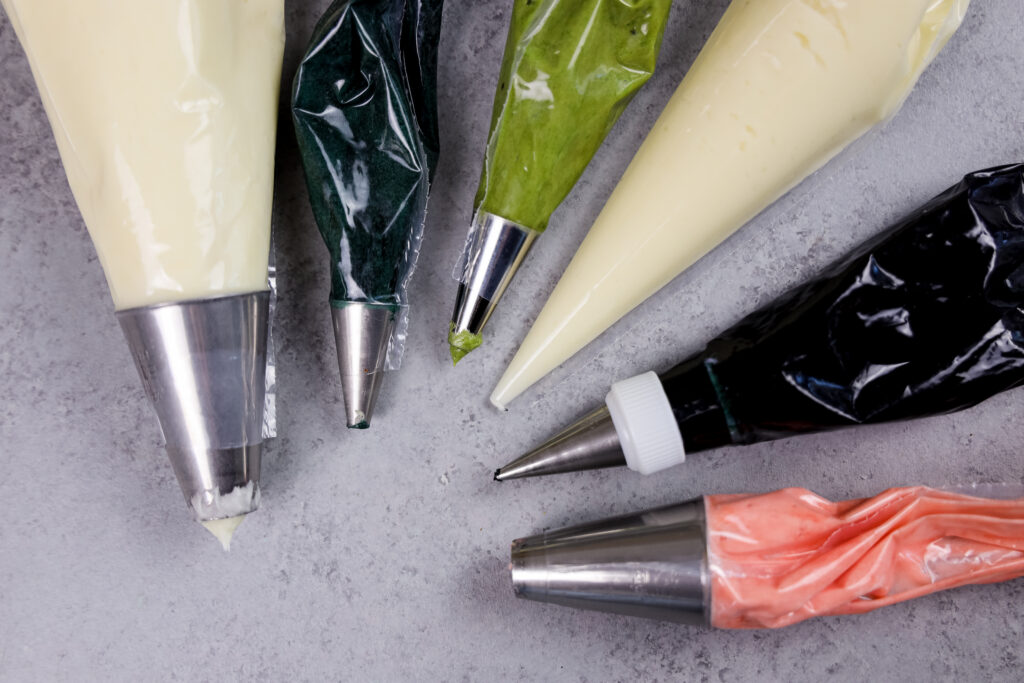
Color the remaining buttercream olive green with green and yellow gel food coloring. If you want to naturally color the frosting I recommend using 1 tbsp of matcha powder.
Add a thicker second layer of green frosting on the cake and smooth using a small offset spatula and/or acetate sheet.
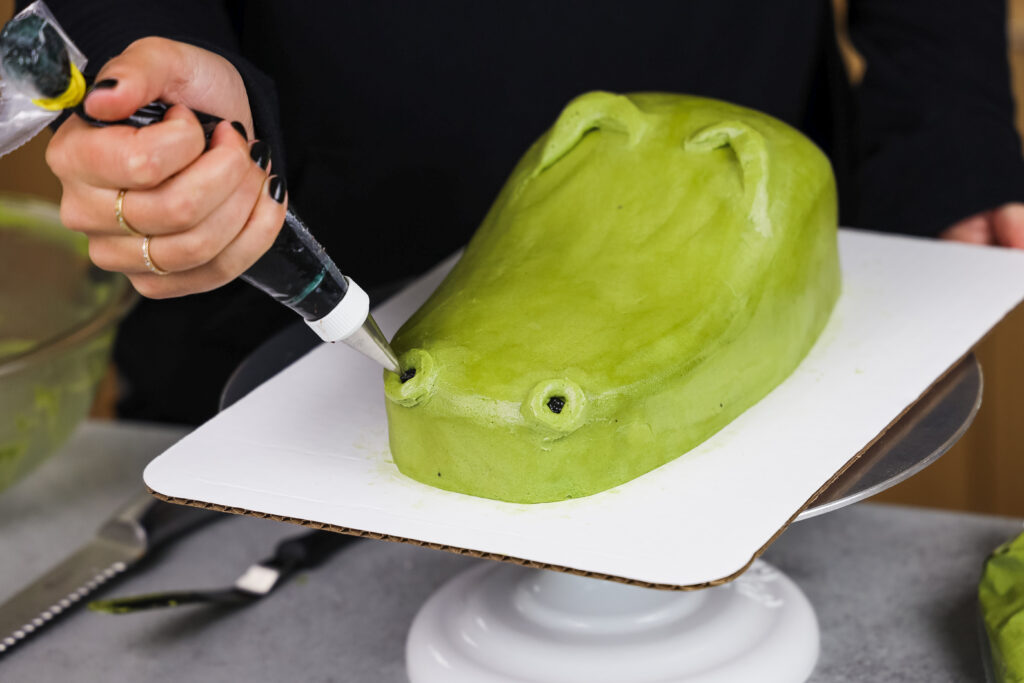
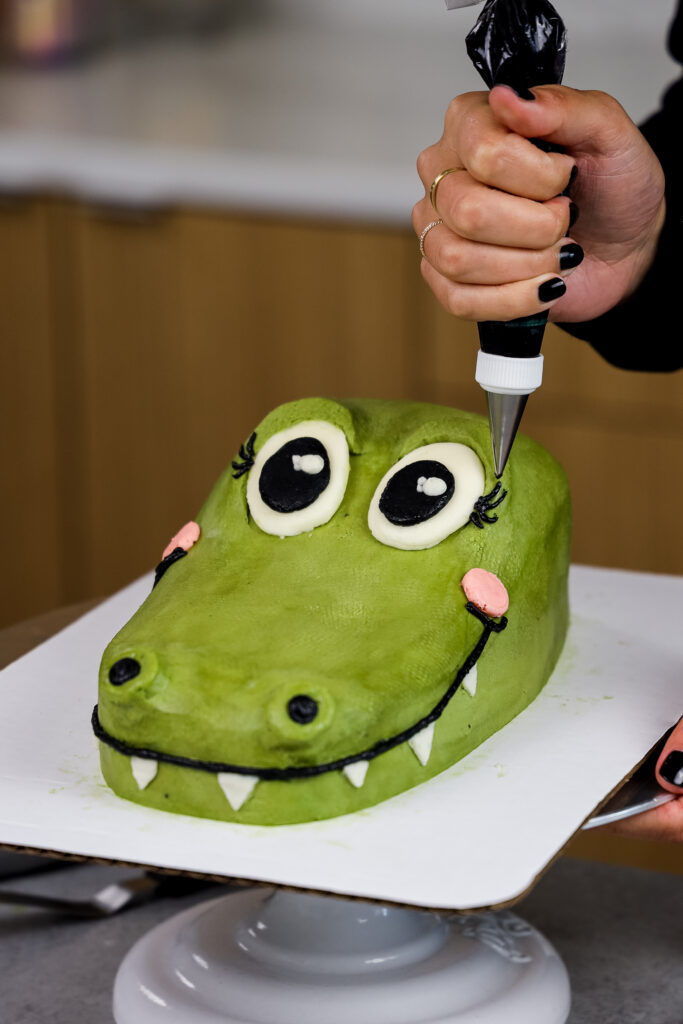
Place the remaining green frosting in a small piping bag fitted with a small round piping tip and pipe on the crocodile’s nostrils and eyebrows.
Smooth the edges around the crocodile’s eyebrows with an acetate sheet.
Step 5: Add Some Texture to this Crocodile Cake
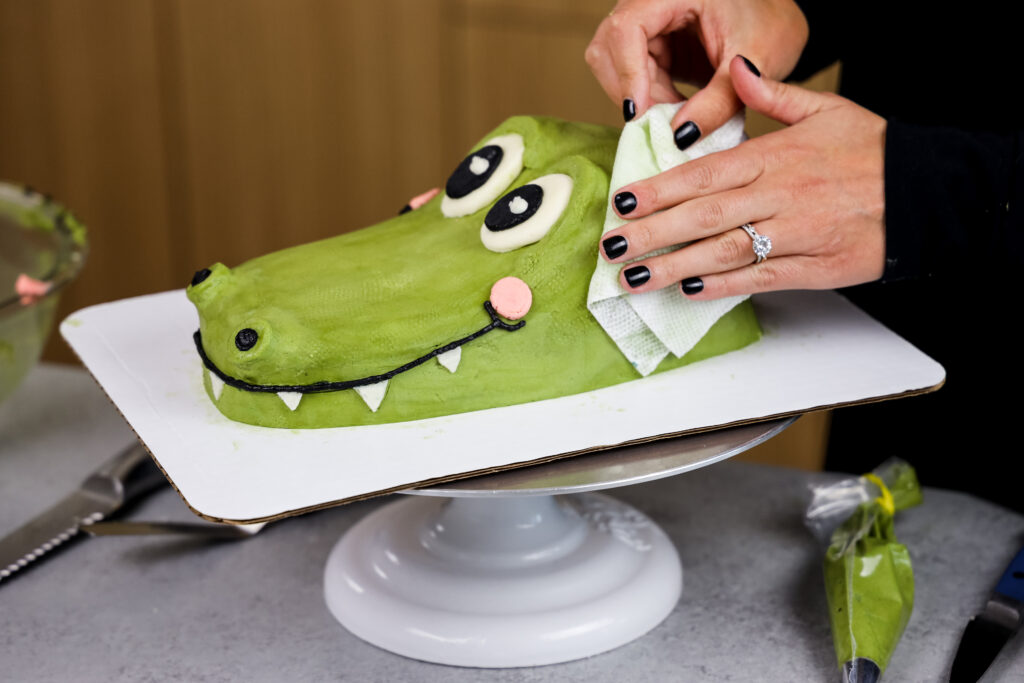
Chill the cake in the freezer for about 5 minutes to help the frosting set.
Once the frosting is somewhat firm to the touch, gently press a paper towel around the cake to add a bit of texture to the frosting and make it look more like reptile skin.
Step 6: Making this Little Crocodile’s Face
The next step is to add on the crocodile’s face! This can be done with buttercream or fondant.
I’ve made this cake twice and the first time I used fondant to make the face. The upside of using fondant is that it’s faster and easier for anyone who isn’t super comfortable piping buttercream. The downside is you need four colors of fondant and fondant tools to cut the shapes.
Either method will work, and I recommend doing whatever you feel the most comfortable with. This time I used buttercream to make the crocodile’s face and I loved how it turned out!
Step 7: Cover the Board with Blue Buttercream
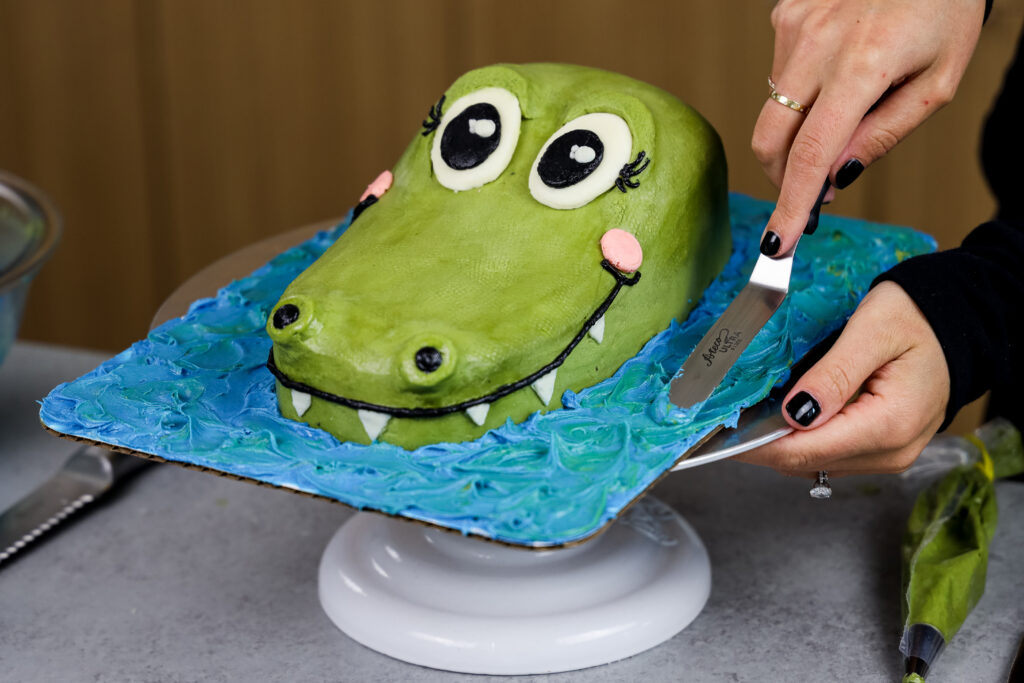
The last step is to cover your cake board with blue buttercream to look like water.
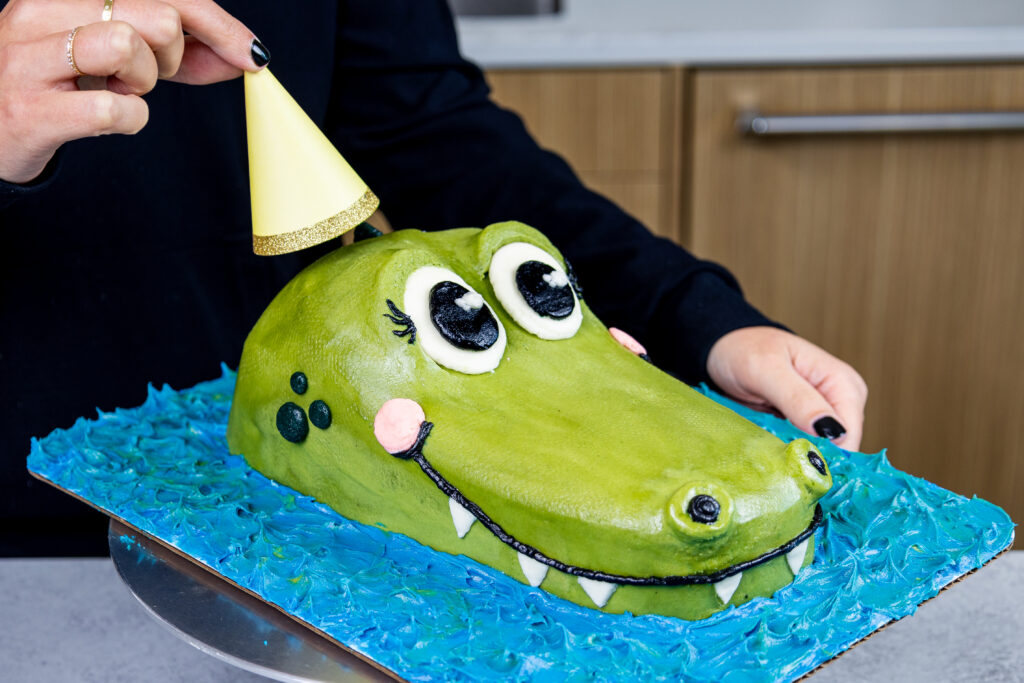
We want this crocodile to look like she’s just peeking her head out of water to say hi, and the blue buttercream totally completes this look!
Substitutions and Swaps – Vanilla Cake Layers
This crocodile birthday cake uses quite a few ingredients and I know you might not have all of them on hand. Or if you have food allergies or restrictions, I’ve got you covered.
Below are some swaps and substitutions that can be made in this cake recipe.
- All Purpose Flour – This recipe turns out best with AP flour, but you can use a gluten-free flour blend or cake flour if that’s all you have on hand.
- Granulated Sugar – I do not recommend reducing the amount of sugar or changing the type of sugar, as it will change the texture of the cake layers.
- Unsalted Butter – If you only have salted butter on hand, you can use it in place of the unsalted butter in this recipe. Just be sure to omit the salt that this cake recipe calls for. You can also use vegan butter in its place (and also omit the salt)!
- Egg whites – I use egg whites out of a carton to avoid wasting any yolks! You can also use 5 egg whites or 3 whole eggs if needed. Or if you have an egg allergy, you can use flaxseed eggs or an egg replacer.
- Buttermilk – You can also use full-fat yogurt, sour cream, whole milk, or an alternative yogurt or milk (almond, soy, oat) if you’re dairy-free.
- Vegetable Oil – You can use any flavorless oil in this recipe. Canola or even sunflower oil would work great!
- Vanilla Extract – Other extracts can also be used in place of the vanilla extract. Feel free to use almond, lemon, or even coconut extract.
Substitutions and Swaps – Vanilla Buttercream Frosting
- Unsalted Butter – If you only have salted butter on hand, you can use it in place of the unsalted butter. Just be sure to omit the salt that this frosting recipe calls for. You can also use vegan butter in its place (and omit the salt)!
- Heavy Cream – Whole milk or alternative milk (soy, almond, oat) will work fine in this frosting recipe if that’s what you have on hand.
- Vanilla Extract – Other extracts can also be used in place of the vanilla extract. Feel free to use coconut extract, hazelnut extract, or even pistachio extract.
- Gel food coloring – Natural food coloring (like matcha powder) or liquid food coloring can be used if needed.
Tips for Making the Best Crocodile Cake:
- Be sure to properly measure your flour (spoon into the cup measure, then level) or use a kitchen scale to measure your dry ingredients.
- Use gel food coloring to create brightly colored frosting without throwing off the consistency of the frosting or giving it a bitter taste.
- Ingredients at room temperature mix together better, so be sure you set out any cold ingredients ahead of time.
- Mix your cake batter just until the ingredients are incorporated. This will ensure your cake layers are tender and soft.
- Use an acetate sheet to help you get your final coat of frosting super smooth.
- Chill your cake layers in the freezer for about 20 minutes before assembling the cake. This makes it easier to stack and frost.
- Make this crocodile cake vegan or dairy-free if needed! Use your favorite type of dairy-free milk to replace the buttermilk and heavy cream, and use vegan butter sticks in place of the butter. For the eggs, I recommend using an egg replacer like this.
- Gently press a paper towel around the cake once its second layer of frosting has set to add a bit of texture to the frosting and make it look more like reptile skin.
Making this Crocodile Cake in Advance & Storage Tips:
- Make your cake layers in advance and freeze them. It breaks the process up and makes it more approachable.
- Make your frosting ahead of time, too, or save any leftover frosting. It can be stored in an airtight container in the fridge for up to a month. Or store it in the freezer for up to 3 months! Be sure to give it a good stir once it thaws to get the consistency smooth again.
- A frosted cake can last in the fridge for up to a week. The buttercream locks in all the moisture, keeping the cake fresh and delicious.
- If you cut into the cake and have leftovers, use any remaining frosting to cover the cut section to keep it moist. It can be stored in the fridge like this for up to a week.
Let Me Know What You Think!
If you try this crocodile birthday cake recipe, I’d love to hear what you think of it! Let me know by leaving a rating below.
If you plan to share on social media, you can tag me @chelsweets and use #chelsweets so that I can see your amazing creations on social media.
Crocodile Cake
Ingredients
Vanilla Cake
- 2 cups all-purpose flour 260g
- 2 cups granulated sugar 400g
- 1 1/2 tsp baking powder 6g
- 1/2 tsp fine salt 3g
- 2/3 cup unsalted butter, room temperature 150g – 1 & 1/3 sticks
- 2/3 cup carton egg whites or 5 large egg whites, room temperature 155g
- 1 cup buttermilk, room temperature 228g
- 2 Tbsp vegetable or canola oil 28g
- 1 tsp vanilla extract or vanilla bean paste 4g
Vanilla Buttercream Frosting
- 1 1/2 cups unsalted butter, room temperature 339g
- 5 cups powdered sugar 625g
- 3 Tbsp heavy whipping cream, room temperature 45g
- 2 tsp vanilla extract or vanilla bean paste 4g
- 1/4 tsp fine salt 2g
- green, yellow and blue gel food coloring
Instructions
Vanilla Cake Layers:
- Preheat oven to 350°F / 175°F. Grease an 8-inch square cake pan with homemade cake release or non-stick baking spray and parchment paper. Grease a heating core and place at the center of the pan to help it bake more evenly and quickly. Set aside.
- Mix together 2 cups all-purpose flour, 2 cups granulated sugar, 1 1/2 tsp baking powder, and 1/2 tsp salt in a large bowl. Use a stand mixer with a paddle attachment or hand mixer to mix on a low speed until combined.
- Mix in 2/3 cup (1 & 1/3 sticks) unsalted butter slowly into the dry mix on a medium-low speed. Continue to mix until no large chunks of butter remain, and the mixture becomes crumbly.
- Pour in 2/3 cup or about 5 egg whites and mix on low until just incorporated and the batter looks wet.
- Mix in 1 cup of buttermilk, 2 Tbsp of vegetable oil and 1 tsp vanilla extract on a low speed until just incorporated. Scrape the sides and bottom of the bowl as needed with a rubber spatula.
- Fill the prepared square cake pan and bake for 35-45 minutes, or until a toothpick comes out with a few moist crumbs. Bake time can vary quite a bit based on your oven and if you use a heating core, so keep an eye on the cake once it's been in the oven for 35 minutes.
- Allow the cake to cool in the pan for 20 minutes, then run a small offset spatula around the perimeter of the pan to separate the cake from the pan and flip the cake onto a wire rack to finish cooling. Gently remove the heating core from the cake layer.
- Once the cake layer has cooled fully use a sharp knife to level the top of the cake layer. Cut the cake to make a piece that is 6" x 8", and 2" x 8". Take the the 2" x 8" piece of cake and cut into a 2" x 5" and 2" x 3" piece. If you're making these in advance, wrap and freeze them at this point.
Vanilla Buttercream Frosting:
- While the cake layers bake and cool, make the vanilla buttercream frosting.
- Beat 1 1/2 cups of unsalted butter on a medium speed for 30 seconds with a paddle attachment or hand mixer until smooth.
- Slowly mix in 5 cups of powdered sugar on a low speed, 1 cup at a time. Halfway through, add in 3 Tbsp of heavy cream or milk to make it easier to mix.
- Scrape the sides and bottom of the bowl as needed with a rubber spatula.
- Once the frosting is fully mixed and smooth, add in 2 tsp of vanilla extract and 1/4 tsp salt. Mix on the lowest speed for a couple minutes to help make the frosting silky smooth.
- If the frosting seems too thick, add in additional cream (1 teaspoon at a time). If the frosting is too thin, add in more powdered sugar (quarter of a cup at a time). If you're unsure how thick your frosting should be, you can learn what consistency you're looking for in my frosting consistency post.
- Wait to color the buttercream until the cake is crumb coated.
To Assemble this Crocodile Cake:
- Stack and frost this cake on a rectangular greaseproof cake board or large rectangular plate using a dab of frosting to help stick the first cake layer to the board. Place the 6" x 8" cake layer on the center of the board.
- Spread an even layer of buttercream on one of the shorter ends of the cake layer and press the 2" x 5" piece of cake on top of the frosting at the same end of the cake. This will be the crocodile's eyes. Use a small, sharp knife to trim the cake layers to give the crocodile a rounded snout and to round out its eyes (see the video and pictures above). Use the leftover 2" x 3" piece of cake to make the back of the crocodiless neck.
- Add a thin coat of frosting around the cake to fully cover the cake layers.
- While the cake chills, color about 1 cup of the uncolored buttercream blue with gel food coloring. Cover and set aside.
- Now it's time to color some of the frosting to make the crocodile's face. Use gel food coloring to color 1/2 cup of frosting black, leave 1/2 cup of frosting white, color 1/3 cup of frosting dark green and 1/4 cup of frosting light pink. Place each color of frosting in small piping bags. Snip a small opening in the bottom of each bag and set aside.
- Color the remaining buttercream olive green with green and yellow gel food coloring. If you want to naturally color the frosting I recommend adding 1 Tbsp of matcha powder.
- Add a thicker second layer of green frosting on the cake and smooth using a small offset spatula and/or acetate sheet. Chill the cake in the freezer for about 5 minutes to help the frosting set. If desired, gently press a paper towel around the cake to add a bit of texture to the frosting and make it look more like reptile skin.
- Place the remaining green frosting in a small piping bag fit with a small round piping tip and pipe on the crocodile's nostrils and eyebrows. Smooth the edges around the crocodile's eyebrows with an acetate sheet.
- Use the black, white, dark green and pink frosting to add the crocodiles mouth, eyes, spots, and cheeks.
- Cover your cake board with blue buttercream to look like waves then enjoy!
Video
Notes
Tips for Making the Best Crocodile Cake
- Be sure to properly measure your flour (spoon into the cup measure, then level) or use a kitchen scale to measure your dry ingredients.
- Use gel food coloring to create brightly colored frosting without throwing off the consistency of the frosting or giving it a bitter taste.
- Ingredients at room temp mix together better, so be sure you set out any cold ingredients ahead of time.
- Mix your cake batter just until the ingredients are incorporated. This will ensure your cake layers are tender and fluffy.
- Chill your cake layers in the freezer for about 20 minutes before assembling the cake. This makes it easier to stack and frost.
- Make this crocodile cake vegan or dairy free if needed! Use your favorite type of dairy free milk to replace the buttermilk and heavy cream, and use vegan butter sticks in place of the butter. For the eggs I recommend using an egg replacer like this.
- Use an acetate sheet to help you get your final coat of frosting super smooth.
- Gently press a paper towel around the cake once its second layer of frosting has set to add a bit of texture to the frosting and make it look more like reptile skin.
Making this Cake in Advance
- Make your cake layers in advance and freeze them. It breaks the process up and make it more approachable.
- Make your frosting ahead of time too or save any leftover frosting! It can be stored in an airtight container in the fridge for up to a month or in the freezer for up to 3 months. Be sure to give it a good stir once it thaws to get the consistency nice and smooth again.
- A frosted cake can last in the fridge for up to a week, or in the freezer for up to a month. The buttercream locks in all the moisture, keeping the cake fresh and delicious!
- If you cut into the cake and have leftovers, use any remaining frosting to cover the cut section to keep it moist and store in the fridge for up to a week.
Nutrition
Other Recipes You Might Like:

Can you please make a squidward cake? My daughter is turning 6 and she wants squidward 🙂
I made your Patrick cake last year and it turned out so good!
Thanks,
Alison