
2026 Christmas Cookie Boxes
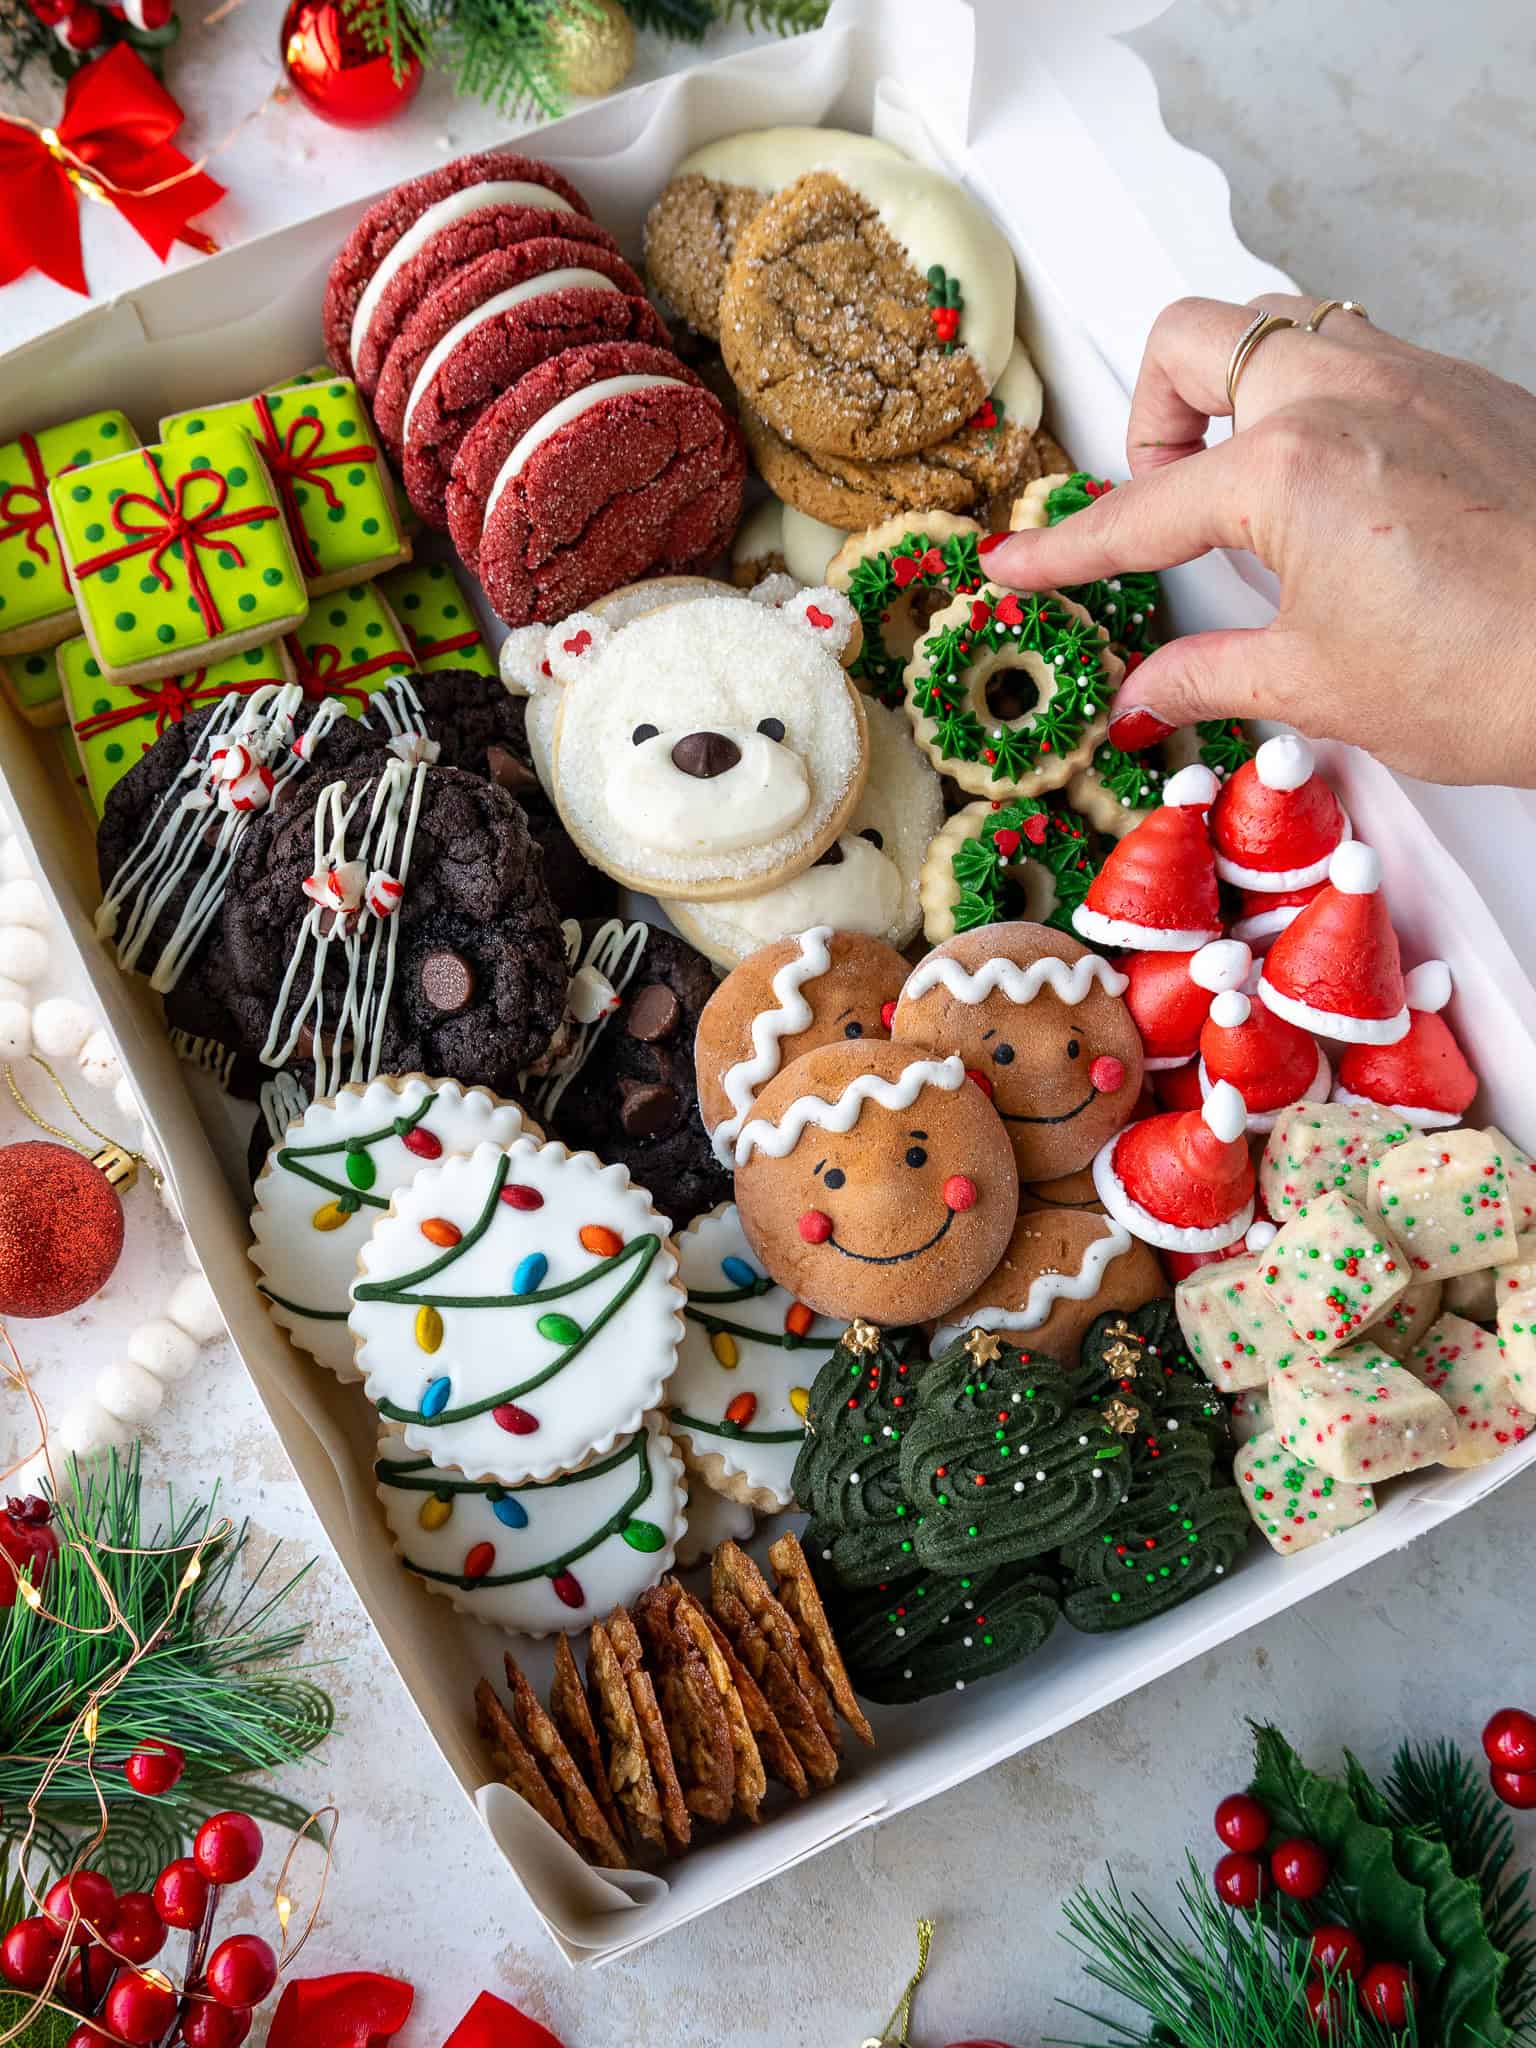
Here are the 12 recipes and cookie designs I’m using to make my 2026 Christmas cookie boxes. This year’s assortment has a mix of classic Christmas flavors, colorful decorated cookies, crisp cookies, soft sandwich cookies, marshmallows, and meringues.
I’ve also shared how I plan out a box like this, how I break the baking into manageable days, and how I store everything so assembling the boxes feels fun instead of overwhelming.
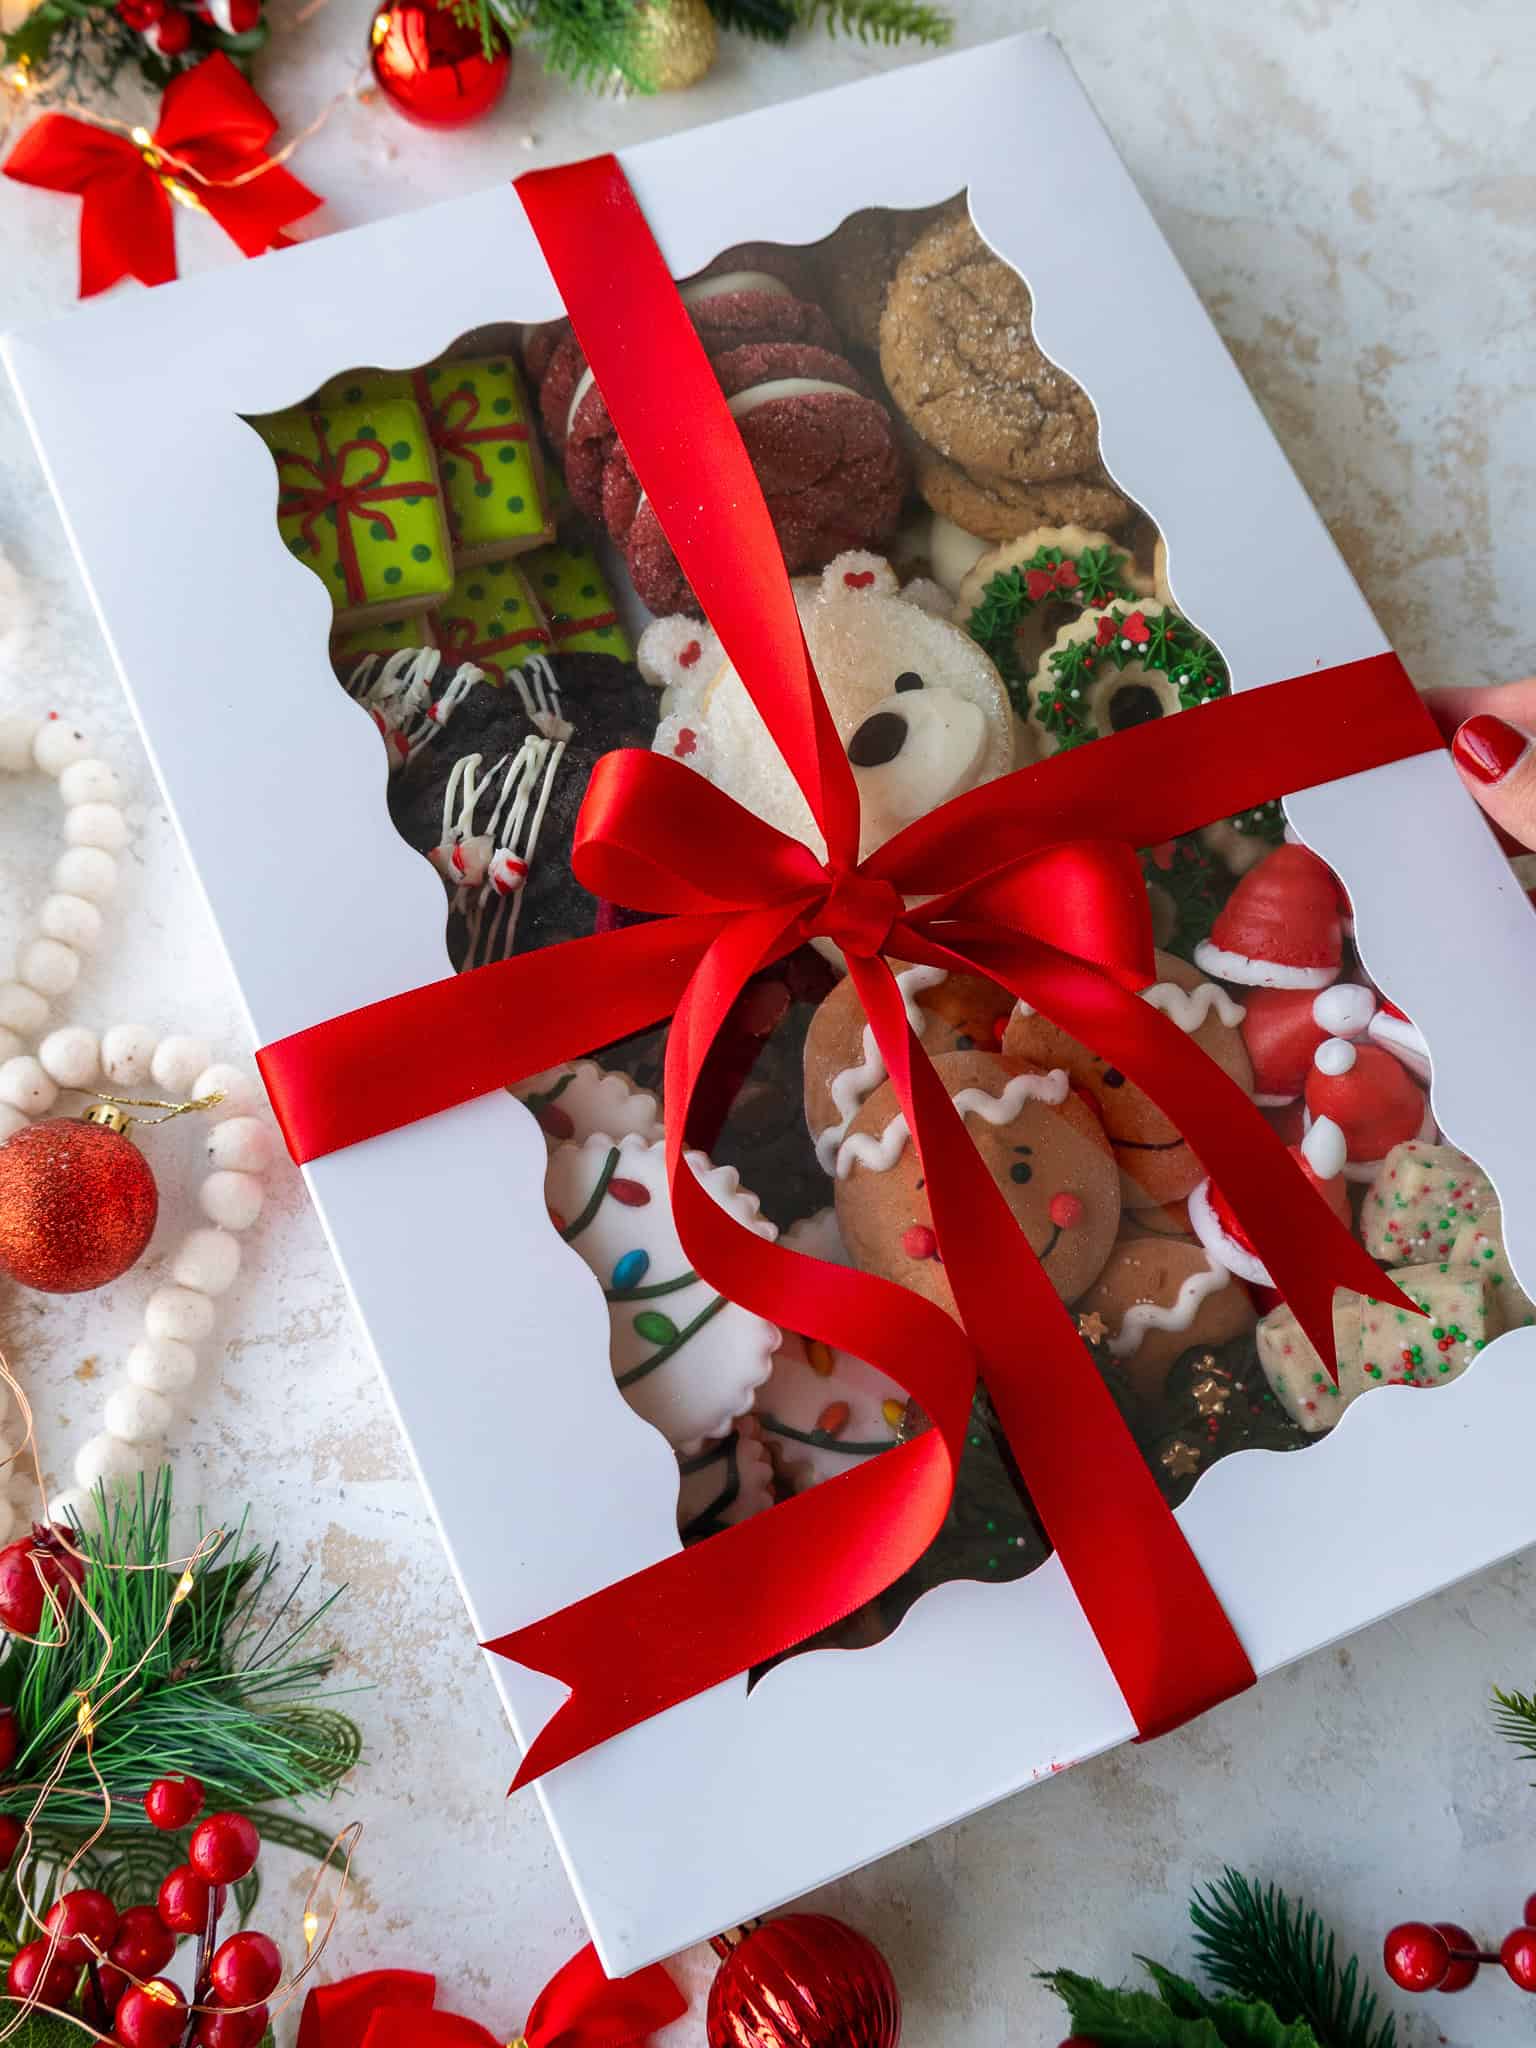
I use 10×14-inch boxes for events or big get-togethers, and 10×10-inch boxes when I’m gifting cookies to friends and family. I recommend placing a cardboard cake board underneath the cookies to help support their weight and give the box more structure.
This Year’s Cookie Assortment
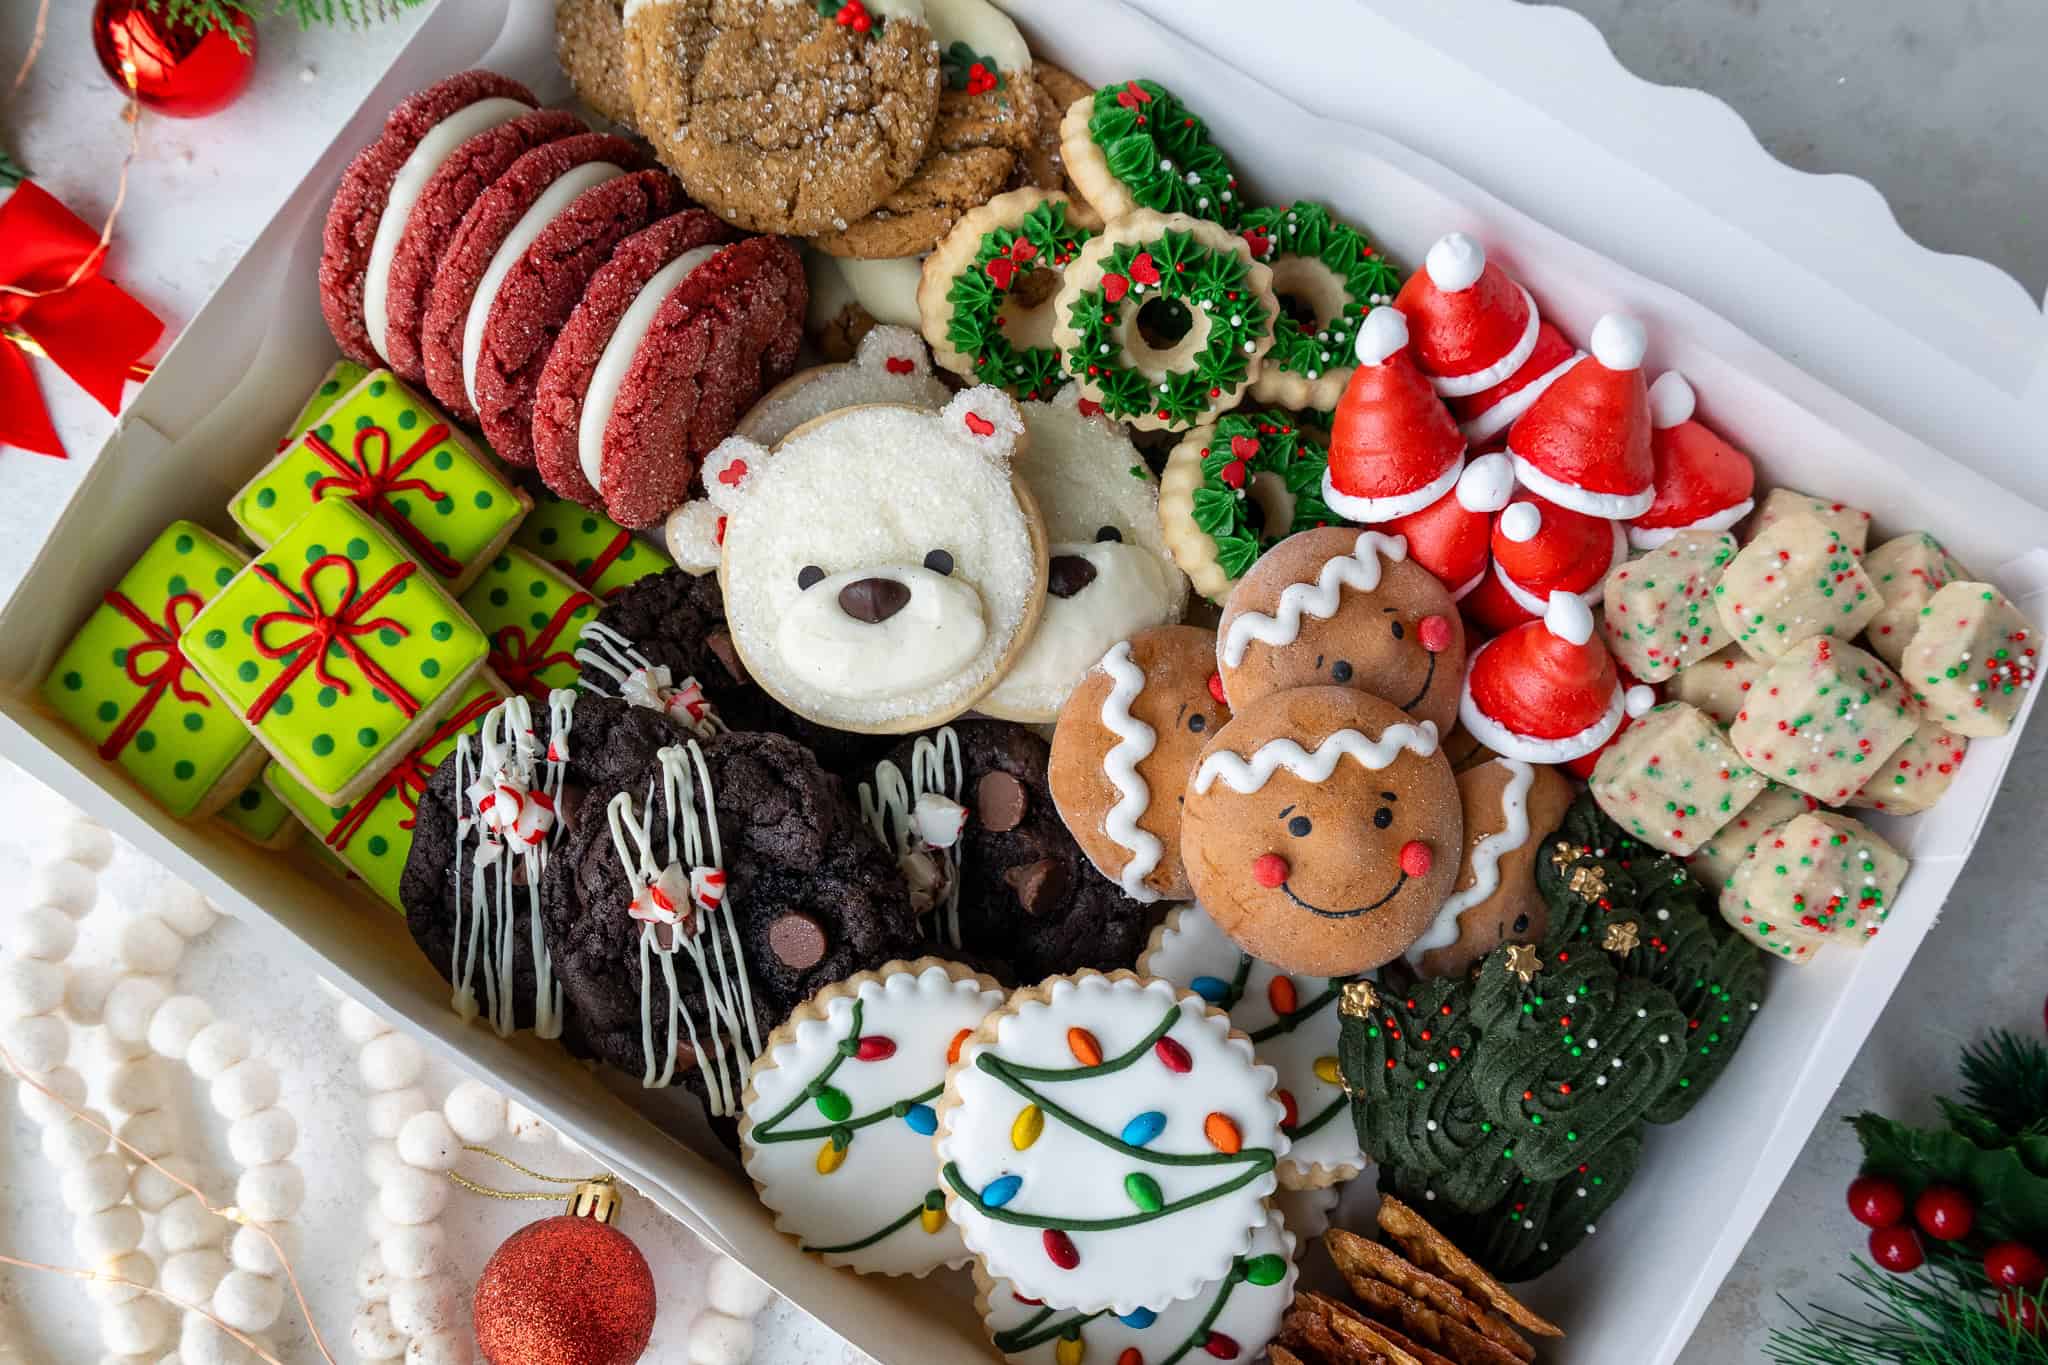
Here are the 12 cookies and treats I’m including in this year’s box, listed from top left to bottom right. Some of these are twists on existing recipes of mine, some are tried-and-true recipes that I followed to a T, and some are new recipes! I’ve added notes below for any recipes I modified for this Christmas box.
- Christmas Present Sugar Cookies – Made with my cream cheese sugar cookie dough and royal icing
- Red Velvet Sandwich Cookies
- Dipped Gingerbread Cookies – I used my gingerbread sandwich cookie recipe, skipped the buttercream, and dunked about 1/3 of each cookie in white chocolate.
- Peppermint Mocha Cookies
- Polar Bear Cookies
- Wreath Buttercream Cookies
- Christmas Lights Sugar Cookies – Made with my cream cheese sugar cookie dough and royal icing, and decorated with halved M&Ms
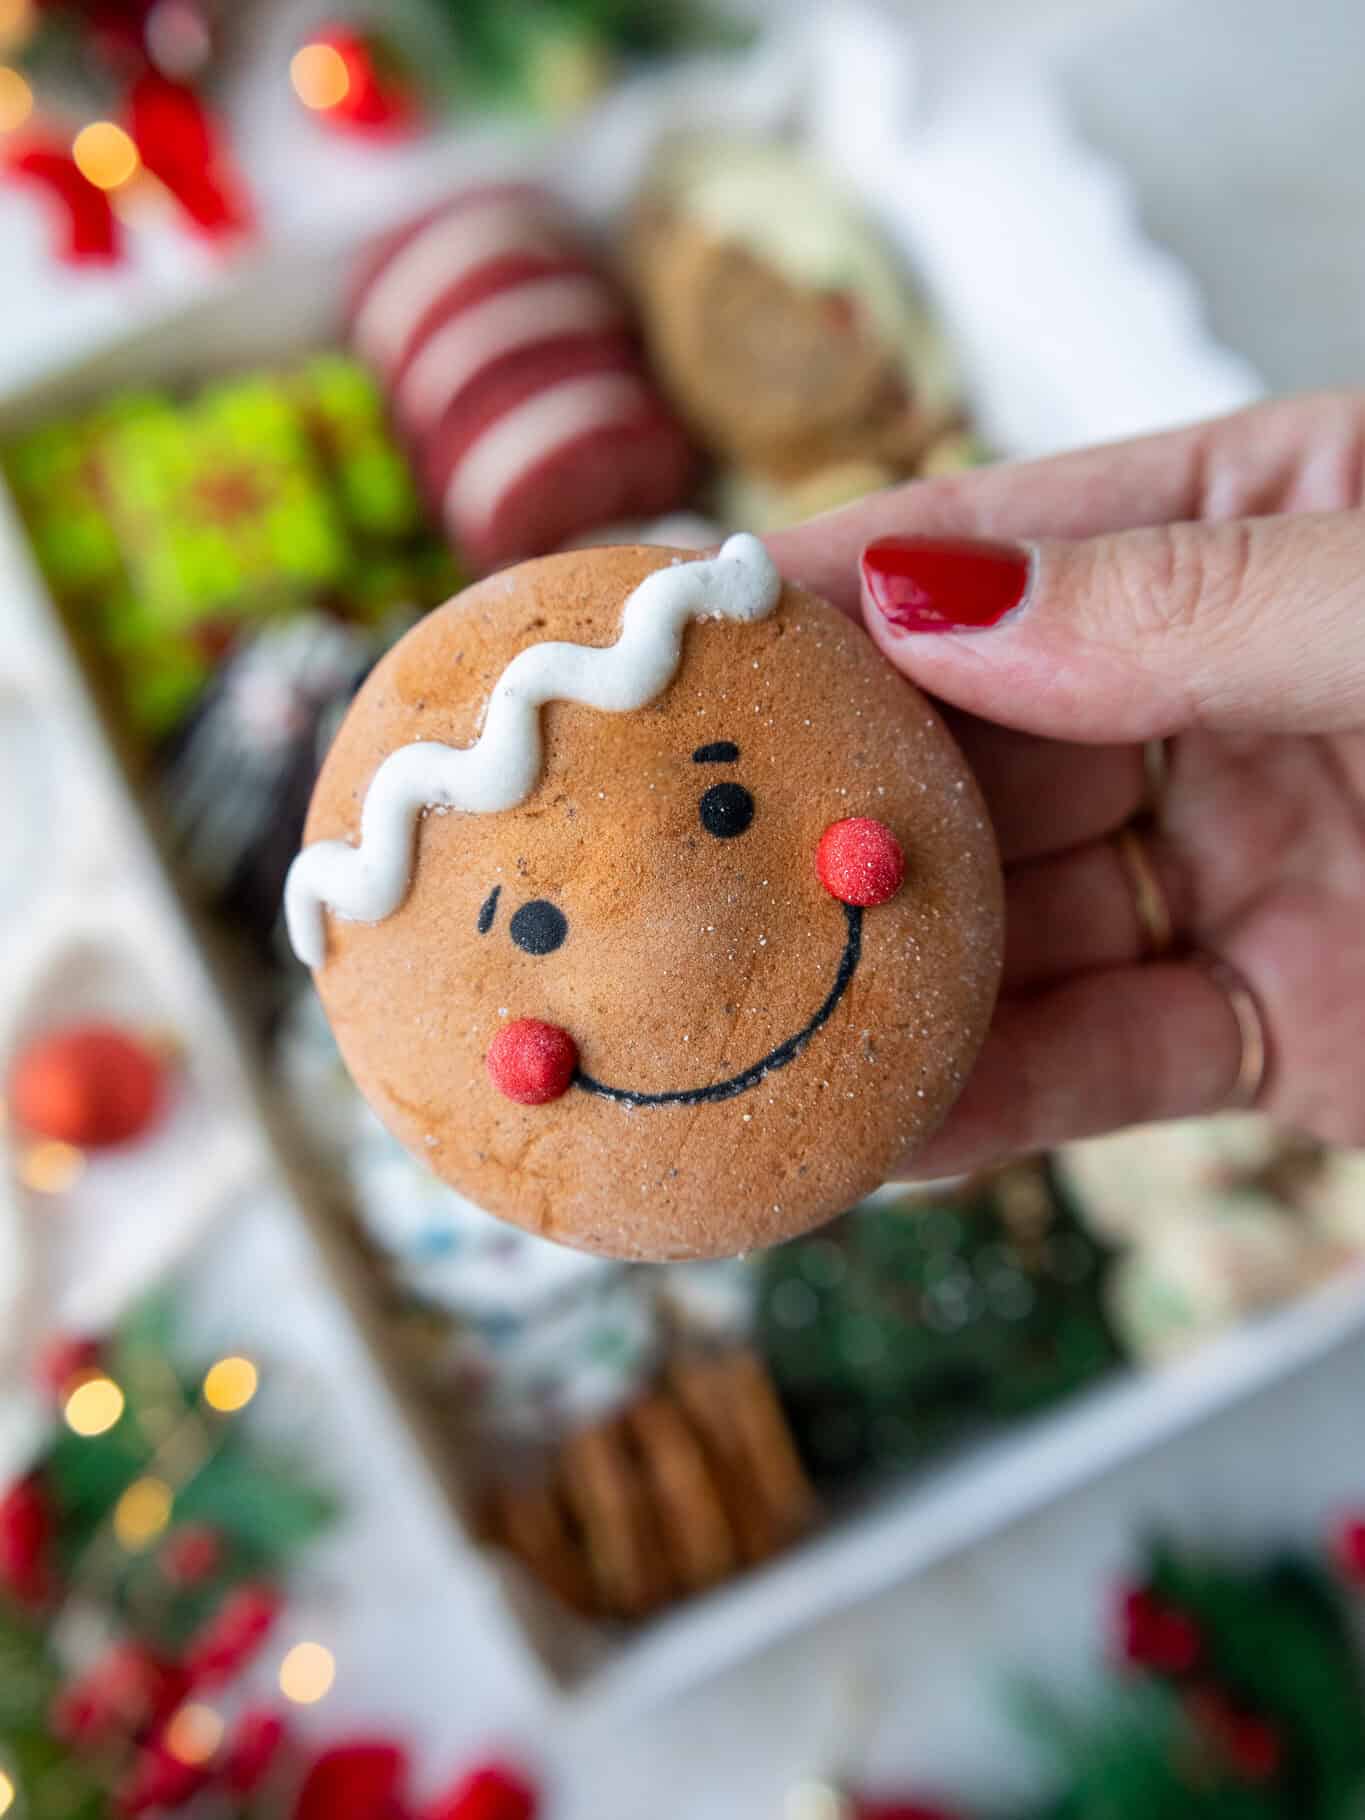
- Gingerbread Marshmallow Faces – I used my gingerbread marshmallow recipe to make these, but just made faces this year.
- Santa Hat Meringues – Color 3/4 of the meringue red and leave 1/4 white, then use a large French piping tip to pipe the hats.
- Oatmeal Lace Cookies
- Christmas Tree Butter Cookies – I used my butter cookie recipe and colored the cookie dough a deep green color, then added some Christmas nonpareil sprinkles before baking them.
- Christmas Funfetti Shortbread Cookies – Swap out the rainbow sprinkles for Christmas nonpareil sprinkles.
Picking Out the Perfect Mix of Cookies
The key to a beautiful Christmas cookie box is choosing cookies that look and taste different from one another. I try to think about flavor, texture, shape, size, and color while I’m planning the assortment.
I like to think about how all the flavors will pair together, and how I can create a cohesive assortment. For example, you might not want to set peppermint cookies and peanut butter cookies next to each other in a box, as some of the flavors can mingle over time.
Shape matters just as much. A box filled with only large round cookies can end up with awkward gaps, while a mix of larger statement cookies and smaller cookies is much easier to arrange. The present cookies, polar bears, wreaths, sandwich cookies, and Santa hats give this box a lot of visual variety.
Color is another thing I think about when I plan the box. I wanted plenty of classic red, green, white, and brown throughout this assortment so the finished box immediately feels like Christmas.
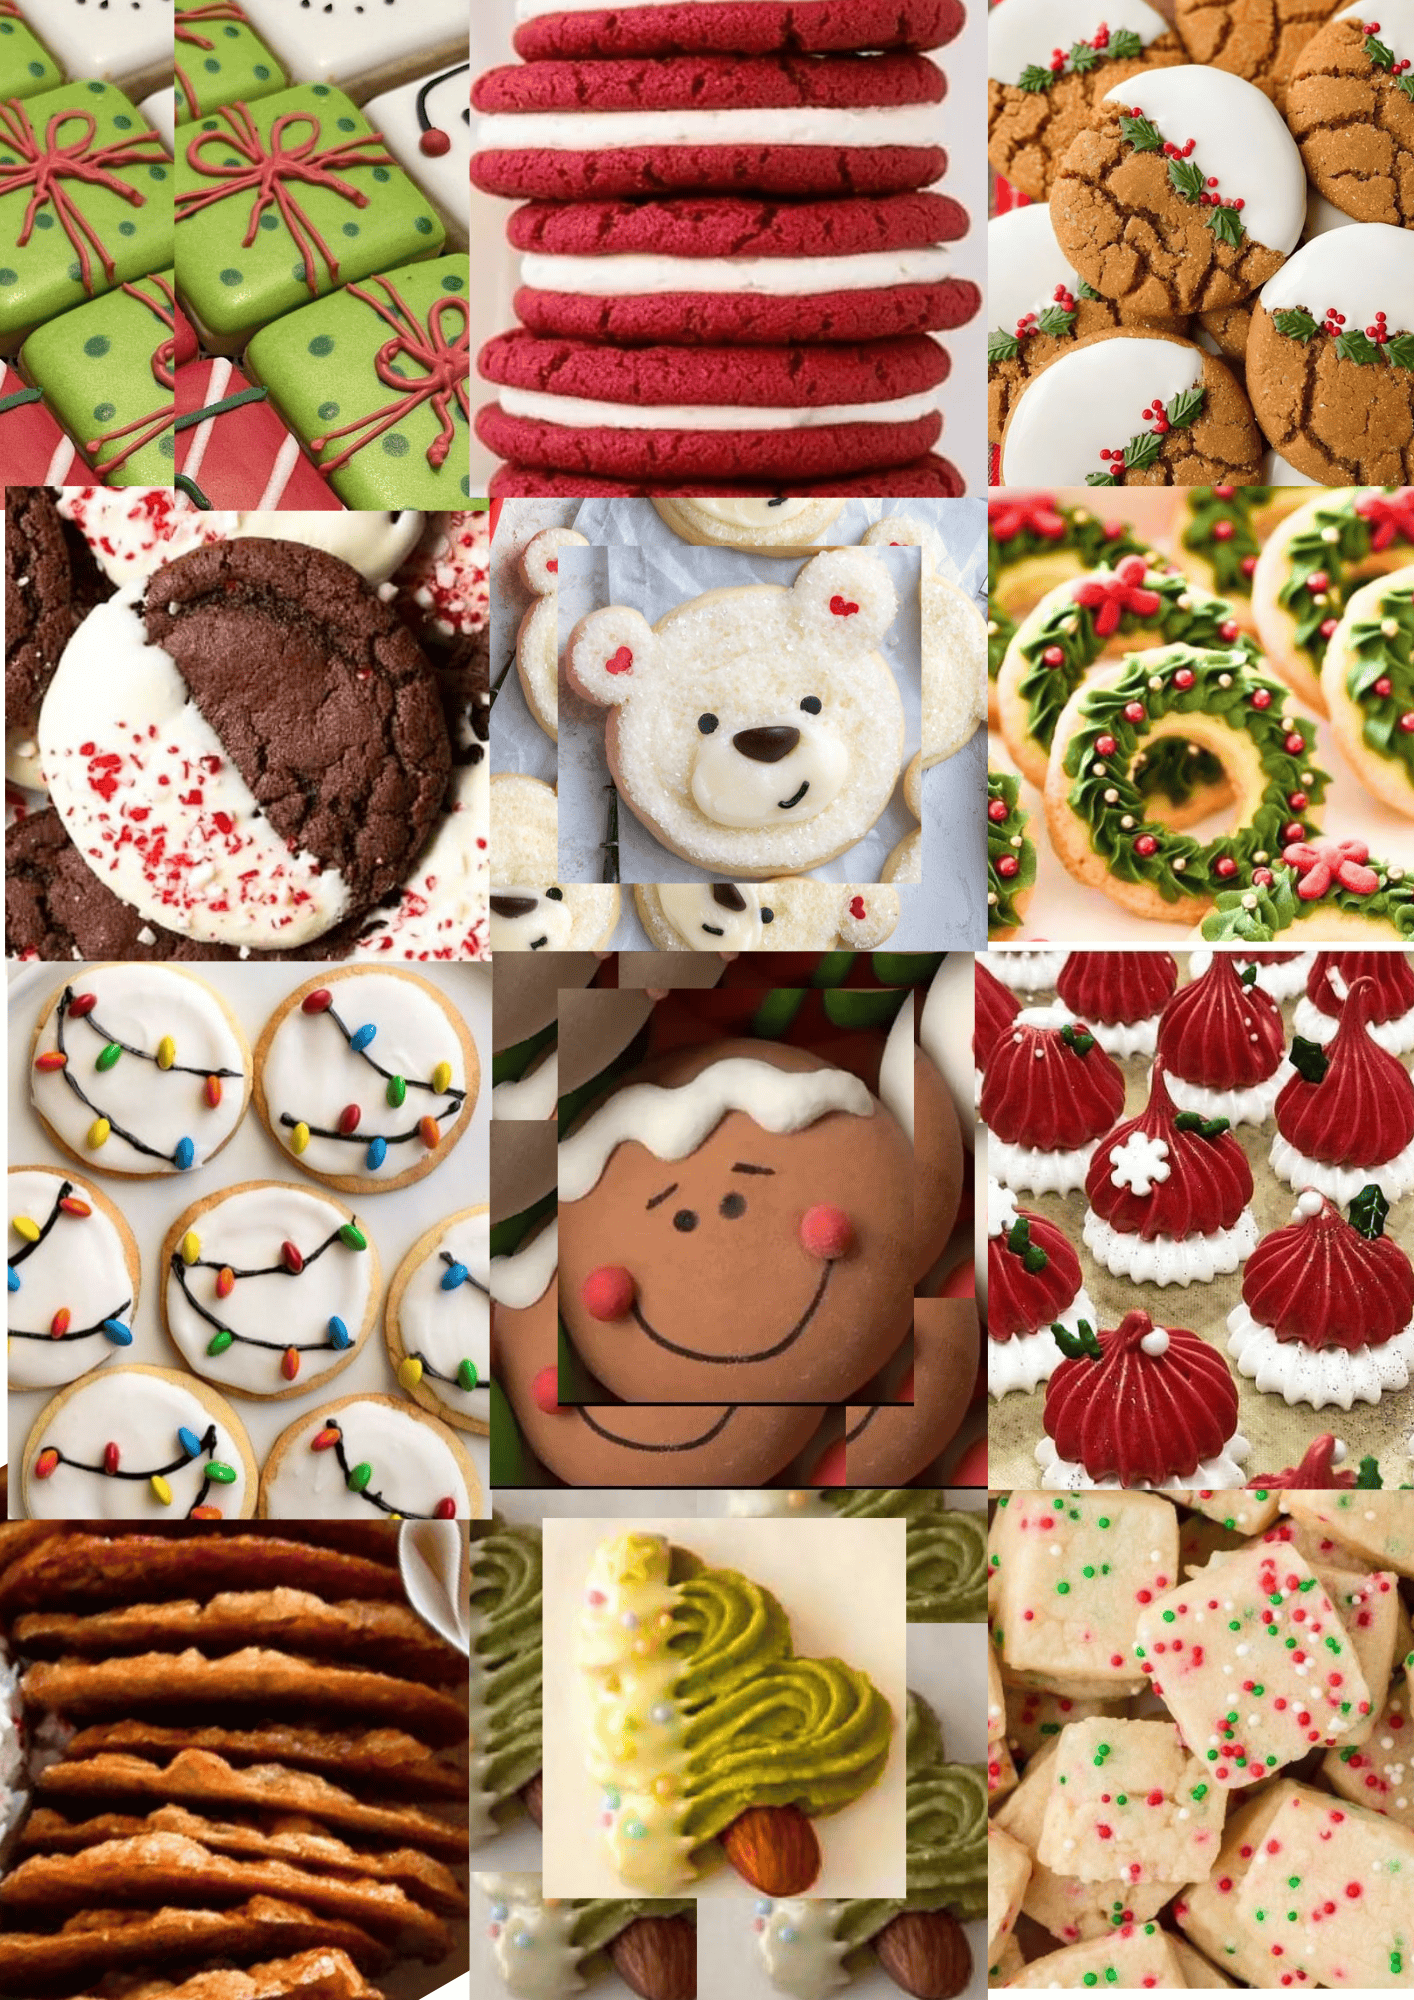
If you’re a planner like me, it can be really helpful to make a quick grid with pictures of each cookie before you bake (I use Canva to do this). It gives you a rough idea of how the colors and shapes will look together and makes it easier to spot if the assortment feels too repetitive.
How to Make Cookies in Advance for Christmas Cookie Boxes
Once you know what you want to include, the next step is figuring out your baking timeline. Making 12 different cookies and treats in one day would be just about impossible, so I strongly recommend breaking the process into phases.
I usually spread the baking over several days and group recipes together based on the type of dough, how involved the decorating is, and whether the finished cookies can be frozen. This also makes it easier to pair one time-consuming cookie with one or two simpler recipes.
Step 1: Figure Out How Many Batches You Need
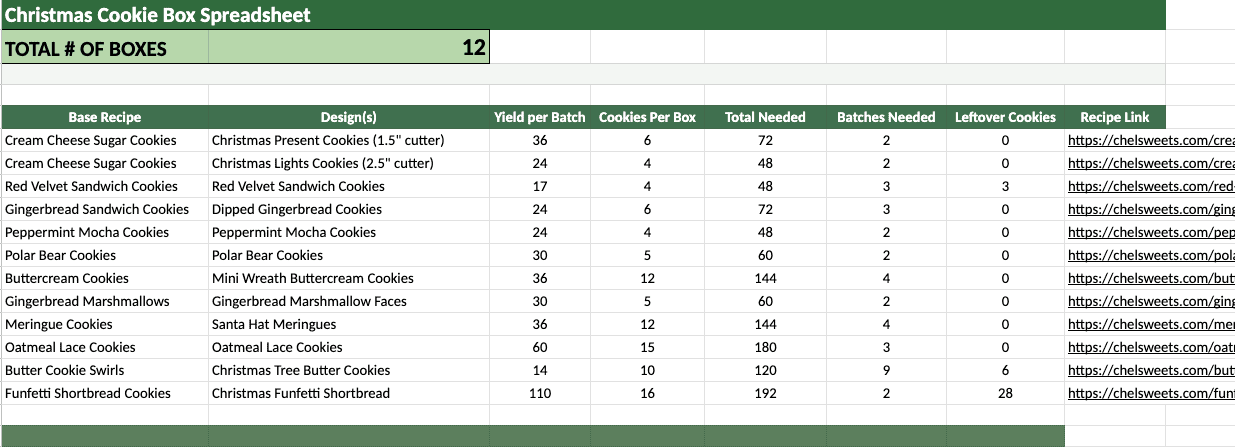
Before you start baking, look at the yield of every recipe and decide how many of each cookie you want to put in each box. Then multiply that by the total number of boxes you plan to make.
I like to make a spreadsheet (you can download a copy of it here for free and then edit it for your own cookie boxes) with the cookie name, the yield per batch, the number I want in each box, and the number of boxes I’m making. From there, it’s easy to calculate how many batches of each recipe I need.
This is especially helpful because the cookies in this box are very different sizes. You might only need a few large decorated cookies per box, but you may want a ton of smaller cookies like the oatmeal lace cookies or shortbread bites.
Step 2: Group Similar Recipes Together
Once you know how many batches you need, look for ways to group recipes together. I like to pair cookies that use similar decorating supplies or base recipes, and I also try to balance more detailed cookies with easier recipes.
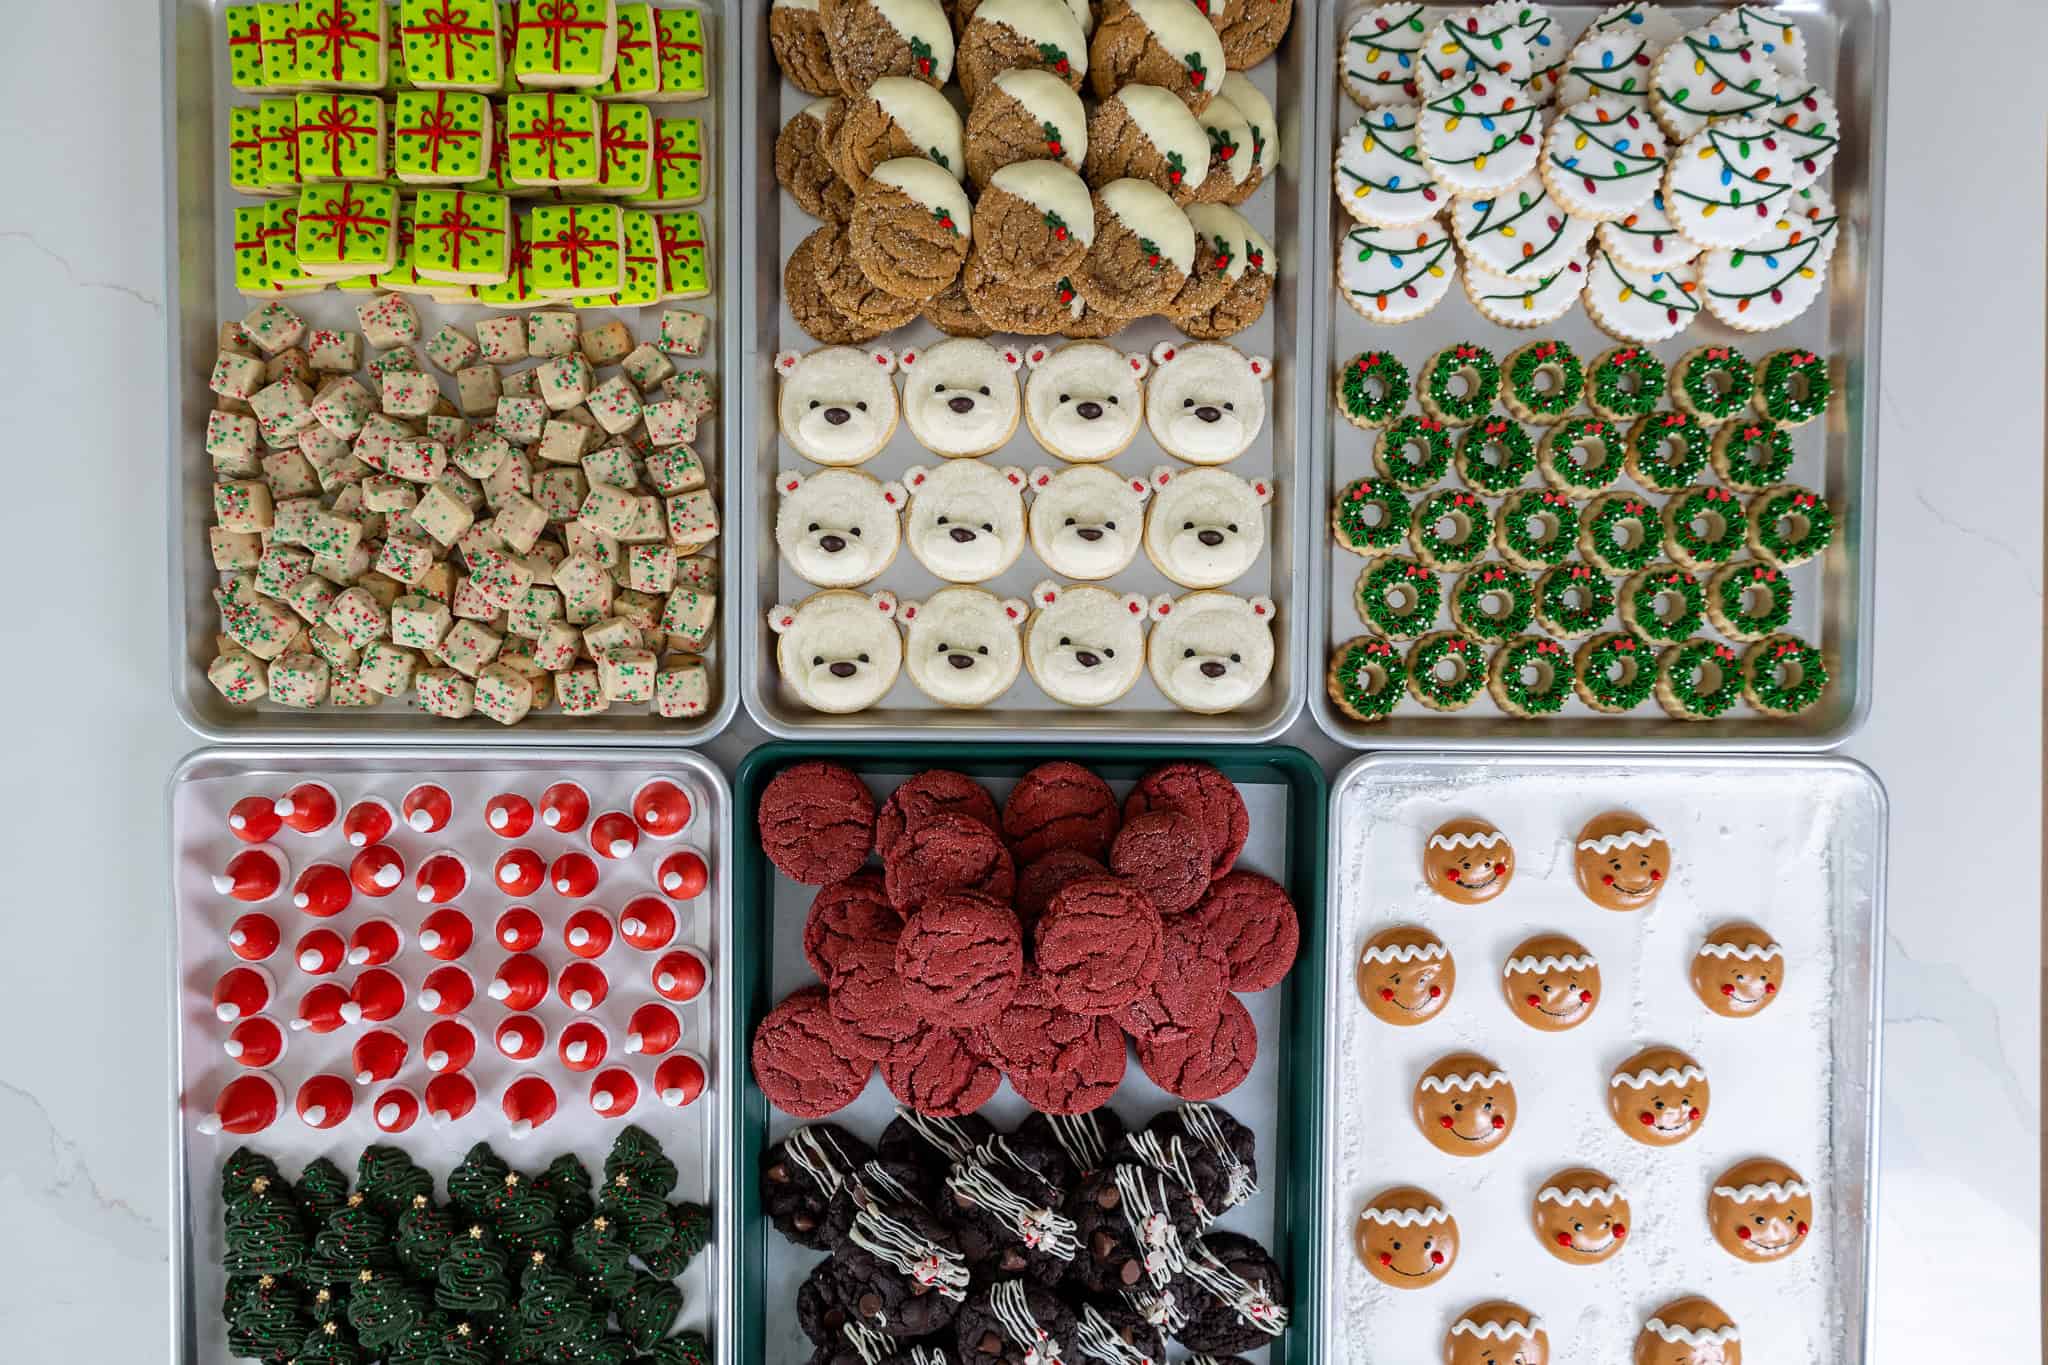
For this year’s assortment, the Christmas present cookies and Christmas lights cookies both use my cream cheese sugar cookie base and royal icing, so it makes sense to make them at the same time (I made a double batch of dough and icing). The polar bear cookies and wreath cookies also fit together nicely because both use the same base and are decorated with buttercream.
A sample four-day schedule for this assortment could look like this:
- Day 1: Christmas Present Sugar Cookies, Christmas Lights Sugar Cookies, and Christmas Funfetti Shortbread Cookies (double batch of dough for the present cookies and Christmas lights cookies because they use the same dough, and a double batch of royal icing for the present and Christmas lights cookies).
- Day 2: Red Velvet Sandwich Cookies, Dipped Gingerbread Cookies, and Peppermint Mocha Cookies (melt a double batch of white chocolate and dip and drizzle the gingerbread and peppermint mocha cookies all in one go).
- Day 3: Polar Bear Cookies, Wreath Buttercream Cookies, Christmas Tree Butter Cookies, and Oatmeal Lace Cookies (double batch of dough because the polar bears and wreaths use the same cookie dough base/buttercream).
- Day 4: Gingerbread Marshmallow Faces and Santa Hat Meringues. I’d save these for the end because the marshmallows don’t freeze well and meringues are best kept dry at room temperature.
You definitely don’t have to follow that exact schedule. The goal is just to keep each baking day manageable and save the most delicate or least freezer-friendly treats for last.
Step 3: Store and Freeze the Cookies Properly
If you’re baking in advance, let every cookie cool completely before storing it. For cookies that freeze well, I like to place them in airtight containers or freezer bags with parchment paper between the layers.
If a cookie has delicate decorations, freeze it in a single layer first so the decoration can firm up before stacking. Strongly flavored cookies, especially peppermint cookies, should be kept in their own container or freezer bag so their flavor doesn’t transfer to everything else.
The gingerbread marshmallows are the exception in this assortment. They don’t freeze well, so I’d make the gingerbread marshmallow faces close to the day you assemble the boxes and store them in an airtight container at room temperature.
I also keep the Santa Hat Meringues at room temperature and make them as close to assembly day as possible. Moisture is the enemy of meringues, so keeping them dry is the most important thing.
Step 4: Choose the Right Cookie Boxes
The size of the box you need depends on how many types of cookies you’re including and how many of each cookie you want to add. For an assortment this large, I like a rectangular box that gives me enough space to create little clusters of cookies rather than stacking everything on top of one another.
If you use a lightweight bakery box, place a greaseproof cardboard cake board underneath the cookies. Once a box is filled with cookies, it can get surprisingly heavy, and the board makes the whole thing much easier to carry.
I also like to line the inside of the box with white parchment paper and wrap a red ribbon around each box. It makes the box look more finished and gives it that homemade holiday-gift feel.
Step 5: Assemble the Christmas Cookie Boxes
This is my favorite part. Start with the biggest or most eye-catching cookies and place those first, then use the smaller cookies to fill in the gaps.
Try to spread out similar colors and shapes instead of grouping them all in one corner. You can also turn some cookies on their sides, overlap them slightly, or tie small stacks together with twine to give the box more dimension.
Once everything is arranged, you can add a ribbon, bow, and/or gift tag to make each cookie box feel even more special.
How Far in Advance Can You Assemble Christmas Cookie Boxes?
Even if you bake and freeze most of the cookies ahead of time, I recommend assembling the actual boxes as close to the time you plan to give them away as possible.
Cardboard cookie boxes aren’t airtight, so once everything is assembled, the cookies will gradually start to lose freshness. I generally try to assemble my boxes no more than a day or two before I plan to share them.
The exact window also depends on what’s in your box. Cookies with buttercream or softer fillings have a shorter room-temperature shelf life than sturdy shortbread or crisp cookies, so always use the most perishable cookie in the assortment to guide your timing.
How to Ship Christmas Cookies
If you want to ship your cookie boxes, I recommend packing them a little differently than you would for a local gift box. Choose sturdy cookies, package similar cookies together, and make sure there isn’t room for anything to slide around.
Freezer zip-top bags are my favorite option for keeping cookies fresh during shipping, but individual cellophane bags also work if you want a prettier presentation. Seal everything well before placing it into the shipping box.
Use bubble wrap or another protective packing material around the cookies, especially around delicate shapes. Fill any extra space in the shipping box so the cookies can’t shift around in transit.
I’d also be cautious about shipping the gingerbread marshmallow faces, Santa Hat Meringues, or buttercream cookies unless you know they’ll arrive quickly and stay protected.
Let Me Know What You Think!
I hope this helps you plan your own Christmas cookie boxes! If you make a box inspired by this year’s assortment, I’d love to hear what you include and how it turns out.