
Sugar Cookie Sandwiches
These sugar cookie sandwiches are the perfect treat! They bake up with crisp edges and soft, chewy centers and are filled with homemade cream cheese buttercream.
With a hint of citrus (if you choose), they’re the perfect balance of sweet, tangy, and utterly irresistible.

How to Make These Sugar Cookie Sandwiches
Let’s walk through each step of this recipe to ensure your cookie sandwiches turn out absolutely perfect. I’ve also shared the tools I used to make these below.
Not all of these tools are mandatory, but they definitely make the process easier. If you don’t have everything on hand, feel free to improvise with what you have.
- Hand mixer or stand mixer
- Parchment paper or silicone baking mats
- 2 large baking sheets
- 1 1/2 Tbsp cookie scoop
- Zester – optional
Step 1: Make the Cookie Dough
Preheat the oven to 350 F / 175 C and line two large baking sheets with silicone baking mats or parchment paper. Set aside.
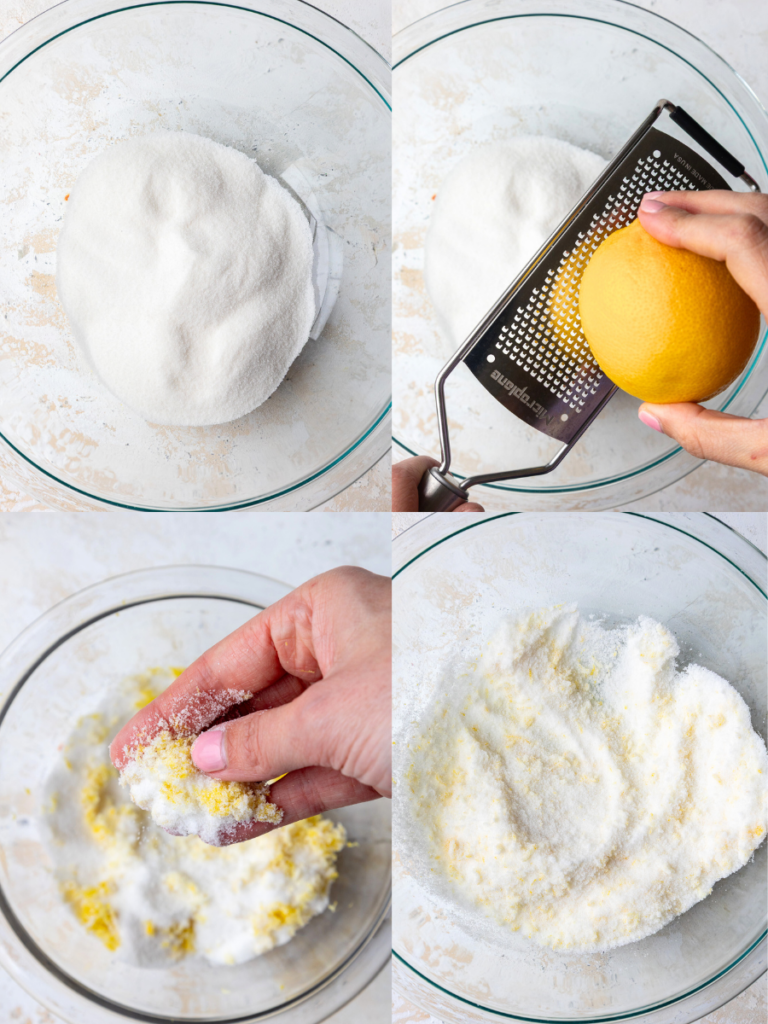
The first step is to massage the lemon or orange zest into the sugar with your fingertips – this releases the essential oils and creates an incredibly flavorful sugar base.
However, if you aren’t adding citrus to these, you can skip this step.
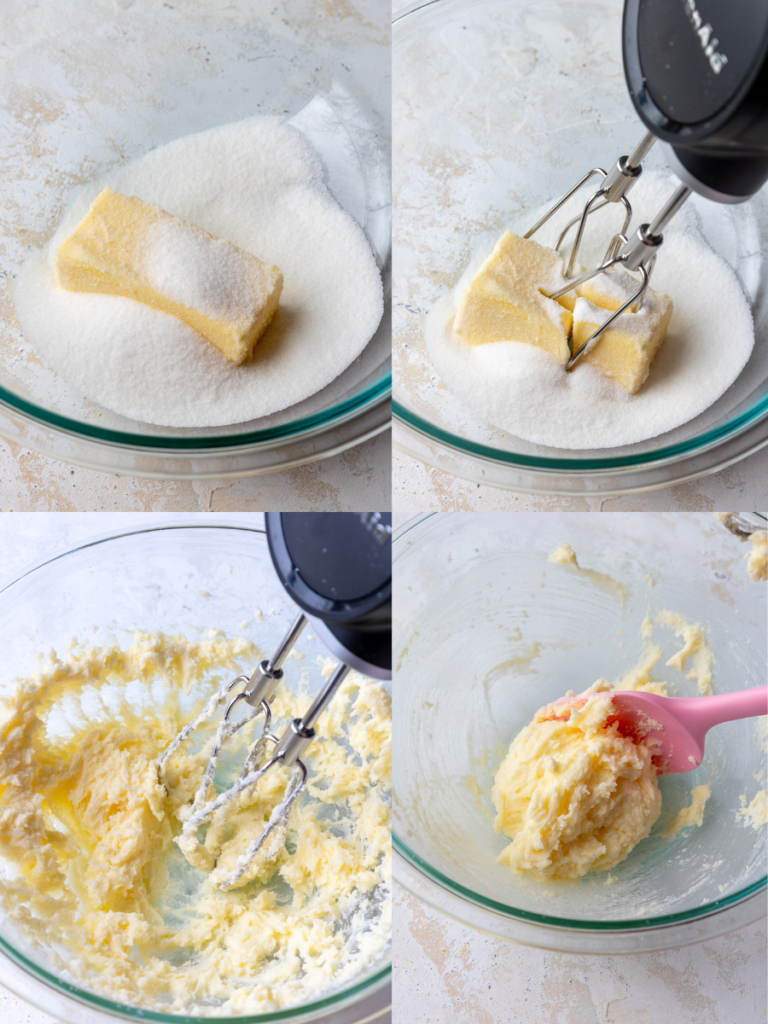
Then, cream the butter and citrus sugar together on a medium-high speed for a couple of minutes, until the mixture becomes lighter in color.
This incorporates air into the dough, which helps create that perfect cookie texture.
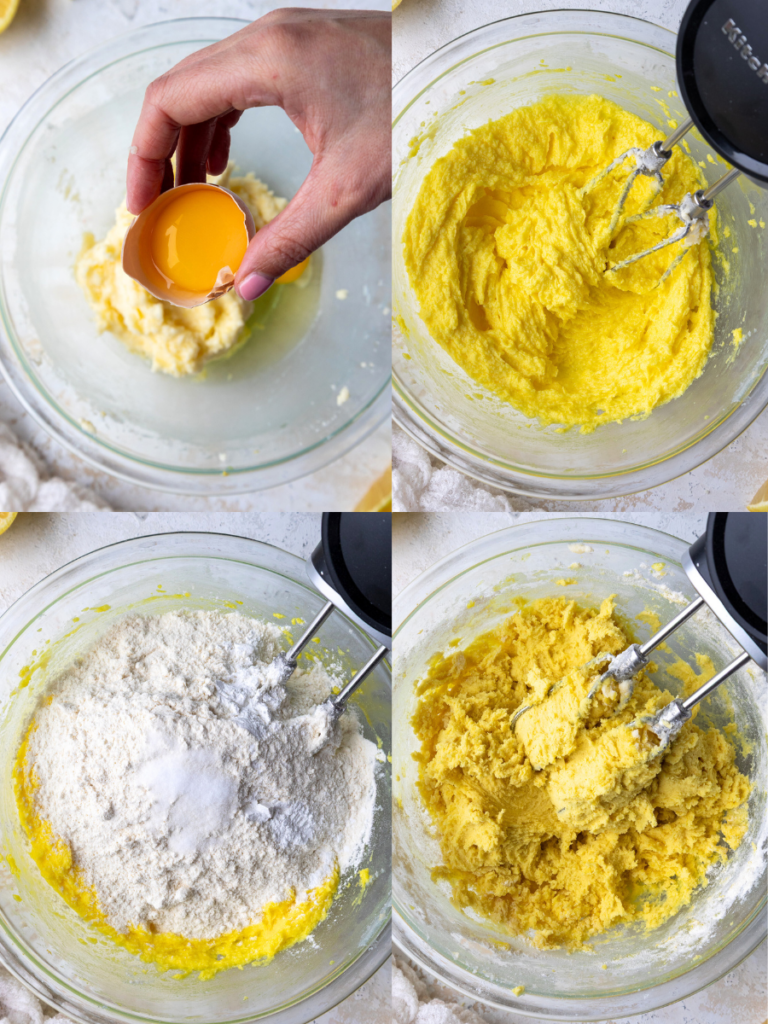
Next, add the egg and egg yolk, vanilla, and food coloring. I love adding a tiny drop of gel food coloring to make these cookies even more fun, but this is optional!
Then, mix in the flour (use a scale or fluff the flour in the bag, then spoon it into the measuring cup and level it), baking powder, and fine salt.
Mix on low speed until it is JUST incorporated. Scrape the sides of the bowl with a rubber spatula.
Mix until JUST incorporated to avoid developing too much gluten, which can lead to tough cookies.
Step 2: Scoop, Roll, and Bake
Then add 1/2 cup of granulated sugar and 1 Tbsp lemon or orange zest (optional) into a shallow bowl and again use your fingertips to massage the zest into the sugar.
Use a 1 1/2-Tbsp cookie scoop to scoop the dough into balls (you should end up with about 30 cookies), then roll them in sugar until they’re evenly coated.
Rolling the cookie dough balls in sugar before baking creates that gorgeous sparkly exterior and enhances their crispy edges.
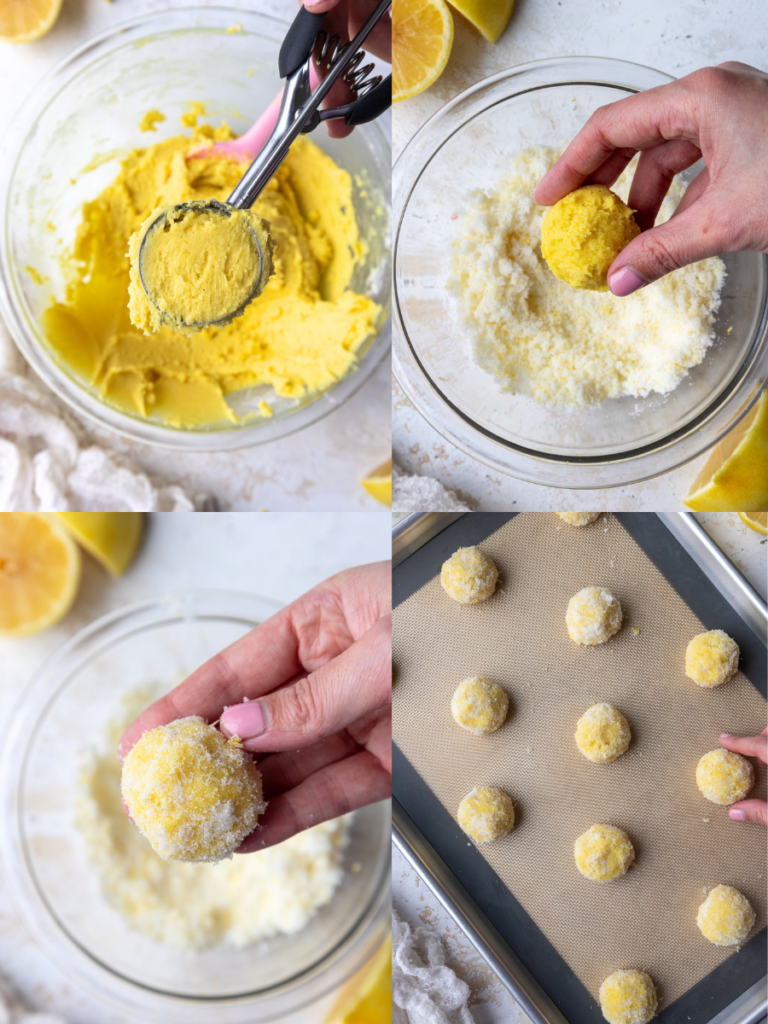
Place them on the baking tray with plenty of room to spread – about 3 inches apart.
Bake for 10-11 minutes, or until the edges of the cookies are set but the centers are still a bit soft.
Cool for 15 minutes on the pan, then move the cookies to a wire rack to finish cooling.
The key to perfect cookies is slightly underbaking them. You want the edges set but the centers still a bit soft when you pull them from the oven.
They’ll continue baking from residual heat on the baking sheet, resulting in that perfect chewy center we’re all after.
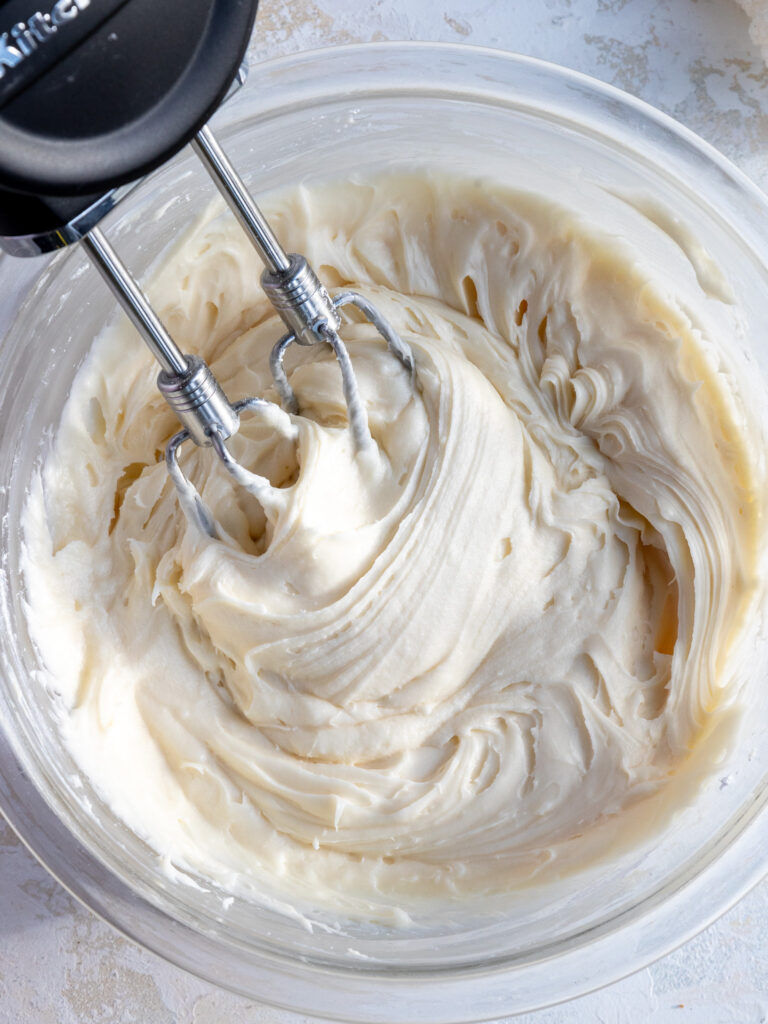
Step 3: Make the Cream Cheese Buttercream
While the cookies cool, make the delicious cream cheese buttercream.
Make sure your butter and cream cheese are properly softened for best results. If they’re still cold, you’ll end up with lumps!
The buttercream should be soft enough to pipe, but thick enough to keep its shape. If yours seems too thick, add a splash of milk or heavy cream.
Or, if it’s too thin, you can add more powdered sugar.
I love adding citrus zest to the frosting to complement the cookies, but you can also try almond extract for a different flavor profile.
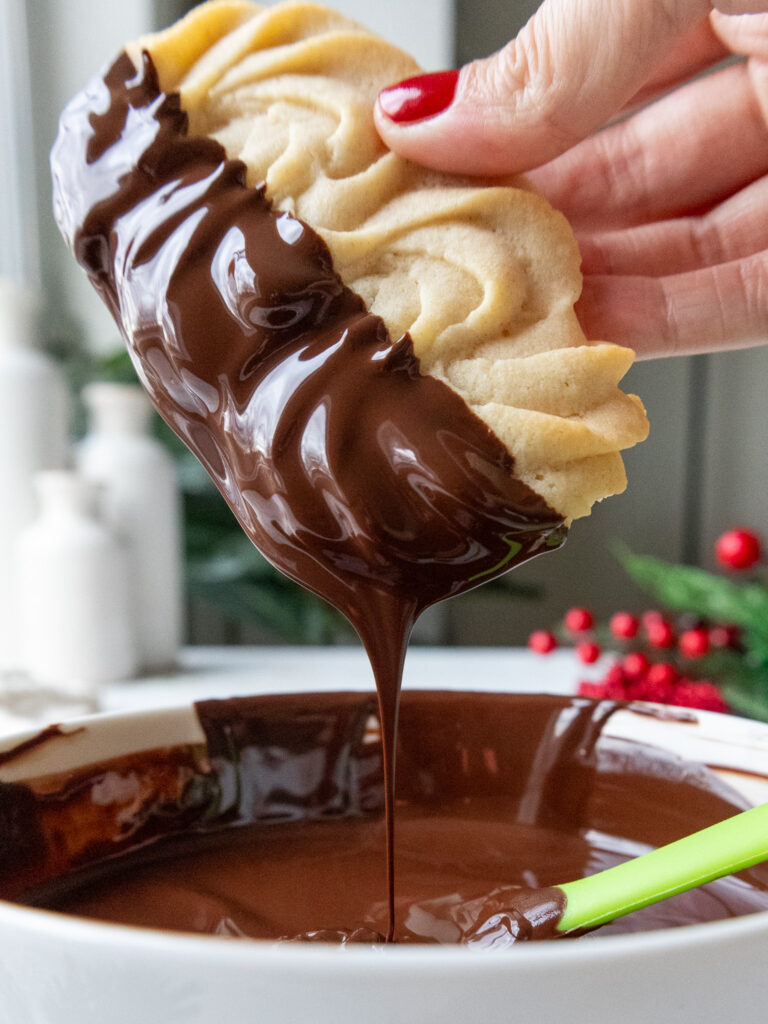
Step 4: Assemble the Cookie Sandwiches
Once the cookies are completely cool, it’s assembly time!
Pair up your cookies by size – they should be relatively similar, but there are always some variations.
Pipe a generous swirl of buttercream on the bottom of one cookie, then gently press another cookie on top.

Be careful not to press too hard – you don’t want the filling to squish out the sides!
Substitutions & Swaps
- All-purpose flour: You can use a gluten-free flour blend instead. Just be sure to use a good baking blend like King Arthur’s GF flour.
- Butter: Unsalted is preferred, but if you only have salted, just omit the additional salt in the recipe.
- Cream Cheese – Unsalted butter can be used in place of the cream cheese if you’re not a fan.
- Eggs: For an egg-free version, try a flaxseed egg substitute (1 tablespoon ground flaxseed mixed with 3 tablespoons water per egg).
- Citrus zest: If you don’t want to incorporate citrus, try adding 1 1/2 teaspoons of almond extract to the cookie dough and 2 teaspoons to the buttercream for a delicious almond sugar cookie sandwich.
- Food Coloring: Completely optional! These cookies are gorgeous with or without added color.
Making These Sugar Cookie Sandwiches in Advance
These cookie sandwiches can be stored at room temperature for a few hours, but they’re best kept in the fridge for up to 5 days in an airtight container.
The cream cheese in the filling means they shouldn’t sit out too long, especially in warm weather.
You can also freeze these treats for up to 3 months! I recommend freezing the cookies and buttercream separately, then assembling them when you’re ready to enjoy them.
The cookie dough balls can be frozen for up to a month. I like to thaw them in the fridge overnight before baking.
How to Make the Best Sugar Cookie Sandwiches
- Cream thoroughly: Really take your time creaming the butter and sugar. This incorporates air and creates a better texture.
- Don’t overwork the dough: Once you add the flour, mix gently just until combined to avoid tough cookies.
- Slightly underbake: Pull the cookies from the oven when the edges are set but the centers are still soft.
- Match sizes carefully: Pair cookies of similar sizes for the most professional-looking sandwiches.
- Room temperature ingredients: Make sure your butter and cream cheese are properly softened for the smoothest frosting.
Let Me Know What You Think!
If you make these sugar cookie sandwiches, I’d love to hear what you think! Please leave a rating and comment below.
Don’t forget to tag me @chelsweets and #chelsweets if you share on social media! I absolutely love seeing your delicious creations.
Other Recipes You Might Like:


Sugar Cookie Sandwiches
Ingredients
Sugar Cookies
- 1 1/4 cups granulated sugar 250g
- 1 Tbsp fresh orange or lemon zest – optional 7g*
- 1 cup (2 sticks) unsalted butter, room temperature 226g
- 1 large egg + 1 egg yolk 76g
- Gel food coloring – optional
- 1 tsp vanilla extract or vanilla bean paste 5g
- 2 1/2 cups all-purpose flour – fluffed then spooned and leveled 325g
- 2 tsp baking powder 8g
- 1 tsp fine salt 6g
Cream Cheese Buttercream Frosting
- 1/2 cup unsalted butter, room temperature 113g
- 1/2 cup cream cheese, room temperature 113g
- 1 Tbsp vanilla extract or vanilla bean paste 15g
- 1 Tbsp fresh orange or lemon zest – optional 7g*
- 1/2 tsp fine salt 3g
- 3 cups powdered sugar 375g
- 2 Tbsp heavy cream or milk, room temperature 30g
Sugar Coating
- 1/2 cup granulated sugar 100g
- 1 Tbsp fresh lemon zest – optional 7g*
Recommended Tools
Instructions
Citrus Sugar Cookies
- Preheat the oven to 350 F / 175 C and line two large baking sheets with silicone baking mats or parchment paper. Set aside.
- Add 1 1/4 cup of granulated sugar and 1 Tbsp lemon or orange zest into a large bowl or the bowl of a stand mixer. Use your fingertips to massage the zest into the sugar to help release the oil in the zest. You should be able to smell the oils being incorporated into the sugar.
- Add 1 cup butter into the bowl with the lemon sugar and mix on a medium-high speed for a couple of minutes, until the mixture becomes lighter in color.
- Then mix in 1 large egg + 1 large egg yolk, 1 tsp vanilla extract, and a small drop of gel food coloring (optional) on a medium speed until fully incorporated. Scrape the sides and bottom of the bowl as needed with a rubber spatula.
- Add 2 1/2 cups or 325g of flour (use a scale or fluff the flour in the bag, then spoon it into the measuring cup and level it), 2 tsp baking powder, and 1 tsp fine salt and mix on low speed until it is JUST incorporated. Scrape the sides of the bowl with a rubber spatula.
- Add 1/2 cup of granulated sugar and 1 Tbsp lemon or orange zest (optional) into a shallow bowl and again use your fingertips to massage the zest into the sugar.
- Use a 1 1/2-Tbsp cookie scoop to scoop the dough into balls (you should end up with about 30 cookies), then roll them in sugar until they're evenly coated. Place the cookies about 3 inches apart on the prepared baking sheets.
- Bake for 10-11 minutes, or until the edges of the cookies are set but the centers are still a bit soft. Cool for 15 minutes on the pan, then move the cookies to a wire rack to finish cooling.
- These cookies can be stored in an airtight container at room temperature for up to 3 days.
Cream Cheese Buttercream Frosting
- While the cookies bake and cool, make the cream cheese buttercream frosting. Beat 1/2 cup of room temperature butter and 1/2 cup room temperature cream cheese on a medium speed for 30 seconds with a paddle attachment, until smooth.
- Mix in 1 Tbsp vanilla extract, 1 Tbsp fresh orange or lemon zest – optional*, and 1/2 tsp salt on a low speed
- Slowly add in 3 cups powdered sugar, 1 cup at a time. Halfway through add in 2 Tbsp of heavy cream or milk to make it easier to mix.
- Beat on low until the ingredients are fully incorporated and the desired consistency is reached. Scrape the sides and bottom of the bowl with a rubber spatula as needed.
- If the frosting seems too thick, add in additional cream (1 Tbsp at a time). If the frosting is too thin, add more powdered sugar (a quarter of a cup at a time).
- Scoop the buttercream into a large piping bag fitted with a large round piping tip, or snip a 1 cm opening at the base of the bag. Set aside.
Assembling the Sugar Sandwich Cookies
- Pair up the cookies – they should all be relatively similar in size, but often, some are slightly bigger than others.
- Then pipe a generous swirl of buttercream on the bottom of one of the cookies before topping it with another. Repeat with the remaining cookies, and enjoy!
Notes
Substitutions and Swaps
Please refer to the substitutions and swaps section in the post above for all the ingredient variations that can be used in this recipe. *If you don't want to incorporate citrus into the cookie dough or buttercream, I recommend either omitting it completely or adding 1 1/2 tsp of almond extract to the cookie dough and 2 tsp into the buttercream to make almond sugar cookies.How Many Cookies Does This Recipe Make?
This recipe can be used to make about 30 cookies using a 1 1/2 Tbsp cookie scoop, which makes 15 cookie sandwiches. The yield and bake time can vary based on the size of the cookie scoop you use. If you want to make larger cookies, use a 3 Tbsp cookie scoop and bake at 350 F / 175 C for 11-12 minutes, or until the edges are set but the centers are still a bit soft. You'll end up with about 8 cookie sandwiches. This recipe can also be halved to make fewer cookies (just use one large egg) or doubled.Making These Sugar Cookie Sandwiches in Advance and Storage Tips
You can store these cookies in an airtight container at room temperature for a few hours, in the fridge for up to 5 days, or in the freezer for up to 3 months. Scooped cookie dough balls can also be frozen for up to 1 month if stored in an airtight container. I like to move the cookie dough to the fridge the night before I plan to bake the cookies.Tips for Making the Best Sugar Cookie Sandwiches
- Really cream together the butter and granulated sugar at the start of this recipe. It helps incorporate air into the dough which makes tender and soft cookies.
- Don’t overwork the cookie dough once you add in the flour! It can overwork the gluten and result in tough, dense cookies.
- Don’t overbake the cookies. Err on the side of underbaking your cookies, and remember that the cookies continue to bake for a few minutes once they’re out of the oven.
Can these be made ahead and frozen?
@Kimberly, there is a section in the post after the recipe about storage tips. It says you can freeze them for up to 3 months. I made them myself and plan to freeze them without the filling and then add that when I defrost them later!
Thanks Melissa!!! I hope your cookies turn out/freeze great 🙂
They totally can! I have a section about that in the post above and in the notes section of the recipe card 🙂 Hope that helps, happy baking!
Hi! Is your oven fan heated or top-and-bottom heated? Thank you!
Hi Leelee,
I actually don’t use a fan heated oven! I just use an electric oven without the fan setting!
Hi,
I’m allergic to eggs, can I use an egg replacer in this recipe?
Hi Yanez,
Yes, you can totally use an egg replacer in this recipe! I’ve had readers use products like Bob’s Red Mill Egg Replacer or even a flax egg (1 Tbsp ground flax + 2.5 Tbsp water, let it sit for a few minutes) with good results. Just keep in mind that the texture might be slightly softer, but they should still bake up beautifully and hold their shape.
Let me know if you give it a try—I’d love to hear how they turn out for you!
Hi! Can the buttercream be made ahead of time and refrigerated until assembling or does it have to be made when putting the cookies together?
Hi Sammi,
Great question! Yes, you can definitely make the buttercream ahead of time and store it in the fridge. Just let it come back to room temperature before using, and give it a good re-whip to bring it back to that nice, fluffy texture.
It’s a great way to break up the work if you’re prepping in advance—makes assembling the cookies way easier! You can also fill the cookies in advance if you want! They keep super well in the fridge. Hope that helps, happy baking!
Hi! Can I use lemon juice instead of the zest or almond extract? Thanks
Hi Amy,
You can, but it will change the texture of the dough a bit and make it slightly stickier/less tender. Hope that helps, happy baking!