
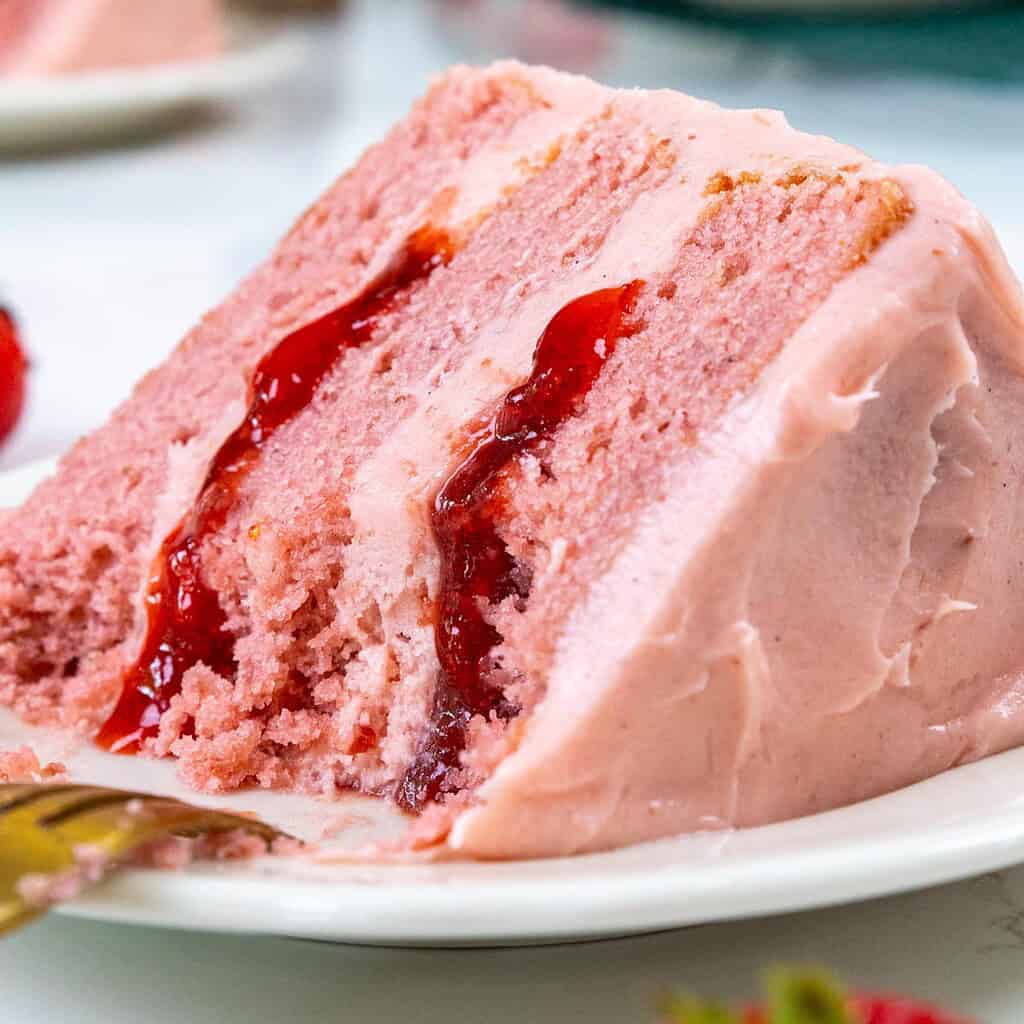
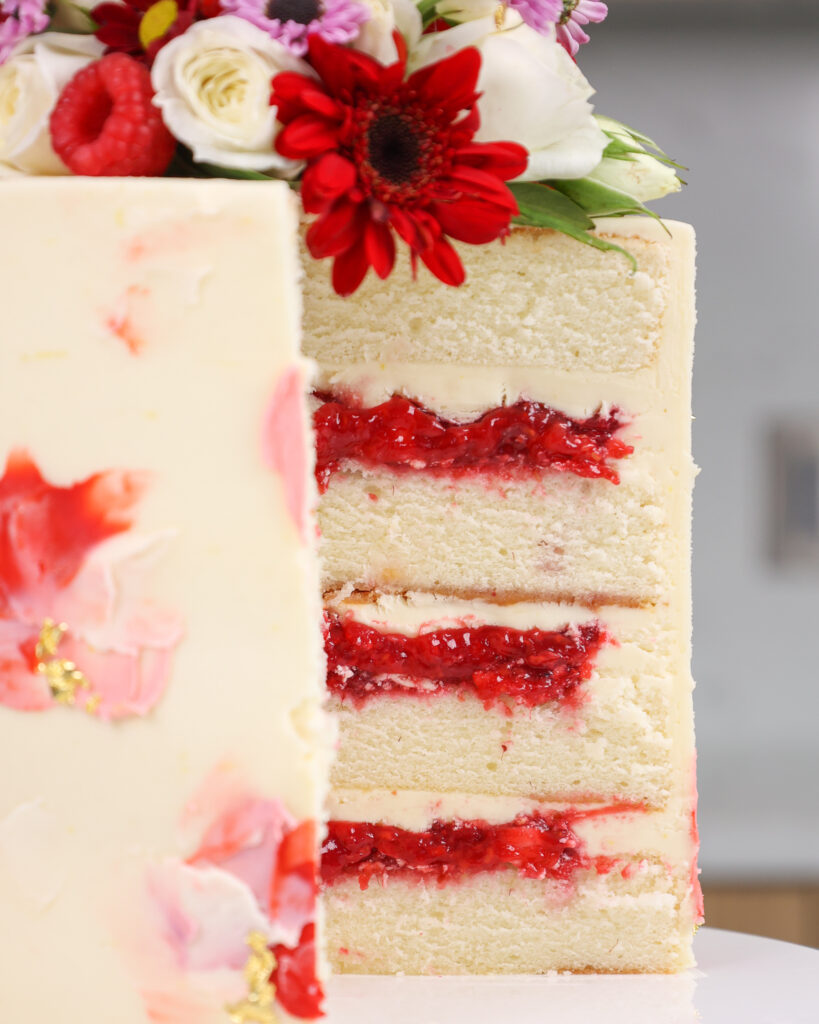
Strawberry Cake with Strawberry Filling
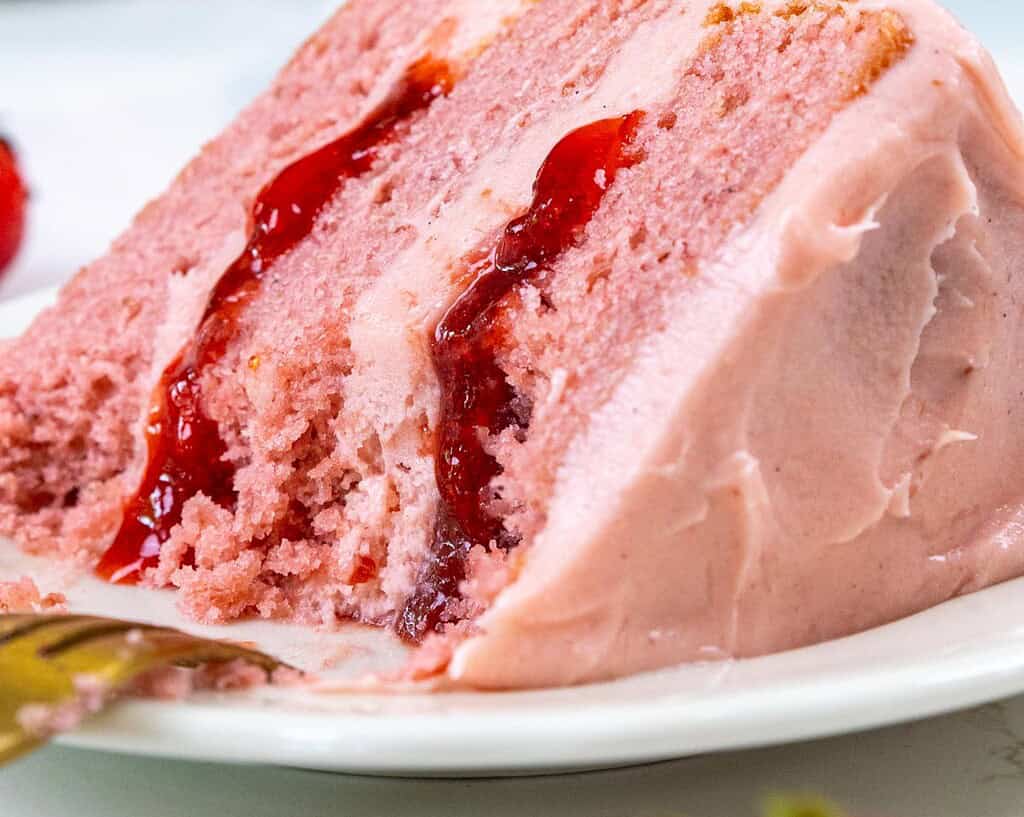
This strawberry cake with strawberry filling is the perfect summer cake! From its tender strawberry cake layers to its fluffy cream cheese strawberry frosting and homemade strawberry filling, it is a strawberry lover’s dream.
How to Make This Strawberry Cake
To make sure this cake turns out as amazing as possible, let’s walk through each step together!
I’ve also shared a detailed tutorial of this strawberry cake recipe on YouTube if you’re a visual learner.
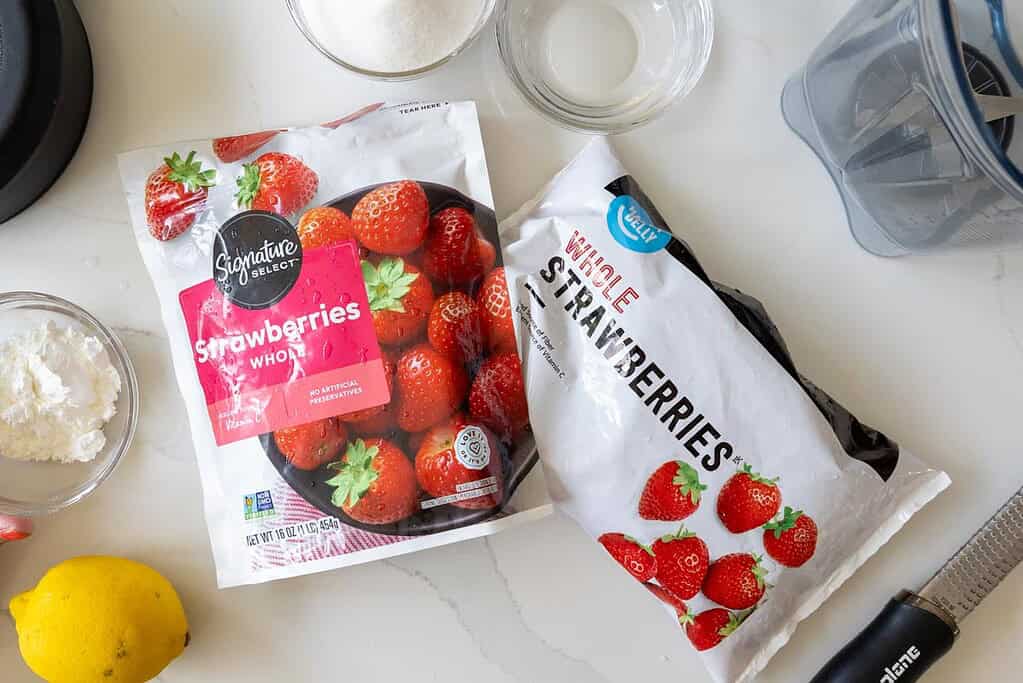
Step 1: Make the Strawberry Cake Filling
Note: This part of the recipe has about an hour of cook time and an hour of cooling time. If you’re short on time, the strawberry reduction can be made in advance and stored in the fridge for up to a week or in the freezer for up to a month.
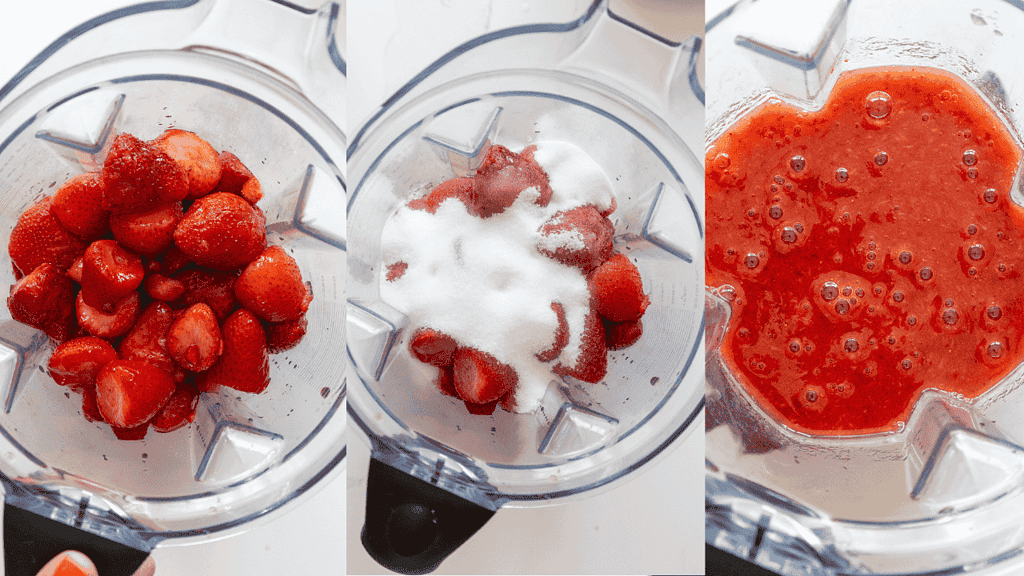
Add 6 cups of fresh or frozen (and thawed) hulled strawberries and 3/4 cup granulated sugar into a blender or food processor and blend until smooth. Pour this into a medium-sized saucepan.
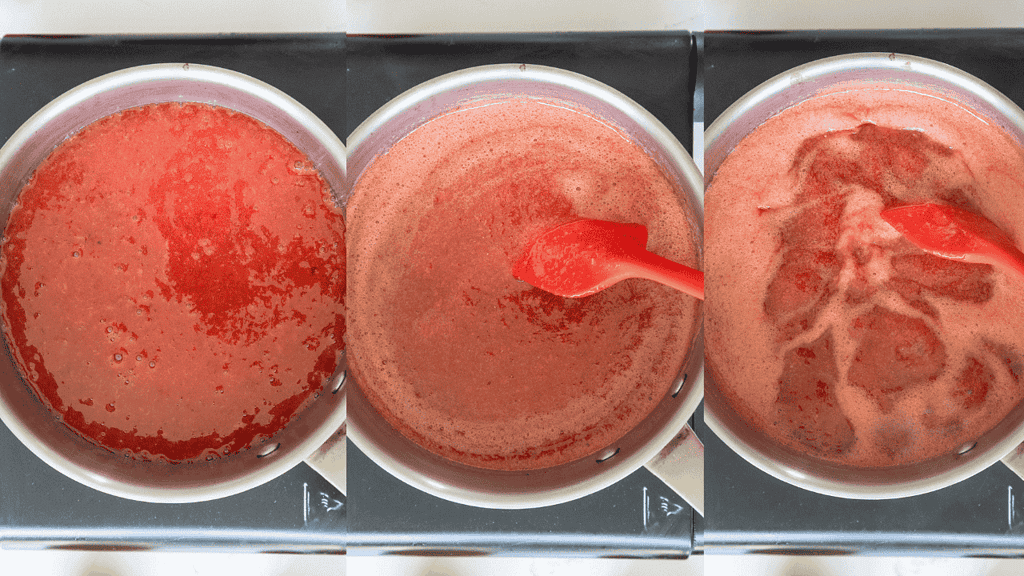
Heat over medium-high heat, stirring occasionally until the mixture begins to boil. Once it reaches this stage, lower the heat to medium-low.
Stir the mixture occasionally, and let it continue to cook down for about 50-60 minutes, or until the mixture has reduced in volume by half.
Cook time will vary based on the size of the pan you use. You should be left with about 3 cups (720g) of strawberry reduction.
I recommend pouring it into a heat-proof bowl and weighing it or using a liquid measuring cup to check before adding in the cornstarch slurry. If you have more than that, it needs to be cooked down further.
After it’s cooked down to this point, make the cornstarch slurry. In a separate small bowl, whisk together 1/4 cup of water and 1/4 cup of cornstarch until fully combined (make sure there are no lumps!).
Pour the cornstarch slurry into the strawberry mixture and stir until combined, then let the filling simmer for 5-6 minutes. At this point, the mixture should have visibly thickened and look kind of glossy.
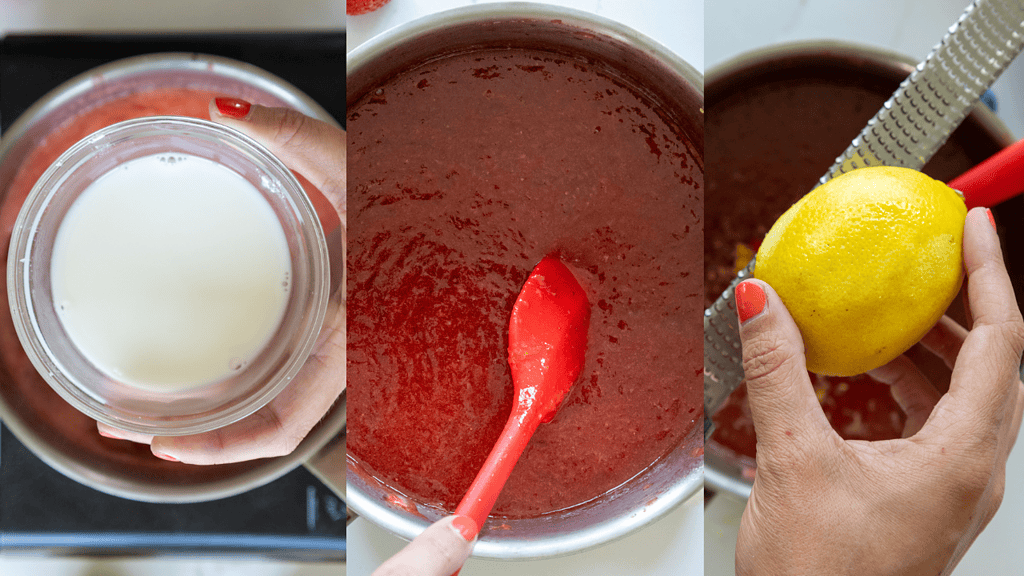
Turn off the heat, and remove the pot from the stove. Pour the filling into a separate bowl to cool, then stir in 1 Tbsp lemon juice, 2 tsp lemon zest, and a pinch of fine salt. Let the filling cool to room temperature before using it.
If you make it in advance, cover it with plastic wrap or store it in an airtight container and place it in the fridge once it’s reached room temperature.
Step 2: Make the Strawberry Cake Layers
Preheat the oven to 350°F / 175°C. Grease and line three 8-inch cake pans with nonstick spray and parchment paper rounds. Set aside.
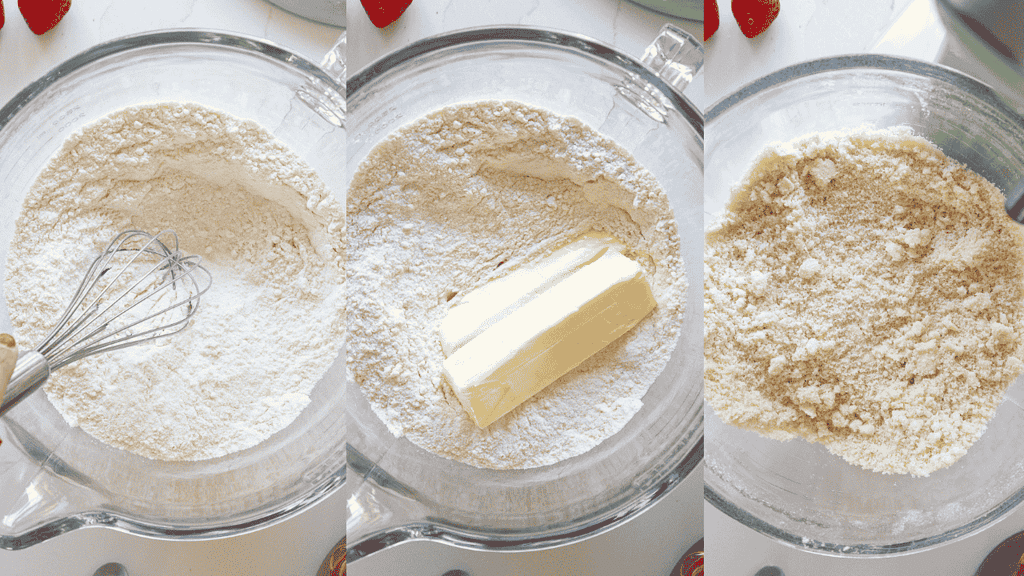
Mix 3 cups all-purpose flour, 2 1/2 cups sugar, 1/4 cup freeze-dried strawberries (optional), 2 1/2 tsp baking powder, and 1 tsp salt together in a stand mixer with a paddle attachment or hand mixer until fully combined.
Then mix in 1 cup of room temperature, unsalted butter slowly into the dry ingredients on a low speed. Continue to mix until no large chunks of butter remain and the mixture looks like moist sand.
Pour in 1 cup of egg whites and mix on low until just incorporated. Then mix in 1 1/2 cups of sour cream at a low speed.
Then add 1/2 cup of strawberry reduction (made above), 2 Tbsp of vegetable oil, 2 tsp of vanilla extract, and pink gel food coloring (optional), and mix at a low speed until fully incorporated.
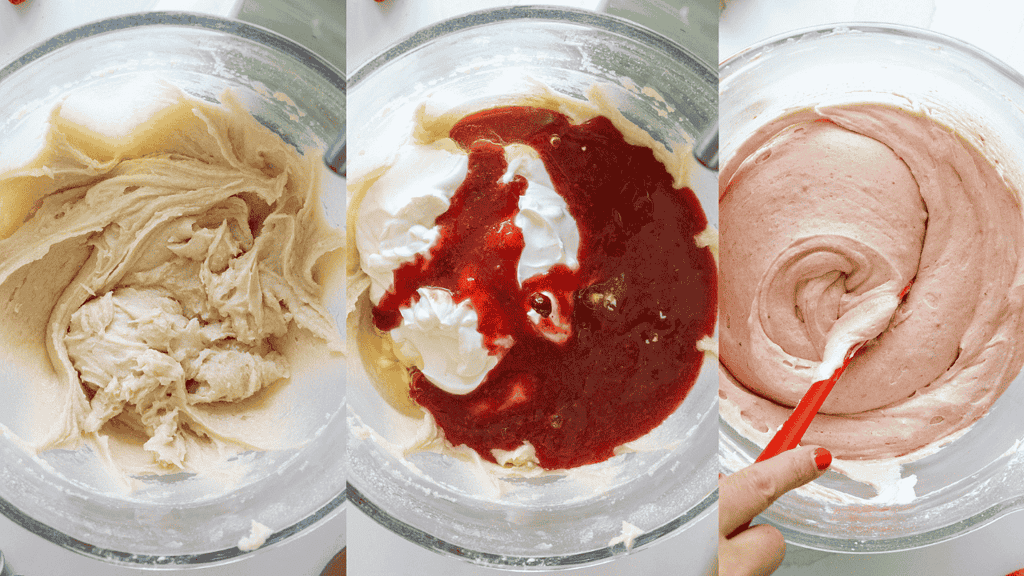
Scrape down the sides of the bowl with a rubber spatula, then beat on a medium speed for about a minute to make sure everything is properly mixed together. This also helps lighten the texture of the cake layers.
Divide the batter evenly between the prepared pans. I like to use a scale to make sure each pan has the same amount of batter and will bake up to the same height (about 600g per pan).
Bake for 33-36 minutes or until a toothpick inserted in the center of one of the layers comes out with a few moist crumbs. Let the pans cool for 10 minutes, then run a small offset spatula around the perimeter of the pan to separate the cake from the pan.
Place the cake layers in the freezer for 30 minutes to accelerate the cooling process. Once the layers are fully cooled, carefully flip the pans and remove the layers.
Use a serrated knife to level the tops of the layers right before you plan to assemble your cake, or you can wrap and freeze the layers if you’re making them in advance.
If you make these cake layers in advance and freeze them, let them thaw for about 20 minutes before making your cake. The cake layers should still be slightly cold to the touch, which will make it easier to assemble the cake.
Step 3: Make the Strawberry Cream Cheese Frosting
While the cake layers bake and cool, make the strawberry cream cheese frosting.
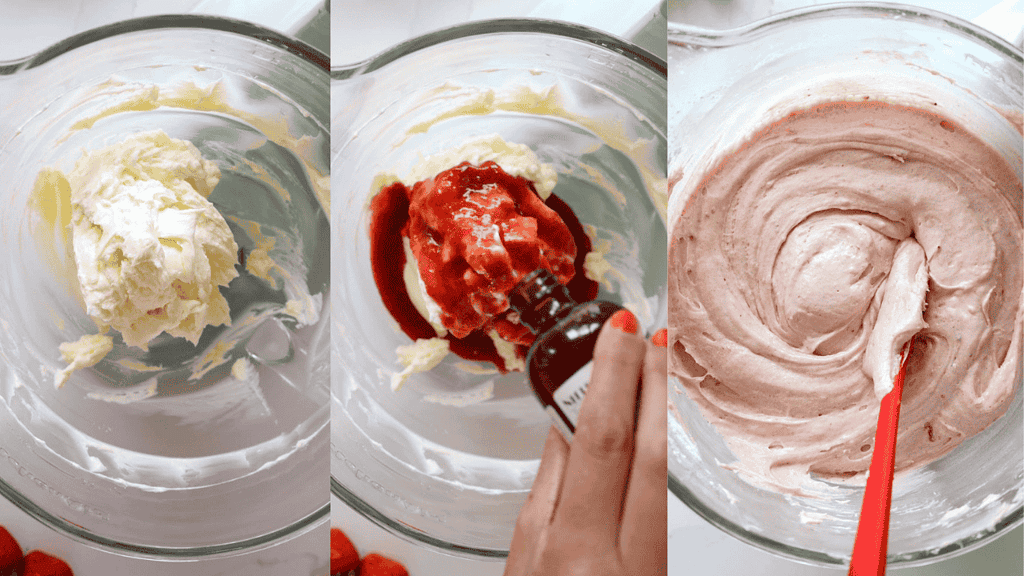
Beat 1 1/2 cups of unsalted butter and 1 cup of cream cheese on a medium speed for 30 seconds with a paddle attachment until smooth.
Then mix in 1/4 cup of room temperature strawberry reduction (made above), 3 Tbsp of freeze-dried strawberry powder (optional), 1 tsp of vanilla extract, 1/2 tsp salt, and pink gel food coloring (optional) on a low speed.
Slowly mix in 6 cups of powdered sugar on a low speed. Scrape the sides and bottom of the bowl with a rubber spatula to make sure everything is properly mixed together.
Continue to mix on a low speed for a few minutes until the desired consistency is reached. If the frosting seems too thin, add more powdered sugar (a quarter of a cup at a time).
xPlace about 1 1/2 cups of frosting in a piping bag or freezer ziplock bag, seal the top with a rubber band, and cut a 1/2-inch opening at the base of the bag. Set aside, and cover the frosting flush with plastic wrap unless you plan to use it immediately (otherwise it will crust!).
Step 4: Assemble the Cake
Stack and frost the cake layers on a greaseproof cakeboard or flat plate using a dab of frosting to help stick the first cake layer to the board.
Spread about 1 cup of strawberry cream cheese frosting onto the first cake layer with a large offset spatula.
Pipe a frosting ring around the edge of the cake layer, then fill the center of it with half of the remaining strawberry reduction. Repeat with the next cake layer, and place the third cake layer on top.
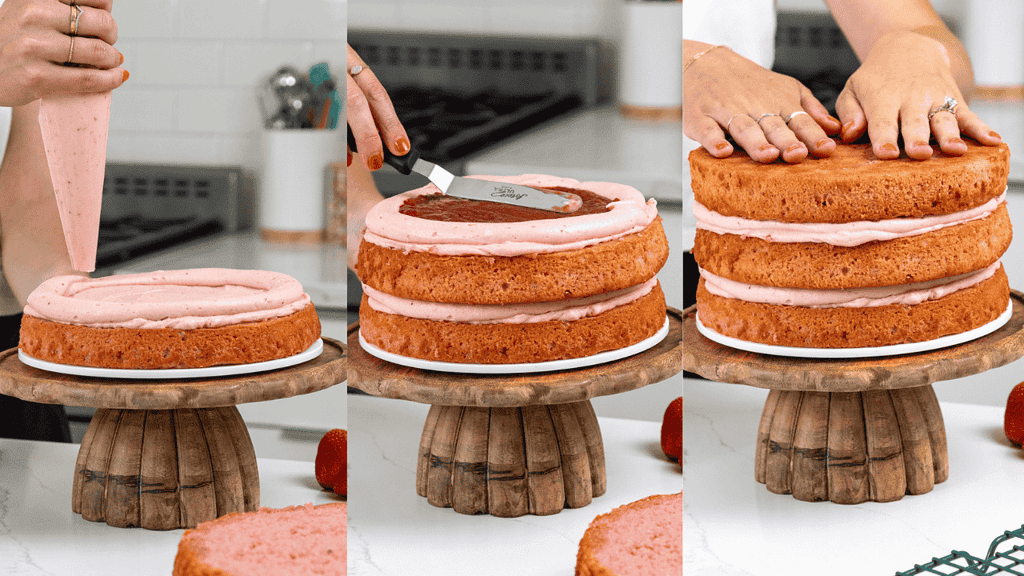
Chill the cake in the fridge (30 minutes) or freezer (10 minutes) until the frosting is firm to the touch.
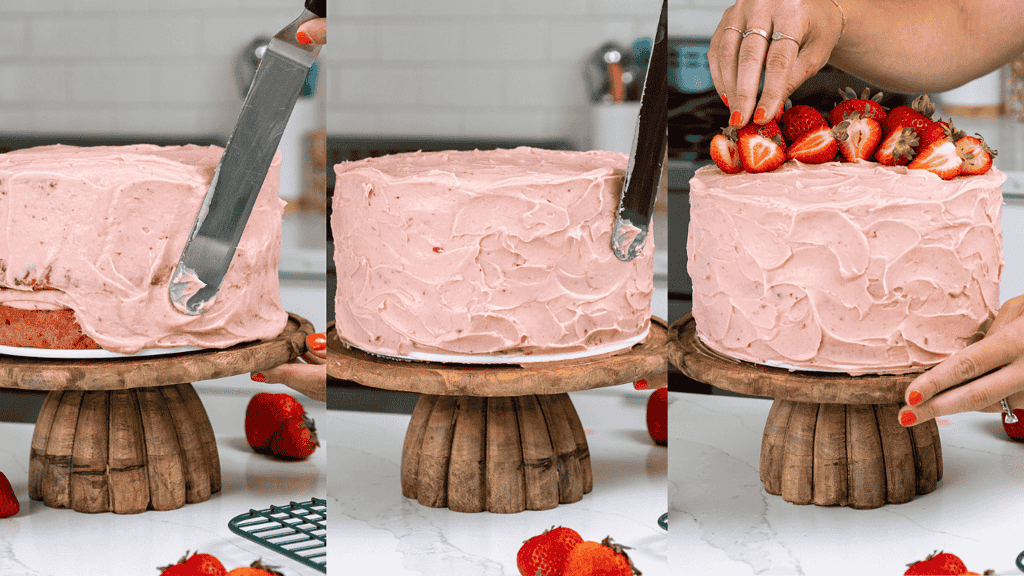
Then spread the remaining strawberry buttercream around the cake and create a textured look using an offset spatula or the back of a spoon. Add a semicircle of fresh strawberries around the top of the cake, then enjoy.
Substitutions and Swaps in This Strawberry Cake Recipe
This recipe uses quite a few ingredients, and I know you might not have them all on hand. Or if you have food allergies or restrictions, I’ve got you covered.
Below are some swaps and substitutions that can be made in this cake recipe.
- Strawberries – You can use fresh or frozen strawberries in this recipe. If you use frozen, just make sure the strawberries are thawed before blending them to make the reduction.
- All-Purpose Flour – This recipe turns out best with AP flour. However, you can use a gluten-free flour blend or cake flour if needed.
- Granulated Sugar – I do not recommend changing the type or reducing the amount of sugar. It will change the texture of the cake layers.
- Freeze Dried Strawberry Powder – This is optional but adds an extra boost of strawberry flavor. You can also grind down freeze-dried strawberries to make your own powder.
- Unsalted Butter – If you only have salted butter on hand, you can use it in place of the unsalted butter in this recipe. Just be sure to omit the salt that this cake recipe calls for. You can also use vegan butter in its place (and also omit the salt)!
- Egg whites – I like to use the pasteurized egg whites that come in a carton, but you can also separate your own egg whites and use 7 large egg whites or 4 whole, large eggs. If you have an egg allergy, you can try using flaxseed eggs or a vegan egg replacer.
- Sour Cream – You can also use full-fat yogurt, whole milk, buttermilk, or an alternative yogurt or milk (almond, soy, oat) if you’re dairy-free.
- Vegetable Oil – Any flavorless oil will work in this recipe. Canola or even sunflower oil would work great!
Substitutions and Swaps – Cream Cheese Strawberry Frosting
- Unsalted Butter – If you only have salted butter on hand, you can use it in place of the unsalted butter. Just be sure to omit the salt that this frosting recipe calls for. You can also use vegan butter in its place (and omit the salt)!
- Cream Cheese – If you’re not a fan of cream cheese frosting, use 1 cup of unsalted butter in place of the cream cheese to make strawberry buttercream.
Can I Make a Strawberry Sheet Cake with This Recipe?
One batch of cake batter makes about 1800 grams or 10 cups. If you make 3 layers, add 600 grams to each pan.
I usually make 3, 8-inch cake layers, but it can also be used to make 4, 6-inch cake layers, but they will take a few minutes longer to bake.
You can also use this recipe to make a sheet cake! One batch will make 2, 9 x 13-inch cake layers that are about 1 inch tall.
Bake for 35-40 mins at 350°F/175°. I recommend using heating cores if you have them to help large cake layers like this bake more evenly and quickly.
You can also make one 9 x 13-inch cake layer that’s about 2 inches tall, but the bake time will be 45-55 minutes at 350°F/175°C.
Making this Strawberry Cake in Advance & Storage Tips
I recommend making these cake layers in advance and freezing them. It breaks the process up and makes it more approachable.
You can also make the frosting ahead of time or save any leftover frosting! Store it in an airtight container in the fridge for up to a week or in the freezer for up to a month.
Lastly, you can make the strawberry reduction ahead of time, too. Store it in the fridge for up to a week or in the freezer for up to a month.
Be sure to give it a good stir once it thaws to get the consistency nice and smooth again.
A frosted cake can last in the fridge for up to a week or in the freezer for a month. The buttercream locks in all the moisture, keeping the cake fresh and delicious! Wait to add the fresh strawberries to the top until right before you serve the cake.
If you cut into the cake and have leftovers, use any remaining frosting to cover the cut section. This locks in the moisture and keeps the cake tasting nice and fresh.
Tips for Making the Best Strawberry Layer Cake
- Ingredients at room temperature mix together better! Set out any cold ingredients ahead of time.
- Properly measure your flour (spoon into the cup measure, then level). Or better yet, use a kitchen scale to measure your dry ingredients.
- Use a scale to weigh your cake pans as you fill them. It will make the cake layers bake up to the same height and bake more evenly.
- Level the room temperature or thawed cake layers with a serrated knife to make them easier to stack.
- Chill the cake layers in the freezer for about 20 minutes before assembling the cake. It makes them so much easier to stack and frost!
- If your cake layers turn out less than perfect, read my cake troubleshooting guide to see where things might’ve gone awry.
Let Me Know What You Think!
If you make this strawberry cake with strawberry filling, I’d love to hear what you think! Let me know by leaving a rating and comment below.
Don’t forget to tag me @chelsweets if you share on social media so I can see your amazing creations!
Strawberry Cake with Strawberry Filling
Equipment
Ingredients
Strawberry Reduction
- 6 cups fresh or frozen (and thawed) strawberries, hulled 900g or 2 lbs
- 3/4 cup granulated sugar 150g
- 1/4 cup water 60g
- 1/4 cup cornstarch 32g
- 1 Tbsp lemon juice 15g
- 2 tsp fresh lemon zest 5g
- pinch of fine salt
Strawberry Cake Recipe
- 3 cups all-purpose flour 375g
- 2 1/2 cups granulated sugar 500g
- 1/4 cup freeze-dried strawberry powder (optional) 28g
- 2 1/2 tsp baking powder 10g
- 1 tsp fine salt 6g
- 1 cup (2 sticks) unsalted butter, room temperature 226g
- 1 cup carton egg whites or 4 large whole eggs, room temperature 240g
- 1 1/2 cups sour cream, room temperature 360g
- 1/2 cup strawberry reduction (made above), room temperature 120g
- 2 Tbsp vegetable or canola oil 30g
- 2 tsp vanilla extract or vanilla bean paste 8g
- pink gel food coloring – if desired
Strawberry Cream Cheese Frosting
- 1 1/2 cups (3 sticks) unsalted butter, room temperature 339g
- 1 cup cream cheese, room temperature 226g
- 1/4 cup strawberry reduction (made above), room temperature 60g
- 3 Tbsp freeze-dried strawberry powder (optional) 20g
- 1 tsp vanilla extract or vanilla bean paste 5g
- 1/2 tsp fine salt 3g
- 6 cups powdered sugar 750g
- pink gel food coloring – if desired
Instructions
Strawberry Reduction
- Note: This part of the recipe has about an hour of cook time and an hour of cooling time. If you're short on time, the strawberry reduction can be made in advance and stored in the fridge for up to a week or in the freezer for up to a month.
- Add 6 cups of fresh or frozen (and thawed) hulled strawberries and 3/4 cup granulated sugar into a blender or food processor and blend until smooth. Pour this into a medium-sized saucepan.
- Heat over medium-high heat, stirring occasionally until the mixture begins to boil. Once it reaches this stage, lower the heat to medium-low. Stir the mixture occasionally, and let it continue to cook down for about 50-60 minutes, or until the mixture has reduced in volume by half. Cook time will vary based on the size of the pan you use. You should be left with about 3 cups (720g) of strawberry reduction. I recommend pouring it into a heat-proof bowl and weighing it or using a liquid measuring cup to check before adding in the cornstarch slurry. If you have more than that, it needs to be cooked down further.
- After it's cooked down to this point, make the cornstarch slurry. In a separate small bowl, whisk together 1/4 cup of water and 1/4 cup of cornstarch until fully combined (make sure there are no lumps!). Pour the cornstarch slurry into the strawberry mixture and stir until combined, then let the filling simmer for 5-6 minutes. At this point, the mixture should have visibly thickened and look kind of glossy.
- Turn off the heat, and remove the pot from the stove. Pour the filling into a separate bowl to cool, then stir in 1 Tbsp lemon juice, 2 tsp lemon zest, and a pinch of fine salt. Let the filling cool to room temperature before using it. If you make it in advance, cover it with plastic wrap or store it in an airtight container and place it in the fridge once it's reached room temperature.
Strawberry Cake Layers
- Preheat the oven to 350°F / 175°C. Grease and line three 8-inch cake pans with nonstick spray and parchment paper rounds. Set aside.
- Mix 3 cups all-purpose flour, 2 1/2 cups sugar, 1/4 cup freeze-dried strawberries (optional), 2 1/2 tsp baking powder, and 1 tsp salt together in a stand mixer with a paddle attachment or hand mixer until fully combined.
- Then mix in 1 cup of room temperature, unsalted butter slowly into the dry ingredients on a low speed. Continue to mix until no large chunks of butter remain and the mixture looks like moist sand.
- Pour in 1 cup of egg whites and mix on low until just incorporated. Then mix in 1 1/2 cups of sour cream at a low speed.
- Then add 1/2 cup of strawberry reduction (made above), 2 Tbsp of vegetable oil, 2 tsp of vanilla extract, and pink gel food coloring (optional), and mix at a low speed until fully incorporated.
- Scrape down the sides of the bowl with a rubber spatula, then beat on a medium speed for about a minute to make sure everything is properly mixed together. This also helps lighten the texture of the cake layers.
- Divide the batter evenly between your prepared pans (about 600g per pan). I like to use a scale to make sure each pan has the same amount of batter and will bake up to the same height.
- Bake for 33-36 minutes or until a toothpick inserted in the center of one of the layers comes out with a few moist crumbs.
- Let the pans cool for 10 minutes, then run a small offset spatula around the perimeter of the pan to separate the cake from the pan.
- Place the cake layers into the freezer for 30 minutes to accelerate the cooling process. Once the layers are fully cooled, carefully flip the pans and remove the layers.
- Use a serrated knife to level the tops of the layers right before you plan to assemble your cake, or you can wrap and freeze the layers if you're making them in advance.
- If you make these cake layers in advance and freeze them, let them thaw for about 20 minutes before making your cake. The cake layers should still be slightly cold to the touch, which will make it easier to assemble your cake.
Strawberry Cream Cheese Frosting
- While the cake layers bake and cool, make the strawberry cream cheese frosting.
- Beat 1 1/2 cups of unsalted butter and 1 cup of cream cheese on a medium speed for 30 seconds with a paddle attachment until smooth.
- Then mix in 1/4 cup of room temperature strawberry reduction (made above), 3 Tbsp of freeze-dried strawberry powder (optional), 1 tsp of vanilla extract, 1/2 tsp salt, and pink gel food coloring (optional) on a low speed.
- Slowly mix in 6 cups of powdered sugar on a low speed. Scrape the sides and bottom of the bowl with a rubber spatula to make sure everything is properly mixed together.
- Continue to mix on a low speed for a few minutes until the desired consistency is reached. If the frosting seems too thin, add more powdered sugar (a quarter of a cup at a time).
- Place about 1 1/2 cups of frosting in a piping bag or freezer ziplock bag, seal the top with a rubber band, and cut a 1/2-inch opening at the base of the bag. Set aside, and cover the frosting flush with plastic wrap unless you plan to use it immediately (otherwise it will crust!).
Assembling This Strawberry Layer Cake
- Stack and frost cake layers on a greaseproof cakeboard using a dab of frosting to help stick the first cake layer to the board.
- Spread about 1 cup of strawberry cream cheese frosting onto the first cake layer with a large offset spatula. Pipe a frosting ring around the edge of the cake layer, then fill the center of it with half of the remaining strawberry reduction. Repeat with the next cake layer, and place the third cake layer on top.
- Chill the cake in the fridge (30 minutes) or freezer (10 minutes) until the frosting is firm to the touch.
- Then spread the remaining strawberry buttercream around the cake and create a textured look using an offset spatula or the back of a spoon. Add a semicircle of fresh strawberries around the top of the cake, then enjoy.
Video
Notes
How Many People Does This Cake Feed?
If you make this cake with 3, 8-inch cake layers, it will feed about 24 people. For more information on cake sizes and servings, check out my cake portion guide.Recipe Variations – Making This Cake in Different Sizes
One batch of this recipe makes about 10 cups of batter or about 1800 grams. If you plan to use three circular cake pans, add 600 grams of batter into each pan. If you want to make a tiered cake or a different-sized cake with this recipe, check out my cake batter calculator to see how many batches of batter you’ll need. This recipe can also be used to make a sheet cake! One batch will make a 1, 9 x 13-inch cake layer that’s about 1.5 inches tall once leveled. Bake for 45-55 minutes at 350°F / 175 °C, or until a toothpick inserted in the center comes out with a few moist crumbs. Bake time can vary a lot based on the type of pan you use, if you use heating cores, and your oven. I recommend using heating cores if you have them; they help sheet cake layers bake more evenly and quickly. For more details on how to convert this cake recipe and others into sheet cakes, check out my sheet cake guide. Last but not least, you can also make cupcakes using this recipe. Fill the liners 3/4 full and bake them at 350°F / 175 °C for 19-21 minutes, or until a toothpick inserted in the center comes out with a few moist crumbs. You should end up with about 3 dozen.Tips for Making the Best Strawberry Layer Cake
- Ingredients at room temperature mix together better! Set out any cold ingredients ahead of time.
- Properly measure the flour (spoon it into the cup measure, then level). Or better yet, use a kitchen scale to measure your dry ingredients.
- Use a scale to weigh your cake pans as you fill them. It will make your cake layers bake to the same height and bake more evenly.
- Make sure the buttercream is the right consistency. This will help give the cake proper structure and make it easier to decorate.
- Level the room temperature or thawed cake layers with a serrated knife to make them easier to stack.
- Chill your cake layers in the freezer for about 20 minutes before assembling the cake. It makes it so much easier to stack and frost them!
- If your cake layers turn out less than perfect, read my cake troubleshooting guide to see where things might’ve gone awry.
Making This Strawberry Cake in Advance & Storage Tips
I highly recommend making the cake layers in advance and freezing them. It breaks the process up and makes it more approachable and enjoyable, and I promise they taste just as delicious! You can also make the frosting ahead of time or save any leftover frosting! It can be stored in an airtight container in the fridge for up to a month or in the freezer for up to 3 months. Be sure to give it a good stir once it thaws to get the consistency nice and smooth again. Lastly, you can make the strawberry reduction ahead of time, too. It can be stored in the fridge for up to a week or in the freezer for up to a month. A frosted cake can last in the fridge for up to a week (as long as it doesn’t have a perishable fruit filling) or in the freezer for up to a month. The buttercream locks in all the moisture, keeping the cake fresh and delicious! Wait to add the fresh strawberries to the top until right before you serve the cake. If you cut into the cake and have leftovers, use any remaining frosting to cover the cut section to keep it moist and store it in the fridge for up to a week.Nutrition
Other Recipes You Might Like:
Could the cake be made with store bought jam instead of the strawberry filling?
Hi Sarah,
Yes, absolutely! You can definitely use store-bought jam instead of the homemade strawberry filling to fill the cake and flavor the frosting, but I’m not totally sure about flavoring the cake layers! Maybe try using half the amount of strawberry reduction the recipe calls for to make the layers? The flavor will be a little different since jam is usually sweeter and thicker, but it will still taste delicious and save you some time. If you try it, I’d love to hear how it turns out! Happy baking!!
I made this for my friend’s birthday when she requested a strawberry cake with cream cheese frosting. I knew from making several of your other recipes it was safe to gamble on a recipe I had never made before. She loved it! I tried some of the scraps from when I leveled my cake layers with some of the frosting and filling and it was delicious. I love that you used only natural strawberry elements to flavor everything. I really hate the artificial taste of strawberry extracts and emulsions. I made 1 1/2 the recipe since I have 9″ pans which worked well. My only note was if I made it in the future, I might try using less cornstarch slurry. I used what was called for but x 1.5 like everything else and it thickened instantly when I stirred it in, a little too thick in my opinion, but it still tasted good.
Hi Ashley,
I love hearing this! I’m so glad your friend enjoyed her birthday cake and that the natural strawberry flavor really shined through. That’s exactly what I was going for! Great call on scaling up for the 9? pans, too. And thank you for sharing your note about the cornstarch slurry, that’s super helpful feedback.
Next time you can definitely start with a little less and add more only if needed, or cook it down a bit less. I just always try to err on the side of thicker than thinner, because there is nothing worse than a runny filling!
Thanks so much for putting this recipe to good use 🙂
How’s do I incorporate the strawberry filling if I’m making the sheet cake?
Great question Elizabeth! You can either cut the layer in half horizontally (a bit difficult though!!) and spread it between the layers or add it underneath or on top of the frosting! You could also just swirl globs of it into the frosting on top of the cake. Lots of options, and I think any of them would taste great!! Hope that helps, and that your sheet cake turns out amazing!! Let me know how it goes!
Any advice on adjustments for this recipe in high altitude?
Hi Jasolyn,
Great question! High altitude baking can definitely throw recipes for a loop. For cakes like this, I usually recommend:
Flour: Add 2–4 extra tablespoons to help strengthen the structure.
Leavening: Reduce baking powder/soda slightly (about ? to ¼ teaspoon less per teaspoon). Too much rise at altitude can cause cakes to collapse.
Sugar: Decrease by 1–2 tablespoons per cup so the cake sets more firmly.
Liquid: Add 2–4 extra tablespoons of milk or water since things dry out faster.
Bake time/temp: Increase the oven temp by 15–25°F and check the cake a little early since it bakes quicker.
I’d start with the smaller adjustments and tweak from there depending on your exact altitude. Sometimes it takes a little experimenting to find the sweet spot. Hope that helps, happy baking!!
I made these as cupcakes and they turned out very dense and small. Disappointed.
Hi Sally,
I’m sorry to hear they didn’t turn out how you hoped! This recipe uses the reverse creaming method, which gives baked goods like cakes or cupcakes a denser, more tender crumb. So they won’t rise as much as recipes made with the traditional creaming method. I do personally like recipe best as a cake! To get a nice full cupcake though, you really do need to fill the liners about 3/4 full. Hopefully that helps if you decide to give them another try!
Hi! First, I love all of your recipes. I am making this cake for a baby shower and the flavor is delicious! I have made four batches so far and my issue is the cake is super dense. It’s delicious, the texture is just off. Do you have any tips? Your guidance is greatly appreciated!
Hi JJ,
Hi! First off, thank you so much for the kind words, that truly means a lot!! And huge props for tackling this cake multiple times for a baby shower, that’s no small feat!
This cake uses the reverse creaming method, which does give it a slightly denser crumb compared to a traditional creamed-butter cake. That said, it should still be very tender and soft, not heavy or stodgy. If it turns out super dense, it’s usually a technique or ingredient-temp issue rather than the recipe itself.
A couple things to double-check:
Are all your ingredients truly at room temperature? Cold butter, eggs, or milk can prevent the batter from emulsifying properly and lead to a tight crumb.
When mixing, be careful not to overmix once the liquids are added. Reverse creaming is forgiving at first, but overmixing at the end can still overdevelop the gluten.
Also make sure your leavening is fresh and measured correctly, even slightly too little can affect the texture.
You’re absolutely right that the flavor is there, so you’re very close! If you don’t think it’s any of those things, let me know and we can keep troubleshooting!!
Hi Chelsea! I love your recipes, they are so well explained but I had the same trouble with this cake. It was so dense, my ingredients were room temperature and I have been doing cakes for a Long time. Its the first time I have this problem ?
Hi, I am wanting to make three 9 inch cakes with this recipe. Can you help me with how much batter goes in each pan and cooking time?
Thanks so much!
Hi Crystal,
You will need about 4 cups of batter per 9″ inch pan, or 12 cups total! As an FYI, one batch of this batter makes about 10 cups of batter. I also have a great chart where I share how much batter you need for different sized cake pans here: https://chelsweets.com/how-much-cake-batter-per-pan/
Hope that helps, and that your cake turns out great 🙂 happy baking!
Thank you so much! ?
no problem!! 🙂
I made the recipe and things didn’t turn out quite right, the cake was too dense and didn’t have any flavor and the filling went absolutely everywhere during assembly. Is the amount of filling to be mixed in with the batter really supposed to only be 1/2c? If that is the case, you only use 3/4c in the cake and icing, so 2 1/4c is supposed to fit between the cake layers?
Hi Sarah,
Thanks so much for trying the recipe and for taking the time to leave such detailed feedback. Yes, the amount of filling mixed into the batter really is supposed to be 1/2 cup, and the frosting uses 1/4 cup. The strawberry reduction is cooked down to about 3 cups total, so the remaining roughly 2 1/4 cups are meant to be divided between the cake layers. I keep the amount in the batter fairly low on purpose, because adding too much reduction to the cake layers can make them heavy and dense.
If the filling ran everywhere, the most likely cause is that the reduction either wasn’t cooked down quite enough or wasn’t fully cooled before assembly. It should be pretty thick once finished, and the frosting dam around each layer is important to help hold it in place. I’d also recommend chilling the cake briefly after stacking so everything can firm up before the final coat.
As for the cake texture, this recipe uses the reverse creaming method, where the butter is mixed into the dry ingredients first. I like that method because it gives the layers a tight, tender crumb, but if the flour is overmeasured or the ingredients aren’t fully at room temperature, the cake can end up feeling too dense. The strawberry flavor in the layers themselves is also more subtle, so the filling and frosting do a lot of the heavy lifting flavor-wise. The freeze-dried strawberry powder helps boost that strawberry flavor a lot too.
Hope that helps, happy baking!!
The cake, icing, and filling are tasty, but the cake came out very dense. I think I’ll try again, but I’ll cream the butter and sugar first like I usually do when baking a cake.
Hi Erin,
Thanks so much for giving the recipe a try and for sharing your feedback!! This cake actually uses the reverse creaming method, which is a little different from the traditional creaming method.
With reverse creaming, the butter is mixed into the dry ingredients first, which coats the flour and helps limit gluten development. That creates a tighter, velvety crumb and makes the cake layers really tender, which is why I prefer it for this recipe. The texture is a bit different from cakes made by creaming the butter and sugar first, so it can seem denser by comparison, but it should still be soft and tender rather than heavy.
If you try it again, I’d make sure your ingredients are at room temperature and that the flour is measured properly, since that can make the cake seem more dense too. Hope that helps, happy baking!!
I use your cake recipes all the time & I love the reverse creaming method. They come out beautifully
Yesss! I love it too!!!!
The flavors were incredible but my cake tasted more like a strawberry cheesecake. After reading through the comments, looks like you’ve already explained to multiple people that the cake is meant to be a denser because of the reverse creaming method.
But I wonder why my cake ended up tasting more like cheesecake? I used a scale to measure out all of my ingredients.
Hi Joy,
My only thought would be that the frosting with the cake is making it taste that way? Or do you mean just the cake itself is tasting like cheesecake? What brand of sour cream did you use? Did you make any substitutes by chance? Hopefully we’ll be able to figure it out together!
hi , I was wondering if this frosting holds up well for decorating the cake with swirls?
Hi Jelissa,
The frosting does hold up well, and you should be able to decorate the cake with swirls easily 🙂 Hope that helps, happy baking!
Why isn’t there a button to save this on Pinterest?