
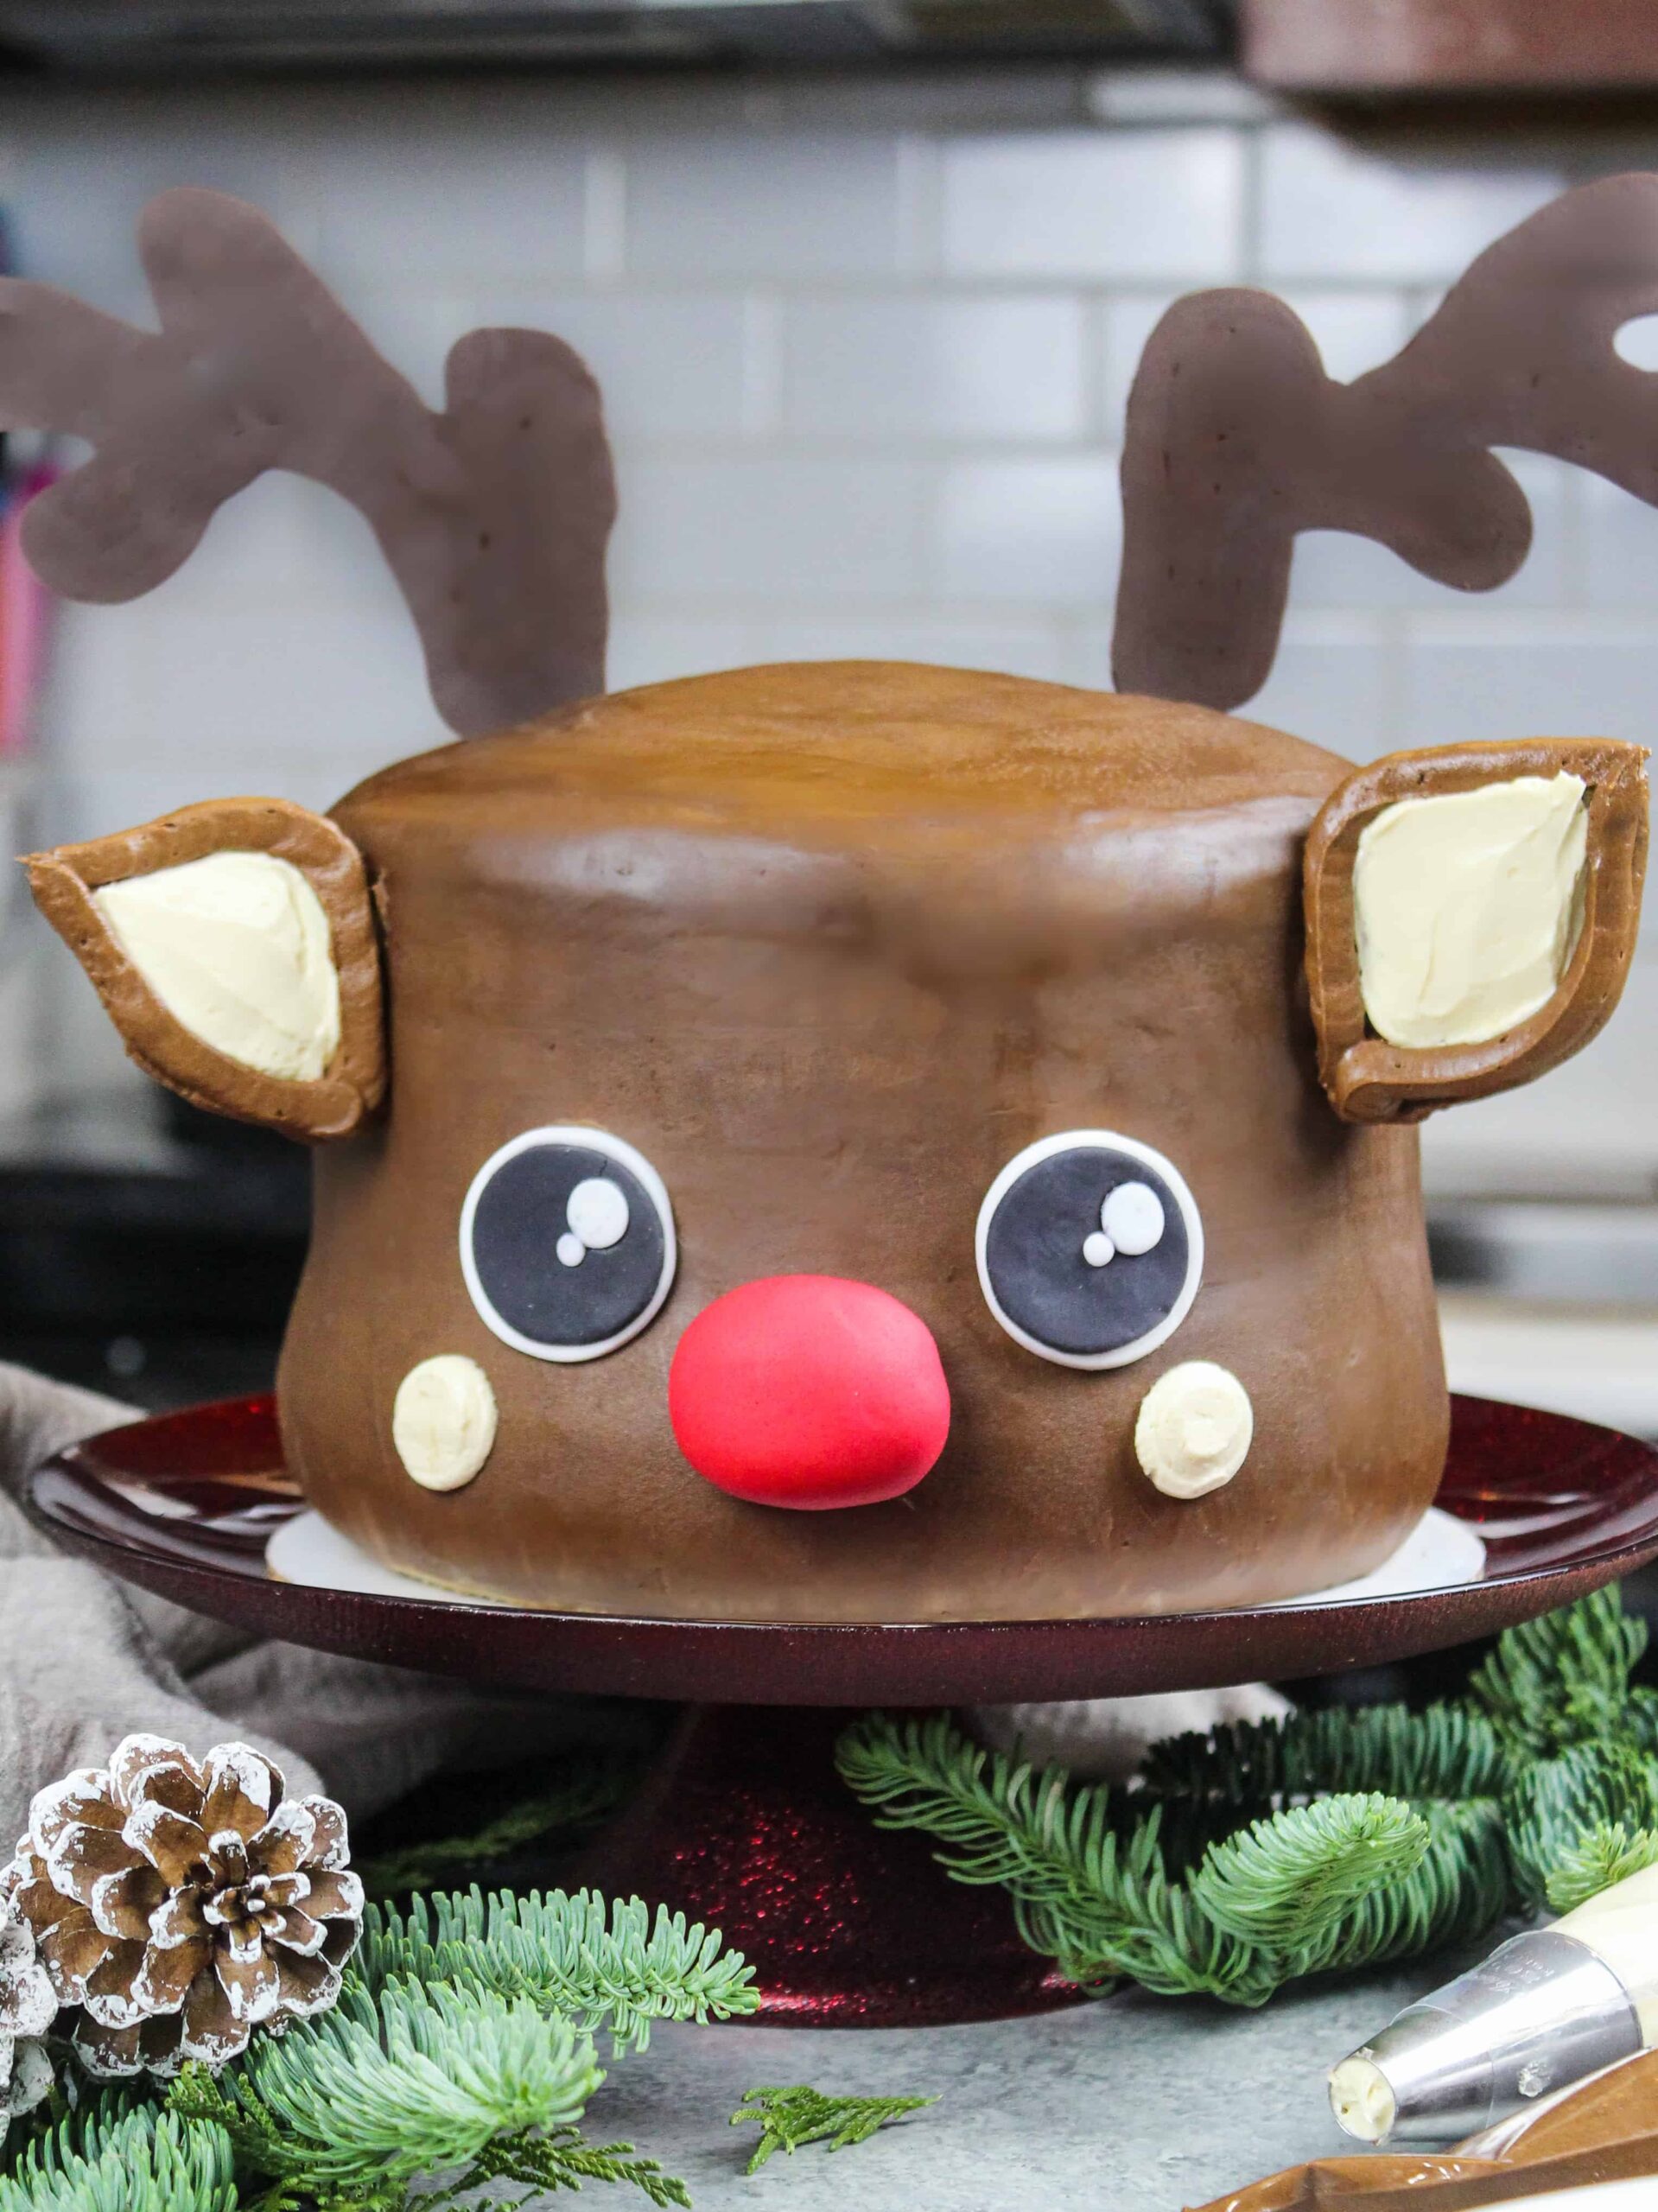
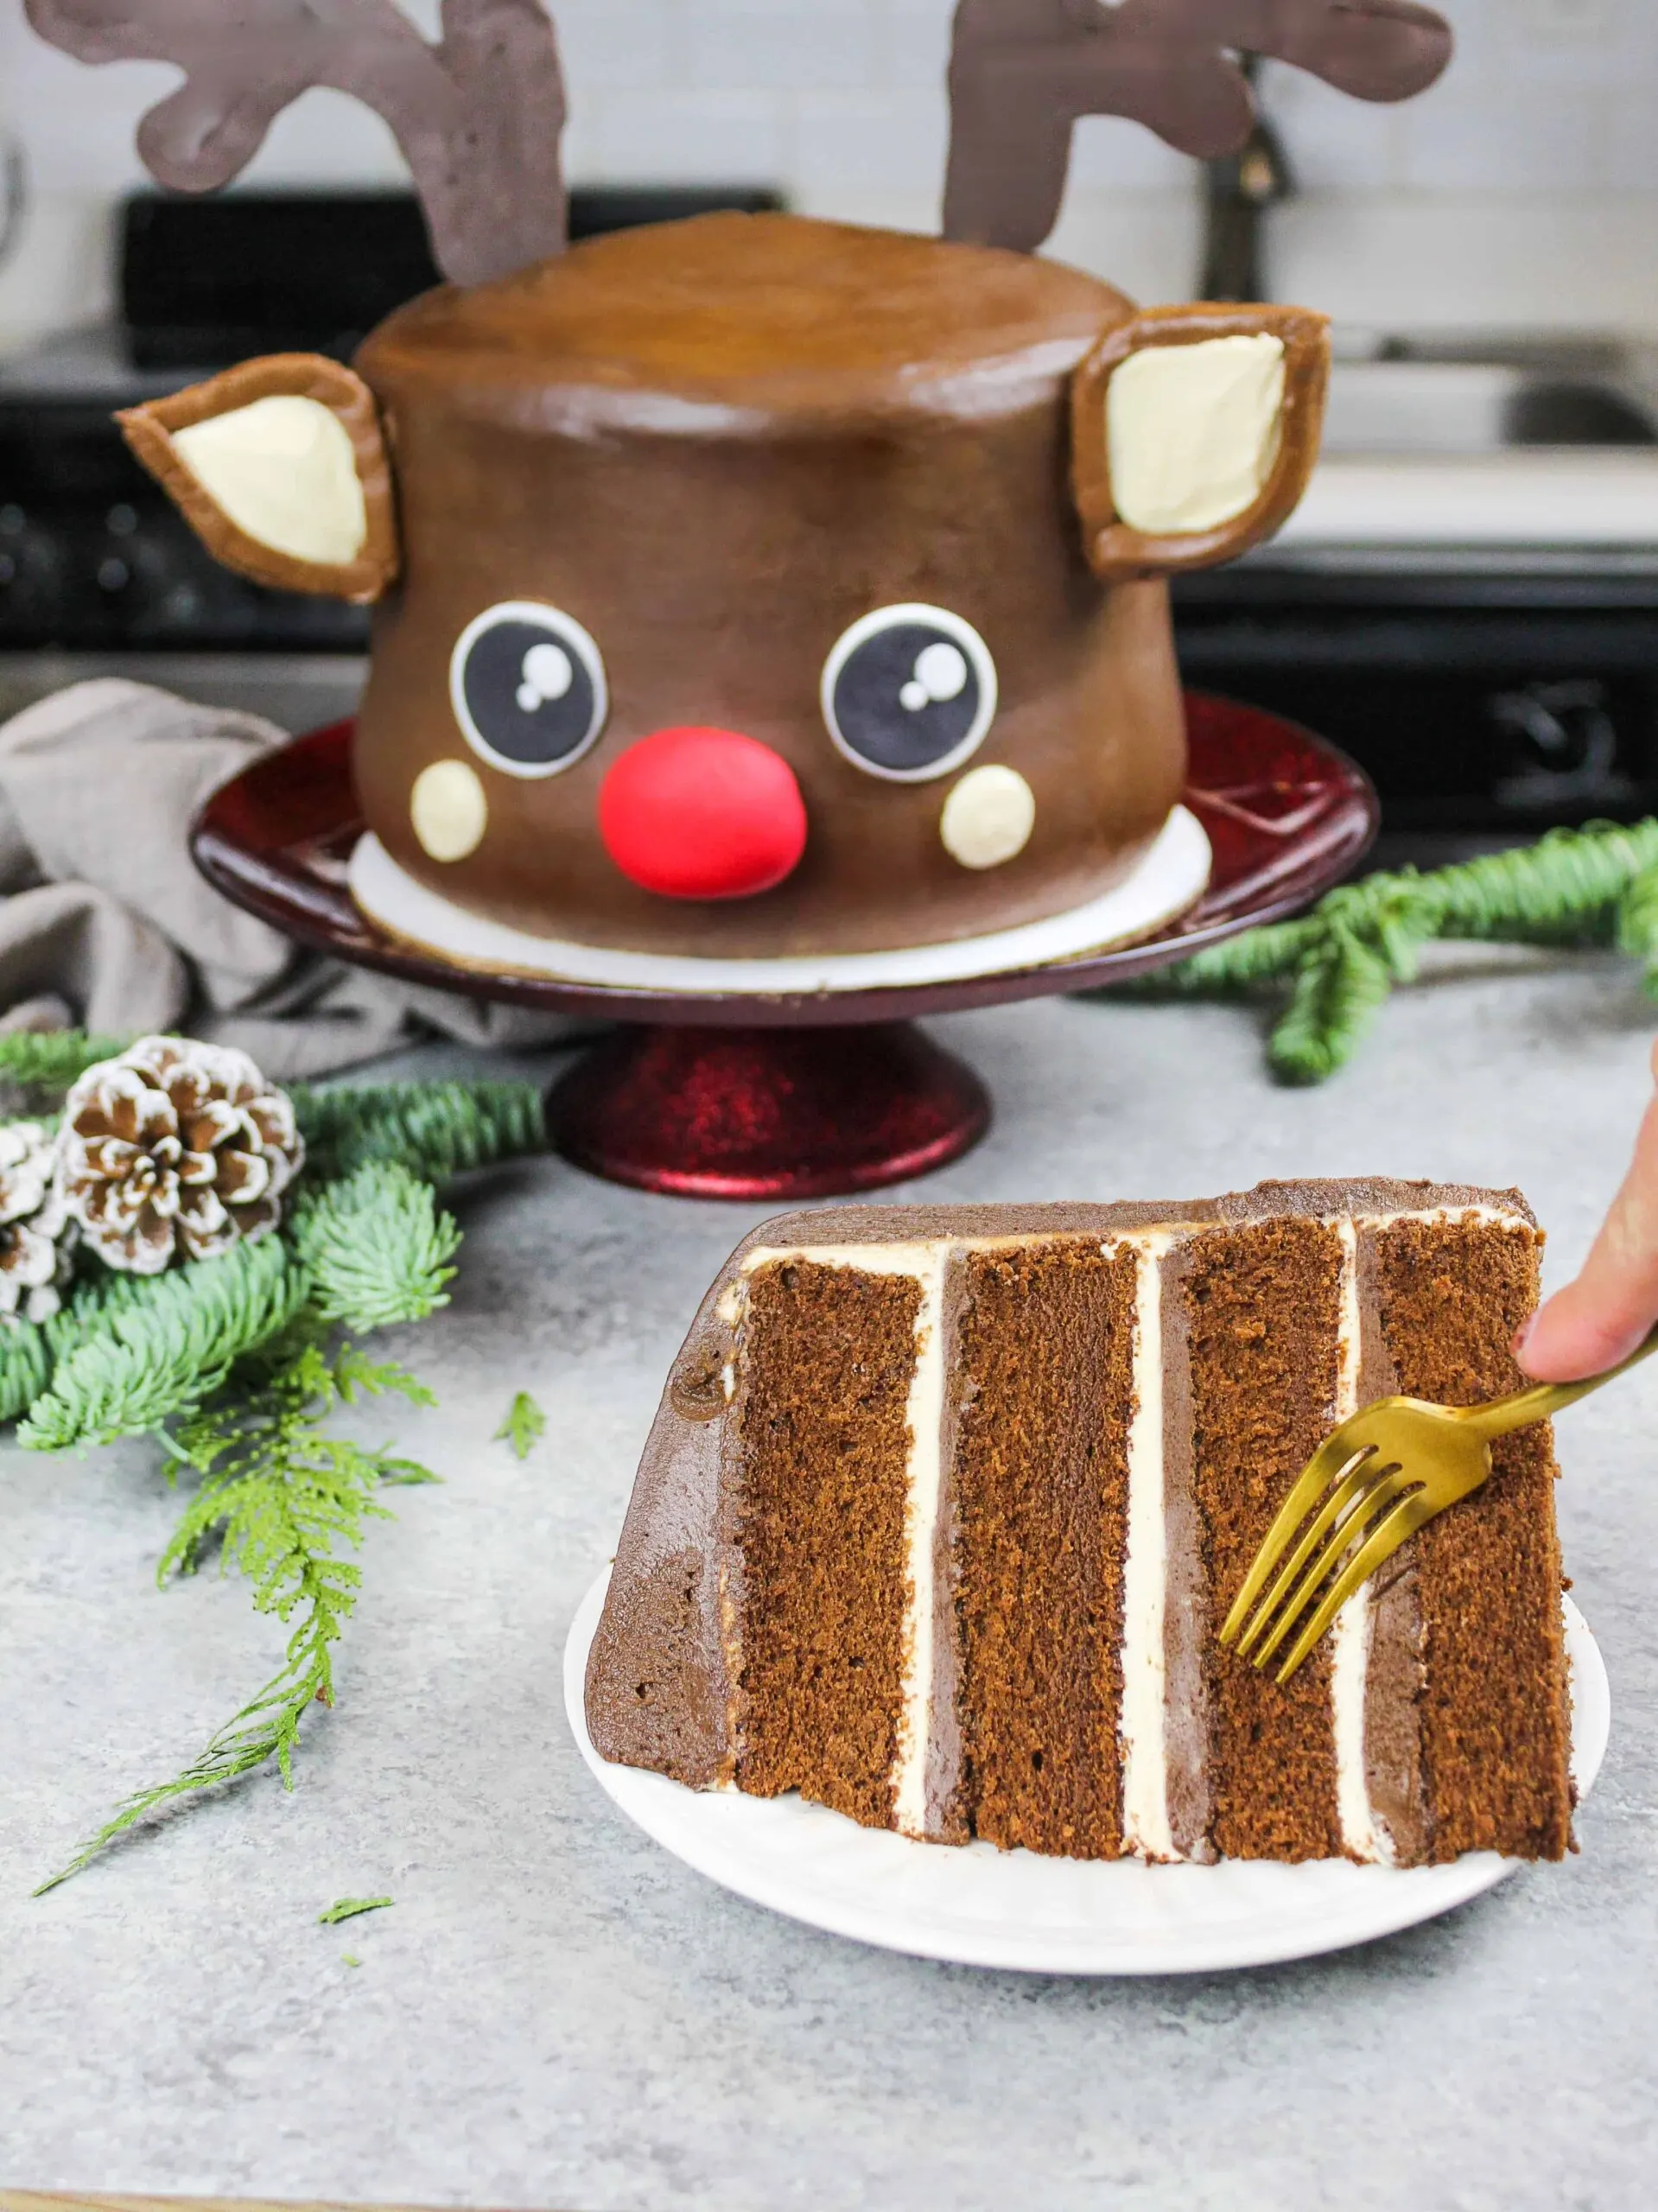
I wanted to squeeze in one more holiday cake before Christmas and I just barely made the cut!! I saved the best for last this year and am in love with this chocolate peanut butter Rudolph cake.
It has all my favorite flavors and is decorated to look just like my favorite holiday character.

Cake Flour vs. All-Purpose Flour
Now some of you might be asking, why use cake flour in this recipe?
Cake flour has less protein in it (usually 7-8%) than all-purpose flour (about 11%). Why does the protein content matter? Because this protein becomes gluten as you mix it with liquid.
More protein means more gluten, which means denser, chewier baked goods (think of a chewy loaf of sourdough bread).
Cake flour makes baked goods that are fluffier and lighter like angel food cake. They also give baked goods a finer crumb.

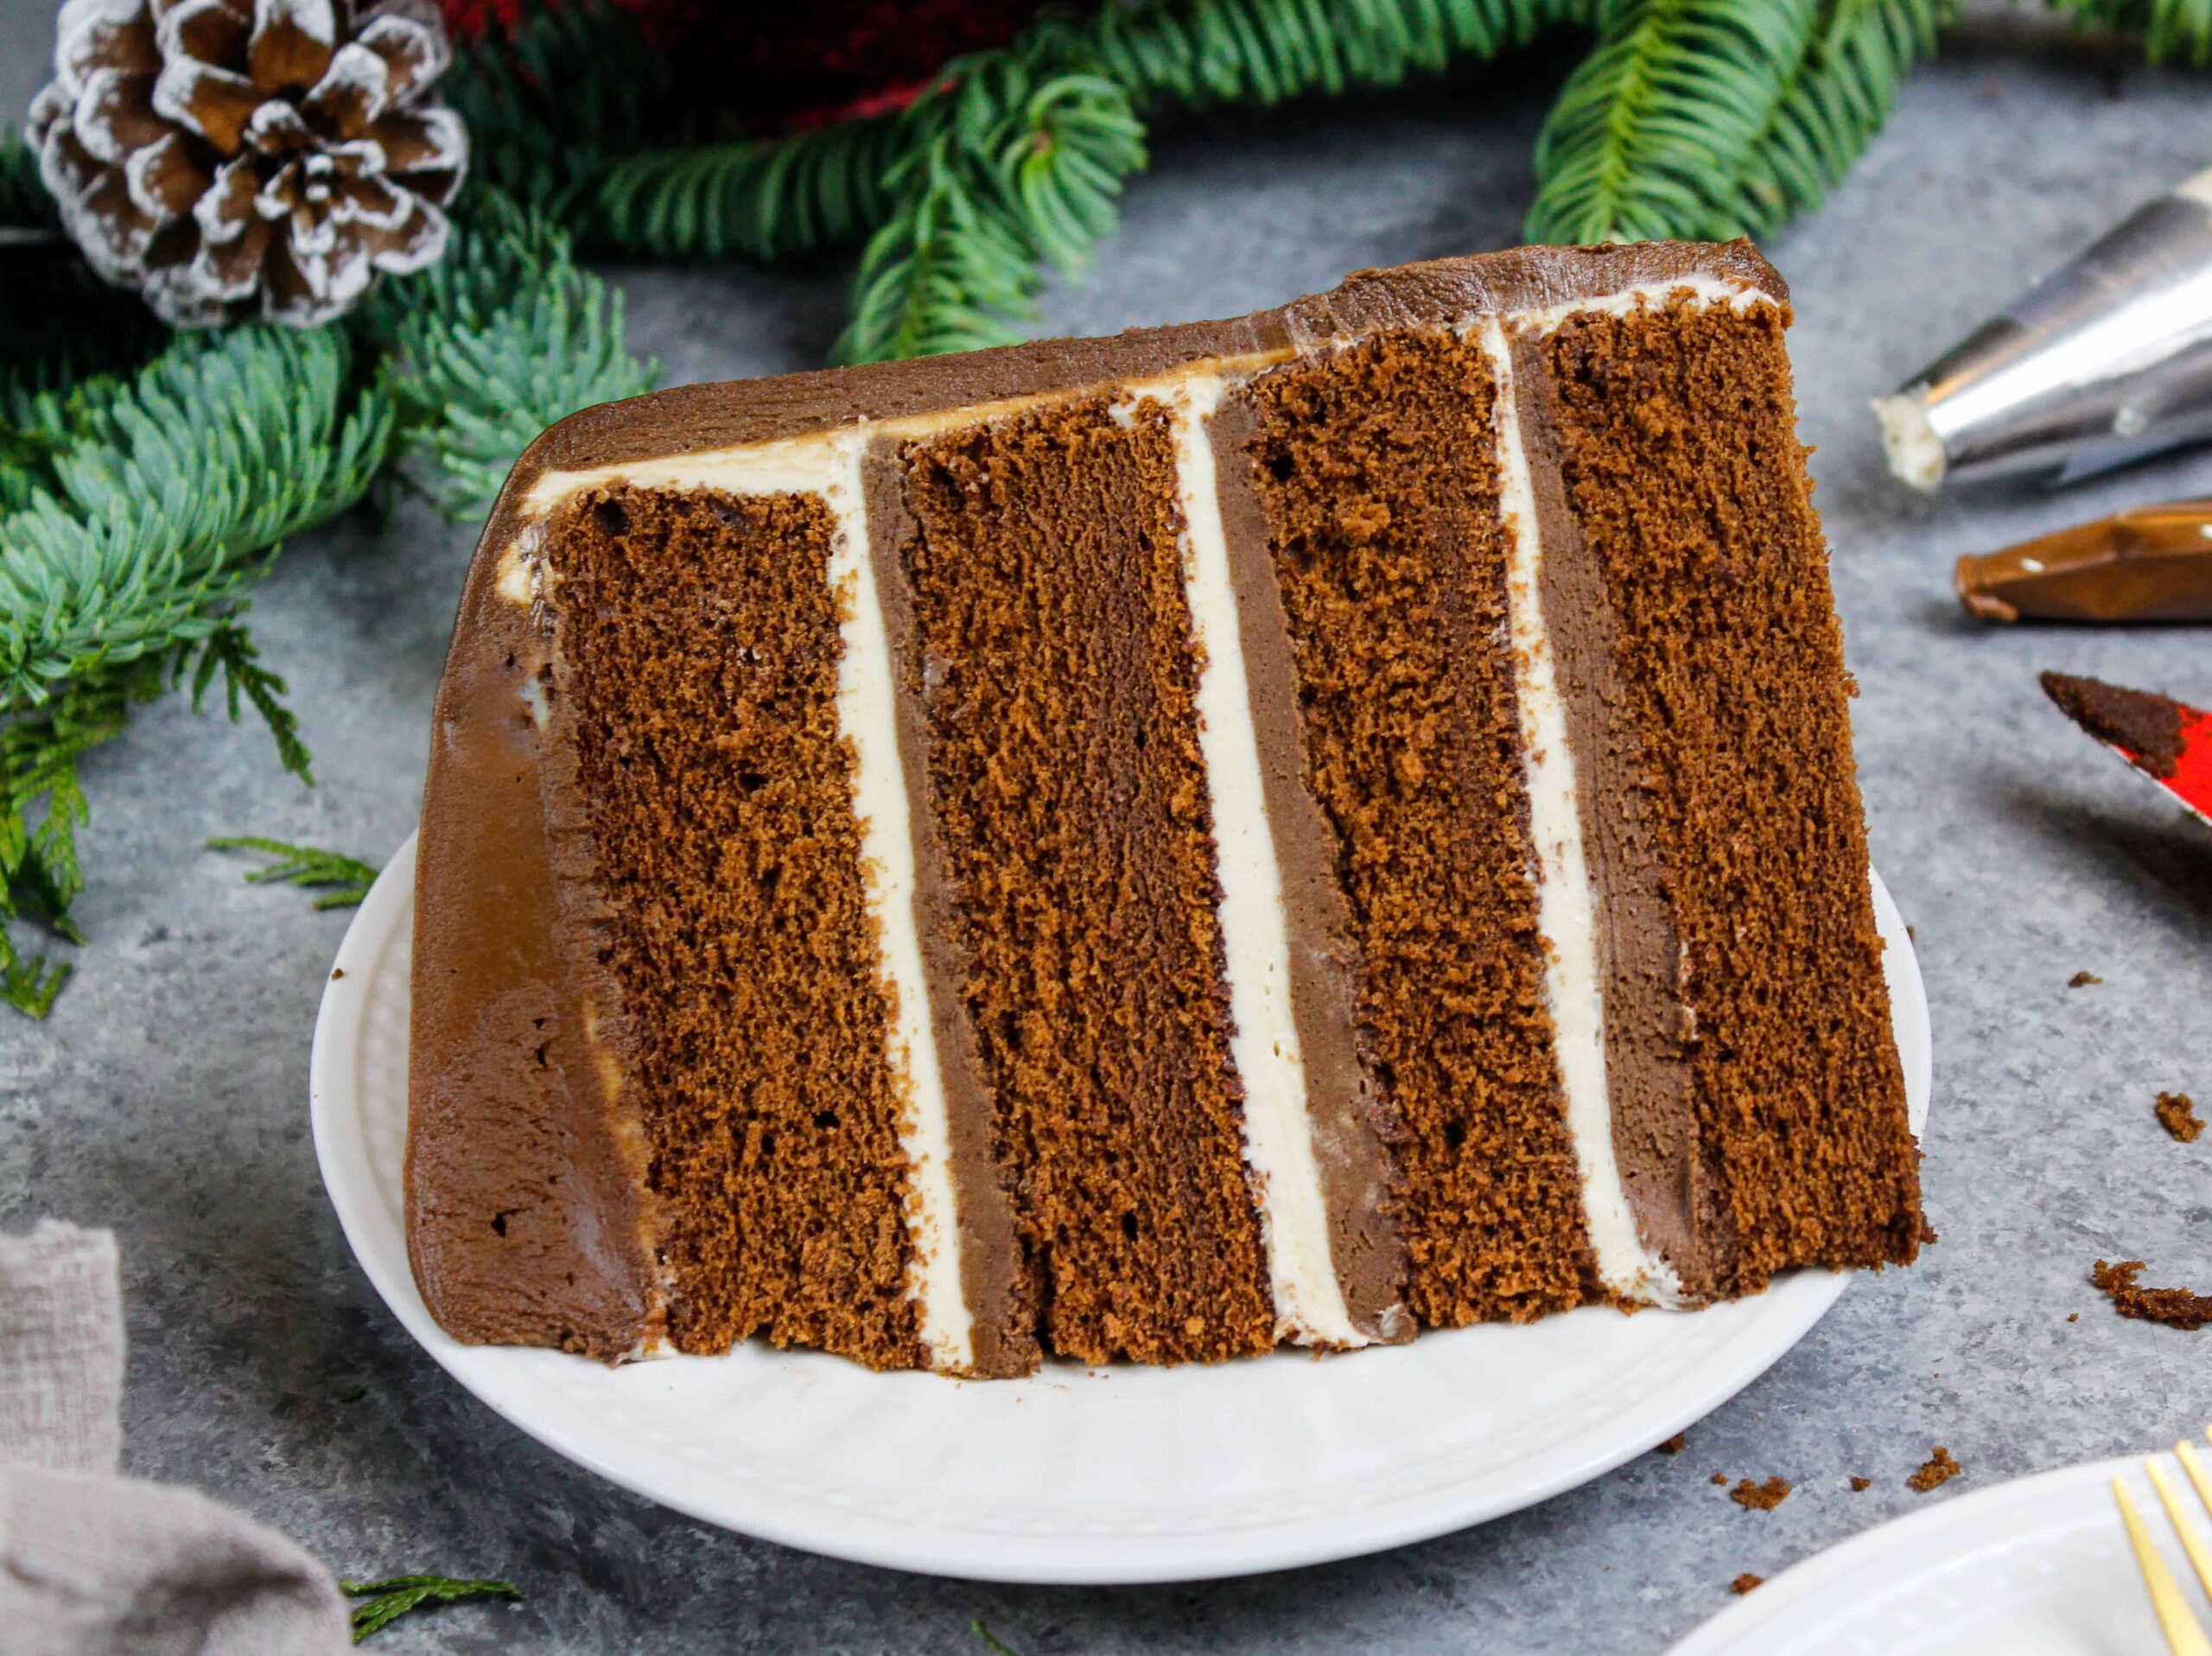
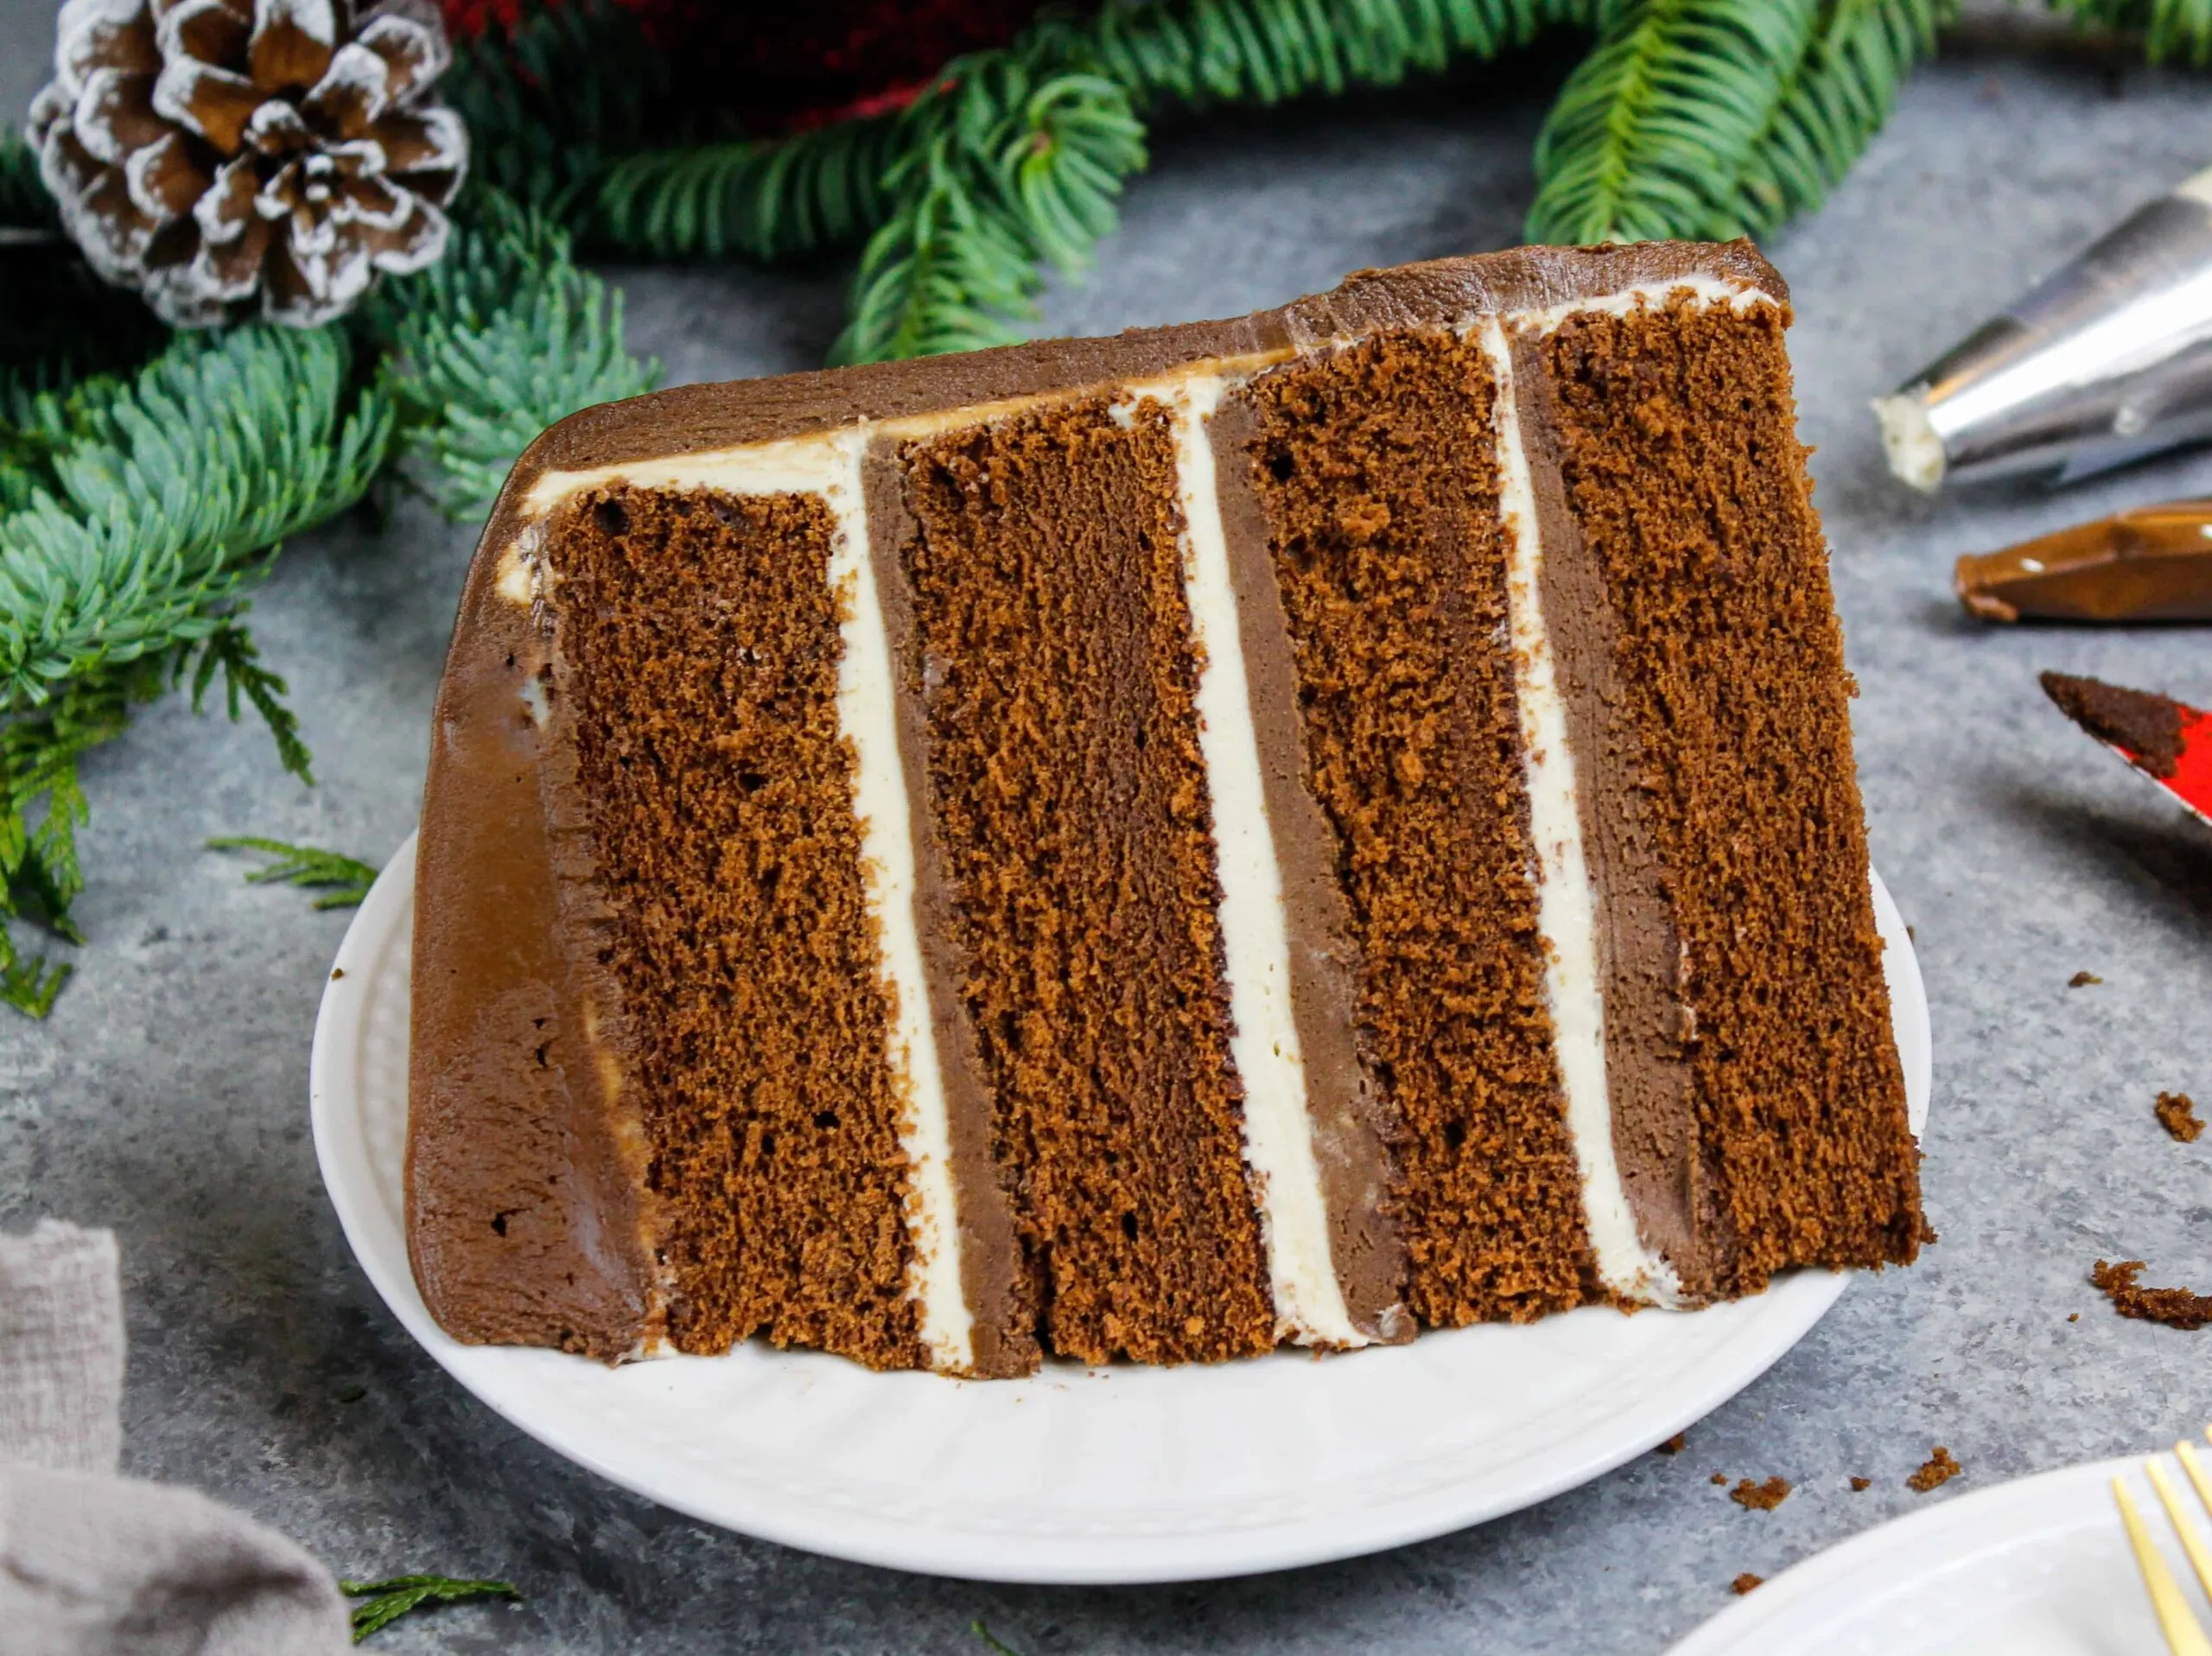
The frosting on this Rudolph cake is pretty rich so I wanted fluffier cake layers to help balance it all out.
Substitutions and Swaps in this Rudolph Cake
While I love making this Rudolph cake following the recipe below, I know you might not have all of the ingredients on hand. Or if you have food allergies or restrictions, I’ve got you covered.
Below are some swaps and substitutions that can be made in this recipe.
- Unsalted Butter – If you only have salted butter on hand, you can use it in place of the salted butter and omit the salt in this recipe. You can also use vegan butter in its place!
- Granulated Sugar – I do not recommend reducing the amount of sugar or changing the type of sugar as it will change the texture of the cake.
- Large eggs – You can also use 1 cup of egg whites or if you have an egg allergy you can use 4 flaxseed eggs.
- Unsweetened Cocoa Powder – I prefer using regular baking cocoa, but you can also use Dutch-processed or black cocoa powder in this recipe.
- Hot Coffee – Any strong coffee will work, or you can mix 1 Tbsp of instant espresso or coffee into 1 cup of hot water. If you want to avoid a coffee flavor, you can also just use hot water.
- Buttermilk – You can also use full fat yogurt, sour cream, whole milk, or an alternative yogurt or milk (almond, soy, oat) if you’re dairy free.
- Self-Rising Cake Flour – This recipe works best with self-rising cake flour, but you can make your own if needed! Please see the section below for instructions.
- Heavy Cream – You can also use whipping cream or coconut cream.
- Dark Chocolate – I like using melted dark chocolate to make the frosting and antlers on this cake, but you can also use milk or semi-sweet chocolate.
Why Self-Rising Cake Flour is Your Best Friend
As you can probably tell, I am a huge fan of self-rising cake flour. Self-rising cake flour is pre-mixed, so salt and baking powder are already incorporated into the cake flour.
I love this because it helps you skip three steps. Rather than getting out all these ingredients and whisking them together, you just use 3 cups of your self-rising cake flour. Viola!

Surprisingly, my neighborhood grocery store only carries the self-rising type of cake flour. If you forgot to grab some at the store or can’t find any, don’t worry.
For every cup of self-rising flour that this recipe calls for, measure out 1 cup of cake flour, then add 1/4 teaspoon salt and 1 1/4 teaspoons baking powder.
Or if you are more of a metrics person, here’s the same formula in grams:
Swap 100 grams of self-rising flour with 94 grams of cake flour, plus 5 1/2 grams baking powder and 1 gram salt.
Making This Rudolph Cake in Different Sizes
This recipe can also be used to make different sized cakes. You can also half or double the ingredients to make a half or double batch!
You can make four 6″ cake layers with one batch of batter. Bake the cake layers at 350 F for 32-34 minutes or until a toothpick comes out with a few moist crumbs.
One batch of batter can also be used to make one 9×13-inch sheet cake. Bake it at 325 F for 35-45 minutes and use flower nails or heating cores to help the cake bake evenly.
You can also use this recipe to make a Bundt cake! Bake time can vary based on the size and type of pan you use and can take anywhere from 45-75 minutes.
I recommend using a toothpick to test for doneness and checking on it every 5-10 minutes once it’s been in the oven for 45 minutes.
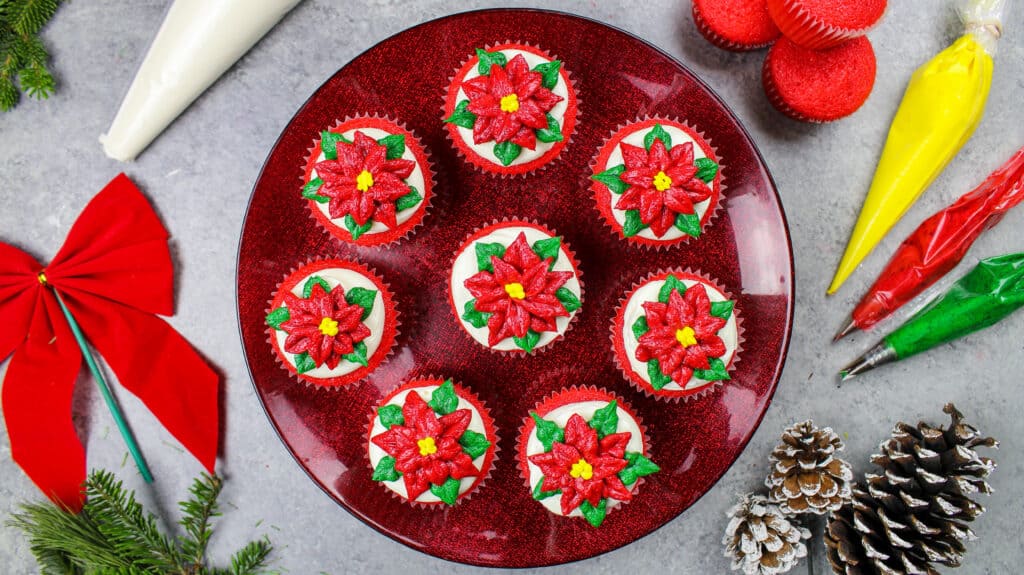
The final variation of this recipe is cupcakes!! This recipe makes about 24 regular sized cupcakes. Fill cupcake liners 3/4 full and bake for 17-19 minutes or until a toothpick comes out with a few moist crumbs.
Tips for Making the Rudolph Cake
- Sketch out a template for your antlers and ears to make sure they’re the same size and properly mirrored.
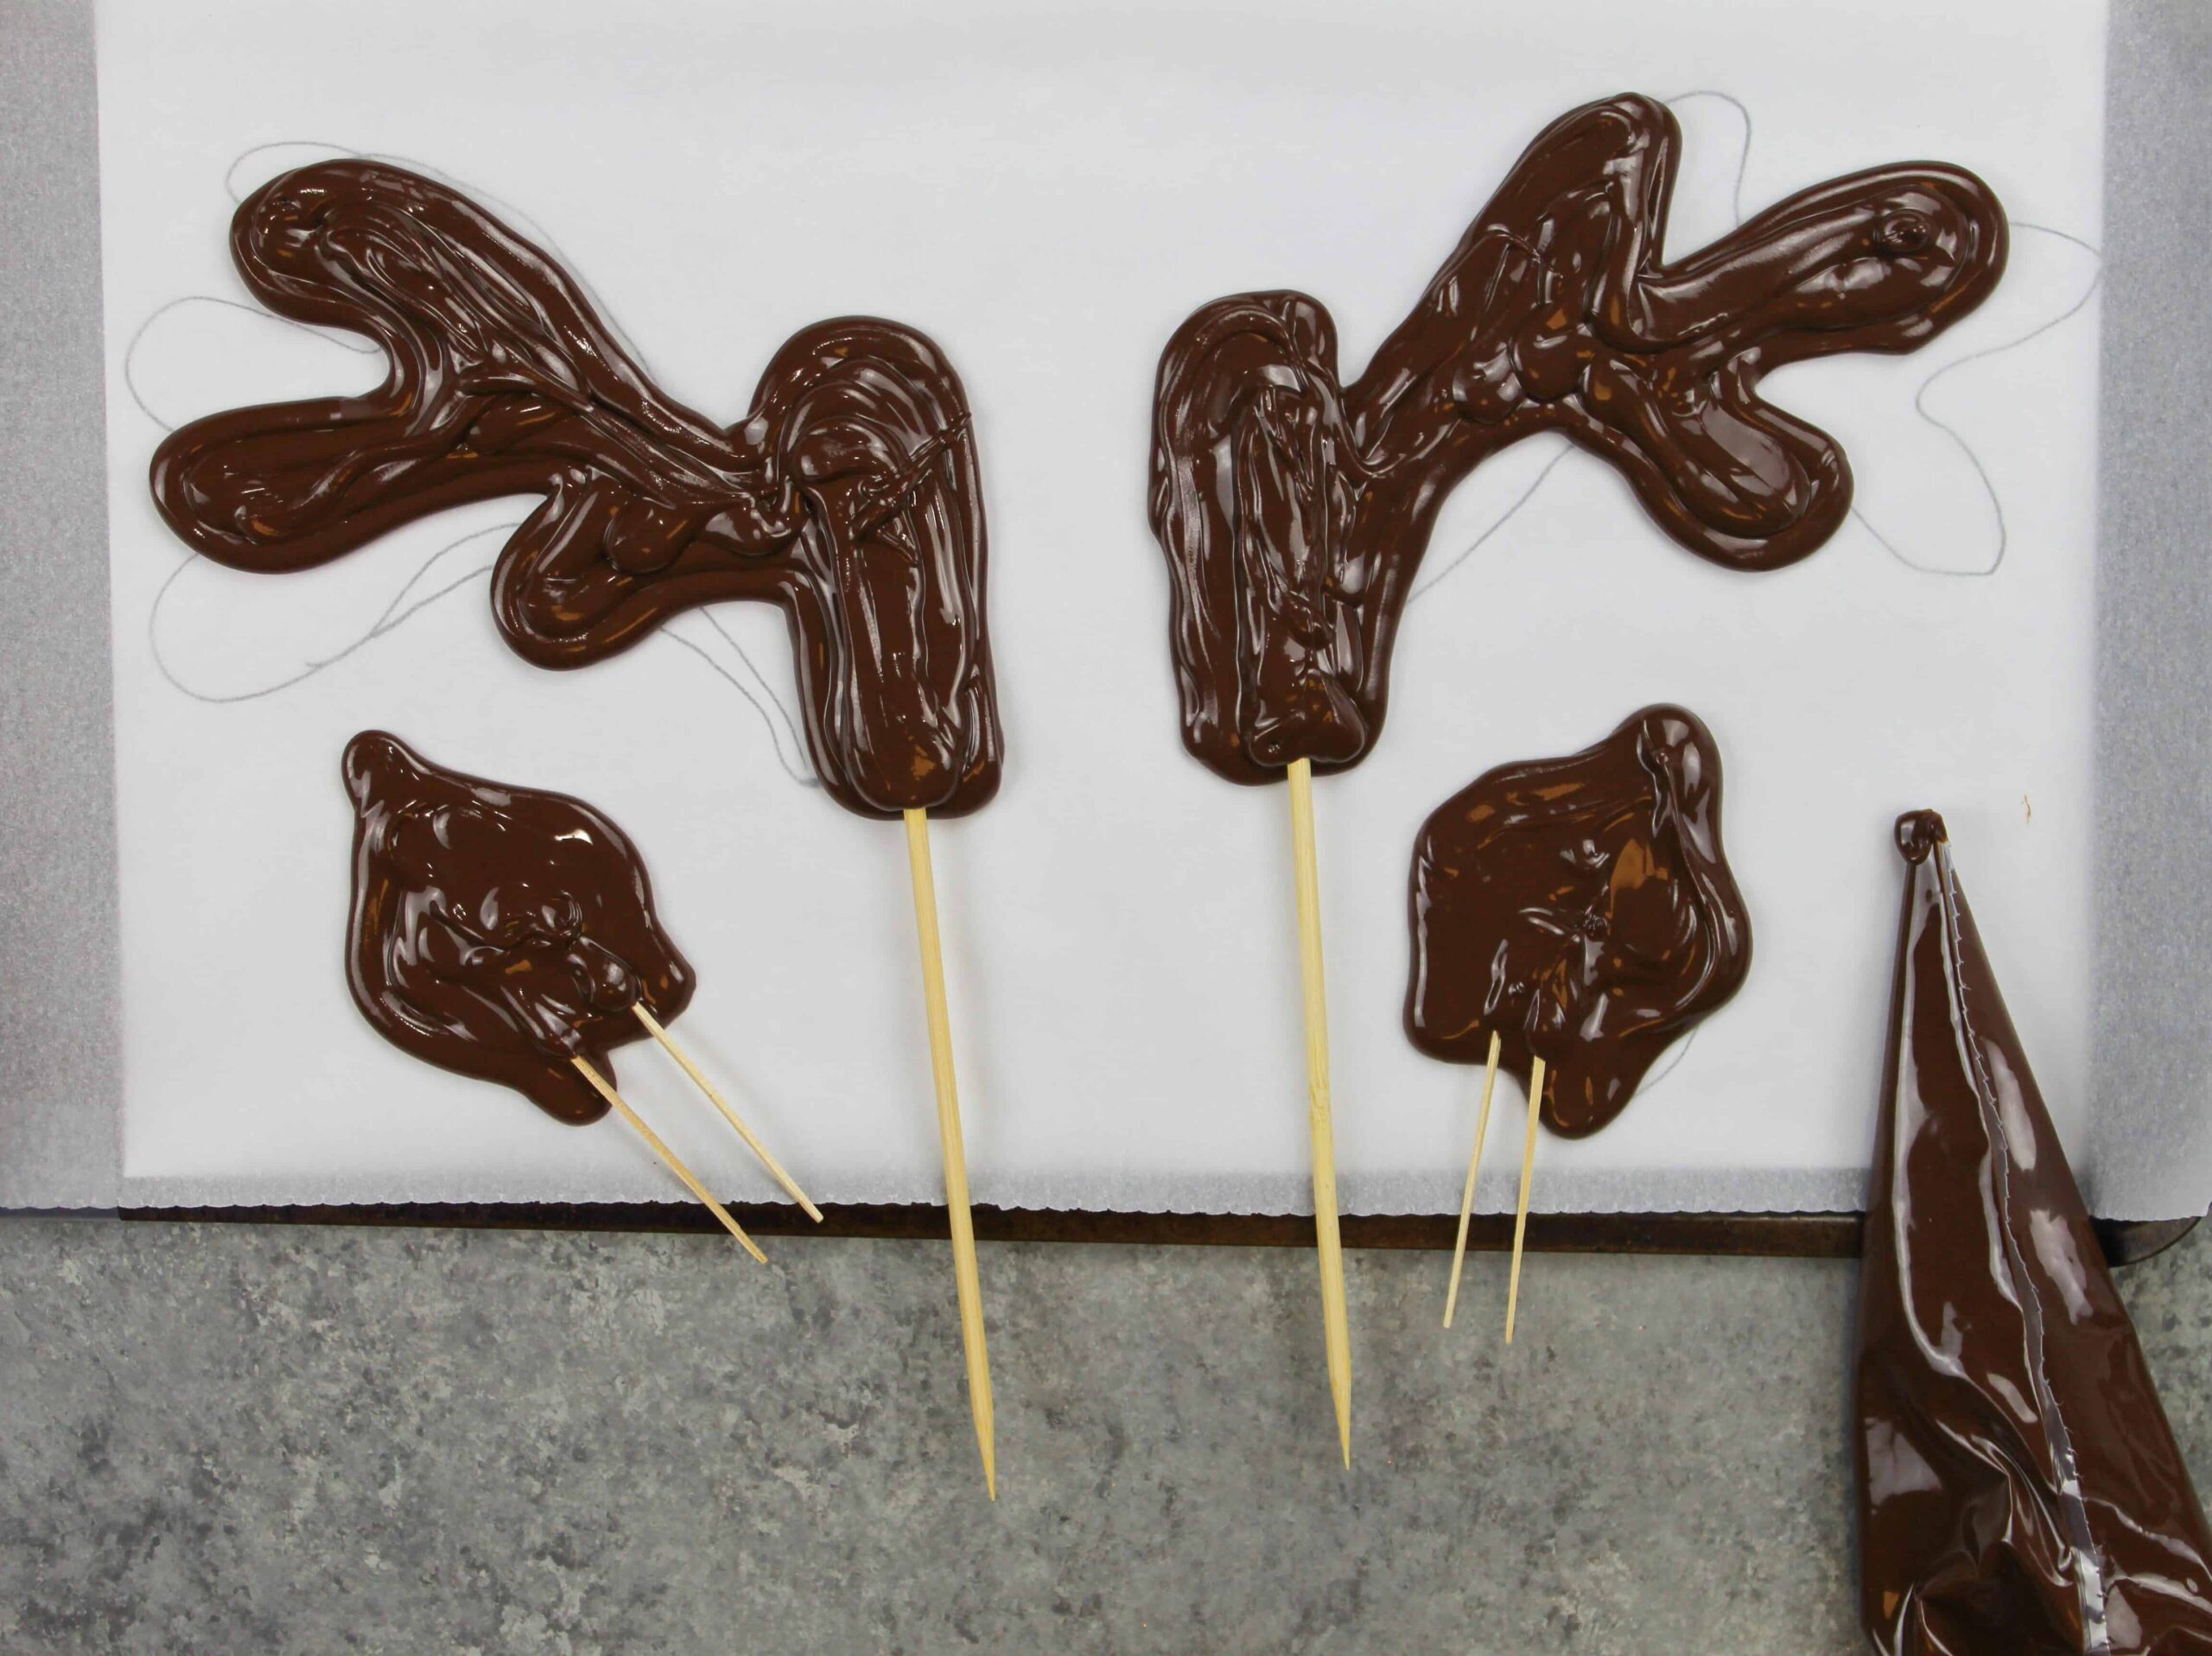
- Gently place a wooden skewer on top of the piped chocolate antler and ears to make them easier to add to the cake. Then pipe a little extra chocolate over them to lock them into place!
- Properly measure your flour (spoon into the cup measure, then level) or use a kitchen scale.
- Make sure your ingredients are at room temperature to help them mix together better.
- Don’t over-mix your batter, stir until the cake flour is just combined.
- Don’t level your cake layers until they are completely cooled.
- Make sure your buttercream is the right consistency before frosting your cake! It will help give your cake proper structure and make it easier to decorate.
- If your cake layers turn out less than perfect, I recommend reading my cake troubleshooting guide to see where things might’ve gone awry.

Making This Rudolph Cake in Advance and Storage Tips
- Make your cake layers in advance and freeze them. It breaks the process up and makes it more approachable.
- Make your frosting ahead of time too or save any leftover frosting! It can be stored in an airtight container in the fridge for up to a month, or in the freezer for up to 3 months. Be sure to give it a good stir once it thaws to get the consistency nice and smooth again.
- A frosted cake can last in the fridge for up to a week, or in the freezer for up to a month. The buttercream locks in all the moisture, keeping the cake fresh and delicious!
- If you cut into the cake and have leftovers, use any remaining frosting to cover the cut section to keep it moist and store in the fridge for up to a week.
- If you make this cake in advance, wait to add the antlers until you plan to serve the cake. It’ll make it much easier to store in the fridge!

Let Me Know What You Think
If you make this Rudolph cake, please tag me @chelsweets and use the #chelsweets!!
Also leave a comment below and a rating to let me know your thoughts.
Other Posts You Might Like:


Rudolph Cake
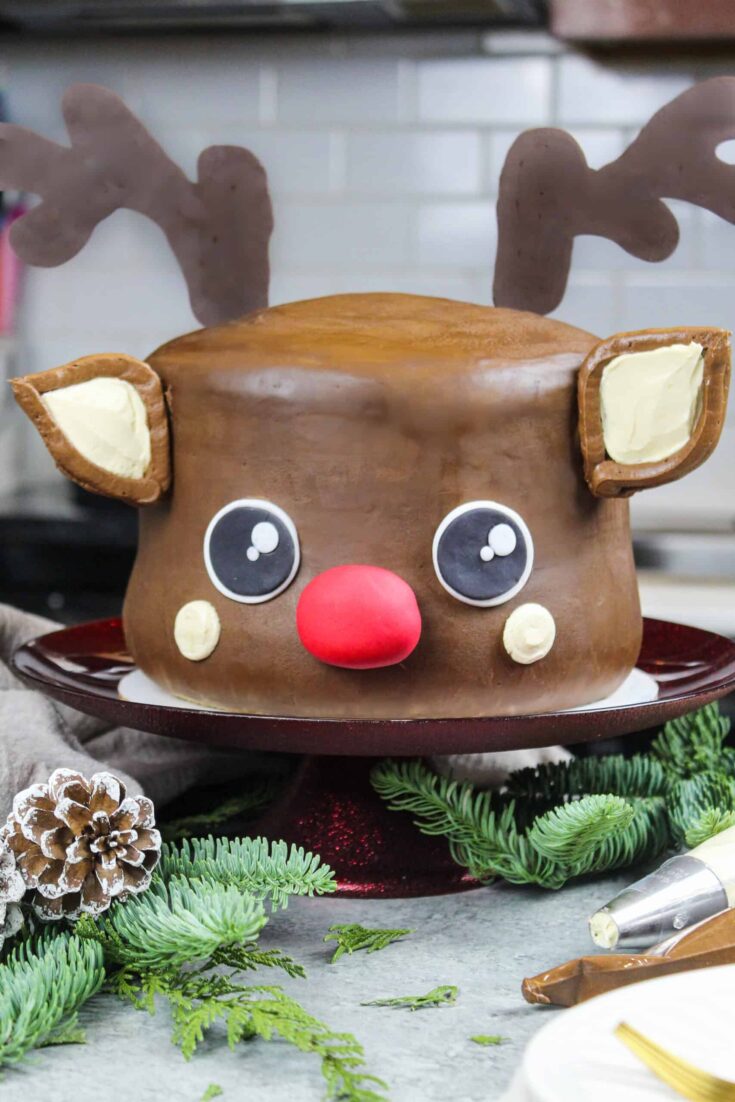

This adorable rudolph cake is made with soft, fluffy chocolate cake layers and frosted with peanut butter buttercream.
Ingredients
Chocolate Cake Layers
- 1 cup or 2 sticks unsalted butter, room temp (226g)
- 2 1/2 cups granulated sugar (500g)
- 4 large eggs, room temp (224g)
- 1 cup hot coffee or hot water (240g)
- 1 cup buttermilk, room temp (240g)
- 1 cup unsweetened baking cocoa (80g)
- 1 tsp vanilla extract (4g)
- 3 cups self-rising cake flour (360g)
Chocolate Peanut Butter Buttercream
- 2 cups or 4 sticks unsalted butter, room temperature (452g)
- 1 cup peanut butter (240g)
- 1/2 tsp fine salt (3g)
- 1 tsp vanilla extract (4g)
- 6 cups powdered sugar (750g)
- 1/2 cup heavy cream (120g)
- 1 cup unsweetened baking cocoa, sifted (80g)
- 1 1/3 cups of melted dark chocolate, cooled (226g)
Rudolph's Antlers & Face
- 2/3 cup dark chocolate chips (112g)
- 2 Tbsp white fondant
- 2 Tbsp black fondant
- 2 Tbsp red fondant
Instructions
Chocolate Cake Layers
- Begin by preheating the oven to 350 F / 175 C and line four 7-inch or 8-inch pans with parchment rounds and spray with non-stick baking spray.
- Add 1 cup butter and 2 1/2 cups granulated sugar into the bowl of a stand mixer. Mix on high for 1 minute with a whisk attachment until the mixture becomes light in color.
- Add in 4 large eggs, two at a time. Mix on medium high until they're fully incorporated.
- In a separate bowl, whisk together 1 cup of hot coffee, 1 cup of buttermilk and 1 cup of baking cocoa until no clumps remain.
- Next, mix 1 cup of self-rising cake flour into the butter/egg mixture on a low speed. Scrape the sides of the bowl with a rubber spatula to ensure the flour is fully incorporated.
- Pour in half of the buttermilk/cocoa mixture and mix on a low speed.
- Repeat with next cup of cake flour and the remaining cocoa mixture.
- Add in the last cup of self-rising cake flour and mix on low until the flour is just incorporated.
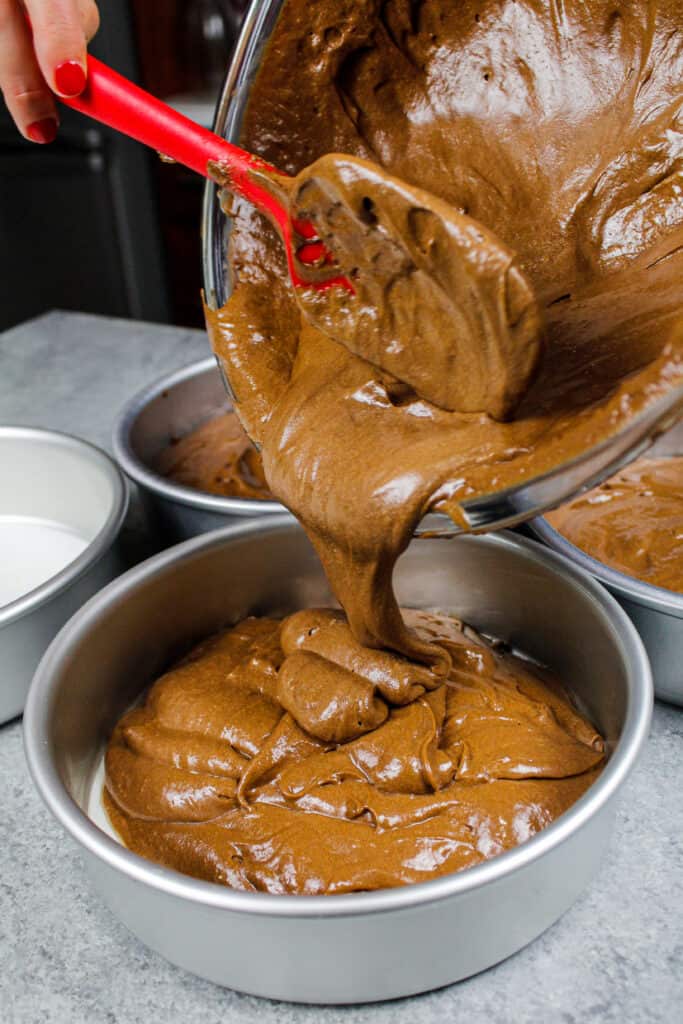
- Pour the batter evenly into the prepared pans and bake for 28-32 minutes or until a toothpick comes out with a few moist crumbs.
- Let the cake layers cool in the pans for 10 minutes then run an offset spatula around the edge of the pans to help separate the layers from the pans.
- Place the pans in the freezer for 30 minutes to speed the cooling process. Once the layers are fully cooled carefully flip the pans and remove the layers from the pans.
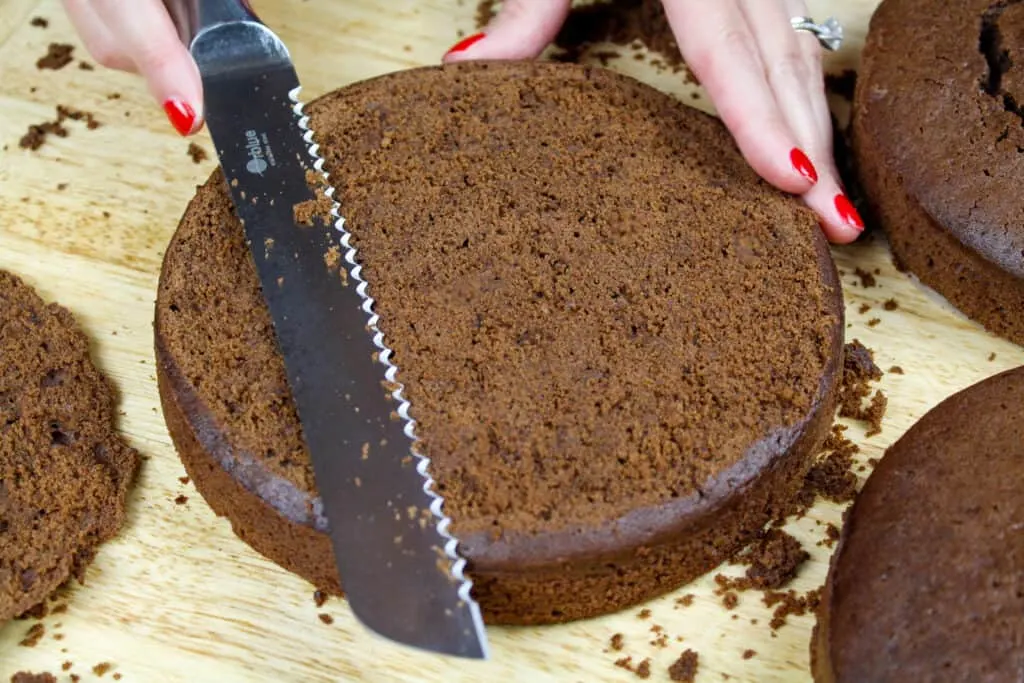
- Use a serrated knife to level the tops of the layers. If you're making these in advance, wrap them in plastic wrap and freeze them once they're leveled.
Chocolate Peanut Butter Buttercream
- While the cake layers bake and cool, make the peanut butter chocolate buttercream.
- Beat 2 cups of butter and 1 cup peanut butter on a medium speed for 30 seconds with a paddle attachment until smooth.
- Mix in 1/2 tsp salt and 1 tsp vanilla on low speed.
- Slowly add in 6 cups of powdered sugar, 1 cup at a time. Halfway through add 1/2 cup of heavy cream to make the frosting easier to mix.
- Place 1/2 cup of frosting in a small piping bag and set aside. This will be used to make Rudolph's cheeks and ears.
- Mix in 1 cup of sifted baking cocoa and 1 1/3 cups of cooled, melted chocolate.
- Beat on low until the ingredients are fully incorporated and the desired consistency is reached.
- If the frosting is too thick, add an extra Tbsp of heavy cream. If it's too thin, add in another 1/4 cup of powdered sugar.
- Stir by hand with a rubber spatula to get the frosting SUPER smooth.
Assembling This Rudolph Cake
- Place 2/3 cup of dark chocolate chips in a piping bag and seal the top with a rubber band. Heat in the microwave in 15 second intervals until melted.
- Place a piece of parchment paper on a metal baking sheet and use the melted chocolate to pipe two antlers and ears. Gently place a small wooden skewer on top of each antler/ear, then place in the fridge to harden.
- Next stack and frost the chocolate cake layers on a greaseproof cake board, using a dab of buttercream to help stick the first cake layer to the board.
- Spread an even layer of frosting on top of each cake layer with a large offset spatula.
- Repeat with remaining cake layers.
- Once the cake layers are stacked, cover the cake in a thin coat of frosting. Smooth using a bench scraper, then chill the cake in the fridge (10 minutes) or freezer (5 minutes) until the frosting is firm to the touch.
- Add a second, thicker layer of frosting to the cake and smooth using a bench scraper.
- Use the white and black fondant to make cartoon eyes and shape Rudolph's nose using the red fondant.
- Gently press the chocolate antlers and ears into the cake and use a bit of buttercream to add the fondant facial features on the cake.
Notes
Make your cake layers in advance and freeze them. It breaks the process up and make it more approachable.
Make your frosting ahead of time too or save any leftover frosting! It can be stored in an airtight container in the fridge for up to a month, or in the freezer for up to 3 months. Be sure to give it a good stir once it thaws to get the consistency nice and smooth again.
A frosted cake can last in the fridge for up to a week or in the freezer for up to a month. The buttercream locks in all the moisture, keeping the cake fresh and delicious!
If you cut into the cake and have leftovers, use any remaining frosting to cover the cut section to keep it moist and store in the fridge for up to a week.
Nutrition Information
Yield
24Serving Size
1Amount Per Serving Calories 434Total Fat 30gSaturated Fat 15gTrans Fat 0gUnsaturated Fat 12gCholesterol 90mgSodium 178mgCarbohydrates 36gFiber 2gSugar 29gProtein 6g
Tessa AuBuchon
Saturday 2nd of January 2021
I saw you put “24” as the yield. Is this cups..? I’m trying to determine how much cake batter I need