Marbled Cookies
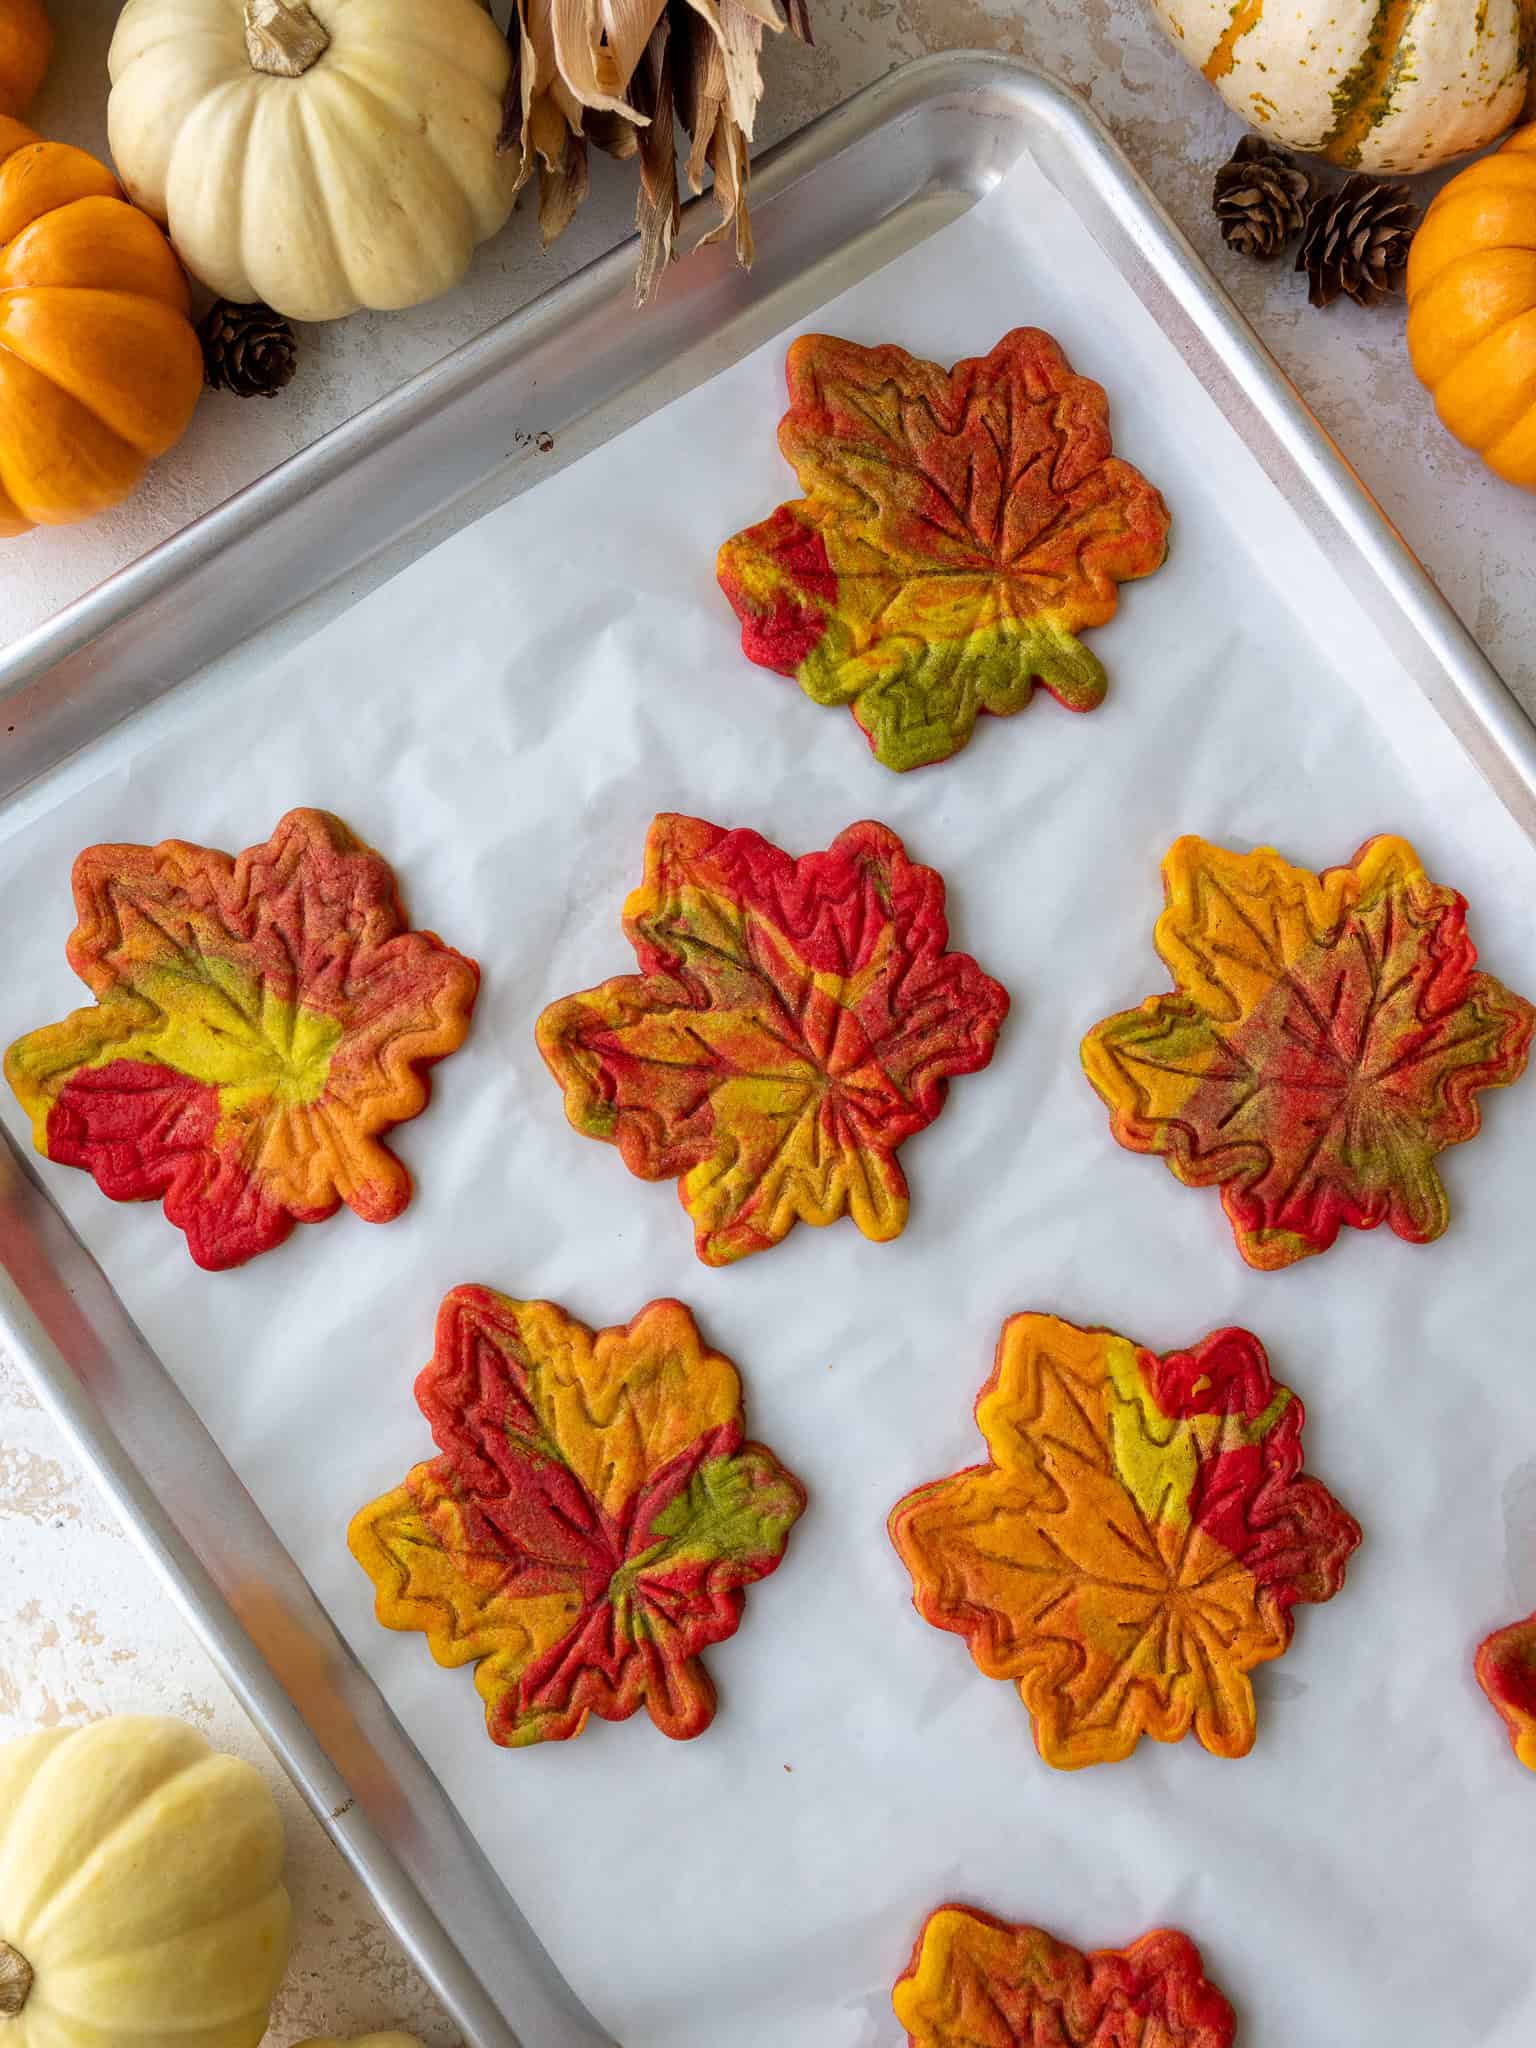
These marbled cookies bake up soft and chewy with a beautiful swirled pattern.
I love using red, orange, yellow, and green for a fall-inspired look, especially when the dough is cut into leaf shapes, but you can use any colors you like.
Marbled Cookies at a Glance
- Yield: About 24 3-inch cookies
- Texture: Soft and chewy
- Prep Time: About 30 minutes
- Bake Time: 14–17 minutes per tray
- Cookie Thickness: About 1/3 inch
- Storage: Up to 5 days at room temperature or 1 month in the freezer
Key Ingredients & Substitutions
These cookies are made with my cream cheese cookie dough, which bakes up soft and holds its shape well. Here are a few of the ingredients that matter most.
- Unsalted Butter: Make sure it’s at room temperature so it mixes together smoothly with the cream cheese and sugar.
- Full-Fat Cream Cheese: Use full-fat cream cheese at room temperature for the best texture.
- Granulated Sugar: Creaming the sugar with the butter and cream cheese helps add air to the dough and keeps the cookies soft. I don’t recommend changing the type or amount of sugar in the dough.
- Vanilla Extract or Vanilla Bean Paste: Either works well in this dough.
- Maple Extract: This is optional, so you can leave it out if you don’t like the flavor or don’t have any on hand.
- All-Purpose Flour: You can use a gluten-free baking flour in place of the AP flour in this recipe if needed.
- Cornstarch: This helps keep the cookies soft and tender, but can be omitted. However, the cookies won’t bake up with the same texture.
- Gel Food Coloring: Gel coloring gives the dough vibrant color without adding much extra liquid. You can use liquid if needed, but the dough will be stickier.
How to Make Marbled Cookies
Let’s walk through each step of this recipe so that your cookies turn out as great as possible.
Step 1: Make the Cream Cheese Cookie Dough
Preheat the oven to 350°F / 175°C and line two large baking sheets with parchment paper or silicone baking mats. NOTE: The cookies will spread less and hold their shape better when baked on parchment paper.
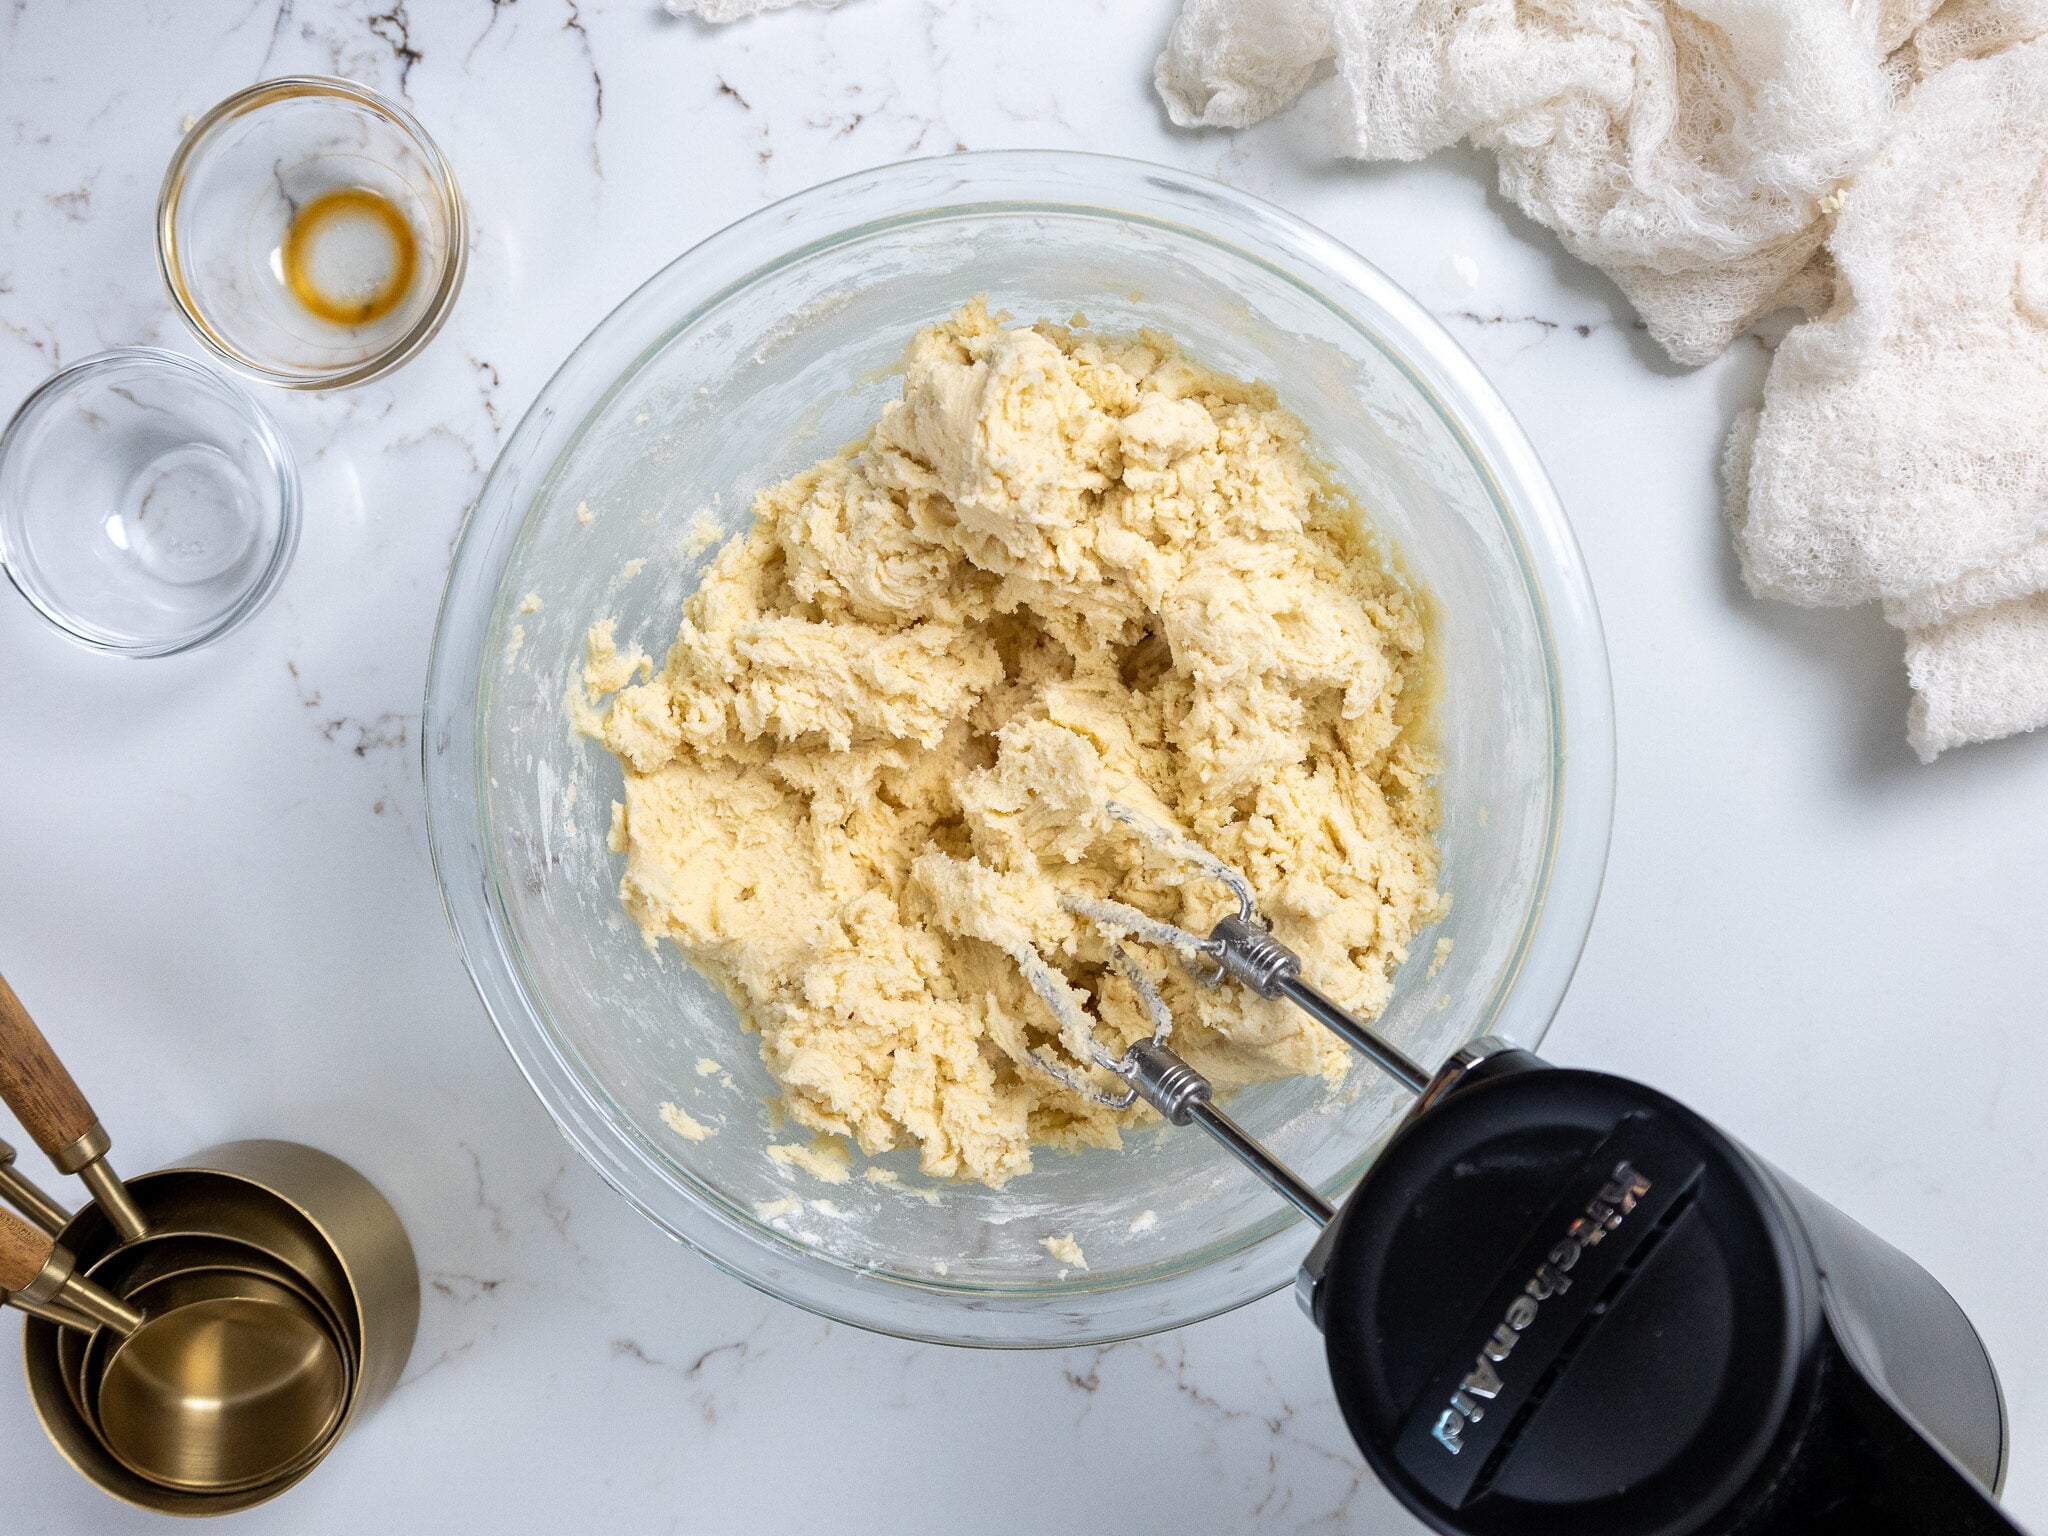
Beat the room-temperature butter and cream cheese together until smooth, then add the granulated sugar and mix on medium-high speed for a couple of minutes until the mixture becomes lighter in color.
Mix in the egg, vanilla extract or vanilla bean paste, and optional maple extract.
In a separate bowl, whisk together the flour, cornstarch, fine salt, and baking powder. Add the dry ingredients to the butter mixture and mix on low speed until they are just incorporated. Scrape the sides and bottom of the bowl with a rubber spatula to make sure everything is evenly mixed.
Step 2: Divide and Color the Dough
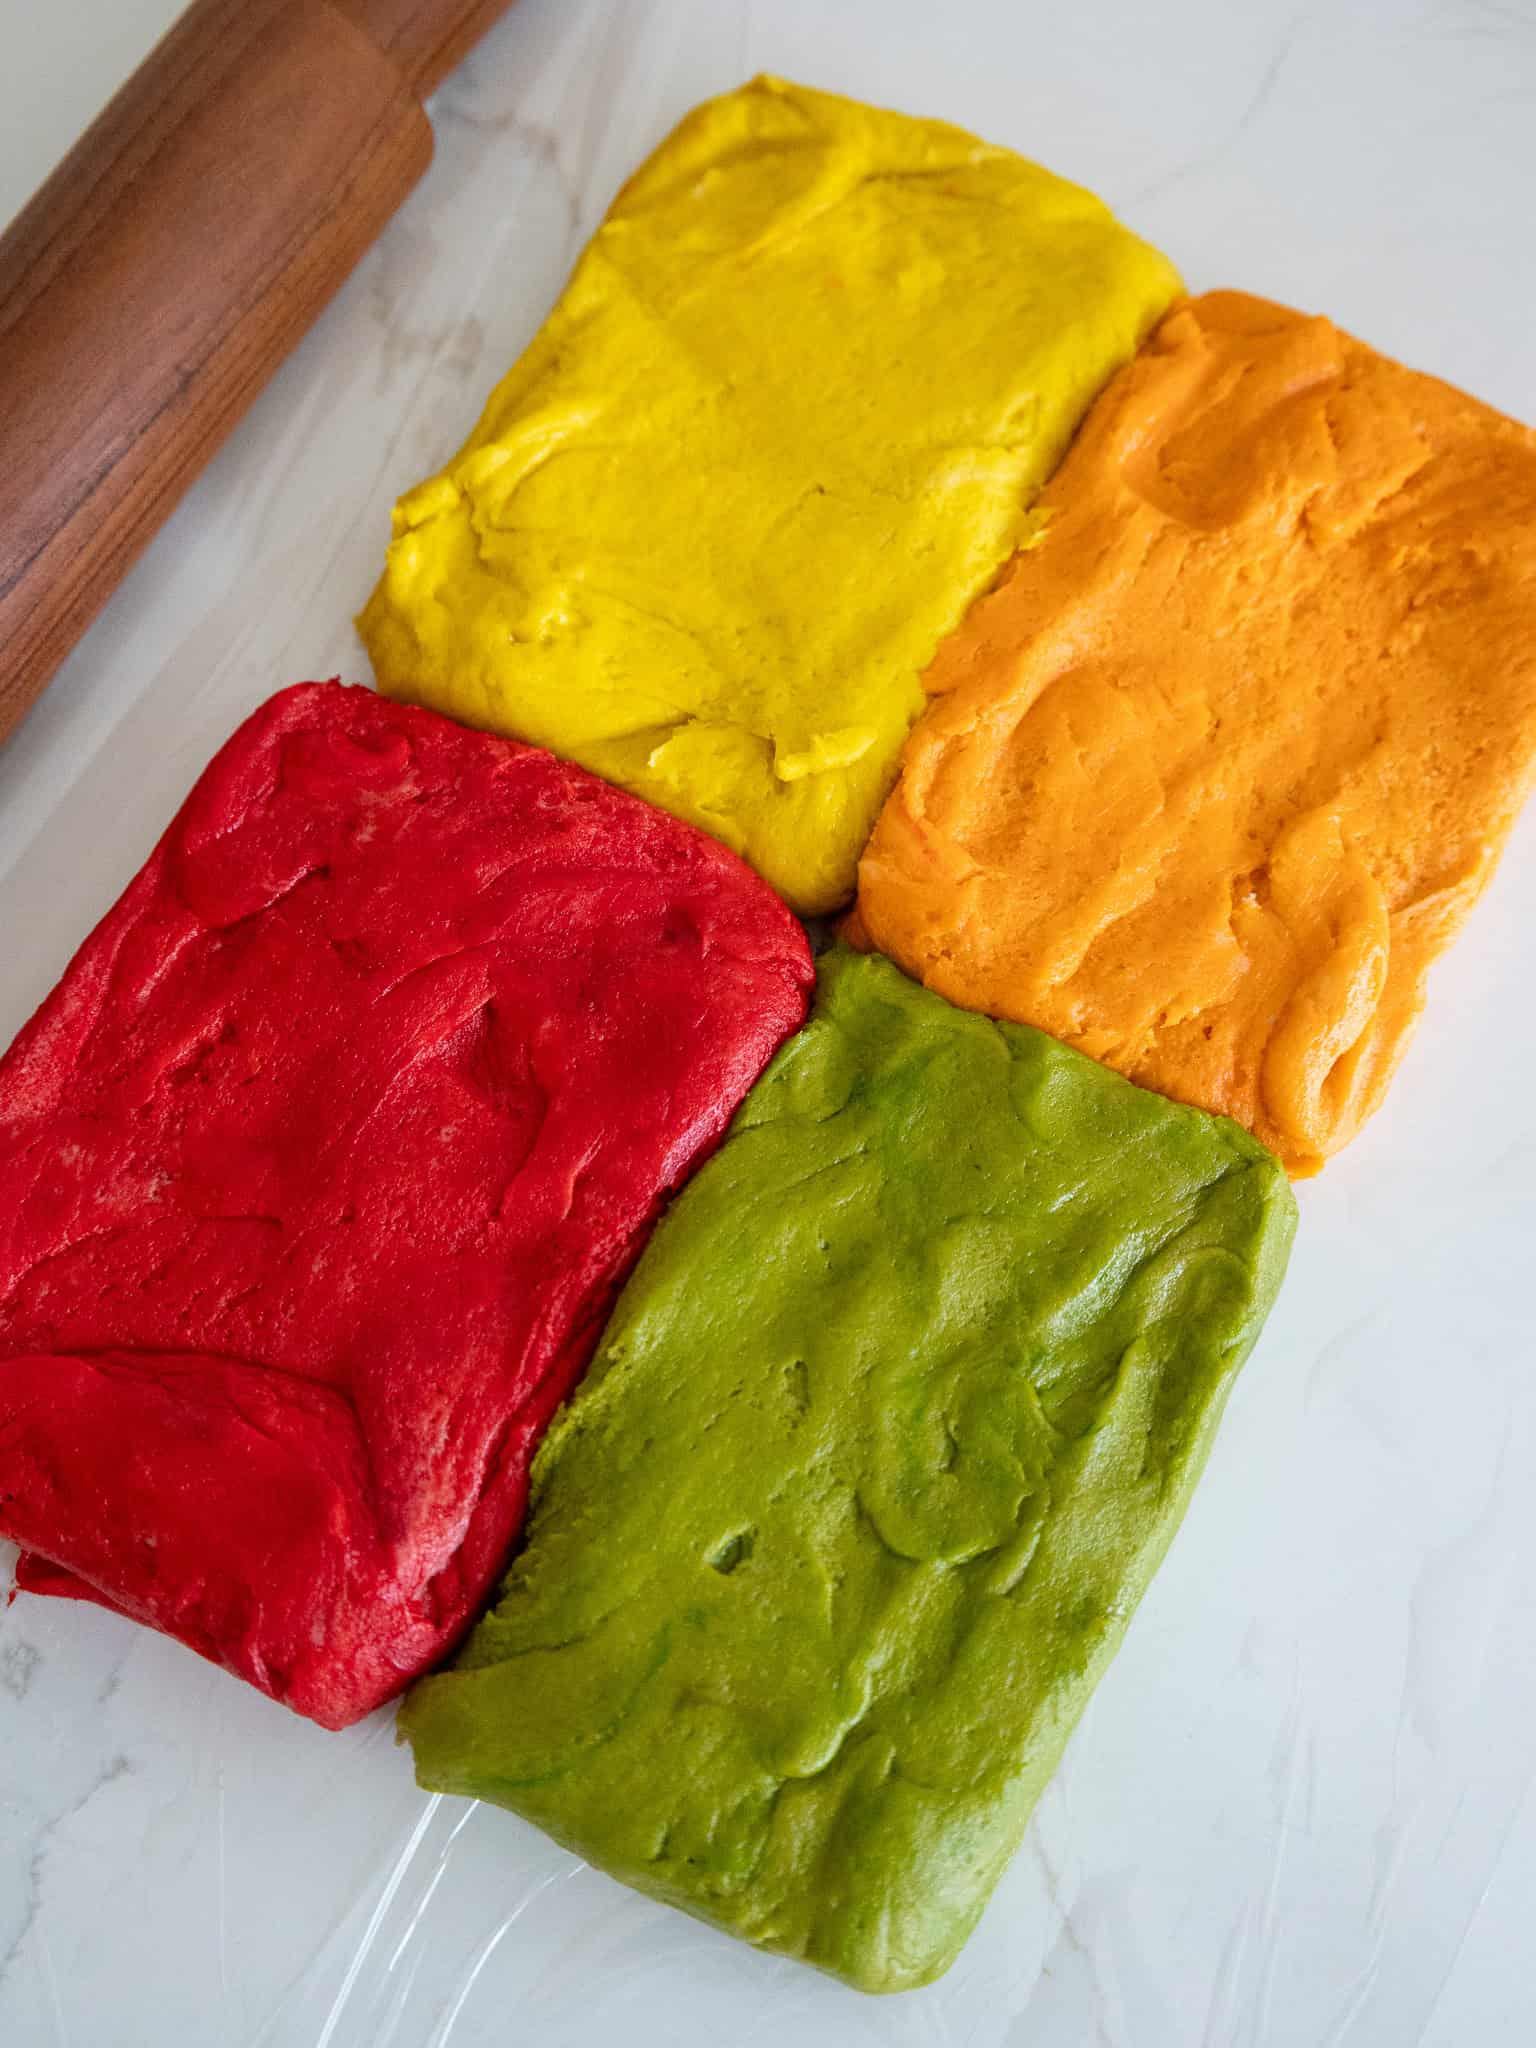
Divide the cookie dough into four equal portions. Use gel food coloring to color one portion red, one orange, one yellow, and one green.
You can also use completely different colors if you want to match another holiday or theme.
Step 3: Create the Marbled Pattern
Tear off small pieces of each of the four cookie doughs and arrange them in a random, alternating pattern to form a large rectangle.
Roll over the dough a couple of times with a rolling pin to press the pieces together, then gently fold or knead the dough a couple of times until you’re happy with the marbled look.
Be careful not to overmix it! You still want to see distinct sections of each color.
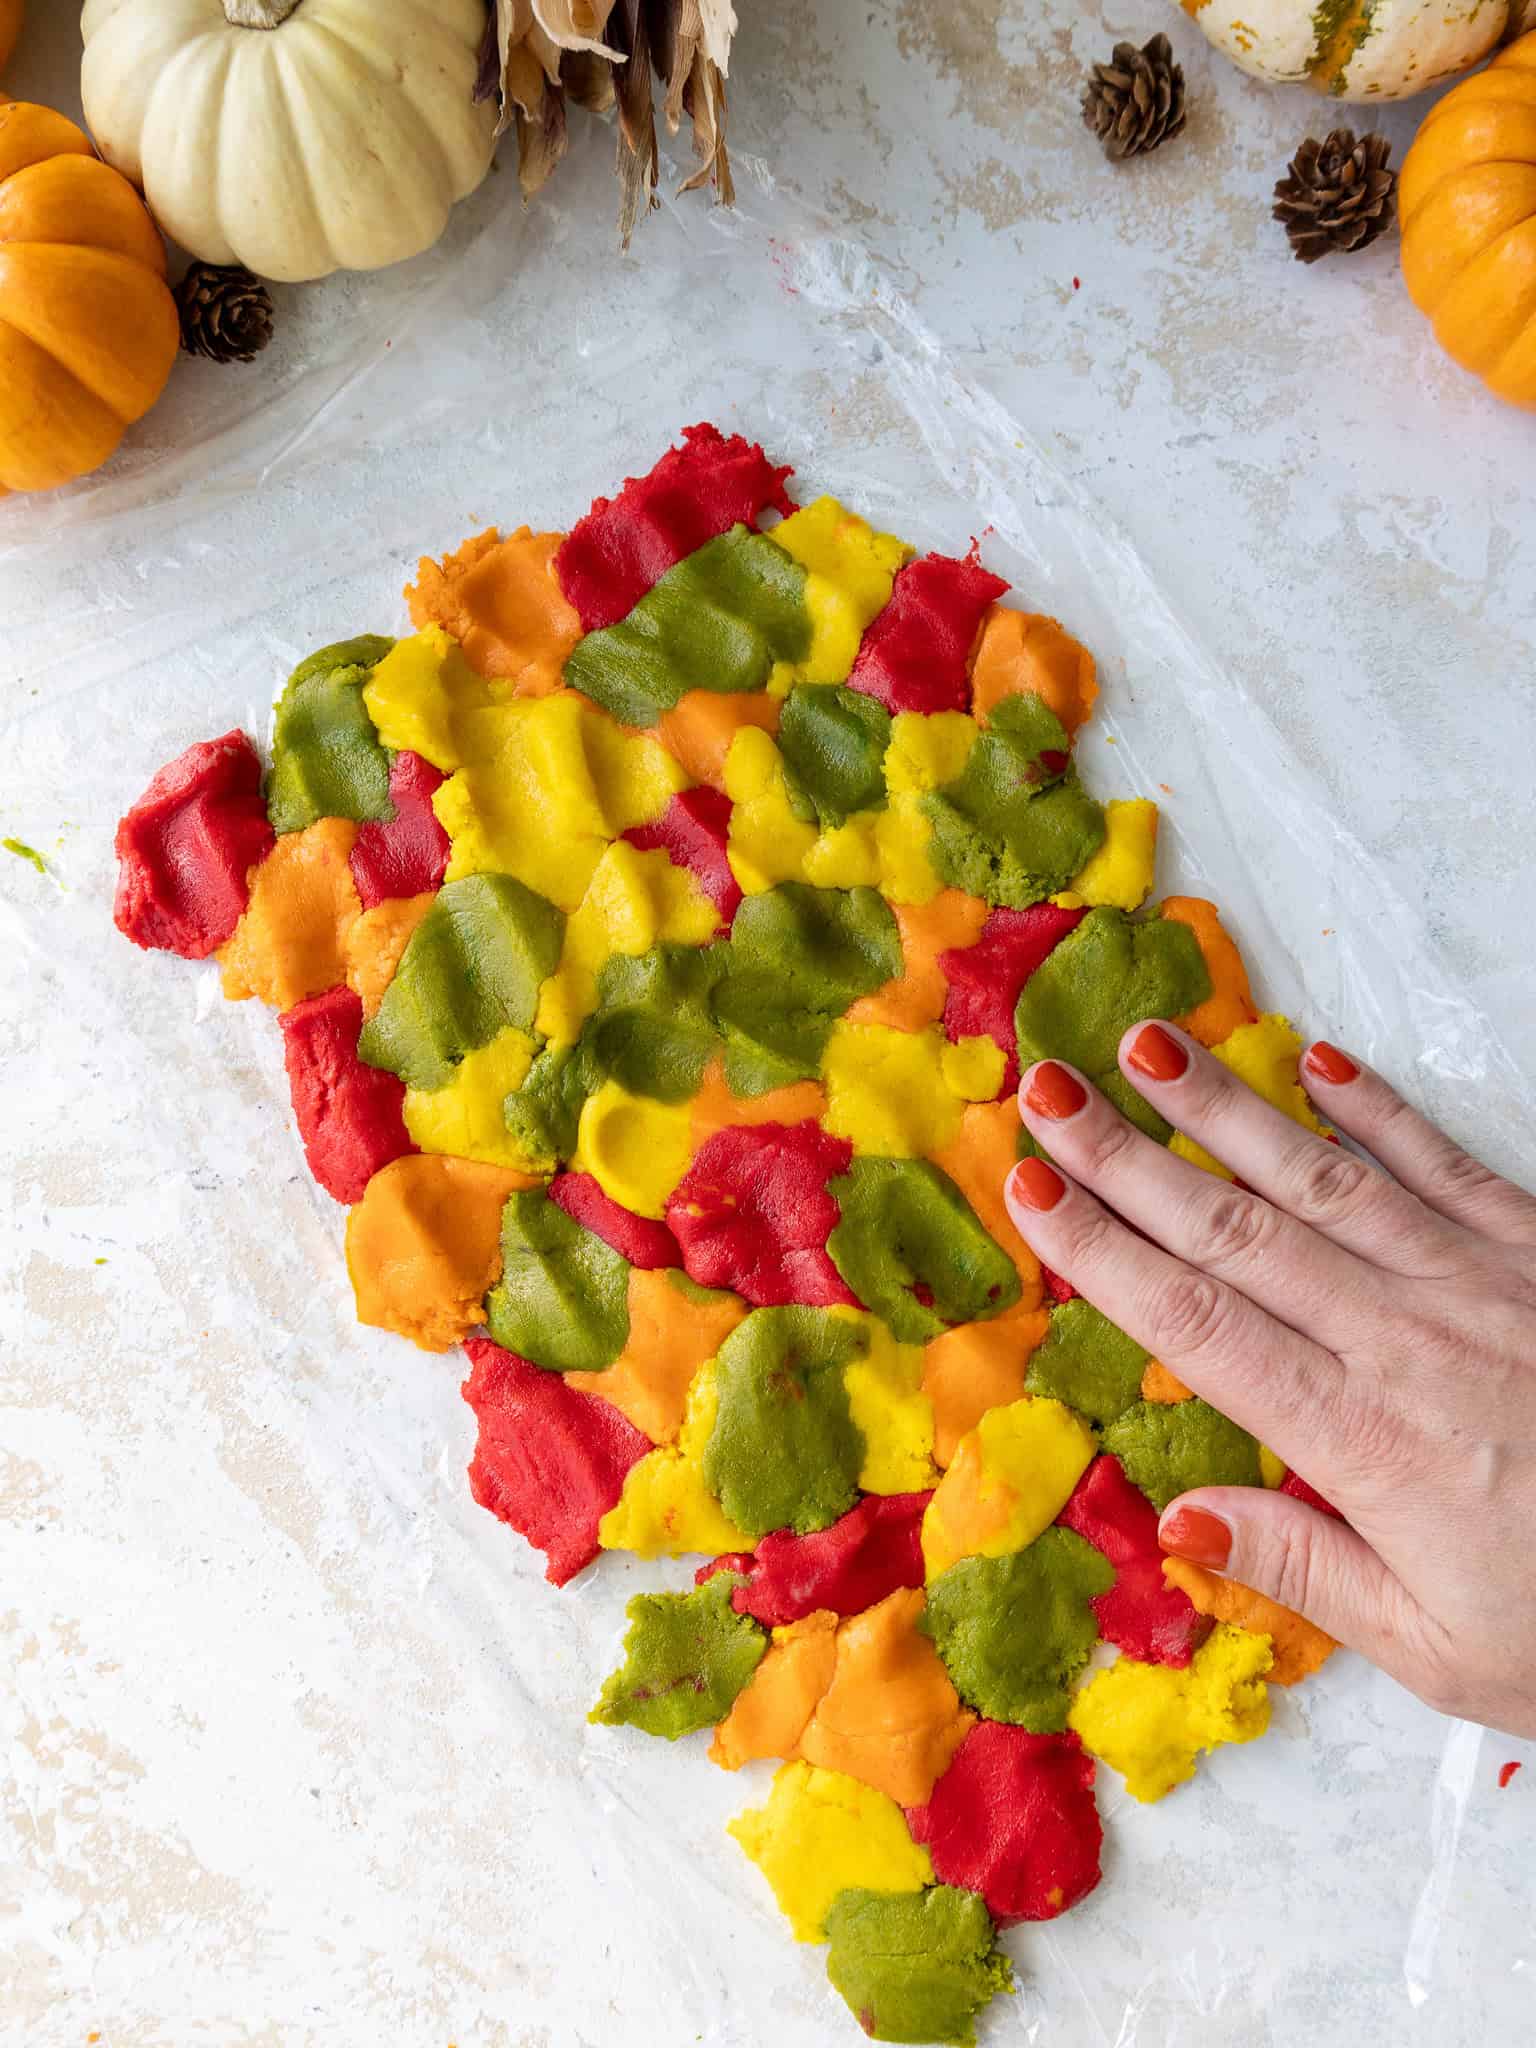
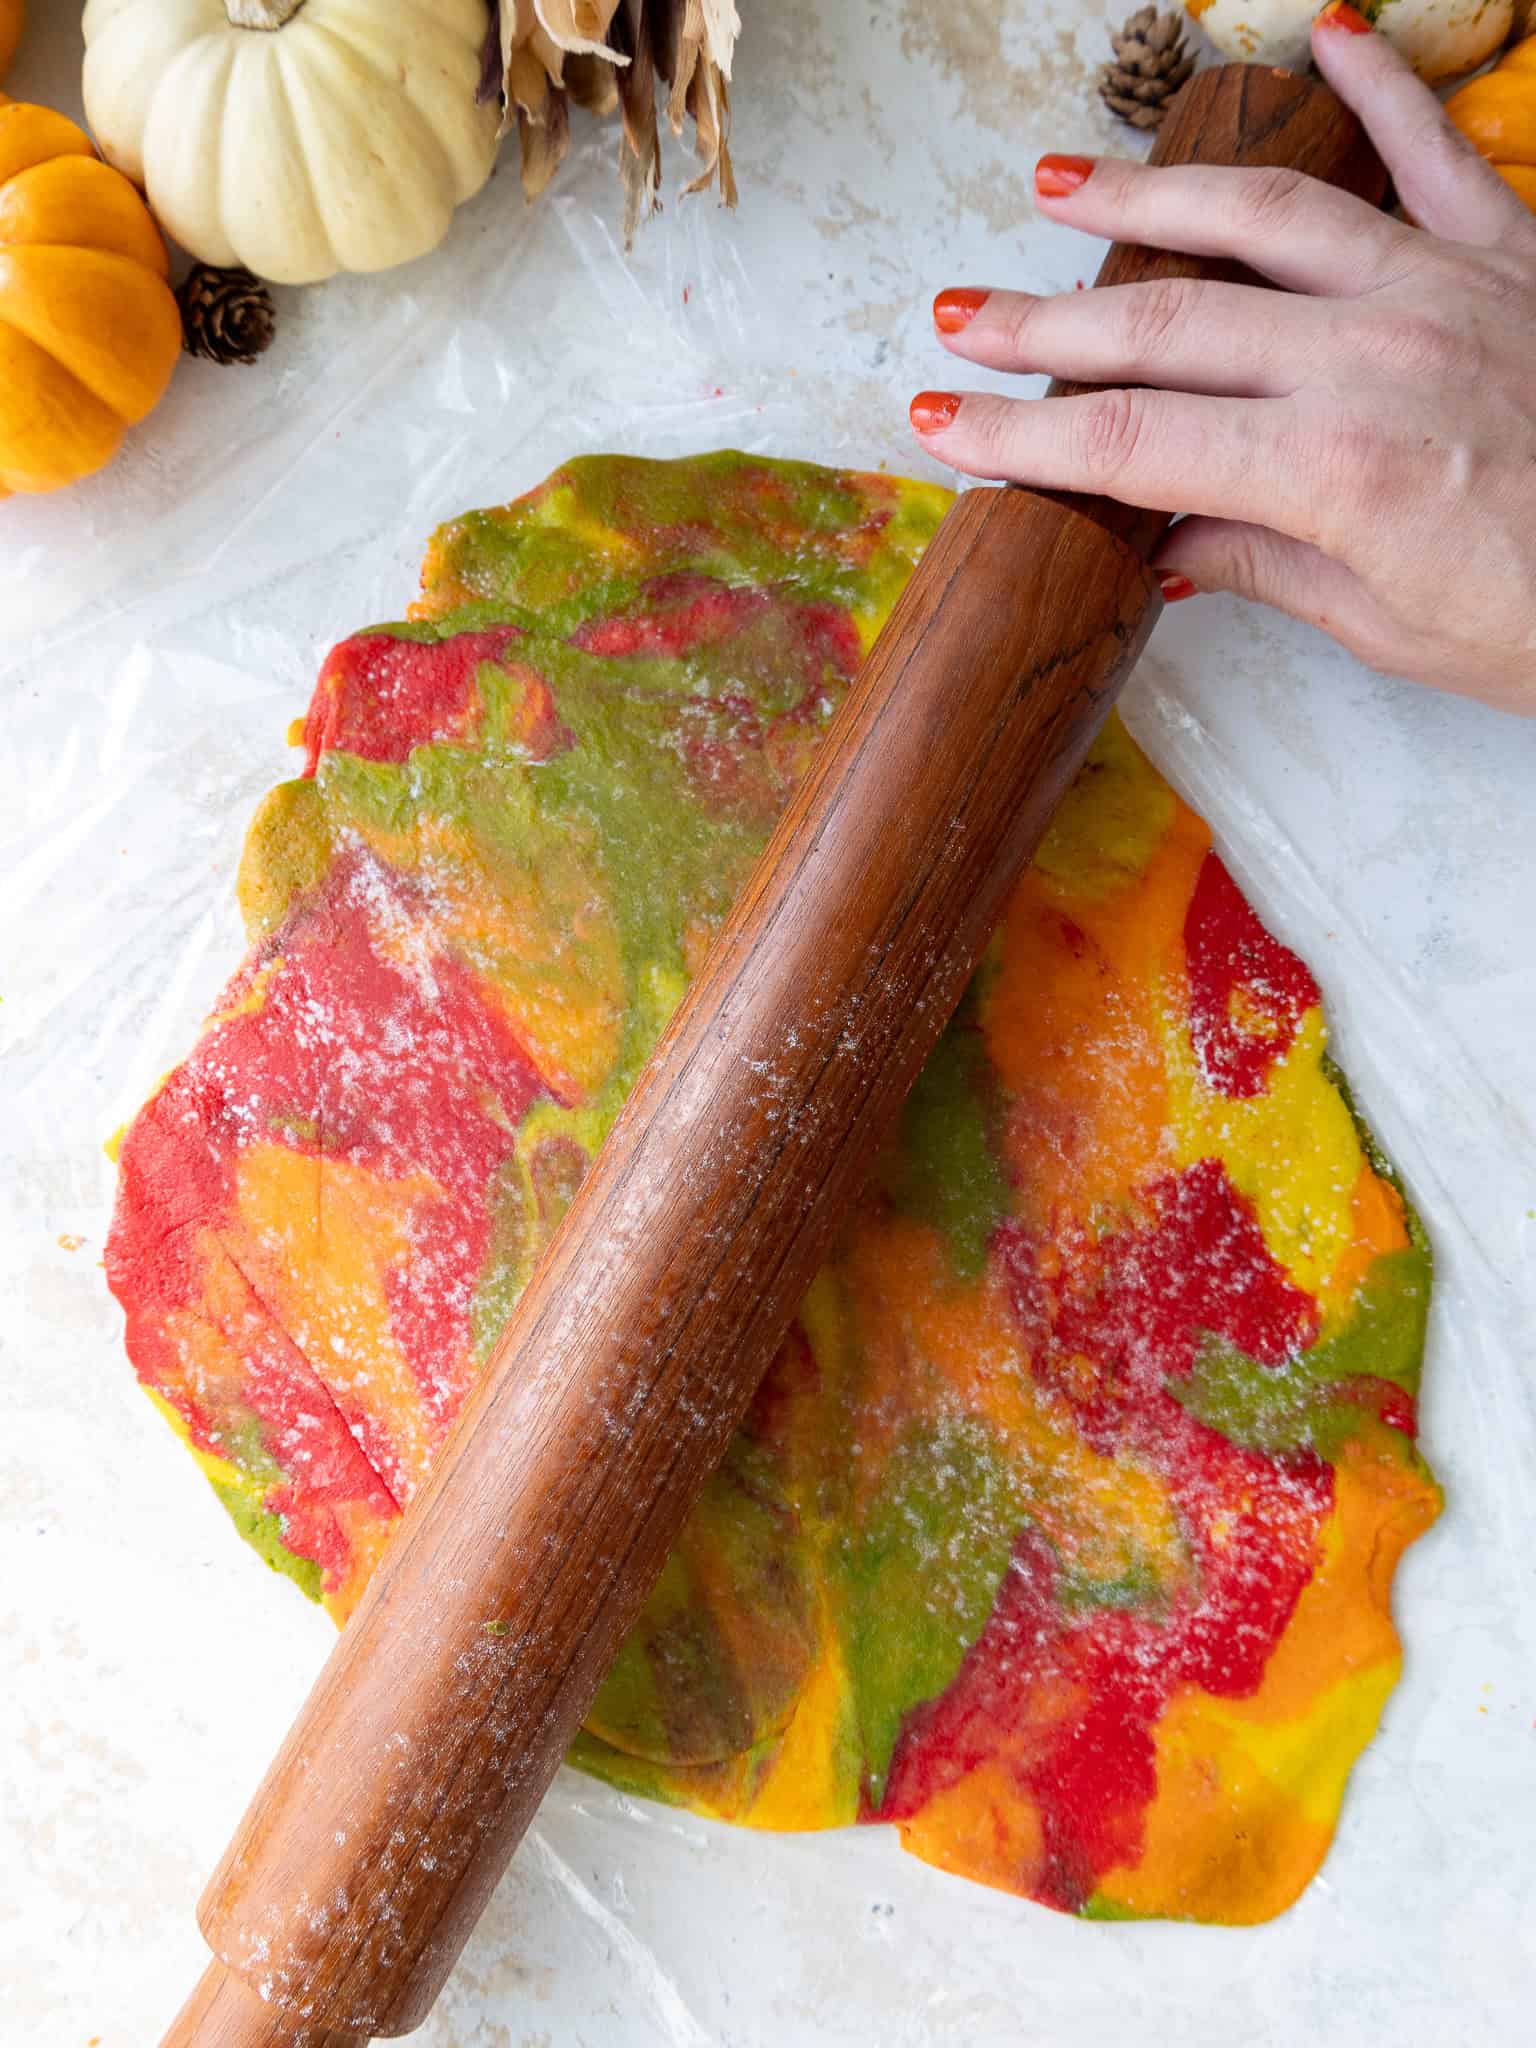
The more you mix the dough, the more blended the colors will become. I like to stop while there are still clear ribbons and patches of each color rather than mixing everything into one muddy shade.
Step 4: Roll Out and Cut the Cookies
Roll the marbled dough out to about 1/3 inch thick. Dust your cookie cutter with flour, then cut out the cookies using a 2- or 3-inch cutter.
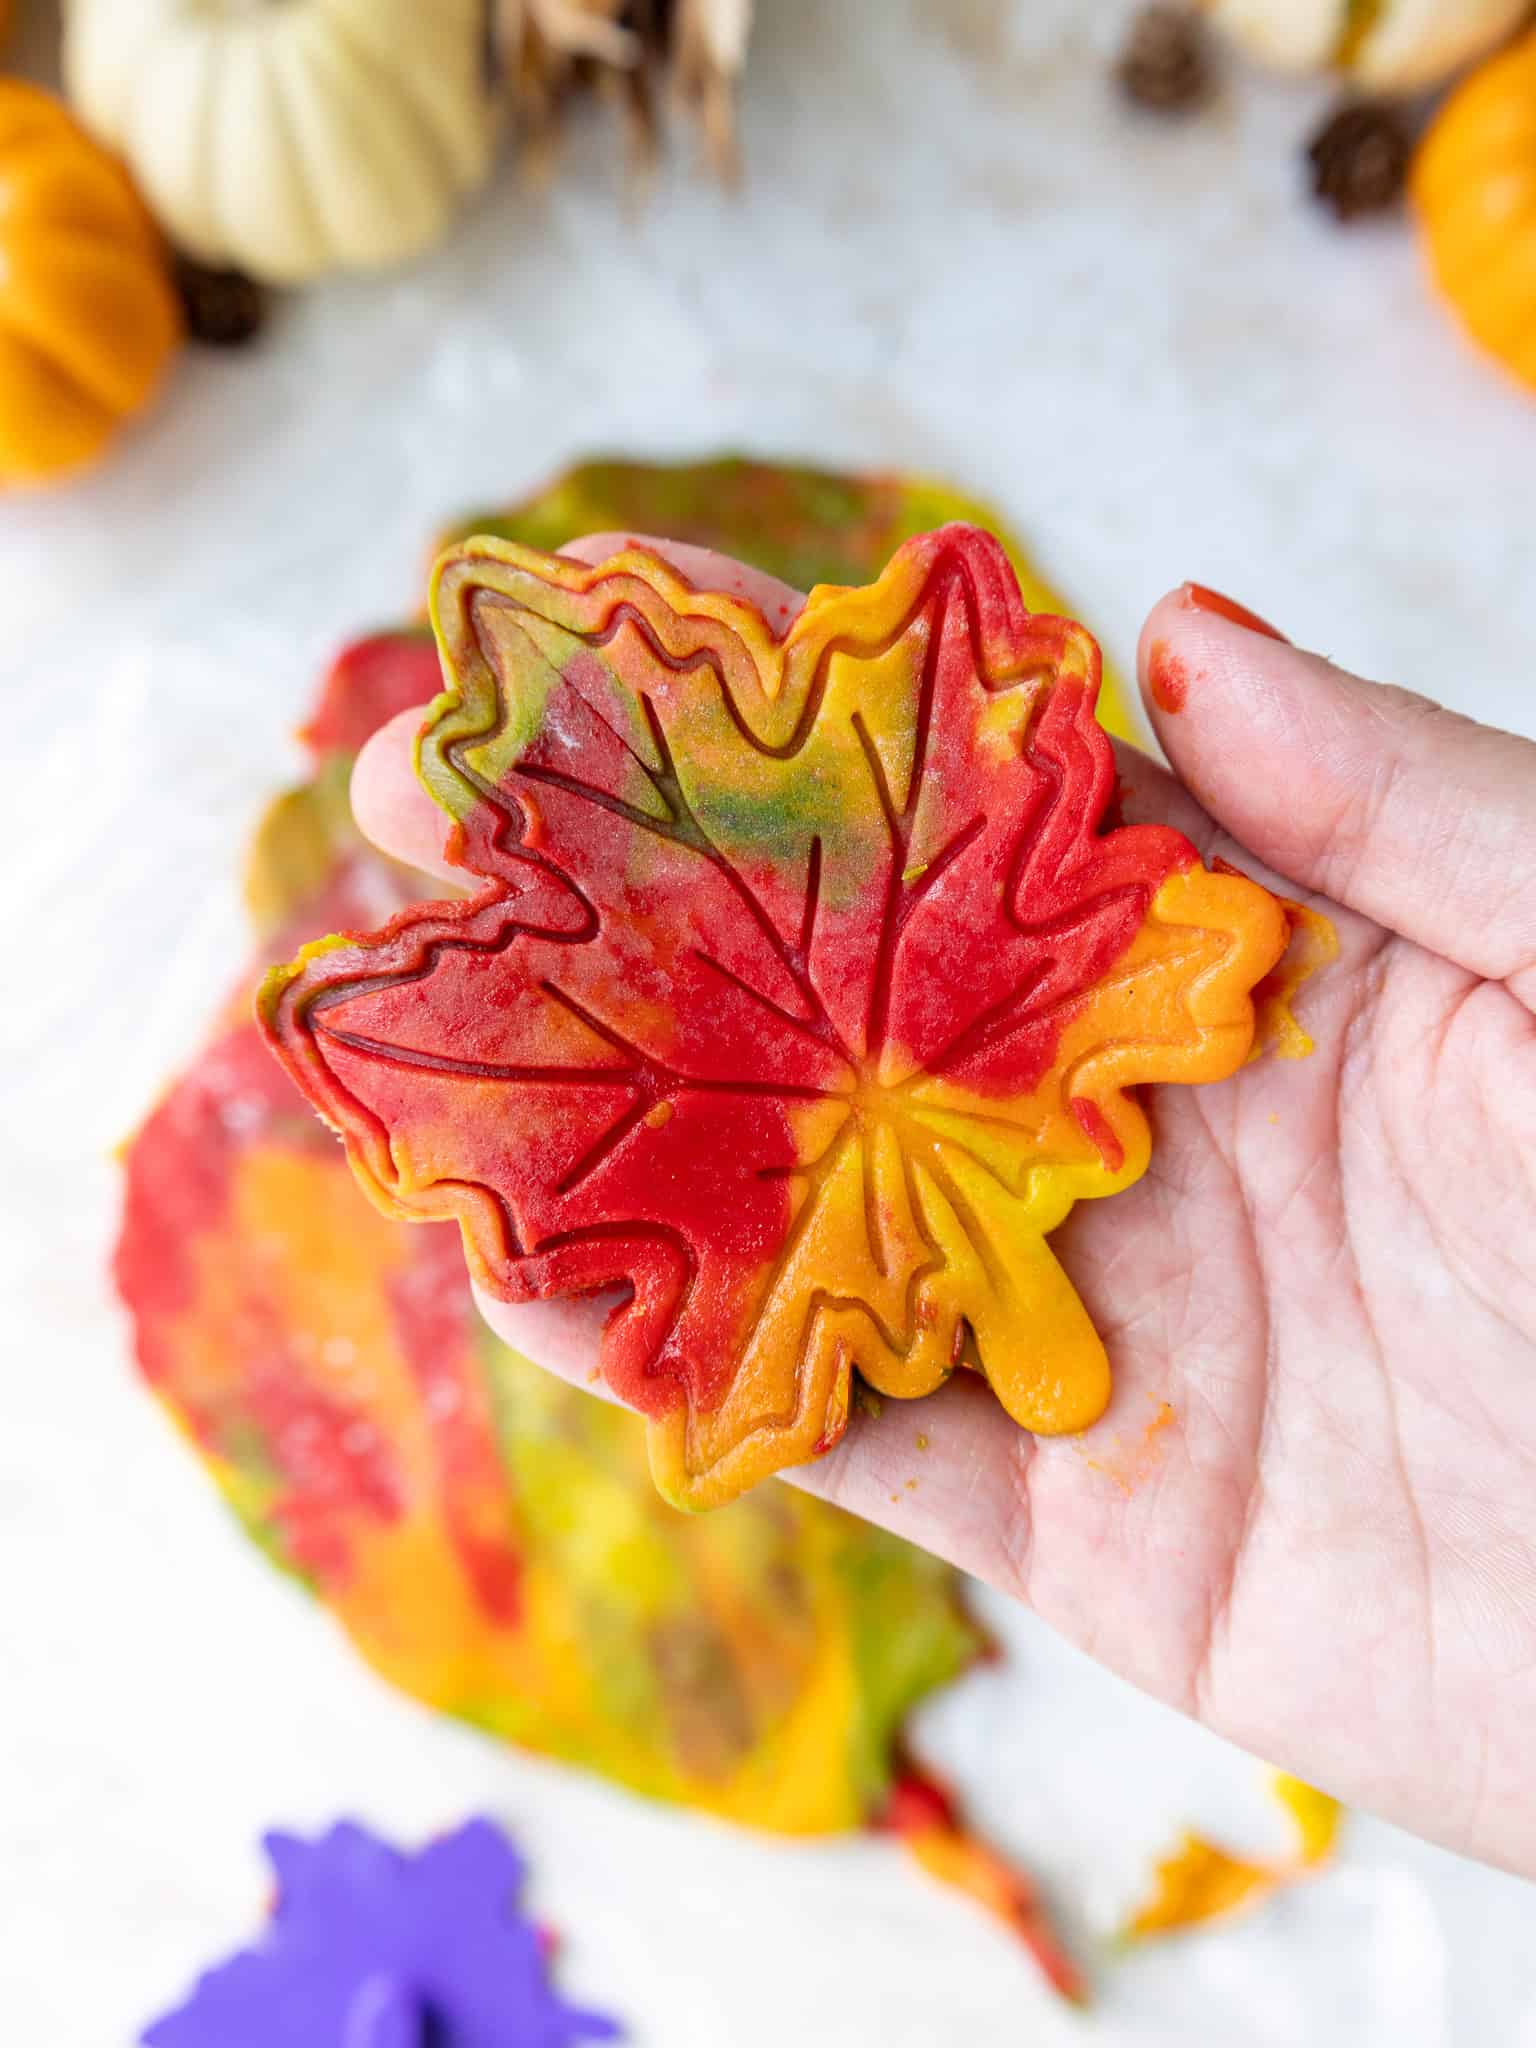
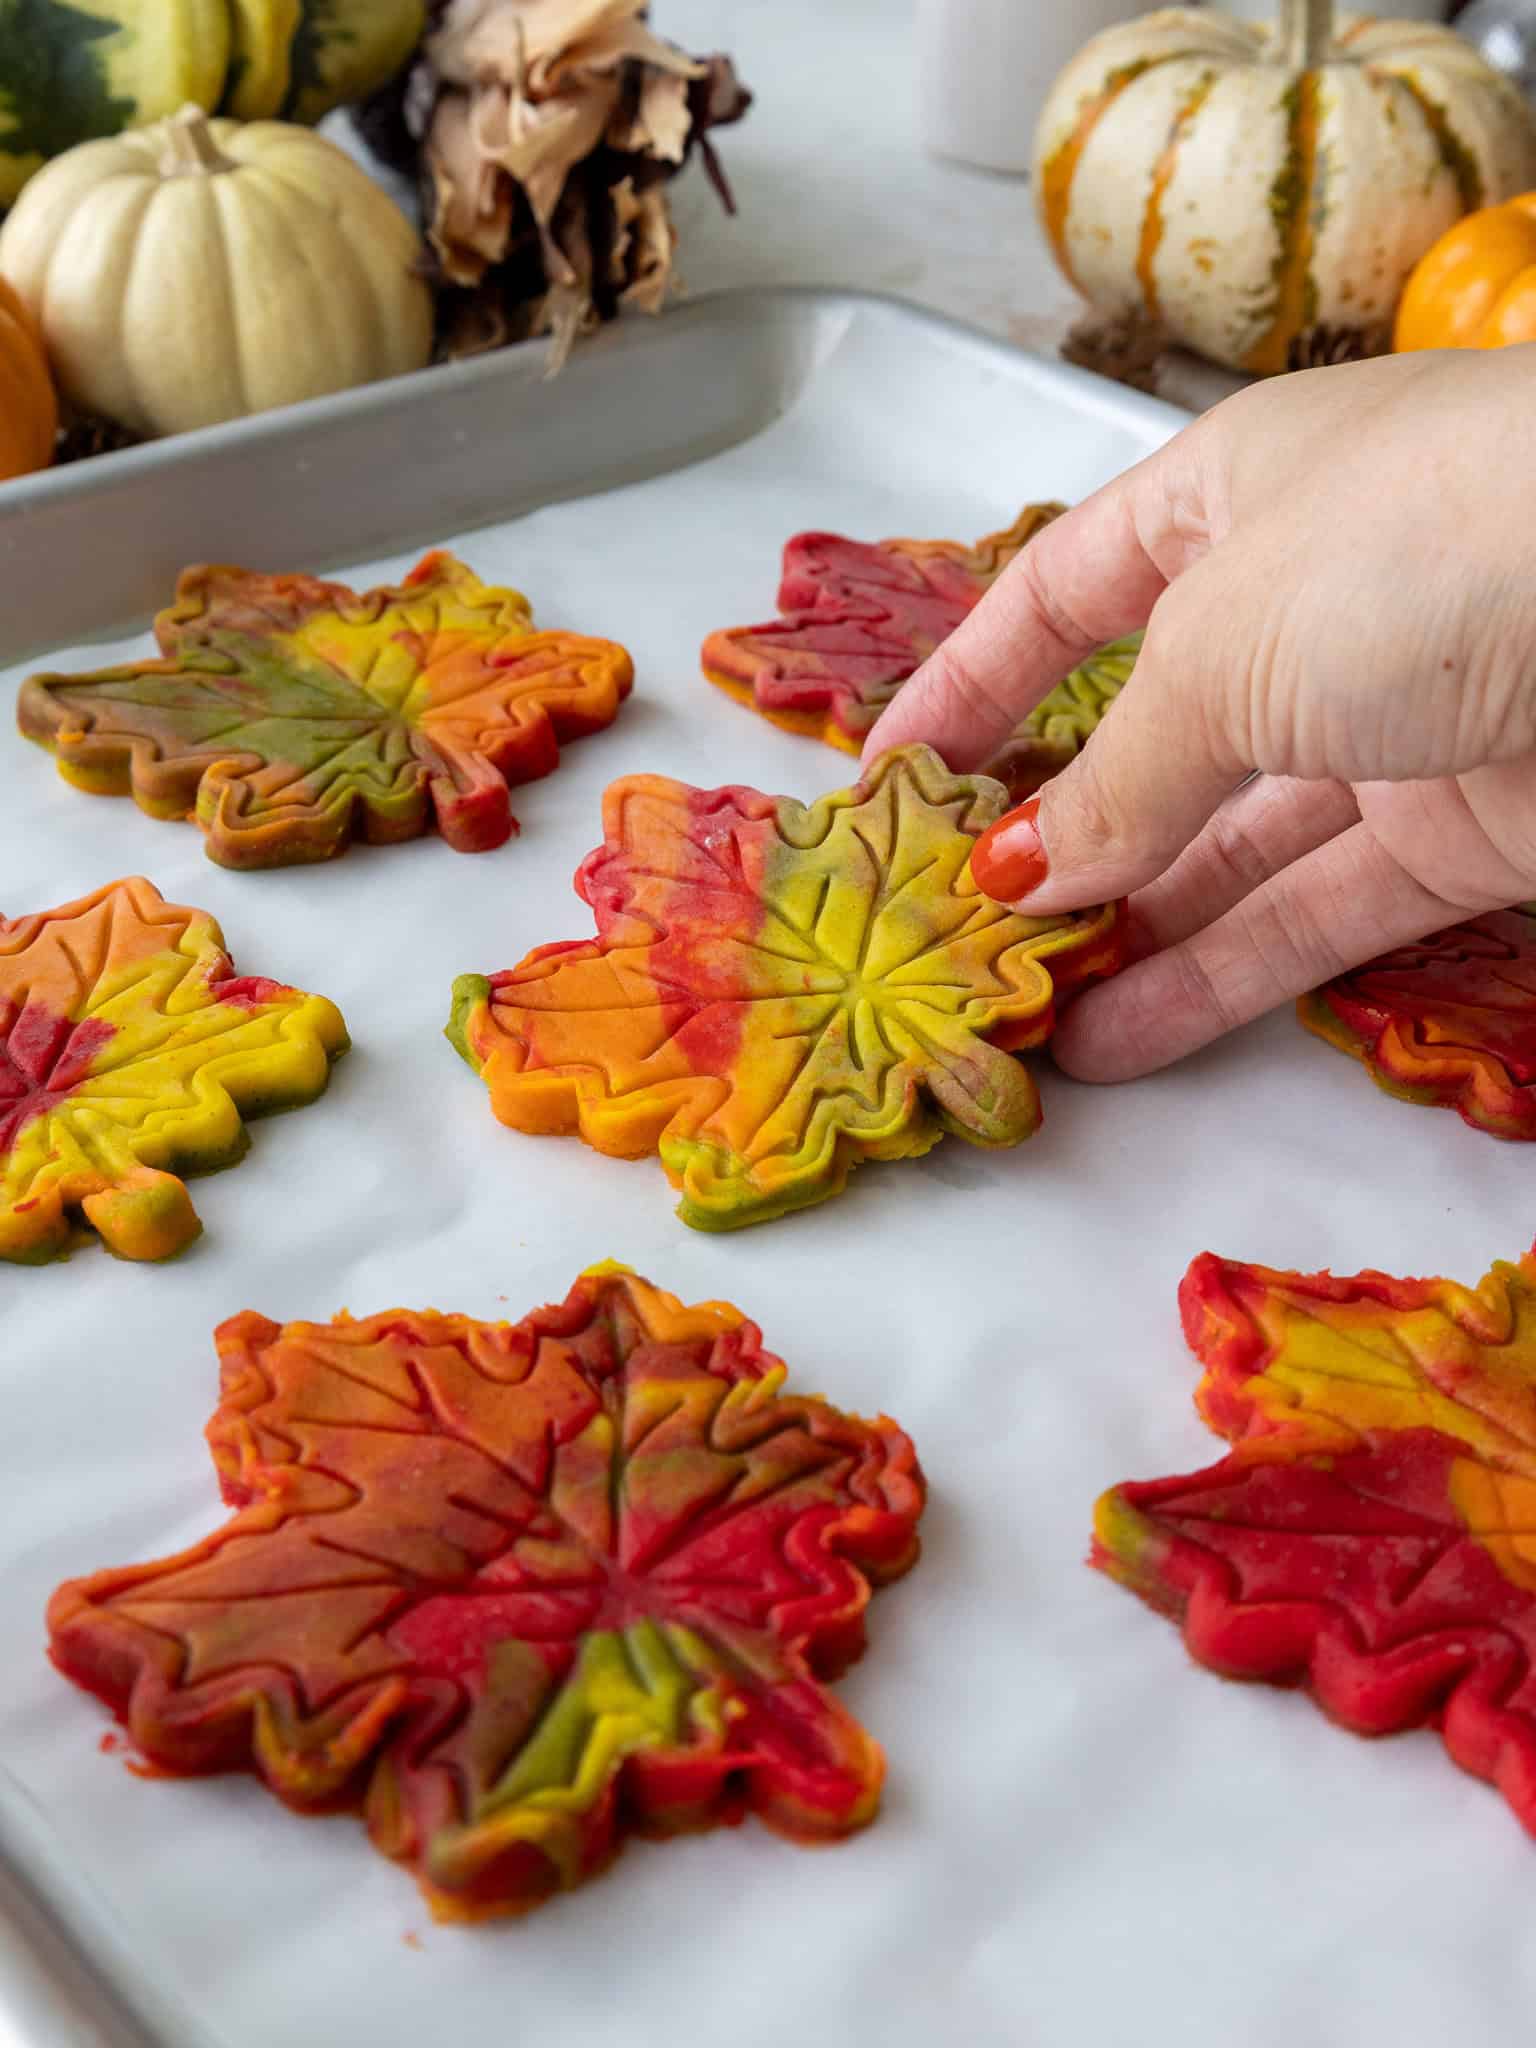
Brush off any excess flour with a kitchen brush, then place the cookies about 1 inch apart on the prepared baking sheets.
Step 5: Chill and Bake
Chill the cut-out cookies for 15 minutes in the fridge or 5 minutes in the freezer. This helps them keep their shape as they bake.
Bake one sheet at a time on the middle rack for 14–17 minutes. The exact bake time will depend on the size and shape of your cookies. Keep a close eye on them and pull them out before the edges start to brown.
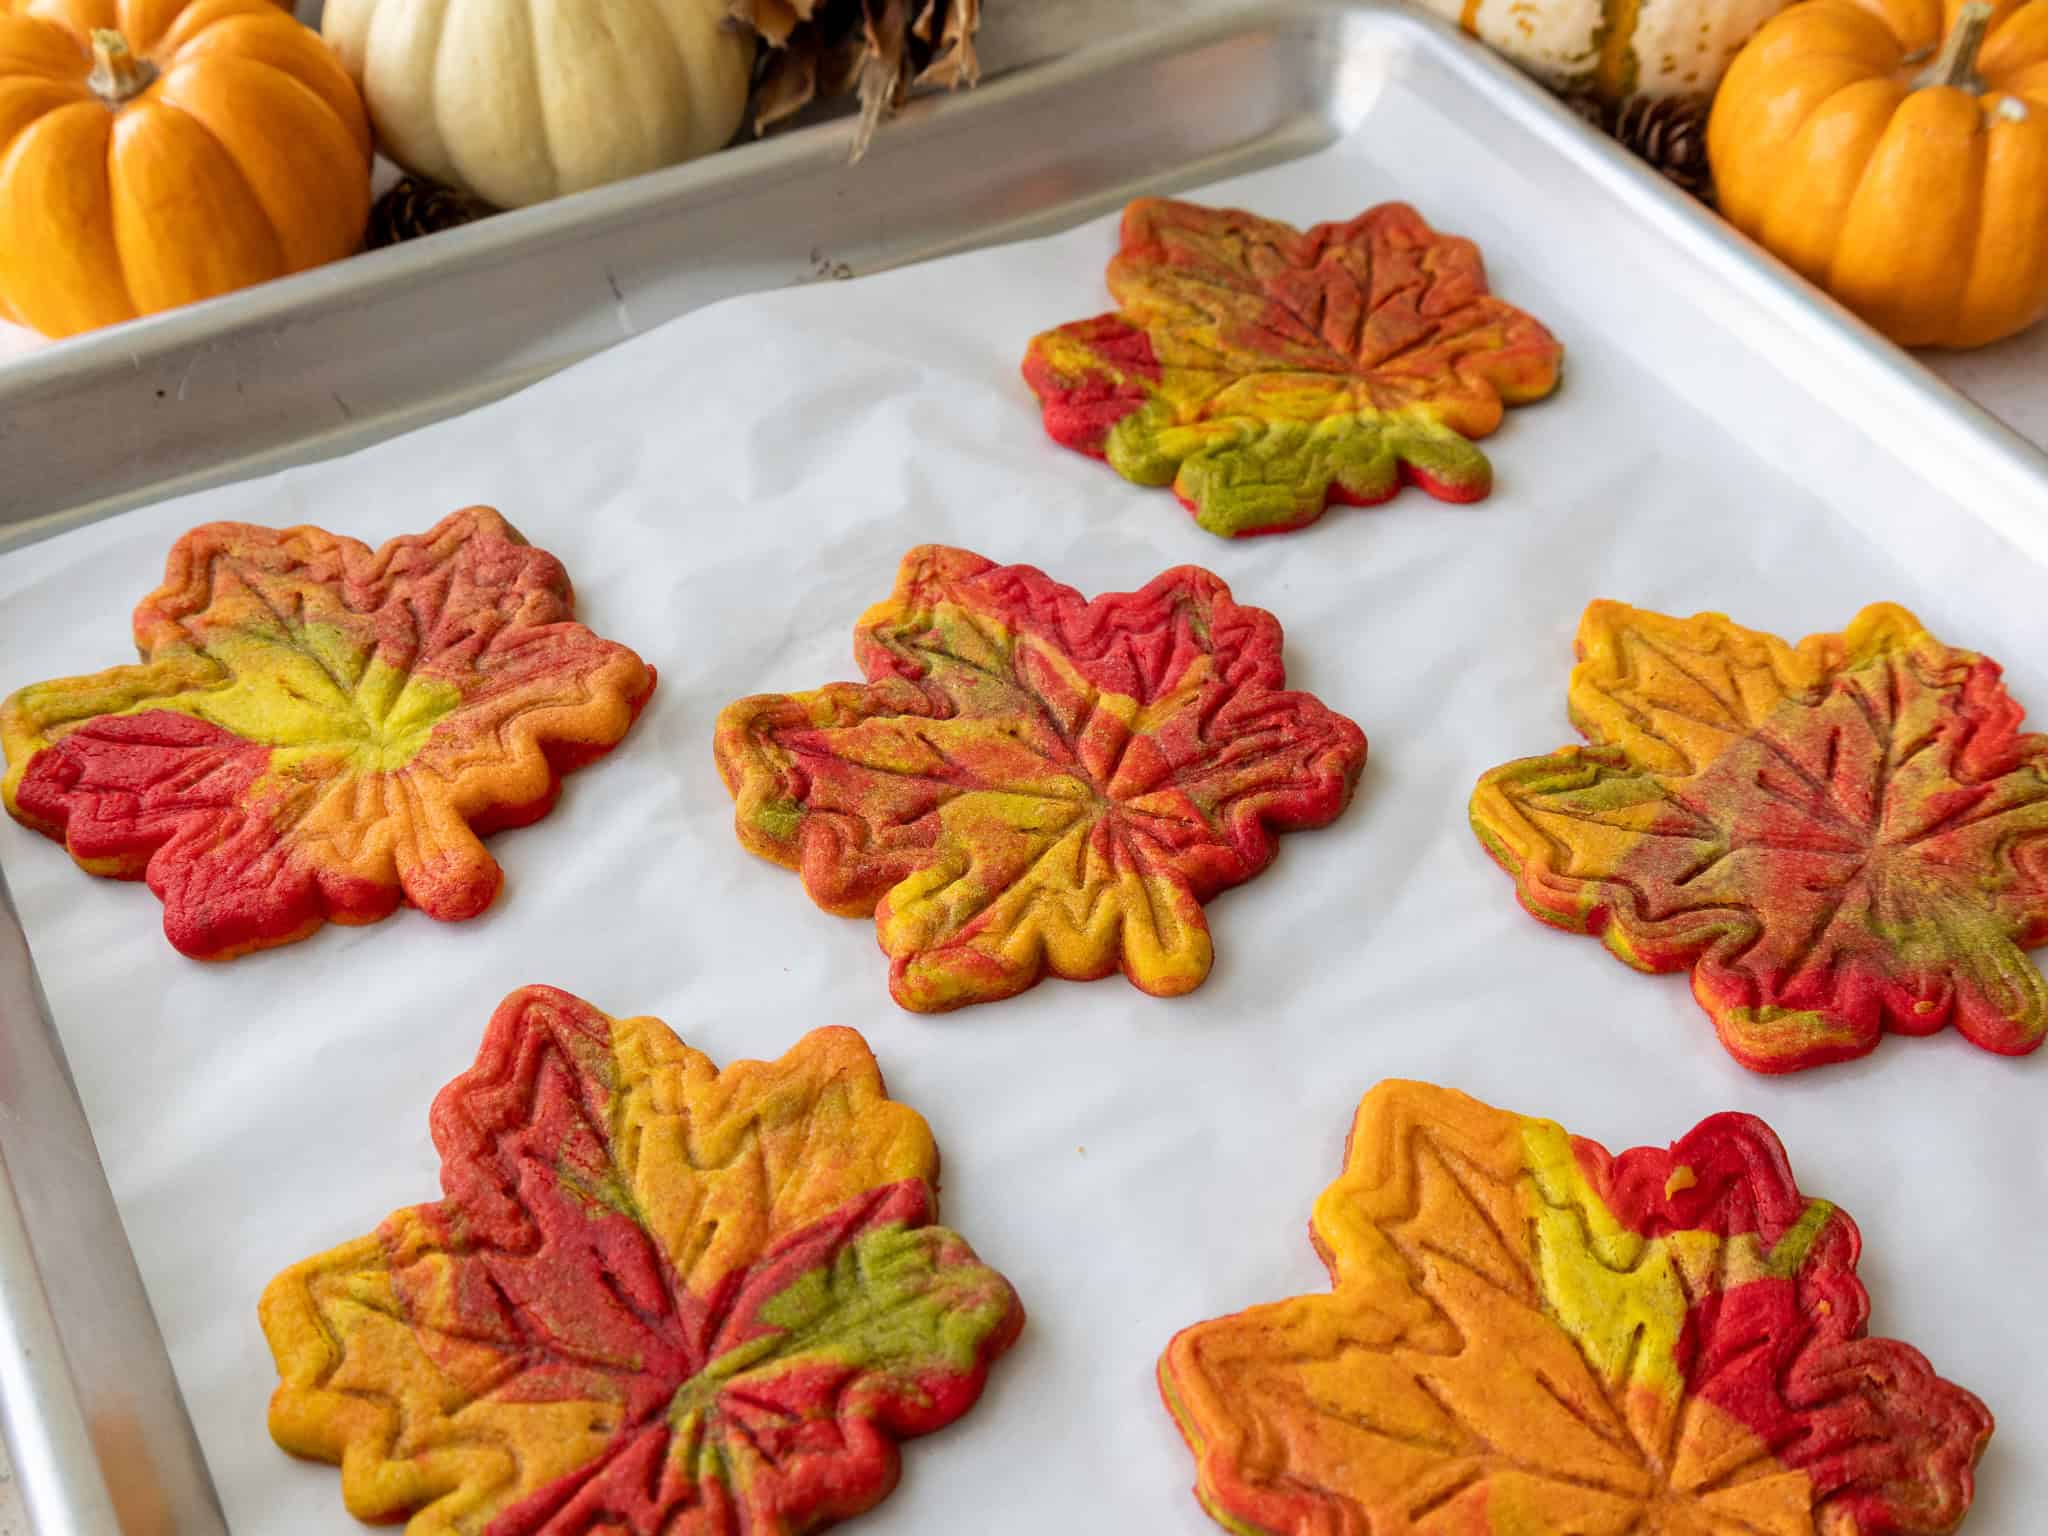
Let the cookies cool on the pan for about 15 minutes, then transfer them to a wire rack to finish cooling.
Knead the dough scraps together gently and repeat the rolling and cutting process until you’ve used all the dough.
How to Get a Pretty Marbled Pattern
The marbling is the easiest part to overthink, but here are a few tips that can help!
- Use small pieces of dough. Smaller pieces give you more variation throughout the finished pattern.
- Alternate the colors randomly. Try not to group too much of one color in the same area.
- Fold the dough instead of heavily kneading it. Folding creates streaks and layers without blending the colors too much.
- Stop mixing sooner than you think. The dough will marble more as you roll it out.
- Keep the dough fairly cool. If it gets too soft while you’re working with it, chill it briefly before rolling it out.
Can I Use Different Colors?
Absolutely! The red, orange, yellow, and green combination is great for fall, but the marbling technique works with any gel food coloring.
You could use red and pink for Valentine’s Day, pastels for Easter, red and green for Christmas, or colors that match a birthday or party theme.
I recommend sticking with three or four colors so the pattern stays distinct and doesn’t get too busy.
Can These Marbled Cookies Be Made in Advance?
Yes! The cookie dough can be frozen for up to 1 month if it’s wrapped tightly in plastic wrap and stored in an airtight container.
Move the dough to the fridge the night before you plan to roll it out and bake the cookies.
Baked cookies can be stored in an airtight container for up to 5 days at room temperature or frozen for up to 1 month.
Frequently Asked Questions
Why did my marbled colors blend together?
The dough was probably mixed or kneaded a little too much. Stop while you can still see clear sections of each color. The pattern will blend a bit more when you roll the dough out.
Why did my cookies spread?
Make sure you chill the cut-out cookies before baking them. Baking them on parchment paper rather than a silicone mat can also help them hold their shape better.
How thick should I roll the dough?
Roll the dough to an even 1/3 inch thick. Keeping the cookies the same thickness helps them bake evenly.
Can I use a different cookie cutter?
Yes! This recipe works with any 2- or 3-inch cookie cutter. Just keep in mind that the yield and bake time may change depending on the size and shape you use.
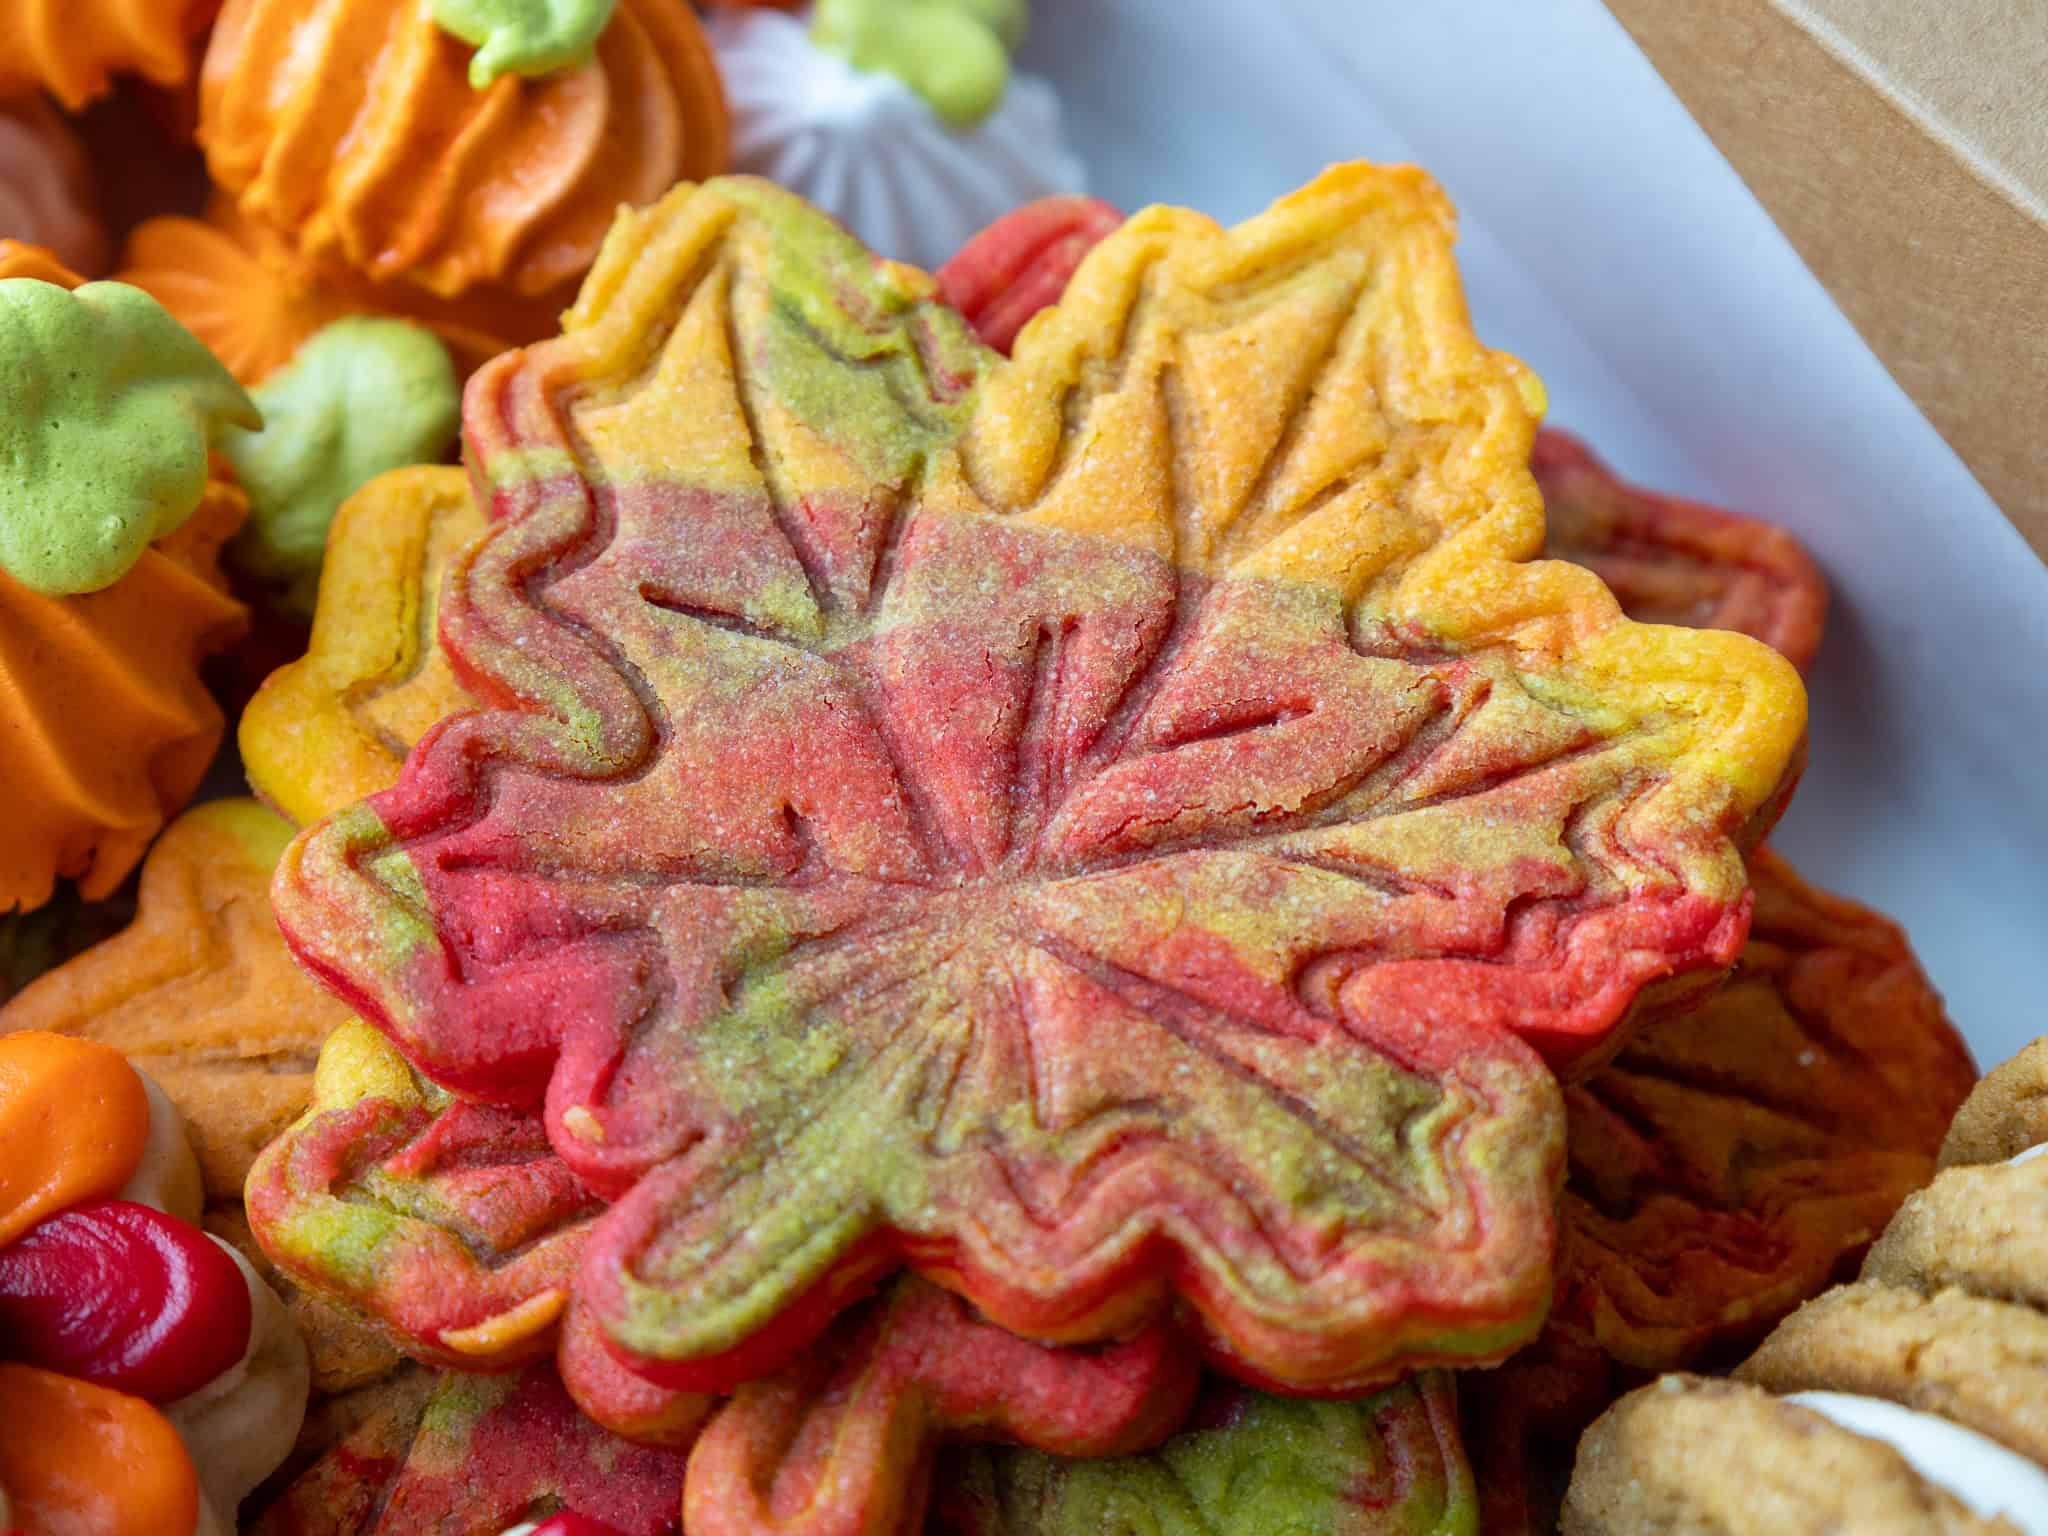
Tips for Making the Best Marbled Cookies
- Really cream together the butter, cream cheese, and granulated sugar. This helps incorporate air into the dough and keeps the cookies soft.
- Use gel food coloring. It gives you strong color without adding too much liquid to the dough.
- Roll the dough to a consistent 1/3-inch thickness. This helps all the cookies bake at the same rate.
- Don’t skip the chill time. Chilling the cut-out cookies helps them hold their shape.
- Don’t overbake them. Pull the cookies from the oven before the edges start to brown.
Let Me Know What You Think!
If you try these marbled cookies, I’d love to hear what you think! Please leave a rating and let me know your thoughts by sharing a comment.
Marbled Cookies
Equipment
Ingredients
Marbled Cookie Dough
- 3/4 cup (1 1/2 sticks) unsalted butter, room temperature 170g
- 1/2 cup (4 oz) full-fat cream cheese, room temp 113g
- 1 1/2 cups granulated sugar 300g
- 1 large egg, room temperature 56g
- 2 tsp vanilla extract or vanilla bean paste 8g
- 2 tsp maple extract, optional 10g
- 3 1/4 cups all-purpose flour 400g
- 1 Tbsp cornstarch 8g
- 1 tsp fine salt 6g
- 1/2 tsp baking powder 2g
- red, orange, yellow, and green gel food coloring
Instructions
Marbled Cookie Dough
- Preheat the oven to 350°F/175°C and line two large baking sheets with silicone baking mats or parchment paper. Set aside. NOTE: The cookies will spread less/keep their shape better if baked on parchment paper.
- In a large bowl or the bowl of a stand mixer, beat 3/4 cup butter and 1/2 cup cream cheese on medium speed with a hand mixer or whisk attachment until smooth.
- Next, add 1 1/2 cups of granulated sugar and mix on a medium-high speed for a couple of minutes, until the mixture becomes lighter in color.
- Add 1 egg, 2 tsp vanilla bean paste or vanilla extract, and 2 tsp maple extract (optional). Mix on medium speed until incorporated.
- In a separate bowl, whisk together 3 1/4 cups flour, 1 Tbsp cornstarch, 1 tsp fine salt, and 1/2 tsp baking powder. Add the flour mixture into the butter mixture and mix on a low speed until it is JUST incorporated. Scrape the sides and bottom of the bowl with a rubber spatula to make sure everything is properly mixed together.
- Divide the dough into 4 equal portions and use gel food coloring to color them red, orange, yellow, and green (or whatever colors you prefer). Then tear off small pieces of each of the four cookie doughs and arrange them in a random, alternating pattern to form a large rectangle. Roll over the dough a couple of times with a rolling pin to press the pieces together, then fold the dough over itself into thirds (like folding a letter).
- Gently knead the dough until you’re happy with the marbled look. Be careful not to overmix it! You still want to see distinct sections of each color.
- Then roll the dough about 1/3 inch thick and cut out the cookies with a 2- or 3-inch flour-dusted cookie cutter. Use a kitchen brush to brush any excess flour off the cookies and place them on the prepared baking sheets. The cookies don't spread much as they bake, so you can place them about 1 inch apart.
- Chill the cut-out cookies one more time in the fridge for 15 minutes or the freezer for 5 minutes to help them keep their shape as they bake.
- Bake one sheet of cookies at a time. Bake for 14-17 minutes on the middle rack of your oven (bake time will vary based on the size and shape of the cookies). Keep a close eye on the cookies and be sure to pull them out before the edges start to brown.
- Let the baked cookies cool on the pan for about 15 minutes, then transfer to a wire rack to finish cooling. While the first batch bakes and cools, knead together the cookie dough scraps and repeat the steps above until you've used all the dough.
Notes
Making These Marbled Cookies in Advance and Storage Tips
You can store these cookies in an airtight container for up to 5 days at room temperature or for up to a month in the freezer. This cookie dough can also be frozen for up to 1 month if wrapped tightly in plastic wrap and stored in an airtight container. I like to move the cookie dough to the fridge the night before I plan to cut out and bake the cookies.Tips for Making the Best Marbled Cookies
- Really cream together the butter, cream cheese, and granulated sugar in the first step of this recipe. It helps incorporate air into the dough, which helps make the cookies soft and fluffy.
- Don’t overwork the cookie dough! It can overwork the gluten and result in tough, dense cookies.
- Roll the cookie dough out to a consistent thickness of 1/3 inch. If some are thicker or thinner than others, they may over- or underbake in the oven.
- Take the time to chill the cookie dough. It helps prevent your cookies from spreading while they bake and helps them bake up with a soft texture.
- Don’t overbake your cookies. Err on the side of underbaking your cookies, and remember that the cookies continue to bake for a few minutes once they’re out of the oven.
Nutrition
Other Recipes You Might Like: