
Candy Corn Meringues
These cute little candy corn meringues are the perfect Halloween dessert! They’re light, airy, and perfectly crunchy with chewy centers.

Candy Corn Meringues at a Glance
- Yield: About 150 small meringues
- Texture: Crisp outside with chewy centers
- Bake time: 1 1/2 hours, plus cooling time
- Best for: Halloween parties, cookie boxes, and dessert boards
- Make ahead: Store in an airtight container for up to a week
How to Make These Candy Corn Meringues
While the recipe below is quite detailed, I find visual cues to be super helpful! Below are some photos of the process to help guide you through this recipe.
Step 1: Preheat the Oven & Make the Meringue
Preheat the oven to 200°F/93°C and line 2 large baking sheets with parchment paper. Set aside.
Before you whip up the meringue, make sure there are no traces of grease on the whisk attachment or in your bowl.
Grease can prevent the meringue from whipping up properly. If you see or feel any grease, moisten a paper towel with vinegar and wipe the inside of the bowl and the whisk attachment to remove any grease.
Then add 4 large egg whites to the bowl of a stand mixer fitted with a whisk attachment or into a large bowl, and mix on medium speed until the surface of the egg whites is covered in small bubbles.
Add 1/4 tsp cream of tartar and continue to mix until the meringue reaches the soft peak stage and leaves visible tracks.
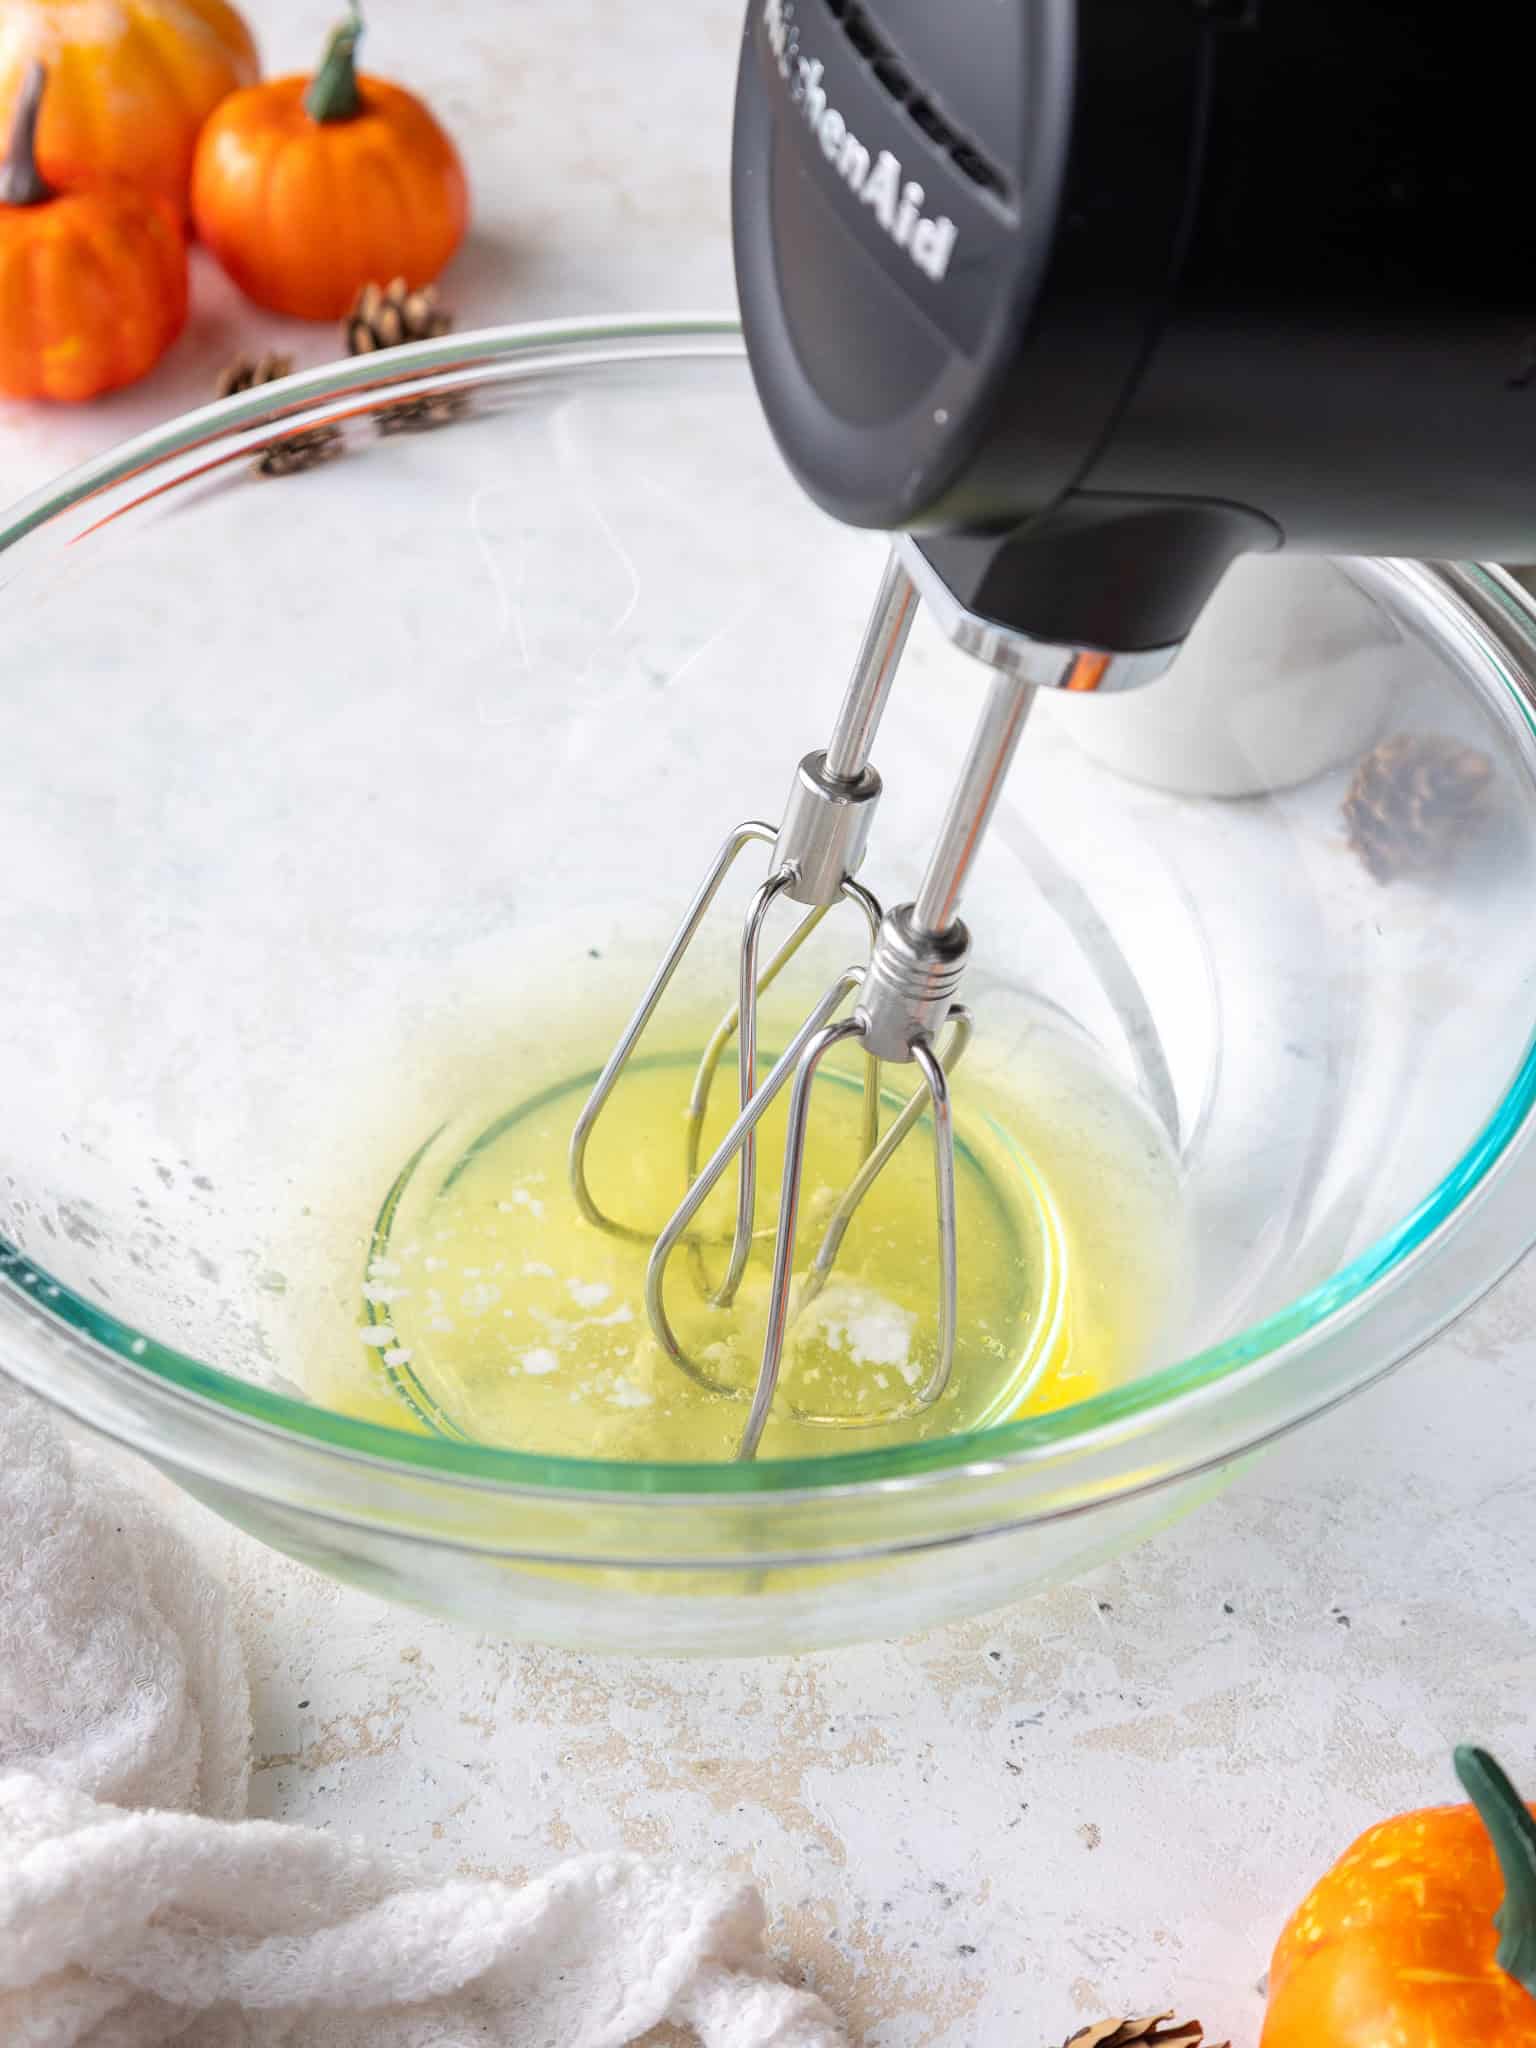
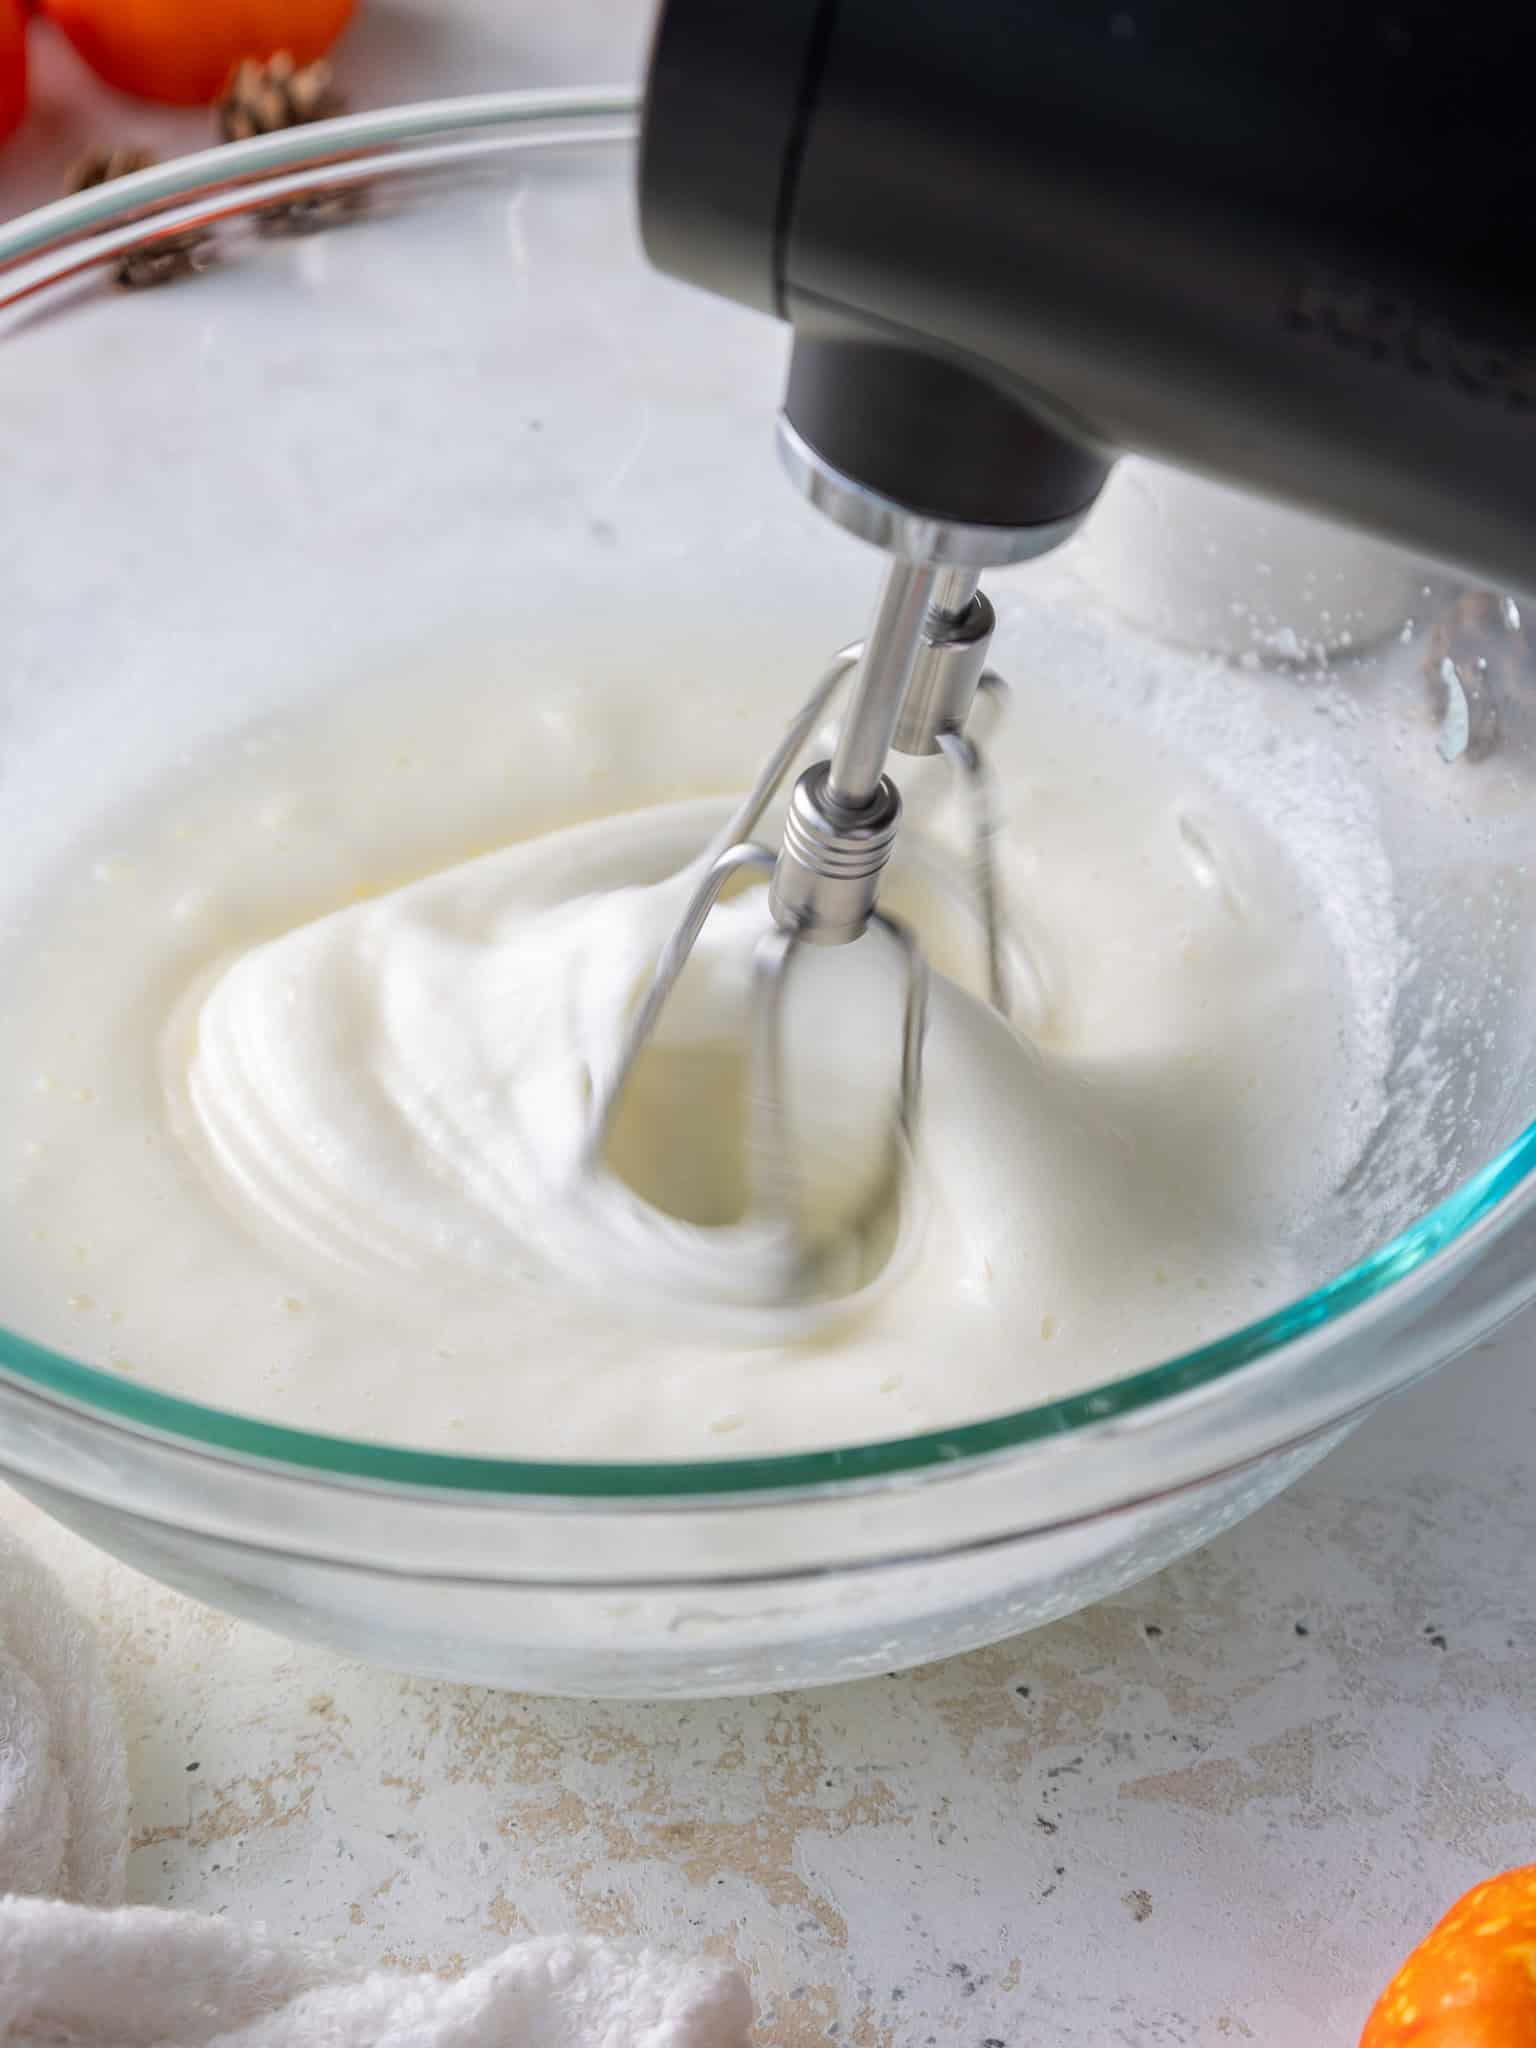
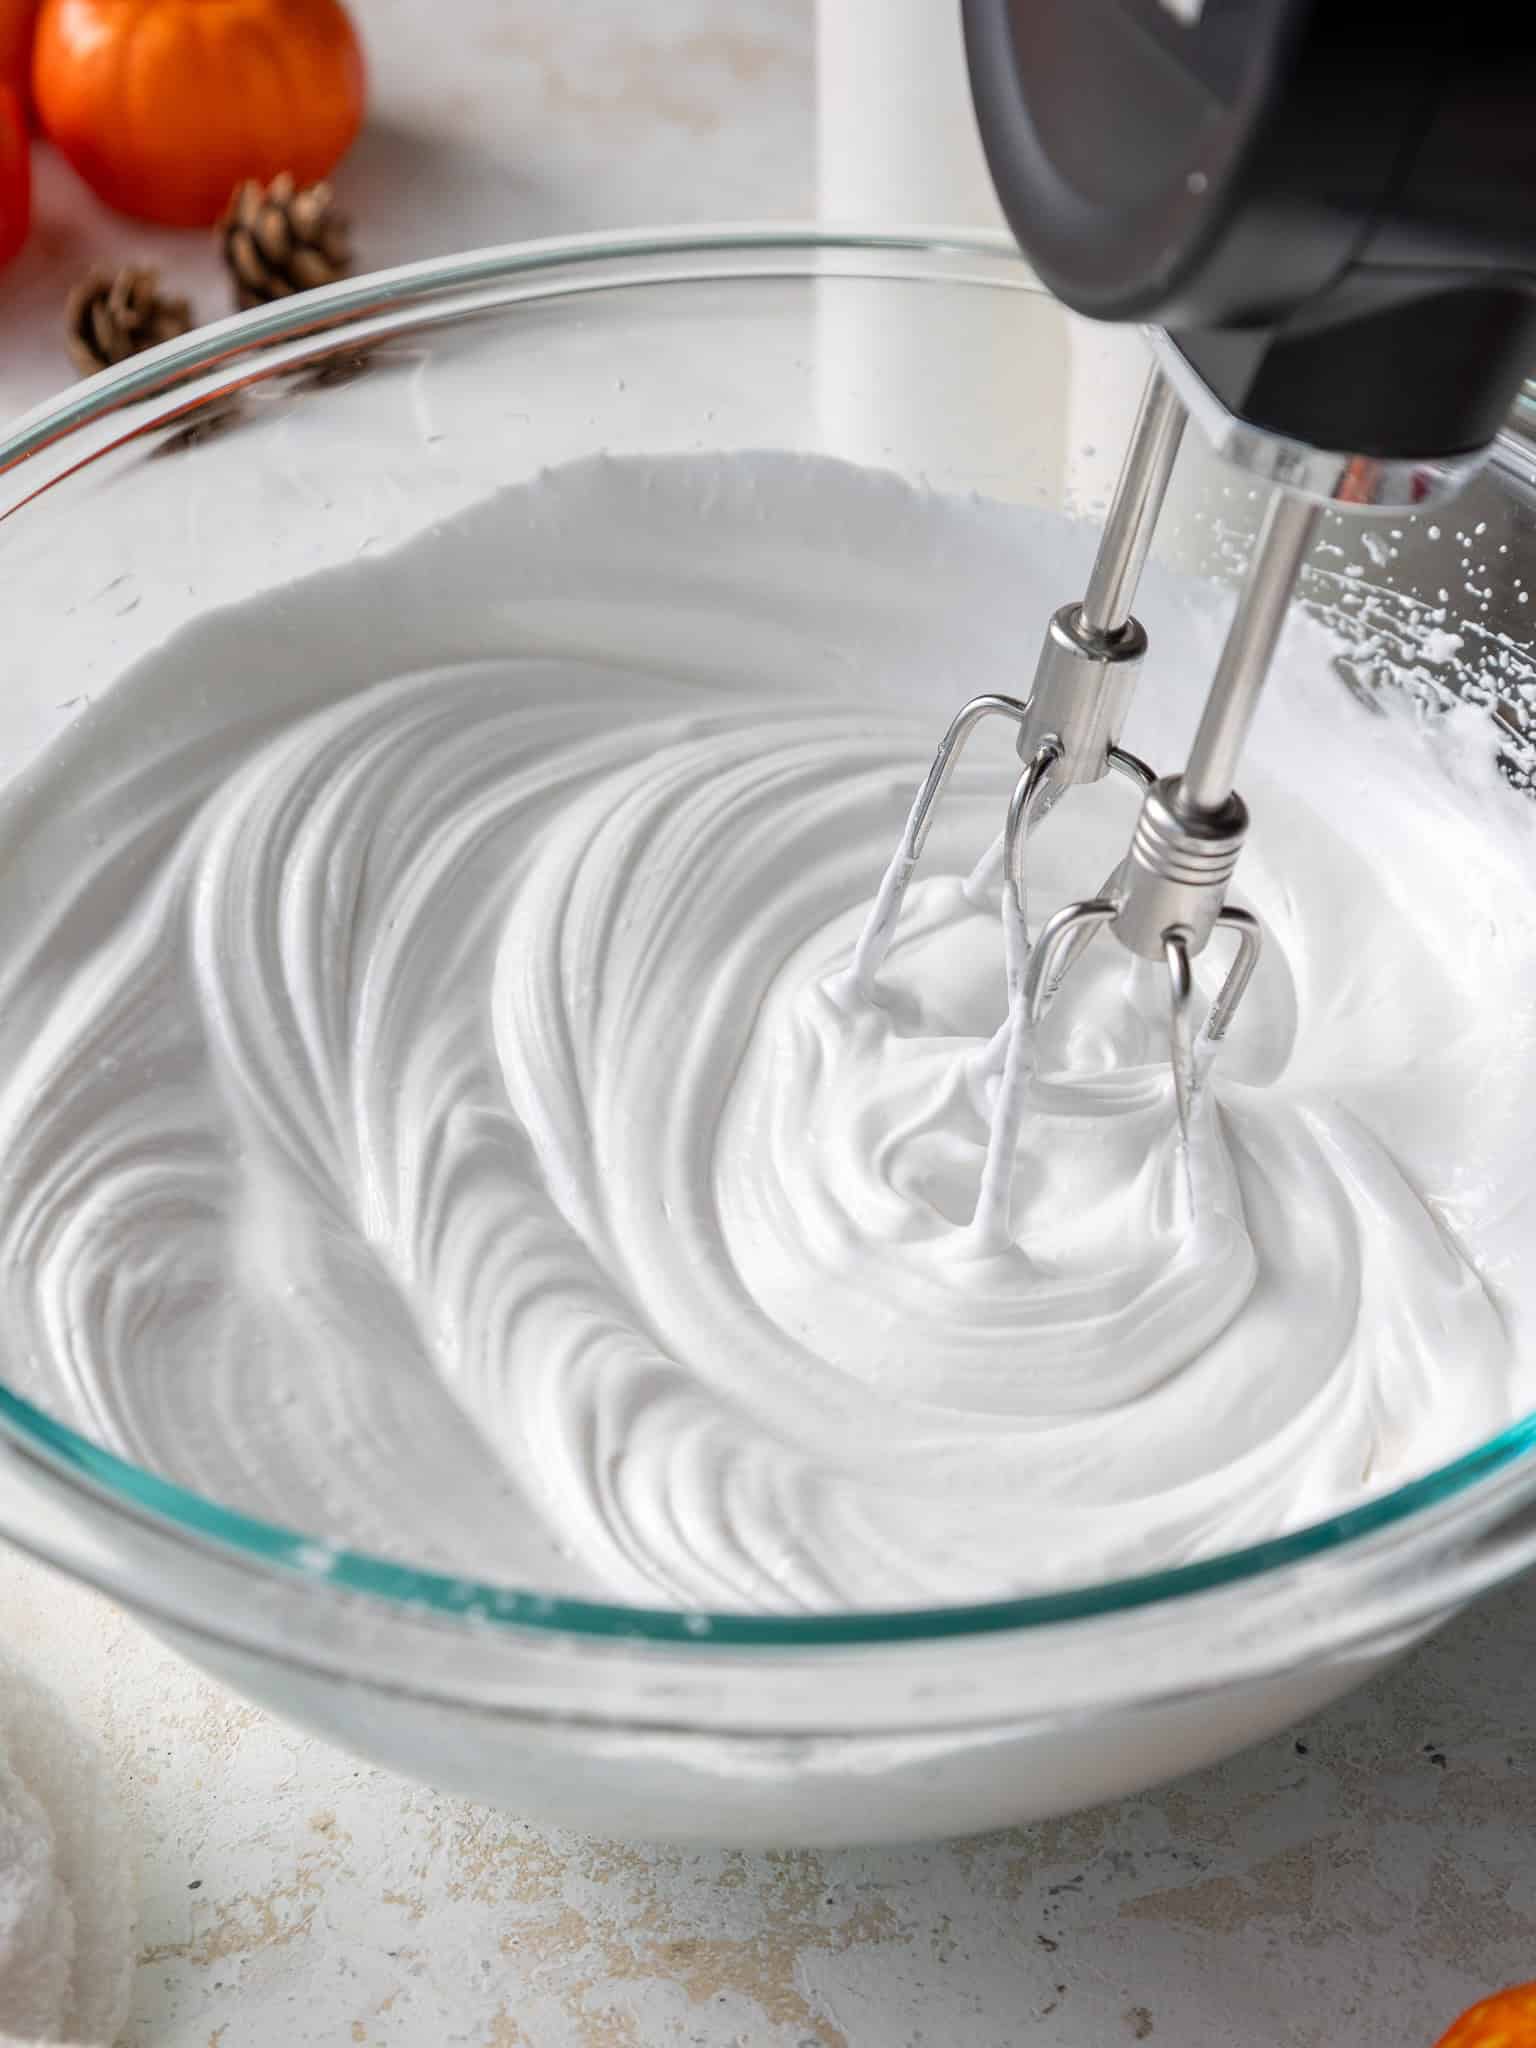
Gradually mix 1 cup of granulated sugar, 1 Tbsp at a time, into the egg whites over a few minutes while mixing on a medium-low speed.
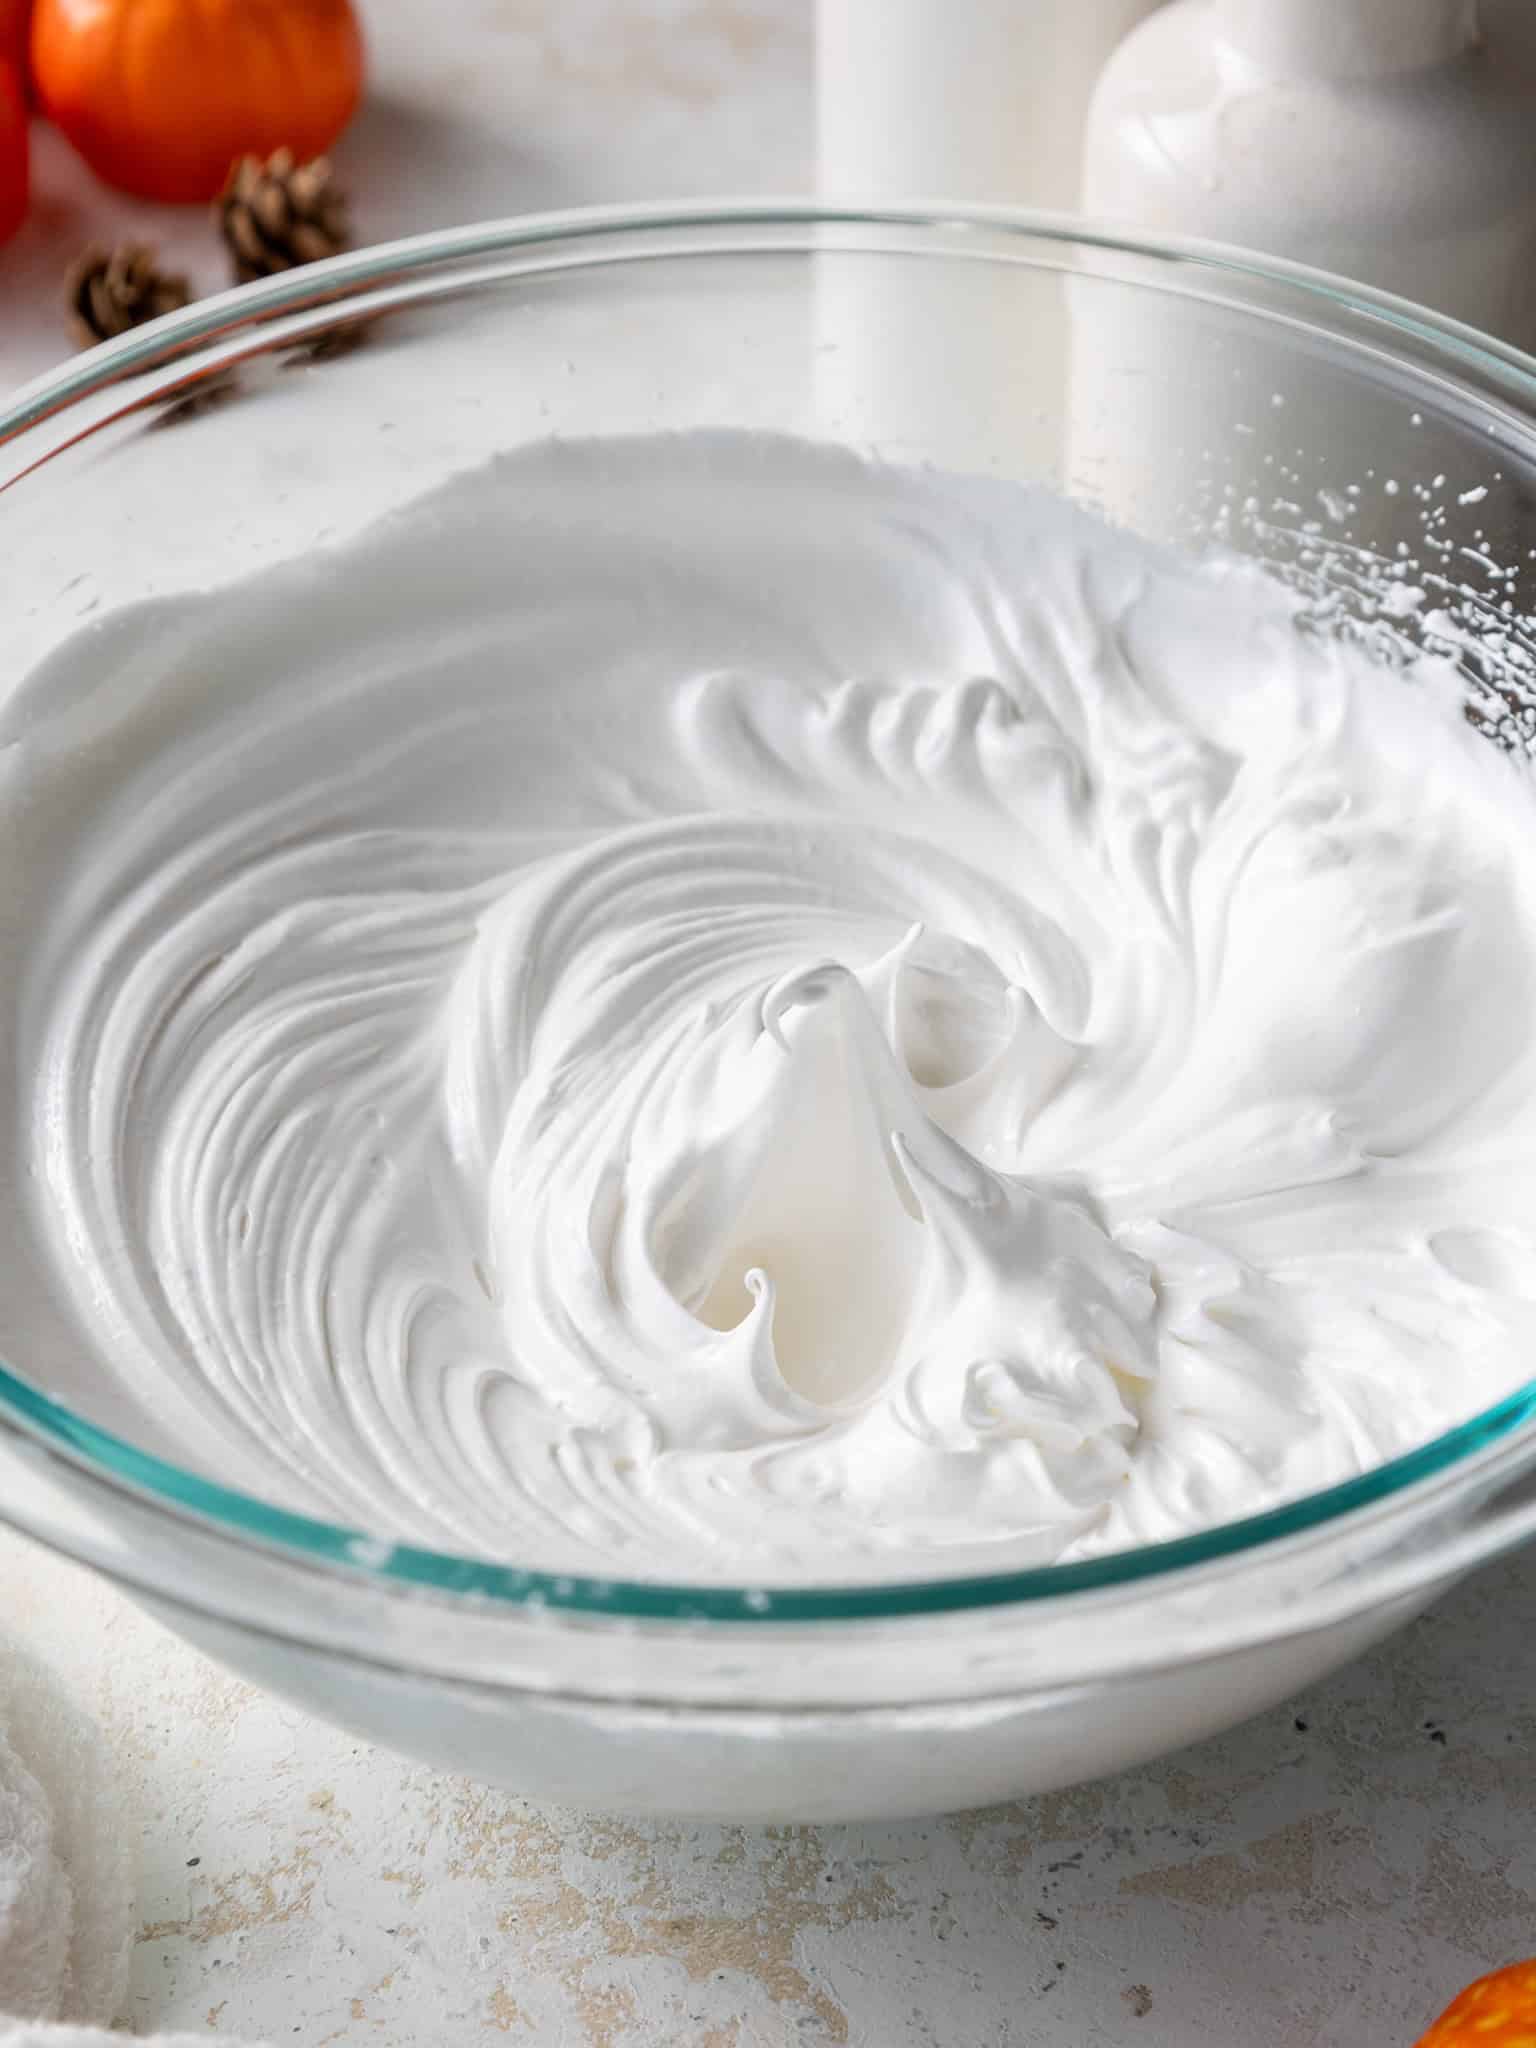
When the meringue gets close to reaching stiff peaks, add 1/2 tsp of vanilla or almond extract. Keep mixing until stiff, glossy peaks form.
Step 2: Color the Meringue
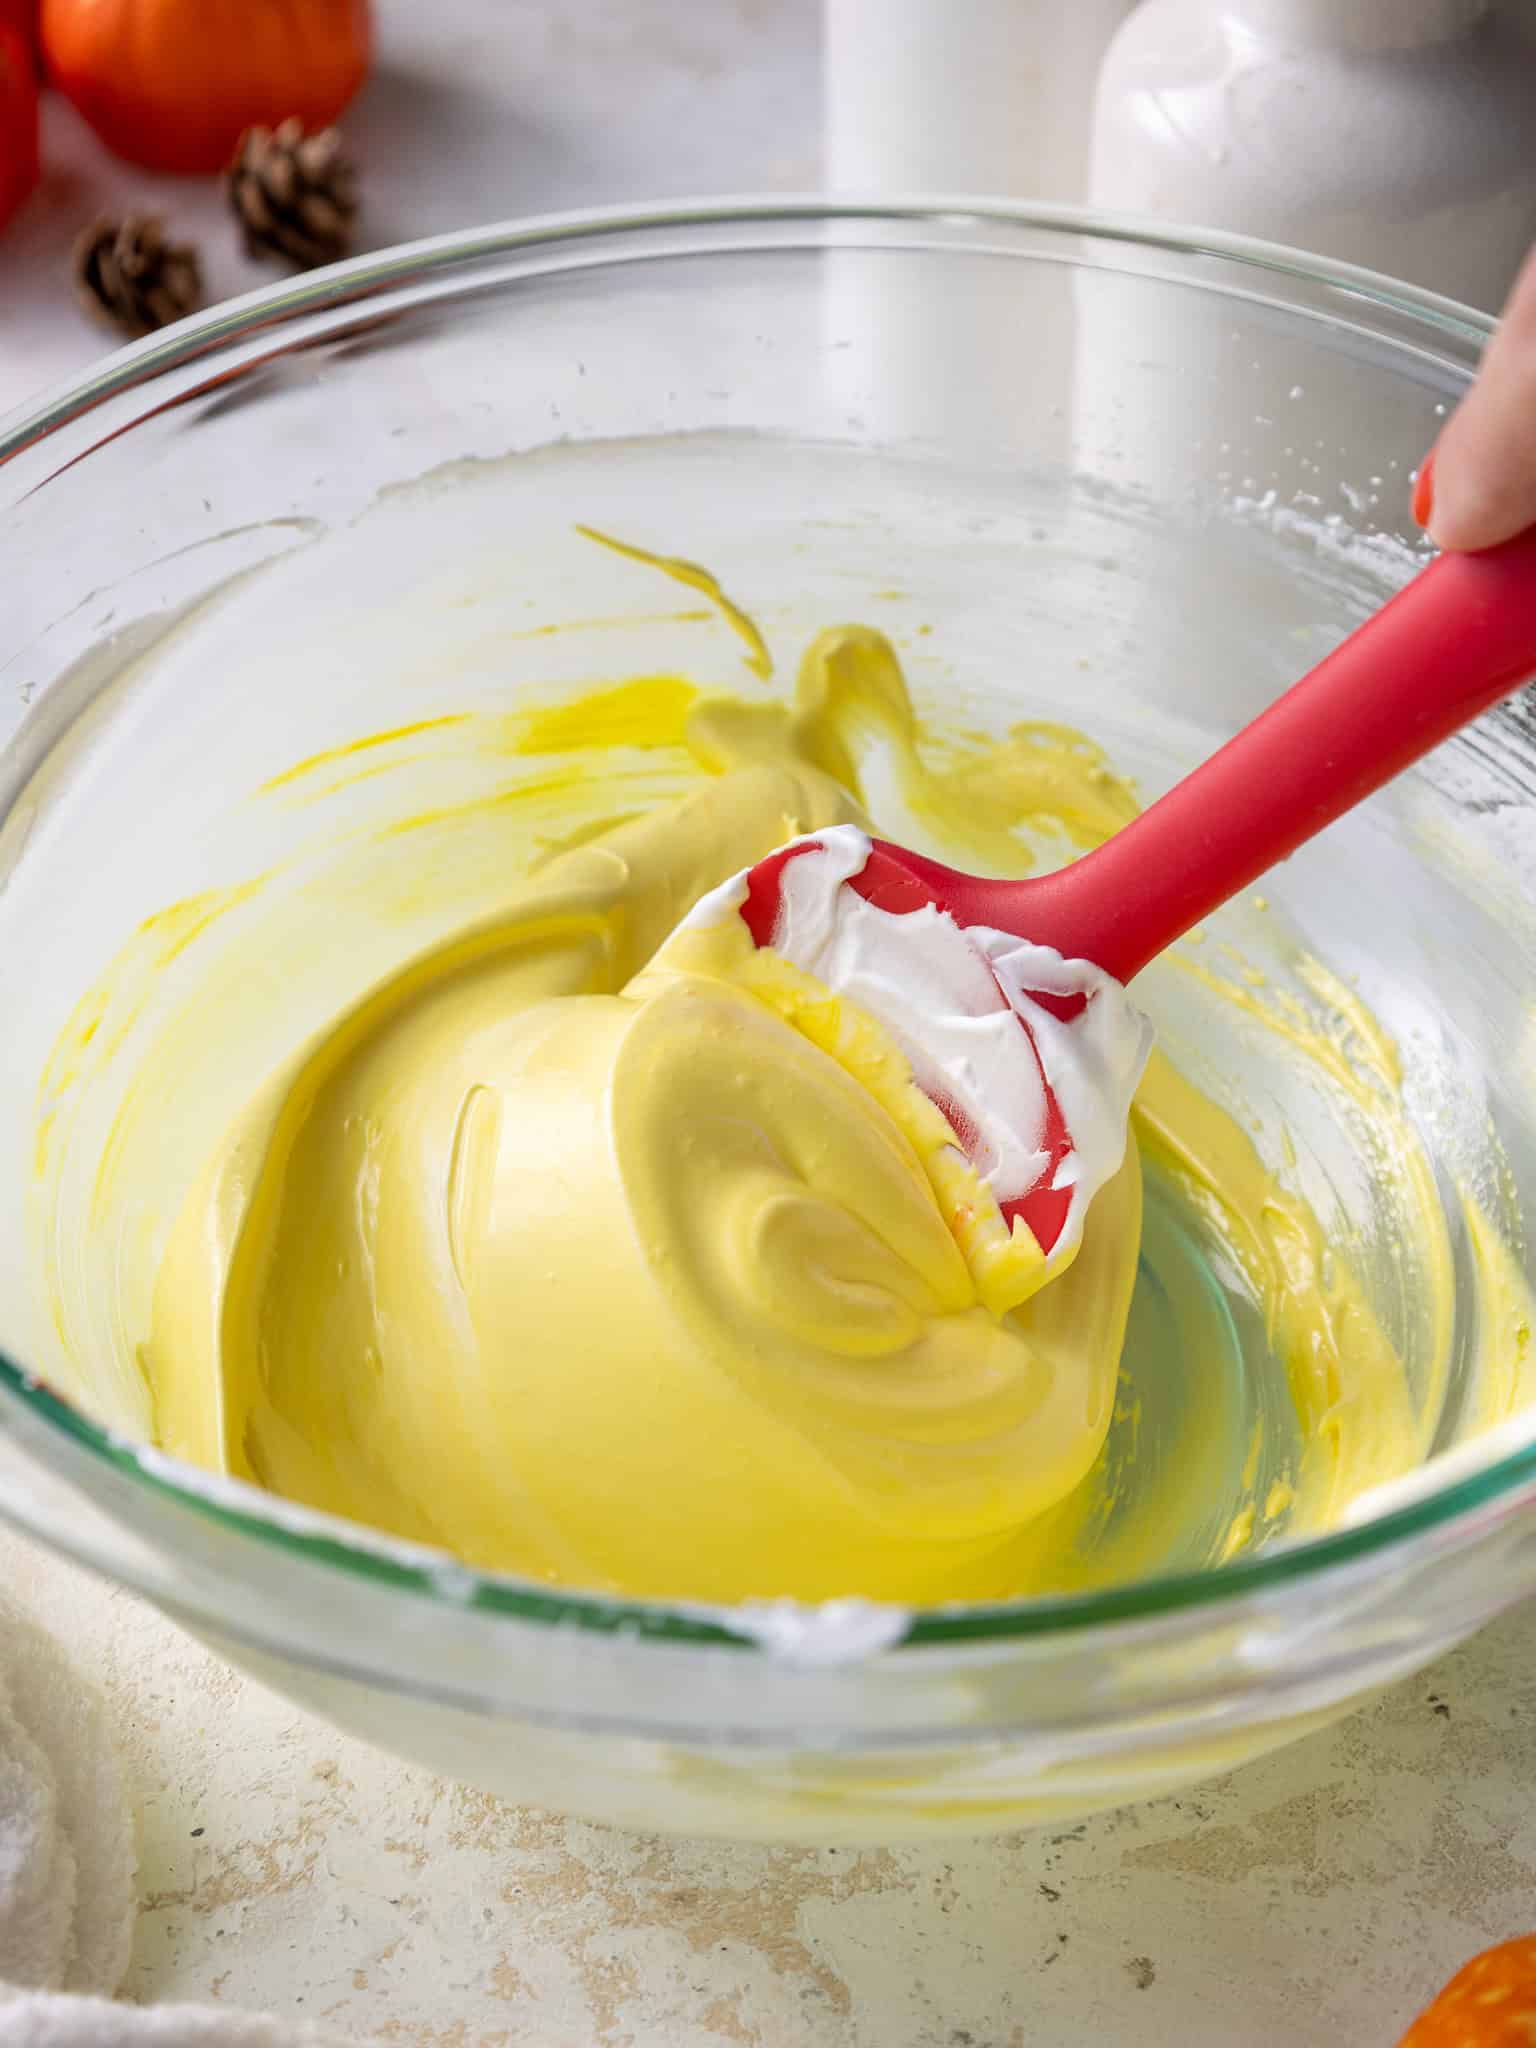
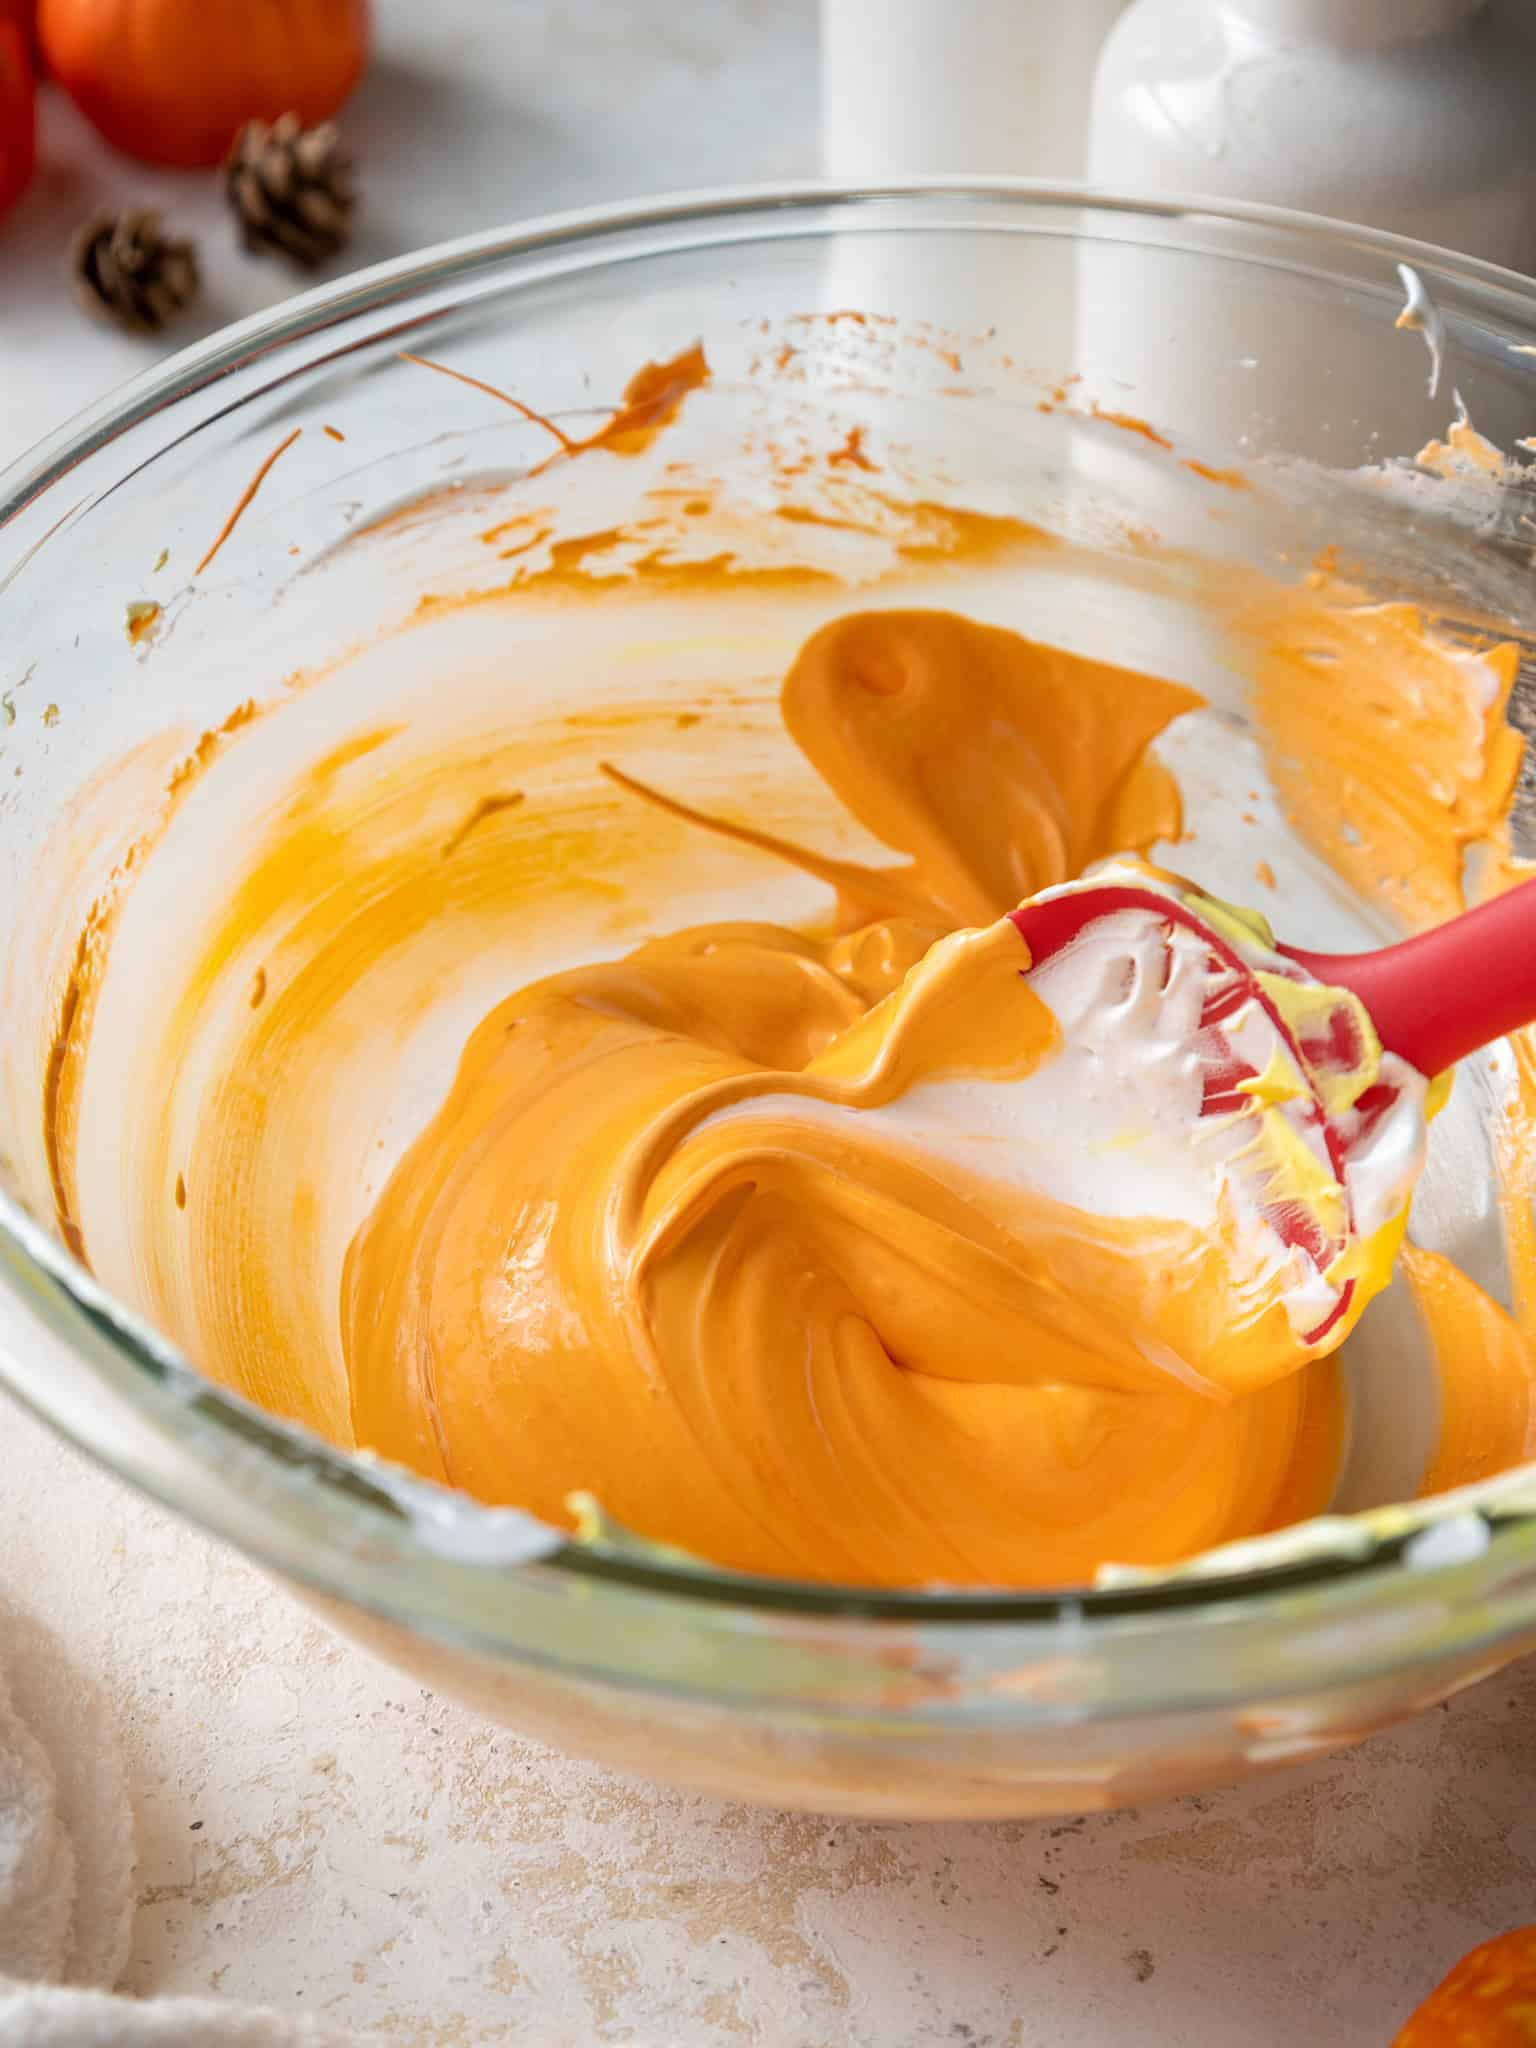
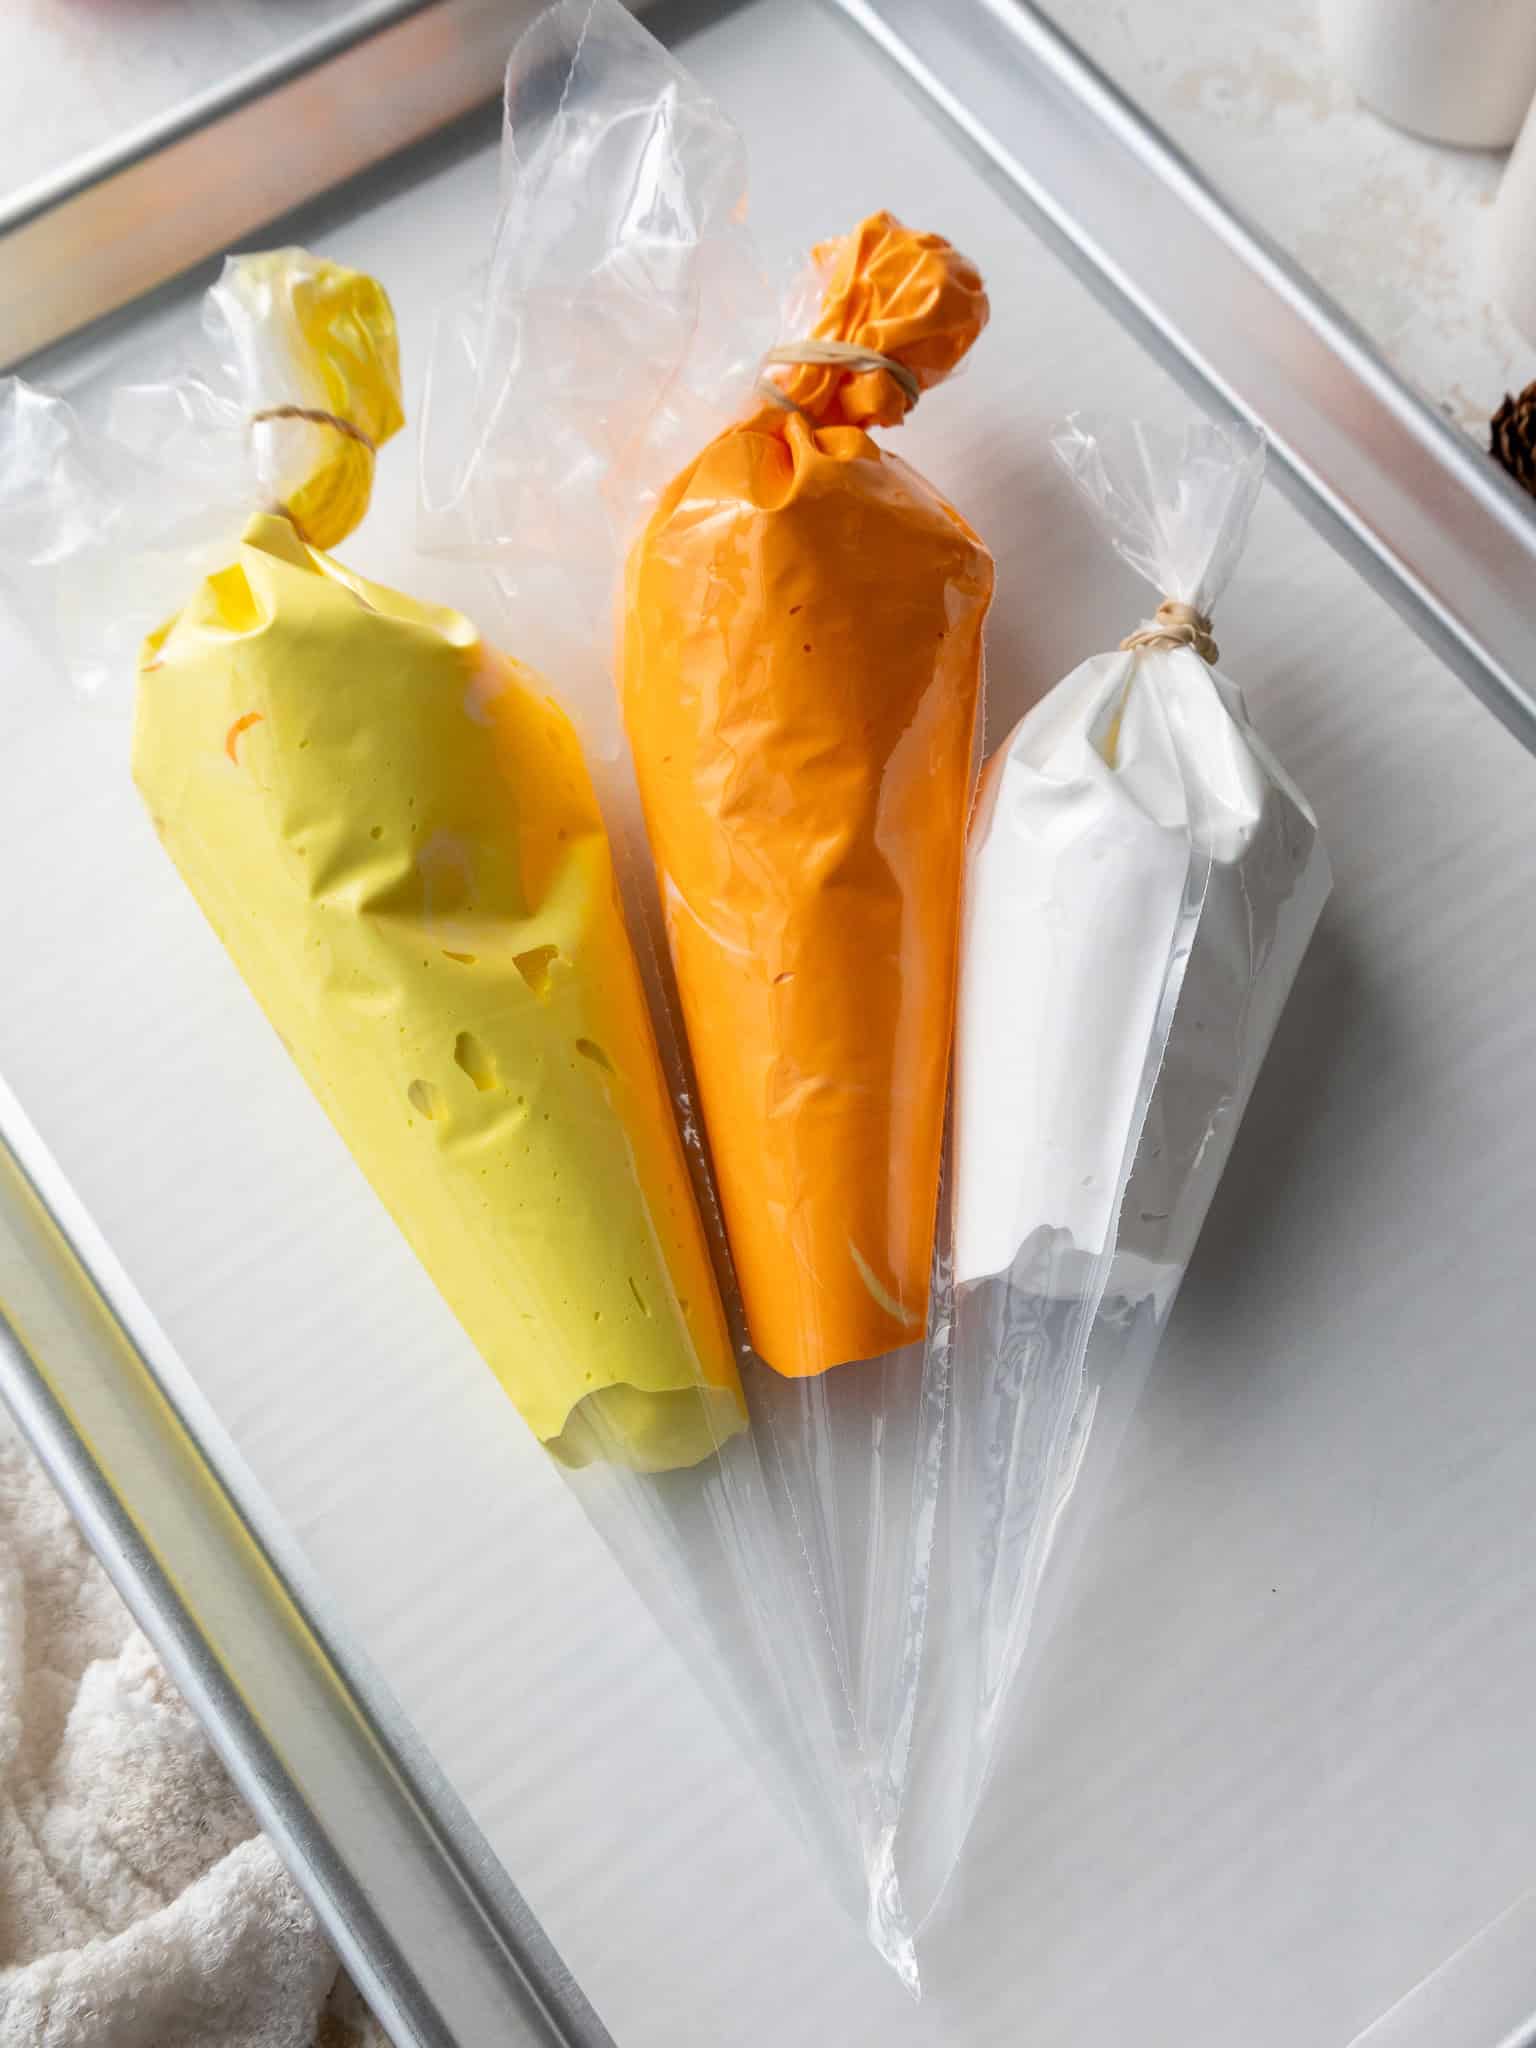
Color about 2/3 of the meringue yellow, about 1/4 orange, and leave the remaining meringue white. Mix just until it’s evenly colored, then scoop each color into a small piping bag.
These don’t spread as they bake, so they can be piped about 1 inch apart.
Step 3: Pipe the Meringue
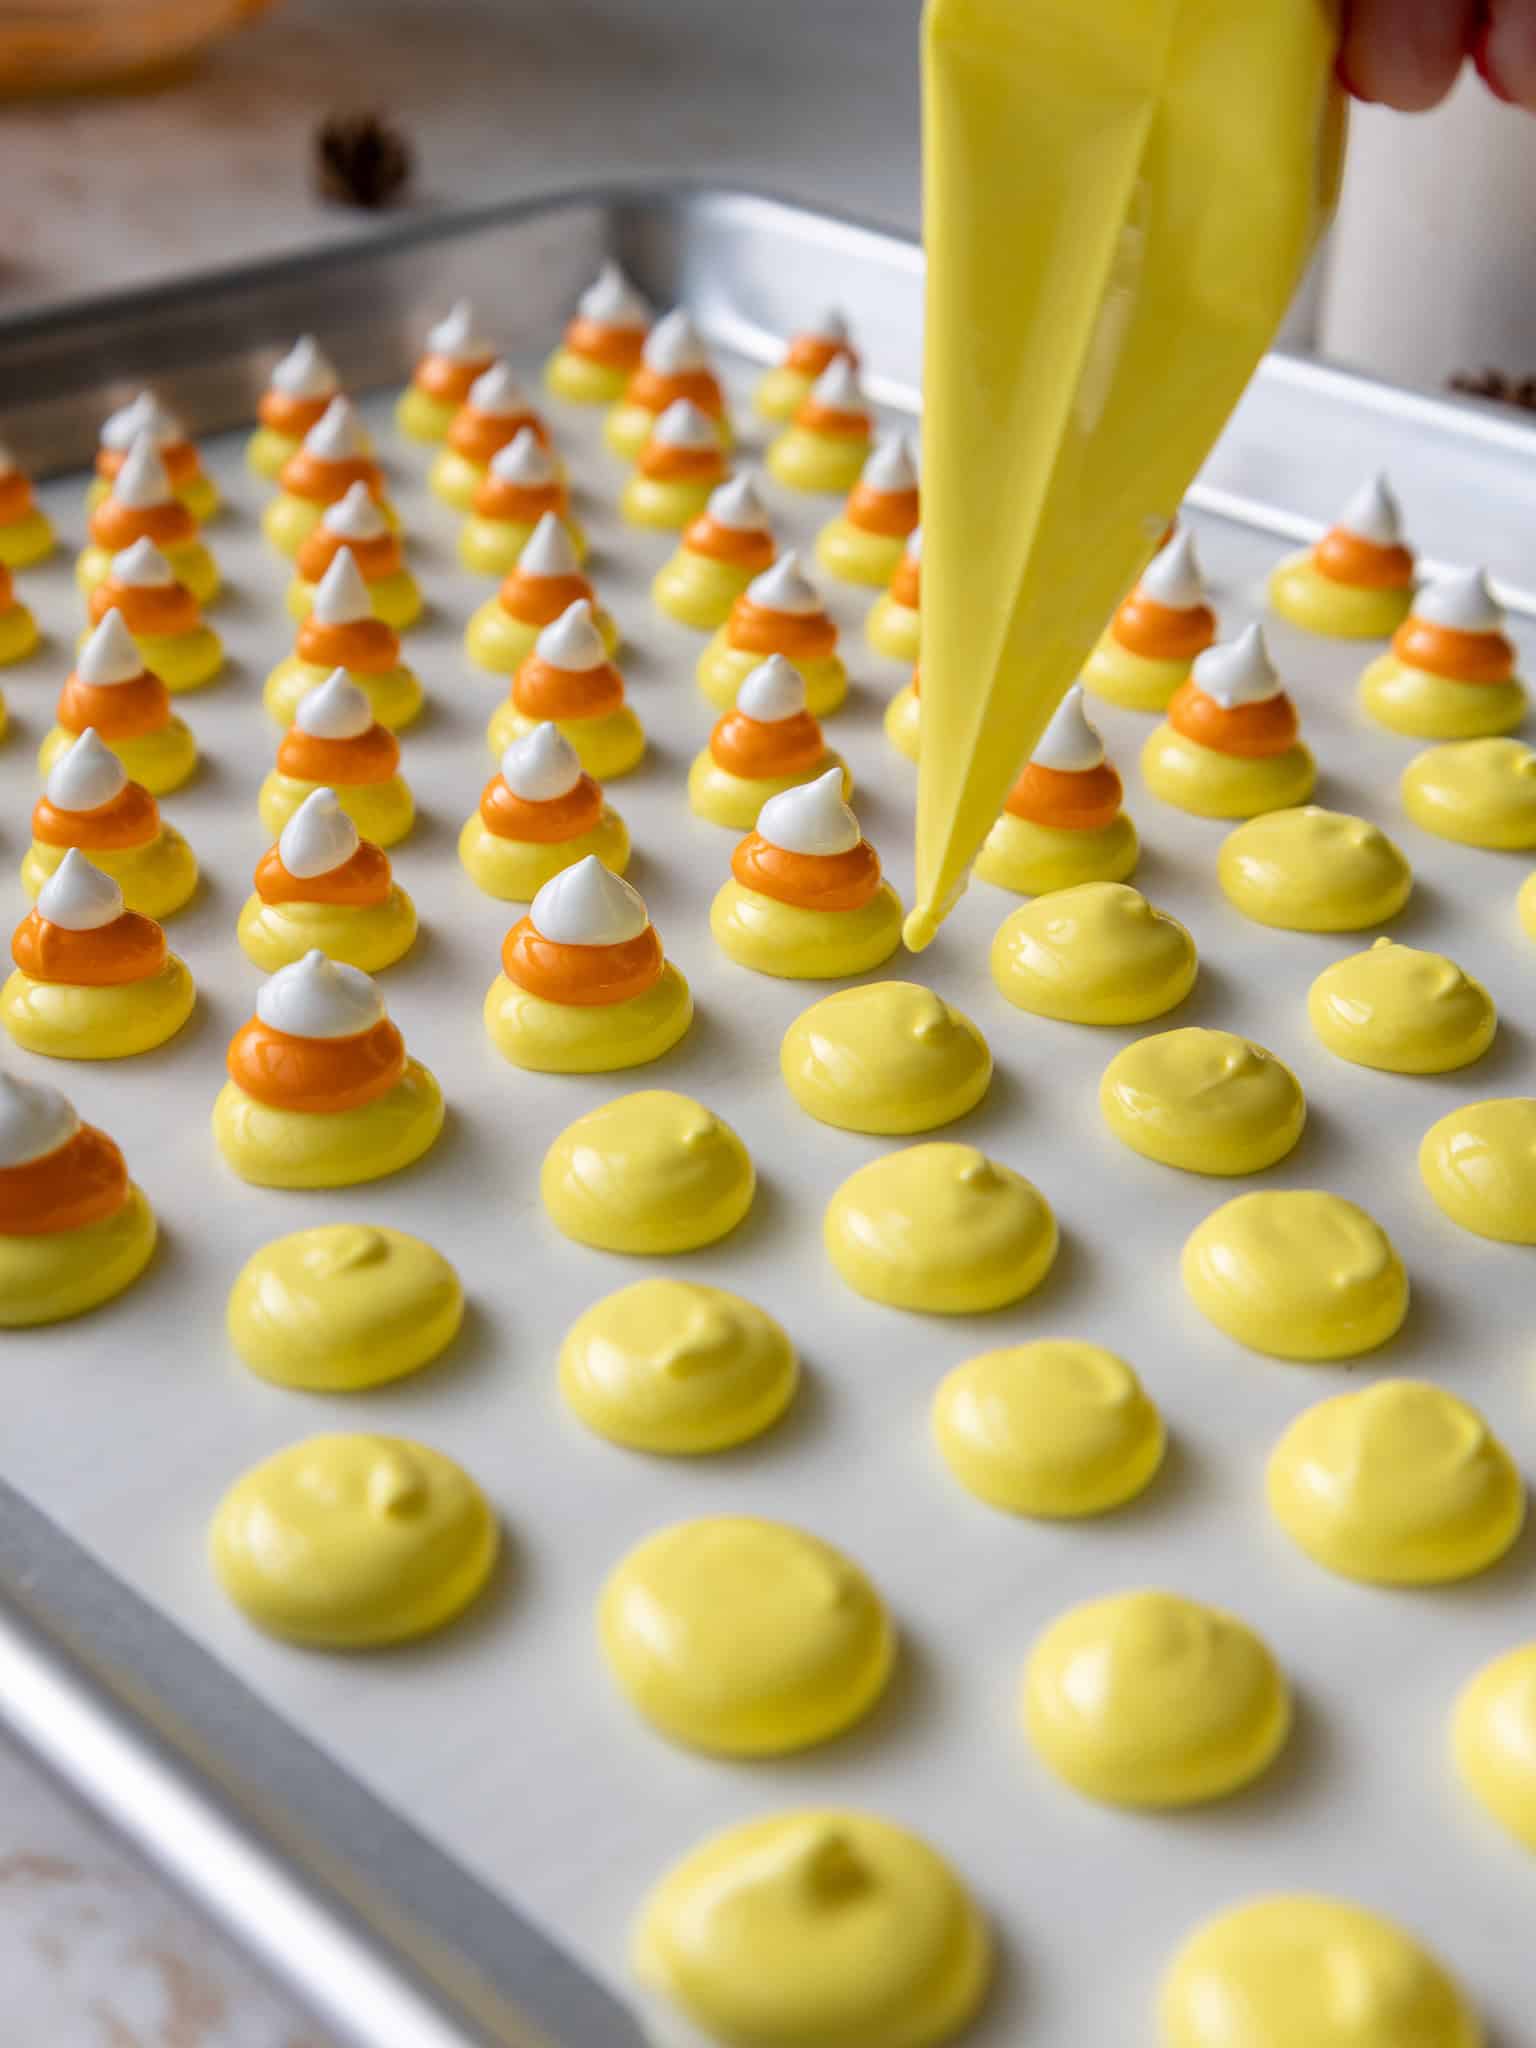
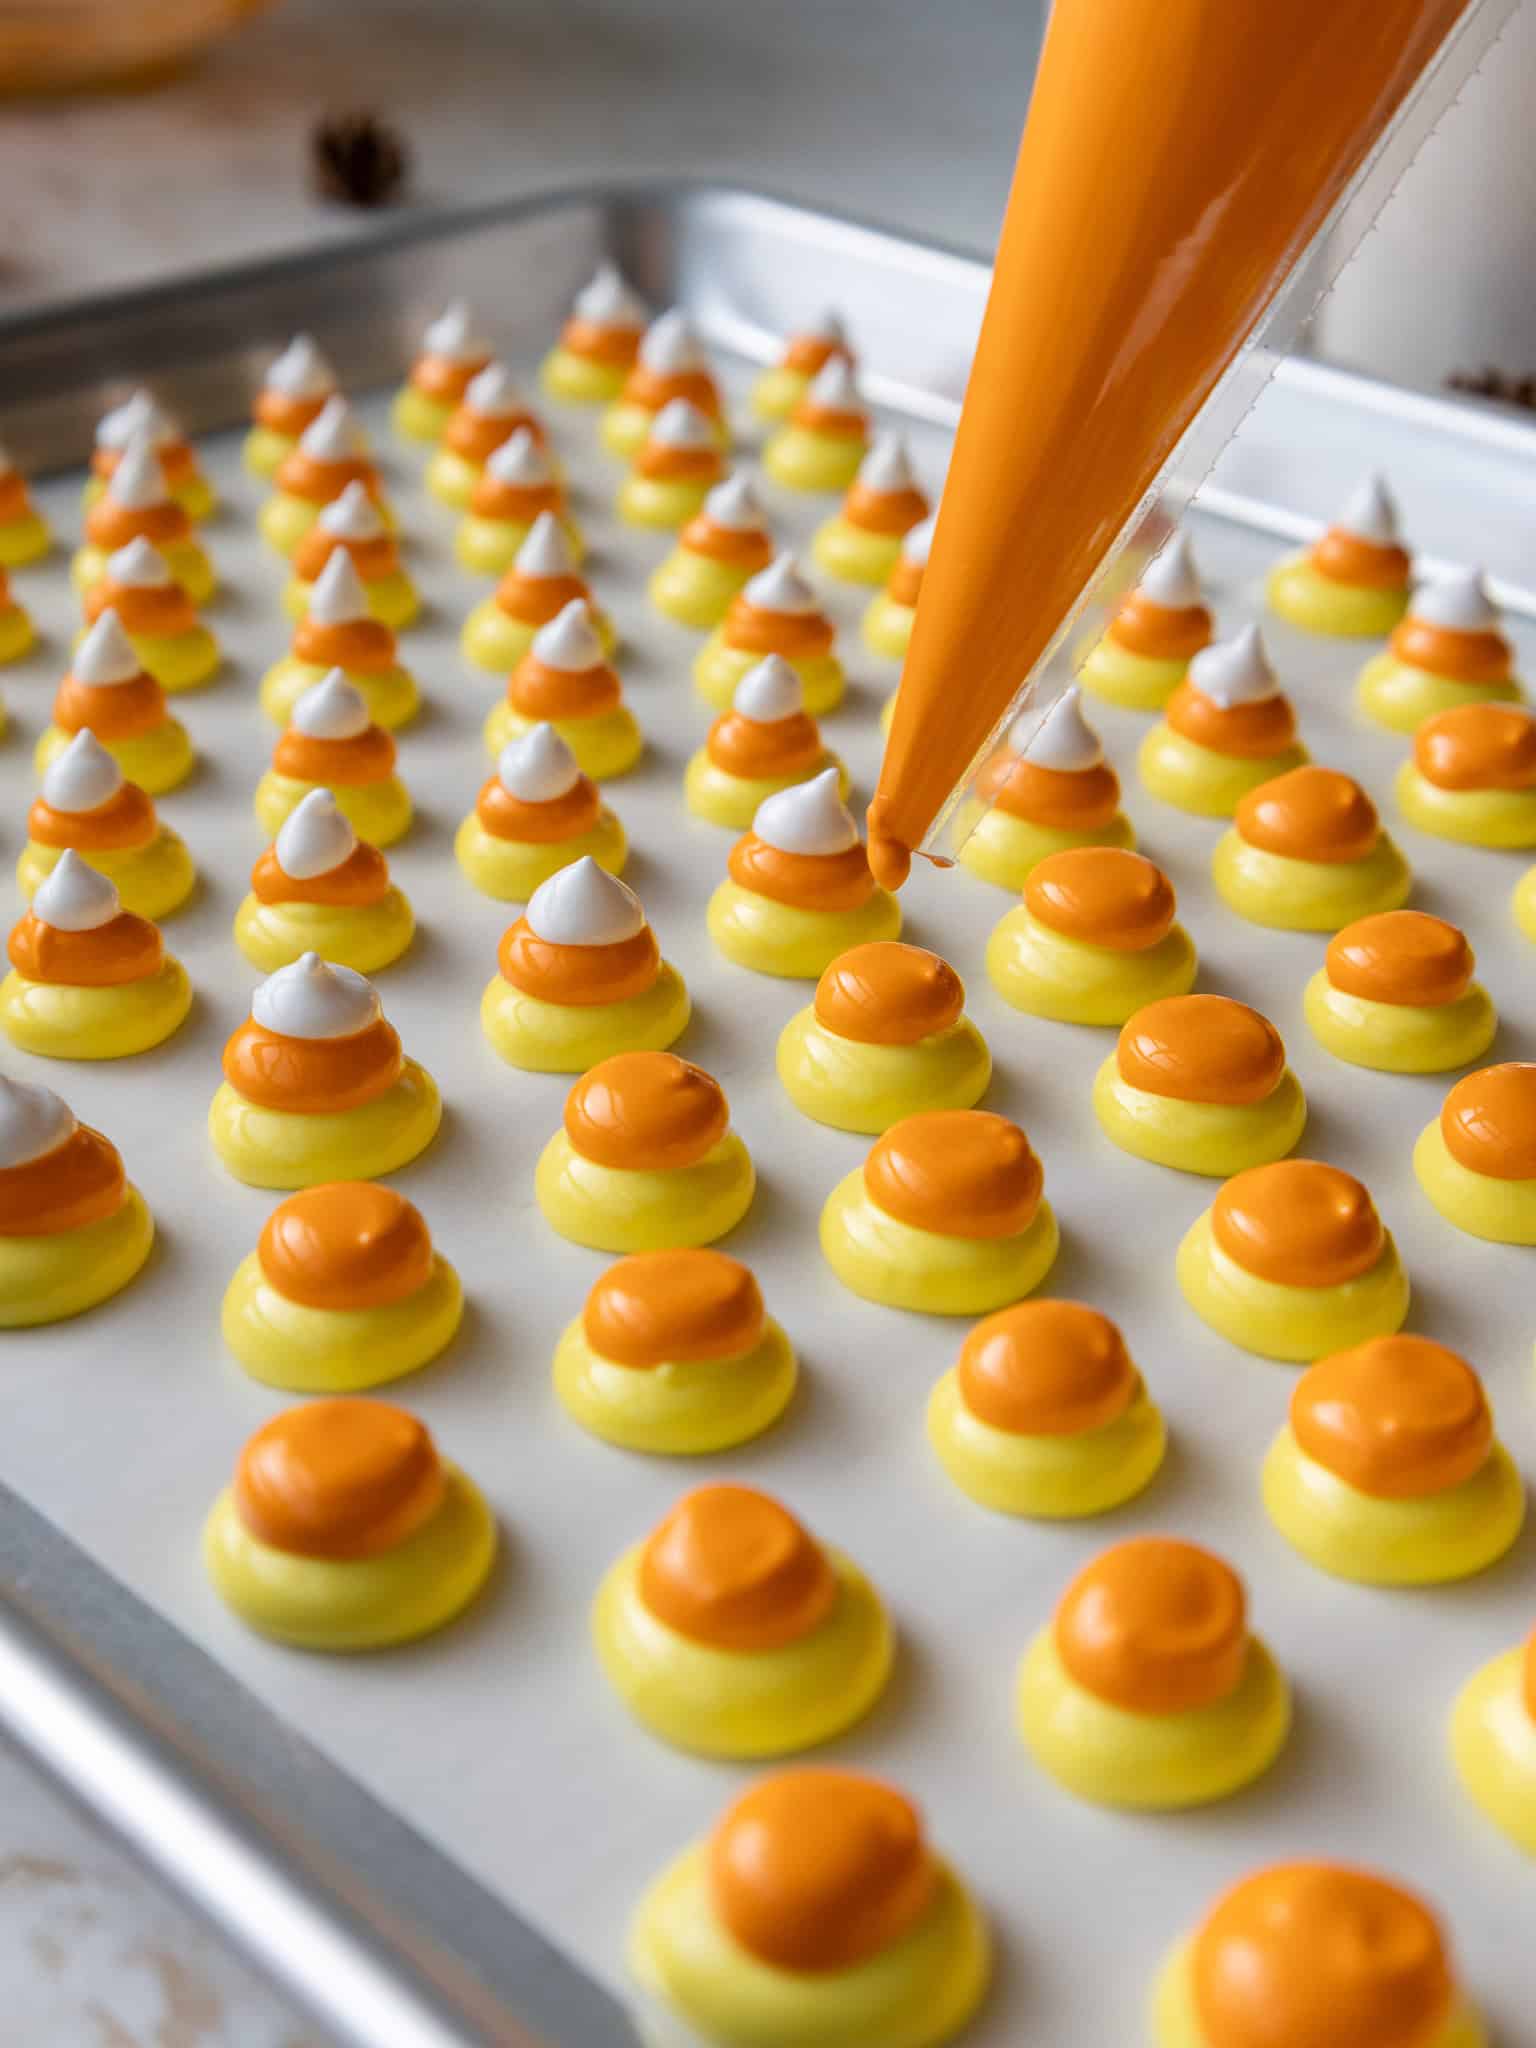
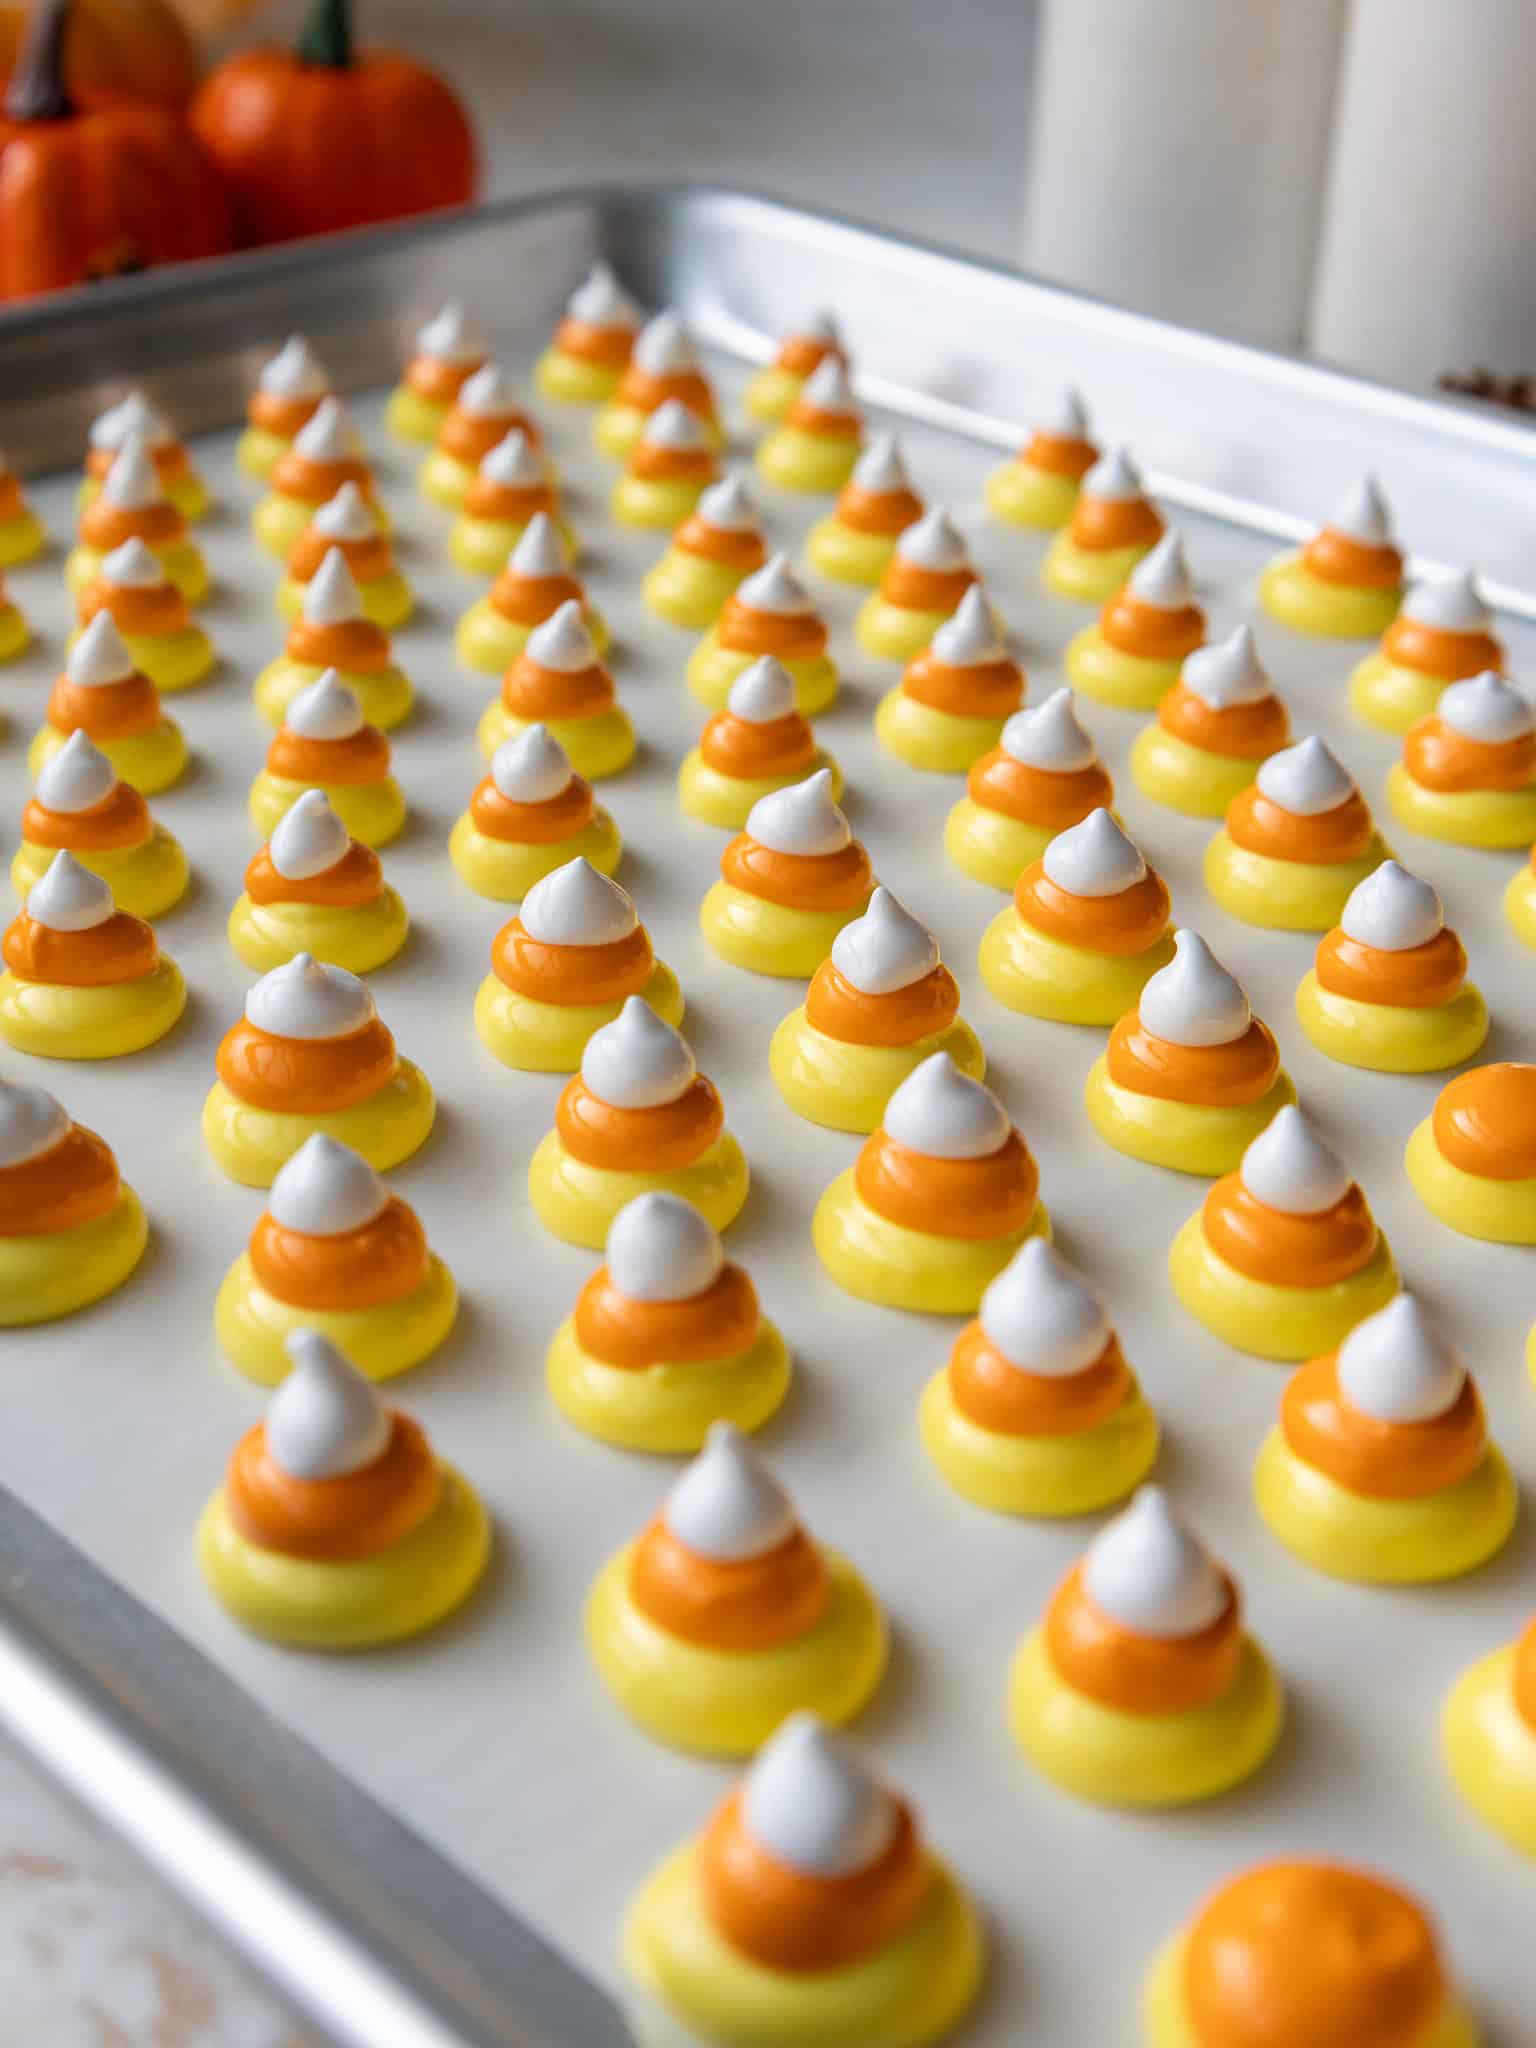
Cut a 1/4-inch opening at the base of each bag. Pipe dollops of yellow meringue on the prepared baking sheets that are about 3/4 inch in diameter, spacing them about 1 inch apart (these don’t spread as they bake).
Next, pipe a slightly smaller dollop of orange meringue on top of the yellow, followed by a smaller dollop of white meringue.
Step 4: Bake & Gradually Cool the Meringues
Bake the trays for 1 1/2 hours, then turn the oven off and let the meringues sit in the oven for another hour without opening the door.
Letting them gradually cool helps prevent them from cracking. At this point, the meringues should be fully cooked and look and feel dry to the touch. If they still seem wet or moist, leave them in the turned-off oven for another 30-60 minutes.
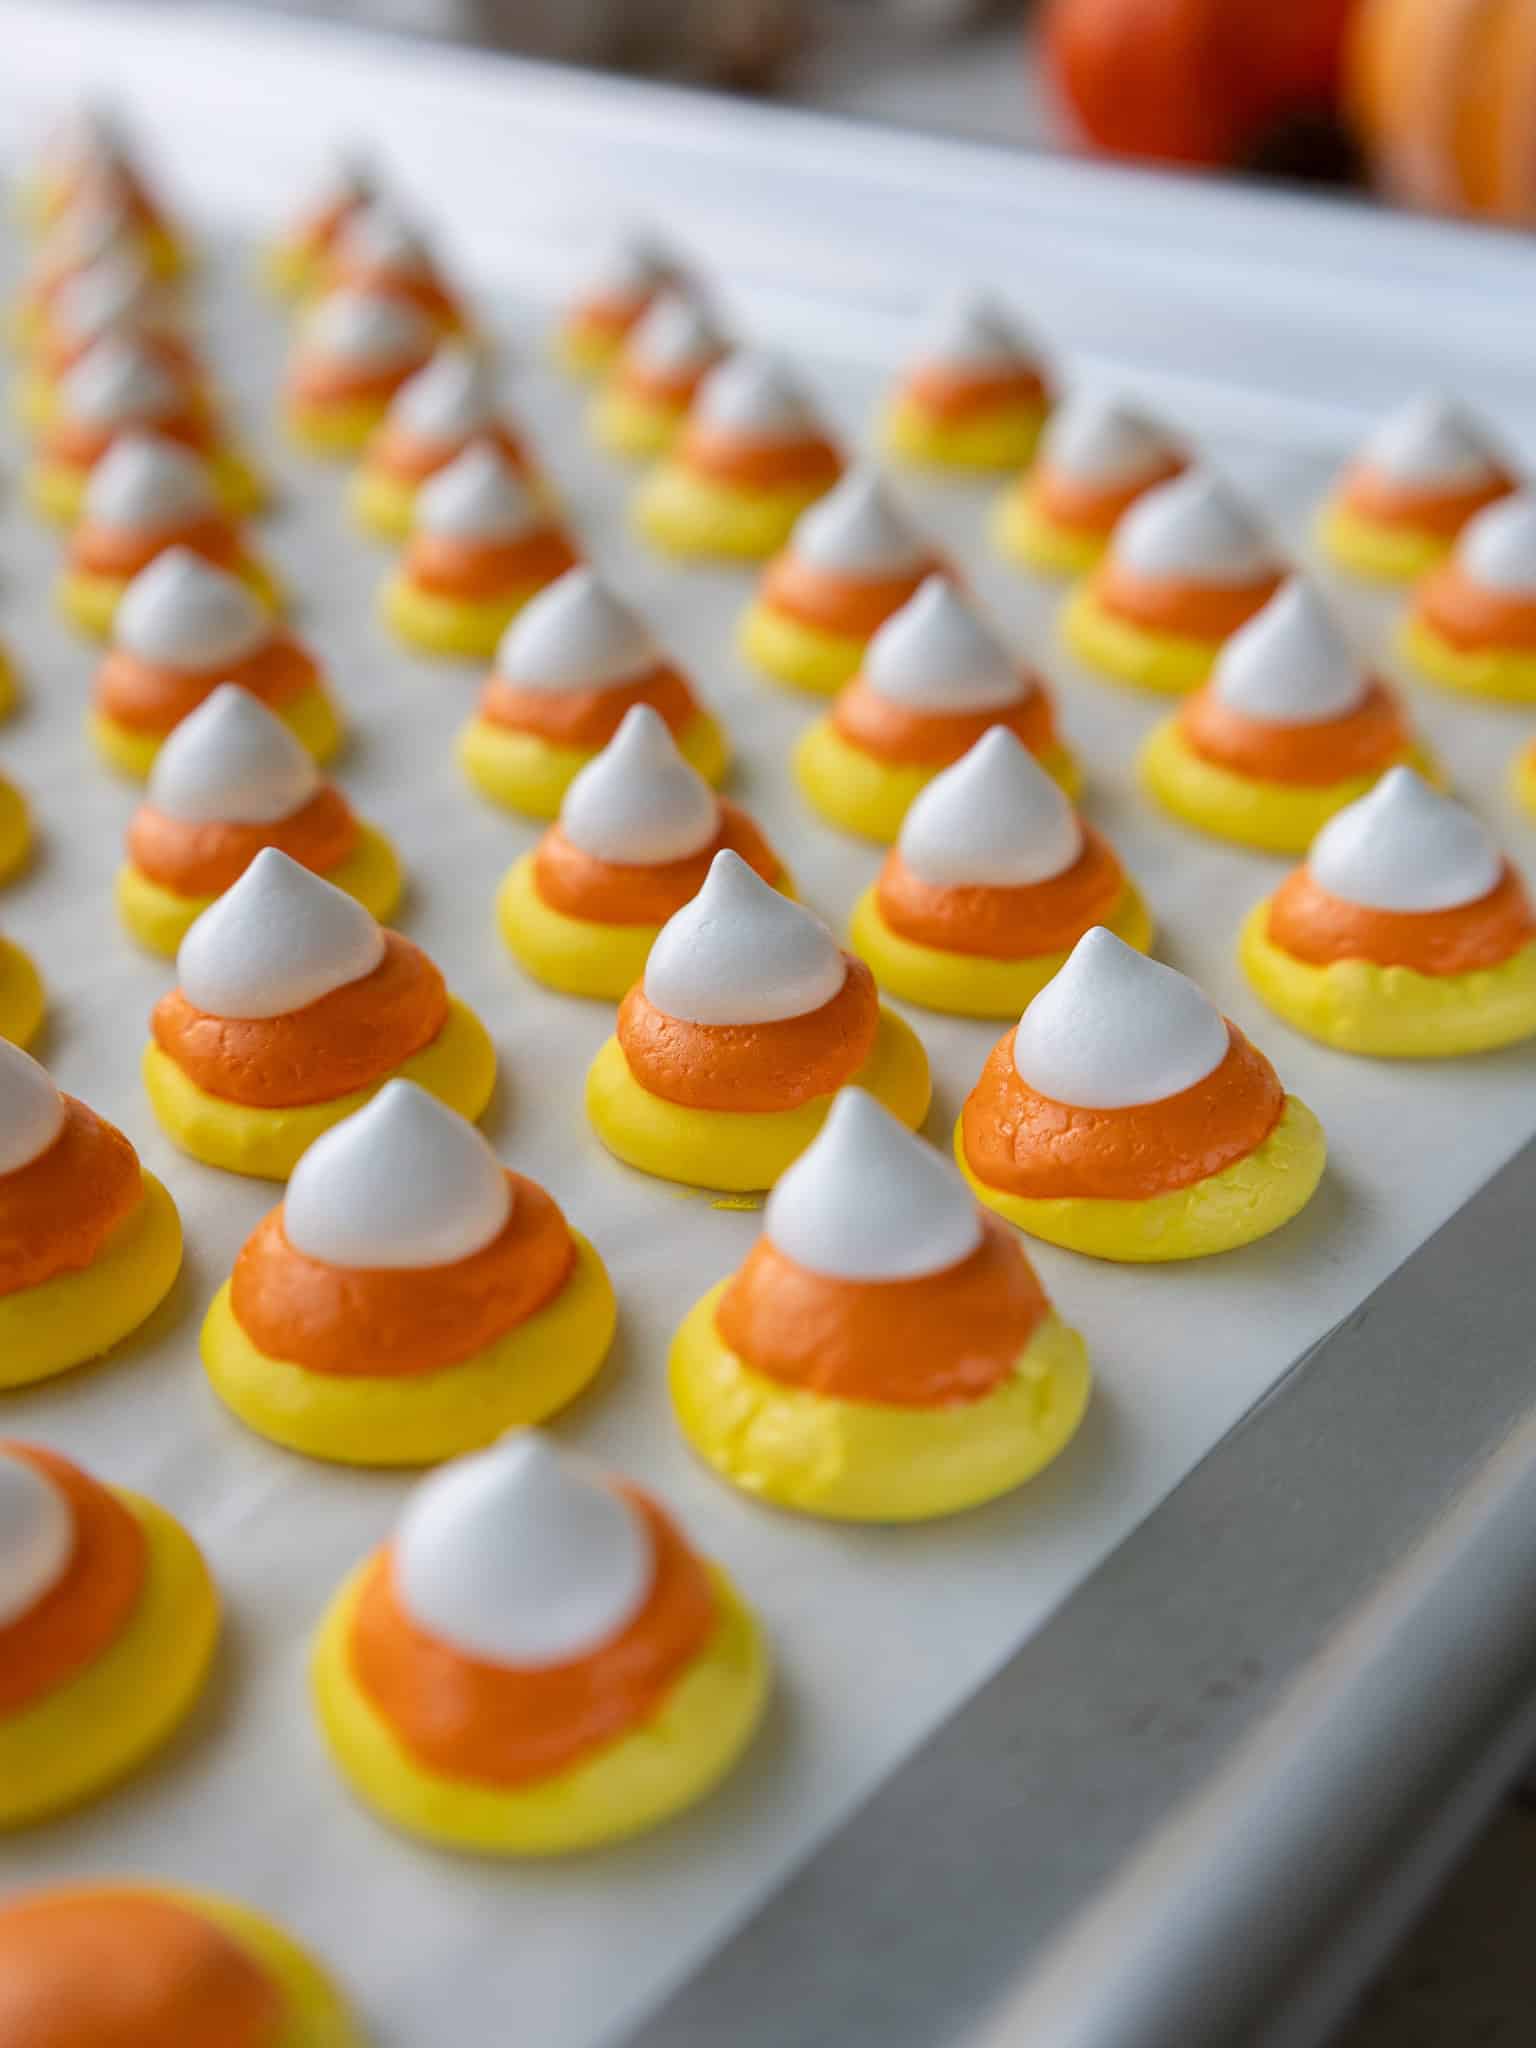
Remove the trays from the oven. They should have a crunchy exterior and a soft, chewy center. Let the meringues cool fully to room temperature, then remove and enjoy or store in an airtight container. These can be stored at room temperature for up to a week.
How Many Candy Corn Meringues Does This Recipe Make?
The yield can vary a lot based on how large you pipe the meringues and what piping tip you use. I made about 150 meringues with a base diameter of 3/4 inch.
Frequently Asked Questions
Why are my meringues sticky?
Meringues can become sticky if they haven’t baked long enough, if they cooled too quickly, or if they’re exposed to humidity. After baking, let the meringues sit in the turned-off oven so they can gradually dry out and cool.
If they still feel wet or sticky after the bake and cool time, leave them in the turned-off oven for another 30-60 minutes. Once they’re fully dry, store them in an airtight container at room temperature.
Why did my meringues crack?
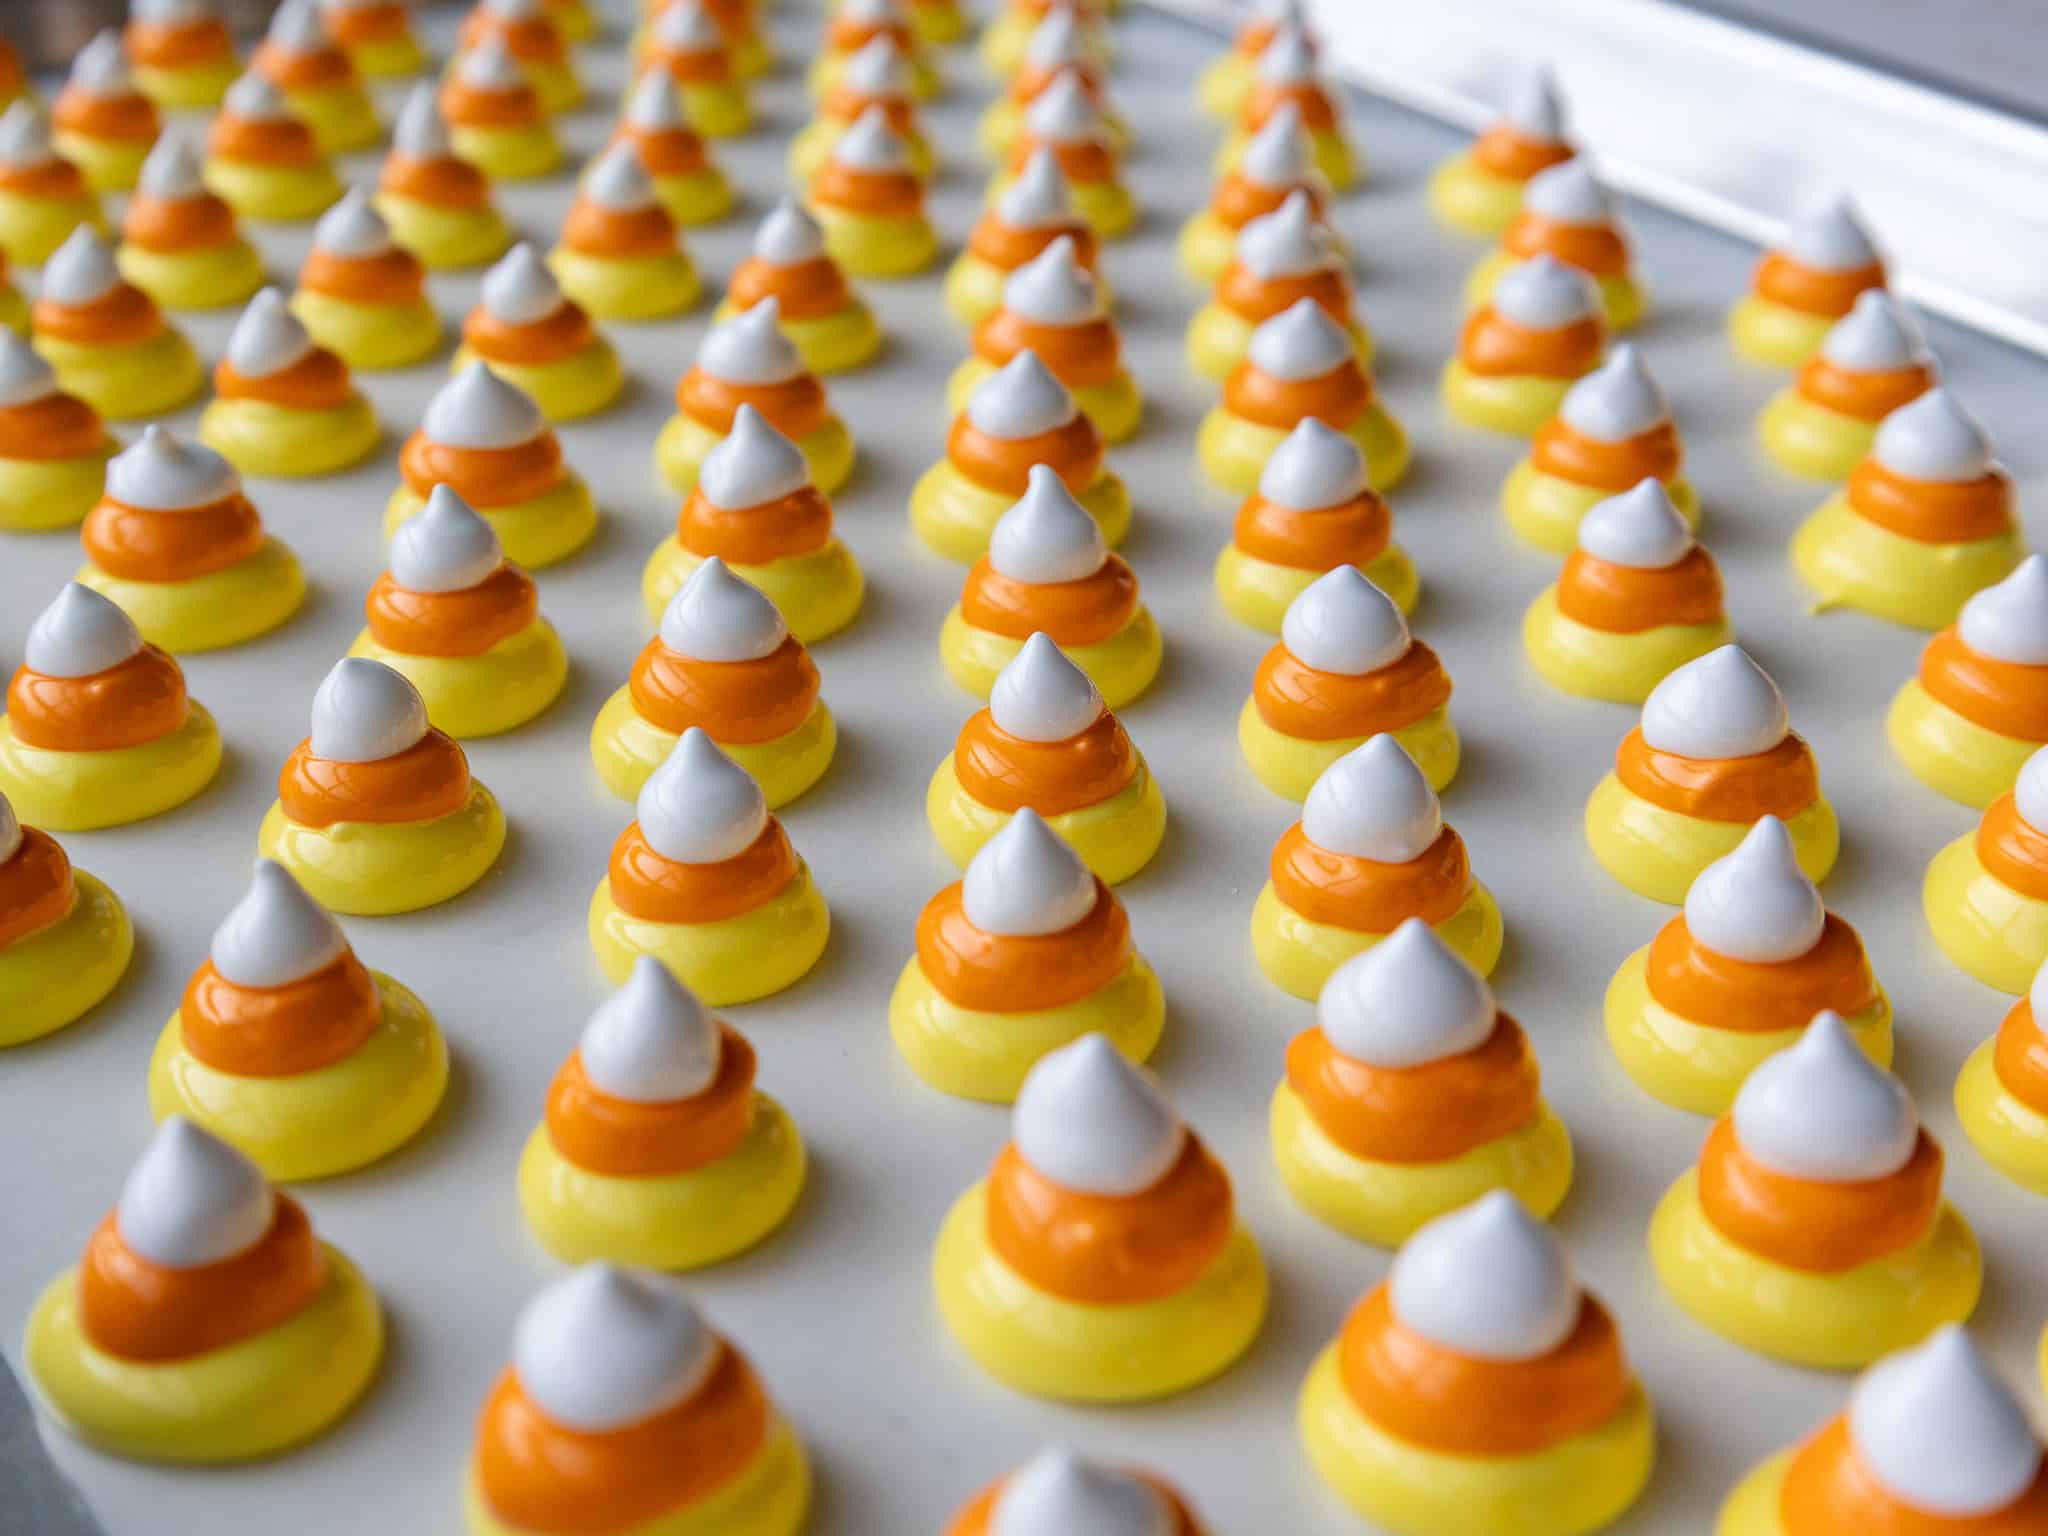
Meringues usually crack when they bake or cool too quickly. This is why they’re baked low and slow, then left in the oven after it’s turned off. That gradual cooling helps prevent big temperature changes that can cause cracking.
A few small cracks are totally normal, especially with shaped meringues like these! They’ll still taste delicious.
Can I make candy corn meringues ahead of time?
Yes! Candy corn meringues are a great make-ahead Halloween dessert. Once they’re fully baked, cooled, and dry to the touch, store them in an airtight container at room temperature.
They can last for up to a week if they’re stored properly and kept away from humidity.
Can I use carton egg whites?
I recommend using freshly separated egg whites because they whip up best and create a more stable meringue. Carton egg whites are usually pasteurized, and they don’t always whip up as well.
If you try to use carton egg whites, make sure the carton says they can be used for meringues or whipping. Keep in mind that they may take longer to whip and might not create quite as much volume.
Can I use liquid food coloring?
I don’t recommend using liquid food coloring in this recipe. It can add too much extra moisture to the meringue and make it less stable.
Gel food coloring works best because it gives the meringue a bright color without thinning it out. Be sure to mix it in gently and only until the color is evenly distributed.
How do I know when meringues are done?
The meringues are done when they look and feel dry to the touch and peel cleanly off the parchment paper. They should have a crisp exterior with a soft, chewy center.
If they still feel wet, sticky, or don’t peel off cleanly, leave them in the turned-off oven a bit longer so they can continue drying out.
Tips for Making the Best Candy Corn Meringues
- Note that with the total bake and cool time, these need to be in the oven for at least 2 1/2 hours, if not overnight. I like to make these at the end of the day, so it doesn’t get in the way of any other baking/cooking I need the oven for.
- Separate your eggs while they’re still cold! While we want the egg whites to be room temperature when we whip them up, it’s easiest to separate them when they’re still cold.
- Use gel food coloring to color the meringue. If you try to use liquid food coloring, it can throw off the consistency and cause the meringue to be less stable.
- Beat the meringue on a medium-high speed instead of the highest speed. This will help you create a more stable meringue with smaller air bubbles that will be easier to pipe.
- Bake time can vary based on how large you pipe the meringues and what piping tip you use. After they’ve baked and cooled in the oven, test them for doneness by gently trying to peel one off the parchment paper. It should peel off cleanly.

Let Me Know What You Think!
If you try this recipe for candy corn meringues, I’d love to hear what you think! Please leave a rating and comment below.
Tag me @chelsweets and use #chelsweets on social media so that I can see your amazing creations!

Candy Corn Meringues
Equipment
- 3 Piping Bags or Freezer Ziplock Bags
Ingredients
Candy Corn Meringues
- 4 large egg whites, room temperature 120g
- 1/4 tsp cream of tartar – optional but recommended
- 1 cup superfine caster or granulated sugar 200g
- 1/2 tsp vanilla or almond extract – optional 3g
- orange and yellow gel food coloring
Instructions
Candy Corn Meringues
- Preheat the oven to 200°F/93°C and line 2 large baking sheets with parchment paper. Set aside.
- Before you whip up the meringue, make sure there are no traces of grease on the whisk attachment or in your bowl. Grease can prevent the meringue from whipping up properly. If you see or feel any grease, moisten a paper towel with vinegar and wipe the inside of the bowl and the whisk attachment to remove any grease.
- Then add 4 large egg whites to the bowl of a stand mixer fitted with a whisk attachment or into a large bowl, and mix on medium speed until the surface of the egg whites is covered in small bubbles. Add 1/4 tsp cream of tartar and continue to mix until the meringue reaches the soft peak stage and leaves visible tracks.
- Gradually mix 1 cup of granulated sugar, 1 Tbsp at a time, into the egg whites over a few minutes while mixing on a medium-low speed. Adding the sugar gradually makes a huge difference in the stability of the meringue. Increase the mixing speed to a medium-high speed (6 on a KitchenAid). When the meringue gets close to reaching stiff peaks, add 1/2 tsp of vanilla or almond extract. Keep mixing until stiff, glossy peaks form.
- Color about 2/3 of the meringue yellow, about 1/4 orange, and leave the remaining meringue white. Mix just until it's evenly colored, then scoop each color into a small piping bag.
- Cut a 1/4-inch opening at the base of each bag. Pipe dollops of yellow meringue on the prepared baking sheets that are about 3/4 inch in diameter, spacing them about 1 inch apart (these don't spread as they bake). Next, pipe a slightly smaller dollop of orange meringue on top of the yellow, followed by a smaller dollop of white meringue.
- Bake both trays for 1 1/2 hours, then turn the oven off and let the meringues sit in the oven for another hour. Letting them gradually cool helps prevent them from cracking. At this point, the meringues should be fully cooked and look and feel dry to the touch. If they still seem wet or moist, leave them in the turned-off oven for another 30-60 minutes.
- Remove the trays from the oven. They should have a crunchy exterior and a soft, chewy center. Let the meringues cool fully to room temperature, then remove and enjoy or store in an airtight container. These can be stored at room temperature for up to a week.
Video
Notes
Tips for Making the Best Candy Corn Meringues
- Note that with the total bake and cool time, these need to be in the oven for at least 2 1/2 hours, if not overnight. I like to make these at the end of the day, so it doesn’t get in the way of any other baking/cooking I need the oven for.
- Separate your eggs while they’re still cold! While we want the egg whites to be room temperature when we whip them up, it’s easiest to separate them when they’re still cold.
- Use gel food coloring to color the meringue. If you try to use liquid food coloring, it can throw off the consistency and cause the meringue to be less stable.
- Beat the meringue on a medium-high speed instead of the highest speed. This will help you create a more stable meringue with smaller air bubbles that will be easier to pipe.
- Bake time can vary based on how large you pipe the meringues and what piping tip you use. After they’ve baked and cooled in the oven, test them for doneness by gently trying to peel one off the parchment paper. It should peel off cleanly.
Nutrition
Other Recipes You Might Like:


Could you use Splenda or another sugar alternative to make these diabetic friendly?
Hi Janice,
I haven’t tested these with Splenda or another sugar substitute, and I wouldn’t recommend swapping the sugar 1:1 in this recipe. Sugar plays a big role in the structure and texture of meringues, so a substitute can keep them from whipping or drying properly. A sugar alternative specifically designed for meringues may work, but the results would likely be different. Sorry I can’t be of more help!