
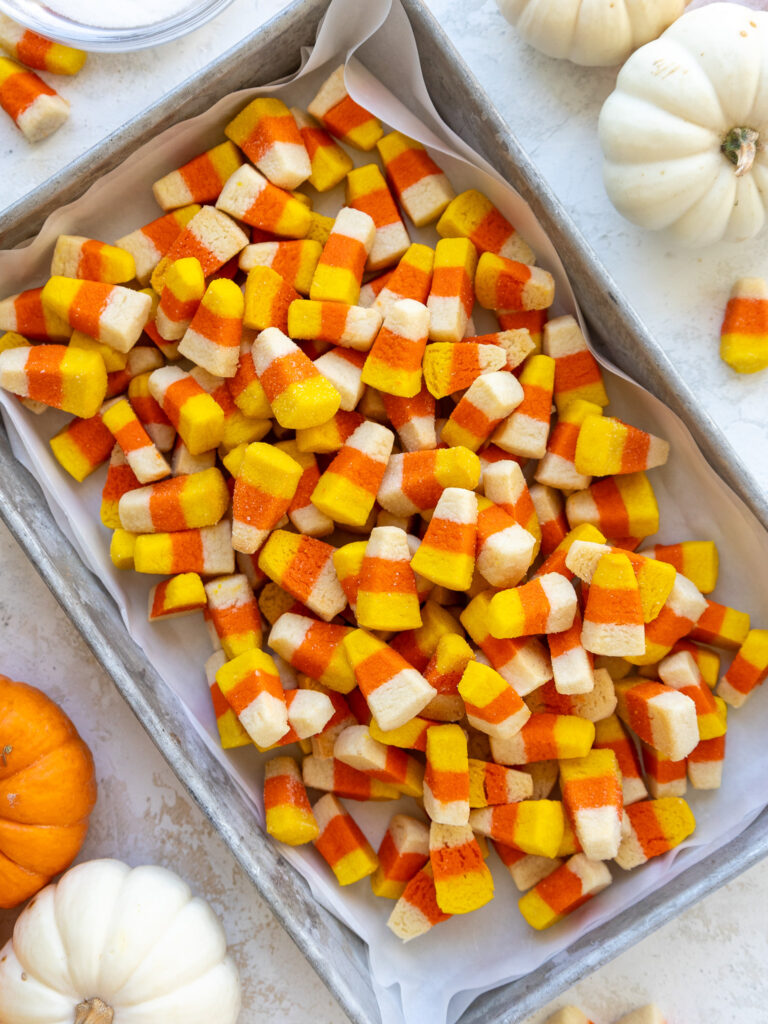
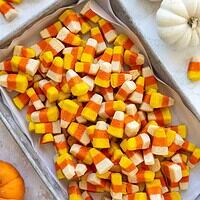
Candy Corn Cookies
These candy corn cookies are colored, layered, and cut to look just like little pieces of candy corn!! They’re the perfect Halloween cookie.
How to Make These Candy Corn Cookies
Let’s walk through each step of this recipe to make sure it turns out as amazing as possible!
I’ve also shared a video tutorial on how to make them below.
Step 1: Make the Cookie Dough
The first step is to make the cookie dough following the recipe card at the bottom of this post.
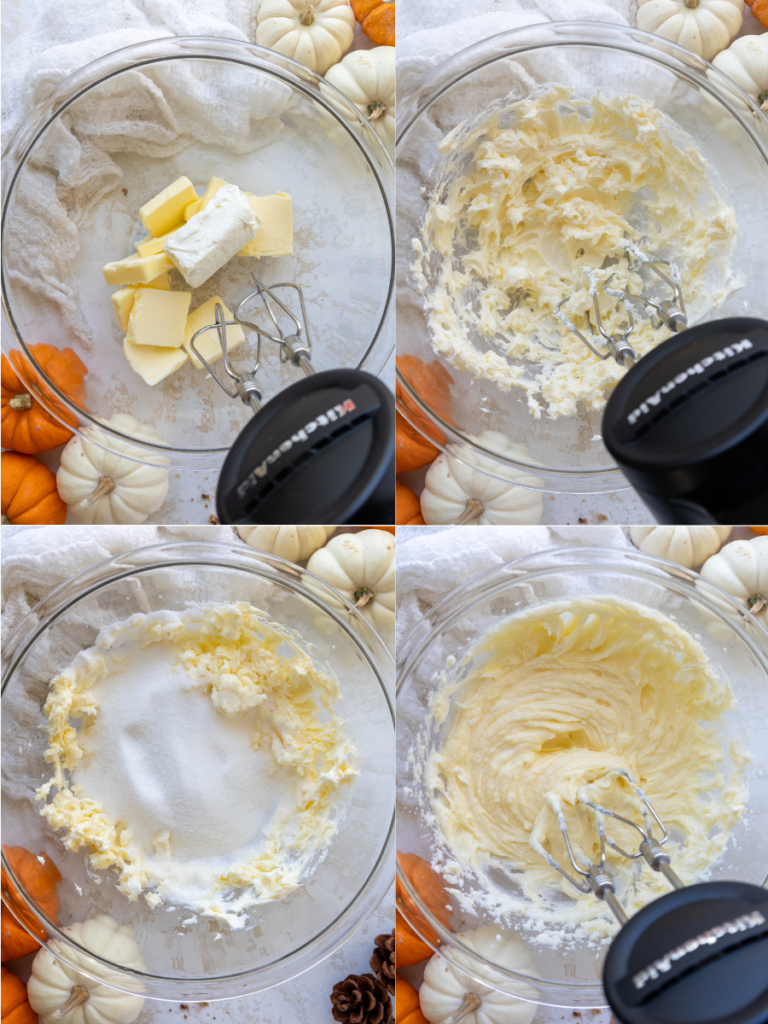
In a large bowl, beat the butter and cream cheese on medium speed with a hand mixer or whisk attachment until smooth.
Next, add the granulated sugar and mix at a medium-high speed for a couple of minutes, until the mixture becomes lighter in color.
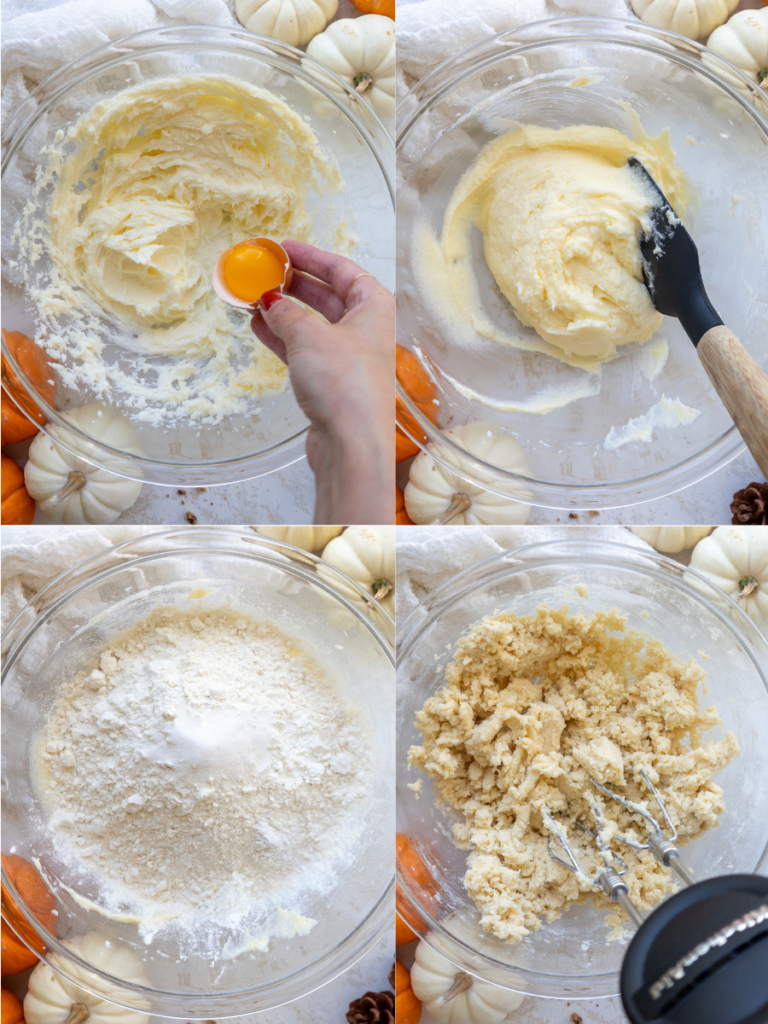
Then mix in the egg yolk, vanilla bean paste or vanilla extract, and almond extract. Mix on a medium speed until incorporated.
Next, add the flour, cornstarch, fine salt, and baking powder and mix on a low speed until it is JUST incorporated.
Scrape the sides and bottom of the bowl with a rubber spatula to make sure everything is properly mixed together.
Step 2: Color and Chill the Dough
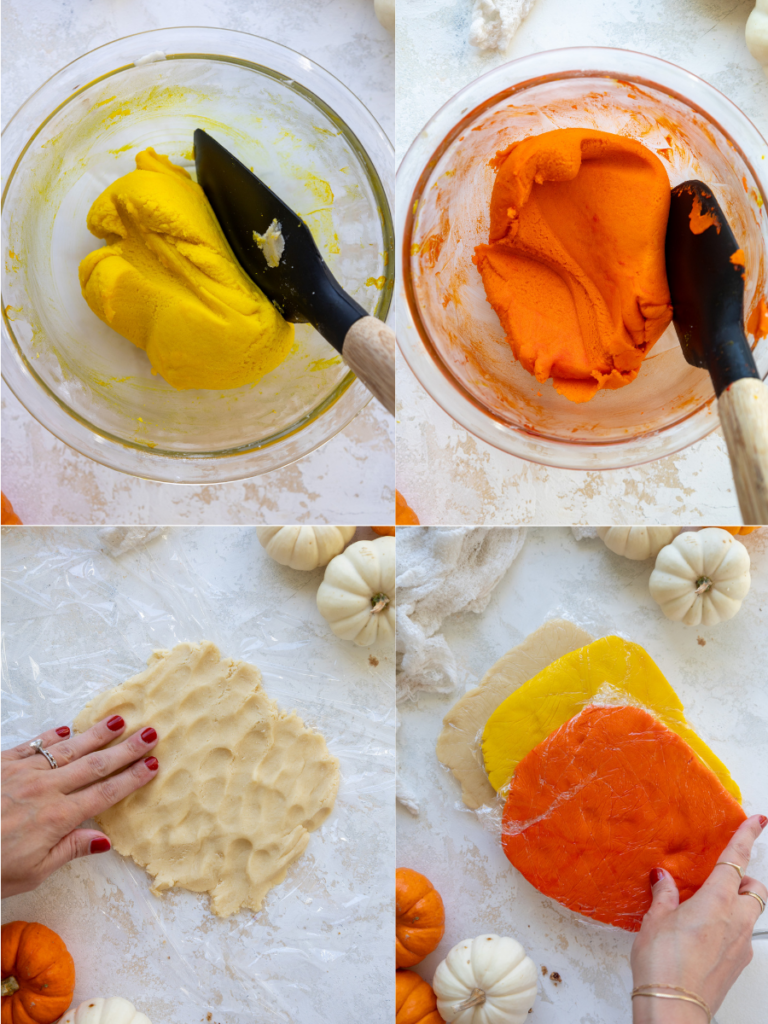
At this point, the dough should still be pretty sticky. Divide the dough into three equal-sized portions.
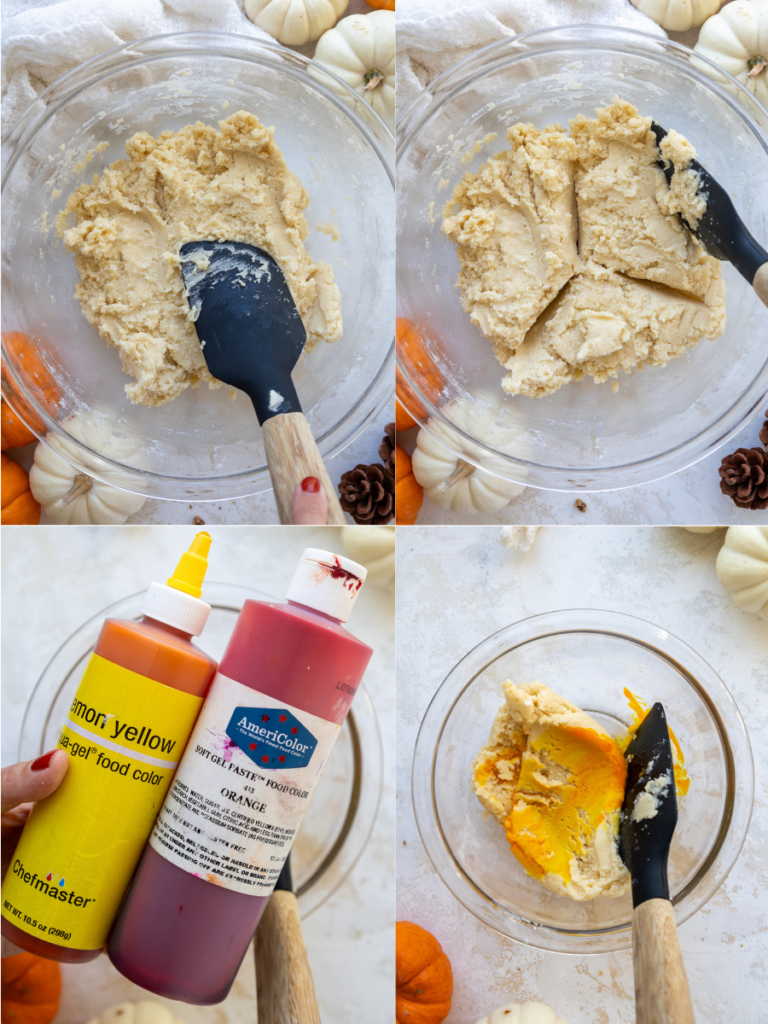
Leave one uncolored, and use gel food coloring to color one portion yellow, and the other orange with a rubber spatula. Stir the dough until it’s evenly colored.
Wrap each portion of dough in a piece of plastic wrap. I like to flatten the dough out into a rectangle that’s about 1/3 inch tall to make it easier to roll out once it’s chilled.
Chill the dough in the fridge for about 30 minutes, in the freezer for 10 minutes, or in the fridge overnight.
If you chill the dough overnight, let it sit out at room temperature for about 5 minutes before trying to roll it out. This will make it easier to roll out.
Step 3: Roll Out and Layer the Cookie Dough
Preheat the oven to 350 F / 175 C for about 30 minutes before you plan to roll out the dough, and line two large baking sheets with silicone baking mats or parchment paper. Set aside.
Unwrap each portion of cookie dough and lay the plastic wrap out flat on your counter.
We will be rolling out the cookie dough on the plastic wrap to make cleanup a breeze and to make it easier to cut the cookies. Dust the top of each portion of cookie dough and the rolling pin with flour.
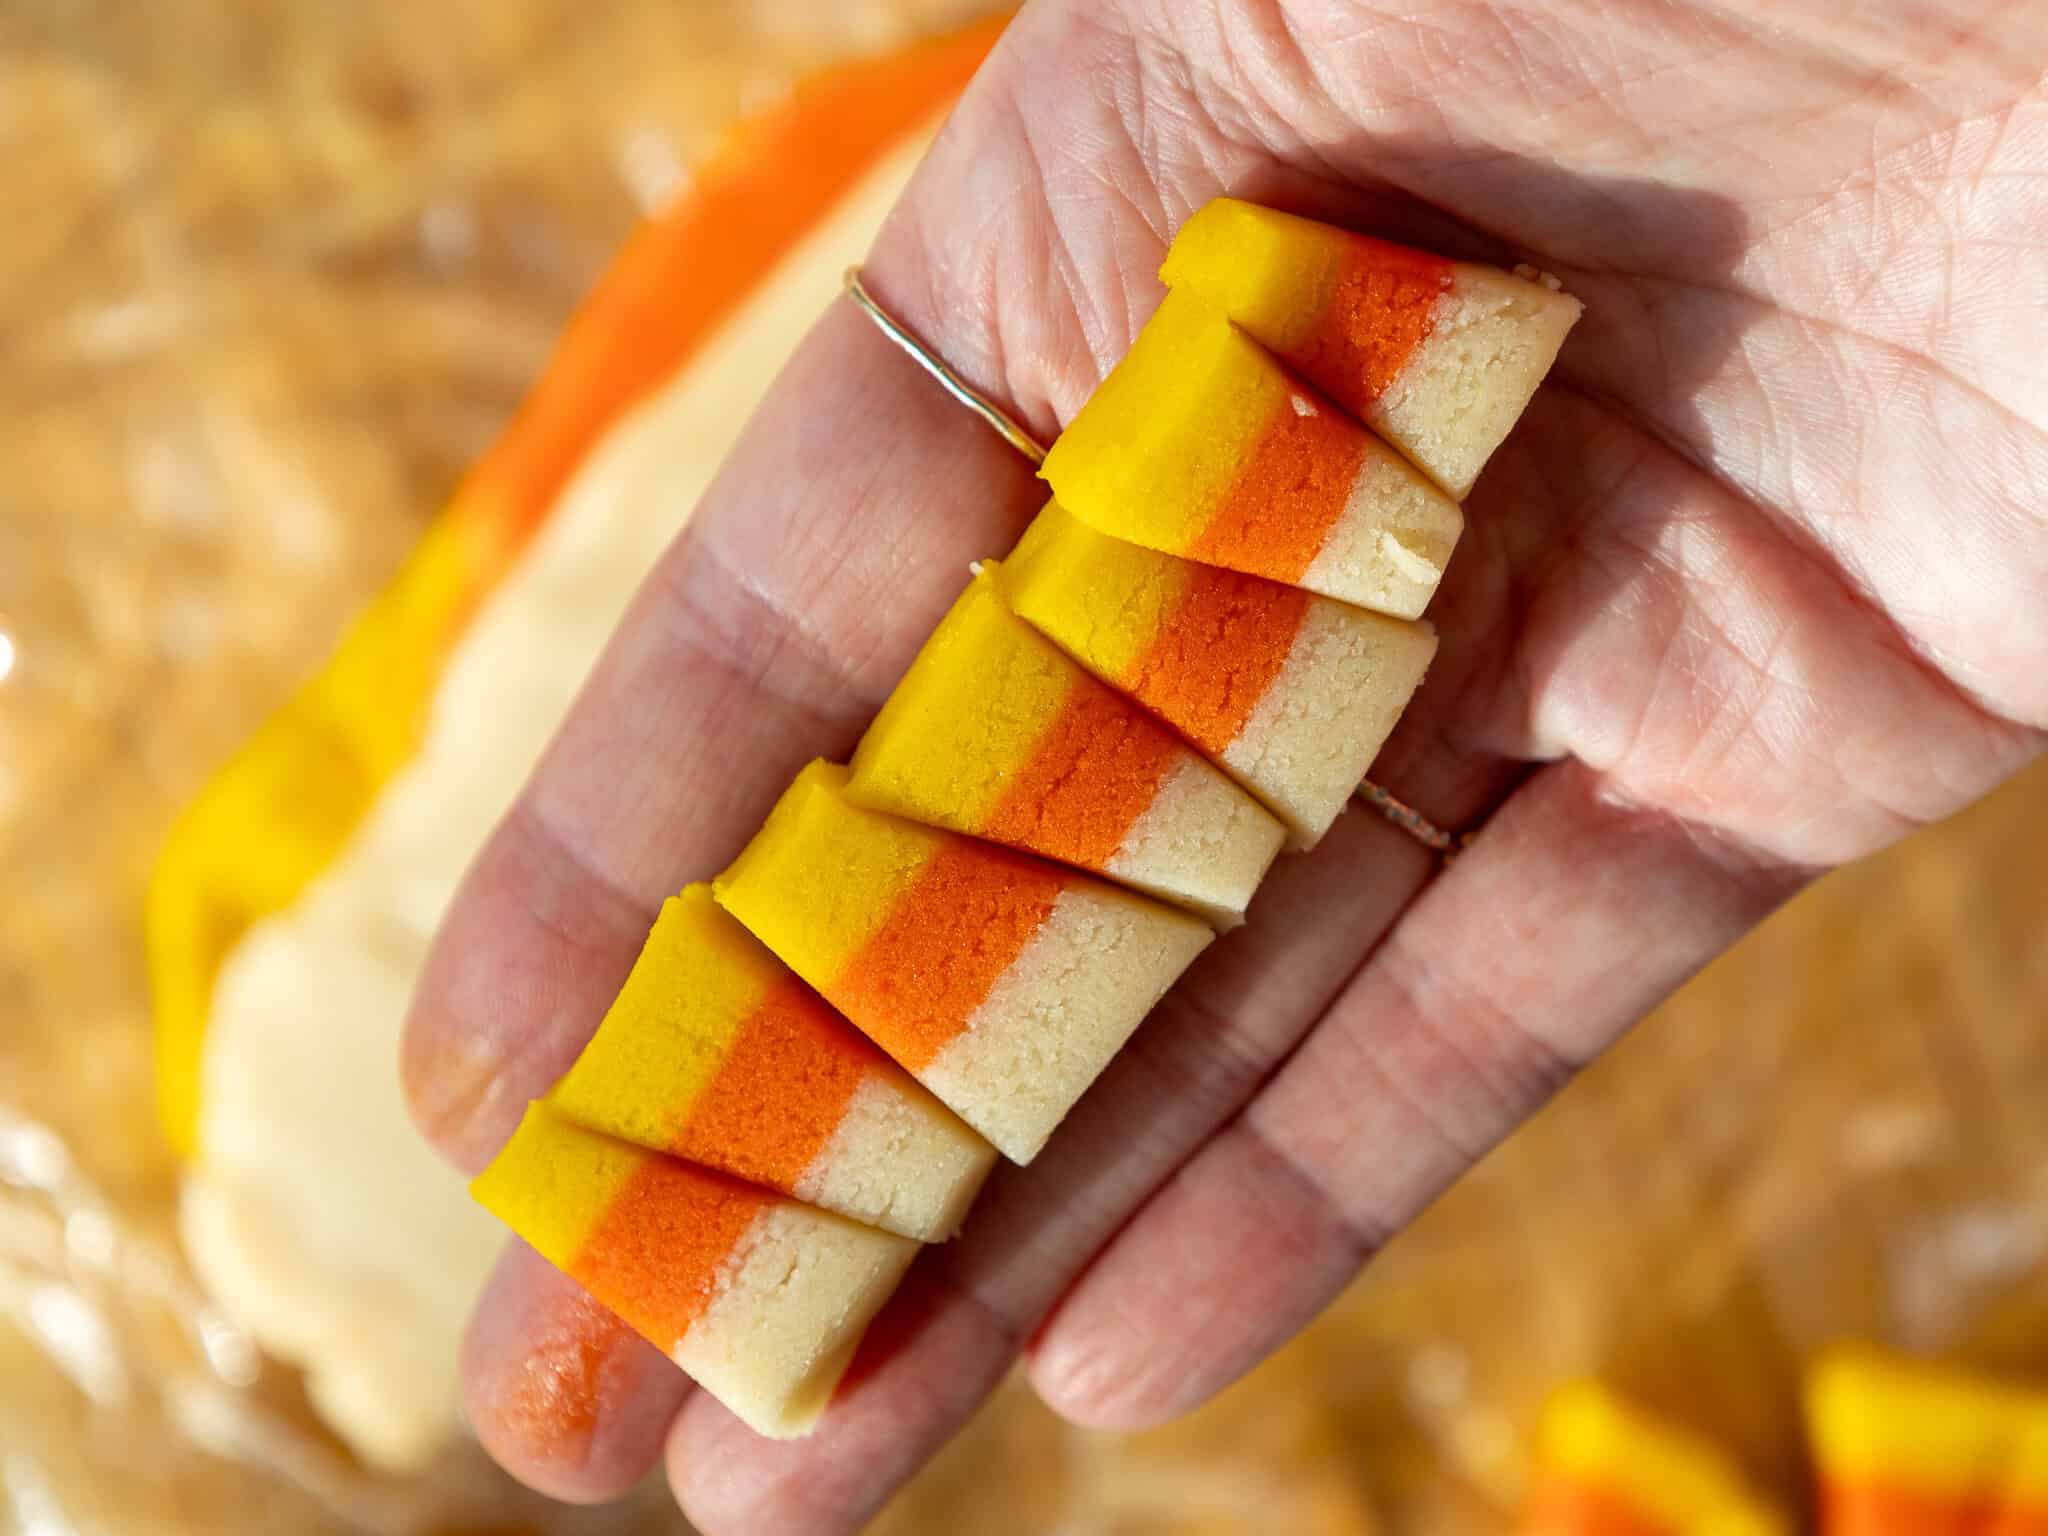
Roll out each portion of chilled dough to be 1/4 inch thick (I use the bands on my rolling pin, which are so helpful at rolling the dough to a consistent thickness) and then stack the dough in the following order: yellow, orange, white.
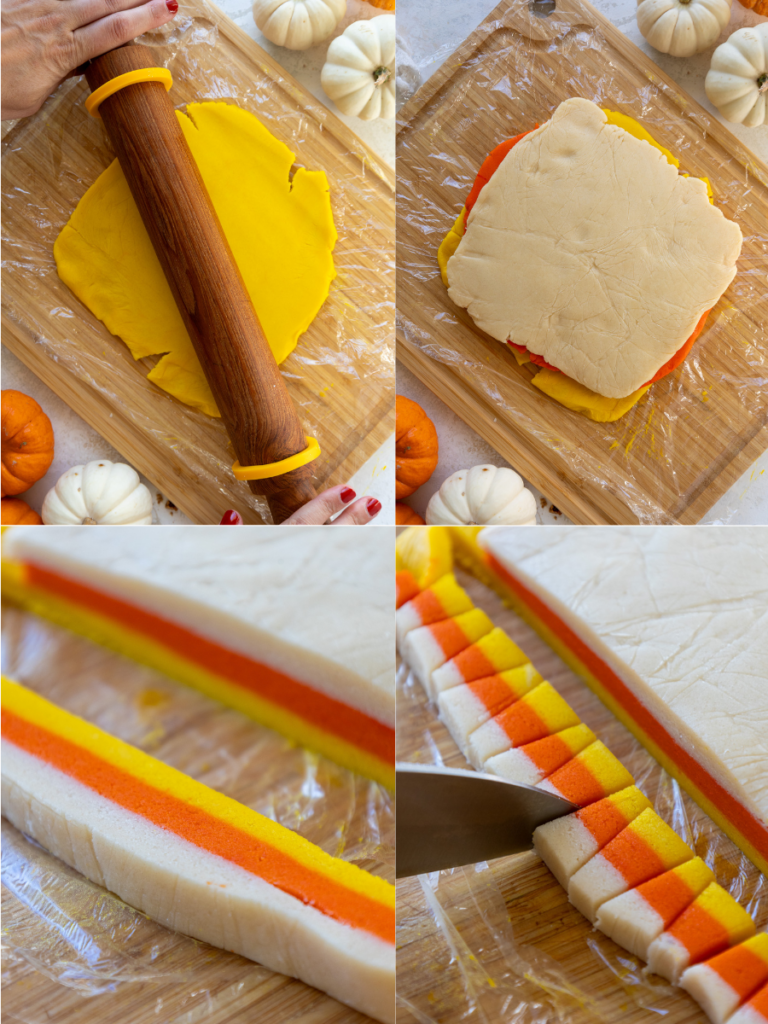
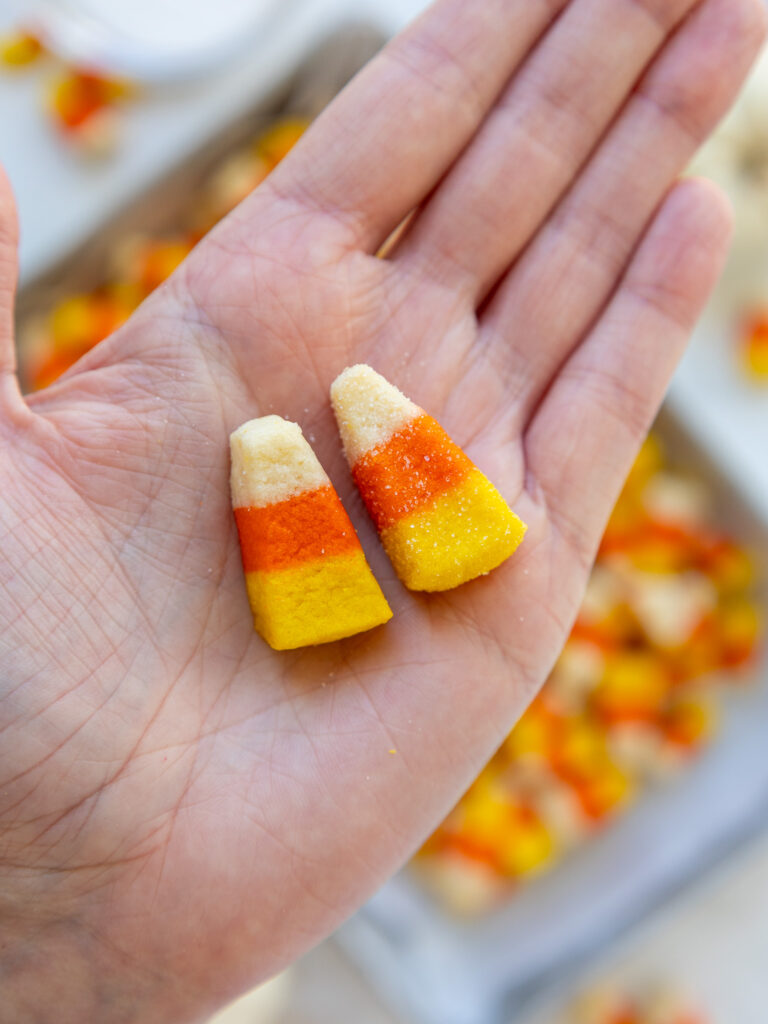
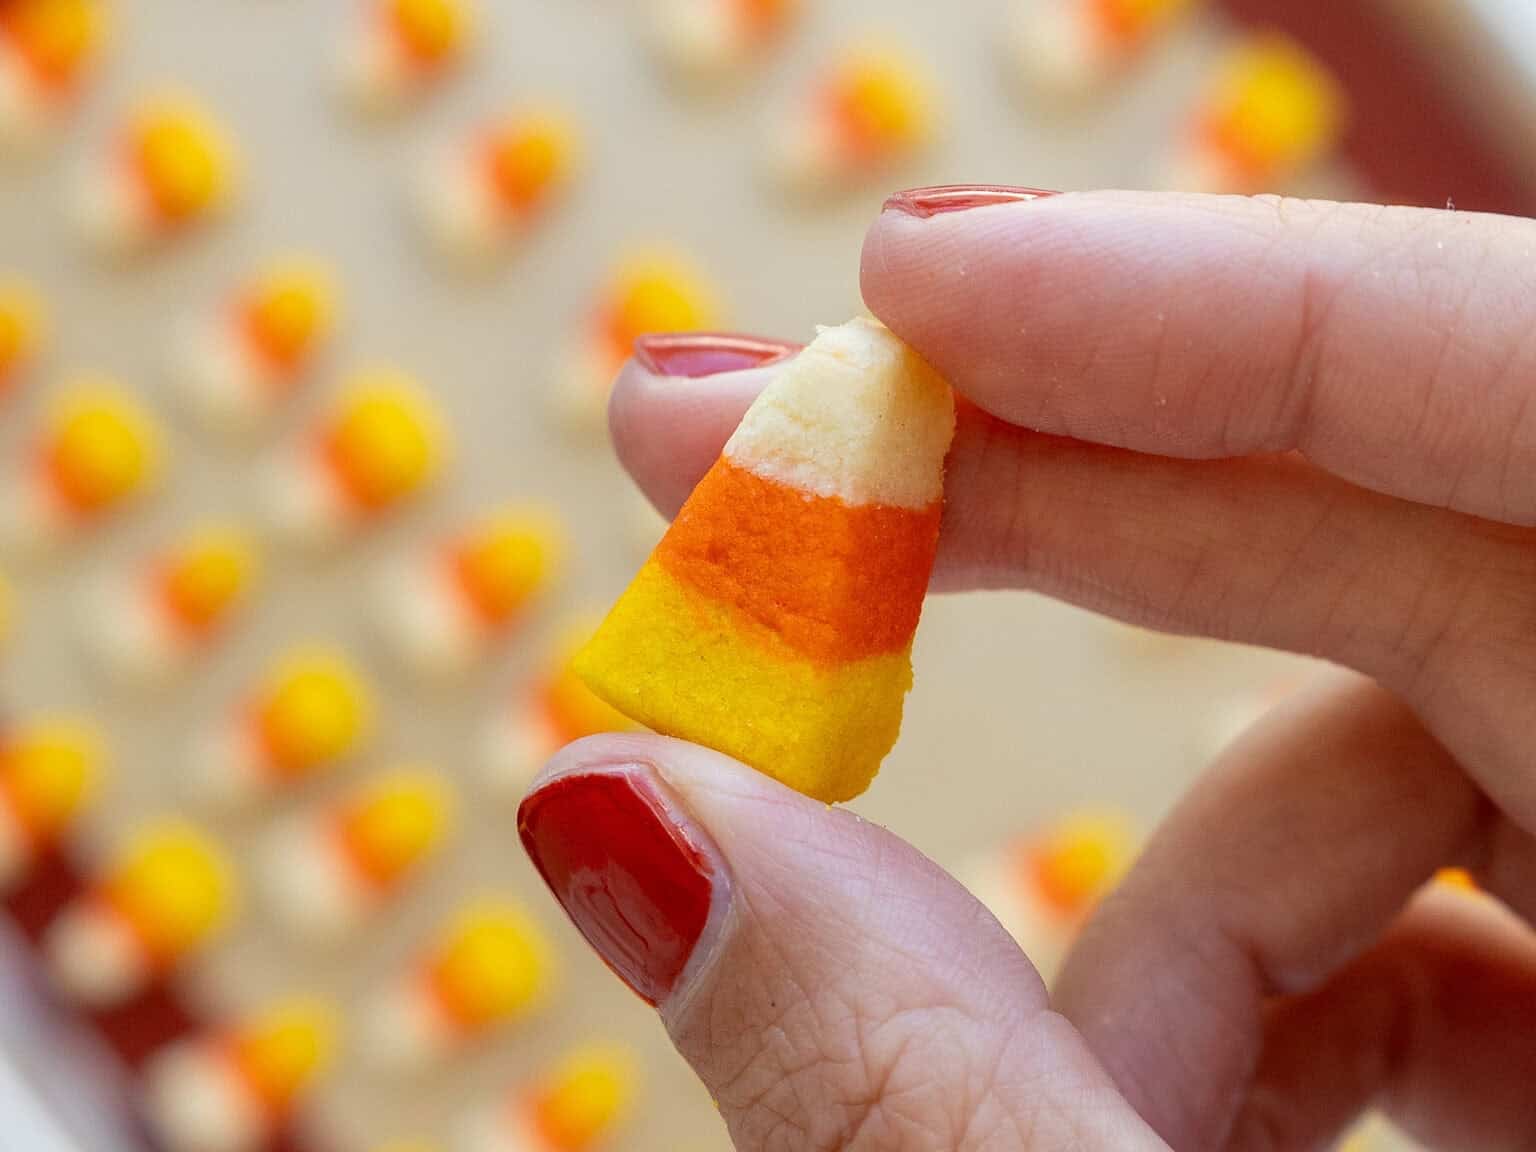
Use a sharp kitchen knife to cut strips of cookie dough that are about 1/3 inch wide (yes, if you have a ruler, I recommend using it!). Then cut tall, narrow triangles out of the strips similar to the photo above.
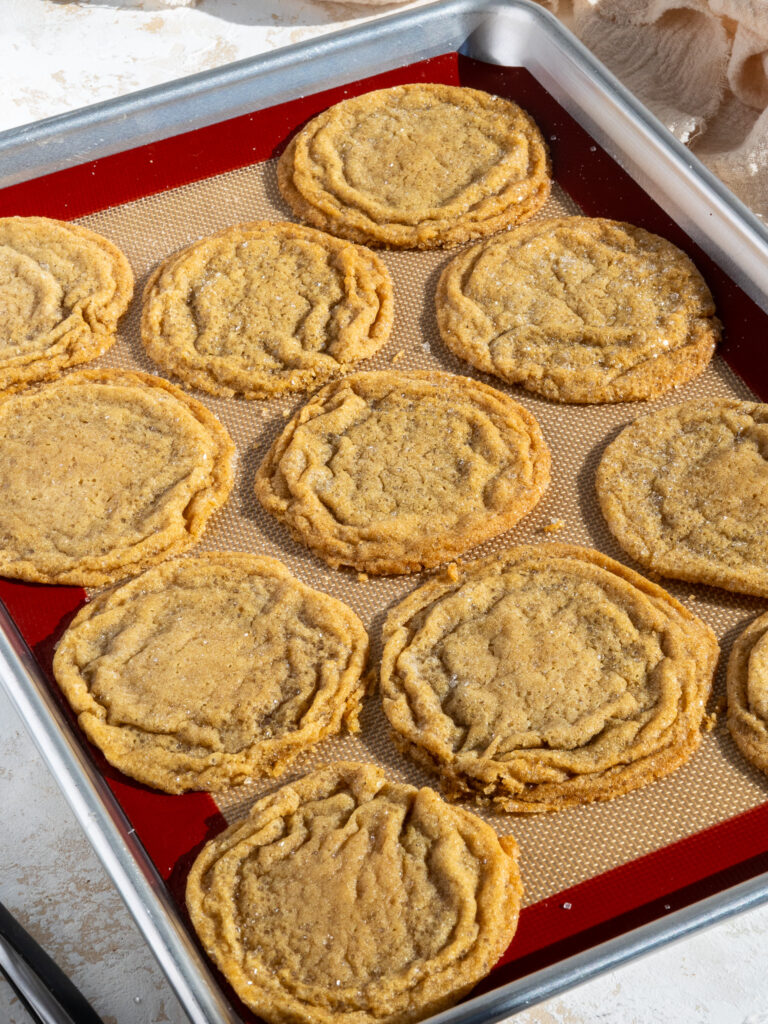
If desired, the cookies can be tossed in granulated sugar. It will make them look slightly less realistic, but will also give them a hint of sweetness and a crunchy outside. Below is a side-by-side comparison of a sugar-dunked cookie (right) vs. a standard cookie (left).
Step 4: Bake the Candy Corn Cookies
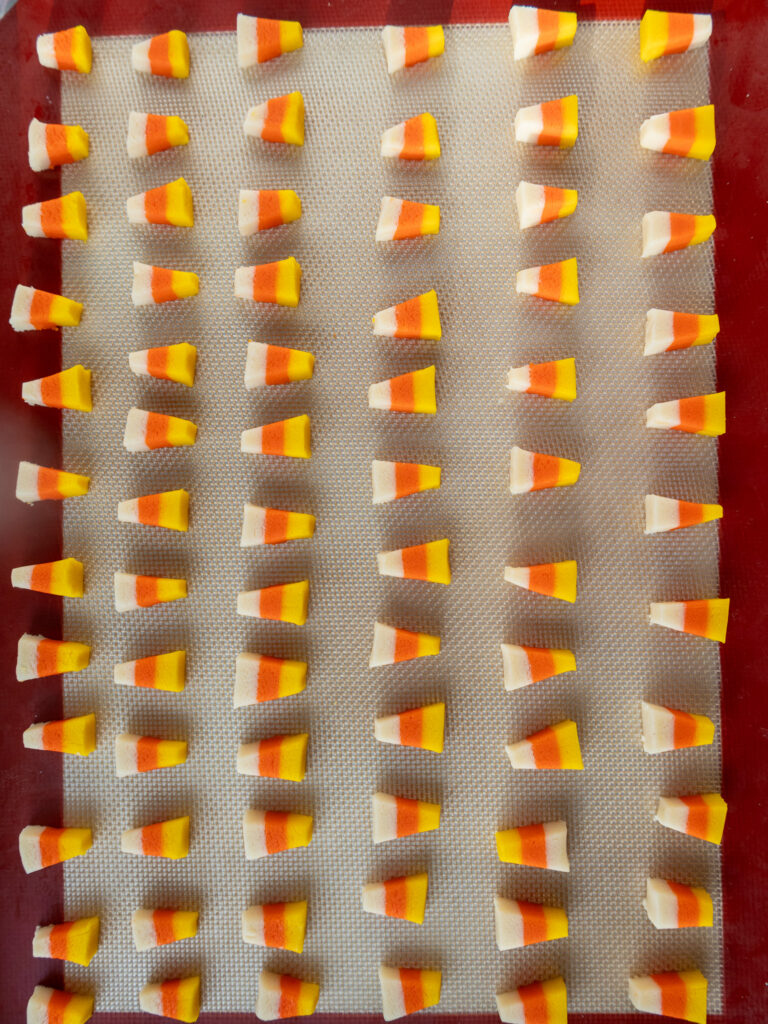
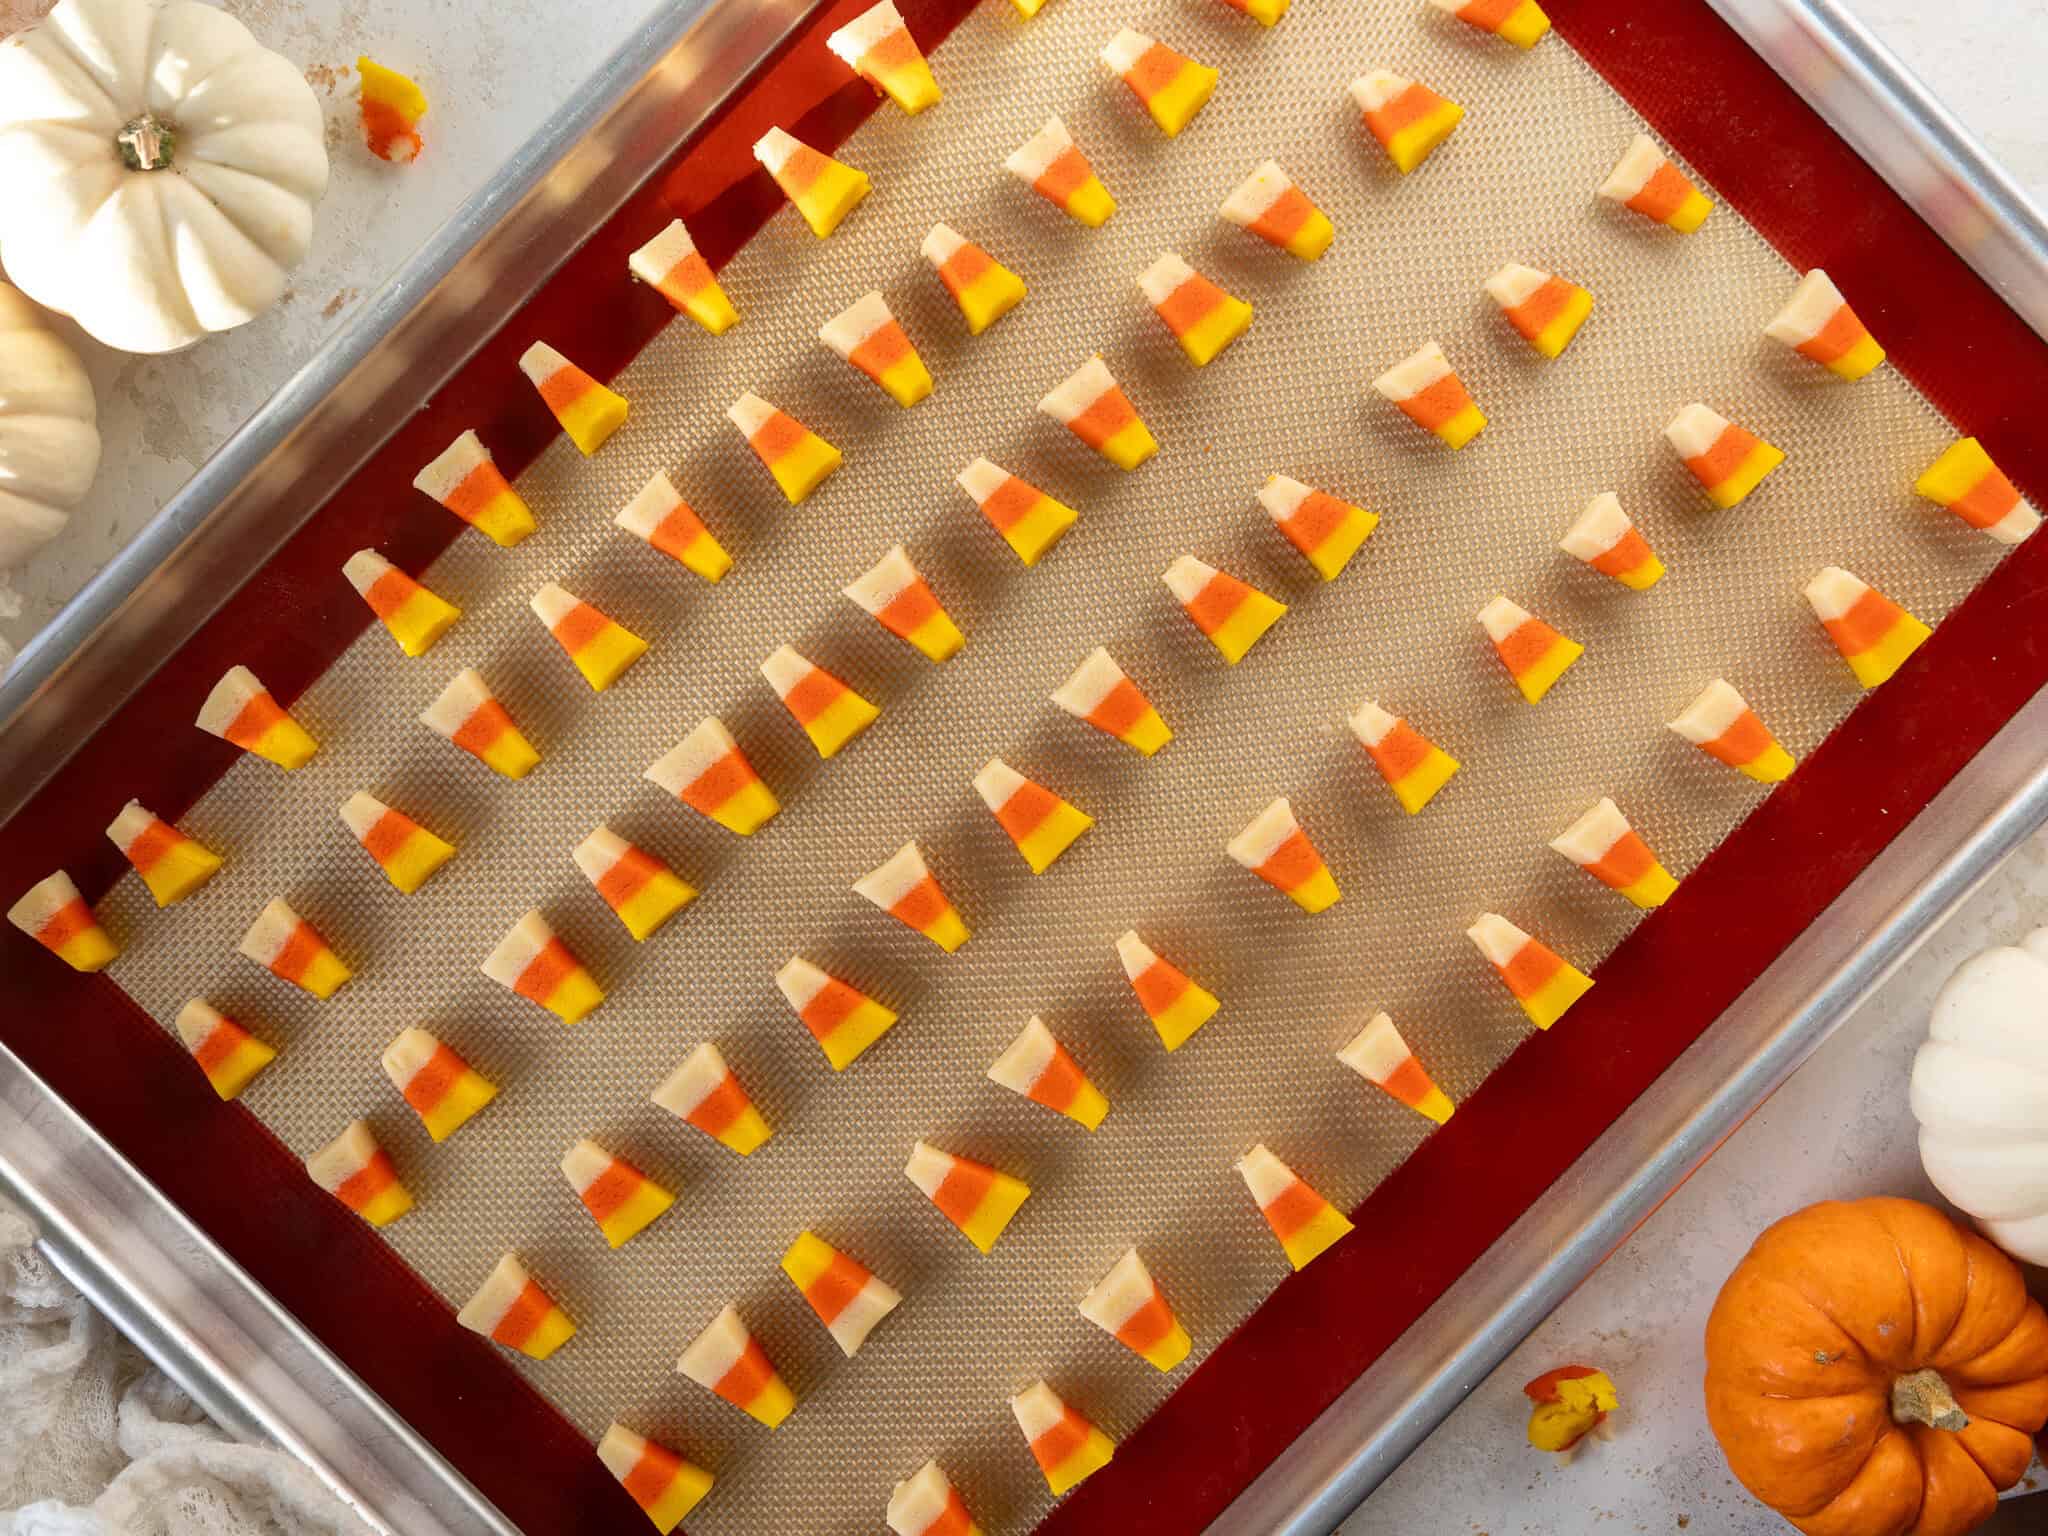
Place the cookies on the prepared baking sheets, spacing them about 1/2 inch apart. The cookies won’t really spread much as they bake.
Chill the cookies (pan and all) one more time in the fridge for 15 minutes or the freezer for 5 minutes to help them keep their shape as they bake.
Bake one sheet of cookies at a time. Bake for 8-12 minutes on the middle rack of your oven (bake time will vary based on the size and shape of the cookies).
Keep a close eye on the cookies and be sure to pull them out before the edges start to brown.
I like to gently poke one of the cookies to test for doneness. The outside should be slightly firm, like it has a soft crust. It’s ok if it’s still a little bit soft, but it should not be soft like dough, and you shouldn’t leave a big fingerprint.
When in doubt, err on the side of undercooking! The cookies will continue to firm up on the pan as they cool.
Let the baked cookies cool fully on the pan, then enjoy!
If you choose not to dunk them in sugar but wish they were sweeter once they’re baked, you can place them on a wire rack and pour a glaze over them! To make the glaze, whisk together 2 cups powdered sugar, 3 Tbsp milk, and 2 tsp vanilla extract.
How Many Cookies Does This Recipe Make?
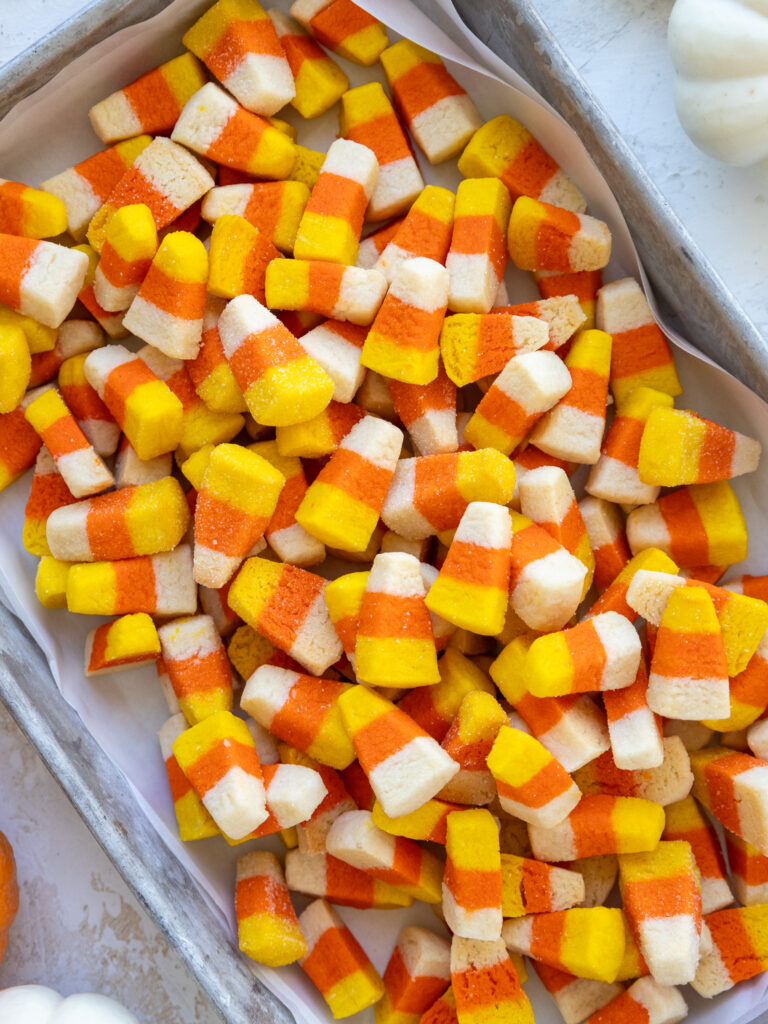
This recipe can be used to make about 225 little candy corn cookies. The yield and bake time will vary based on the size and thickness they are cut.
This recipe can be doubled to increase the yield if needed. You can use 1 whole egg in place of the egg yolk if you double the recipe.
Substitutions and Swaps – Candy Corn Cookies
Now that we’ve covered how to make these cookies, let’s talk about the ingredients!
This recipe uses quite a few ingredients, and I know you might not have them all on hand.
Or if you have food allergies or restrictions, I’ve got you covered. Below are some swaps and substitutions that you can make.
- Unsalted Butter – If you only have salted butter on hand, you can use it in place of the unsalted butter. Just be sure to omit the salt that this frosting recipe calls for. You can also use vegan butter in its place (and omit the salt)!
- Cream Cheese – Full-fat cream cheese that comes in a block works best.
- Granulated Sugar – I do not recommend reducing the amount of sugar or changing the type of sugar, as it will change the flavor of these cookies.
- Egg Yolk– If you have an egg allergy, try using half of a flaxseed egg or a vegan egg replacer like this one made by Bob’s Red Mill.
- All-Purpose Flour – This recipe turns out best with AP flour, but you can use a gluten-free flour blend if needed.
- Cornstarch – Cornstarch helps give these cookies a soft texture! If you don’t have any one hand, it can be omitted, but your cookies won’t bake up as soft.
- Almond Extract – This is essentially what gives these cookies all their flavor! I love the way it makes them taste, but the almond extract can be omitted or swapped for another extract if needed.

Making These Candy Corn Cookies in Advance and Storage Tips
You can store these cookies in an airtight container for up to 5 days at room temperature or for up to a month in the freezer.
This cookie dough can also be frozen for up to 1 month if wrapped tightly in plastic wrap and stored in an airtight container.
I like to move the cookie dough to the fridge the night before I plan to roll it out and bake the cookies.
Tips for Making the Best Candy Corn Cookies
- Really cream together the butter, cream cheese, and granulated sugar. It helps incorporate air into the dough, which makes tender, soft cookies.
- Use gel food coloring to color the cookie dough! Liquid can throw off the consistency of the dough and won’t create quite as bright a color.
- Roll the cookie dough out to a consistent thickness of 1/4 inch. This will give the cookies even layers of color and make them look more realistic!
- Take the time to chill the cookie dough. It helps prevent the cookies from spreading while they bake and helps them bake up with a soft texture.
- Don’t overbake the cookies. Err on the side of underbaking your cookies and remember that the cookies continue to bake for a few minutes once they’re out of the oven.
- If you choose not to dunk them in sugar but wish they were sweeter once they’re baked, you can place them on a wire rack and pour a glaze over them! To make the glaze, whisk together 2 cups powdered sugar, 3 Tbsp milk, and 2 tsp vanilla extract.
Let Me Know What You Think!
If you try this recipe for candy corn cookies, I’d love to hear what you think! Please leave a rating and let me know your thoughts by sharing a comment.
Candy Corn Cookies
Equipment
- Rolling Pin Bands optional
Ingredients
Candy Corn Cookies
- 1/2 cup (1 stick) unsalted butter, room temperature 113g
- 1/4 cup (2 oz) full fat cream cheese, room temp 56g
- 1 cup granulated sugar 200g
- 1 large egg yolk 20g
- 1 tsp vanilla extract or vanilla bean paste 5g
- 1 tsp almond extract, optional 5g
- 2 cups all-purpose flour 260g
- 2 tsp cornstarch 5g
- 1/2 tsp fine salt
- 1/4 tsp baking powder
- yellow and orange gel food coloring
Instructions
Candy Corn Cookies
- In a large bowl or the bowl of a stand mixer, beat 1/2 cup (1 stick) unsalted butter and 1/4 cup cream cheese on medium speed with a hand mixer until smooth.
- Next, add 1 cup granulated sugar and mix on a medium-high speed for a couple of minutes, until the mixture becomes lighter in color.
- Add in 1 egg yolk, 1 tsp vanilla bean paste or vanilla extract, and 1 tsp almond extract (optional). Mix on a medium speed until incorporated. Scrape the sides and bottom of the bowl with a rubber spatula as needed.
- Then, add 2 cups flour, 2 tsp cornstarch, 1/2 tsp fine salt, and 1/4 tsp baking powder to the butter mixture and mix at a low speed until it is JUST incorporated. Scrape the sides and bottom of the bowl with a rubber spatula to make sure everything is properly mixed together.
- At this point, the dough should still be pretty sticky. Divide the dough into three equal-sized portions. Leave one uncolored, and use gel food coloring to color one portion yellow, and the other orange. Wrap each portion of dough in a piece of plastic wrap. I like to flatten the dough out into a rectangle that's about 1/3 inch tall to make it easier to roll out once it's chilled. Try to make sure the cookie dough portions are similar in size to make it easier to stack them together later.
- Chill the dough in the fridge for about 30 minutes, in the freezer for 10 minutes, or in the fridge overnight. If you chill the dough overnight, let it sit out at room temperature for about 5 minutes before trying to roll it out. This will make it easier to roll out.
- Preheat the oven to 350°F/175°C for about 30 minutes before you plan to roll out the dough, and line two large baking sheets with silicone baking mats or parchment paper. Set aside.
- Unwrap each portion of cookie dough and lay the plastic wrap flat on your counter. We will be rolling out the cookie dough on the plastic wrap to make cleanup a breeze and to make it easier to cut the cookies. Lightly dust the top of each portion of cookie dough and the rolling pin with flour.
- Roll out each portion of chilled dough to be 1/4 inch thick (I use these bands on my rolling pin which are so helpful at rolling the dough to a consistent thickness) and then stack the dough in the following order: yellow, orange, white. Use the rolling pin to gently roll over the three layers of cookie dough to make sure they stick together.
- Use a large, sharp kitchen knife to cut strips of cookie dough that are about 1/3 inch wide (yes, if you have a ruler I recommend using it!). Then cut tall, narrow triangles out of the strips similar to the photos above. They might look small when you cut them, but they will puff up a bit once they're baked.
- If desired, the cookies can be tossed in granulated sugar. It will make them look slightly less realistic, but will also give them a hint of sweetness and a crunchy outside.
- Place the cookies on the prepared baking sheets, spacing them about 1/2 inch apart. The cookies won't really spread much as they bake.
- Chill the cookies (pan and all) one more time in the fridge for 15 minutes or the freezer for 5 minutes to help them keep their shape as they bake.
- Bake one sheet of cookies at a time. Bake for 8-12 minutes on the middle rack of your oven (bake time can vary a lot based on the size and thickness of the cookies). Rotate the pan halfway through to help them bake more evenly. Keep a close eye on the cookies and be sure to pull them out before the edges start to brown. I like to poke one of the cookies to test for doneness. The outside should be slightly firm like it has a soft crust. It's ok if it's still a little bit soft, but it should not be soft like dough and you shouldn't leave a big fingerprint. When in doubt, err on the side of undercooking! The cookies will continue to firm up on the pan as they cool.
- Let the baked cookies cool fully on the pan, then enjoy!
Video
Notes
Making These Candy Corn Cookies in Advance and Storage Tips
You can store these cookies in an airtight container for up to 5 days at room temperature or for up to a month in the freezer. This cookie dough can also be frozen for up to 1 month if wrapped tightly in plastic wrap and stored in an airtight container. I like to move the cookie dough to the fridge the night before I plan to roll it out and bake the cookies.Tips for Making the Best Candy Corn Cookies
- Really cream together the butter, cream cheese, and granulated sugar. It helps incorporate air into the dough, which makes tender, soft cookies.
- Use gel food coloring to color the cookie dough! Liquid can throw off the consistency of the dough and won’t create quite as bright a color.
- Roll the cookie dough out to a consistent thickness of 1/4 inch. This will give the cookies even layers of color and make them look more realistic!
- Take the time to chill the cookie dough. It helps prevent the cookies from spreading while they bake and helps them bake up with a soft texture.
- Don’t overbake the cookies. Err on the side of underbaking your cookies and remember that the cookies continue to bake for a few minutes once they’re out of the oven.
- If you choose not to dunk them in sugar but wish they were sweeter once they’re baked, you can place them on a wire rack and pour a glaze over them! To make the glaze, whisk together 2 cups powdered sugar, 3 Tbsp milk, and 2 tsp vanilla extract.
Nutrition
Other Recipes You Might Like:

What are the names of the americolor orange and yellow you used? They’re so perfect
they’re called “lemon yellow” and then just “orange” 🙂
I just made this recipe and it was fantastic and surprisingly easy. I love how cute they came out. Thanks for posting!
So happy to hear that Jaycee!! Thank you for sharing 🙂
I made these today and couldn’t get the different layers to stay together at all. My dough was chilled, but not overly cold. After cutting the they just fell apart. I ended up adhering the colors together with egg wash. What did I do wrong? There was no flour between the layers.
Hi Kelly,
I’m so sorry to hear that, that sounds so frustrating!! My first thought is to ask how you measured the flour for the batter. Did you you scoop the flour directly into the measuring cup? Sometimes that packs in more than the recipe calls for. If you aren’t already, you want to fluff the flour, then spoon it into the measuring cup and level it with the back of a knife, or you can weigh it with a kitchen scale.
Either way, if you make these again and they won’t stick together, you can use a bit of egg wash or even brush a little water between the layers with your fingers to get them to stick. Hope that helps for the future, happy baking!
The cookie batter was so easy to make but as I was cutting them I asking myself why I chose this recipe! Definitely a tedious process but they came out soo cute. I just looked at the video and it seems like I cut them way smaller so I probably just made more work for myself lol. But delicious and so cute! Definitely a good idea if you want to be festive but don’t like actual candy corn
It absolutely is a labor of love Sam!! I’m laughing because I had the same thought when I was recipe testing these, but as soon as they come out of the oven you kind of forget/it’s worth it 🙂 The size you cut them definitely has a big impact on the yield, so that could have been it! Glad you loved how they turned out though, happy baking!
Made these 2 days ago and Im already making a second batch but doing Halloween colors to really get that Halloween vibe going. I must say these are so much fun to make I was squealing through the whole process because it was going so well. First time doing a cookie like this and I was overjoyed with how well everything went. I really made this recipe because of the almond extract my family makes candy cane cookies for Christmas that uses the extract and these tasted just like them!! Not only are these by far the cutest cookies ive made but they have also brought me a little bit of early Christmas spirit and I am obsessed!! Thank you so much for sharing this recipe, I will definitely be adding it to my book!
Hi Miranda,
Omg I love that!!! It is so fun when you cut that first slice and they look so perfect 🙂 Thank you so much for sharing!
I made these but used green coloring so they look like little trees! And mine turned out really small, but very cute!
Oh I love that!! Such a cute idea Brooke!!!
How do you shape the carrot variation of these for Easter?
Hi Tracie,
I share how I shape then in the middle of this video! I’ll be sharing a video on the carrot cookies on instagram next week, but in the mean time hope this helps! https://www.instagram.com/p/DIMSQ7MJyNO/
Happy baking!
I made one batch today exactly by the recipe. I had no faith that I was going to get anywhere close to 200 cookies out of what I thought was just a little bit of dough. I was wrong! I got 275 adorable, tasty, little cookies! I bagged them up with 12 in a bag for our fall festival today at church. Thank you for this unique, fun-to-make, delicious recipe!
Hahaha omg 275!!!!!!! I love that so much, I am so happy to hear it Meredith!! Thank you for sharing 🙂
I love candy corn and so excited I found this recipe! Quick question – if I make the dough in advance, should I freeze each colored dough separately or when they’re stacked together? Thanks!
PS the first time I made macarons I used your recipe and they turned out amazing!
Hi Alysha,
I am so happy you found it too! That is a great question. This dough is pretty forgiving, so you could either freeze the dough separately then stack it, or stack it then freeze it! I usually like to do most of the work upfront so it’s easier to make things in the future, so if I were you I’d layer the dough then freeze it. I don’t think the colors should bleed, especially if you transfer the dough the fridge the night before you plan to cut it. Hope that helps, let me know how it goes!!
Turned out so cute. Taking them to the Parish Fair Bake sale along with the candy corn cookies!
Ah I love that!!!!! I hope everyone loves them as much as I do 🙂 Thanks for sharing!
I cut the first few the wrong direction—my error. After that it was simple. They are delicious without the additional sugar. Extra cute with your Meringue Monsters.
That part can be hard! So glad they turned out great in the end though, and so fun that you made the monster meringues too 🙂 Thanks so much for sharing!