
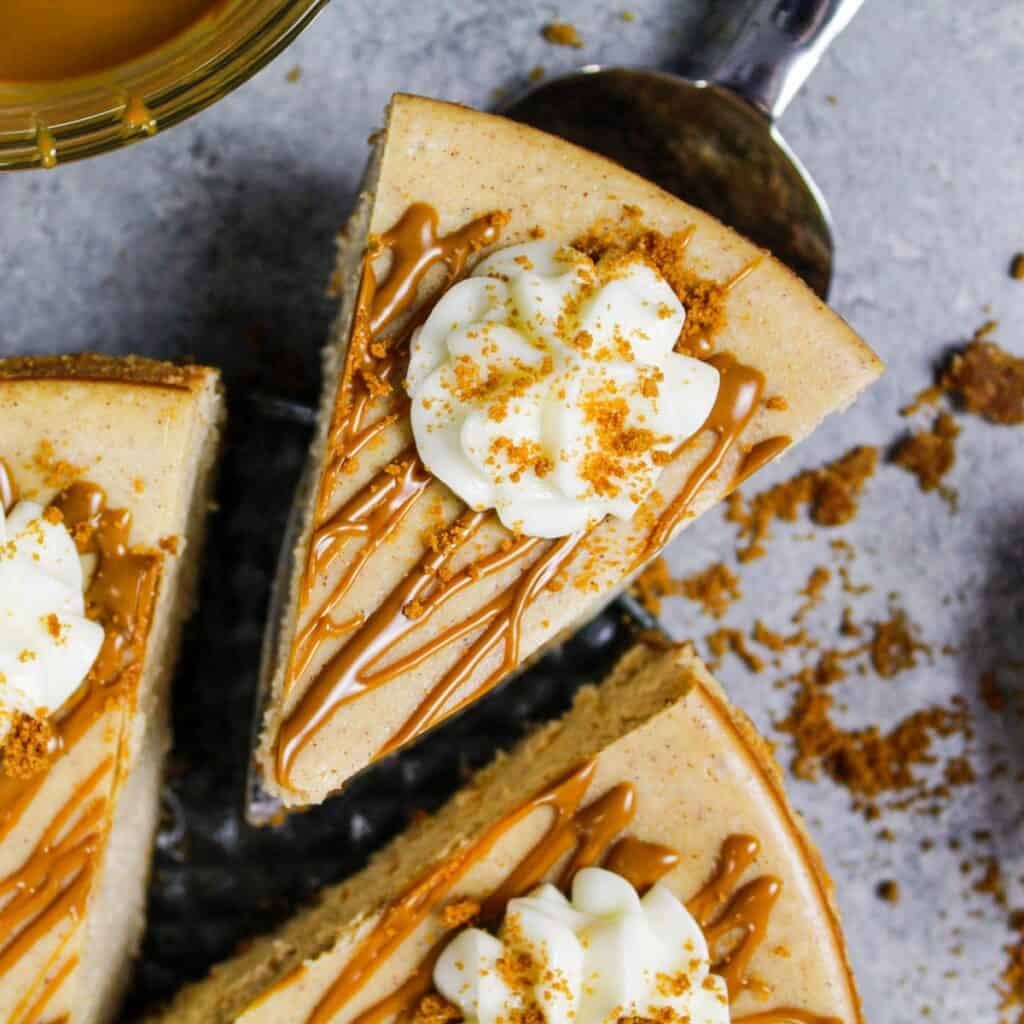
Biscoff Cheesecake
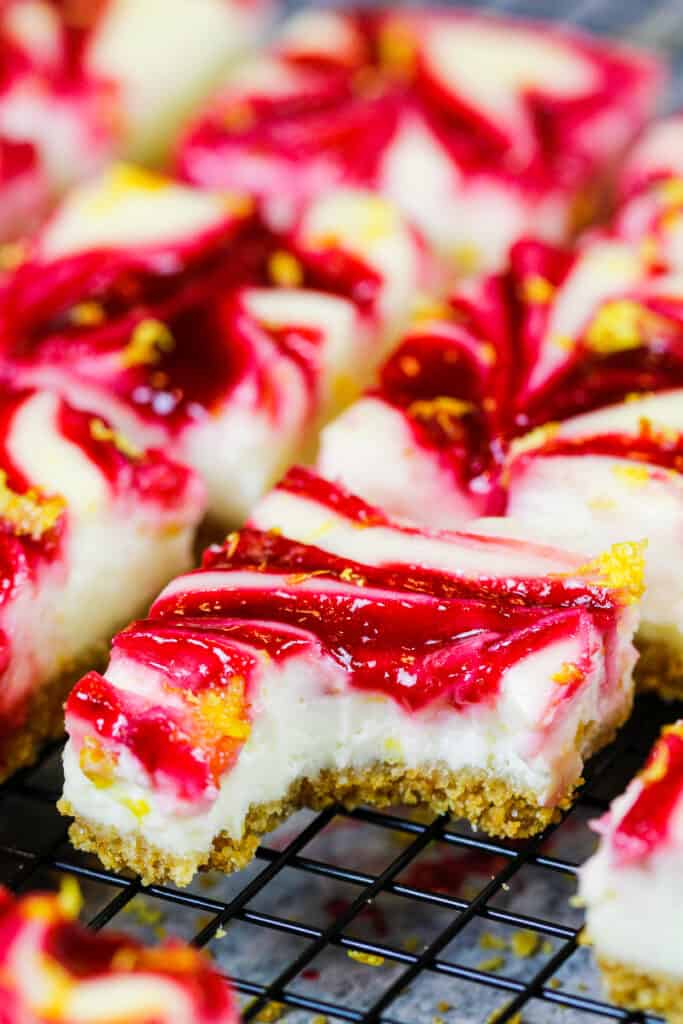
This creamy Biscoff cheesecake is packed with cookie butter flavor, from the Biscoff cookie crust to the warm cookie butter drizzle on top.
It’s baked low and slow and cooled gradually, so you get a creamy, smooth cheesecake without a water bath.
This recipe is adapted from Lauren’s Latest cheesecake recipe to have a delicious cookie butter twist. It’s made with a Biscoff cookie crust, a hint of cinnamon, and of course, some cookie butter!
As a bonus, it’s surprisingly easy to make and is the perfect make-ahead dessert. Somehow, it tastes even better as it sits over time. It’s magic, I swear!
This Recipe At a Glance
- Flavor: Cookie butter + cinnamon + Biscoff crust
- Texture: Creamy, dense, classic cheesecake
- Skill level: Intermediate (easy steps, long chill time)
- Time: ~15 min prep + bake + overnight chill
- Pan: 9-inch springform recommended
- Best tip: Low-and-slow bake + gradual cooling (no water bath)
How to Make Cheesecake Without Using a Water Bath
Thanks to a very gradual cooking and cooling process, this cheesecake recipe doesn’t require a water bath!
Cooking it low and slow gives it an amazing texture, and letting the cheesecake gradually cool in the oven minimizes any risk of cracking.
The result is a creamy, delicious cheesecake that’s crack-free!! The process is so easy and stress-free, you’ll wonder why you ever used a water bath in the first place.
Substitutions & Swaps for This Biscoff Cheesecake
Here are some ingredient swaps if you’re missing something or need to make substitutions.
- Biscoff Cookie Crumbs – I like to crush up Biscoff cookies to make the crust! This can easily be done in a food processor, or you can crush the cookies in a Ziplock bag with a rolling pin. You can also use crushed graham crackers or crushed Oreo cookies if you can’t find Biscoff cookies.
- Salted Butter – To keep things simple, I use salted butter to make the crust. If you only have unsalted butter, add about 1/4 tsp of salt to the crust mixture.
- Granulated Sugar – I think this cheesecake has just the right amount of sweetness, but you can increase or decrease the amount of sugar by a few Tablespoons based on your preferences.
- Cream Cheese – This recipe turns out best with full-fat cream cheese. However, you can use low-fat cream cheese or Neufchâtel cheese in its place, and the recipe will still turn out great.
- Eggs – Sadly, this recipe does not turn out with egg alternatives like applesauce or flaxseed eggs. I highly recommend using regular large eggs.
- Cookie Butter – The cookie butter drizzle really packs this cheesecake with Biscoff flavor! You can use any brand of cookie butter.
Biscoff Cheesecake Troubleshooting
While I’d love to think everyone’s cheesecake will turn out perfectly every time, I know that sometimes things don’t go that smoothly. Below are some tips and advice to help!
Why did my cheesecake crack?
Most common reasons:
- It was overbaked (the center should still jiggle when you turn off the oven).
- It cooled too quickly (follow the slow cooling steps).
- The batter was overmixed (mix on low after the cream cheese + sugar step to avoid air bubbles).
If it cracks, don’t stress. A generous drizzle of cookie butter will cover it!
How can I tell when cheesecake is done?
- The center should still be jiggly, but the edges should look set.
- Toothpick test: insert 1 inch from the edge. If it comes out clean, you’re good.
- Temp test: ~175°F about 1 inch from the edge.
Why did my cheesecake deflate?
A little settling is normal. Big deflation usually means it was overmixed (too much air) or cooled too fast.
Frequently Asked Questions
Can I make mini Biscoff cheesecakes?
Yes. Pre-bake the crusts for about 5 minutes at 350°F, then bake the filled minis at 300°F for 18–21 minutes, until the tops look set.
Can I bake this without a springform pan?
Yes! You can make cheesecake bars in a 9×13 pan. Line it with parchment and spray well for easy lifting and slicing. Bake them for 38-42 minutes at 325°F or 165°C.
Do I have to use sour cream?
You can use full-fat Greek yogurt as a 1:1 swap for the sour cream.
What is cookie butter?
It’s basically Biscoff cookies blended into a smooth, spreadable paste (usually found near nut butters).
How far ahead can I make it?
This is a perfect make-ahead dessert. Store in the fridge up to 5 days, or freeze up to 3 months (add the cookie butter drizzle/whipped cream right before serving).
How many cookies do I need for the crust?
About 14 Biscoff cookies make enough crumbs for the crust.

How To Make The Best Biscoff Cheesecake
- Make sure your ingredients are at room temperature. It helps them mix together better and ensures your cheesecake has a smooth texture once it’s baked.
- Beat the cream cheese on a low speed before adding the other ingredients! This helps to prevent any lumps from forming in the cheesecake batter.
- Mix on a low speed while making the cheesecake batter. You want to incorporate as little air as possible into the batter, as air bubbles can cause your cheesecake to crack.
- Follow the cooling instructions to a T! I know it’s a slow process, but it’s worth it. It helps ensure your cheesecake has the perfect consistency once it’s cooled, and it prevents cracking.
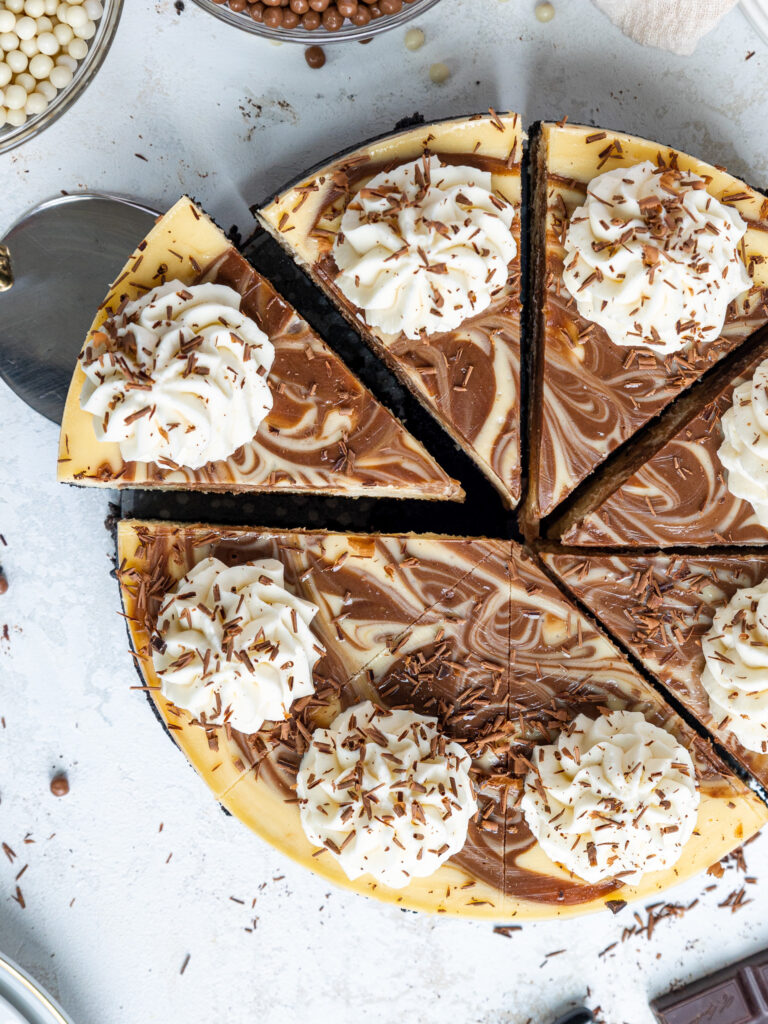
- Use a warm, sharp knife to get clean slices. Fill a tall cup with hot water and dip a sharp knife into it. Dry the knife fully, then cut into the cheesecake. Repeat with each cut, being sure to wipe the blade completely clean after each cut.
Note: This recipe is written for a 9-inch springform. A 10-inch works (shorter cheesecake). I don’t recommend using a smaller pan unless you scale down the batter.
Let Me Know What You Think!
If you try this Biscoff cheesecake recipe, I’d love to hear what you think of it! Please leave a rating and comment below.
Biscoff Cheesecake
Equipment
Ingredients
Biscoff Cookie Crust
- 1 3/4 cups biscoff cookie crumbs 190g
- 5 Tbsp granulated sugar 63g
- 6 Tbsp salted butter, melted 85g
Biscoff Cheesecake
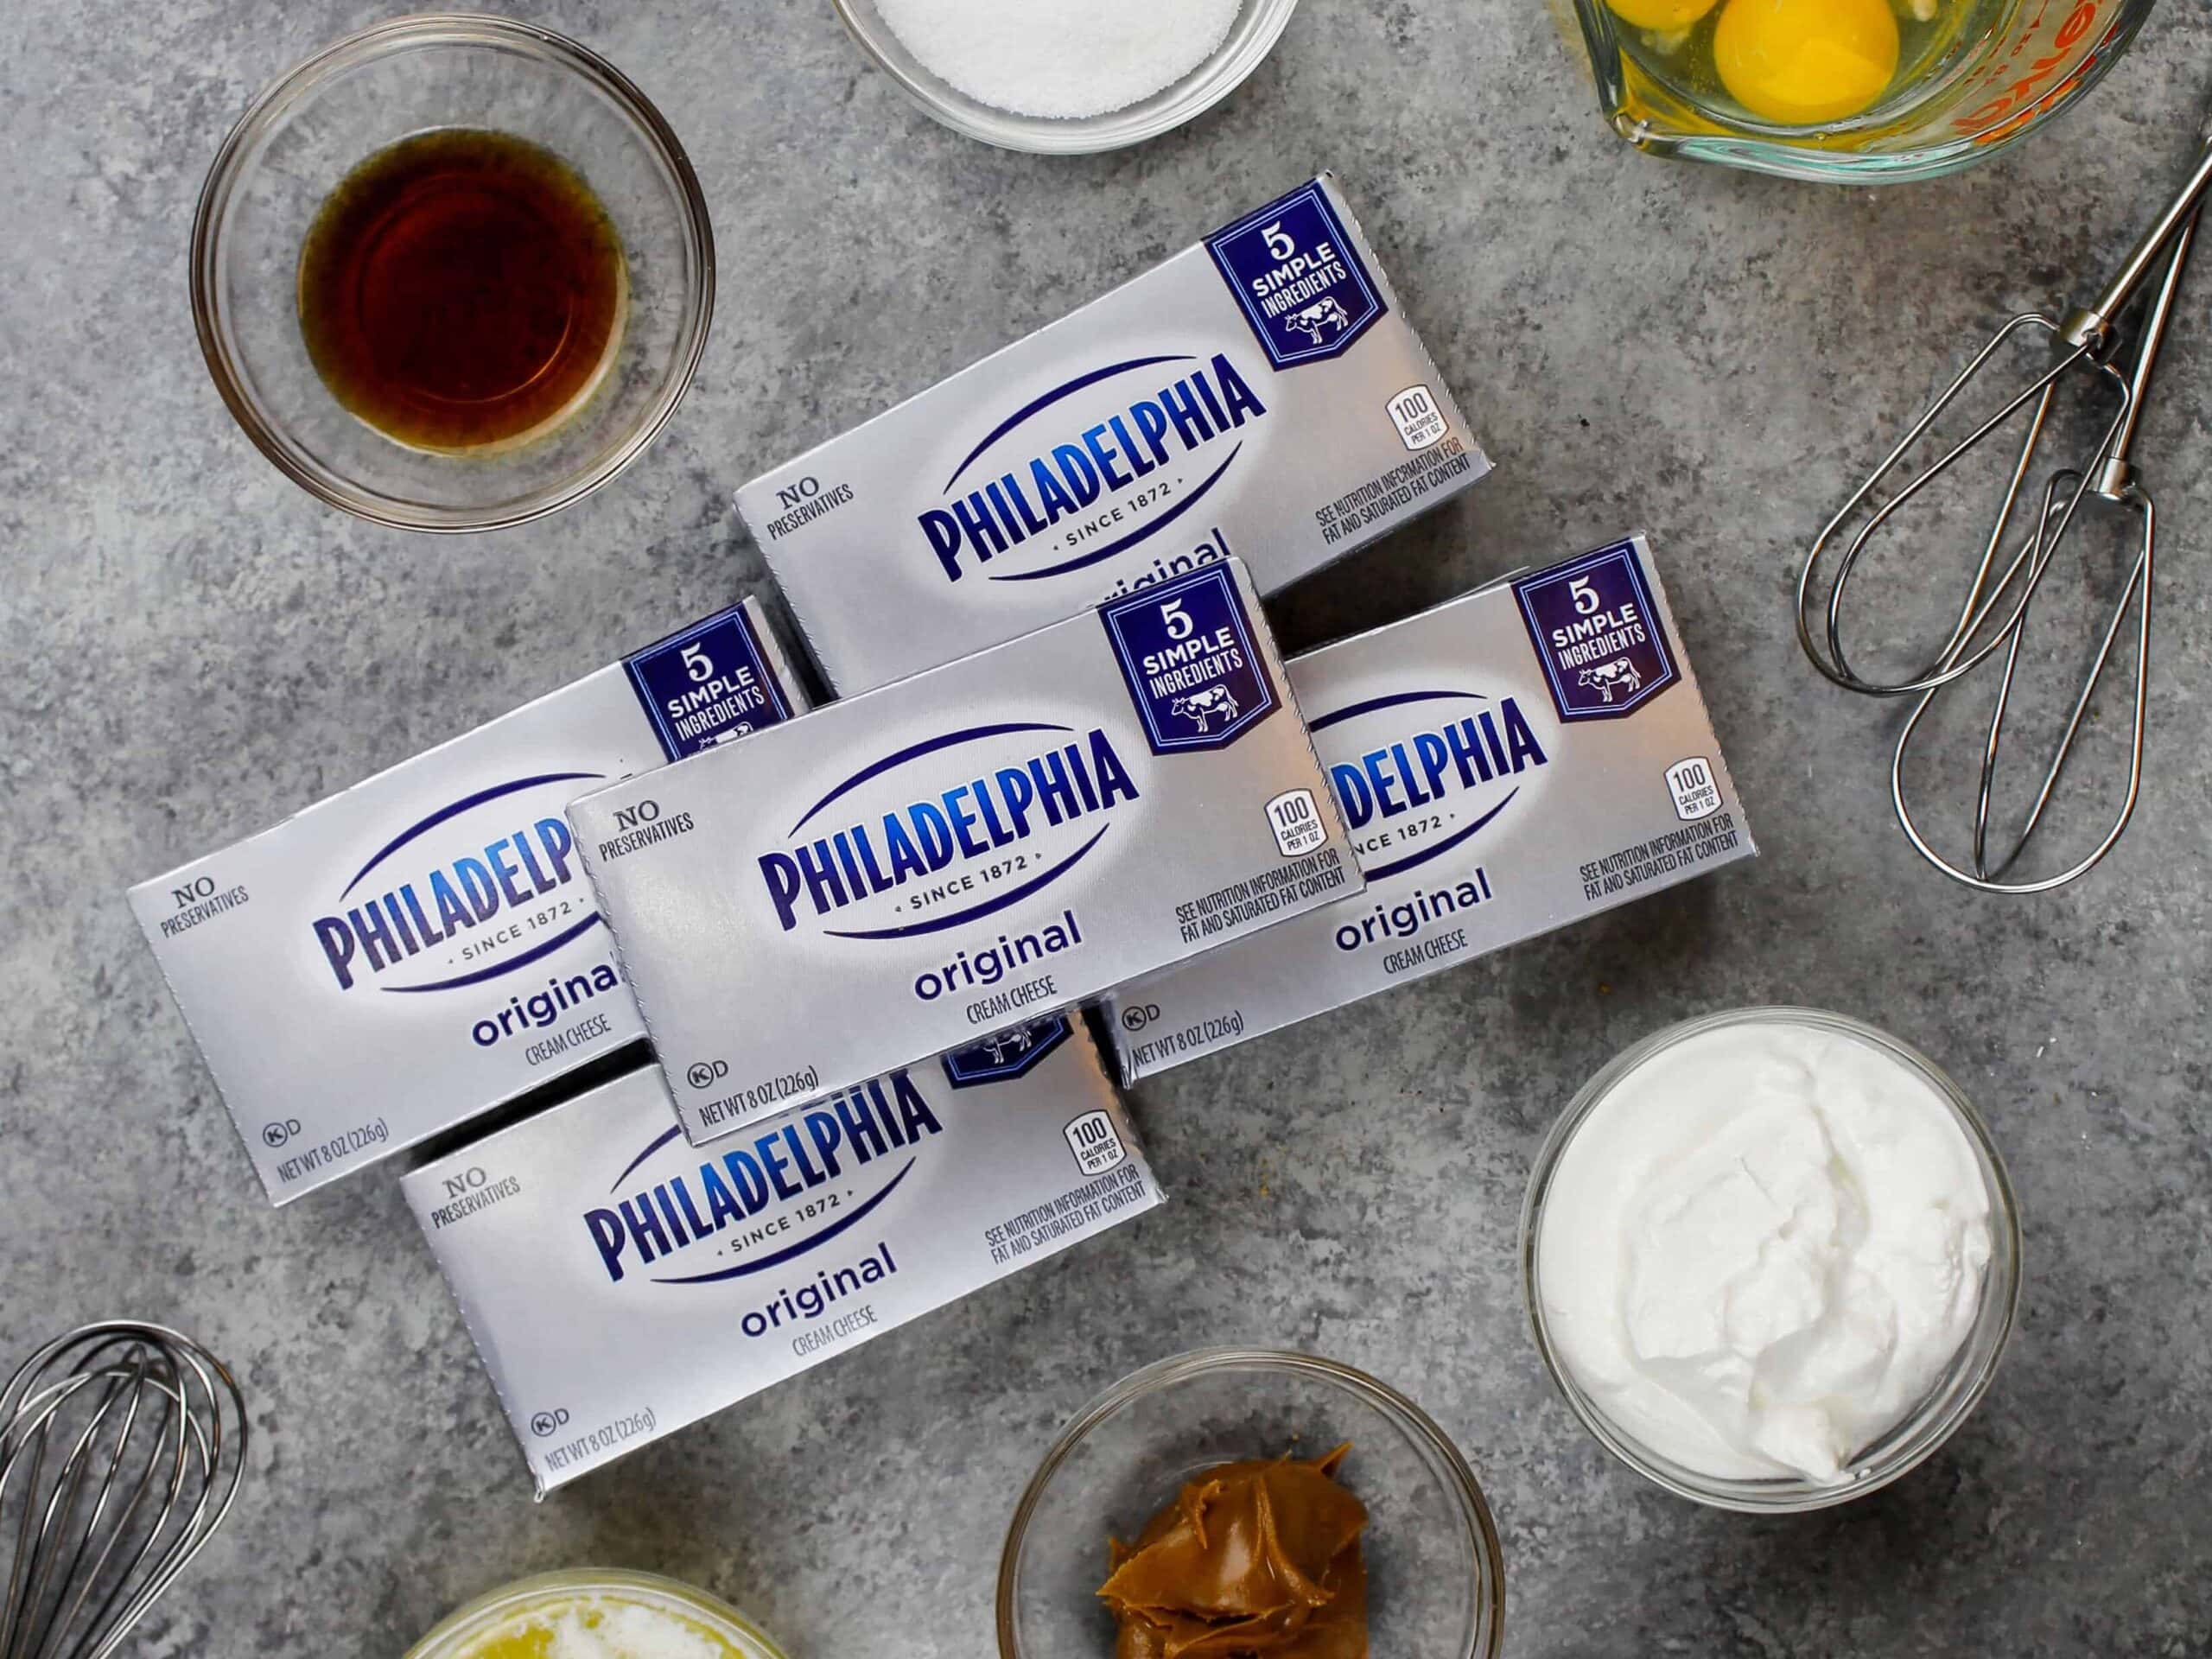
- 5 cups (five 8 oz. packages) full-fat cream cheese, room temperature 1130g
- 1 1/2 cups granulated sugar 300g
- 1/2 cup full-fat sour cream, room temperature 128g
- 1/4 cup cookie butter 60g
- 1 Tbsp vanilla extract or vanilla bean paste 12g
- 1 Tbsp ground cinnamon 7g
- 4 large eggs, room temperature 224g
Garnish
- 1/2 cup cookie butter, warmed 120g
- Whipped cream
Instructions
Biscoff Cookie Crust
- Preheat oven to 350°F/175°C.
- Add 1 and 3/4 cups of Biscoff cookie crumbs, 5 Tbsp granulated sugar, and 6 Tbsp melted butter into a medium bowl. Mix together until the ingredients are combined and the cookie crumbs look moist.
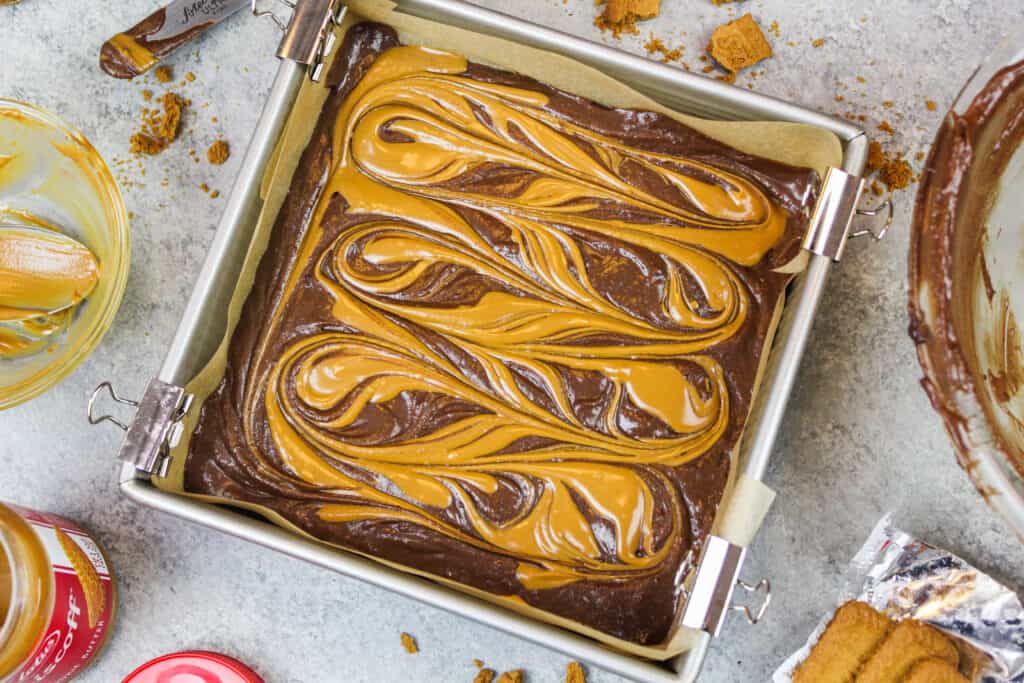
- Pour the cookie mixture into a 9-inch or 10-inch springform pan. Use the back of a spoon or the bottom of a measuring cup to press down firmly and create a compact, even crust covering the bottom of the pan and reaching about halfway up the sides of the pan.
- Bake for 8 minutes, then remove from the oven. Place the pan on a wire rack to cool. Keep your oven on but reduce the temperature to 325°F/165°C.
Biscoff Cheesecake
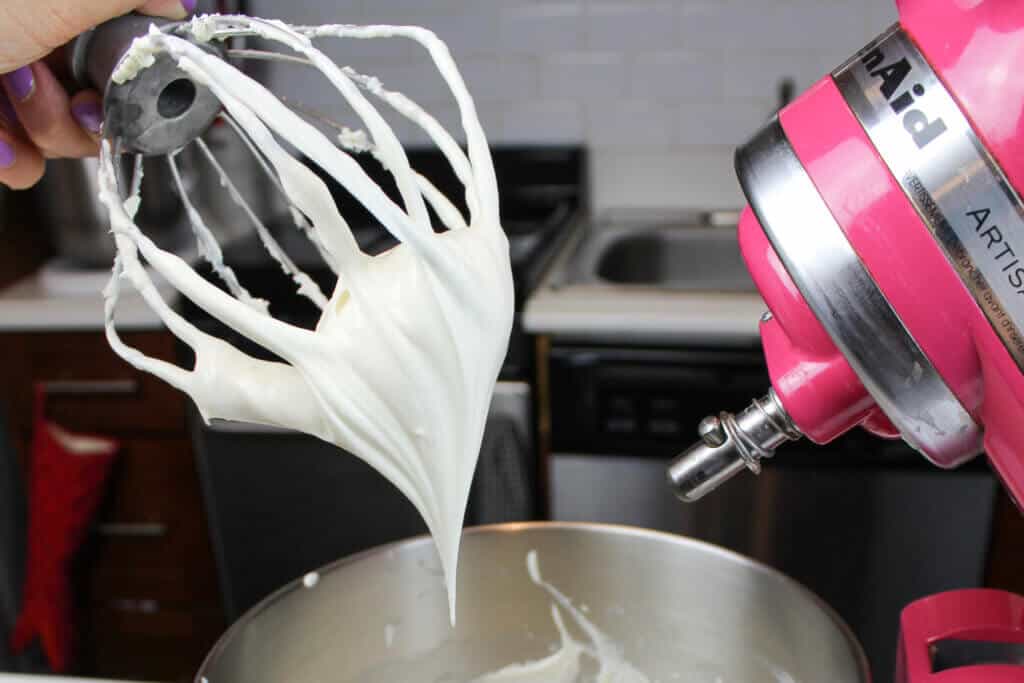
- While the cookie crust bakes and cools, make the cheesecake filling. Place 5 cups of room temperature cream cheese in a large bowl. Beat with a hand mixer or stand mixer fitted with a whisk attachment on a low speed until creamy and smooth.
- Add in 1 1/2 cups of sugar, 1/2 cup room temperature sour cream, 1/4 cup cookie butter, 1 Tbsp vanilla extract, and 1 Tbsp ground cinnamon. Mix on a medium-low speed until combined, scraping the sides of the bowl with a rubber spatula as needed.
- Crack 4 large eggs into a separate bowl and mix together with a fork until scrambled. Slowly mix the eggs into the cream cheese mixture on a medium-low speed. Mix just until the eggs are incorporated.
- Scrape the sides and bottom of the bowl with a rubber spatula, then mix on a low speed as needed to ensure the ingredients are fully combined and that the batter is smooth. Gently bang your mixing bowl on your counter a few times to help release any trapped air bubbles, which can cause your cheesecake to crack.
- Pour the cheesecake filling on top of the cooled cookie crust and bake at 325°F/165°C for 30 minutes. Then reduce the oven temperature to 250°F/120°C and bake for an additional 45 minutes.
- Once the cheesecake is fully baked, turn the oven off but leave your cheesecake in the oven to cool for another 30 minutes WITHOUT OPENING THE DOOR. I know it's hard not to peek, but it's important that all that heat stays in the oven to let it slowly cool. This minimizes the temperature shock and prevents your cheesecake from cracking.
- After 30 minutes of cooling, crack your oven door open with a wooden spoon and let the cheesecake cool in the oven for another hour.
- Next, remove the cheesecake from the oven and let it continue to cool at room temperature for 2 hours. Once it's reached room temperature, cover the top of the cheesecake with plastic wrap and refrigerate the cheesecake for an additional 3-4 hours or overnight.
- When you're ready to enjoy this Biscoff cheesecake, remove it from the fridge and carefully release the collar of the springform pan.
- Drizzle warm cookie butter over the top of the cheesecake and top with whipped cream swirls. Use a sharp, warm knife to cut into the chilled cheesecake. Clean the knife after each cut to get perfect slices.
- Leftover cheesecake can be kept in the fridge for up to 5 days in an airtight container.
Video
Notes
How To Make the Best Biscoff Cheesecake
- Make sure your ingredients are at room temperature. It helps them mix together better and ensures your cheesecake has a smooth texture once it’s baked.
- Beat your cream cheese on a low speed before adding the other ingredients! This helps to prevent lumps from forming in the cheesecake batter.
- Mix on a low speed while making the cheesecake batter. You want to incorporate as little air as possible into the batter, as air bubbles can cause your cheesecake to crack.
- Follow the cooling instructions to a T! I know it’s a slow process, but it’s worth it. The gradual cooling process will give your cheesecake a perfect consistency once it’s cooled and prevent cracking.
- Use a warm, sharp knife to get clean slices. Fill a tall cup with hot water and dip a sharp knife into it. Dry the knife fully, then cut into the cheesecake. Repeat with each cut, being sure to wipe the blade completely clean after each cut.
Nutrition
Other Posts You Might Like:
Hi! Are you able to make these into mini cheesecakes? If so what temp would I bake them at and how long? Thanks
Can i bake this in muffin tin?
I made this cheesecake the day the recipe was posted! Came out so great, and my fiancé loved it too. I would only change a few things next time—with my kitchen-aid standing mixer, the paddle attachment would’ve been a lot easier than the whisk! And I will make 1.5x or 2x the crust next time…that’s the best part! Baking and cooling carefully were worth it—no cracks and perfectly cooked through.
Thanks for sharing this recipe!
I sent this recipe to a friend that loves to bake and he tried it this weekend. It was sincerely one of the best cheesecakes in both flavor and texture that I have had the pleasure of sampling. Thank you for sharing!
This recipe is perfect! If I decided to make it in a bigger pan for a thinner cake, I can figure out the increased crust ratio- but what about the baking time? Also- where do you calculate the nutrition info? My fitness pal was WAYYY different.
Delicious!!! I love cookie butter and I love cheesecake so this recipe was perfect! This was my first time making a cheesecake- I’ve always been too scared to make one-, but I followed the recipe exactly and it turned out amazing!
This came out amazing! My family was super impressed, it looked professional and tasted amazing.
This may be a very stupid question, but I have never heard of cookie butter. What is it?
@Gail, cookie butter is biscoff in a butter form. I found this at target near the peanut and almond butter isle.
Can’t I make this in a 7 inch pan and just not use all the batter?
We loved it!!! My sister showed me your recipe not knowing I use some of your other recipes. I was happy to make this. It’s delicious and the instructions were easy to follow. Everyone raved about the taste!
Wow!!! This is AMAZING!!! I’ve been looking for a good biscoff cheesecake recipe and this is definitely a keeper.. I doubled the cookie butter in the recipe to 1/2 cup. I DID do a water bath and baked at 325 degrees for about an hour and 40 minutes. Best cheesecake EVER!!! It was a hit with my family and friends.
Sorry- forgot to add the texture is super creamy too! Perfection!
AMAZING! I followed the instructions exactly and it turned out perfect. Thank you!
Hi chels! I love watching your videos and have made many of your recipes! Your cheesecake recipe looks so so good!! I can’t wait to try it. Can I use a 9inch pan for this? Thank you?
It did not disappoint!! Ok to be honest I was skeptical of not using a water bath and I will use one next time but this cheesecake came out really creamy and full of flavor! I did have a big crack that I covered with the cookie butter and it deflated slightly. I will make this recipe again and try water bath to see if it helps.
Do I really need to use sour cream? I am not a big fan of it.
OMG, this recipe is magical. I got soooooo many compliments. Thanks so much.
Made this for Thanksgiving and it was wonderful! Came out perfect! I was worried about not using a water bath but it came out crack free! Thank you so much for this wonderful recipe(:
We made this cheesecake for the holidays to rave reviews. I followed the recipe to a T and the cheesecake did not crack, and of course turned out delicious. This one will go into our recipe collection for sure.
Hi!!
I have the same question as Syria about making them into mini cheesecakes, what temperature and how long do I bake for. Thanks in advance
This is soooooo delicious…thank you for sharing.
I made this Biscoff Cheesecake but substituted the sour cream with Greek yogurt and left it plain without the toppings. My family loves Biscoff biscuits and we were satisfied with the outcome. Thank you for sharing this recipe.
This was amazing! I left the cookie butter out of the actual cheesecake to give it more of a classic taste but melted the cookie butter on top and it was perfect
Hi Kelsey,
Love that!!! Sounds delicious 🙂 Thank you for sharing!
I made this cheesecake for a co-workers bday. Everyone said it was the BEST cheesecake they had EVER eaten!!! My one and only issue, totally my fault!, is I started the process the night before I needed it, at like 6:30! ? so, I ended up staying up very late, but was so worth it!! Can’t wait to try more of your recipes!!
Hi Wende,
I’m so happy to hear everyone loved it!! Thank you for sharing 🙂
And OMG, I’ve done that before too and it’s such a struggle! I feel ya!!
How many cookies do you need to get the crumbs for the crust? Is one package enough?
@Jenni, I just made this and used a pack from Vons that had 20 cookies in it. Used14 for crust, saved 4 for topping and couldn’t help myself and ate 2.
Hello can I make use this recipe for mini cheesecake?
Hi Apple,
It can be used to make mini cheesecakes!! It should work great for that. I’d recommend baking the mini crusts first for about 5 minutes in a 350 F oven, then topping them with cheesecake batter and baking them at 300 F / 150 C for 18-21 minutes or until the tops of the mini cheesecakes are set. Hope that helps, happy baking!
This Cake IS AMAZING. I always say good food & deserts take hours.
Hi Pam,
YAY!! So happy to hear that, and agreed 🙂 Thank you for sharing!!!
Made the “mistake” of making this cheesecake for a function and now it is my most requested dessert. The cooling is tedious but beats the water bath alternative. I always worry that water will leak into foil. So I’ll take the hours of lowering temp. Delicious! Certainly a family and friend fave! Thanks
Haha good problems to have 😉 So happy to hear it was such a hit, and I totally agree on the baking technique! Thanks for sharing Dana!!
I just made this and it is AMAZING! Thank you for a wonderful recipe. Have you ever spit this into two small pans for mini cheesecakes? In an effort to not open that oven door, I’m curious on how to adjust the timing…
Hi Savann,
So happy to hear you loved this recipe!! I have not split this into two small pans before, but I would guess bake time would actually be pretty similar! It depends on the size of pans you plan to use. What size are you going to use?