
Cheesecake Cake Filling
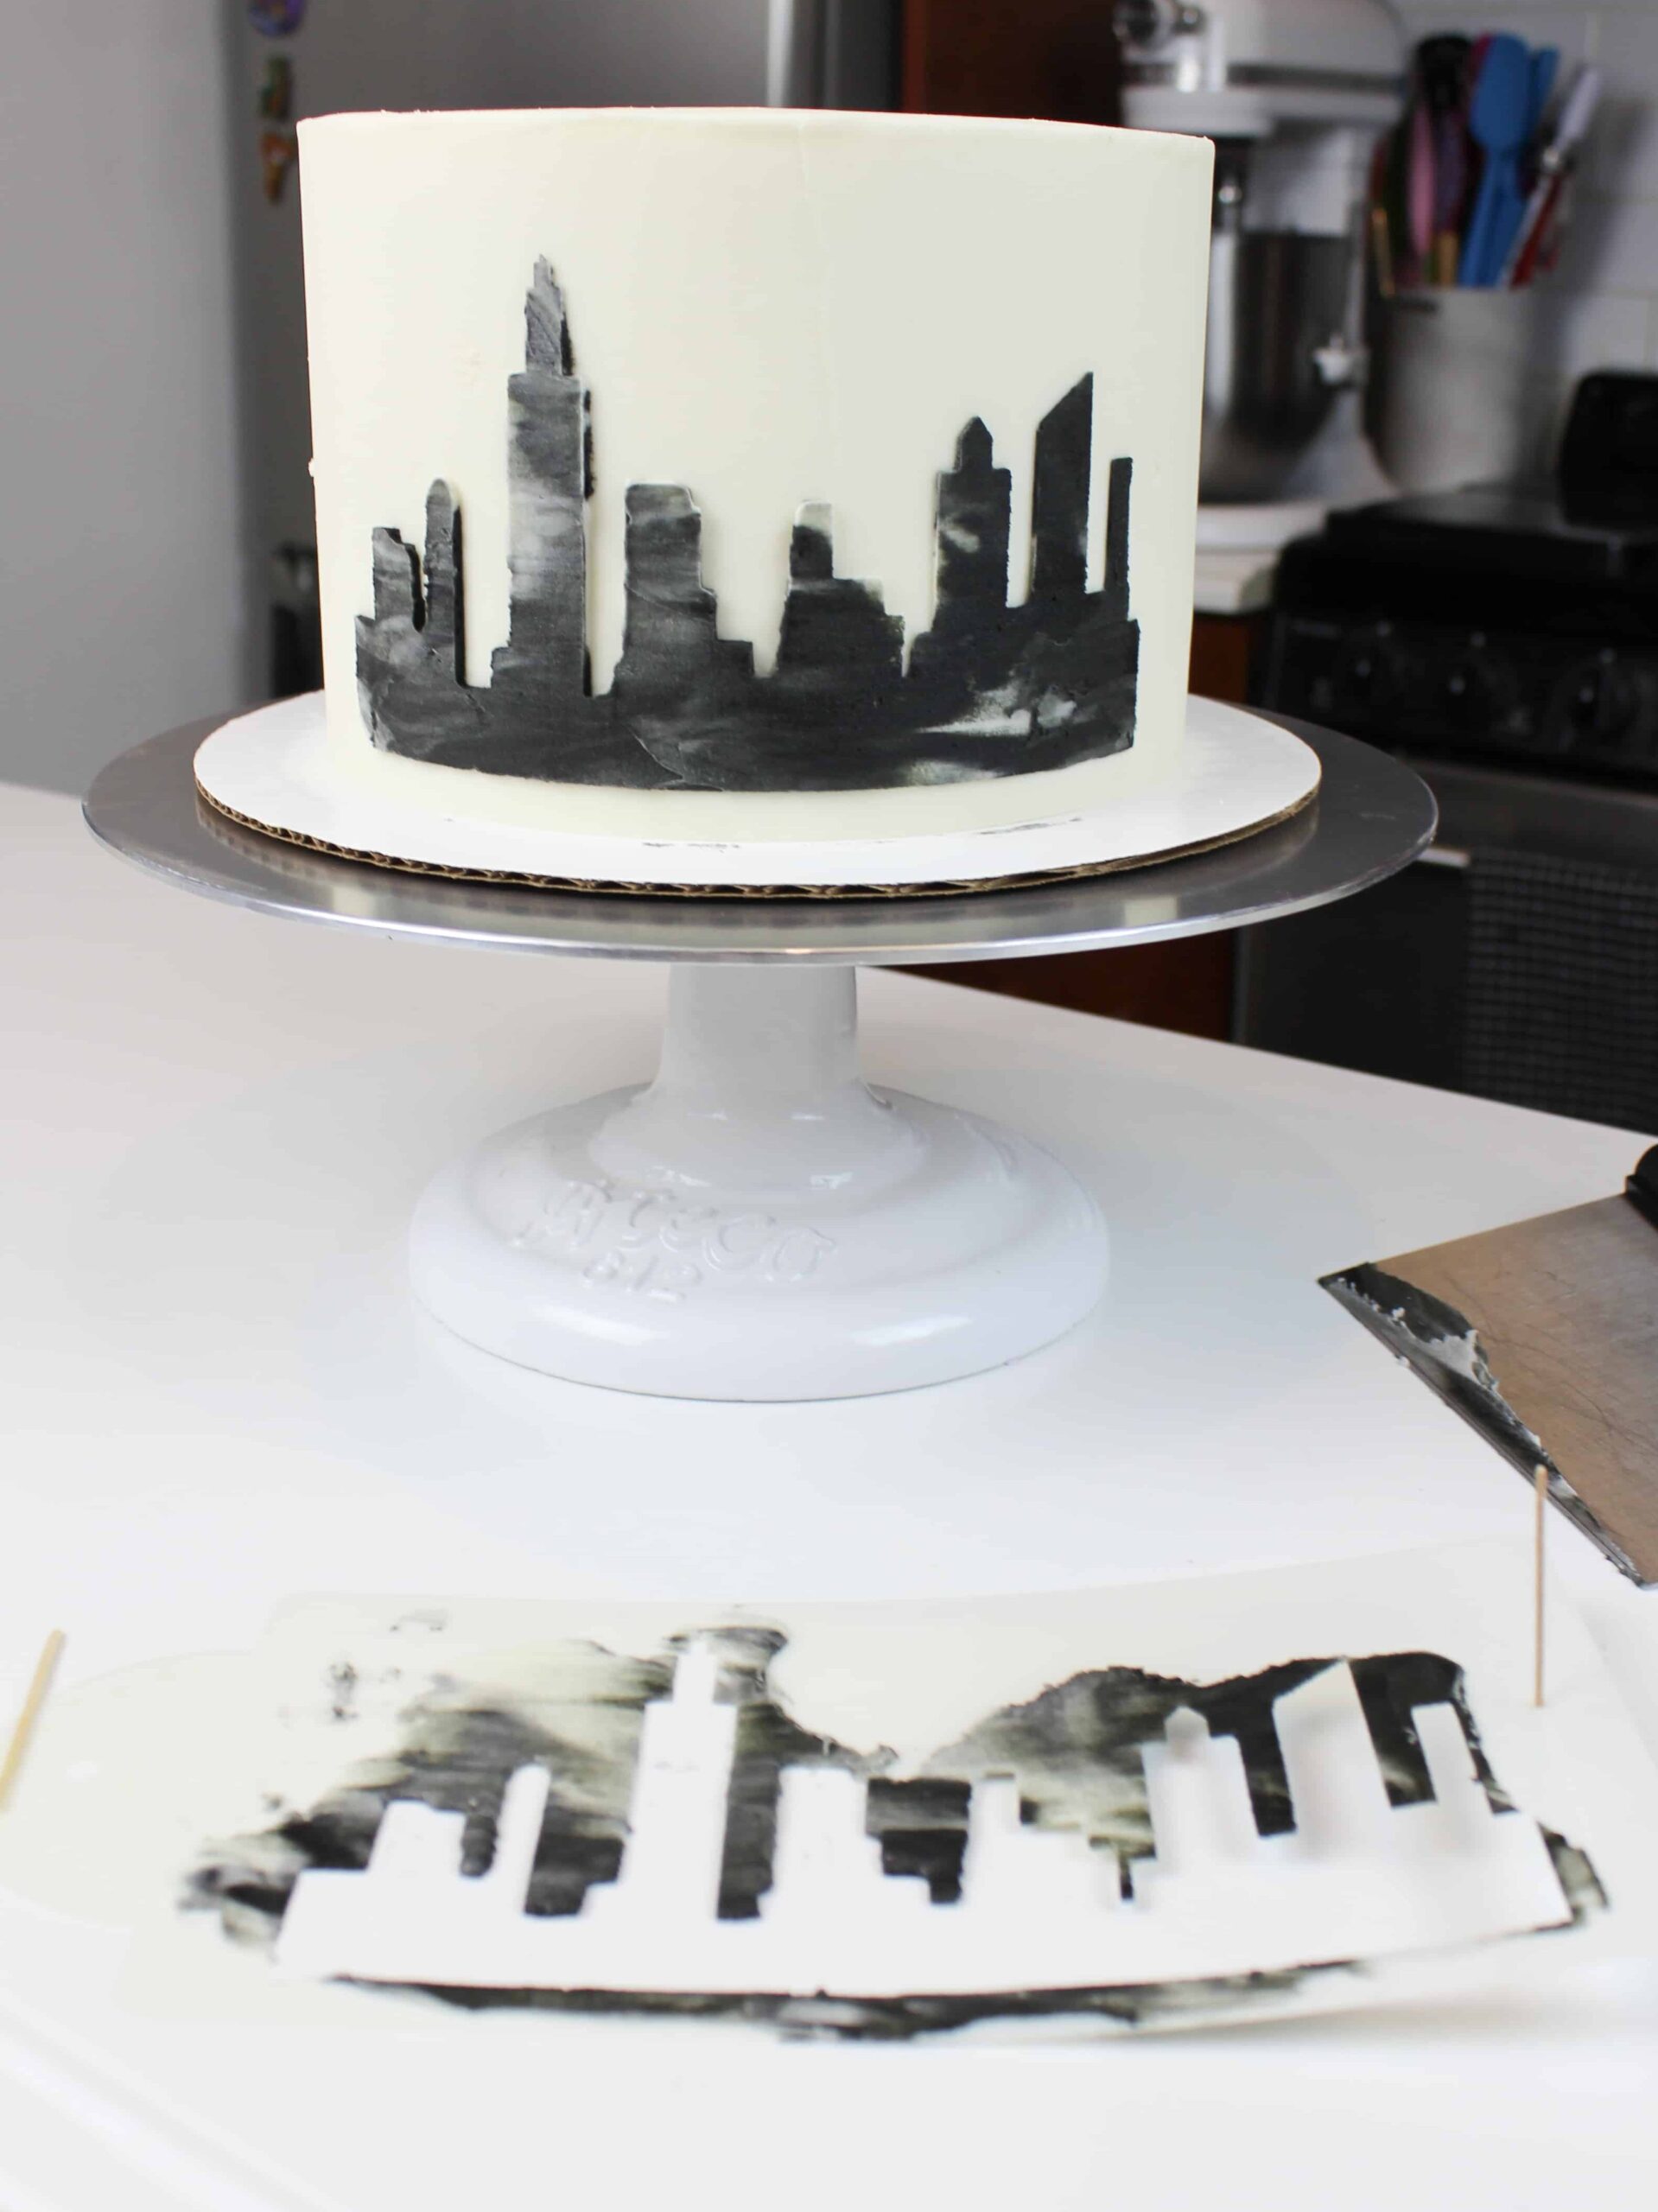
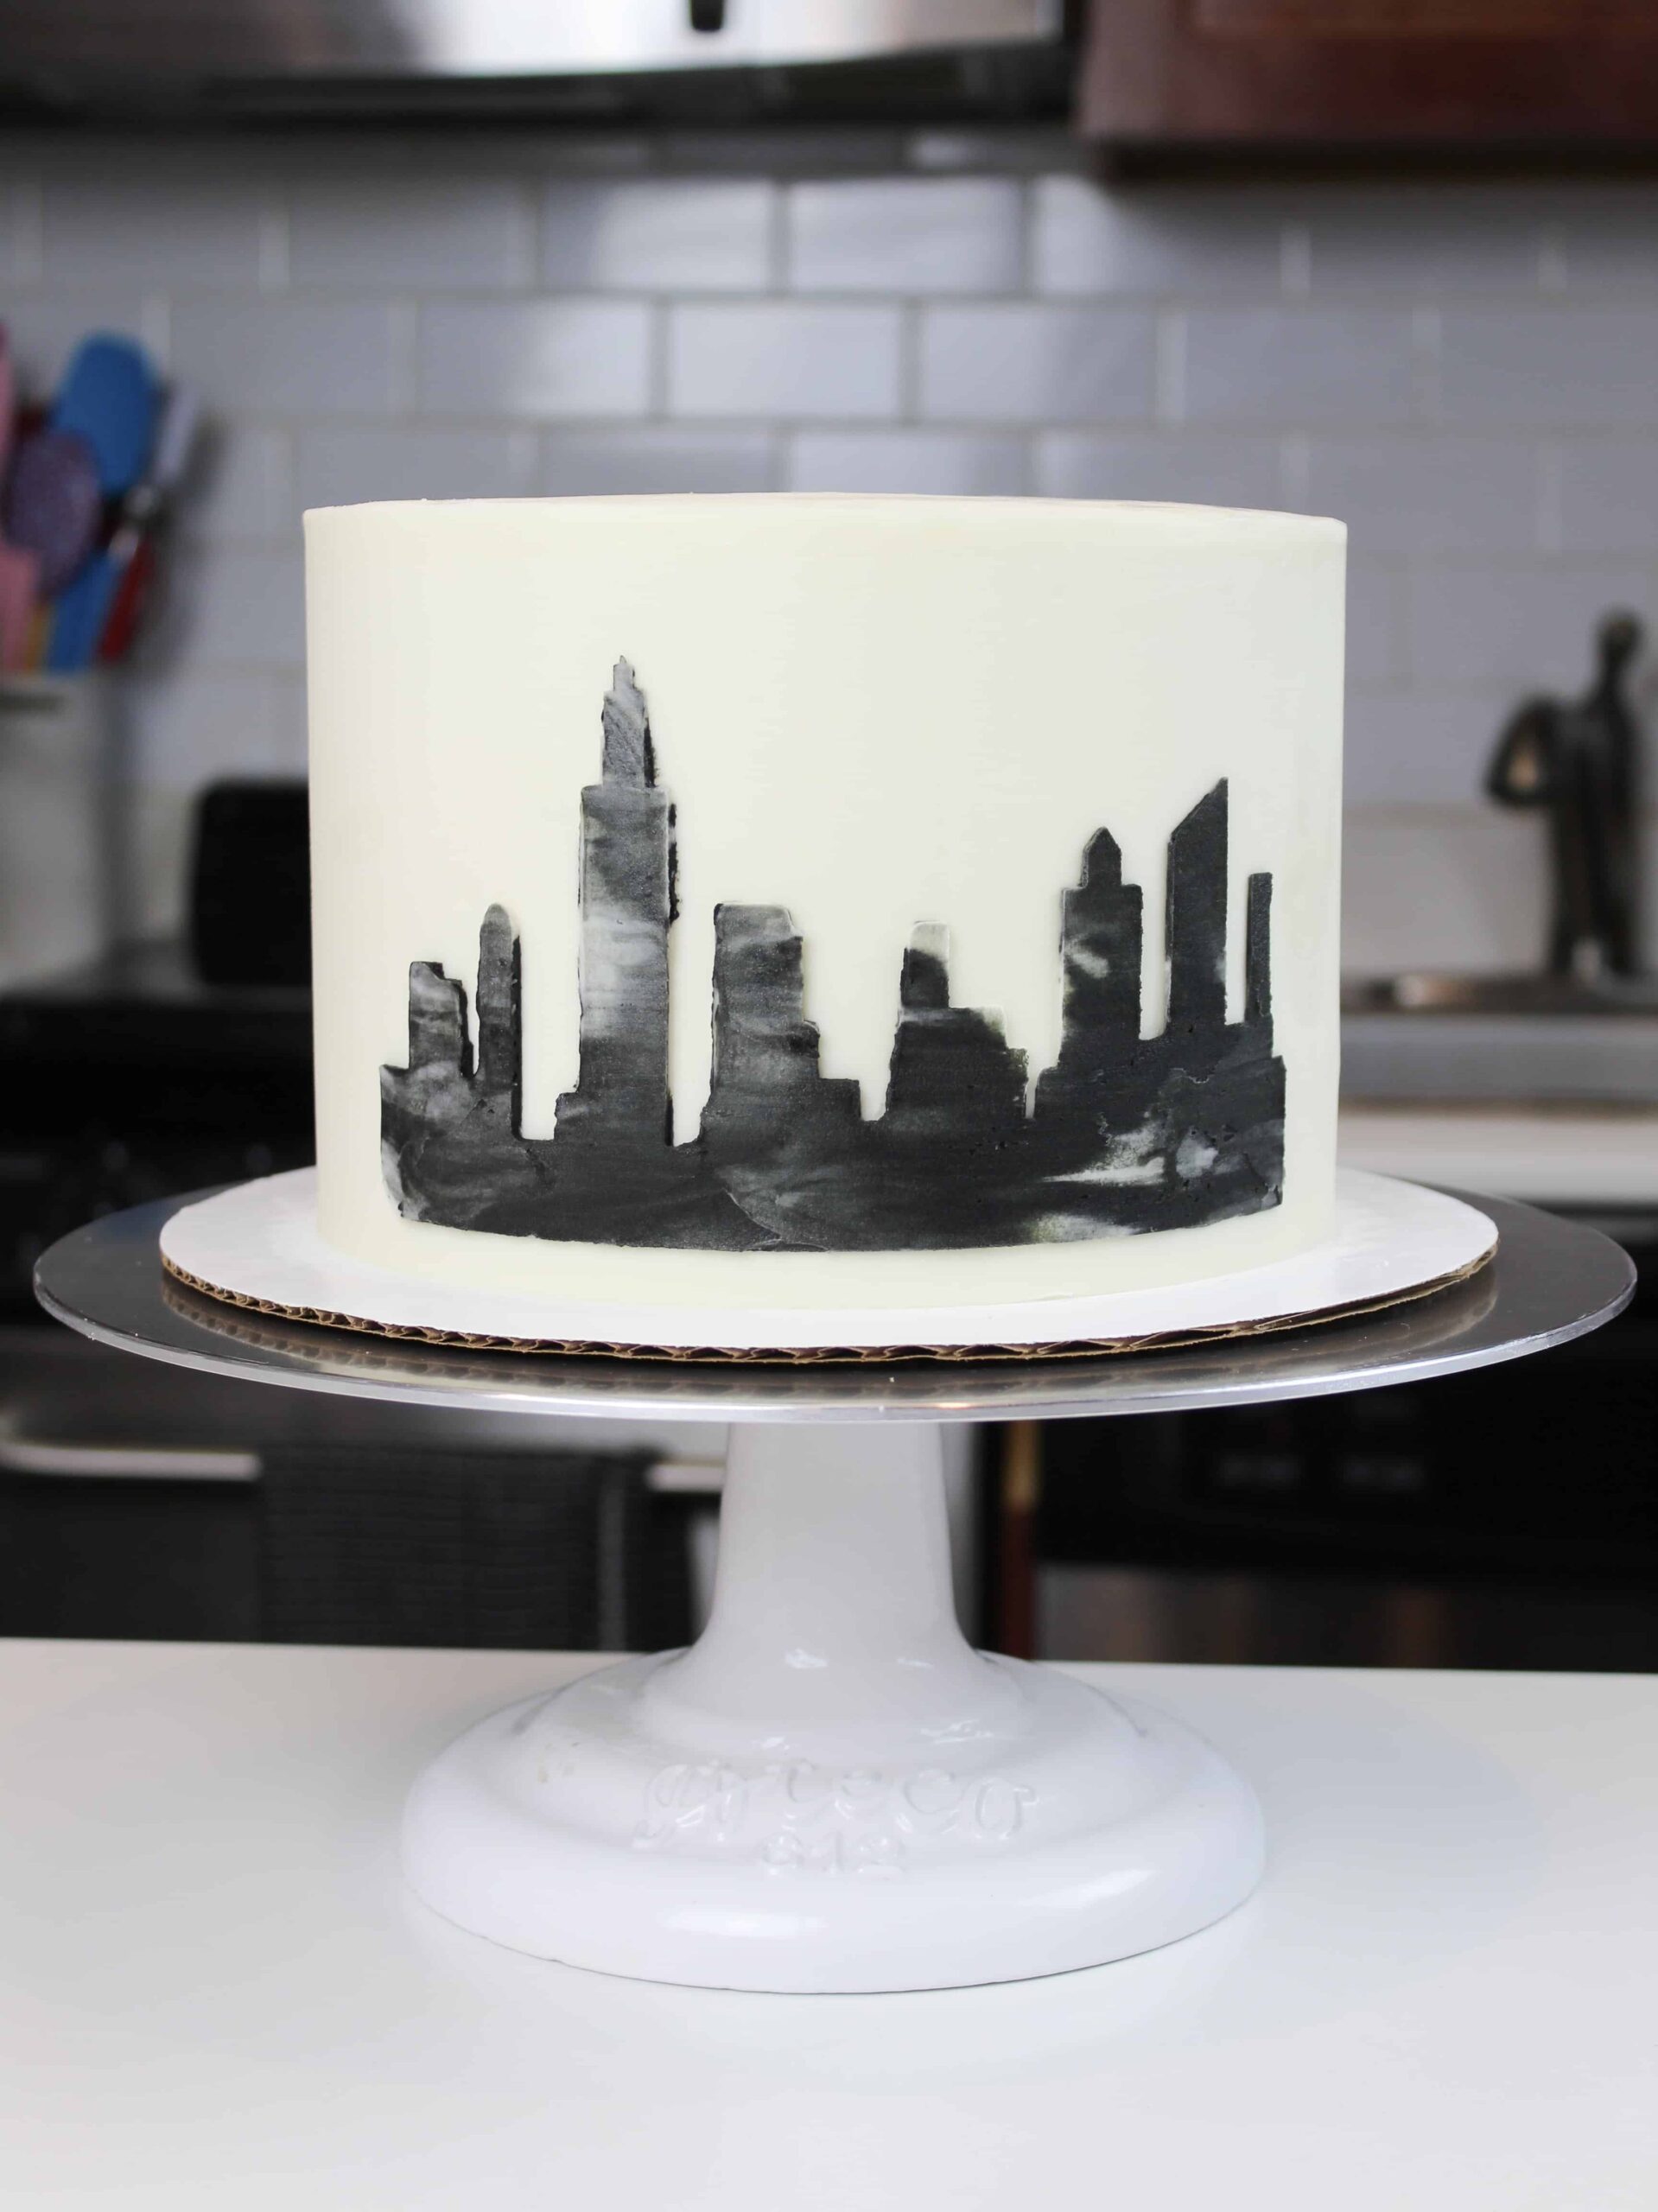
I was brainstorming ideas for a NYC-themed cake (I used this amazing stencil to create this look) and was struggling to pick a flavor.
I even took a poll on Instagram, and got suggestions for everything from black and white cookies to an apple cake!
When I sat back and thought about what flavors I associated with NYC, cheesecake seemed like a clear winner.
But rather than make a cheesecake and sandwich it between two cake layers, I wanted to make a cheesecake filling for a cake!
While this might seem like a small difference, it makes a huge difference in the process of making and assembling this cake. Sometimes it’s nice to keep things simple.
Cheesecake Cake Filling vs. Making an Entire Cheesecake
If you’ve ever made (or attempted to make) a cheesecake before, you know it’s no easy feat.
There are all kinds of tricks out there to prevent cracking and different people swear by different methods.
Recipes will say things like, “turn off the oven and leave the cheesecake inside to cool.” The recipes will recommend turning the temperature down part way through, or even cooling the cheesecake on the counter with a bowl over it.
It’s a lot to process and always seems like a hassle to me.
Maybe I’m just lazy, but if I’m already baking cake layers and making frosting from scratch, I just don’t want to bake a cheesecake too.
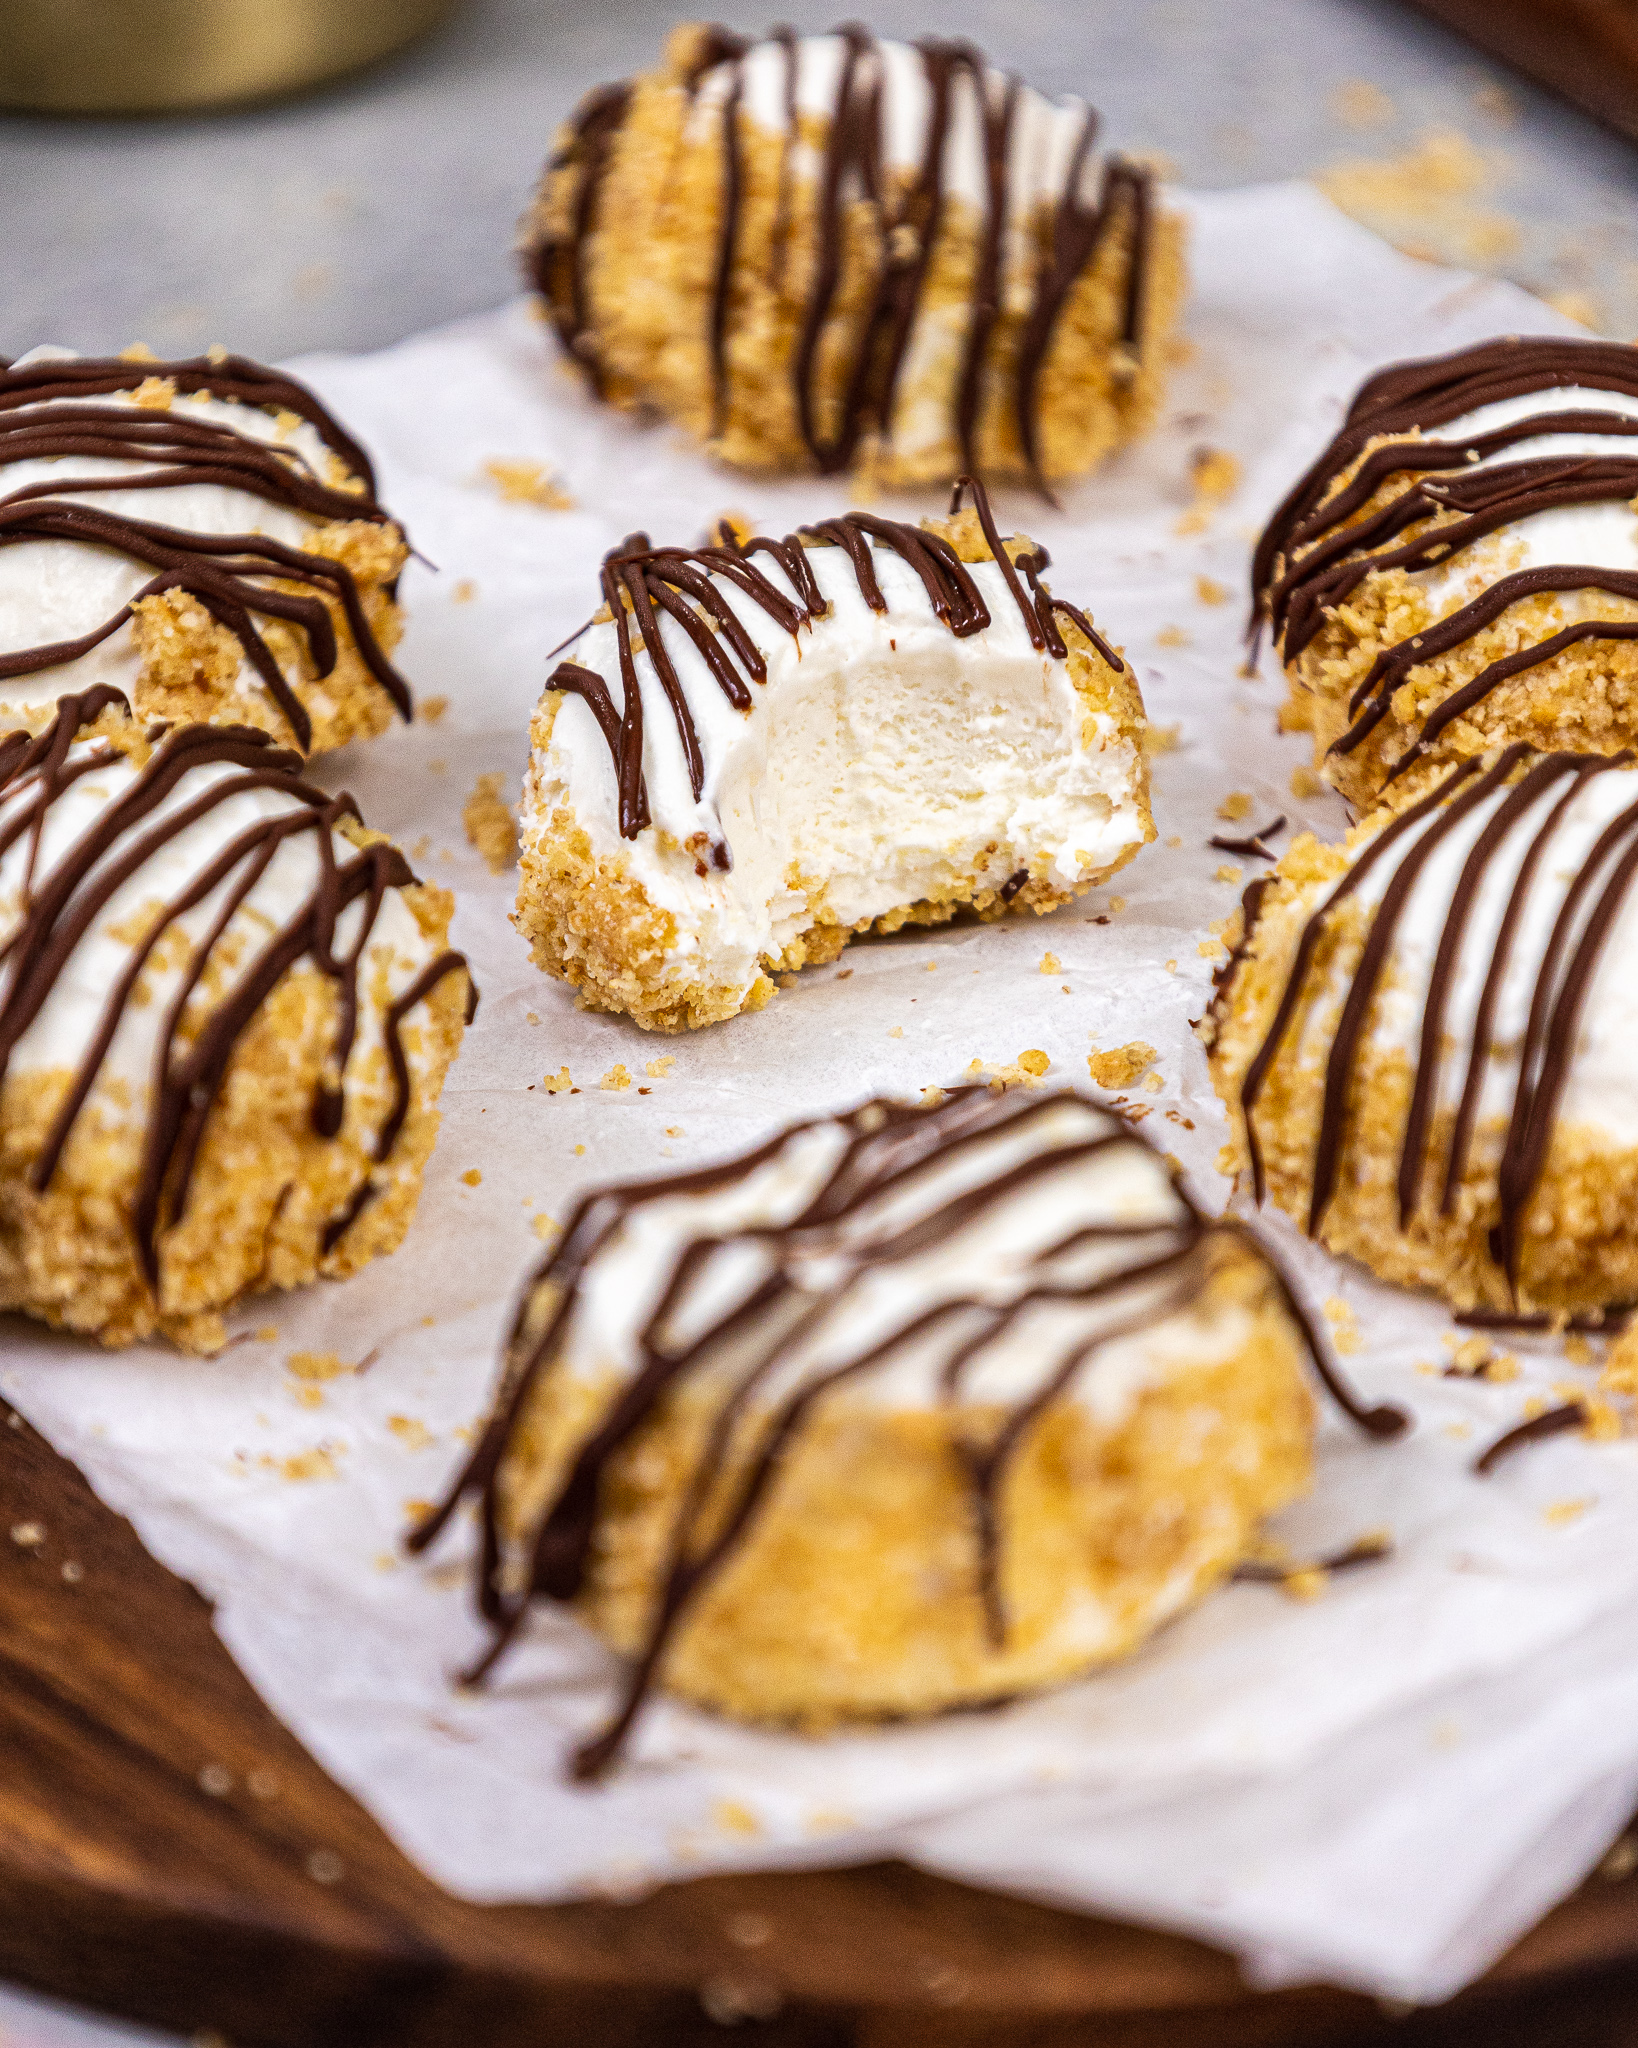
By using a simple, no-bake cheesecake filling for a cake, you get that delicious cheesecake flavor without a ton of additional effort or worry.
For me, not having to worry about this part of the cake process failing gives me so much peace of mind.
How This Cheesecake Cake Filling Differs from No-Bake Cheesecake
This cheesecake filling is similar to most no-bake cheesecake recipes, with one exception.
My recipe uses a lot less sweetened condensed milk. This does two things- it makes the filling a bit less sweet and gives the filling a thicker consistency.

Normally I use American buttercream to fill my cakes, which is rather sweet.
It’s a nice change of pace to have a filling that’s less sweet. This recipe allows the delicious tang of the cream cheese to really shine, which I love.
Using less sweetened condensed milk is also necessary for the consistency to be thick enough to fill a cake.
This amount allows the mixture to stay relatively stiff, and makes it easier to use between cake layers.
How To NOT Add This Filling to a Cake
Like I mentioned above, I added this filling to a New York-Themed Cake.
On my first attempt at assembling this cake, I tried to make cheesecake disks using this recipe, and it was a total bust!
I froze them in regular cake pans. I have no clue why I thought this would work, but I learned my lesson the hard way.
Even though I lined and sprayed the pans, I couldn’t get the disks of cheesecake out. I dipped the bottom of the pans under hot water to help them release, which gave me goopy, melty cheesecake discs that were hard to handle.
Long story short, don’t make disks with this recipe (unless you have springform pans…but even though, I’m not 100% sure it would work).
How to Properly Add This Filling to a Cake
I recommend piping a frosting ring or frosting dam when using this cheesecake filling.
I use this technique whenever I want to fill a cake with something that is soft or less thick than buttercream.
Below is a picture of my raspberry coconut cake from last summer. I filled this layer cake with raspberry preserves and needed to pipe a thick ring of stiff buttercream around them to keep the filling in place.
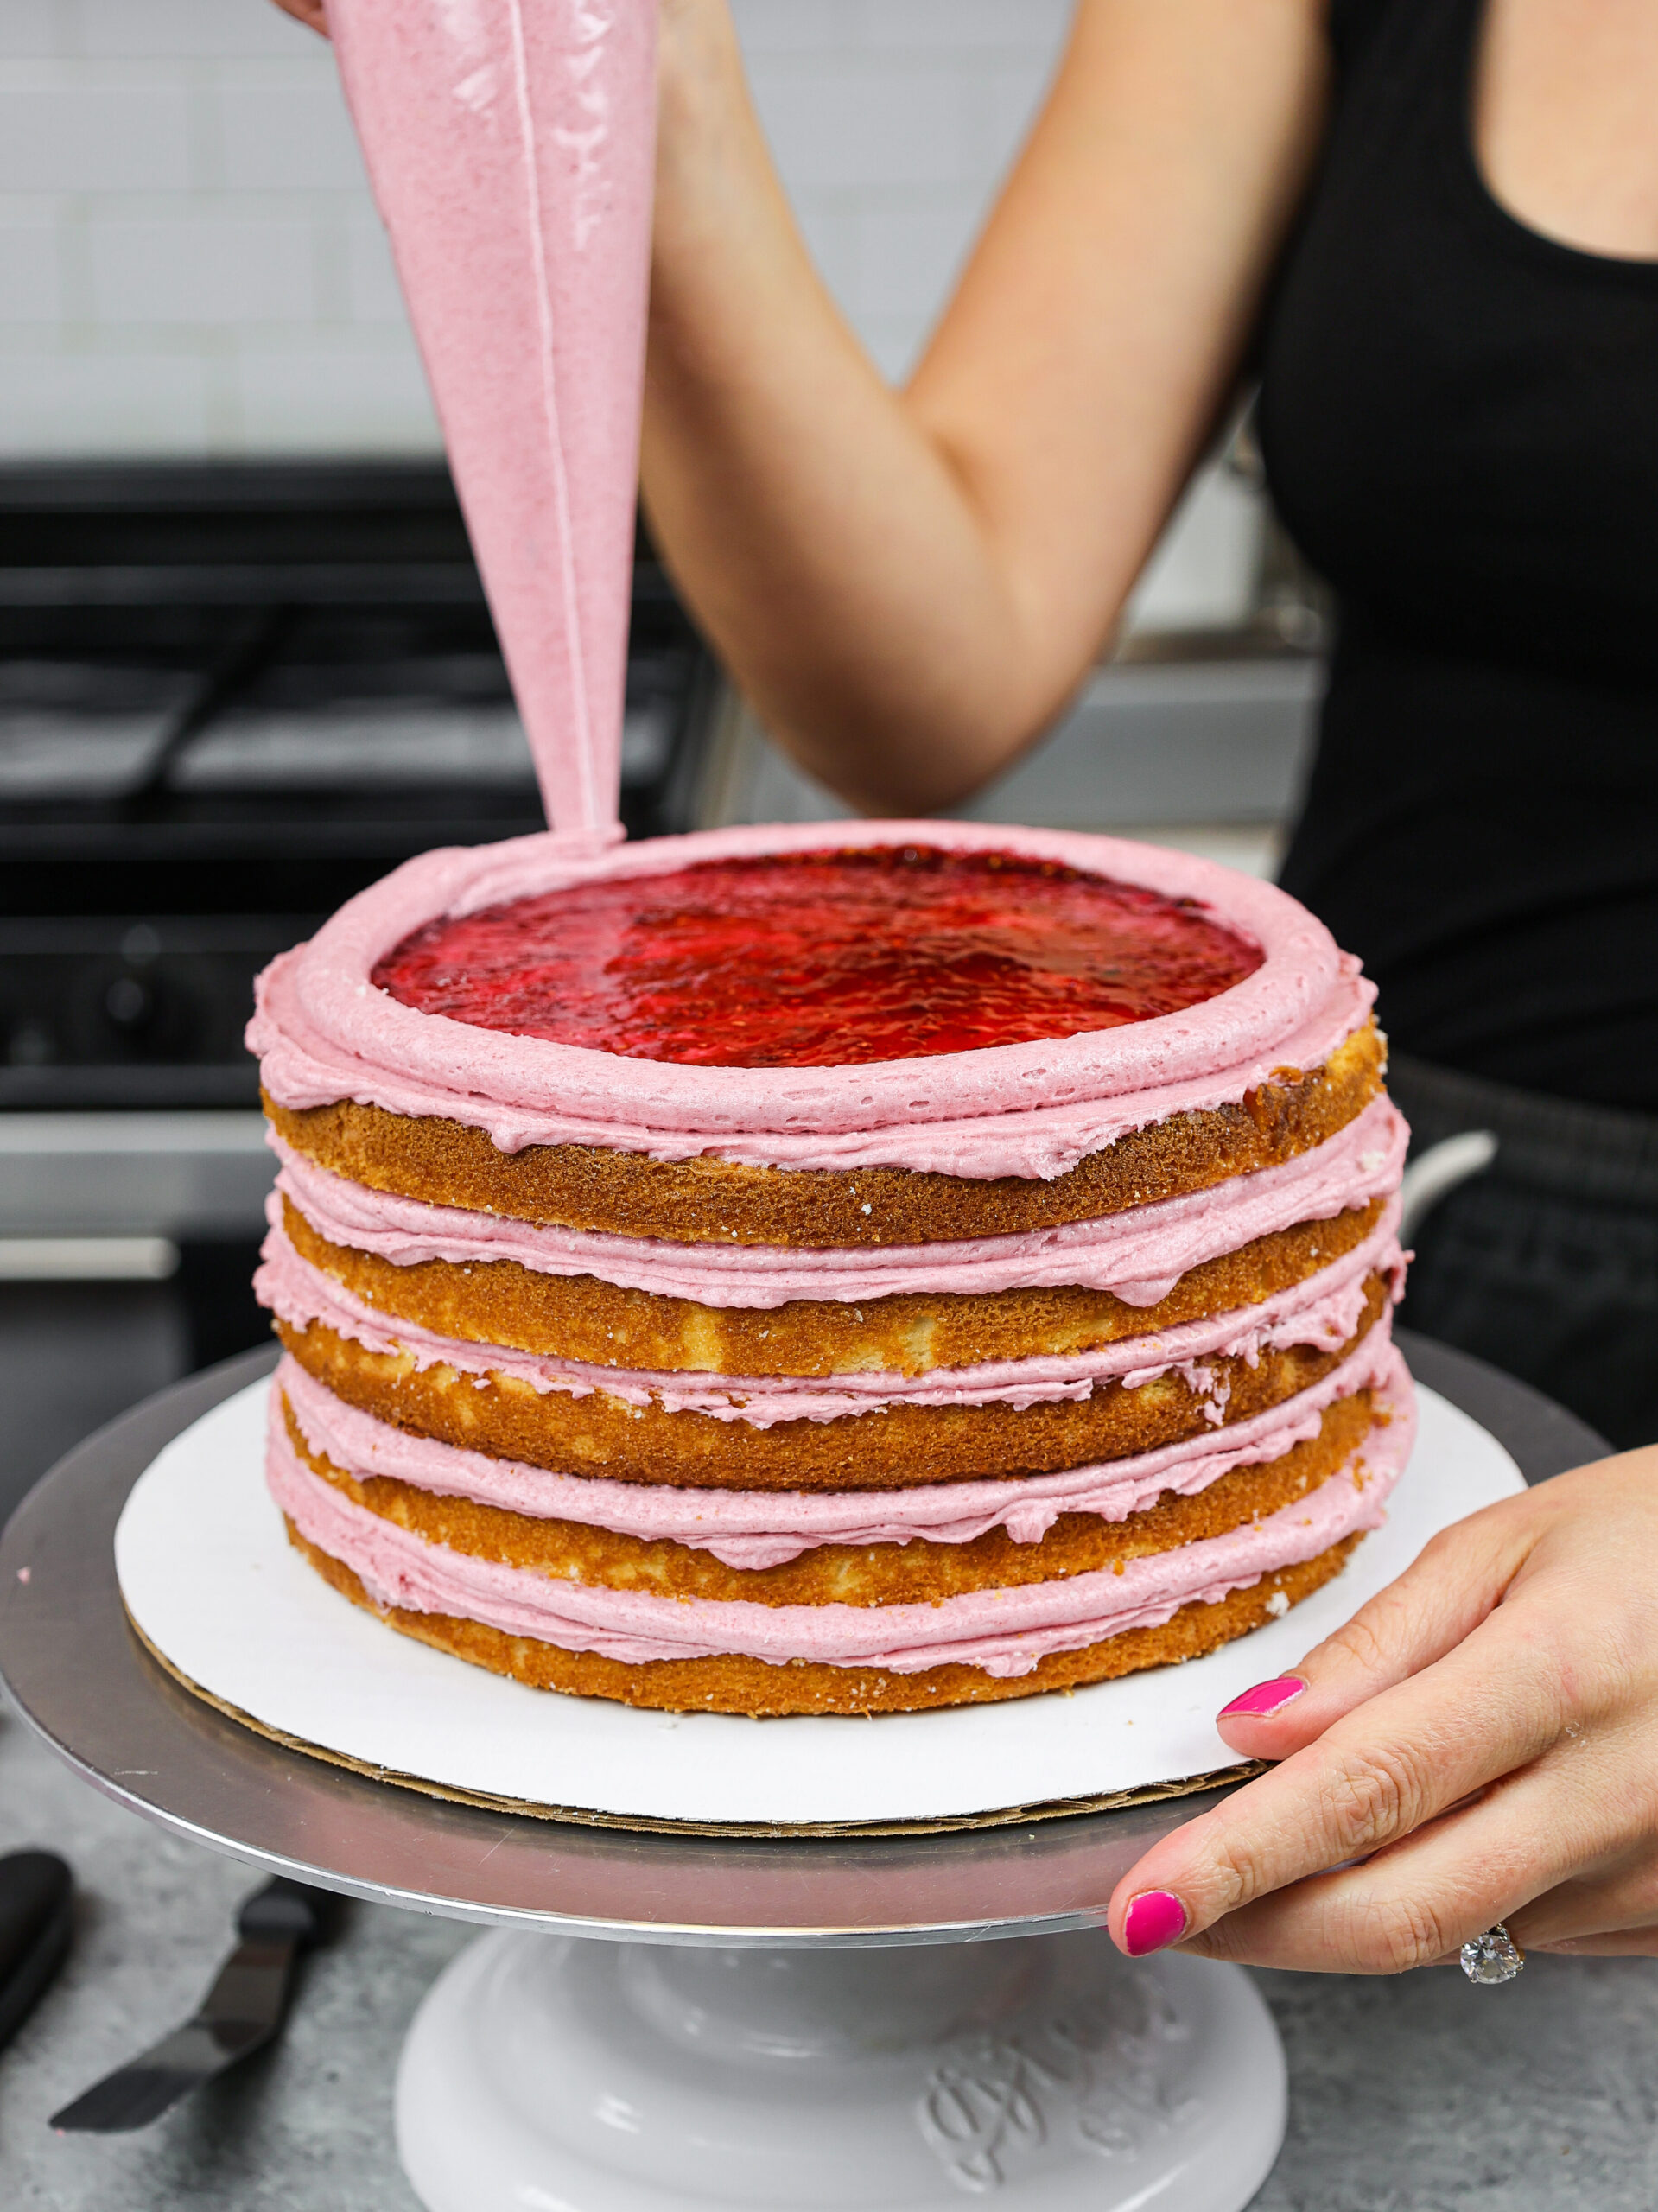
To use this technique, pipe a ring of buttercream around the edge of your cake layer, then spoon a generous amount of this cheesecake filling on the inside. Smooth with an offset spatula, then repeat.
Frost the outside of the cake with the frosting you used to pipe the frosting ring, and you’re all done!
Tips for Making This Cheesecake Cake Filling
- Make sure your cream cheese is at room temperature. It helps the filling mix together so much better.
- Use fresh lemon juice. It really helps balance the richness of the cream cheese.
- Place plastic wrap directly over the filling once it’s made to prevent a skin from forming
- When filling a cake with this cheesecake filling, pipe a ring of stiff frosting around the edge of the cake before adding it to help the filling stay in place.
- If you make this in advance, it keeps in the fridge for up to 5 days. Give it a good stir to smooth it out again before adding it to your cake.
Let Me Know What You Think!
If you try this cheesecake cake filling, I’d love to hear what you think of it! Please leave a rating and comment below.
And don’t forget to tag me @chelsweets and use #chelsweets so that I can see your delicious creations!

Cheesecake Cake Filling
Ingredients
Cheesecake Cake Filling
- 16 oz. (2 blocks) of full fat cream cheese, room temp 452g
- 2/3 cup sweetened condensed milk 7 oz. or 210g
- 1 Tbsp fresh lemon juice 15g
- 1 tsp vanilla extract or vanilla bean paste 4g
Instructions
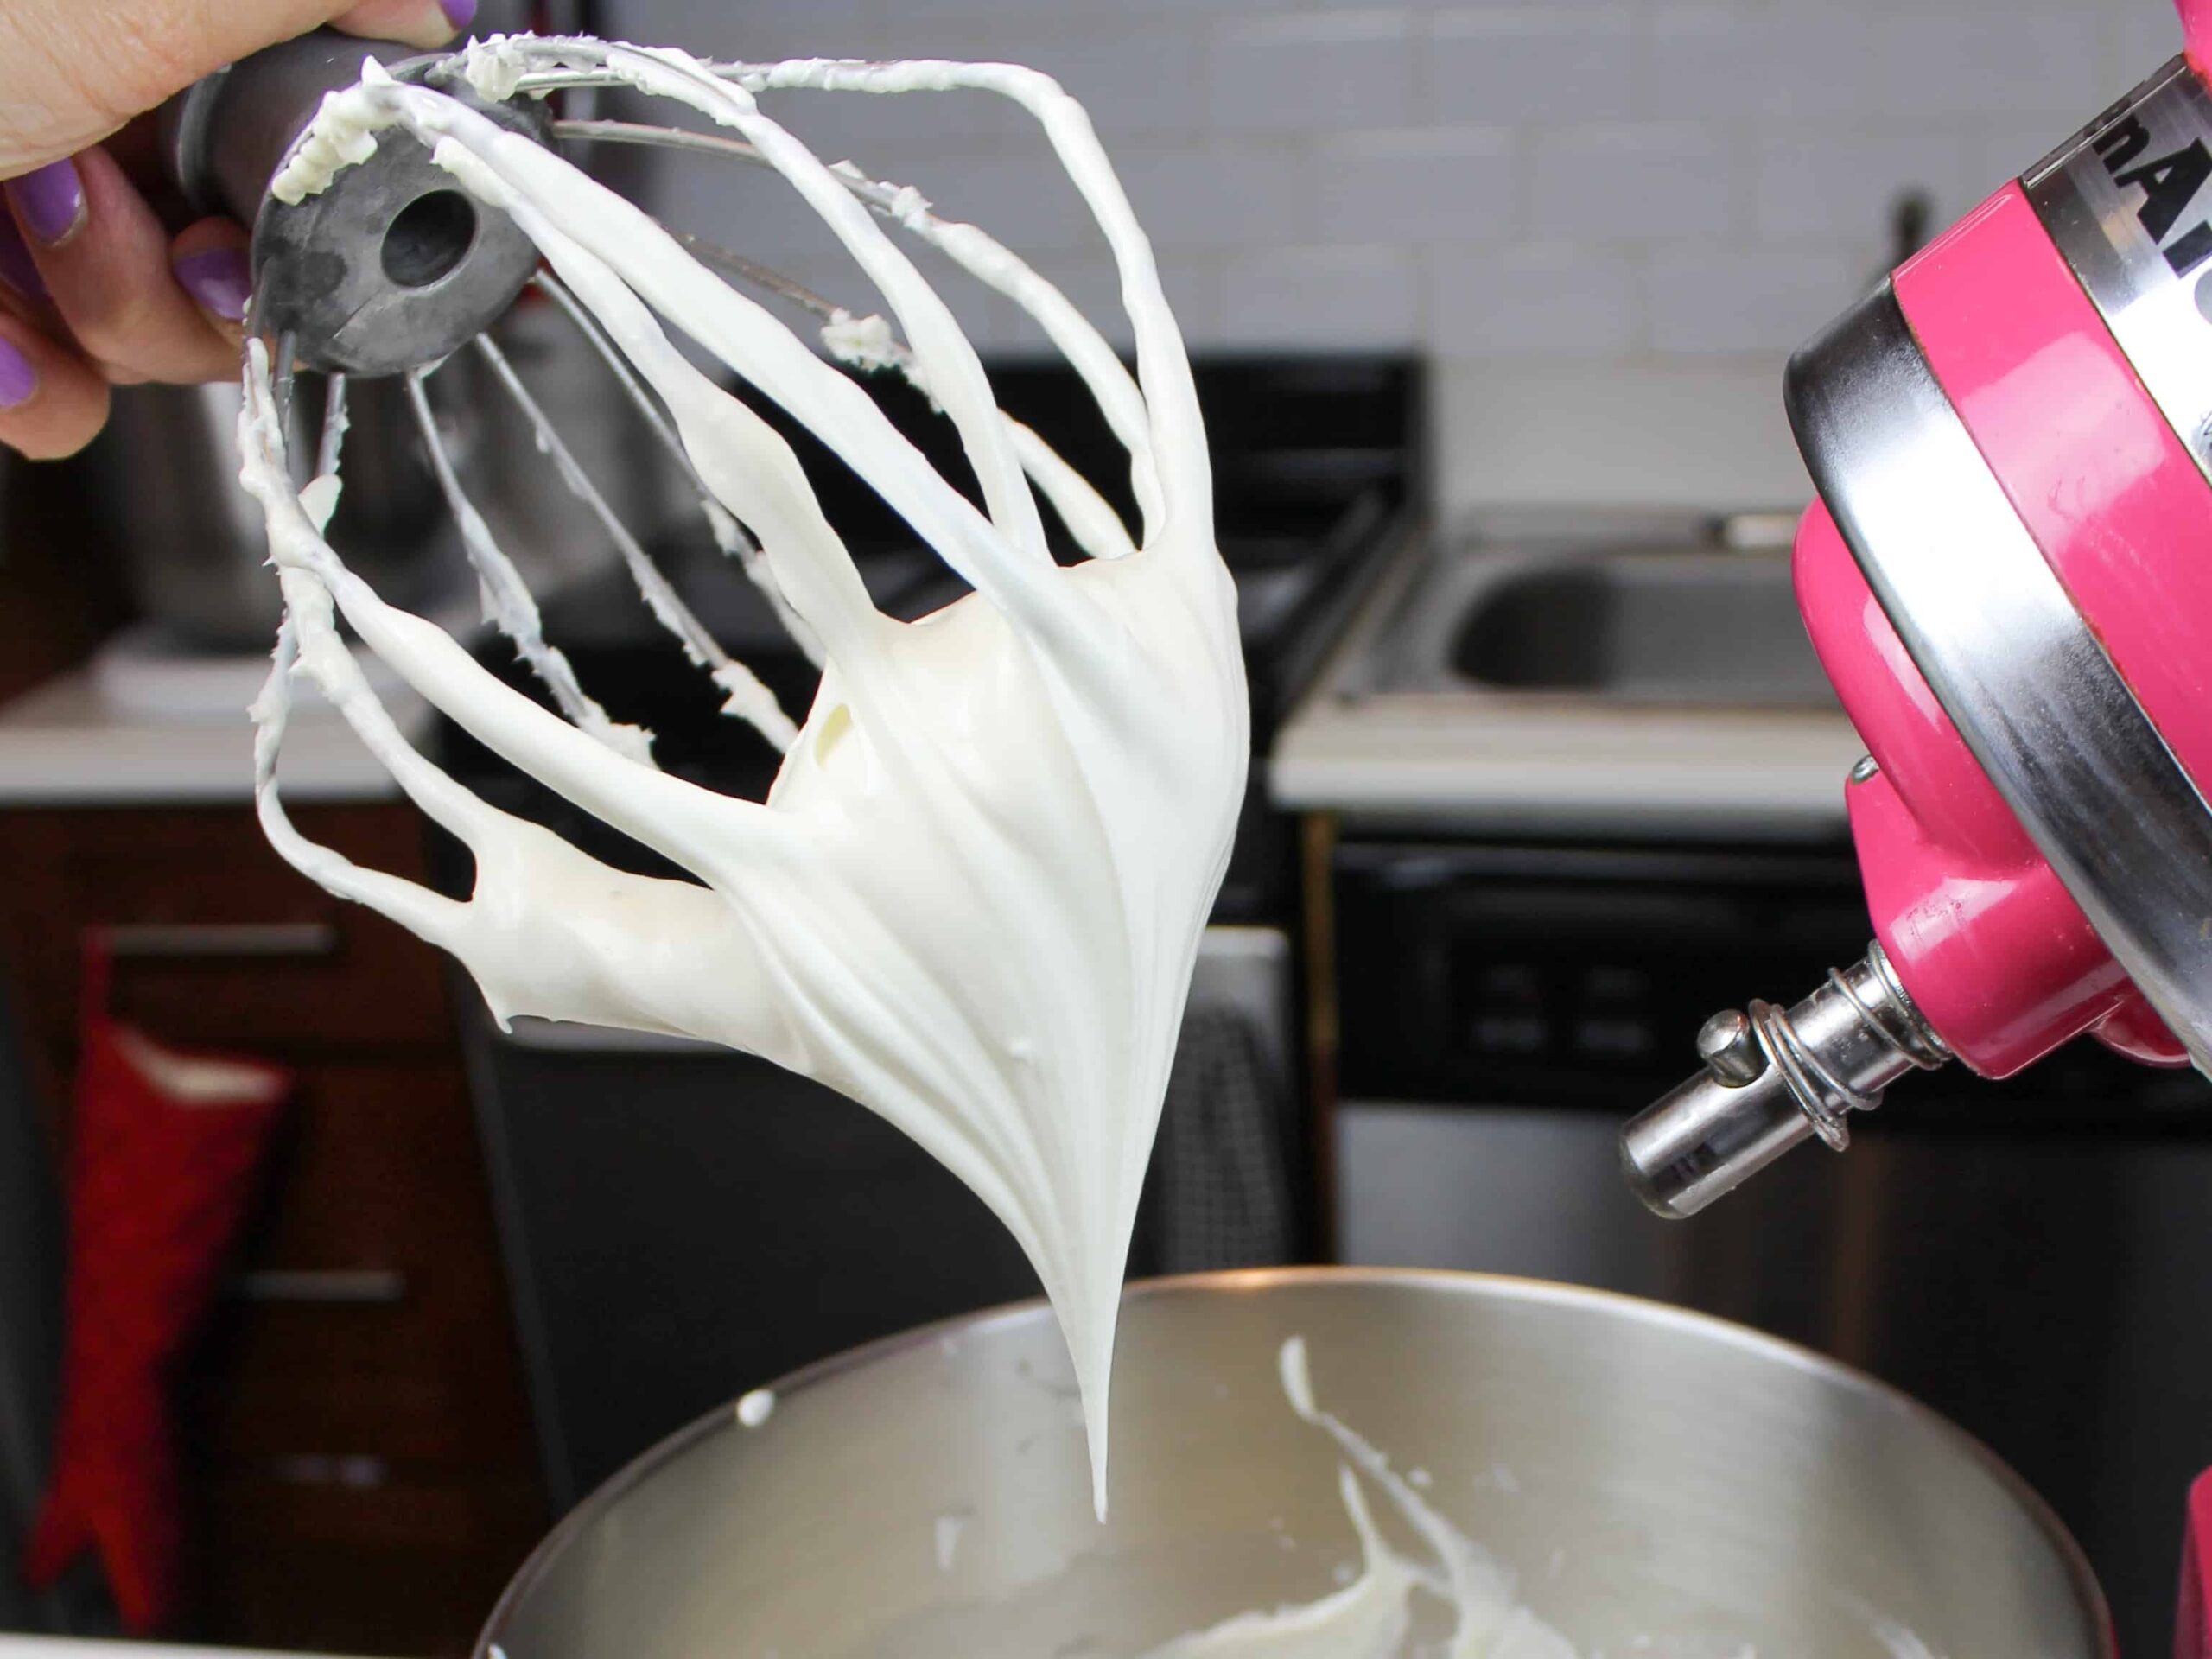
- Place room temperature cream cheese in the bowl of a stand mixer. Mix on medium-high speed with the whisk attachment or a hand mixer for a minute until creamy and smooth.
- Gradually add in the sweetened condensed milk while mixing on a medium speed. Scrape down the sides and bottom of the bowl as needed to make sure the ingredients are fully incorporated.
- Mix in the vanilla extract and lemon juice, on medium speed. Cover with plastic wrap and refrigerate until you are ready to fill your cake.
- Pipe a ring of stiff buttercream around the perimeter of the cake layer, then fill the center with a generous amount of this no-bake, cheesecake filling.
Video
Notes
Nutrition
Other Recipes You Might Like:
How did you make this stencil??! Did you purchase already created?! Love this simple design – I always use your cake recipes, they are the BEST!!!
Hi Lex,
Haha I bought the stencil!! 😛 I’m not that crafty / don’t have a cricut! Here is the link: https://amzn.to/2n7MMGA
This sounds delicious. Would it be thick enough to frost a cupcake with or is it still too runny?
Would you be able to freeze the cheesecake disks and get them out easier by putting plastic wrap in the cake pans first then use the plastic wrap to lift them out when frozen? Or would it be too soft?
That is actually a great idea! I haven’t tried it, but in theory you should be able to pop them out!
@Lyndsey, you might also be able to use a cake ring too. Line the bottom with plastic wrap and bring it up the sides. Then definitely freeze. You could also add a little gelatin.
Hi there – been following you for a bit and really appreciate your recipes and videos. I want to try this cc filling but just want to know if its “less sweetened” condensed milk that you used or sweetened? Because in the paragraph above you stated less sweeetened but in the recipe it says sweetened? Also, if I was making this for a 6″ 3 layer cake, do you think half the recipe would be enough? thank you!
I just watched the YT video again and saw it was sweetened 🙂
haha great! Happy to hear the video helped 🙂
I tried this method after reading your question! Just wanted to let you know that it worked great!!! I did use a pan that was slightly smaller than my cake for the cheesecake disk, but i just used my cream cheese frosting to fill in the gap to lock in the cheesecake. Thanks for the suggestion! 🙂
Aw I am so happy to hear that Kelsey! 🙂 Thank you for sharing!!
I am wanting to use this filling for a three tiered wedding cake. Do you think this filling will be sturdy enough for stacking cakes?
Hi Katrina! As long as you don’t overfill the layers, and as long as you make a buttercream dam, it should hold up in a wedding cake!
@Chelsweets,
I made this in a six layer cake for my granddaughters birthday. I was an solely fabulous but I did use wooden skewers to keep the layers from shifting. Just thought I would share that.
Would the cake need to be served cold with this filling? Or is it still yummy room temperature?
Hi Misty,
It is easier to cut/serve if the cake is still a bit chilled, but it doesn’t need to be served straight out of the fridge! I’d take the cake out 30-60 minutes before you plan to cut and serve it. Hope that helps, happy baking!
Hi I’m planning on using the filling for a 12×12 cake two later cake, will I have enough and taking it to a park for gender reveal gathering will it with stand the wait sitting on the table
Hi Christina,
This filling is definitely softer than buttercream, so I wouldn’t recommend letting the cake sit out for extended periods of time in warm weather or sun. However, if the cake is thoroughly chilled and you pipe a thick frosting dam around the edges it should be ok.
One batch of this filling should enough since you only have one layer to fill (between the two cake layers). Hope that helps, happy baking!
Does the cake need to be refrigerated??
Hi Kay,
I would recommend refrigerating a cake with this filling! It can sit out for a few hours, but I wouldn’t let it sit out for much longer than that. Happy baking!
Hi, just a thought but I was wondering if this no bake cheesecake can be used as a normal no bake cheesecake dessert instead of a cake filling. Thx
Hi Sandi,
I haven’t actually tried that, but you should totally be able to use it that way 🙂 Happy baking!
Hi Chelsweets! Your recipe states that this makes 6 cups of filling? I think it’s more of like 3 cups or so. I made the exact amount and mine is nowhere near 6 cups of filling. It is however absolutely delicious and decadent though and is a keeper! Just wanted to leave a comment ?
Hi Jocelyn,
Thank you for pointing that out! I’ve updated the recipe card to reflect that 🙂 I usually make a double batch of it, which is I think what made me think it made 6!!
I was wondering can you substitute lines for the the lemon?
Hi Franki,
You totally can! happy baking 🙂
Thanks!! I used the last of my lemons and only had pines in my fridge.
This looks delicious! I have a family member with a lemon allergy. Could I just leave it out or would I need to put in a replacement?
Im going to make this
I had a fail for my cake today. I ended up whipping up the cheesecake but its only enough for one of my layers.
Sigh. Im going to try this out.
Can you use this recipe as a filling for cupcakes?
Could you use this filling in a candy mold?
Is this enough for 2 layers (3 tier cake)?
Can this filing be used in other treats such as filled waffle cones?
My 16 year old grandaughter wants a geode cake with carmel cheese cake filling. Can I use melted carmel bits in place of the sweetened condensed milk? I think it may make the filling a little stiffer when chilled?????? I’m no professional baker. Help plz?
Could this filling be used in a trifle?
@Mary, That’s what I’m planning on doing with it. Will report back how it worked out.
Ok, I used it in a trifle … It’s a little too stiff for that, so I added a bit more of the SCM (about 2/3 instead of 1/2 the can) and also folded in some unsweetened whipped cream just before adding it to the trifle. Delicious! Next time I might also add extra lemon juice to loosen it up a little.
Hi Karl,
That is such a good idea!! That sounds like a perfect modification for a trifle 🙂 Thanks for sharing!!
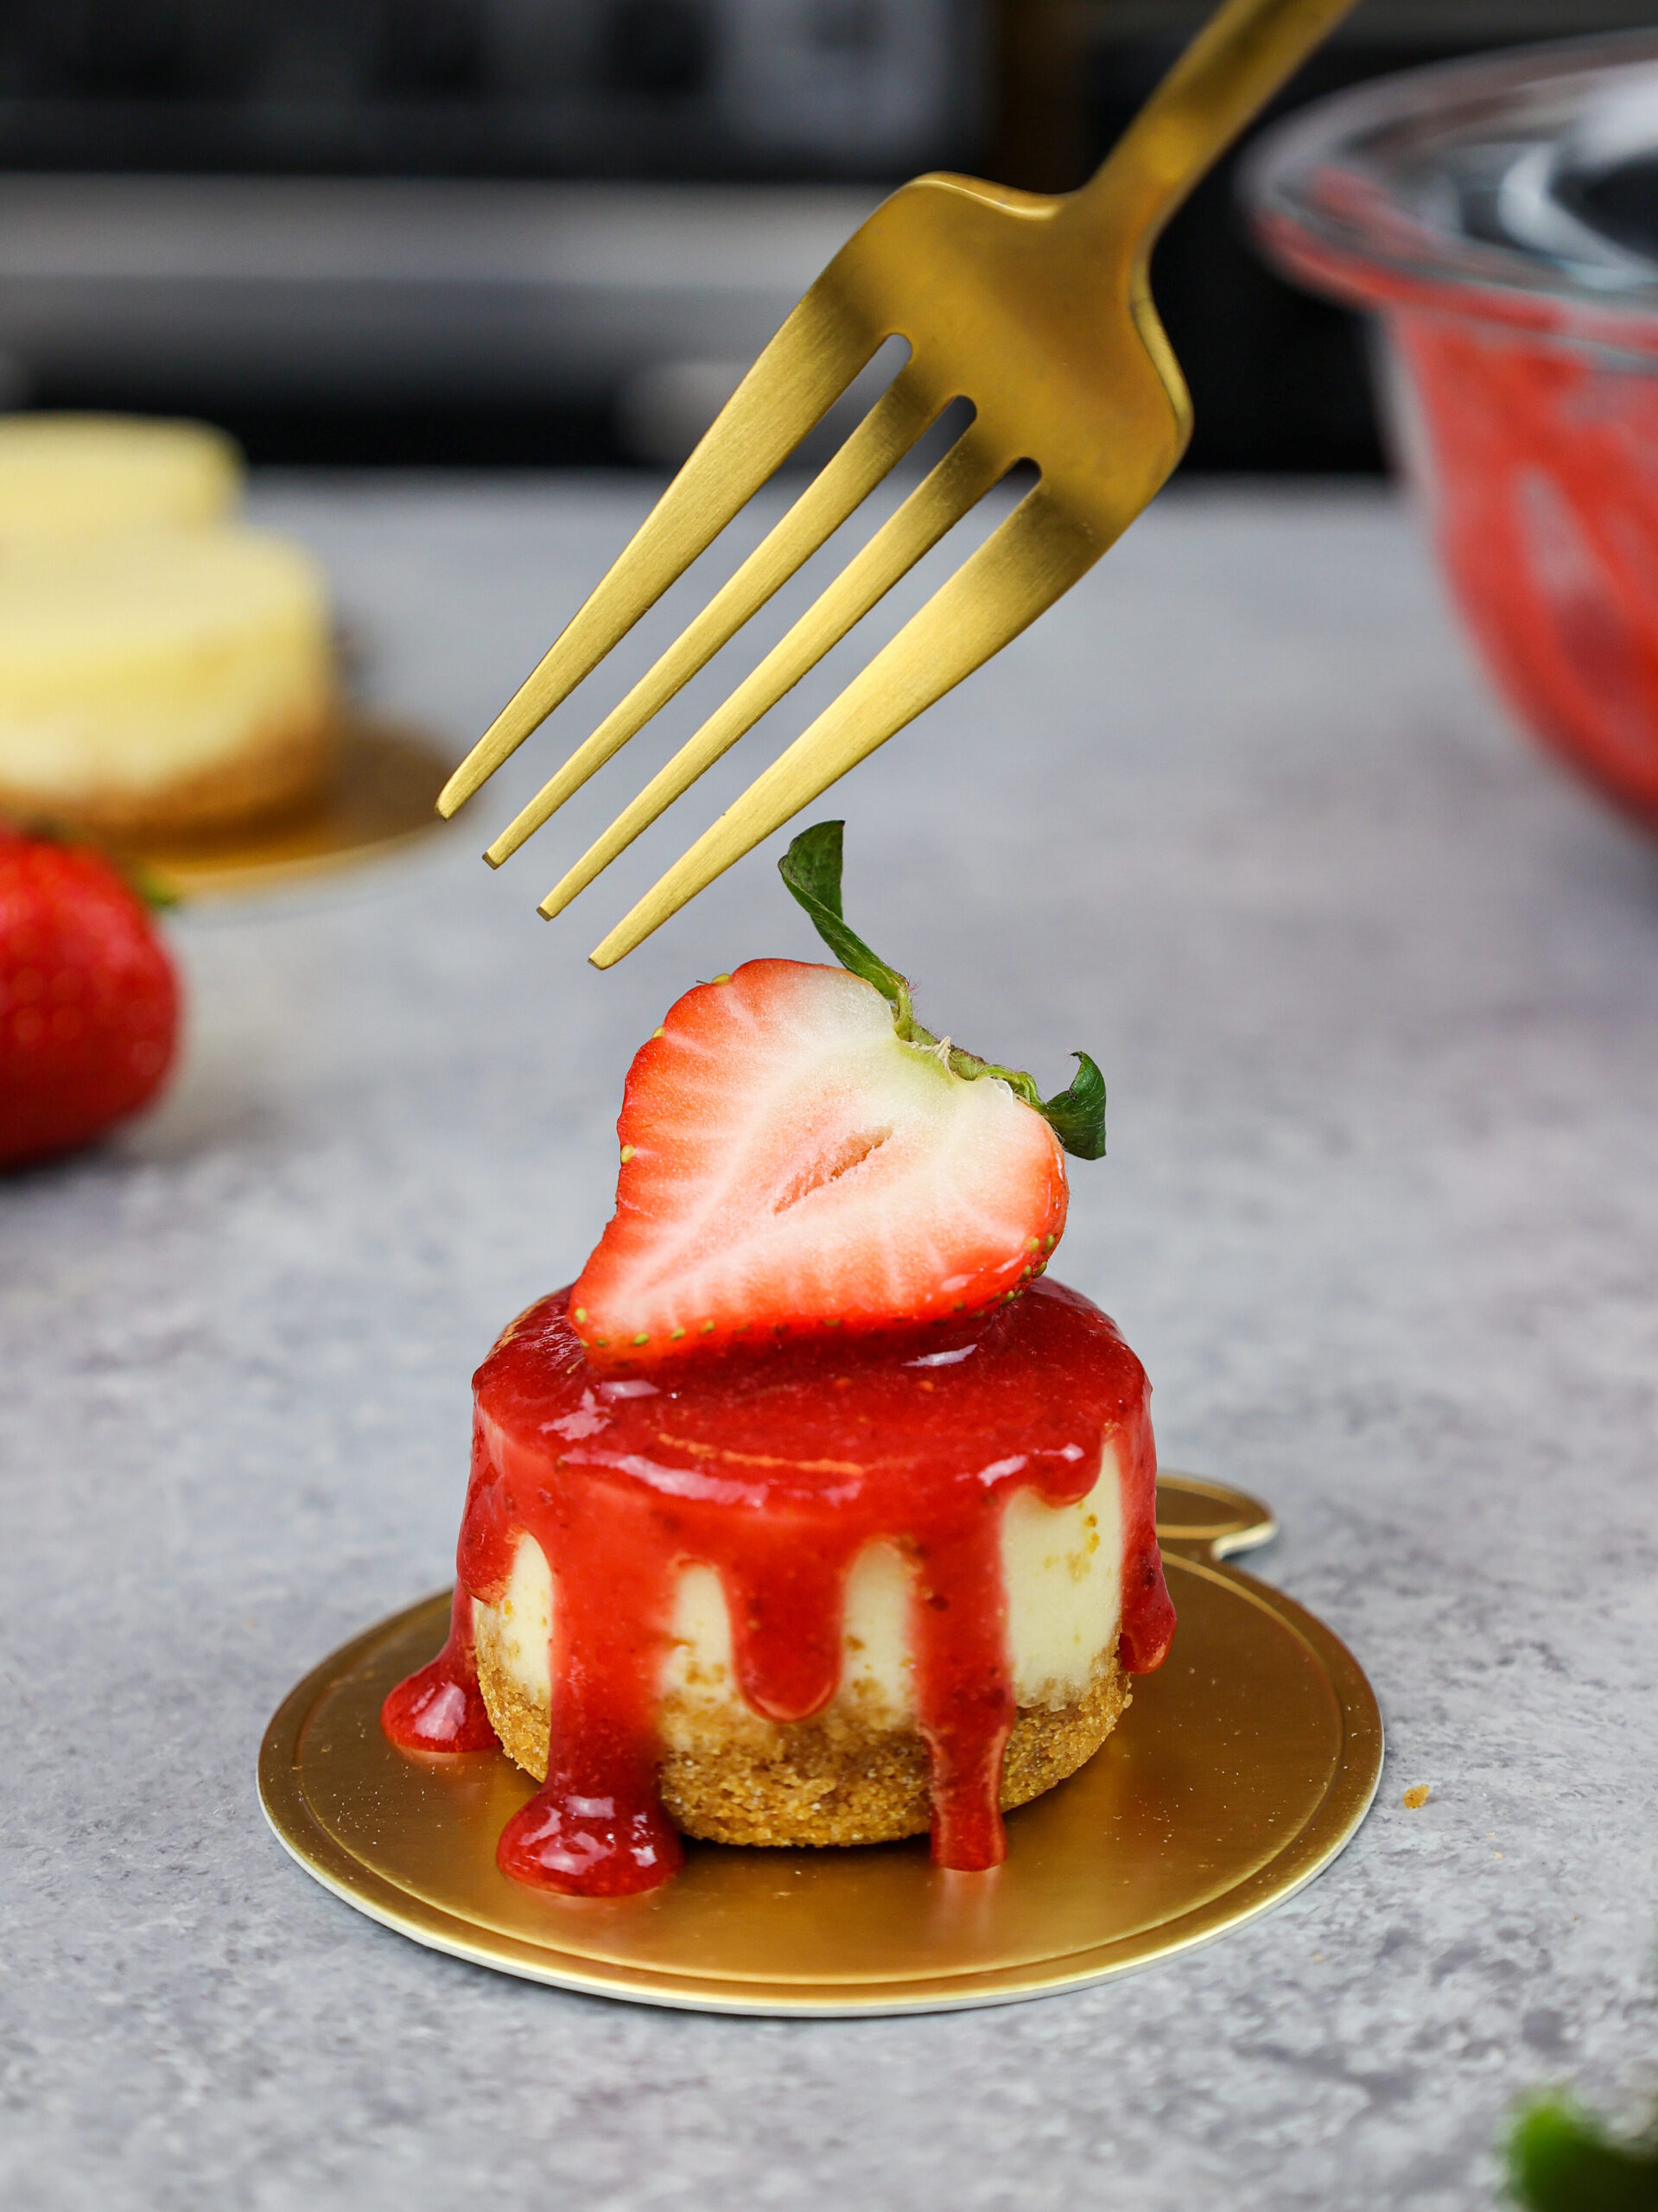
I made this filling for a ‘no bake’ cheesecake (rather than a sponge cake filling) and put it in a Nilla vanilla wafer crust since I didn’t have graham crackers. I will top with fresh blueberries and strawberries for our 4th of July lunch. SOOO GOOD!! Thanks for this quick and delicious recipe.
Absolutely love that Shelley, it sounds like the perfect combination 🙂 Thank you for sharing!!
@Chelsweets, It was amazing! This is now my go-to no-bake cheesecake filling. I love that it is not too sweet and has that nice tang from the cream cheese. 🙂
@shelley, Ok! I put another twist on this filling and it is out of this world. Hubs likes strawberries with cheesecake; I like chocolate. So, I made a batch of this filling without the lemon juice and divided it in half. Half of it got the lemon juice (half the amount for the full recipe) and I folded in some fresh strawberries I had cut up in the fridge. To the other half I added about two tablespoons of cocoa powder…WOW! I had prepared 6 crystal dessert cups with Nilla wafer crust pressed into the bottom. 3 got the strawberry filling and 3 got the chocolate. I sprinkled some of the leftover crust mixture over all of them, then mini semisweet chocolate chips on the chocolate ones and white chocolate chips on the strawberry ones. Such a ‘fancy’ dessert from such an insanely easy and delicious recipe! THANK YOU AGAIN!!!
That sounds so delicious Shelley! My mouth is watering, I want one!!! 🙂
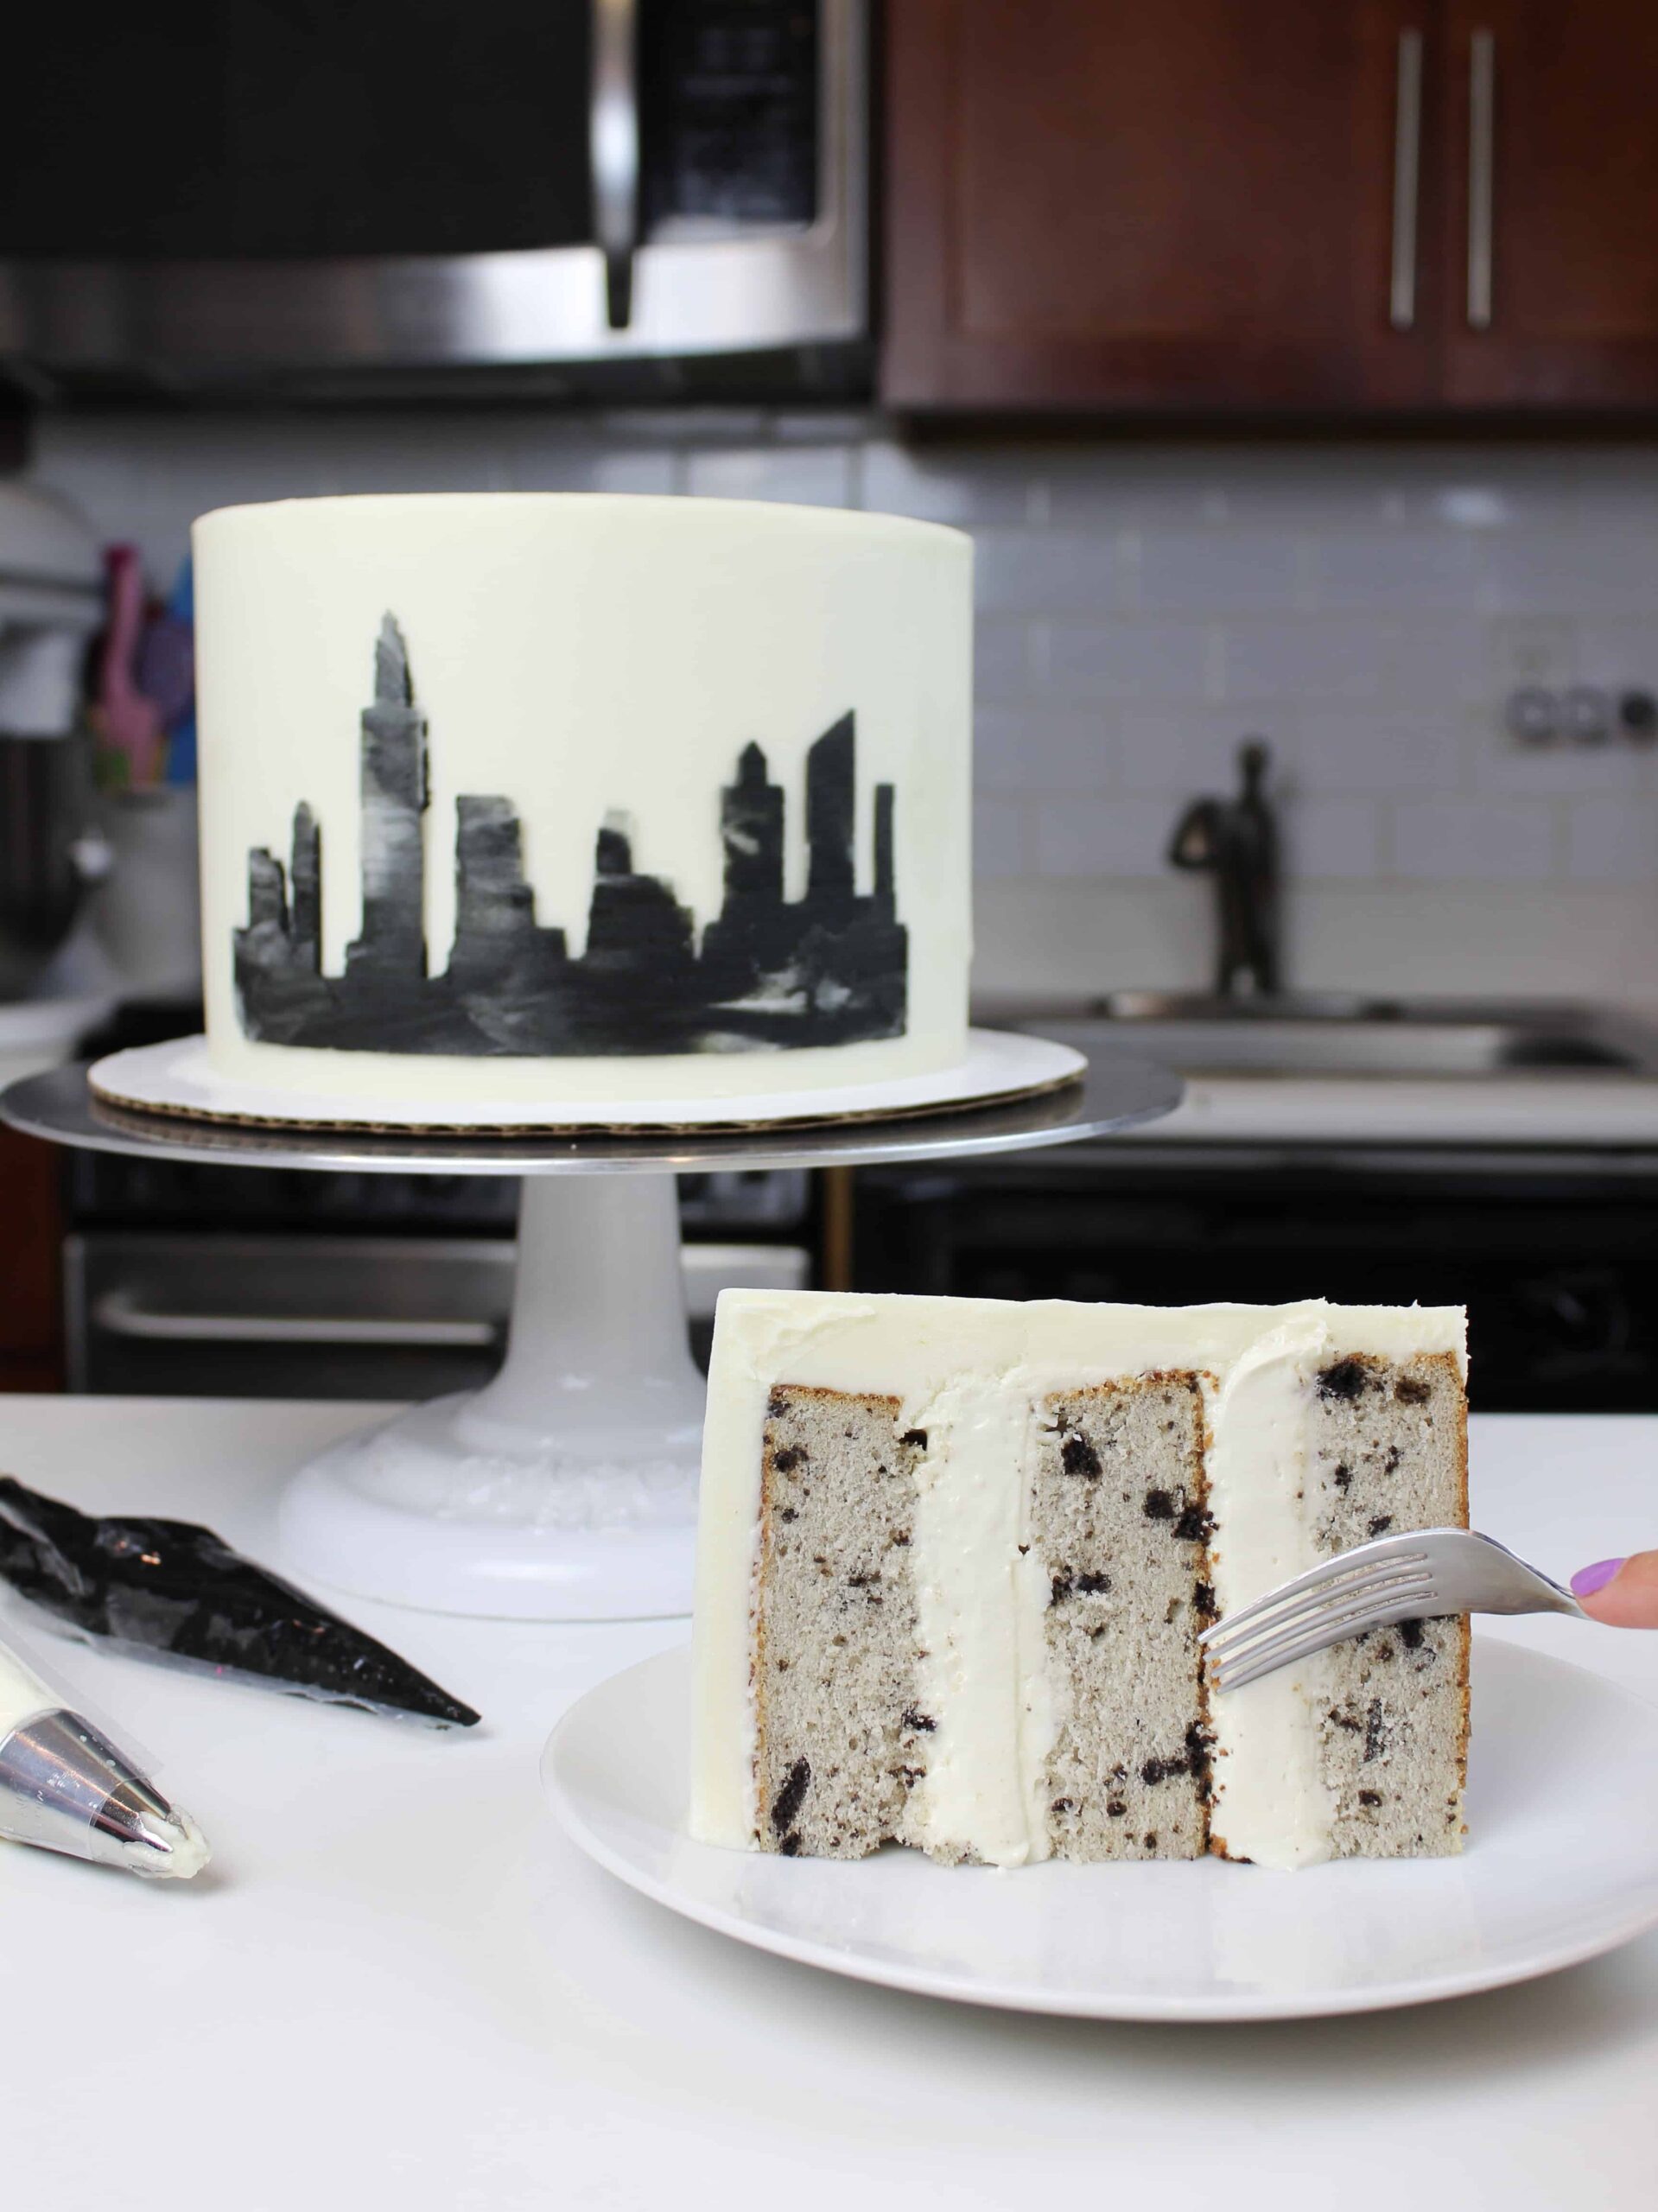
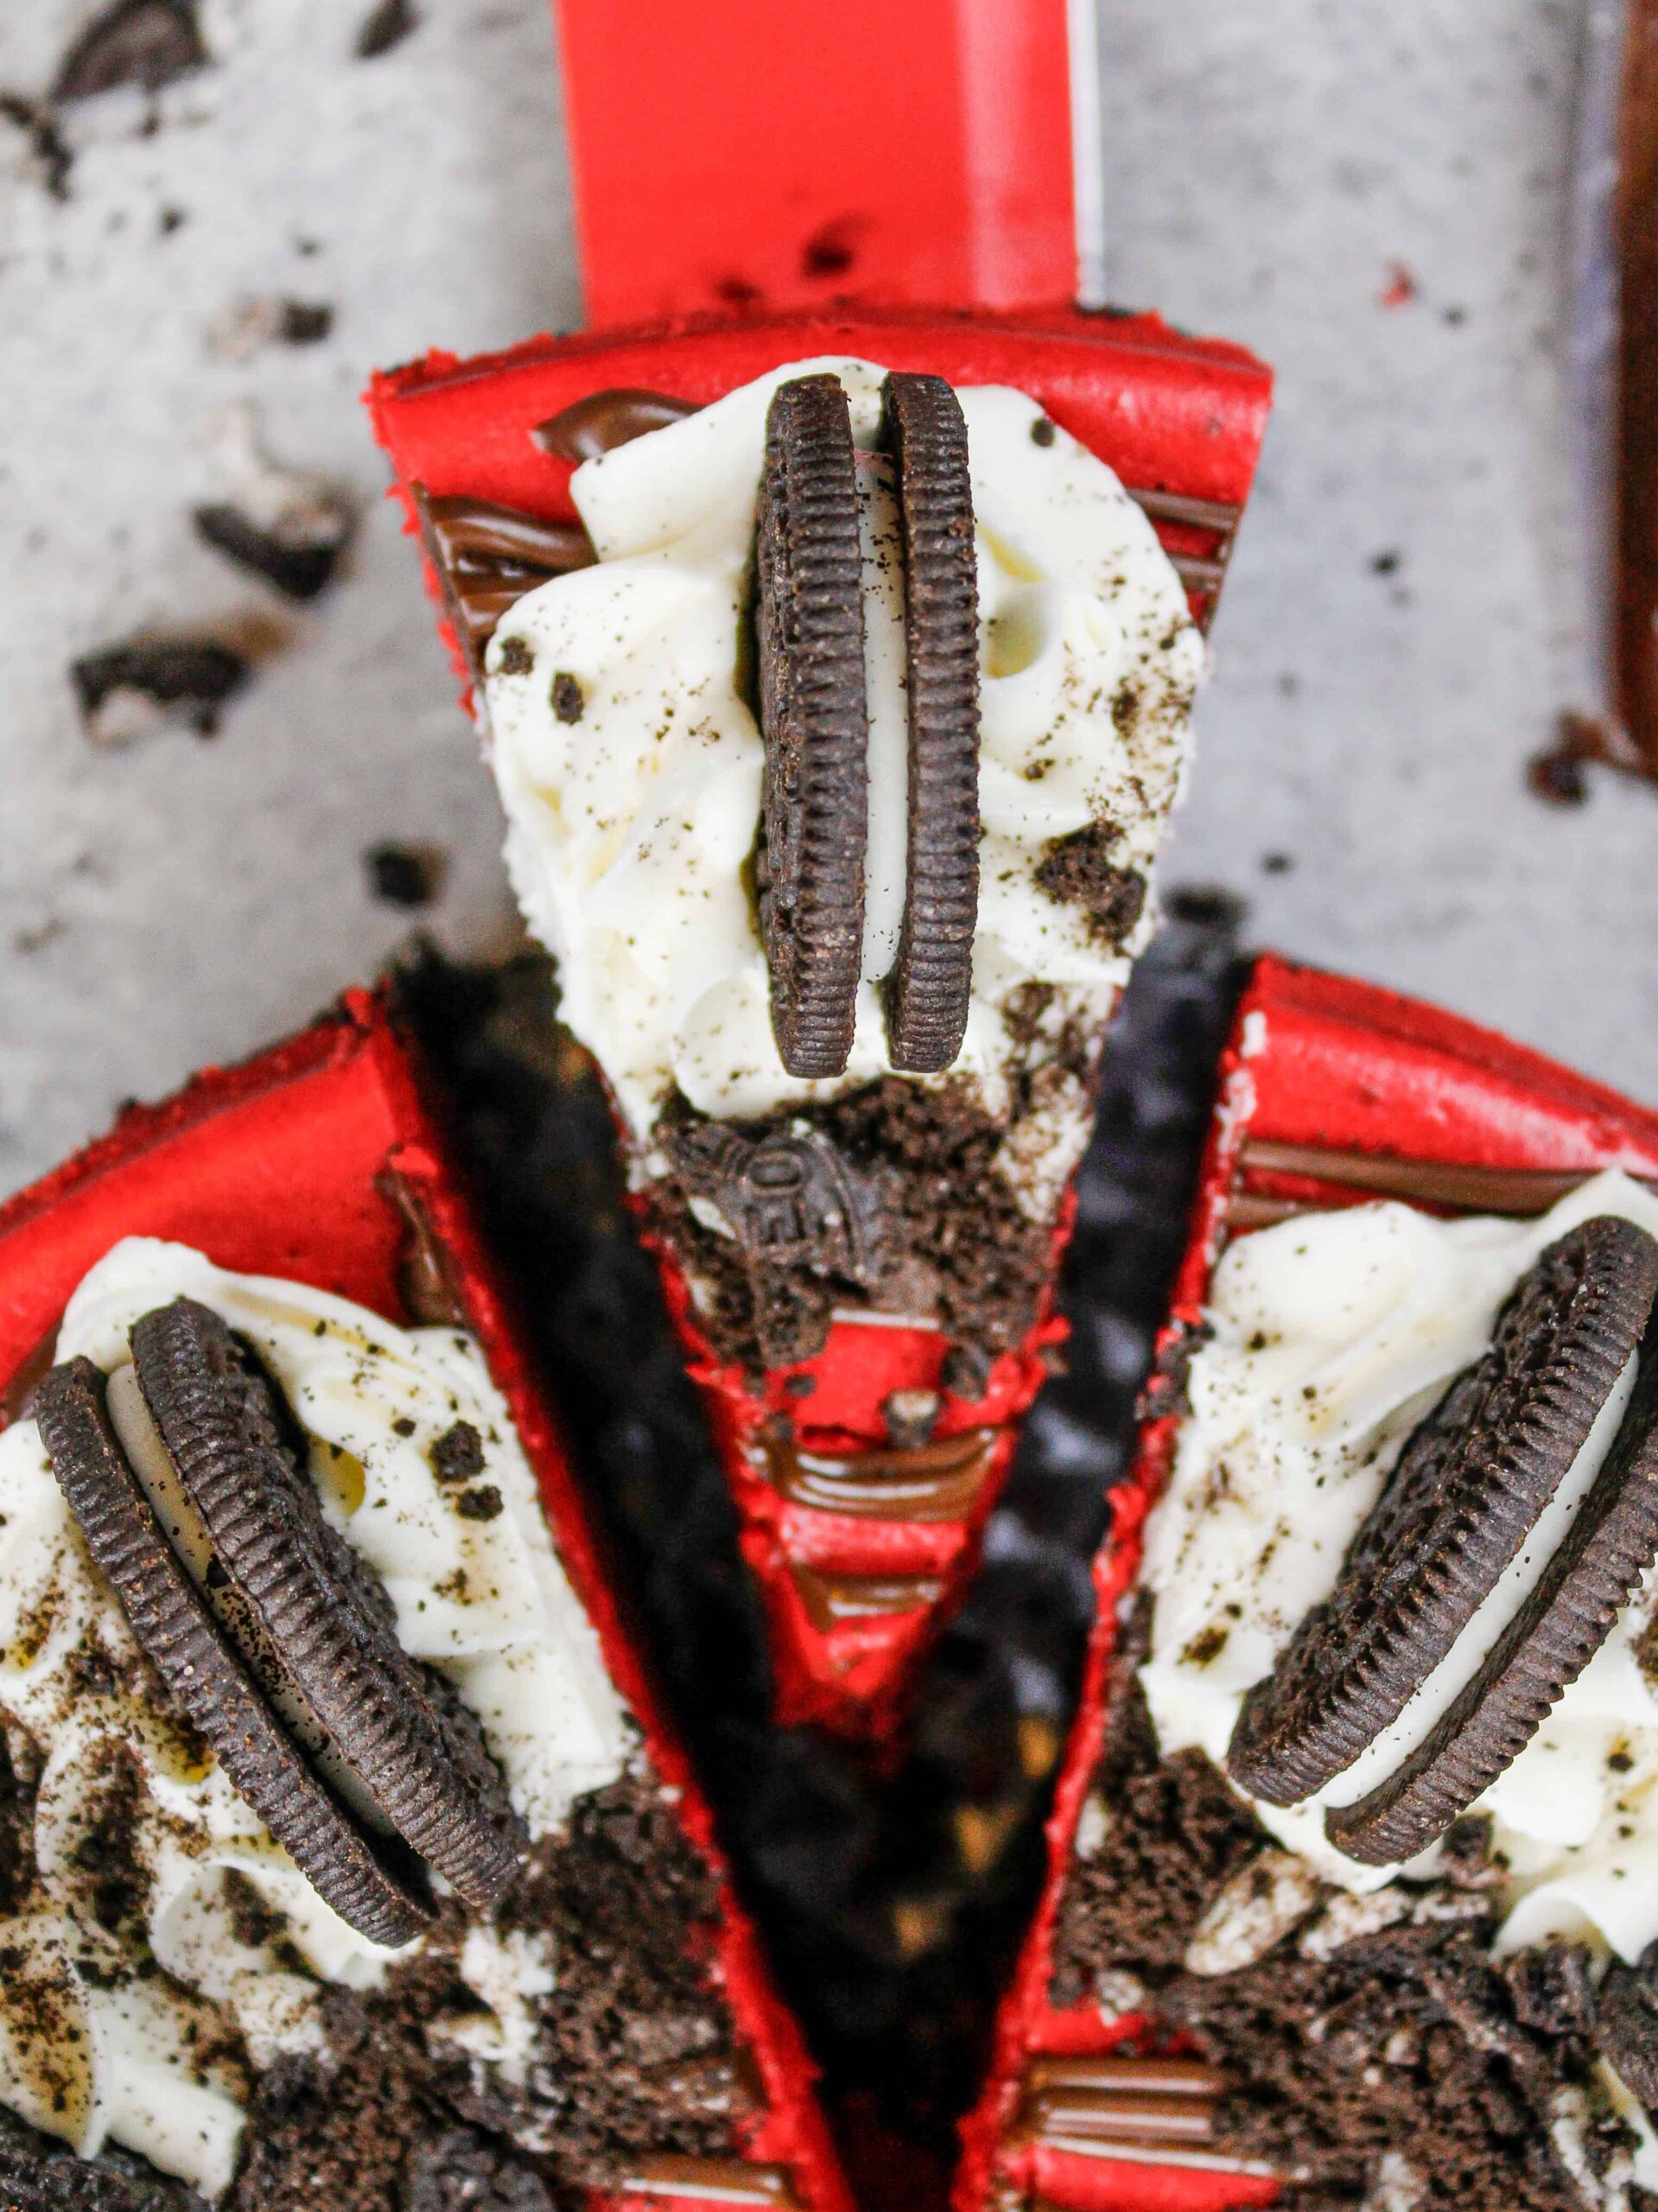
I know it’s been a while sense you’re posted this filling but could I add crushed Oreos to the filling as well ?? I’m making my sisters baby shower cake and she loves Oreos. Thought it would work ?????
Thanks !
Hi Jodi,
You totally could, that would be delicious! Now I want to try that!!
Chelsweets,
Is this filling for a 2-layer cake with each layer sliced….therefore, making 3 layers of cheesecake filling?
Hi Lorrie,
This recipe makes about 3 cups of filling, and the amount of cake layers you can fill will depend on the size of the cake layers and how thick you want the filling to be. I usually use one batch to fill an 8-inch cake that has 3 cake layers (with 2, thick layers of cheesecake filling). Hope that helps, happy baking!
What would I use to flavour this to be strawberry cheesecake?
Hi,
This is precisely what I’ve been looking for! Cheesecake is a hassle to make. Simple is better! I make cheesecake disks for cakes. I line the pan inside with foil, then fill the pan with the cheesecake. Once cool, you lift it out and peel the foil away. It doesn’t affect the cooking time at all. I hope this helps!
Thank you for the fantastic recipe!
So happy to hear that 🙂 Thank you for sharing!!
Can you put any extra in the freezer? If so for how long?
Can I use this as a fill omg for cupcakes?
How might you turn this into a chocolate cheesecake filling? Also, I may have missed it in the recipe but how many layers of an 8″ cake does this fill? It looks like at least 2 thick layers
Hi Briana,
Great questions! To turn this into a chocolate cheesecake filling, you can mix in about ½ cup of melted and cooled semi-sweet or dark chocolate after everything’s combined — it adds a rich chocolate flavor and still keeps that creamy texture. ? As for the amount, this recipe makes enough to generously fill two thick 8” layers, or you could stretch it to fill three if you’re doing slightly thinner layers. Let me know if you need help scaling it up or down — happy to help!
Could you fill cupcakes with this?
Absolutely, that would be delicious!!